A Step-by-Step Guide to Using Bezier Handles in After Effects
Introduction – How to Create and Adjust Motion Paths with Bezier Handles
Bezier handles allow for smoother and more customizable motion in After Effects. By adjusting these handles, you can refine the movement of your objects, making animations look more fluid and natural. This guide will walk you through the process of enabling and using Bezier handles for keyframe animations.
Get 10% off when you subscribe to our newsletter

Step 1: Create a Shape Layer
Start by opening your project in After Effects. Select the Rectangle Tool (Q) and draw a shape on the composition panel. This shape will be animated along a path.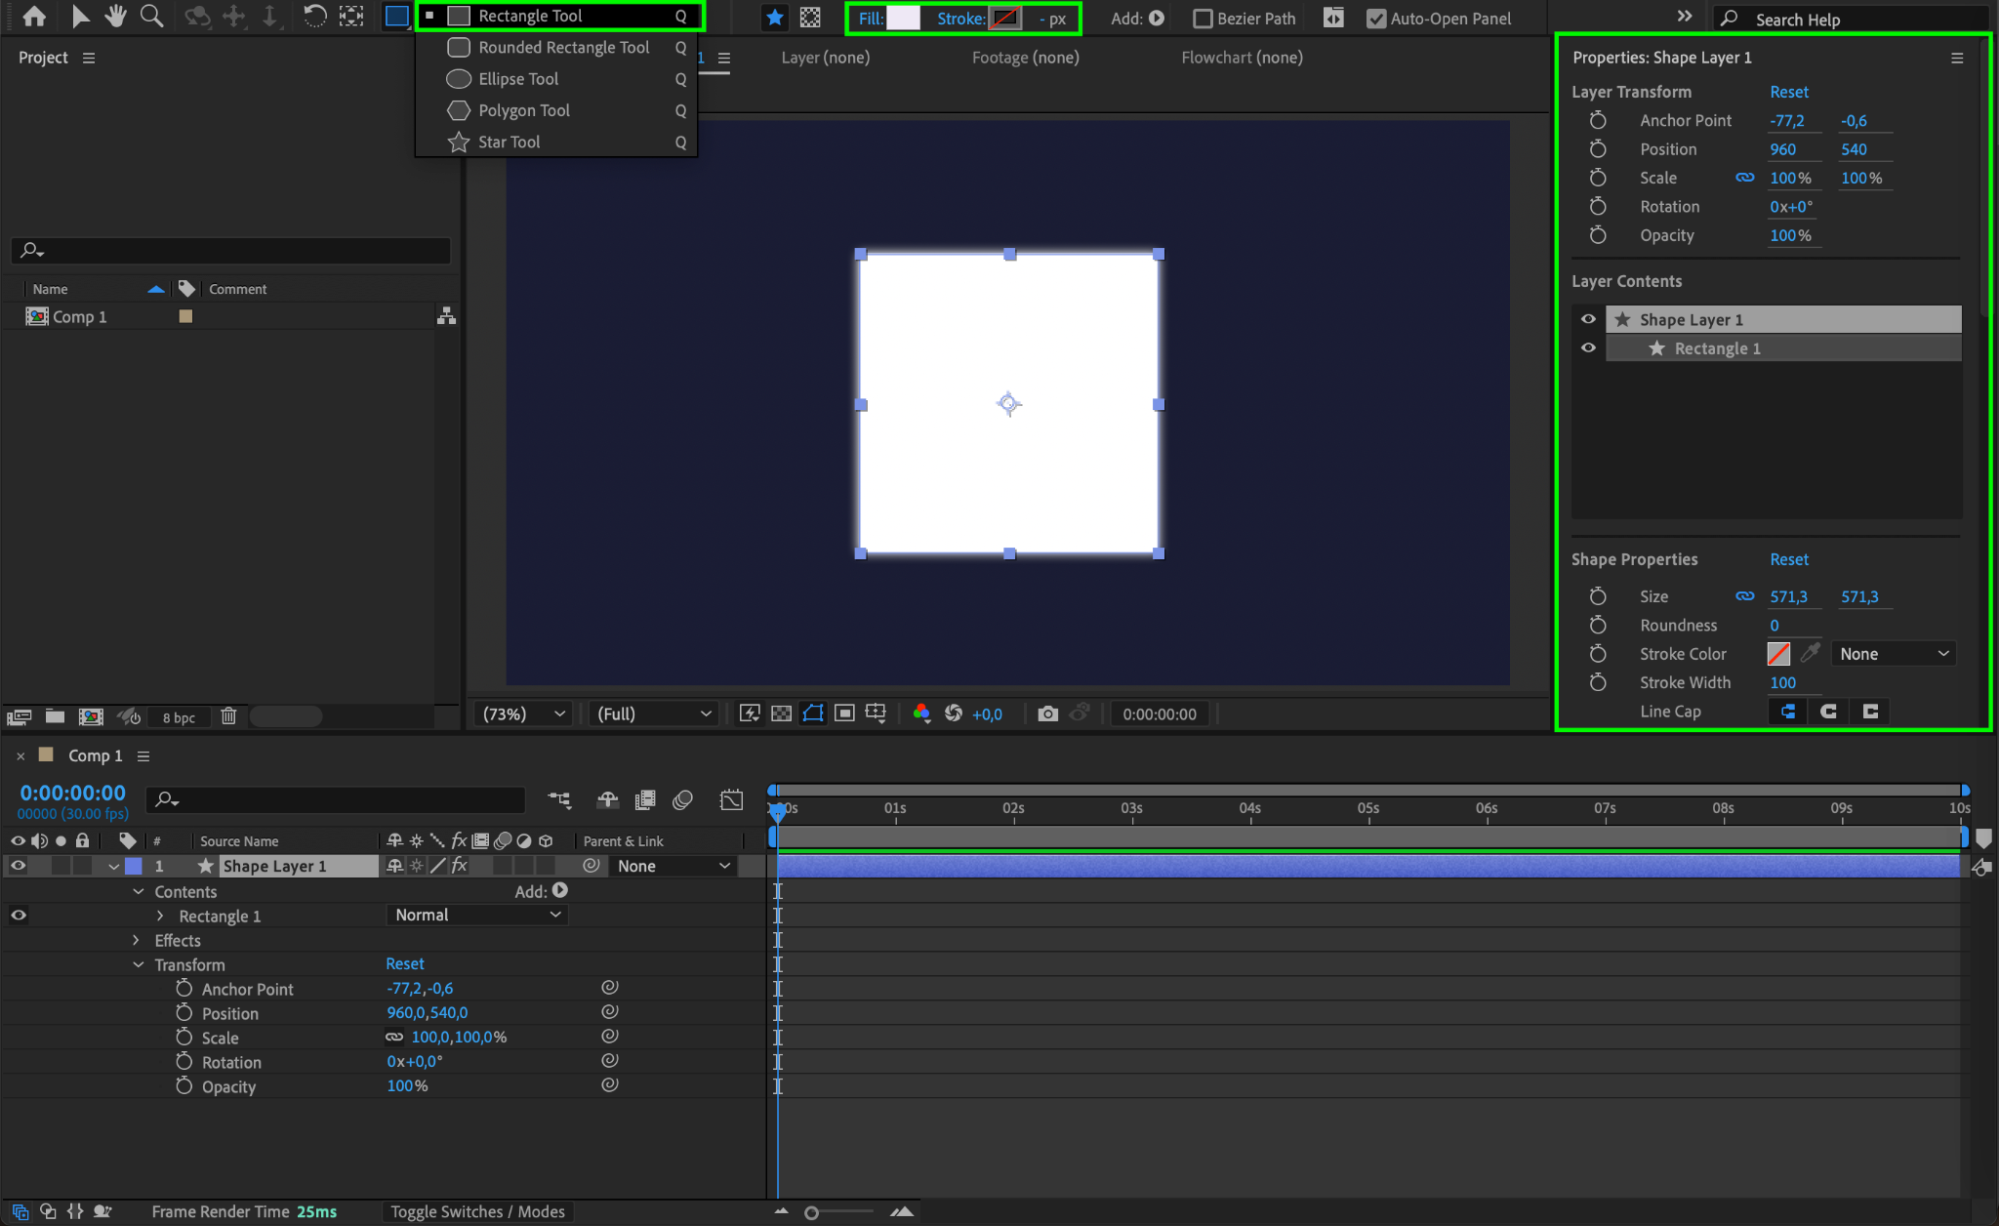 Step 2: Animate the Position
Open the Transform properties for the shape layer and find the Position property. Move the shape to the bottom-left corner of the composition. With the CTI (Current Time Indicator) at the start, click on the stopwatch icon next to Position to create the first keyframe.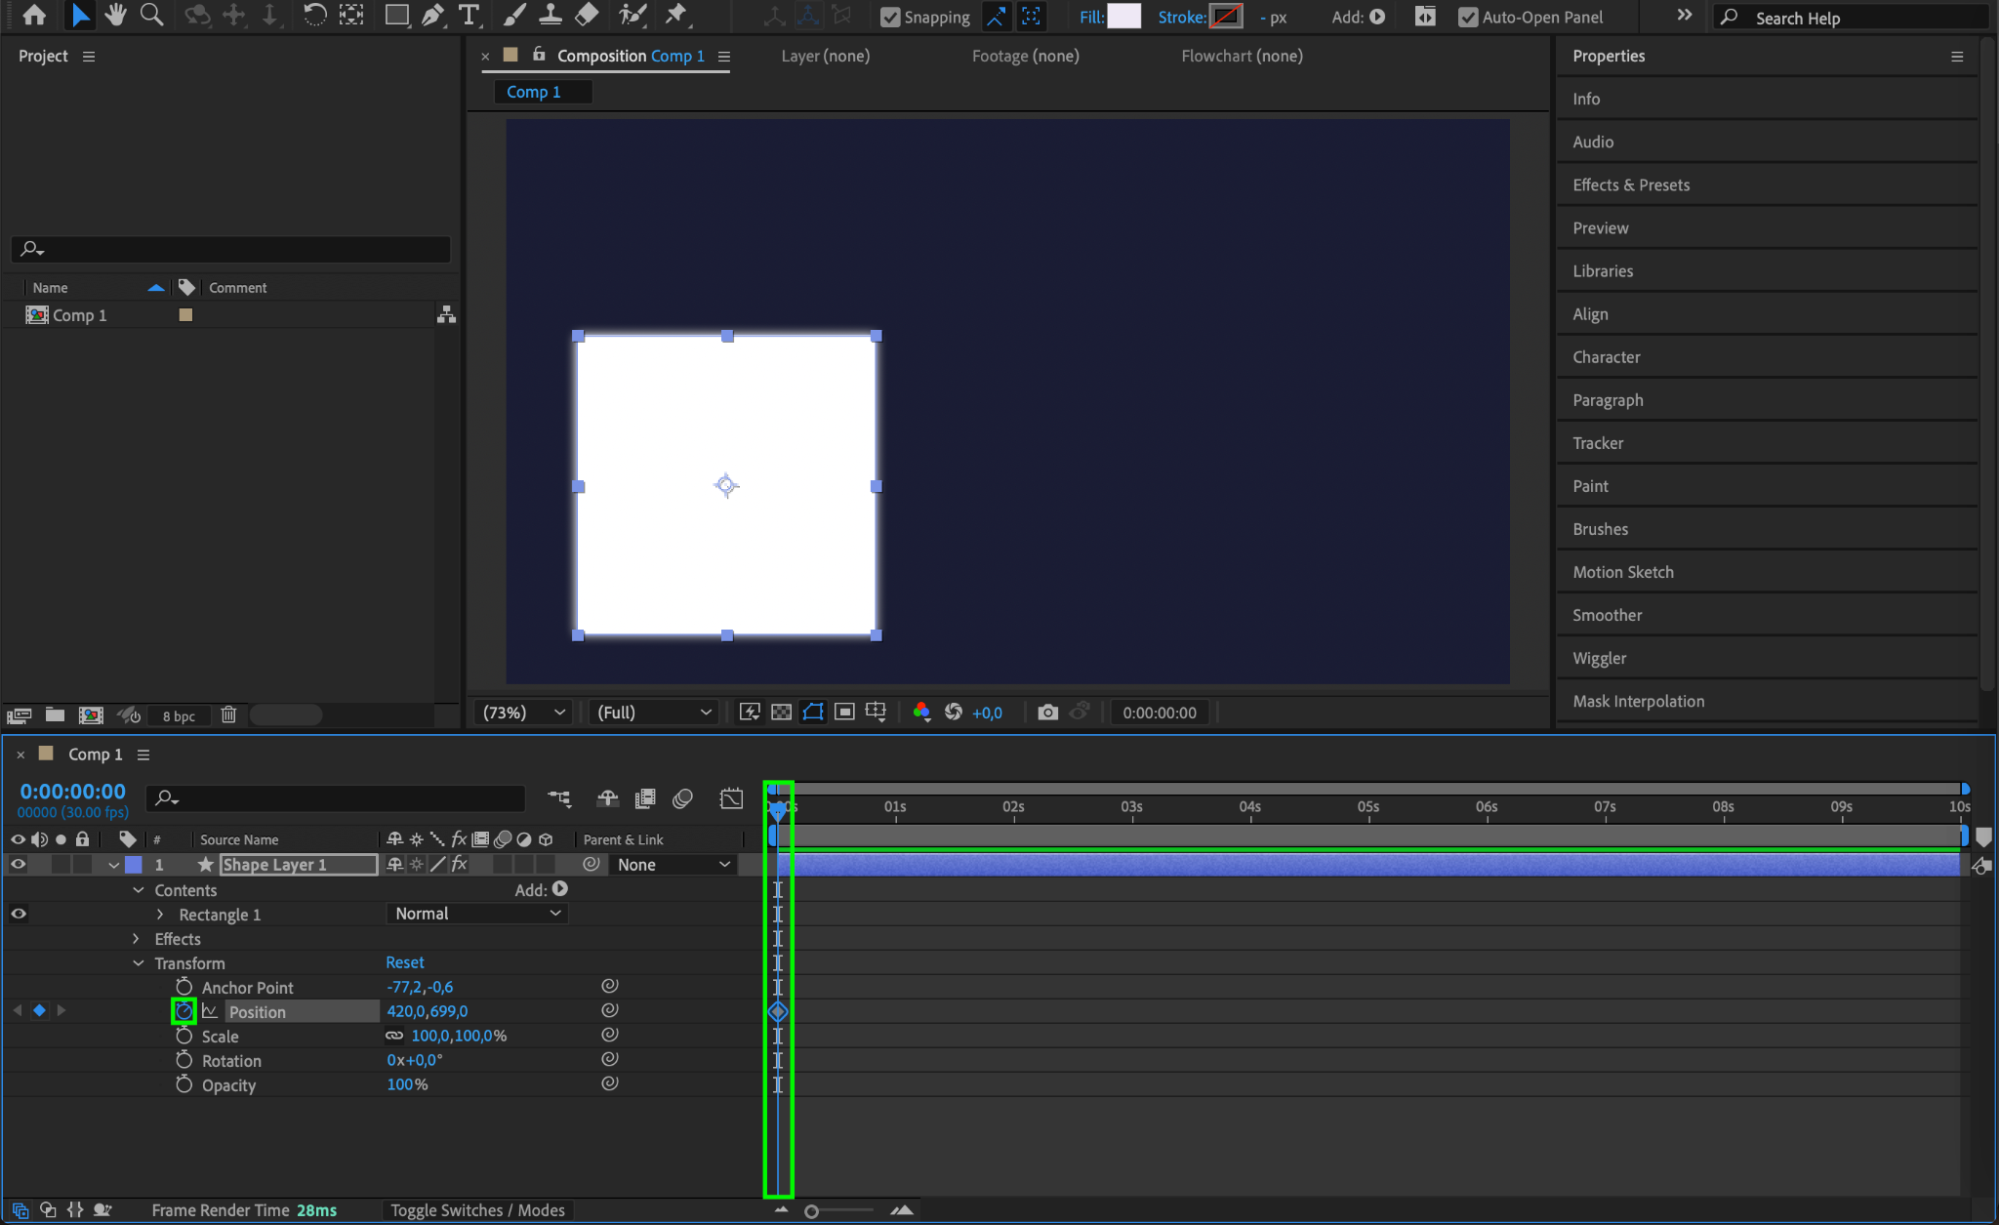 Step 3: Move the Shape to a New Position
Move the CTI to the middle of the composition timeline, then reposition the shape to the top-right corner of the composition. This will automatically create a second keyframe, defining the movement of the shape.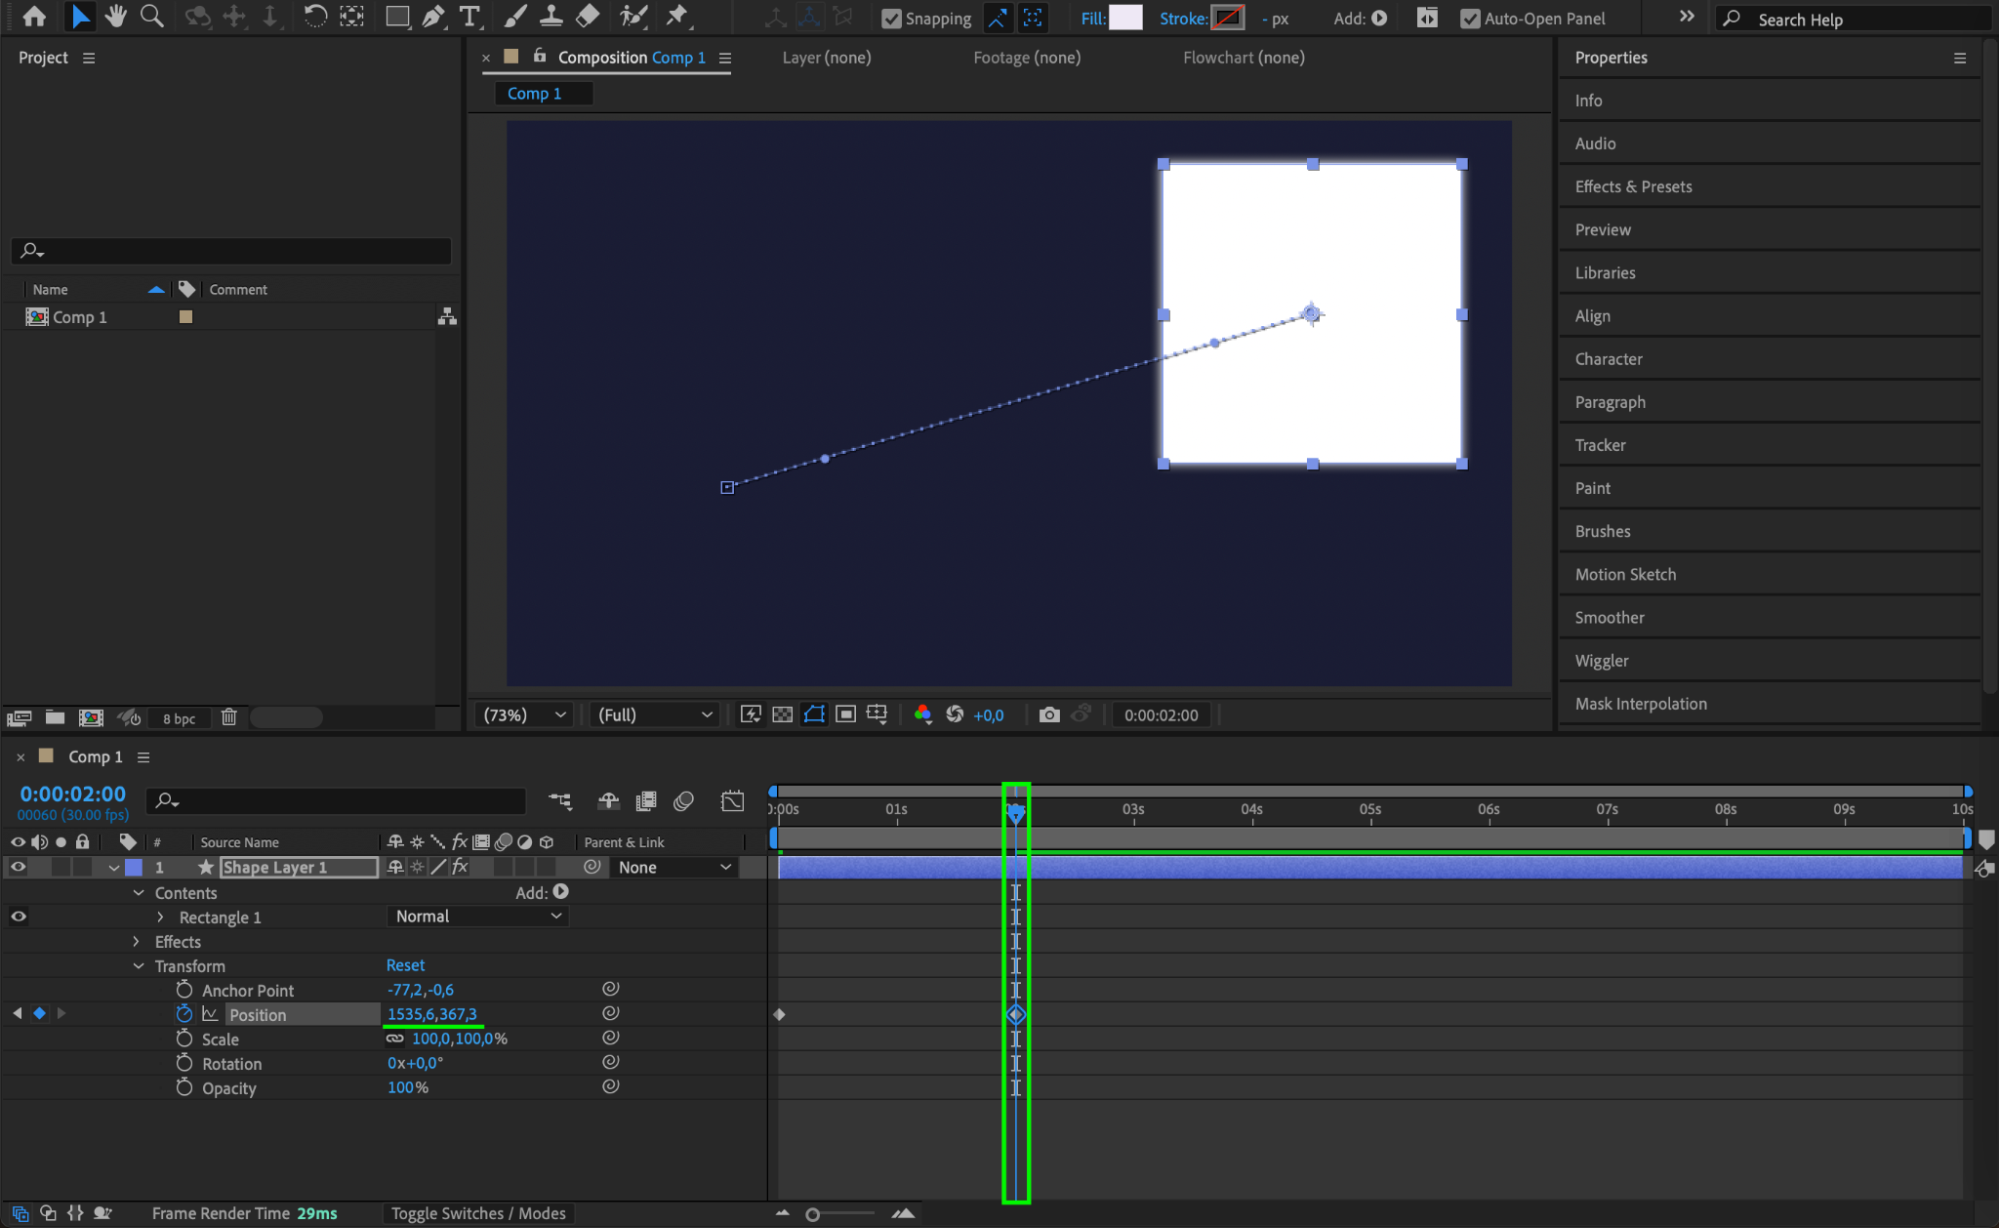 Step 4: Open the Graph Editor
To refine the animation, switch to the Graph Editor. Click on the Graph Editor button, which allows you to see and edit the motion curves of your animation.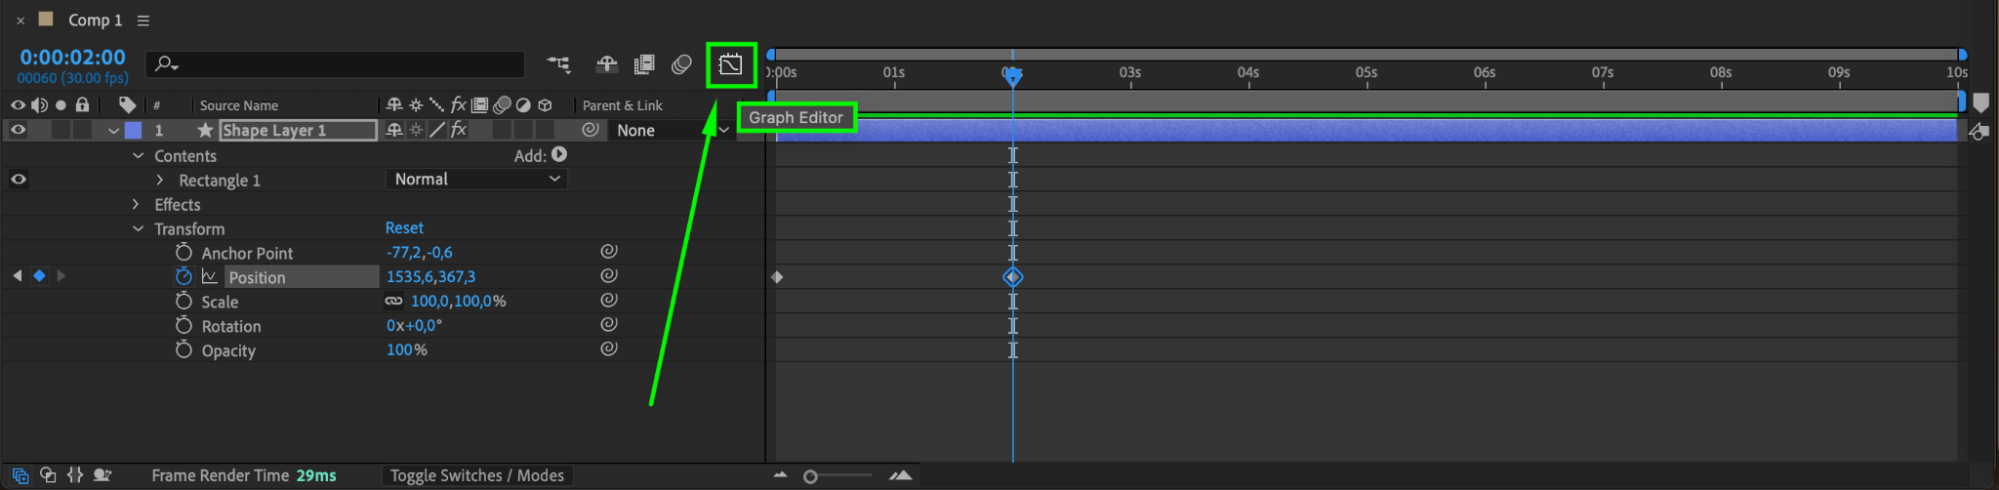 Step 5: Separate Dimensions for More Control
Right-click on the Position property and select Separate Dimensions. This will split the motion into separate X and Y axis animations, giving you better control over movement. Step 6: Apply Easy Ease In
Select the middle keyframes in the Graph Editor, then right-click and choose Keyframe Assistant > Easy Ease In. This will smooth out the animation as the shape enters this position.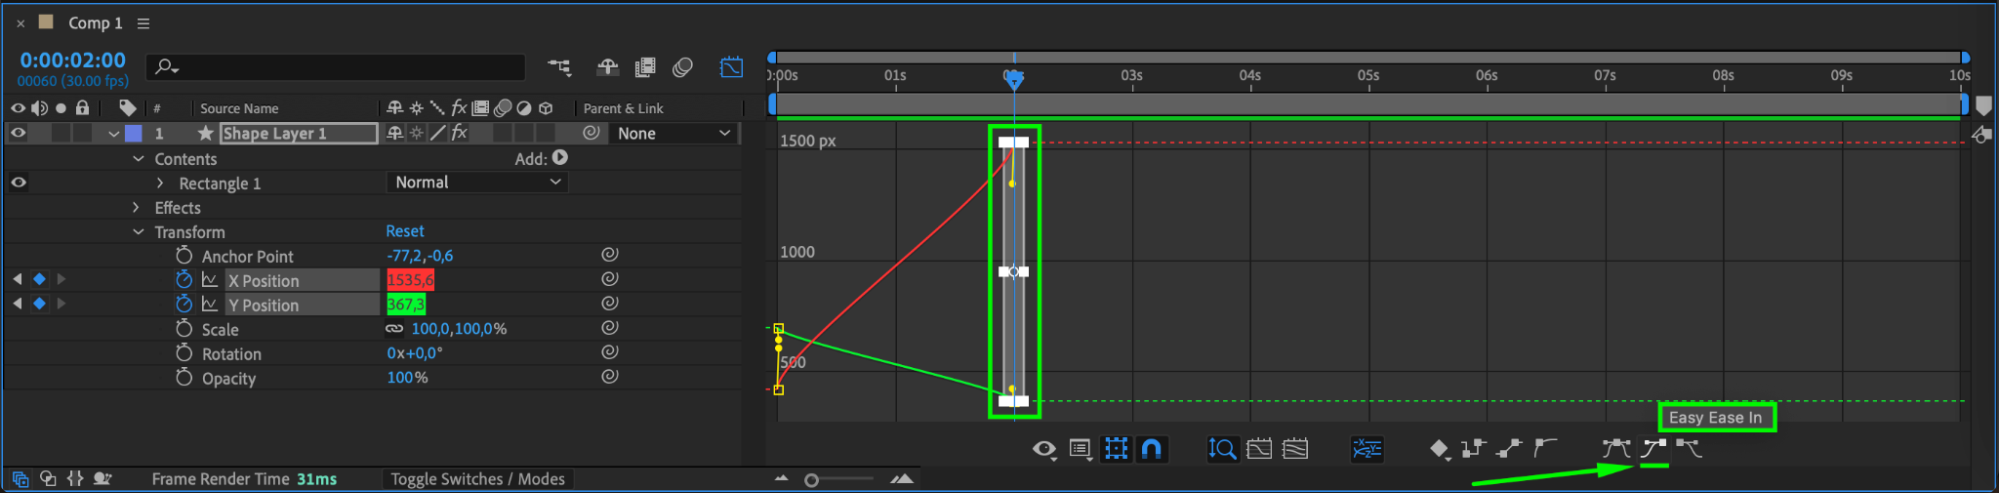 Step 7: Apply Easy Ease Out
Now, select the starting keyframes, right-click, and choose Keyframe Assistant > Easy Ease Out. This makes the motion start smoothly rather than abruptly.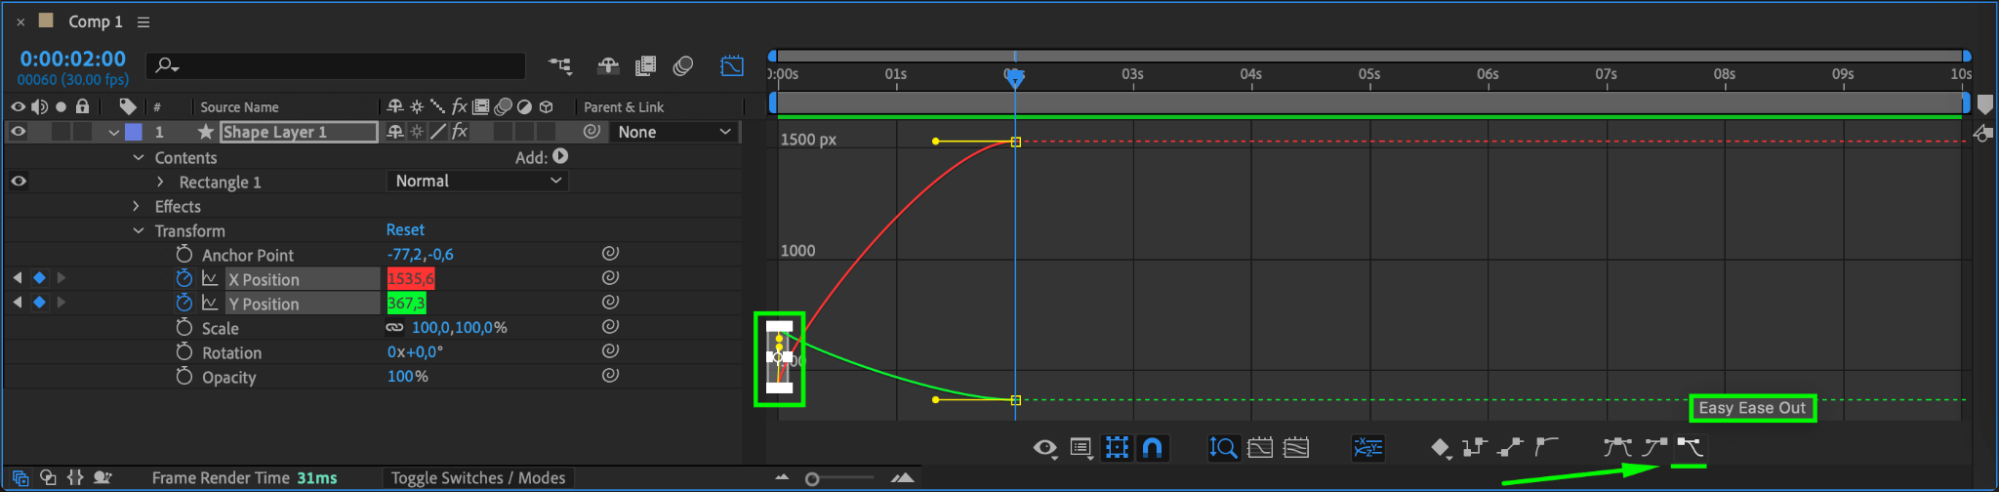 Step 8: Adjust the Bezier Handles
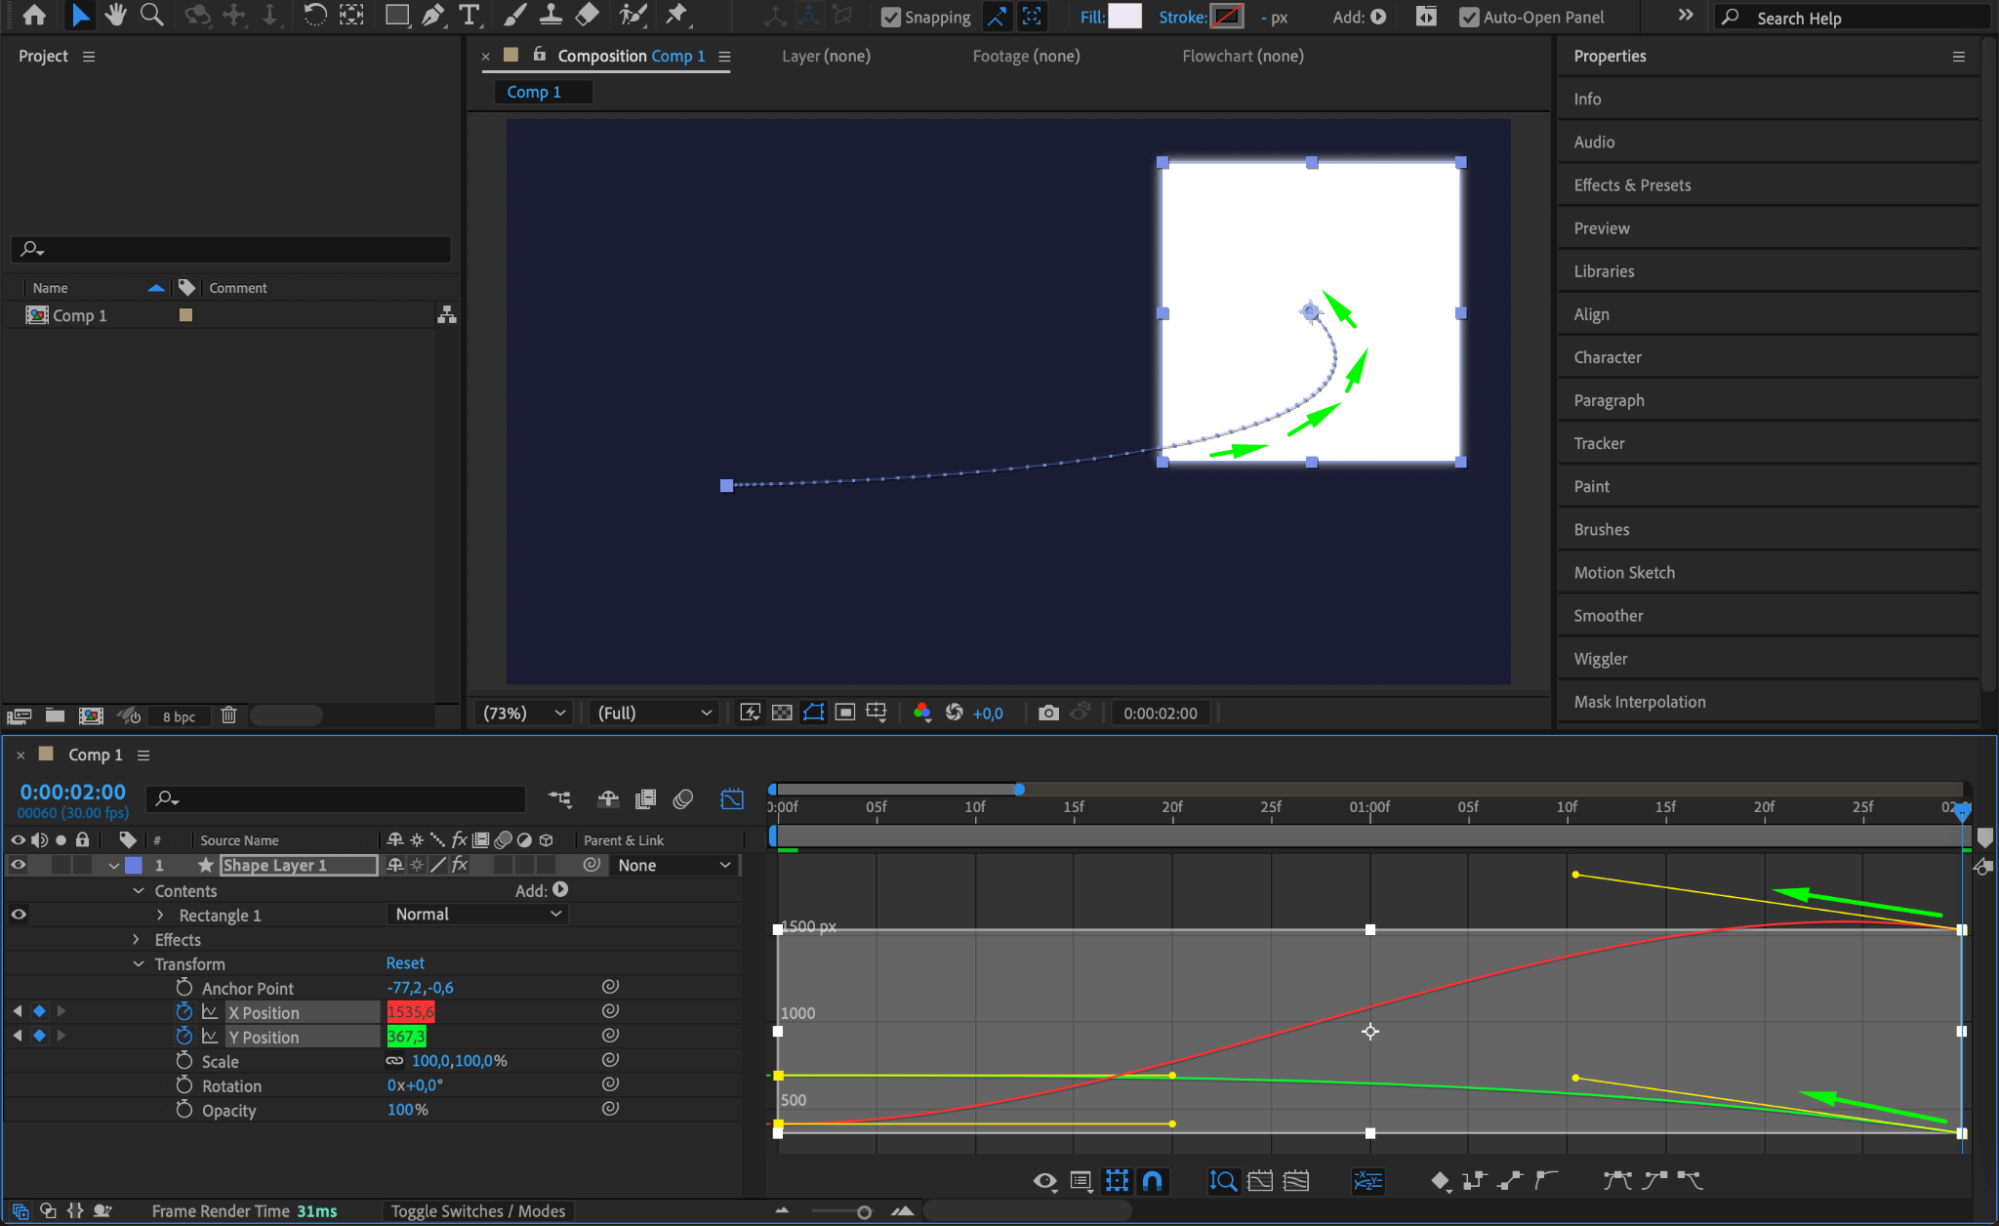
Now that you’ve applied Easy Ease, you will see Bezier handles appear on your keyframes in the Graph Editor. Click and drag these handles to refine the motion curve. As you adjust them, you will notice that the dotted motion path in the Composition panel also changes, allowing you to create a more natural and dynamic movement.
 Conclusion
Using Bezier handles in After Effects gives you complete control over the motion of your animations. By separating dimensions, applying Easy Ease, and adjusting the motion curve, you can create smoother, more dynamic animations. Experiment with different curve shapes to achieve the perfect movement for your project.
Our Bestsellers


