Exporting Your Composition as MP4 in After Effects: A Complete Guide
Introduction to Exporting MP4 Files from After Effects
How to Export your After Effects Composition as an MP4
Do you want to share your After Effects creation as an MP4 file? We’ve got you covered! In this blog post, we will walk you through the process of exporting your video in the popular MP4 format using the built-in Render Queue and Media Encoder in After Effects.
Why Choose MP4?
MP4 is a widely supported video format that works well on various devices and platforms. It’s perfect for sharing on social media, uploading to streaming platforms, or including in presentations. By exporting as MP4, you ensure maximum compatibility and ease of use.
Step-by-Step Instructions for Exporting as MP4
1. Set up your Composition:
Get 10% off when you subscribe to our newsletter

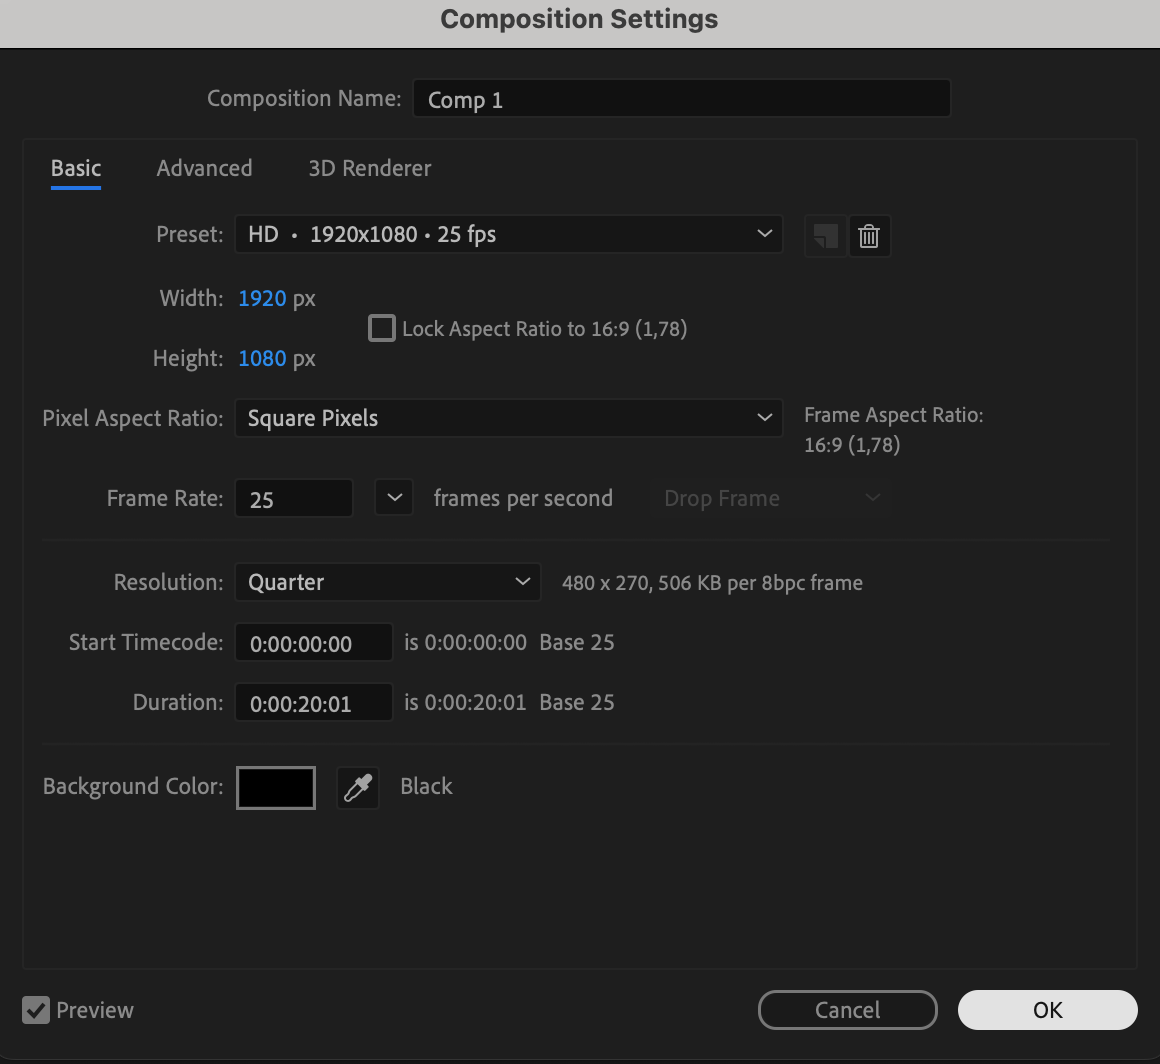
Before exporting, make sure your composition is configured correctly. Adjust the resolution, frame rate, and duration to meet your needs.
 2. Open the Render Queue:
Once your composition is ready, the next step is to add it to the Render Queue. This is where you’ll configure the settings for your MP4 export. To do this, go to the Composition menu at the top of the screen and select Add to Render Queue. This will open the Render Queue panel, where you can begin setting up your export options.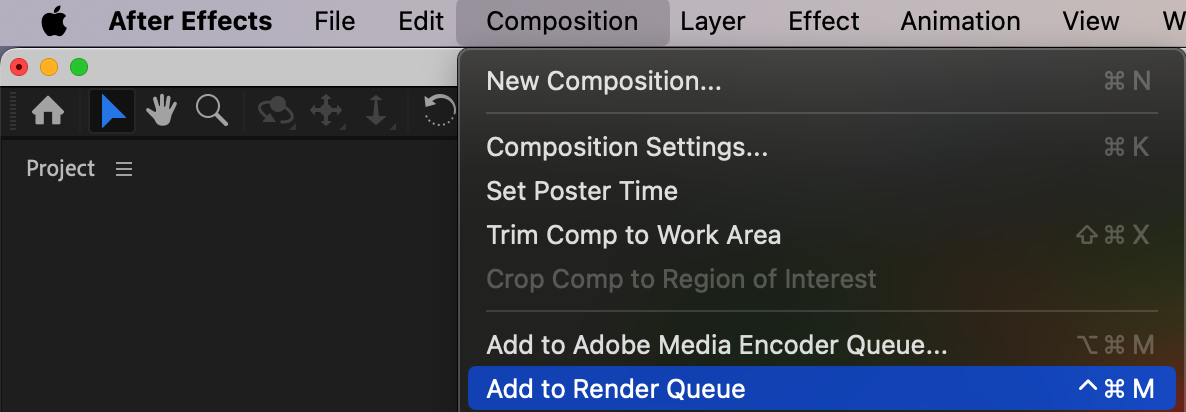 3. Adjust Render Settings:
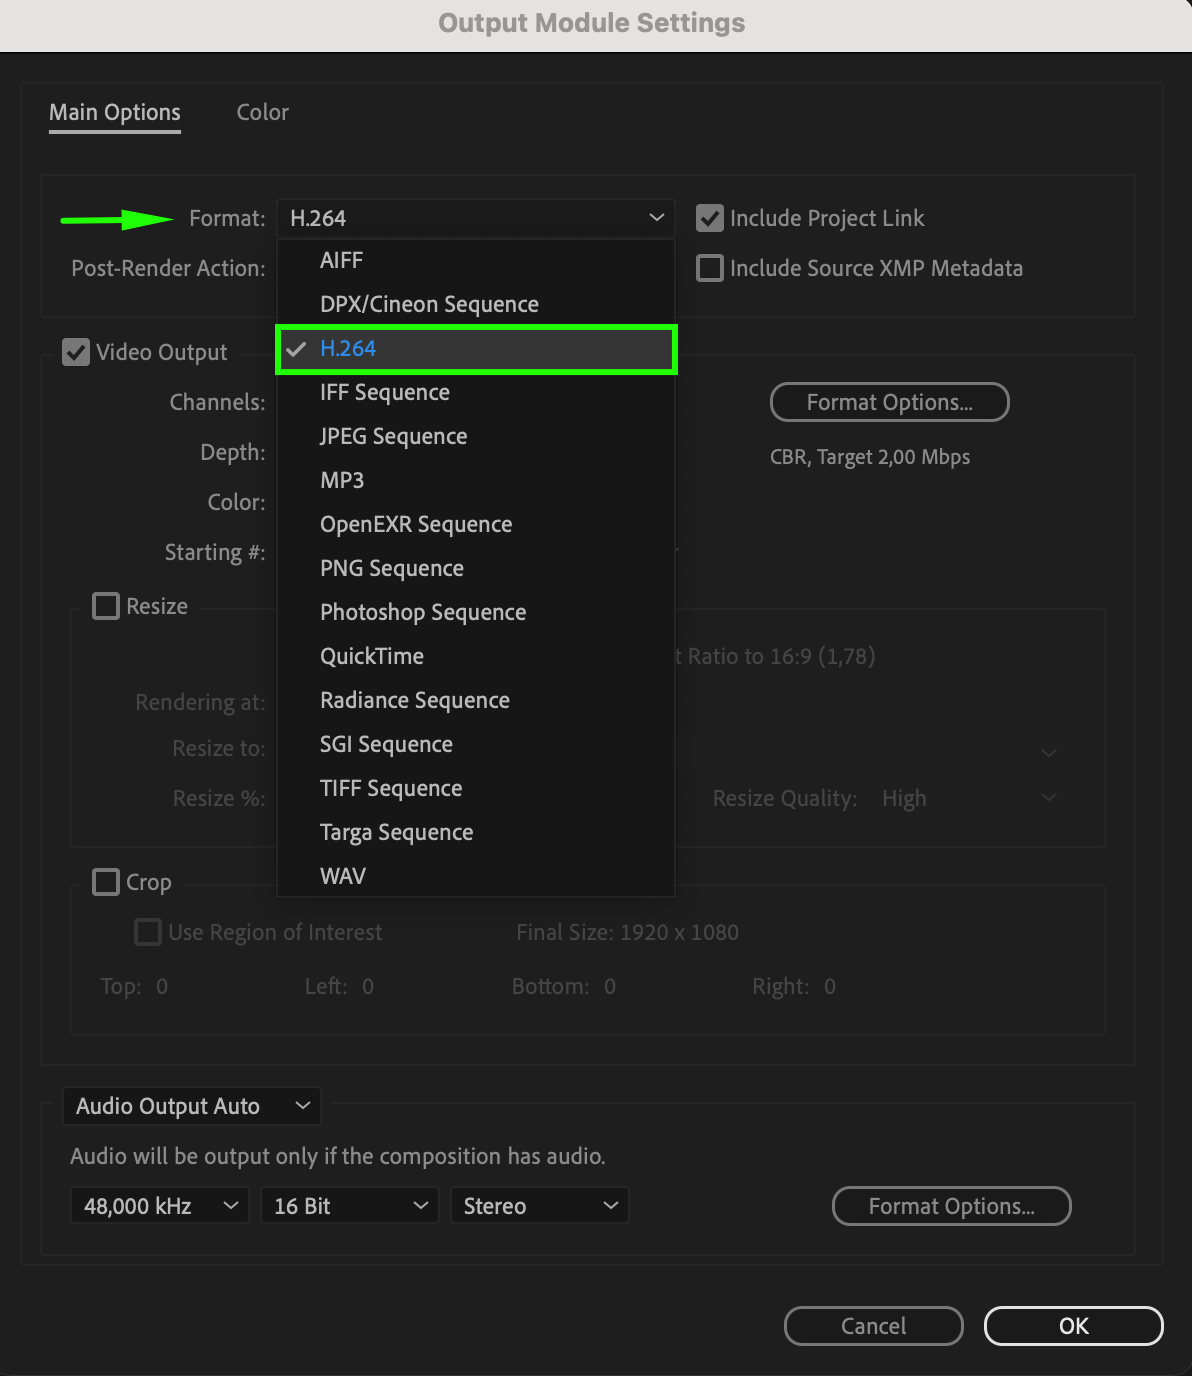
Click on the “High Quality” text next to Output Module to open the Output Module Settings dialog box. Here’s how to configure the settings for an MP4 export:
Format: Choose H.264 (MP4) from the drop-down menu. This is the format that will ensure your video is saved as an MP4 file.
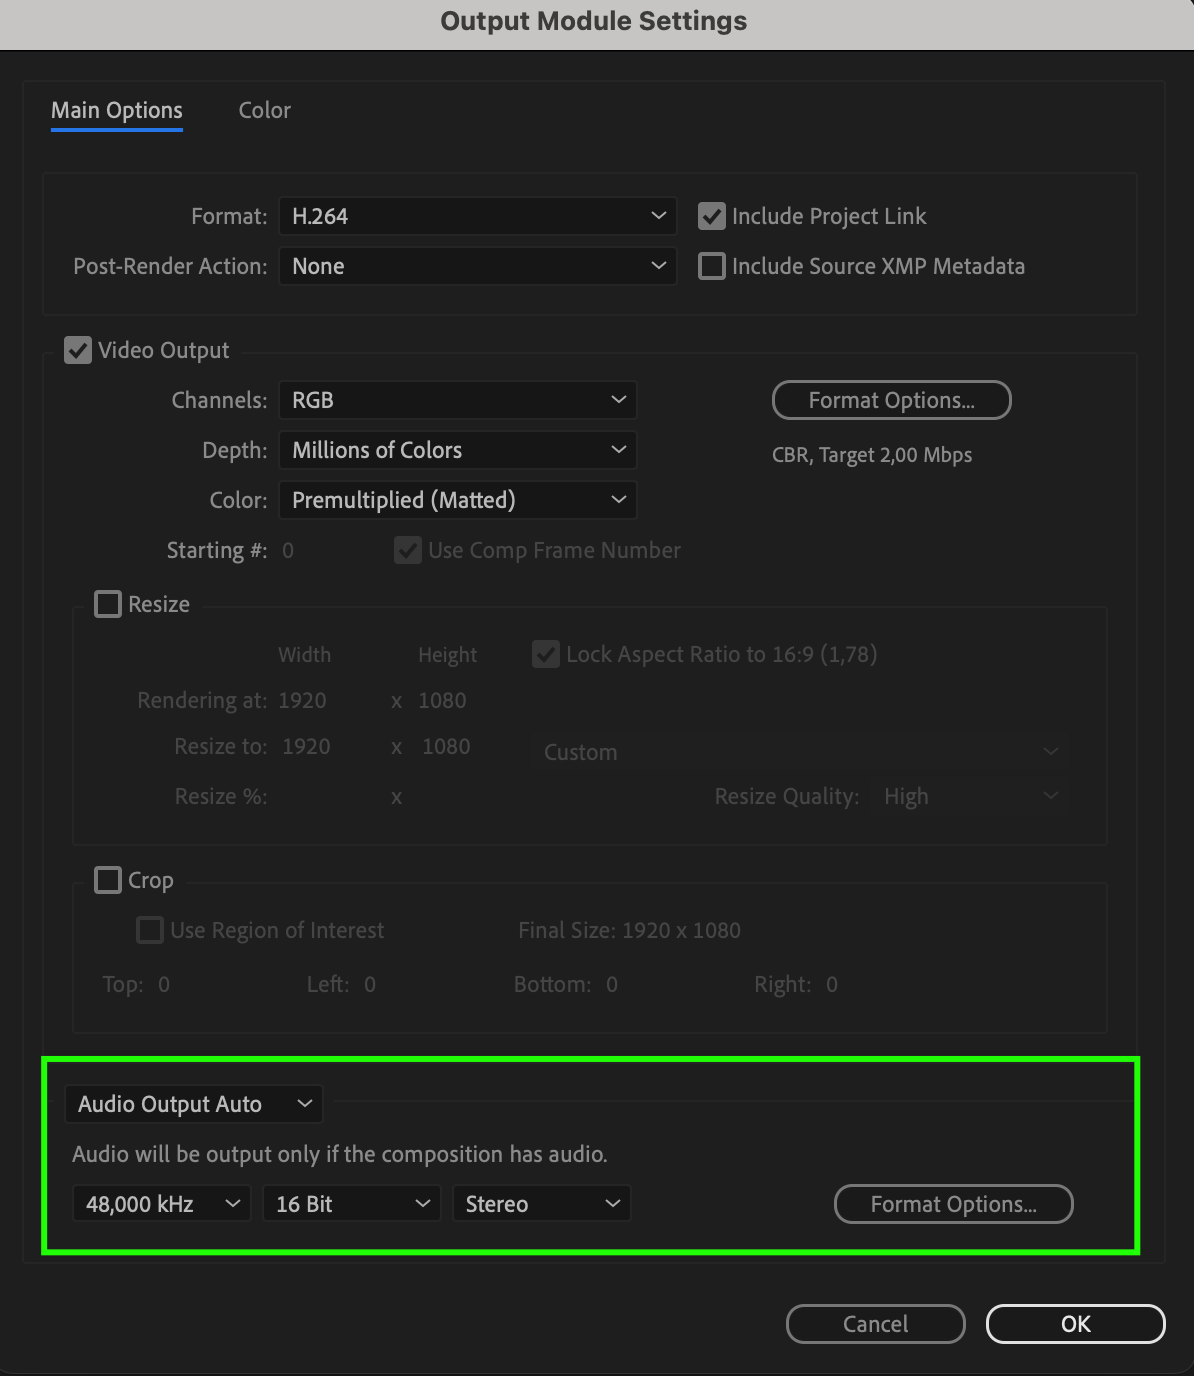
 Audio Output: If your composition includes audio, make sure to select the appropriate codec and configure the audio settings. If there’s no audio in your project, you can disable this option.
 4. Set Output Path and File Name:
After adjusting your render settings, the next step is to choose where your MP4 file will be saved. Click on the text next to “Output To” in the Render Queue panel. This will open a dialog box where you can select your desired destination folder and give your file a descriptive name. It’s important to choose a location that’s easy to find, as this is where your final MP4 file will be saved after rendering.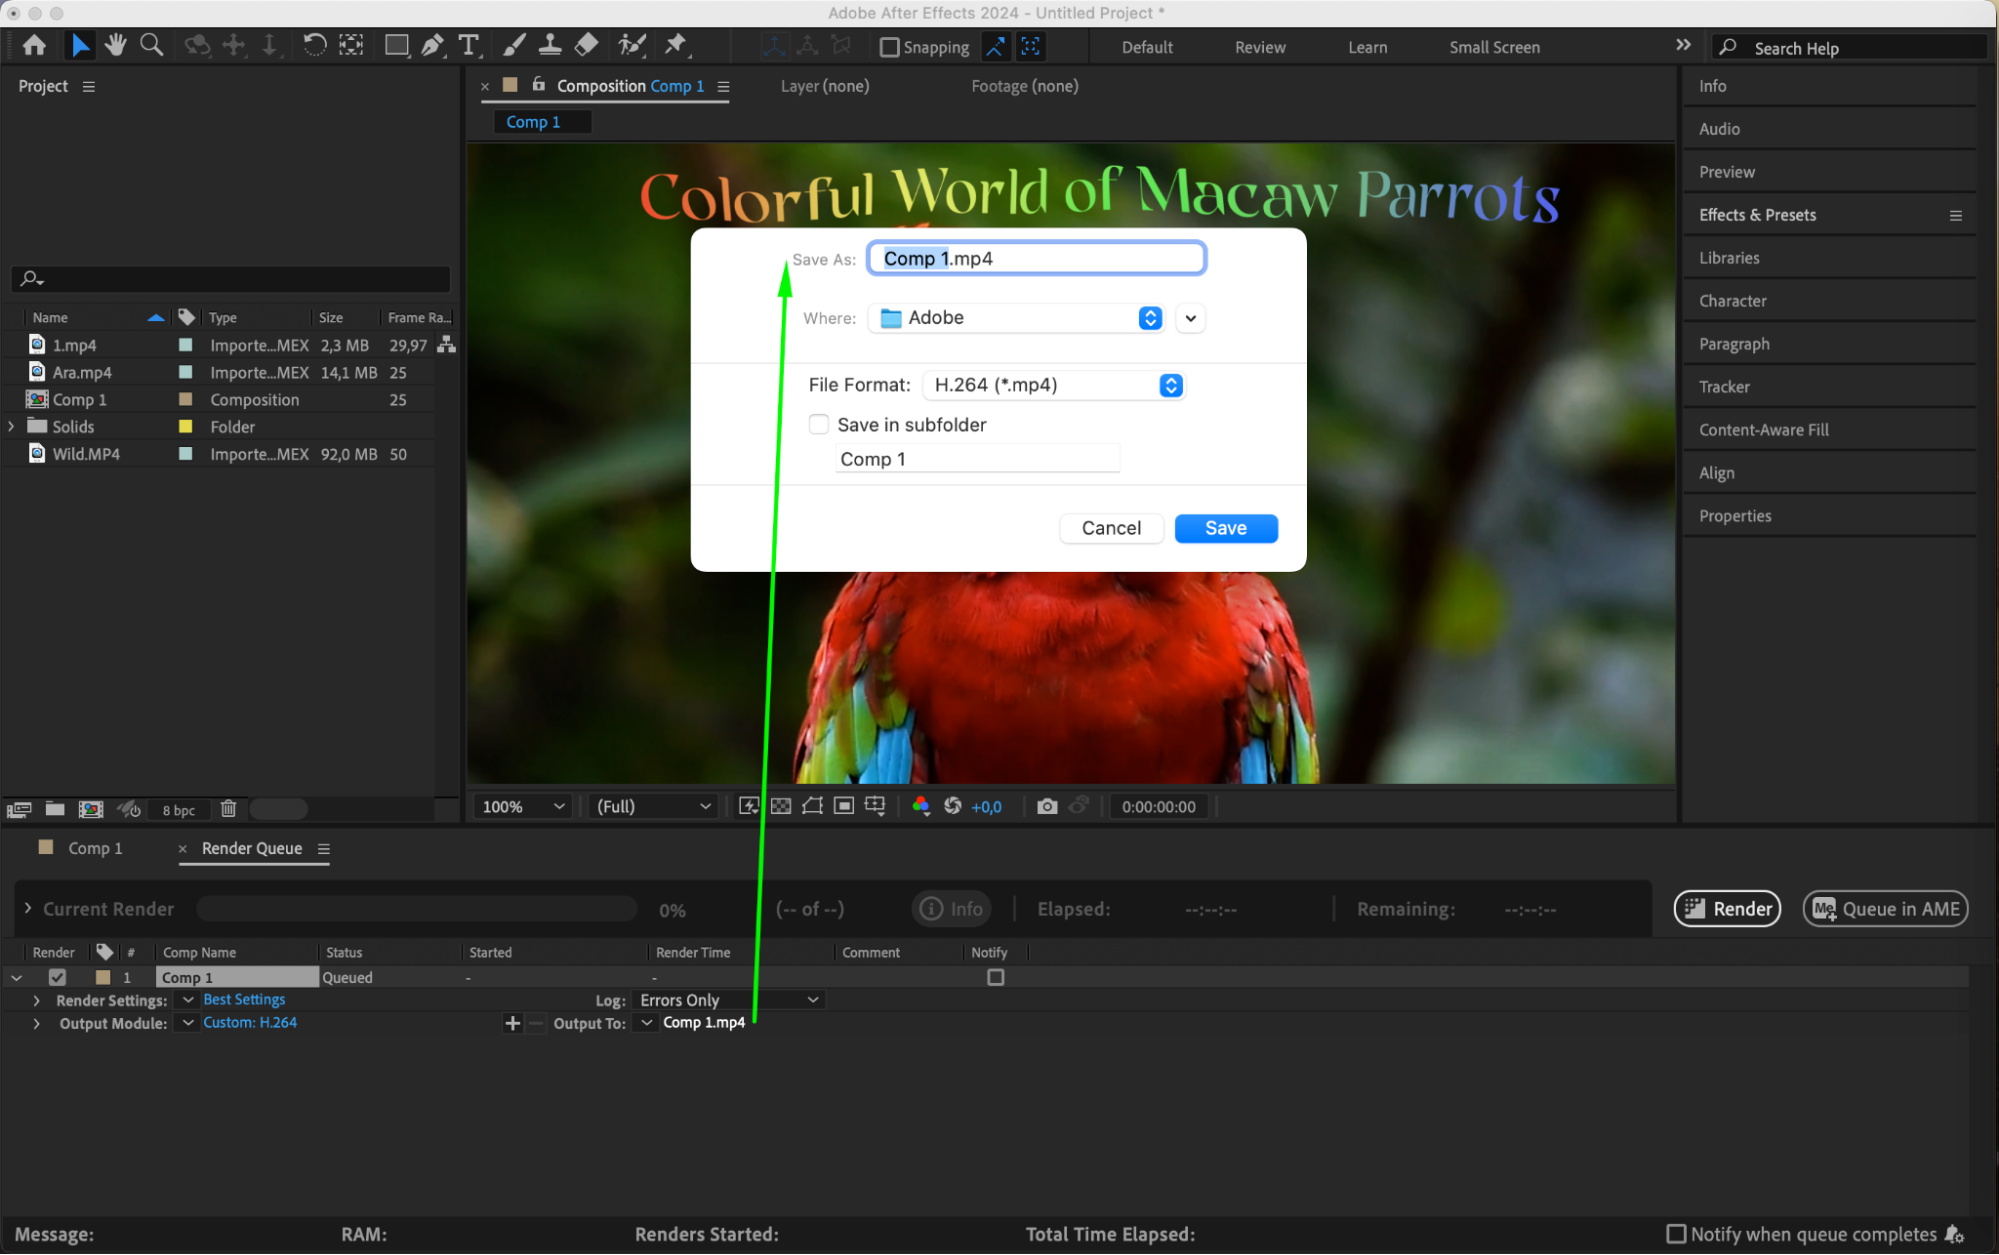 5. Start rendering Process:
With all settings configured and the output path selected, you’re now ready to render your composition. Simply click on the Render button in the Render Queue panel. After Effects will begin processing your composition and exporting it as an MP4 file. Depending on the complexity of your project and the settings chosen, this process can take a few minutes. 6. Monitor the Encoding Progress:
As After Effects renders your composition, you can monitor the progress in the Render Queue panel. This will show you a status bar indicating how much of the rendering process is complete. It’s important to be patient during this step, especially if your composition contains a lot of layers, effects, or high-resolution footage. 7. Completing the Export:
Once the rendering process is complete, After Effects will notify you with an audio cue or a message in the Render Queue panel. Your MP4 file is now ready to be used. You can navigate to the output folder you selected earlier to find your exported video.
Conclusion
Exporting your After Effects composition as an MP4 file is straightforward and ensures that your work is easily shareable and compatible with various platforms. By following these step-by-step instructions, you’ll be able to efficiently export your projects in the widely supported MP4 format using After Effects. Now you can confidently share your videos with the world in a format that’s both high-quality and universally accessible. Happy exporting!


