Mastering Smooth Slow Motion Techniques in After Effects
Introduction to Smooth Slow Motion
Achieving smooth slow motion in After Effects can greatly enhance the cinematic and dramatic impact of your videos. Whether you’re working on a professional film project or simply want to create captivating social media content, mastering smooth slow motion techniques can take your video editing skills to the next level.
Step 1: Shoot High-Framerate Footage
To start, it’s important to have high-framerate footage. Shooting at a higher frame rate allows After Effects to create additional frames when you slow down the footage, resulting in a smoother slow motion effect. Common high frame rates for slow motion include 60fps, 120fps, or even higher if your camera supports it. Import your video through File > Import > File.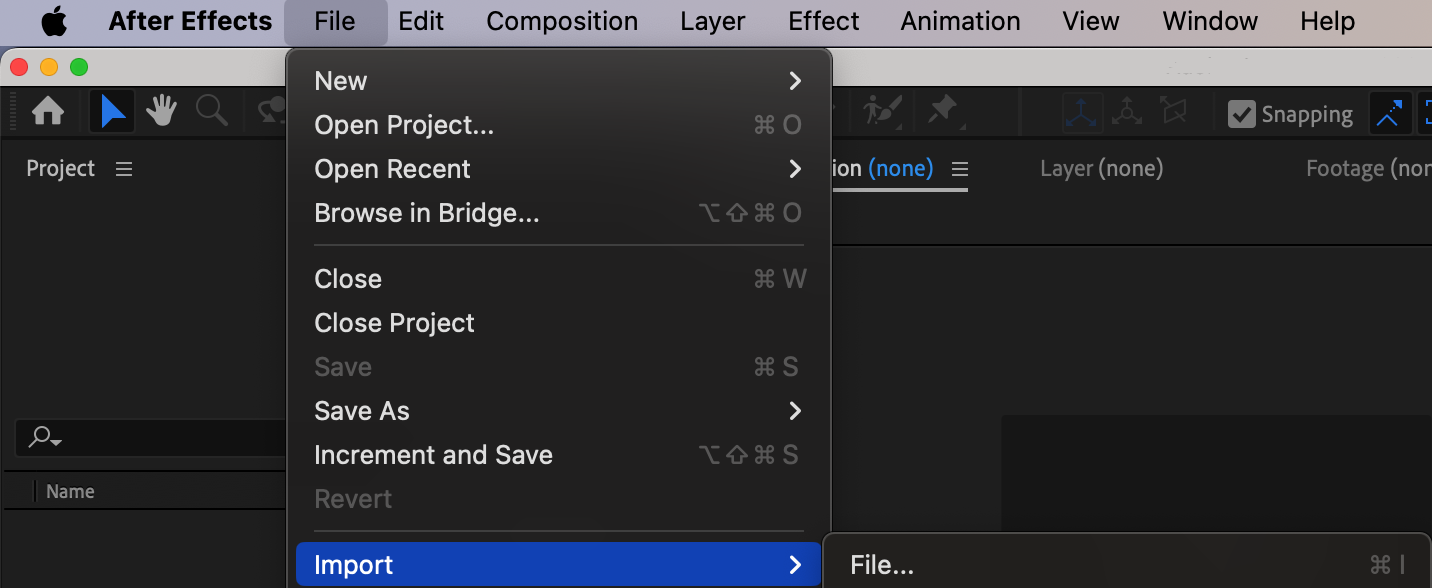 Step 2: Adjust the Frame Rate
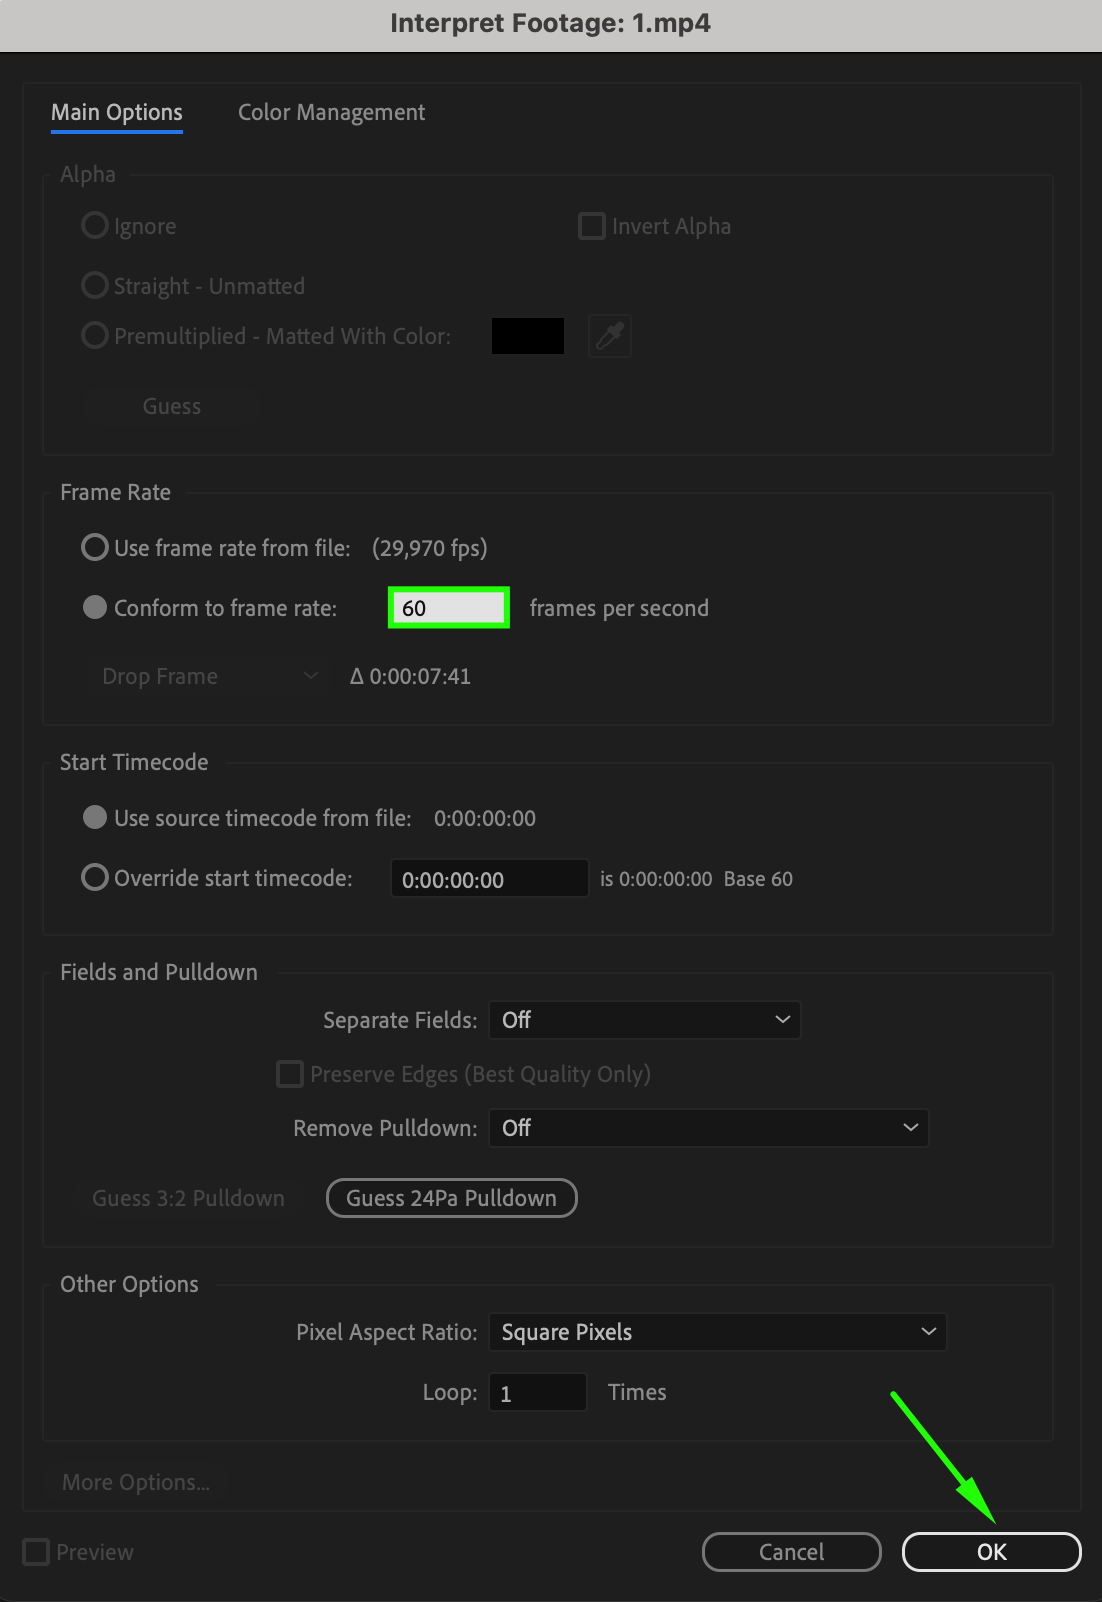
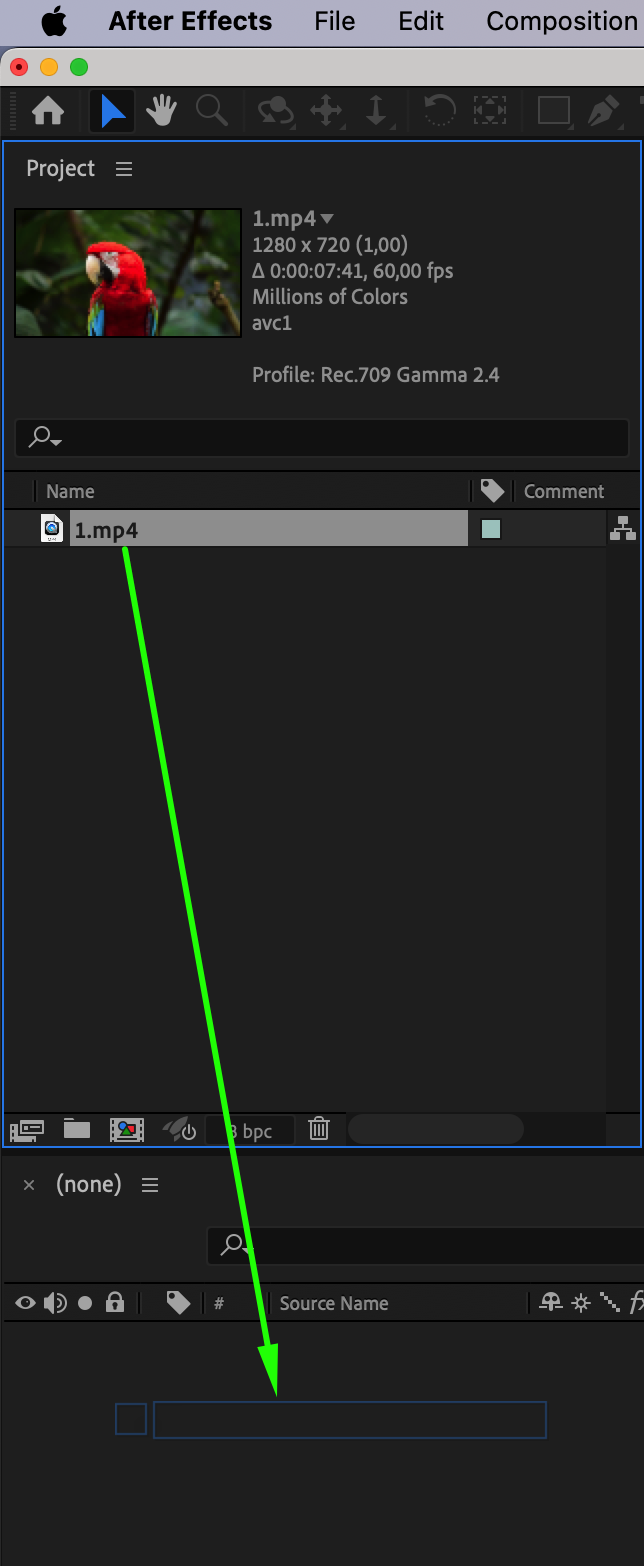
Once you’ve imported your footage into After Effects, adjust the frame rate by right-clicking on the footage in the Project panel and selecting Interpret Footage. From there, you can change the frame rate to match the desired slow motion speed. For example, if your video indicates a 29.97 fps frame rate, you can enter a higher frame rate in the Conform to Frame Rate field to achieve smoother slow motion. Afterward, drag your video from the project panel to the timeline.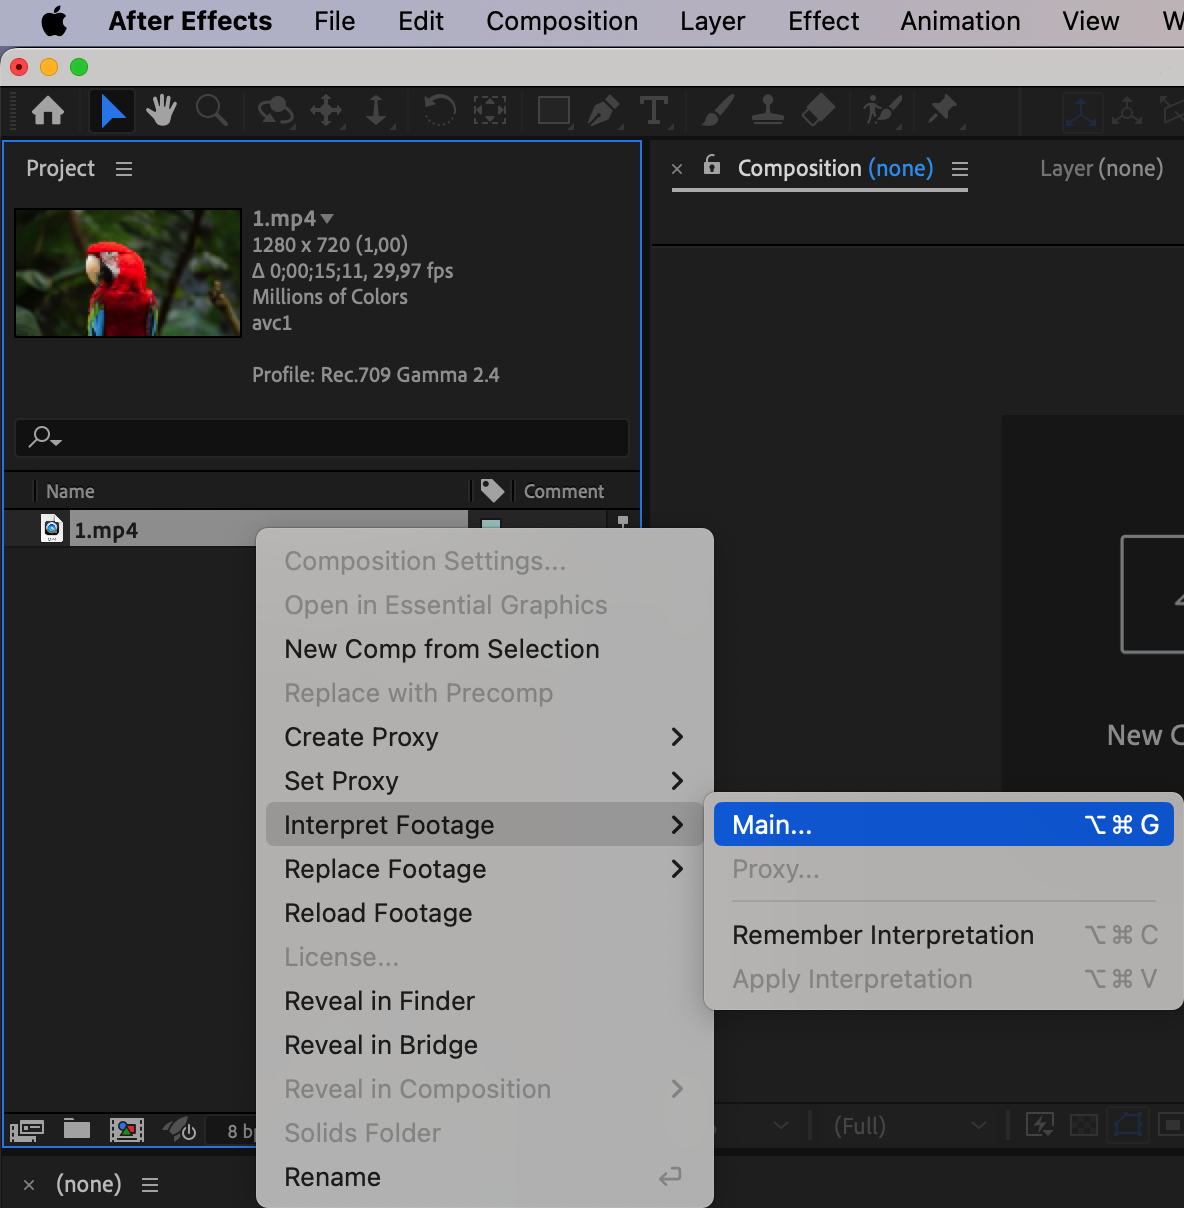
 Step 3: Use Time Stretch
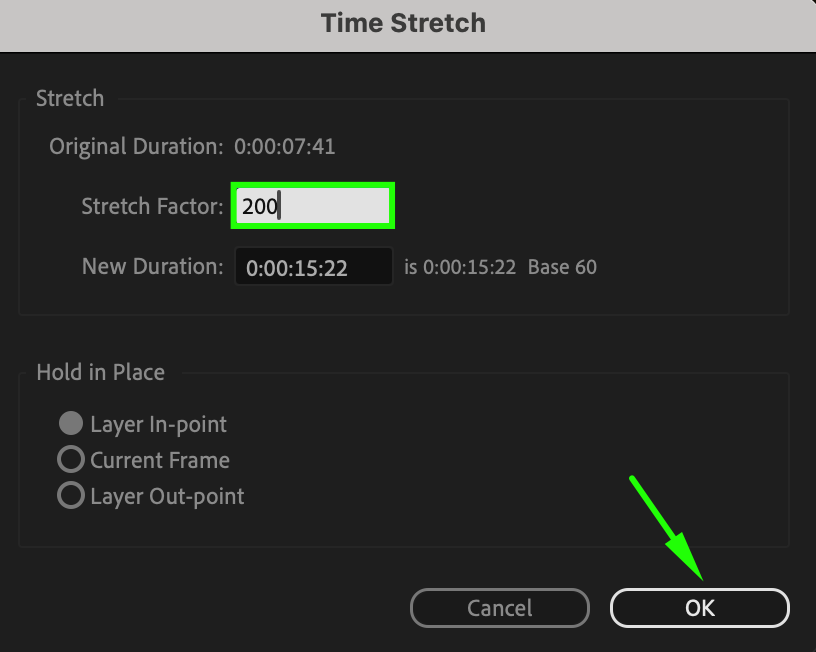
Next, you’ll want to adjust the time stretch of your footage. This can be done by selecting the footage layer, right-clicking, and choosing “Time” > “Time Stretch.” Here, you can adjust the speed of the footage to create the slow motion effect. A time stretch value of 200% will slow the footage down to half its original speed, resulting in smooth slow motion.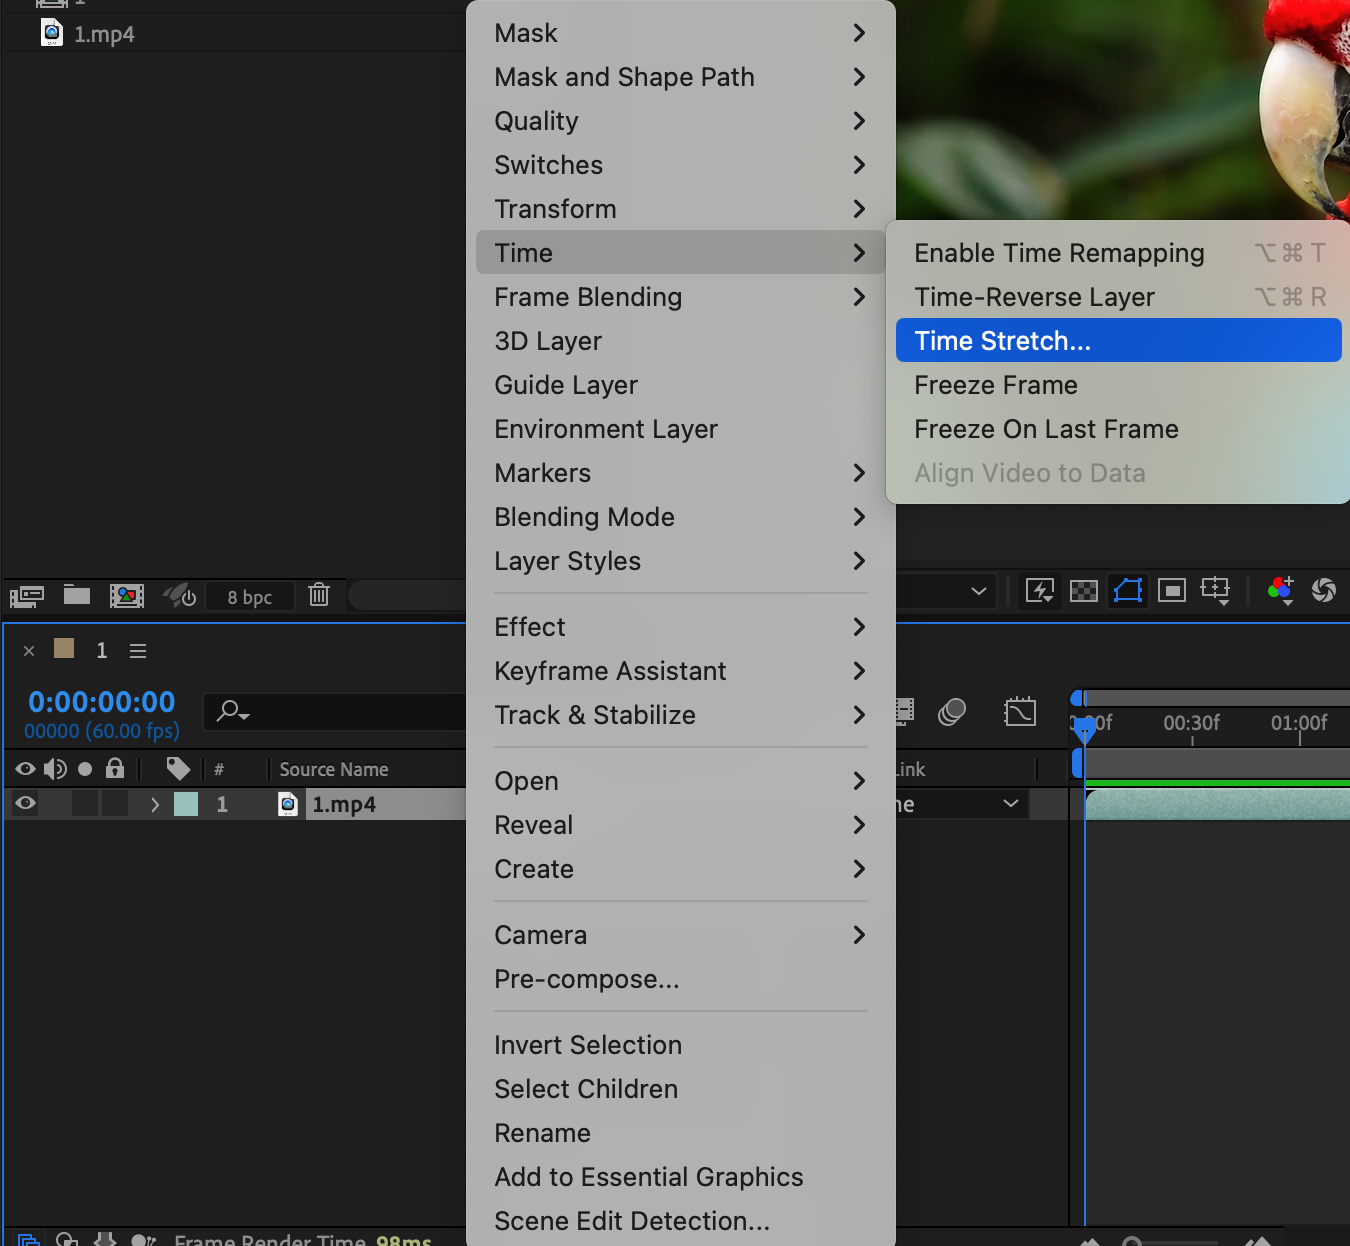
 Step 4: Enable Time Remapping
To further enhance the smoothness of your slow motion footage, you can use time remapping and keyframes. Simply right-click on the footage layer, go to “Time” > “Enable Time Remapping” to activate this feature. Time remapping allows you to control the timing of your footage more precisely.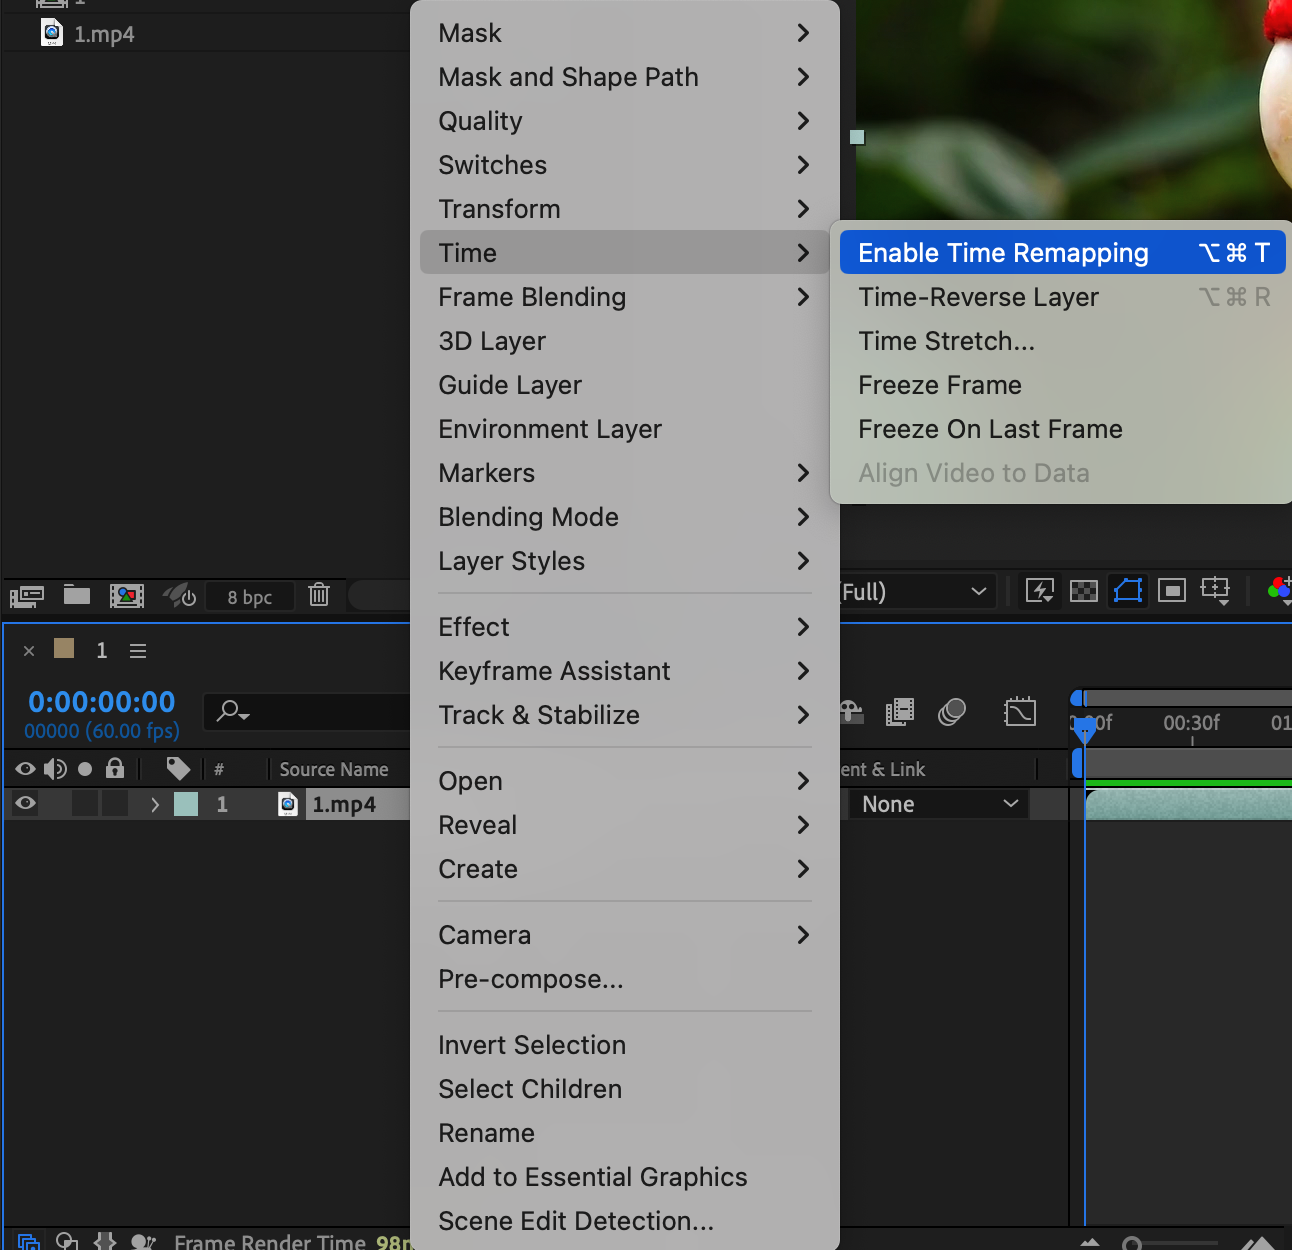

 Step 5: Utilize Optical Flow
For even more refined slow motion, consider utilizing After Effects’ optical flow features. Optical flow analyzes the movement between frames and generates new pixel information to create smoother transitions. To enable optical flow, select the footage layer, go to “Frame Blending” and choose the “Pixel Motion” option. This feature can significantly enhance the quality of your slow motion sequences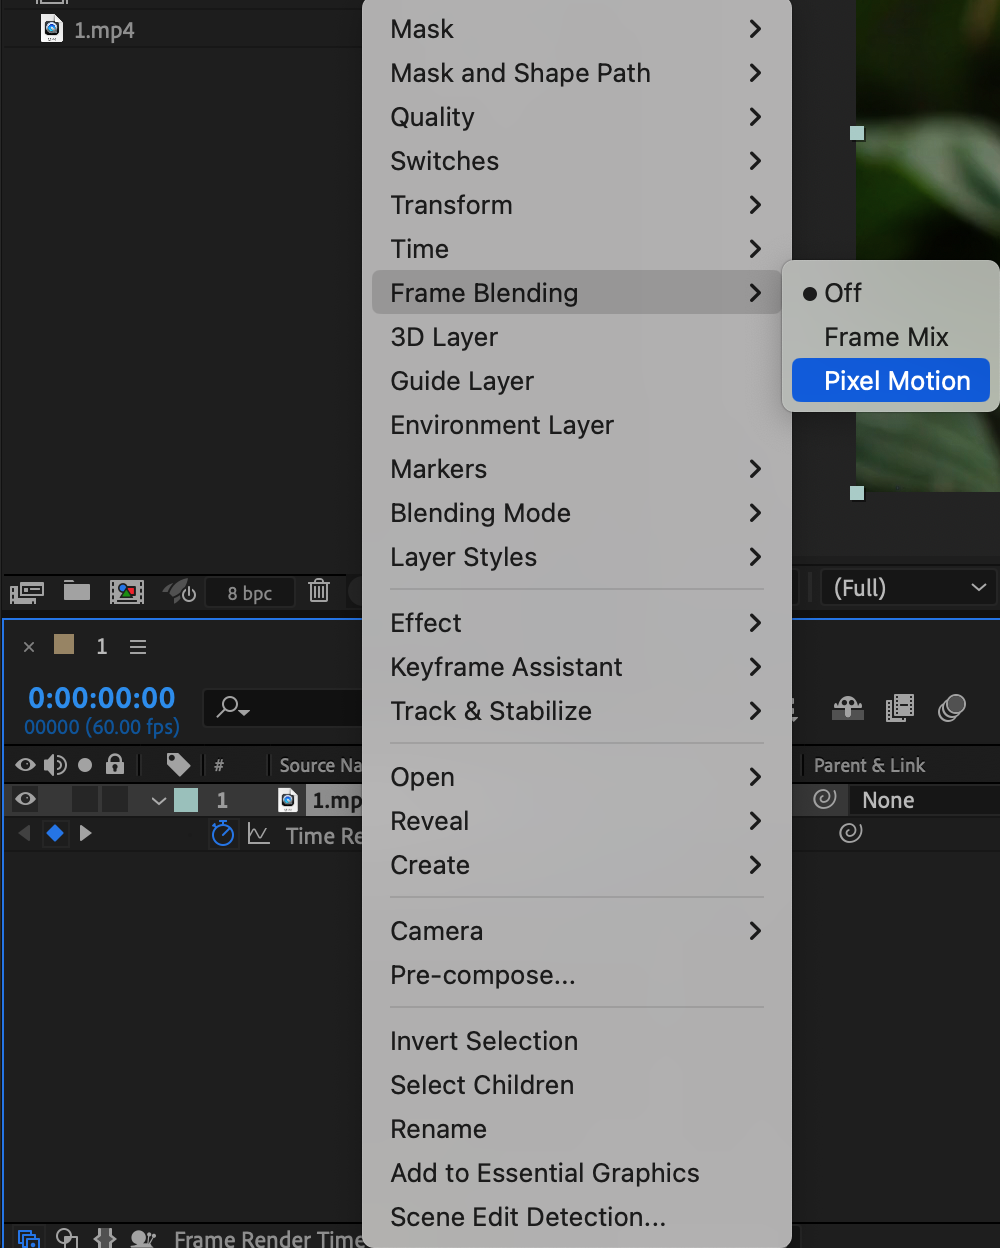 Step 6: Smooth Keyframes and Movements
When working with slow motion, it’s crucial to ensure smooth motion throughout your composition. Adjust your keyframes accordingly, using easy ease, easing in, and easing out of movements to maintain a seamless slow motion effect. This applies not only to the motion of objects but also to any effects or animations you add to your composition.
 Step 7: Explore Plugins and Presets
After Effects also offers a wide range of plugins and presets that can further enhance the quality and smoothness of your slow motion effects. Experiment with plugins like Twixtor or the built-in Motion Blur effect to refine your footage even further. These tools can provide additional options for achieving the desired cinematic impact.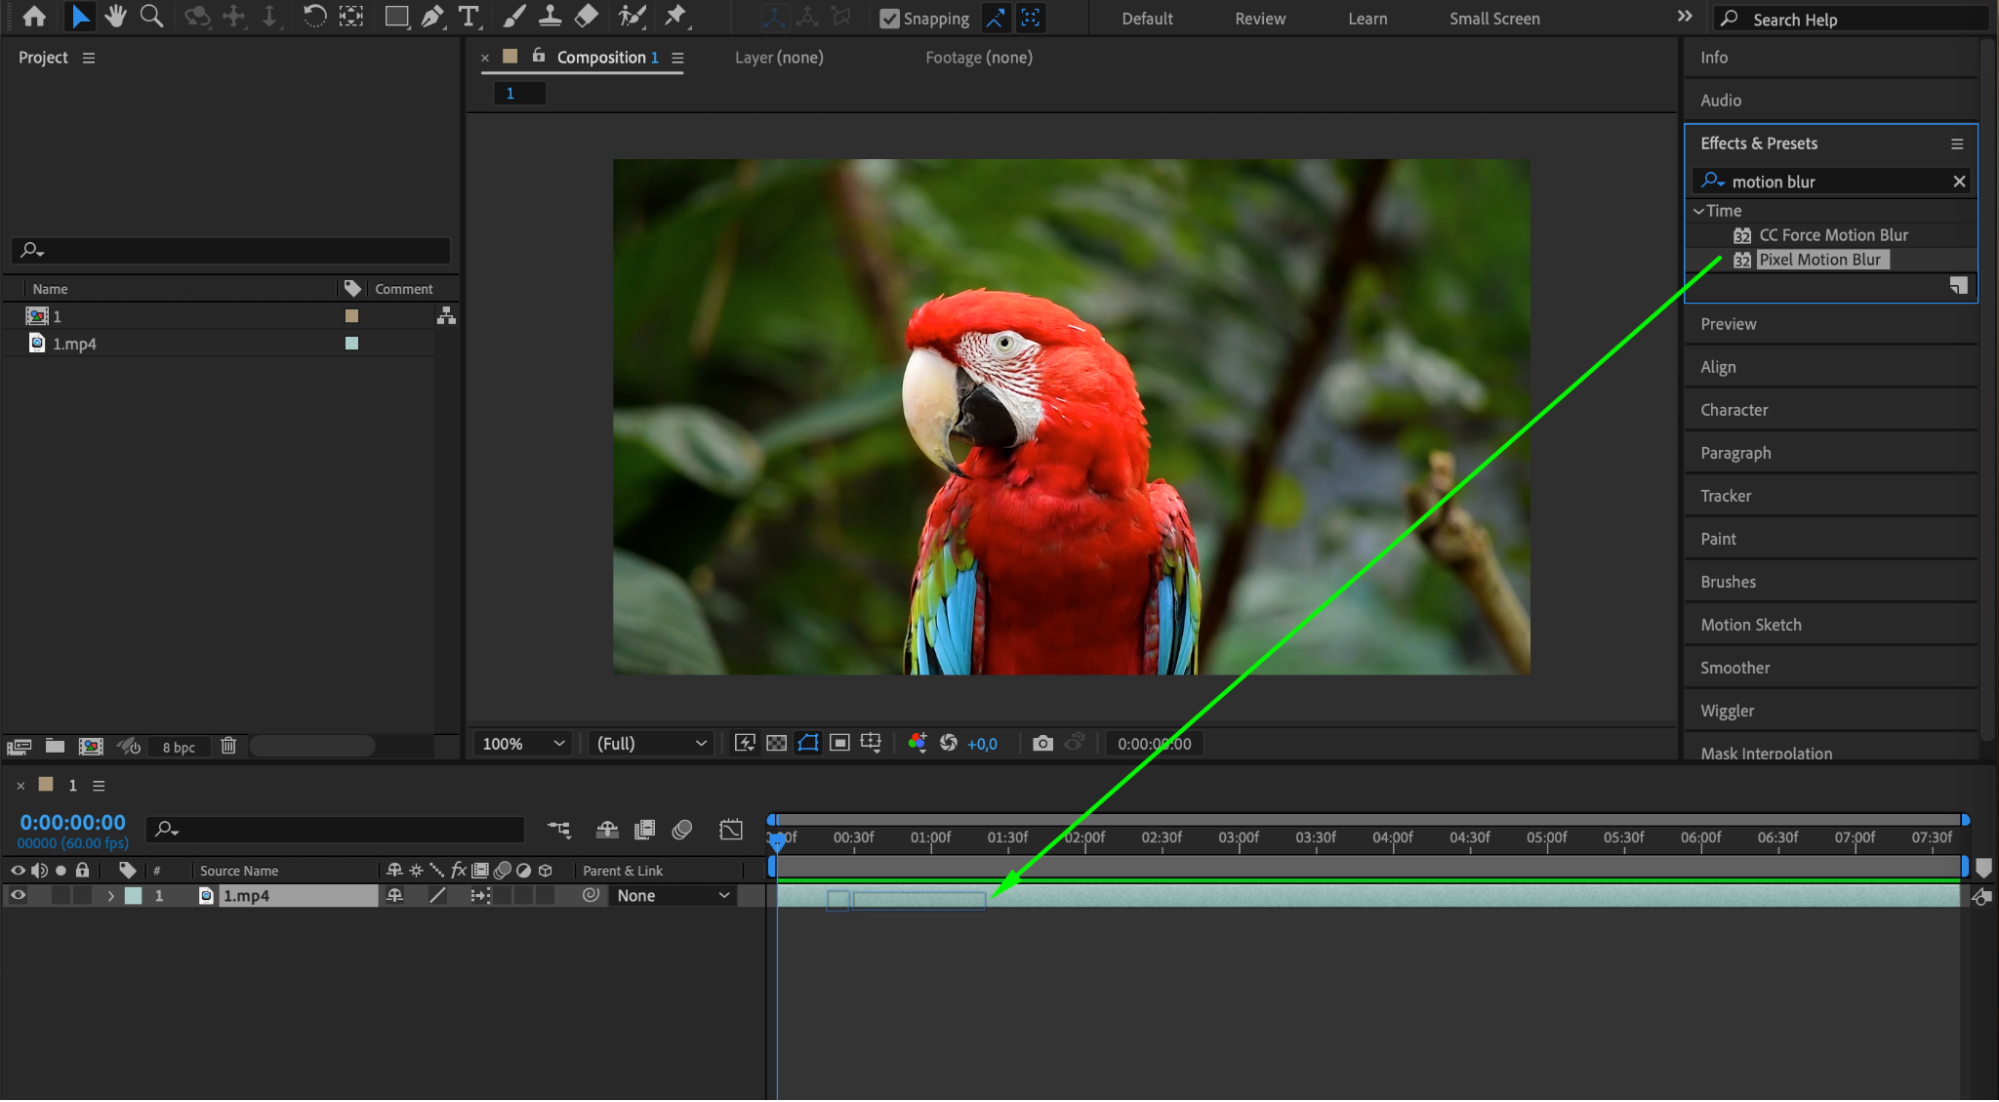
 Conclusion
By following these techniques and utilizing the features available in After Effects, you can create smooth slow motion sequences that will impress your viewers. Take your time, experiment, and don’t be afraid to push the boundaries to achieve the desired cinematic impact in your videos.

