Unlocking Keyframe Precision in After Effects”
Introduction – Dive into the world of keyframes, mastering the art of control for seamless and captivating animations in Adobe After Effects.
Master the art of holding keyframes in After Effects to create seamless animations with precision and control. Discover tips and techniques for maintaining keyframe values and achieving the desired animation effects in your projects. Holding keyframes is a crucial skill for any motion graphics designer or video editor looking to add finesse and professionalism to their animations. Keyframes, the building blocks of animation in After Effects, allow you to specify changes in properties over time for fluid motion and visual effects.
Get 10% off when you subscribe to our newsletter

Learning how to control and manipulate keyframes is essential for bringing your creative vision to life, whether you are a seasoned After Effects user or just starting out. From simple position changes to intricate shape animations, holding keyframes enables you to fine-tune your animations with accuracy. By exploring various methods such as hold keyframes, keyframe interpolation, you can create animations that flow smoothly and convey your intended message to your audience.
In After Effects, holding keyframes typically means keeping a property value unchanged at a specific point in time. Let’s go through the steps to achieve this:
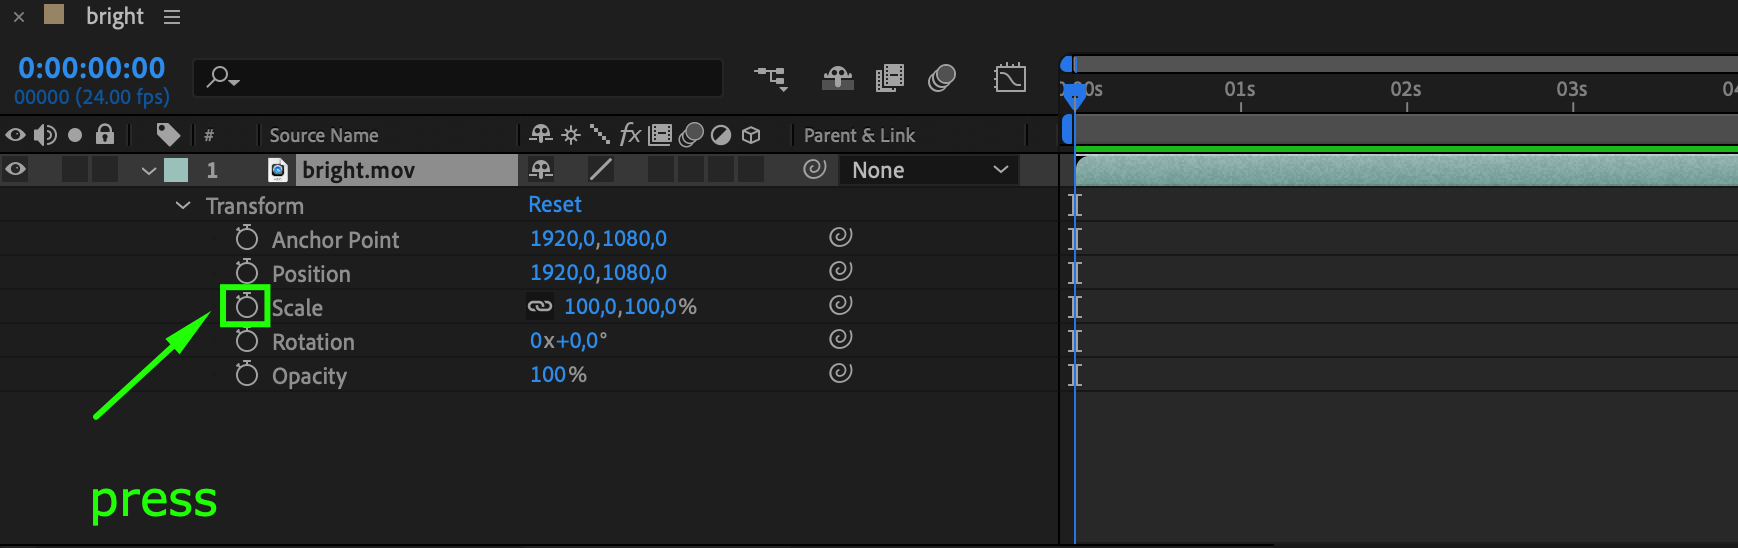
1. Create a Keyframe:
Select the layer for which you want to create a keyframe. Open the properties you want to animate. Click on the stopwatch icon next to the property at the time you want to set the keyframe.

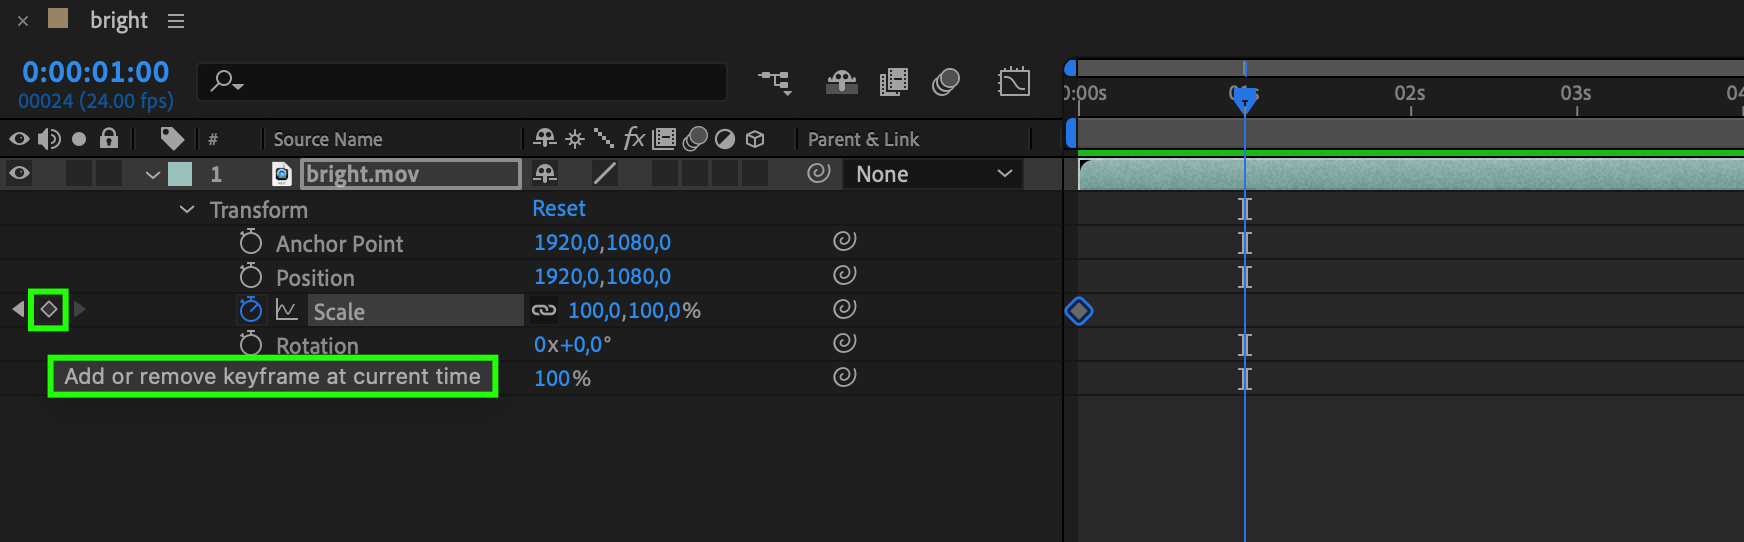
2. Hold the Keyframe:
Move to the timeline to the moment where you want to maintain the property value. If you want the value to remain constant until a certain point, create a new keyframe at that time.
Get 10% off when you subscribe to our newsletter
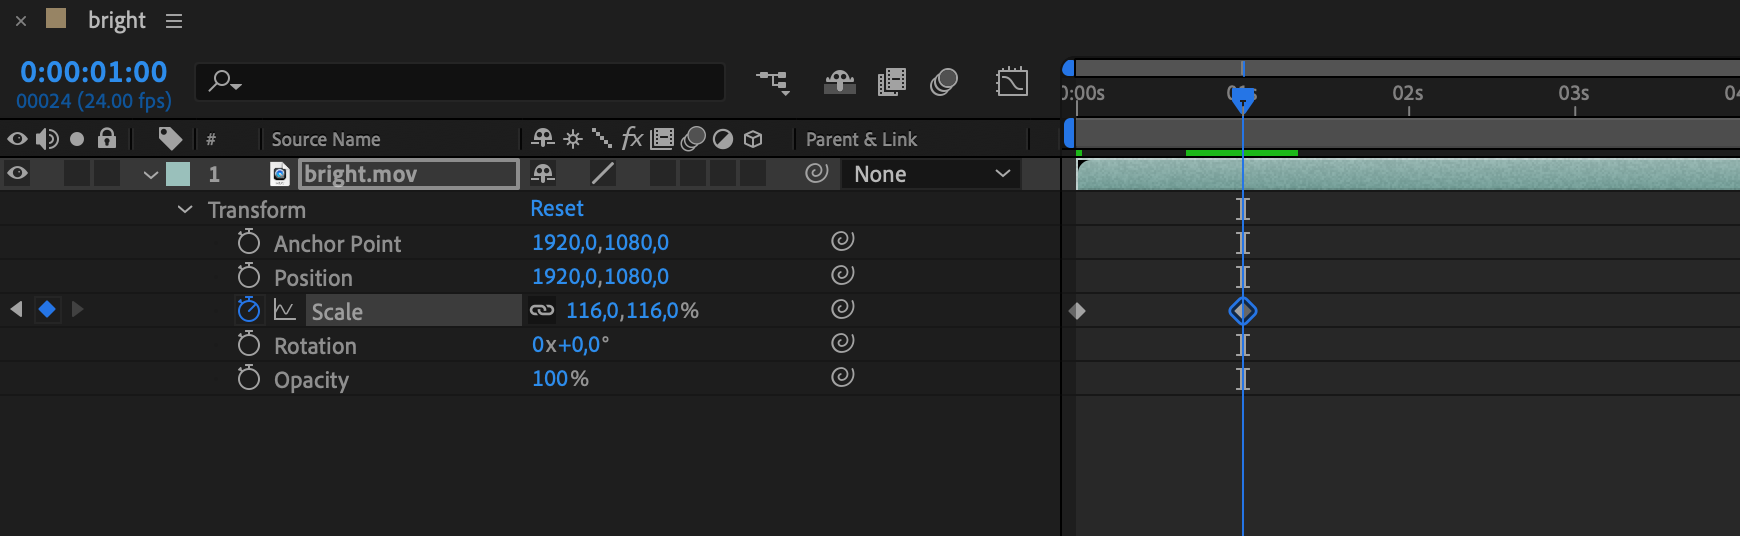
If you want to hold the value unchanged until the next keyframe, set a keyframe at the next moment with the same value.
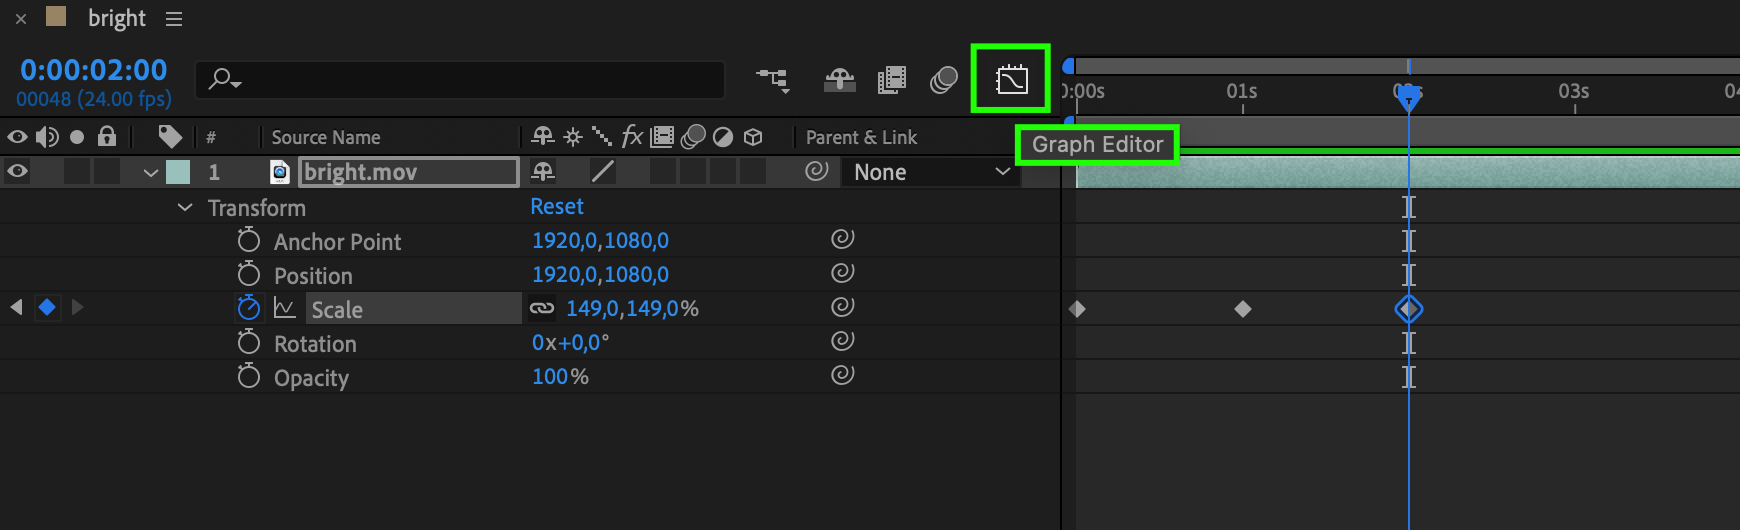
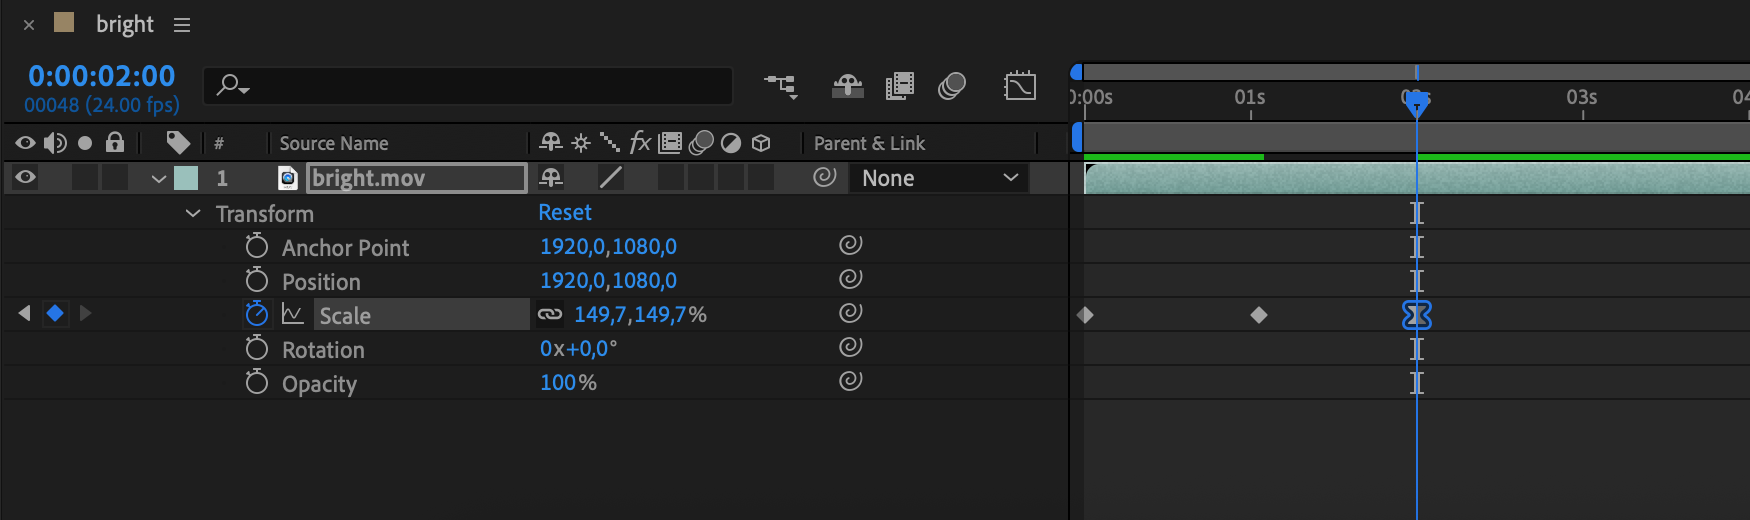
3. Check the Graph Editor:
Open the Graph Editor panel to visually check that values remain constant at the specified moments. You can edit curves between keyframes for more precise animation adjustments.
Get 10% off when you subscribe to our newsletter

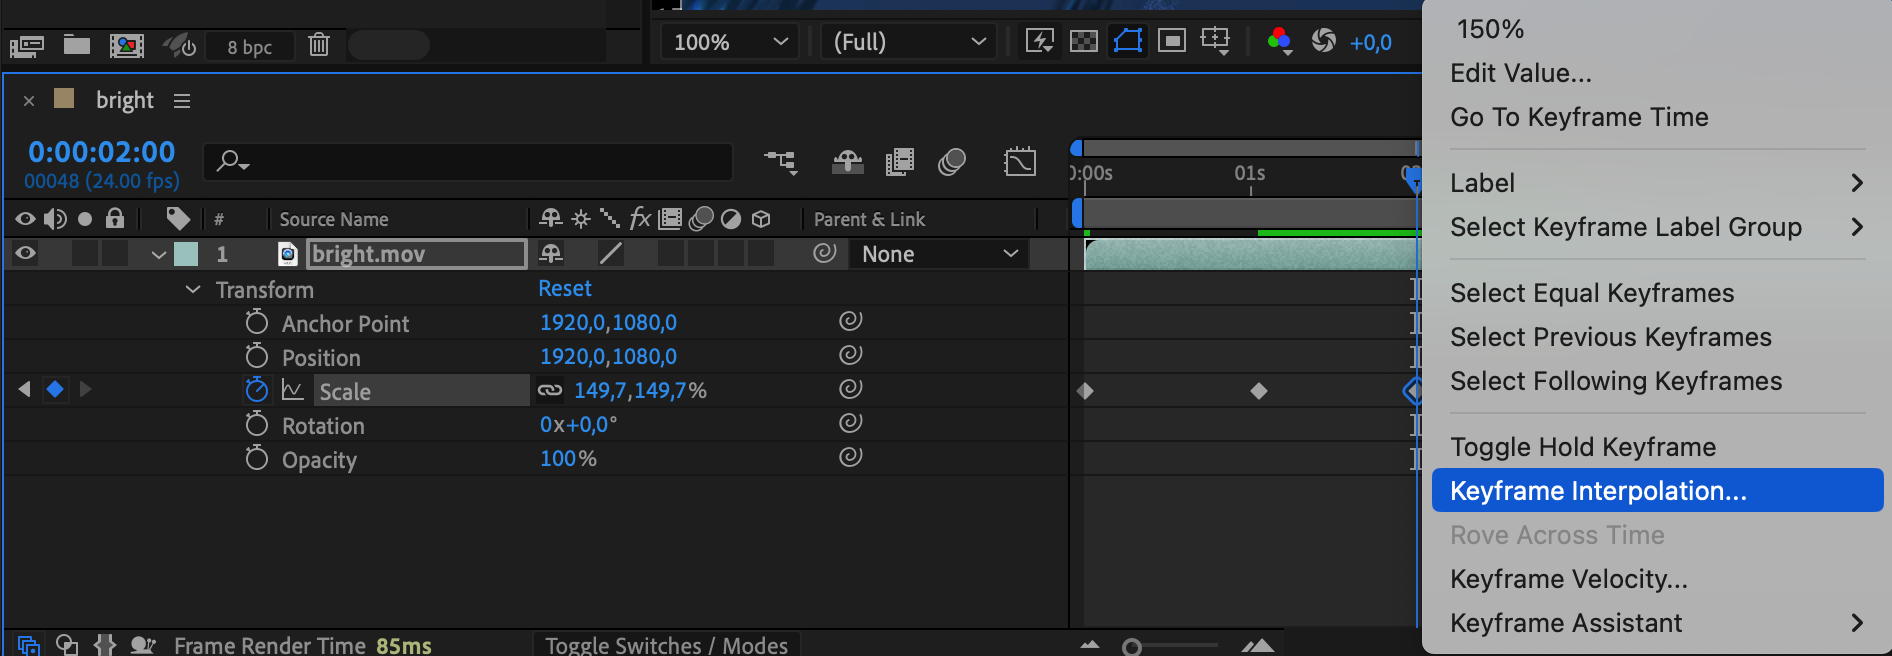
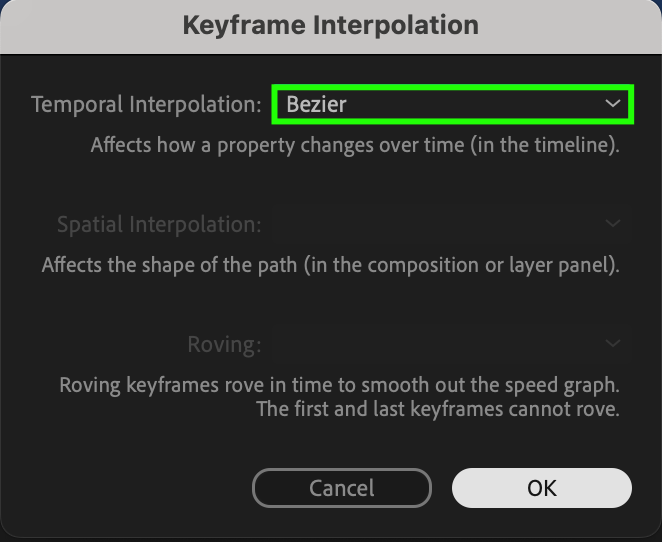
4. Adjust Interpolation if Needed:
If your keyframes have interpolation (smooth transitions) between them, ensure it fits your needs. Select the keyframe and use different interpolation methods in the Temporal Interpolation panel.
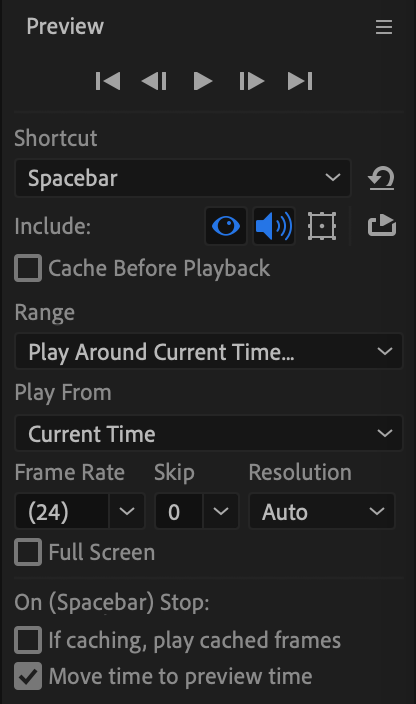
5. Preview:
Before finalizing your animation, use the preview options to see how your changes affect the overall sequence.
Conclusion:
Mastering the art of holding keyframes in After Effects opens doors to limitless creative possibilities, allowing you to elevate the visual impact of your animations. With these newfound skills, you can captivate viewers with dynamic and seamless motion graphics that tell your story with precision. So, dive into the world of keyframes, experiment with different techniques, and let your creativity soar in Adobe After Effects. Unleash the power of keyframe precision for animations that leave a lasting impression on your audience. Your journey into the realm of animation control has just begun!
Our Bestsellers


