Mastering the Import of After Effects Files into Premiere Pro
Streamlining Workflow: Importing After Effects Files into Premiere Pro
Many multimedia creators often find themselves navigating between various Adobe Creative Cloud applications to bring their projects to life. Adobe After Effects and Premiere Pro are two powerhouse tools frequently used together for video editing and motion graphics. However, seamlessly transferring projects from After Effects to Premiere Pro can sometimes be a daunting task for beginners.
In this article, we’ll walk you through a step-by-step guide on how to import an After Effects file into Premiere Pro. Whether you’re a seasoned professional or just starting your journey in video editing, mastering this process will streamline your workflow and enhance your creative capabilities.
Step 1: Open After Effects and select your project
First, open the After Effects program and load your project. Make sure you’re in the desired composition you want to import into Premiere Pro.
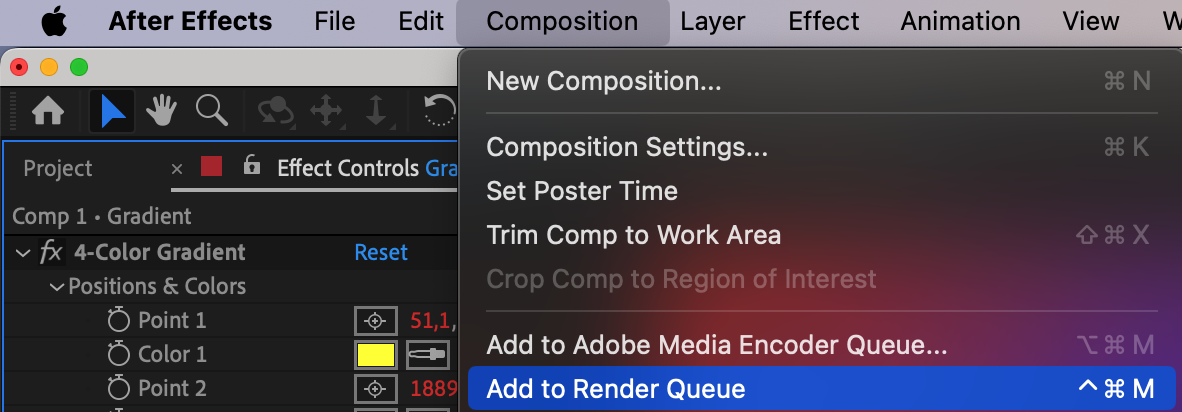
Step 2: Add the composition to the render queue
Go to the Composition menu and select “Add to Render Queue.” This will place your composition in the Render Queue panel.
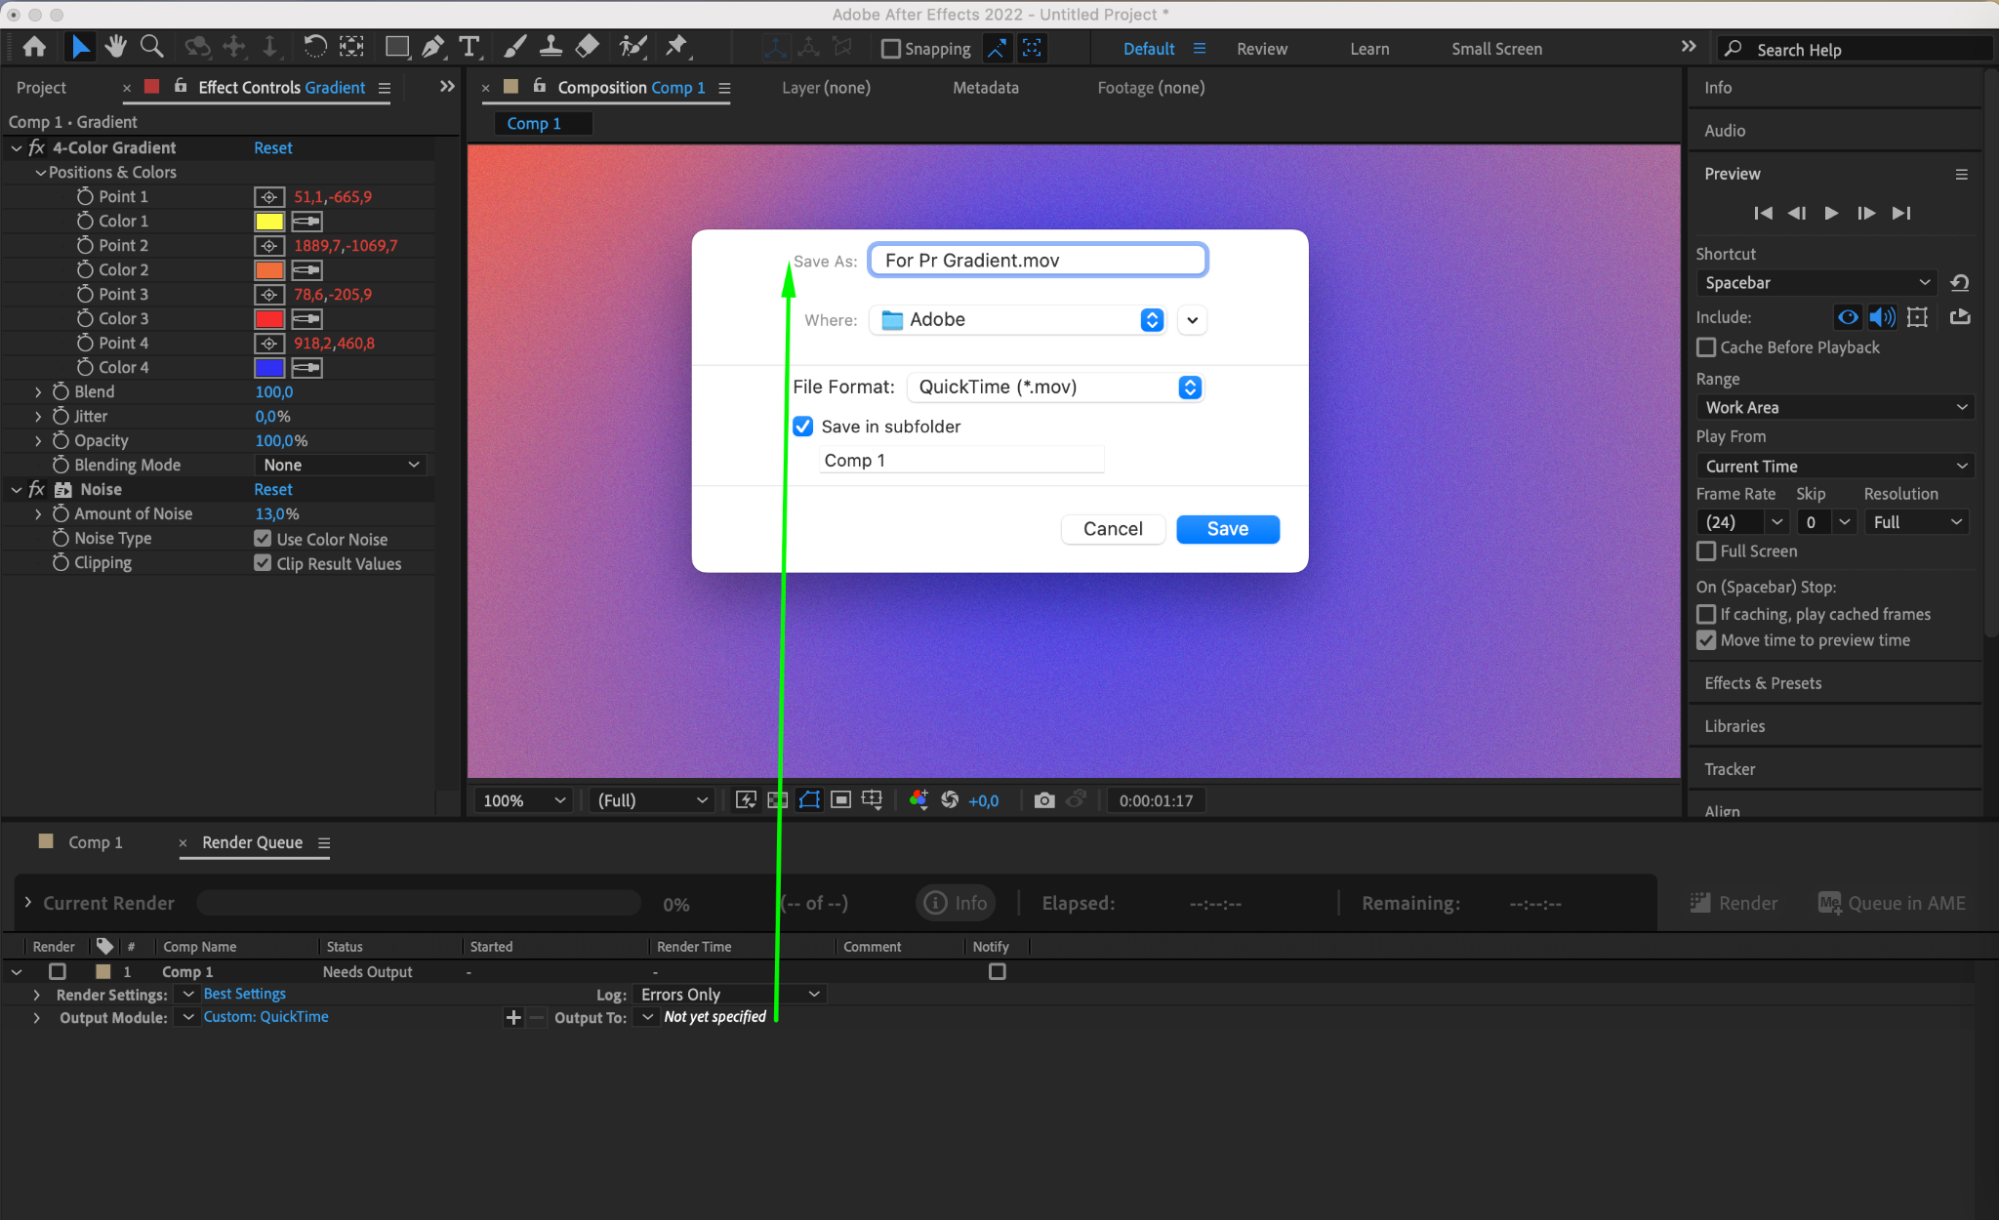
Step 3: Adjust output settings
In the Render Queue panel, go to the “Output Module Settings” section and choose the desired format for your project. For Premiere Pro, QuickTime is commonly used. Make sure to select an appropriate codec and other settings.
Get 10% off when you subscribe to our newsletter


Step 4: Specify the save path
In the “Output To” section, specify the filename and save location for your project.
Get 10% off when you subscribe to our newsletter
Step 5: Start rendering
Click the “Render” button in the Render Queue panel to begin exporting your composition.

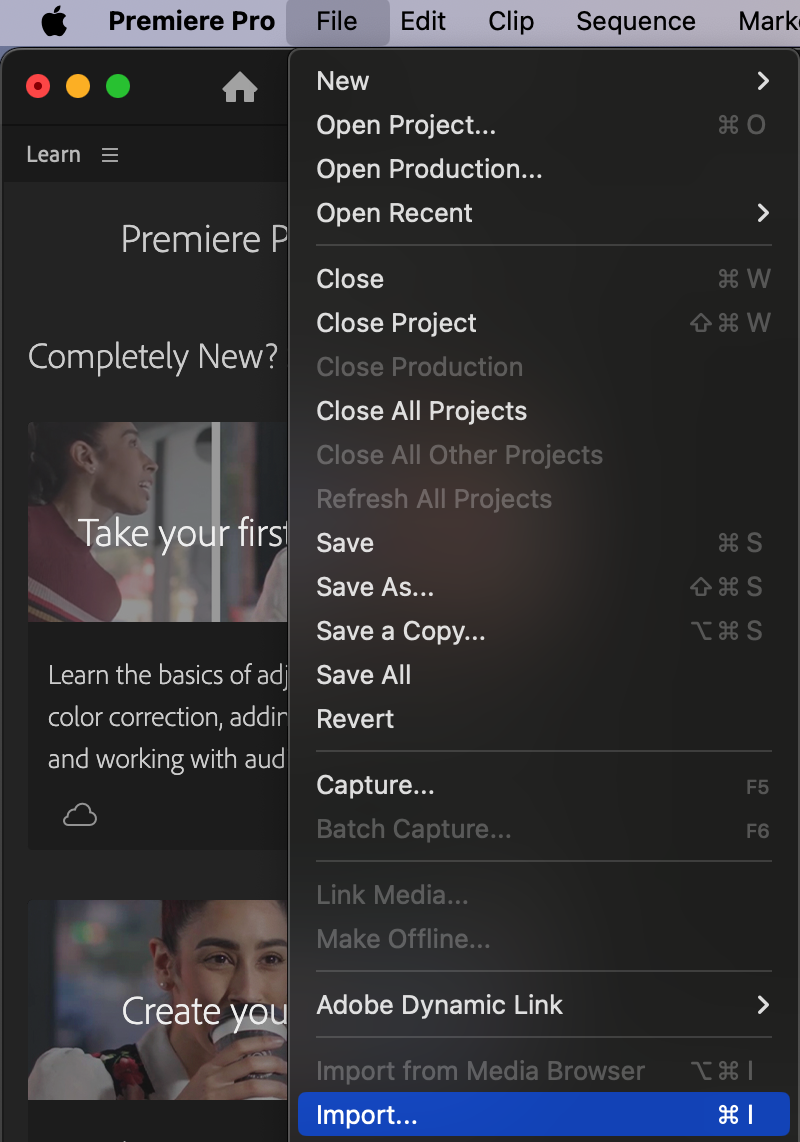
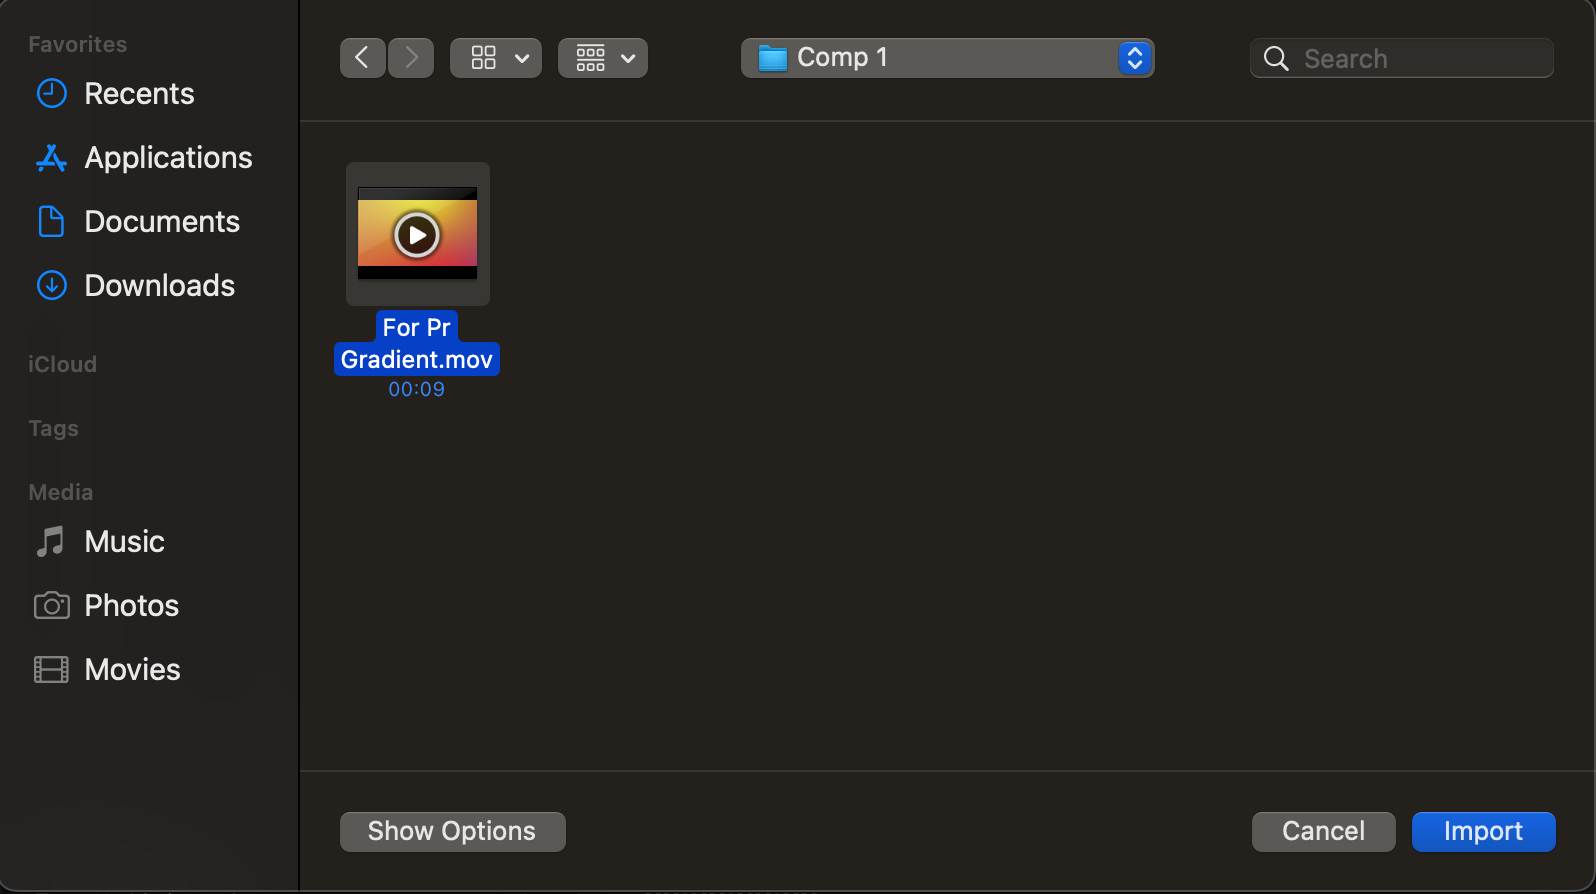
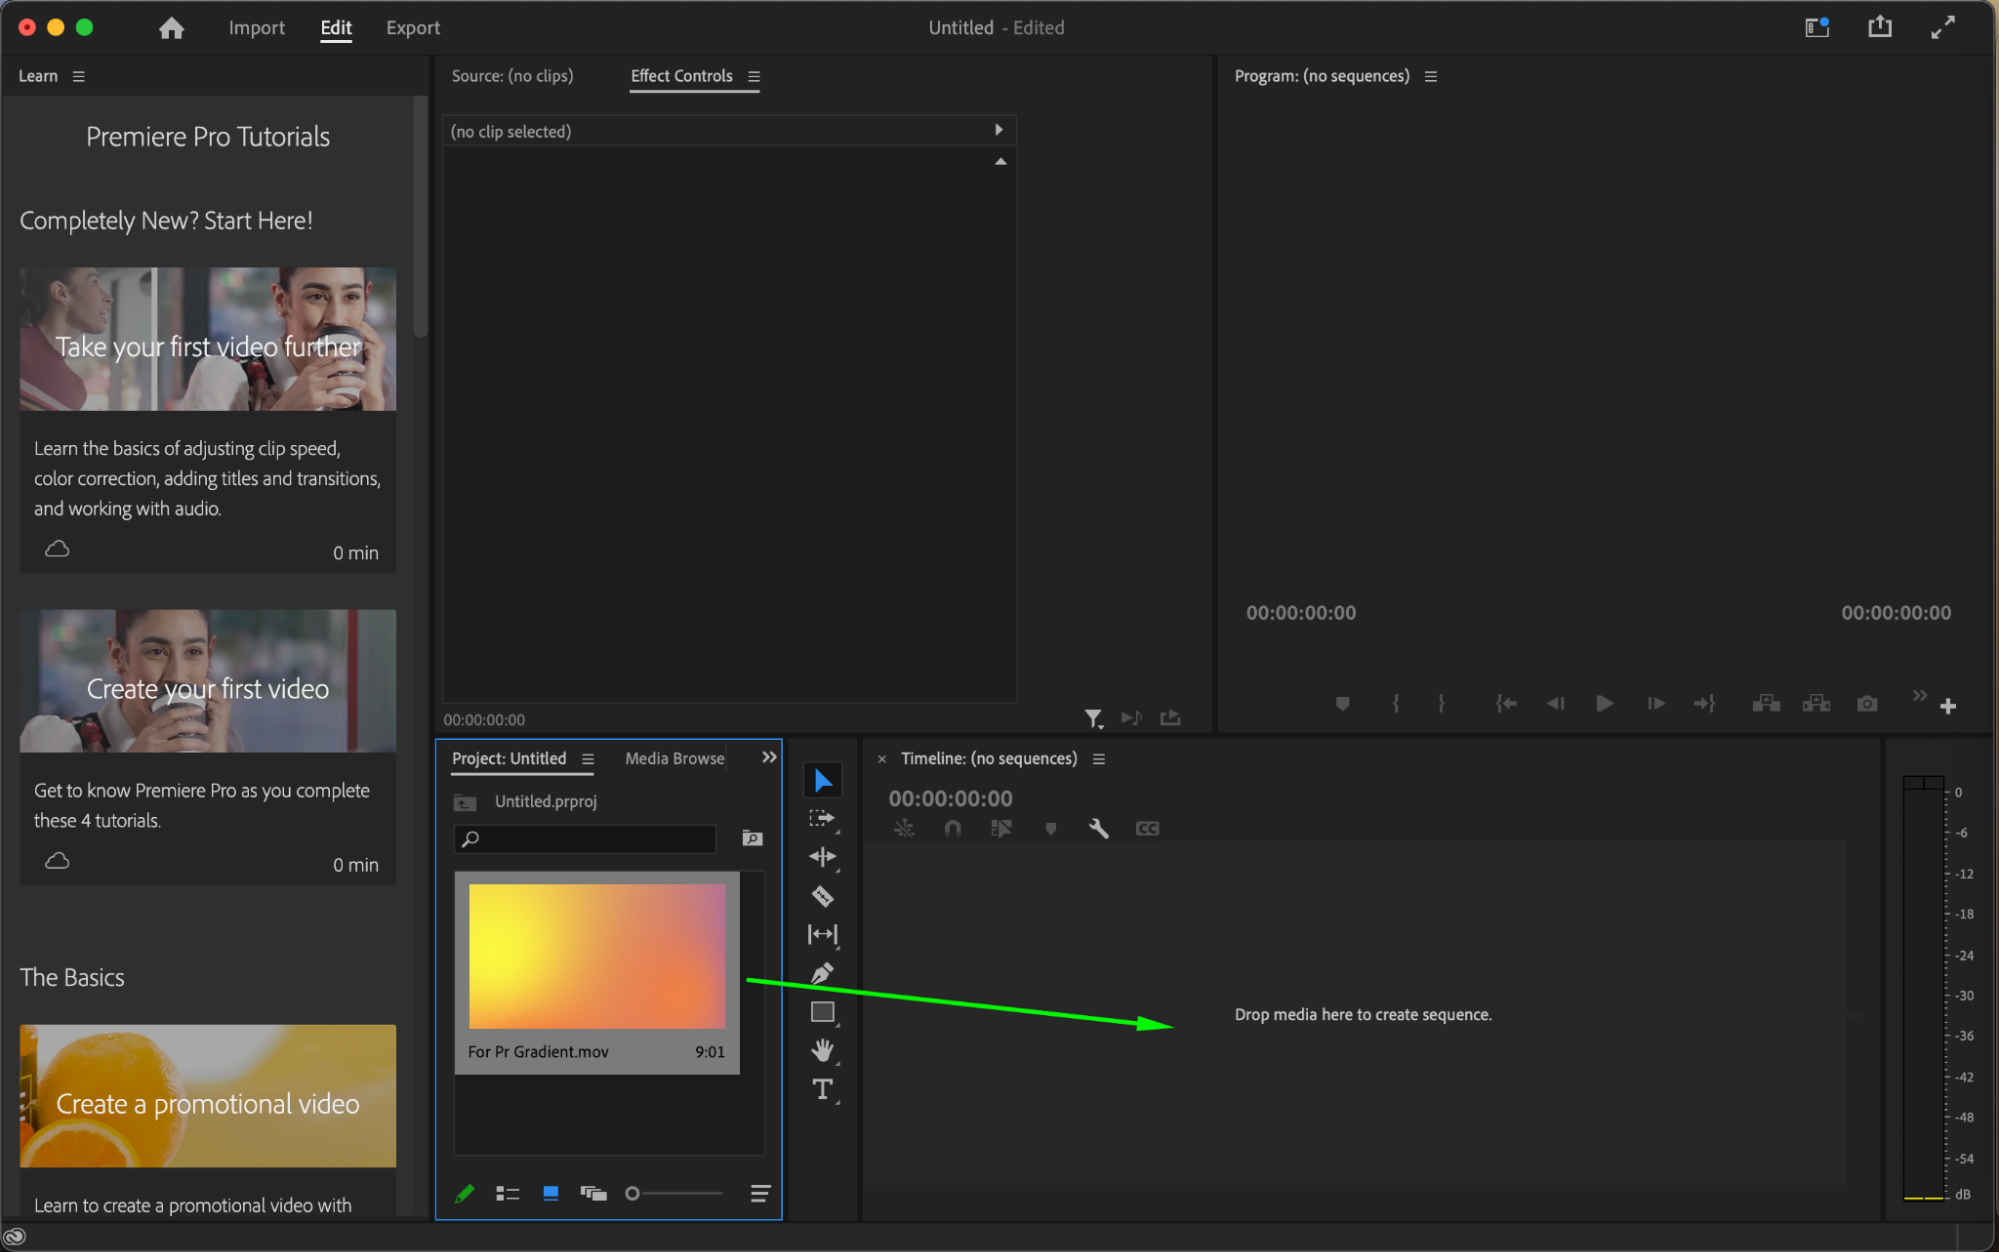
Step 6: Open Premiere Pro and import the file
Launch Premiere Pro and select the “File” menu > “Import.” Locate your file and click the “Import” button.
Get 10% off when you subscribe to our newsletter
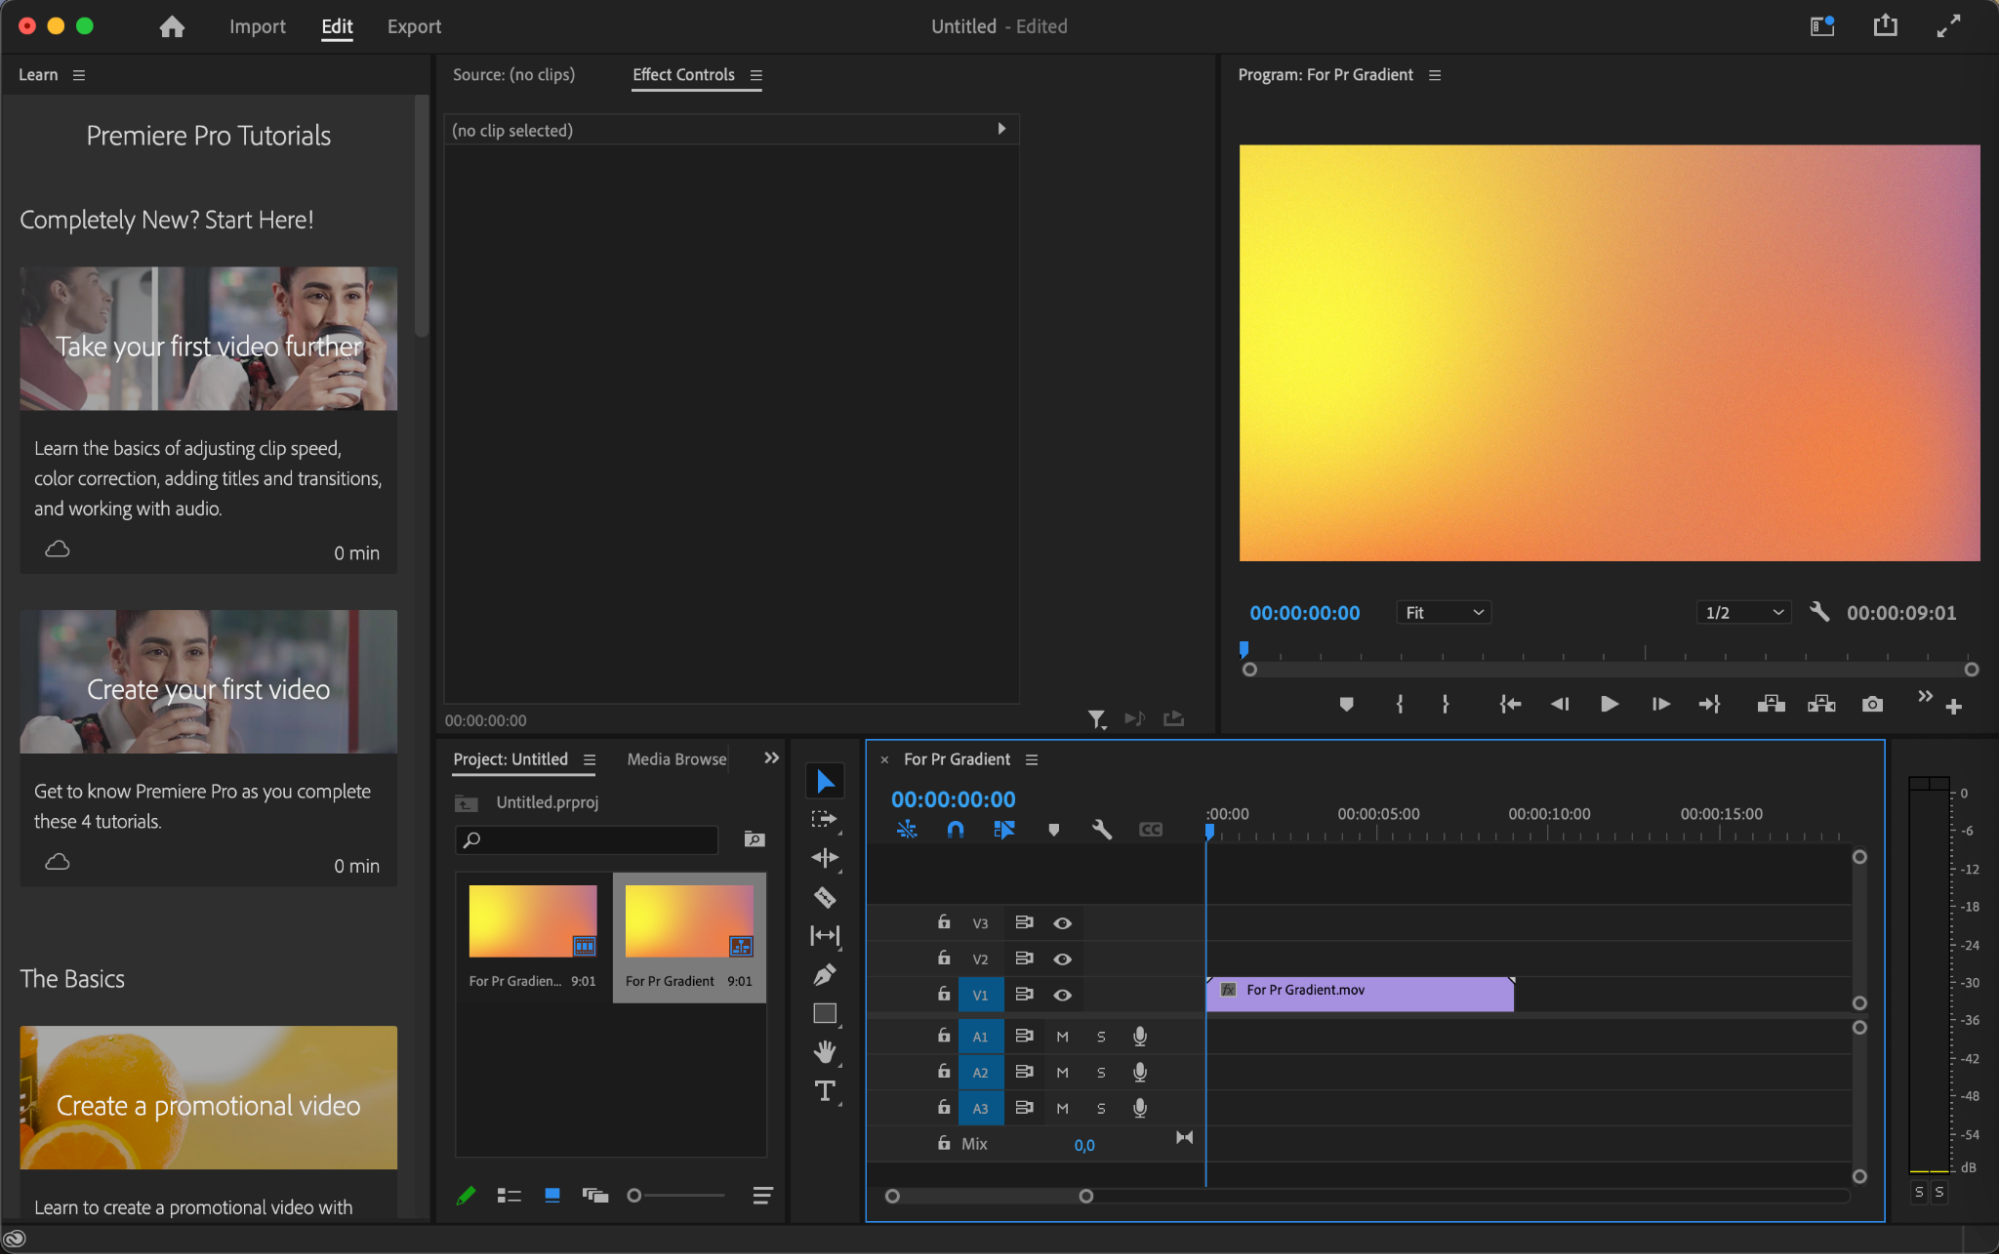
Step 7: Begin editing
Drag the imported file from the project panel to the timeline panel to start editing your project in Premiere Pro.
Get 10% off when you subscribe to our newsletter
Conclusion
Mastering the art of importing After Effects files into Premiere Pro opens up a world of possibilities for multimedia creators. By following the simple steps outlined in this guide, you can seamlessly transition between these two powerful Adobe applications, allowing for smoother collaboration, enhanced creativity, and ultimately, more polished video projects.
Whether you’re creating stunning motion graphics in After Effects or fine-tuning your edits in Premiere Pro, the ability to import and integrate your work across these platforms is an invaluable skill. So don’t let the process intimidate you – with practice and perseverance, you’ll soon be effortlessly moving between After Effects and Premiere Pro like a pro.
Our Bestsellers


