How to Import and Animate Illustrator Files in After Effects
Introduction: Integrate Vector Graphics into Your Motion Graphics Projects
Importing Illustrator files into After Effects is a key skill for video designers, allowing for seamless integration of vector graphics into your motion graphics projects. This guide will walk you through the process of importing your Illustrator files, ensuring that you can effectively animate and manipulate these graphics within After Effects. Whether you’re working on a logo animation, a dynamic graphic, or any other project, mastering this technique will enhance your creative flexibility and control.
Step-by-Step Guide: How to Import and Animate Illustrator Files in After Effects
Step 1: Import Your Illustrator File
Open After Effects, go to File > Import > File and locate your Illustrator file (.ai or .eps) on your computer. Click Open to import the file. 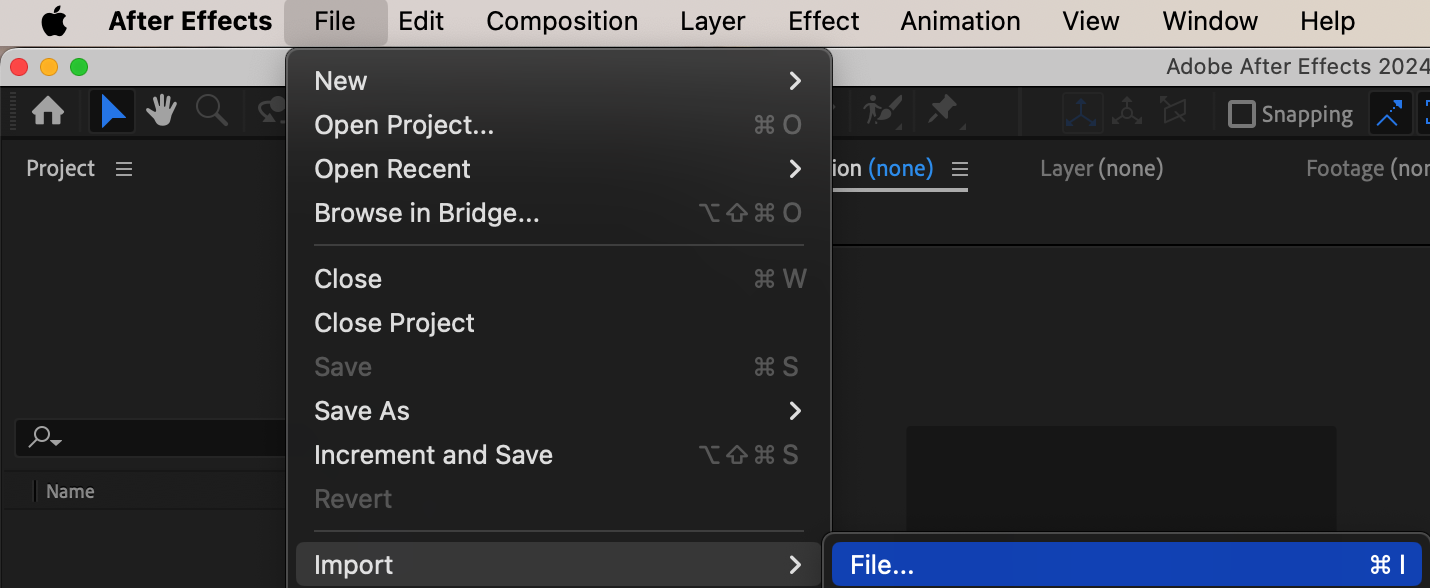 Step 2: Create a Composition
Get 10% off when you subscribe to our newsletter

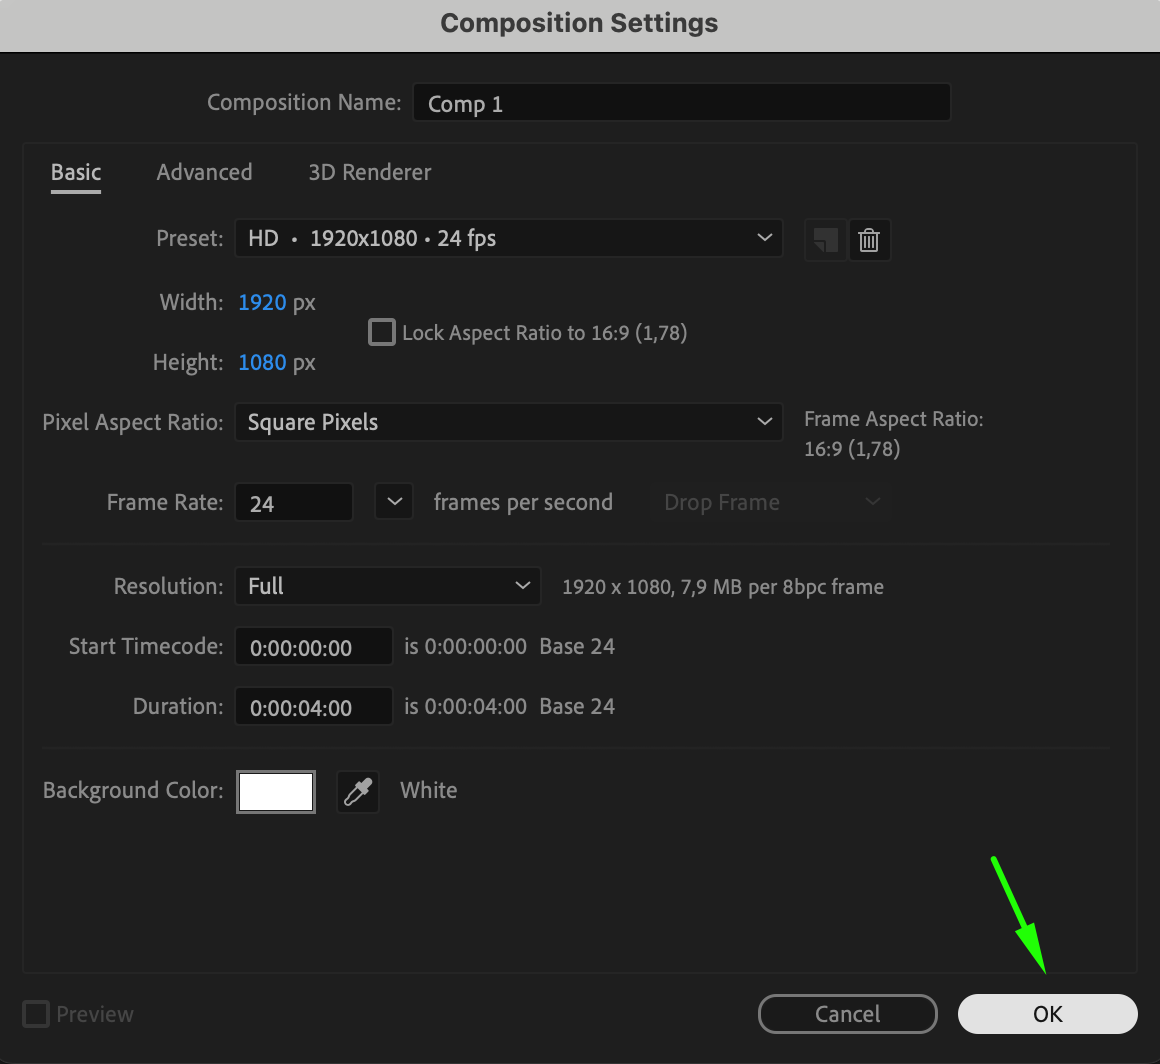
Next, go to “Composition” menu > “New Composition.” Adjust the composition settings to match your project requirements, including frame rate, resolution, and duration. This ensures that your composition is properly set up for the imported Illustrator file.
 Step 3: Add the File to the Timeline
Drag the imported file from the Project panel onto the Timeline panel. This action places your Illustrator file into the composition timeline, making it ready for further editing and animation.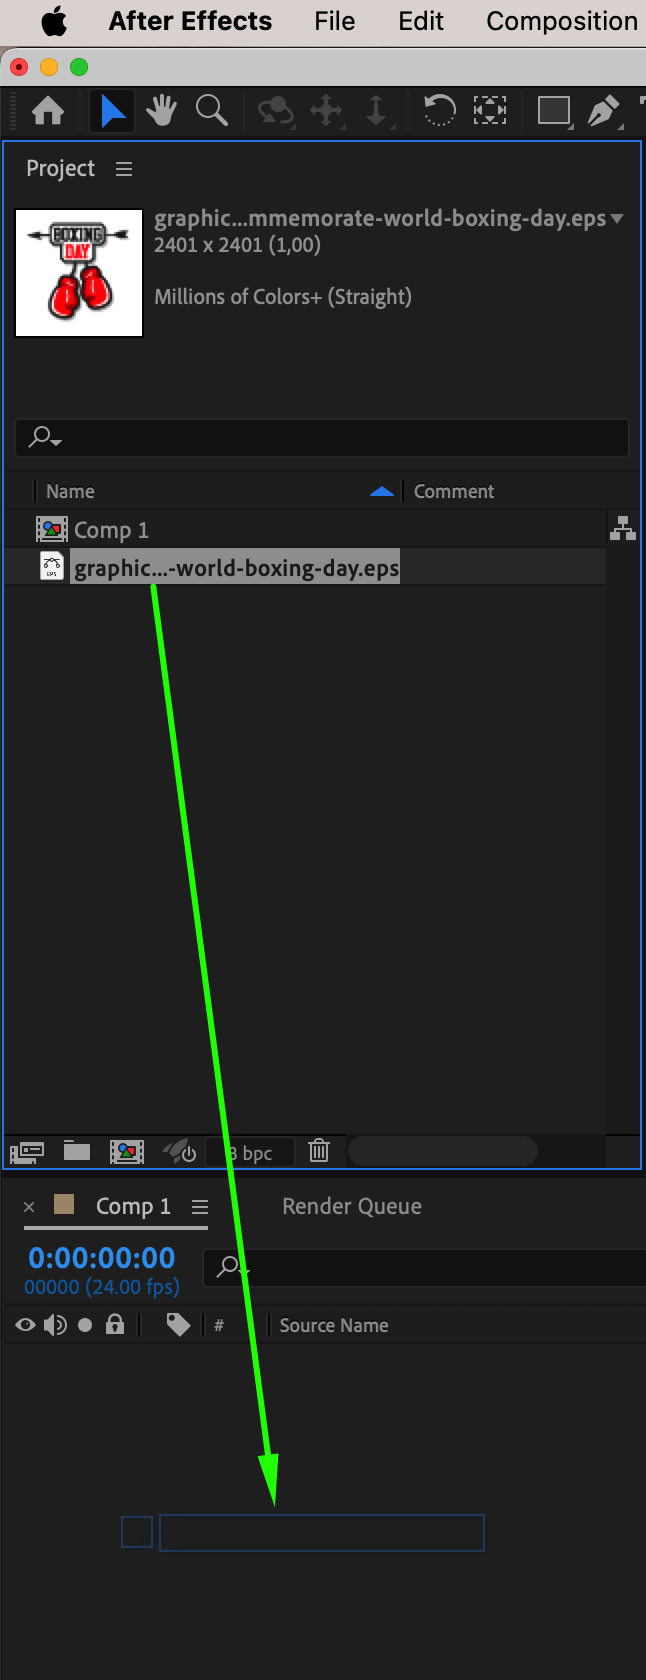 Step 4: Position and Scale the File
In the Composition panel, use the Transform properties to adjust the position and scale of your file. This ensures that the artwork fits appropriately within your composition and is aligned as desired.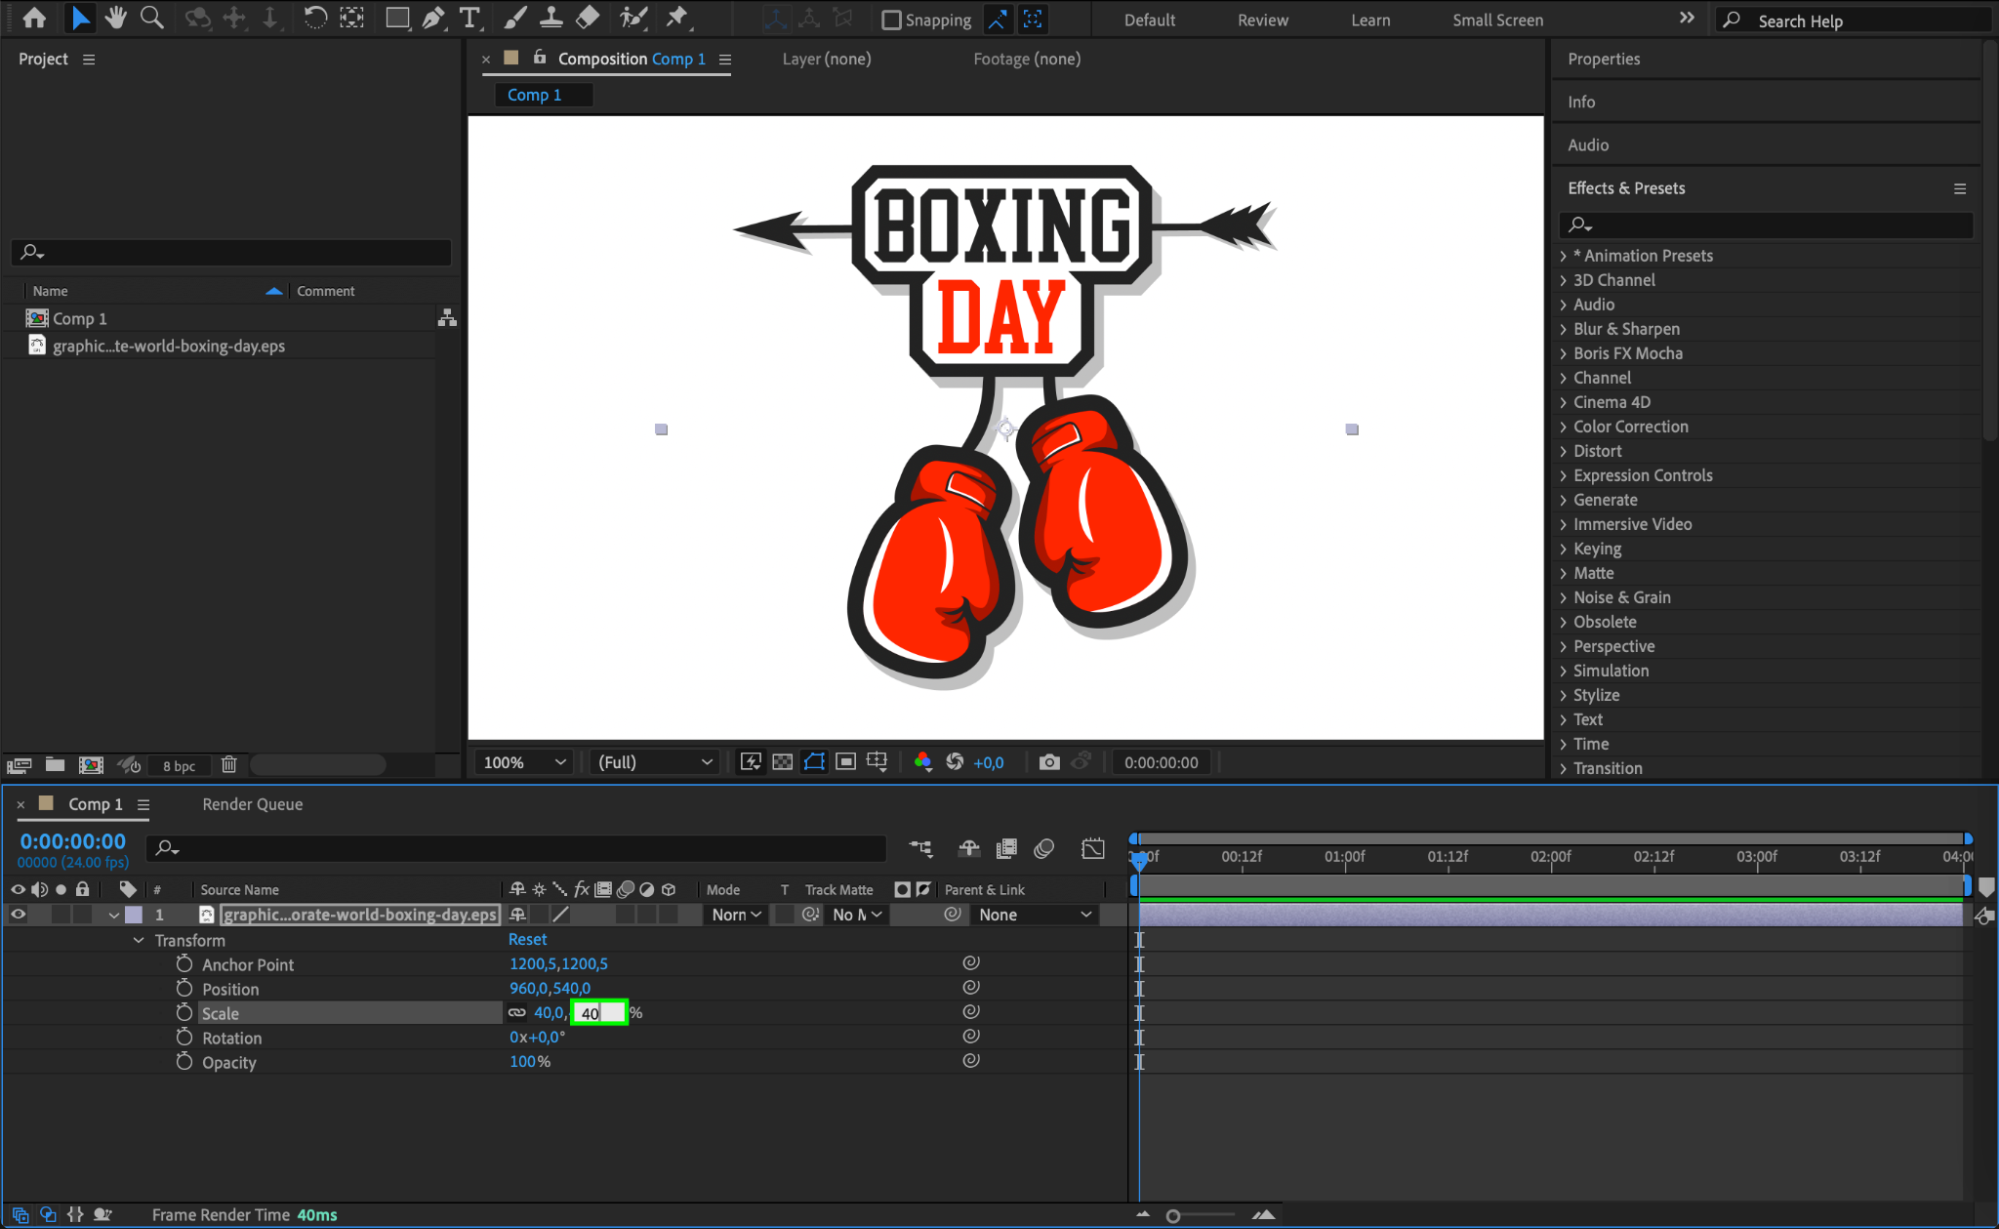
Step 5: Convert to Shape Layers
After Effects provides a variety of tools for working with vector graphics. To convert your vector layer into shape layers, right-click on the layer in the Timeline panel, then select “Create” > “Create Shapes from Vector Layer.” This conversion allows for more detailed animation.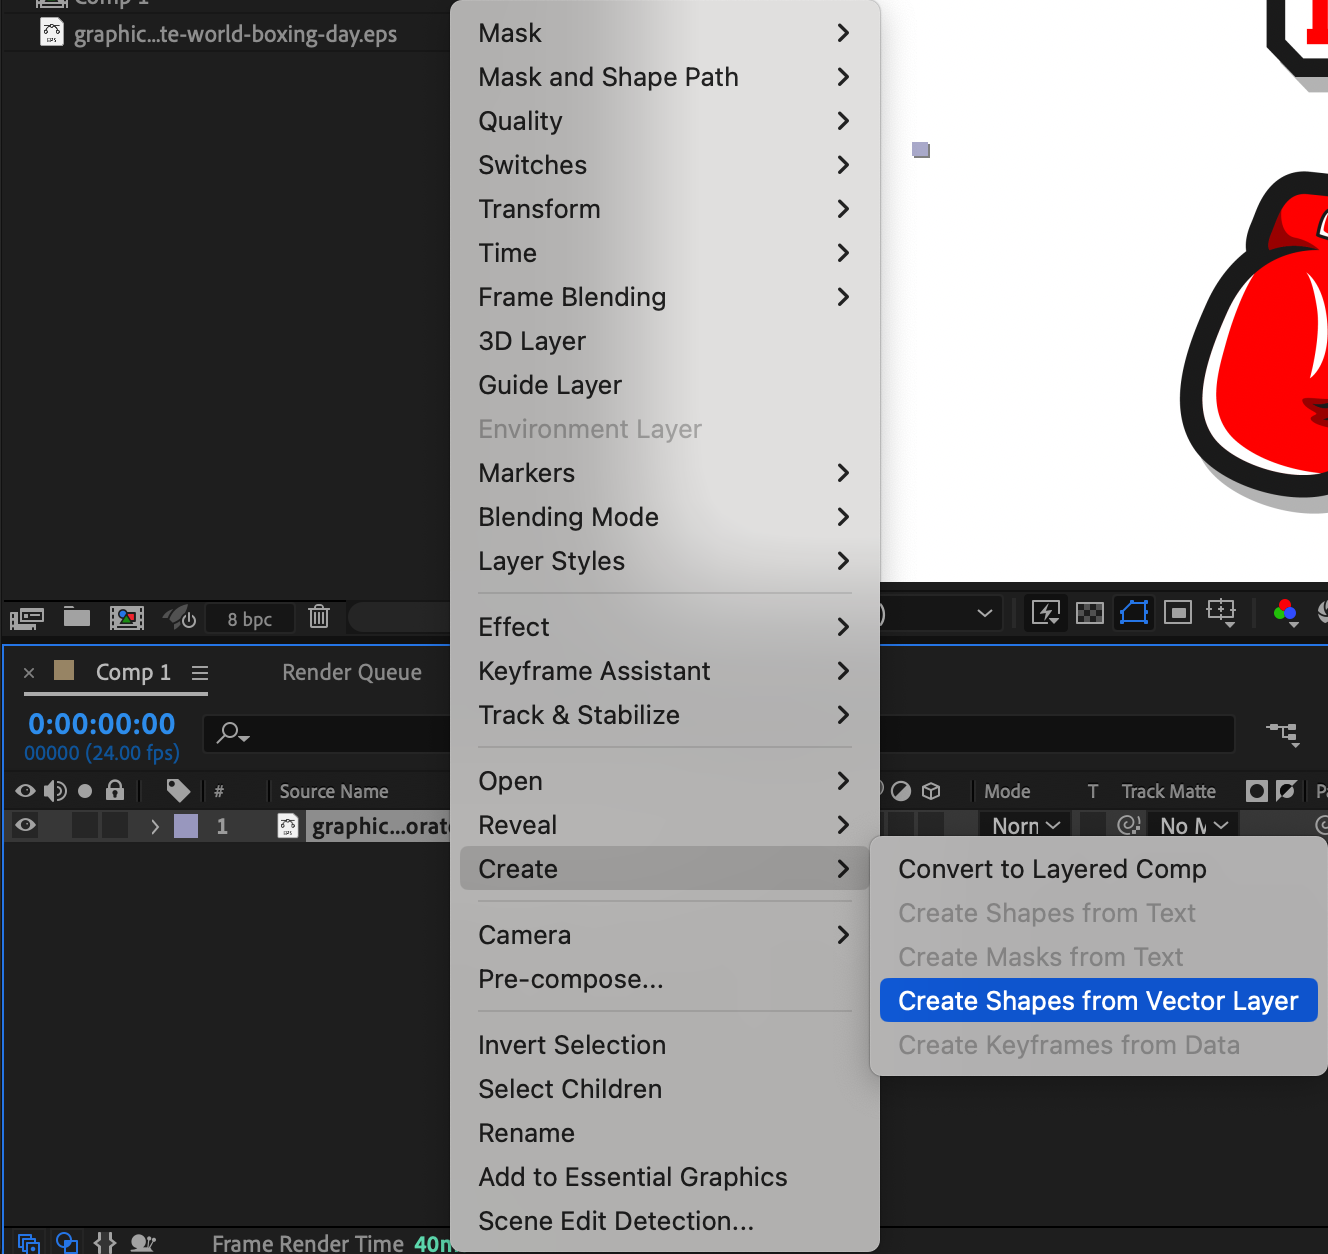
Get 10% off when you subscribe to our newsletter

Step 6: Apply Trim Paths
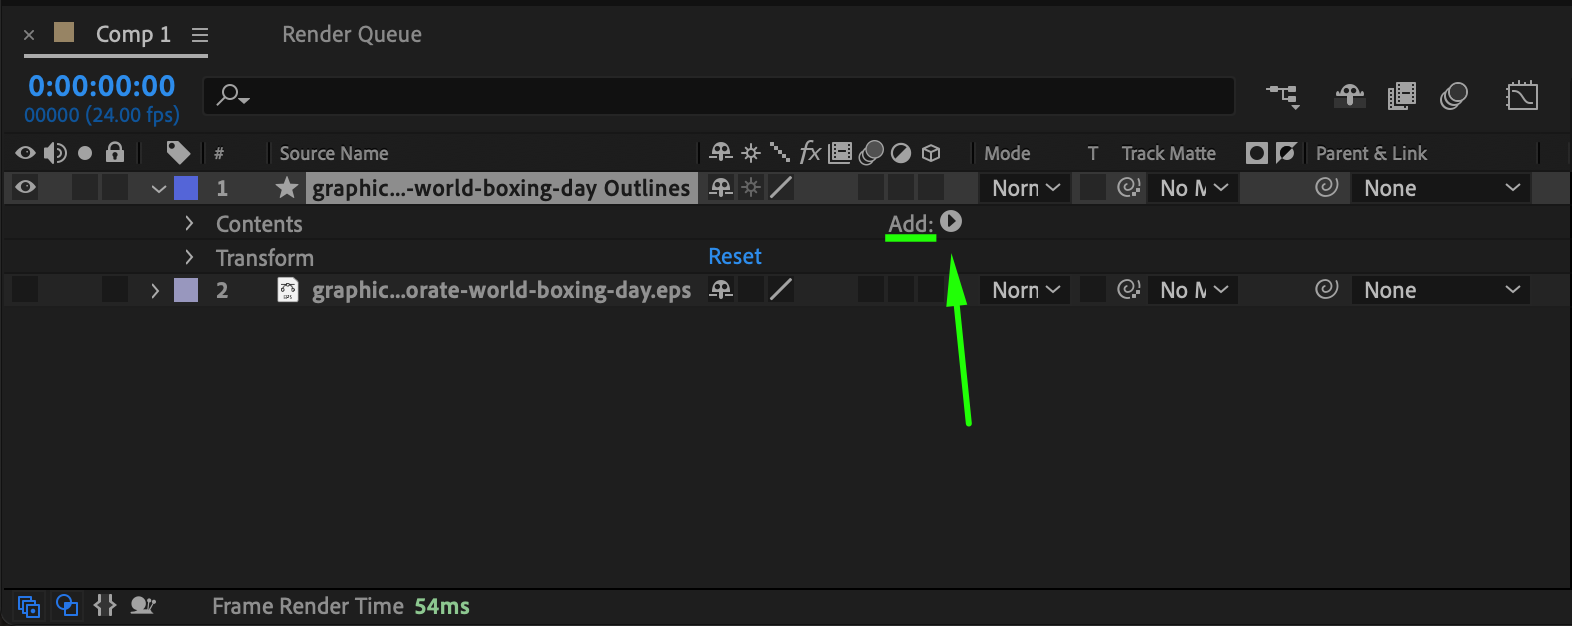
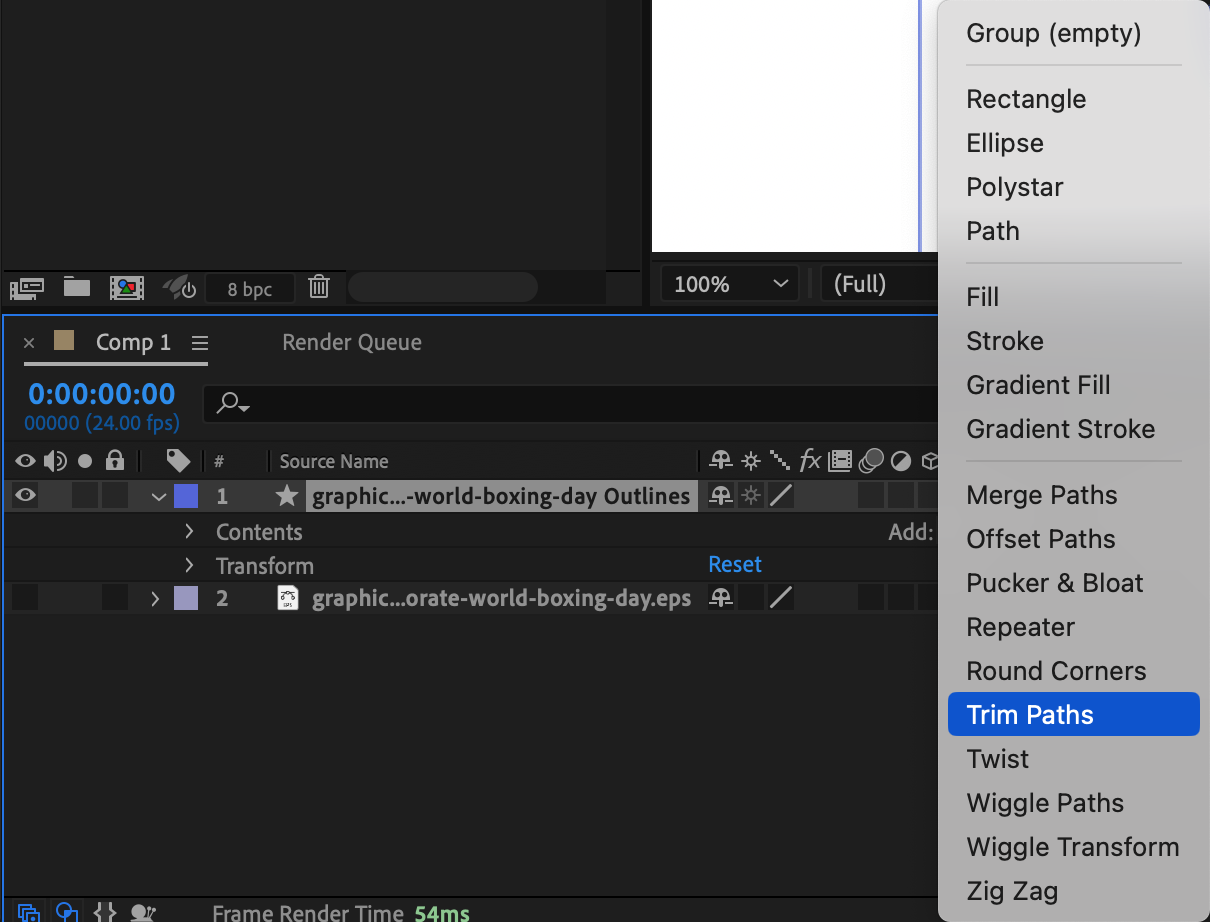
To animate the appearance of the shapes, click the small triangle next to the “Add” button on the shape layer and choose “Trim Paths” from the submenu. This feature lets you animate the stroke of the shapes.
 Step 7: Animate the End Parameter
Get 10% off when you subscribe to our newsletter

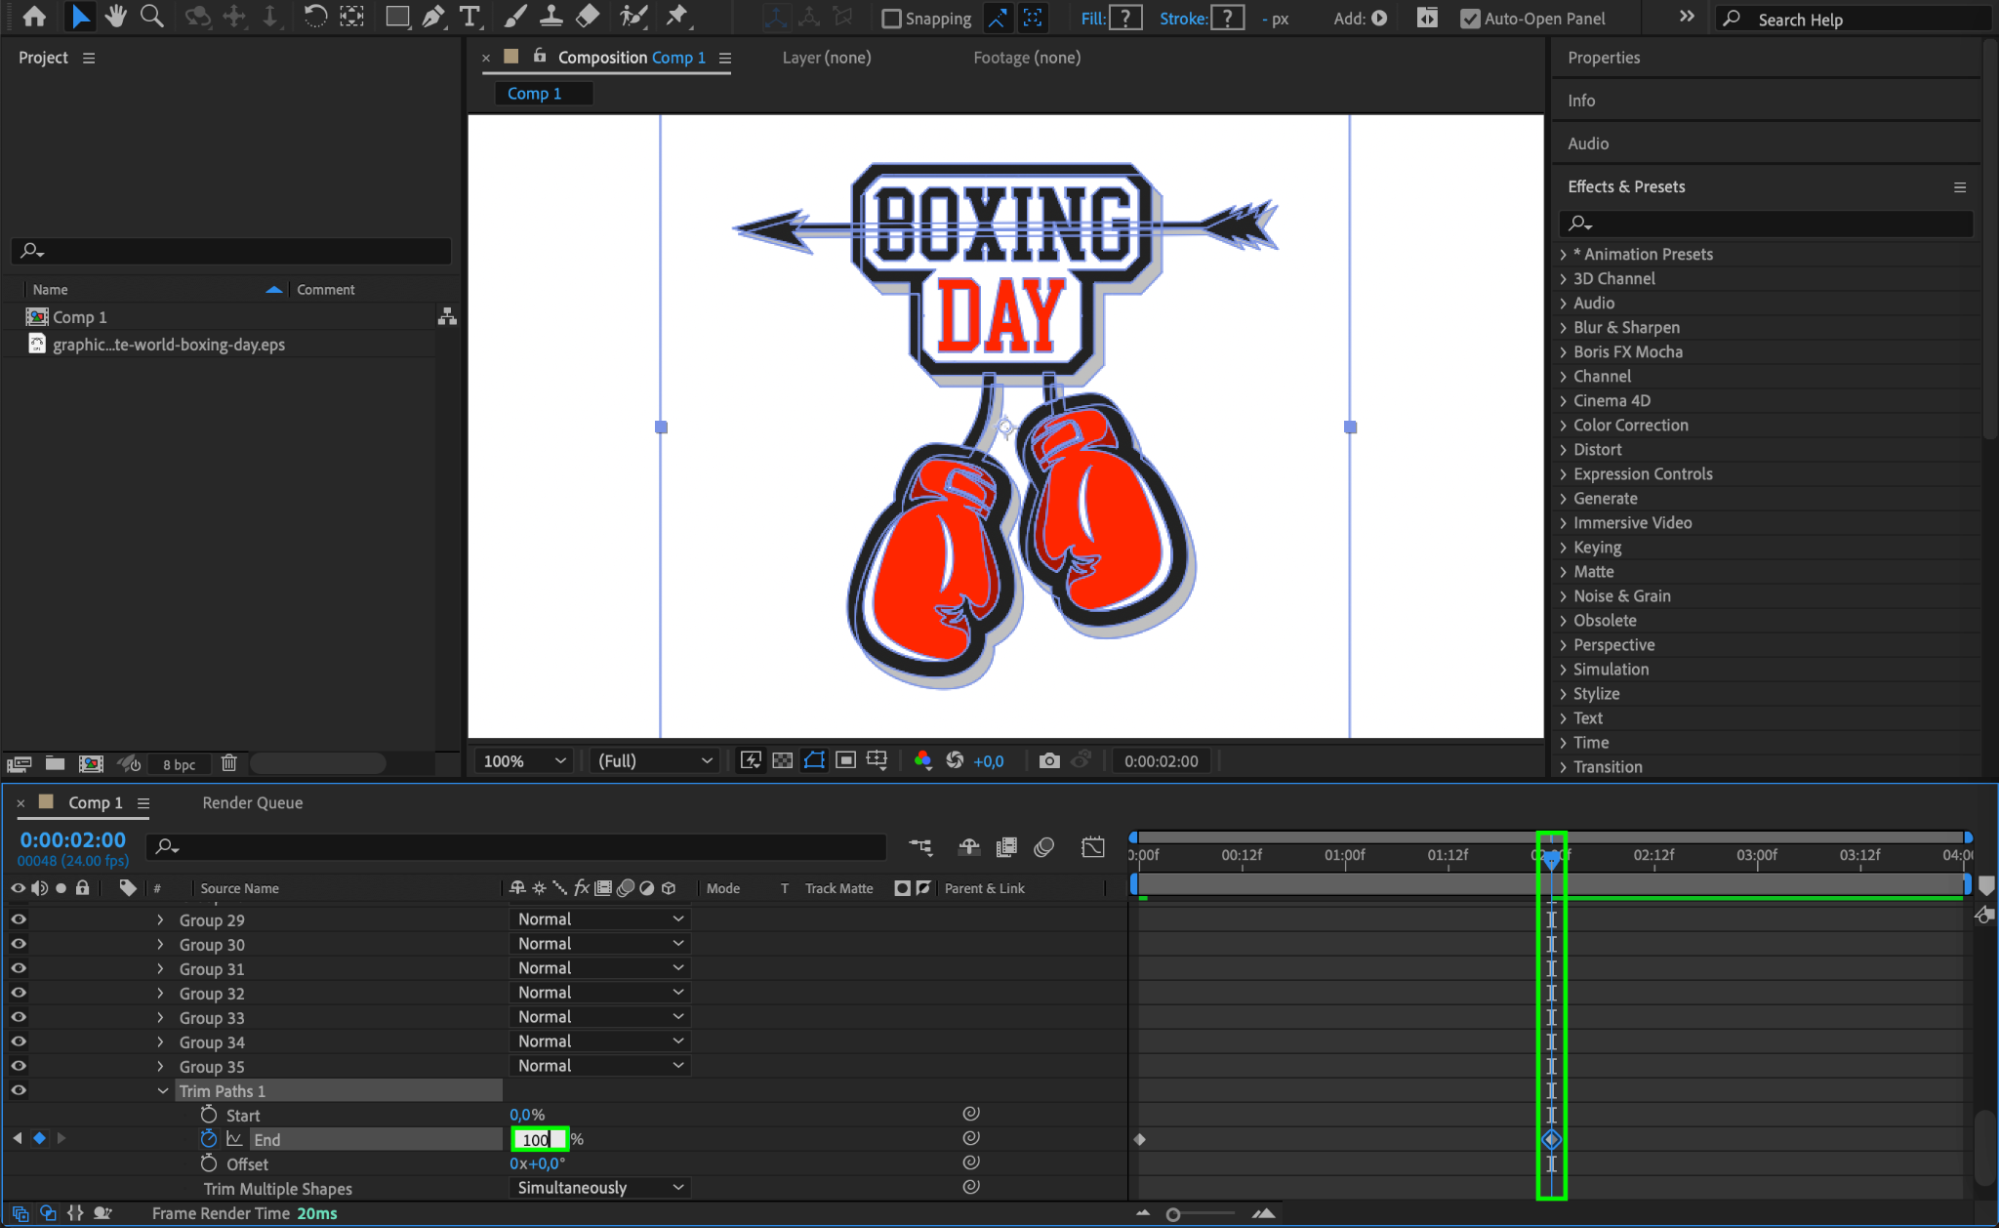
To create a drawing effect, animate the “End” parameter of the Trim Paths. Set the “End” value to 0% at the start of the timeline and 100% at the midpoint. This animation will simulate the effect of the shapes being drawn onto the screen.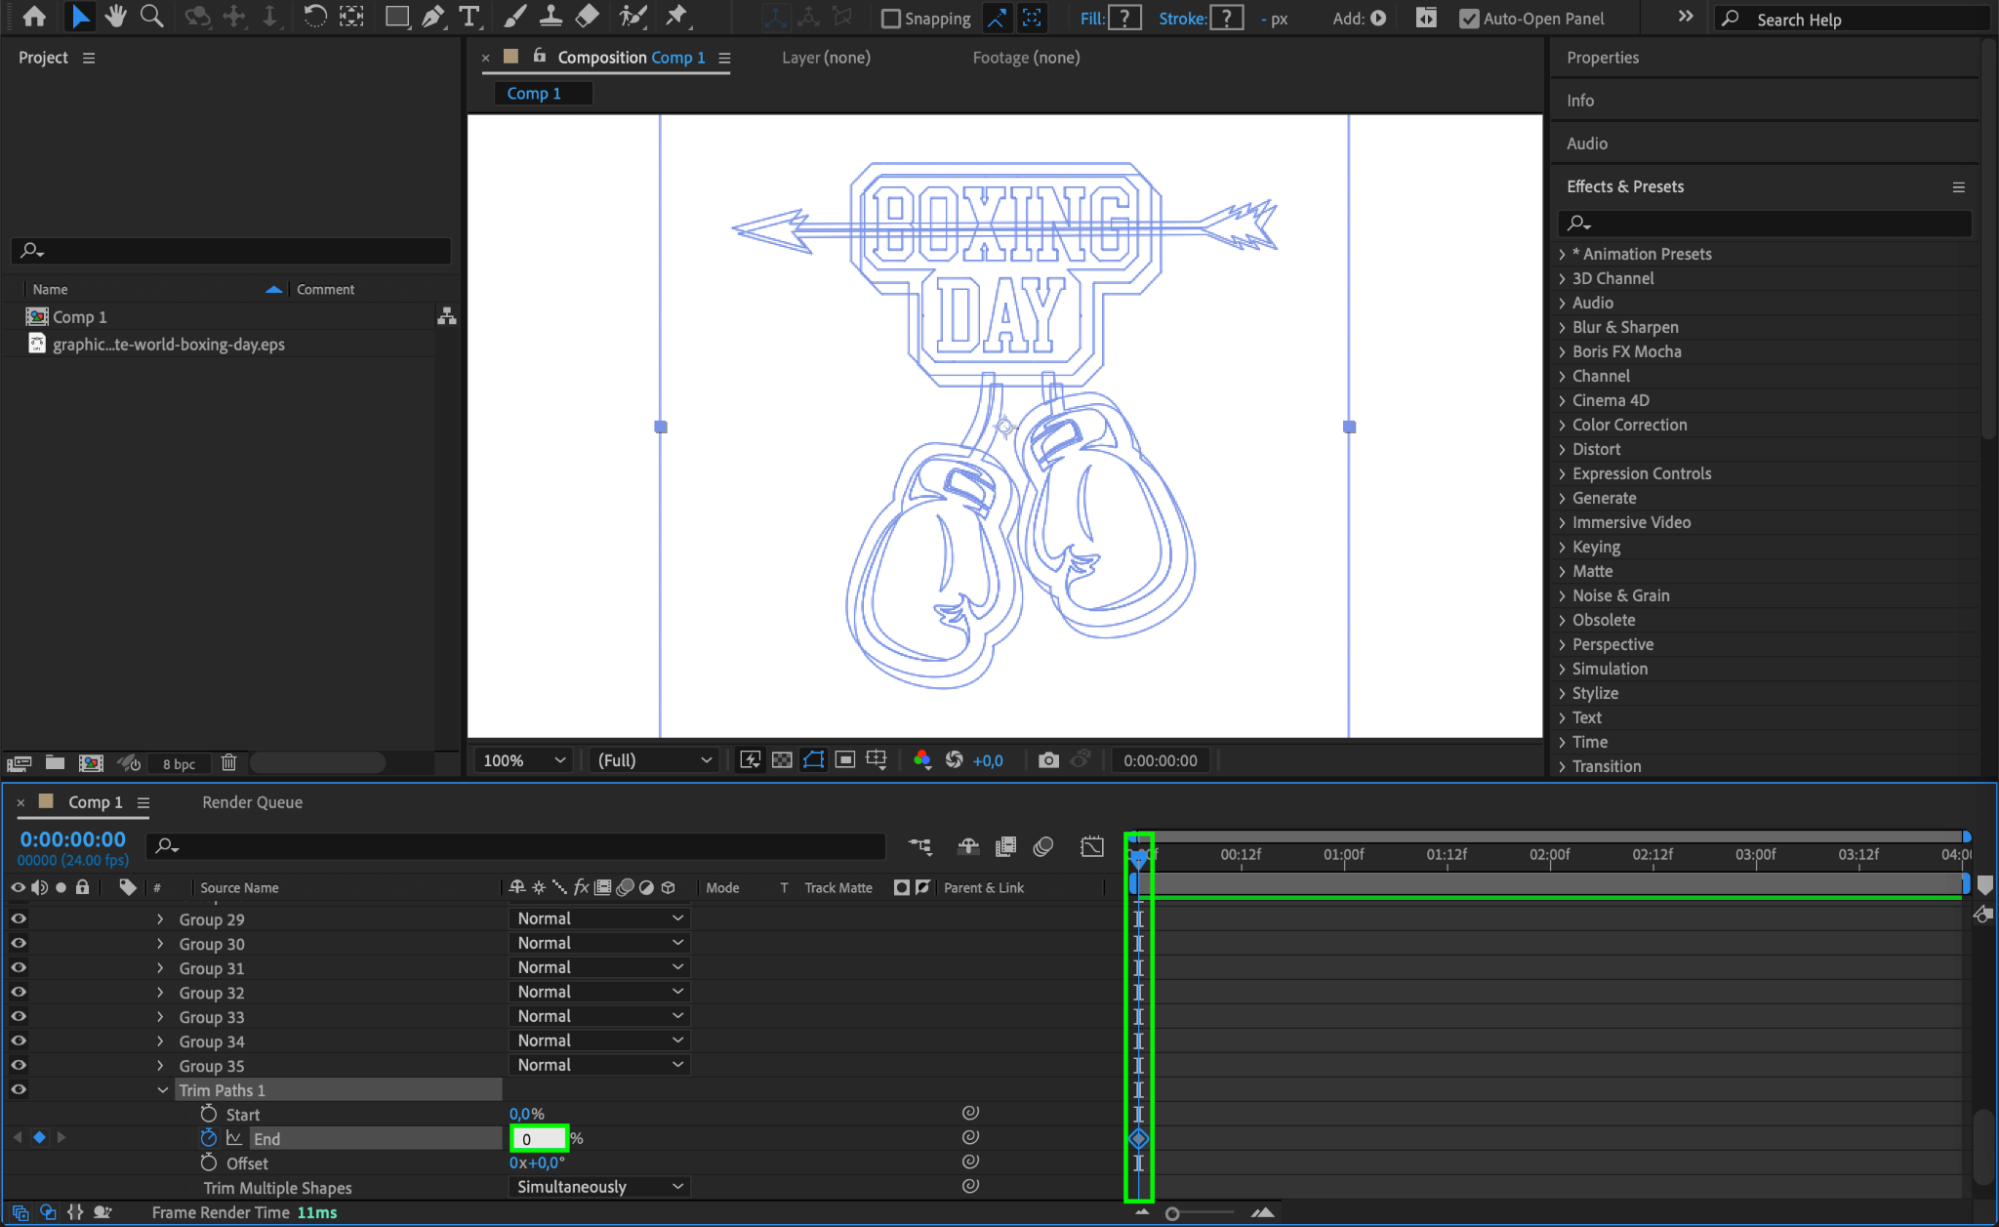
Step 8: Preview Your Animation
Utilize the preview function to view your animation. This allows you to make any necessary adjustments to timing, position, or effects, ensuring that your final output meets your expectations.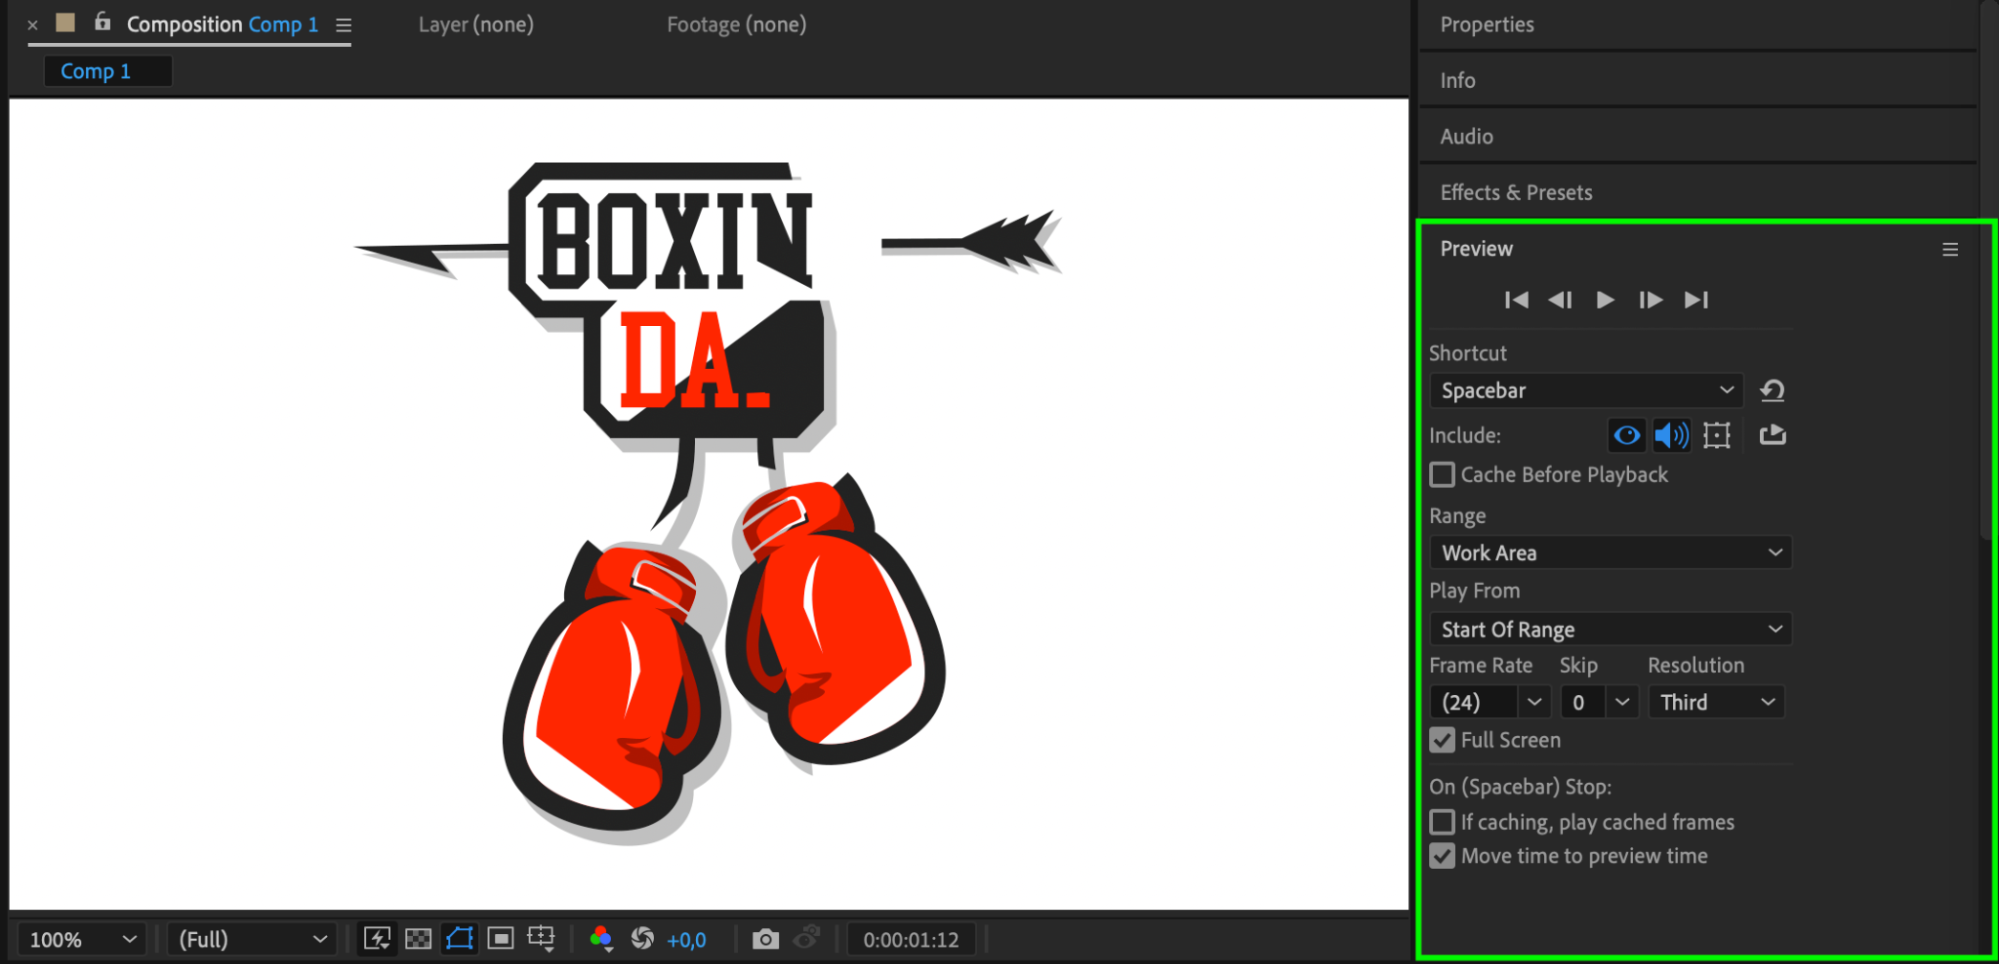
Conclusion
Get 10% off when you subscribe to our newsletter

By following these steps, you can efficiently import and animate Illustrator files in After Effects, enhancing your motion graphics projects with vector artwork. This process provides you with significant creative control and flexibility, crucial for professional video design.


