How to Boost Audio Volume in After Effects
Introduction to Enhancing Audio Volume
Increase the volume of your audio in After Effects with our complete guide. Having clear and loud audio is important for your video projects, and After Effects offers multiple techniques to achieve this. In this guide, we will walk you through step-by-step methods to increase the audio volume in After Effects, ensuring your videos have the perfect sound quality. Whether you’re a beginner or an experienced video designer, these easy-to-follow techniques and tips will help you enhance your audio and make your videos stand out. Let’s dive in and learn how to take your audio to the next level in After Effects!
Get 10% off when you subscribe to our newsletter

When working on your video projects in After Effects, having optimal audio volume is crucial to create a professional and engaging final product. Whether you need to boost the volume of a specific audio clip or increase the overall volume of your entire composition, After Effects provides various methods to achieve this. Below, we will discuss some effective techniques to increase audio volume in After Effects.
Step 1: Adjust Volume Settings in Timeline Panel
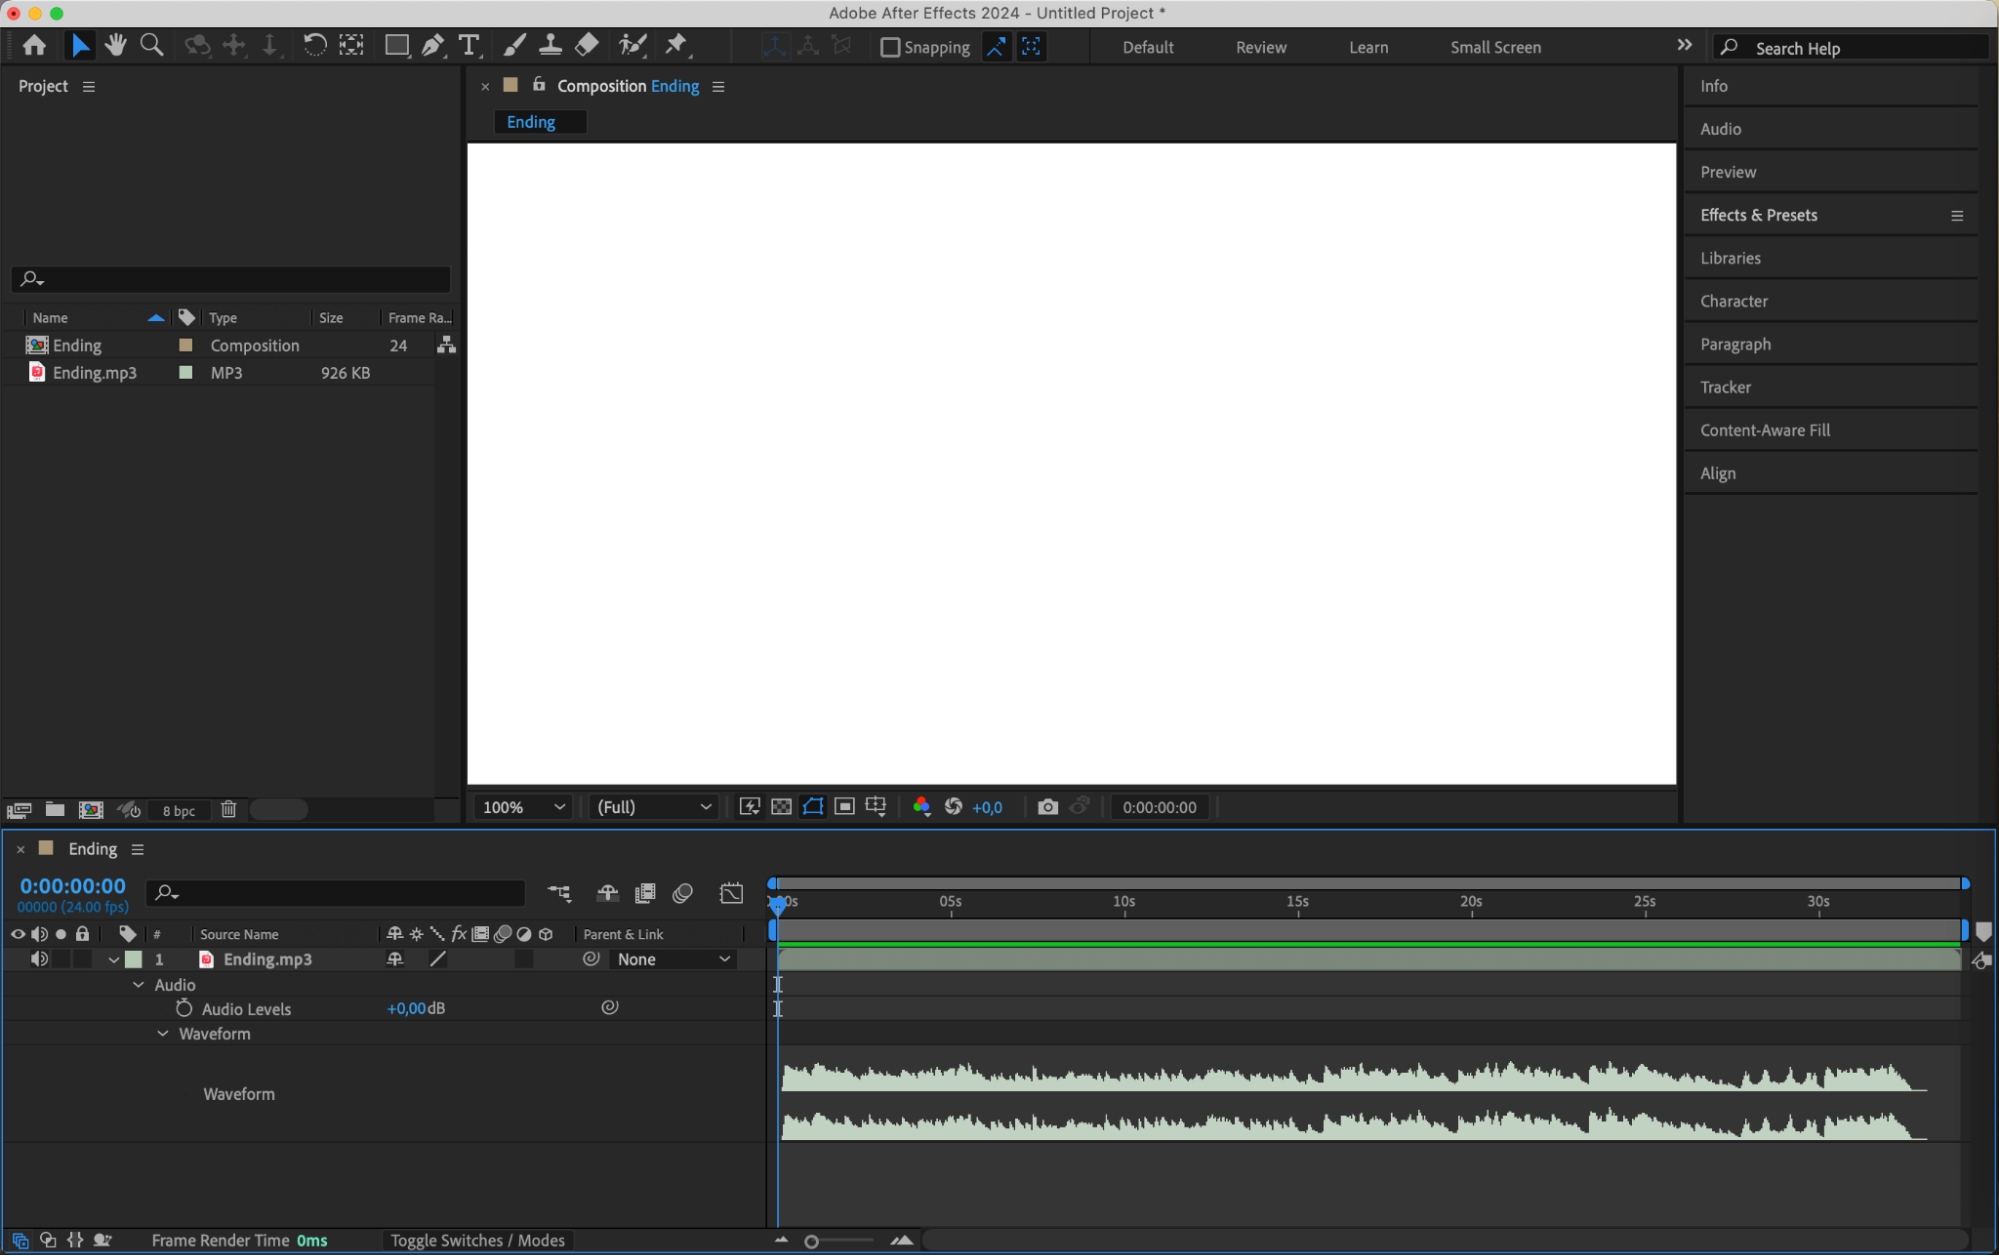
The easiest way to increase audio volume in After Effects is by adjusting the volume settings directly in the Timeline panel. Select the audio layer you want to modify and expand its properties to find the “Audio Levels” parameter. Use the shortcut “L” to quickly reveal this property. The default volume is 0 dB, and you can increase it up to 12 dB for maximum volume. Use the shortcut “LL” to open the waveform and visualize your changes.
 Step 2: Use Audio Effects
Get 10% off when you subscribe to our newsletter

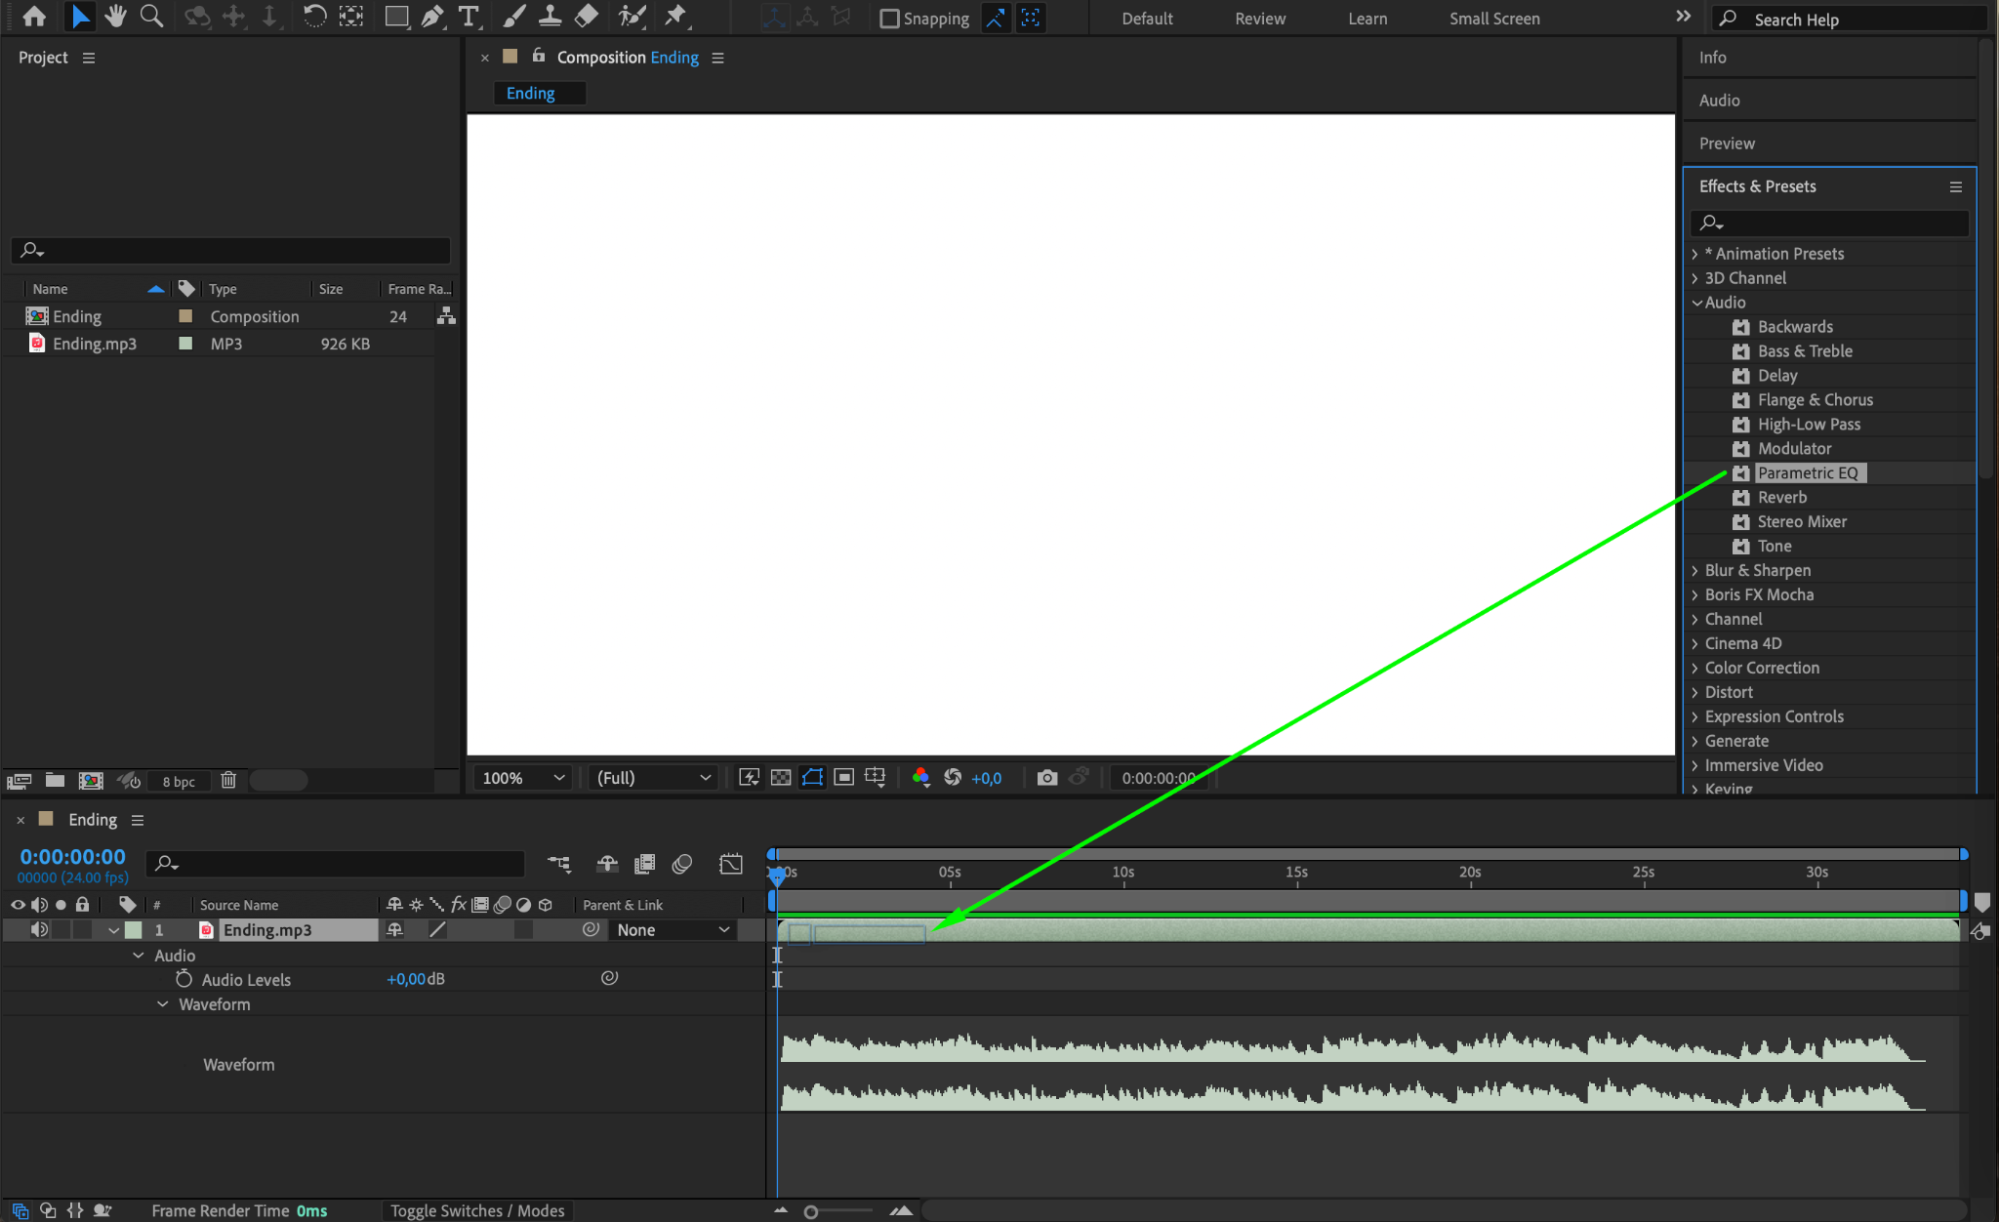
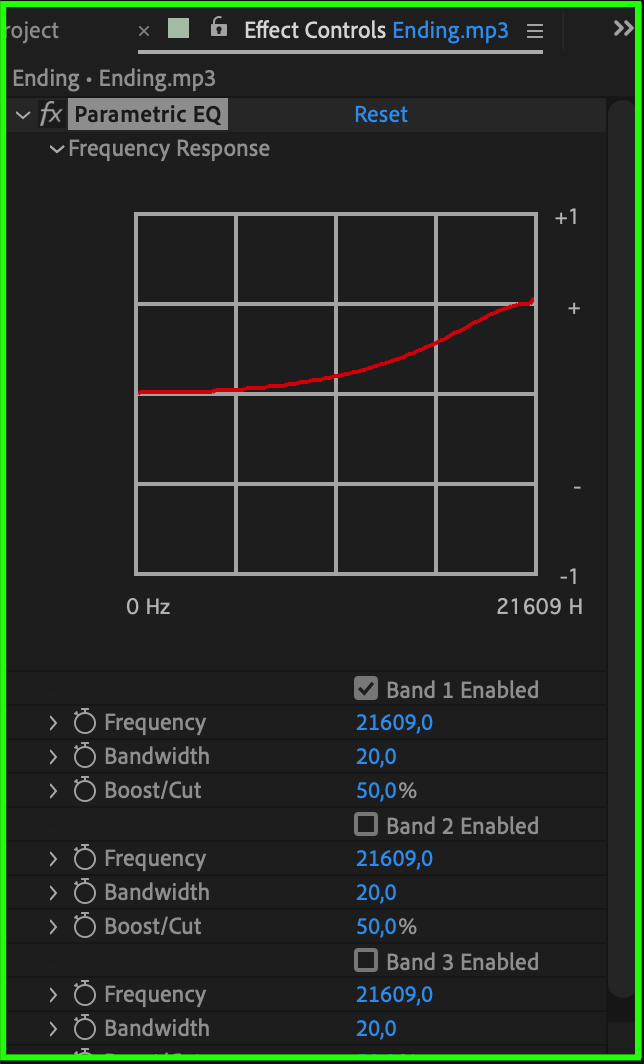
After Effects offers a range of audio effects that can help enhance and increase the volume of your audio. One popular effect is the “Parametric EQ” effect. This effect can be used to boost specific frequency ranges. By increasing the gain for the desired frequency bands, you can make the audio sound louder and more impactful.
 Step 3: Utilize Keyframes
Keyframes are an effective way to control the audio volume over time in After Effects. By adding keyframes to the audio layer’s volume property, you can create a gradual increase or decrease in volume at specific points in your composition. To do this, open the “Audio Levels” property for your layer and click the stopwatch icon next to “Audio Levels.” Then, add keyframes at the desired positions and adjust their values accordingly. The maximum volume is 12 dB, 0 dB represents the original volume, and -70 dB indicates no sound.

 Step 4: Use Third-Party Plugins
If you need more advanced audio manipulation capabilities, you can explore third-party plugins specifically designed for audio in After Effects. These plugins offer a wide range of features, including volume control, equalization, and audio enhancement tools. Some popular plugins for audio processing in After Effects include Sound Keys, Waves Audio, and iZotope RX. These plugins can provide additional control and precision for your audio editing needs.
Conclusion
Get 10% off when you subscribe to our newsletter

Remember, when increasing audio volume in After Effects, it’s important to maintain a balance between volume and audio quality. Always listen to your audio playback to ensure it sounds clear and natural without any distortion or clipping. Additionally, consider using headphones or external speakers to accurately gauge the audio volume levels.
By implementing these techniques and experimenting with different settings, you can effectively increase the audio volume in After Effects and create impactful videos with exceptional sound quality. So, try out these methods and take your audio to new heights in After Effects!

