
Inserting Audio in After Effects CS6: A Step-by-Step Guide
Introduction
Welcome to our guide on how to insert audio in Adobe After Effects CS6! Adding sound to your visual projects can enhance the overall impact and create a more immersive experience for your audience. Whether you’re working on a video project, animation, or motion graphics, synchronizing your visuals with the right audio is crucial for capturing your viewers’ attention and conveying your intended message.
Get 10% off when you subscribe to our newsletter

In After Effects CS6, you have a range of options when it comes to incorporating audio into your projects. From inserting background music to adding sound effects or even including narration, this powerful software allows you to create dynamic and engaging visual experiences that will impress your audience.
In this step-by-step guide, we will walk you through the process of inserting audio in After Effects CS6. We’ll cover everything from importing your audio files to syncing them with your visuals and adjusting audio levels. By the end, you’ll have all the knowledge and techniques you need to bring your projects to life with captivating sound.
So let’s dive in and discover how to make your After Effects CS6 projects resonate with your viewers by adding the perfect audio elements.
How to Insert Audio in After Effects CS6
Adding audio to your After Effects CS6 projects is a straightforward process that can greatly enhance the overall impact of your visuals. Follow these simple steps to seamlessly integrate audio into your creative projects:
1. Import Your Audio File:
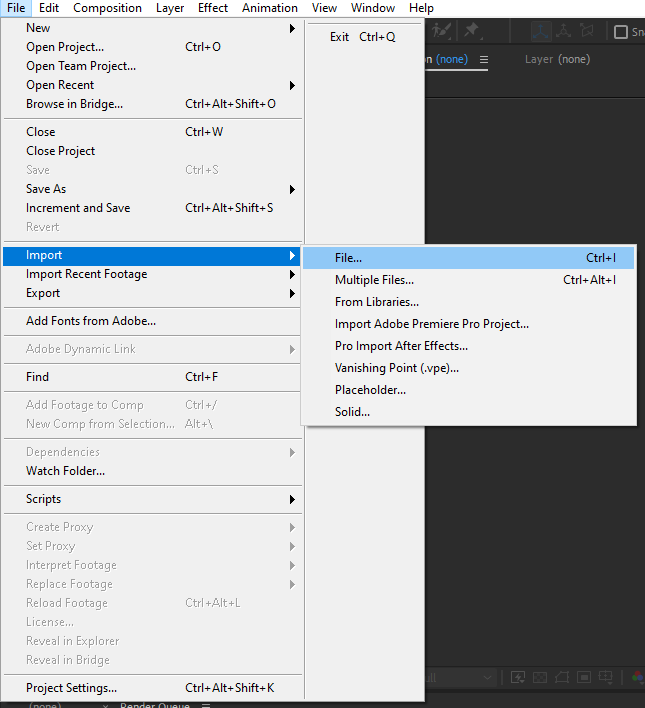
Start by selecting “File” from the menu bar and choosing “Import” > “File.” Locate and select the audio file you want to insert and click “Open.” After Effects CS6 supports various audio file formats, including WAV, MP3, AIFF, and more.
2. Create a New Composition:
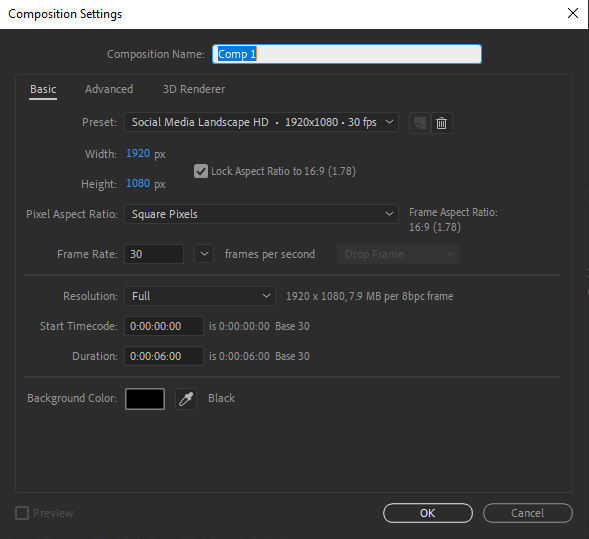
Once your audio file is imported, create a new composition by selecting “Composition” from the menu bar and clicking on “New Composition.” Specify the duration and settings for your composition, ensuring they match your project’s requirements.
 3. Drag and Drop Your Audio File:
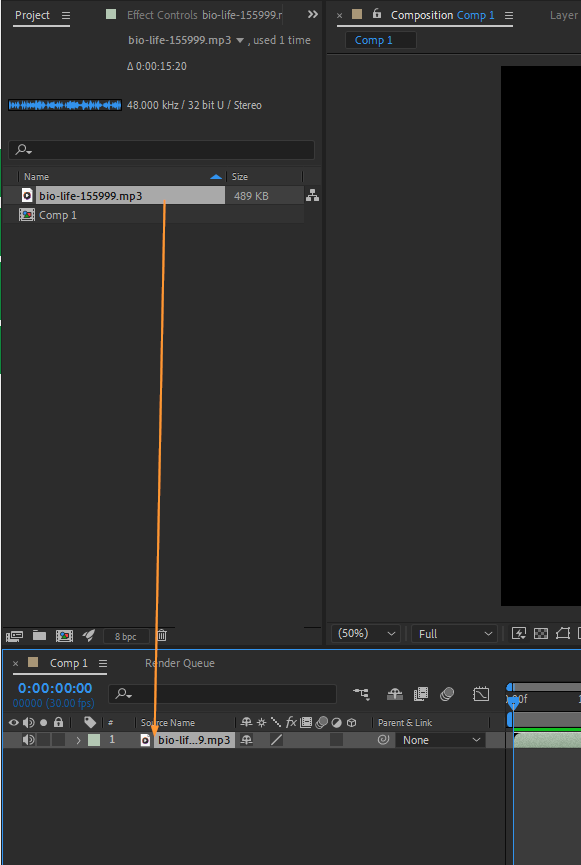
In the Project panel, locate your imported audio file and drag it onto the timeline of your composition. You can also use the shortcut “Ctrl + /” (Command + / on Mac) to automatically create a new layer and insert the audio file.
4. Sync Your Audio and Visuals:
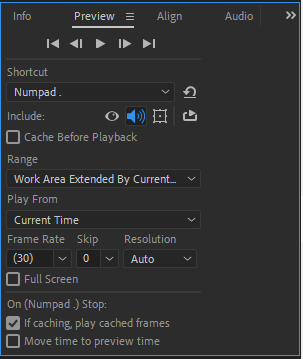
Use the “Audio Preview” button ( “.” on the numeric keypad) to sync your audio and visuals. Scrub through your timeline to define the specific points where your audio cues or narration should start and end. Adjust the position of the audio layer on the timeline as needed to achieve precise synchronization.
 5. Adjust Audio Levels:
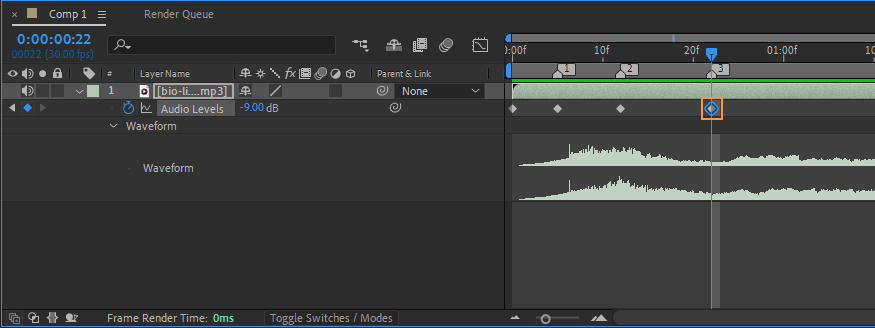
To ensure the audio blends well with your visuals, adjust the volume levels. Select the audio layer on the timeline and press “L” to reveal the Audio Levels property. Use the keyframes option to control the volume at different points in your composition. You can also adjust the overall audio levels in the Effects Control panel.
 6. Apply Audio Effects (Optional):
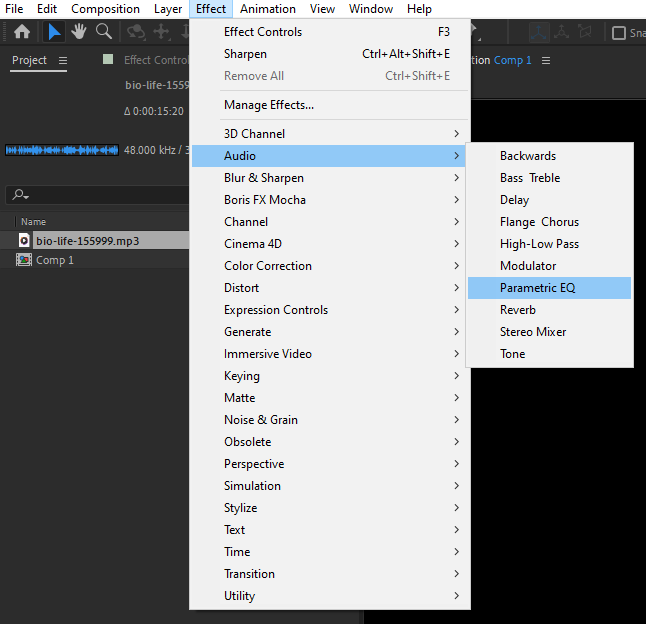
After Effects CS6 offers a range of audio effects to enhance your audio. To apply an effect, select the audio layer and go to “Effect” > “Audio” > [desired effect]. Experiment with effects like EQ, reverb, or delay to achieve the desired audio aesthetic for your project.
 7. Preview Your Project:
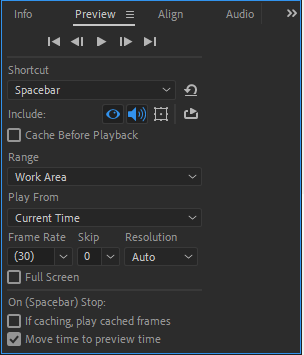
Once you’ve inserted and customized your audio, preview your project to ensure everything is synchronized and working harmoniously. Use the “Spacebar” key to play or pause the timeline, providing you with real-time feedback on your audio integration.
With these steps, you can easily insert audio into your After Effects CS6 projects. Remember to experiment with different audio files, effects, and timings to create captivating visual experiences that leave a lasting impression on your audience.
Tips for a Seamless Audio Integration in After Effects CS6
To ensure a seamless audio integration in After Effects CS6, here are a few additional tips:
1. Organize Your Project: Keep your project tidy by organizing audio files in the Project panel. Create folders for different audio assets to easily locate and manage your files.
2. Use Markers: Utilize markers on the timeline to note specific audio cues or important points in your composition. This makes it easier to synchronize your audio with visuals and make adjustments as needed.
3. Utilize Keyframes: Keyframes allow you to create changes in audio properties, such as volume or effects, over time. Experiment with animating audio to add dynamic elements to your composition.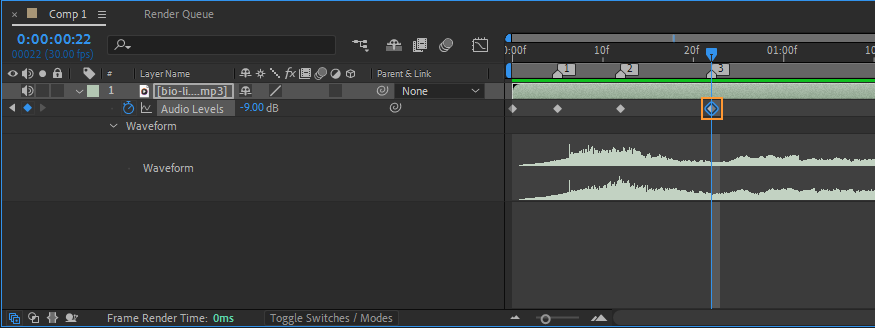
4. Explore Audio Expressions: Advanced users can explore audio expressions to create complex audio interactions within After Effects CS6. This technique allows for more flexible and dynamic control over audio parameters.
By following these tips and utilizing the robust audio features in After Effects CS6, you can elevate your projects to new heights. Experiment, explore, and have fun incorporating audio into your visual creations!
Conclusion
Adding audio to your After Effects CS6 projects can greatly enhance the overall impact and storytelling capabilities of your visuals. With the simple steps and techniques outlined in this guide, you can seamlessly integrate audio elements into your compositions to create immersive and engaging experiences for your audience.
Remember to import your audio files, create a new composition, and drag and drop your audio onto the timeline. Utilize the audio preview function to synchronize your audio with visuals and make precise adjustments. Adjust audio levels to ensure a balanced mix, and consider applying audio effects to further enhance the desired aesthetic.
By organizing your project, using markers, and exploring advanced features like keyframes and audio expressions, you can take your audio integration to the next level and create truly dynamic and captivating visual experiences.
So go ahead and unleash your creativity by incorporating the perfect audio elements into your After Effects CS6 projects. Whether you’re adding sound effects, narration, or background music, audio integration will elevate your projects and leave a lasting impression on your audience.
Now it’s time to dive in, experiment, and create stunning audiovisual compositions that will make your work stand out from the crowd. Enjoy the process and let your audio and visuals harmoniously merge to convey your unique brand and tell your story like never before.
Happy creating!


