How to Add and Edit Pictures in Adobe After Effects
Introduction
Are you ready to take your After Effects projects to the next level? In this step-by-step guide, we will show you how to easily insert and manipulate pictures in After Effects. By following these instructions, you’ll be able to bring your creative ideas to life.
Get 10% off when you subscribe to our newsletter

Step 1: Importing Your Picture
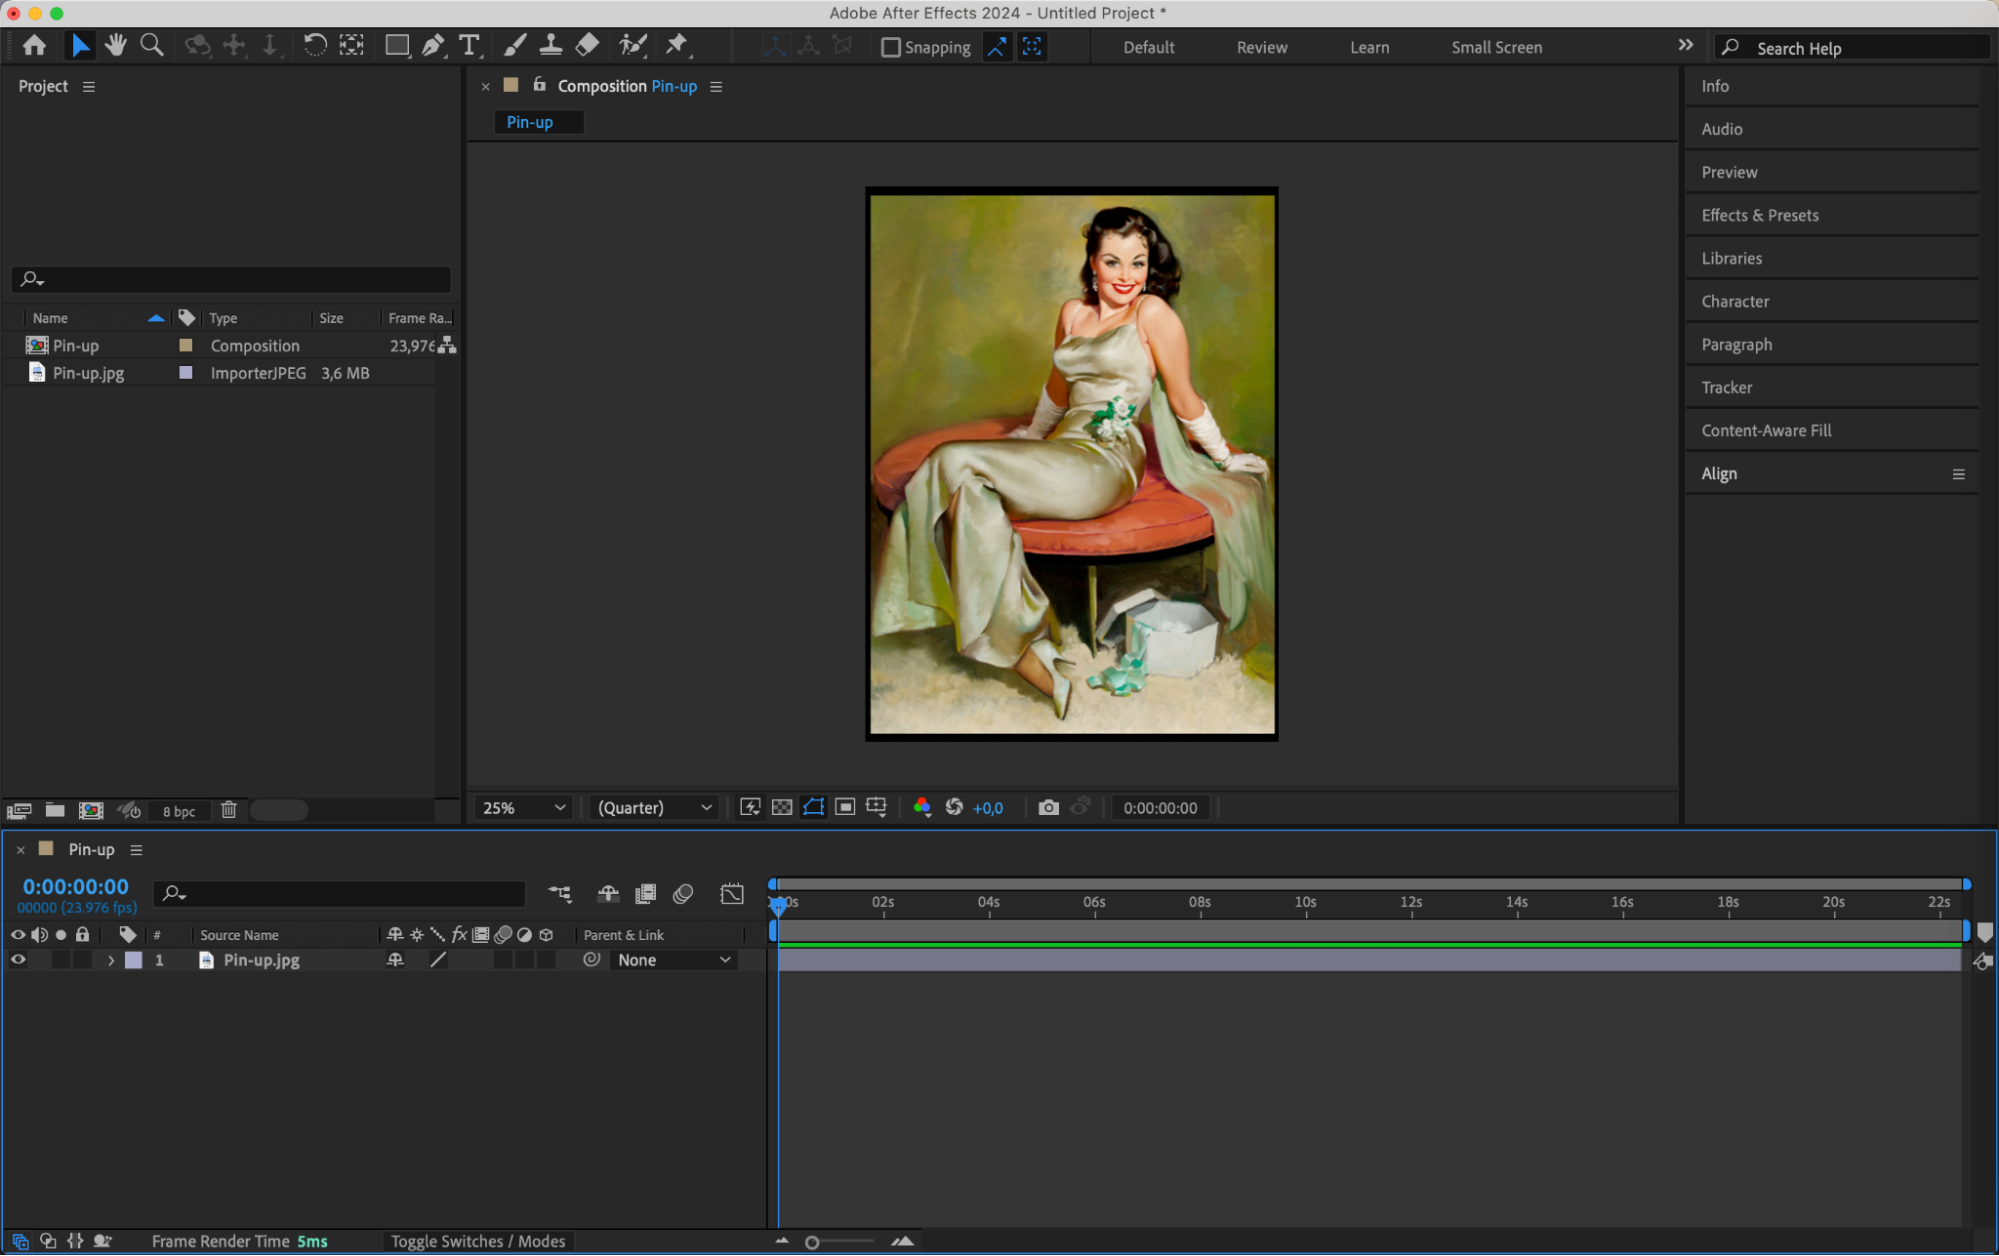
Start by opening After Effects and creating a new composition or opening an existing one. To import your picture, go to the File menu and choose “Import” to browse and select the picture you want to insert. After Effects supports various image formats, such as JPEG, PNG, and TIFF.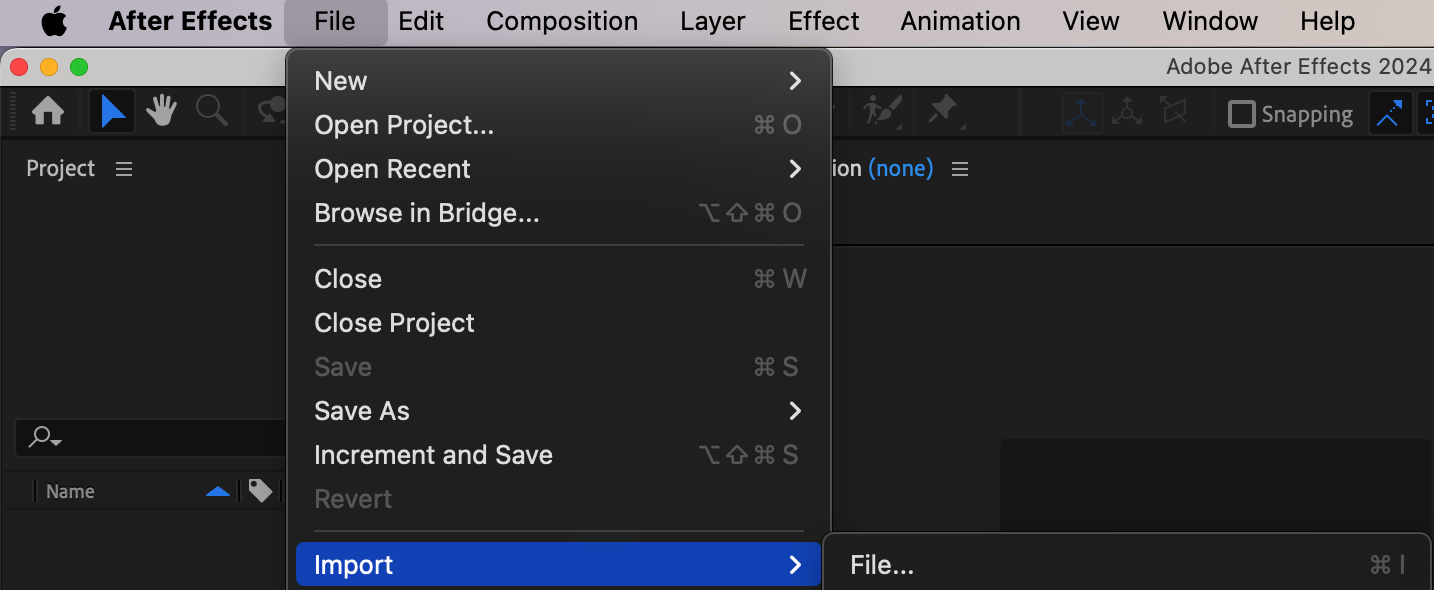 Step 2: Adding Your Picture to the Timeline
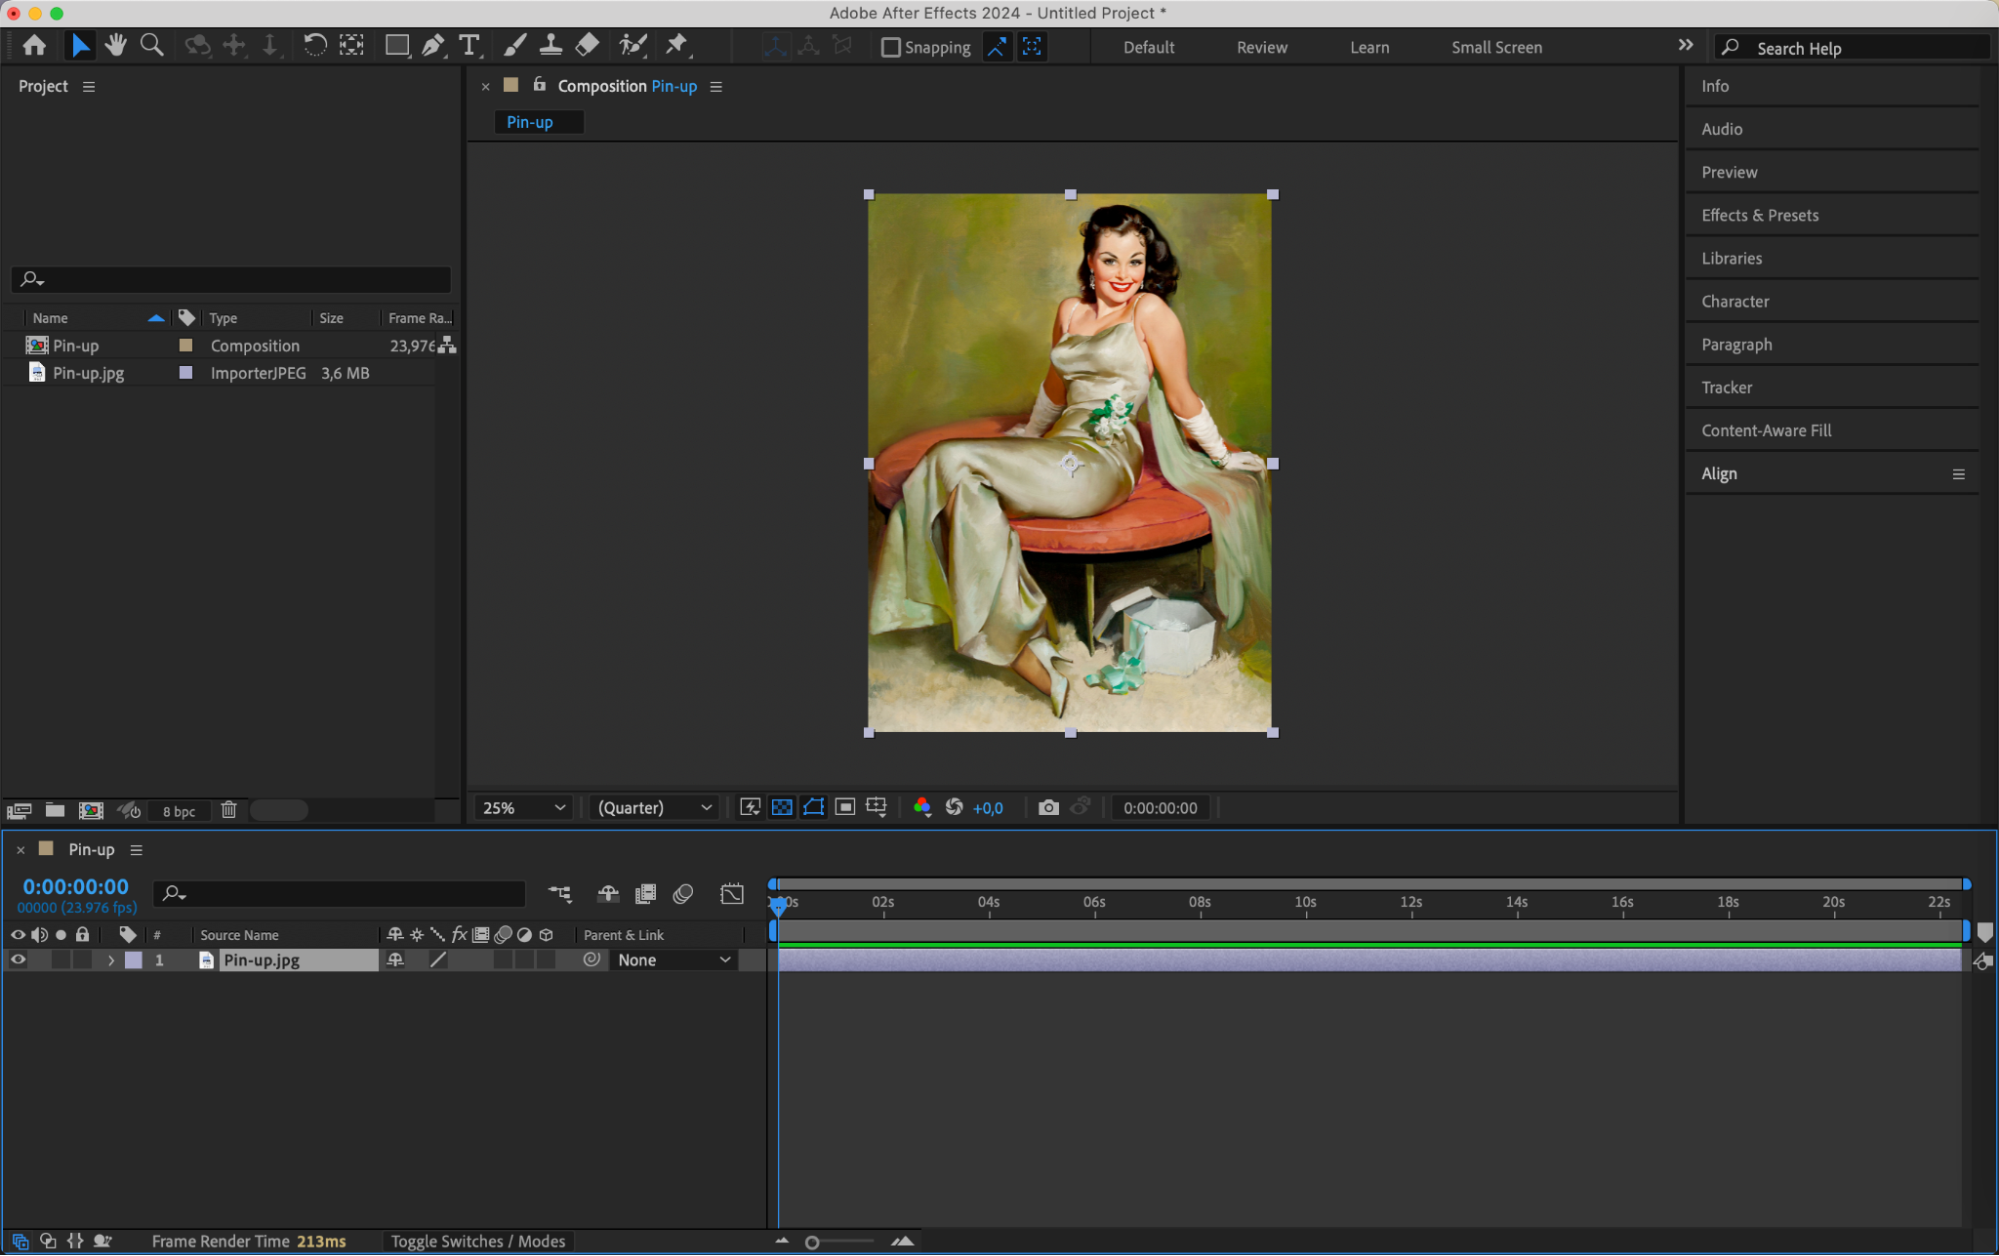
Once you’ve imported your picture, drag it from the Project panel to the Timeline panel. This action will automatically create a new layer for your picture in the composition. You will see your picture appear in the Composition panel, ready for editing.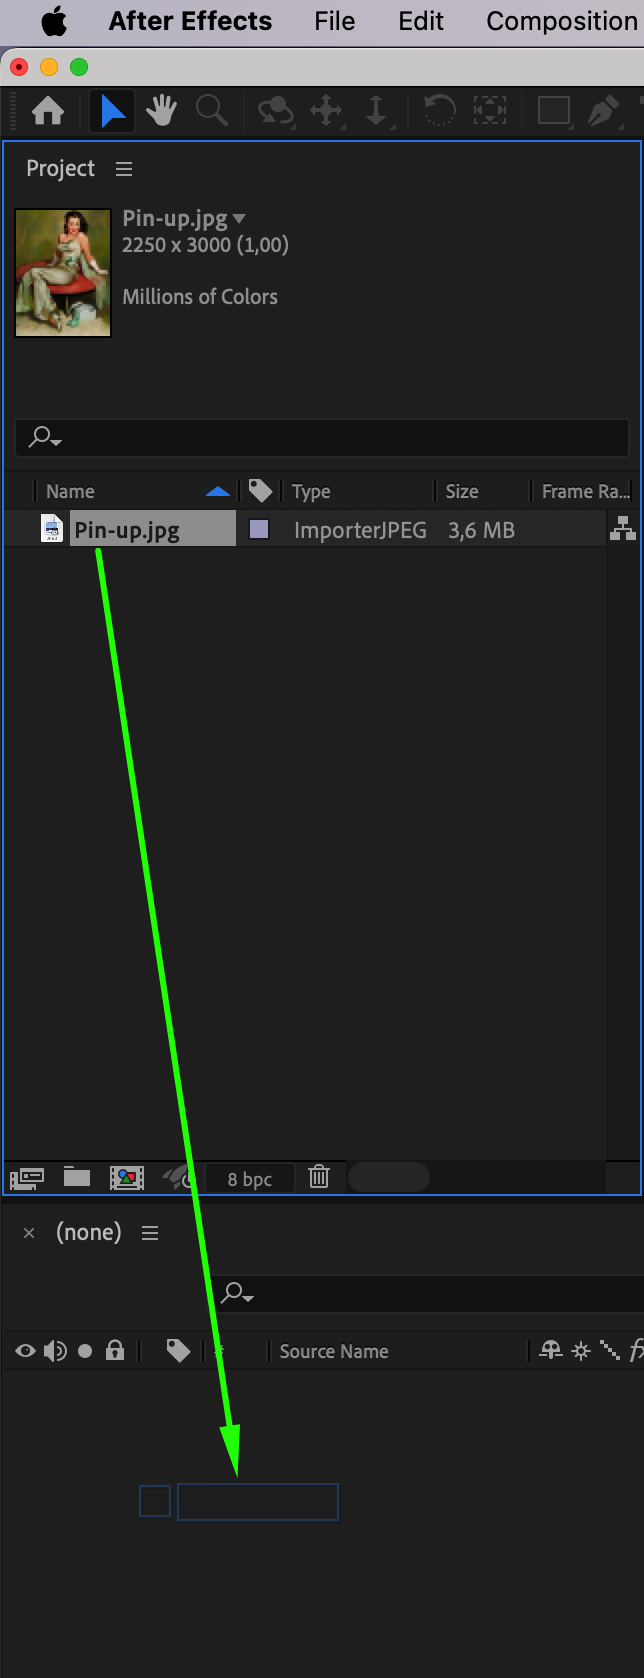
 Step 3: Adjusting Composition Settings
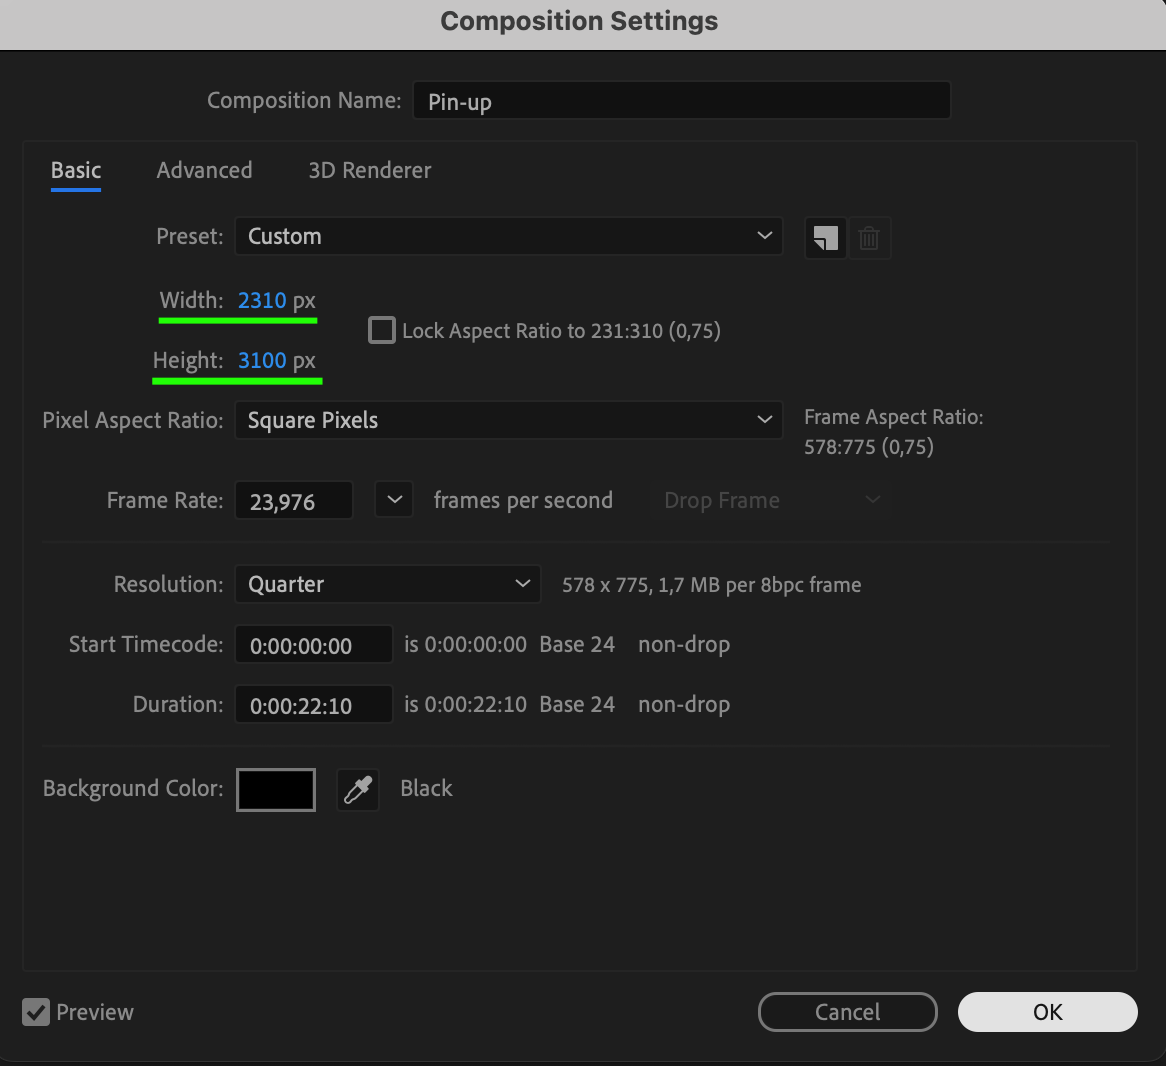
If you need to change the settings of your composition, go to the Composition menu and select “Composition Settings.” Here, you can adjust parameters like width and height to fit your project requirements. This step is useful for creating a frame or background for your picture.
 Step 4: Creating a Solid Layer
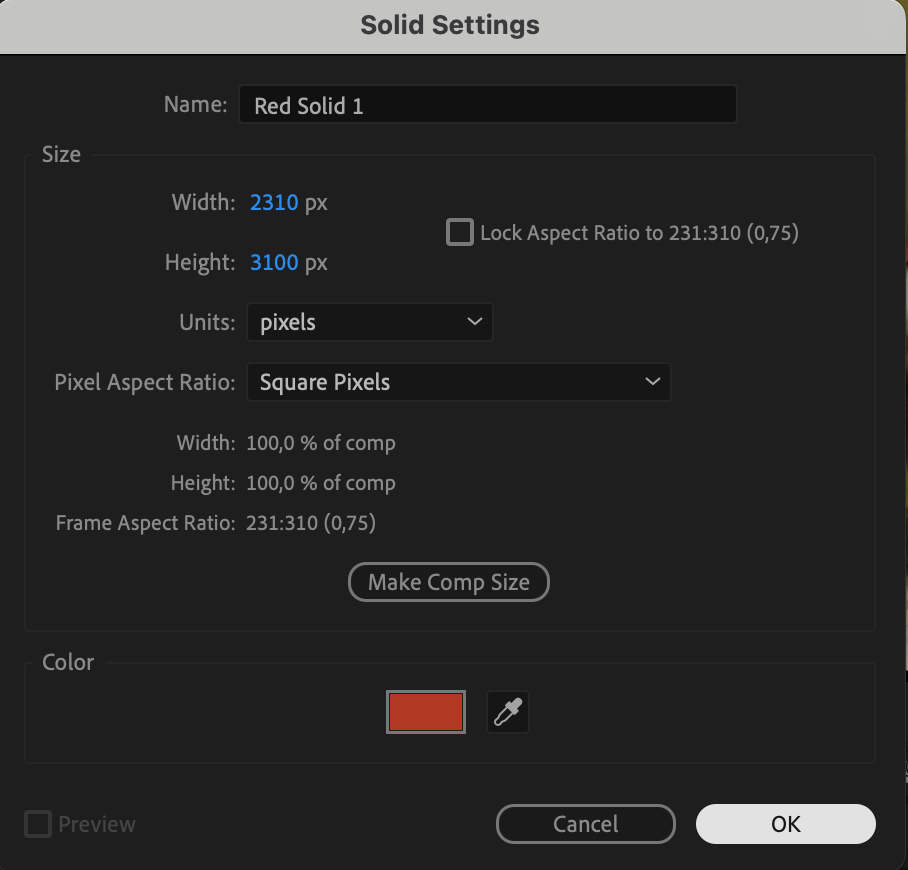
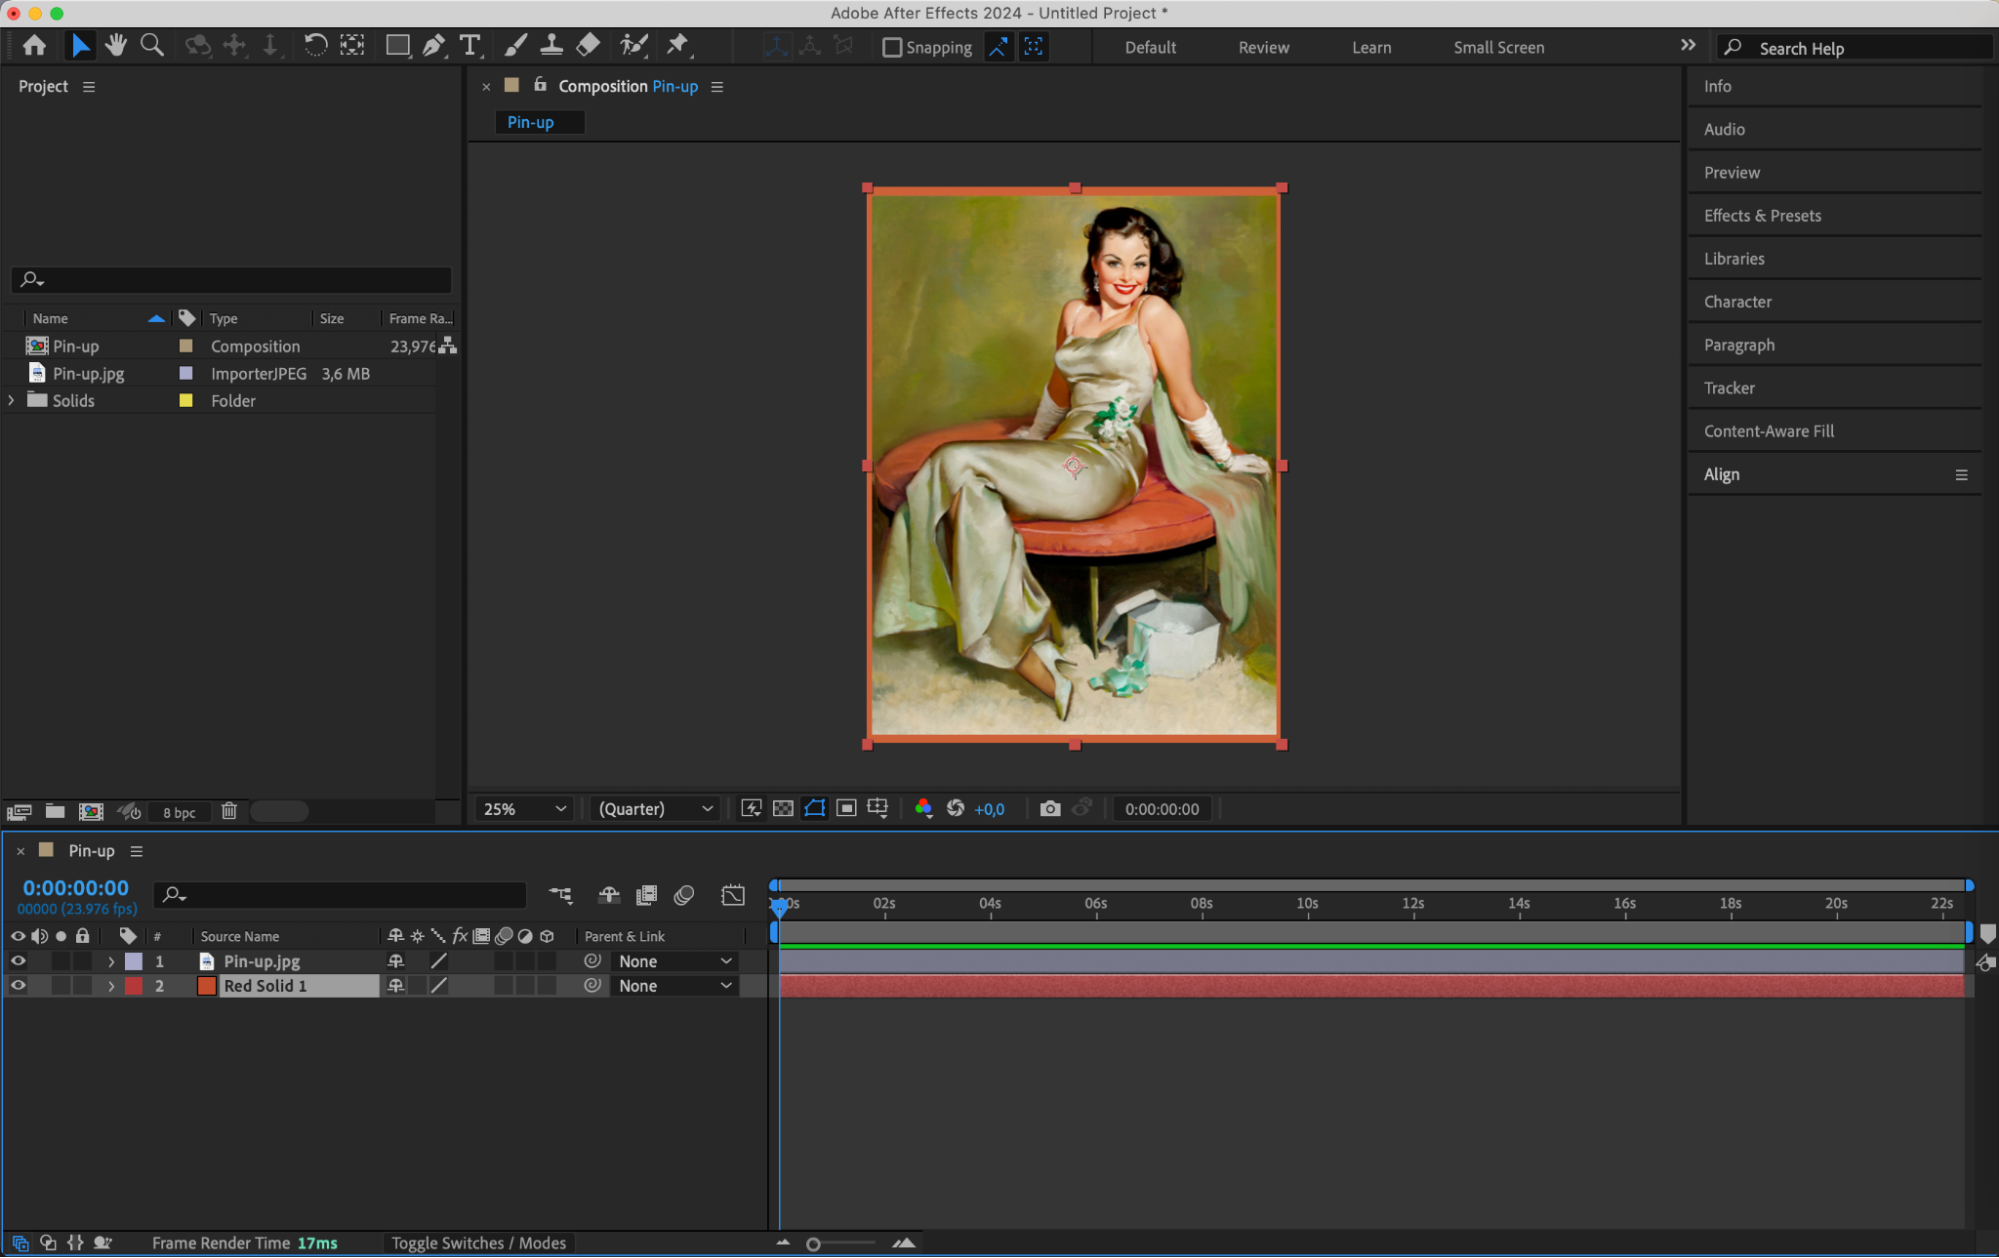
To provide a canvas for your picture, you can create a solid layer. Go to the Layer menu, select “New,” and then “Solid.” Choose the color and size for your solid layer, and place it below your picture layer in the Timeline. This solid layer can serve as a background or additional design element.
 Step 5: Animating Your Picture
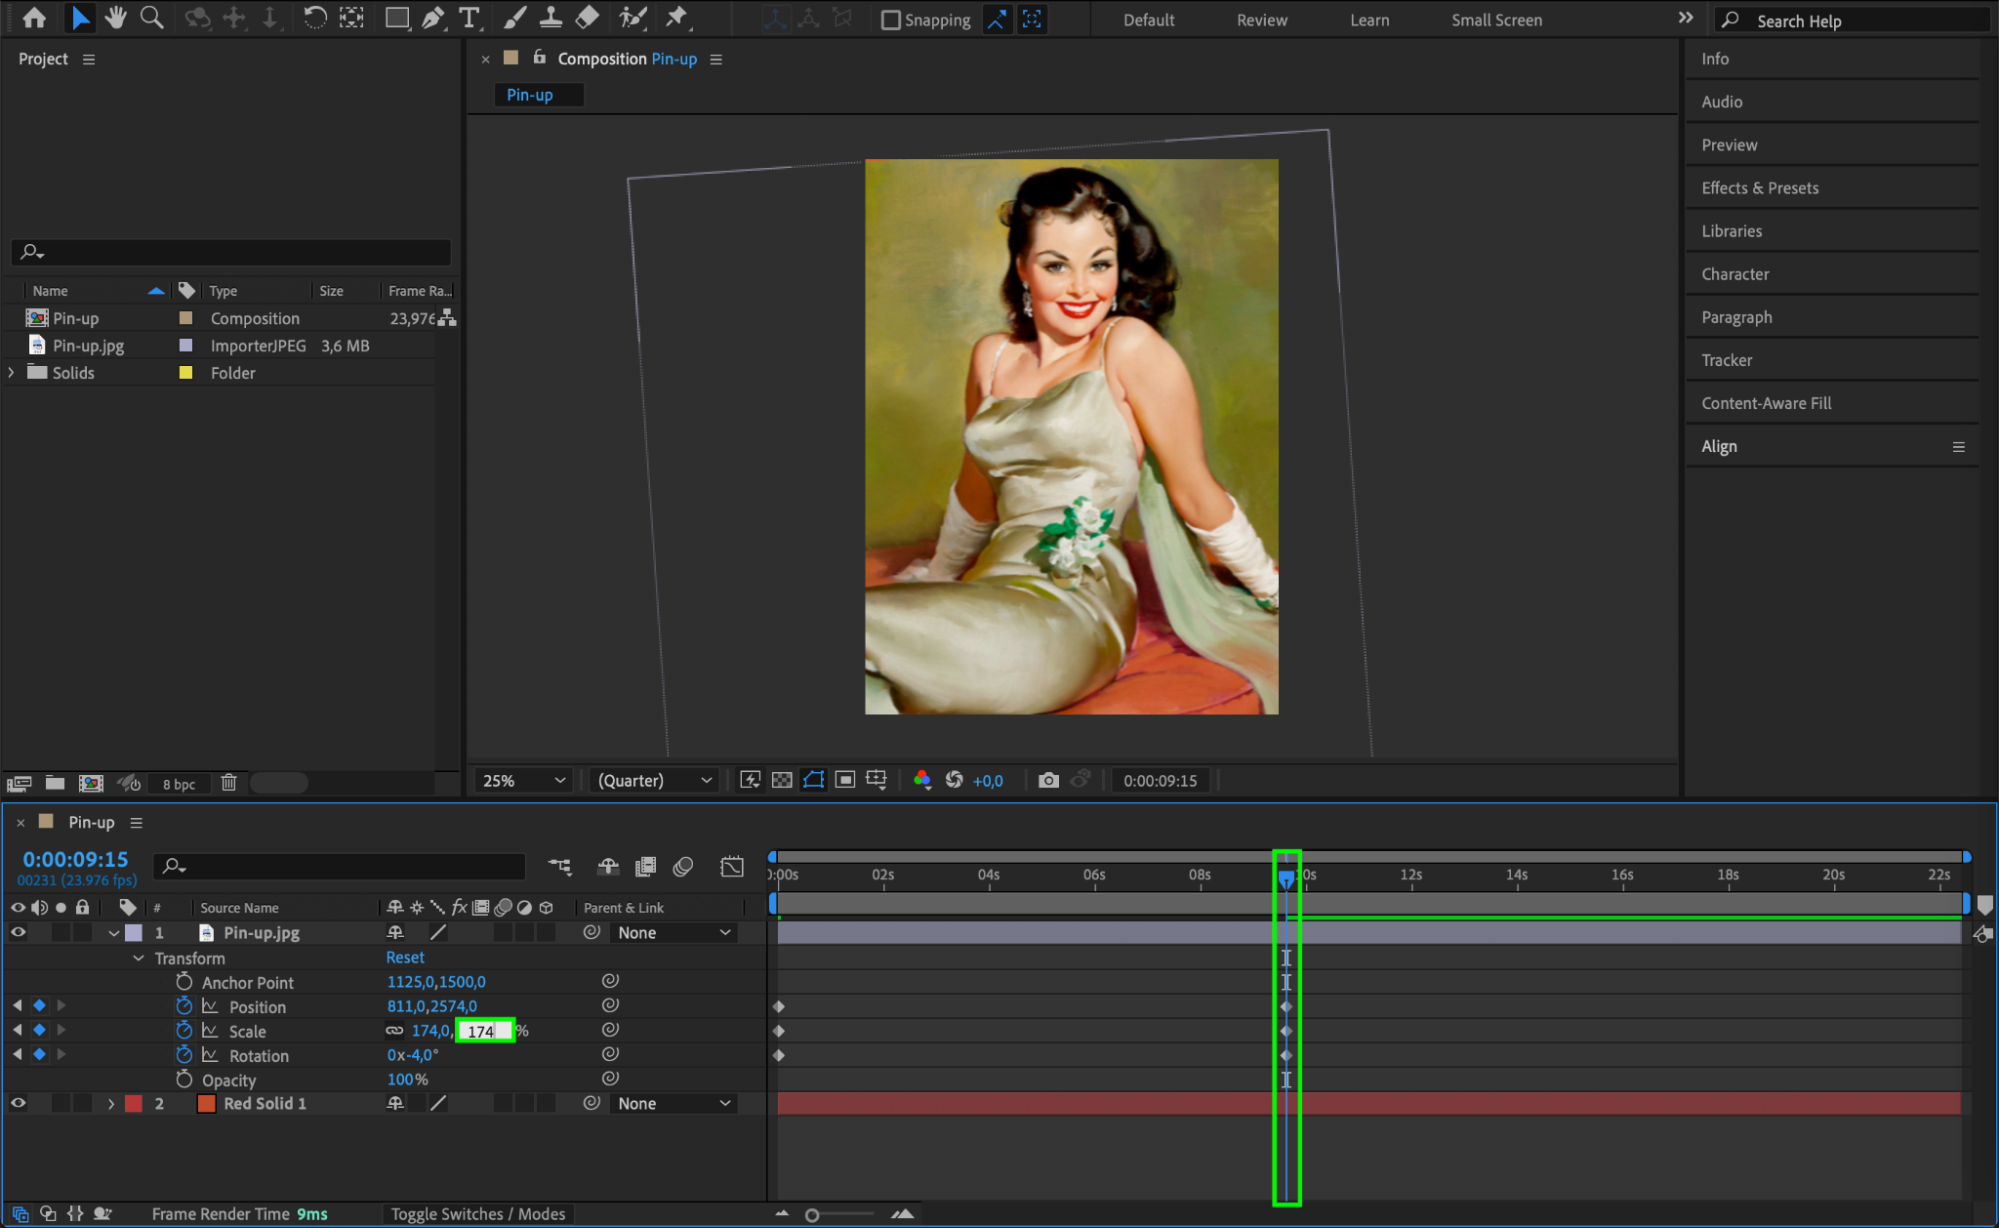
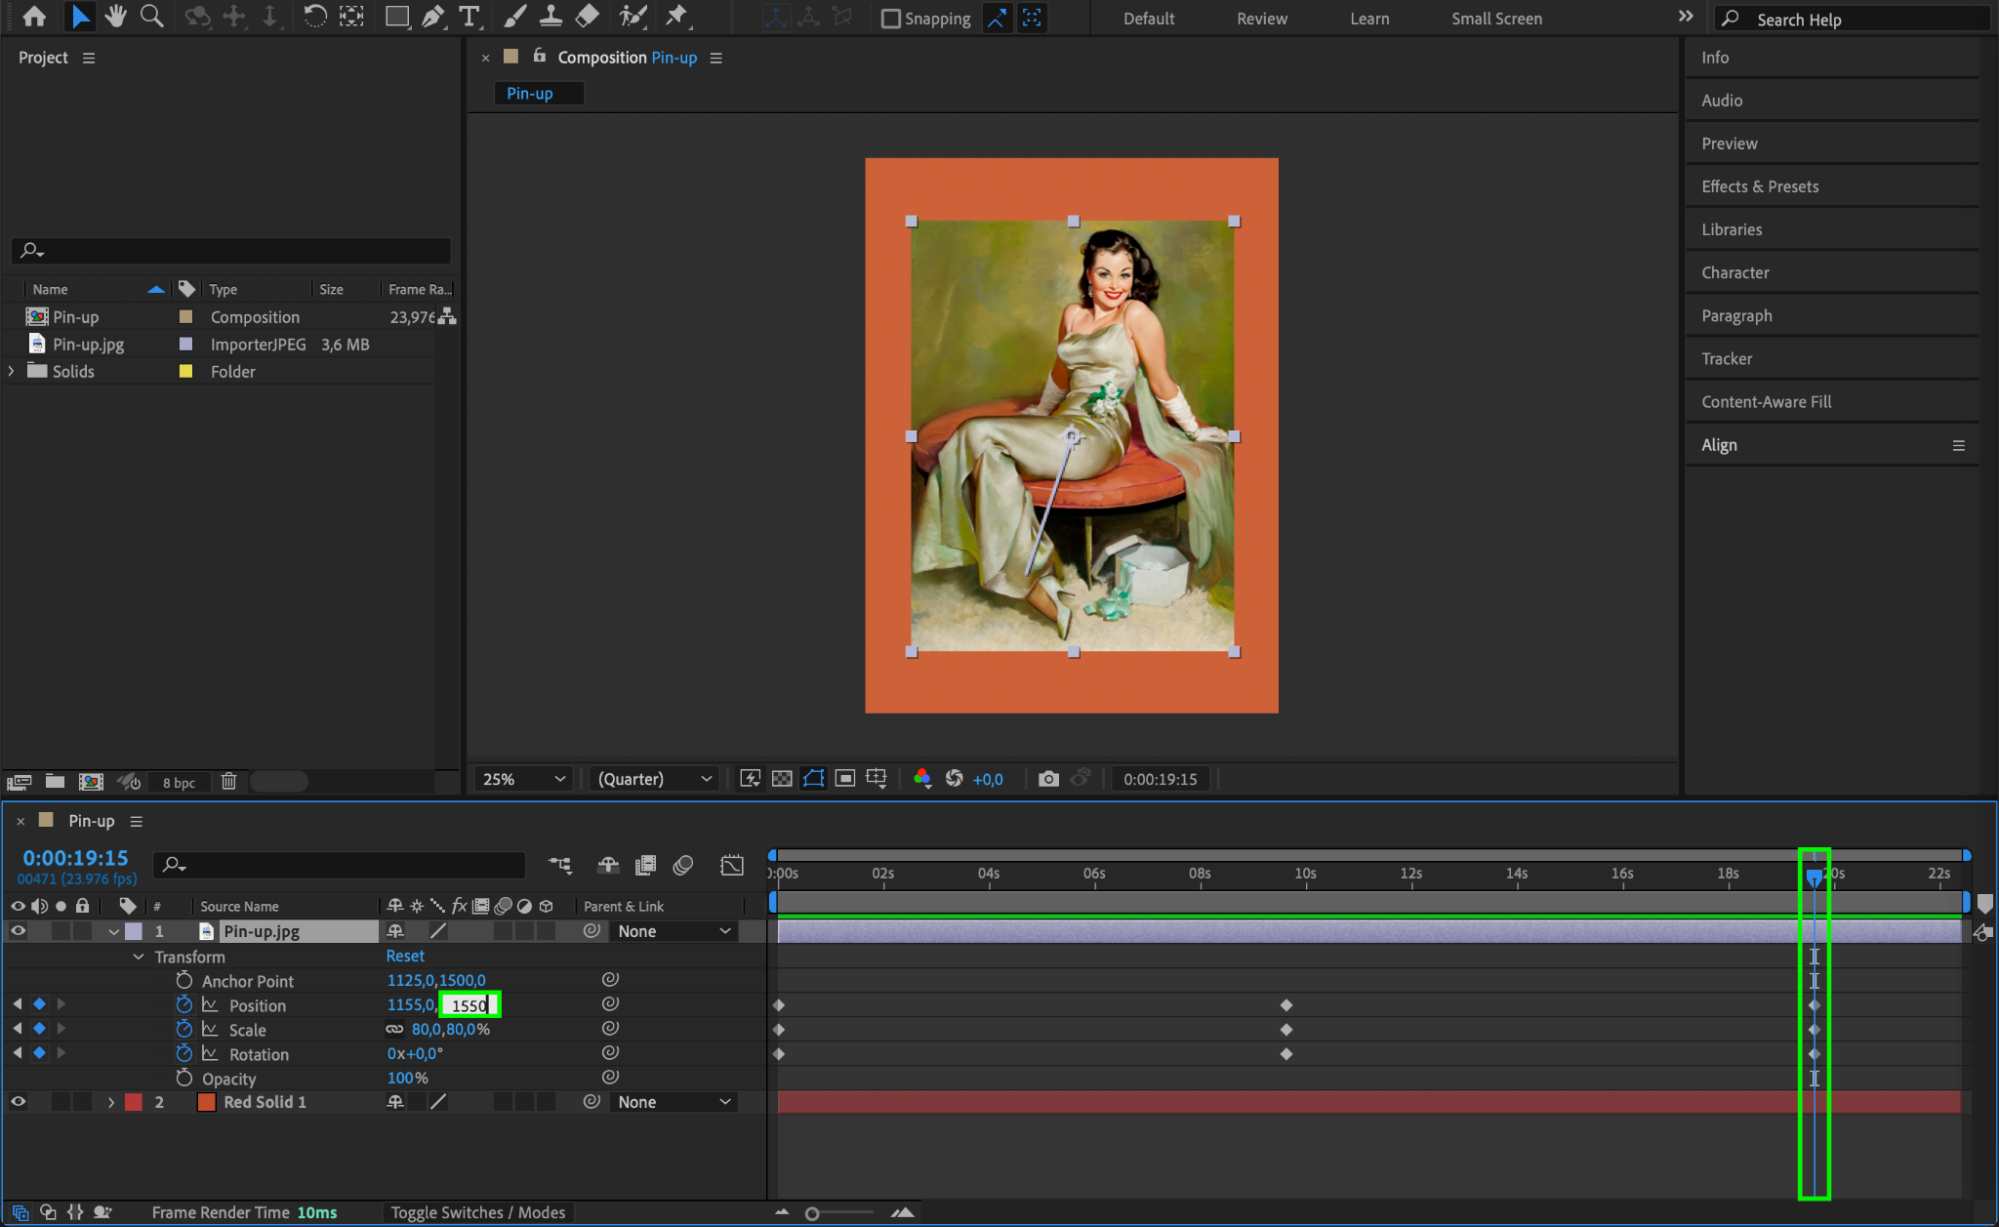
To add animations, select the picture layer and expand its properties by clicking on the arrow next to the layer name. Go to the Transform section and create keyframes to adjust properties like opacity, position, scale, and rotation over time. Experiment with different settings to achieve the desired visual effect.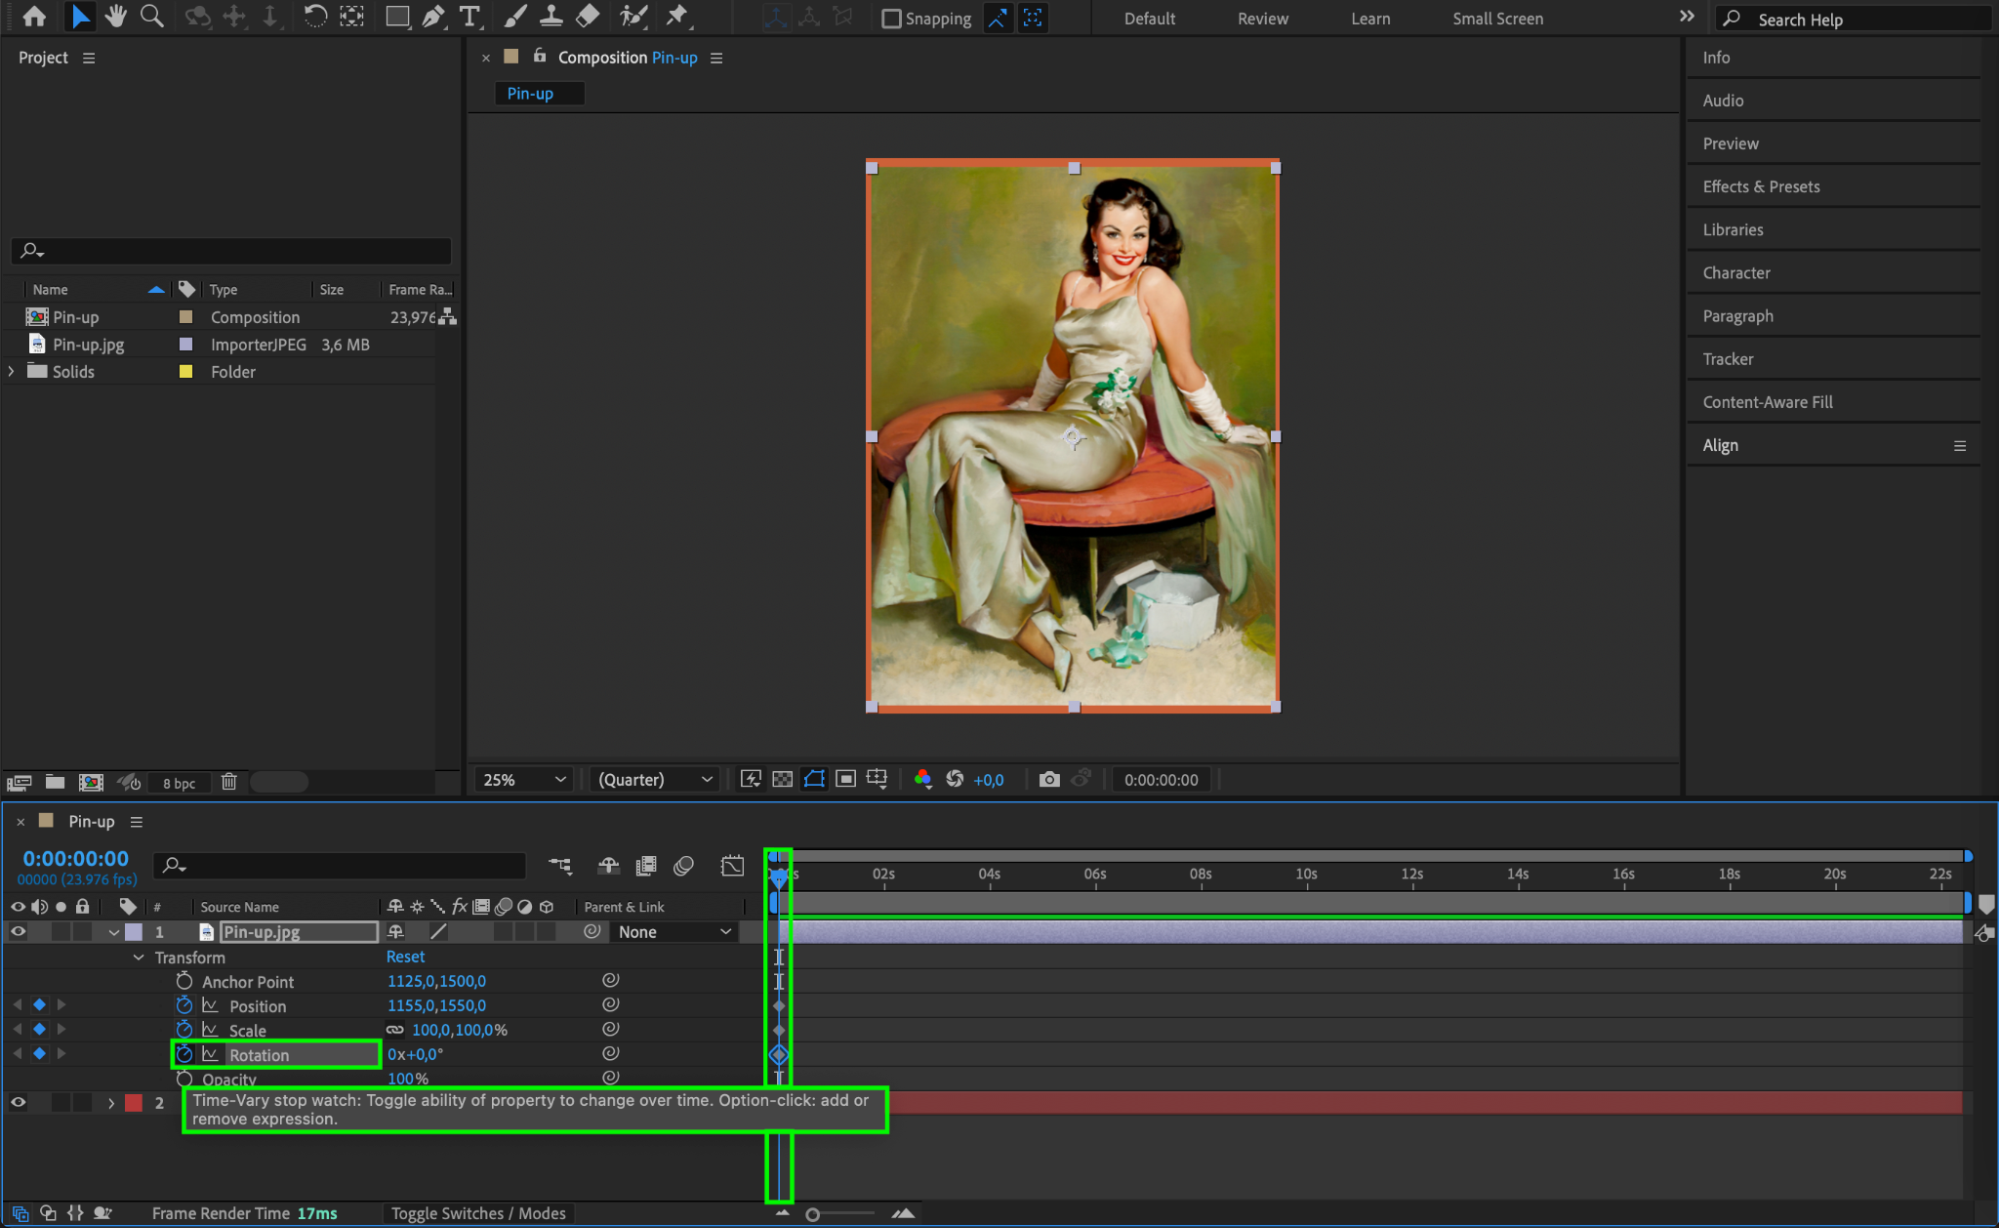
 Step 6: Applying Effects and Presets
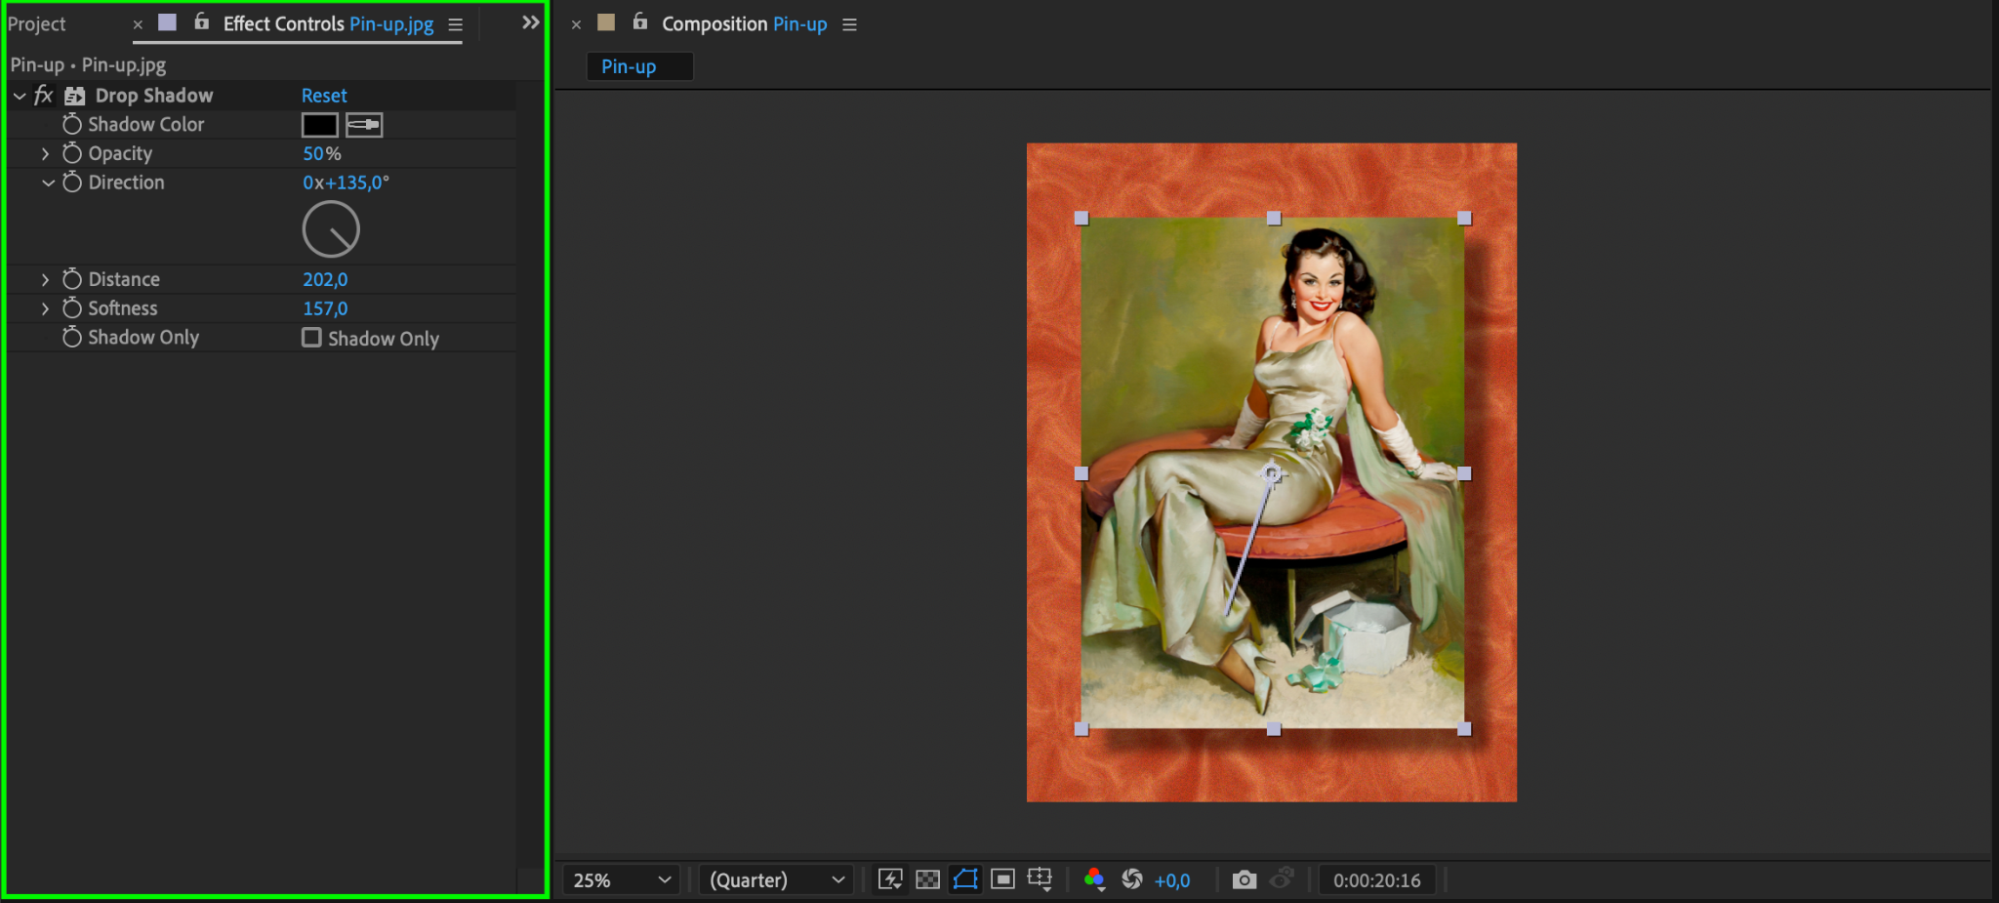
Enhance the appearance of your picture by applying effects and presets. Access the “Effects & Presets” panel and explore the available options. Drag and drop the desired effect onto the picture layer to apply it. You can also experiment with different settings to achieve unique looks.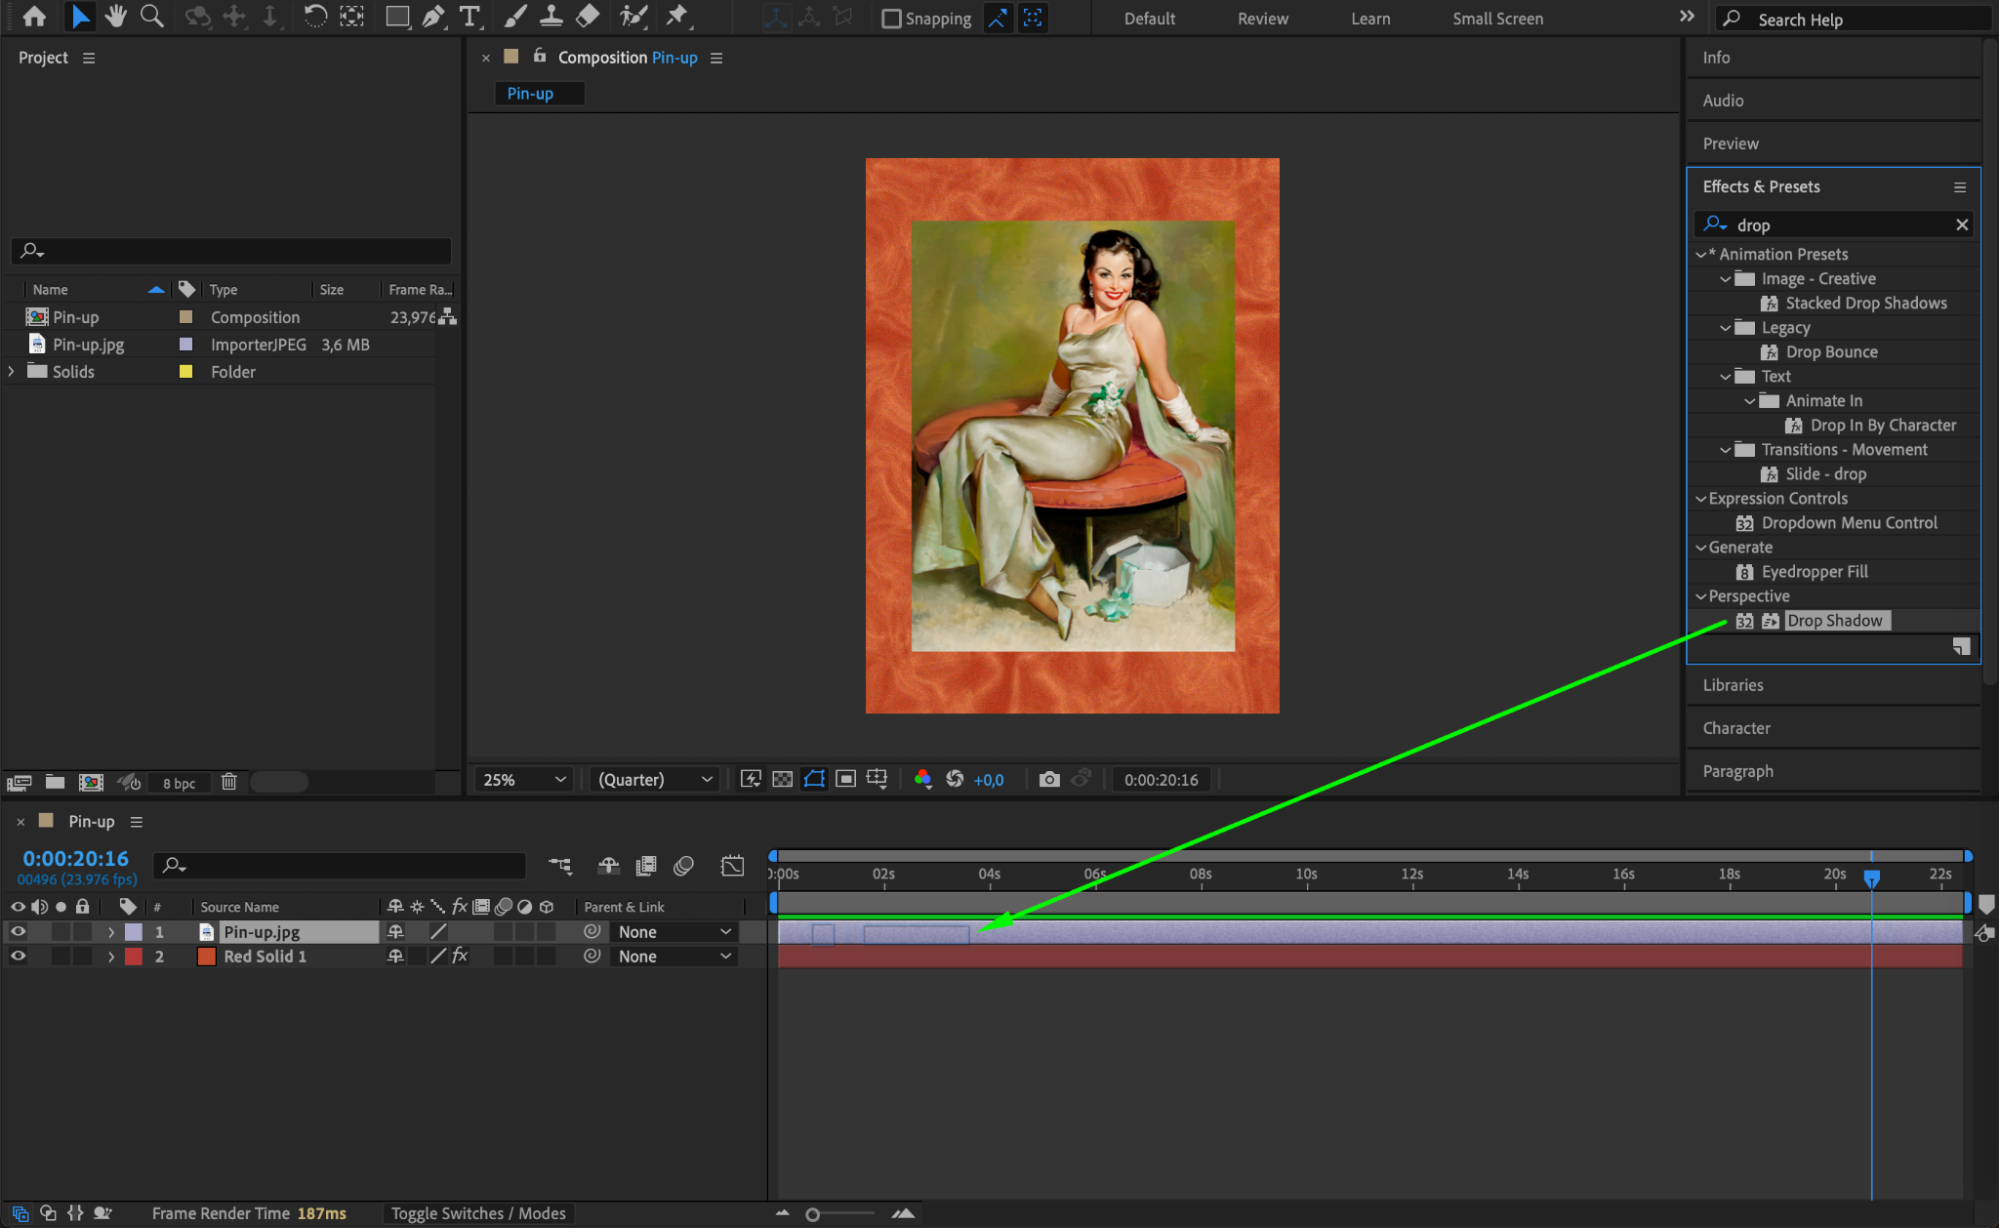
 Step 7: Fine-Tuning and Exporting
Once you’re satisfied with your picture’s positioning, effects, and animations, review the composition for any necessary refinements. Ensure that all elements work harmoniously to achieve your desired outcome. Finally, go to the Composition menu and select “Add to Render Queue” to export your composition in your preferred video format. Customize the settings, choose a filename and location, and click the Render button to export your video with the inserted picture.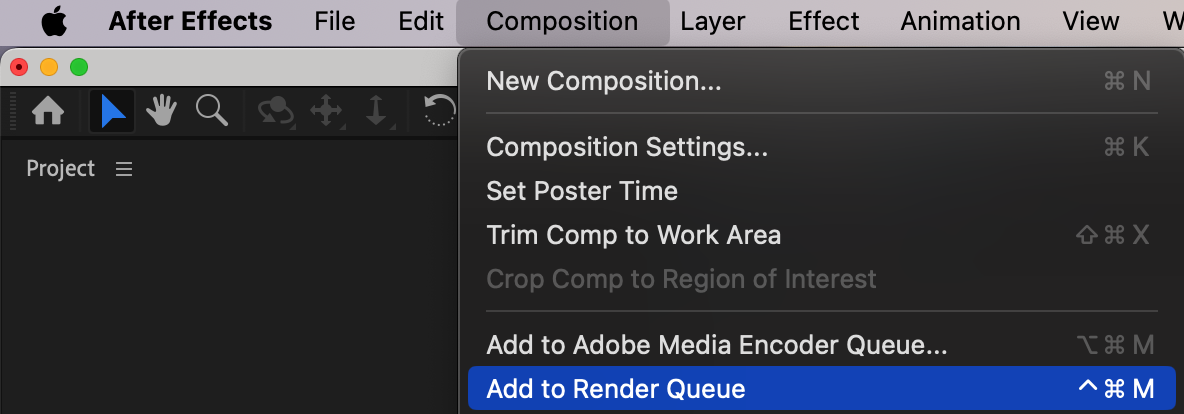
 Conclusion
By following these simple steps, you can seamlessly integrate pictures into your After Effects compositions, adding visual impact and engaging your audience. Unlock the full potential of After Effects and create visually stunning videos that impress. So what are you waiting for? Let’s get started!


