Unlocking Green Screen Magic in After Effects
Elevate Your Videos: A Comprehensive Guide to Green Screen Keying in After Effects
Mastering the art of green screen keying in After Effects doesn’t have to be complicated. By following a few simple steps, you can create professional-looking composite videos that will impress your audience. Here’s a step-by-step guide to help you key out a green screen in After Effects:
Get 10% off when you subscribe to our newsletter

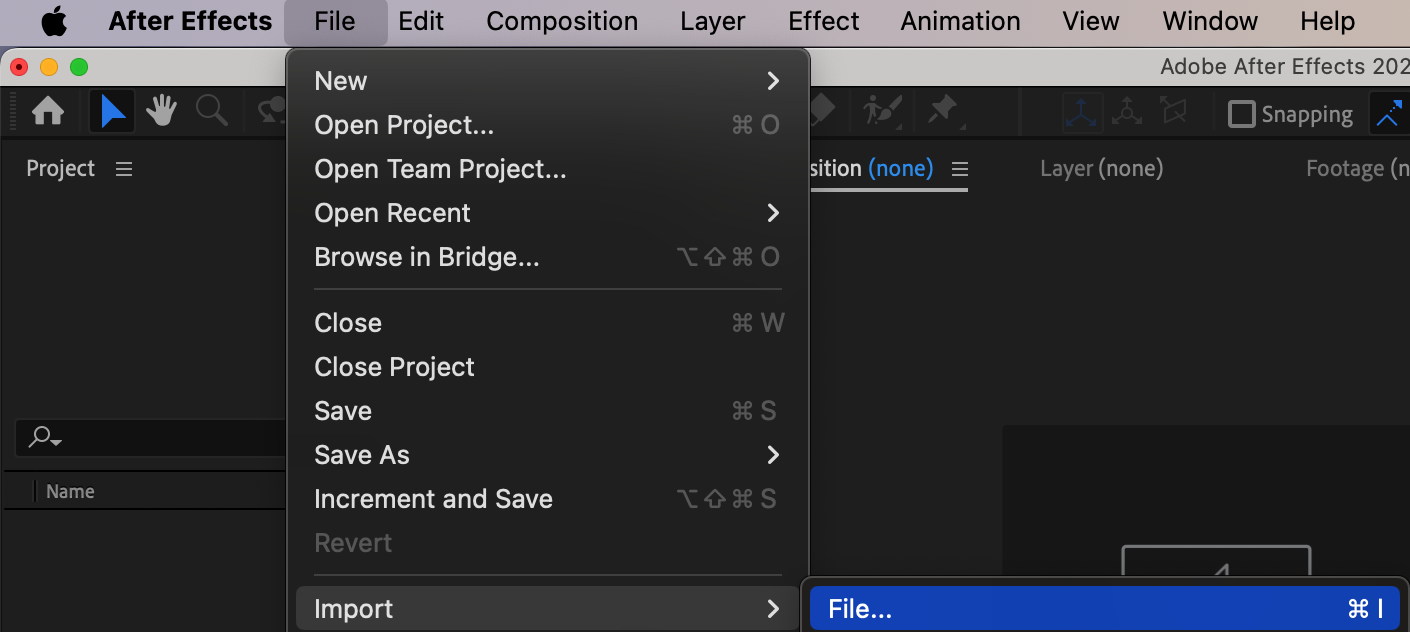
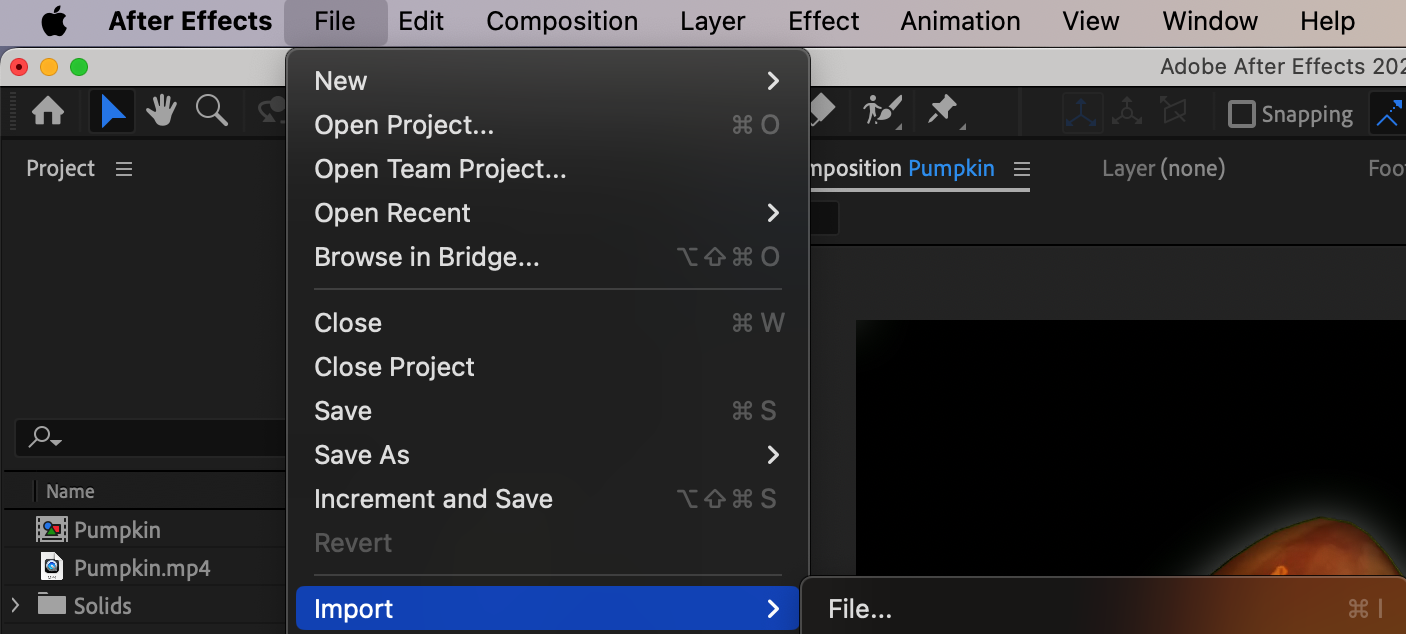
Step 1: Import your footage
Start by importing your green screen footage into After Effects. Go to File, select Import, and choose the file you want to work with. Drag and drop the footage into the composition panel to create a new composition.

Get 10% off when you subscribe to our newsletter
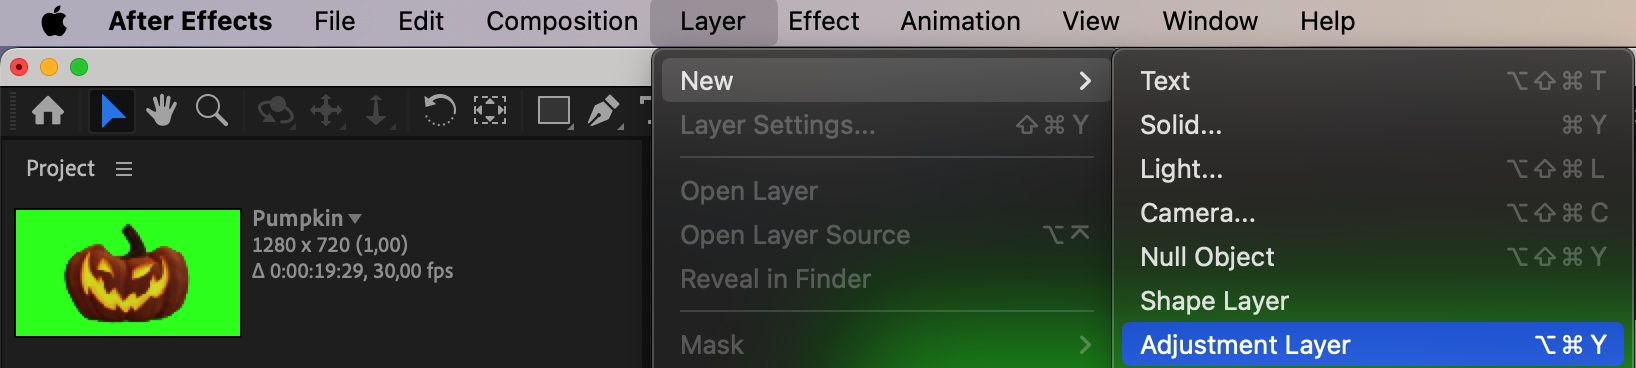
Step 2: Create a new adjustment layer
Next, create a new adjustment layer by going to Layer, selecting New, and choosing Adjustment Layer. This layer will hold the effects and adjustments needed for the green screen keying process.
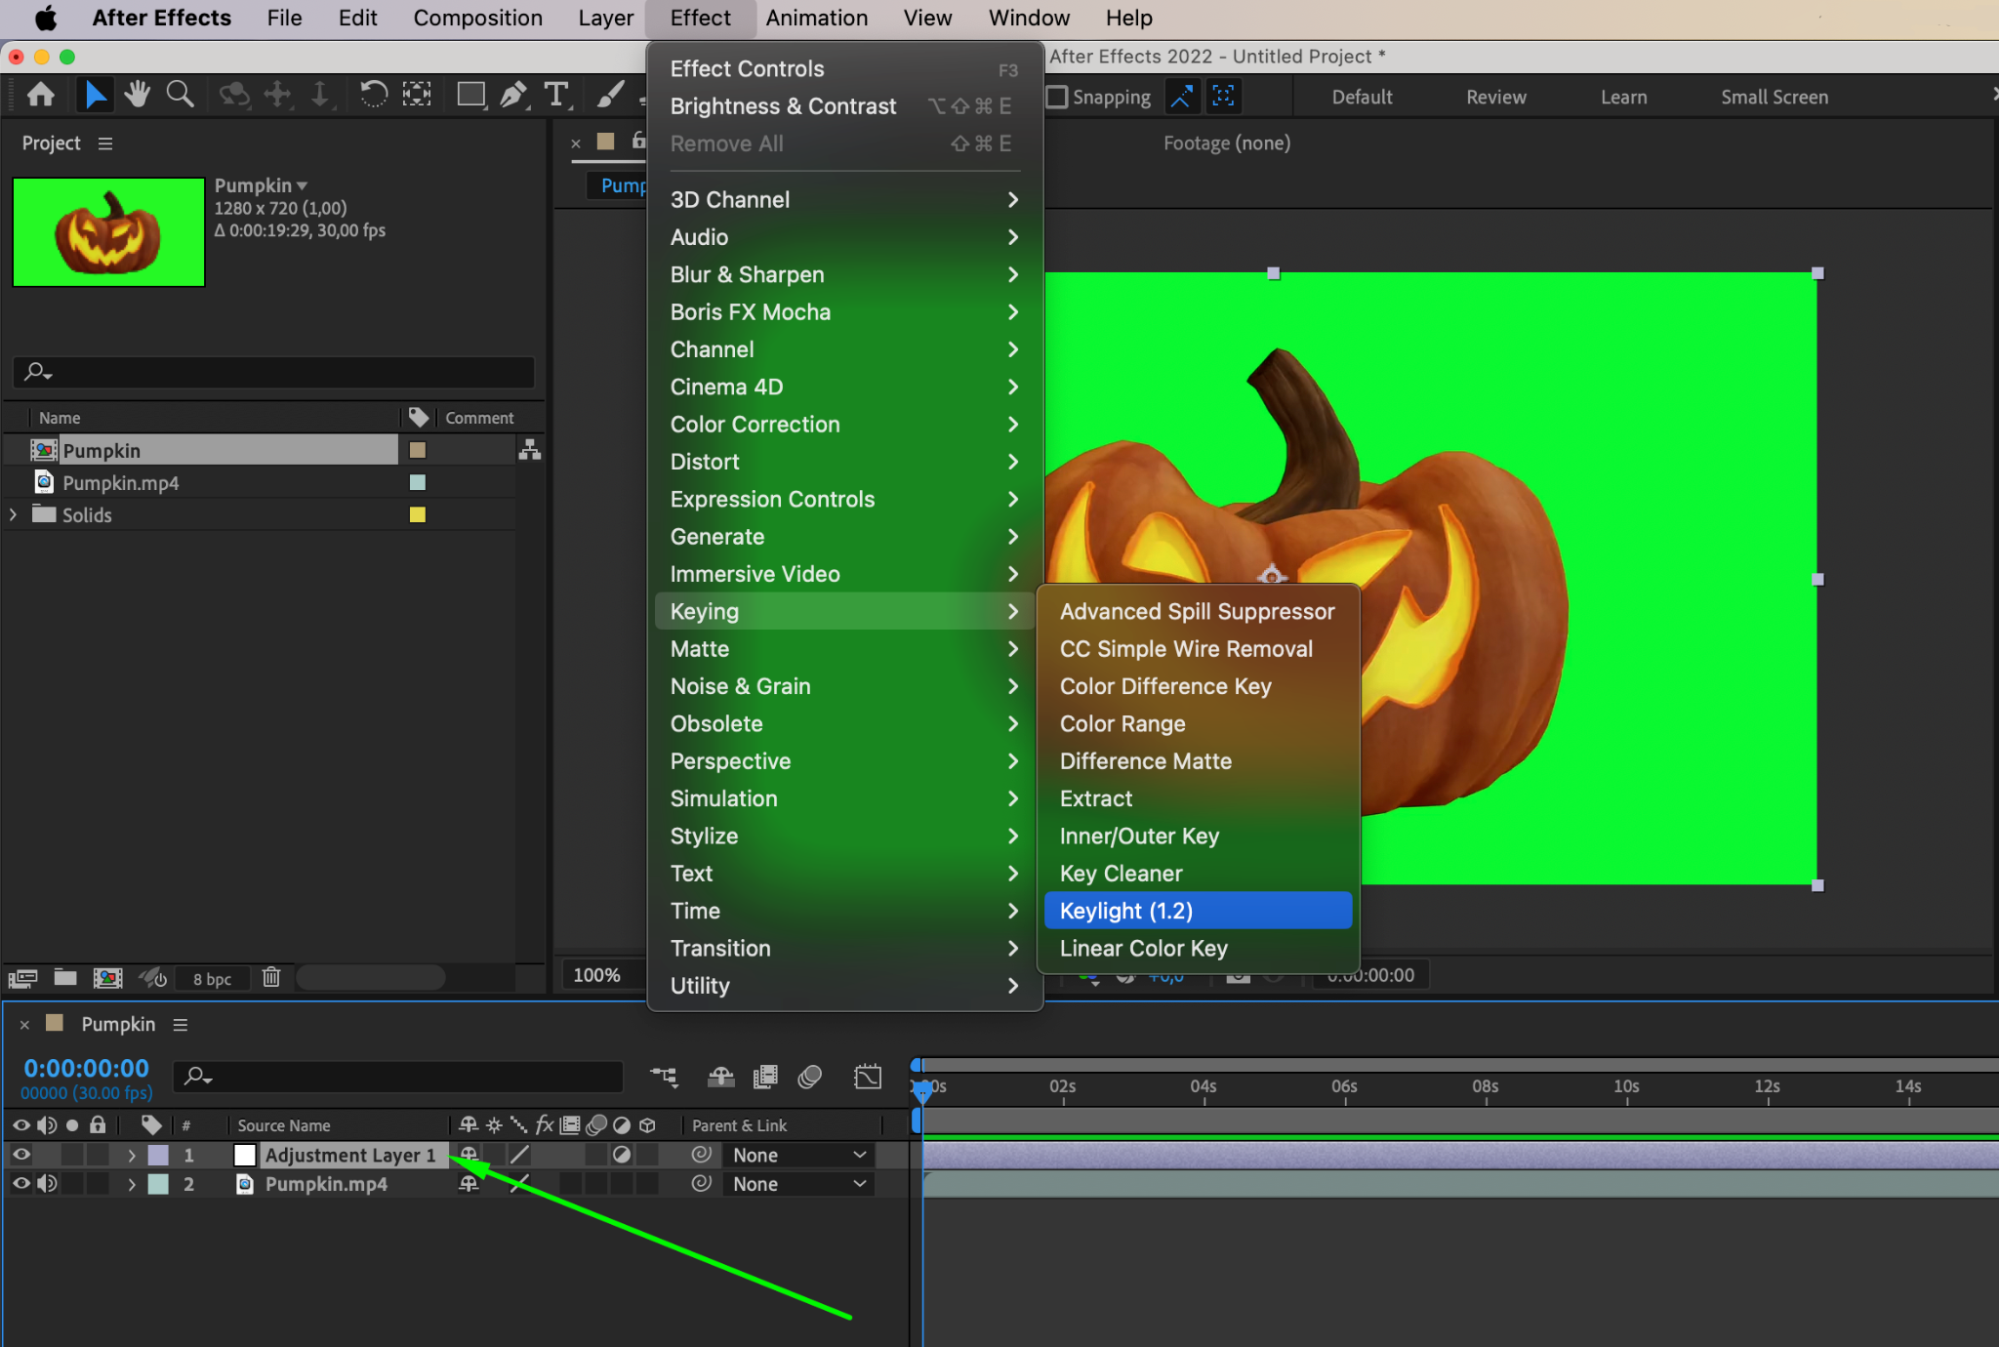
Step 3: Apply the Keylight effect
Get 10% off when you subscribe to our newsletter
With the adjustment layer selected, go to Effect, choose Keying, and select Keylight. Keylight is a powerful keying plugin that comes bundled with After Effects. It provides advanced settings and controls to achieve precise keying results.
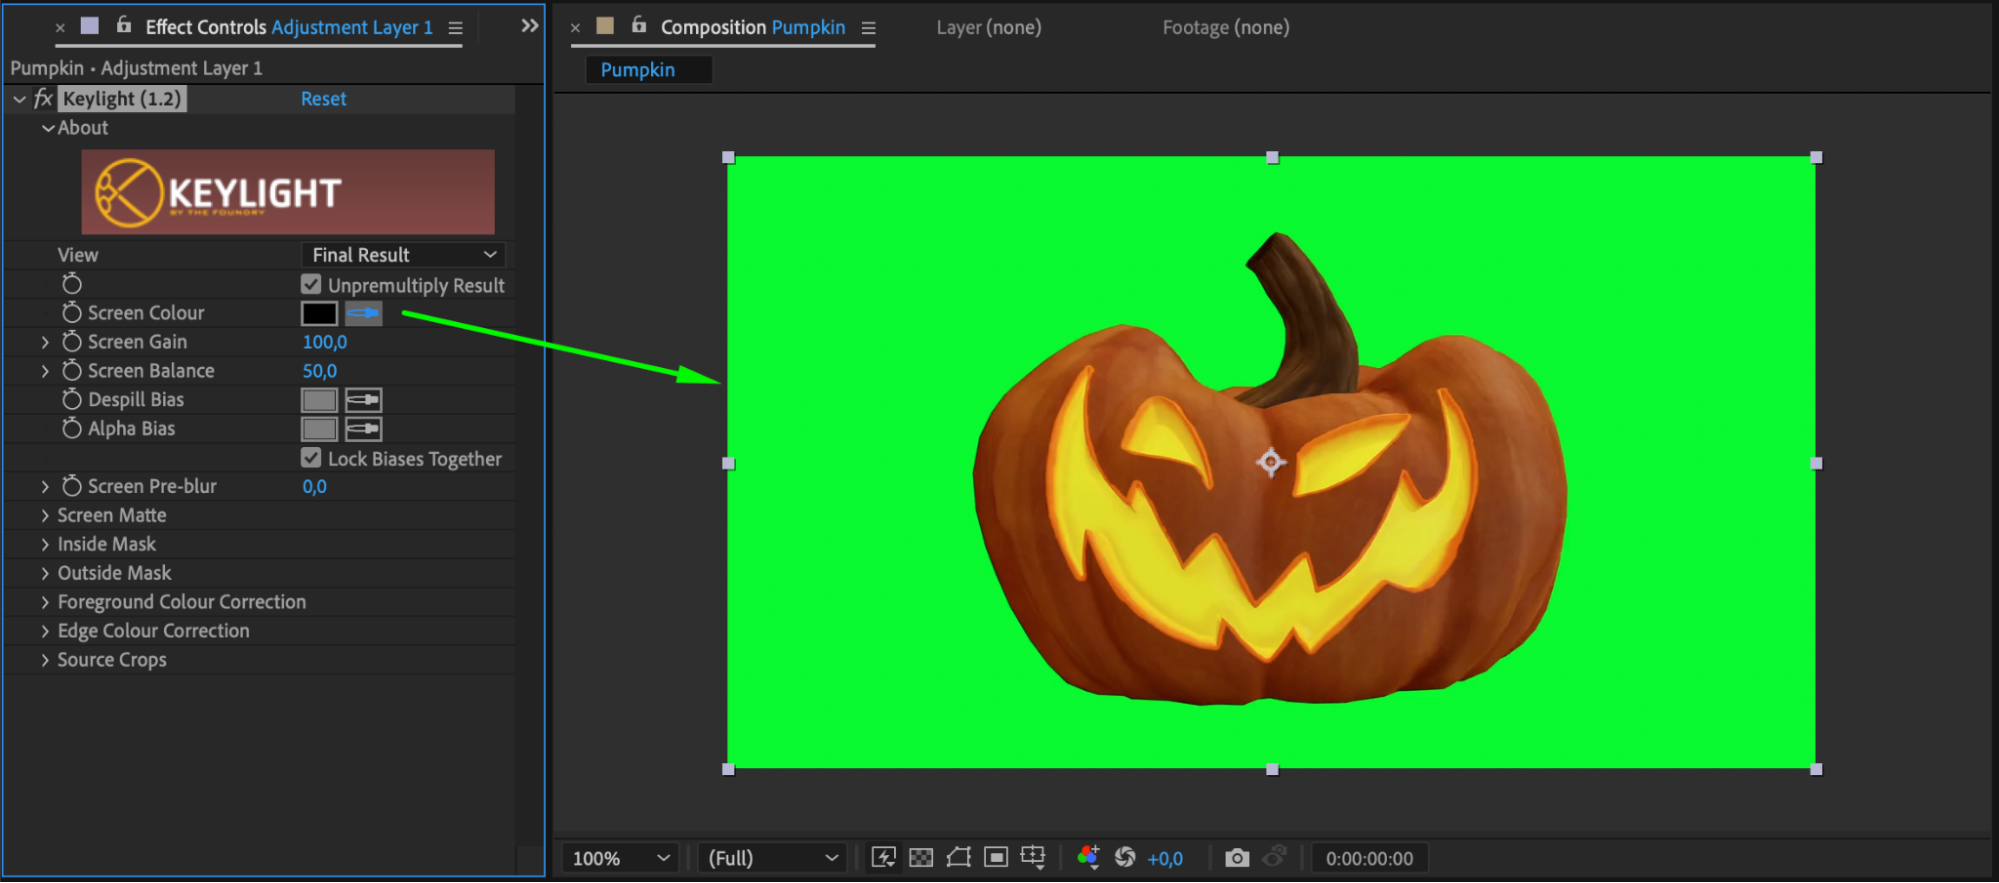
Step 4: Select the green screen color
Use the Eyedropper tool within the Keylight effect to sample the green color from your footage. After Effects will accurately identify and remove the green screen background based on the color you select.
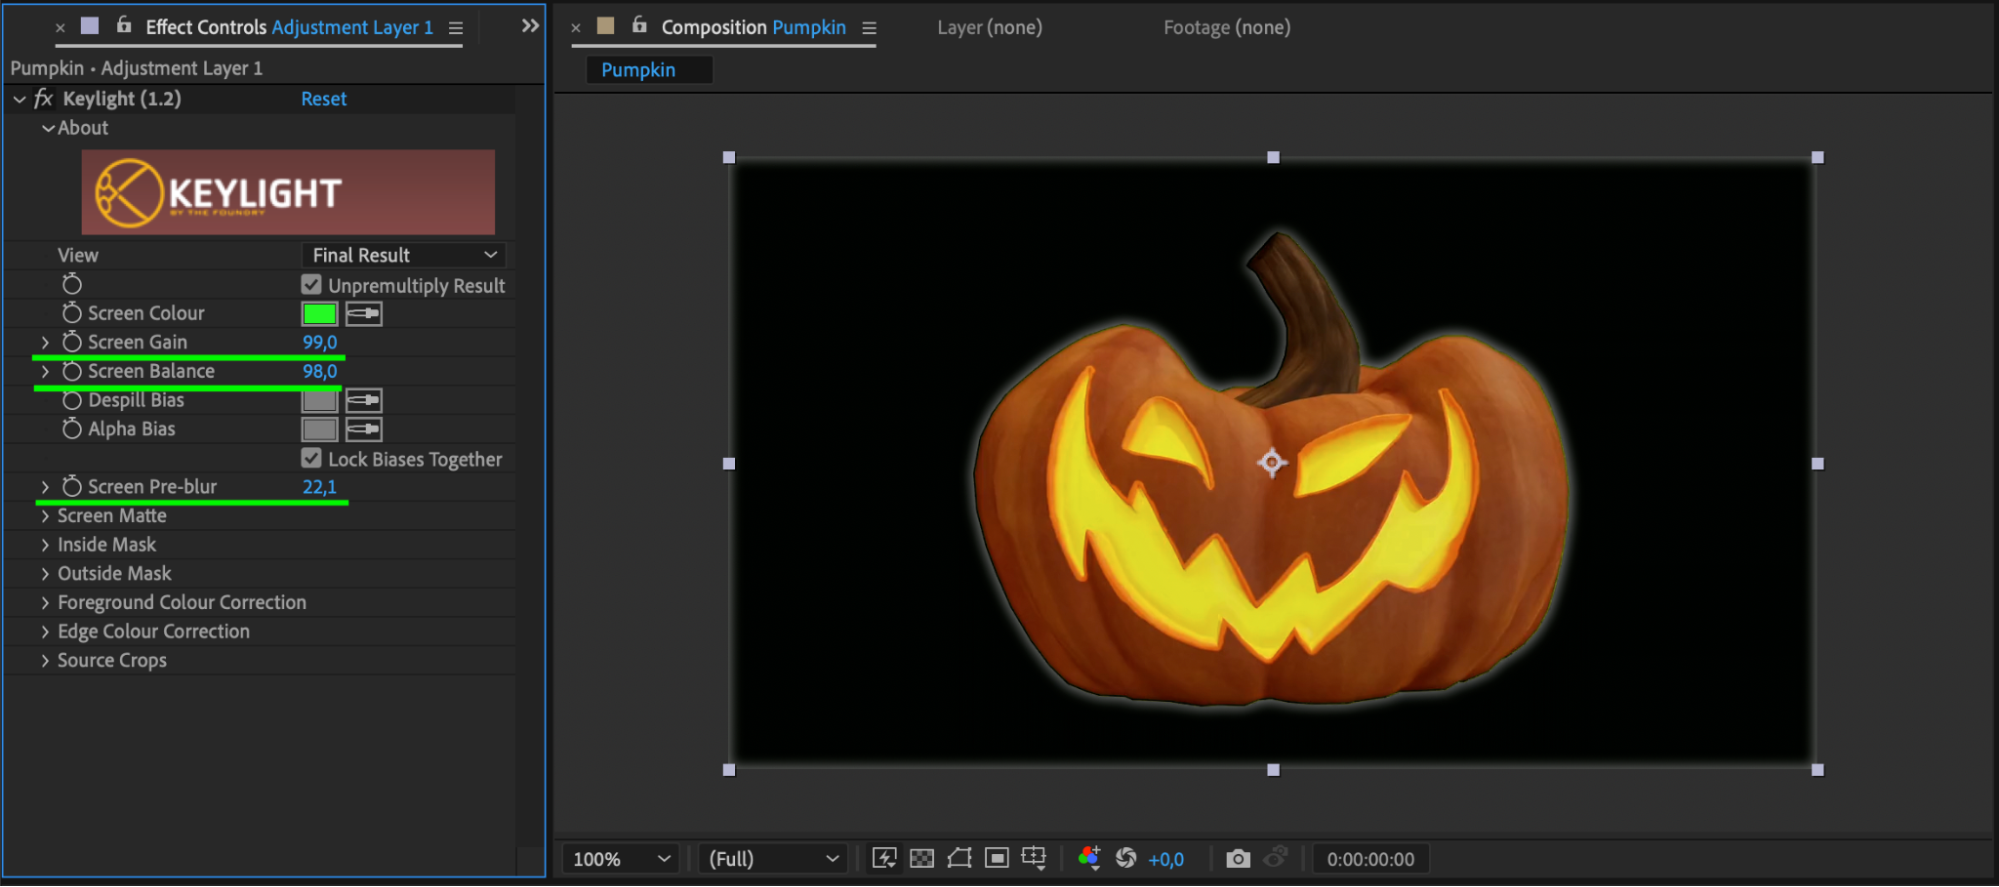
Step 5: Refine the keying settings
Adjust the Screen Gain, Screen Balance, and Screen Pre-blur settings to refine the keying effect. These settings allow you to fine-tune the removal of the green screen and create a cleaner key.
Get 10% off when you subscribe to our newsletter
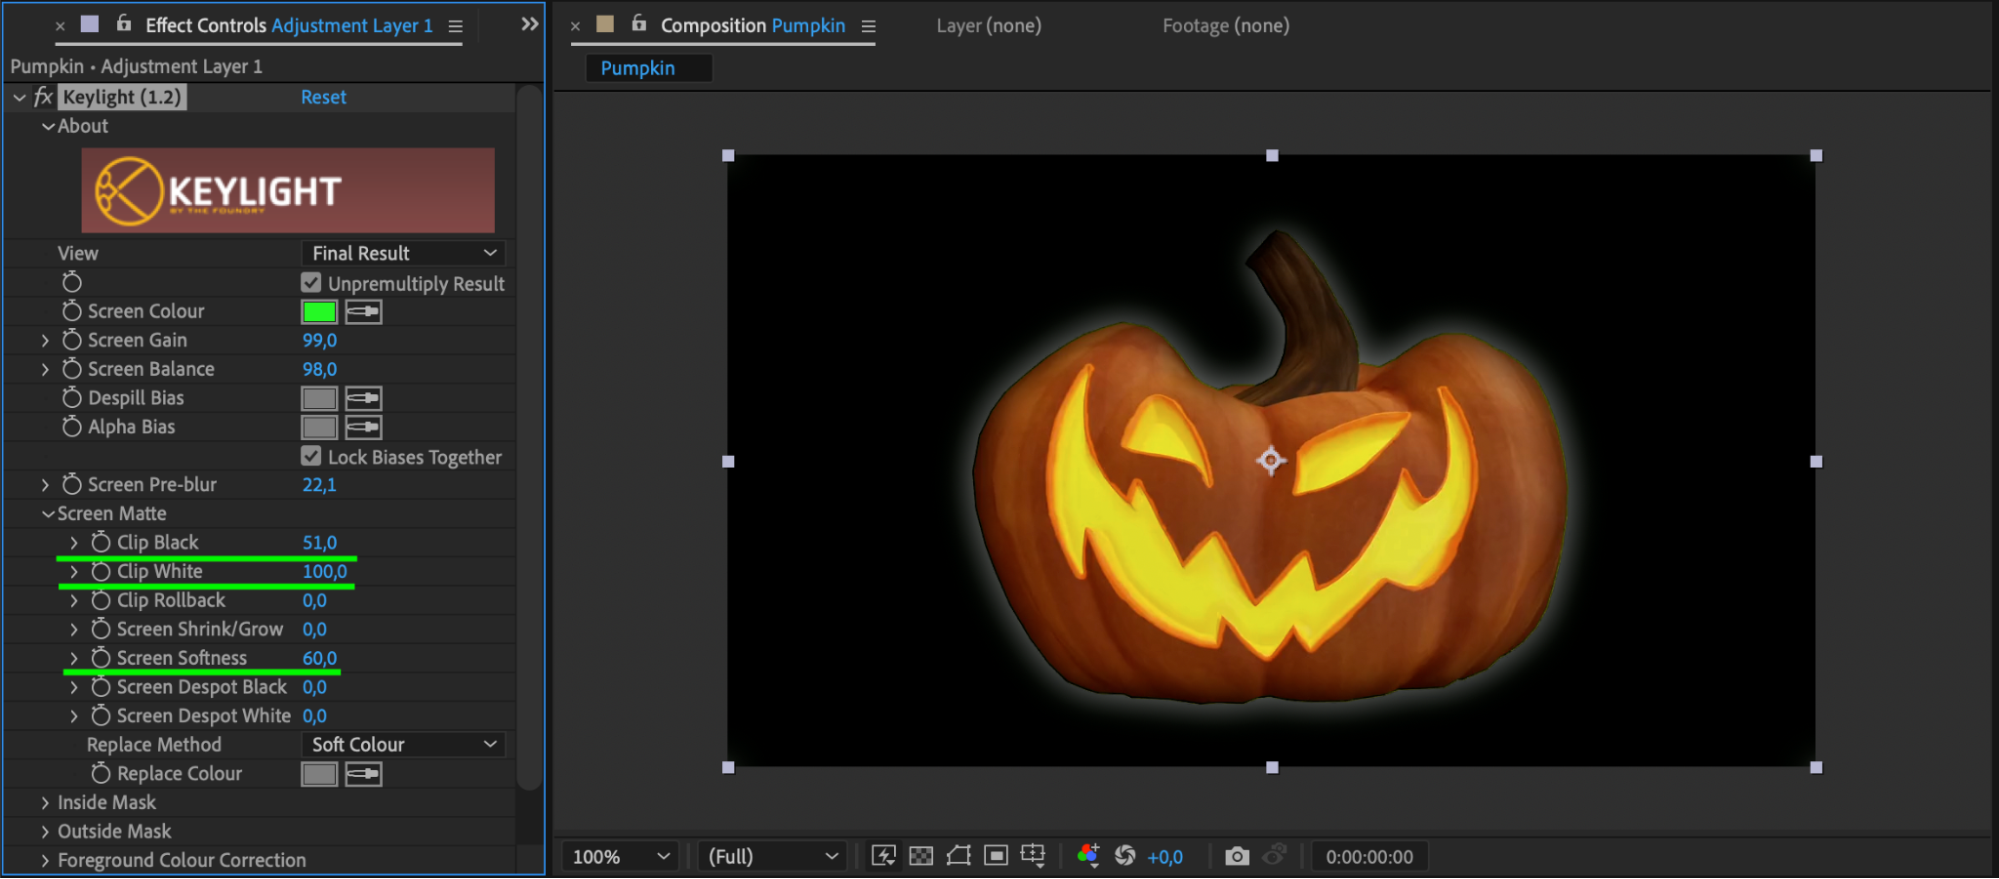
Step 6: Fix any remaining issues
If you still have areas that are not properly keyed out, use the Screen Matte feature within the Keylight effect. Adjust the Clip Black, Clip White, and Clip Softness settings to selectively remove or bring back parts of the background.
Get 10% off when you subscribe to our newsletter
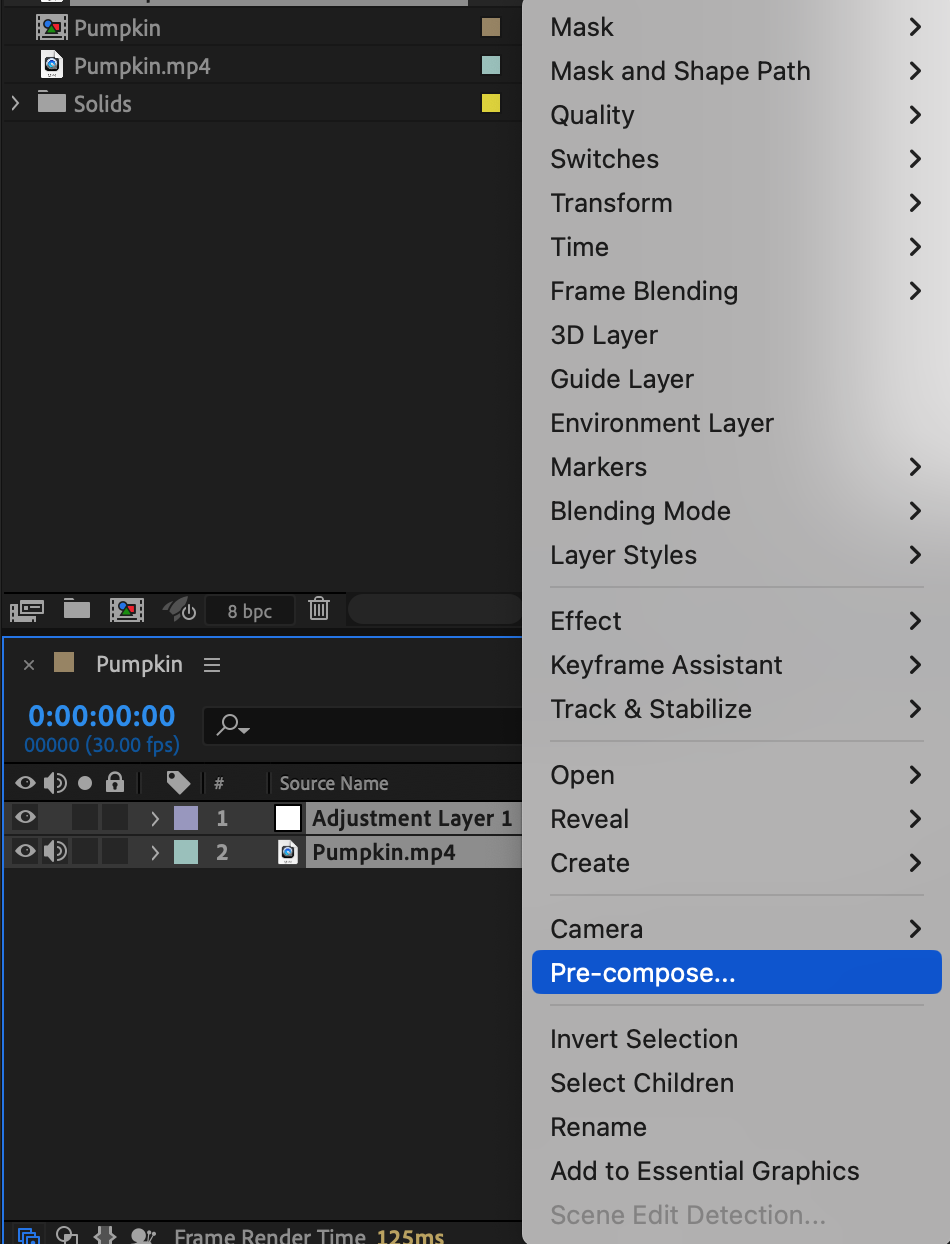
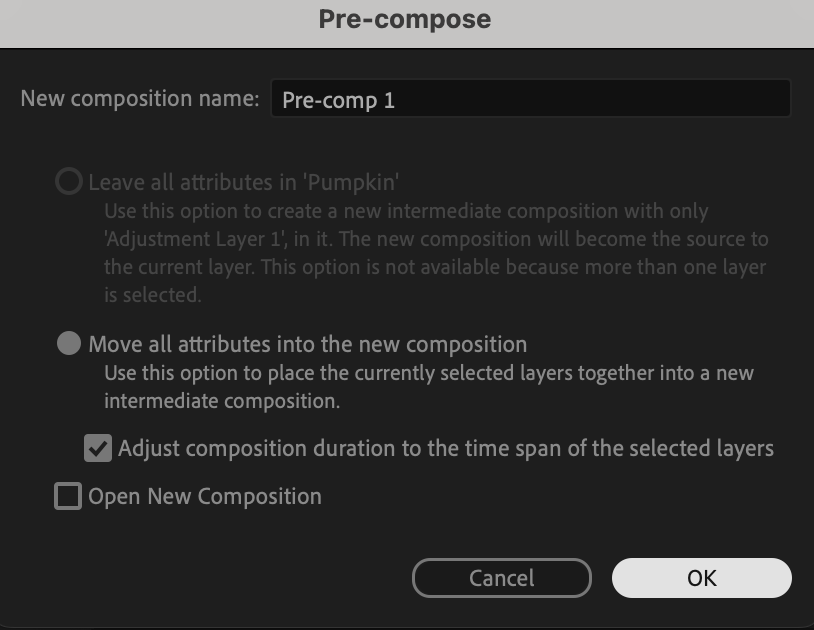
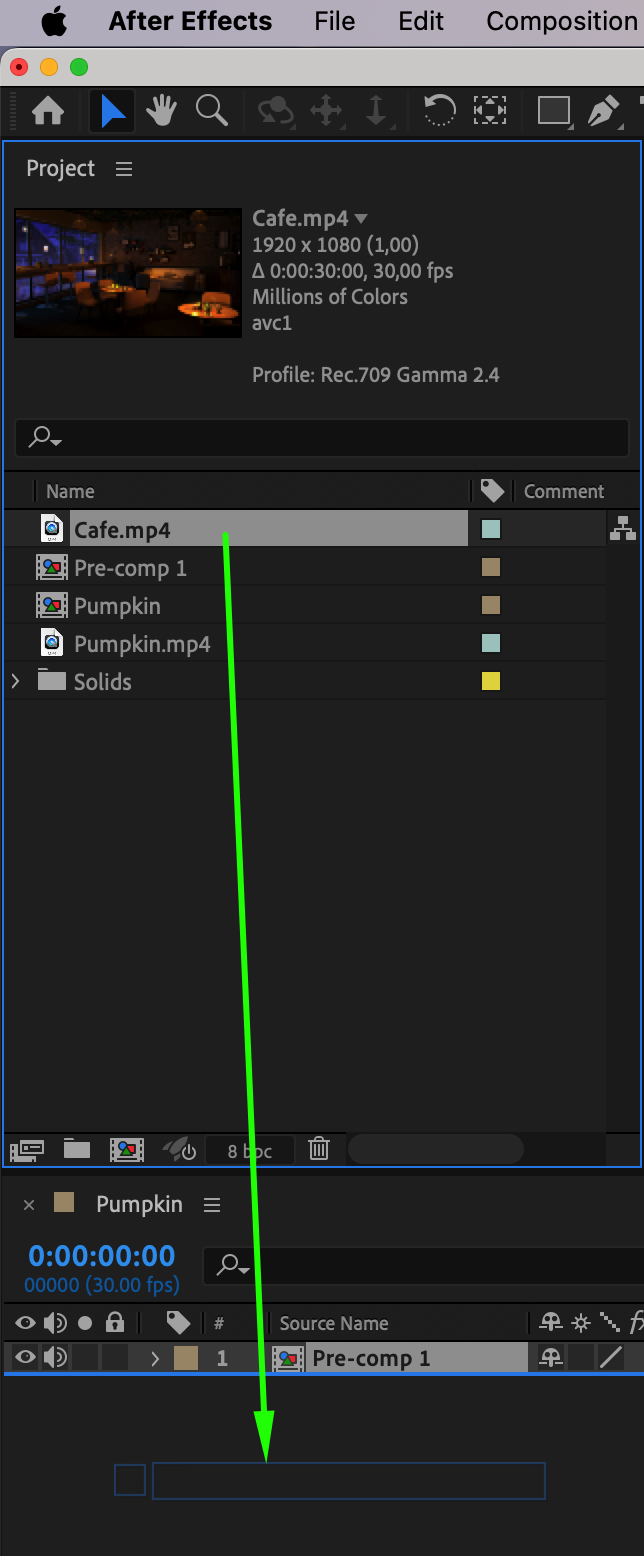
Step 7: Composite your footage
First, create a pre-composition for the green screen video along with the adjustment layer. Then, import the desired background image or video into After Effects. Position the background layer below the pre-composition layer. Finally, composite your footage onto the new background to complete the process.
Get 10% off when you subscribe to our newsletter
Get 10% off when you subscribe to our newsletter
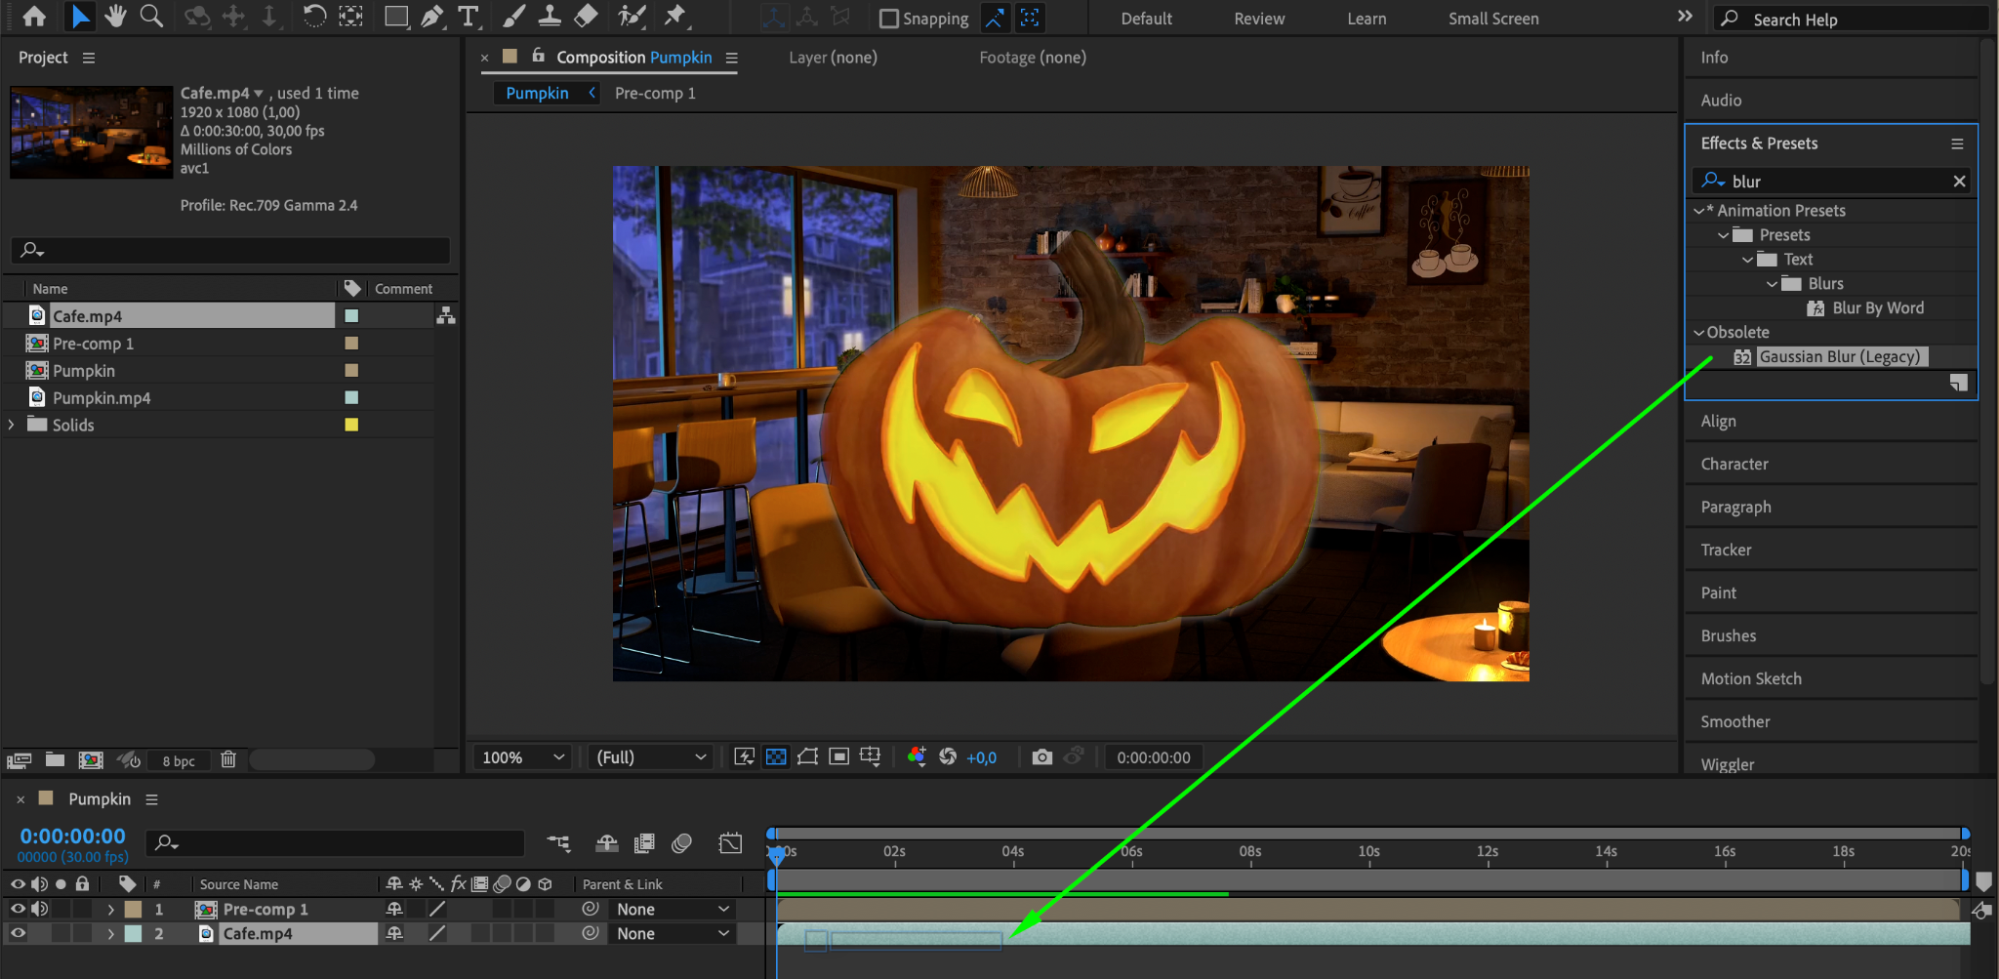
Step 8: Refine the composite
Use additional effects, such as color correction, masking, and blending modes, to further refine and enhance the composite. This step is crucial to ensure that your foreground and background blend seamlessly.
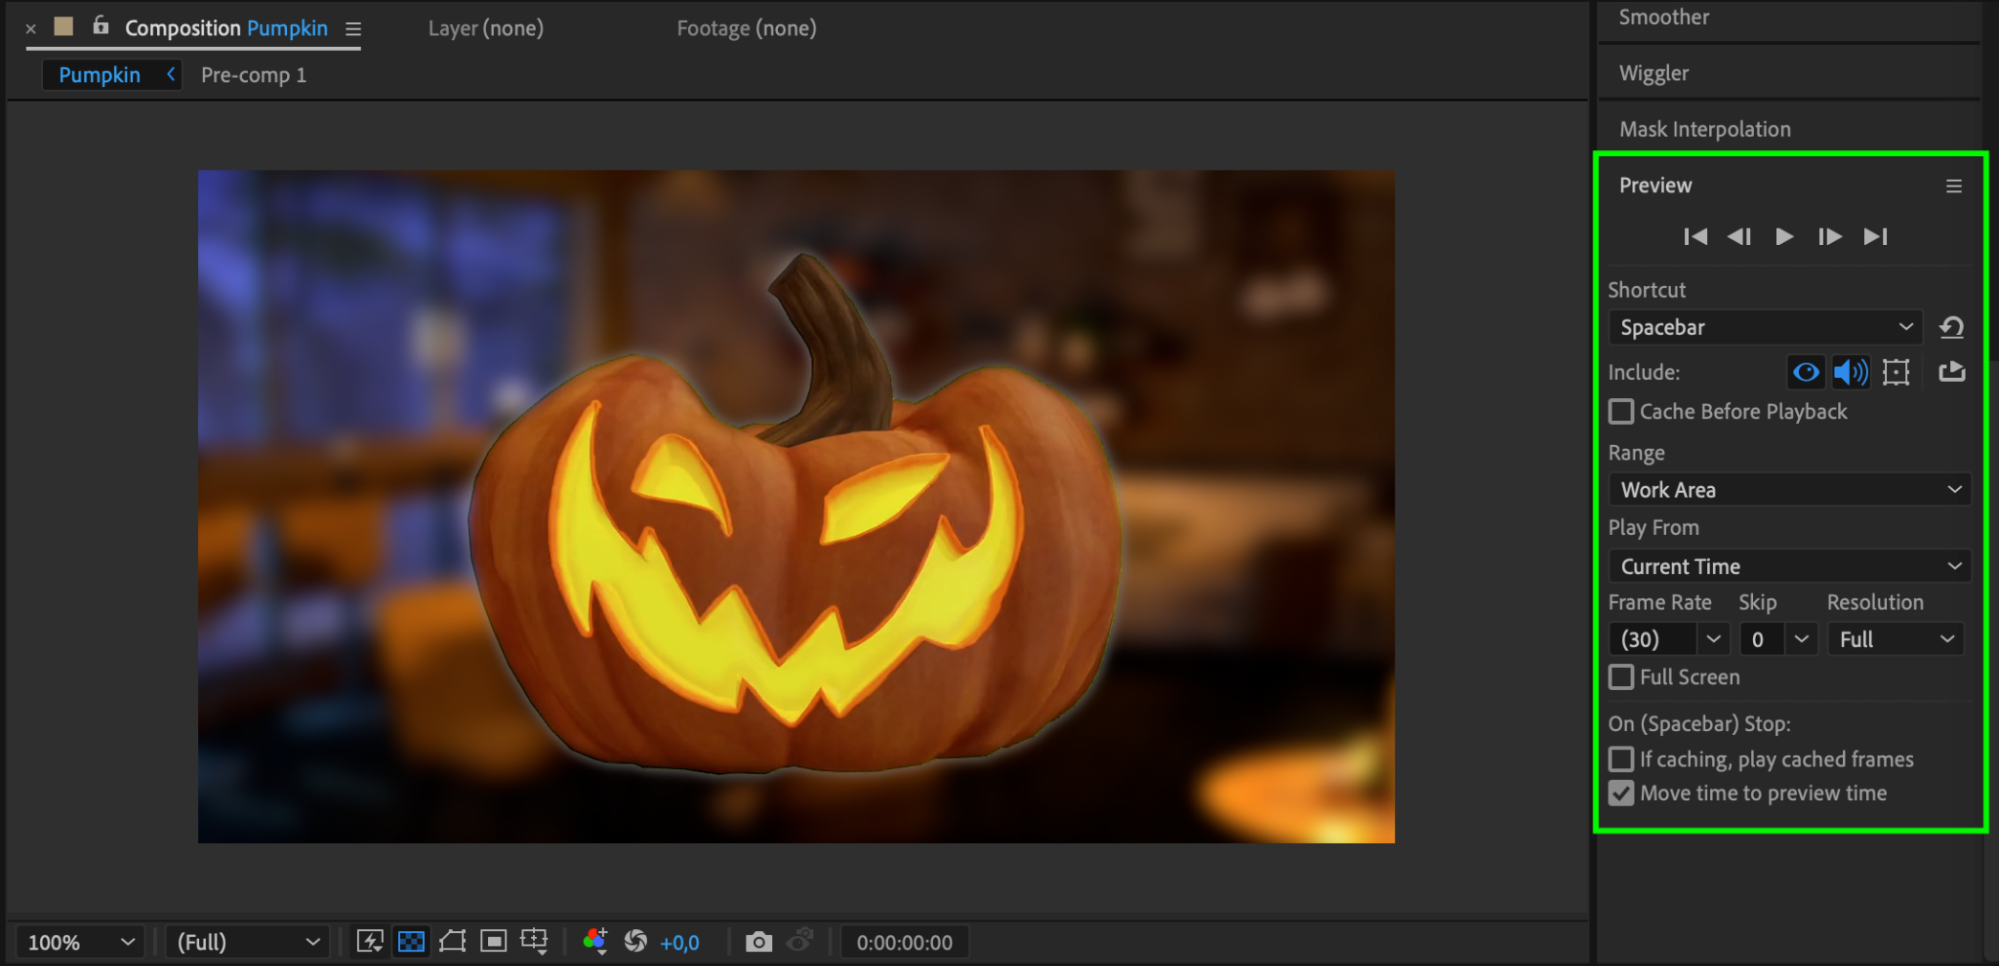
Step 9: Preview and render
Before finalizing your green screen key, preview your composition to ensure the keying and composite look natural and seamless. Once satisfied, render your composition into the desired format and resolution.
Conclusion
By following these steps and experimenting with the settings and adjustments, you can achieve professional-quality green screen keying results in After Effects. Embrace the power of After Effects, practice, and let your creativity shine through the art of green screen keying.
Our Bestsellers


