How to Link Adobe Media Encoder to After Effects for Smooth Rendering and Export
Introduction to Linking Media Encoder and After Effects
In this guide, we will explore how to link Adobe Media Encoder to After Effects for efficient rendering and export. By connecting these two powerful Adobe applications, you can streamline your workflow, allowing you to render compositions from After Effects while continuing your project in parallel. Let’s walk through the steps to set up this integration and make your video production process more efficient!
Adobe After Effects is essential for creating stunning visual effects and motion graphics, while Adobe Media Encoder excels at encoding and exporting media to various formats. Linking these tools ensures a smooth transfer of compositions for rendering, making the entire process more flexible and time-saving.
Step 1: Launch After Effects and Open Your Composition
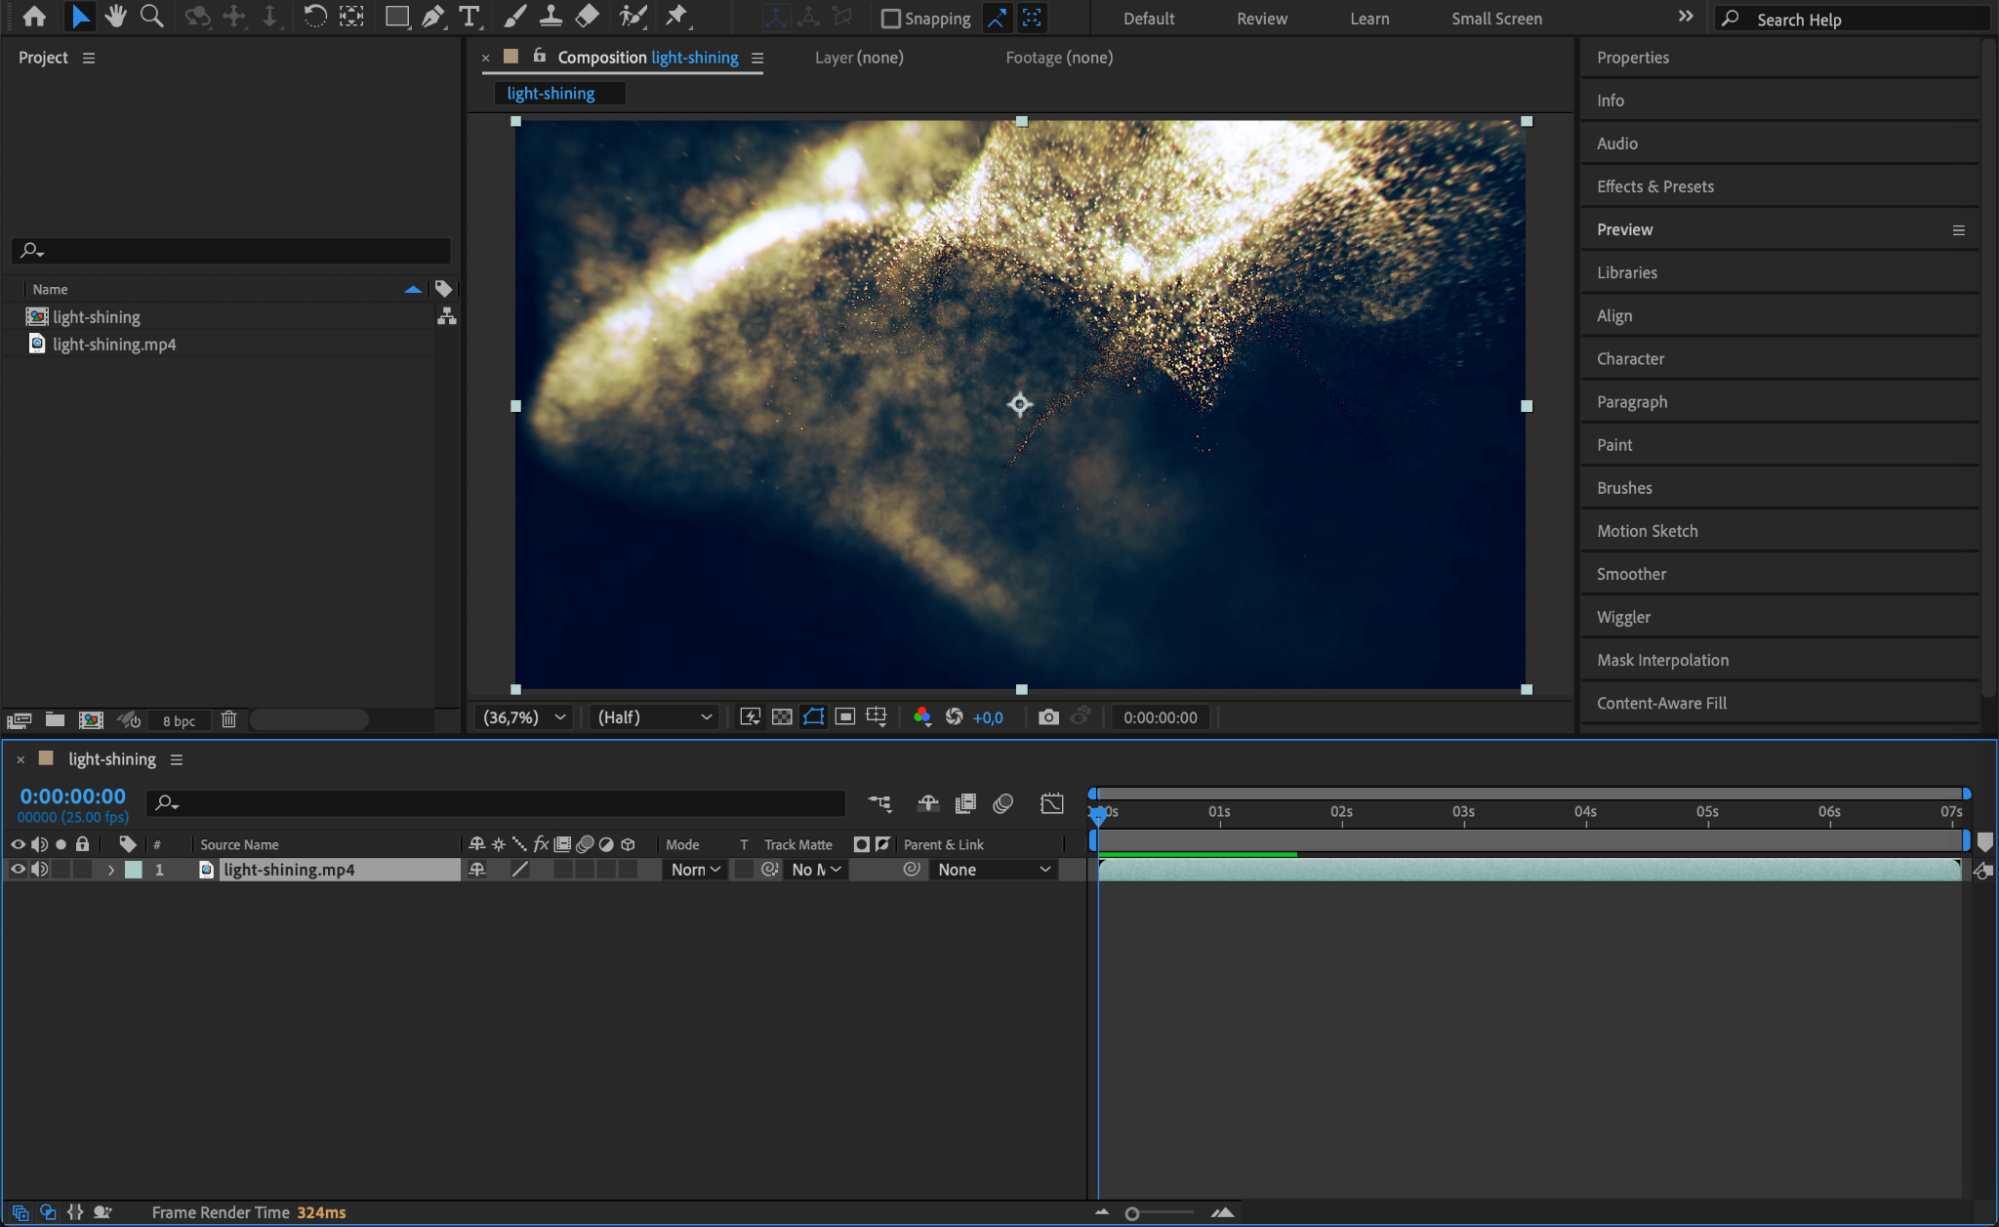
Start by launching After Effects and opening the project composition you wish to export. Ensure that everything is ready to render. This will be the composition you’ll queue for encoding in Media Encoder.
Step 2: Add to Media Encoder Queue
Once your composition is ready, go to the top menu and select Composition > Add to Adobe Media Encoder Queue. Alternatively, you can use the shortcut “Ctrl/Cmd + Alt/Option + M” to instantly send your composition to Media Encoder.

Step 3: Adjust Export Settings in Media Encoder
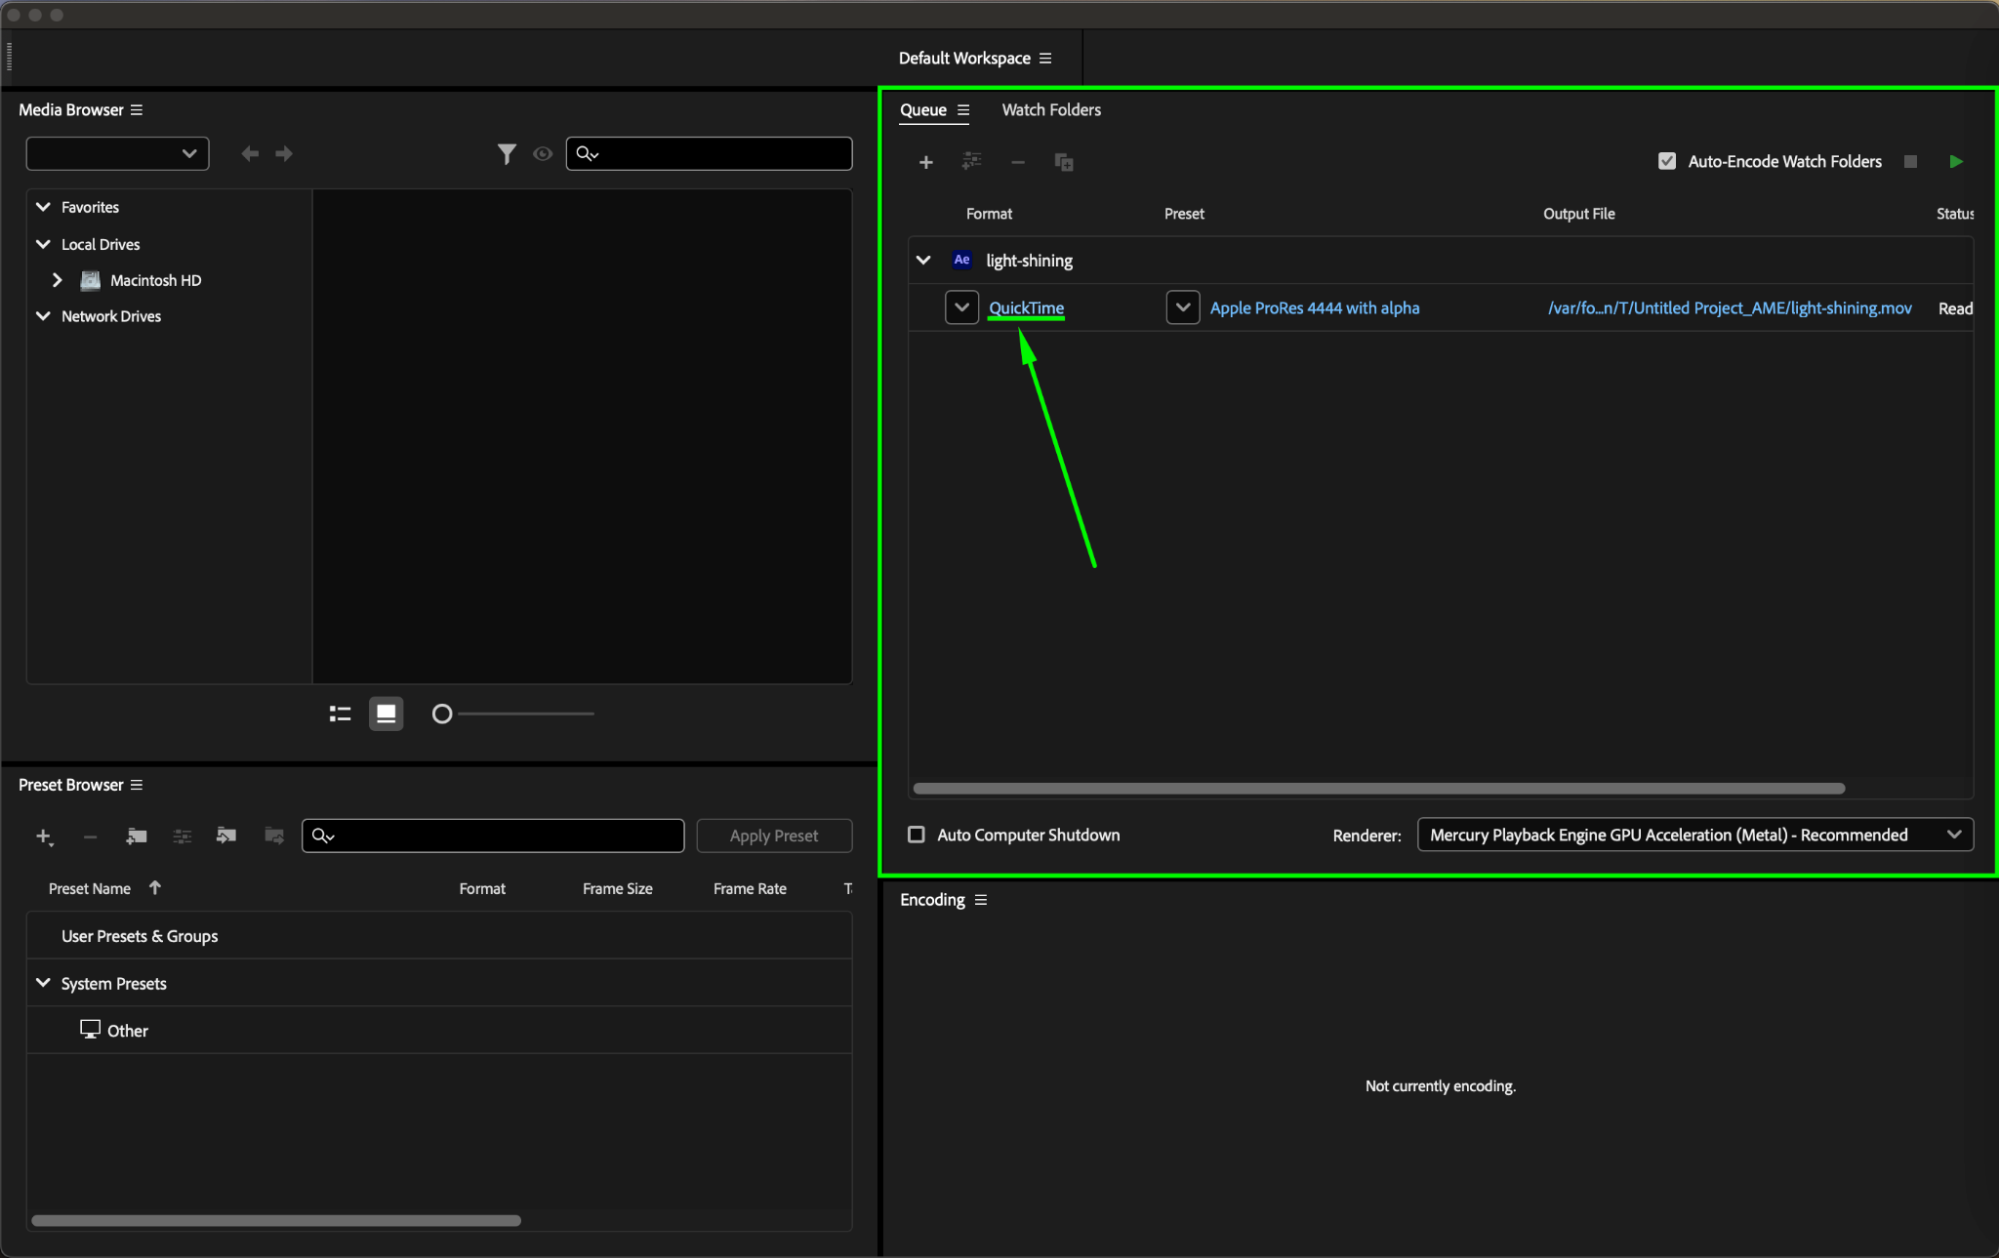
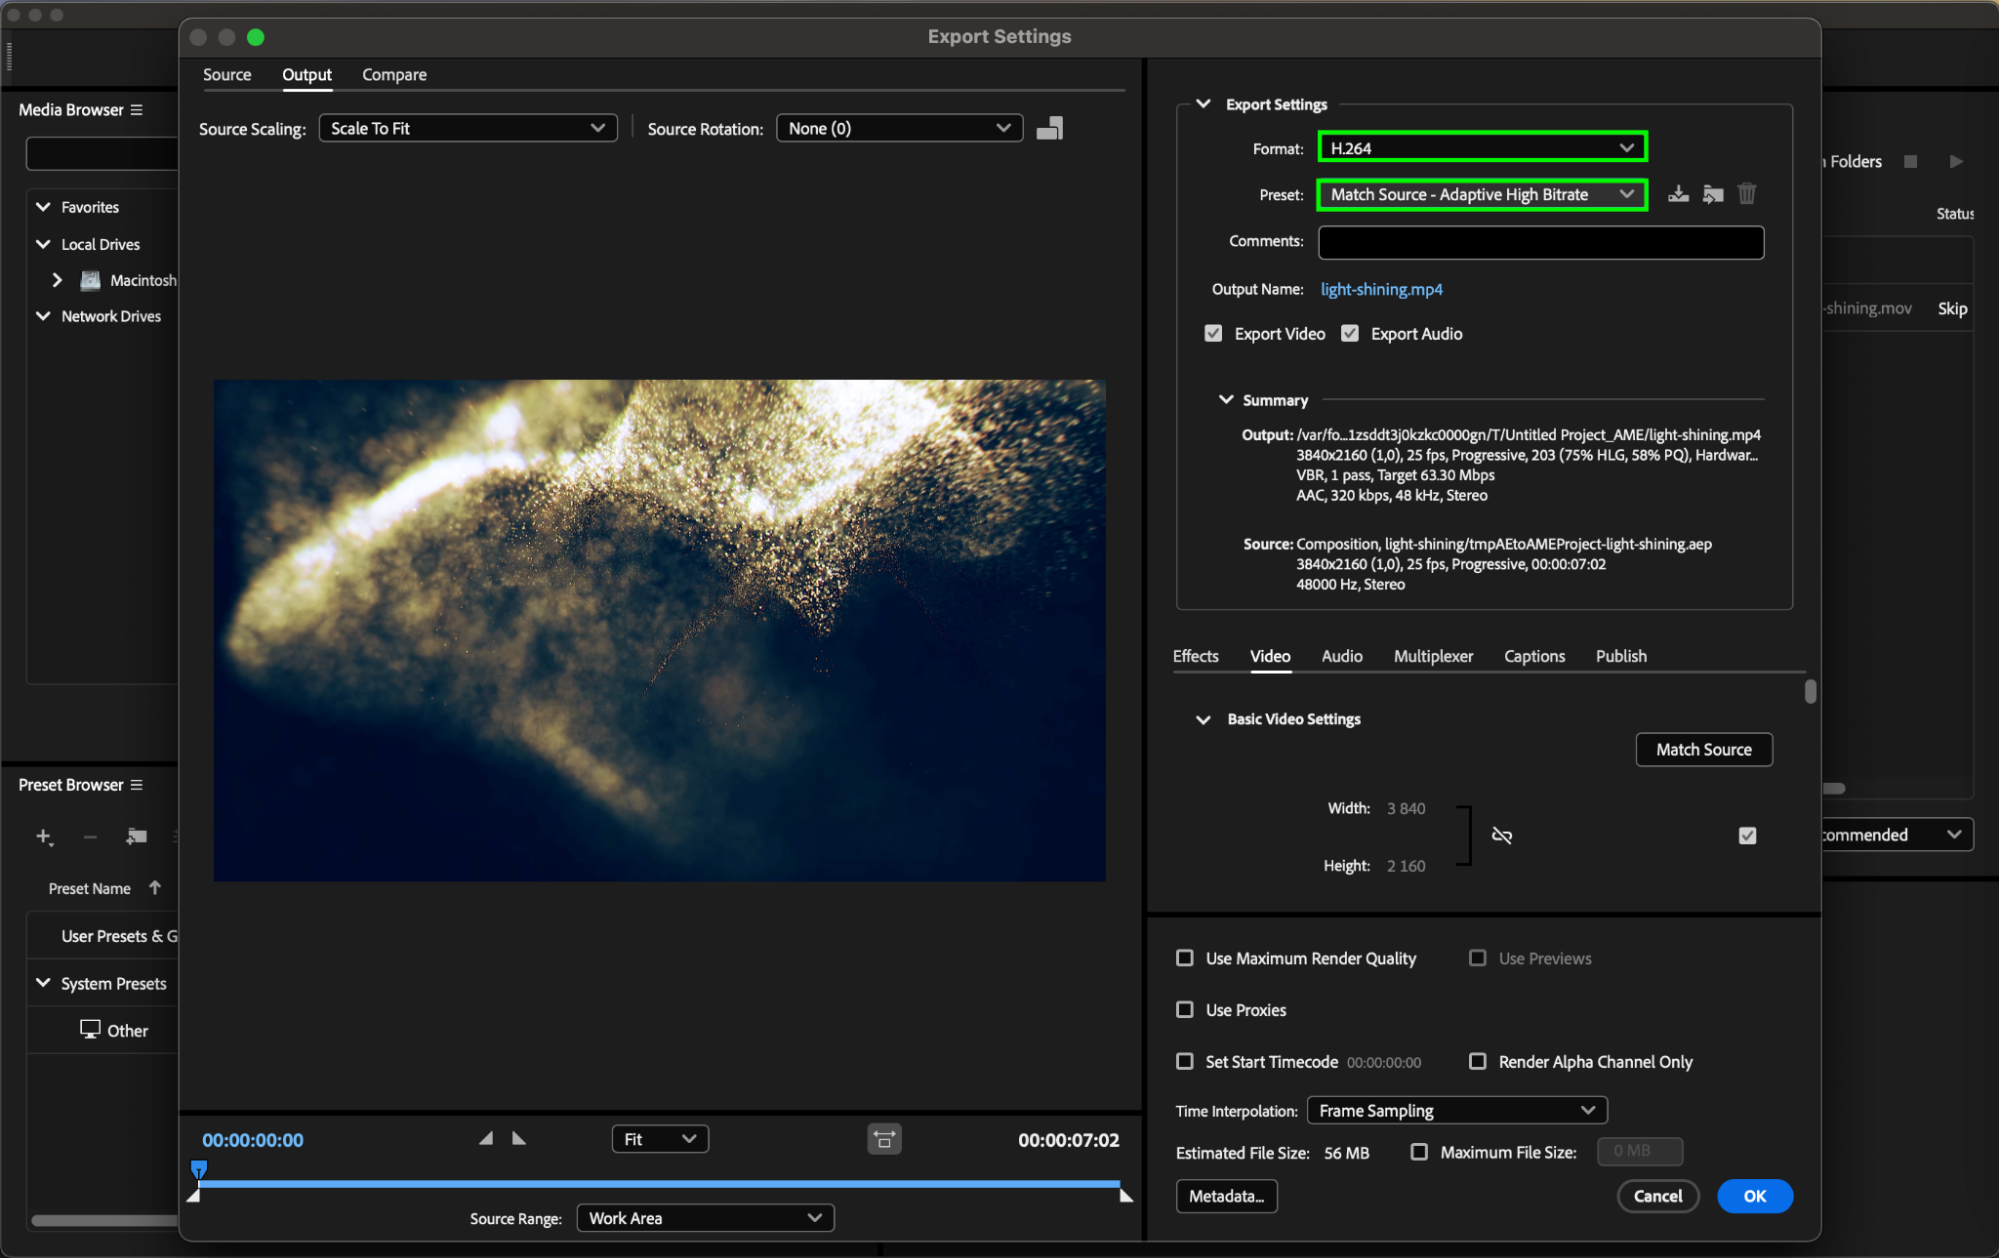
After Adobe Media Encoder opens, you will see your composition in the queue. To open the export settings, click on the format name displayed in the “Format” column next to your composition. This will allow you to customize various output settings, such as the file format (e.g., MP4, MOV), video codec, resolution, frame rate, and bit rate. Adjust these settings to ensure that your final output meets the required quality and format for your project.
Step 4: Set the Output Destination
Next, specify the destination folder where you want to save your rendered file. Click on the “Output Name” link and choose your preferred file location. This ensures that your file is stored in an organized manner and easy to find after the rendering is complete.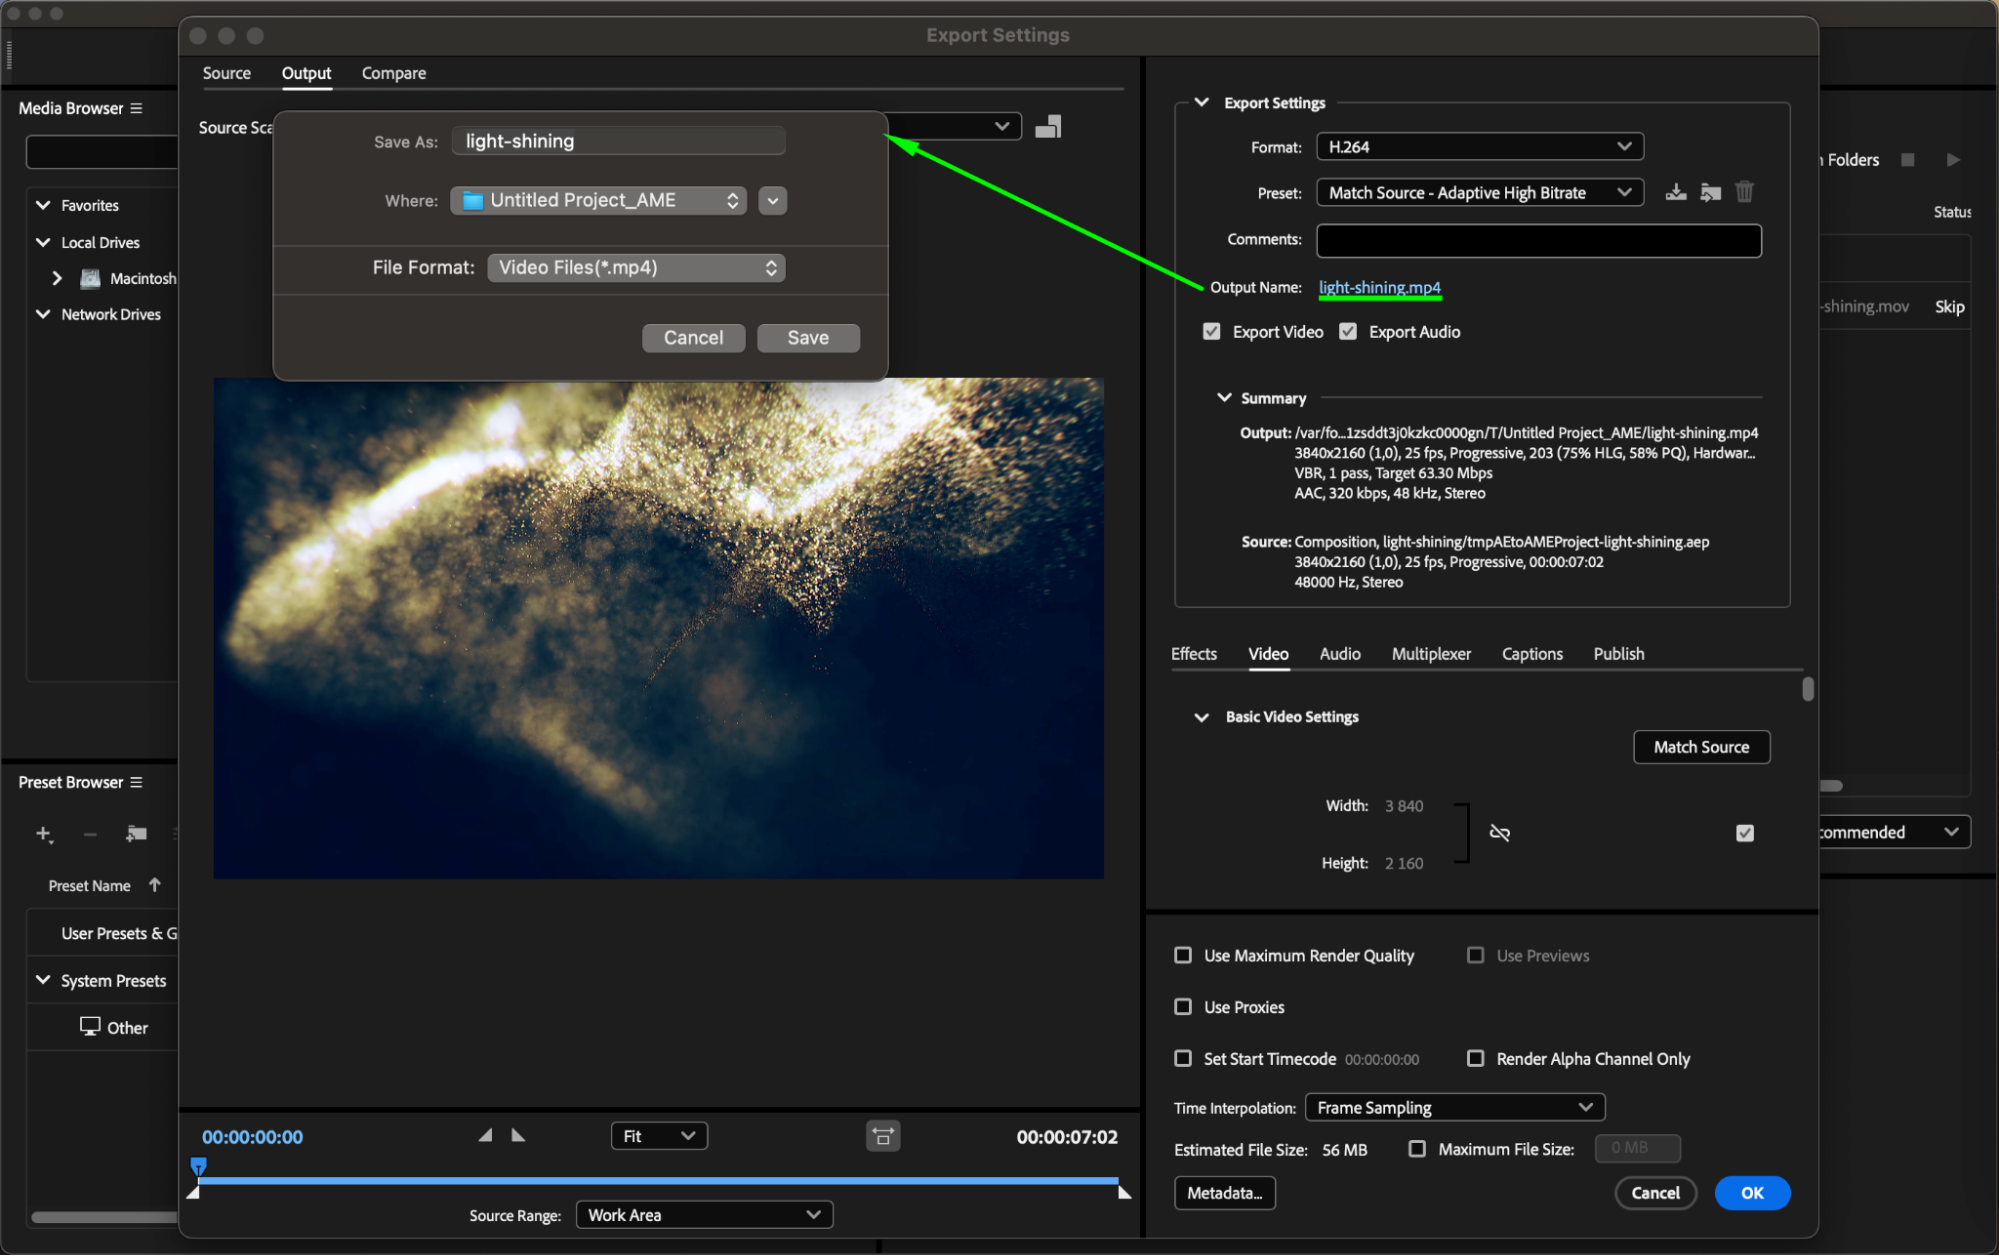
Get 10% off when you subscribe to our newsletter

Step 5: Start the Rendering Process
Once all your settings are in place, press the “Play” button located at the top right corner of the Media Encoder Queue panel to start the rendering process. Adobe Media Encoder will begin encoding the file based on the composition you’ve added from After Effects. You can monitor the progress in the queue, including the estimated time remaining, status, and any additional details about the export.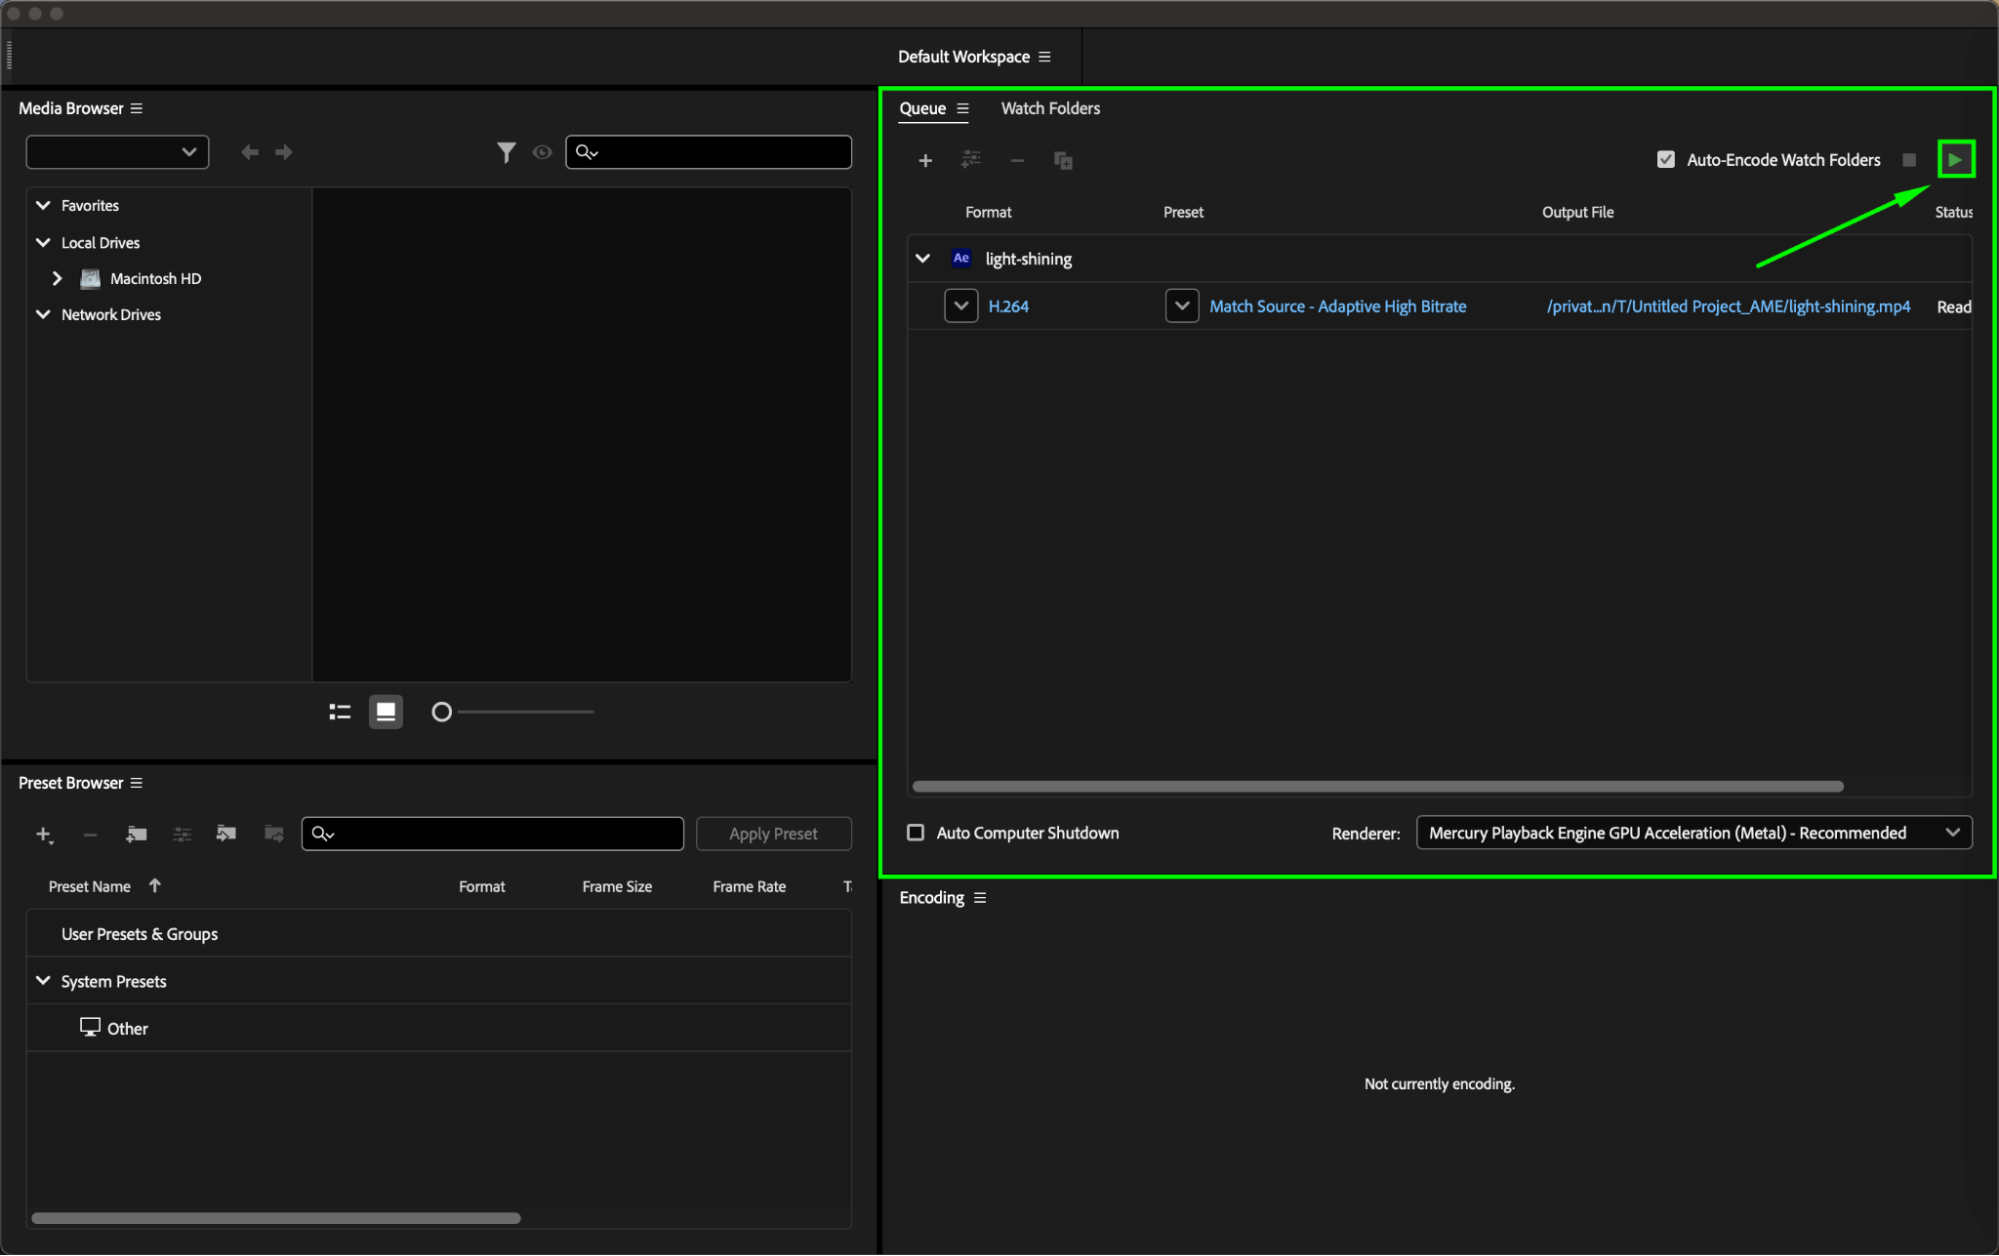
Get 10% off when you subscribe to our newsletter

Monitor the encoding queue, which displays the progress of the render, estimated time remaining, and other useful details. You can add more compositions to the queue while Media Encoder processes your file in the background.
Conclusion: Efficient Workflow with Linked After Effects and Media Encoder
By following these steps, you can effortlessly link Adobe Media Encoder to After Effects, making the rendering and export process much more efficient. This method allows you to render your projects while continuing to work on new compositions in After Effects, maximizing your productivity.
Furthermore, you can batch multiple compositions in the queue for simultaneous rendering, saving you time and allowing Media Encoder to handle the workload while you focus on creative tasks. Whether you’re working on short videos or complex motion graphics, linking Media Encoder to After Effects streamlines the process and ensures high-quality output.
Start using this workflow today, and take your video production efficiency to the next level!


