A Step-by-Step Guide to Linking Media Files in Adobe After Effects
Understanding the Importance of Linking Media in After Effects
In Adobe After Effects, linking media files is an essential process that helps you seamlessly incorporate external assets like images, videos, and audio into your projects. Properly linking these files ensures smooth playback and efficient rendering, while also making your editing workflow more streamlined. In this guide, we’ll walk you through the step-by-step process of linking media in After Effects, from importing your assets to organizing them for optimal use.
Step 1: Launch After Effects and Import Your Media Files
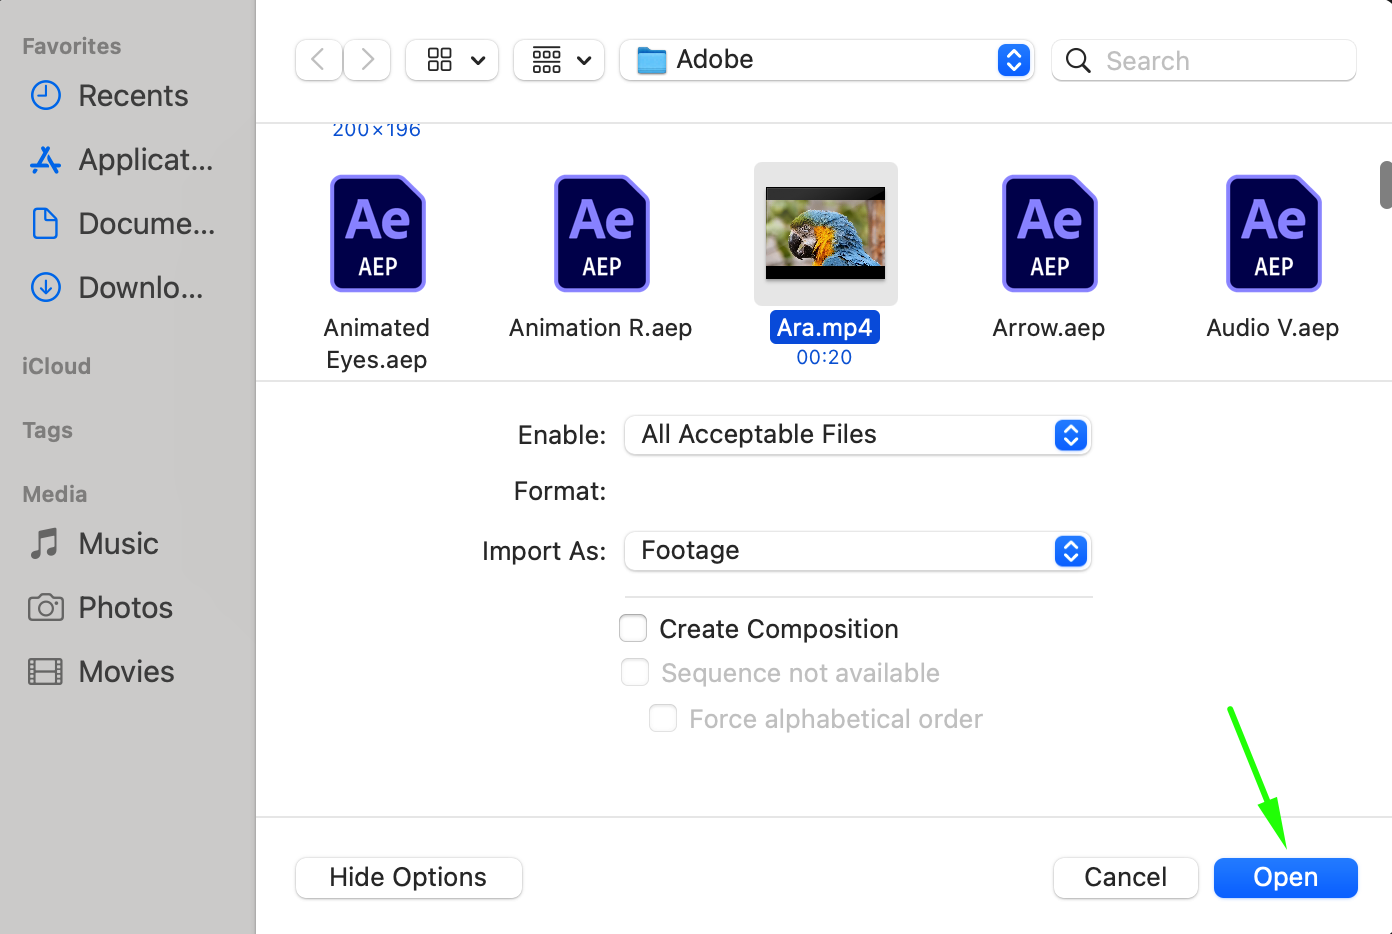
Start by launching After Effects on your computer. Once the software is open, go to File > Import > File. In the dialog box that appears, hold down the Ctrl/Cmd key and select all the audio, video, and image files you need for your project. After selecting the files, click Open. This action imports the chosen media into your After Effects project, where they will be visible in the Project panel.
 Step 2: Organize and Link Your Imported Media Files
Get 10% off when you subscribe to our newsletter

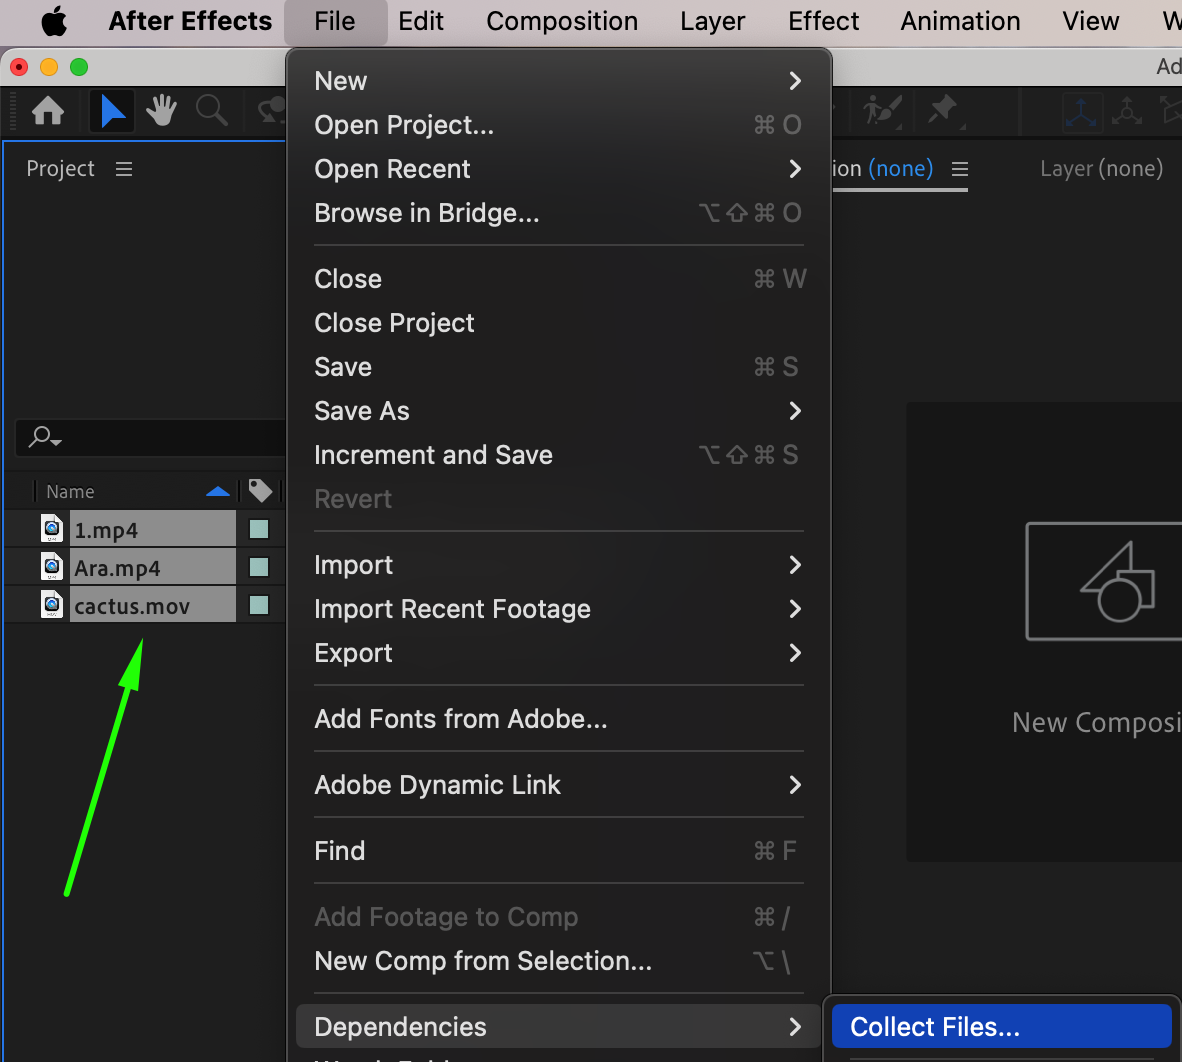
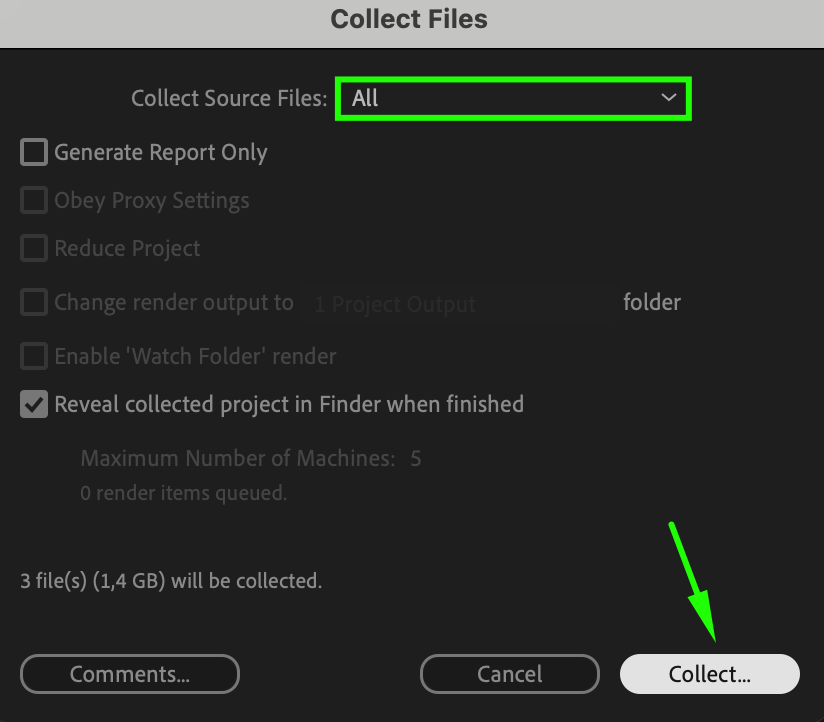
After importing, the media files will appear in the Project panel. To organize and link these files efficiently, select all of them in the panel by holding Shift and clicking on each file. Then, right-click on the selected files and navigate to File > Dependencies > Collect Files. In the window that opens, you’ll see options to collect source files, along with details on the amount of disk space required. This process consolidates all your media into a single location, ensuring that After Effects can easily access and link them during editing. Once ready, click Collect to proceed.
 Step 3: Choose a Location and Save Your Linked Media
In the next step, After Effects will prompt you to choose a name and location for your collected files. Select a directory on your computer where you want the files to be saved, and give the collected project a meaningful name. After finalizing these details, click Save. This action ensures that all your media assets are organized and linked within your project, reducing the risk of missing files and improving the overall editing workflow.
Step 4: Verify the Linked Media Files
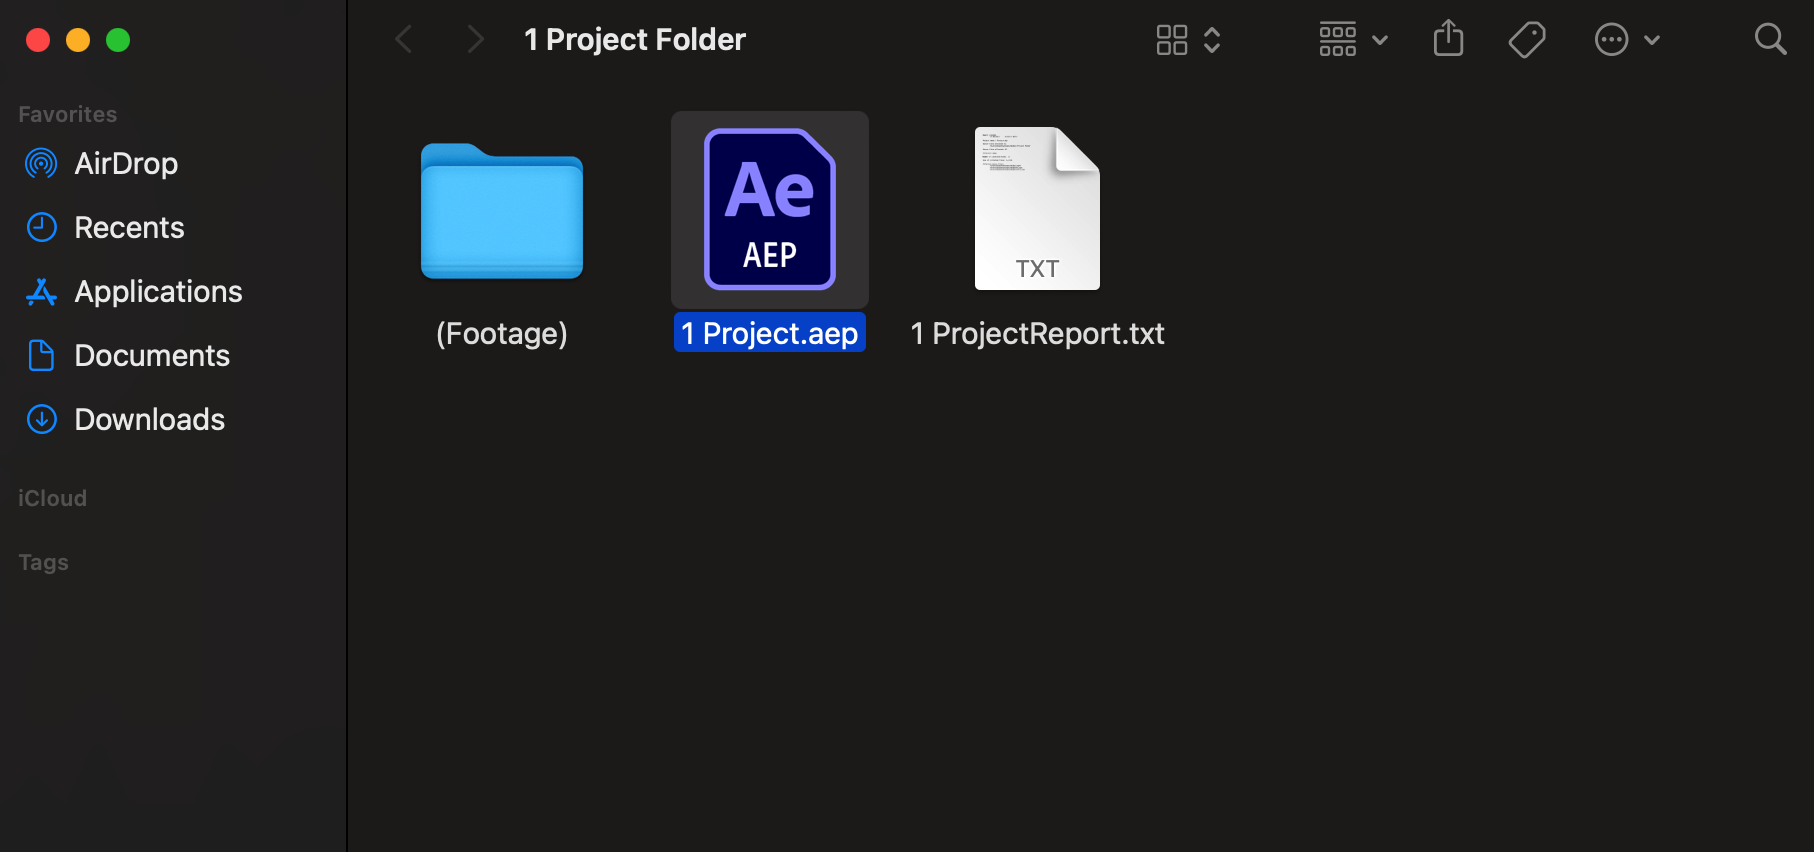
After saving, it’s important to verify that all your media files are correctly linked within your project. Navigate to the location where you saved the collected files and check that everything is in order.

Step 5: Start Using Linked Media in Your Compositions
With your media files linked and organized, you can now begin using them in your compositions. Drag and drop the files from the Project panel onto the timeline or into new compositions as needed. Because the media is properly linked, you’ll experience smoother playback and fewer issues during rendering, making your editing process more efficient and enjoyable.
Conclusion
Linking media files in After Effects is a fundamental step in ensuring a smooth and efficient video editing experience. By following these steps, you can organize and manage your assets effectively, reducing the risk of missing files and improving the overall quality of your projects. Whether you’re working on a simple edit or a complex composition, properly linking your media is key to achieving professional results. Now that your media is linked and ready, you can focus on the creative aspects of your project and bring your vision to life in After Effects.


