How to Create a GIF Loop in After Effects
Introduction to Looping GIFs in After Effects
So, you want to know how to loop GIFs in After Effects? Well, you’re in the right place! In this detailed guide, I’ll walk you through the step-by-step process of creating seamless and captivating loops in After Effects, so your GIFs can play endlessly and leave a lasting impression on your audience.
Get 10% off when you subscribe to our newsletter

First things first, let’s talk about the concept of loops in animation. A loop is a repeating sequence of frames that seamlessly transitions from the end to the beginning, creating a continuous motion without any visible gaps or breaks. By mastering the art of loops in After Effects, you can enhance the flow of your GIFs and make them appear fluid and uninterrupted.
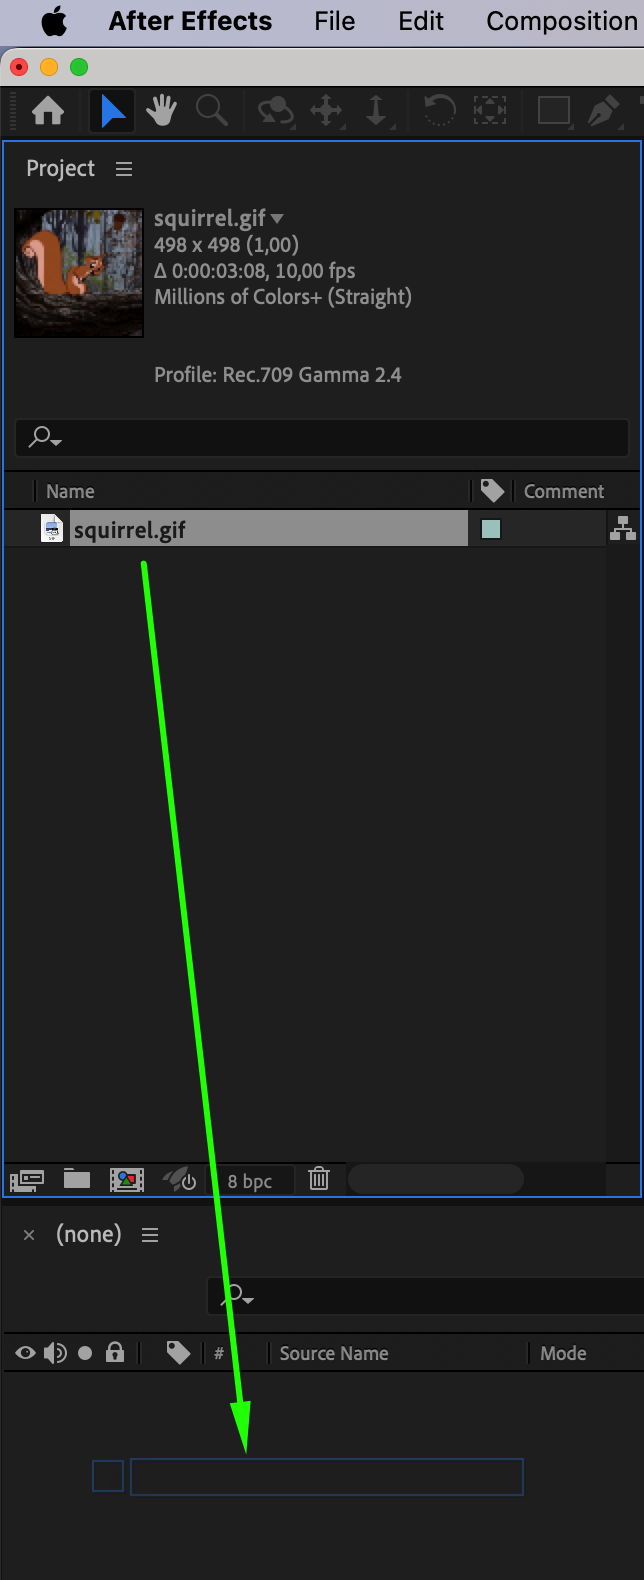
1. Import Your GIF
To get started, import your GIF file into After Effects by going to File > Import > File. Once your GIF is imported, it will appear in the project panel. Drag the file to the timeline panel to start working with it.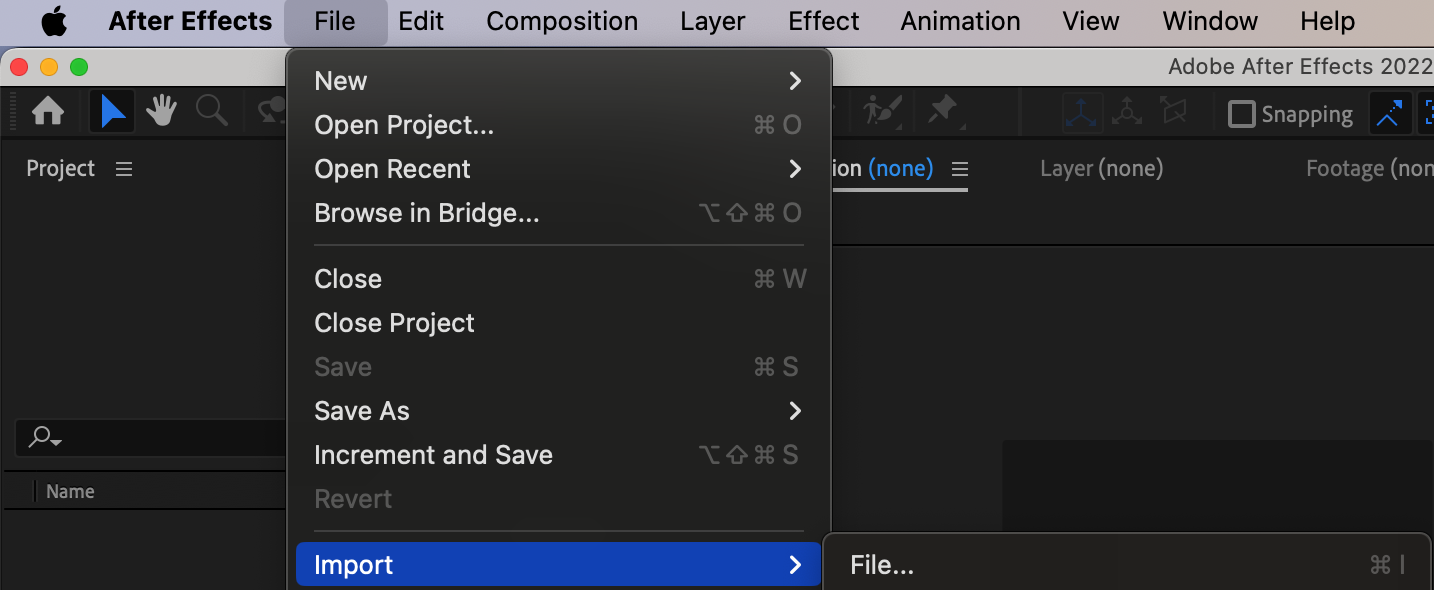
 2. Adjust Composition Duration
Now, you’ll need to adjust the duration of your composition to accommodate the loop. Select Composition from the menu and then choose Composition Settings. Increase the duration to a value that allows for the desired loop length. Keep in mind that the longer the loop, the larger the final file size of your GIF will be.

 3. Enable Time Remapping
Right-click on the GIF layer and select Time > Enable Time Remapping from the submenu.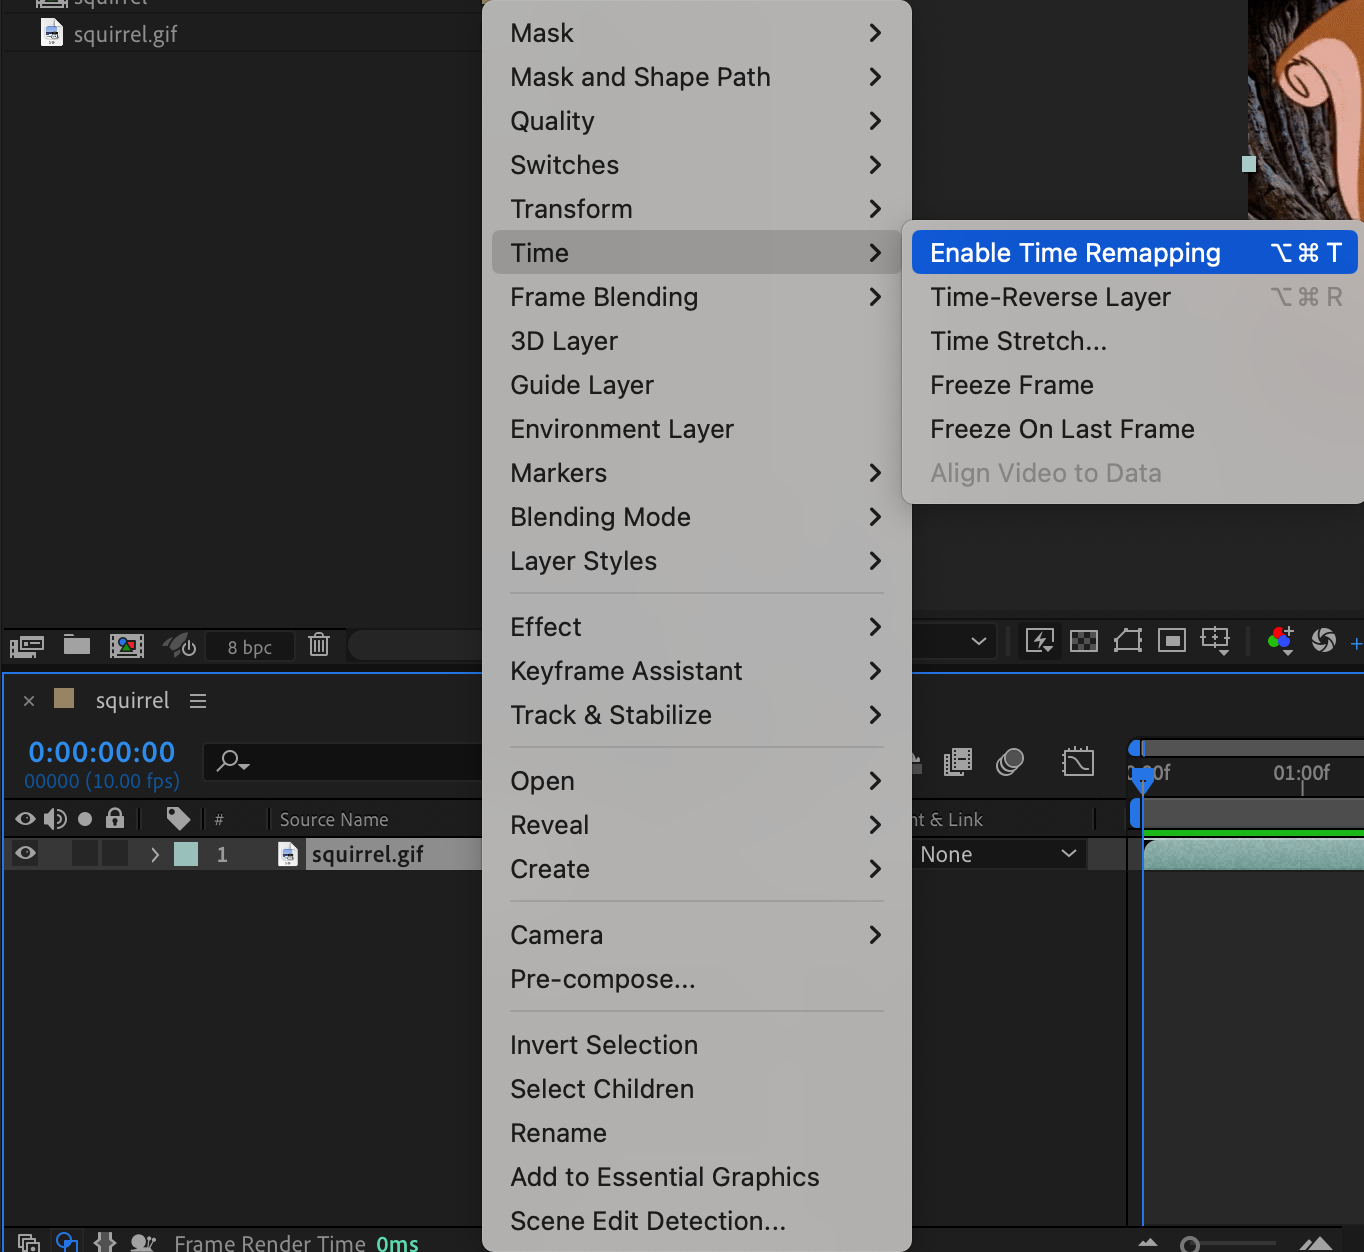 4. Add Expression for Looping
Alt/Option-click on the stopwatch icon next to the newly appeared Time Remap parameter. 5. Apply LoopOut Expression
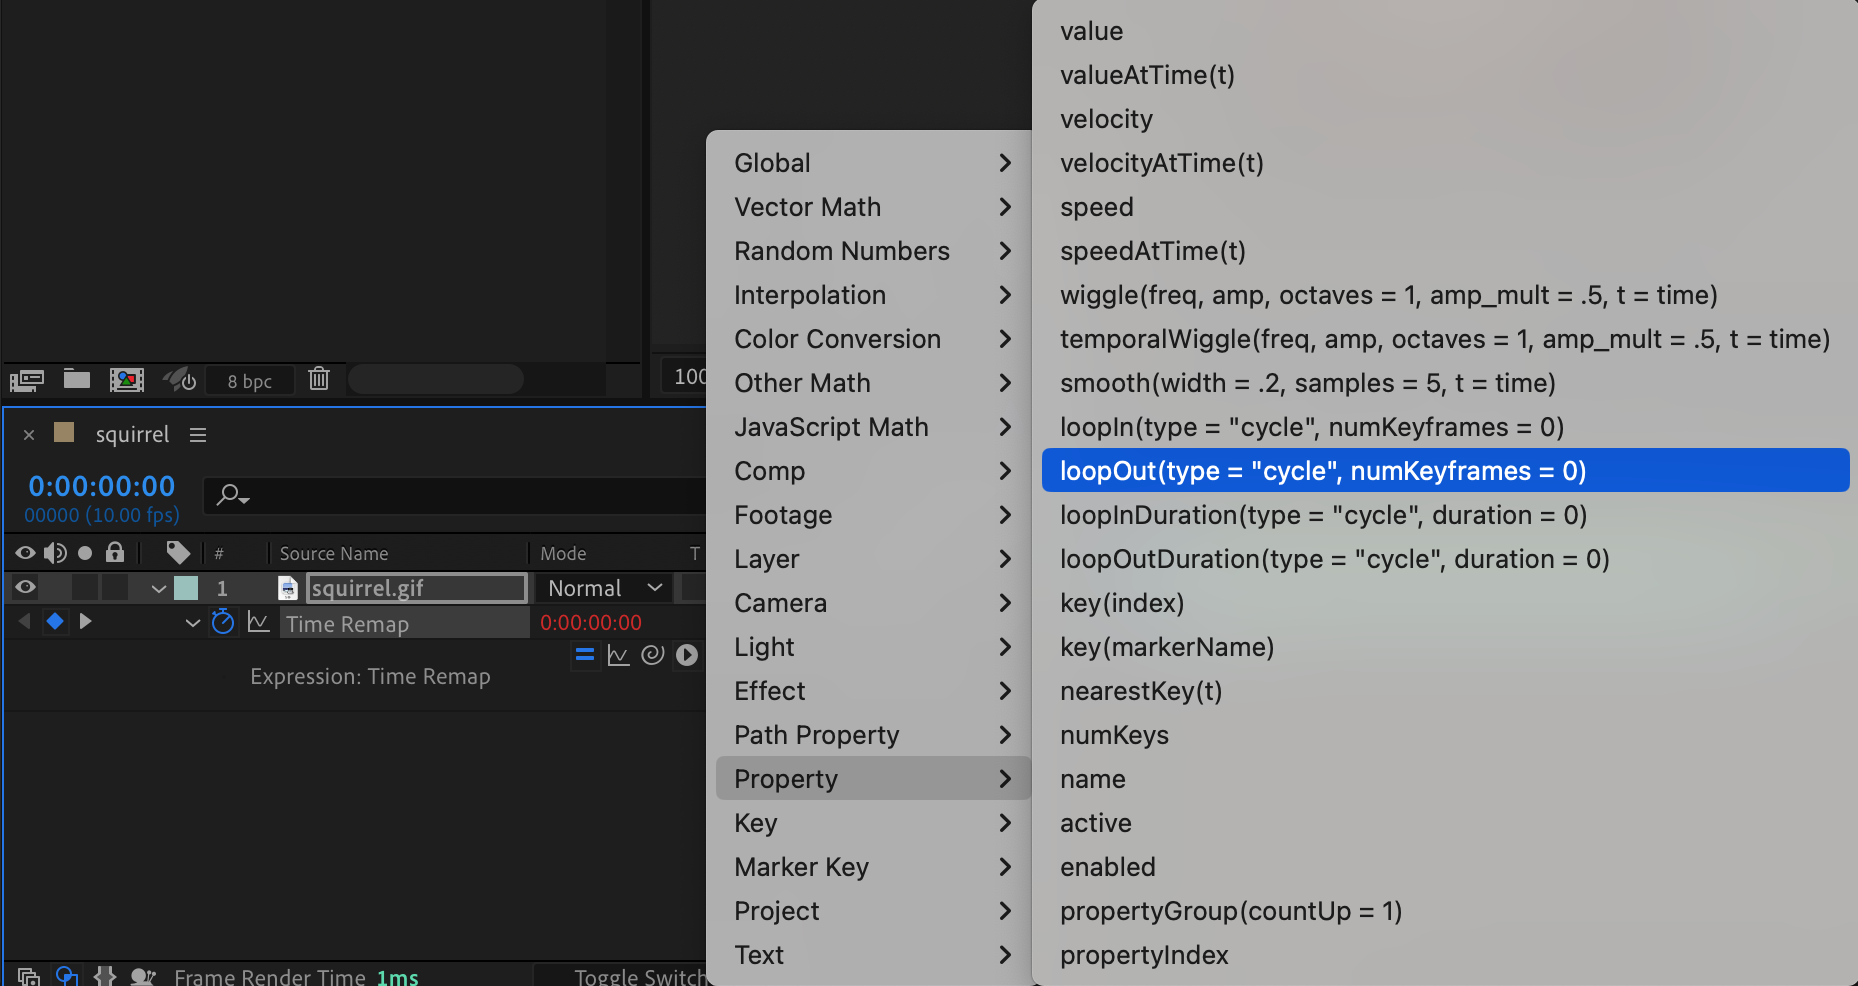
Click on the small triangle to open the expression options and select Property > LoopOut from the submenu.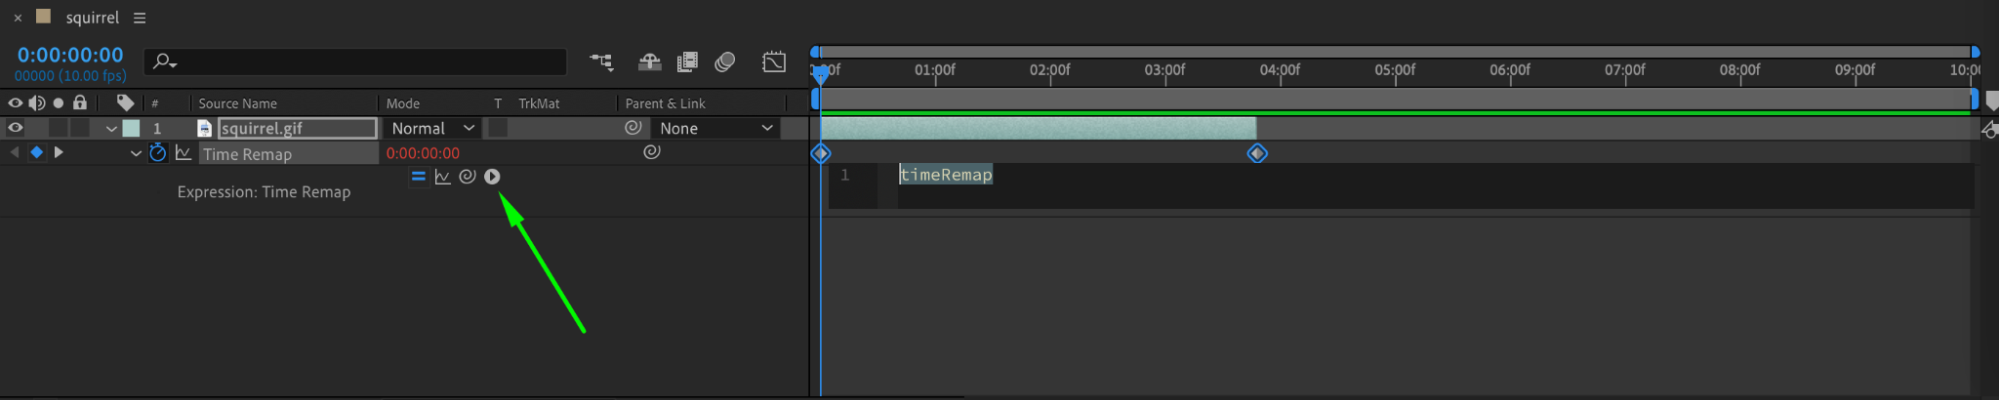
 6. Extend Layer Duration
You will see the expression automatically added in the expression field. Press Enter, then right-click on the layer’s end and drag it to the right to extend its duration. 7. Export Your Looped GIF
Get 10% off when you subscribe to our newsletter
Finally, it’s time to export your looped GIF. Go to Composition > Add to Render Queue. In the Render Queue panel, select your desired output module (GIF) and customize the settings to fit your requirements. Pay close attention to the loop settings in the output module options, as this determines how the GIF will loop once exported.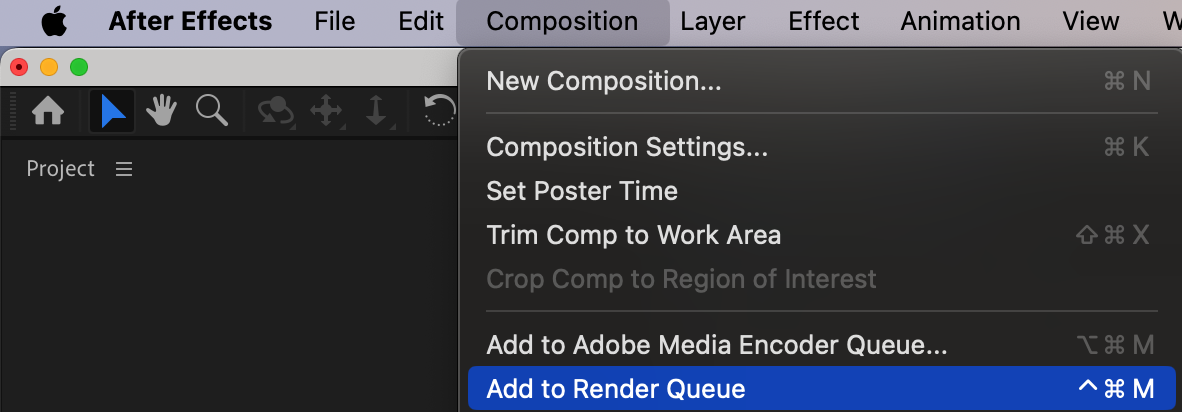
 Conclusion
Get 10% off when you subscribe to our newsletter
When you’re ready, simply click on Render to export your looped GIF. Choose a suitable destination for your file and save it. After a short processing time, your looping GIF will be ready to share with the world.
And there you have it! With this step-by-step guide, you now have the knowledge and tools to create captivating and seamless loops in After Effects. So go ahead, unleash your creativity, and bring your GIFs to life with mesmerizing loops. Happy looping!
Our Bestsellers


