How to Create a 3D Movie in After Effects
Introduction to Making 3D Movies in After Effects
Are you ready to dive into the exciting world of 3D movie-making? With Adobe After Effects, you can harness powerful tools to craft visually stunning 3D films. Whether you’re aiming to tell a story, create an animated short, or make visual effects for a larger production, this guide will walk you through the essential steps, from conceptualization to final rendering.
Get 10% off when you subscribe to our newsletter

Step 1: Develop Your Concept and Storyboard
Before jumping into After Effects, take the time to develop your movie’s concept and story. Create a storyboard outlining each scene and the key visual moments. This roadmap will guide your workflow, ensuring that your scenes are coherent and aligned with your vision. Storyboarding also helps you visualize camera angles, object movements, and transitions, which are crucial in 3D movies.
Step 2: Gather and Import Assets
Next, gather the assets you’ll need for your project. These could include 3D models, images, textures, audio files, and video clips. If you’re using external 3D models, ensure they’re compatible with After Effects. To import your assets, navigate to File > Import > File, and select the files you want to include in your project. Organizing your files in separate folders within After Effects can help maintain a smooth workflow as your project grows.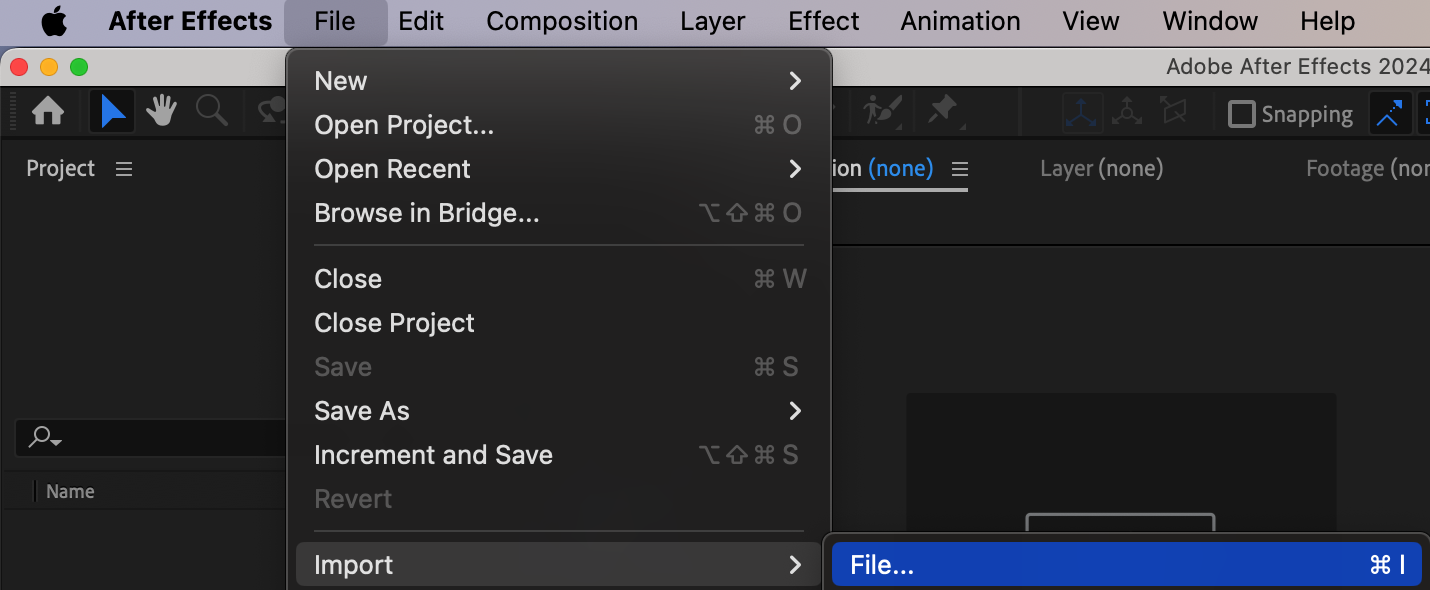
Get 10% off when you subscribe to our newsletter

Step 3: Place Imported Files on the Timeline
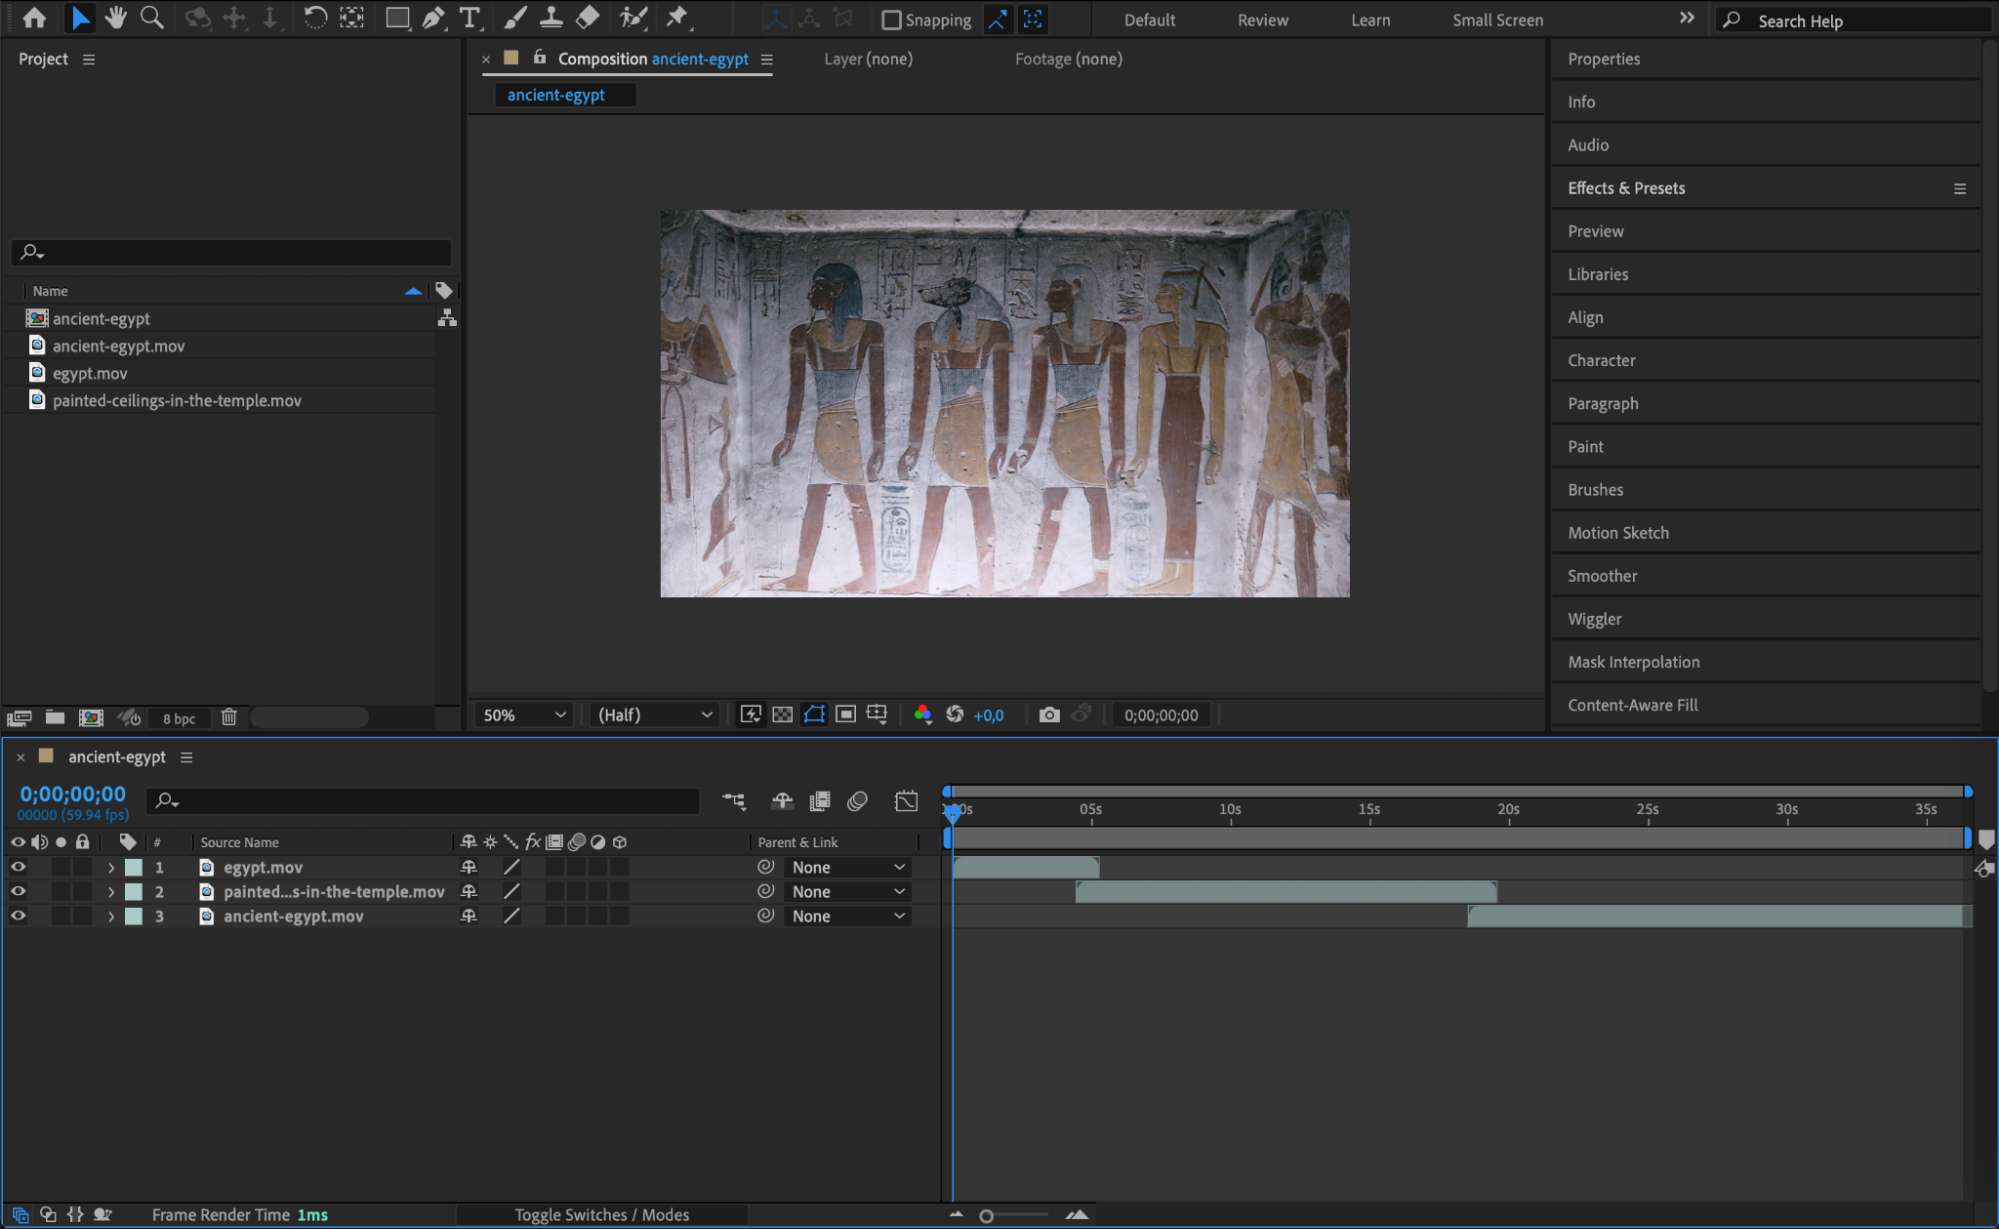
After importing your assets, place them onto the timeline. Drag and drop the files from your project panel to the timeline to start arranging layers. Organize them in a sequence that corresponds to your storyboard. Pay attention to the layer order – this affects the visual stacking of elements in 3D space. Proper layer organization ensures smoother editing when you start manipulating camera angles and effects.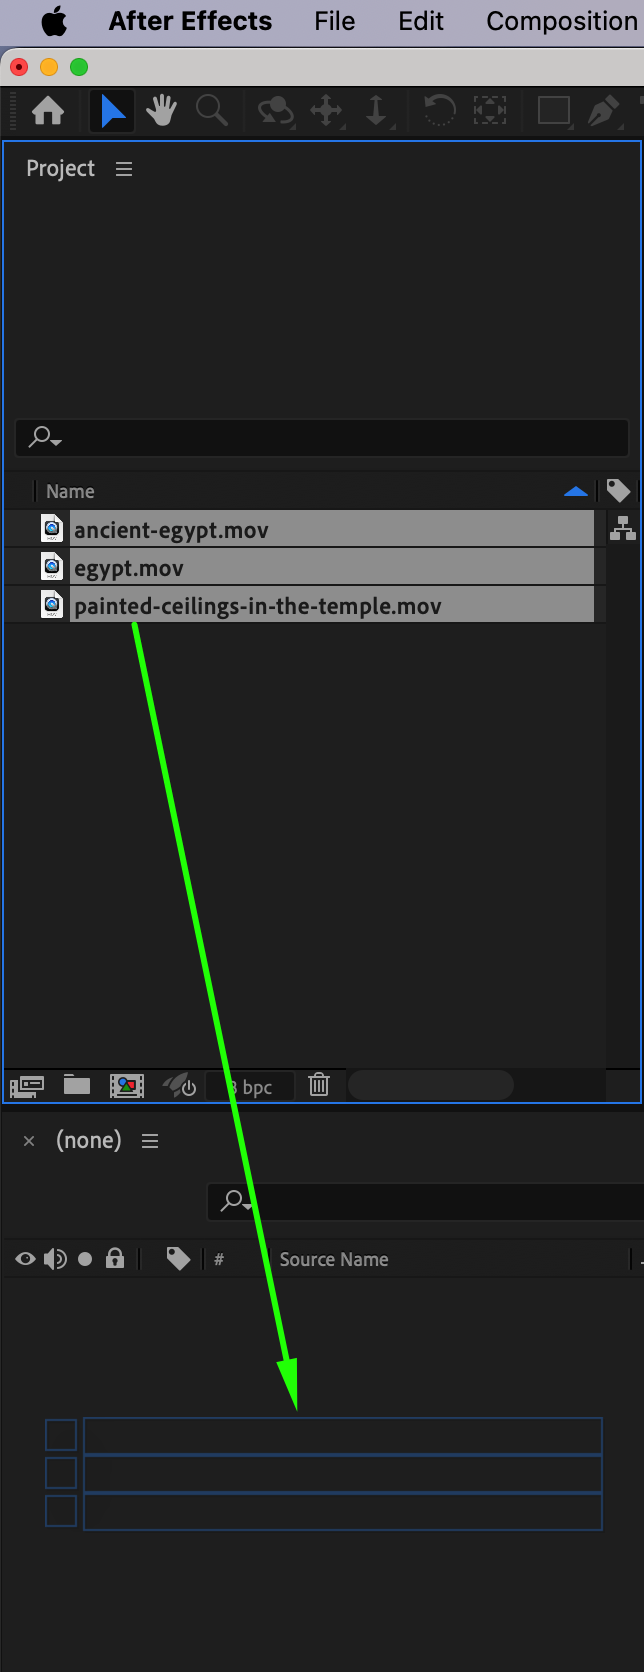

 Step 4: Create a Camera Layer
Get 10% off when you subscribe to our newsletter

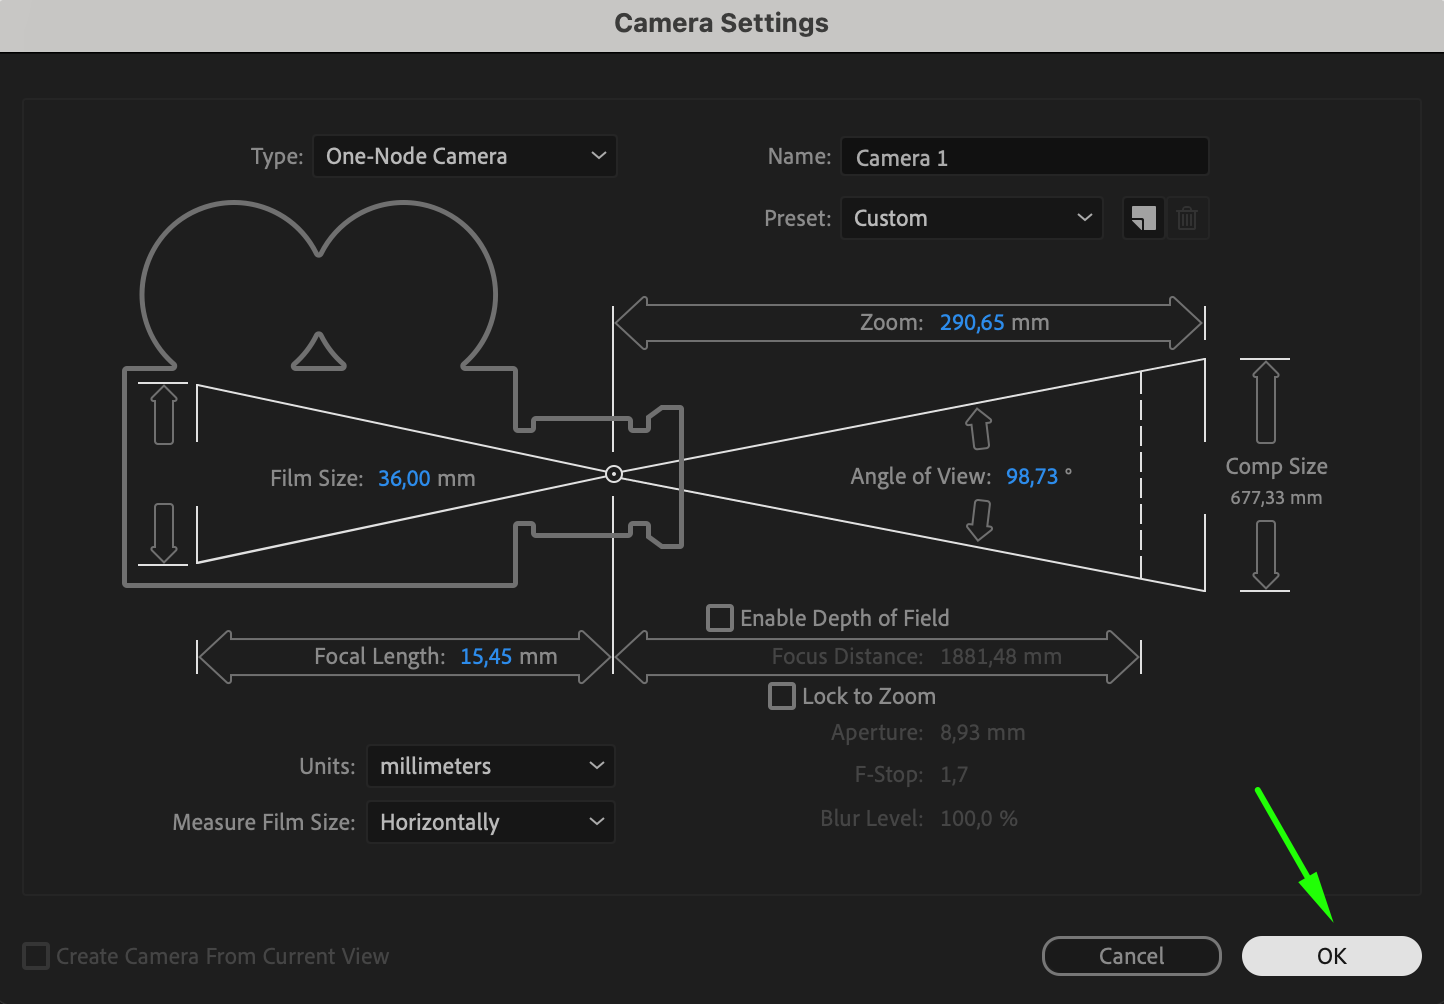
Adding a camera is essential for creating a dynamic 3D space. To do this, go to Layer > New > Camera. This step allows you to set up perspectives, angles, and depth of field. You can adjust parameters like focal length and aperture for more cinematic results. The camera layer adds the illusion of movement within your 3D scene, giving life to your movie by animating different angles and zooms.
 Step 5: Convert Layers to 3D
Get 10% off when you subscribe to our newsletter

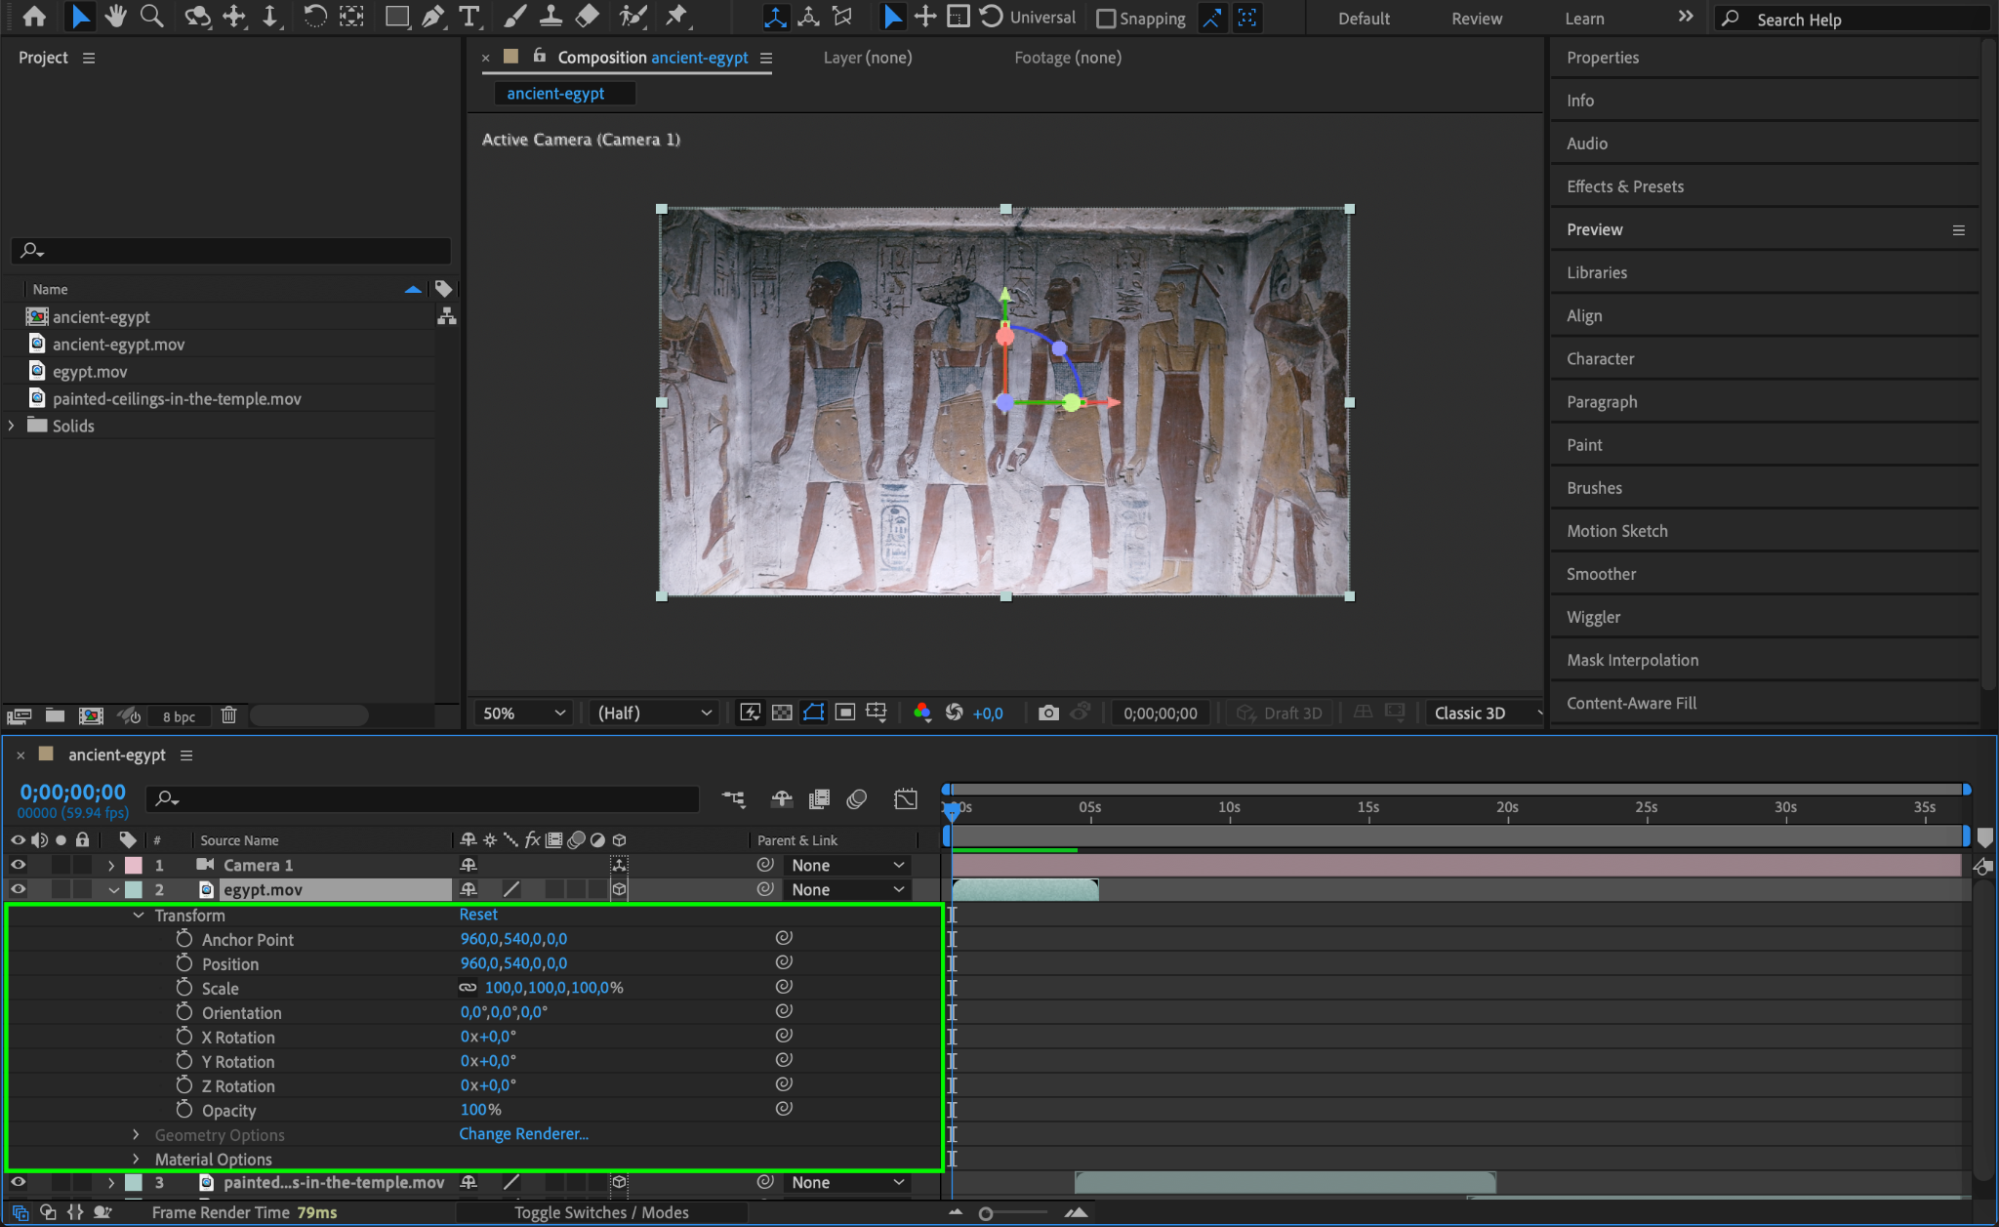
To interact with your assets in 3D space, you need to convert each layer to 3D. Click the cube icon located next to each layer in the timeline to activate 3D properties. Once enabled, you can move layers along the X, Y, and Z axes. You can also rotate and scale these layers in three dimensions, providing full control over how each object interacts with the camera and other elements in your scene.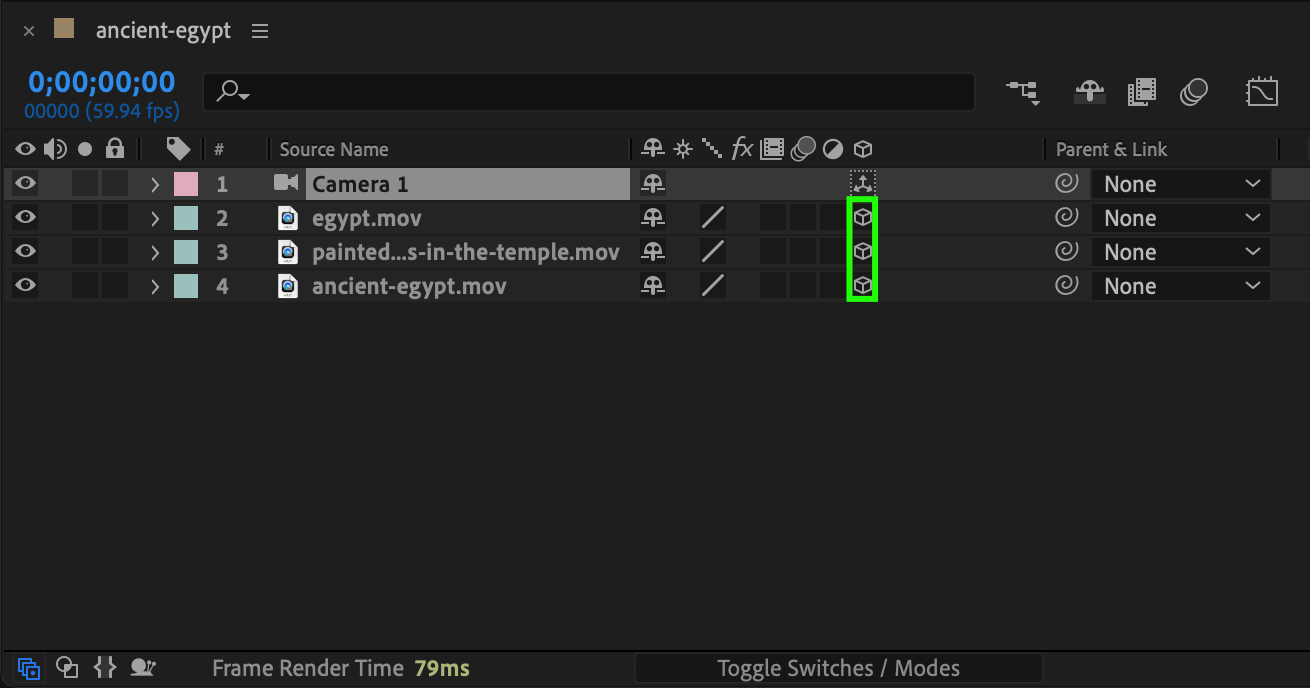
 Step 6: Keyframe Camera Movements
Get 10% off when you subscribe to our newsletter

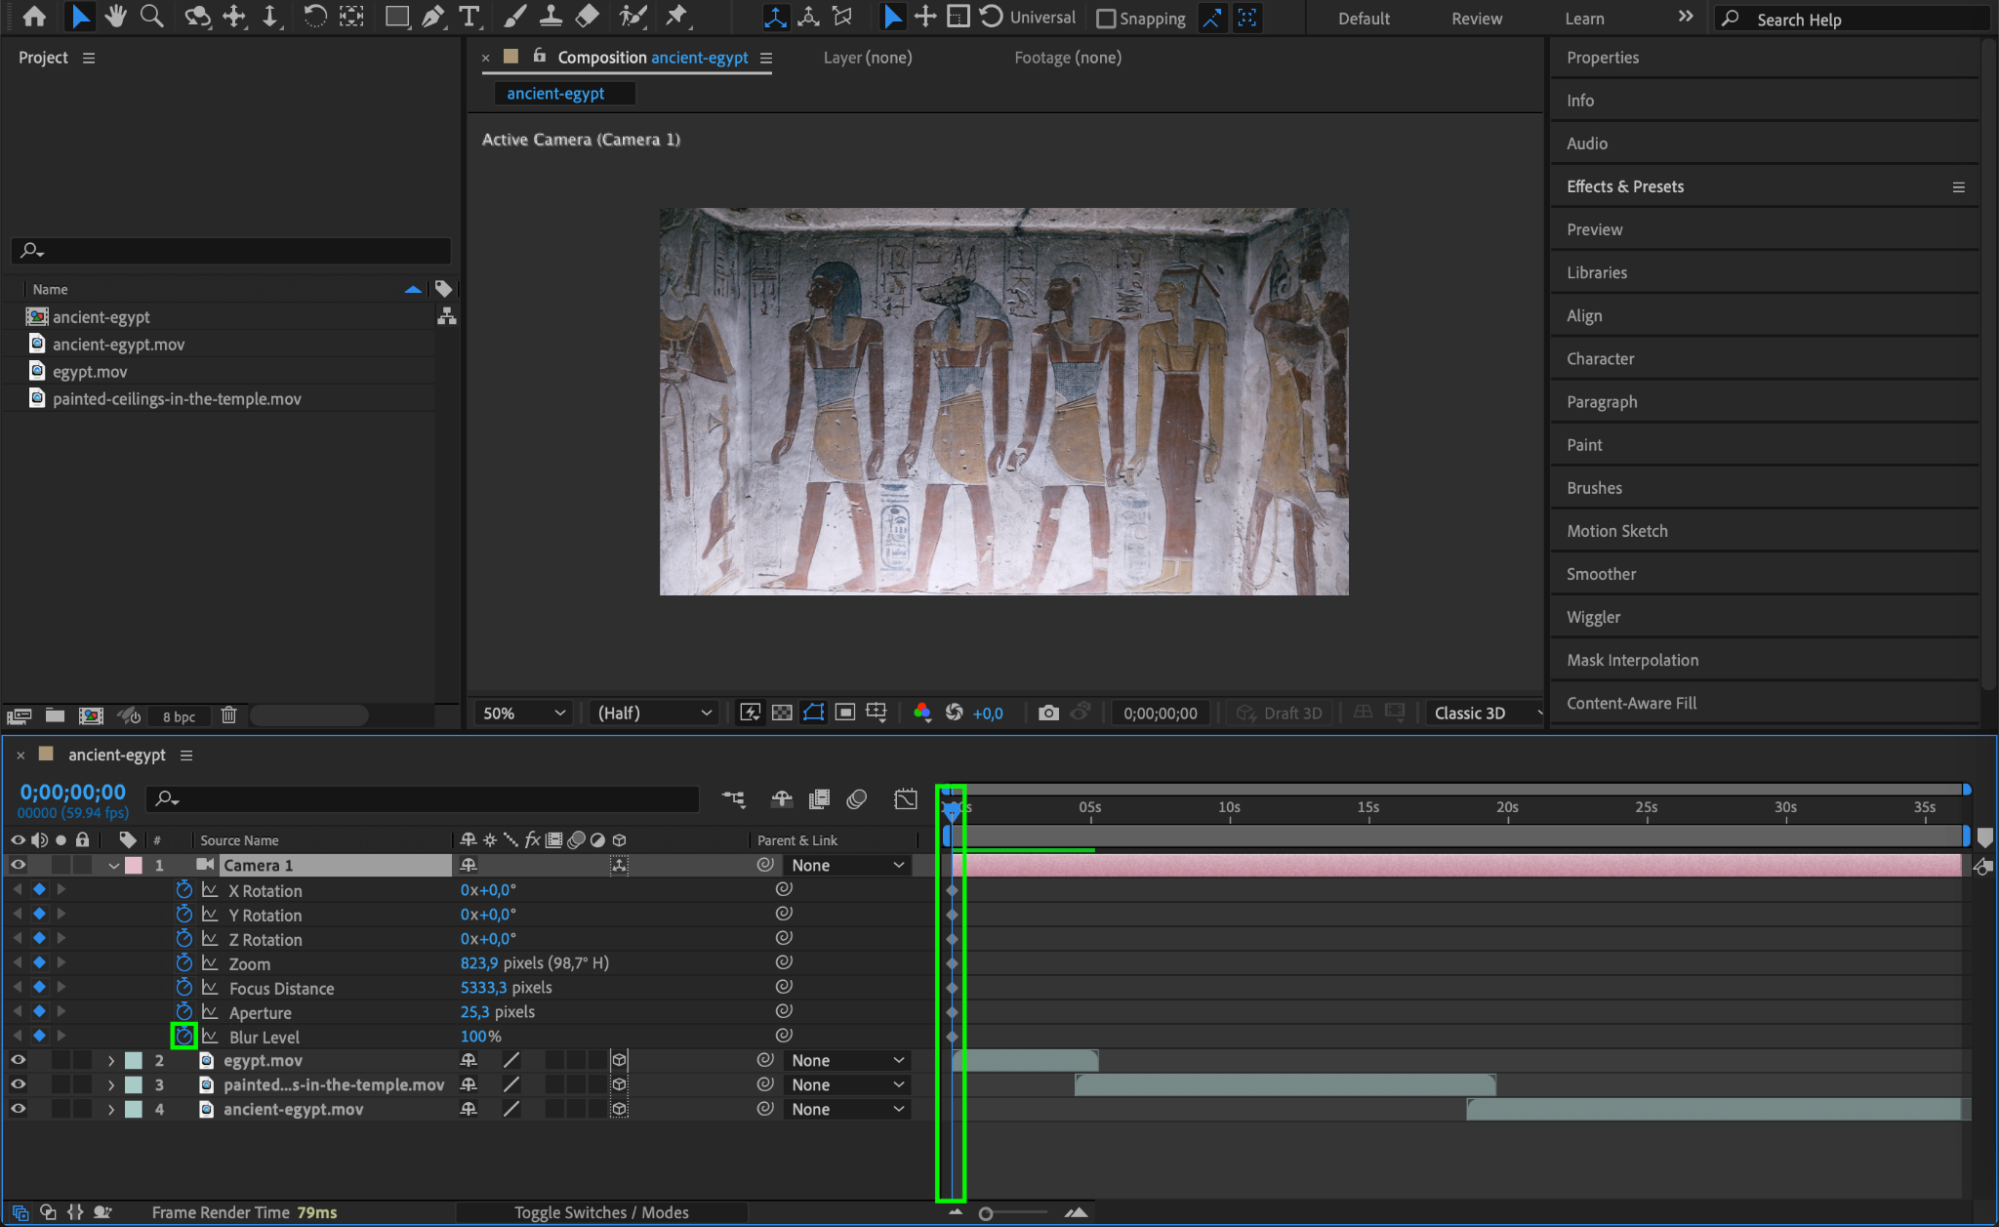
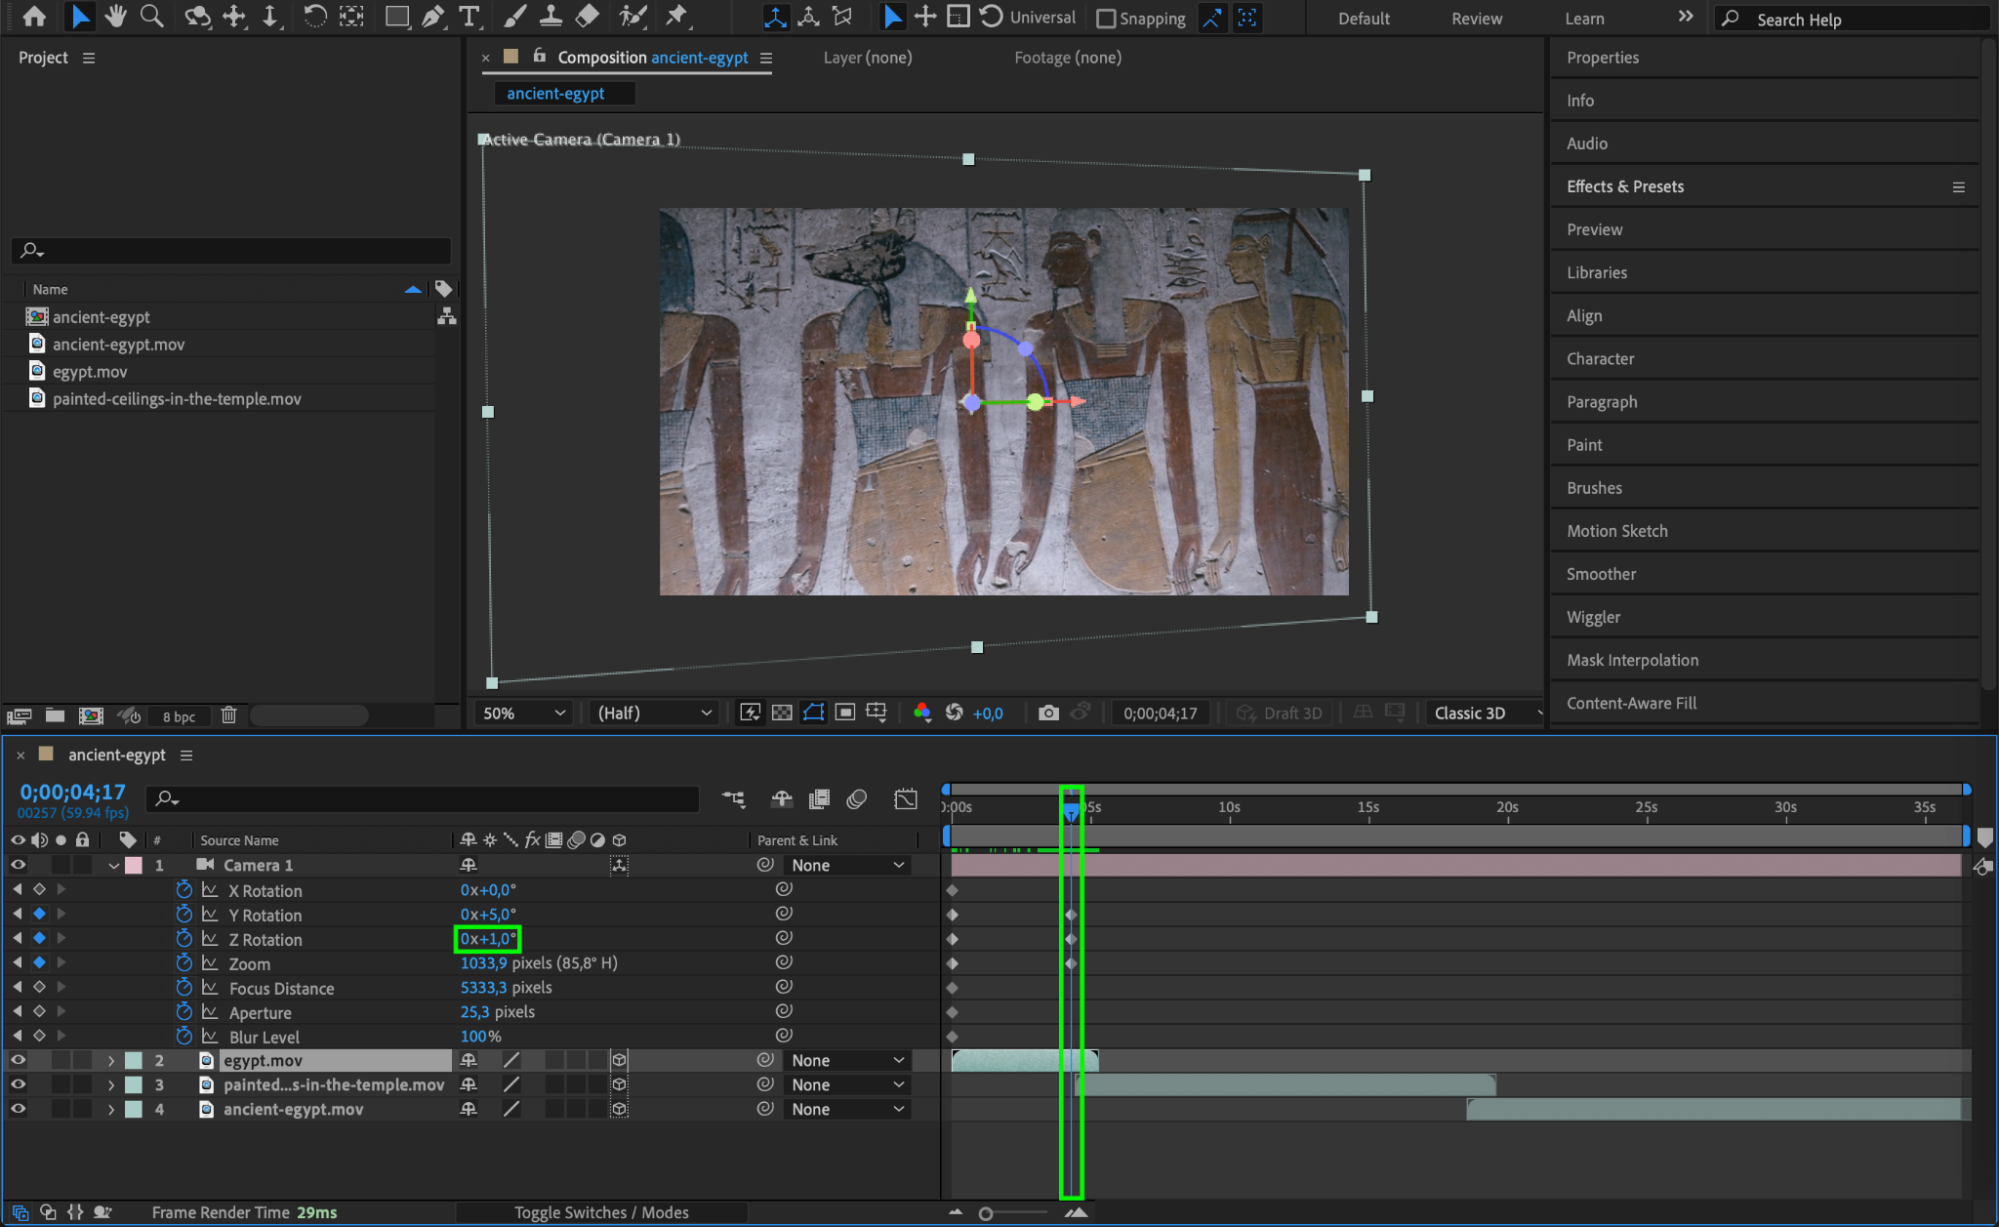
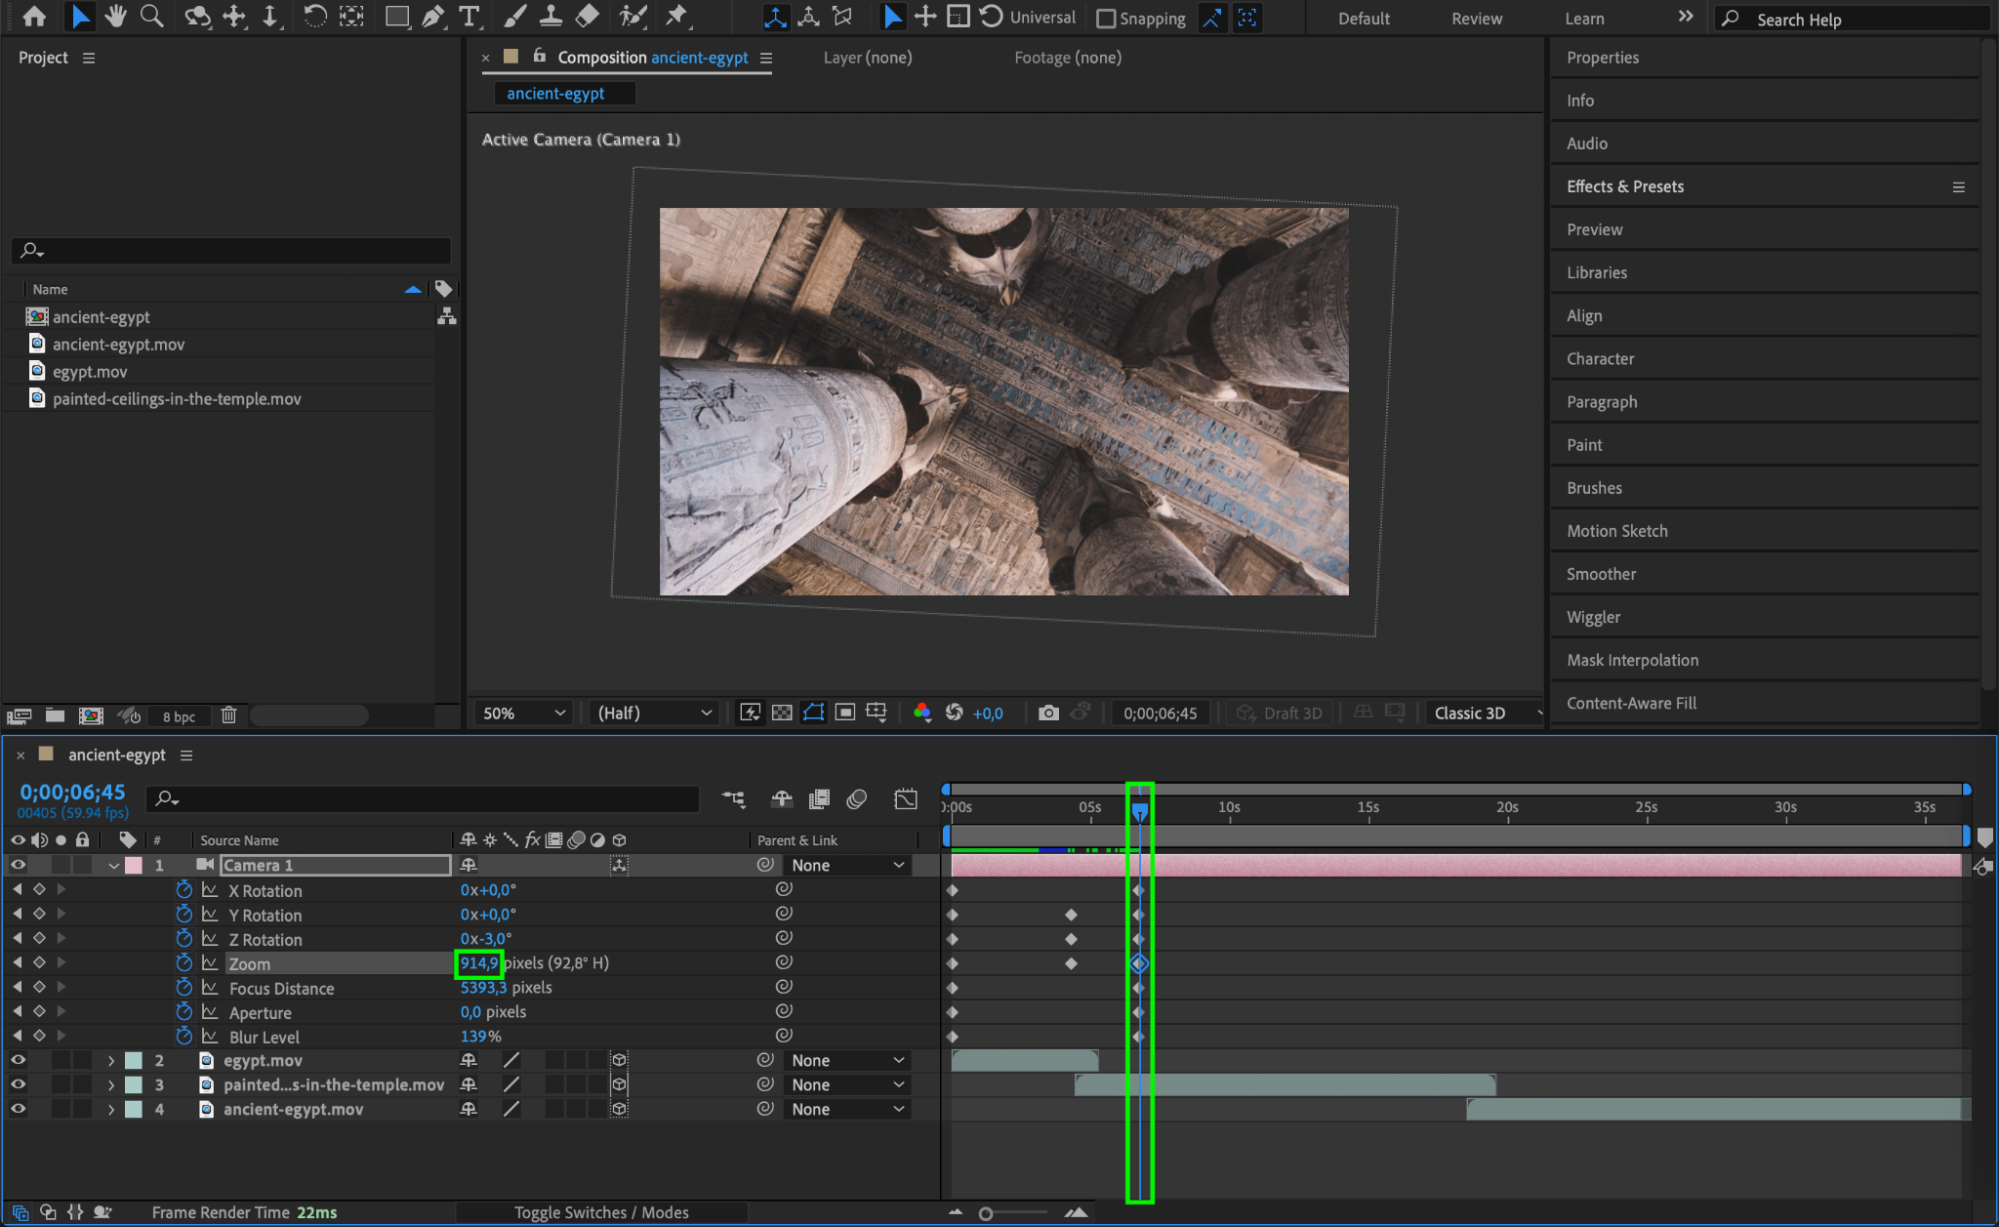
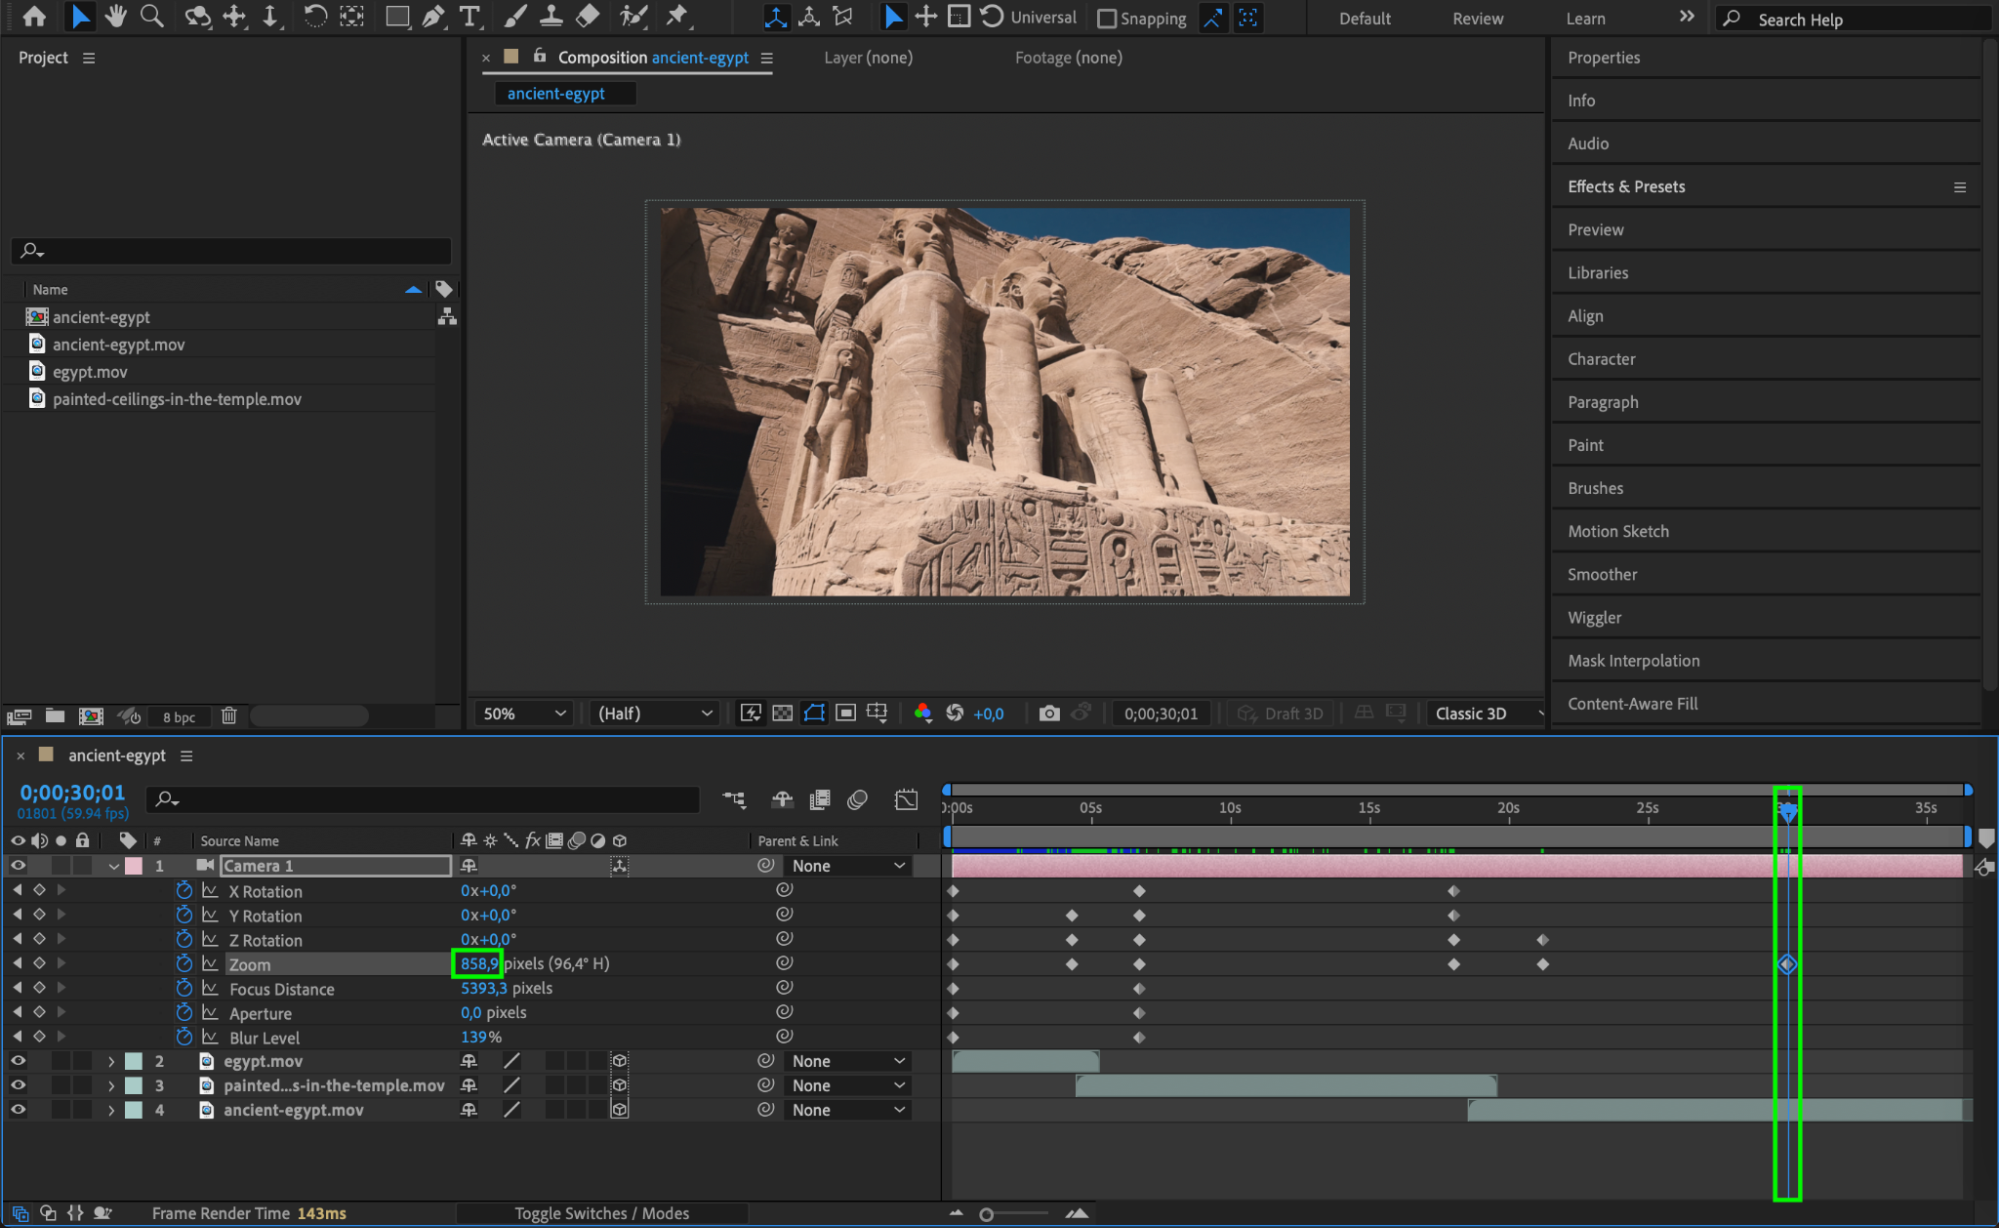
Now that your camera is in place, start animating its movements. Use keyframes to define camera actions such as panning, zooming, or rotating. To set a keyframe, click the stopwatch icon next to the parameter you want to animate (e.g., zoom, rotation). By adjusting these keyframes along the timeline, you create smooth transitions and dynamic movement, adding depth and motion to your 3D movie.
Get 10% off when you subscribe to our newsletter

Step 7: Add Lights and Shadows
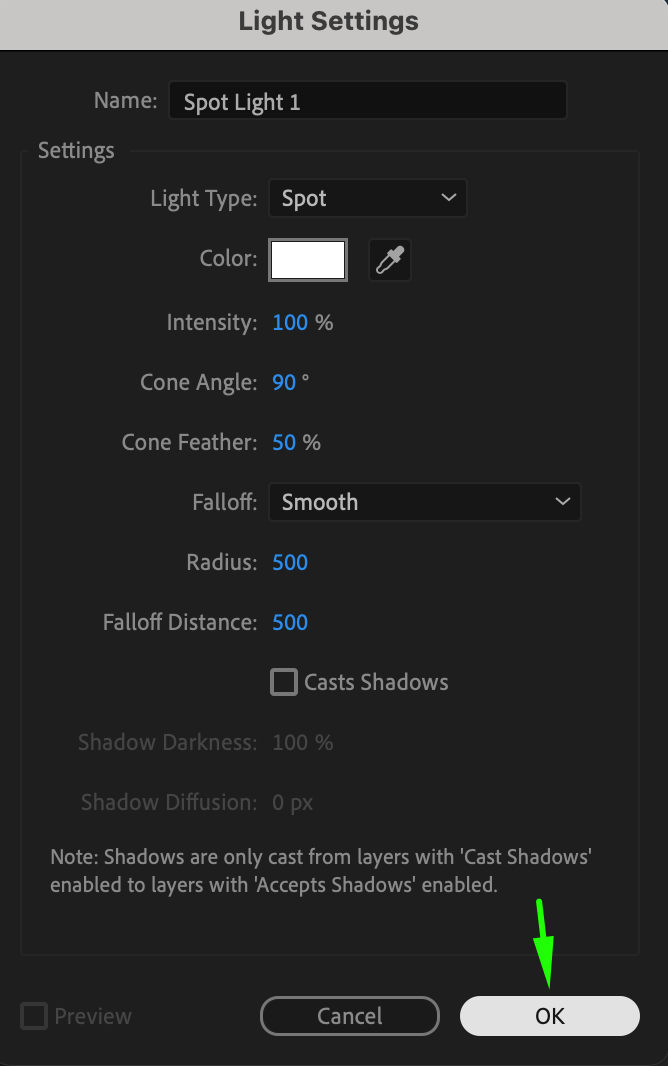
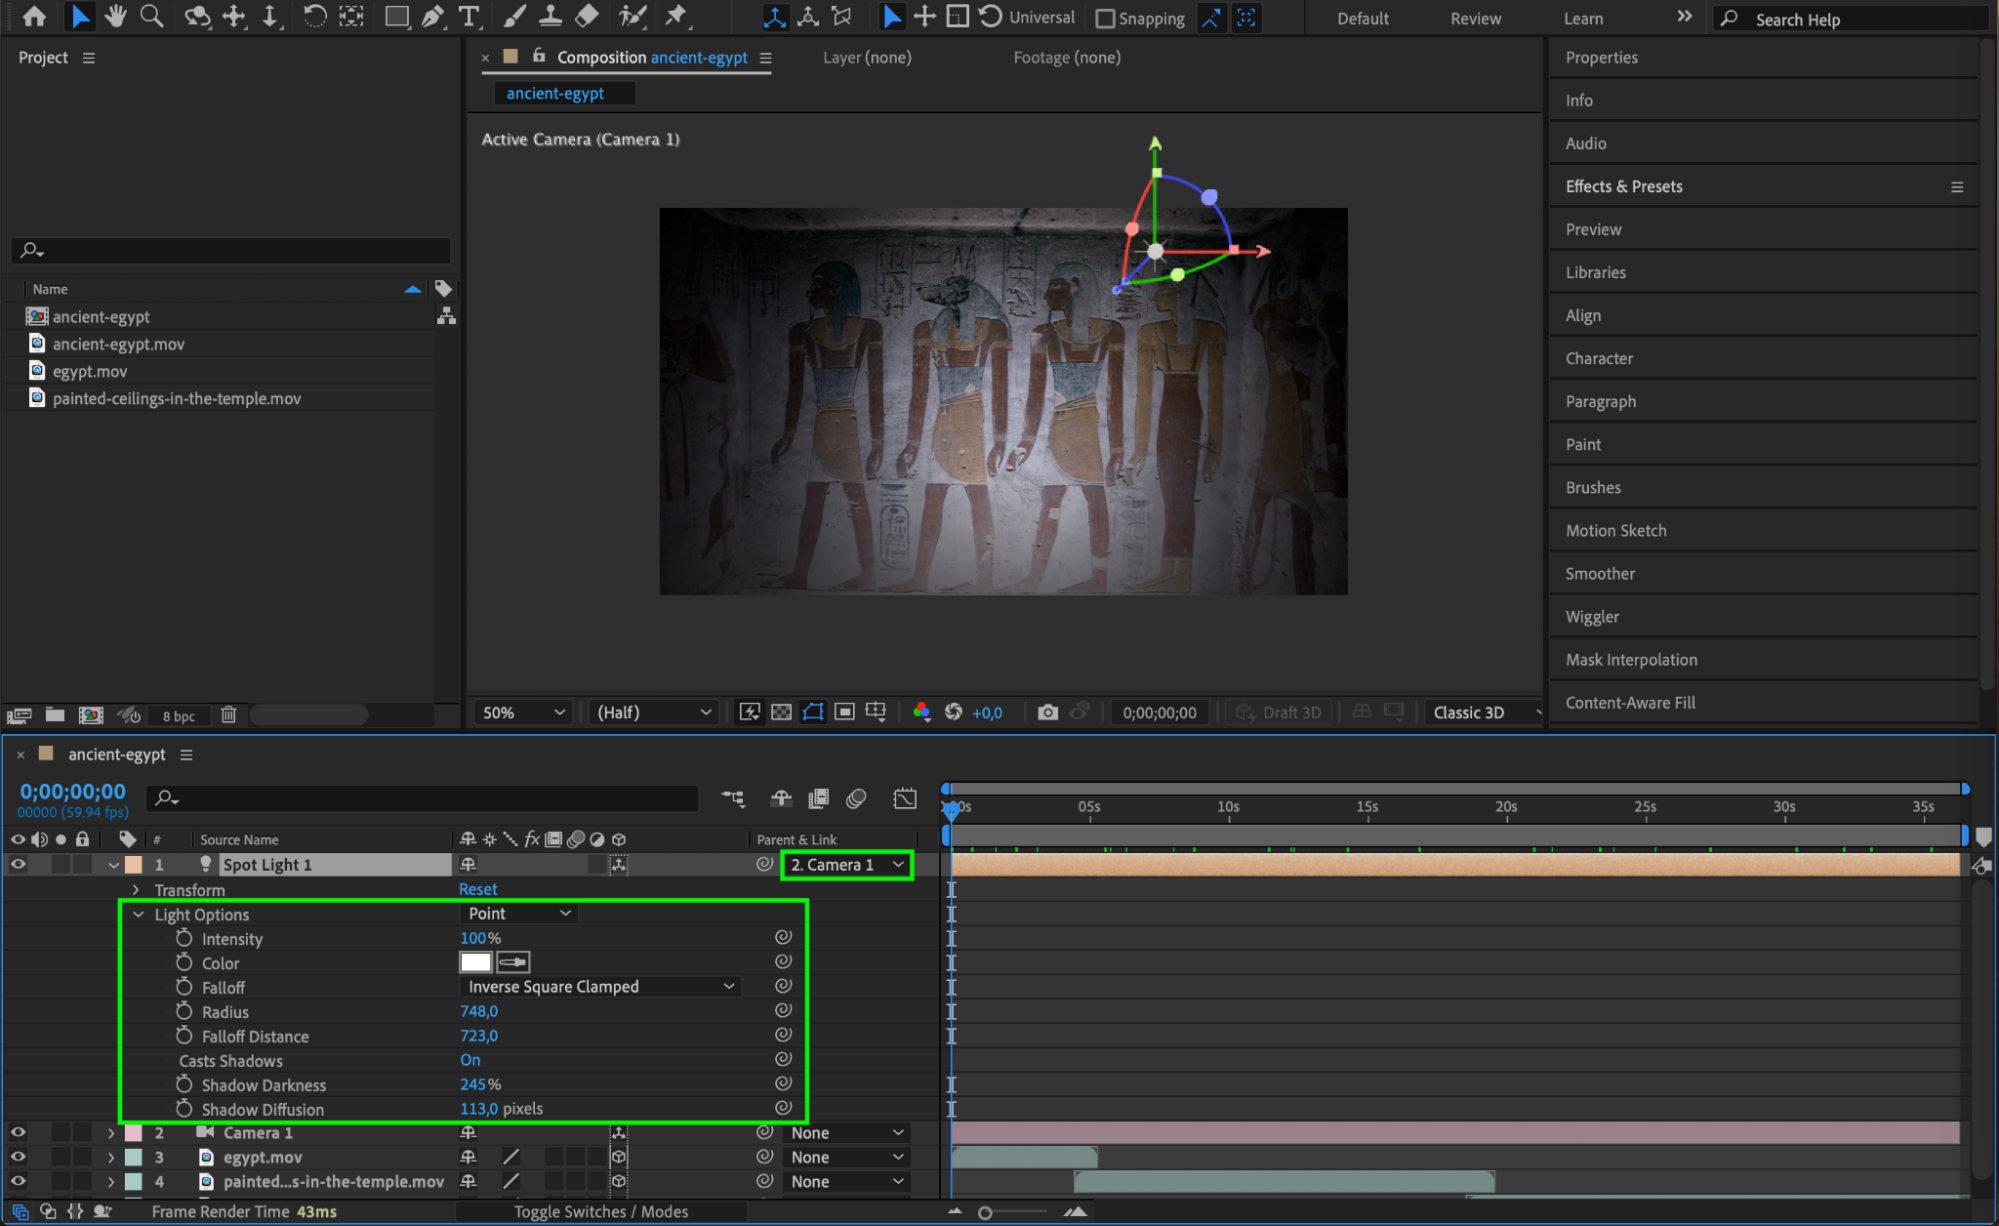
Lighting plays a critical role in setting the mood and realism of your 3D movie. Add lights by going to Layer > New > Light. After Effects allows you to create various types of lights (Spot, Point, Ambient, Parallel), each affecting your scene differently. Adjust the Light Options to control parameters like intensity, color, and shadow falloff. For more advanced control, parent the light layer to your camera for synchronized movements. This technique helps add depth and drama to your scenes through shadows and highlights.
 Step 8: Fine-Tune Scenes and Transitions
Once your assets, camera, and lighting are set up, take time to refine your scenes. Review each section of your movie, adjusting details like timing, object movements, and transitions. Smooth out any awkward cuts or motion using tools from the Effects & Presets panel. Consistency and attention to detail will make your 3D movie visually appealing and professional.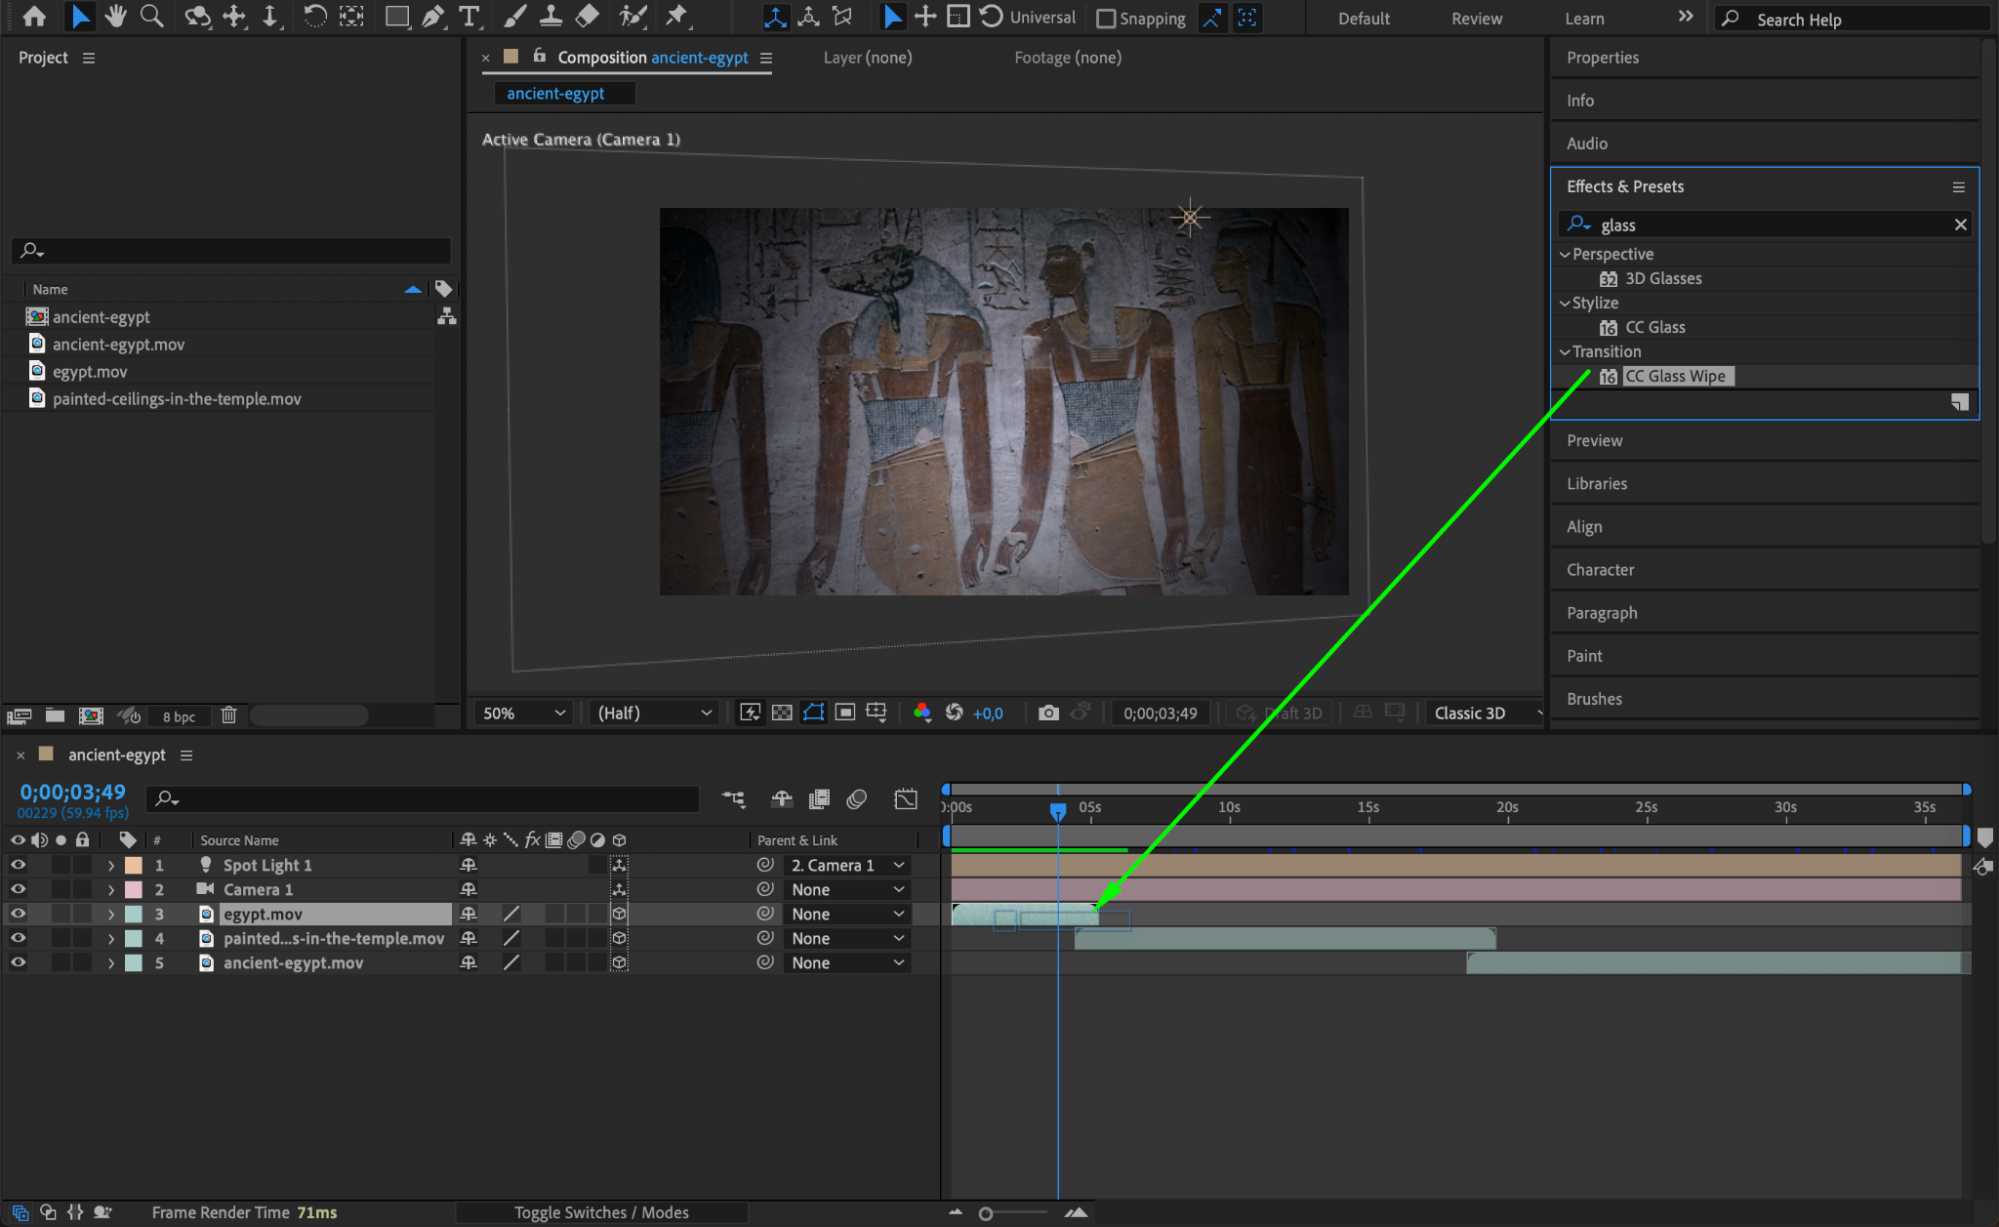
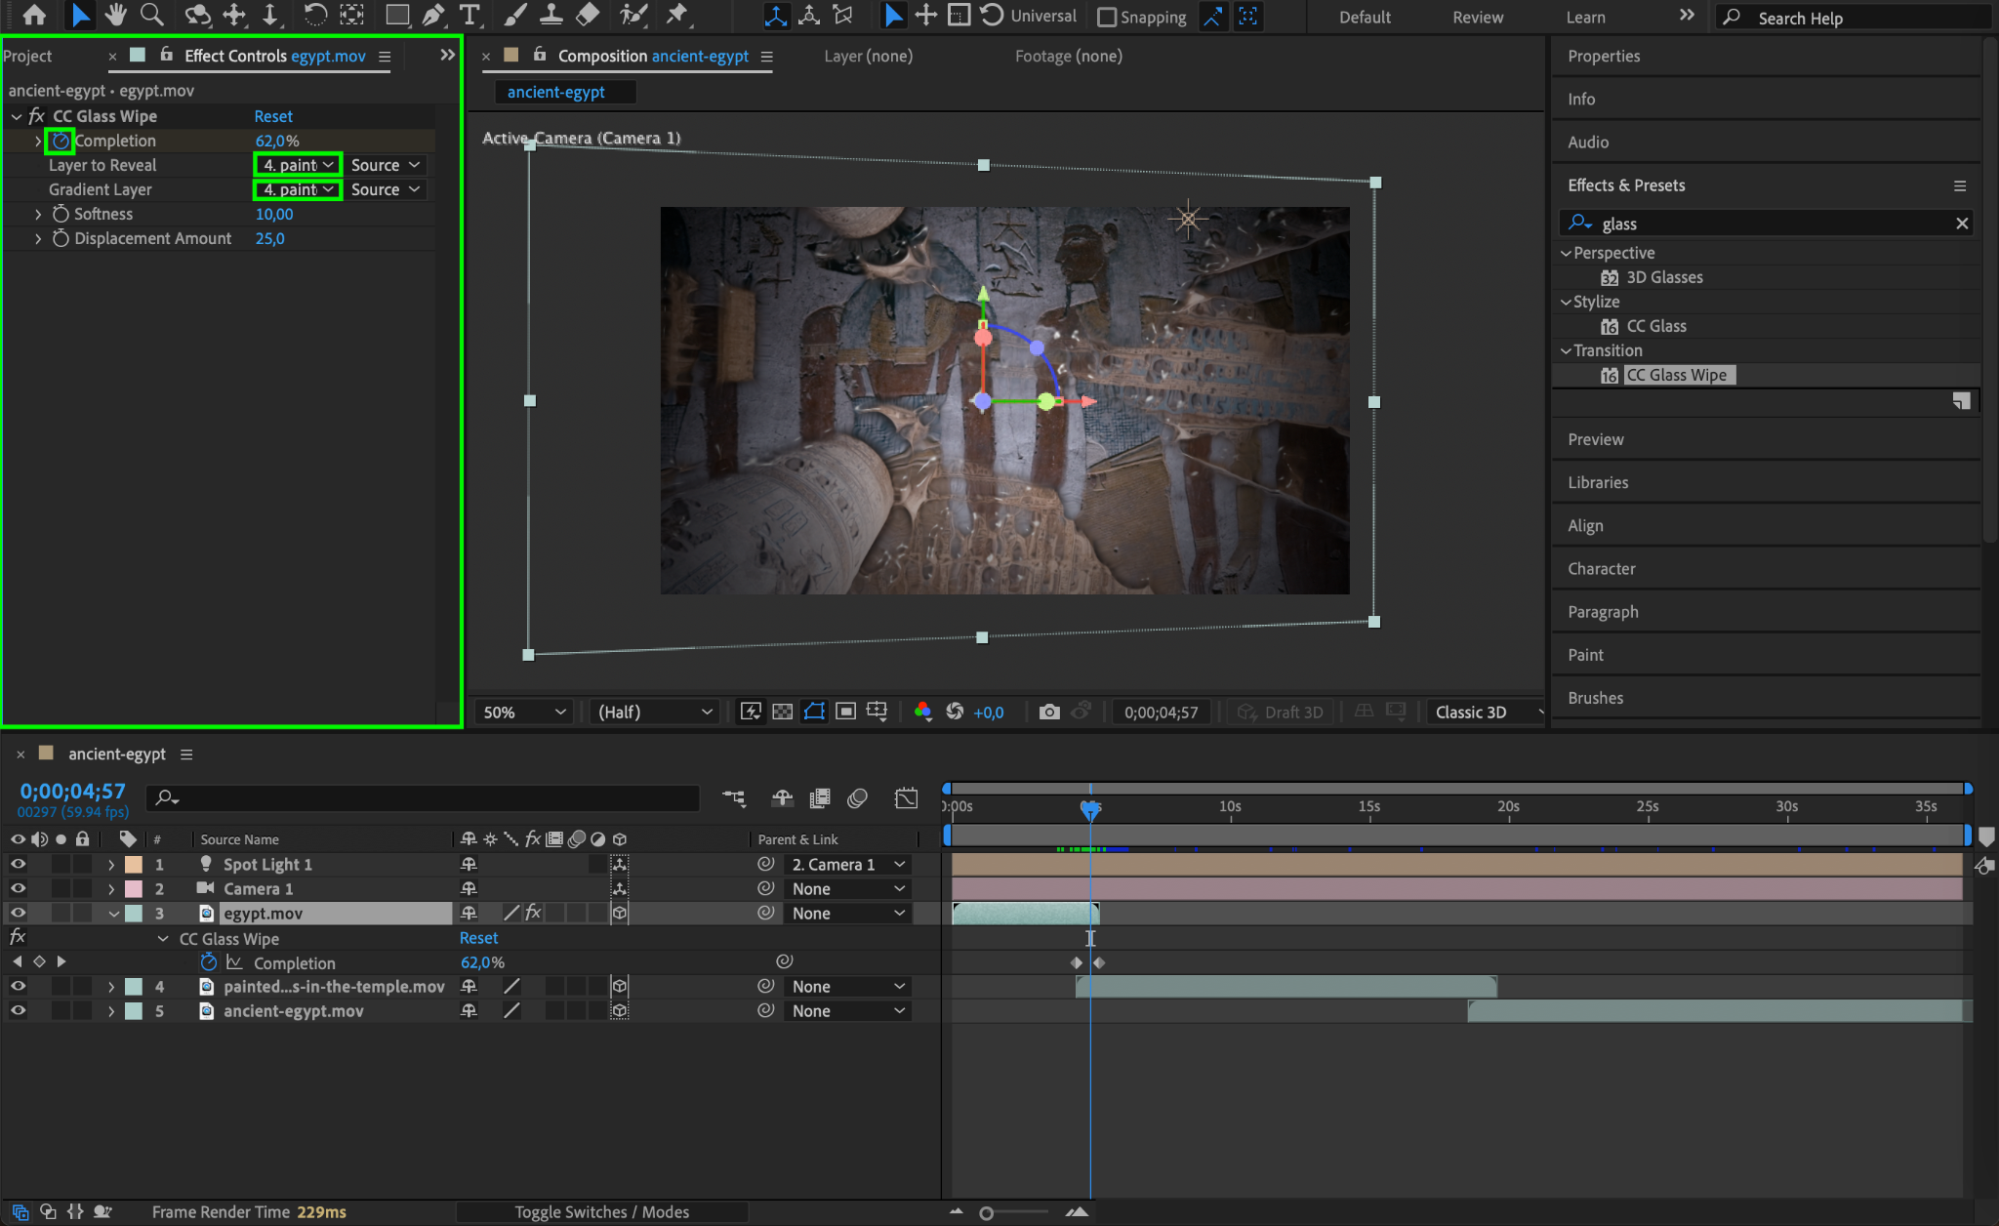 Step 9: Apply Color Grading and Visual Effects
Get 10% off when you subscribe to our newsletter

Enhance your 3D movie by applying visual effects such as color correction and grading. Use Brightness & Contrast, Hue/Saturation, or Curves from the Effects & Presets panel to adjust the overall look of your scenes. Experiment with other effects like Glow, Lens Flare, or Depth of Field to create striking visuals that draw in your audience. Proper color grading will unify your scenes and evoke the right emotional tone.
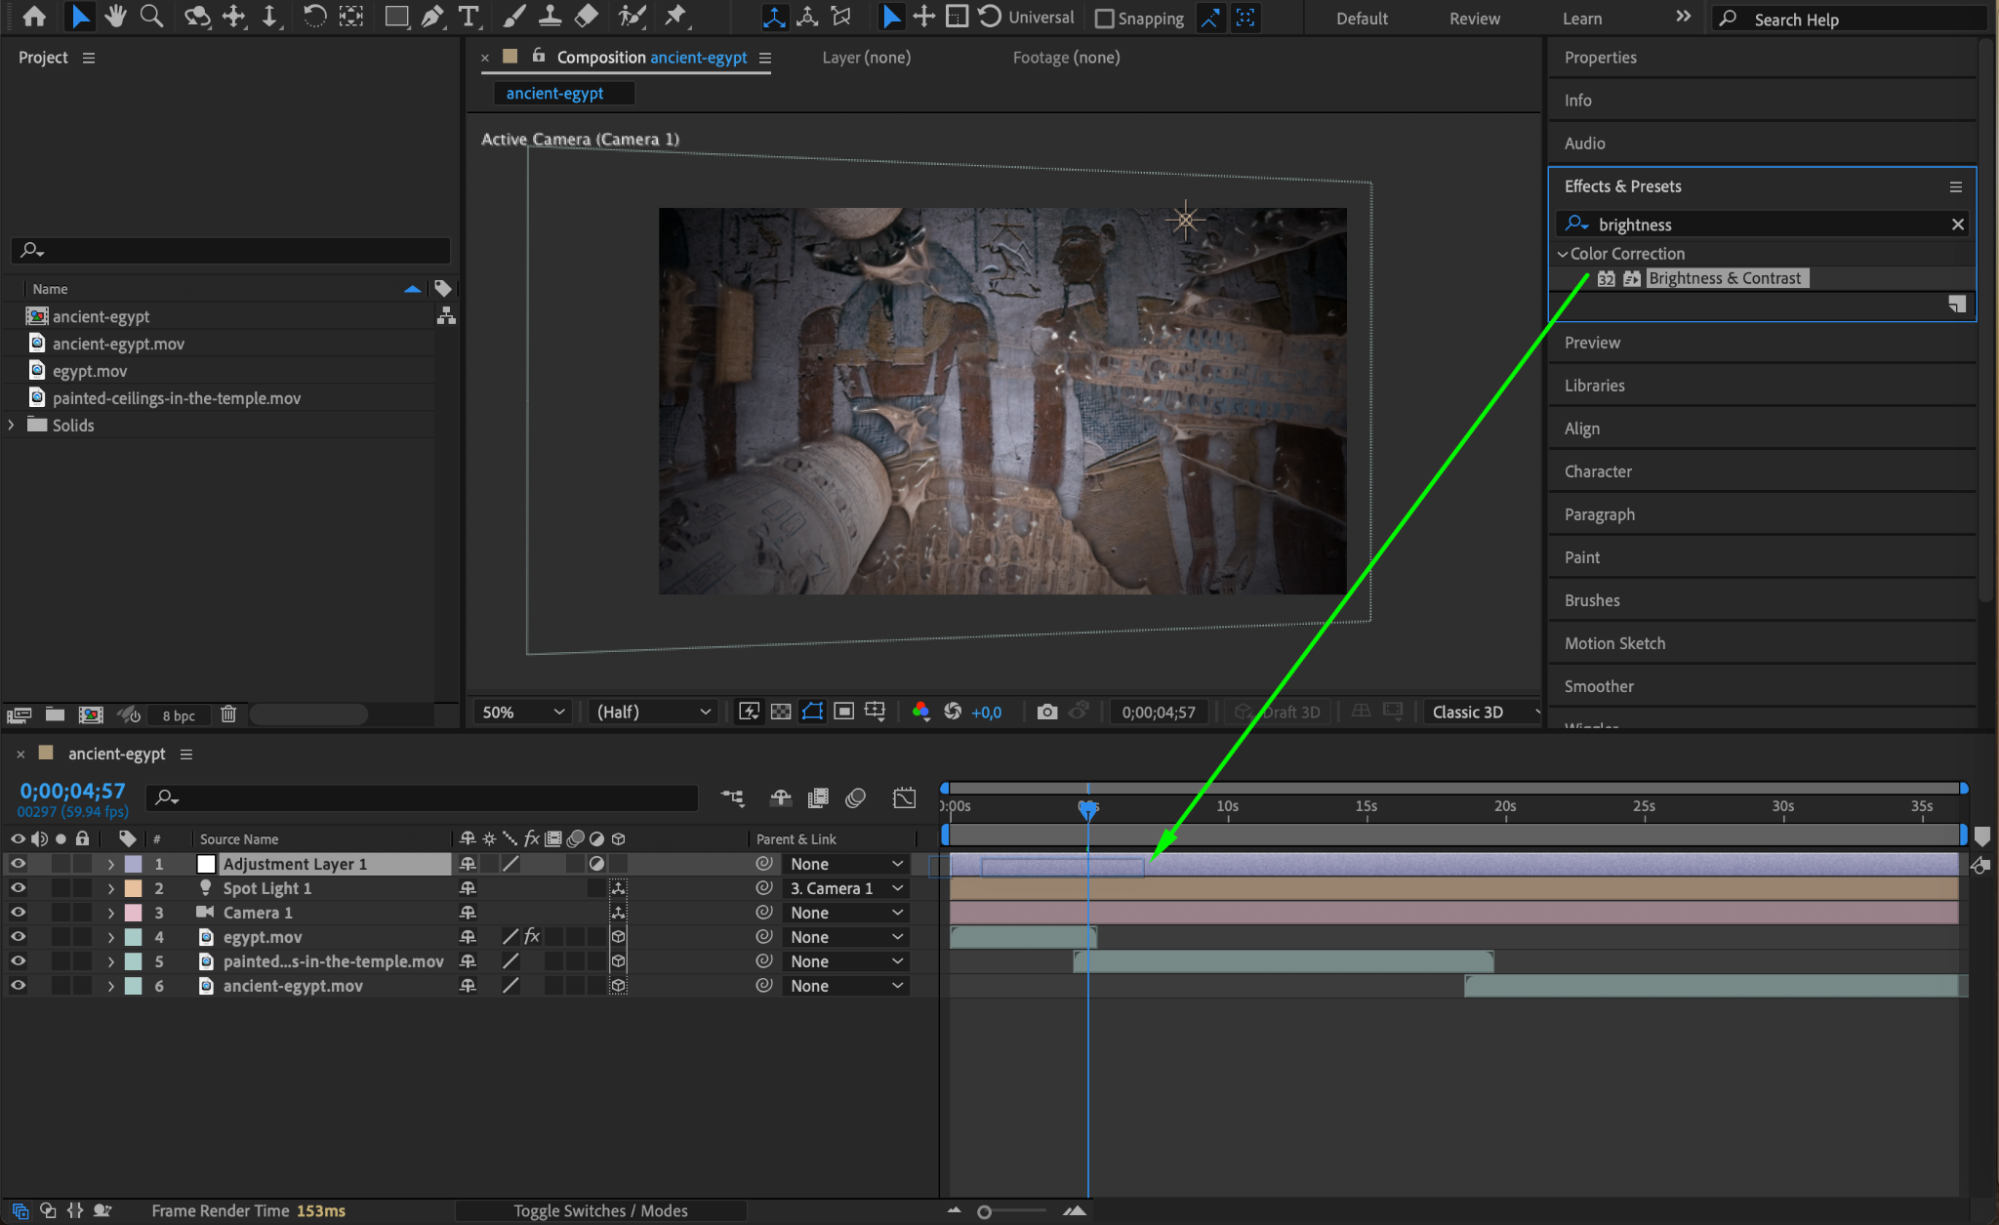
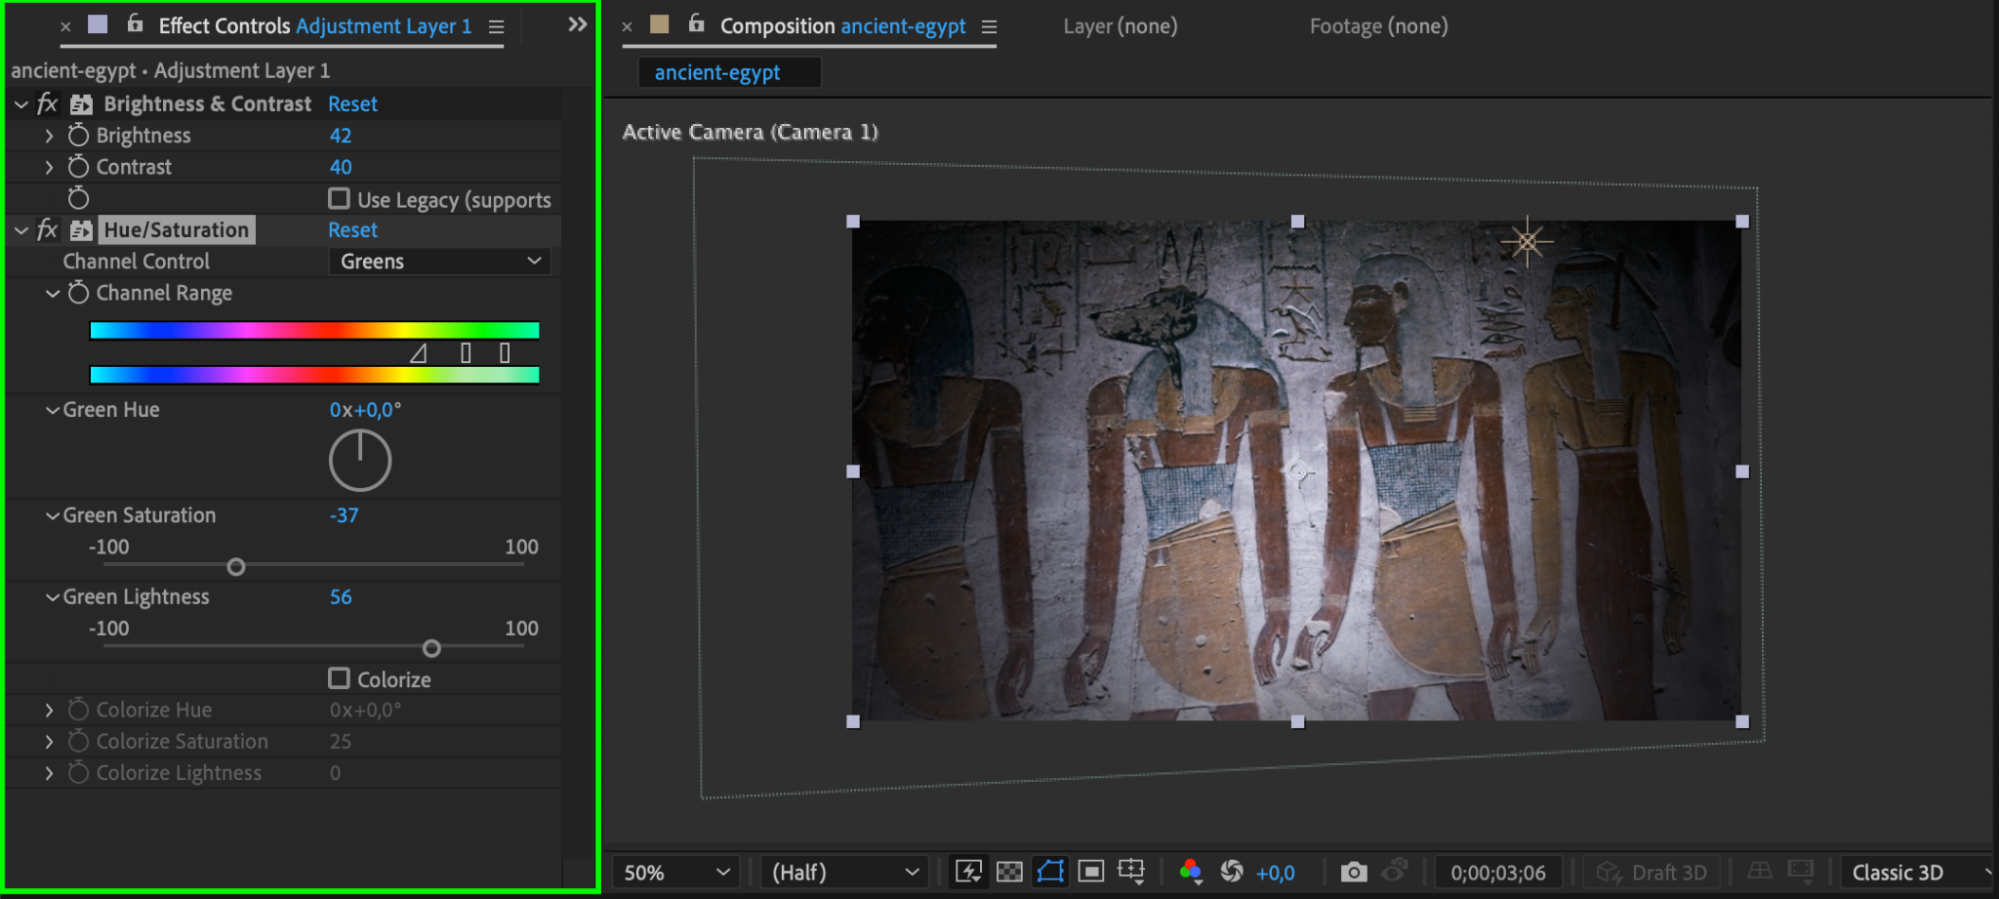 Step 10: Preview Your Work
Get 10% off when you subscribe to our newsletter

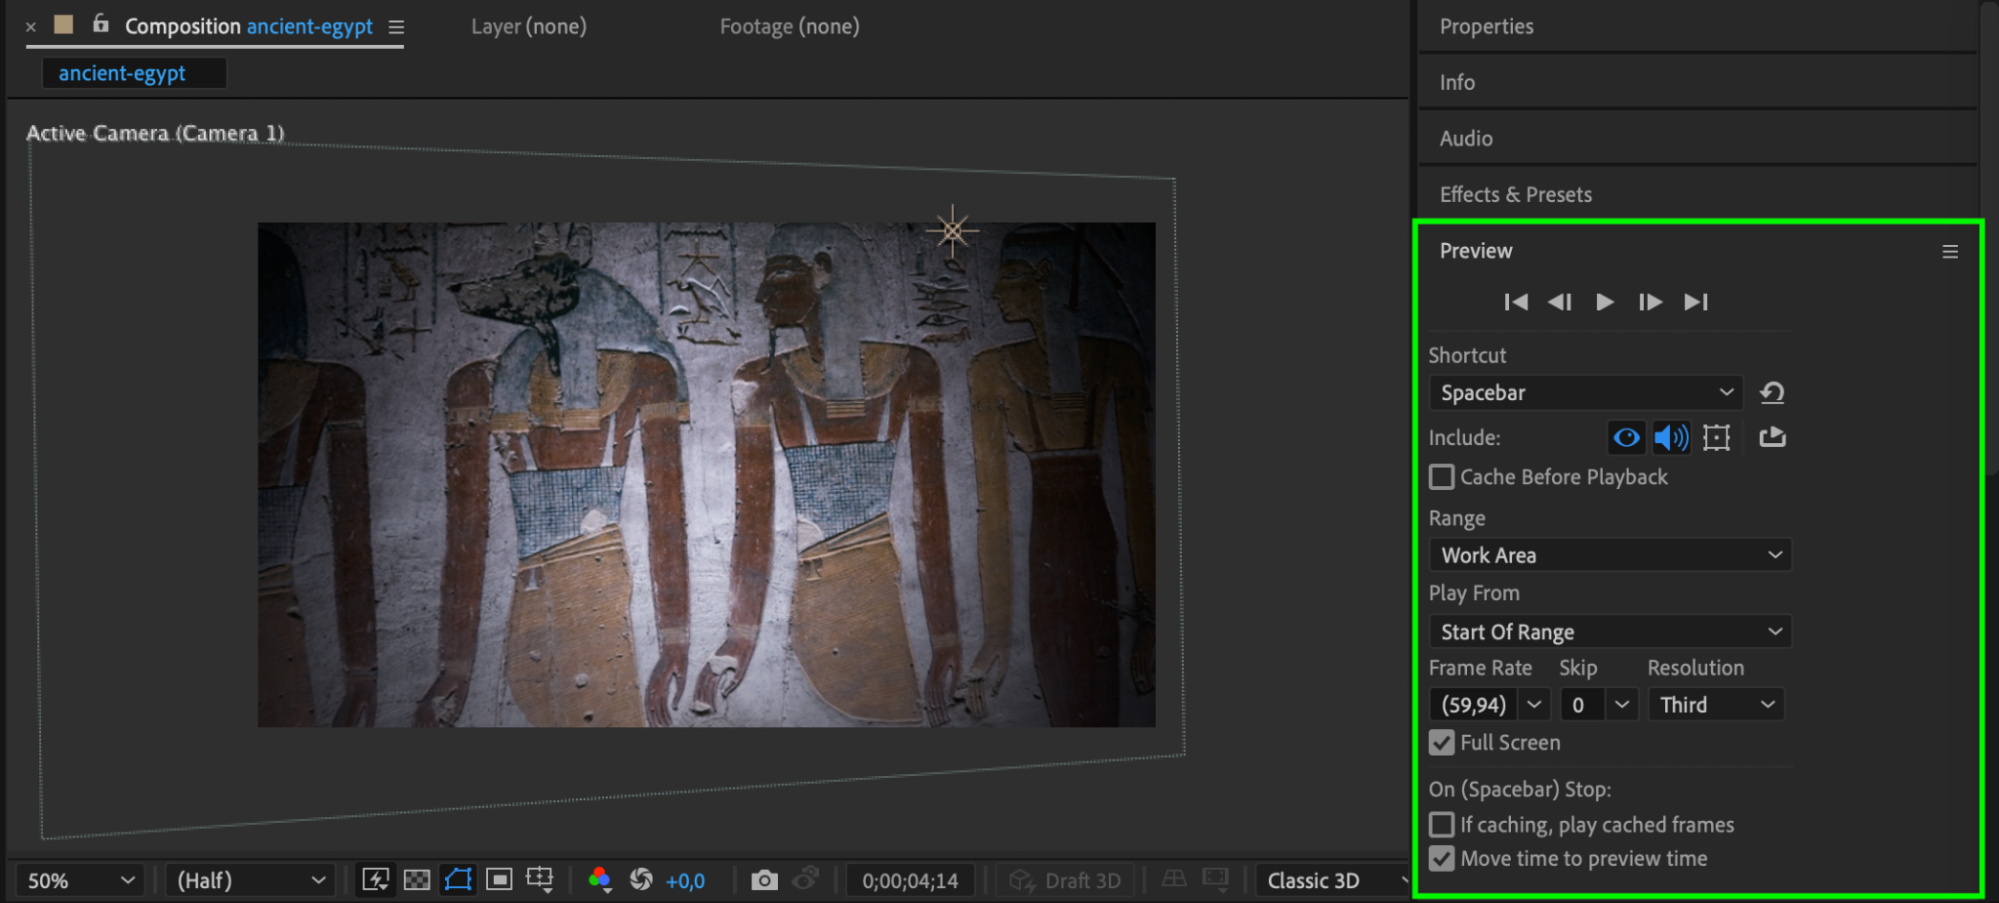
Before finalizing your movie, always preview it to ensure everything works as expected. Hit the spacebar to playback the composition. This will allow you to identify any timing issues, abrupt transitions, or rendering glitches. Adjust your keyframes, effects, or layers based on this review.
 Step 11: Export and Render Your 3D Movie
Once satisfied with your movie, it’s time to render. Go to Composition > Add to Render Queue. In the Render Queue, configure your output settings. For high-quality rendering, choose the desired output format (such as QuickTime or MP4), and make sure the resolution and frame rate are appropriate for your project. After adjusting the settings, click Render to export your 3D movie.

Get 10% off when you subscribe to our newsletter

Conclusion
Creating a 3D movie in After Effects may seem daunting at first, but with these steps, you’ll be on your way to producing professional-quality films in no time. From storyboarding and asset organization to camera movement and lighting, each step adds depth and dimension to your project. With practice and creativity, you can bring your 3D movie ideas to life and impress your audience with stunning visuals.
Start experimenting today, and unlock the full potential of After Effects to create your next 3D masterpiece!


