Creating a Boomerang Effect in After Effects
Introduction to the Boomerang Effect
The boomerang effect creates a seamless back-and-forth looping motion, often used in social media videos and animations. This effect can be easily achieved in After Effects using time remapping and reverse layering.
Step 1: Import Your Video
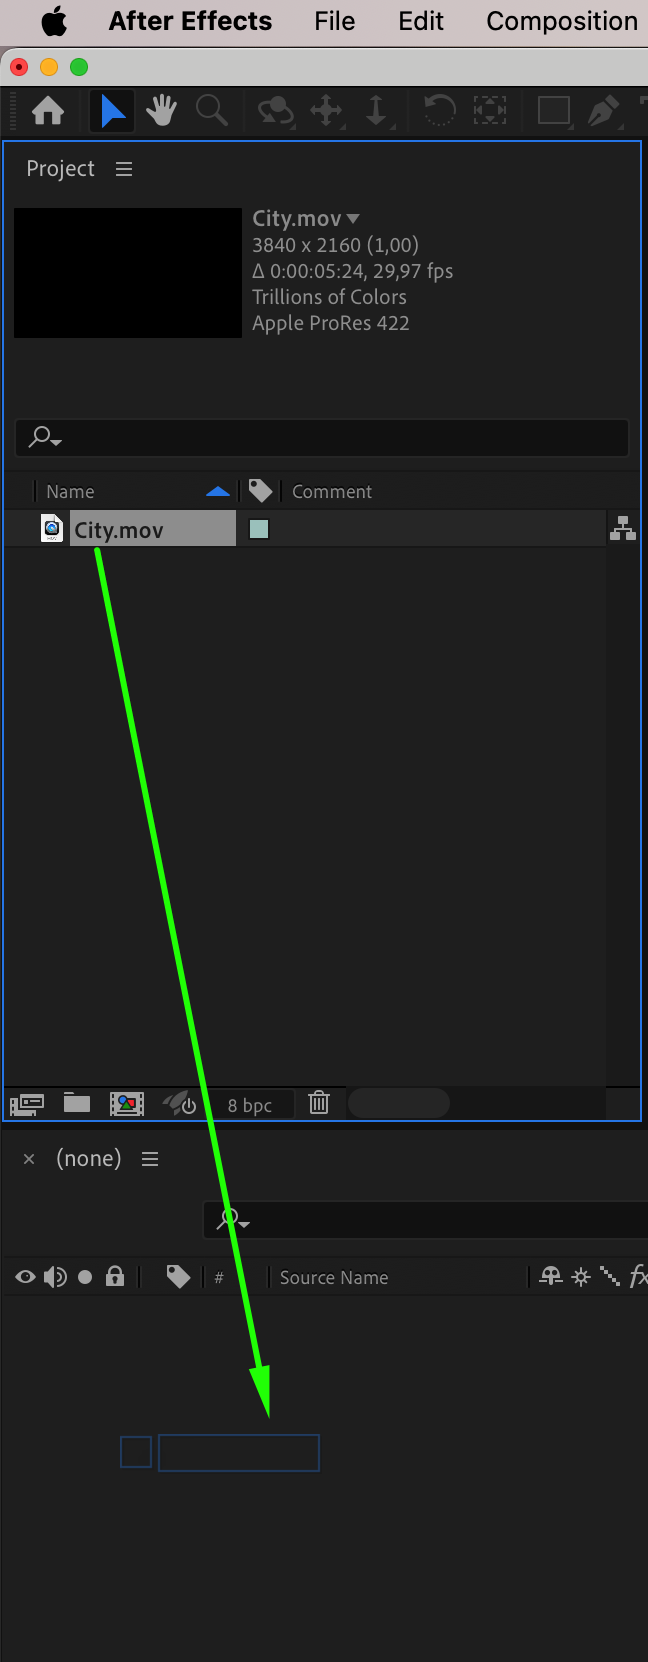
Go to File > Import > File and select the video you want to use for the boomerang effect. Drag the imported file onto the timeline to create a composition.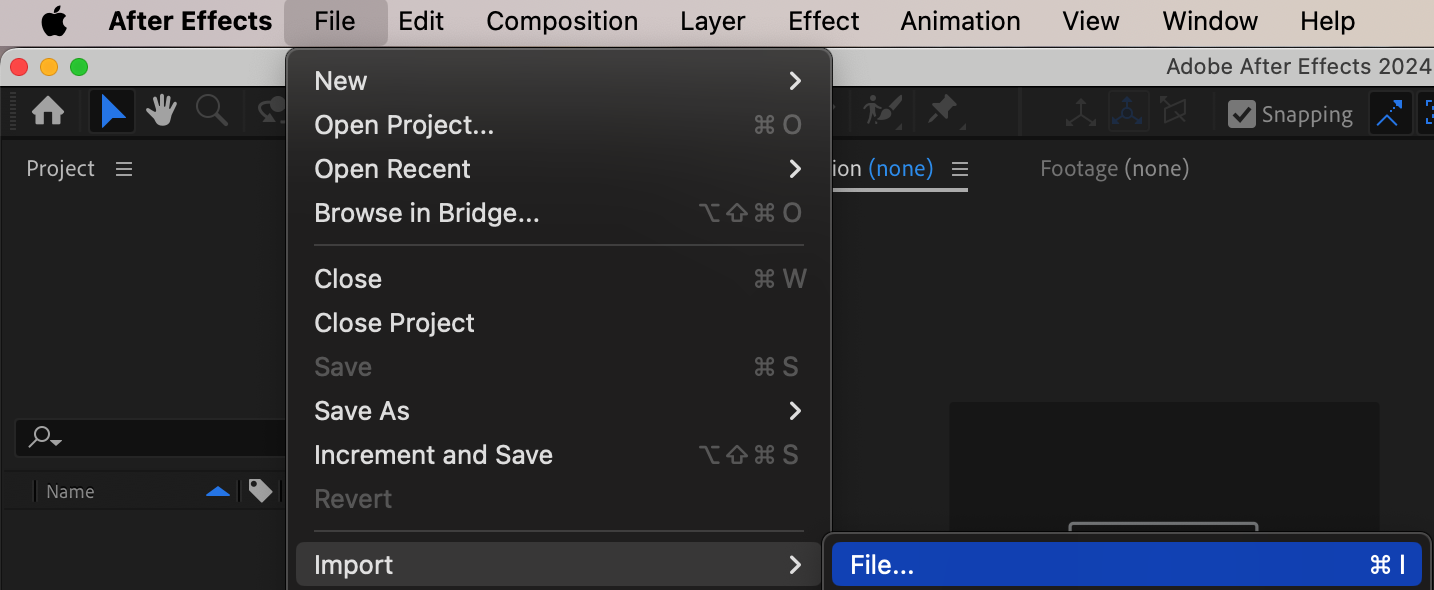
 Step 2: Enable Time Remapping
Right-click on the video layer in the timeline and choose Time > Enable Time Remapping. This will allow you to manually control the timing of your video.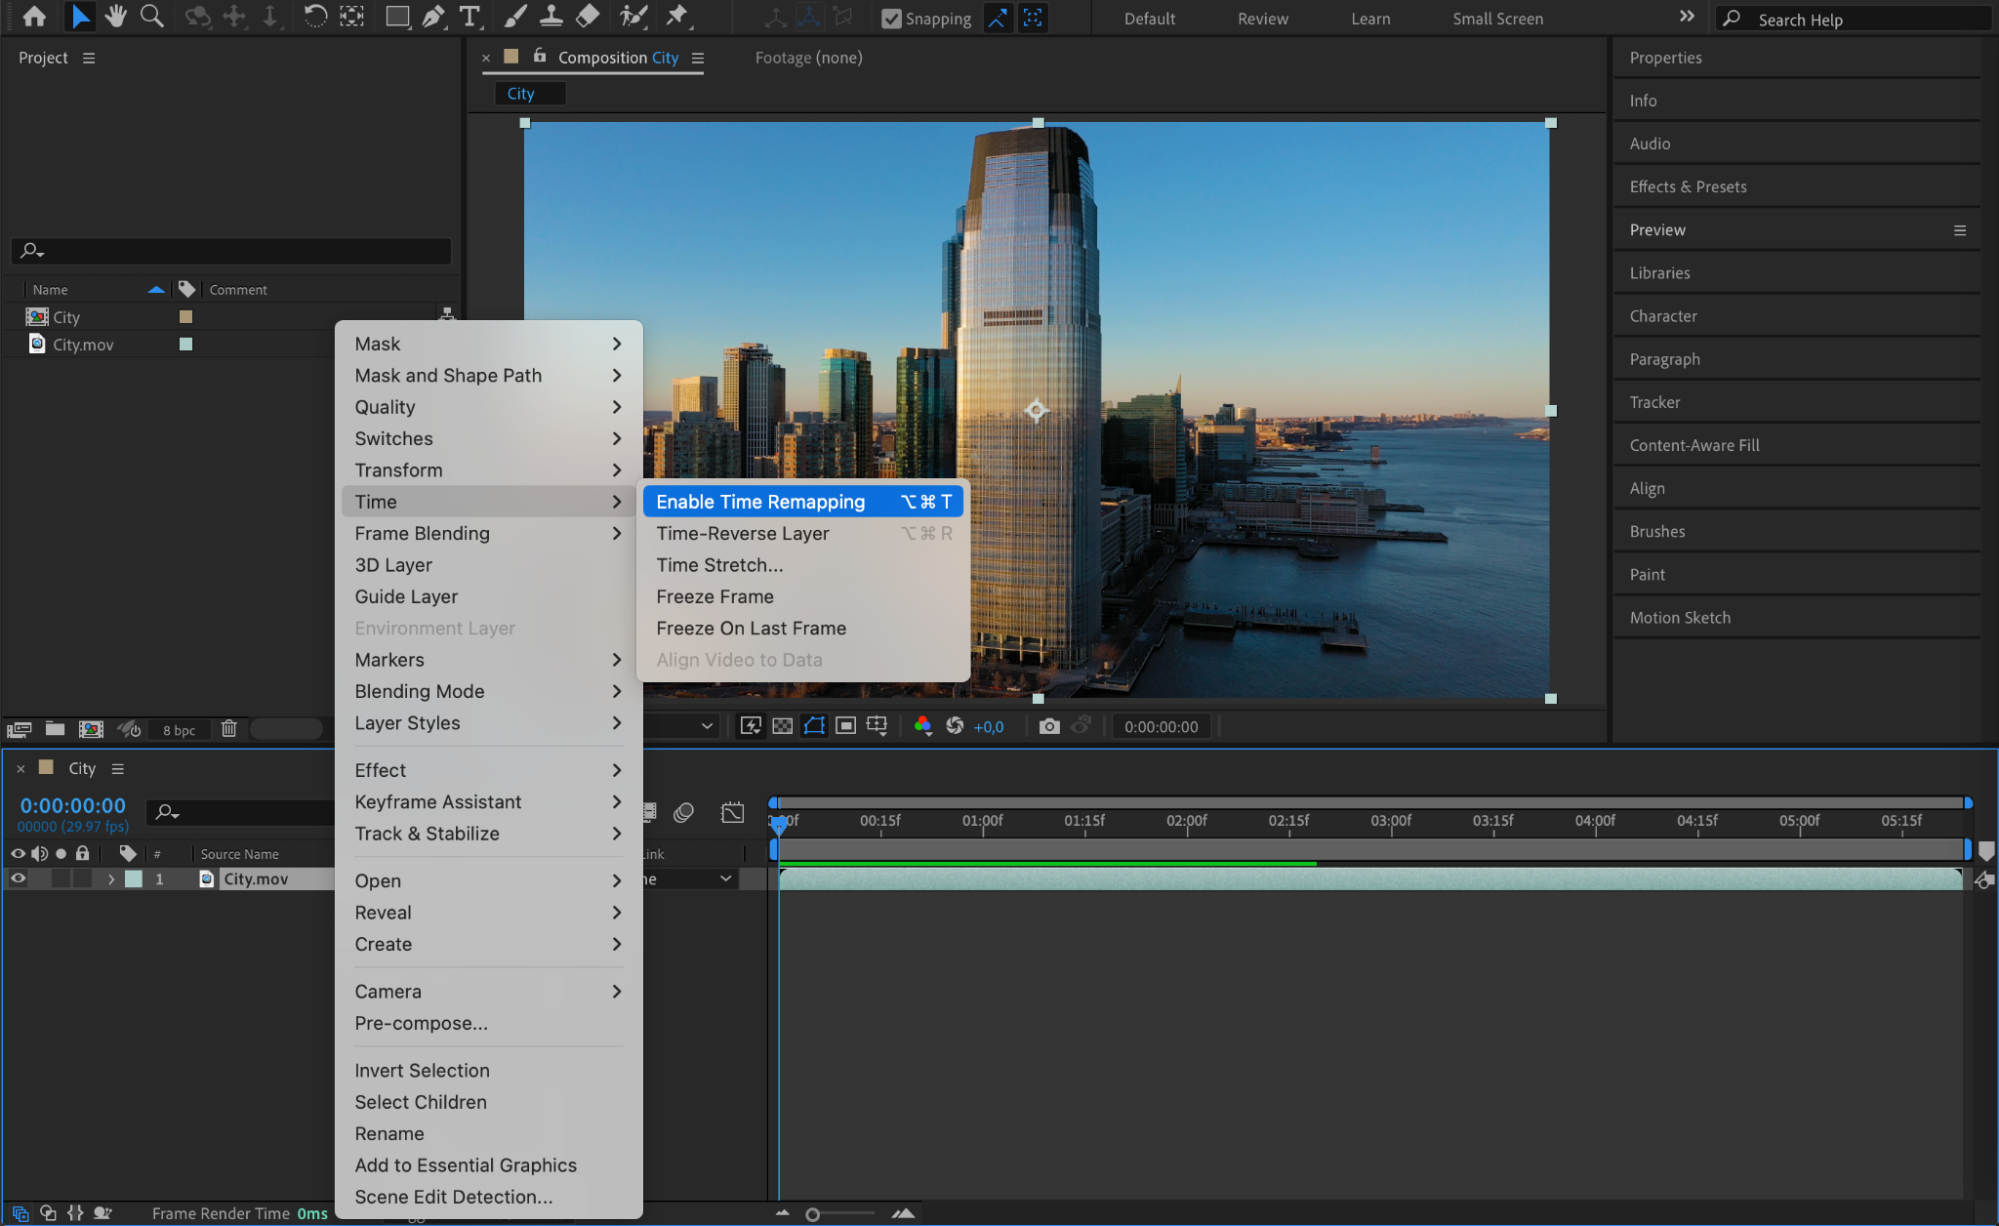 Step 3: Adjust the Keyframes
Move the second keyframe closer to the first keyframe to shorten the playback duration. Then, extend the layer’s end to align with the second keyframe, ensuring a smooth loop.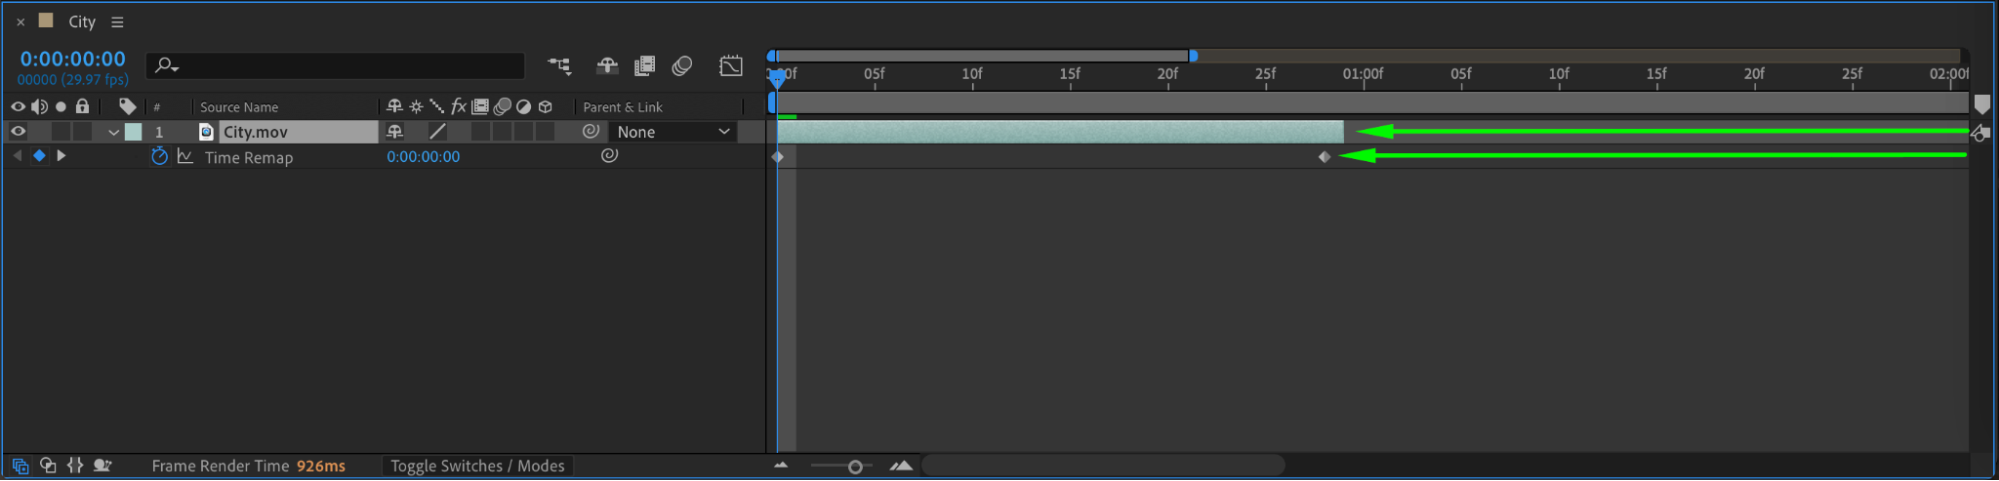 Step 4: Apply Easy Ease for Smoother Motion
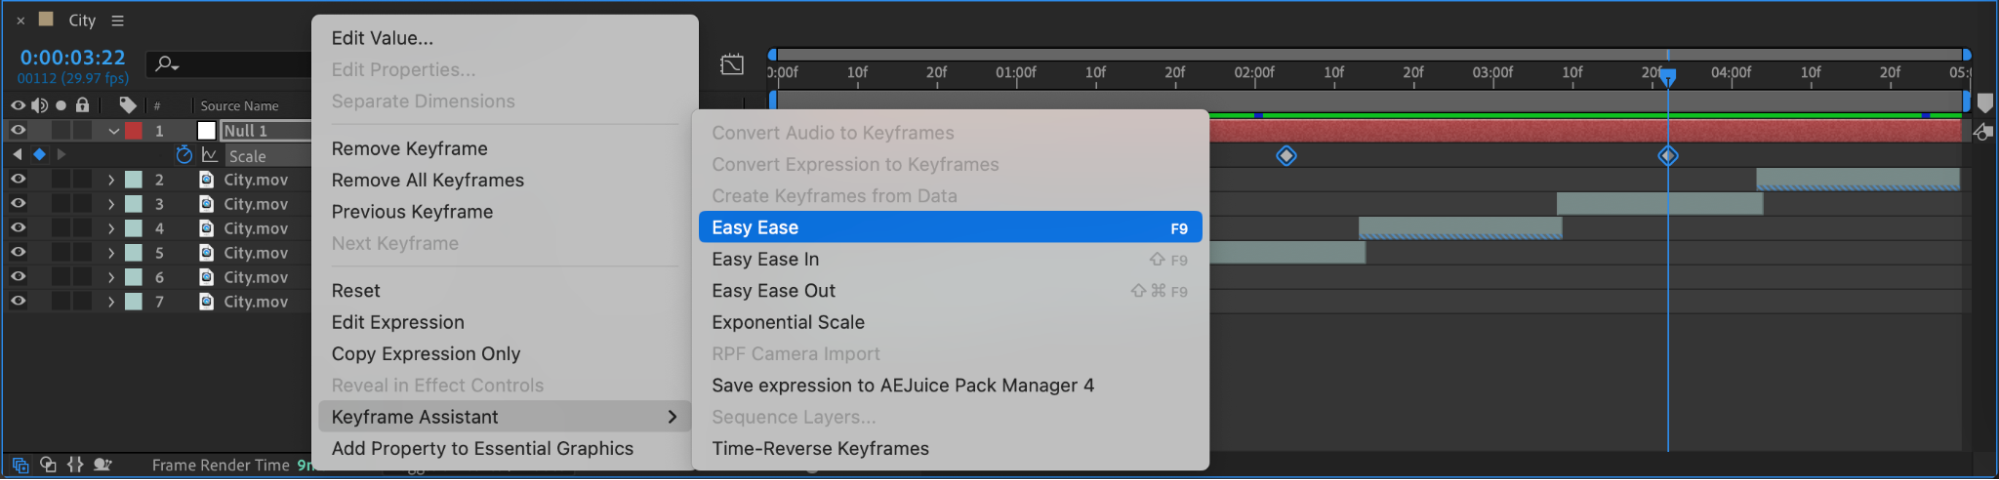
Select both time remap keyframes, right-click, and choose Keyframe Assistant > Easy Ease. This will make the motion smoother.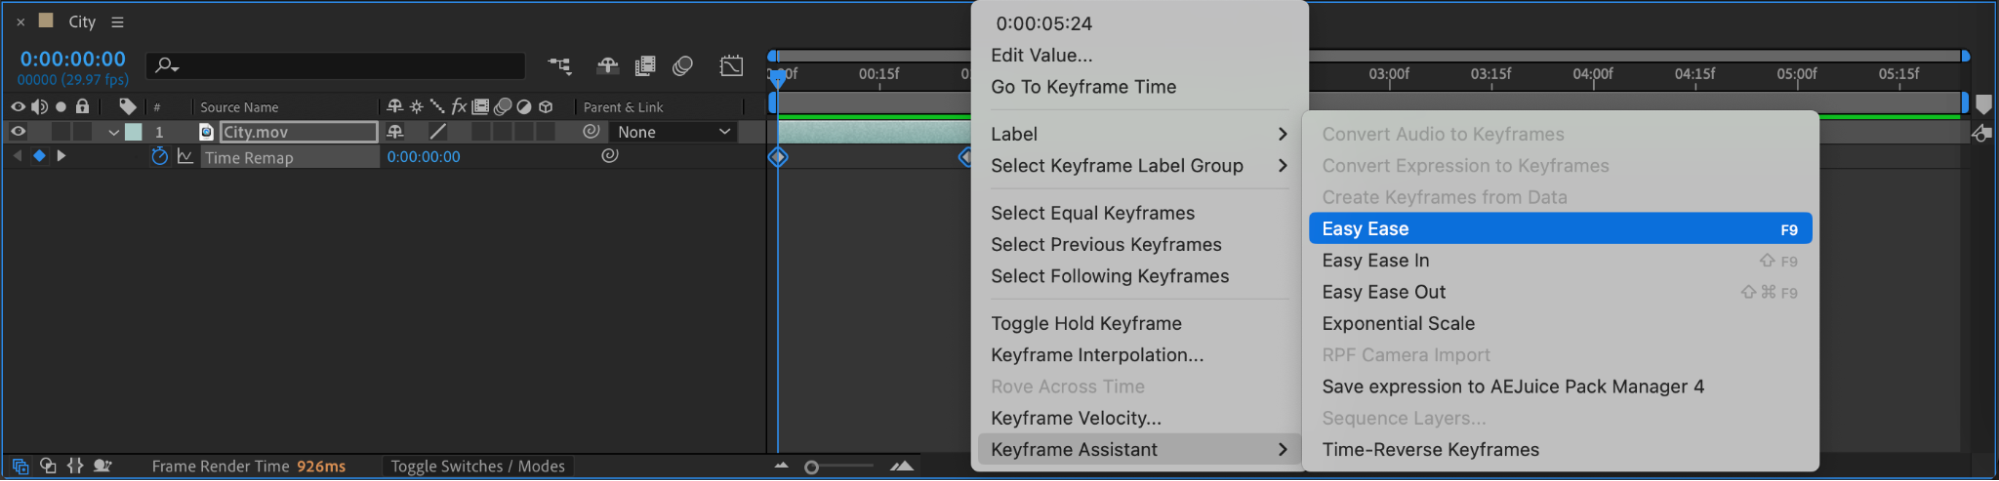 Step 5: Duplicate the Layer
Select your video layer, press “Ctrl/Cmd + D” to duplicate it. This will be used for the reverse playback effect.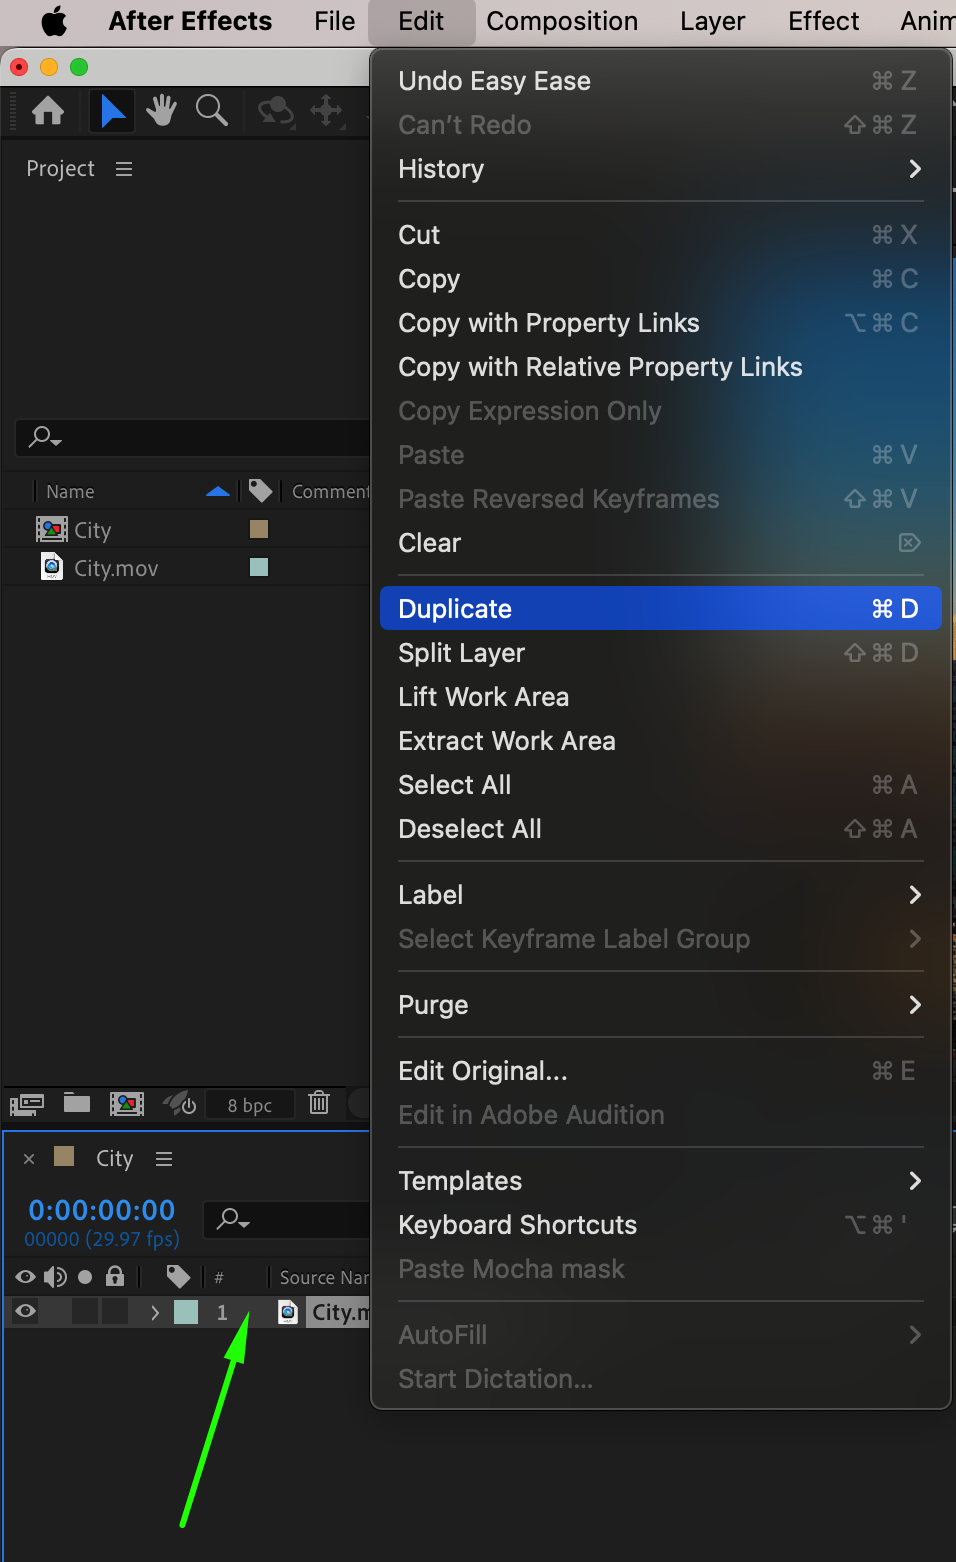 Step 6: Reverse the Duplicate Layer
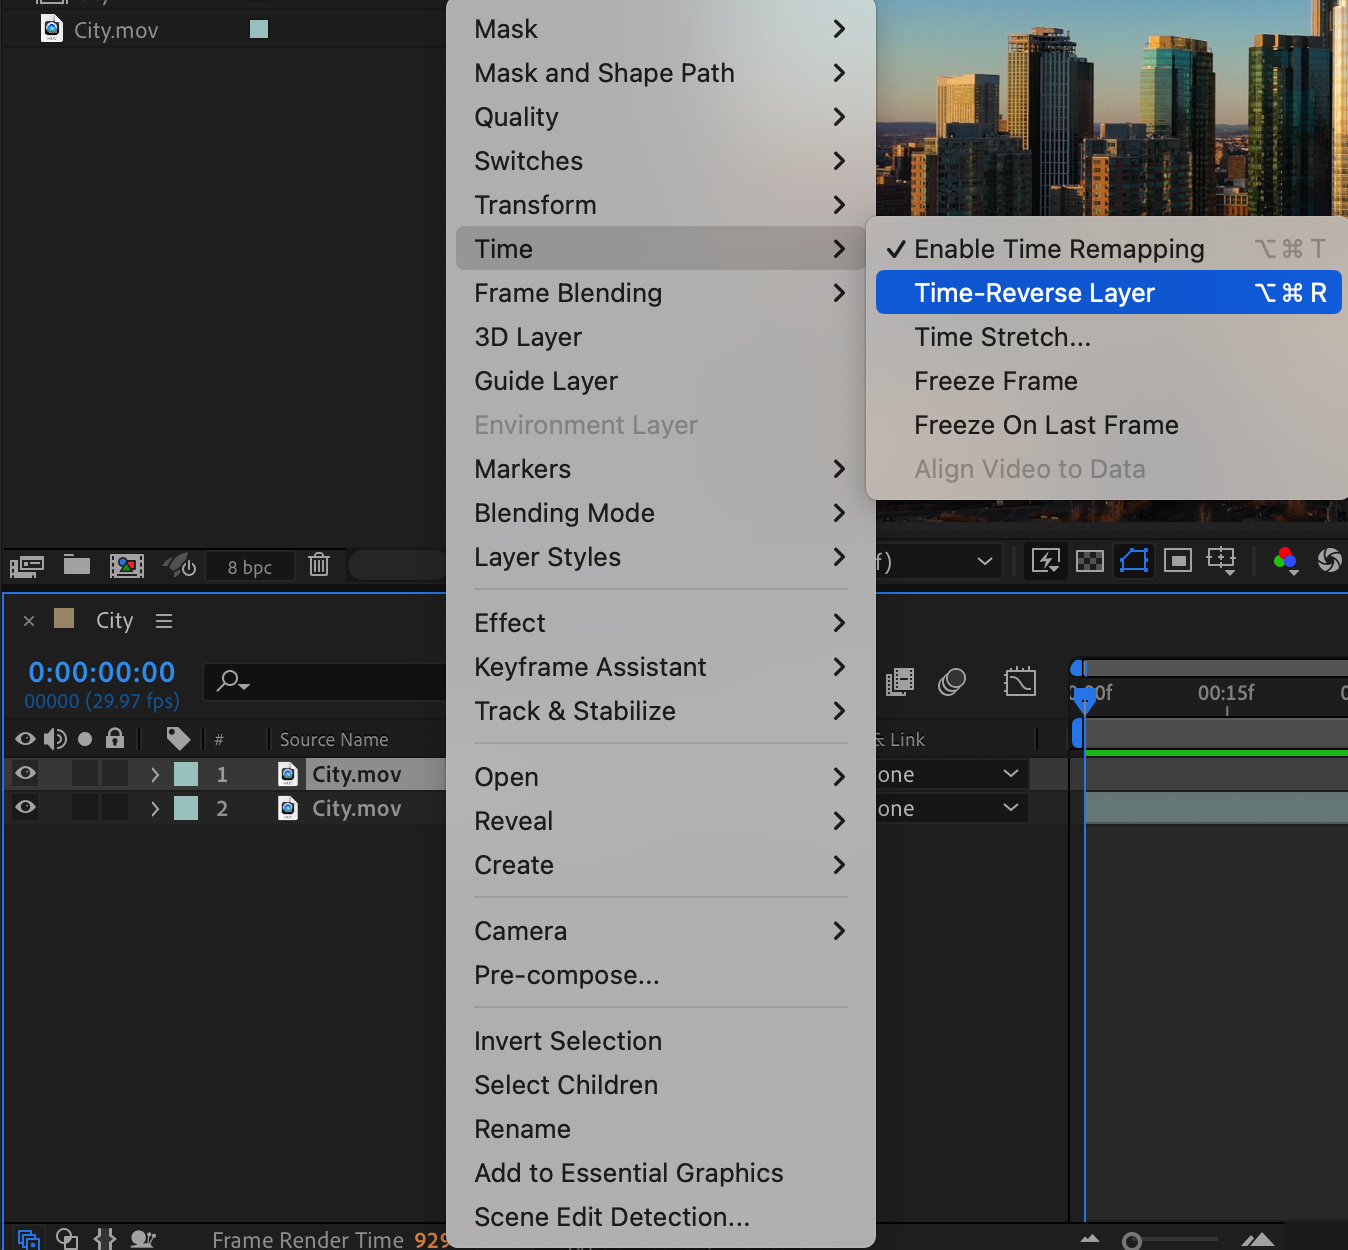
Get 10% off when you subscribe to our newsletter

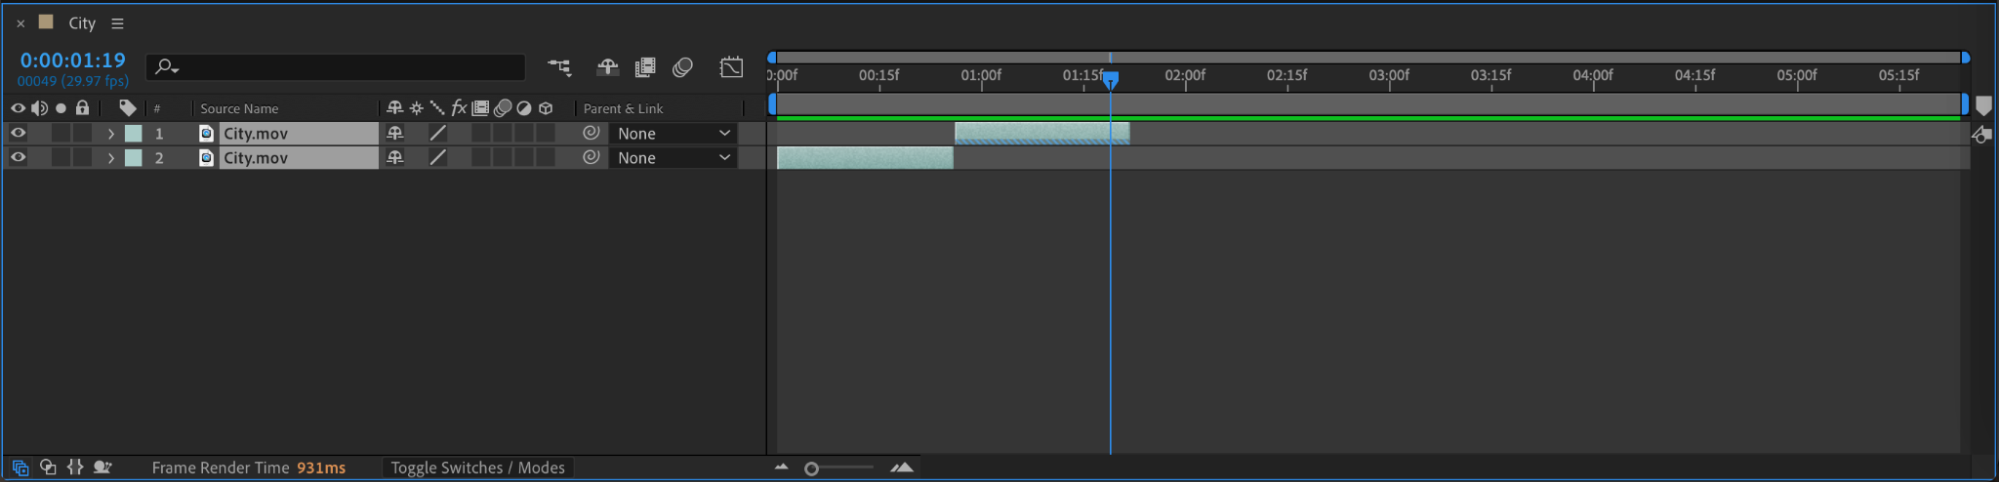
Move the duplicated layer slightly forward so it starts one frame before the first layer ends. Right-click on the duplicate, go to Time > Time-Reverse Layer to play it backward.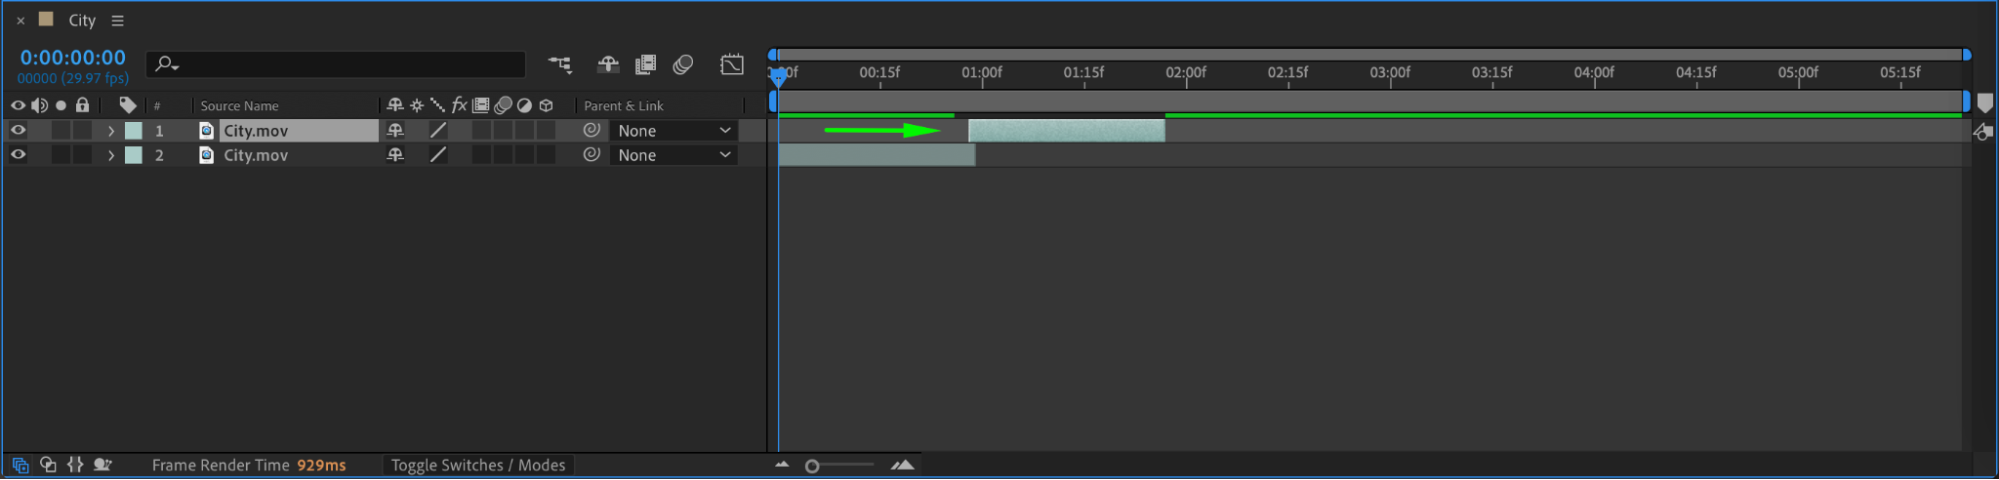
 Step 7: Repeat the Process for a Longer Loop
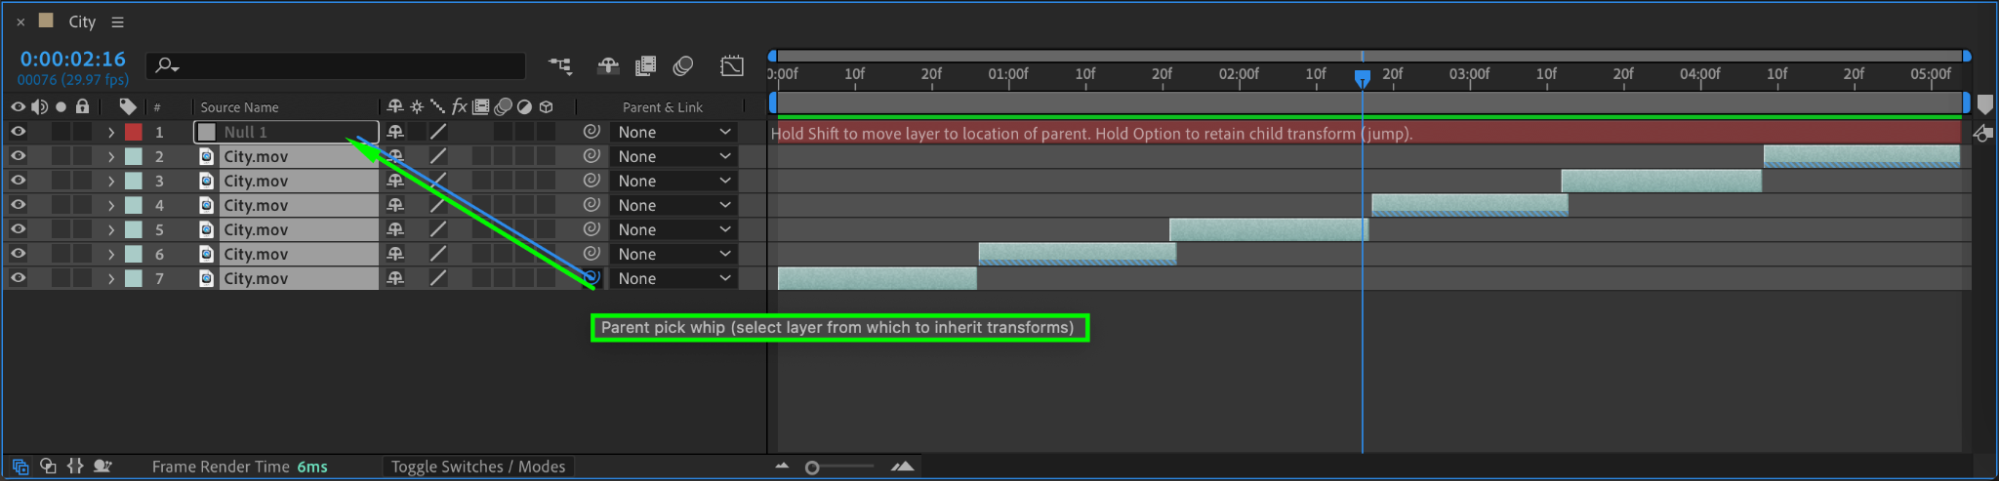
Duplicate both layers and continue placing them in the same order to fill the timeline. This will create a continuous back-and-forth looping effect.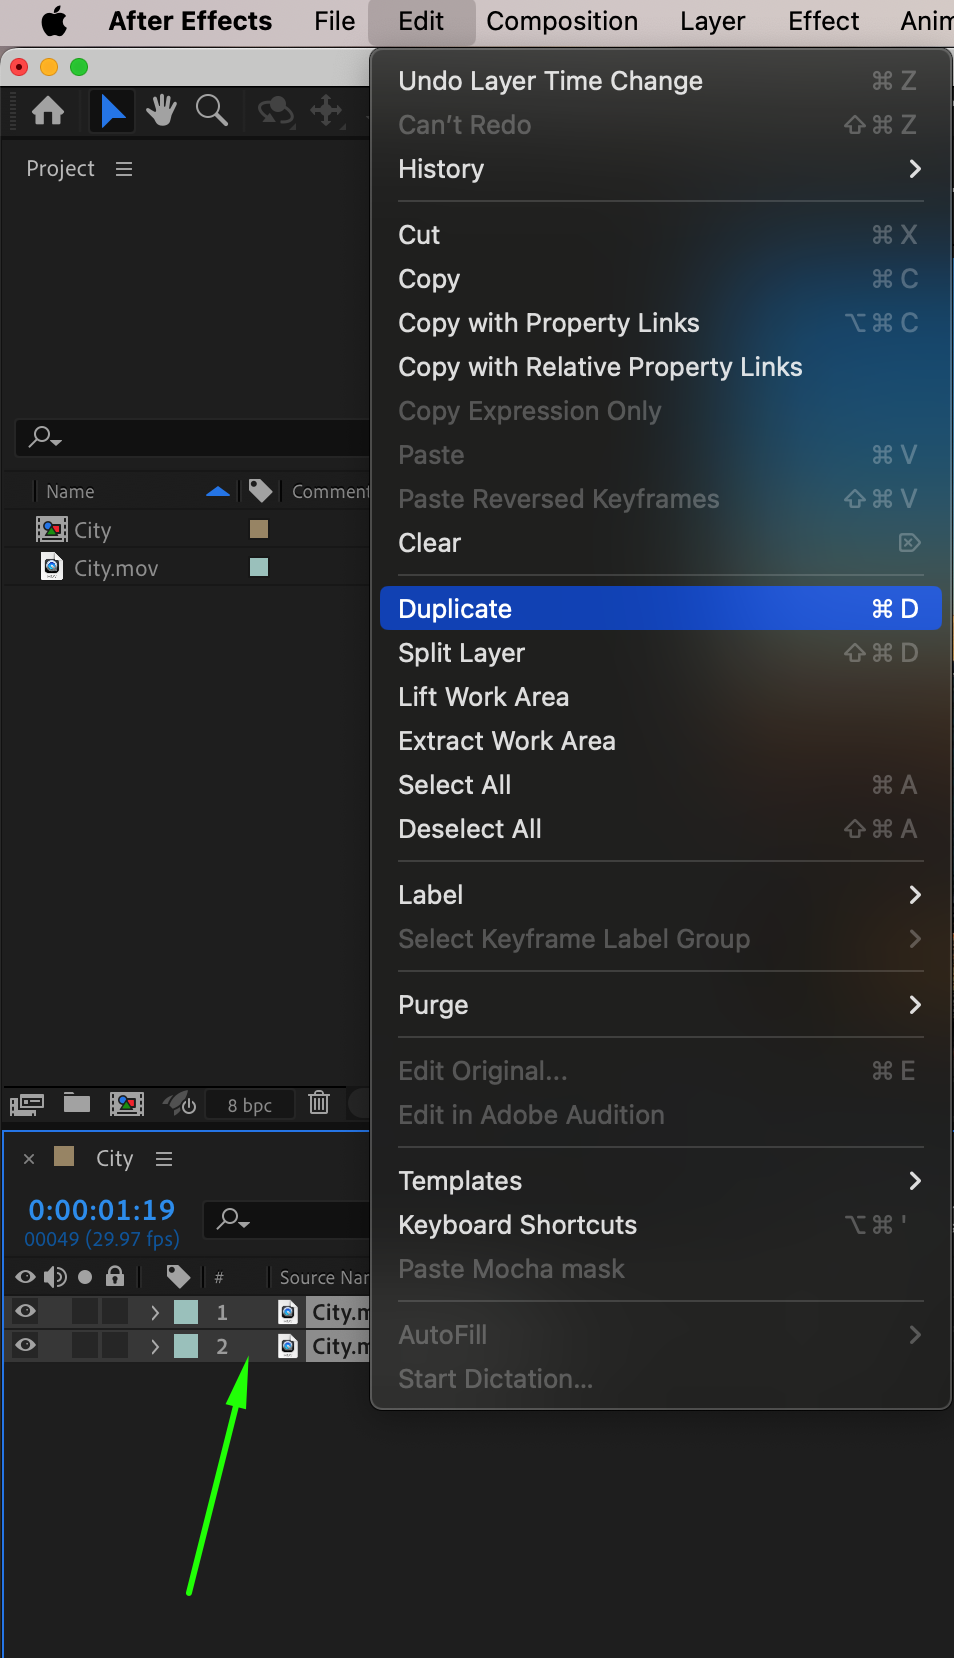
 Step 8: Add a Null Object for Scaling Animation
Go to Layer > New > Null Object and make all video layers child layers by parenting them to the null object. This will allow you to animate all layers at once.
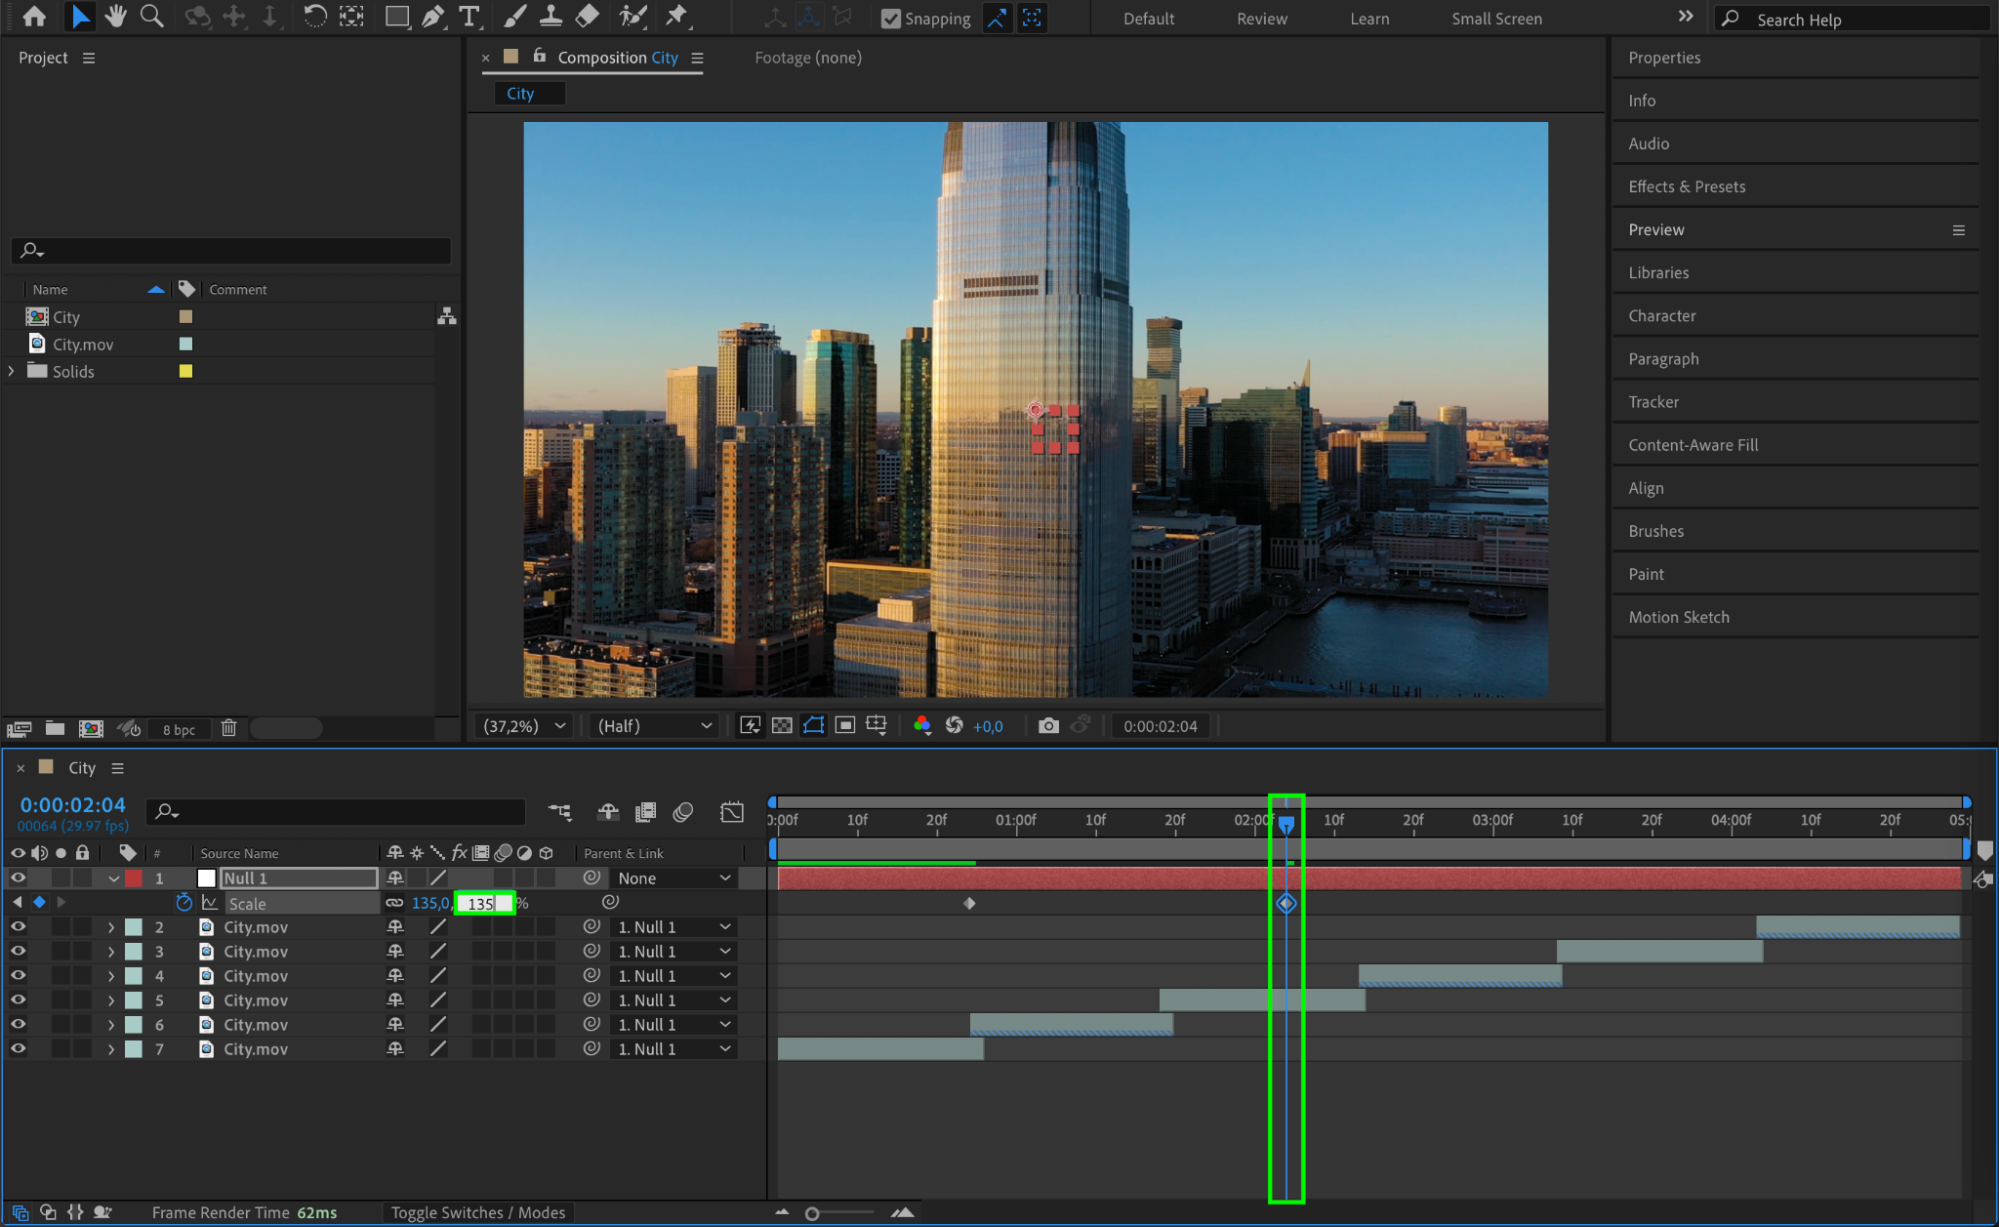
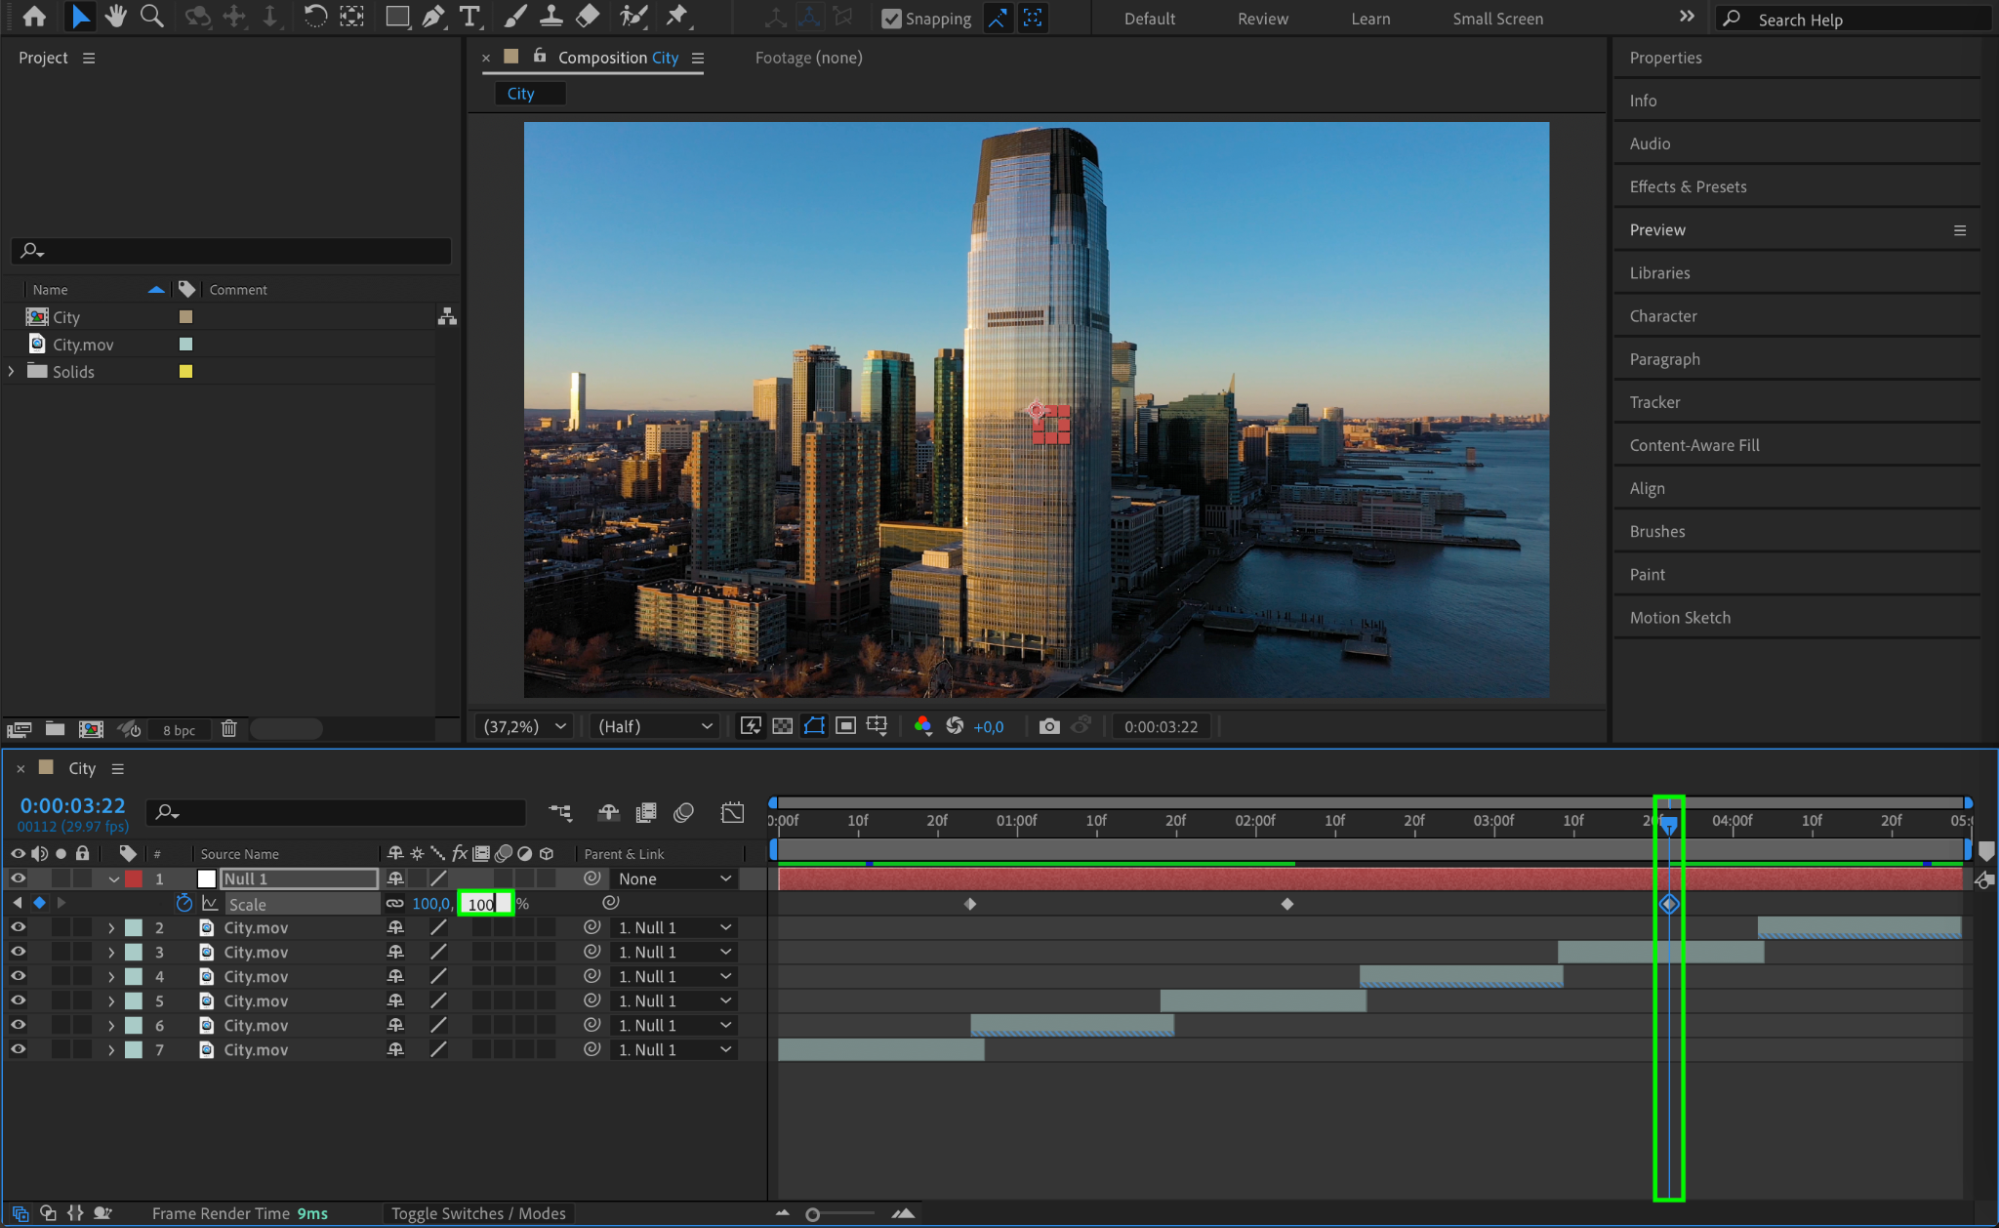
 Step 9: Animate Scale for a Dynamic Effect
Select the Null Object, press “S” to reveal the Scale property. Set keyframes to increase the scale from 100% to 135%, then back to 100% for a zoom-in and out effect. Apply Easy Ease to smooth the animation.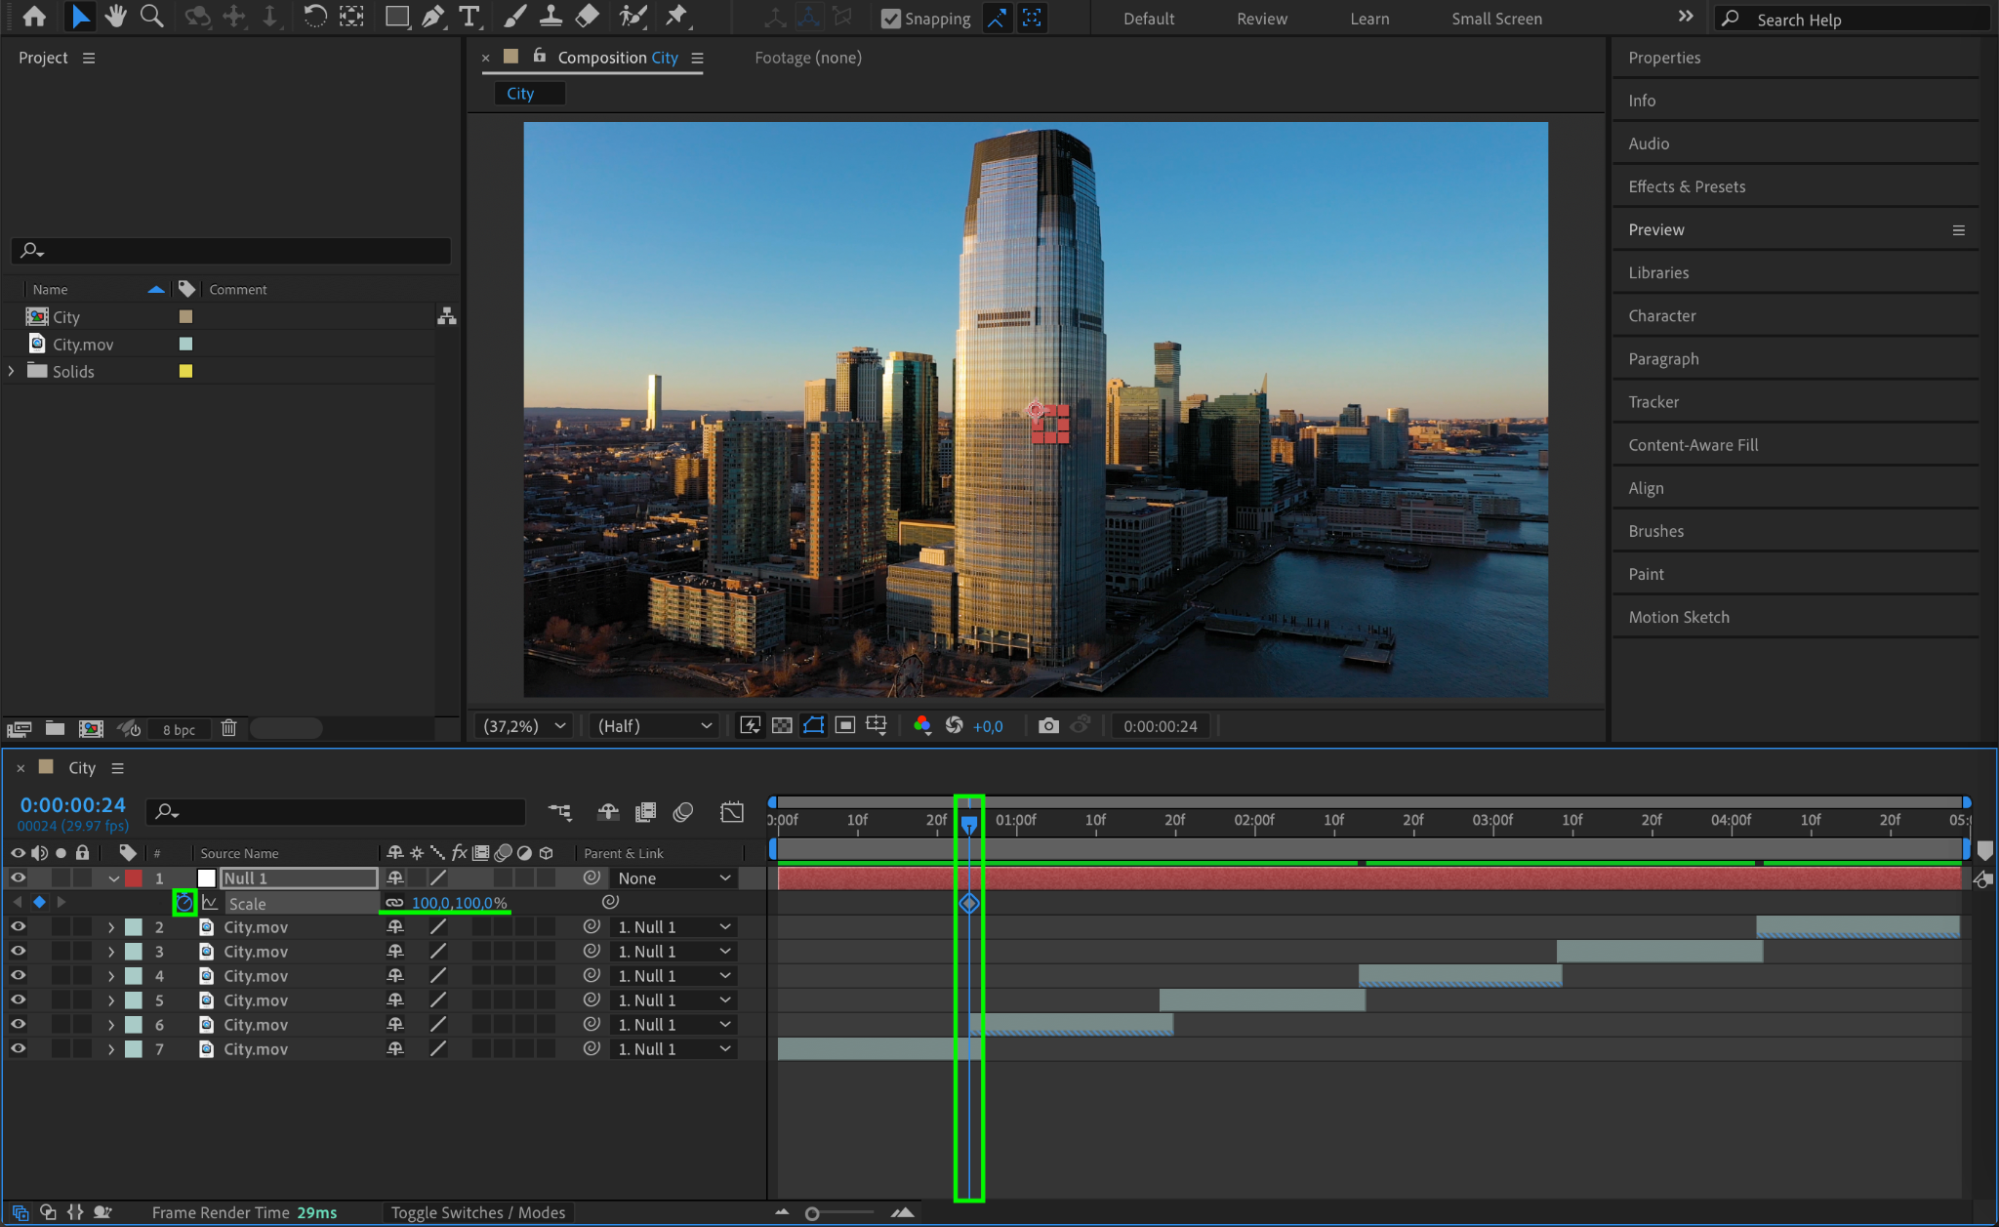
 Step 10: Preview and Adjust
Press Spacebar to preview your animation. If needed, adjust the timing or keyframes to make the loop seamless and natural.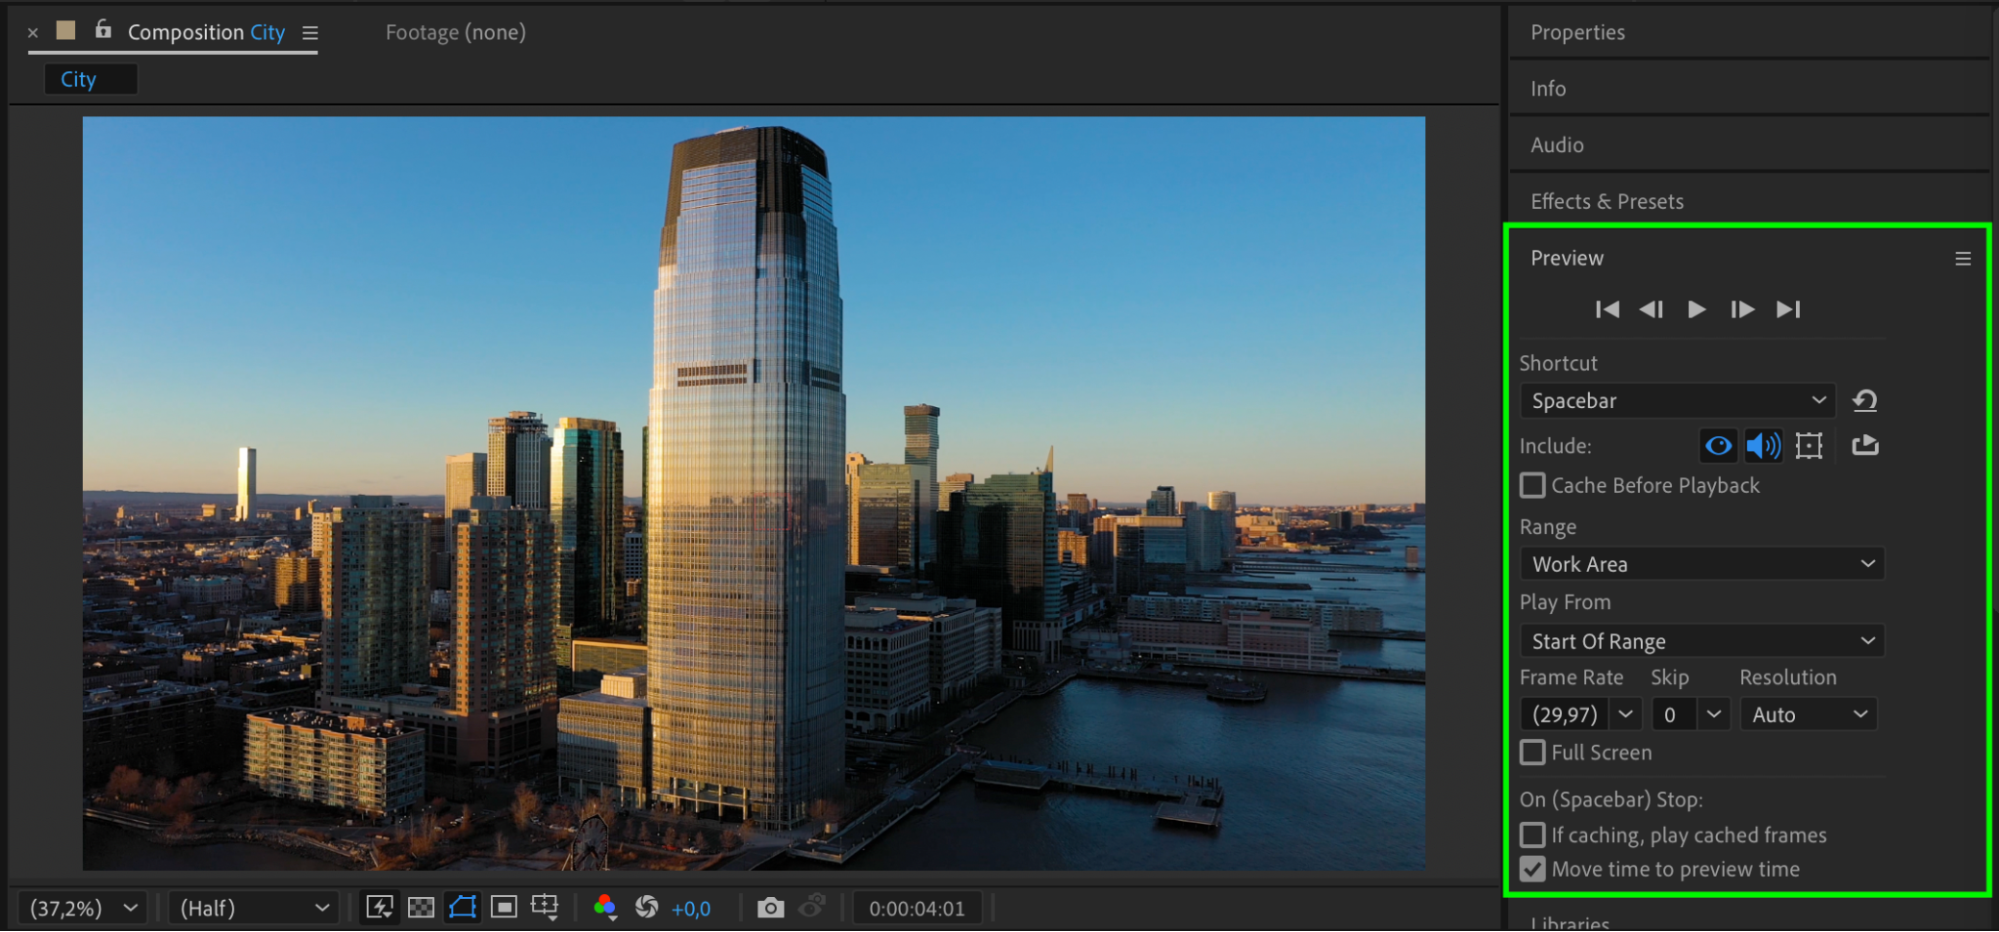 Step 11: Render Your Final Animation
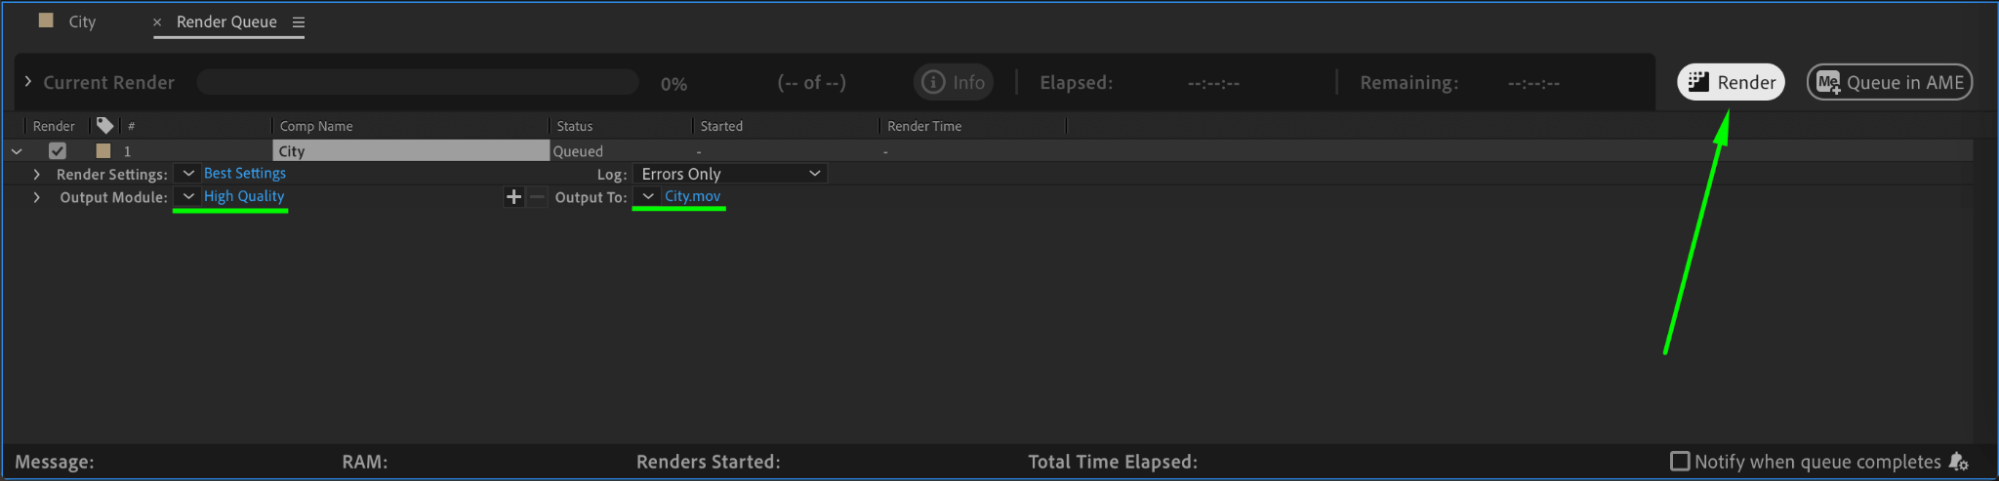
Go to Composition > Add to Render Queue, choose your preferred settings, and click Render to export your boomerang video.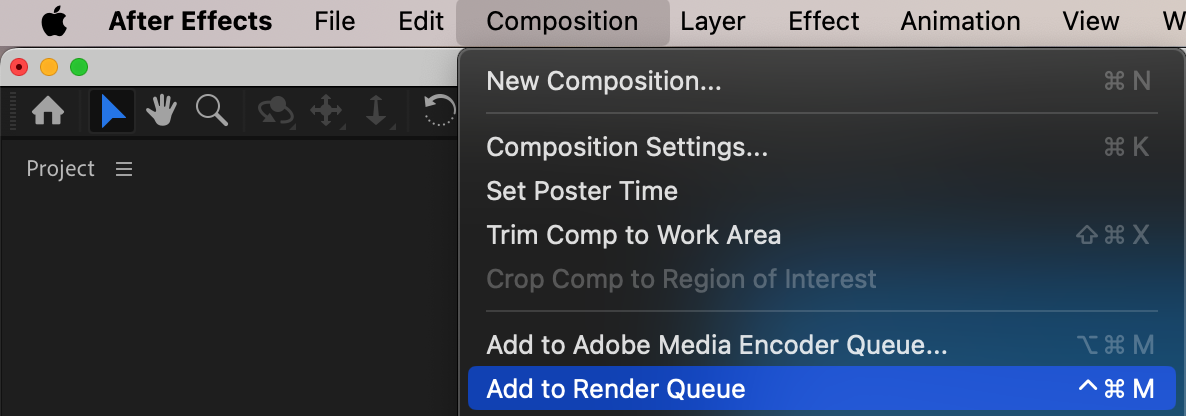
 Conclusion
The boomerang effect in After Effects is a simple but powerful way to create engaging looping animations. By using time remapping, reverse playback, and scale animation, you can achieve a smooth and dynamic effect that enhances your videos.
Our Bestsellers


