Creating a Bubble Pop Animation in After Effects
Introduction to Bubble Pop Animation
Bubble pop animations can add a dynamic and playful effect to your projects. By using shape layers, masks, and simple keyframe animations, you can create a visually appealing effect. In this guide, we will go through the process of designing, animating, and refining a popping bubble effect in After Effects.
Get 10% off when you subscribe to our newsletter

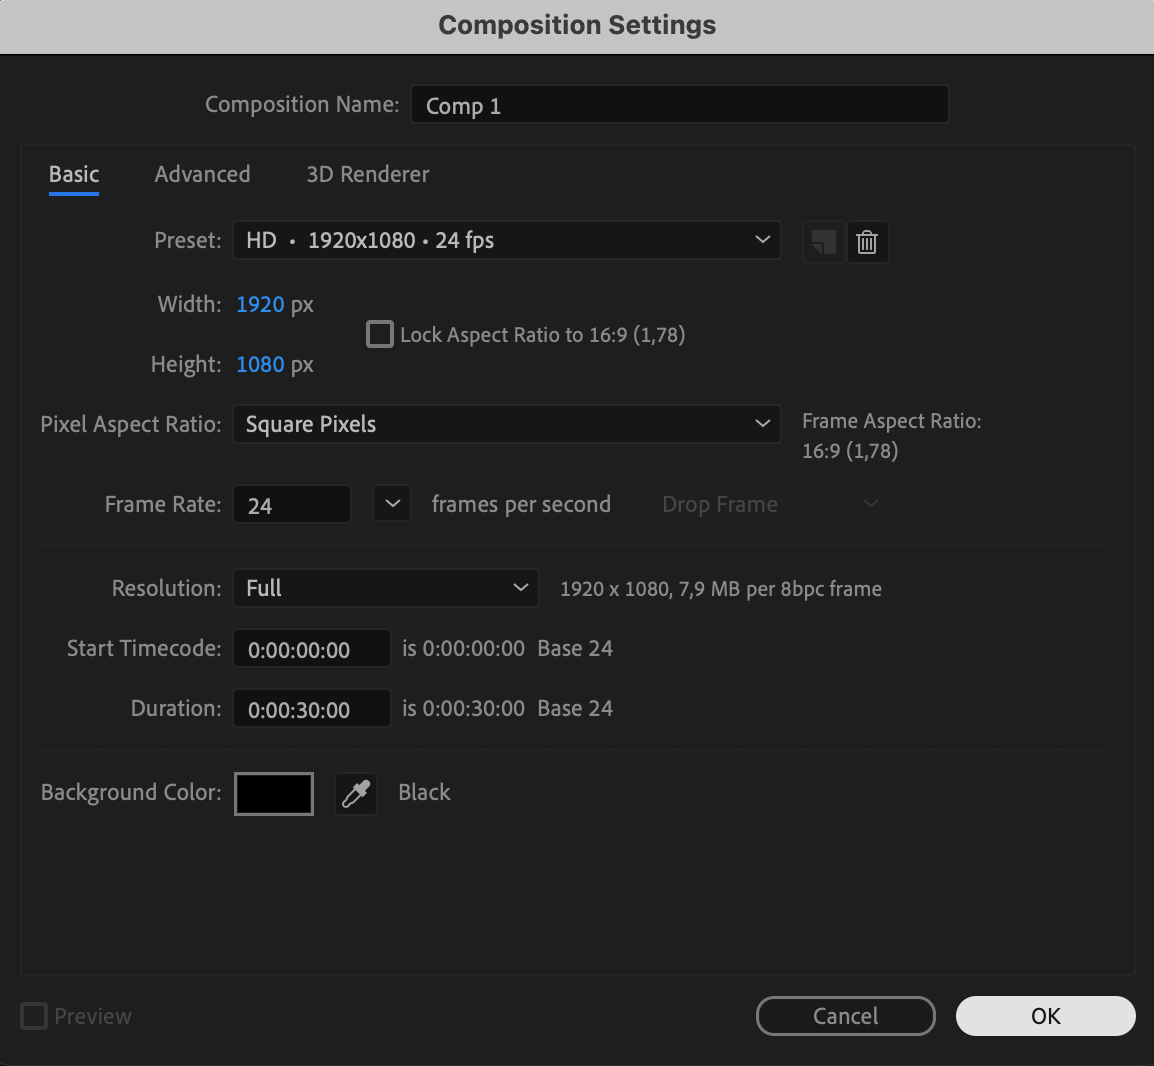
Step 1: Create a New Composition
Start by creating a New Composition (Composition > New Composition) with the desired settings. Use a Frame Rate of 24fps and set the duration to a few seconds to allow enough time for the animation.
 Step 2: Create the Background
Go to Layer > New > Solid, choose White as the color, and name the layer BG. This will act as the background for your animation.
 Step 3: Add a Shape Layer for the Bubble
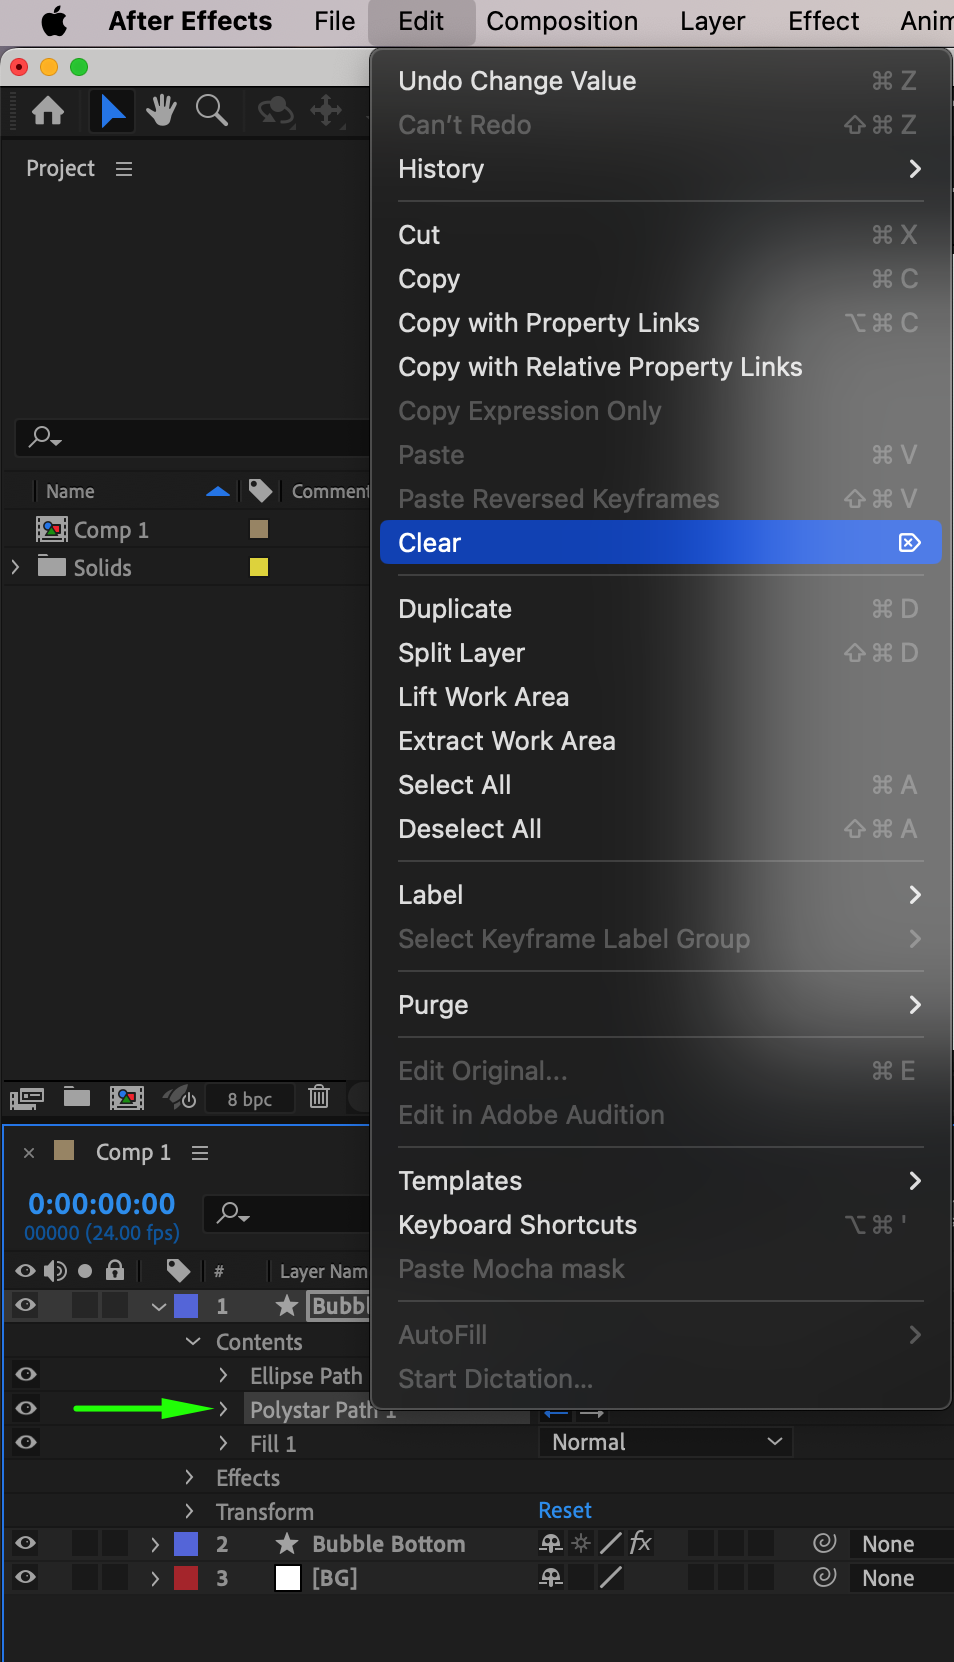
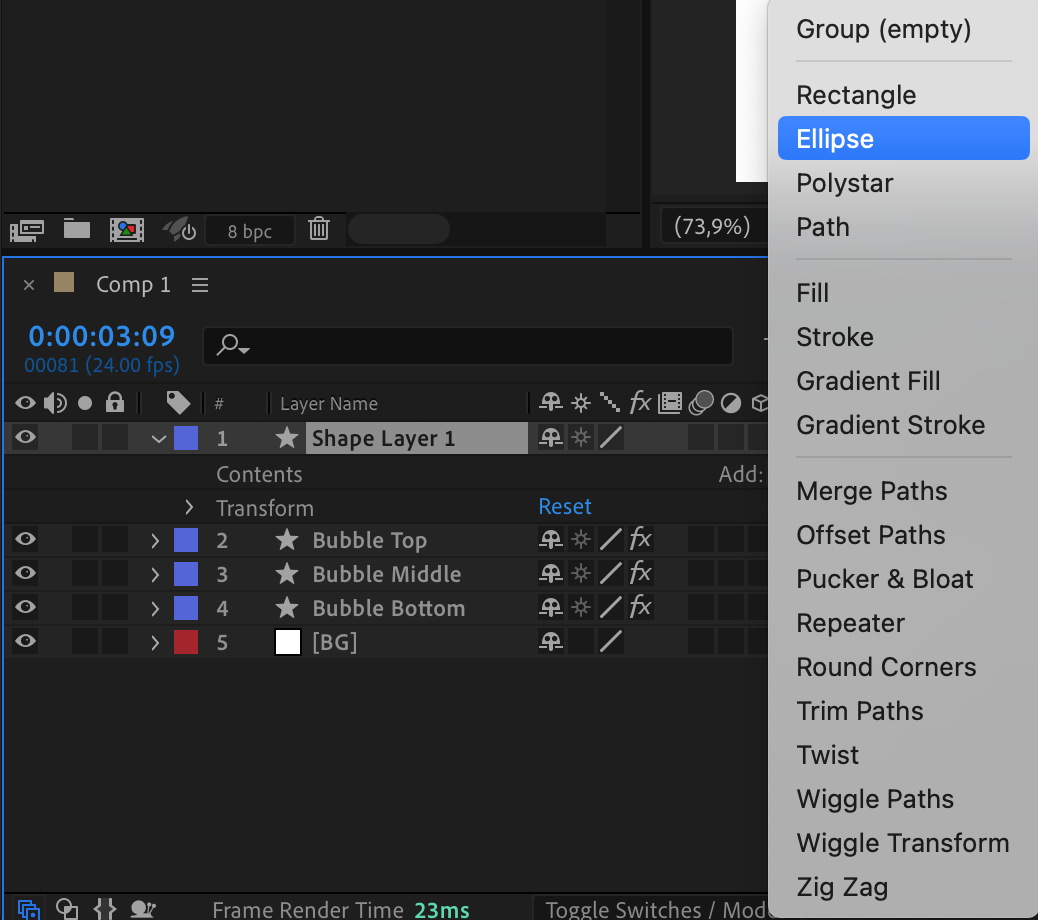
Create a new Shape Layer by selecting Layer > New > Shape Layer. This will serve as the base of the bubble.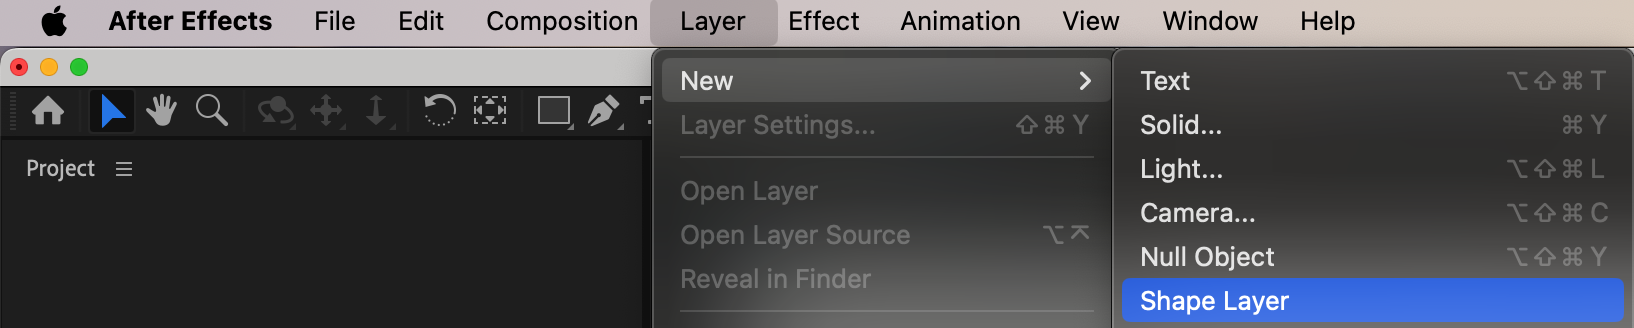 Step 4: Add Ellipse and Polystar Shapes
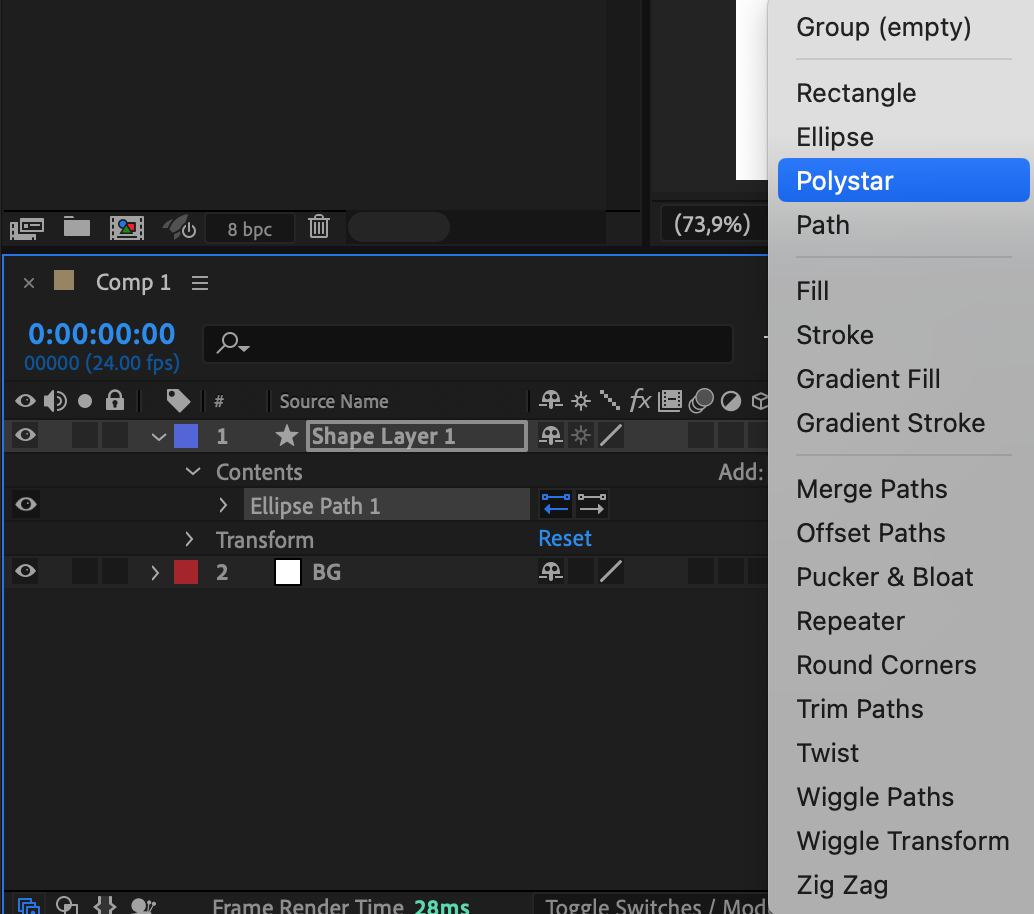
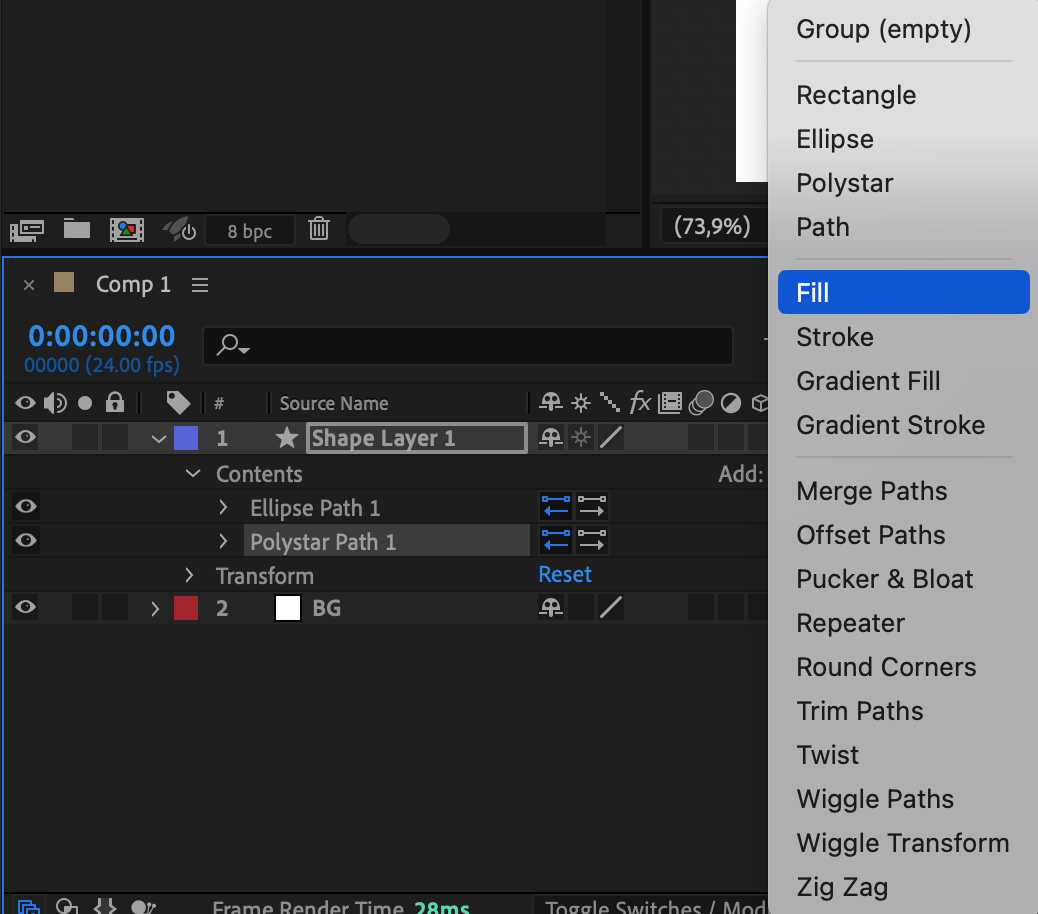
Expand the Shape Layer properties.
Click Add > Ellipse and Polystar (to give the bubble a slightly irregular shape).
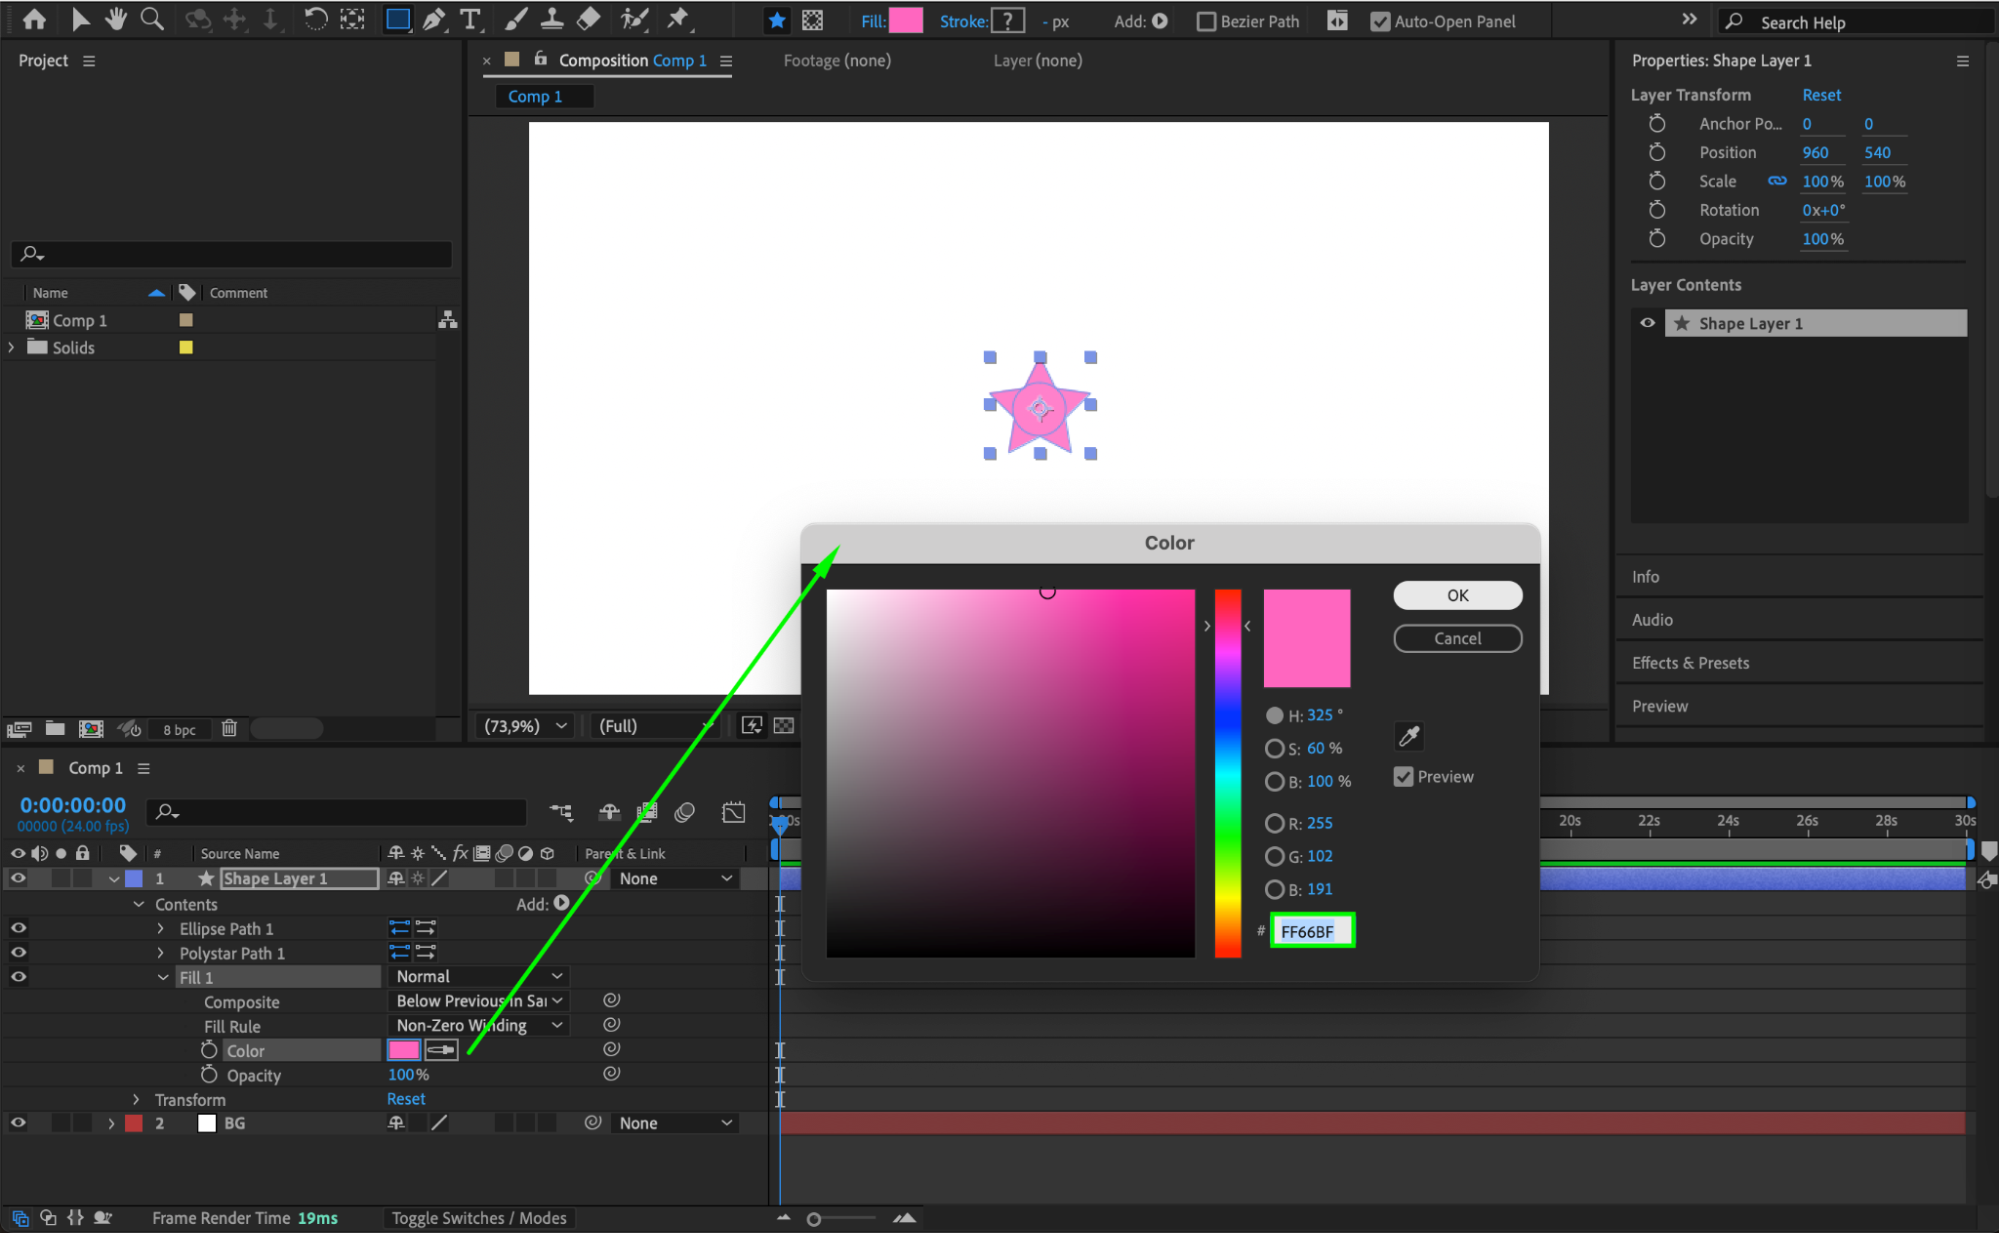
Click Add > Fill and set the color to #FF66BF.
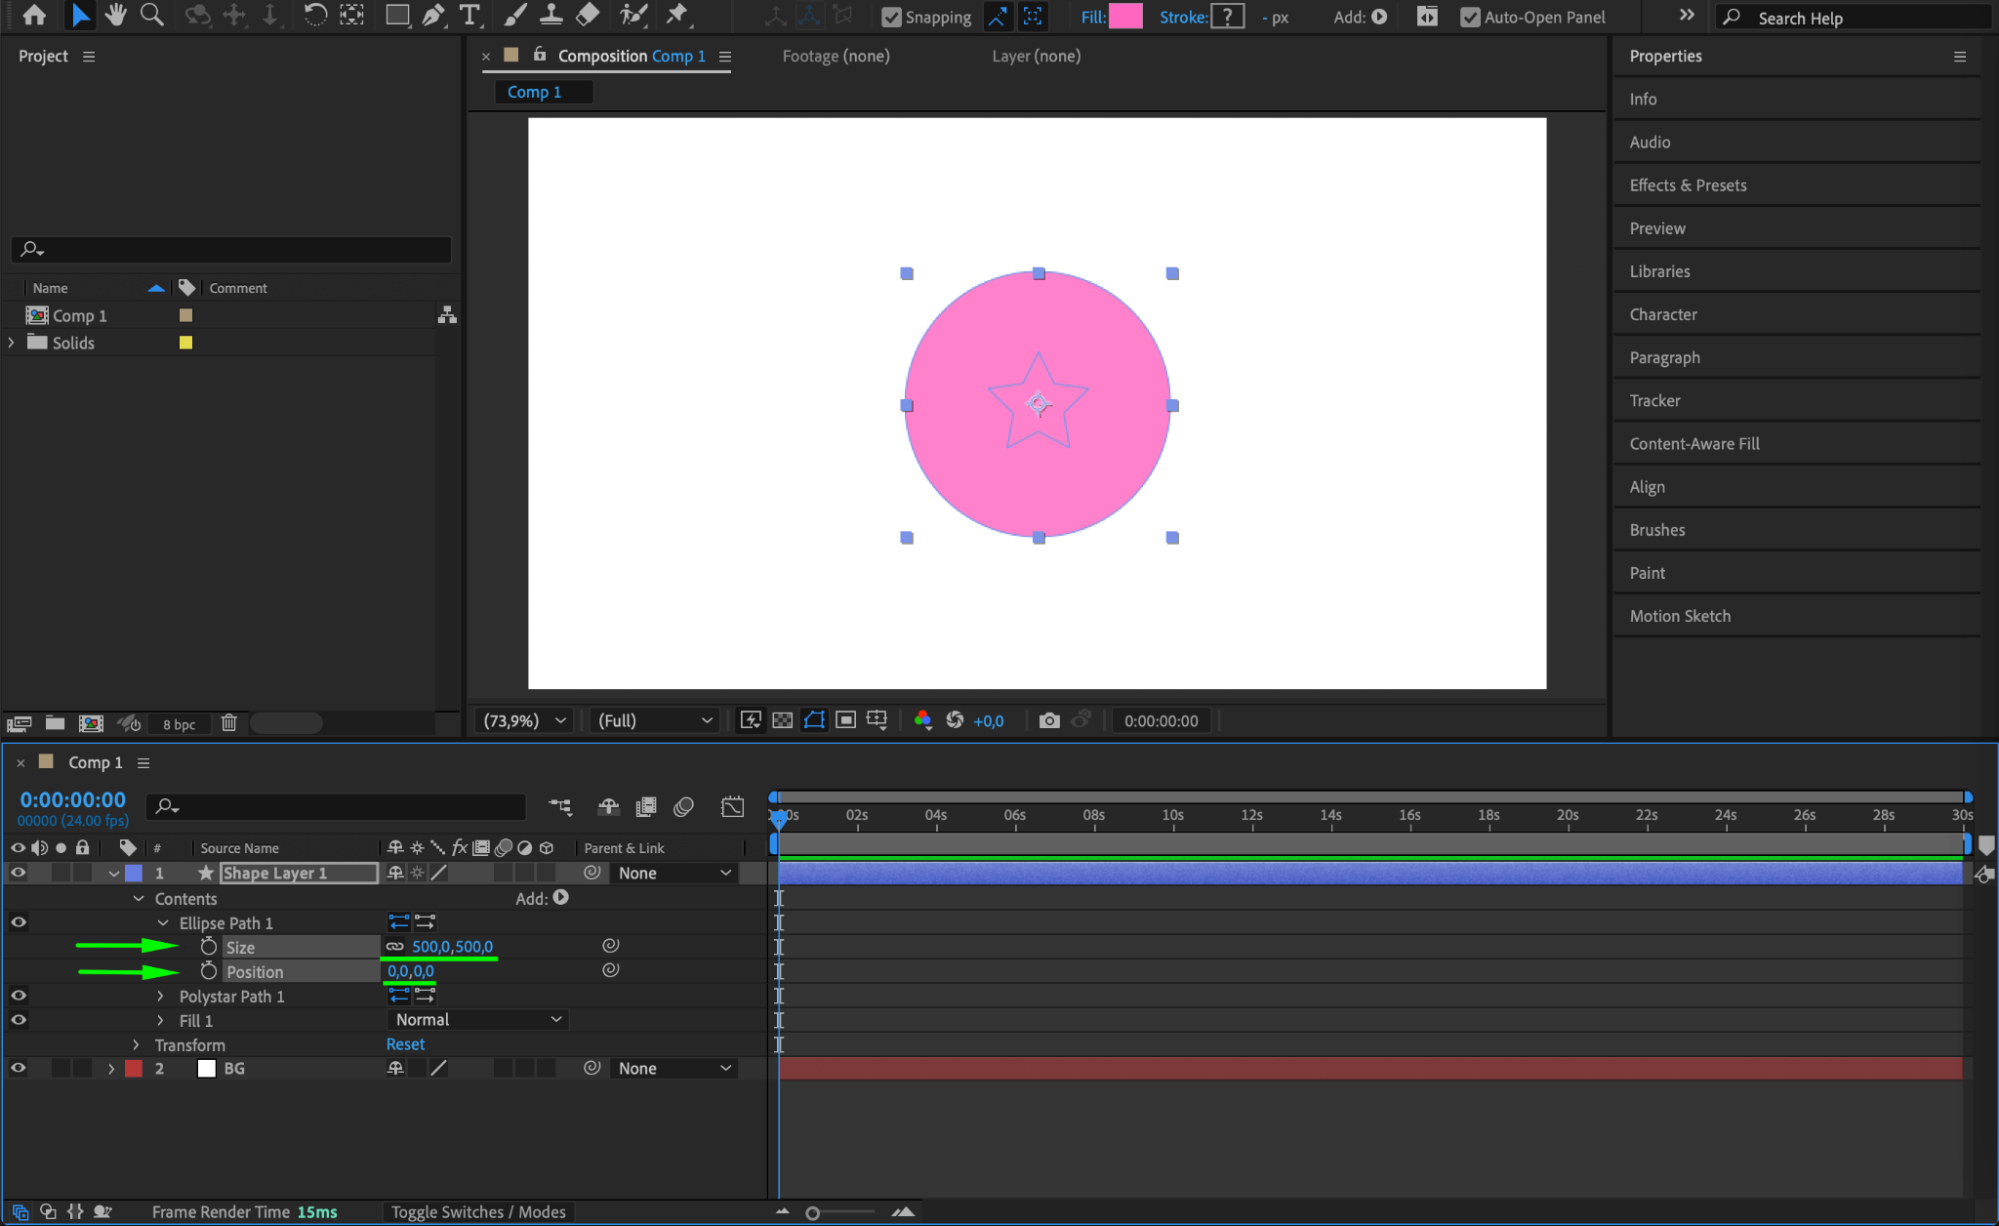
Adjust the Ellipse Path 1:
Size: 500px
Position: (0,0)
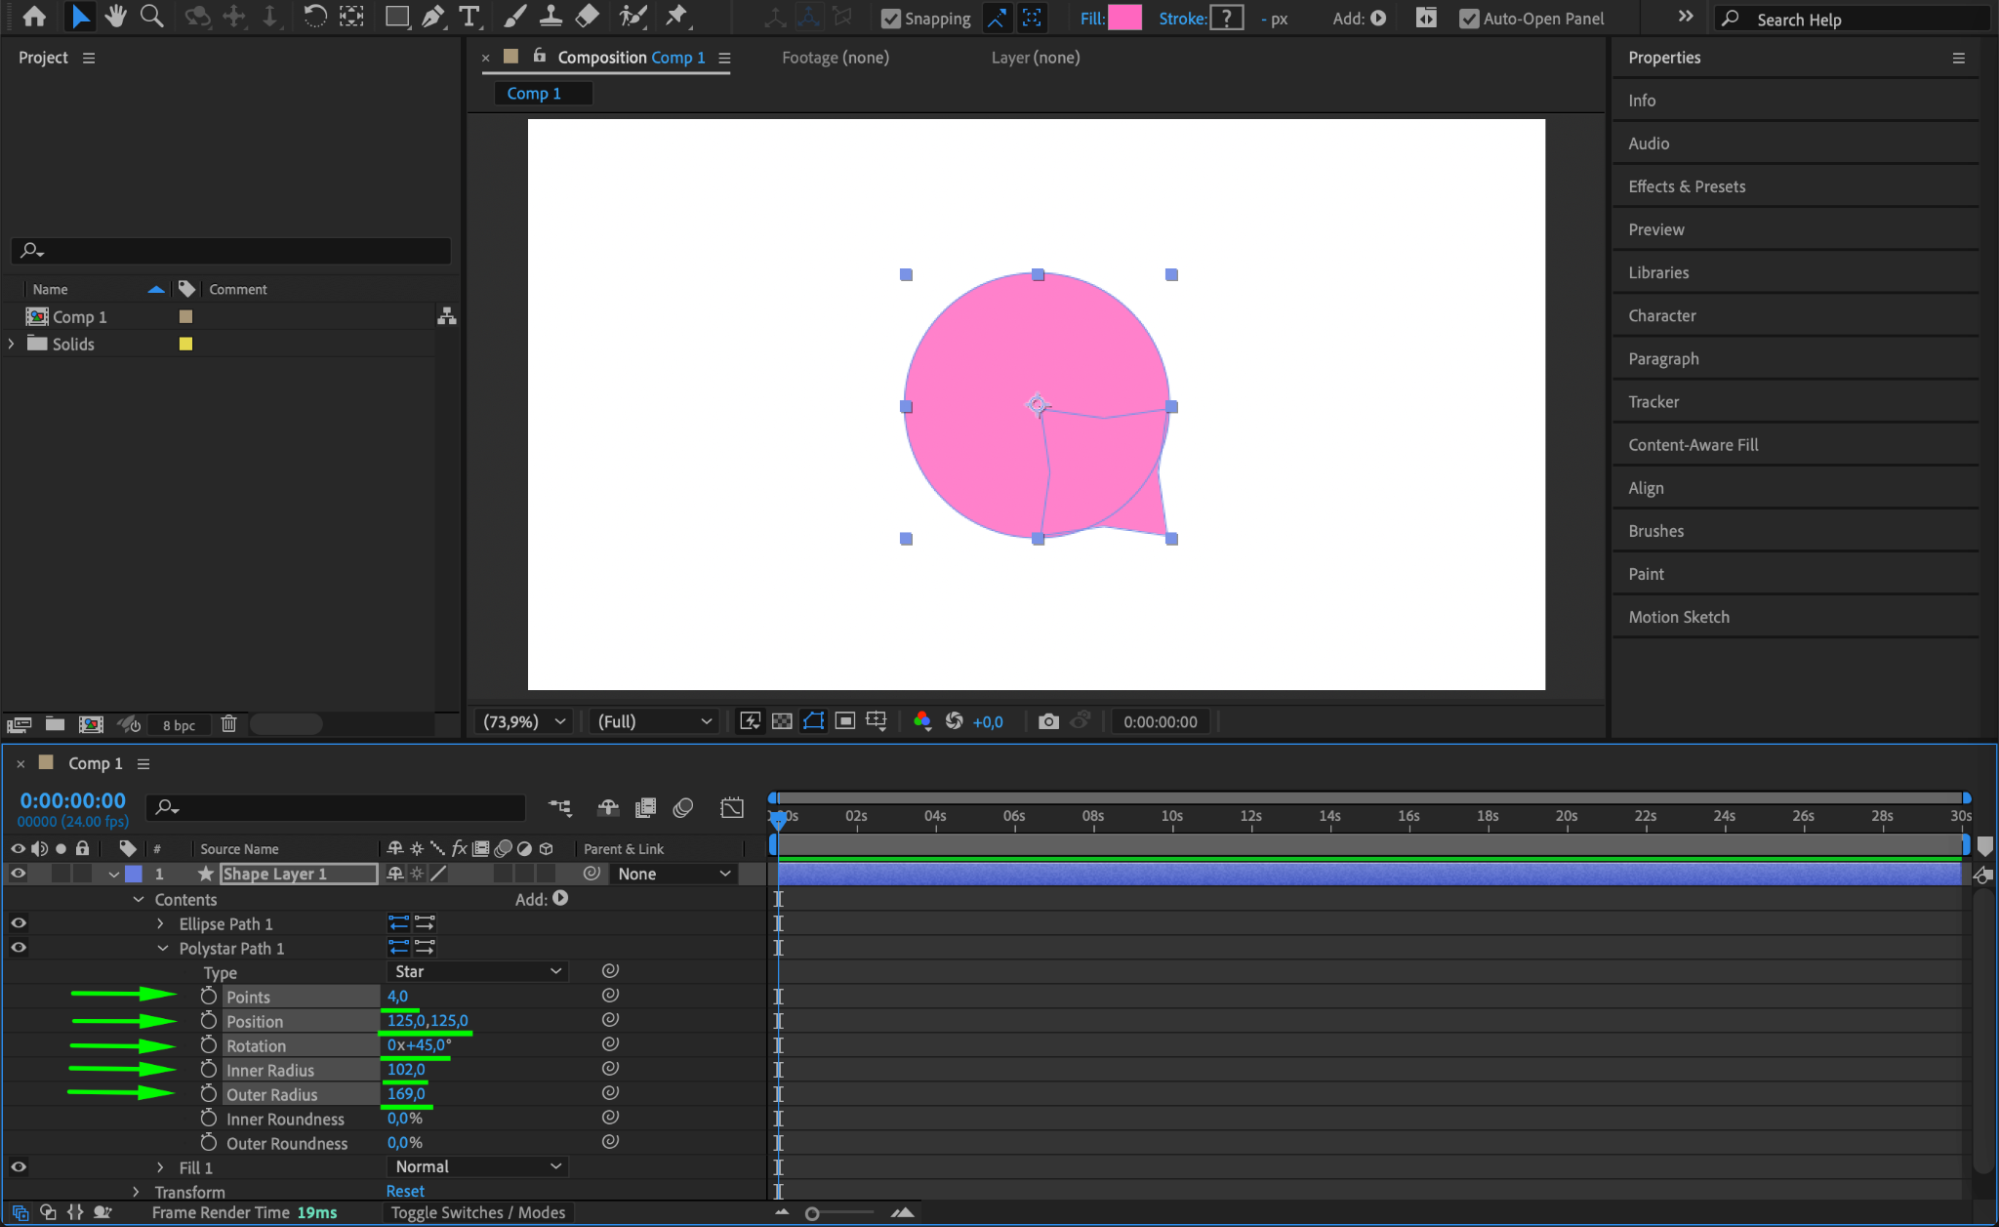
Adjust the Polystar Path 1:
Points: 4
Position: (125,125)
Rotation: 45°
Inner Radius: 102px
Outer Radius: 169px
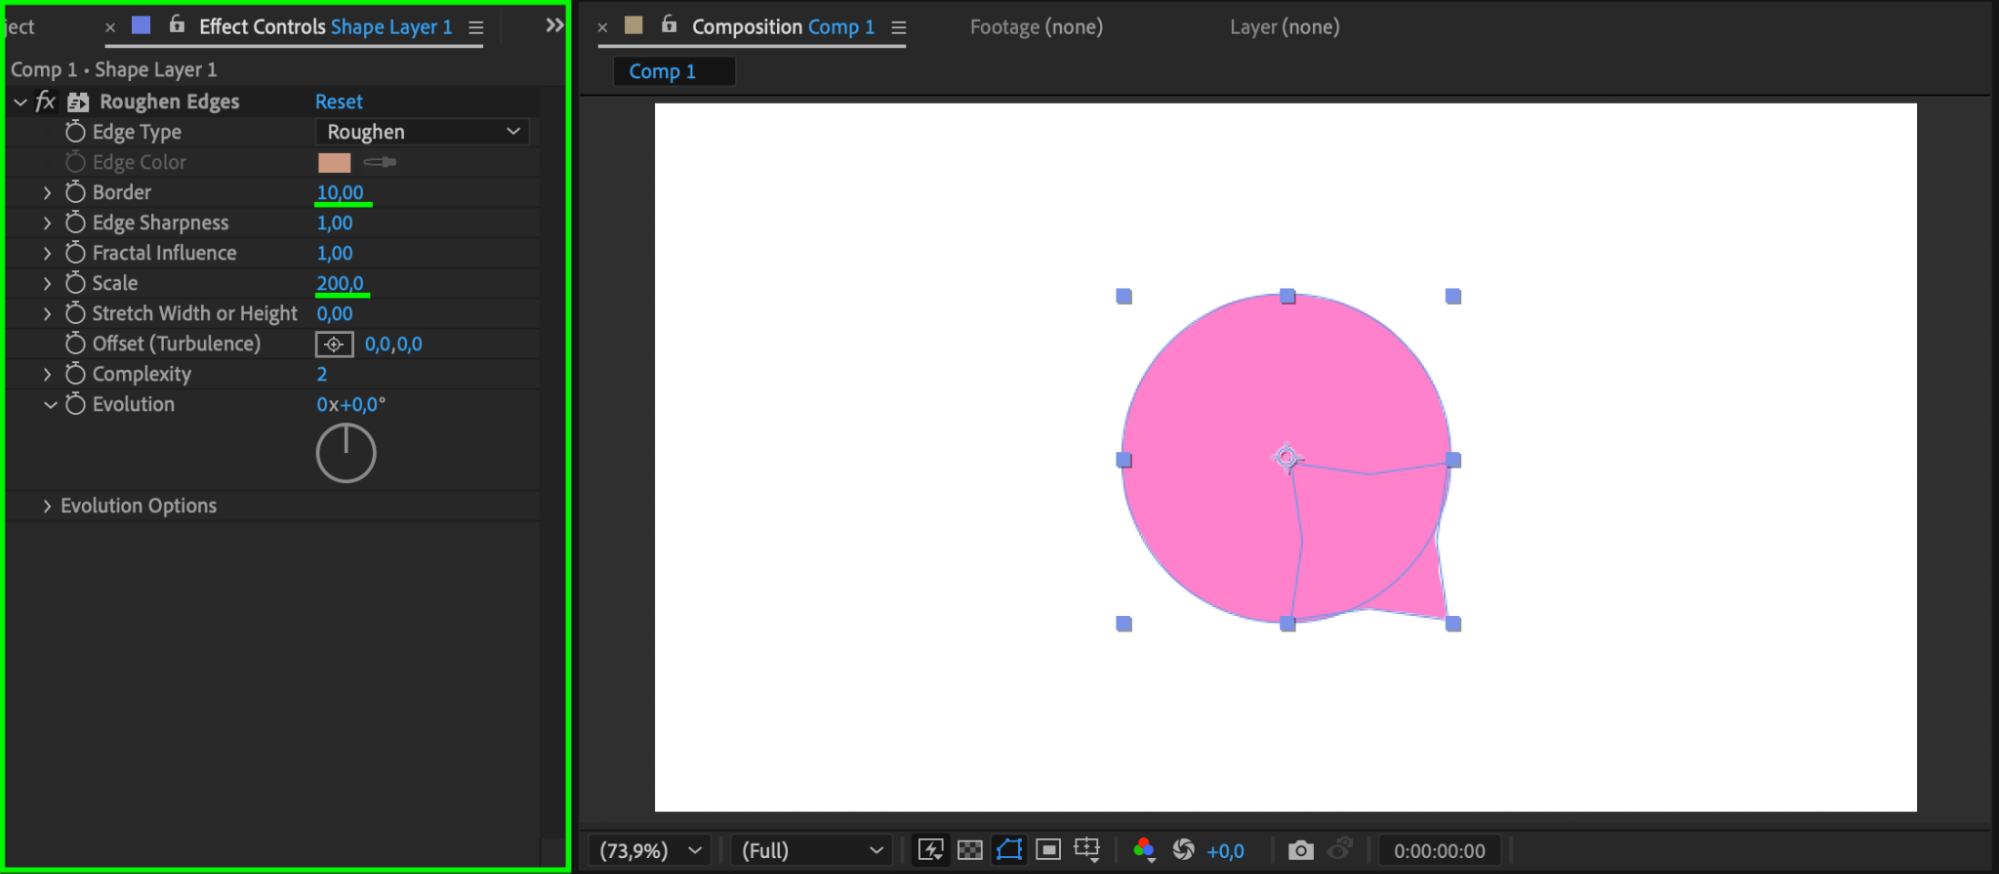
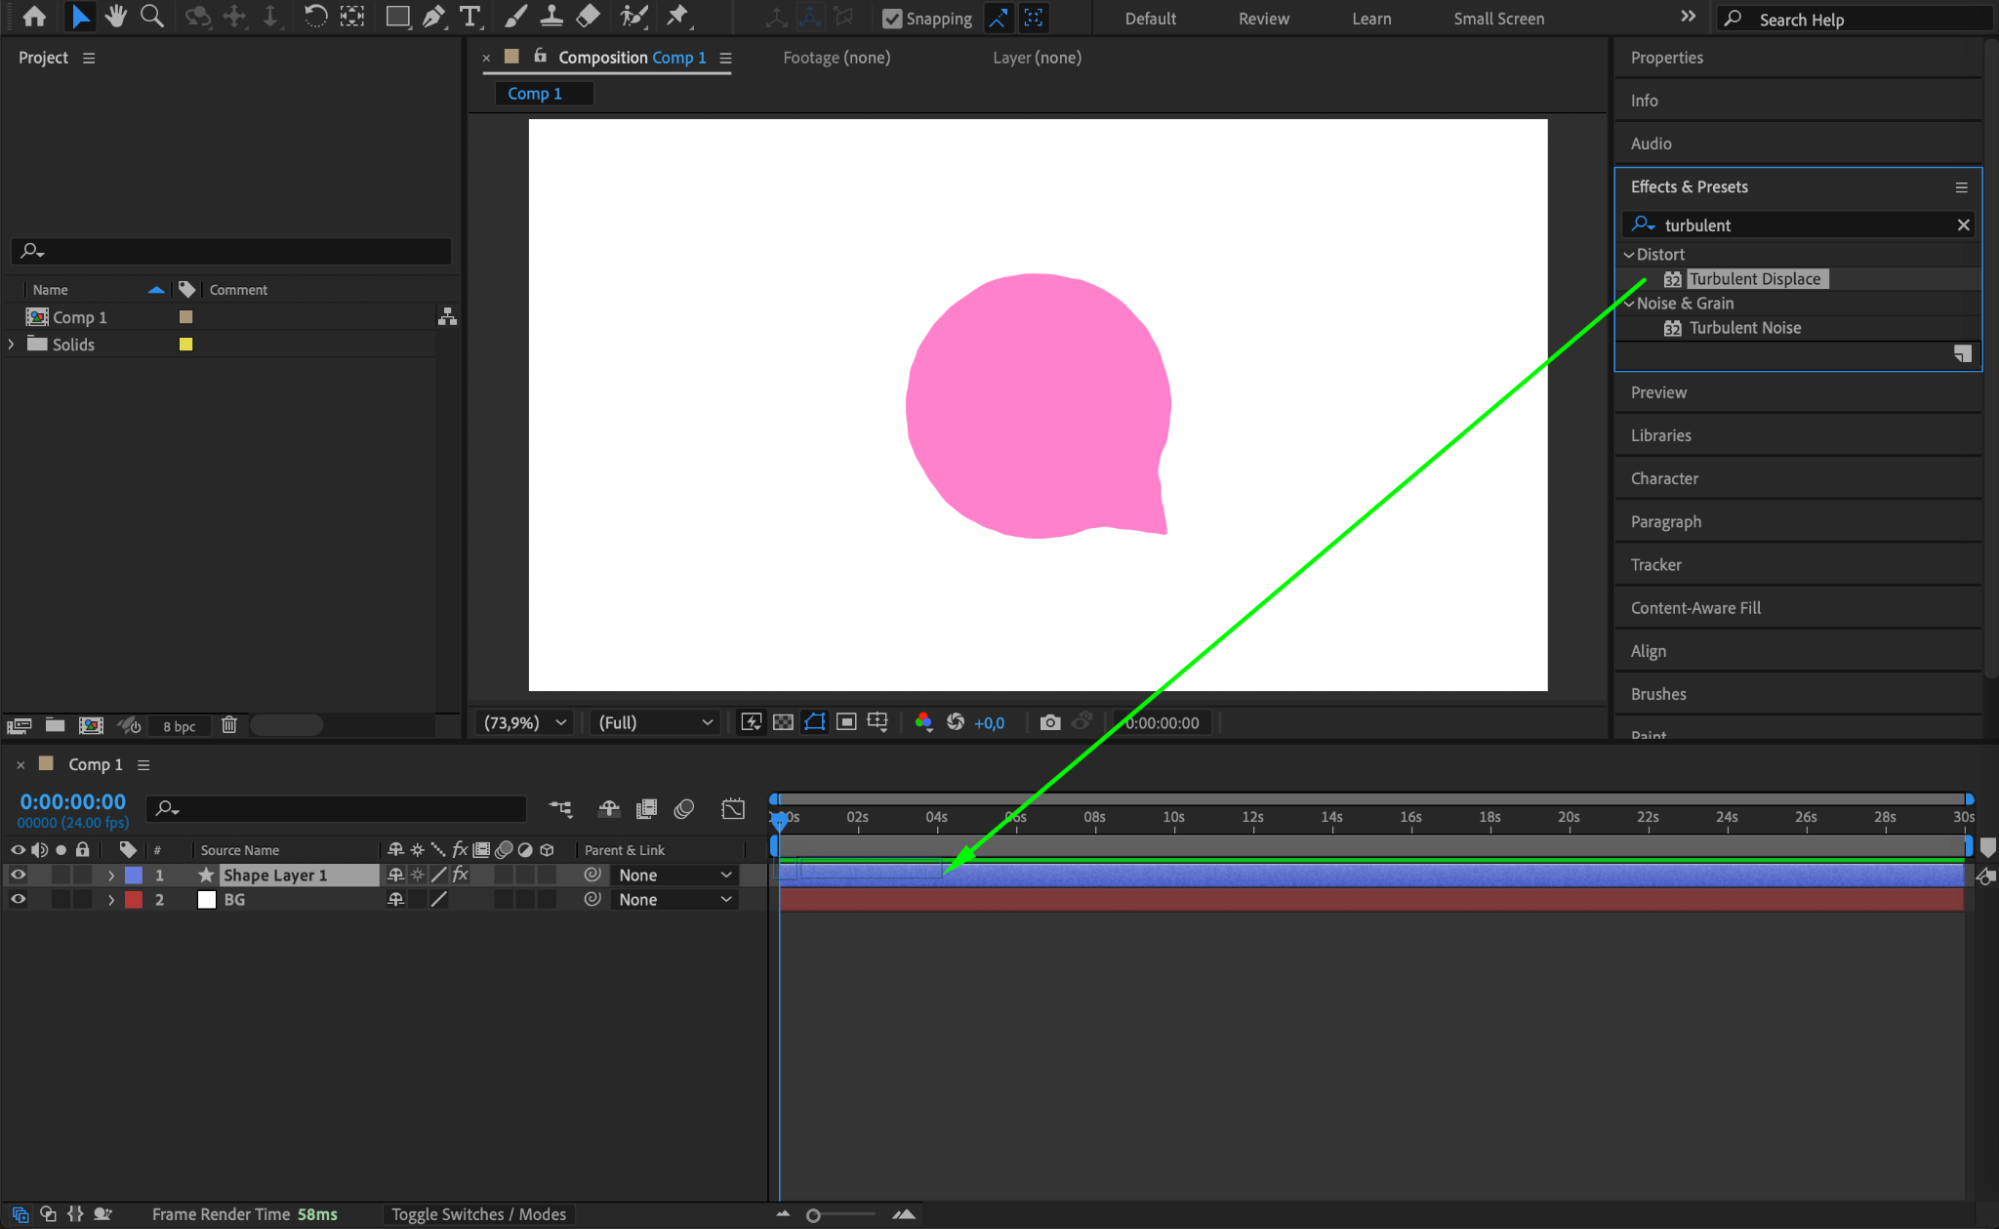
 Step 5: Add Roughen Edges and Turbulent Displace
Apply Roughen Edges effect:
Border: 10
Scale: 200
Apply Turbulent Displace effect:
Amount: 2
Size: 323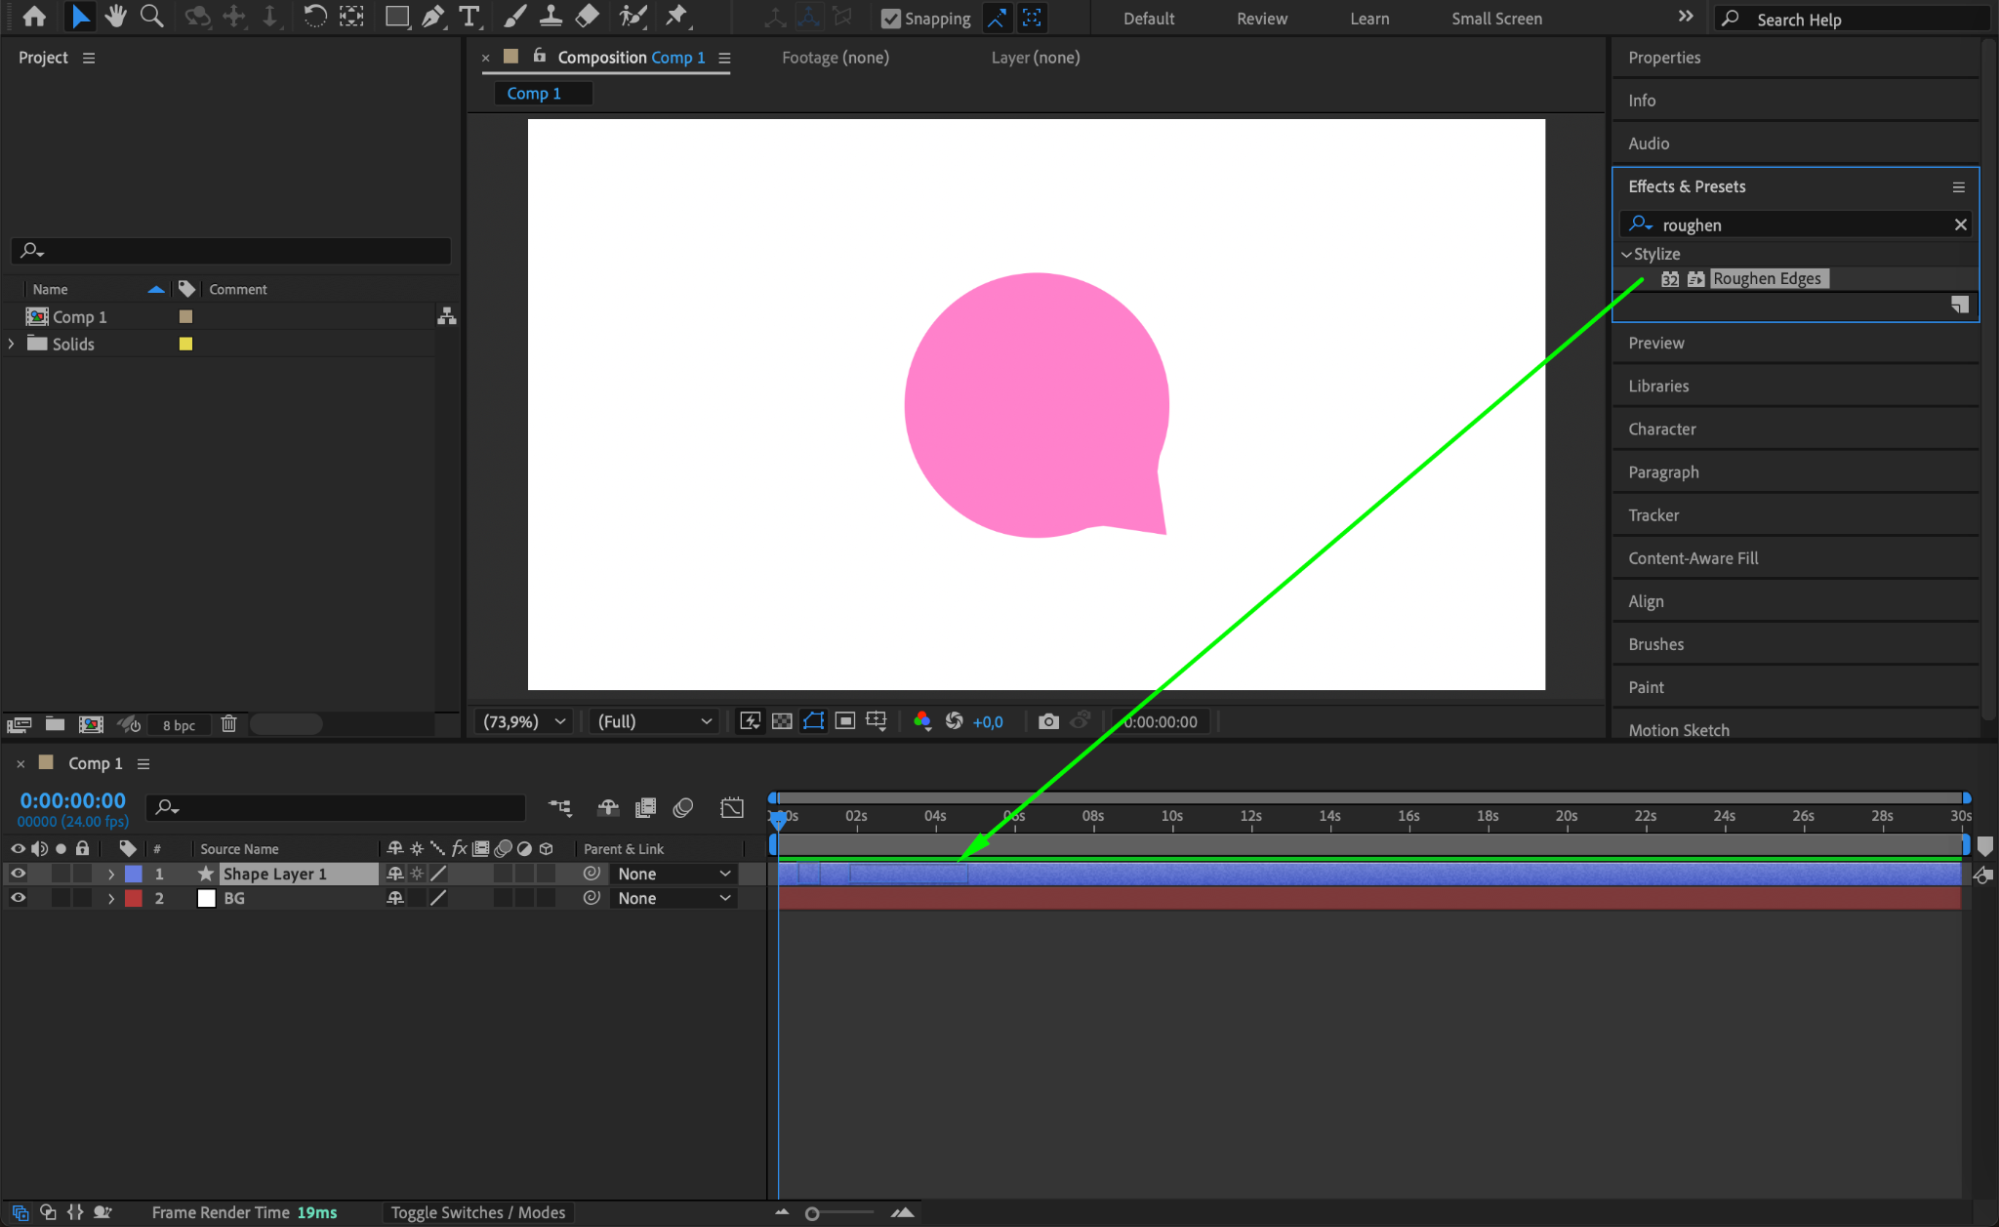
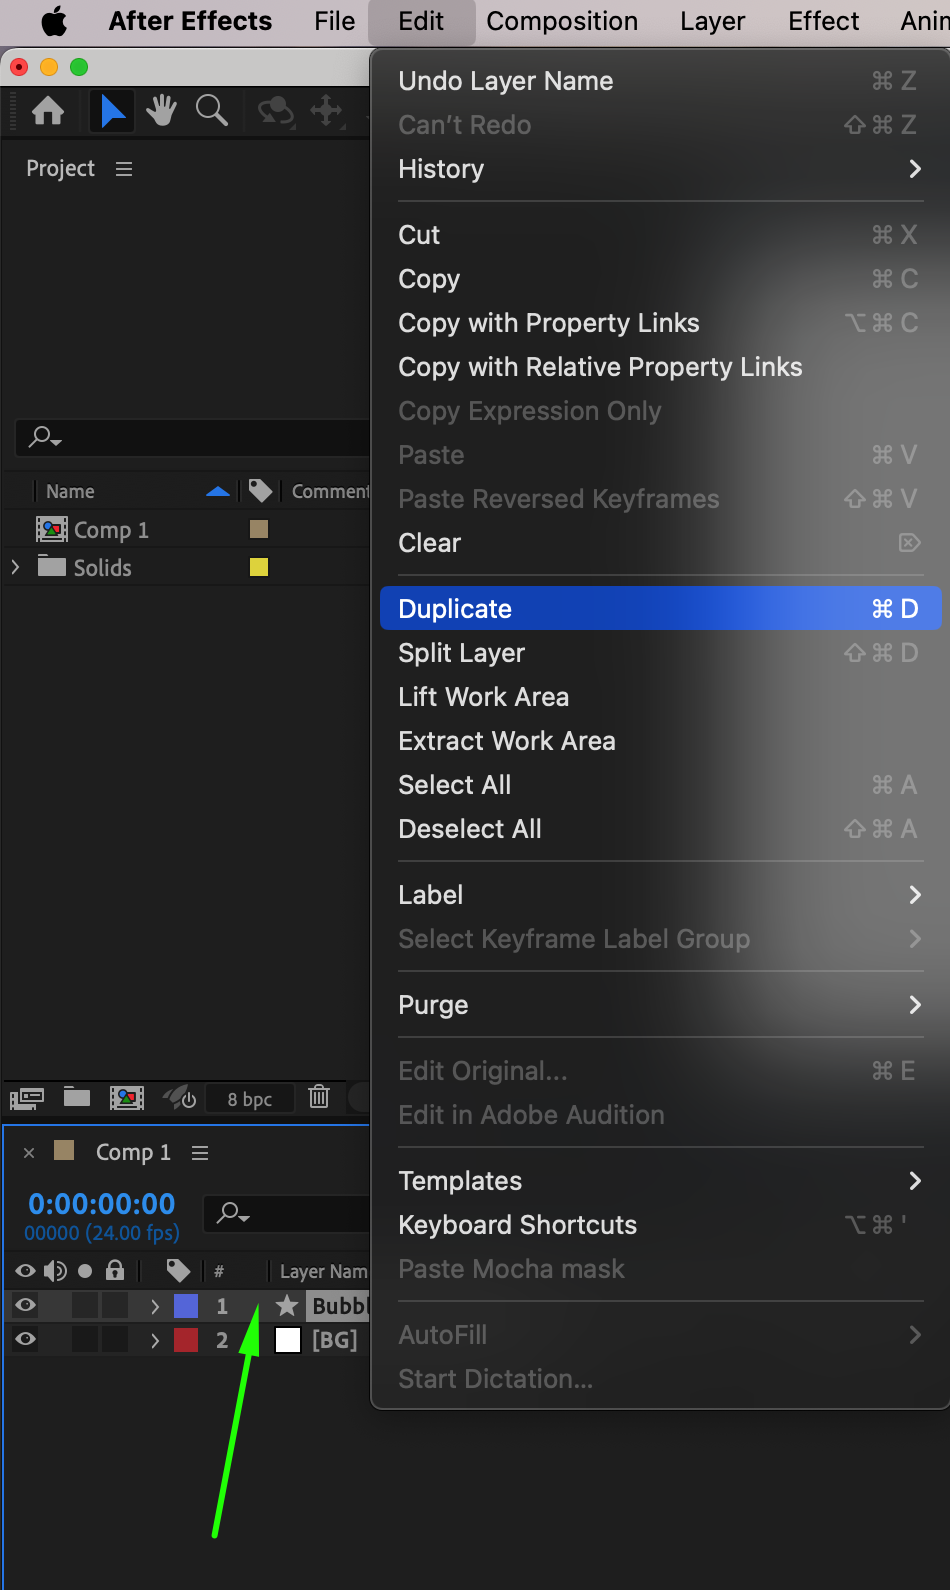
 Step 6: Duplicate Layers to Add Depth
Duplicate the shape layer twice (Ctrl/Cmd + D). Rename the layers: Bubble Bottom (original layer), Bubble Middle (first duplicate), Bubble Top (second duplicate).
 Step 7: Modify the Duplicates
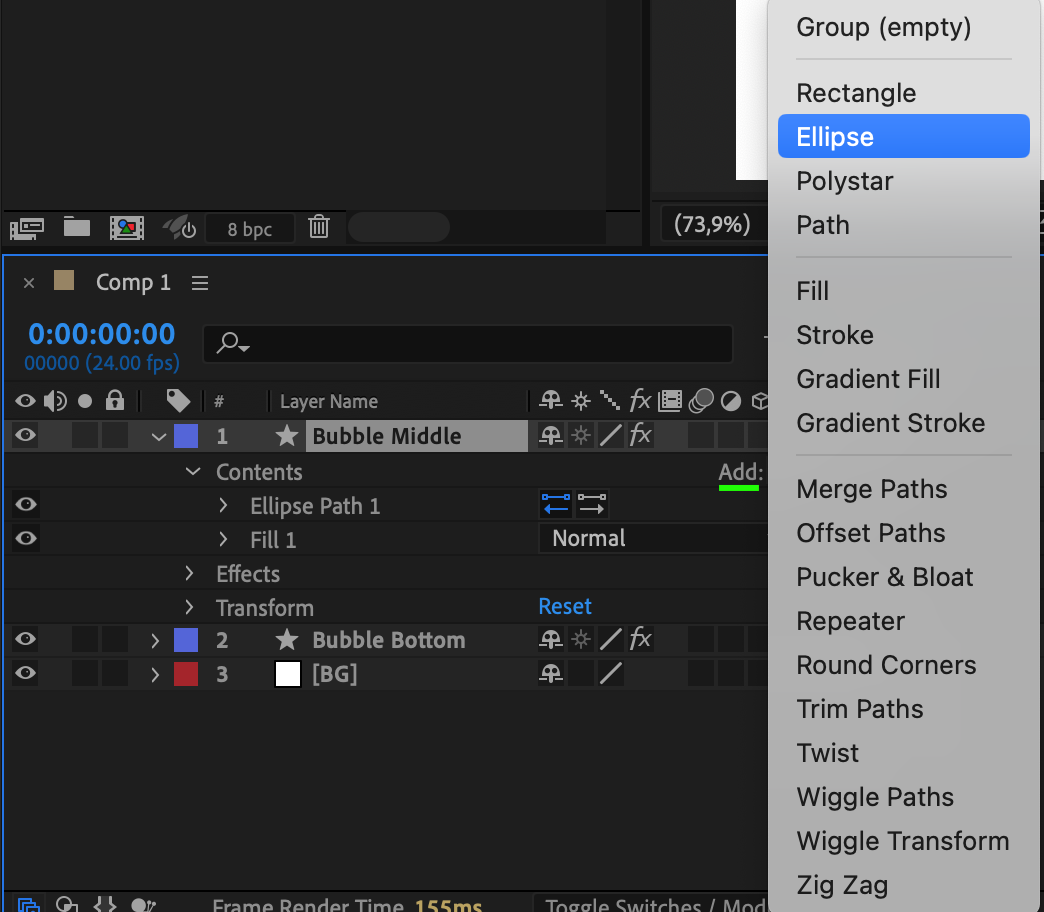
Bubble Middle
Change Fill Color to #FF80CA.
Delete Polystar Path 1.
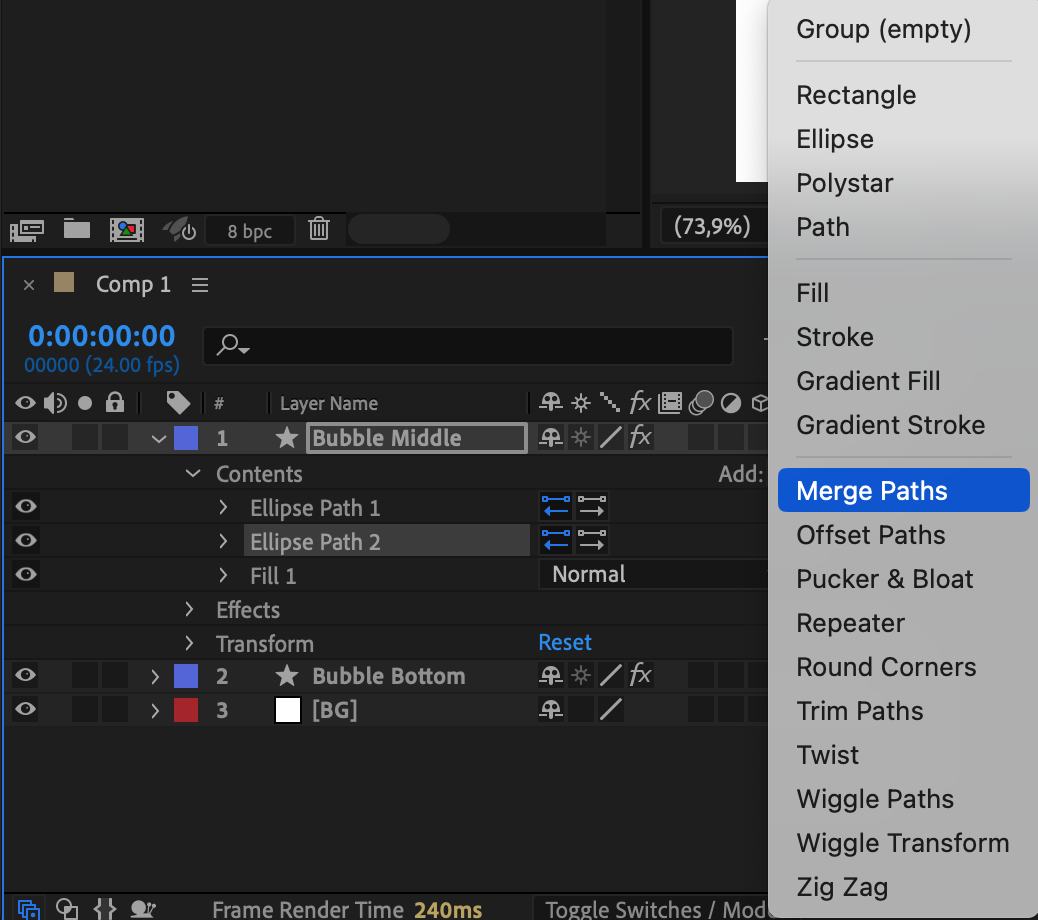
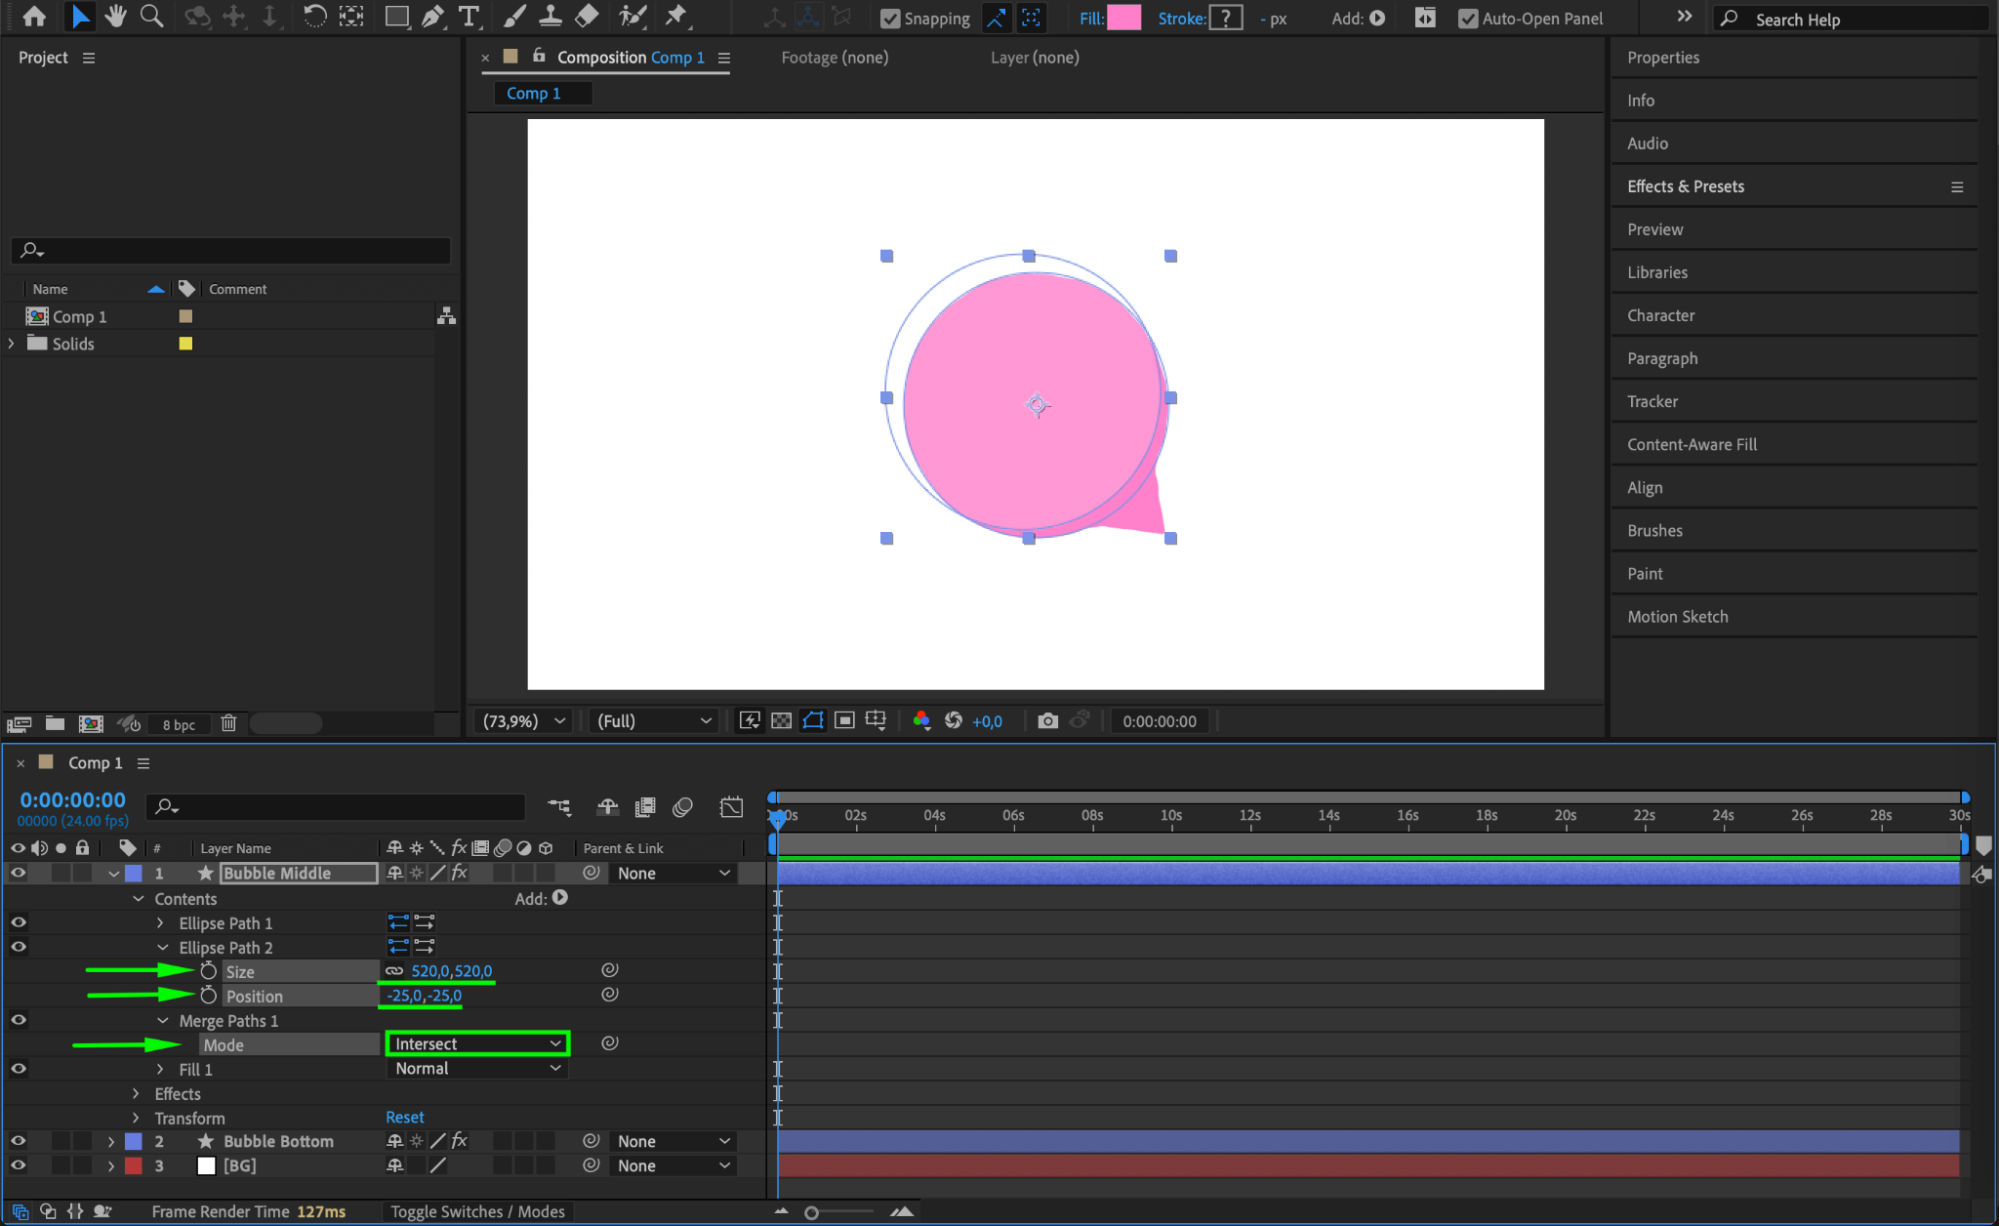
Add Ellipse Path and Merge Paths (Mode: Intersect).
Adjust Ellipse Path:
Size: 520px
Position: (-25,-25)
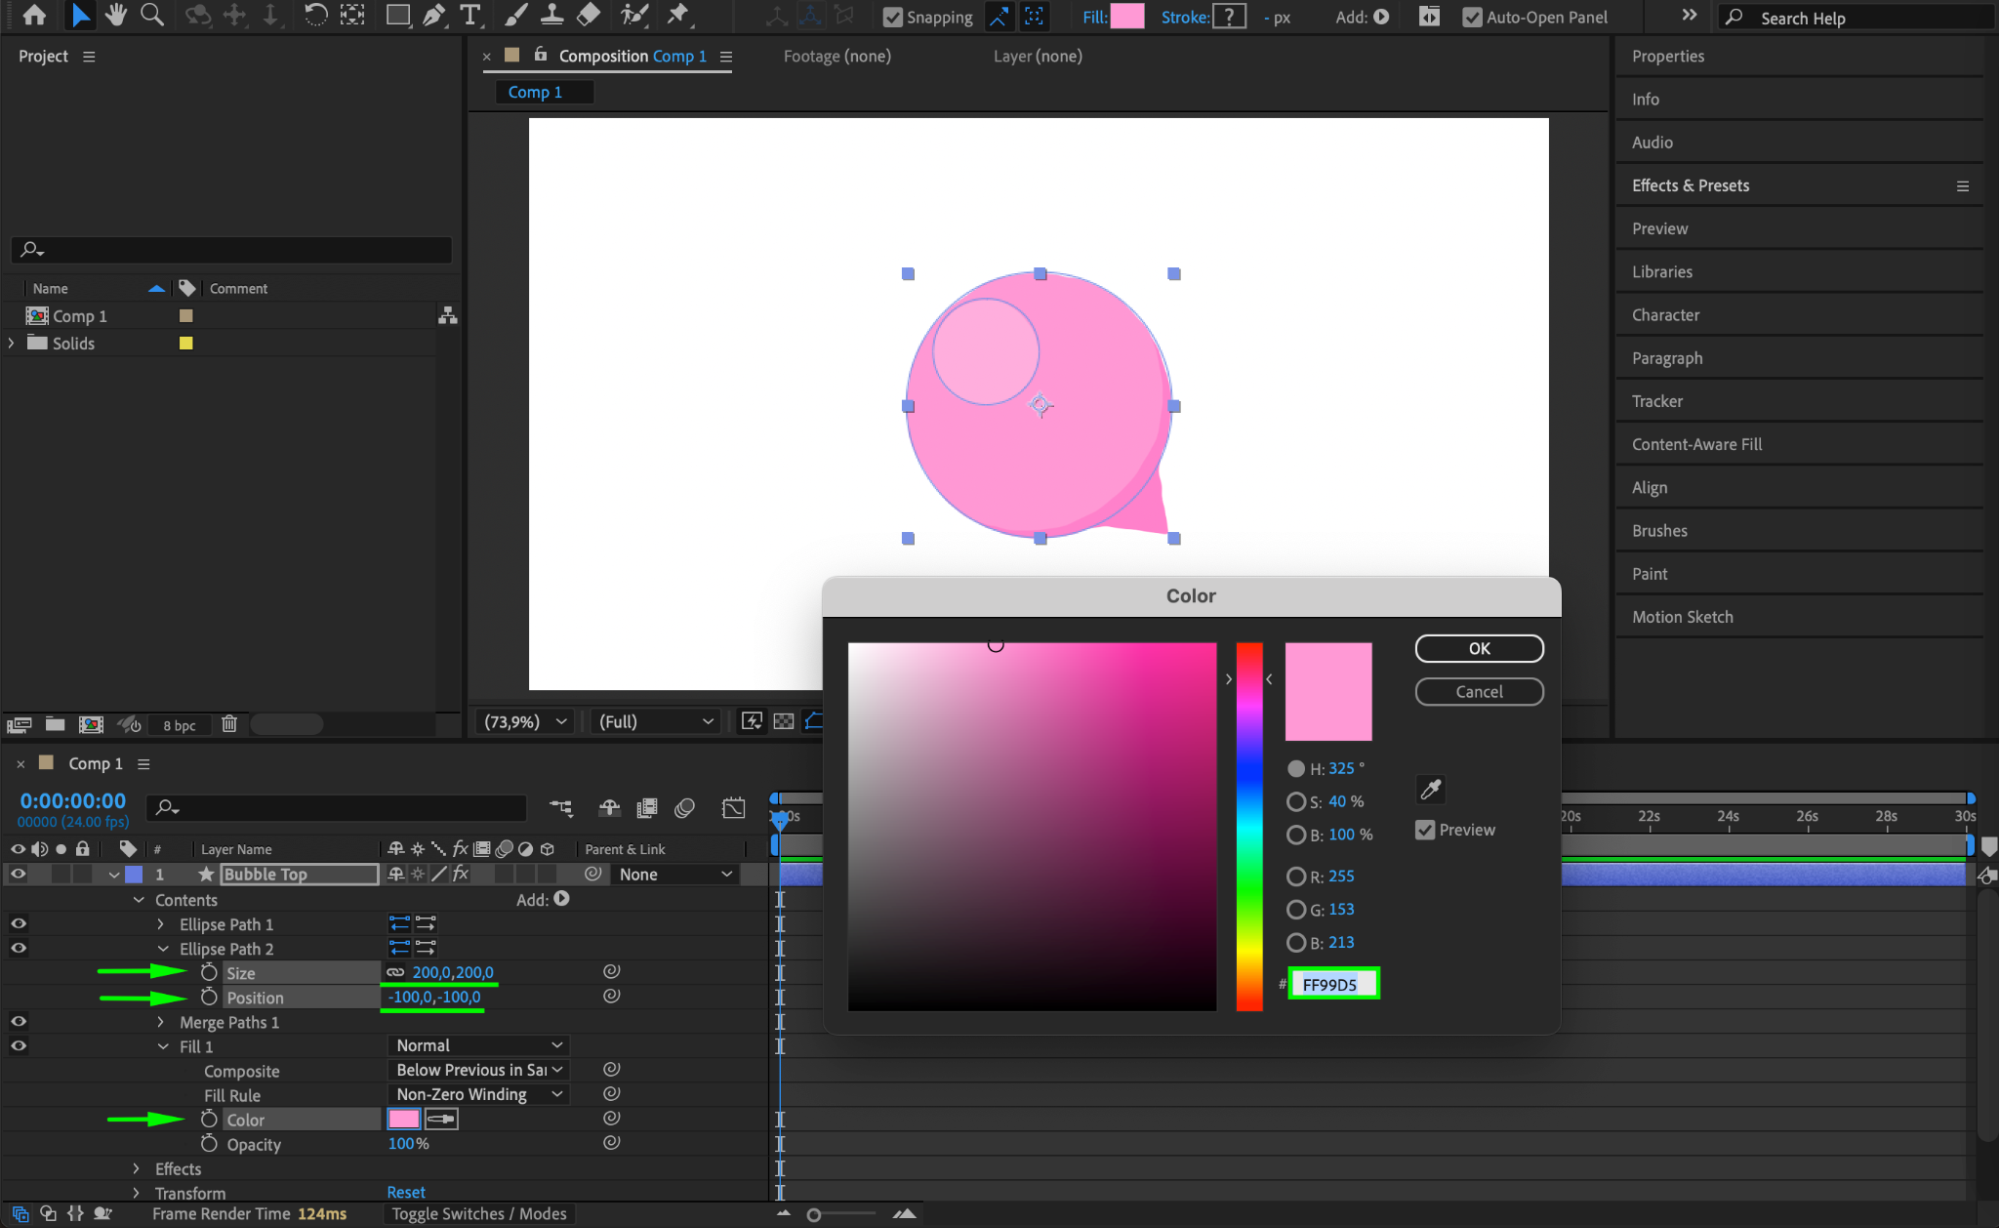
Bubble Top
Change Fill Color to #FF99D5.
Adjust Ellipse Path:
Size: 200px
Position: (-100,-100)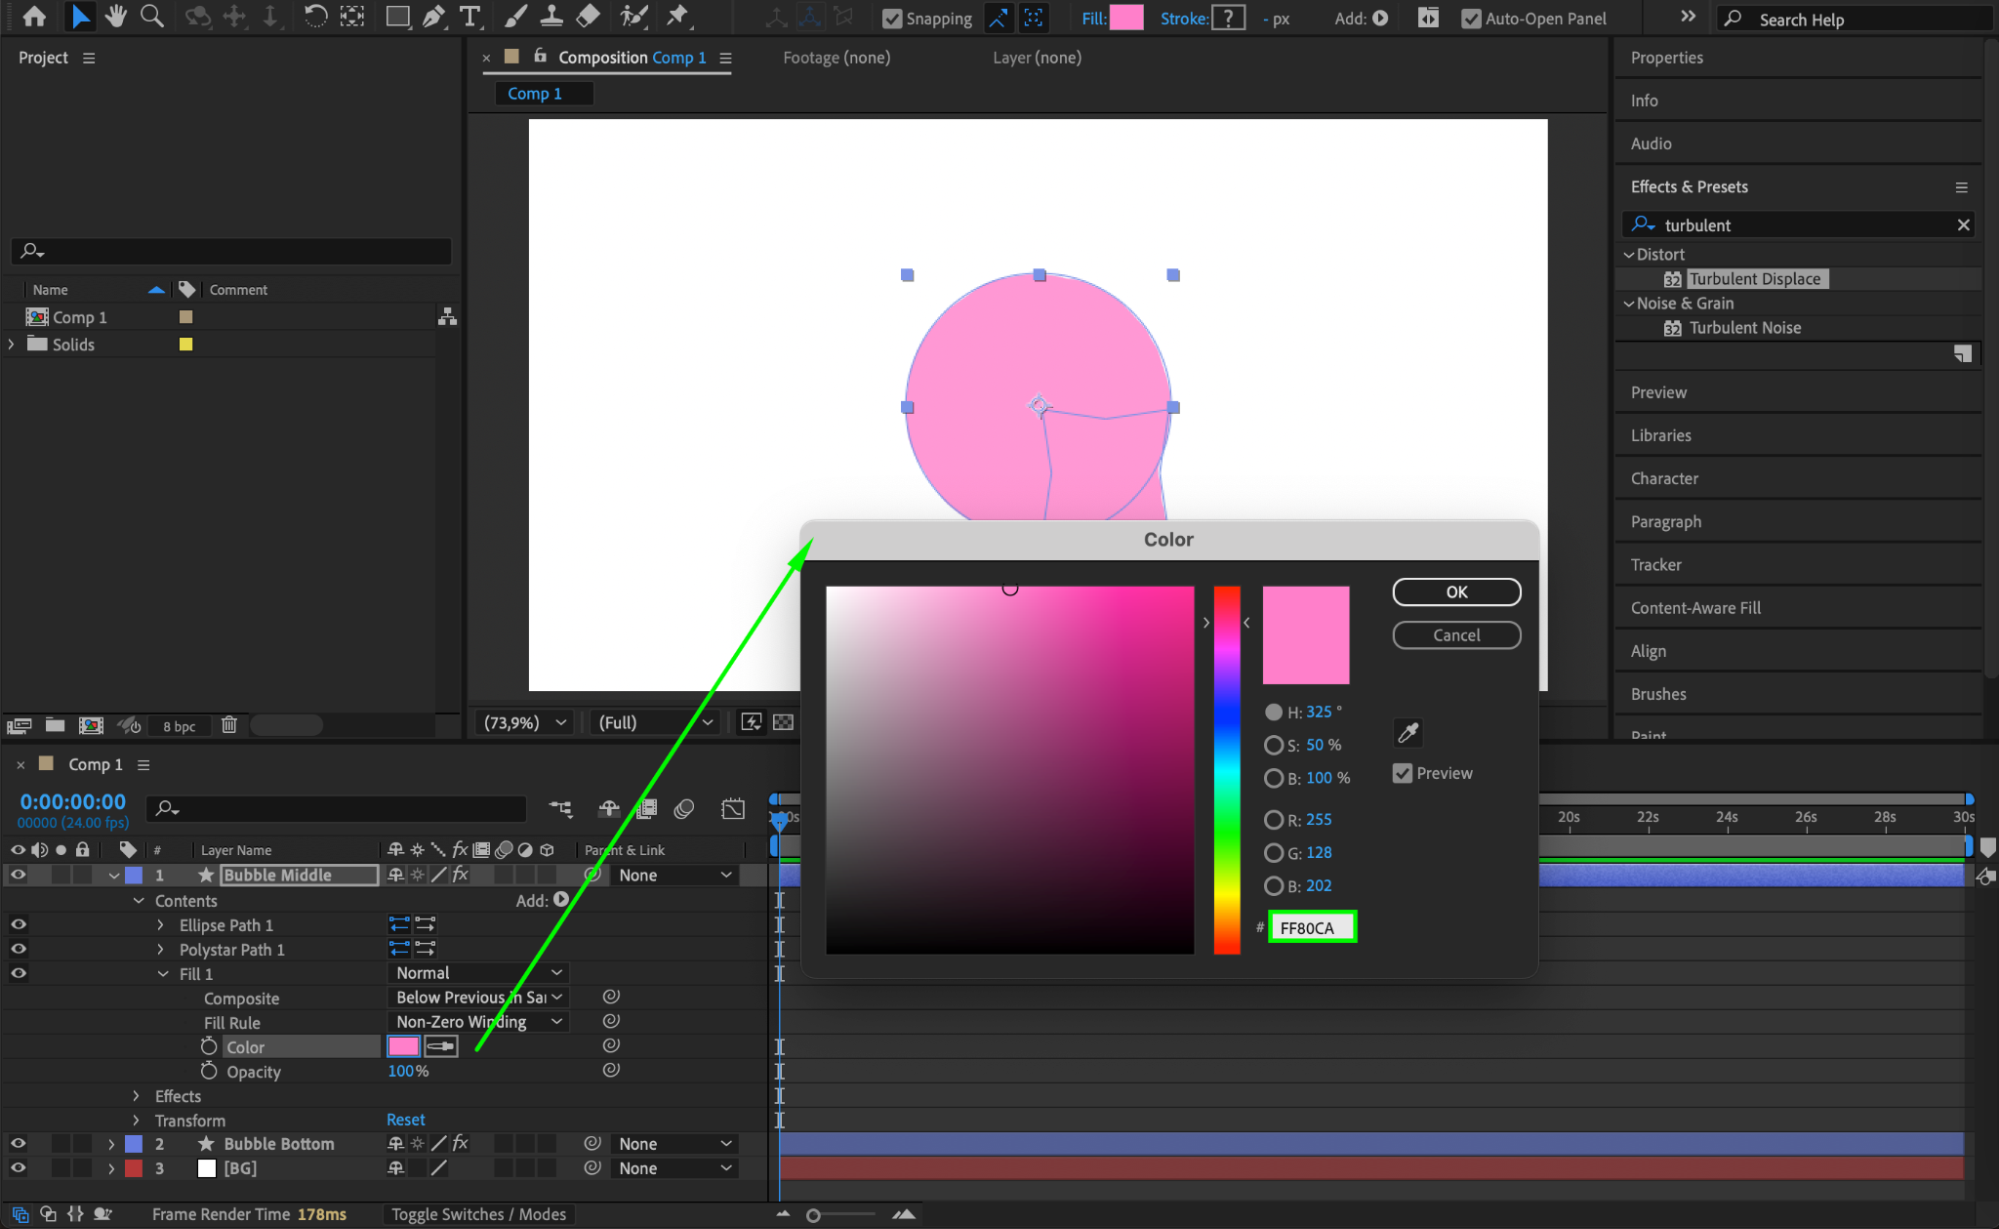
 Step 8: Animate the Bubble Expansion
Move the CTI (Current Time Indicator) to frame 60.
Click the Stopwatch for:
Bubble Top: Size & Position
Bubble Middle: Size & Position
Bubble Bottom: Scale
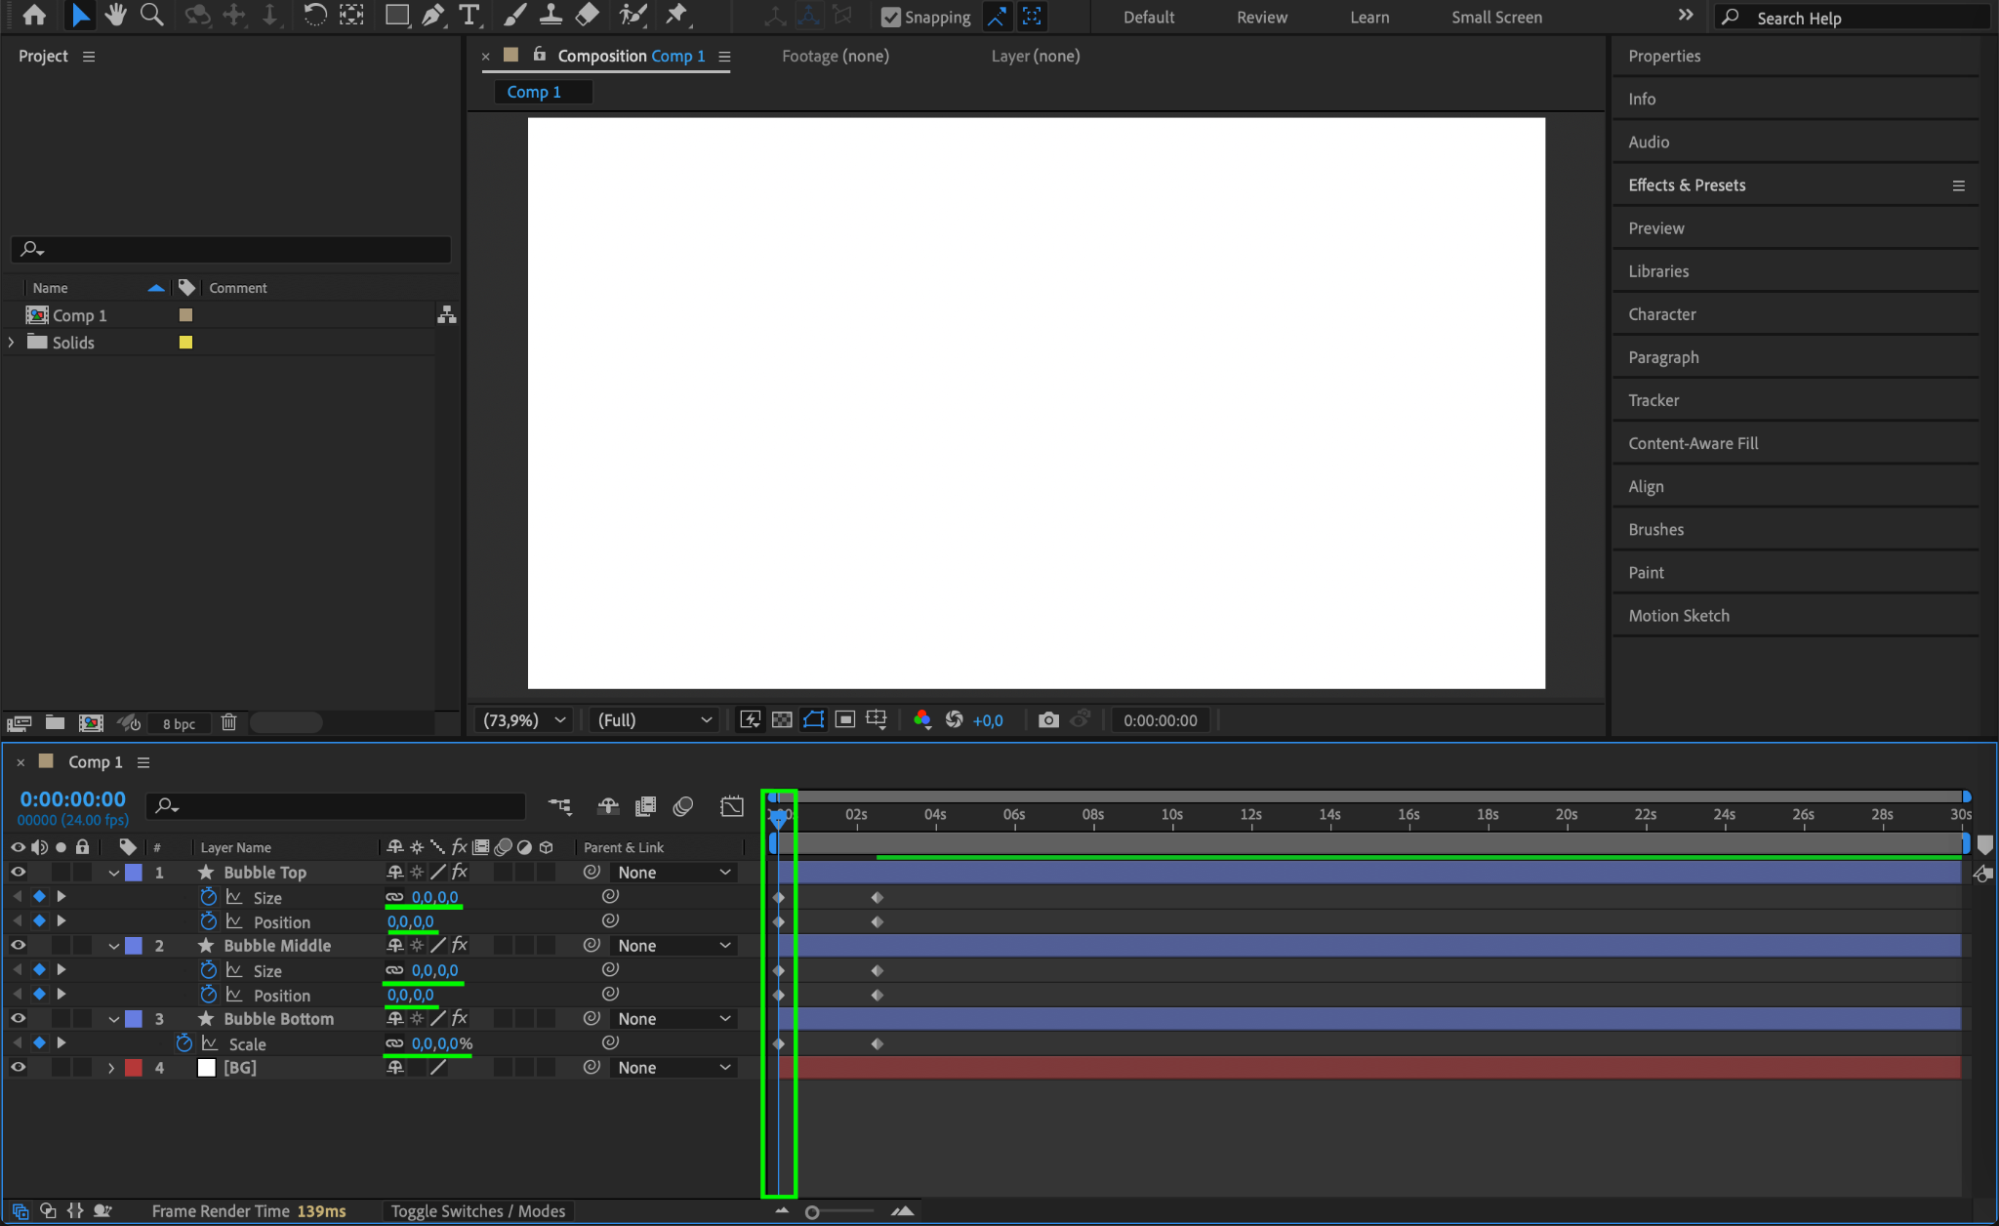
Move the CTI to the start of the timeline and set all values to 0.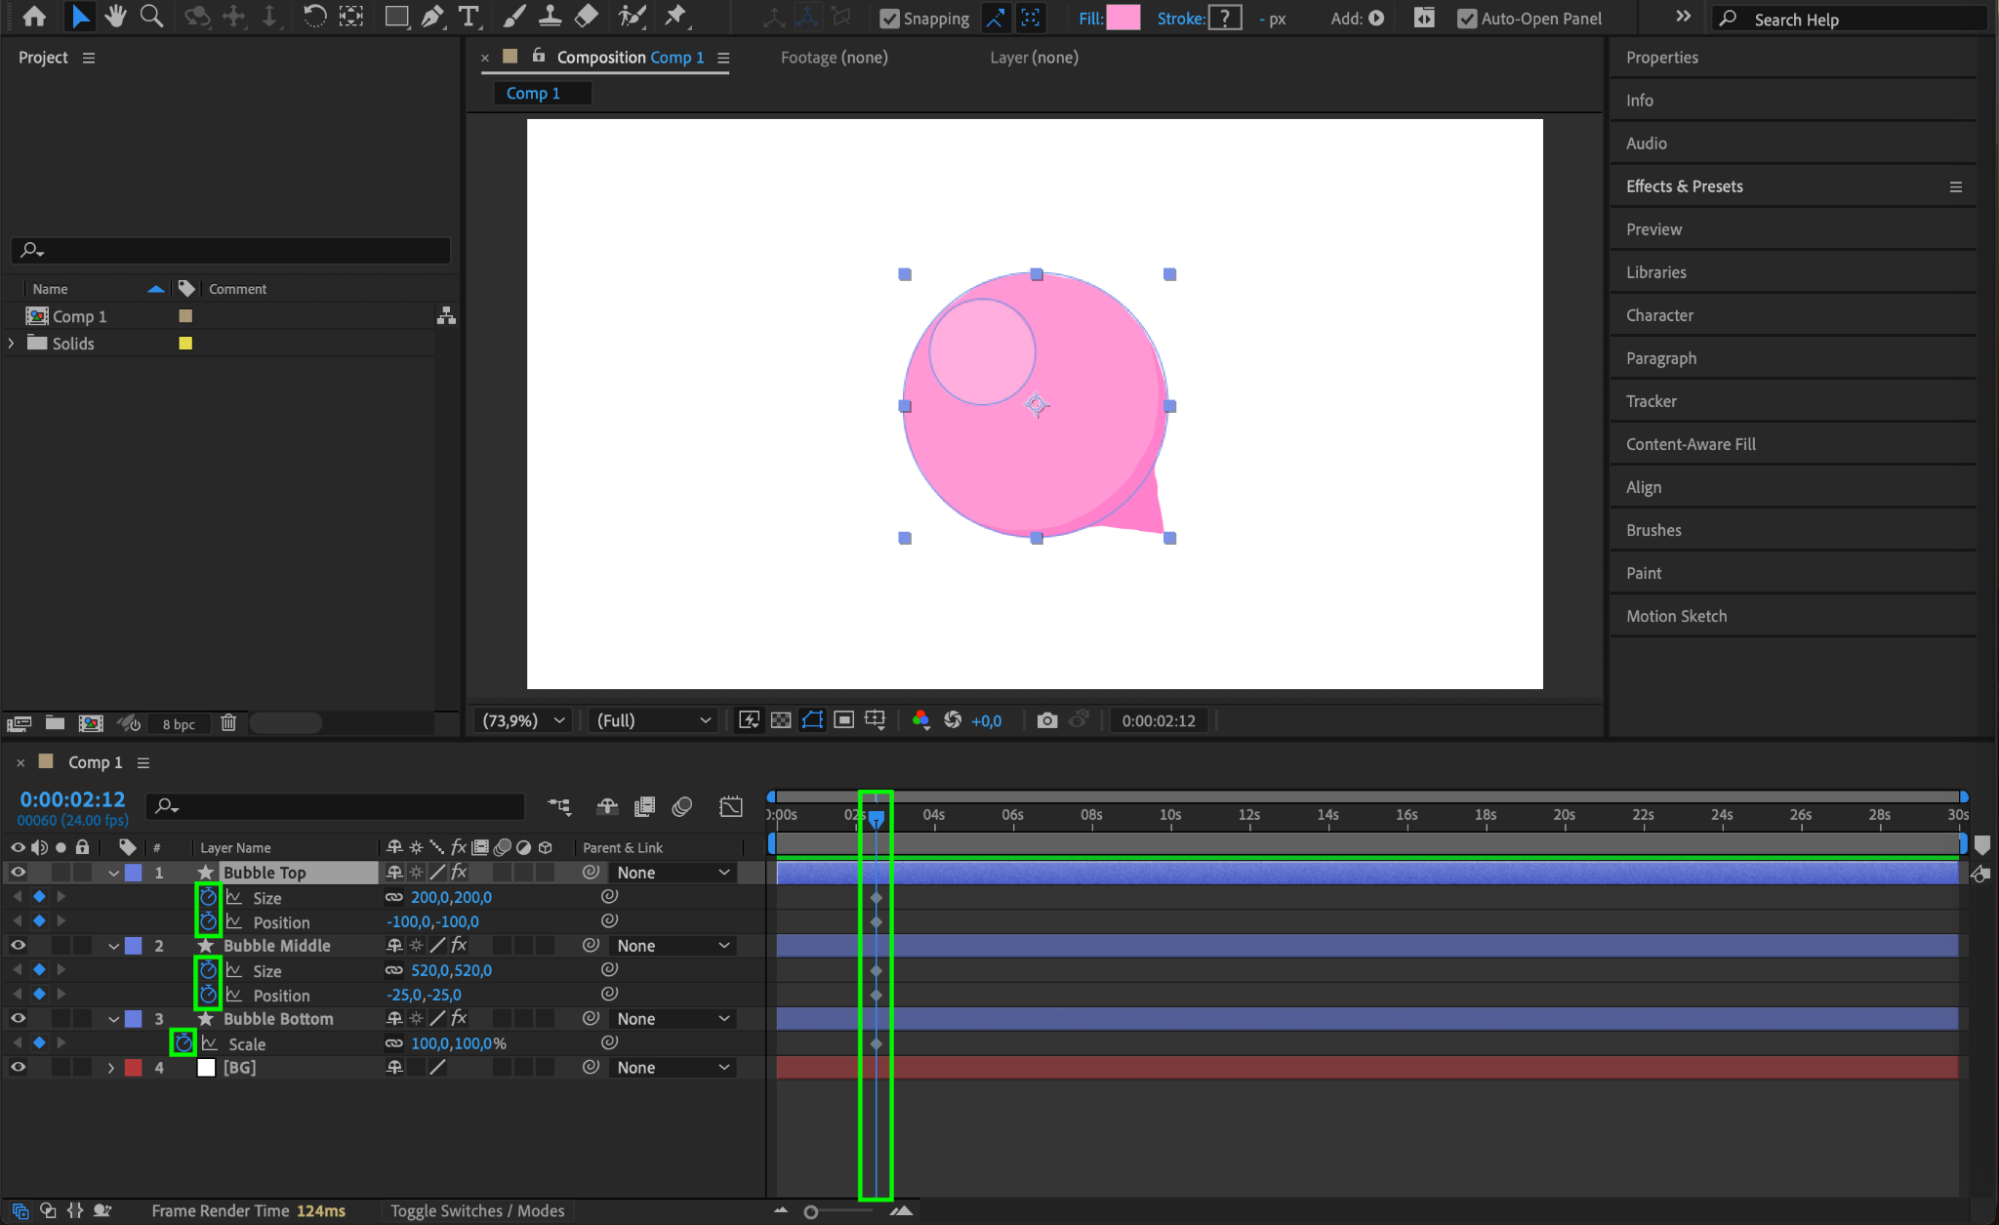
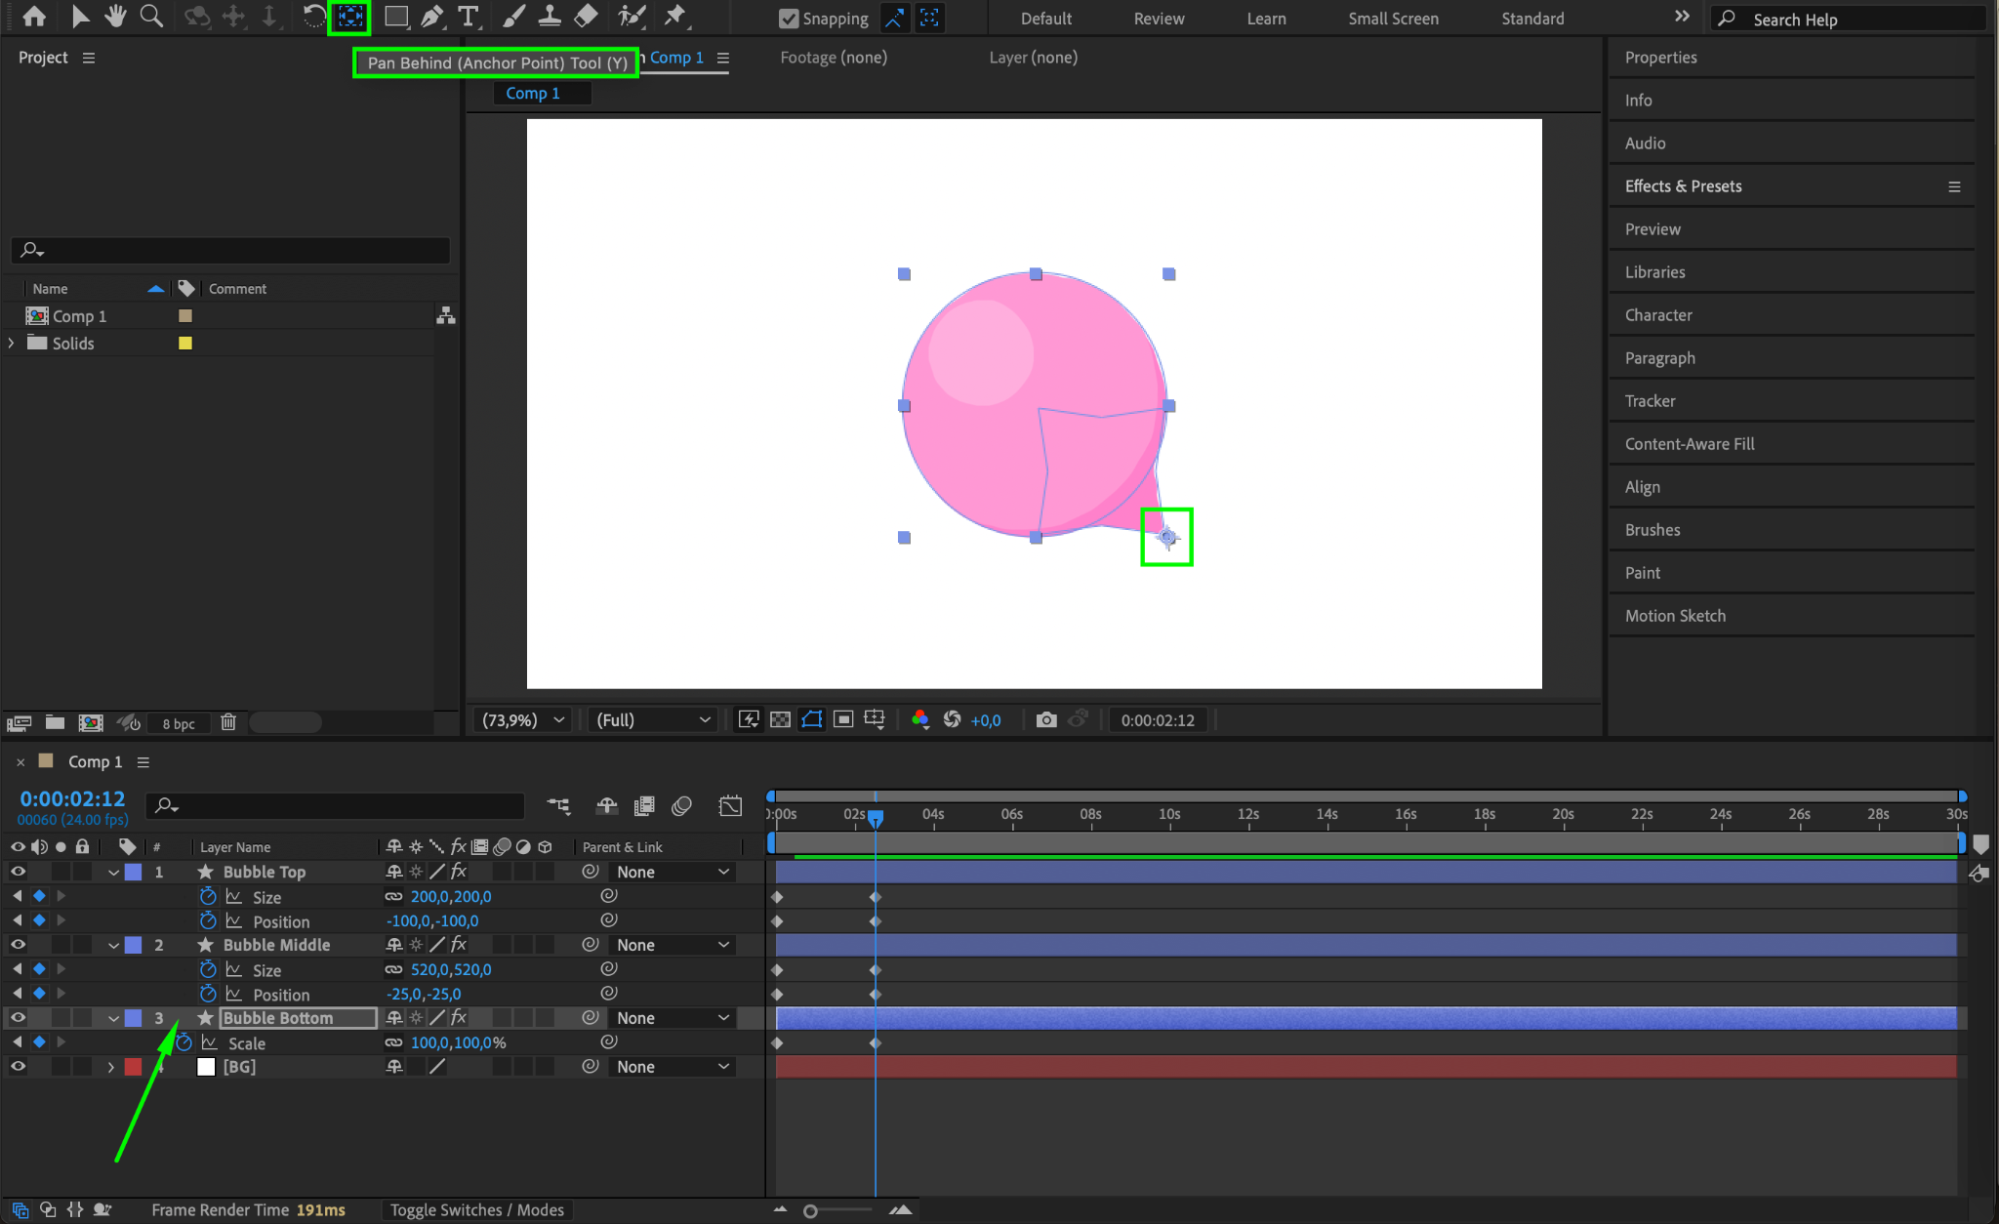
 Step 9: Adjust Anchor Points for Realistic Pop
Move the CTI back to frame 60.
Select Bubble Bottom and use the Pan Behind Tool (Y) to adjust its anchor point to the lower-right corner of the Polystar shape.
Step 10: Parent Layers for Synchronized Movement
Bubble Top and Bubble Middle should be parented to Bubble Bottom for realistic movement. Step 11: Add Additional Keyframes for Natural Animation
Move the CTI to 20 frames and click the diamond icon next to each animated property to add keyframes.
Repeat for 40 frames.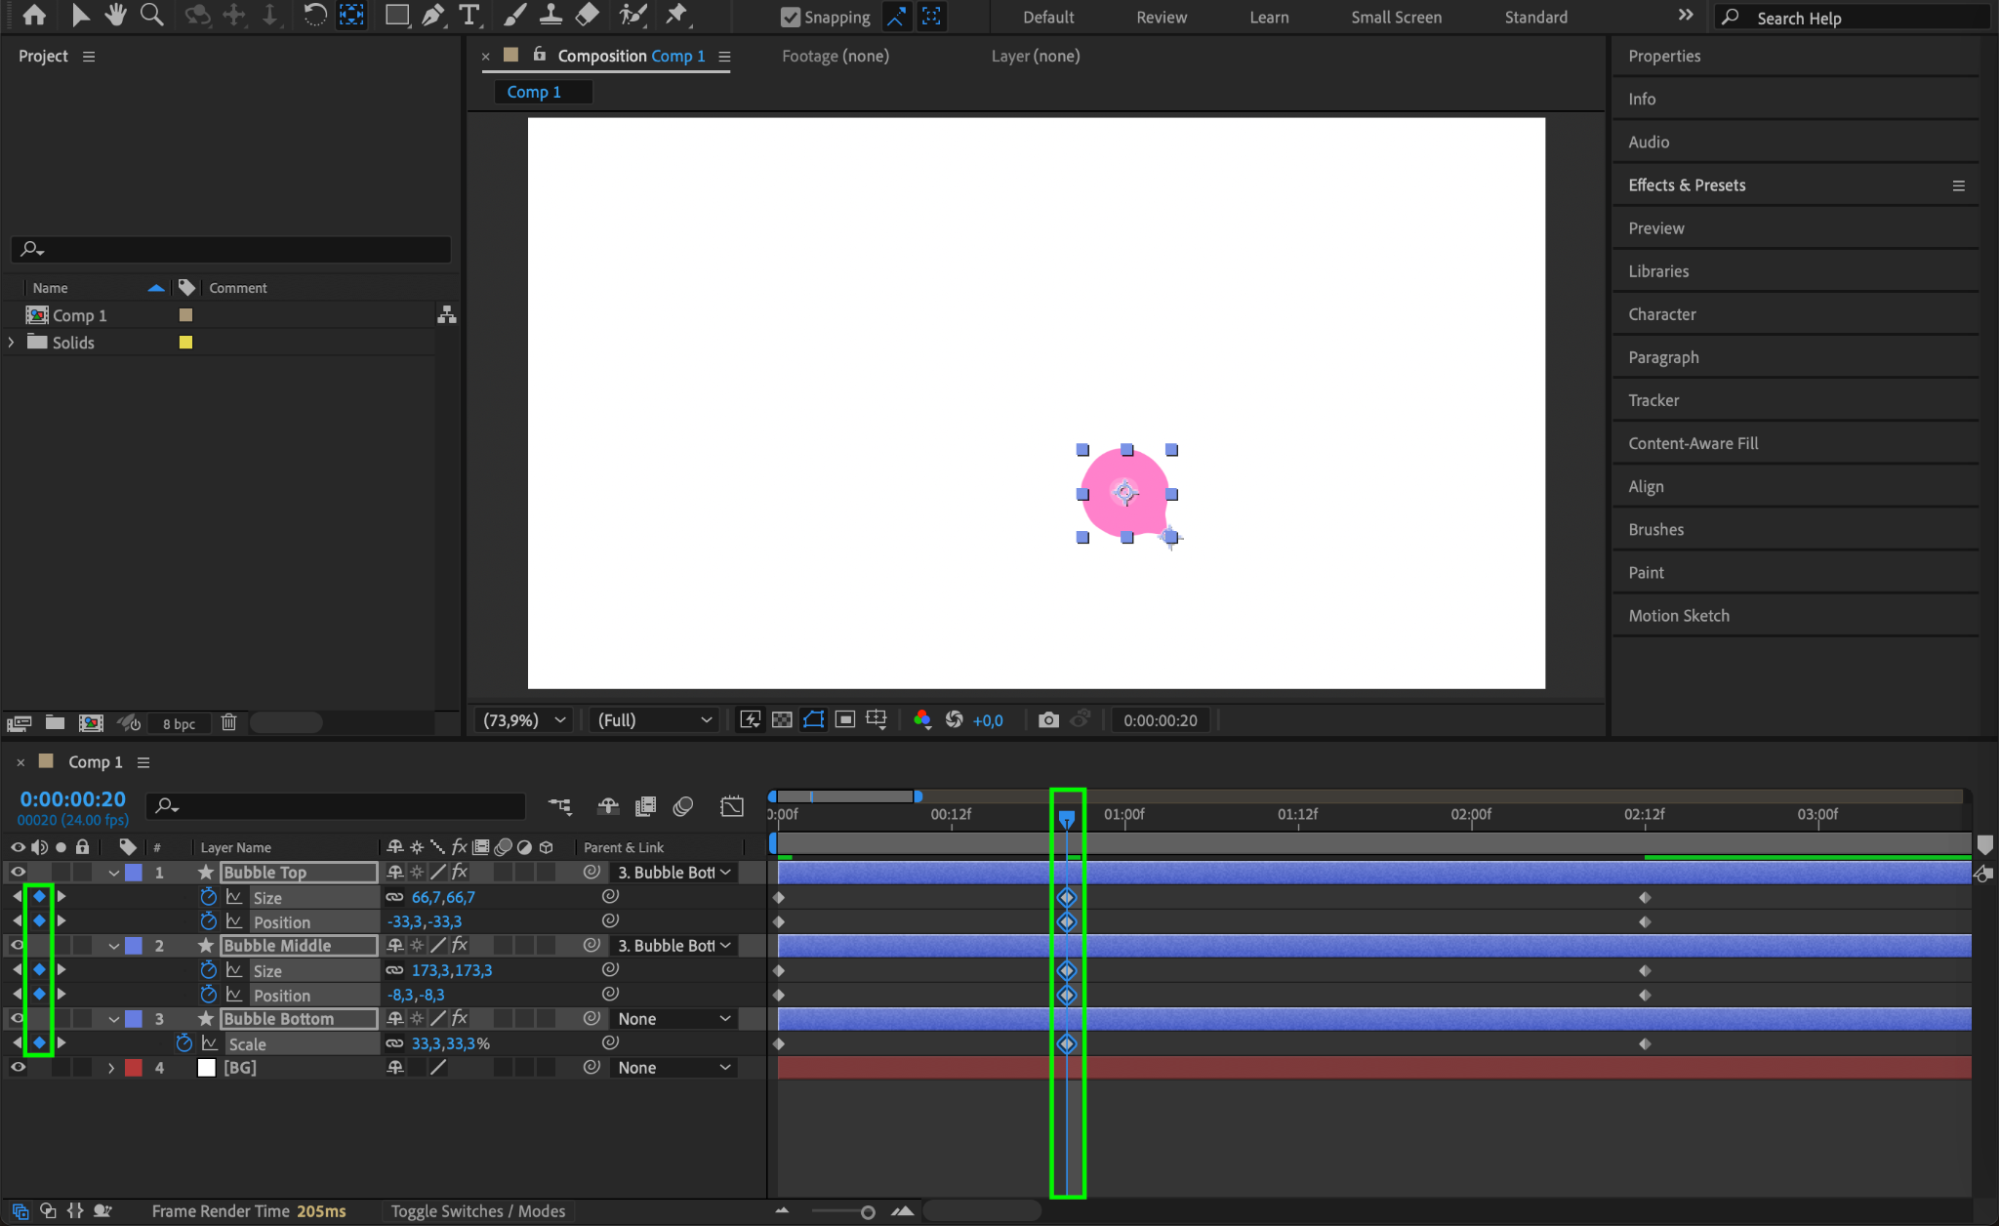
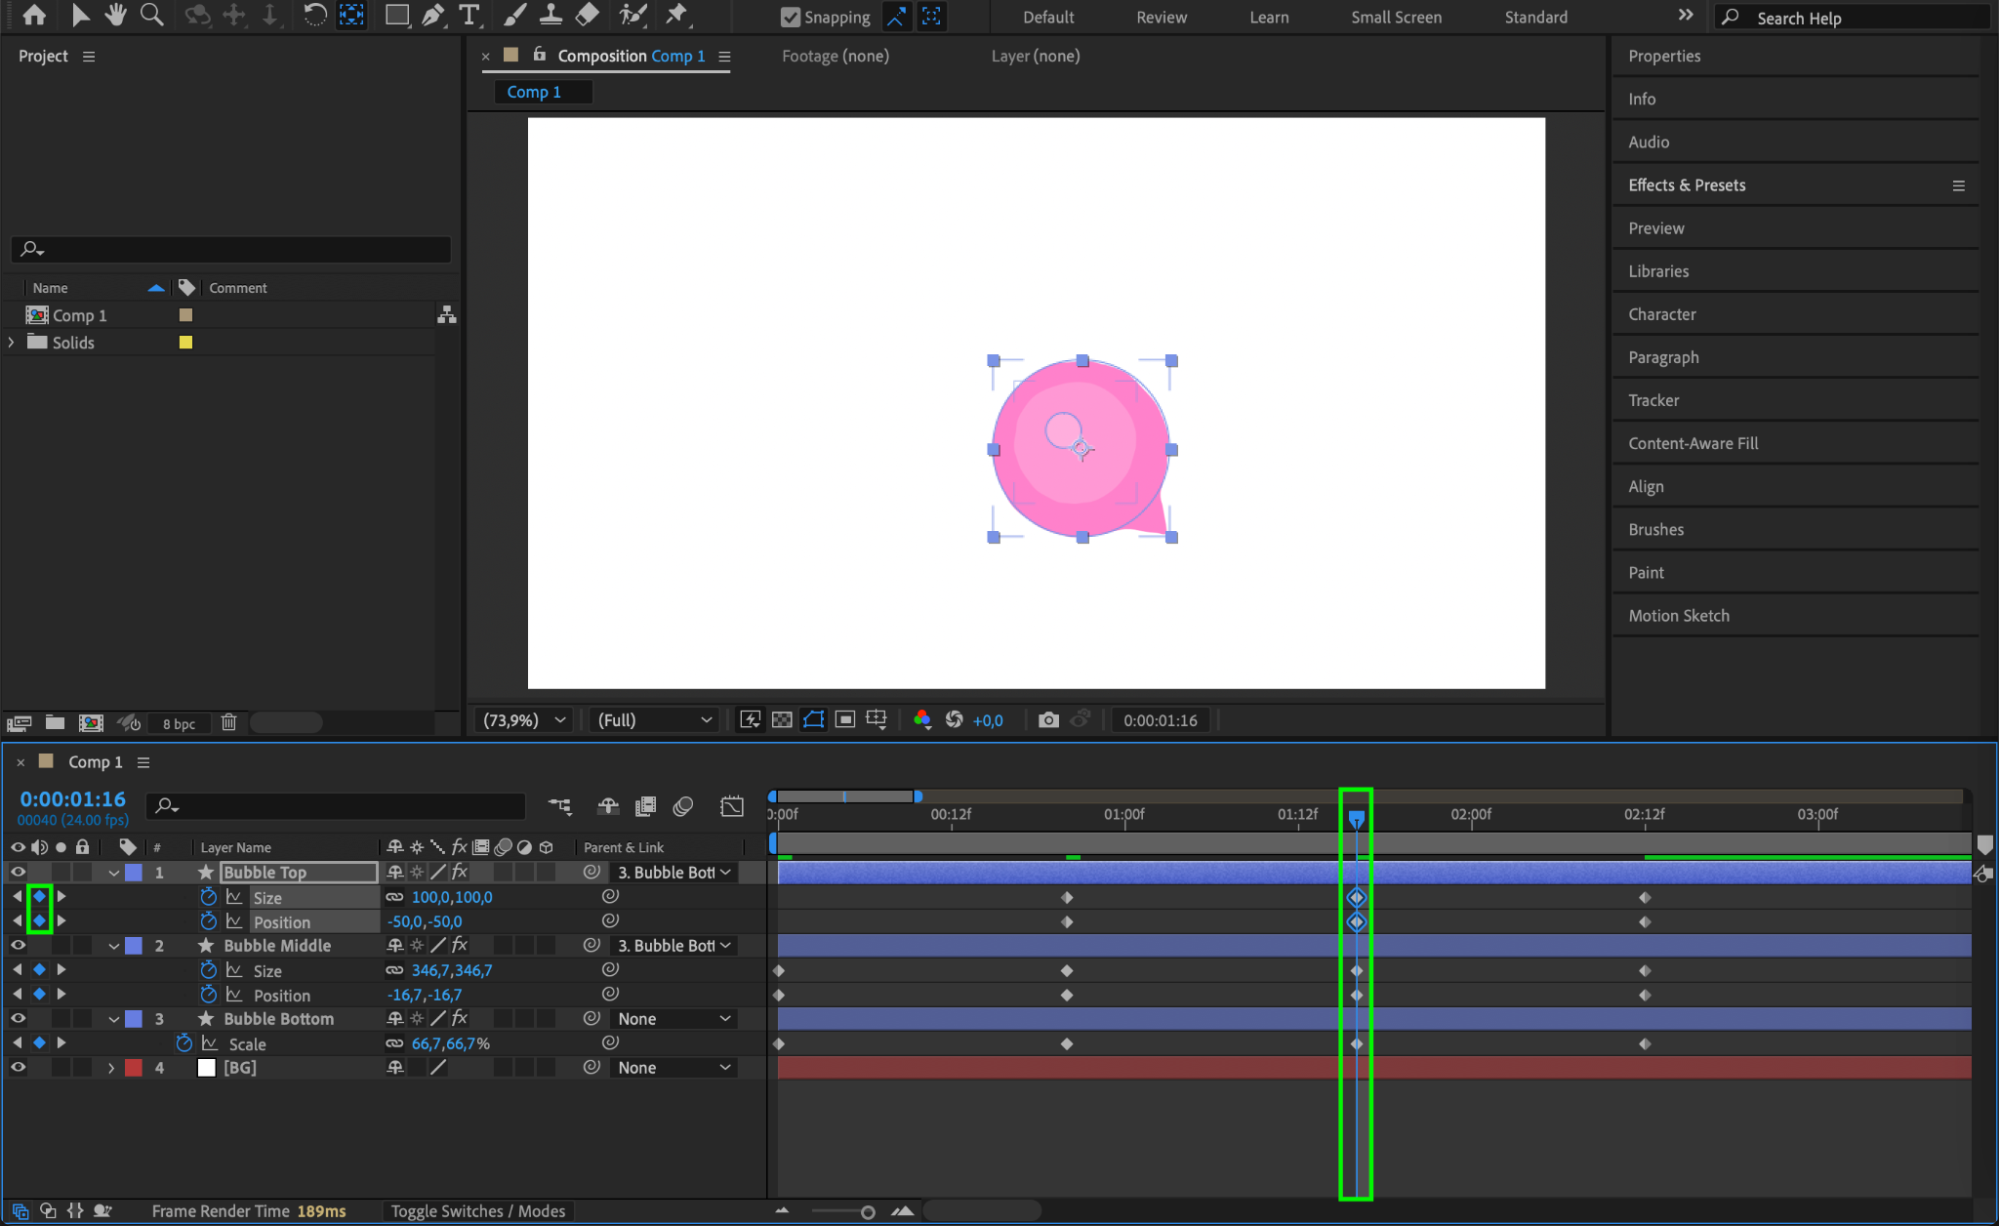
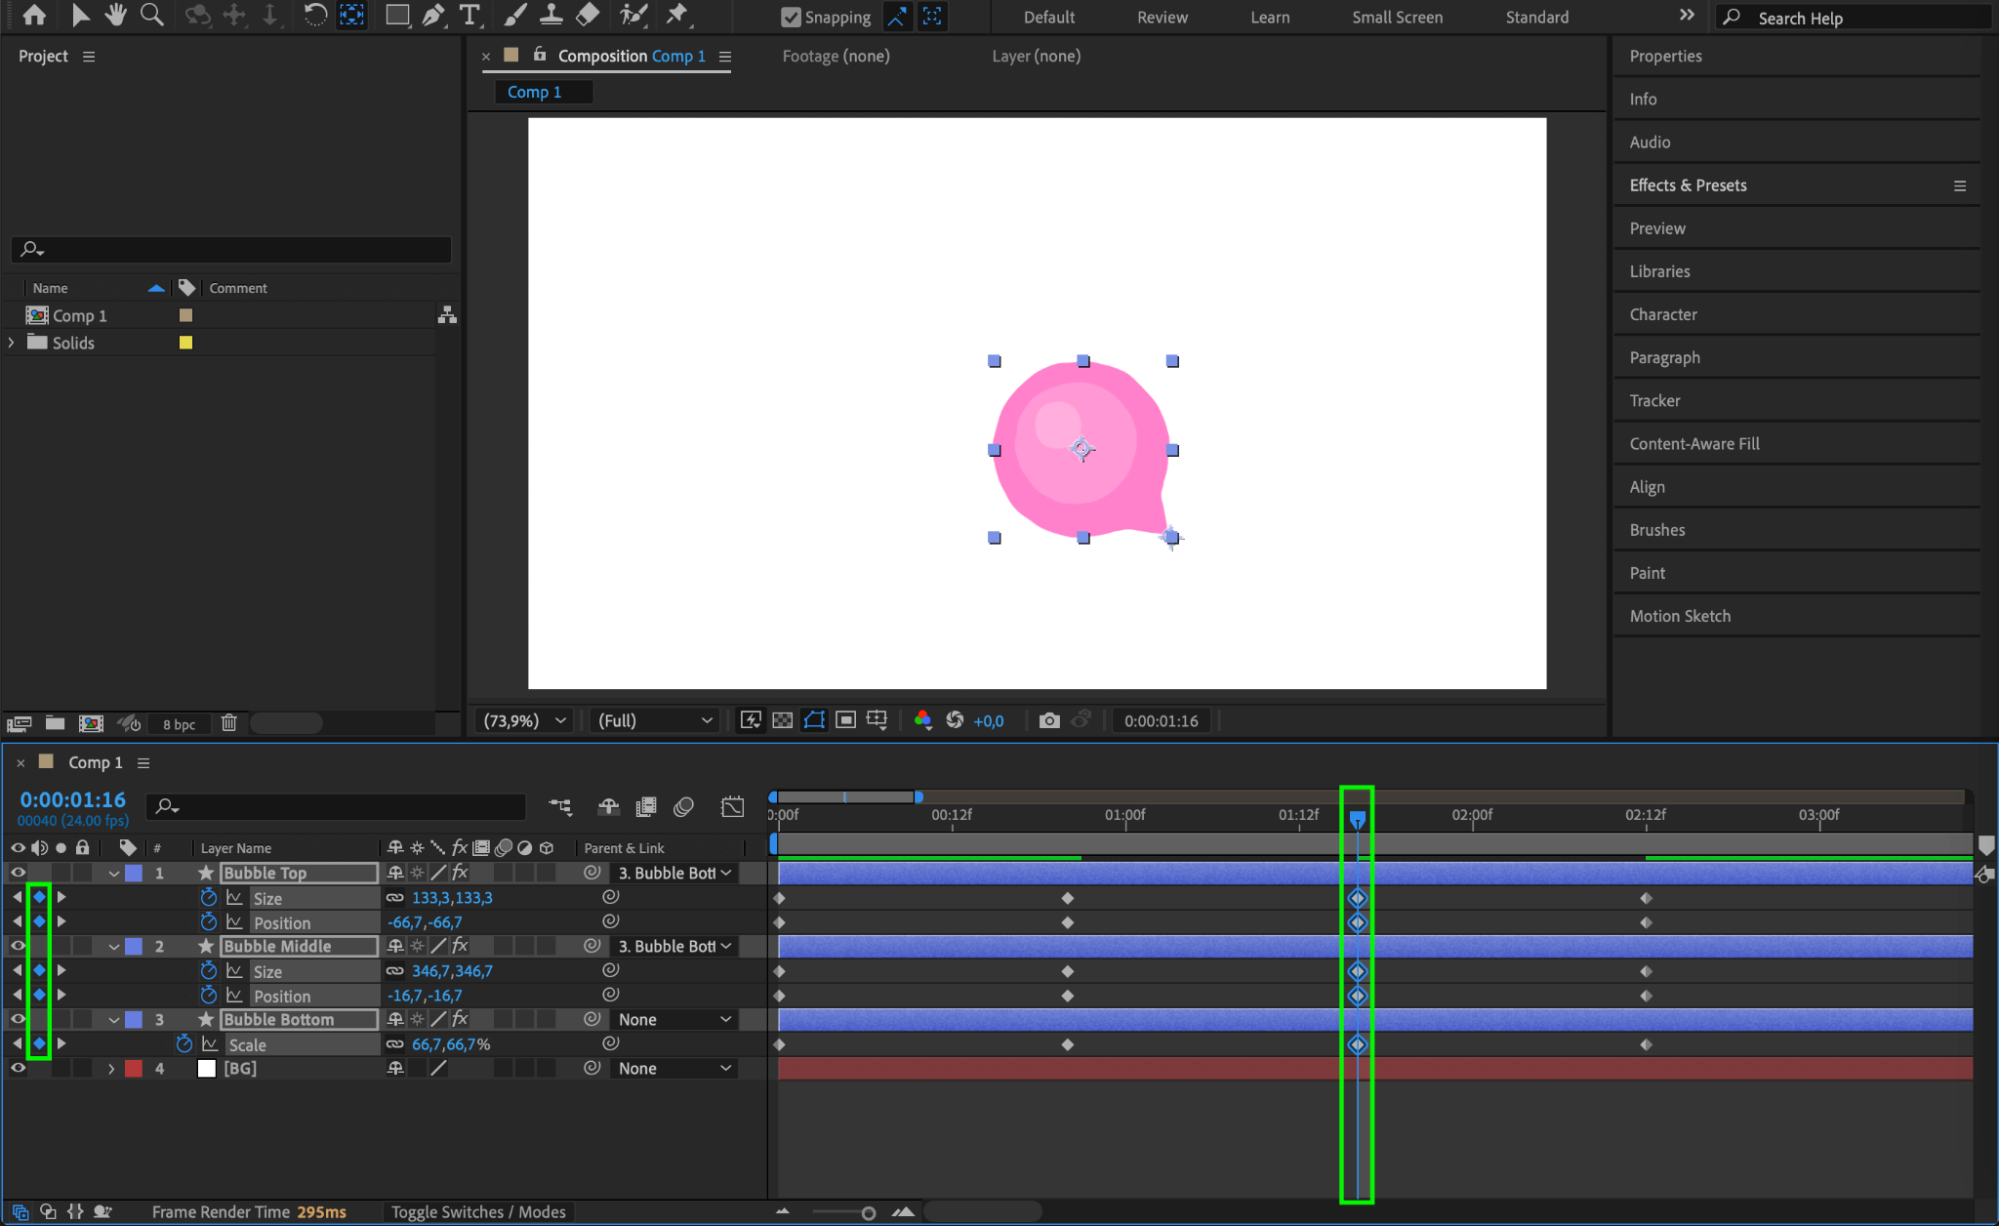 Step 12: Refine Animation for Bubble Top
Remove keyframes for Size & Position at 20 and 40 frames.
Move the first keyframes to 20 frames.
At 40 frames, add new keyframes manually for Size & Position.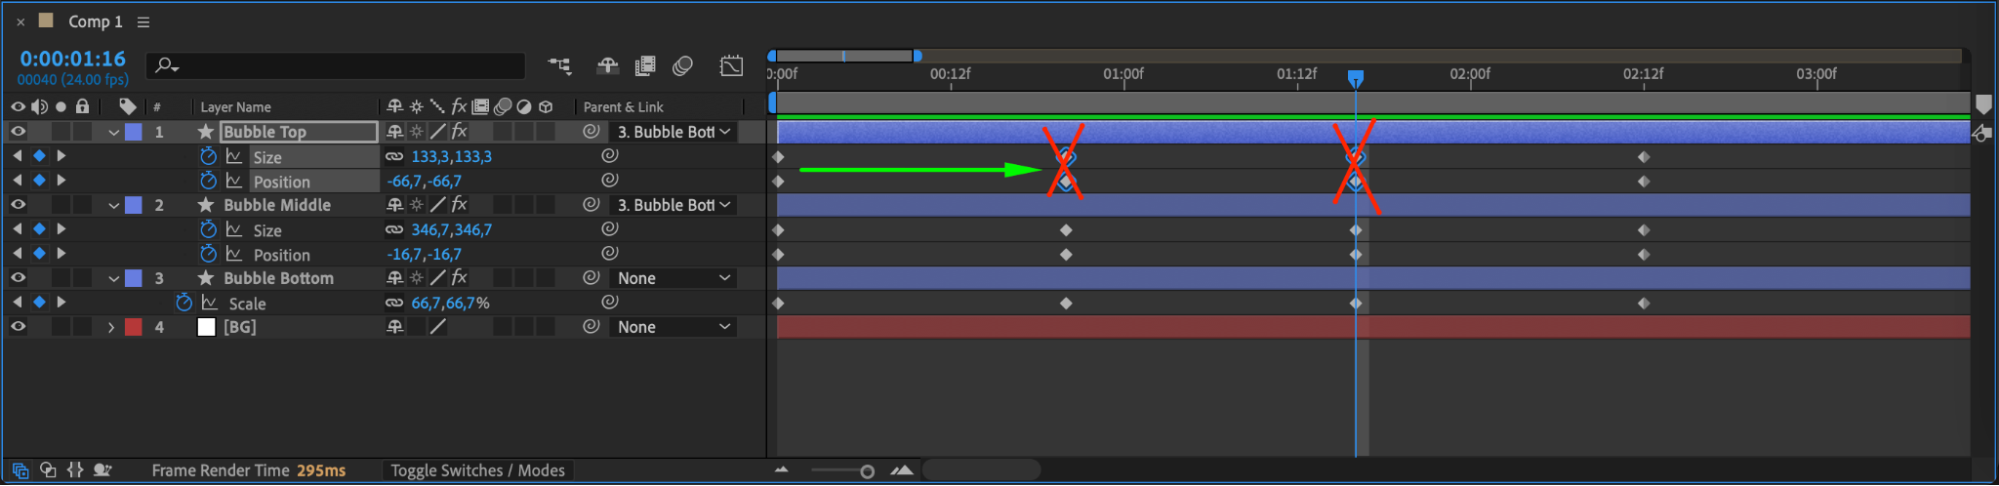
 Step 13: Add Random Rotation Using Expressions
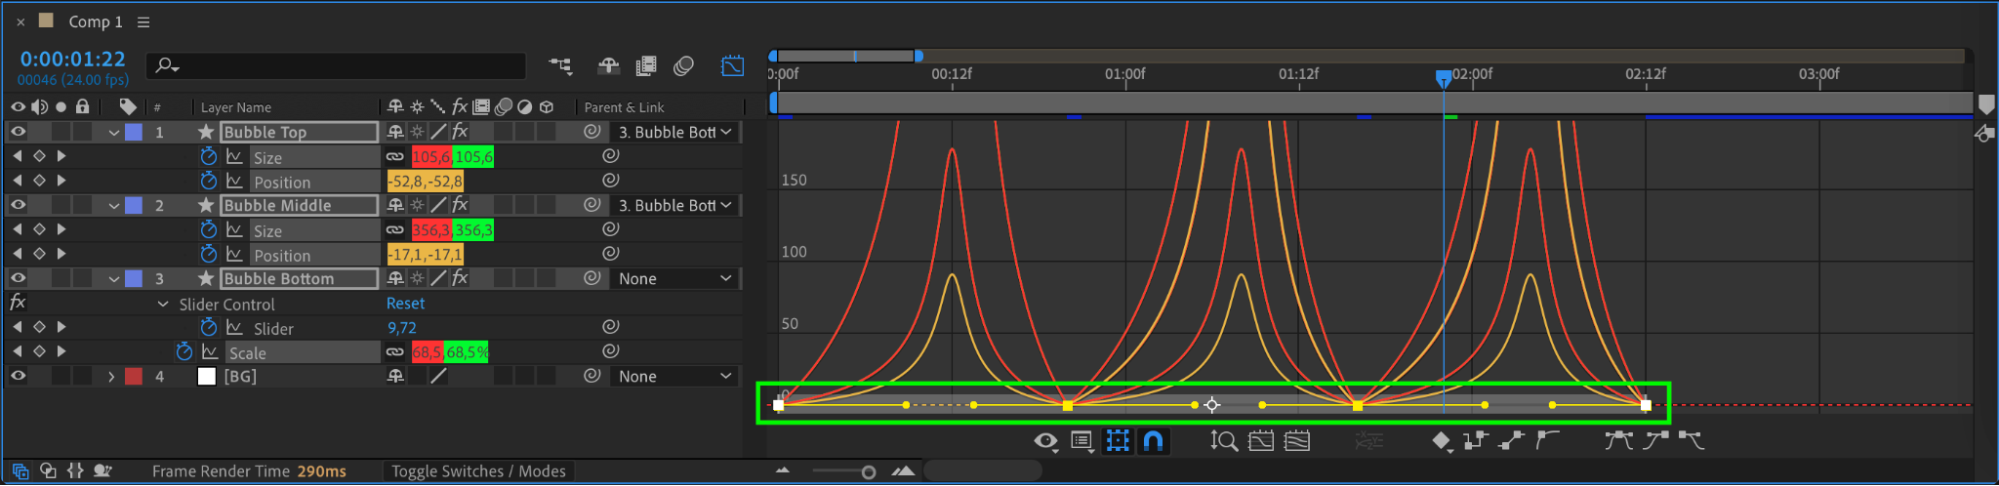
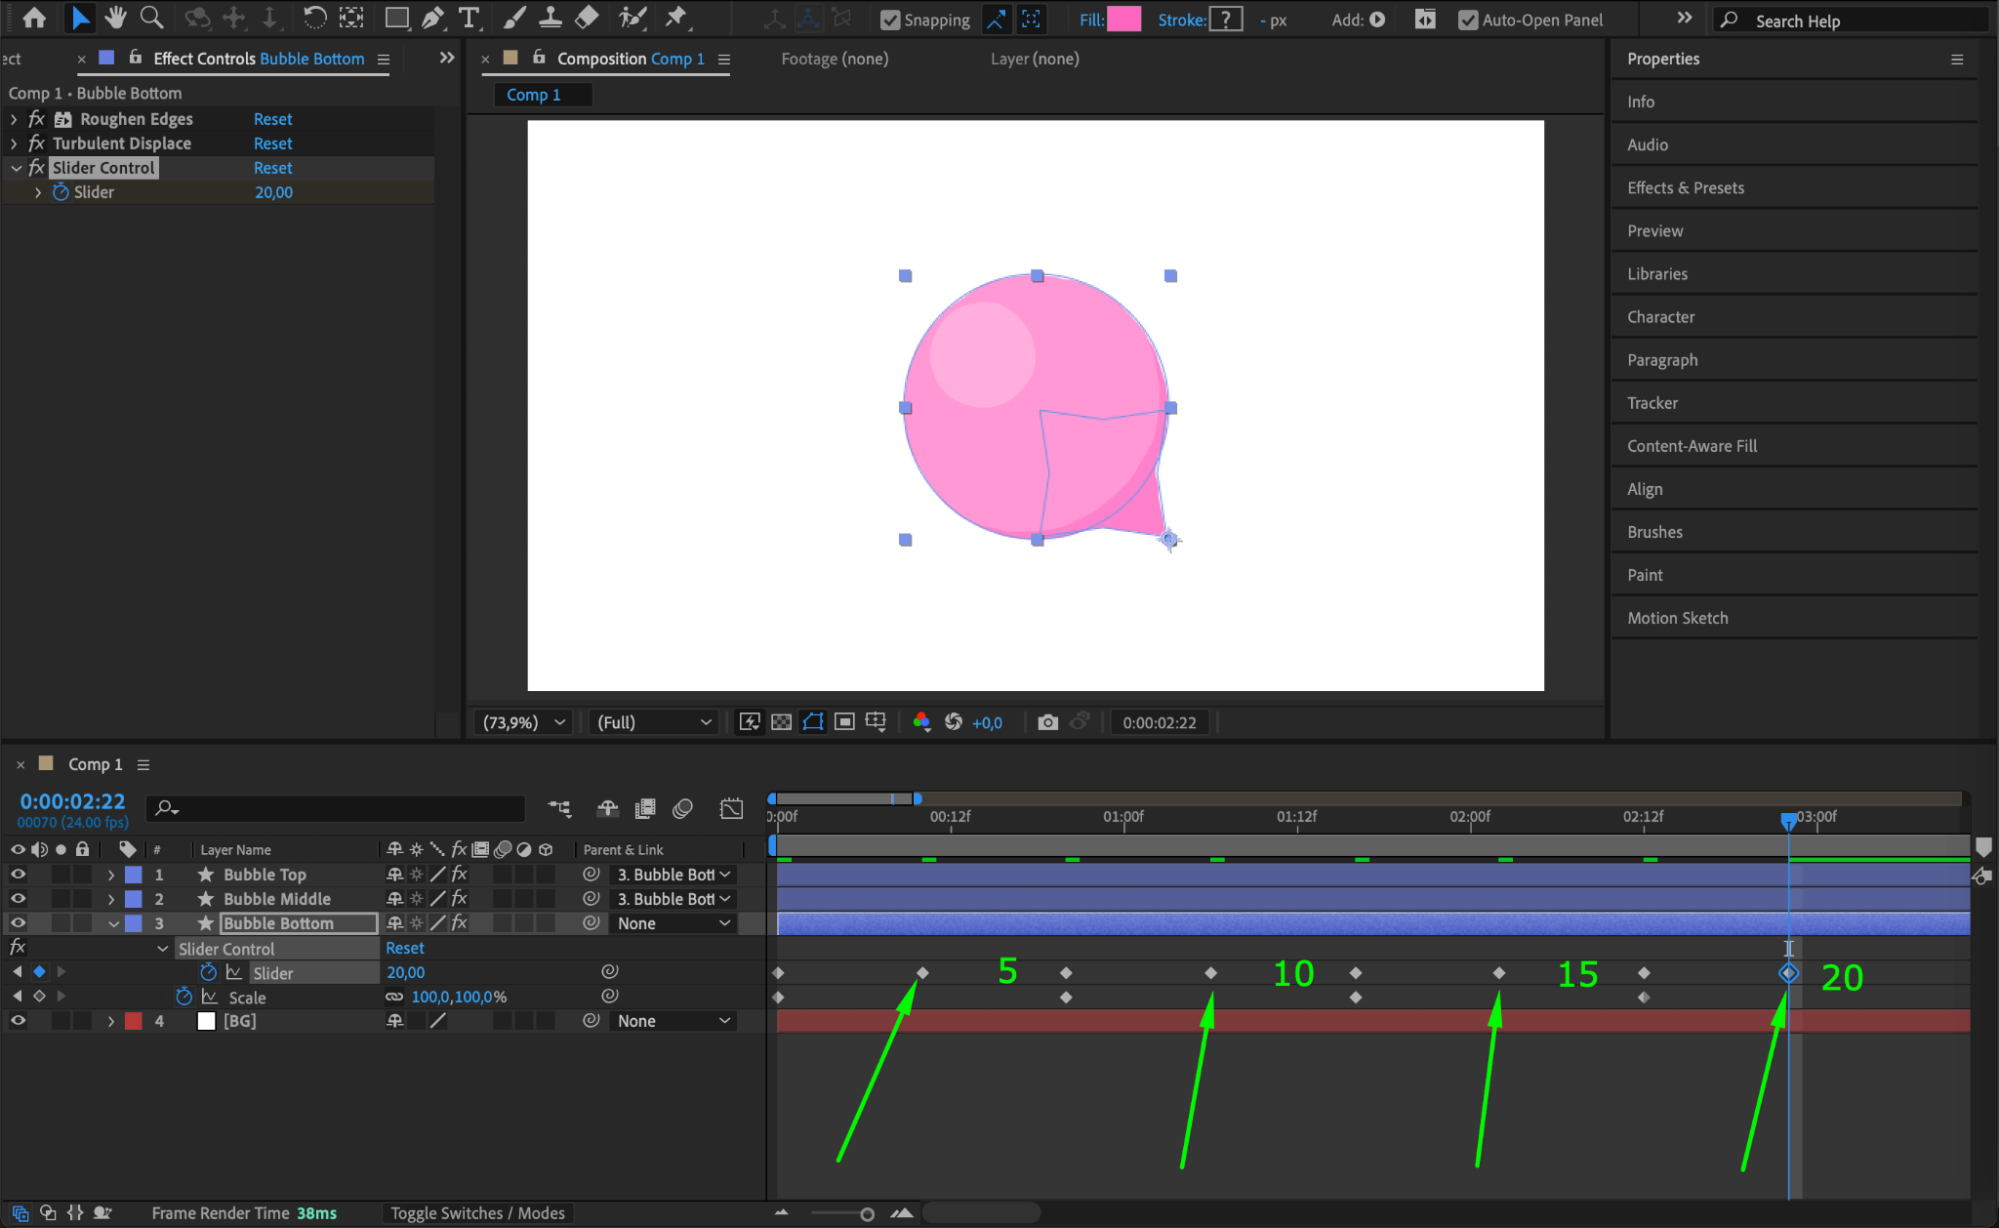
Apply the Slider Control effect to the Bubble Bottom layer.
Set keyframes for the Slider Property at 0, 20, 40, and 60 frames with values of 0. Then, add keyframes between them with values of 5, 10, 15, and 20.
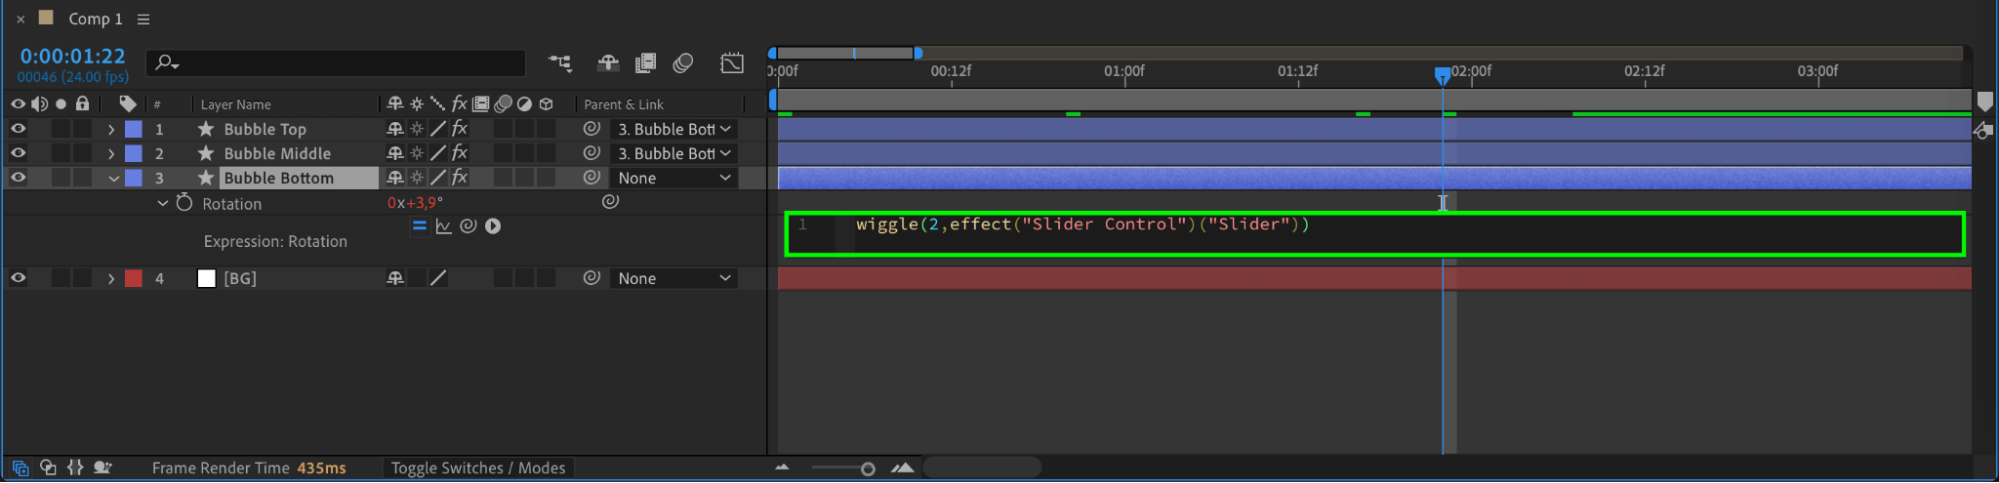
Add an expression to Rotation:
wiggle(2,effect(“Slider Control”)(“Slider”))
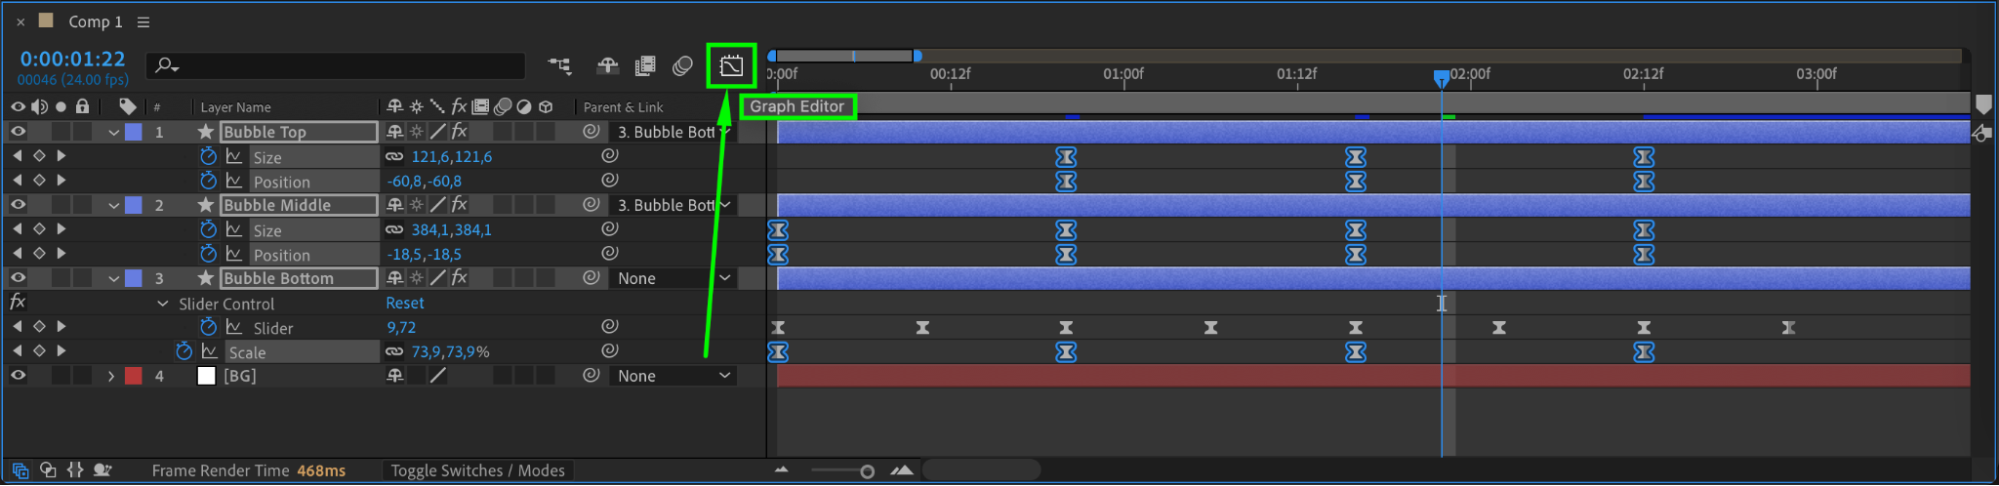
Use Graph Editor to adjust curves for smoother motion.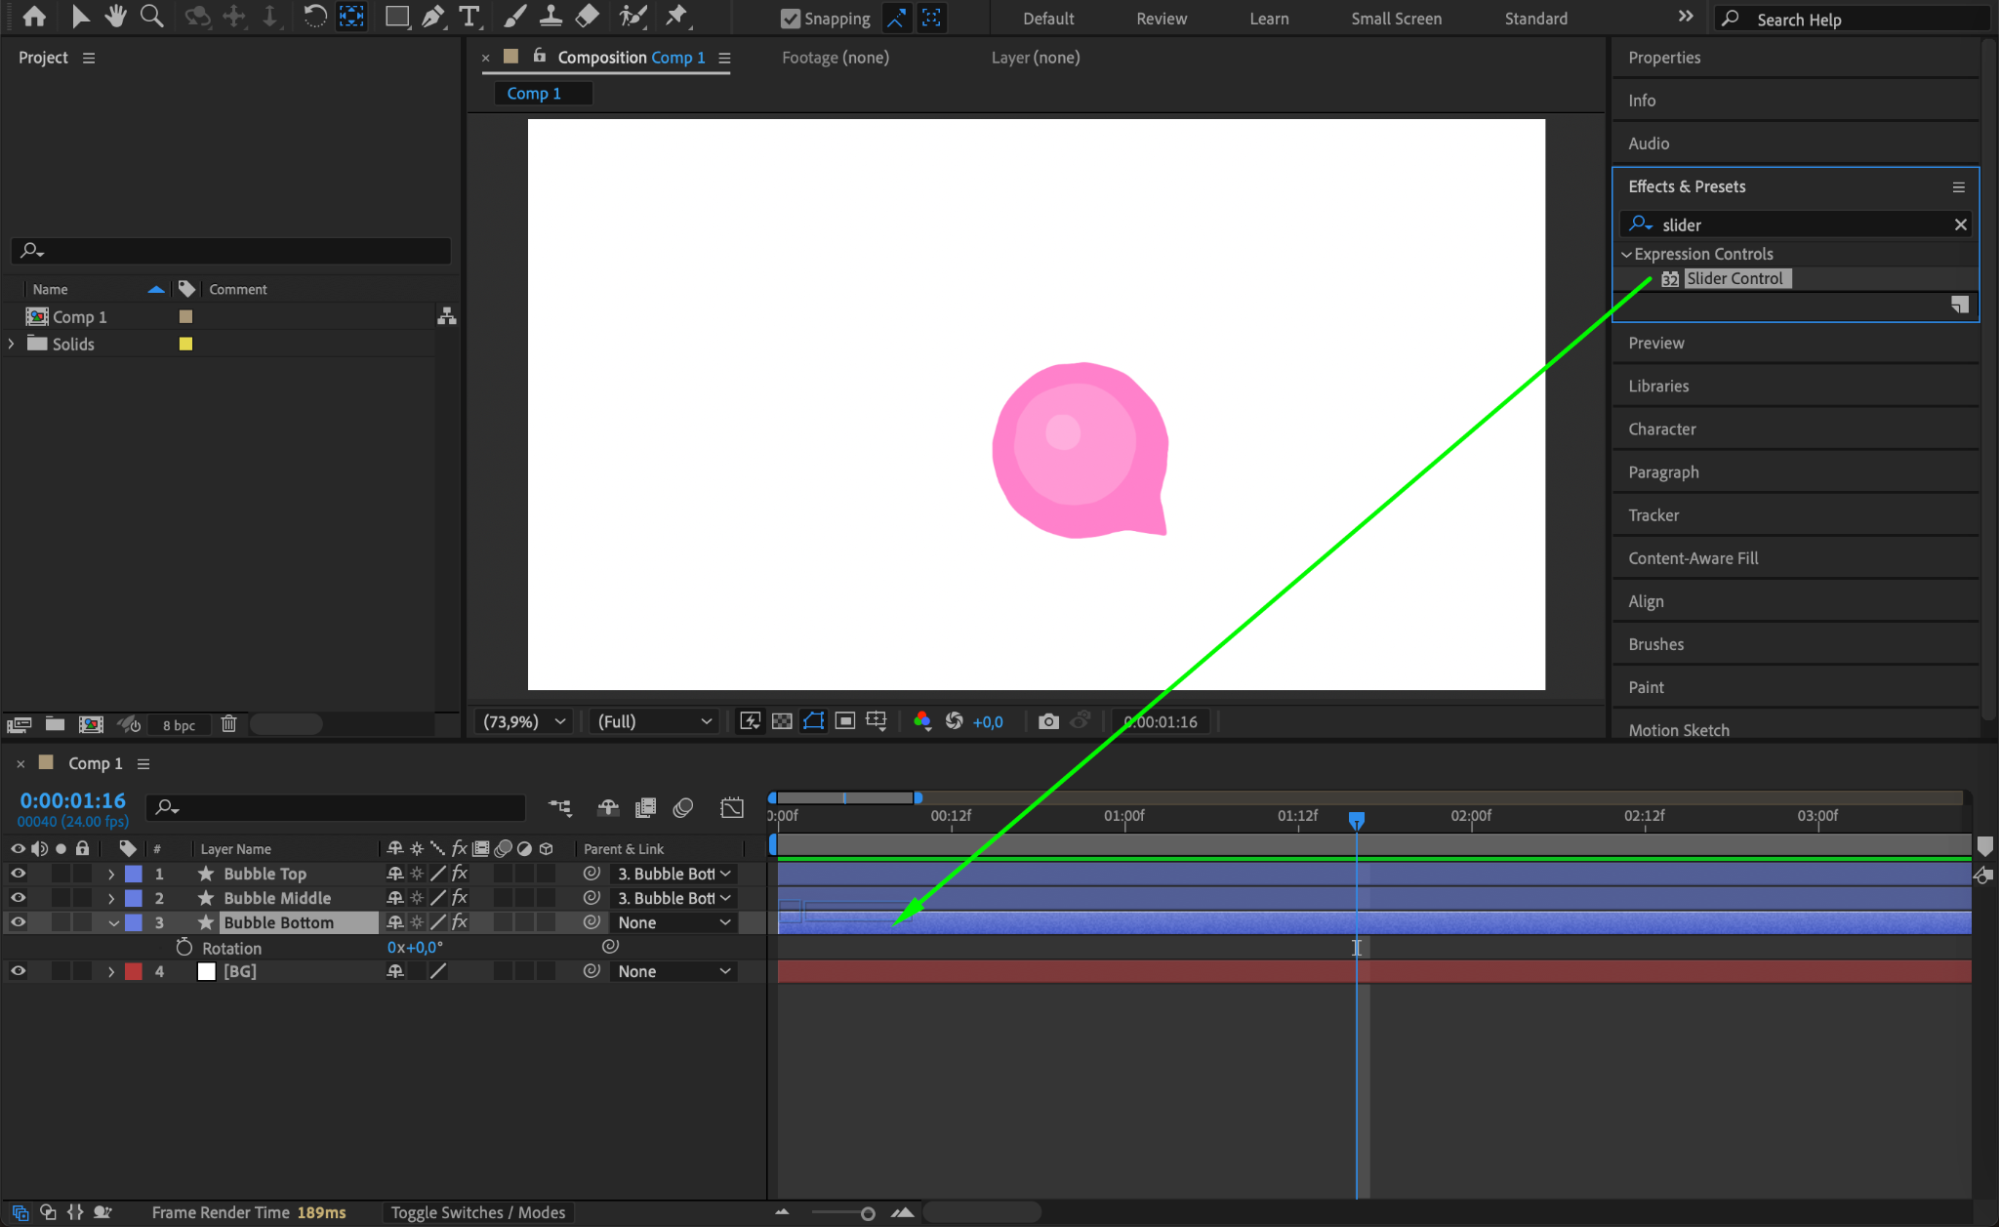

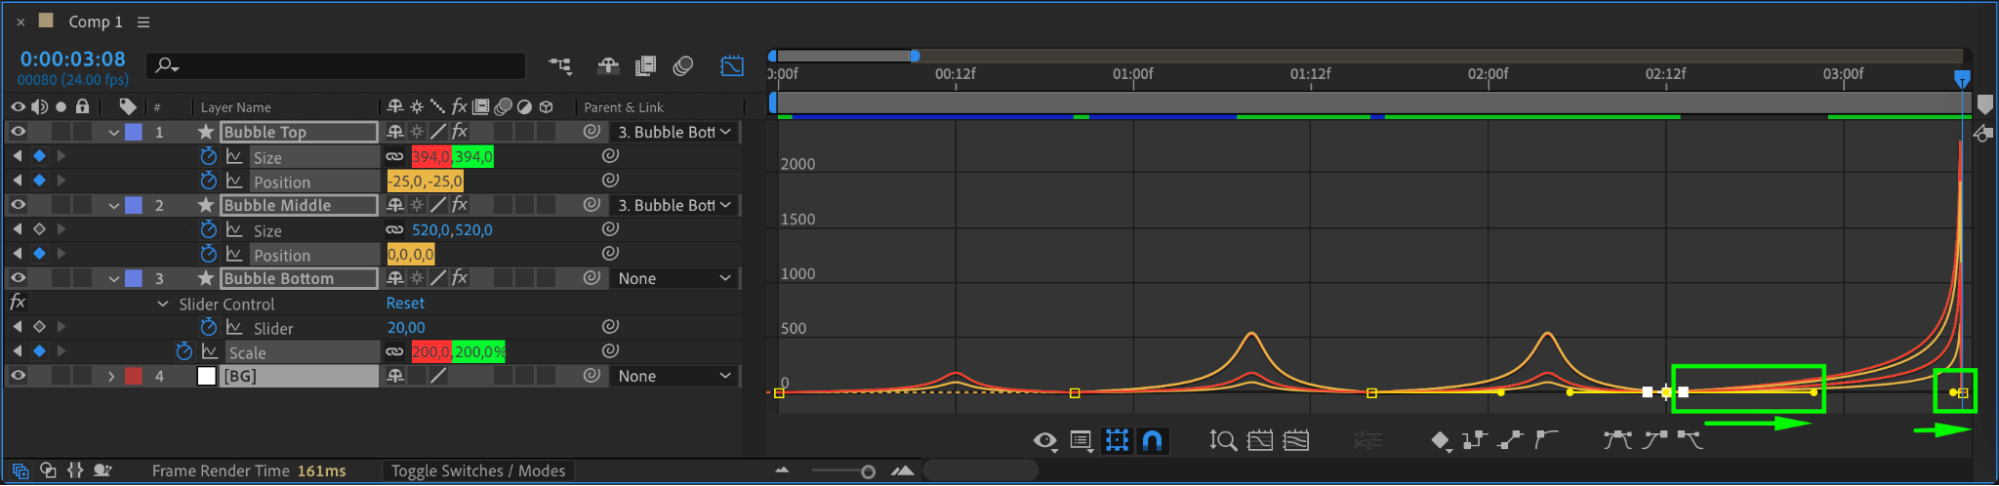
 Step 14: Final Expansion Before Popping
At 80 frames, adjust:
Bubble Top: Size = 394px, Position = (-25,-25)
Bubble Middle: Position = (0,0)
Bubble Bottom: Scale = 200%
Use Easy Ease and fine-tune in Graph Editor. Trim all bubble layers at this point.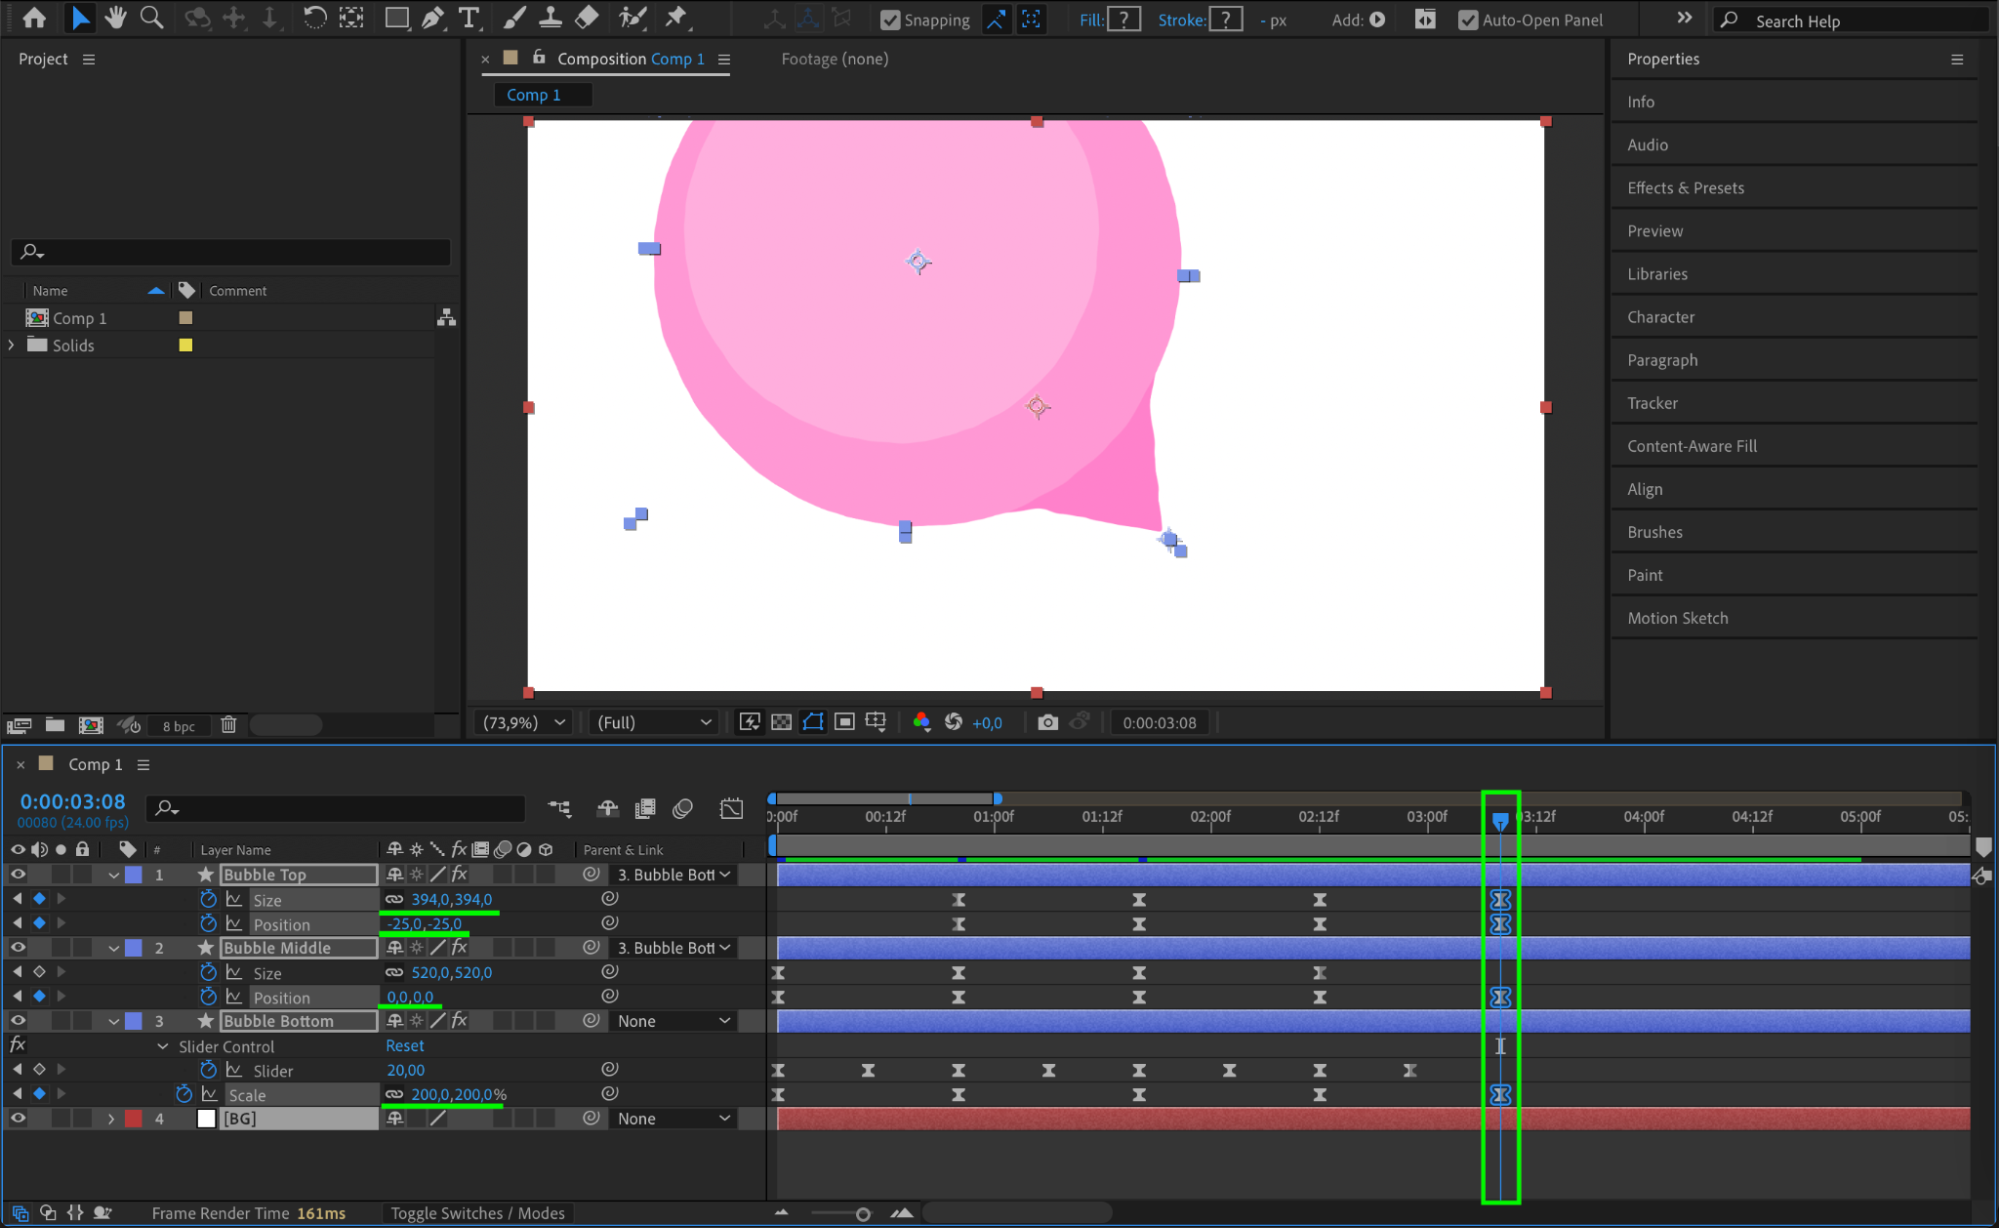
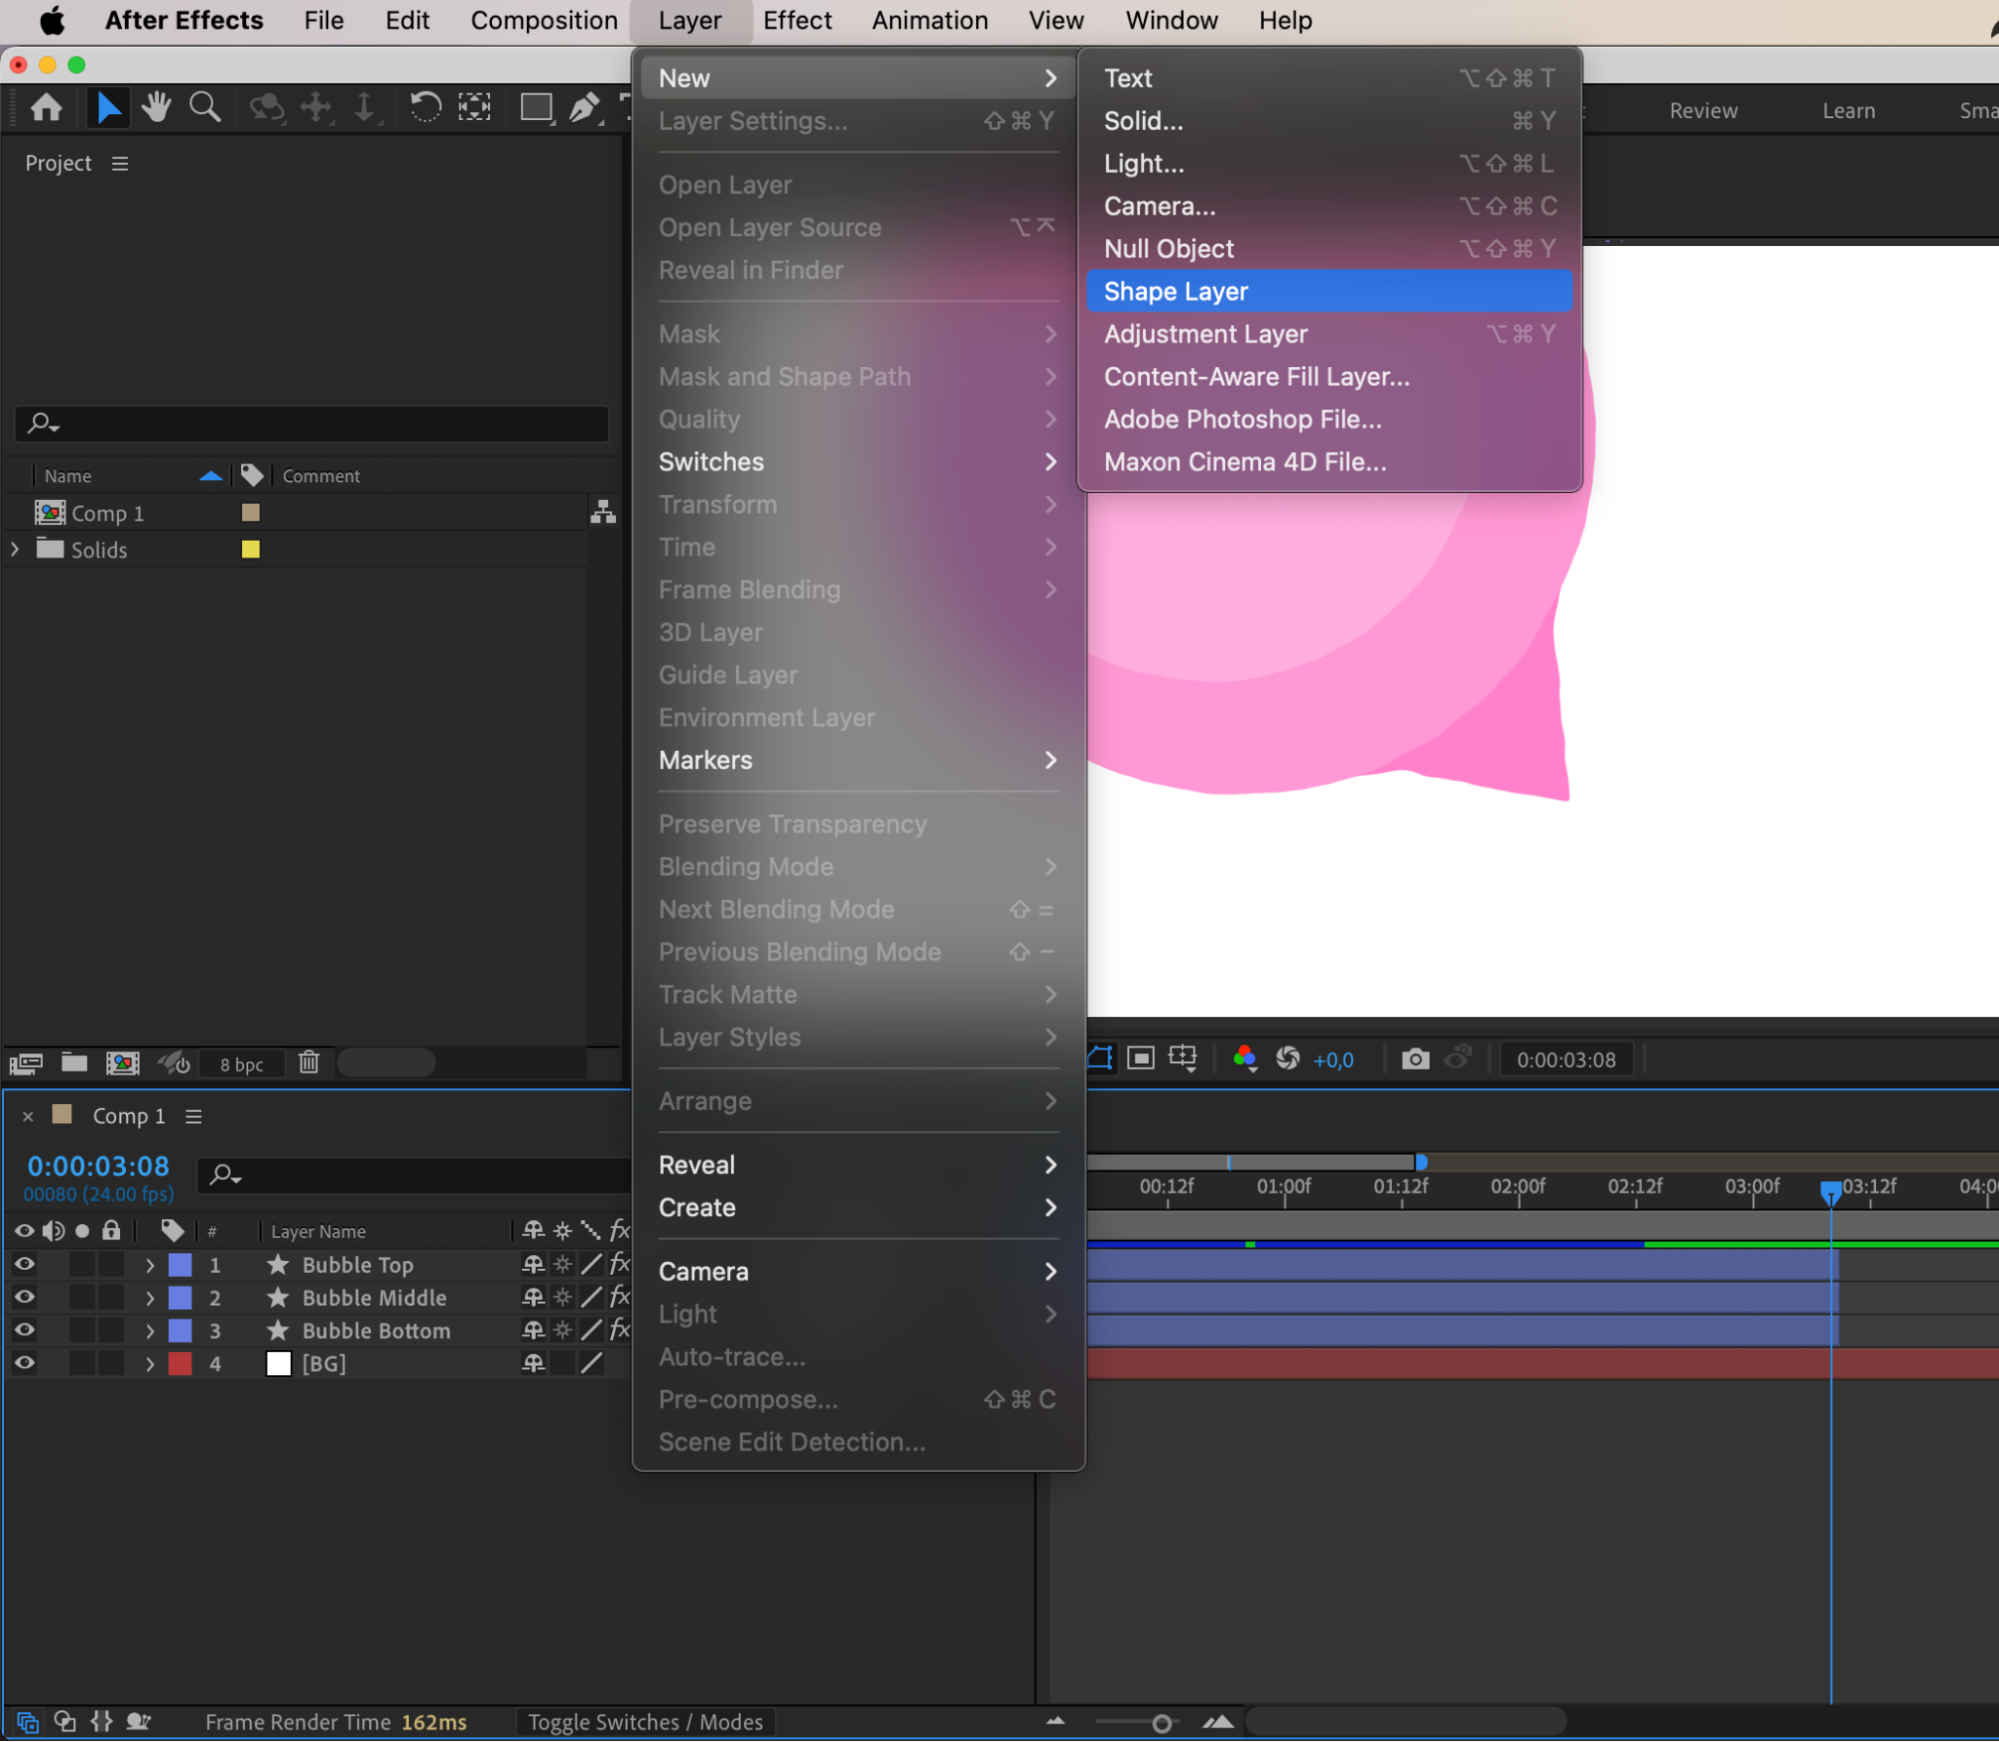
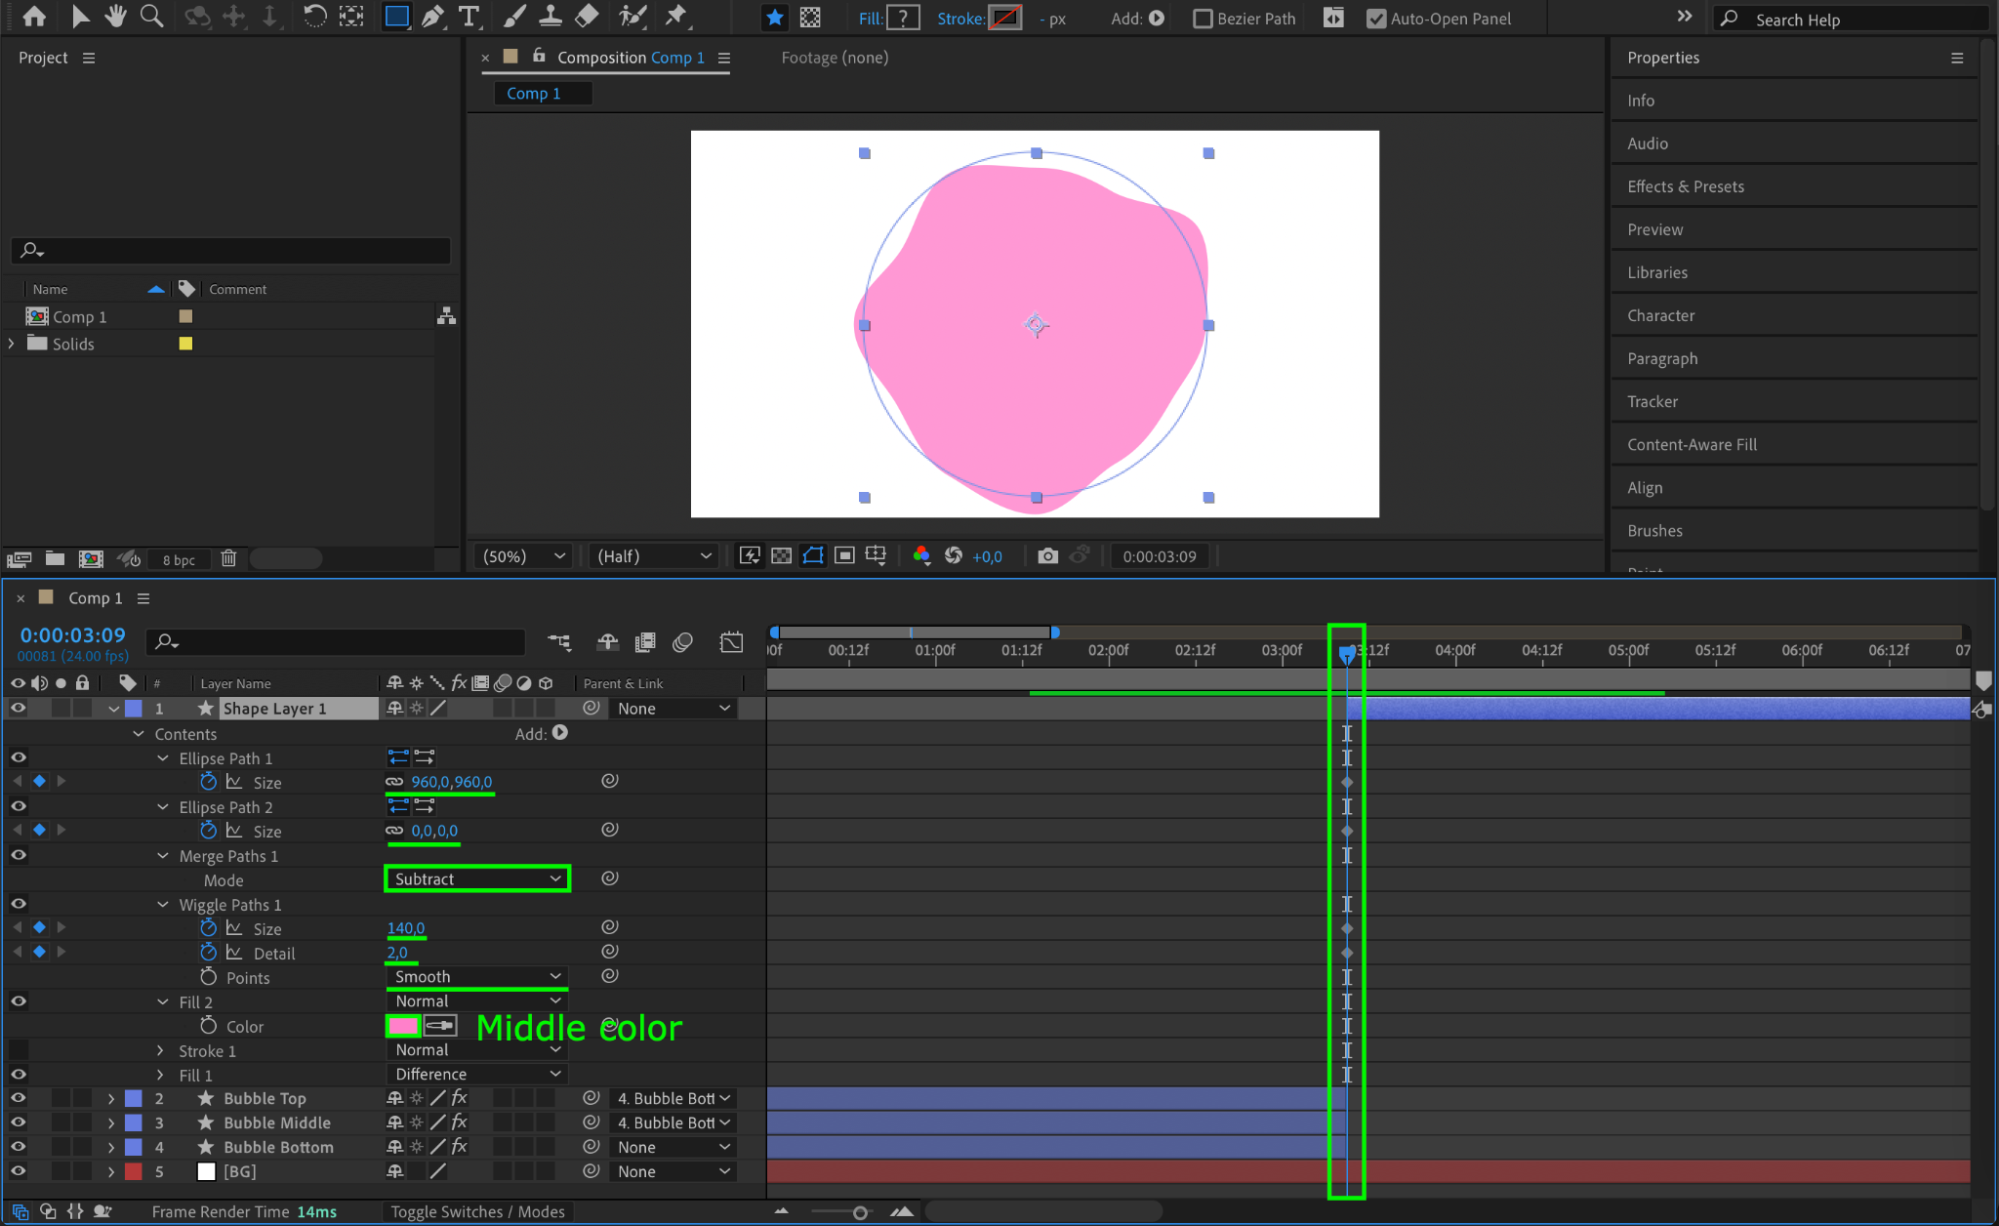
 Step 15: Create the Pop Effect
Layer > New > Shape Layer
Add: Ellipse > Ellipse > Merge Paths (Mode: Subtract) > Wiggle Paths > Fill.
 Step 16: Time the Pop Effect
Trim the new shape layer to start when the bubble disappears.
Set CTI at the start of this layer (Position 1):
Ellipse Path 1 Size: 960px
Ellipse Path 2 Size: 0px
Wiggle Path Size: 140px
Details: 2
Fill Color: Middle Pink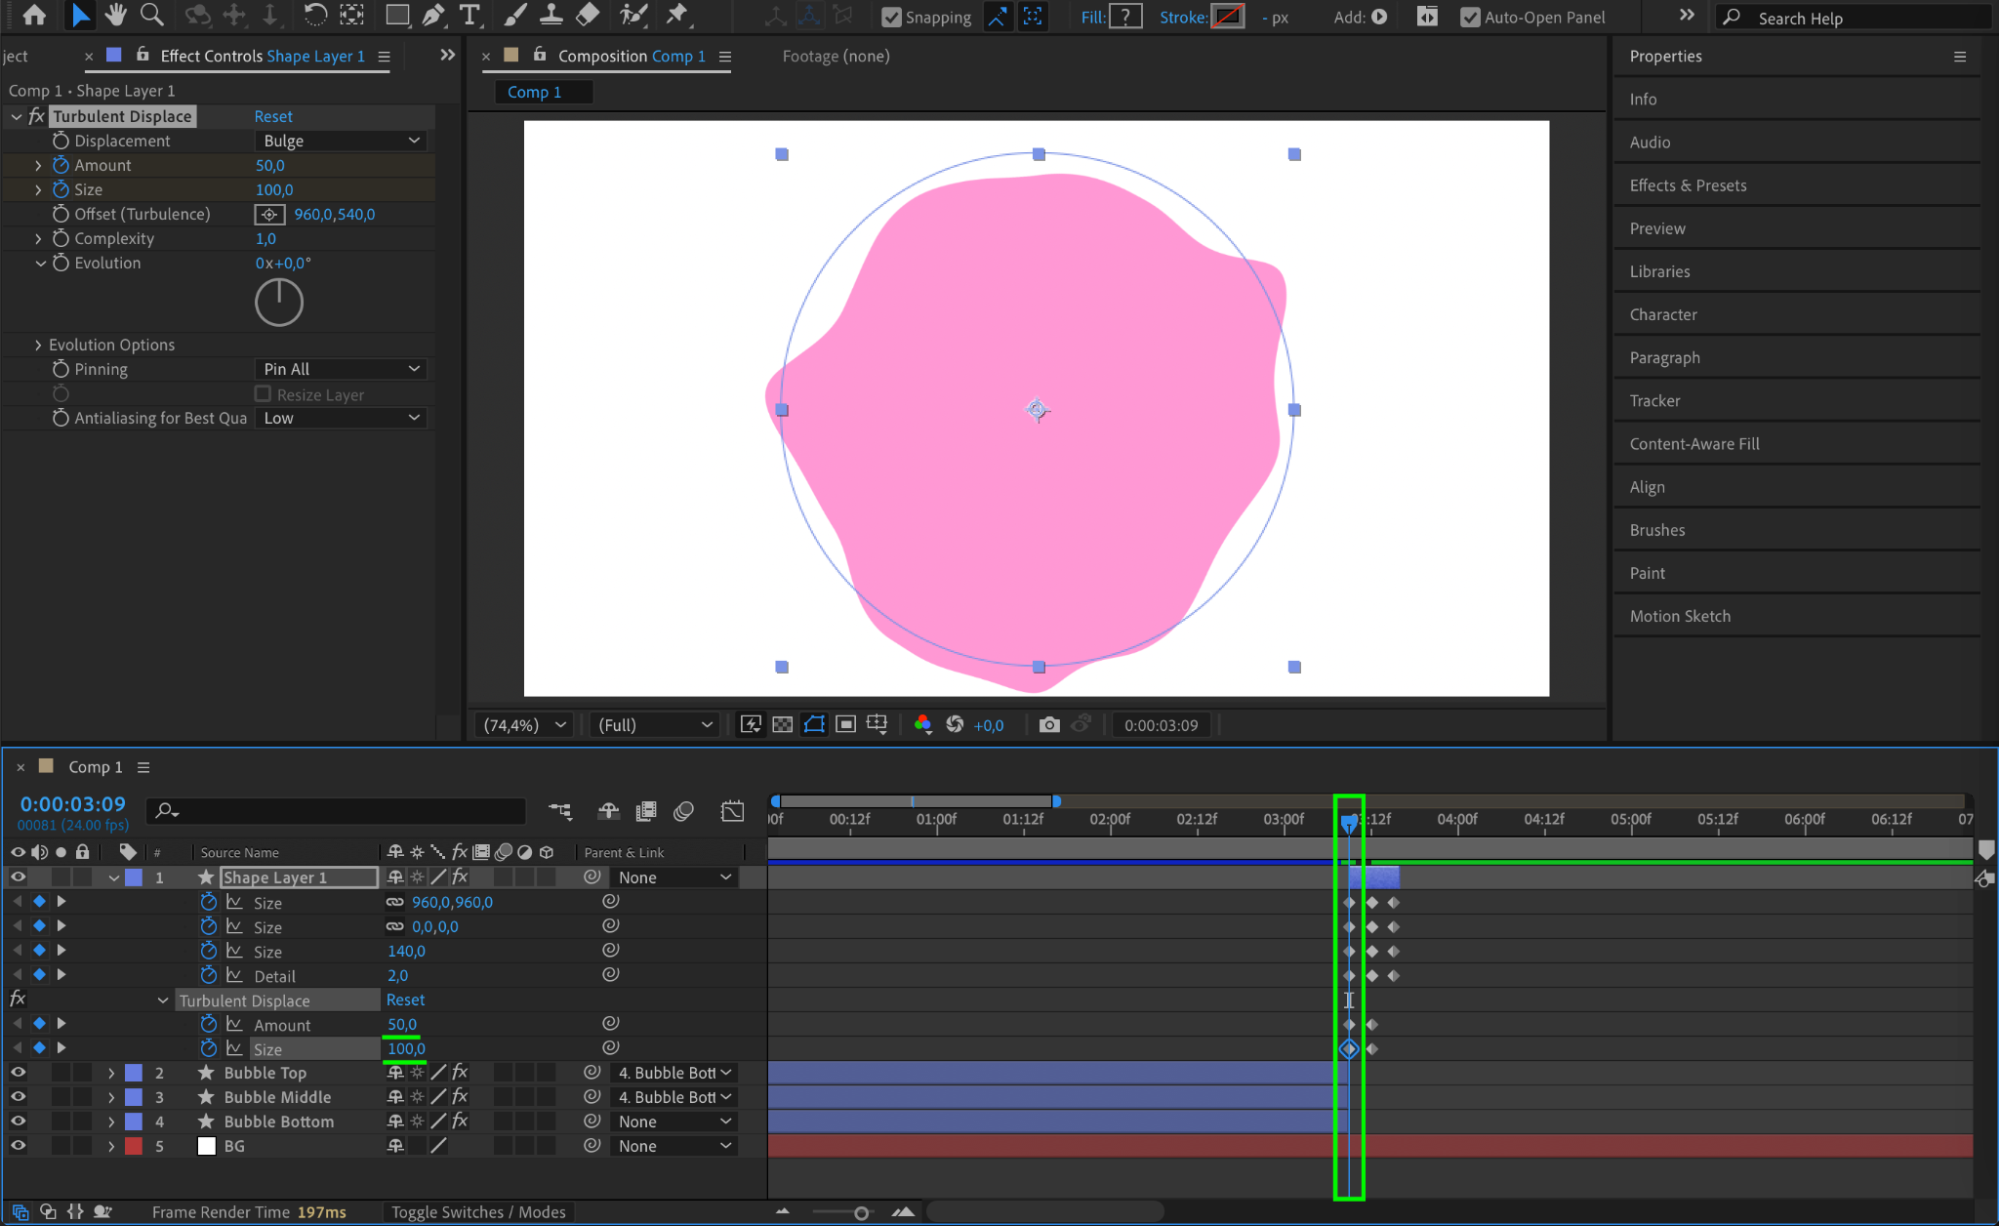 Step 17: Expand the Pop Effect
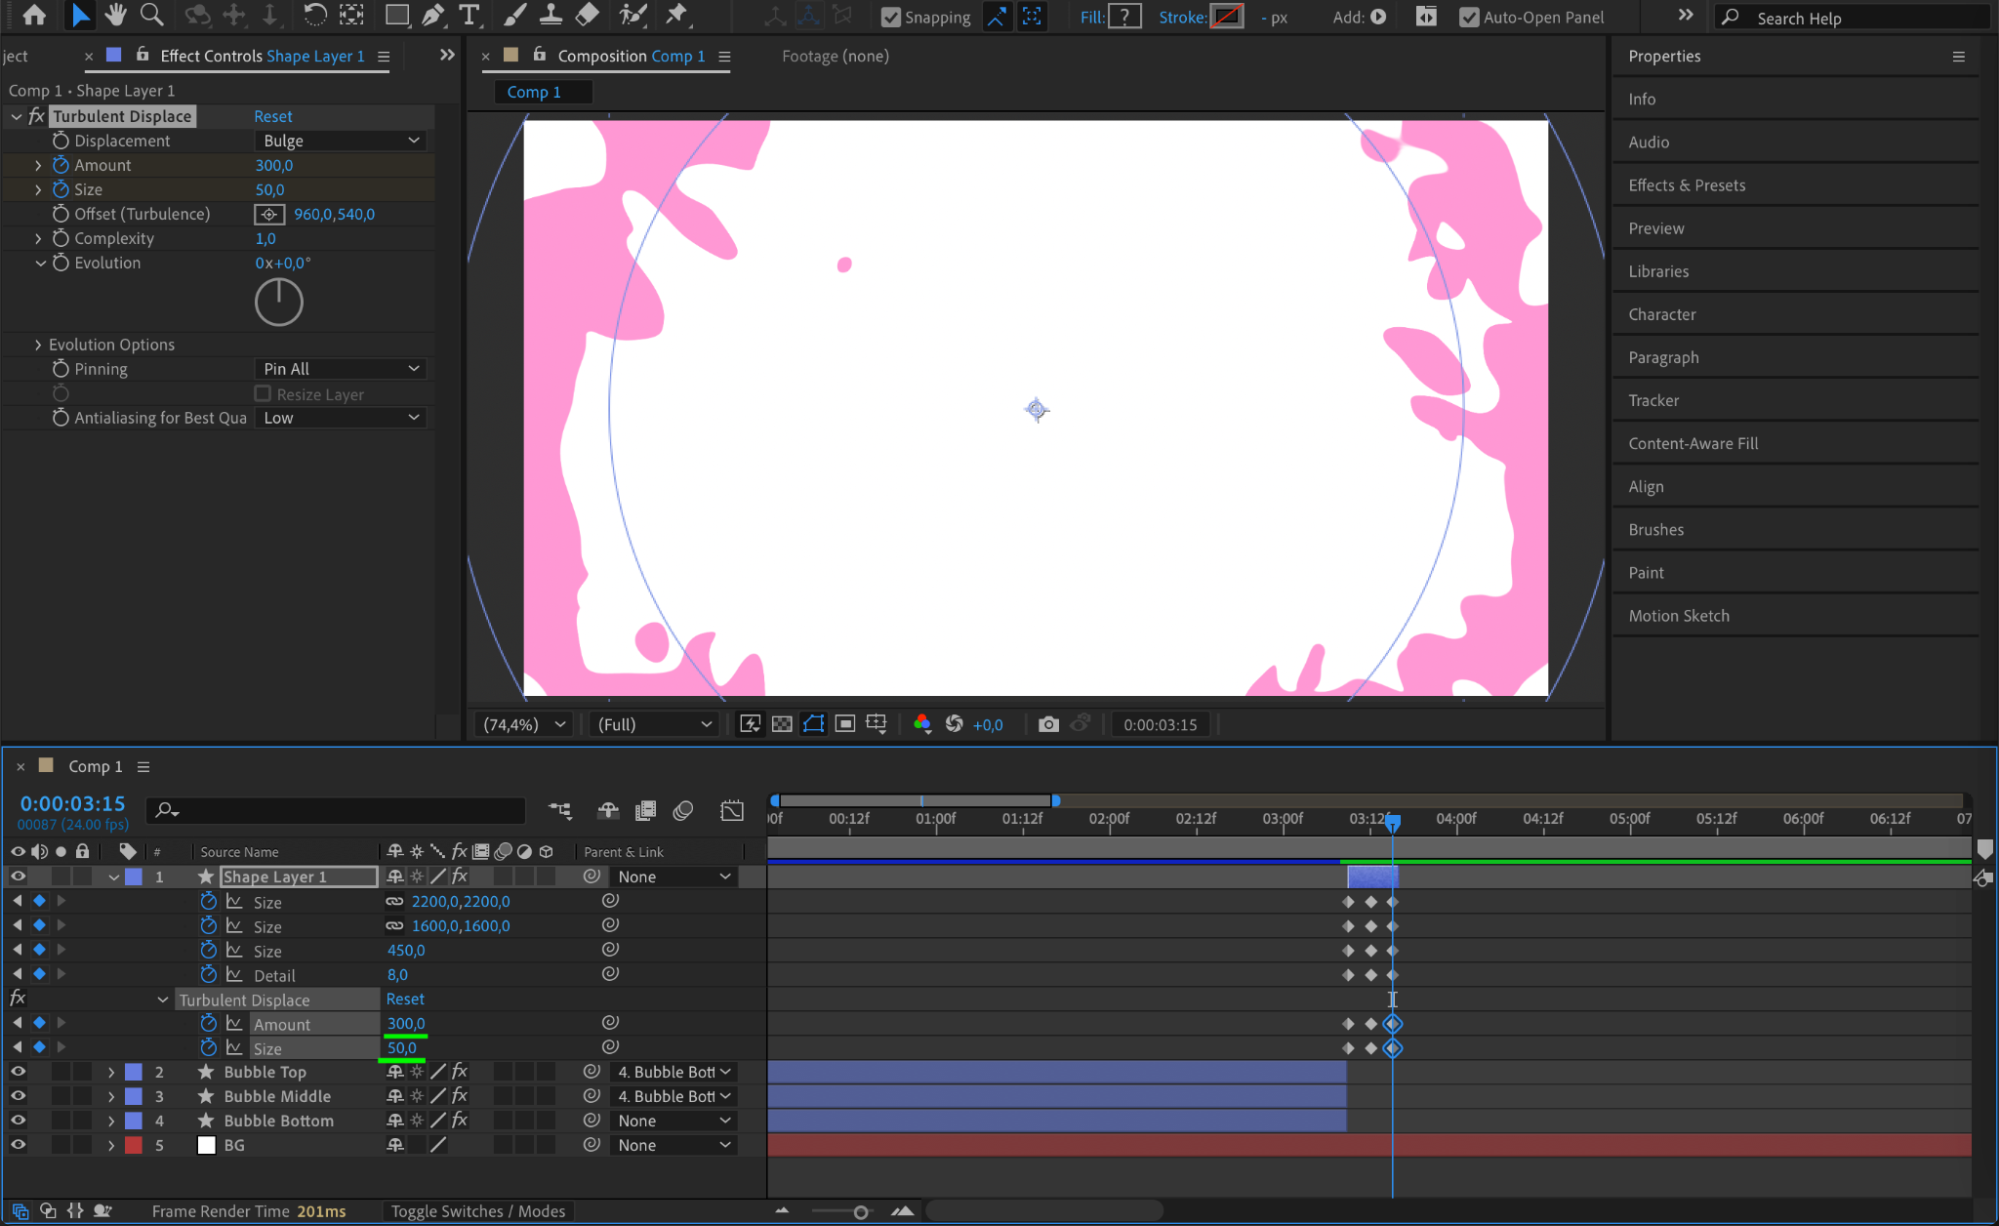
Move CTI to 2 frames later (Position 2) and adjust:
Size: 1200px
Size (Ellipse 2): 540px
Wiggle Path Size: 250px
Details: 4
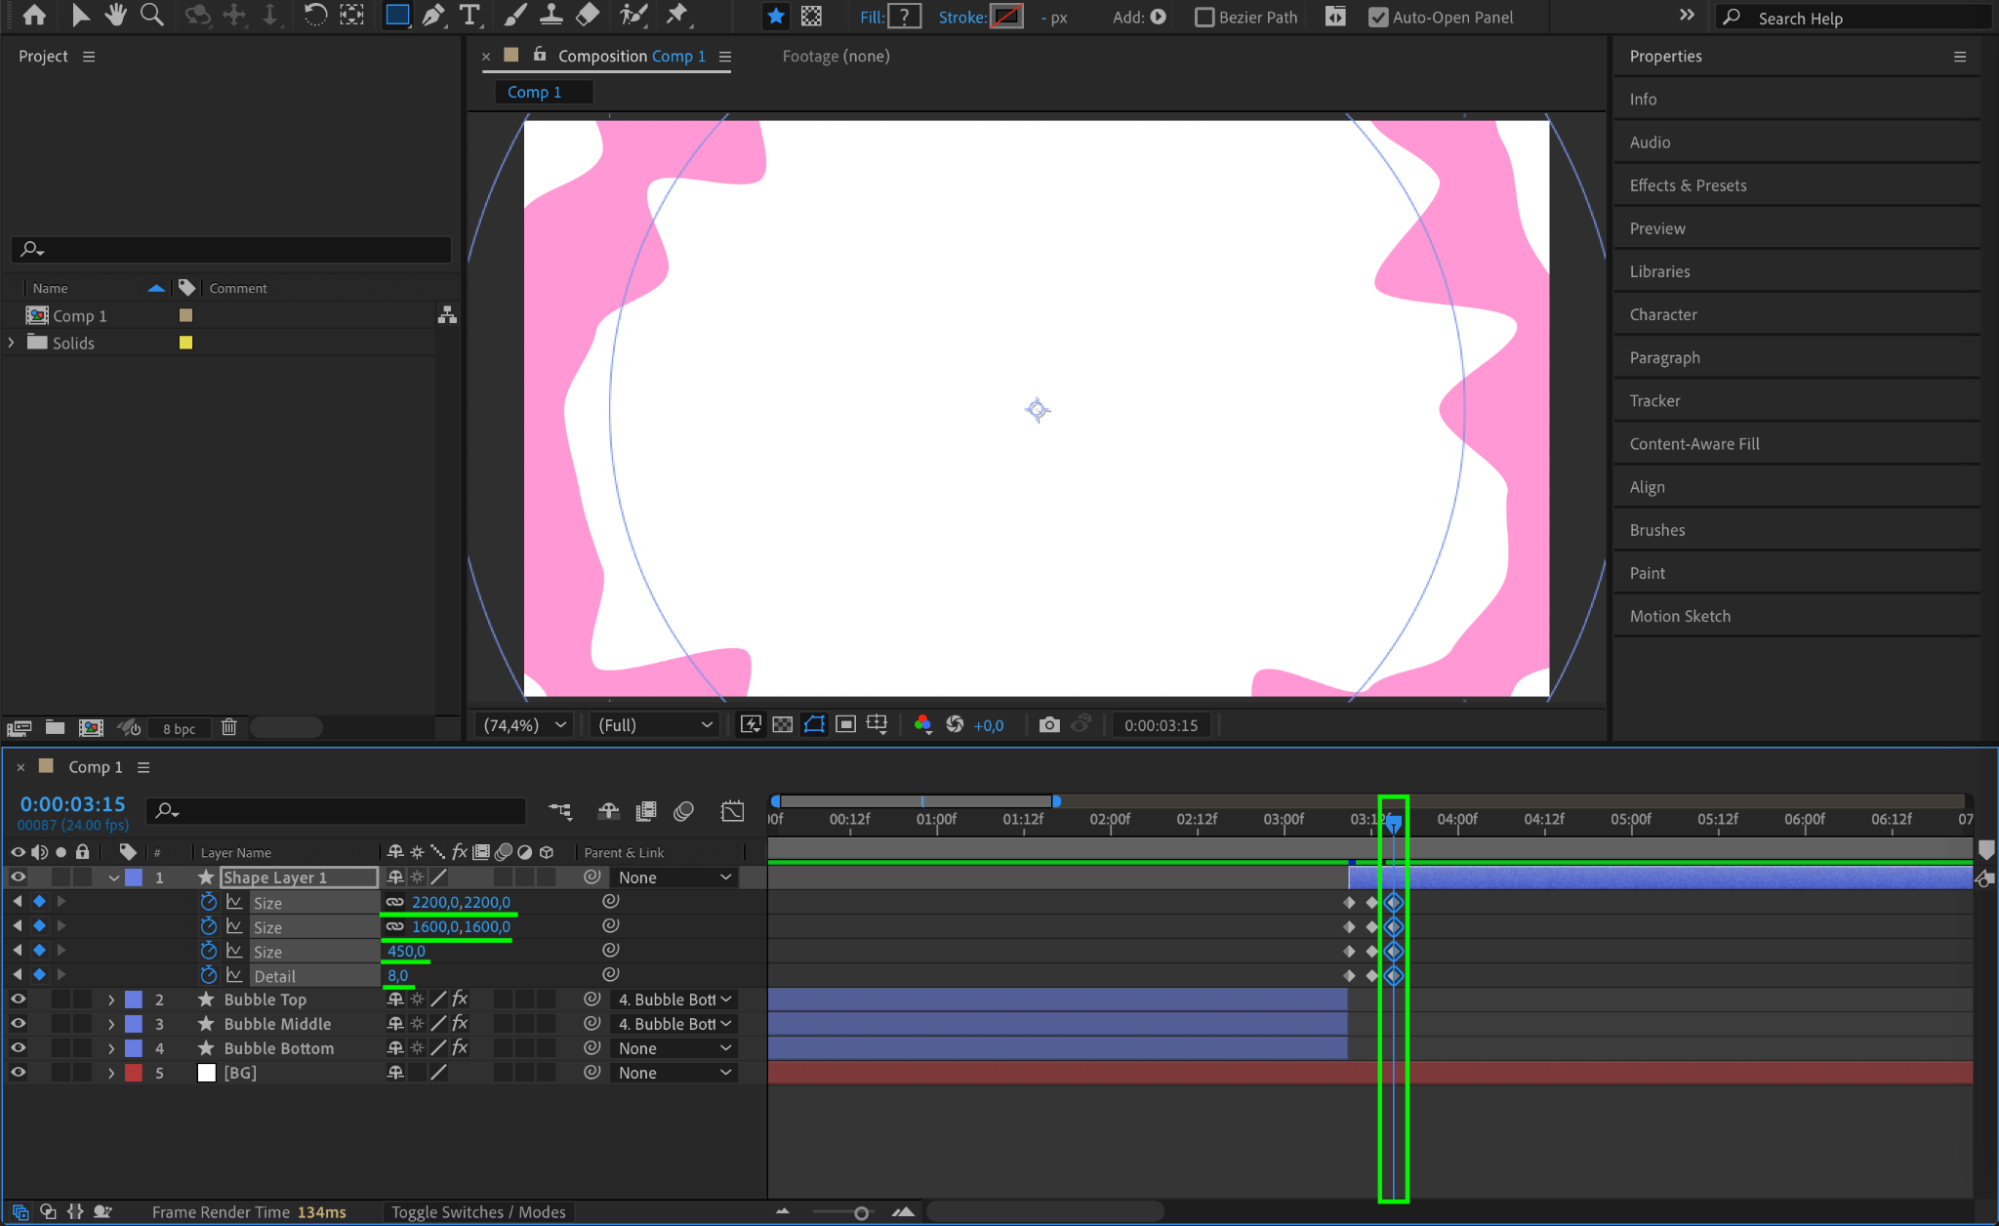
Move CTI to 2 more frames later (Position 3) and adjust:
Size: 2200px
Size (Ellipse 2): 1600px
Wiggle Path Size: 450px
Details: 8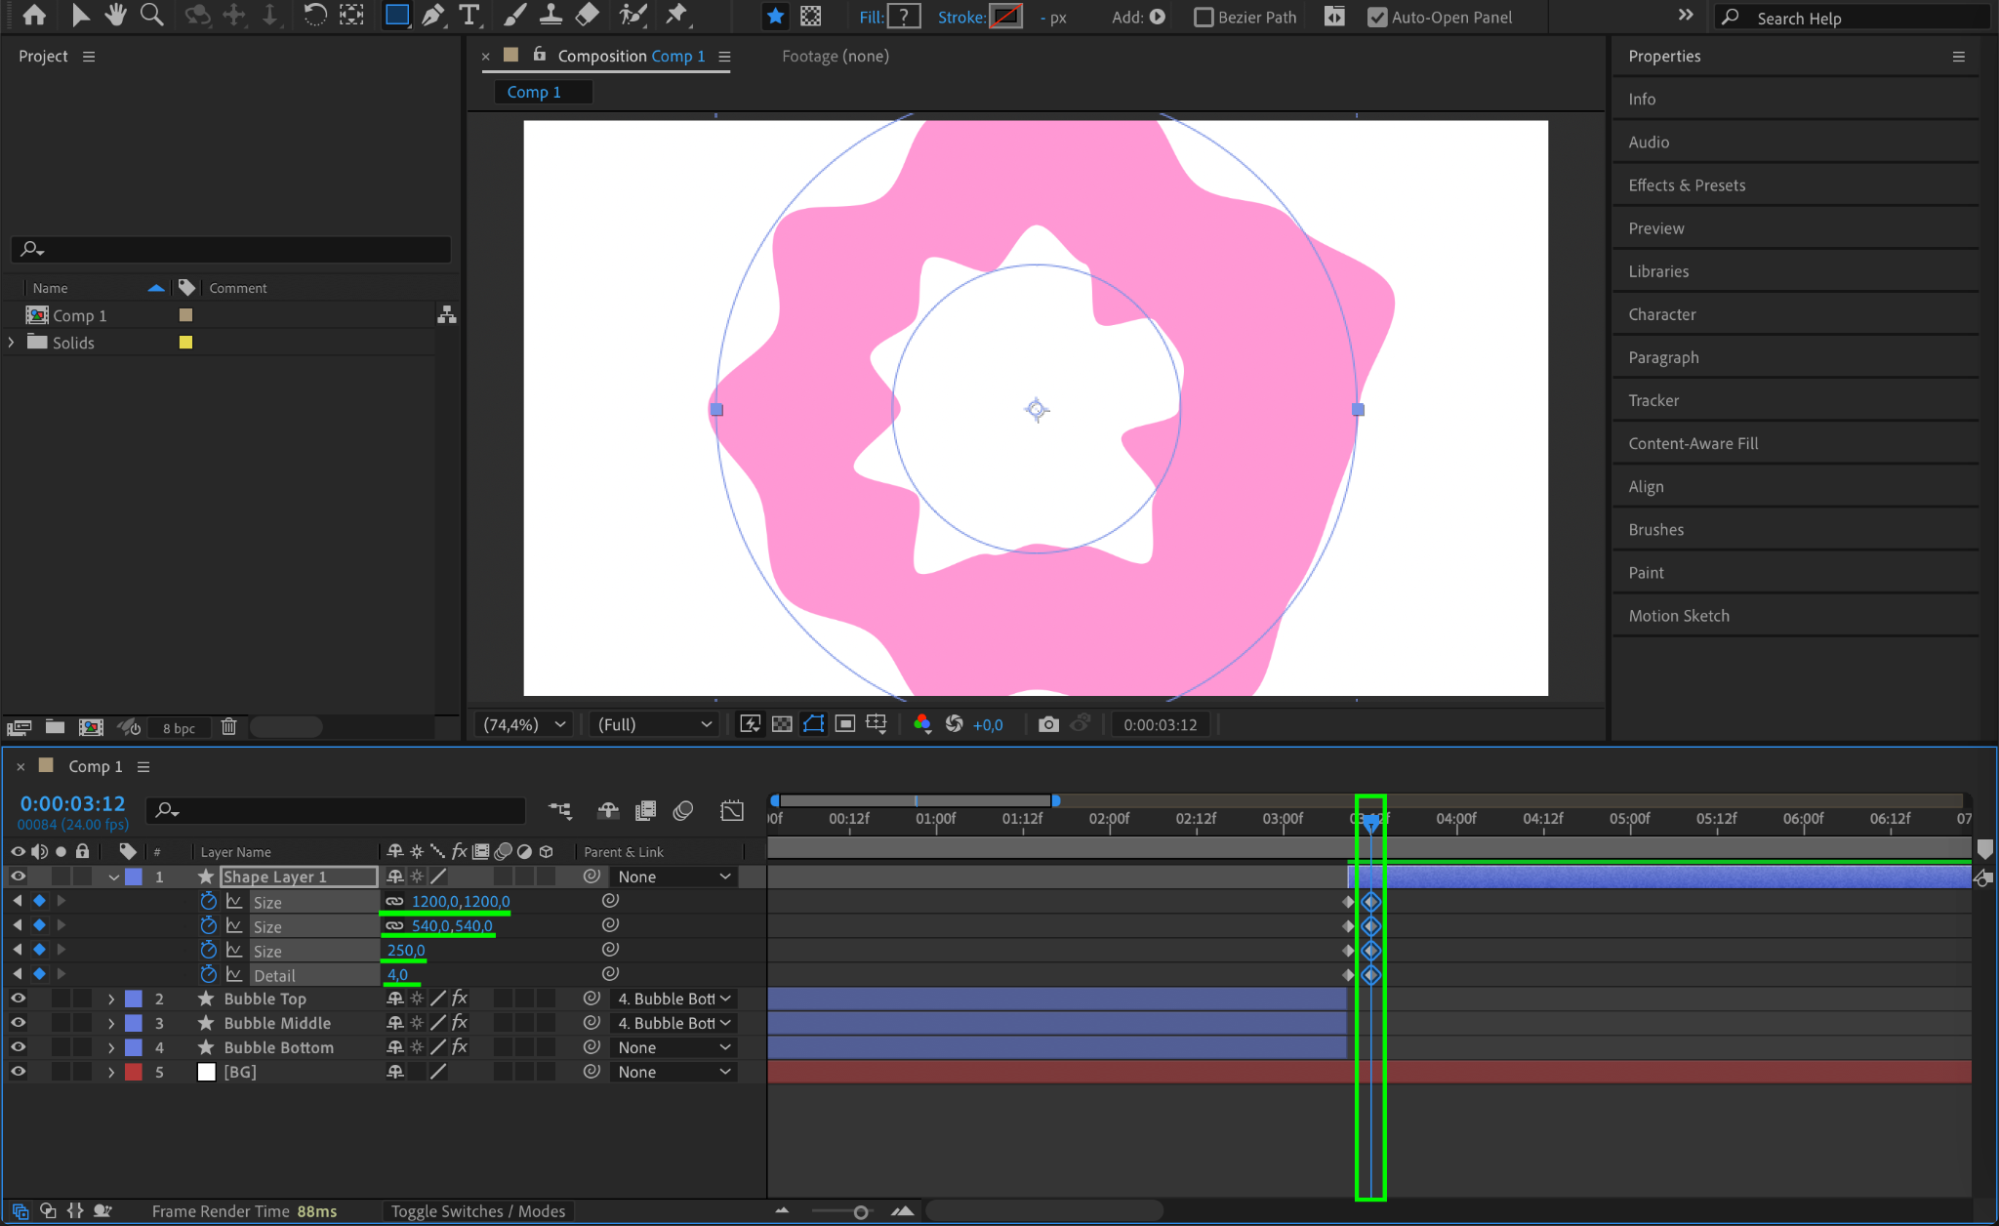
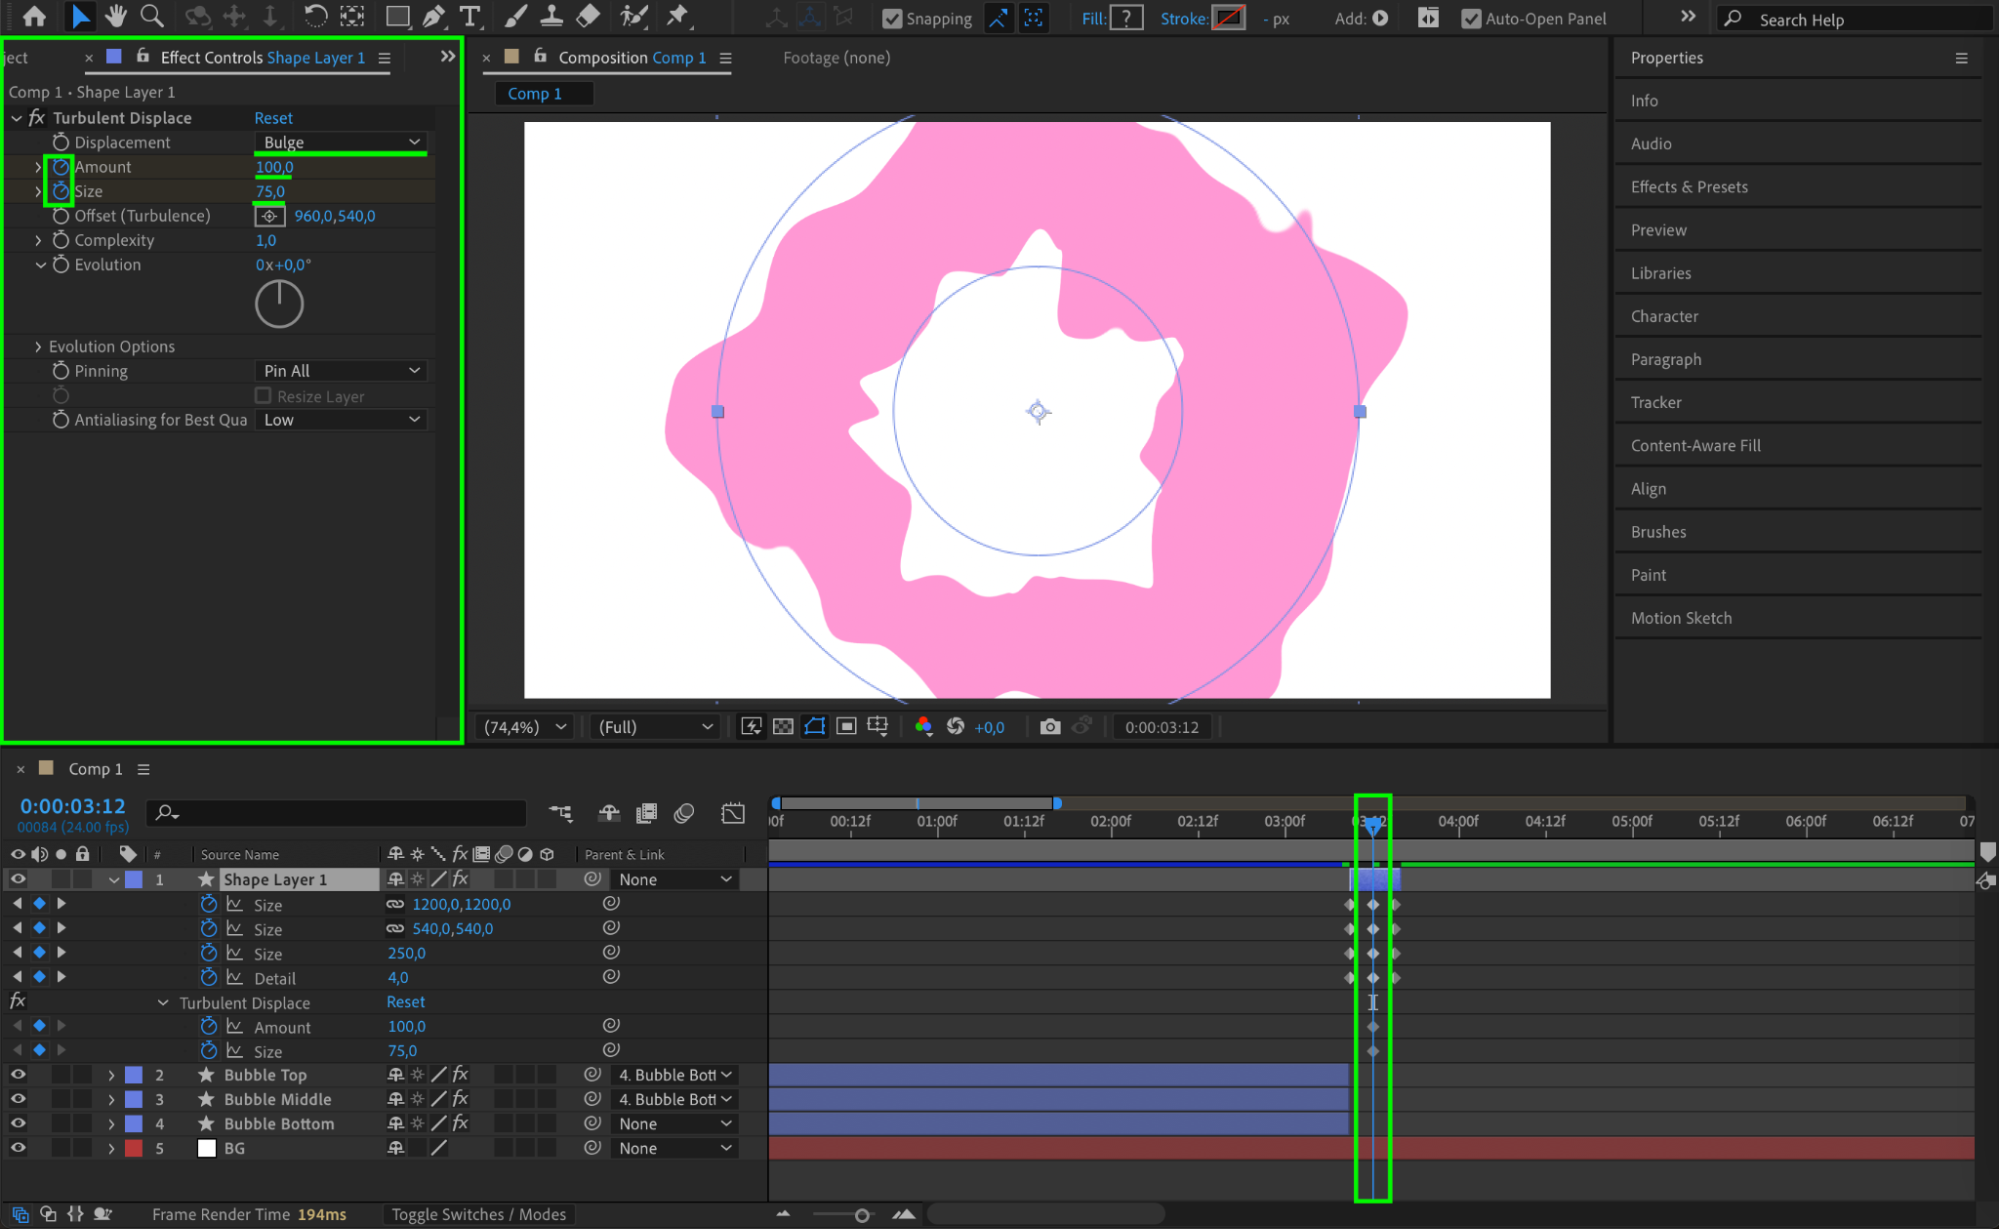
 Step 18: Add a Distortion Effect to the Pop
Copy the Turbulent Displace effect from Bubble Top.
Paste it onto the Shape Layer at CTI Position 2.
Adjust:
Position 1: Amount = 50, Size = 100
Position 2: Amount = 100, Size = 75
Position 3: Amount = 300, Size = 50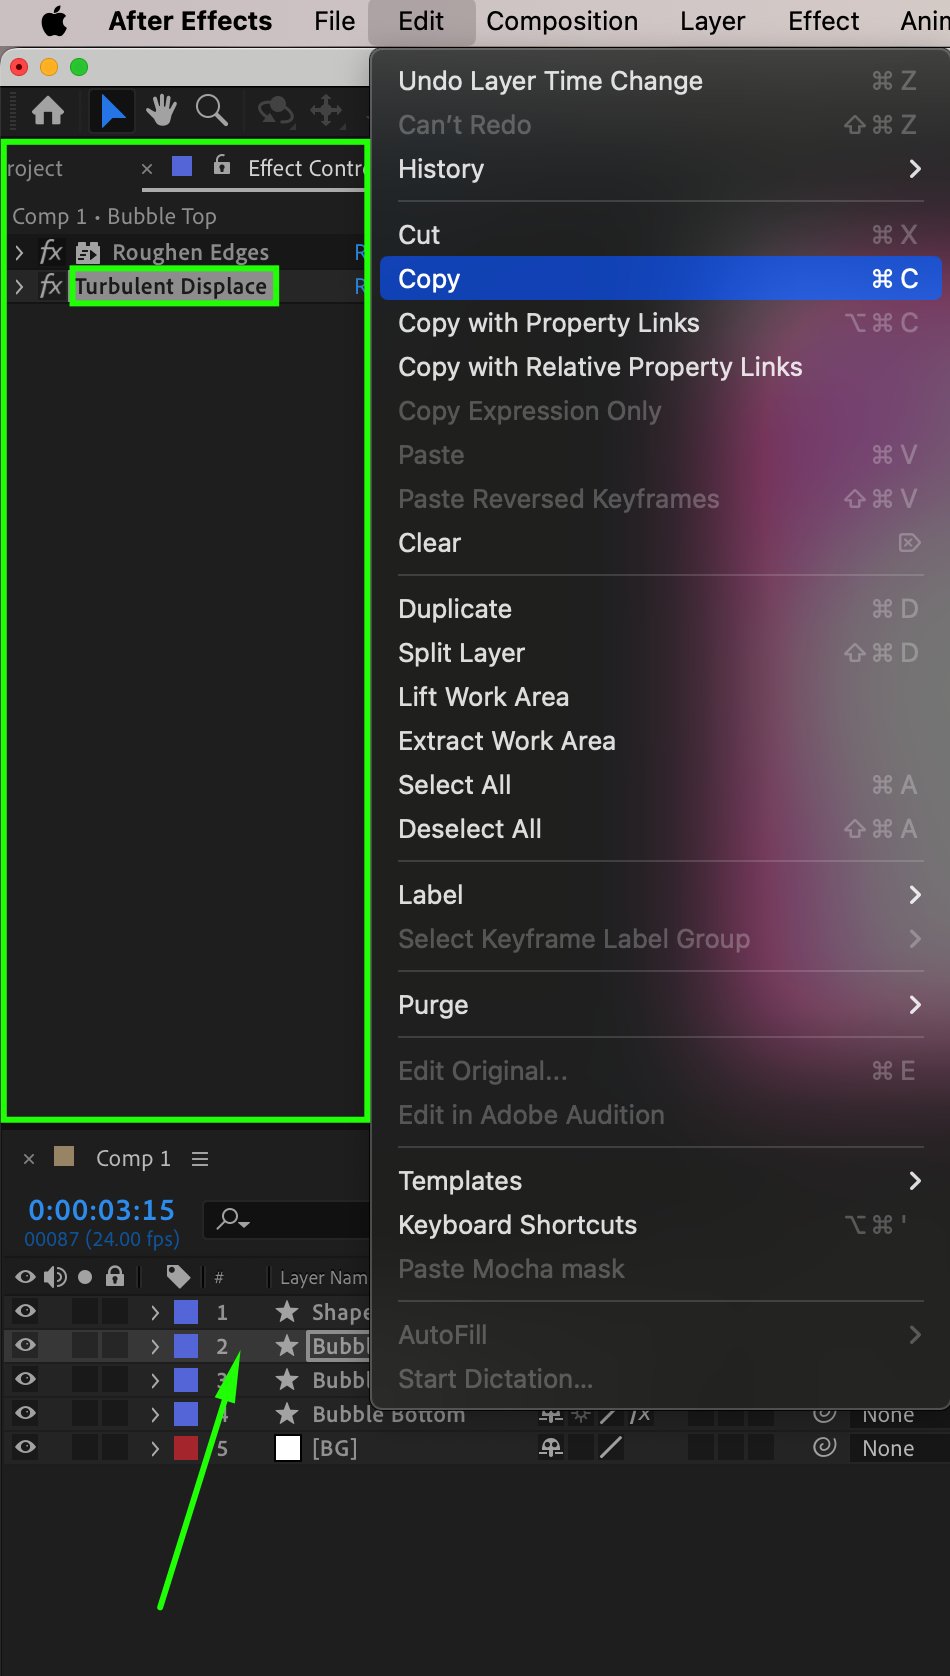
 Step 19: Final Adjustments and Rendering
Preview the animation to ensure smooth motion. Make final refinements in the Graph Editor. Render the animation to export the final bubble pop effect.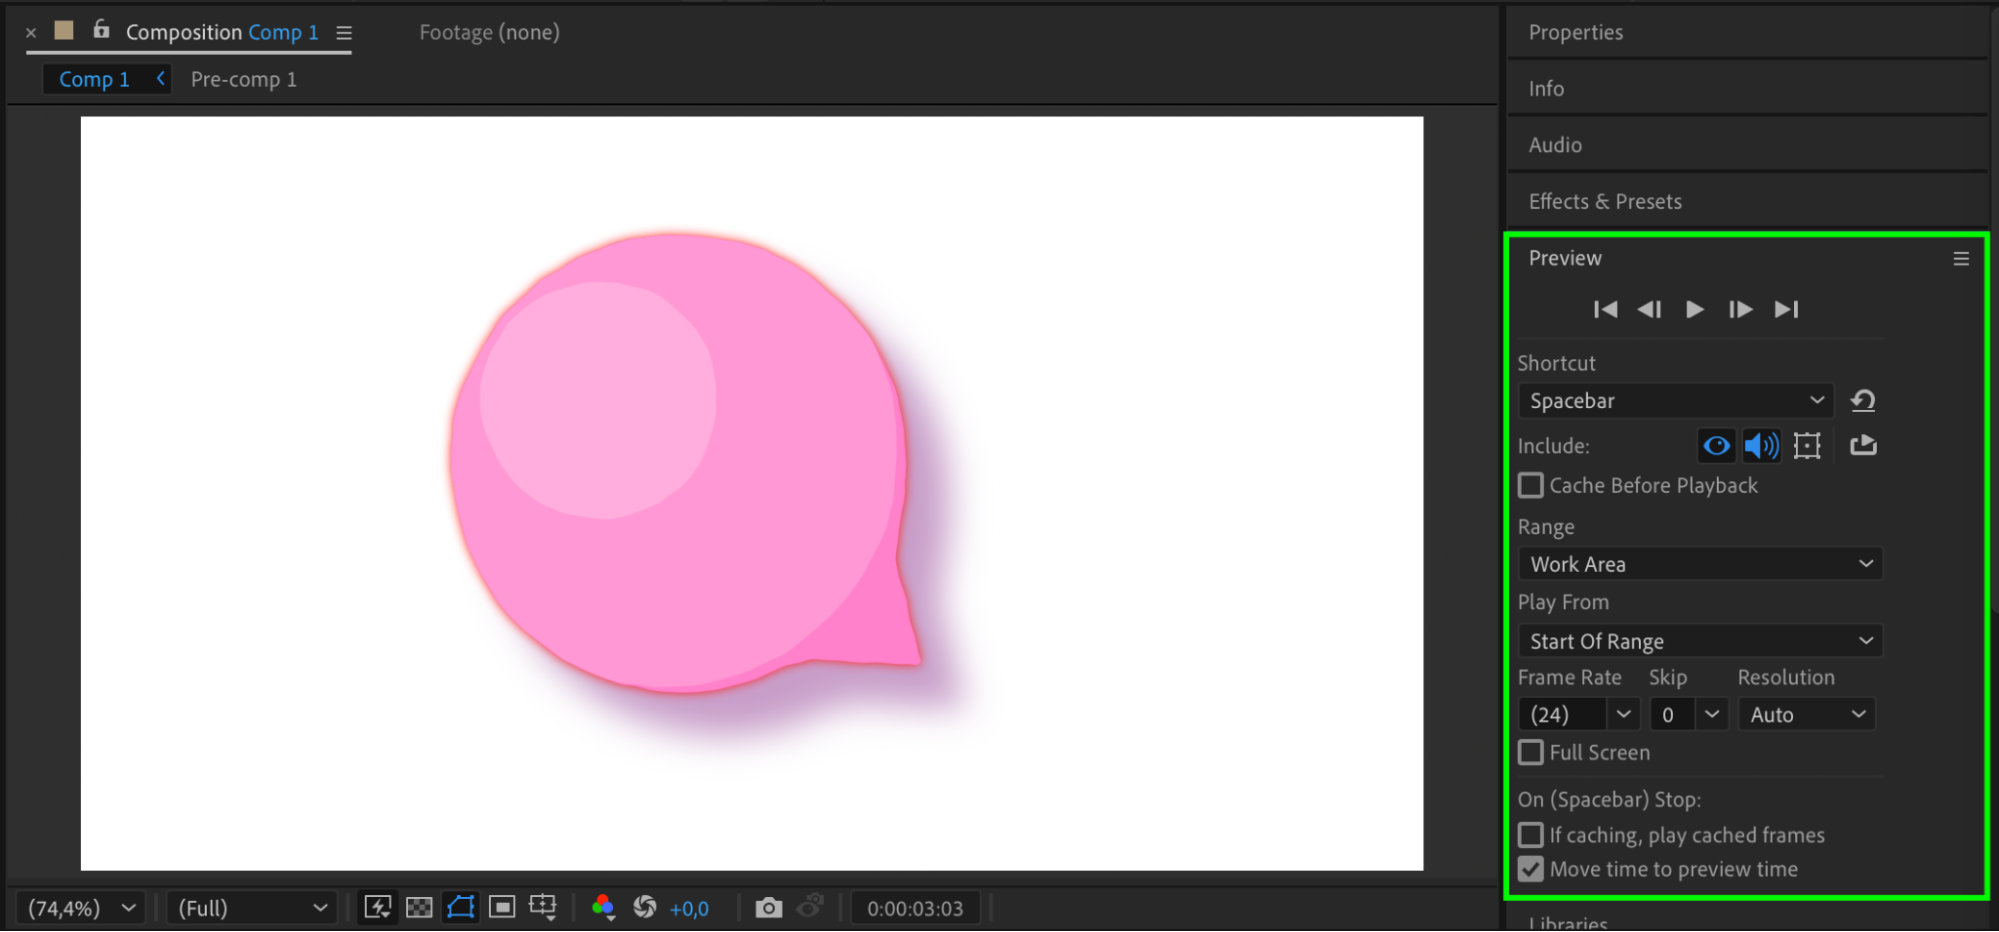 Conclusion
By following these steps, you have created a smooth, stylized bubble pop animation in After Effects. The combination of shape layers, effects, and keyframe animation helps achieve a realistic and visually appealing result. Experiment with colors, timing, and additional effects to customize your animation further
Our Bestsellers


