Creating Stunning Cloud Effects in After Effects: A Step-by-Step Guide
Introduction: Adding Magic and Atmosphere to Your Videos
In this tutorial, we will show you how to create stunning cloud effects in After Effects. By following these steps, you can add depth, atmosphere, and a touch of magic to your video projects. Let’s get started!
How to Create a Cloud in After Effects
Step 1: Set Up Your Composition
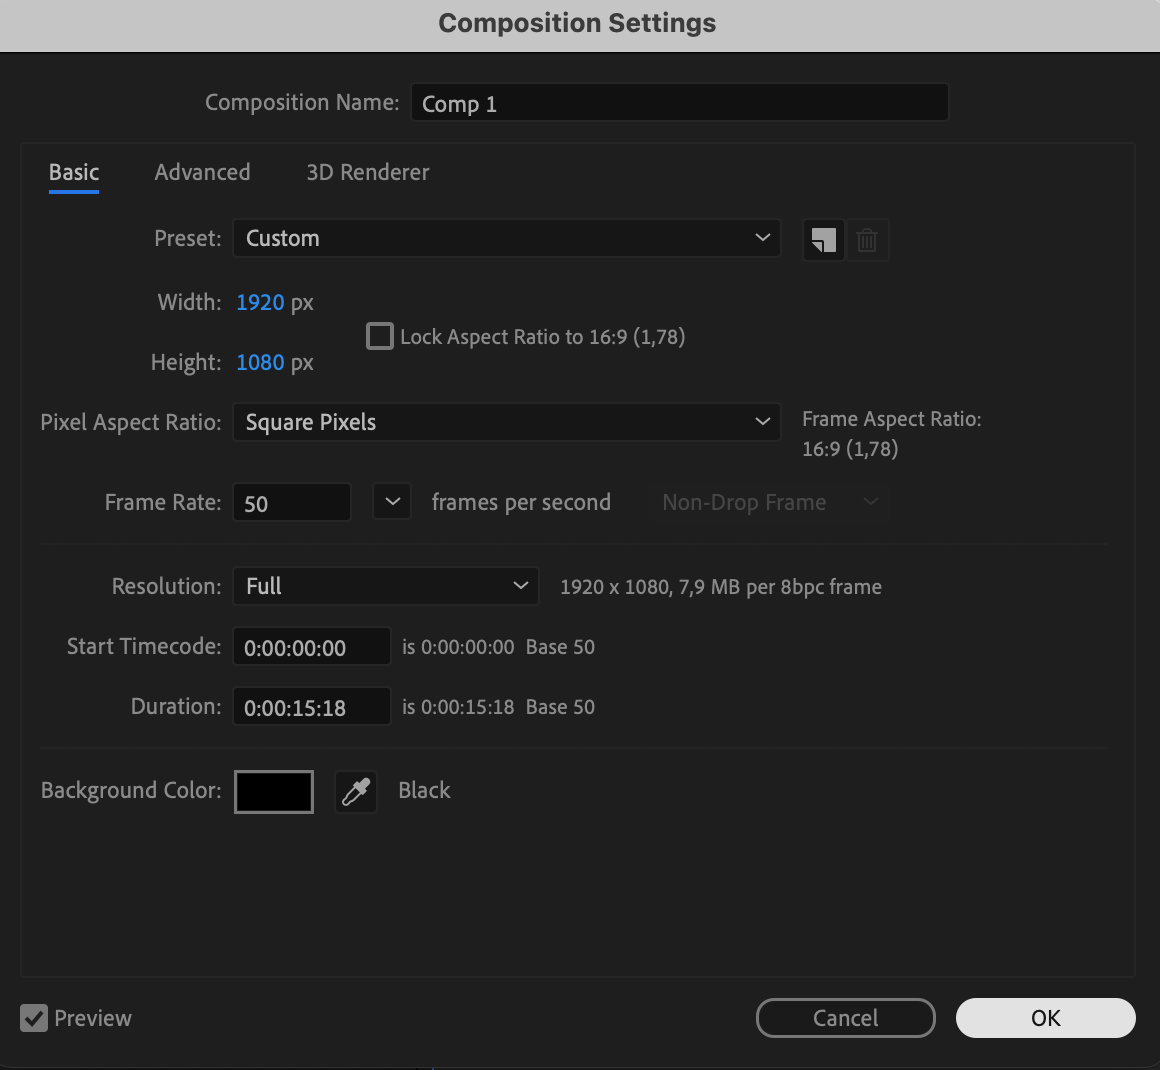
First, it’s important to set up your composition. Create a new composition and adjust the settings to match your desired video output. Consider the dimensions, frame rate, and duration according to your project requirements. Choose a black background color.
 Step 2: Create a White Solid Layer
Get 10% off when you subscribe to our newsletter

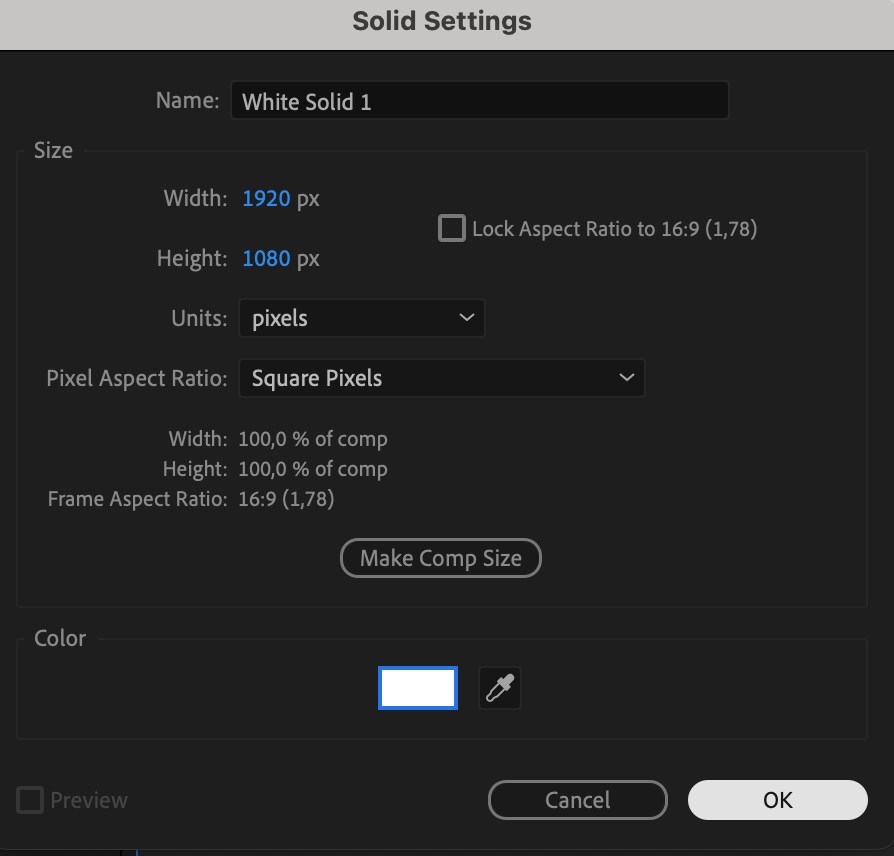
Create a white solid layer that will serve as the base for your cloud. Go to “Layer” > “New” > “Solid” and choose white as the color.
 Step 3: Draw an Ellipse Shape
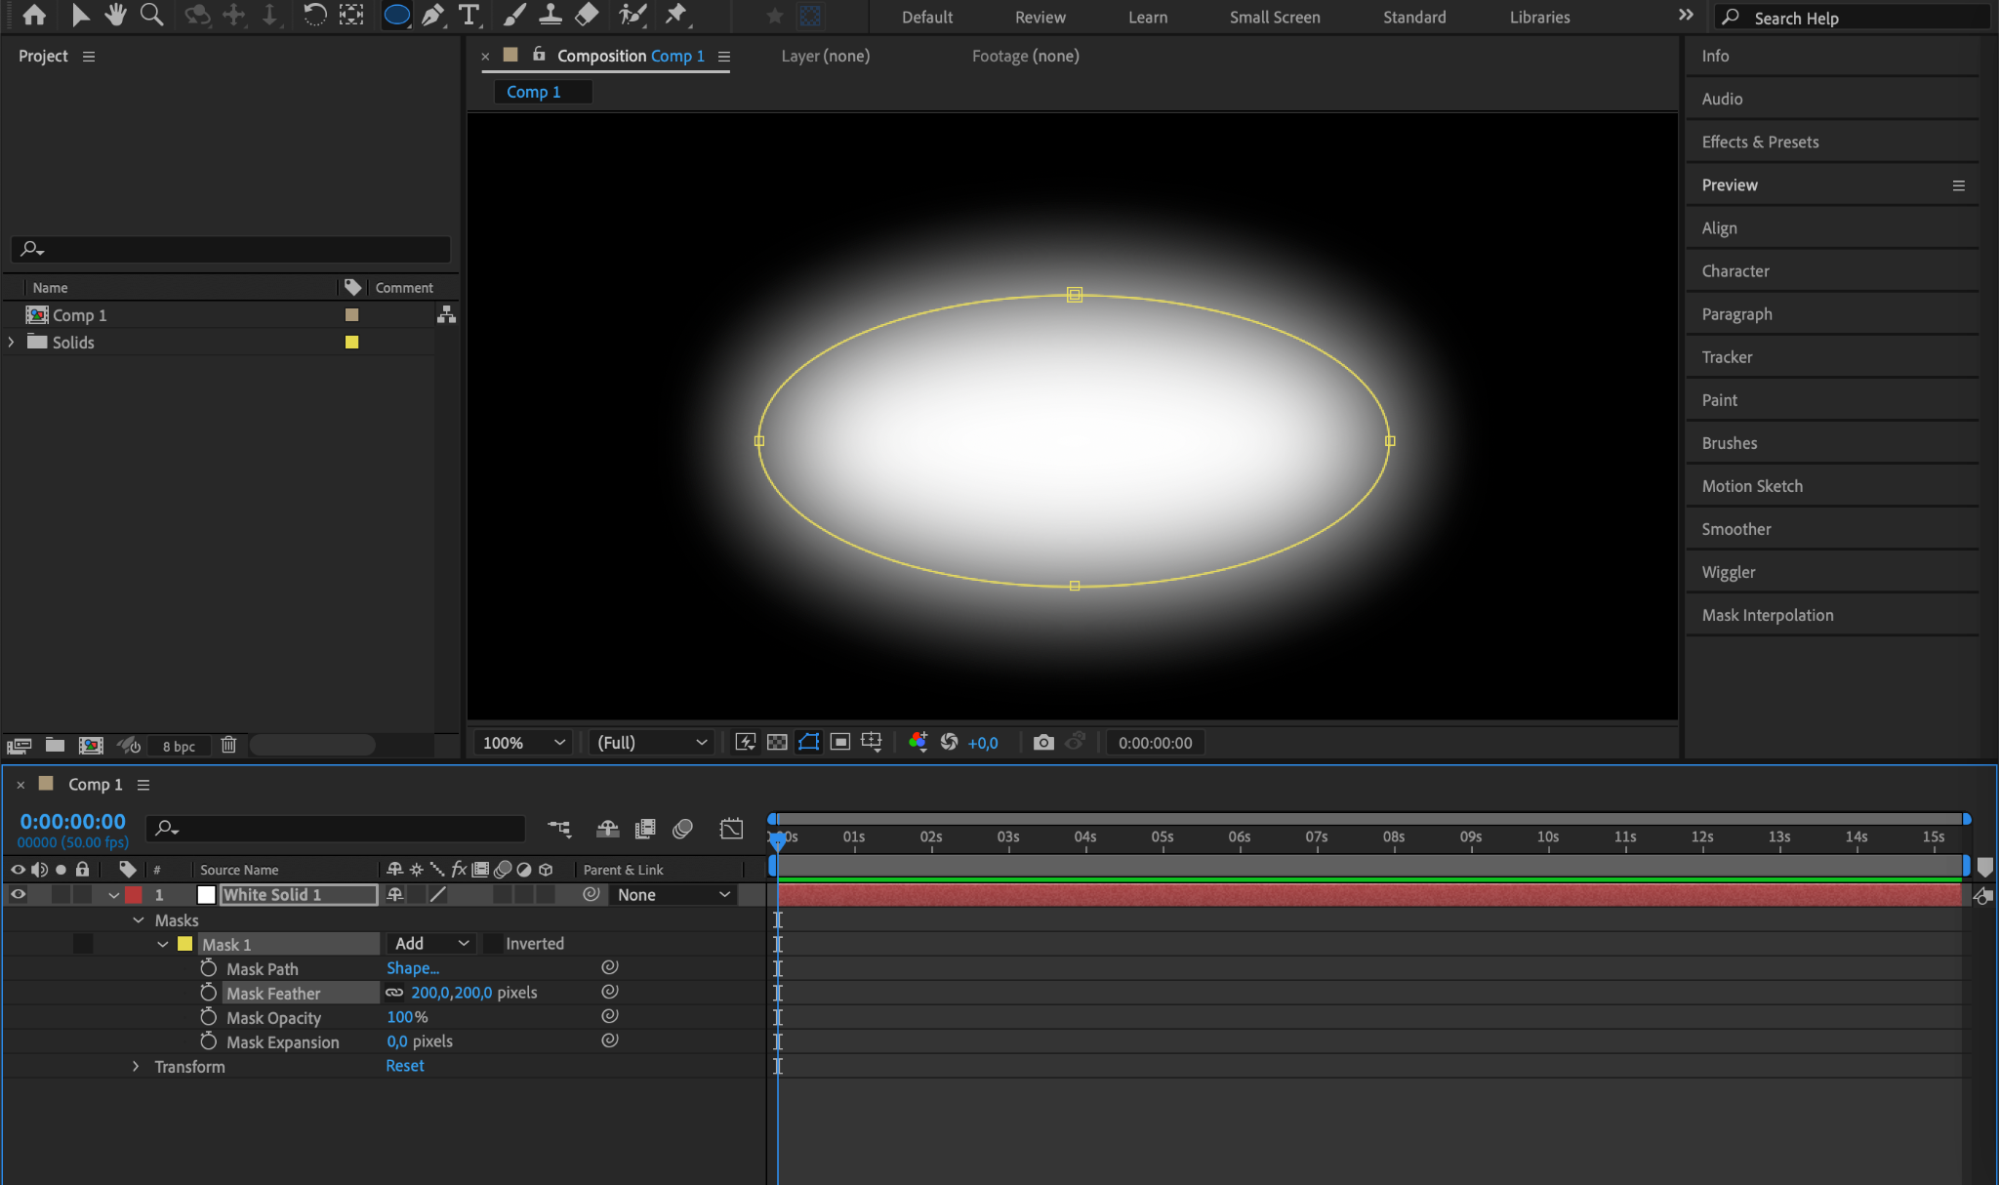
Select the Ellipse Tool from the toolbar and draw a shape that represents the size of your cloud. This will act as the foundation for your cloud effect.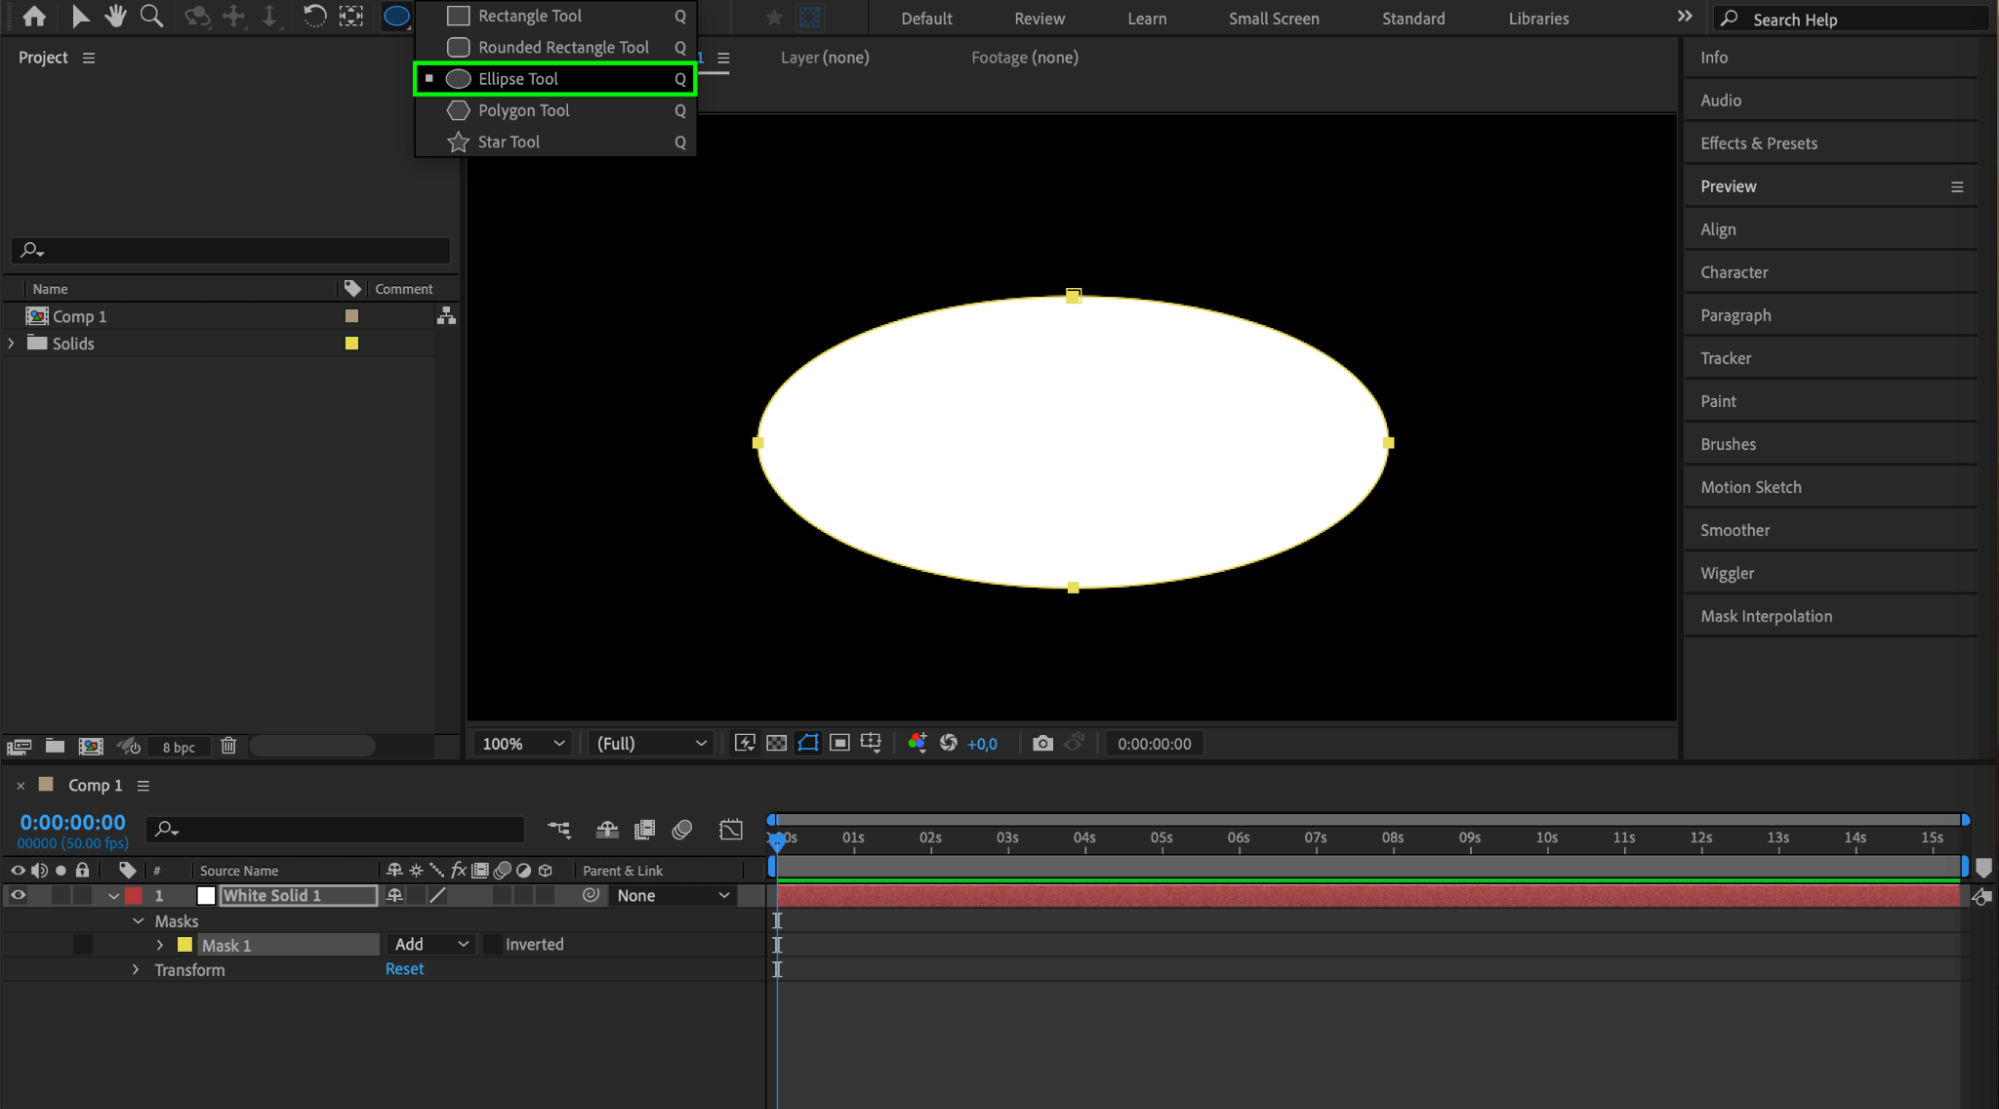 Step 4: Adjust Mask Feather
Expand the properties of the mask you just created and set the Mask Feather parameter to 200. This will soften the edges and give a fluffy appearance to your cloud.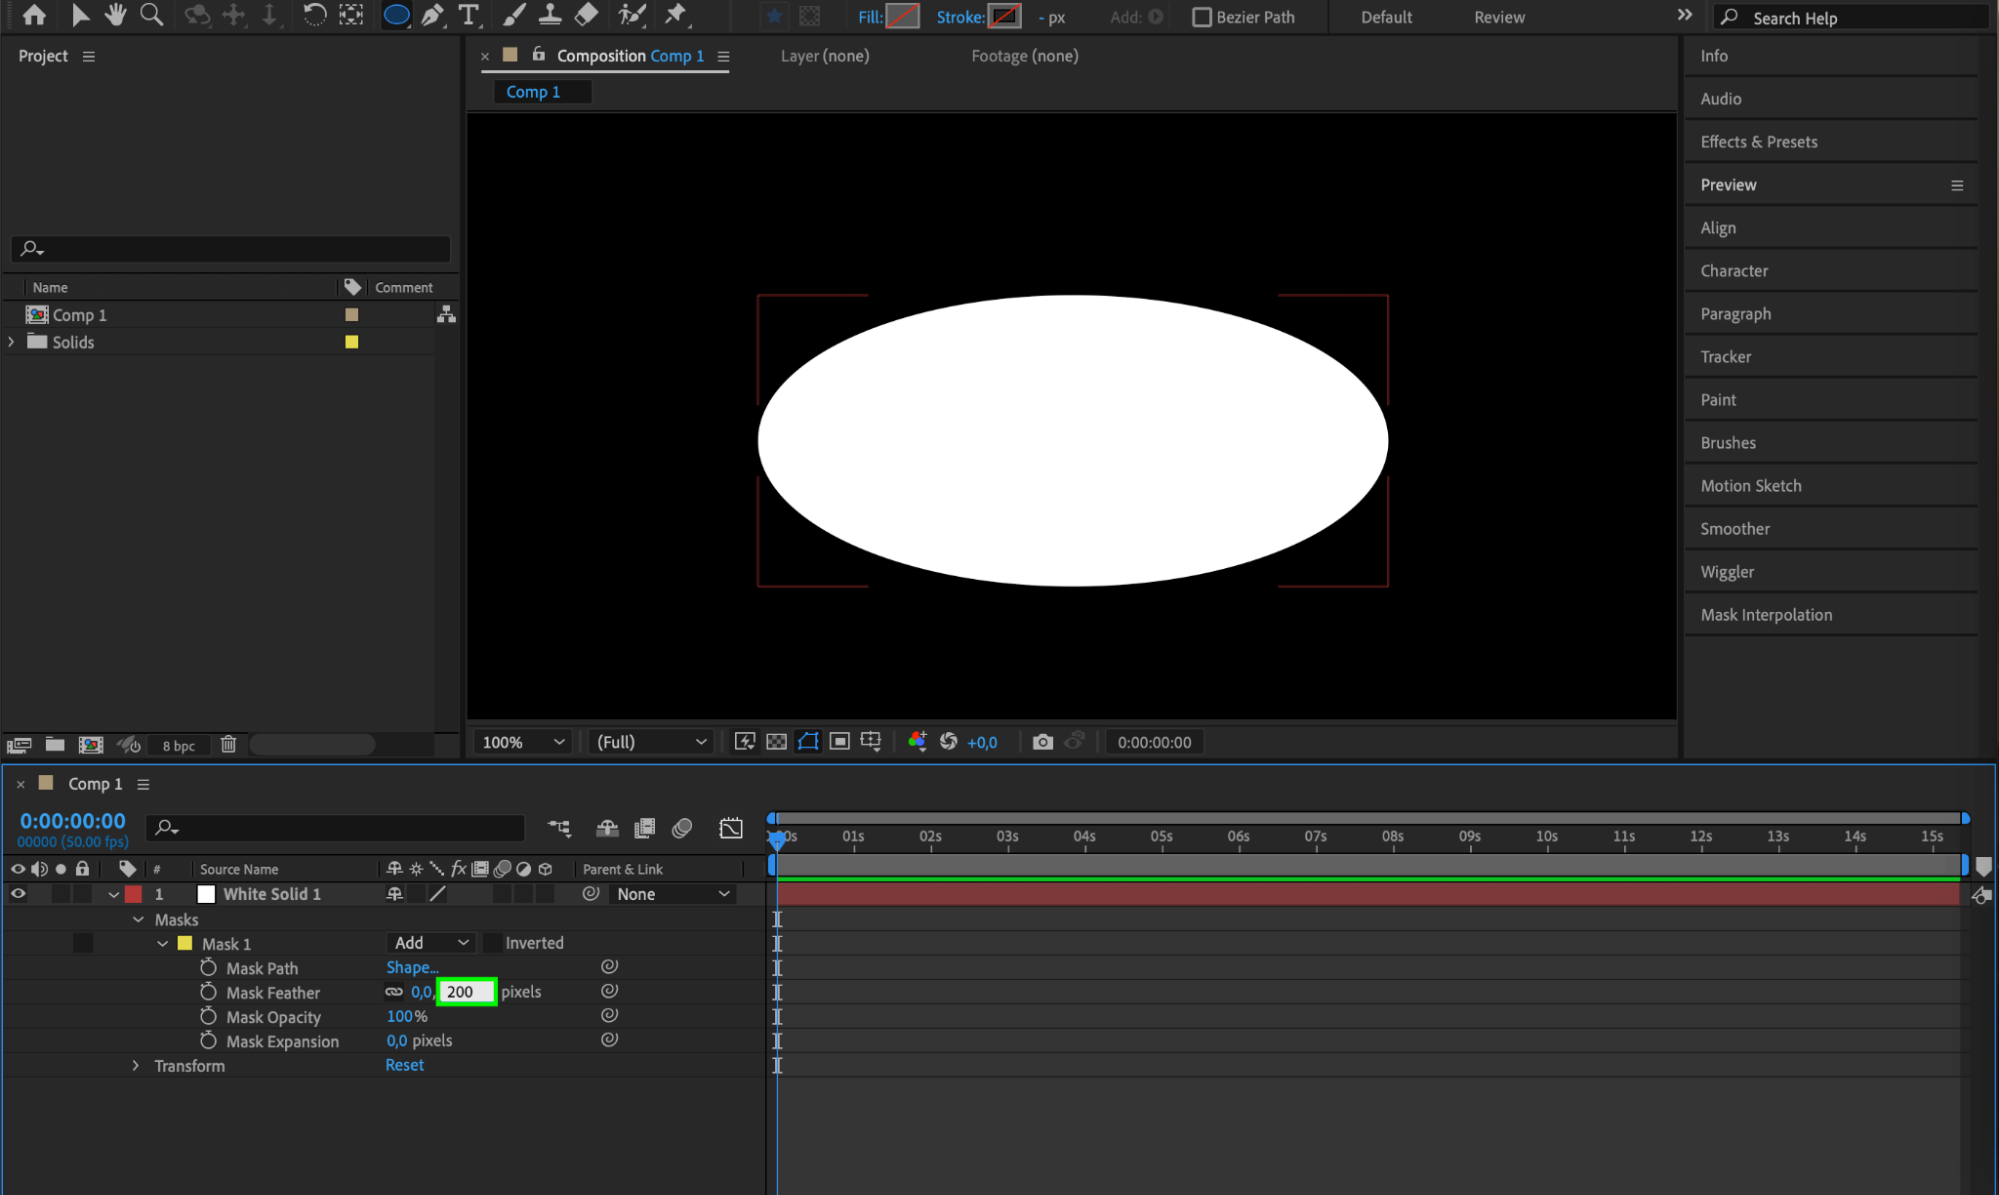
 Step 5: Apply the Turbulent Displace Effect
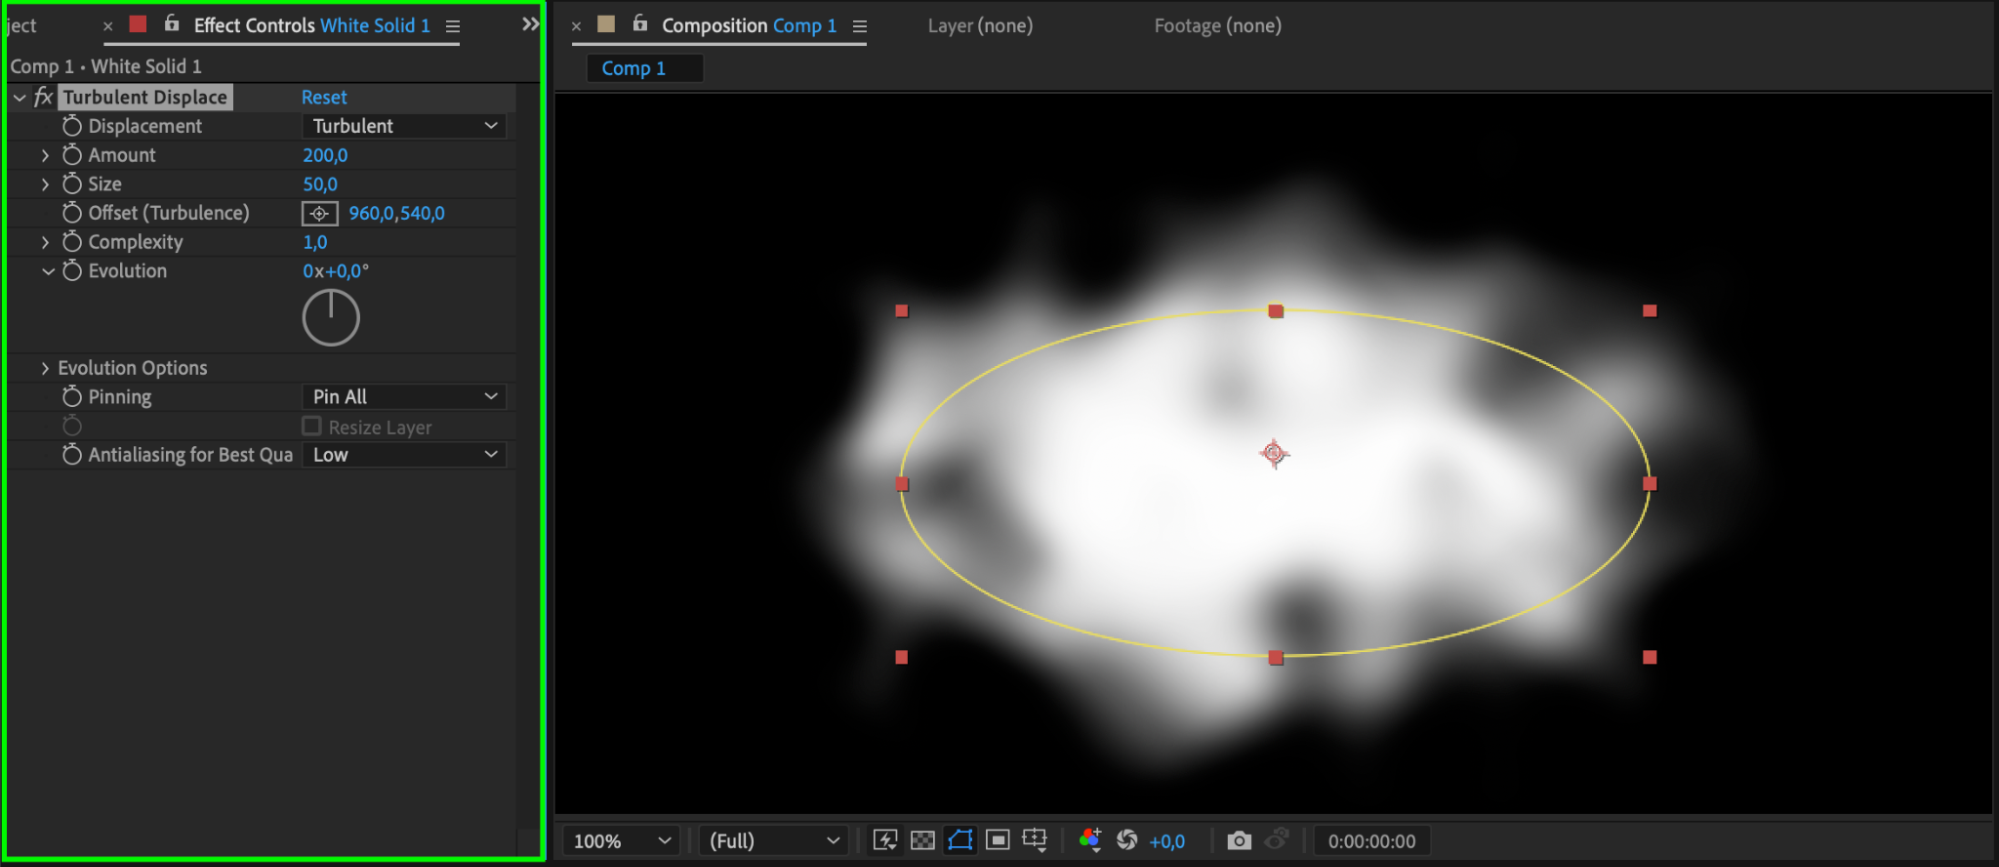
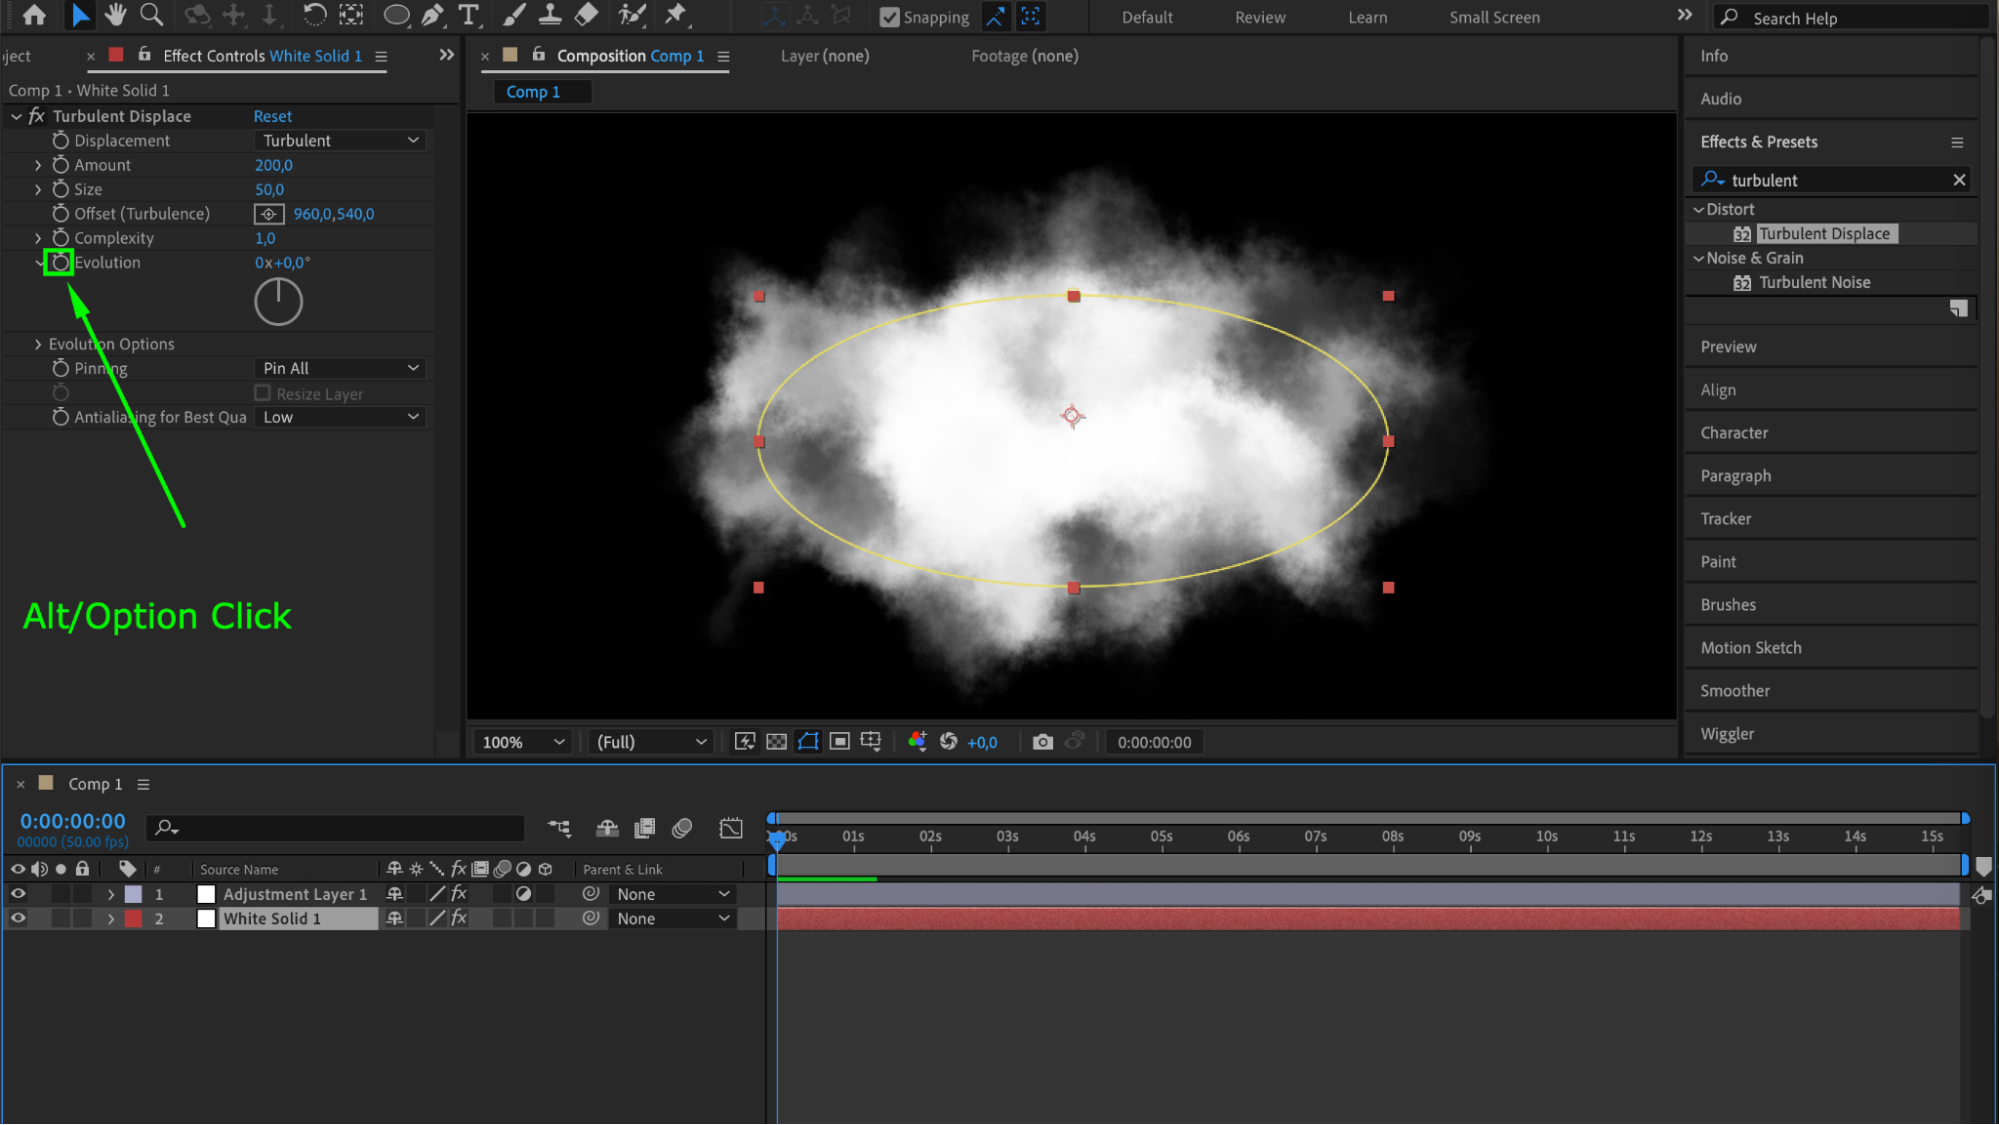
In the Effects & Presets panel, find the “Turbulent Displace” effect and drag it onto your solid layer. In the Effect Controls panel, set the Amount to 200 and the Size to 50. This will add a dynamic, cloud-like texture to your shape.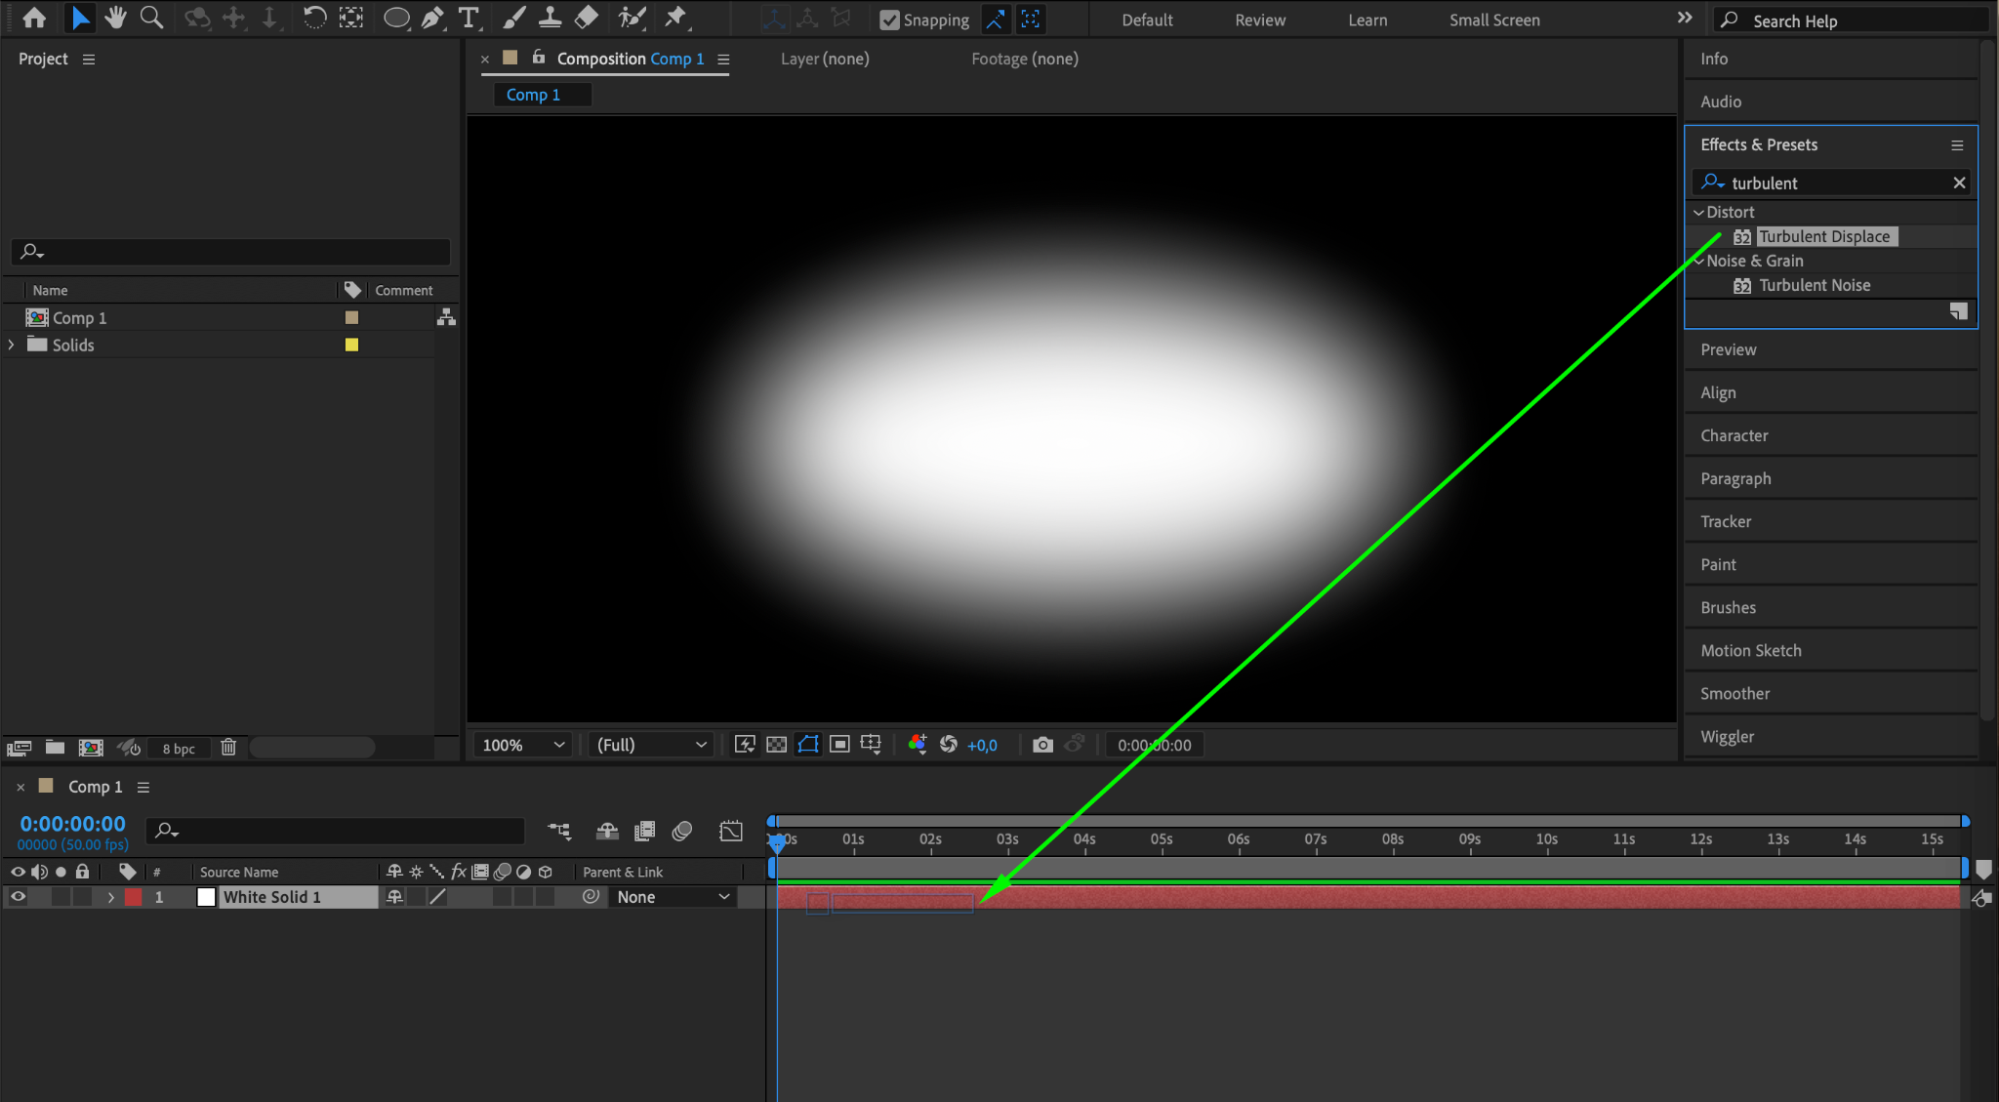
 Step 6: Create an Adjustment Layer
Get 10% off when you subscribe to our newsletter
Create a new adjustment layer by going to “Layer” > “New” > “Adjustment Layer.” This layer will be used to apply additional effects to enhance your cloud.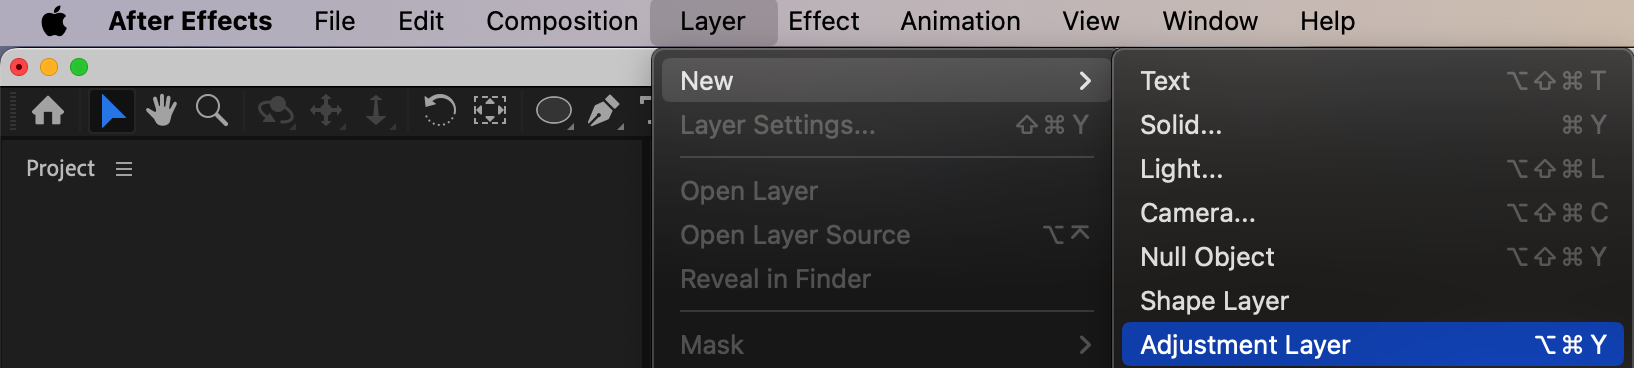 Step 7: Apply Turbulent Displace to Adjustment Layer
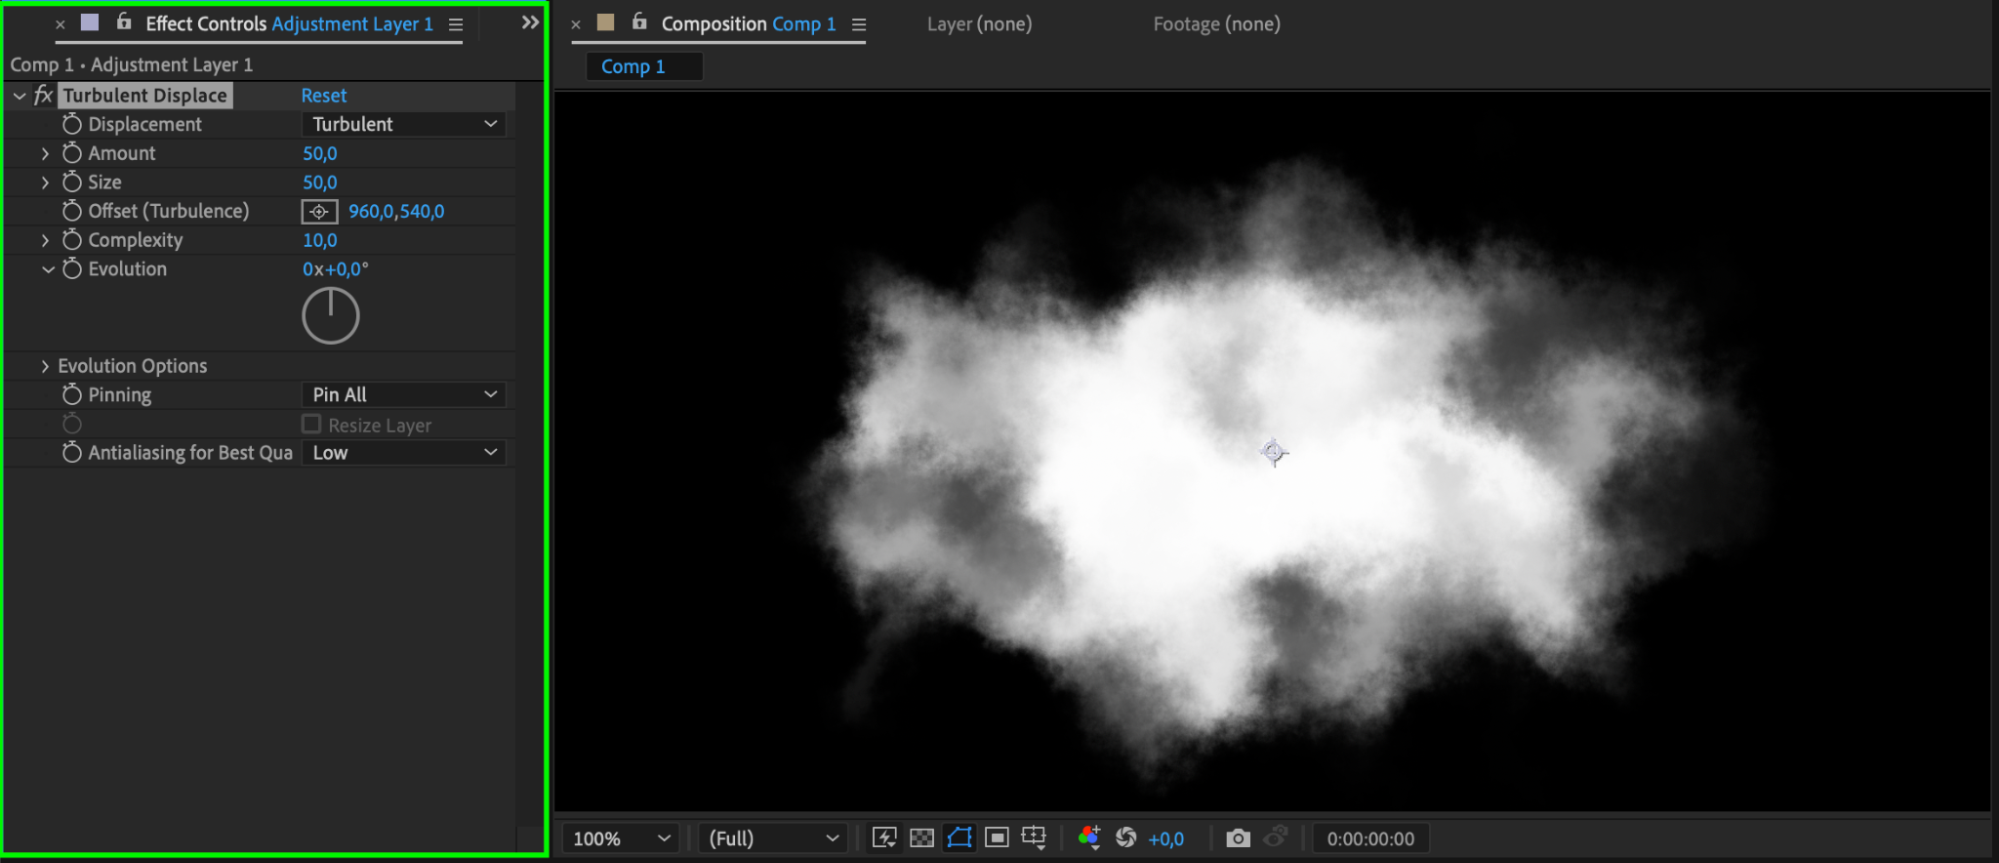
Apply the “Turbulent Displace” effect to the adjustment layer. In the Effect Controls panel, set the Size to 50 and the Complexity to 10. This will add more complexity and realism to your cloud.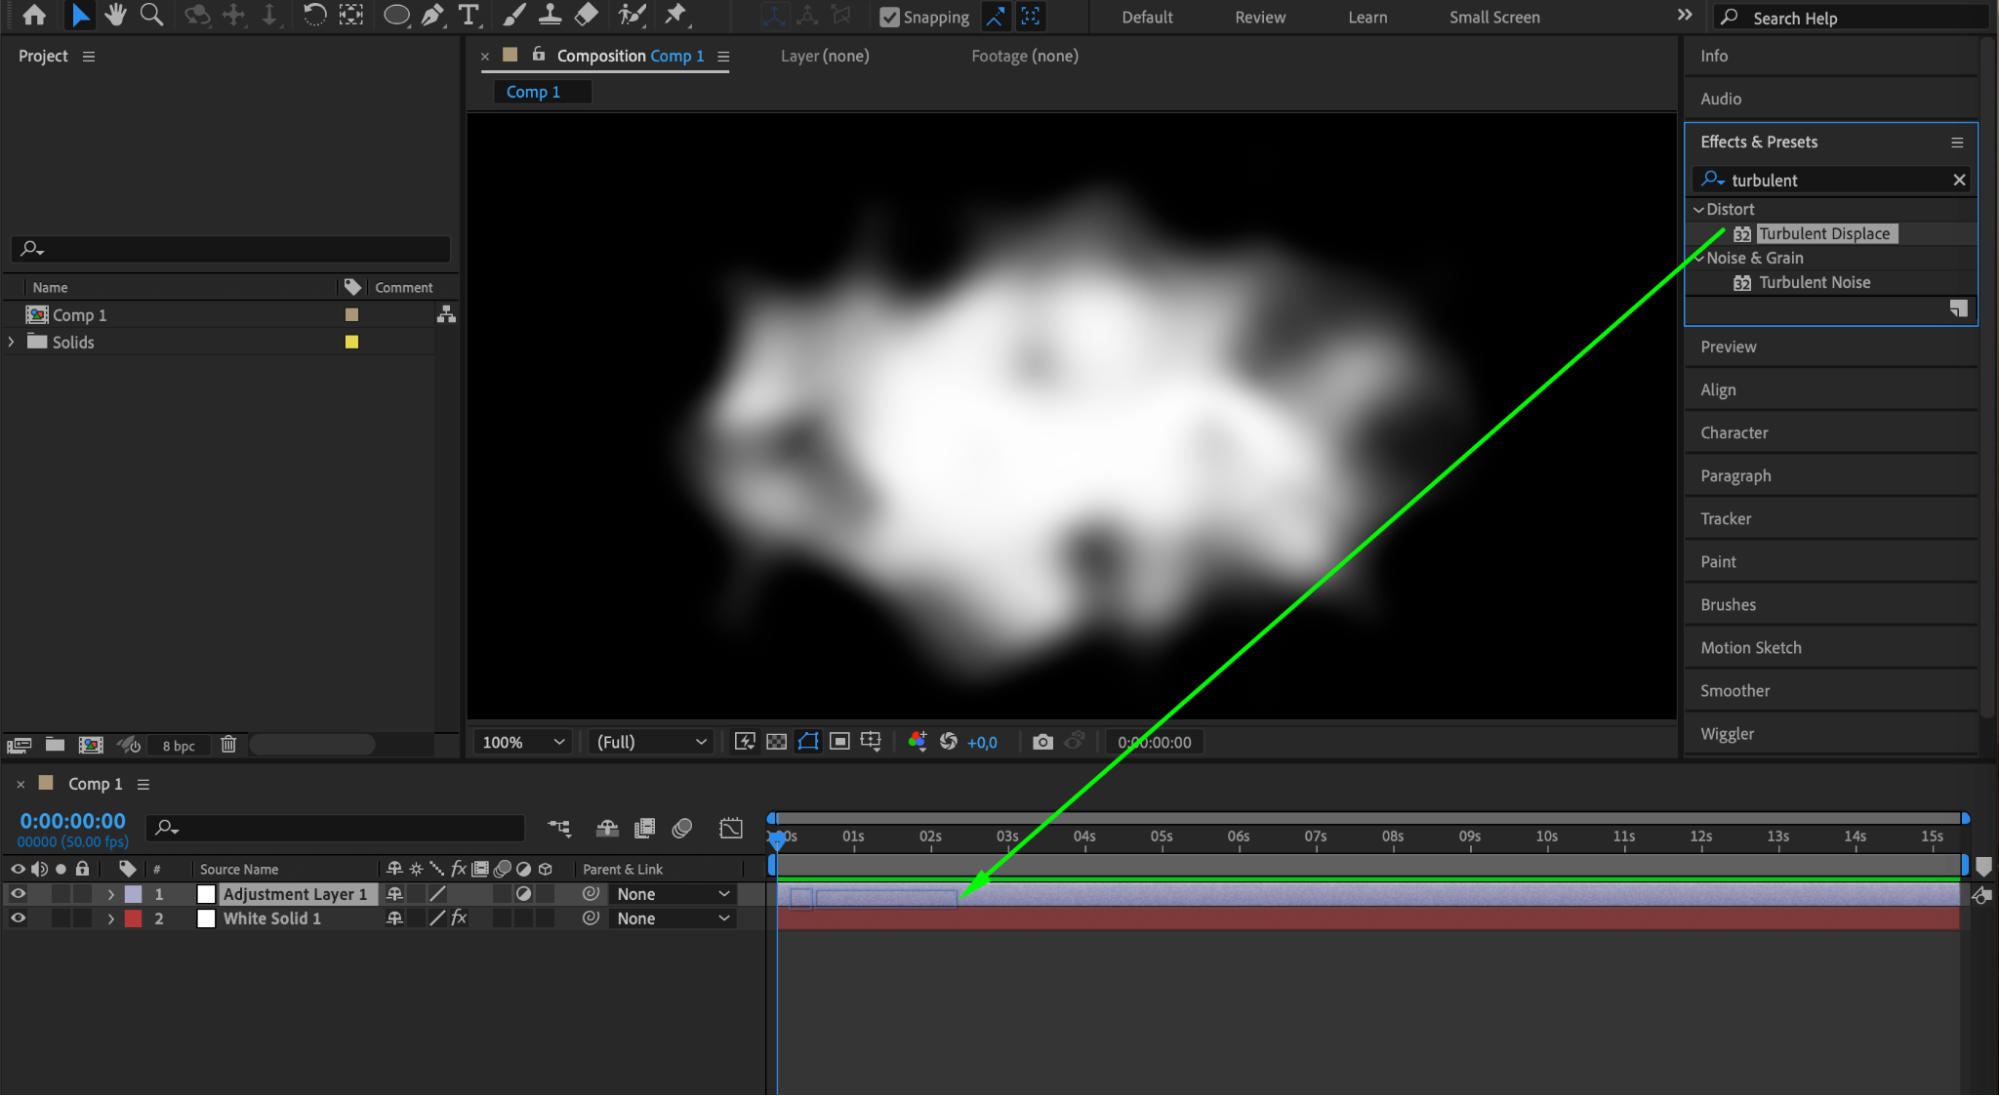
 Step 8: Animate the Cloud Using Expressions
Get 10% off when you subscribe to our newsletter
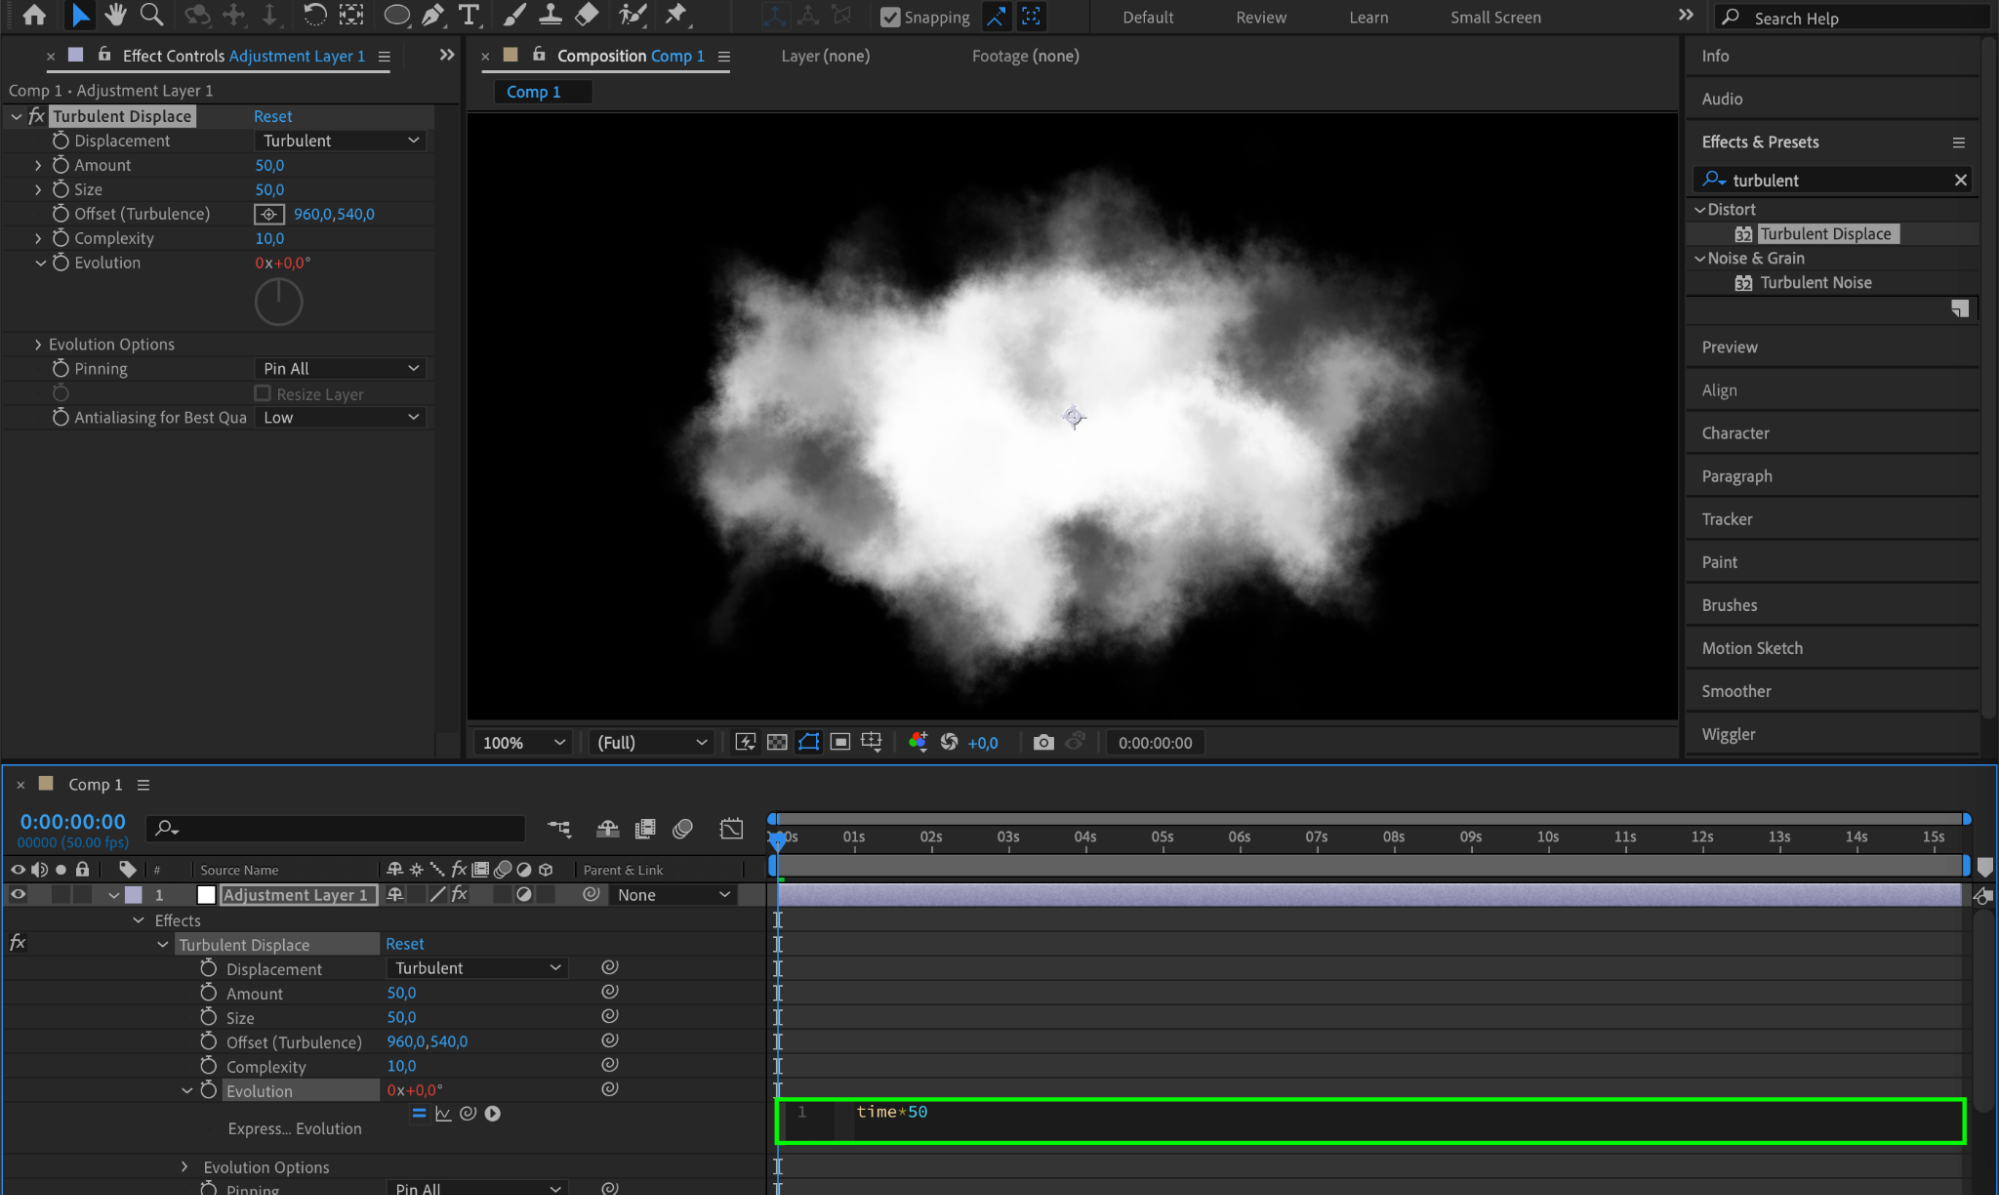
To animate your cloud, find the Evolution parameter in the Effect Controls panel. Hold the Alt/Option key and click on the stopwatch icon next to Evolution. In the expression field that appears, enter the expression (time*50). Repeat this action for the solid layer to create continuous movement.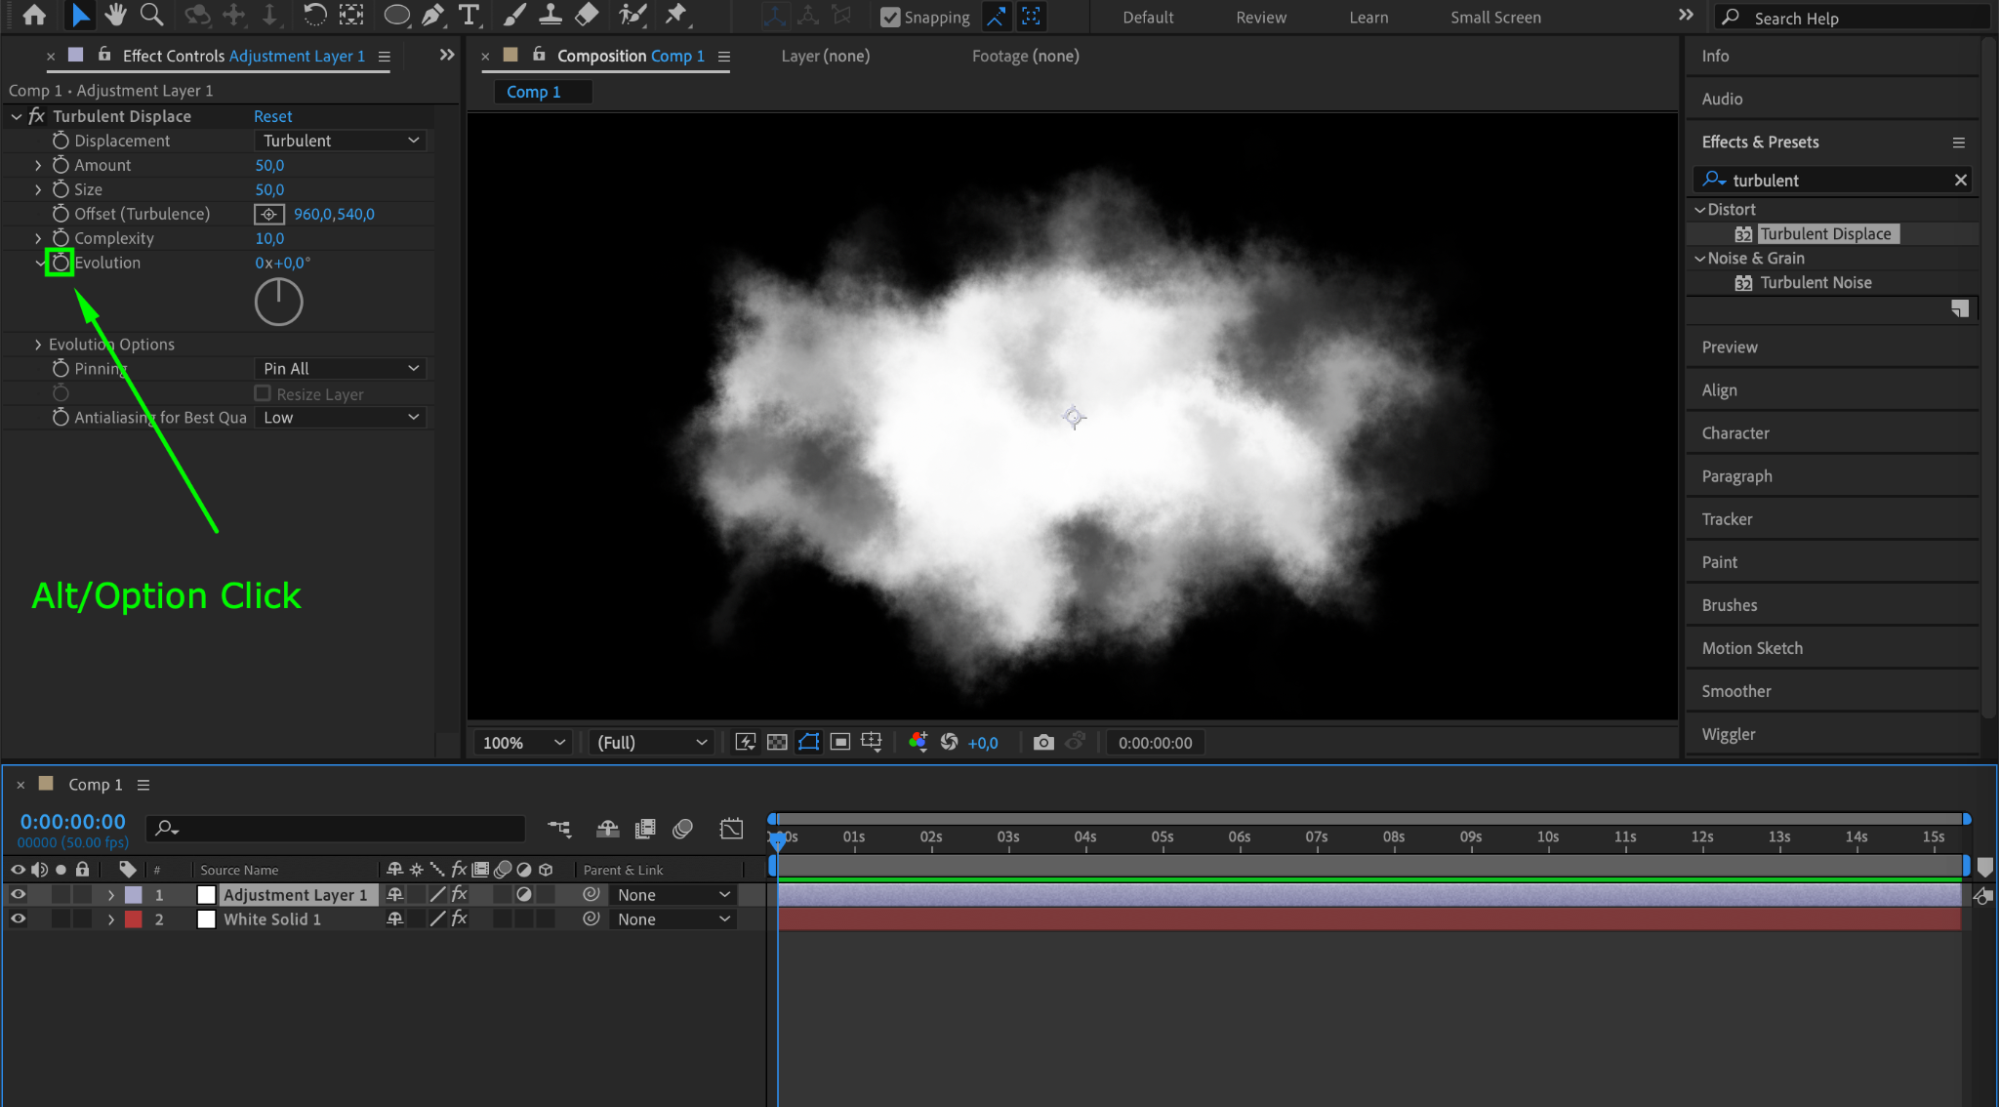
 Step 9: Animate Opacity for Realism
Get 10% off when you subscribe to our newsletter
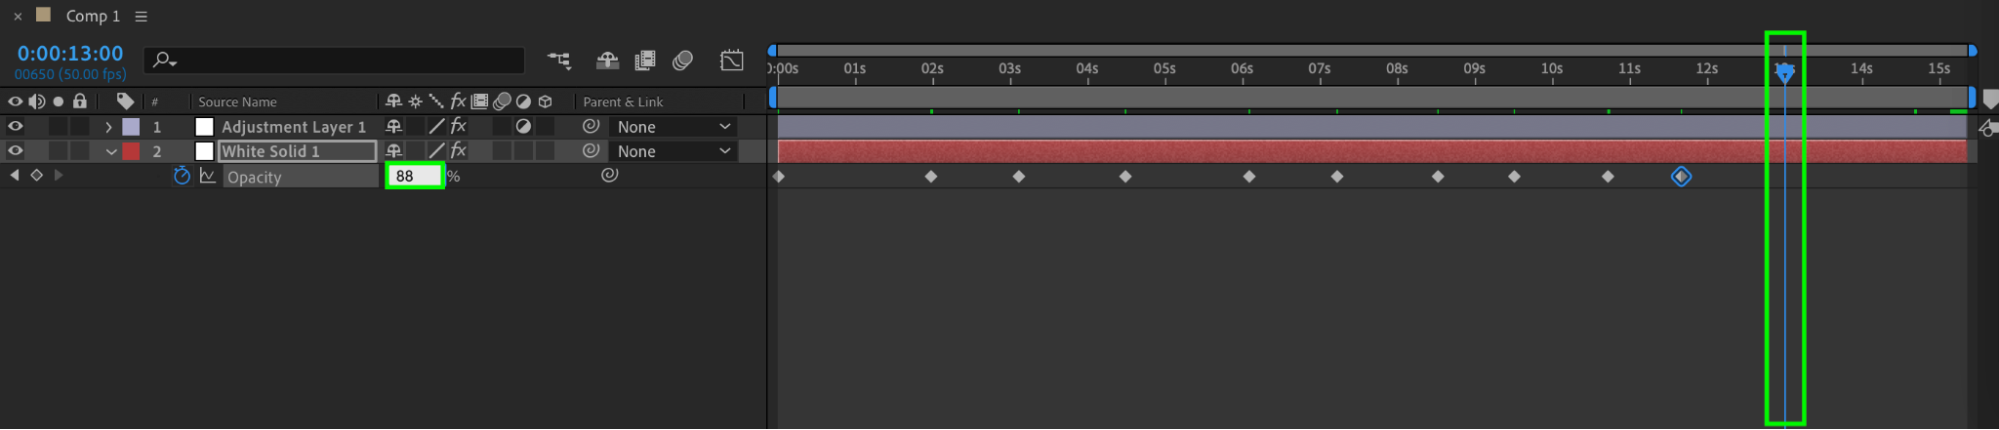
Press the “T” key to open the Opacity properties. Animate the opacity over time to add a natural fade-in and fade-out effect, enhancing the realism of your cloud.
 Step 10: Create a Background Solid Layer
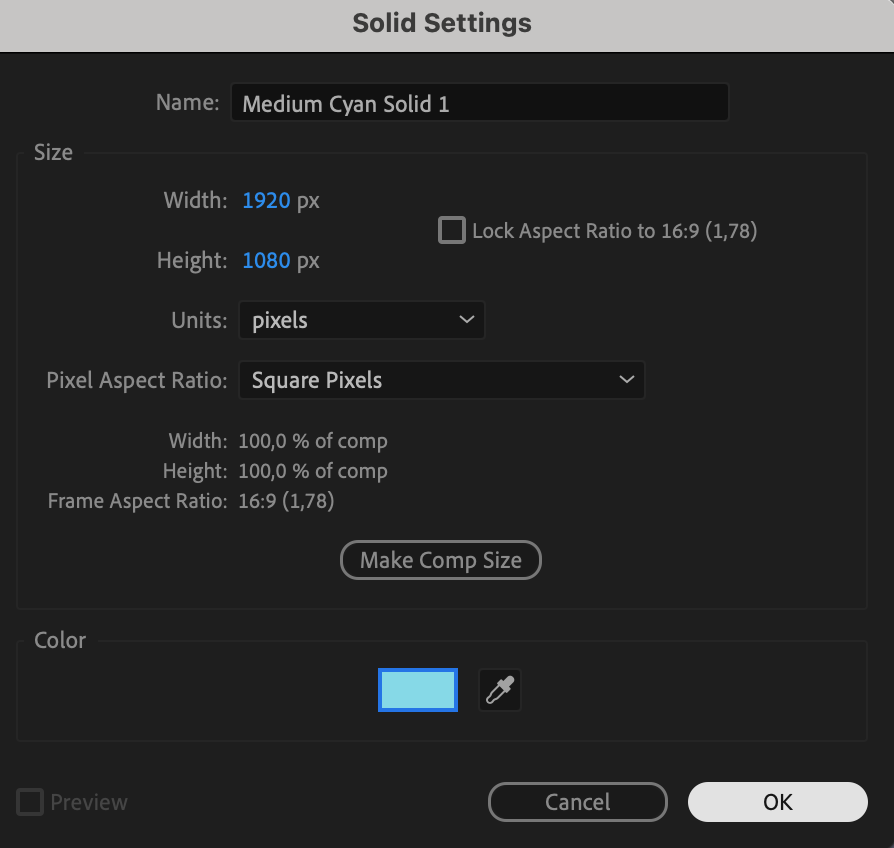
Create another solid layer and choose a color that will serve as the background for your cloud. Place this layer below the cloud layer in the timeline.
 Step 11: Preview Your Composition
Use the preview feature in After Effects to see how your cloud animation looks in real-time. Make any necessary adjustments to improve the overall effect.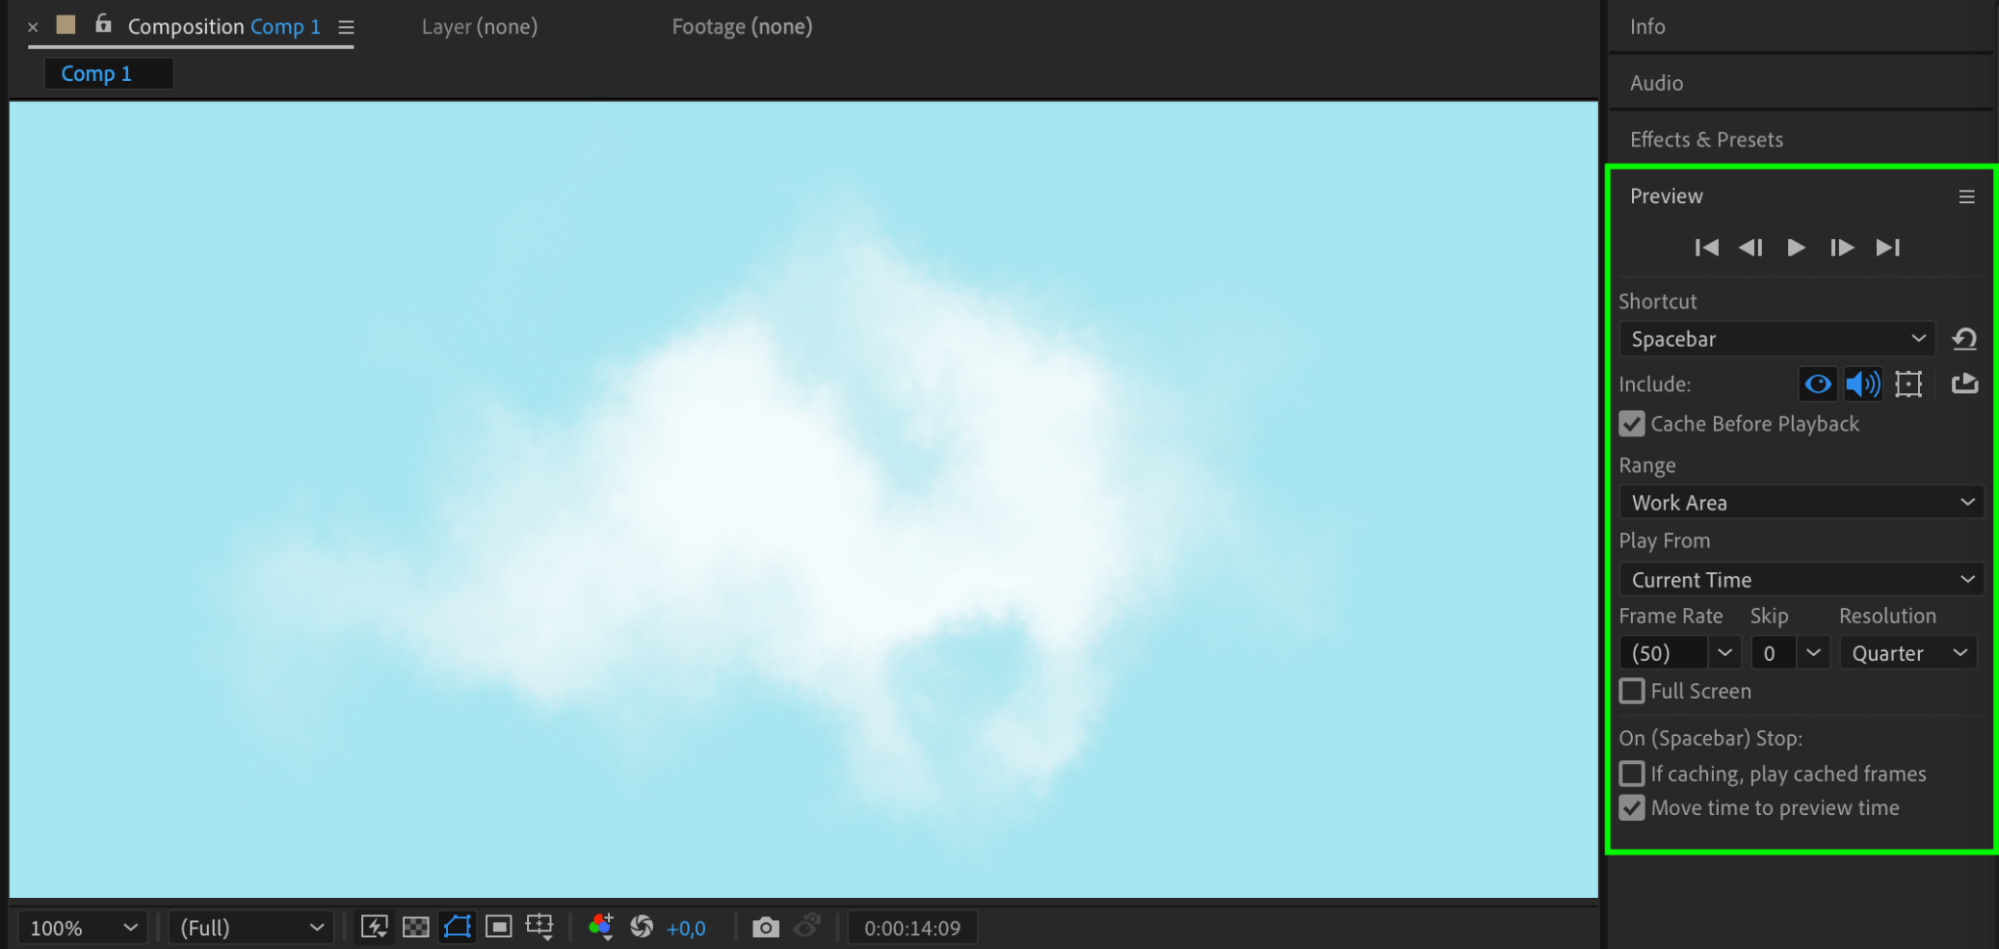 Conclusion: Bringing Clouds to Life in After Effects
By following these steps, you can create stunning cloud effects in After Effects. Remember to experiment, tweak settings, and find the perfect balance between realism and artistic expression. With practice and creativity, you can add a touch of magic and atmosphere to your video projects that will captivate your audience. Let your imagination soar and have fun creating mesmerizing cloud effects in After Effects!
Our Bestsellers


