Step-by-Step Guide to Making a Lightsaber Effect in Adobe After Effects
Introduction to Creating a Lightsaber Effect in After Effects
Creating a lightsaber effect in Adobe After Effects can bring dynamic visual impact to your videos. By using solid layers, masks, and color adjustments, you can simulate the iconic glowing look of a lightsaber. This guide will walk you through each step to achieve a realistic and customizable lightsaber effect.
Get 10% off when you subscribe to our newsletter

Step 1: Import Your Footage
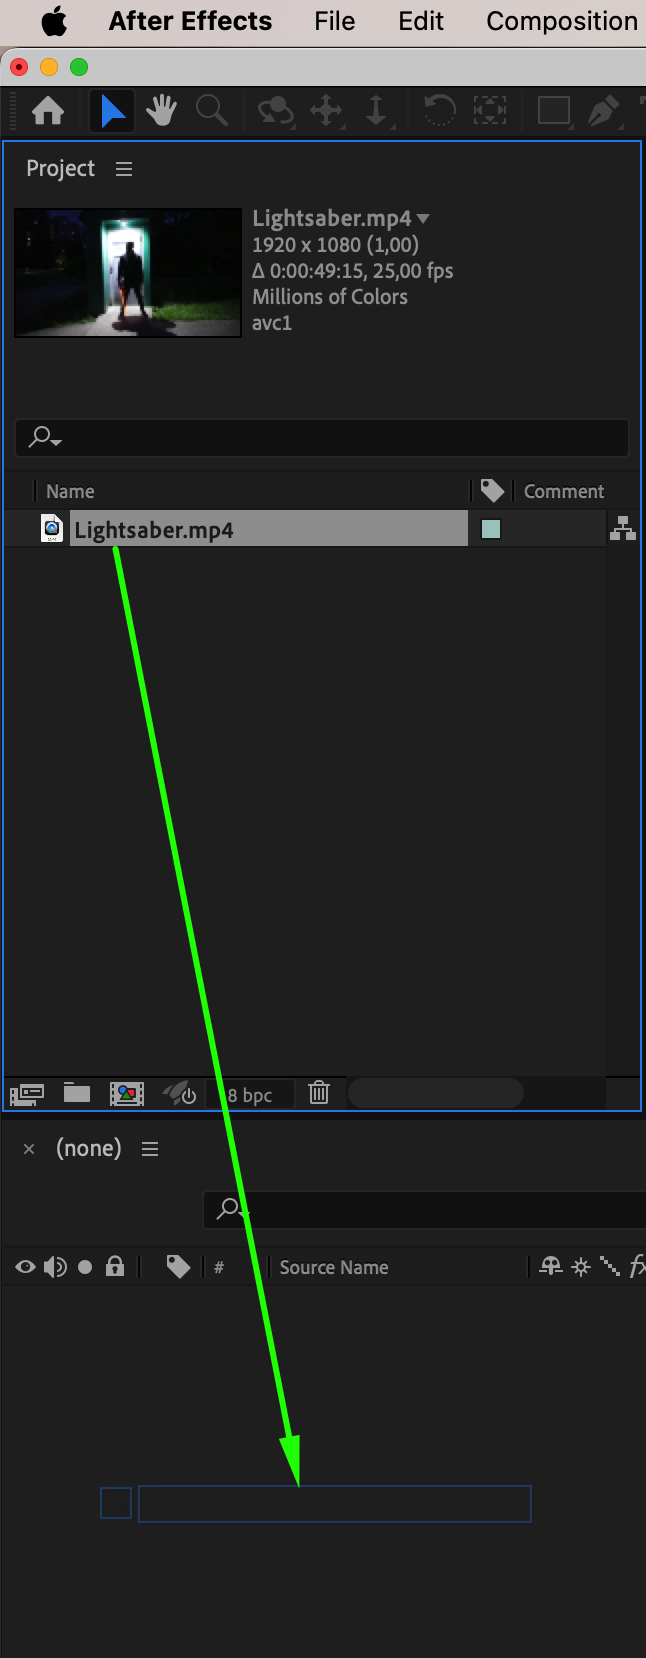
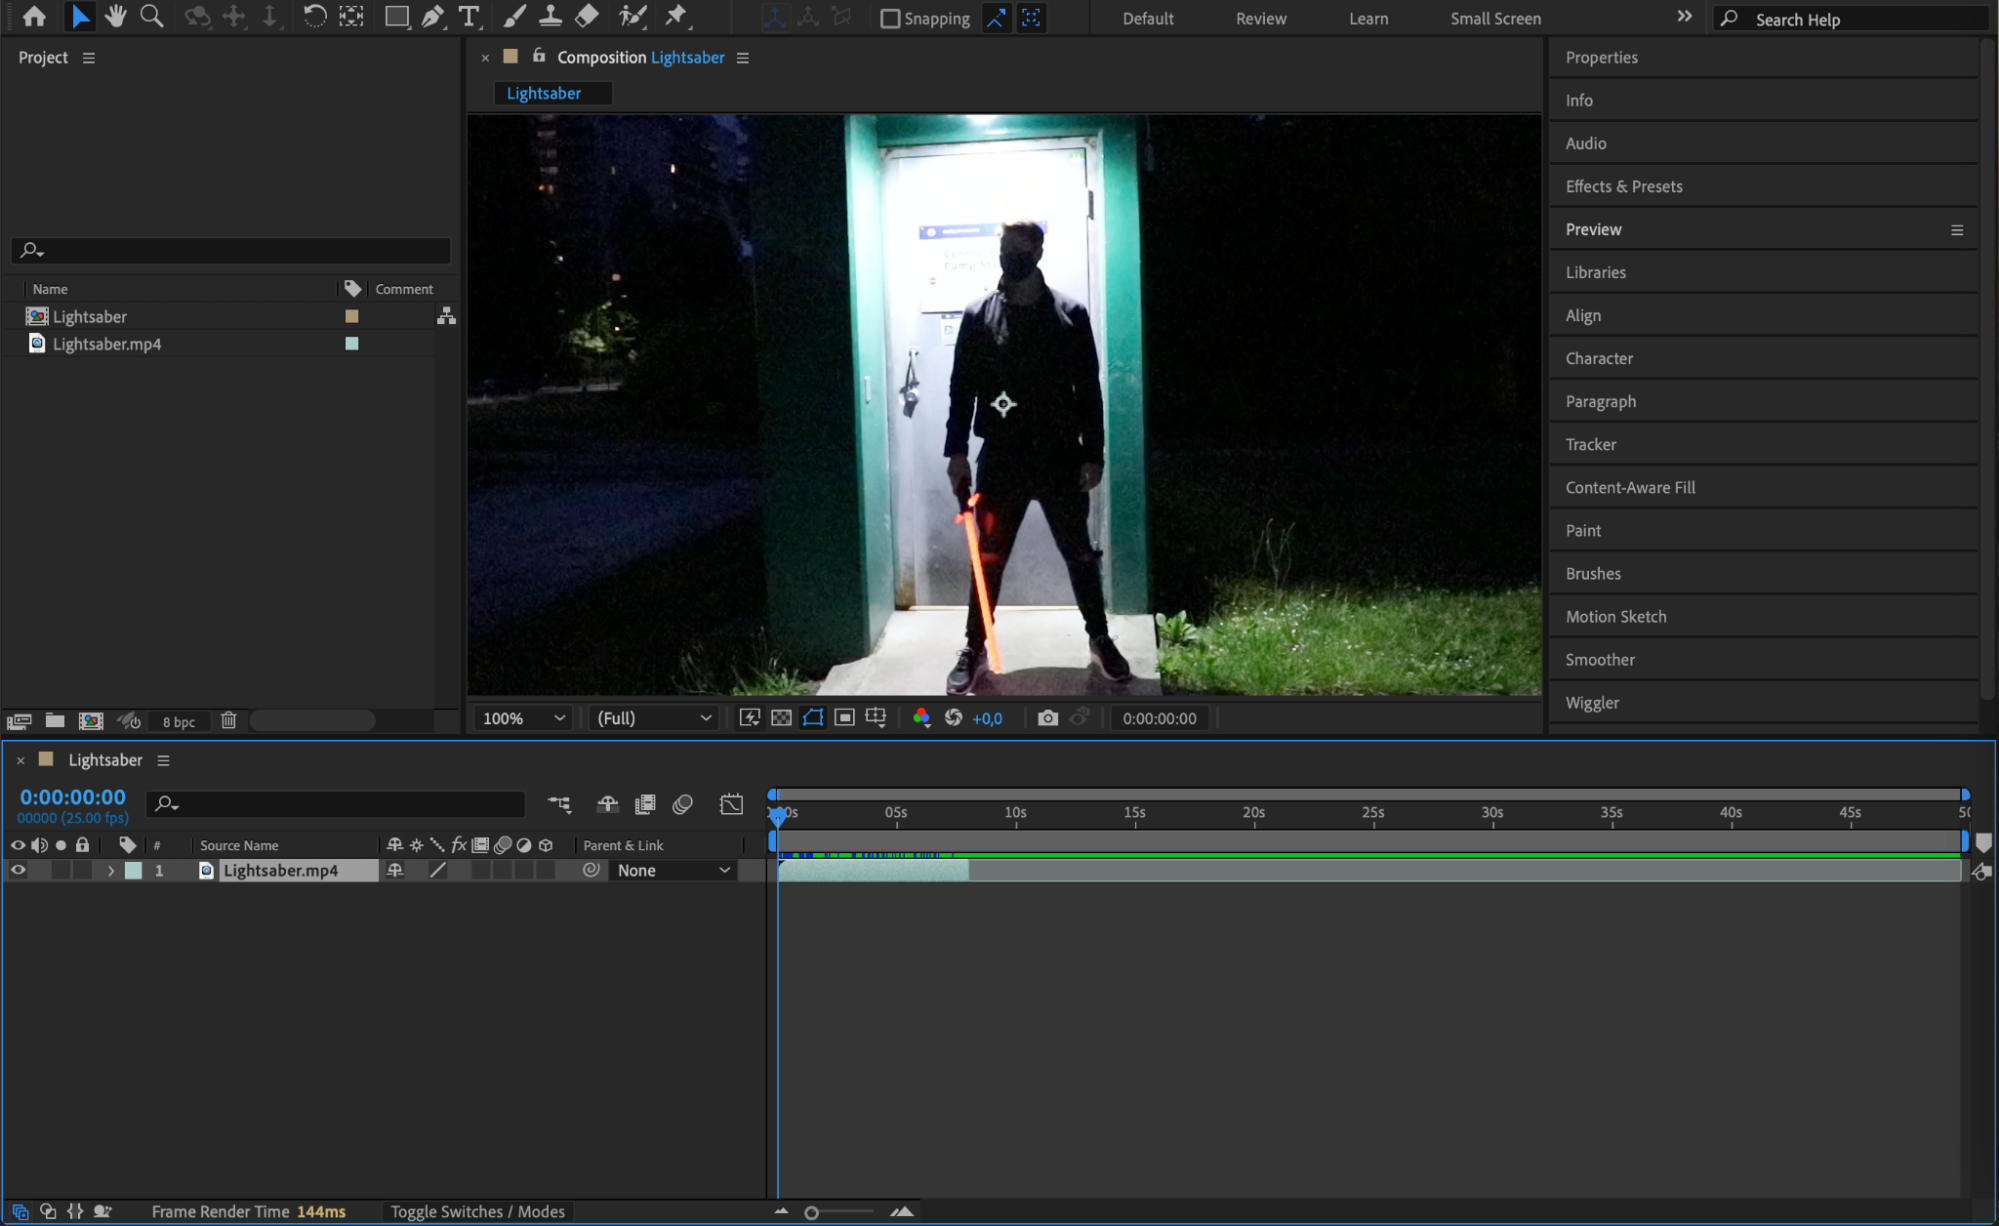
Open After Effects and import the video footage where you want to add the lightsaber. Go to File > Import > File and select your video file. Once imported, drag the footage into the Timeline to create a new composition. This will serve as your main workspace where the lightsaber effect will be added.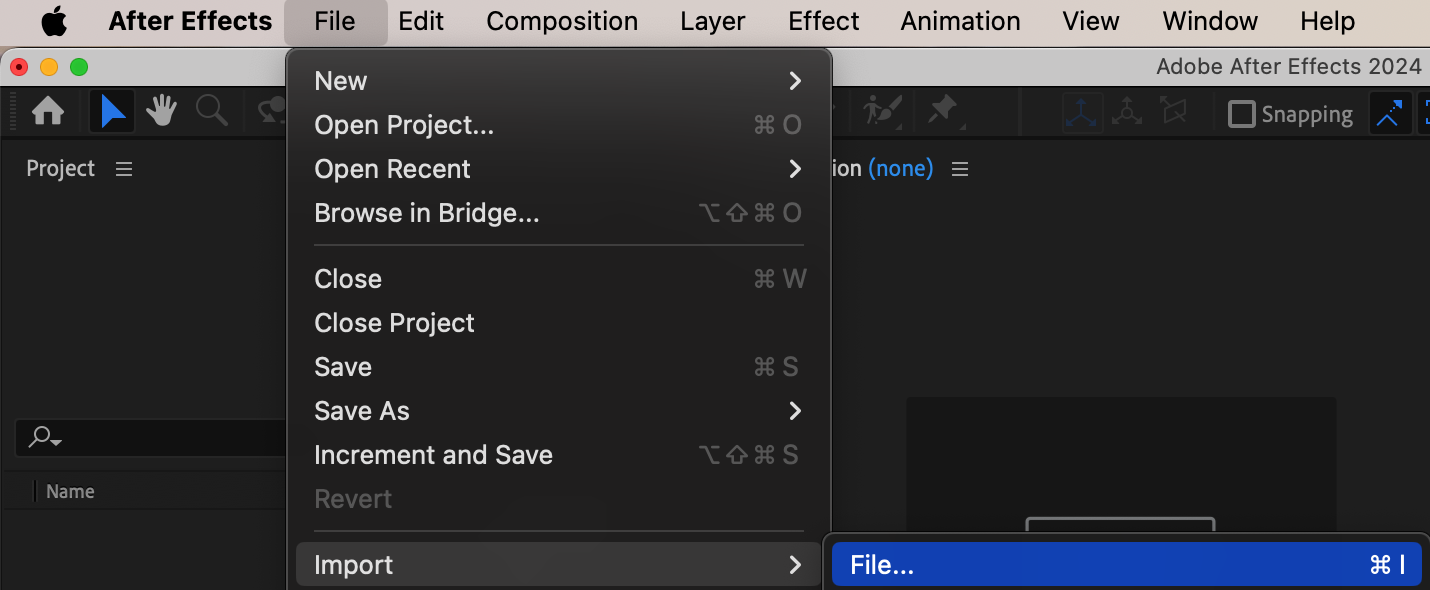
 Step 2: Add a Solid Layer for the Lightsaber
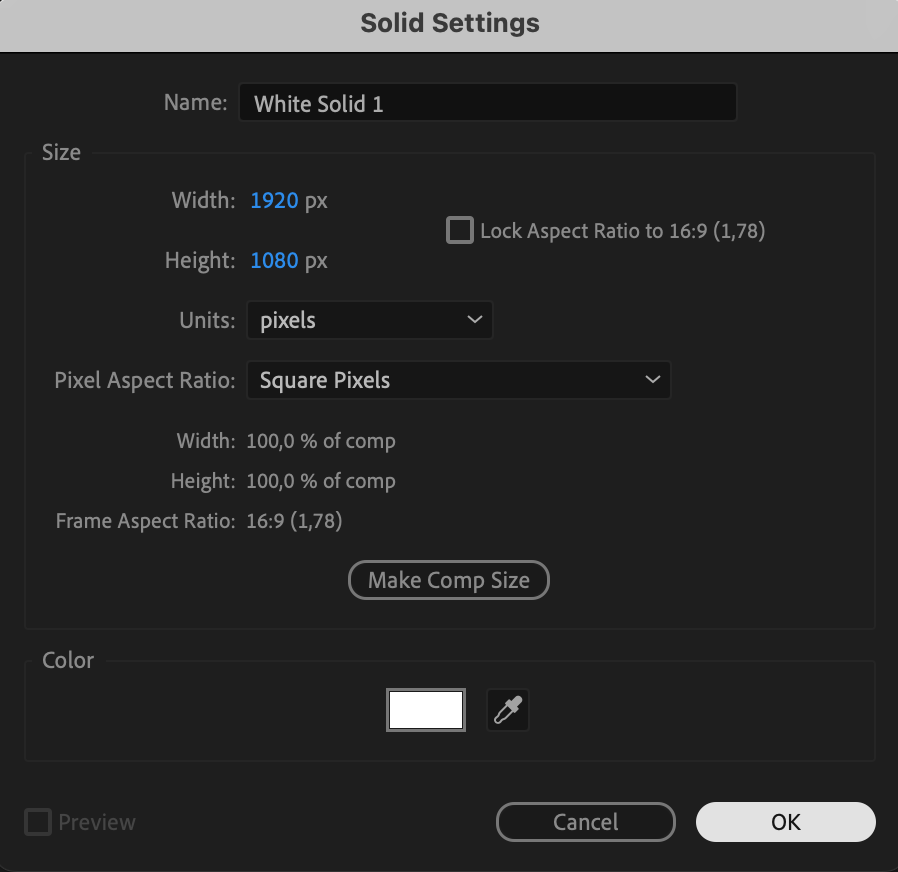
Next, create a new solid layer to serve as the base for your lightsaber effect. Go to Layer > New > Solid, select a bright white color. This solid layer will be used to draw the shape of the lightsaber and will later be modified to create the glowing effect.
 Step 3: Create a Mask for the Lightsaber Blade
Turn off the visibility of the solid layer by clicking the Eye icon next to it in the Timeline. With the layer still selected, choose the Pen Tool (shortcut G) and draw a mask that outlines the shape of the lightsaber blade. Click and drag to create points along the blade, forming a straight line or narrow rectangle.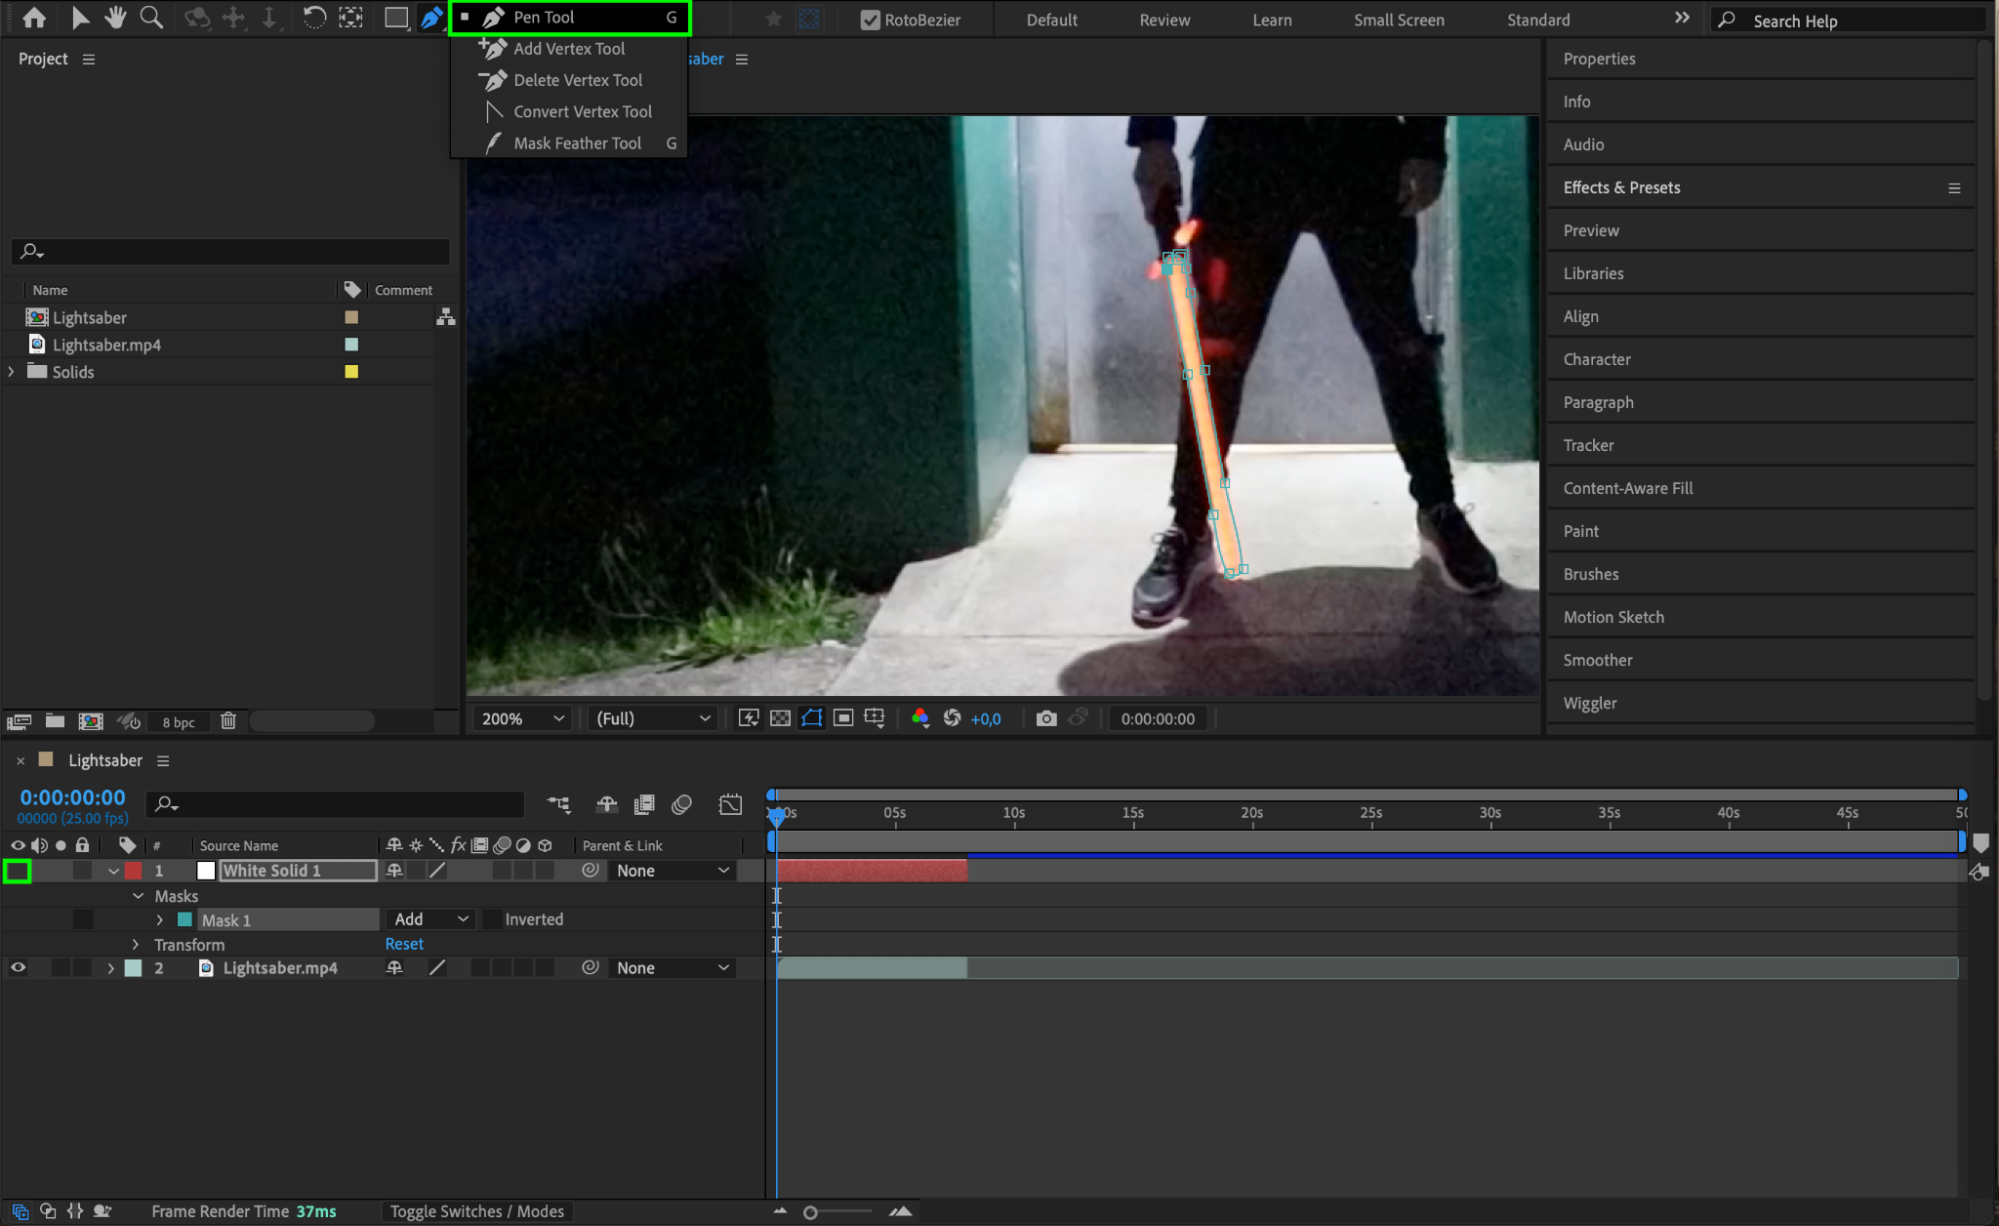 Step 4: Animate the Mask Path
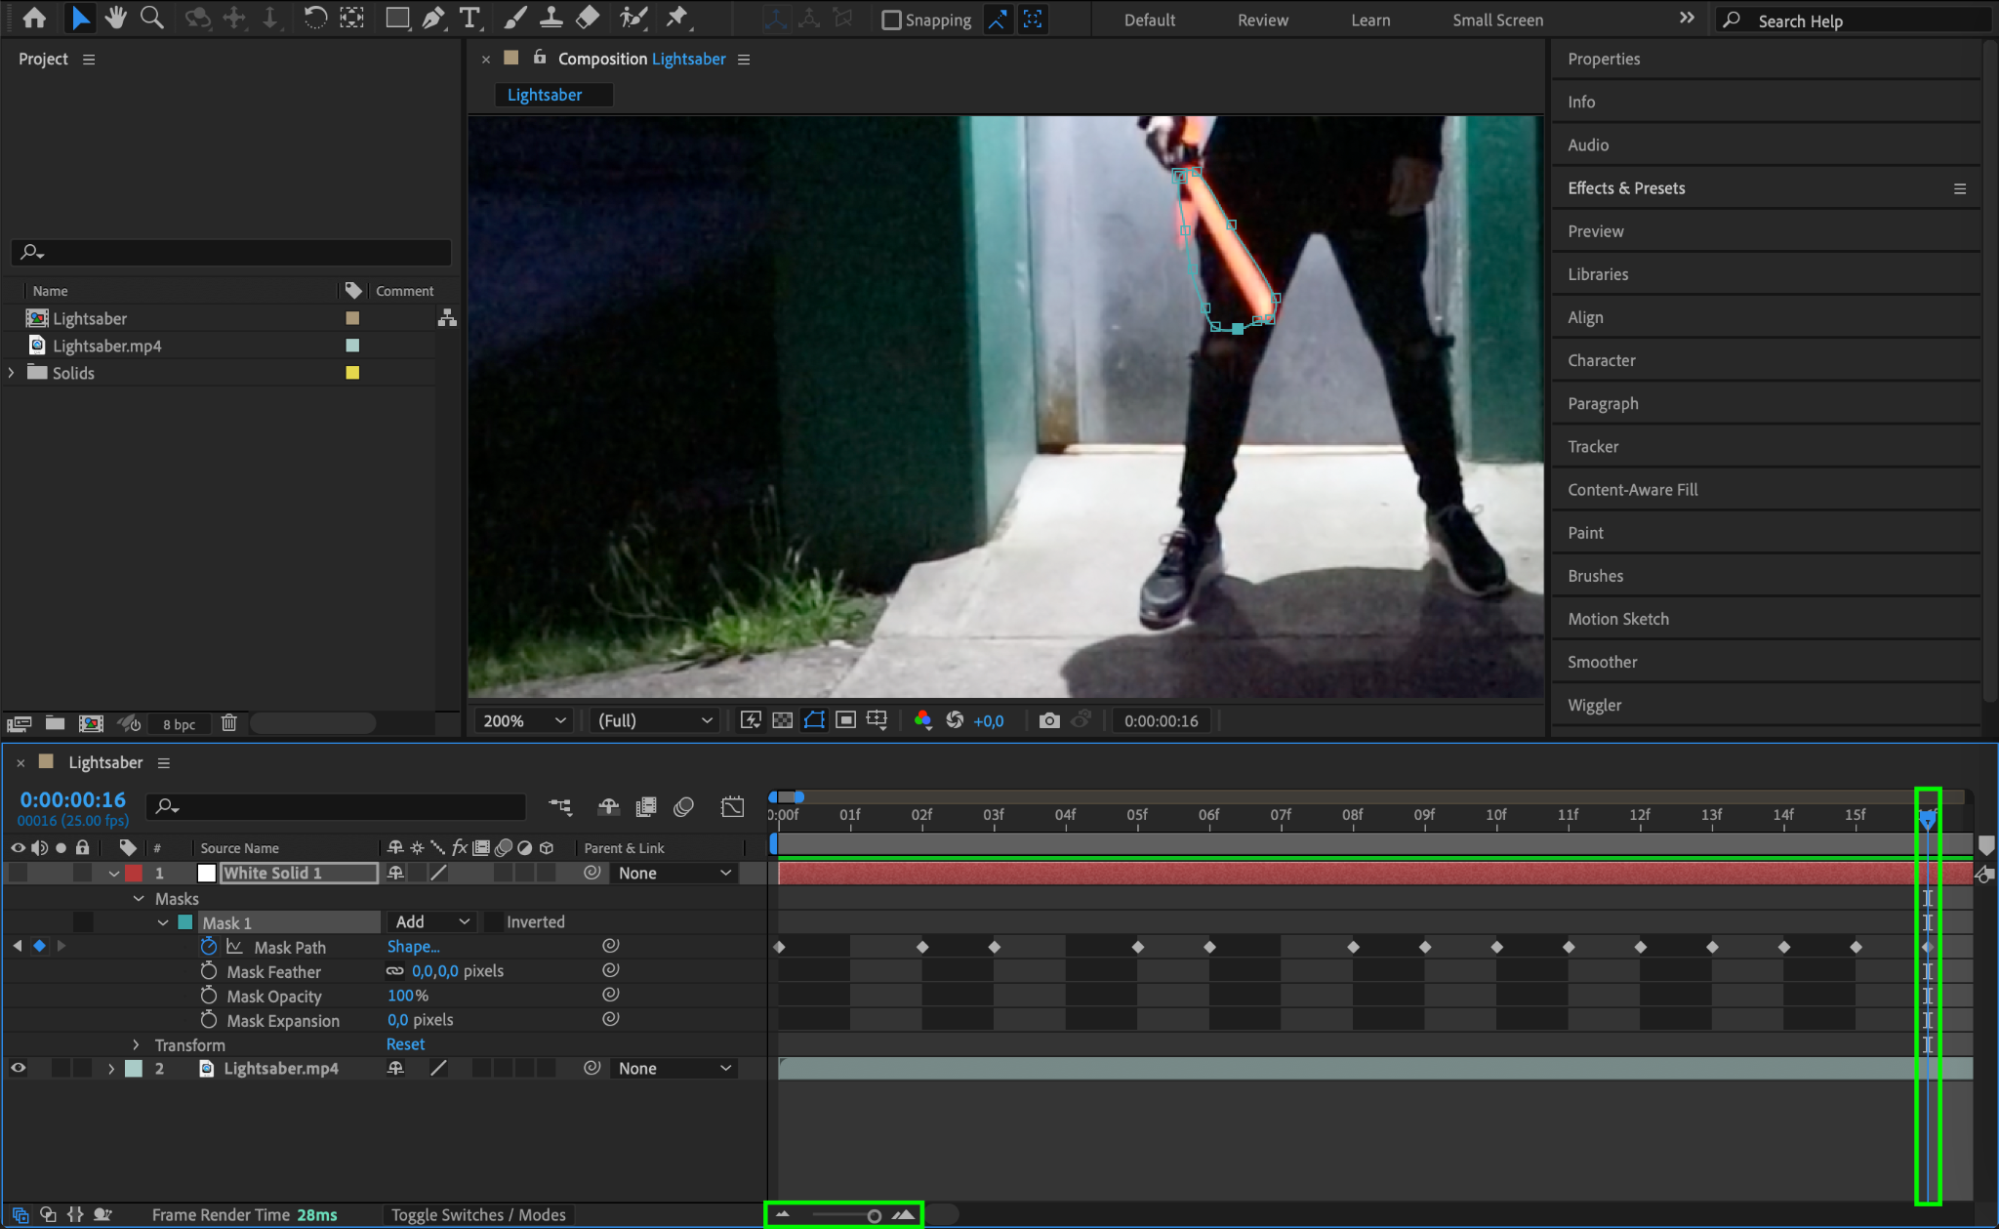
To animate the lightsaber’s movement, open the Mask properties for the solid layer, then click the stopwatch icon next to Mask Path to create a keyframe at the beginning of your composition. Move forward in the Timeline frame by frame, adjusting the mask points to follow the motion of the blade in your footage. This step ensures that the lightsaber aligns with any movements in the scene, creating a realistic effect.
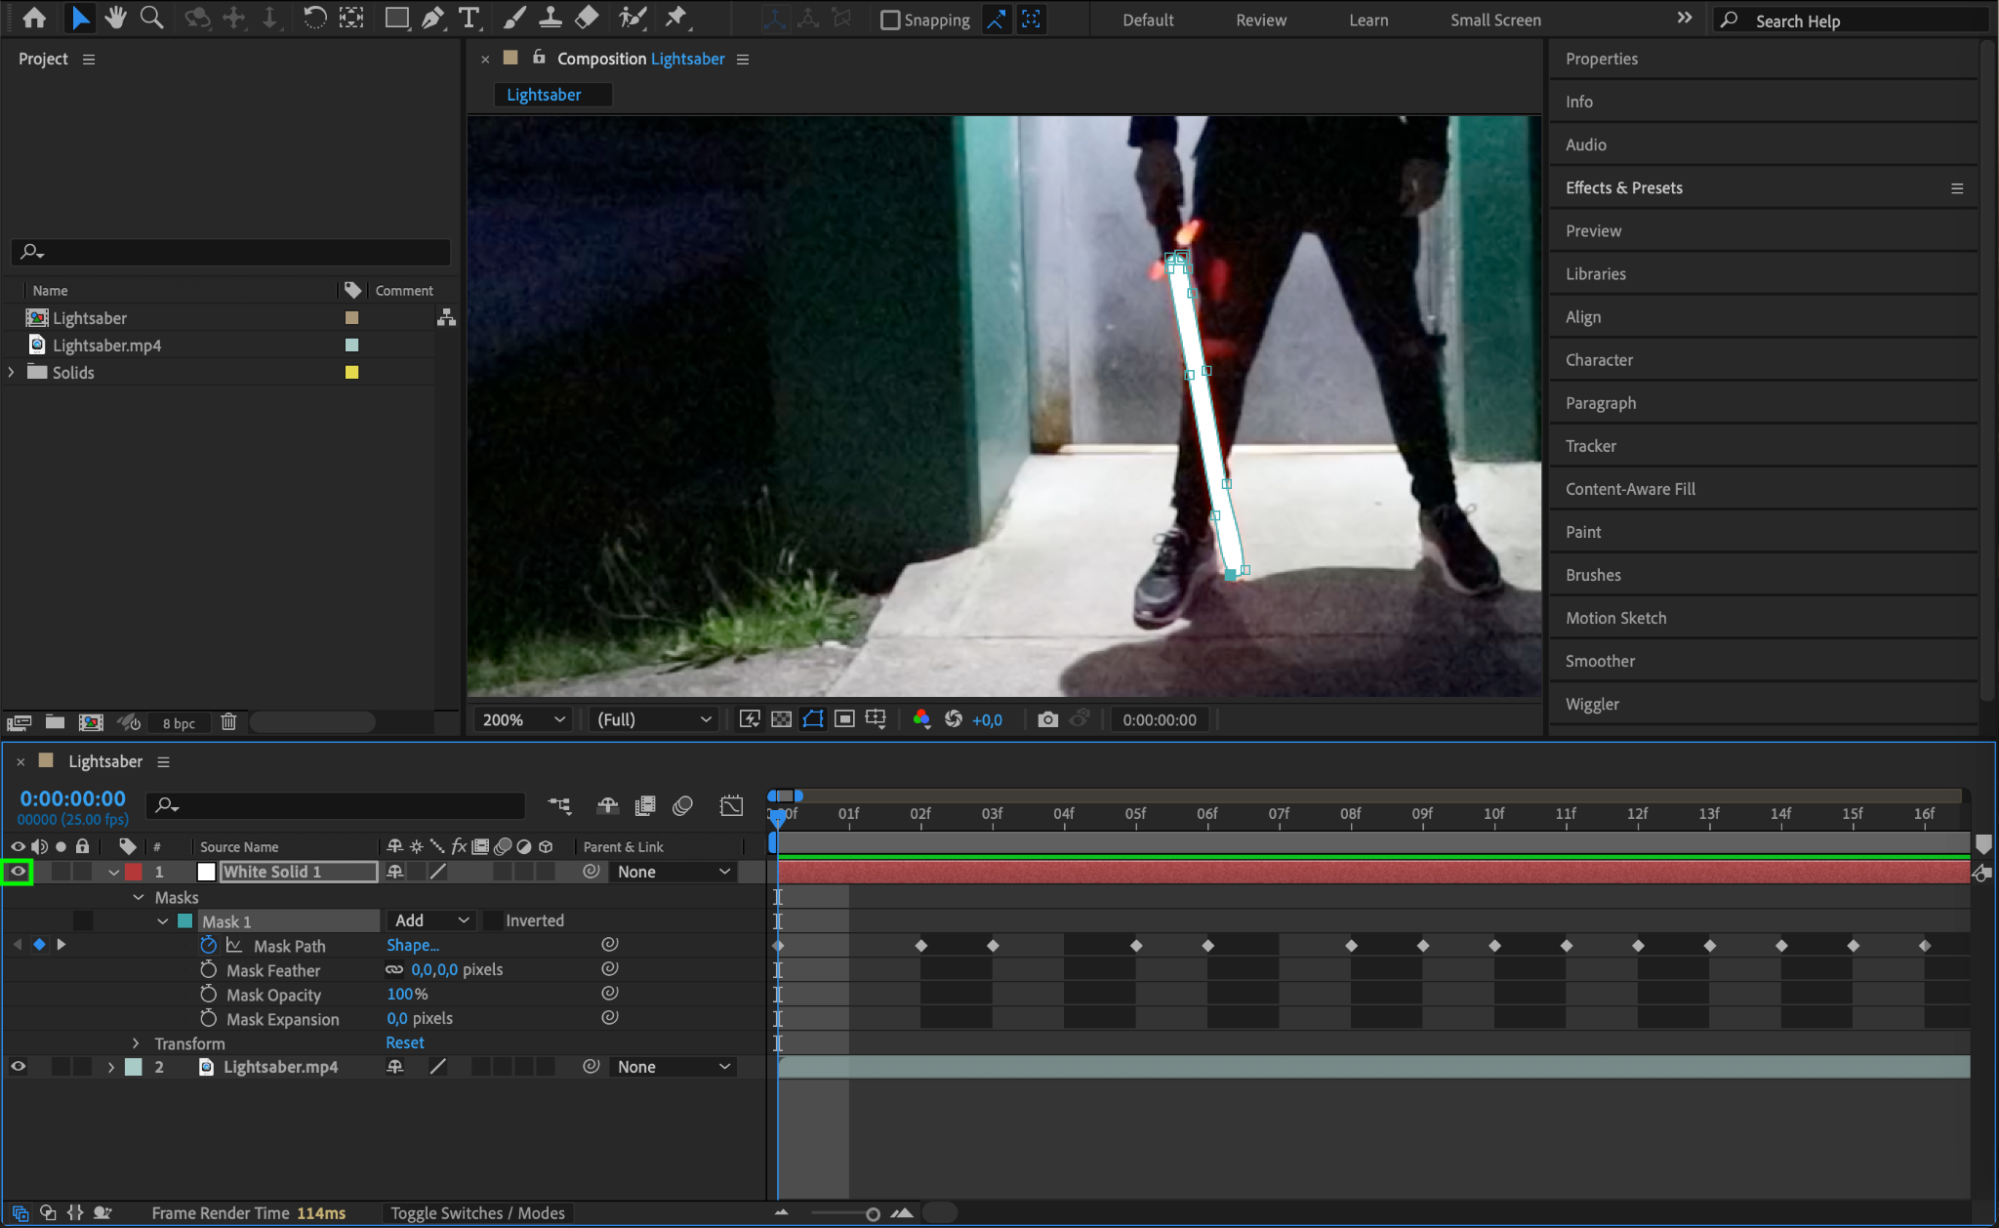
Once the mask path is animated, click the Eye icon next to the solid layer in the Timeline to make it visible again. This restores the layer’s visibility, allowing you to see the animated lightsaber in your composition.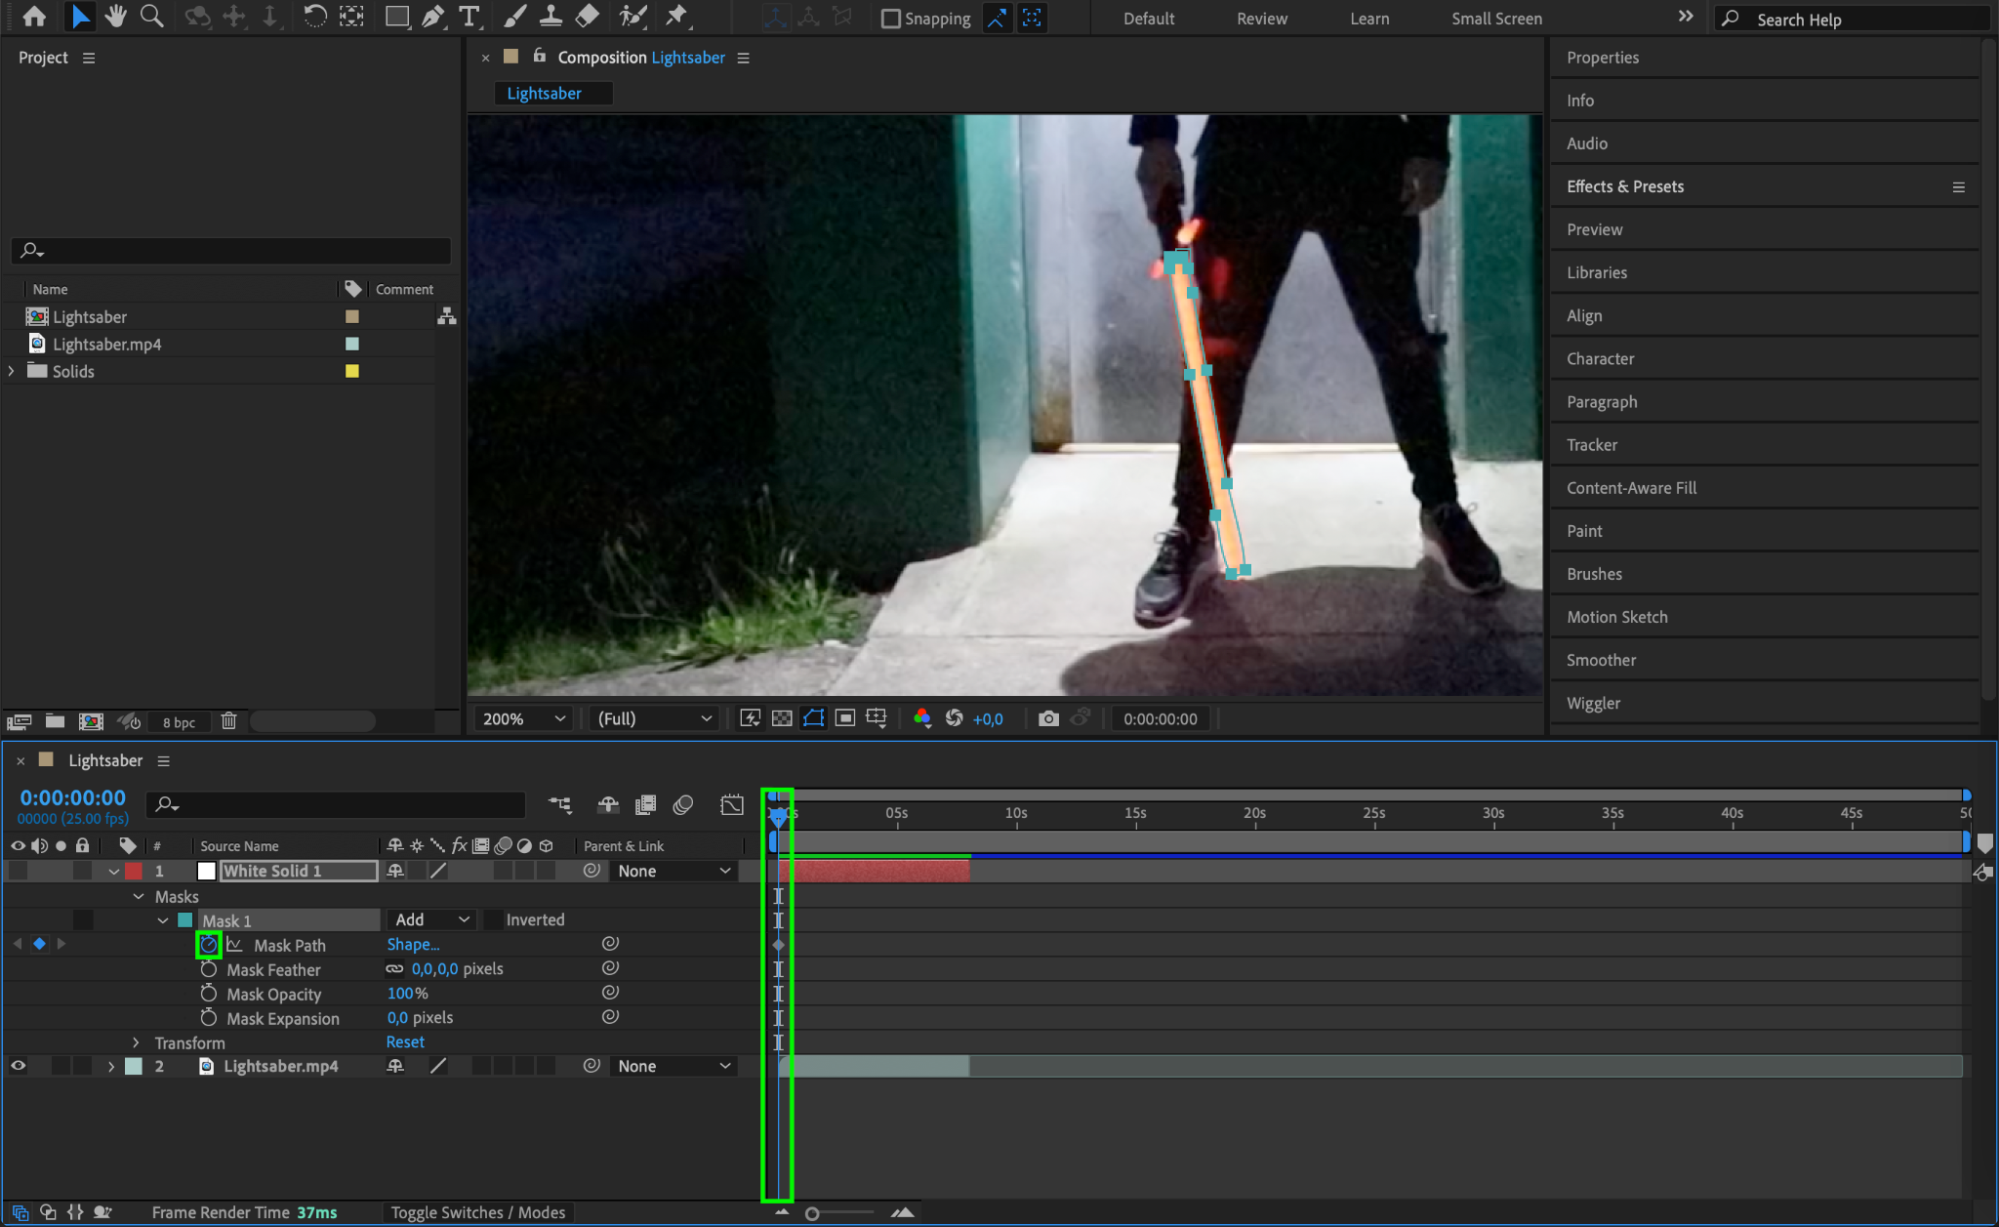
 Step 5: Duplicate the Solid Layer for Glow Effect
To create the glowing effect, duplicate the solid layer four times. Select the layer and press “Ctrl/Cmd + D” four times. This creates multiple copies of the mask, which will give the lightsaber a more intense glow.
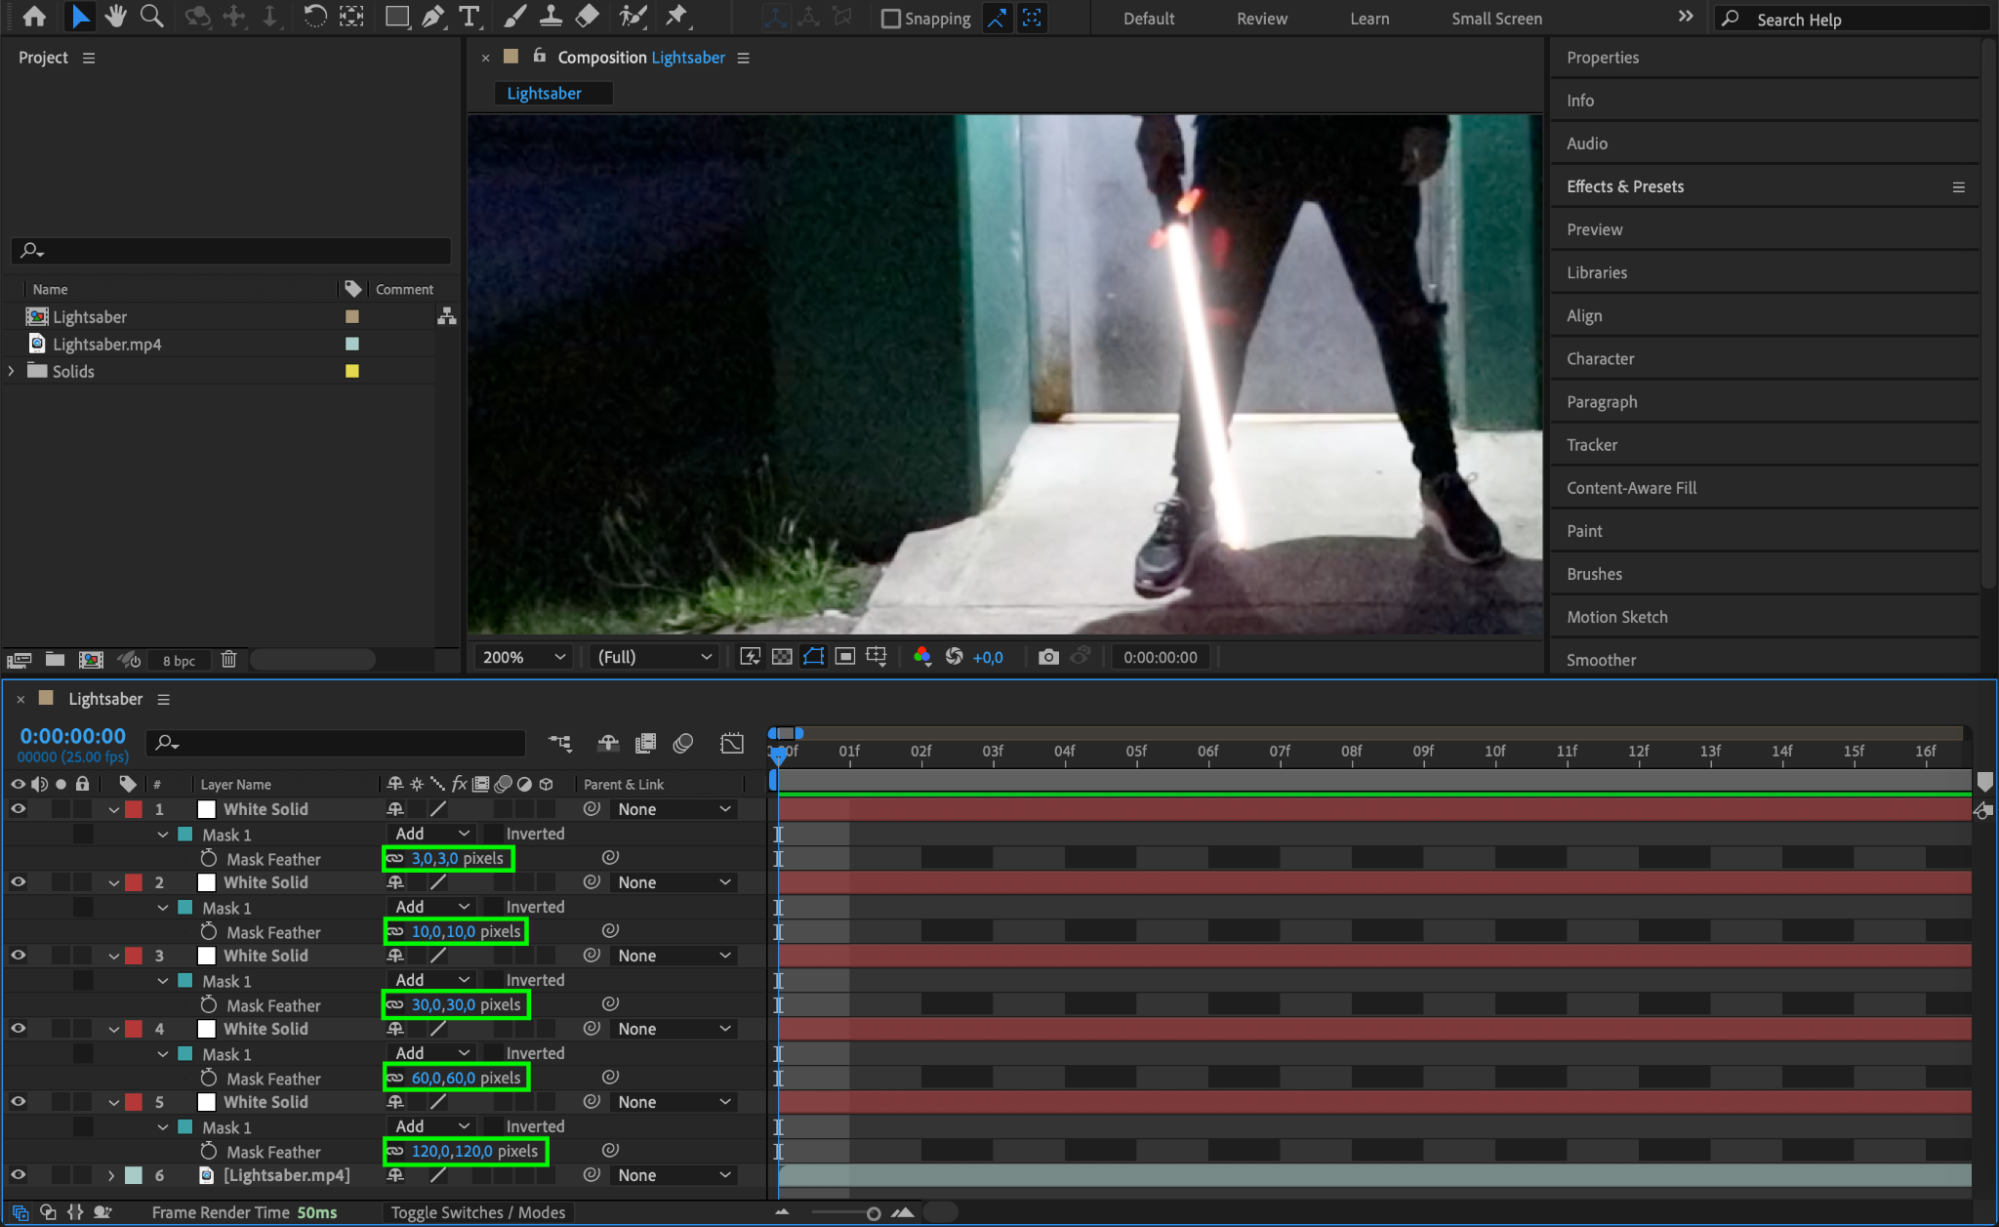
Open Mask Feather settings for each layer by selecting all solid layers and pressing “F”. Adjust the Mask Feather values for each layer as follows:
Layer 1: Set Mask Feather to 3.
Layer 2: Set Mask Feather to 10.
Layer 3: Set Mask Feather to 30.
Layer 4: Set Mask Feather to 60.
Layer 5: Set Mask Feather to 120.
These values will soften the edges, creating a radiant glow effect.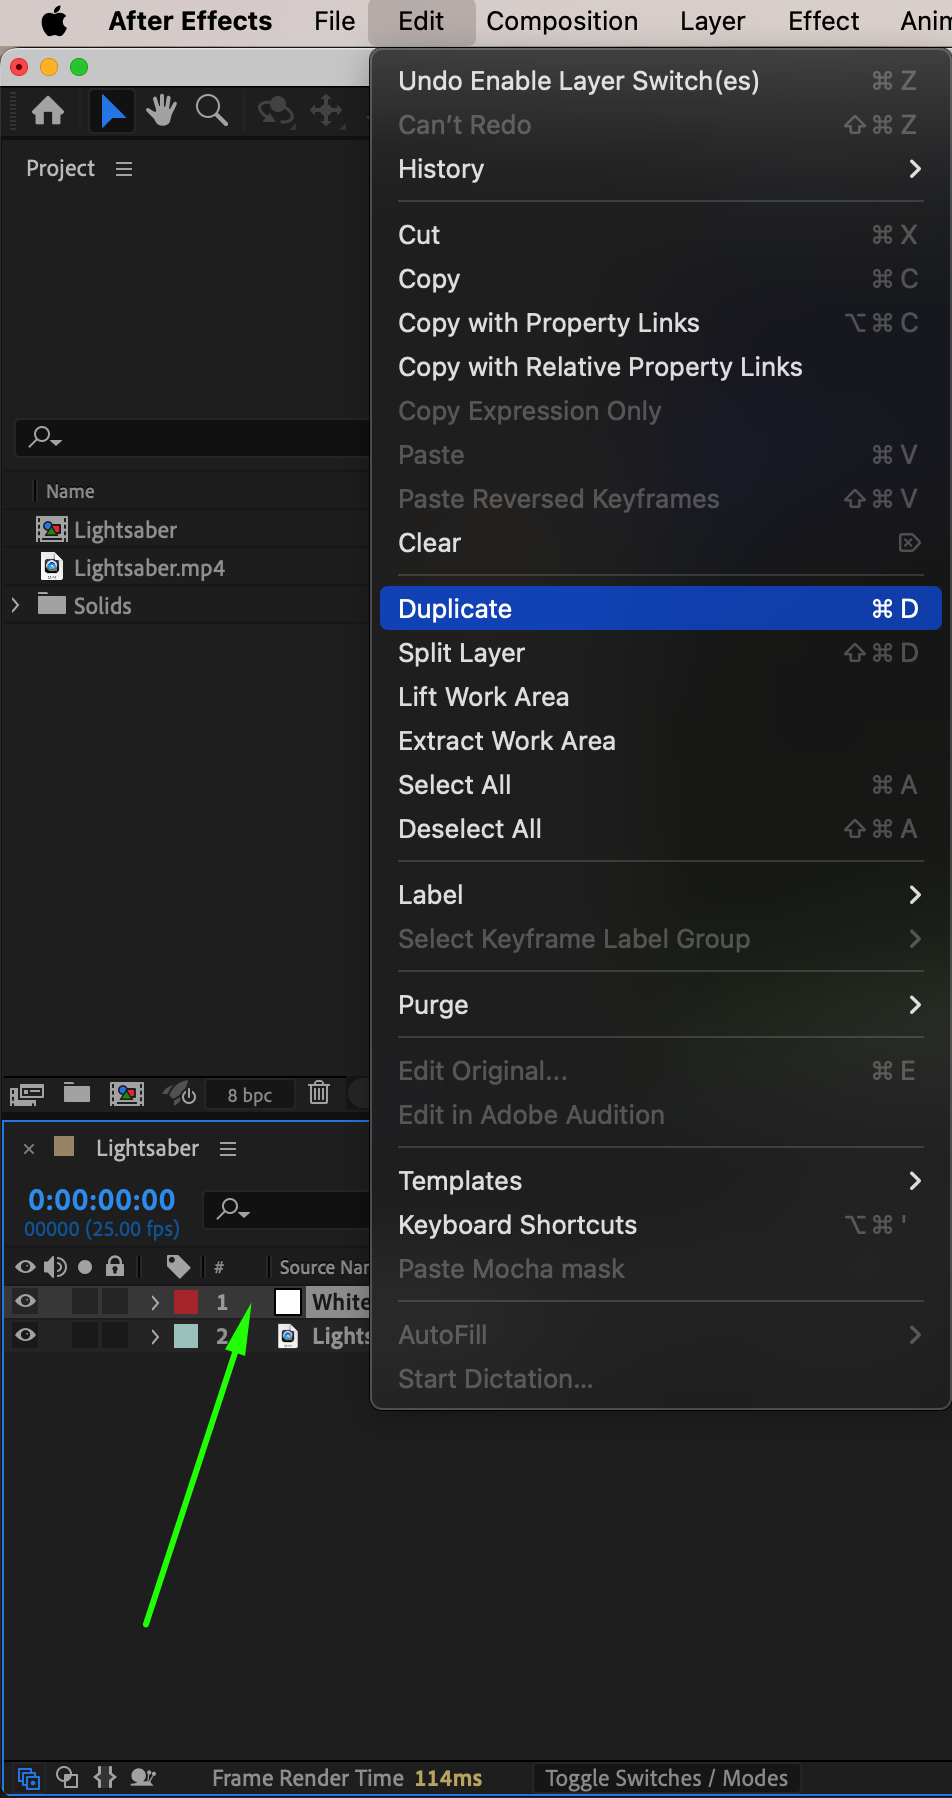

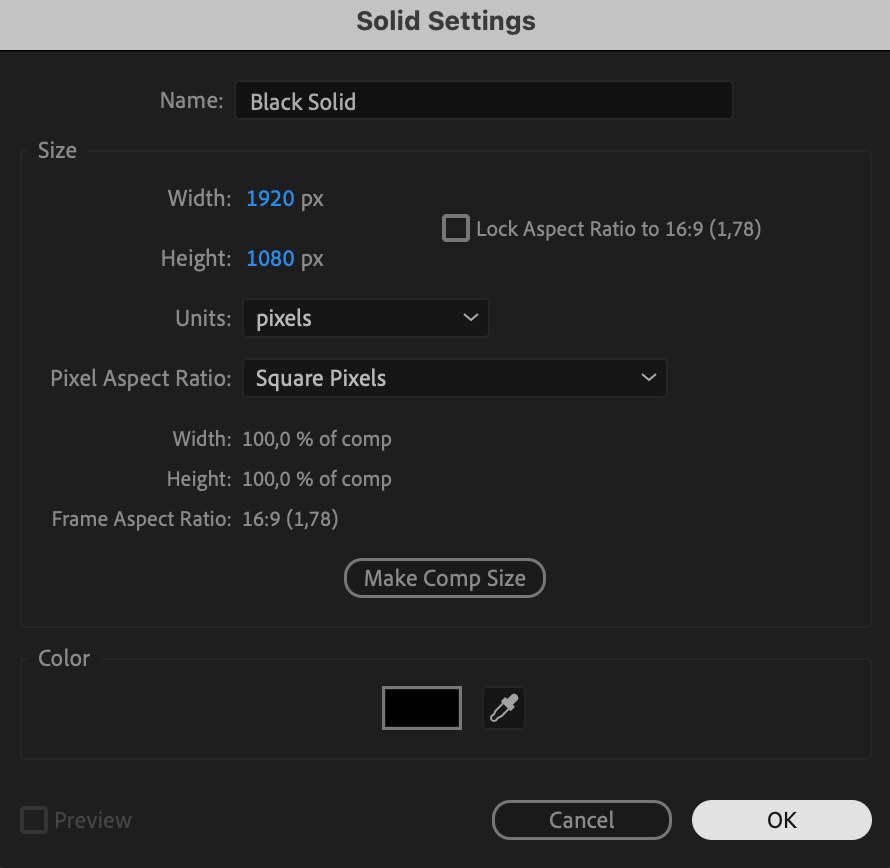
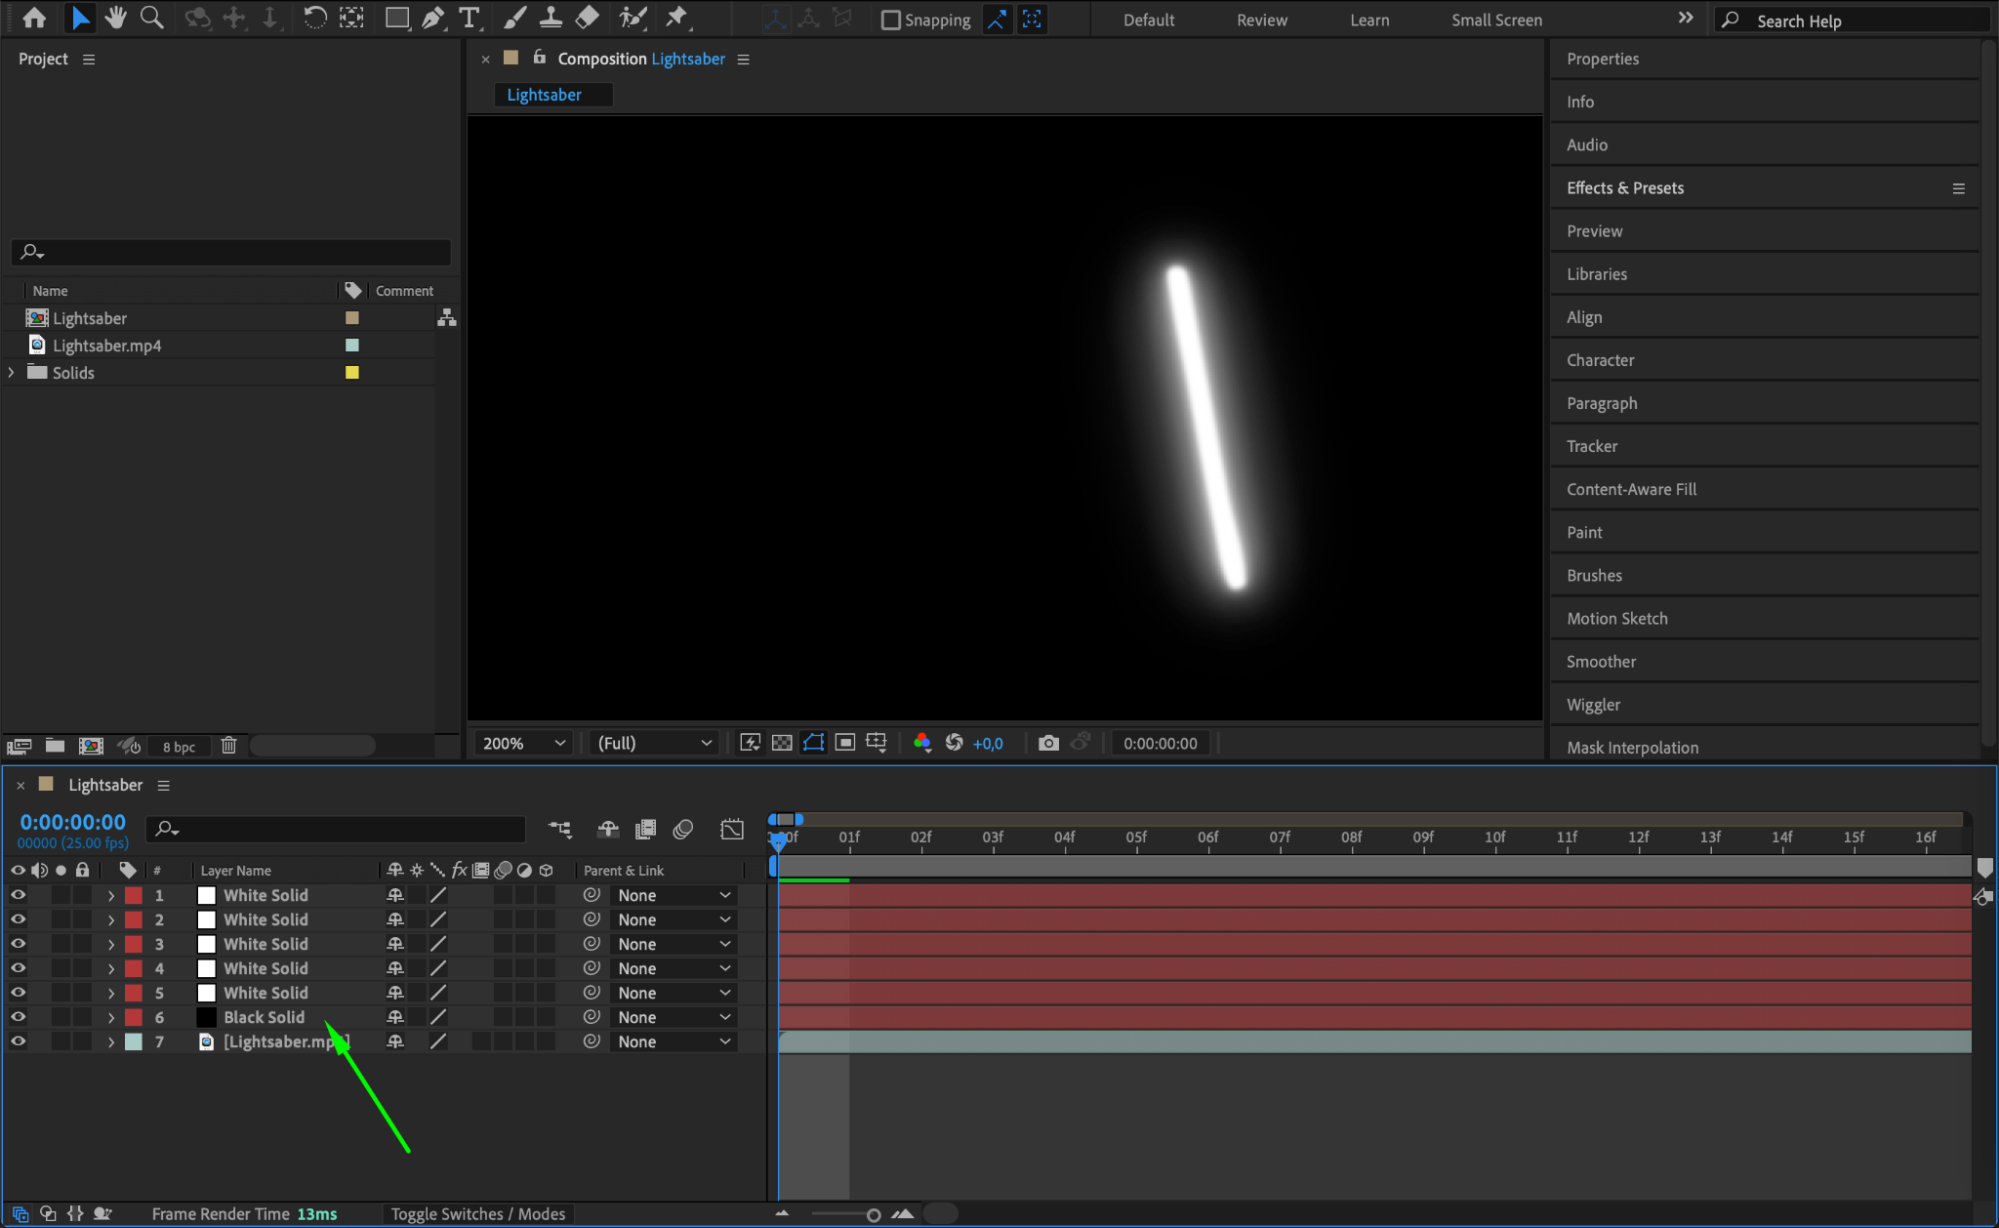
 Step 6: Add a Background Layer
Create a new solid layer in black to serve as the background. Go to Layer > New > Solid, choose black, and place it below your solid layers in the Timeline. This black background helps the glow effect stand out, making the lightsaber appear more realistic.
 Step 7: Pre-compose the Lightsaber Layers
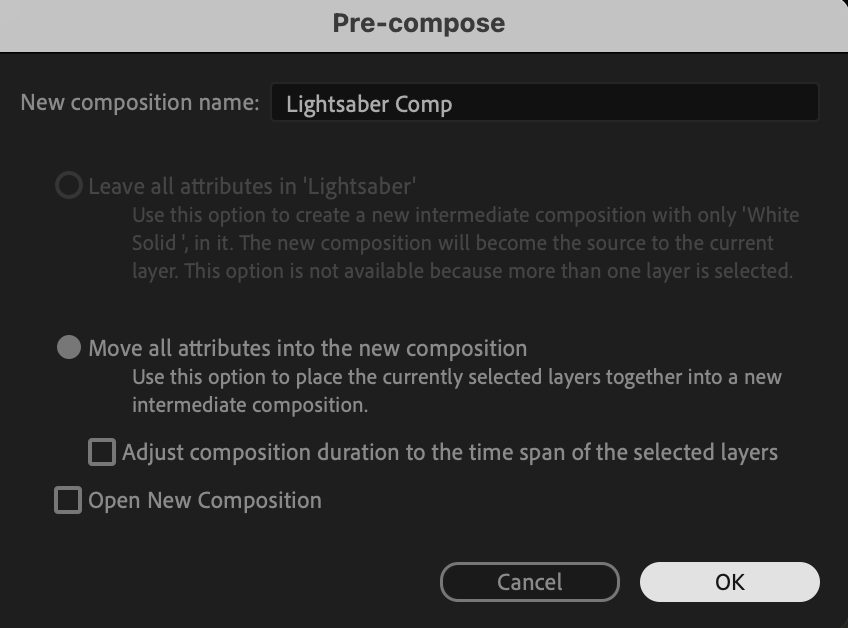
Select all of the solid layers with the mask and right-click to select Pre-compose. Name this composition “Lightsaber Comp” and click OK. Pre-composing the layers combines them into a single layer, making it easier to adjust the overall glow and blending settings for the effect.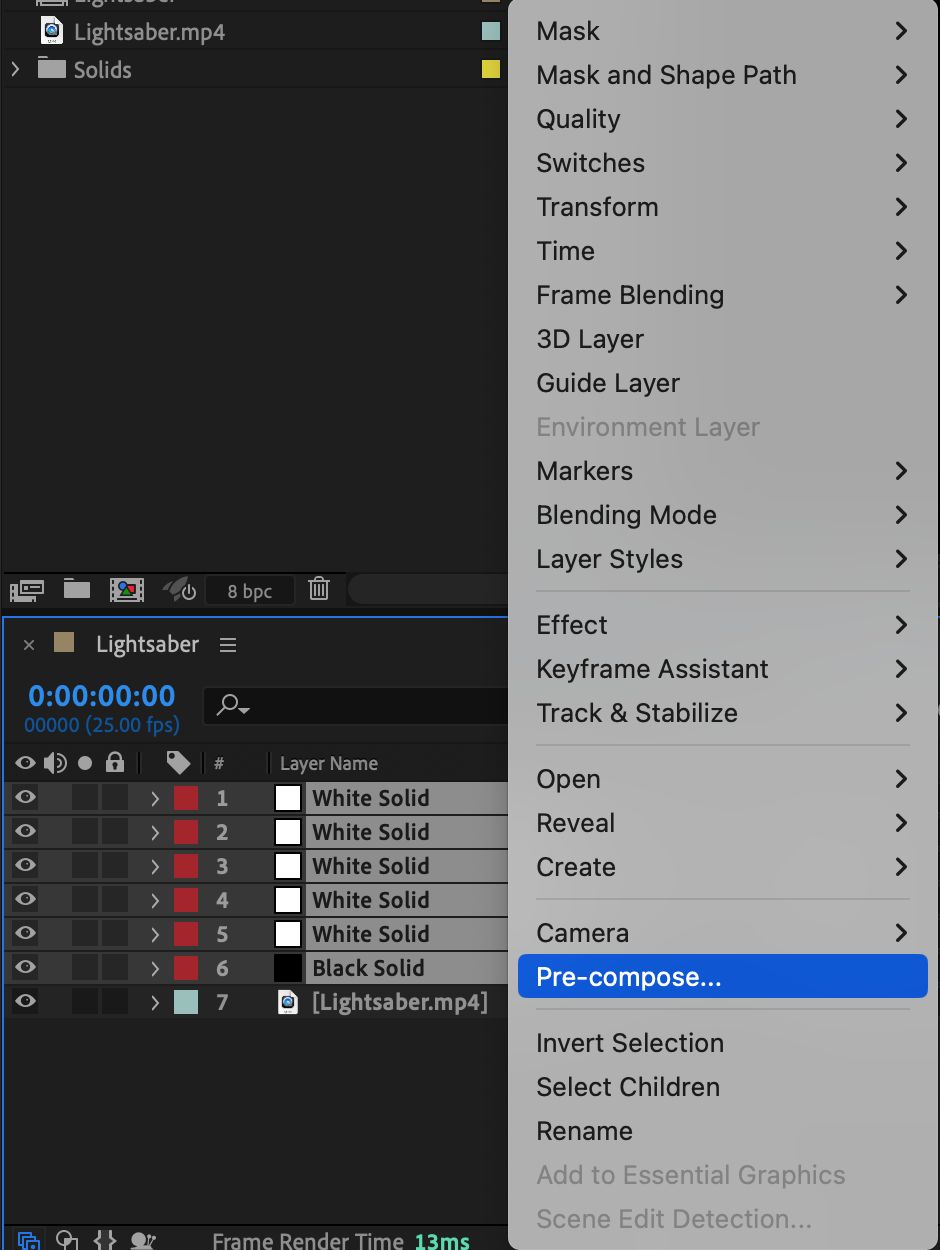
 Step 8: Set Blending Mode to Screen
To make the lightsaber effect blend with the scene, change the Blending Mode of the pre-composed layer to Screen. Right-click on the pre-comp layer, select Blending Mode, and choose Screen. This mode removes the black background of the lightsaber layer, allowing it to blend naturally with the underlying footage.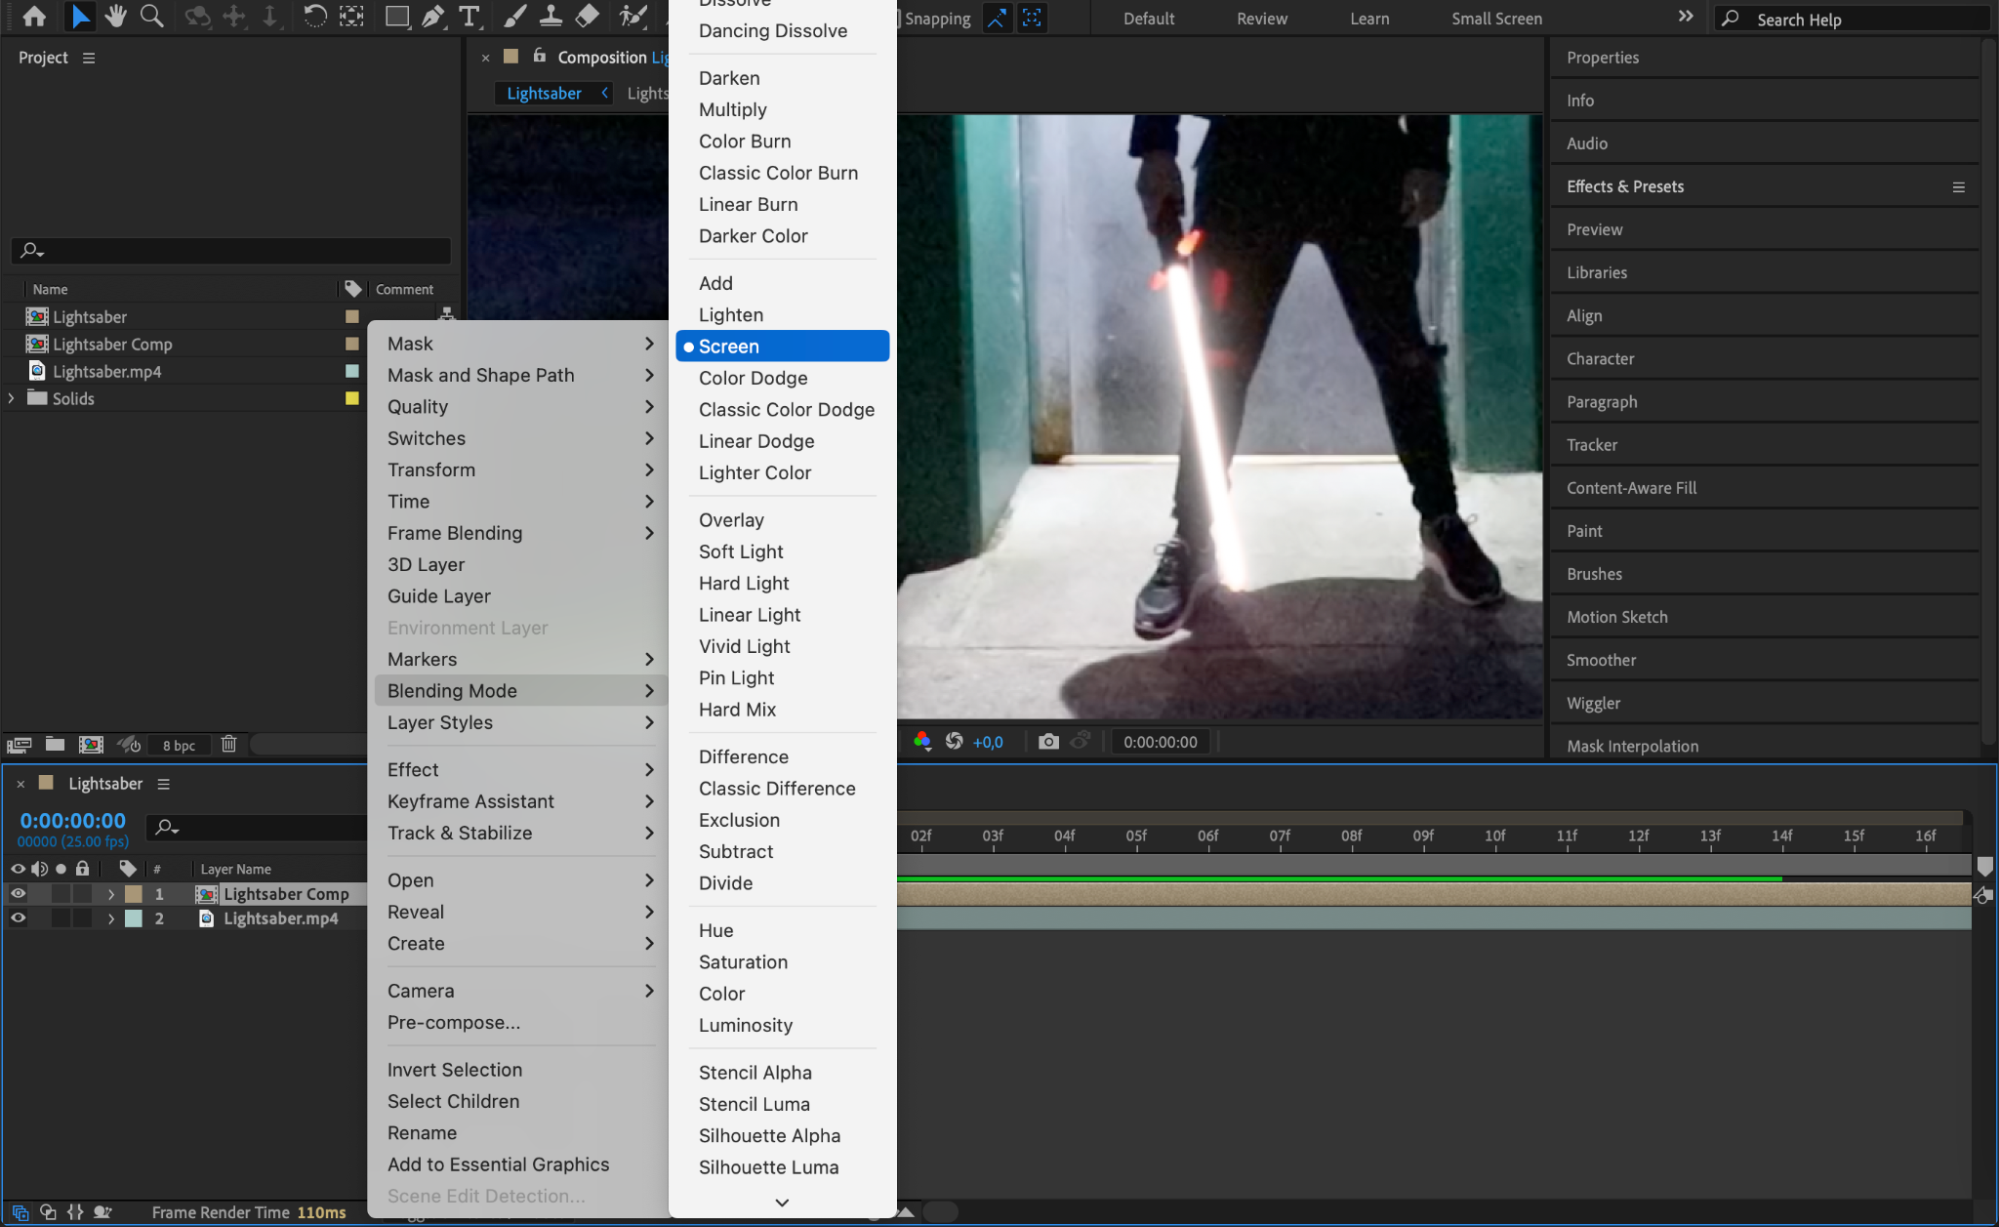 Step 9: Add Color and Final Glow Using Curves
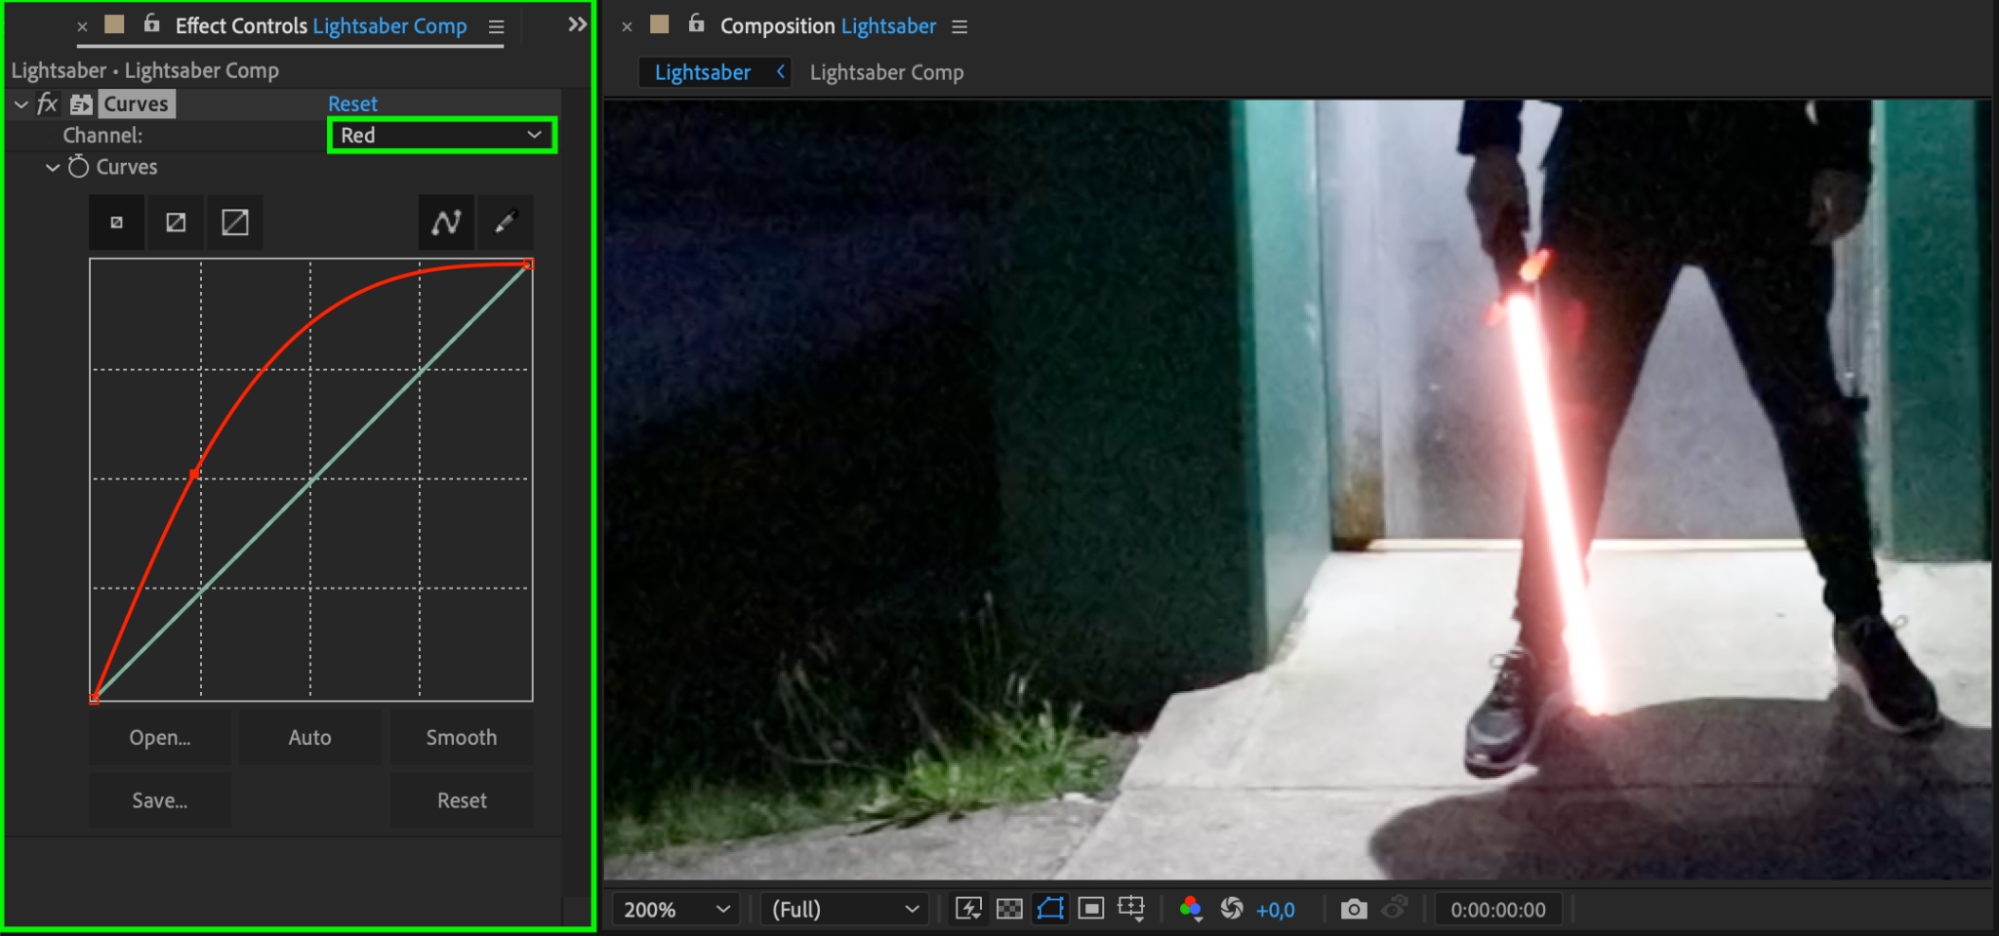
To customize the lightsaber color, add a Curves effect to the pre-comp layer. Go to Effect > Color Correction > Curves and adjust the RGB channels to create your desired lightsaber color, such as blue, green, or red. Increase the Glow Radius and Glow Intensity in the Glow settings for a more vibrant, neon-like effect.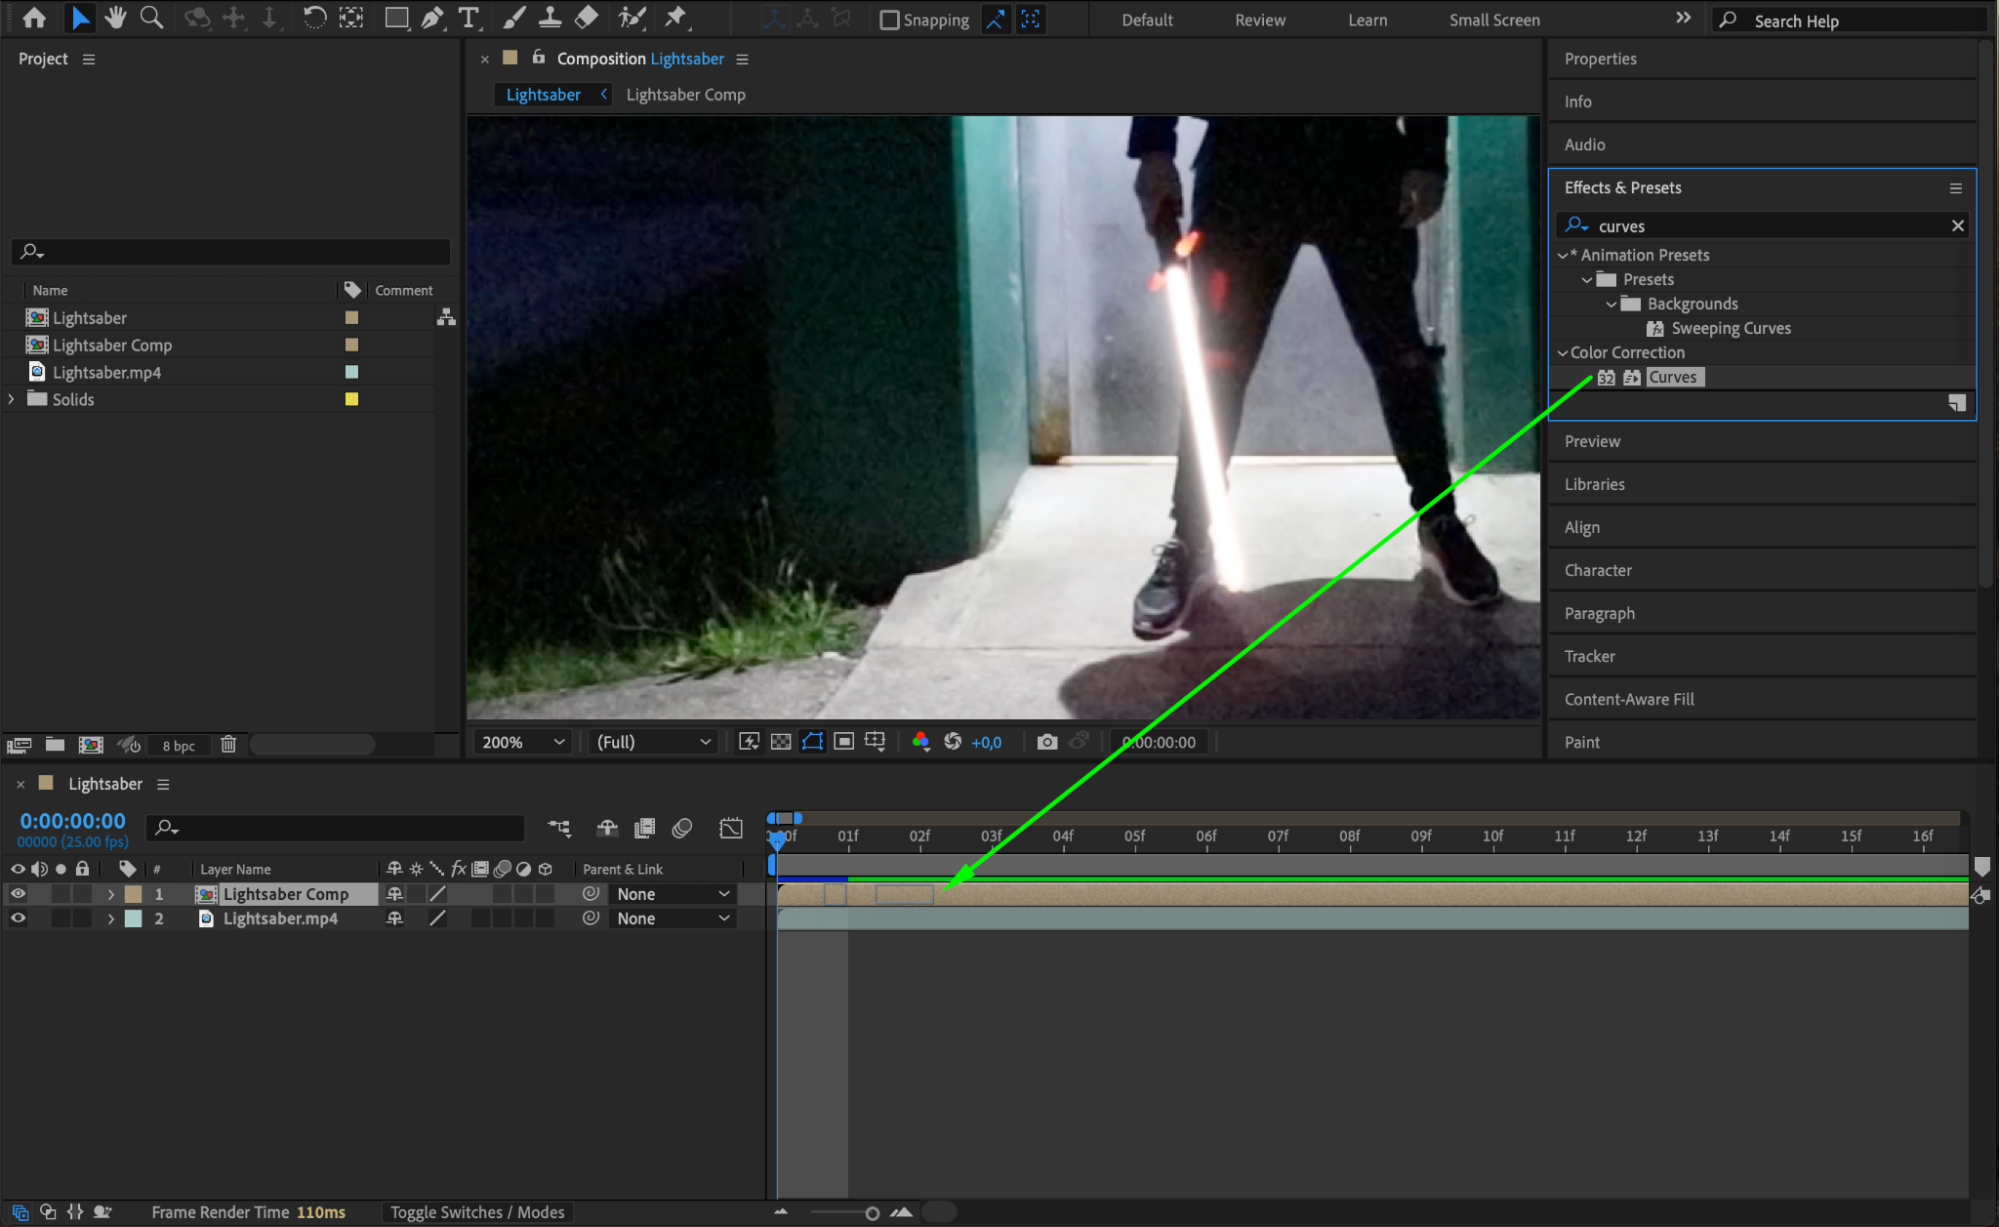
 Step 10: Preview the Animation
Press the Spacebar to preview your composition and see how the lightsaber effect appears. Ensure the mask path is synchronized with the movement in the footage. Make any necessary adjustments to the mask, color, or glow settings to achieve the best effect.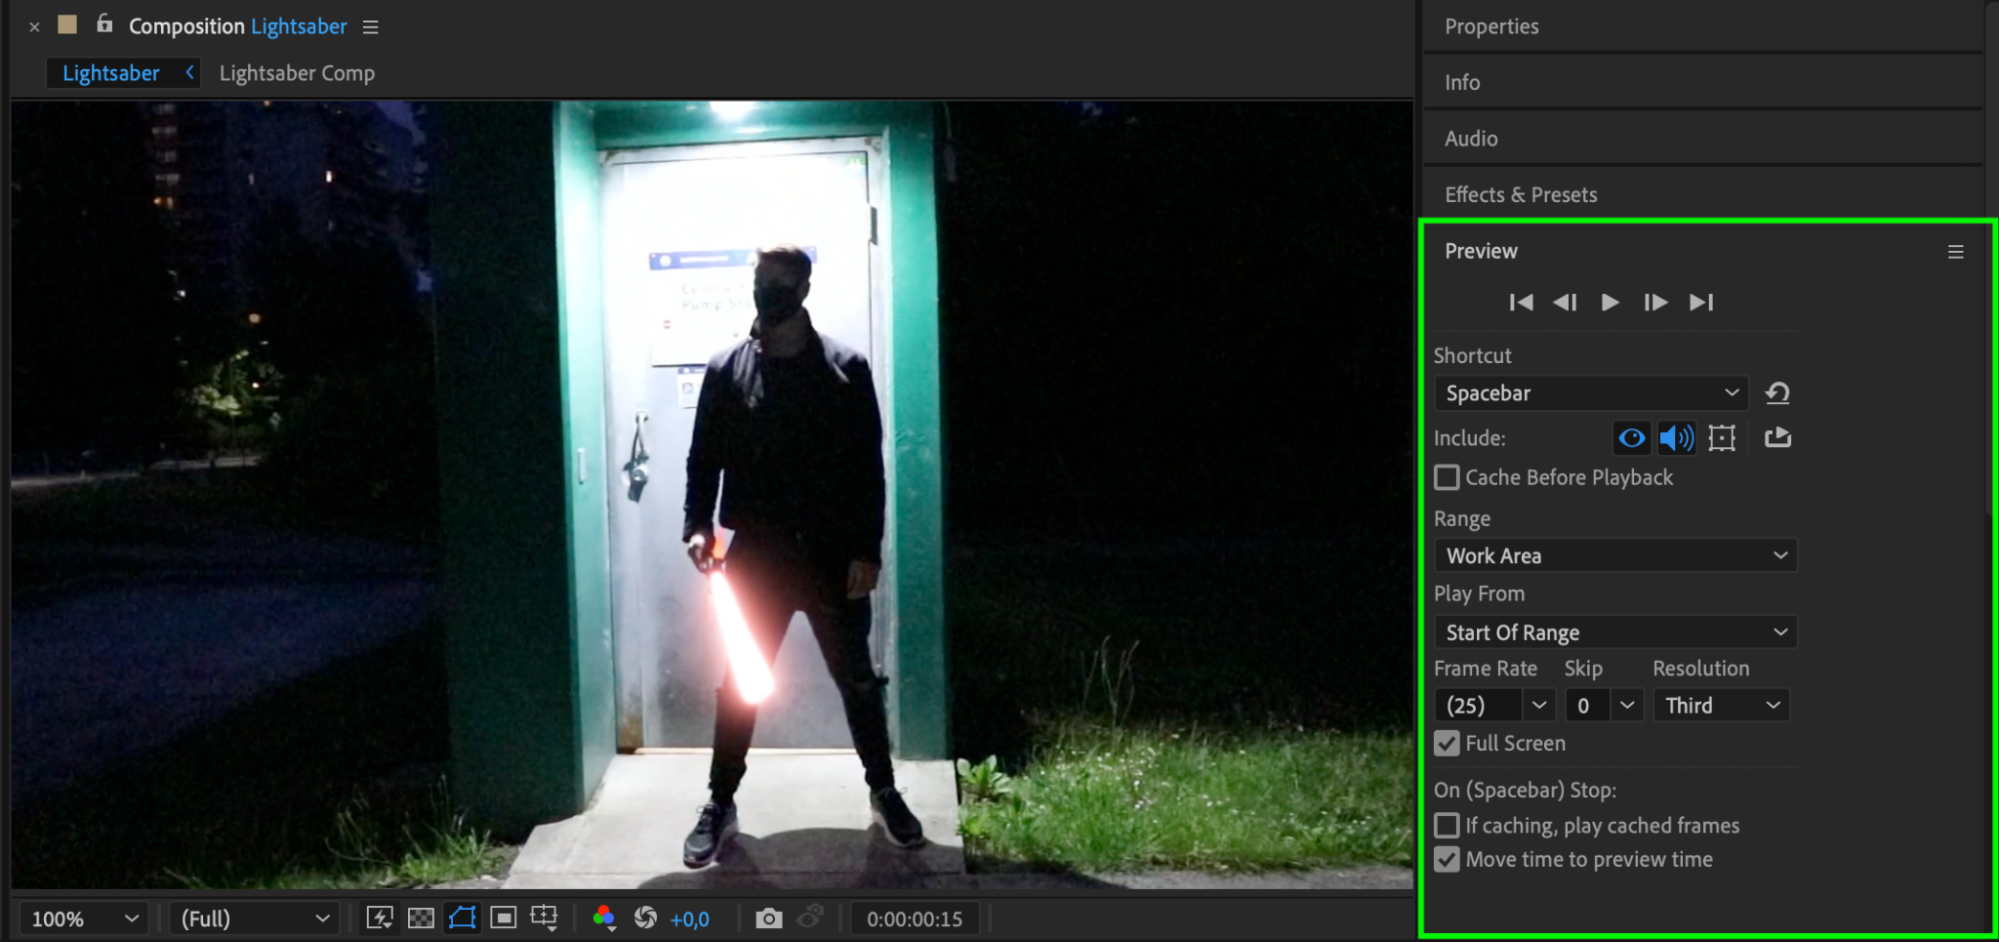 Step 11: Export the Final Video
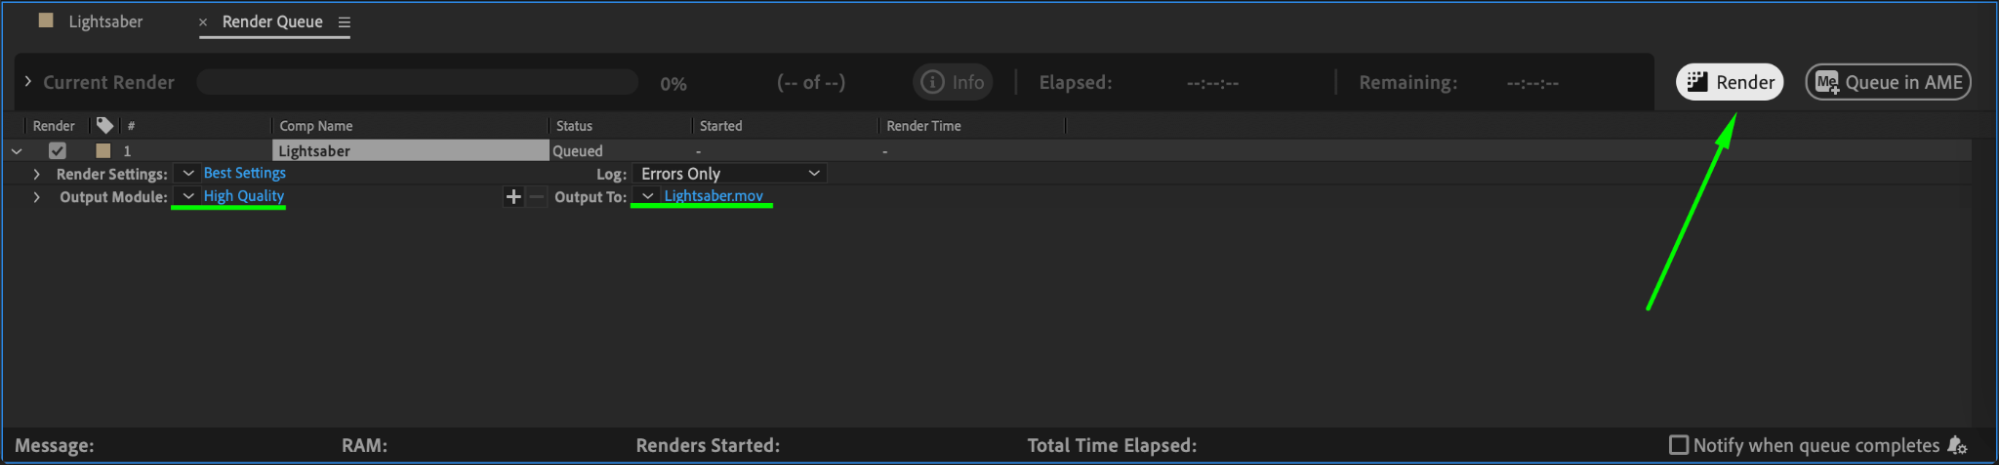
When you’re happy with the effect, export the video by going to Composition > Add to Render Queue. Choose your preferred format, resolution, and other export settings, then click Render to save the video with the lightsaber effect applied.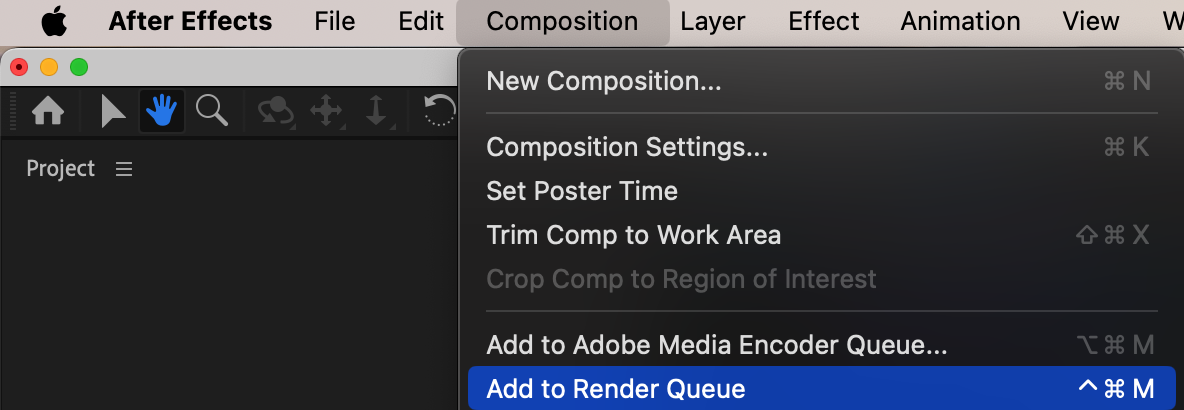
 Conclusion
With this method, you can create a realistic lightsaber effect in Adobe After Effects by using masks, blending modes, and glow settings. This technique is versatile, allowing you to customize color, intensity, and movement for a dynamic and impactful lightsaber look. Experiment with these settings to create your own unique lightsaber animations for your projects.
Our Bestsellers


