Creating masks in After Effects is an essential skill for any video designer or editor. Masks allow you to selectively show or hide portions of your footage, creating stunning visual effects, and giving your videos a professional touch. Whether you want to isolate an object, blur out a background, or create complex motion graphics, knowing how to make a mask in After Effects is a valuable tool in your video editing arsenal.
In this blog post, we will guide you step by step through the process of creating masks in After Effects. We will cover the basics of mask creation and manipulation, as well as some advanced techniques that will take your videos to the next level. So let’s dive in and learn how to create stunning video masks in After Effects.
Step-by-Step Guide to Making Masks in After Effects:
- Creating a Mask:
– Open After Effects and import your footage into a new composition.
– Select the layer you want to apply the mask to.
– Click on the “Pen Tool” from the toolbar or simply press “G” on your keyboard.

– Use the Pen Tool to draw a shape around the area you want to mask. Use Converter Vertex Tool to curve created lines.
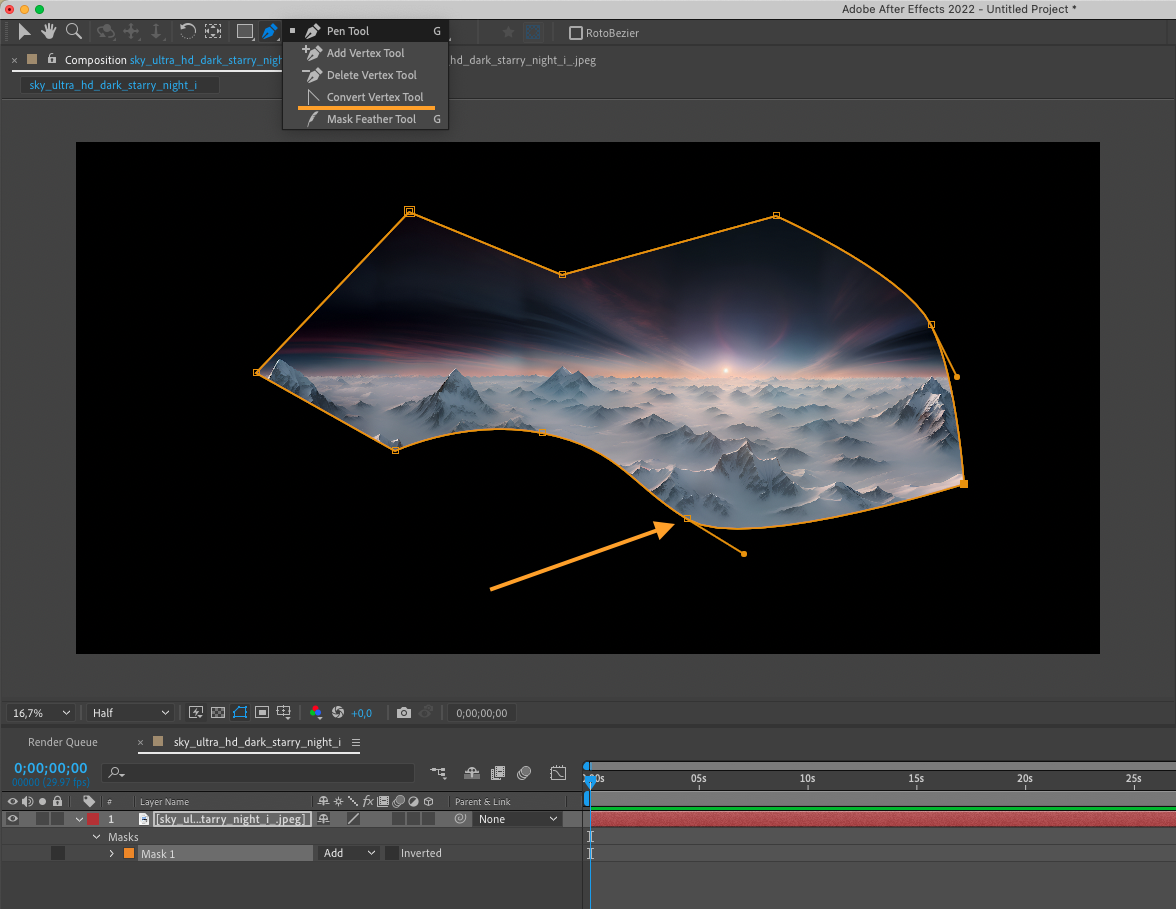
– Once you have completed the shape, close it by clicking on the first point you created.
– Your mask is now created, and you can see it in the layer panel as a separate mask.
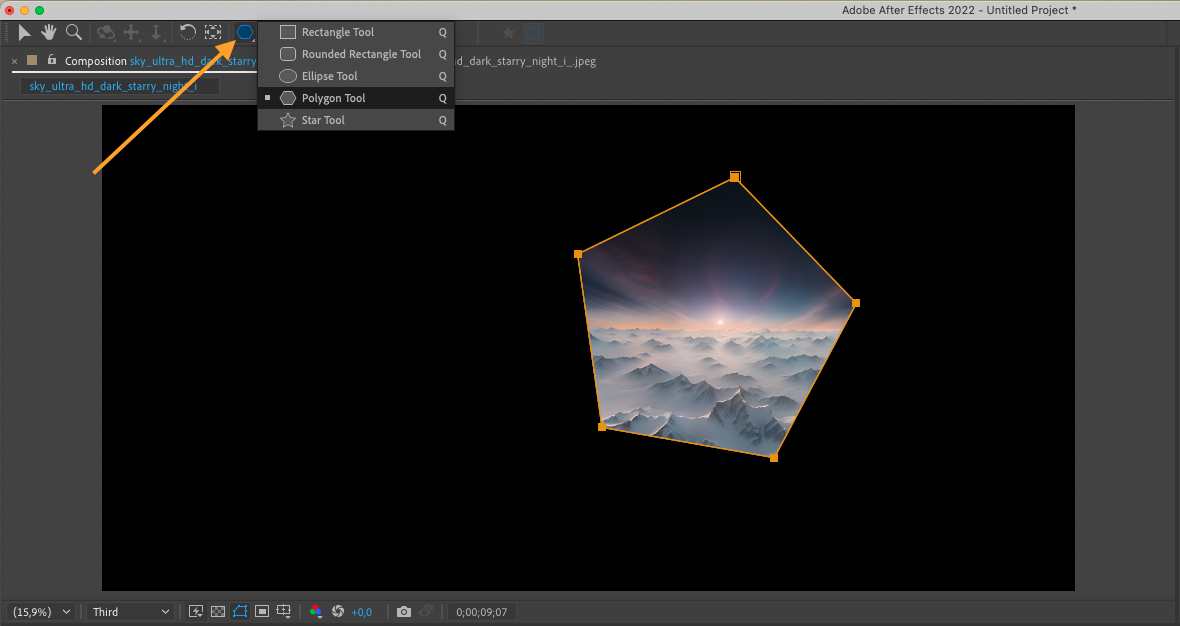
Also, you can create masks using the shape tool in simple shapes like circles, triangles, and squares.
2. Modifying a Mask:
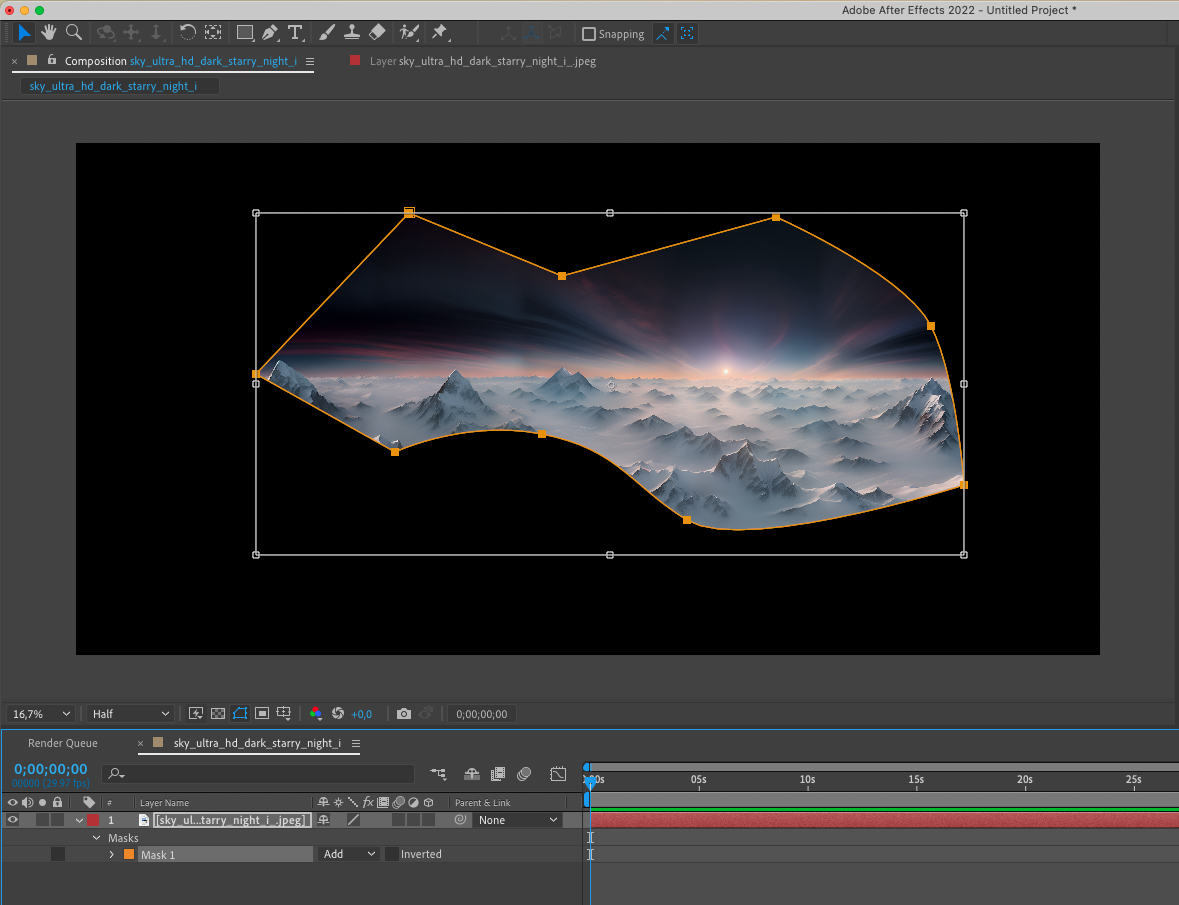
– To adjust the shape of your mask, select the mask layer in the layer panel.
– Use the Selection Tool (V) to click and drag the control points to reshape your mask.

– To move the entire mask, double-click on its lines. The mask also can be scaled this way.
 3. Mask Modes and Feathering:
– After creating your mask, you can change the mask mode to determine how it affects the layer. In the layer panel, click on the “Add” dropdown menu next to the mask layer and explore the different mask modes like “Add”, “Subtract”, “Intersect”, etc.
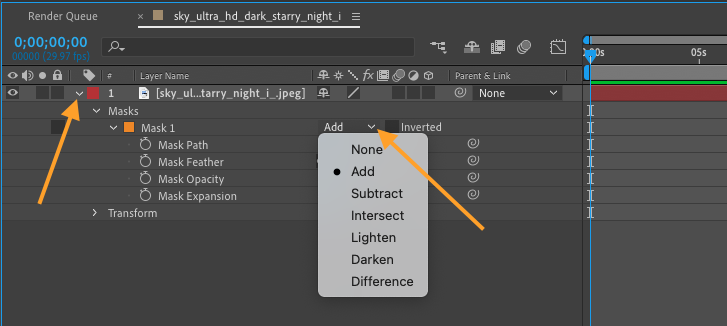
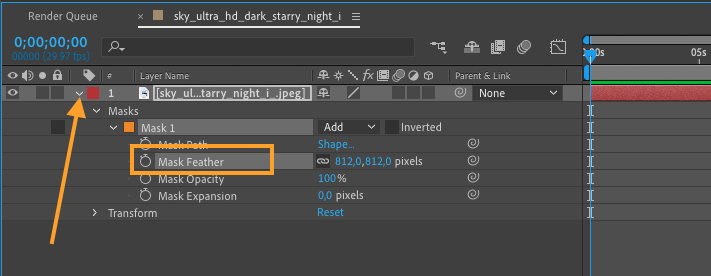
– Adjust the mask feathering to create smoother edges or gradual transitions. You can access the Mask Feather property in the Timeline panel and increase or decrease the feather value.
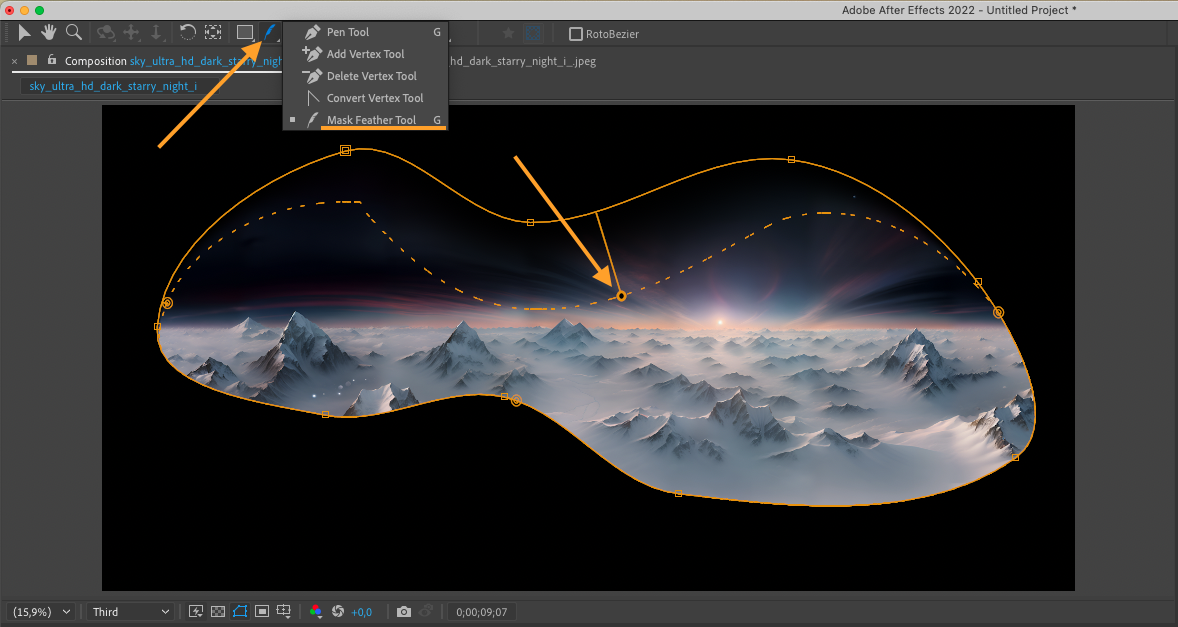
You can use the Mask Feather Tool (G) for more accurate feathering.
 4. Animating Masks:
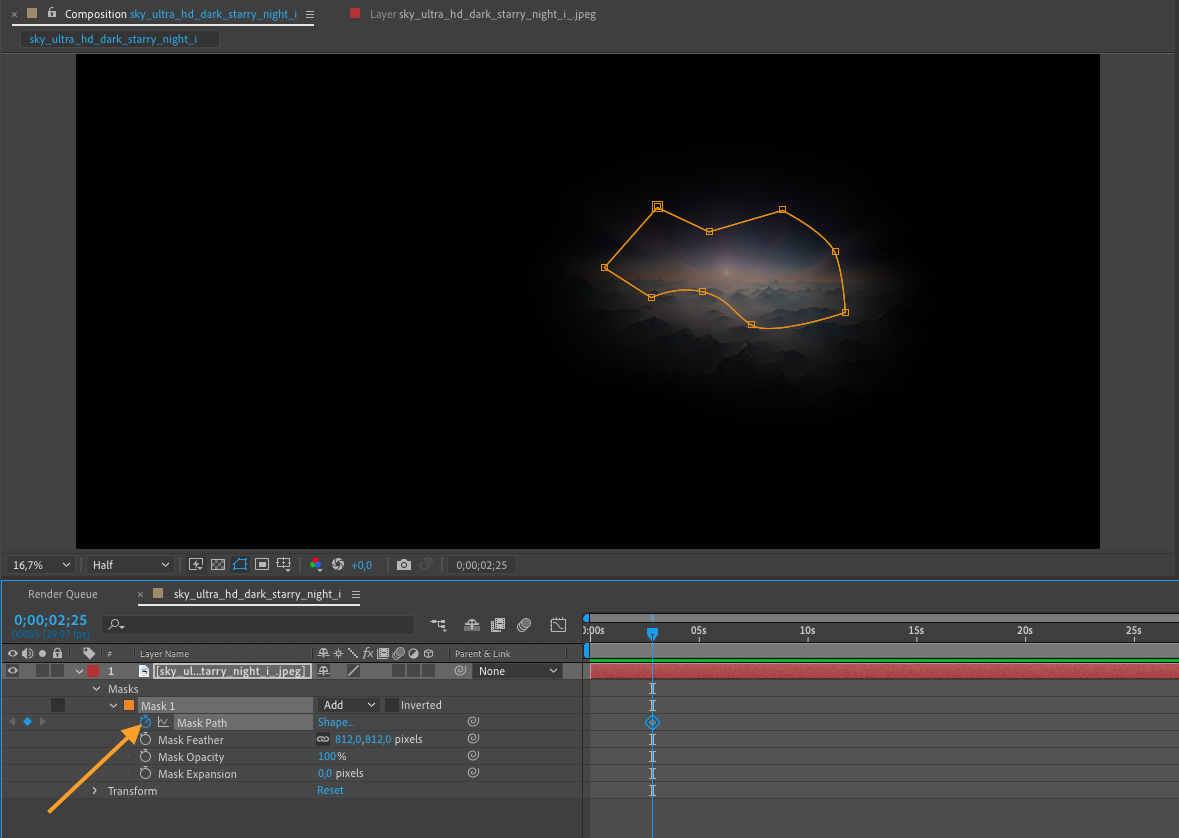
– After Effects allows you to animate your masks to create dynamic effects. In the layer panel, click on the stopwatch icon next to the mask path property to set a keyframe for your mask.
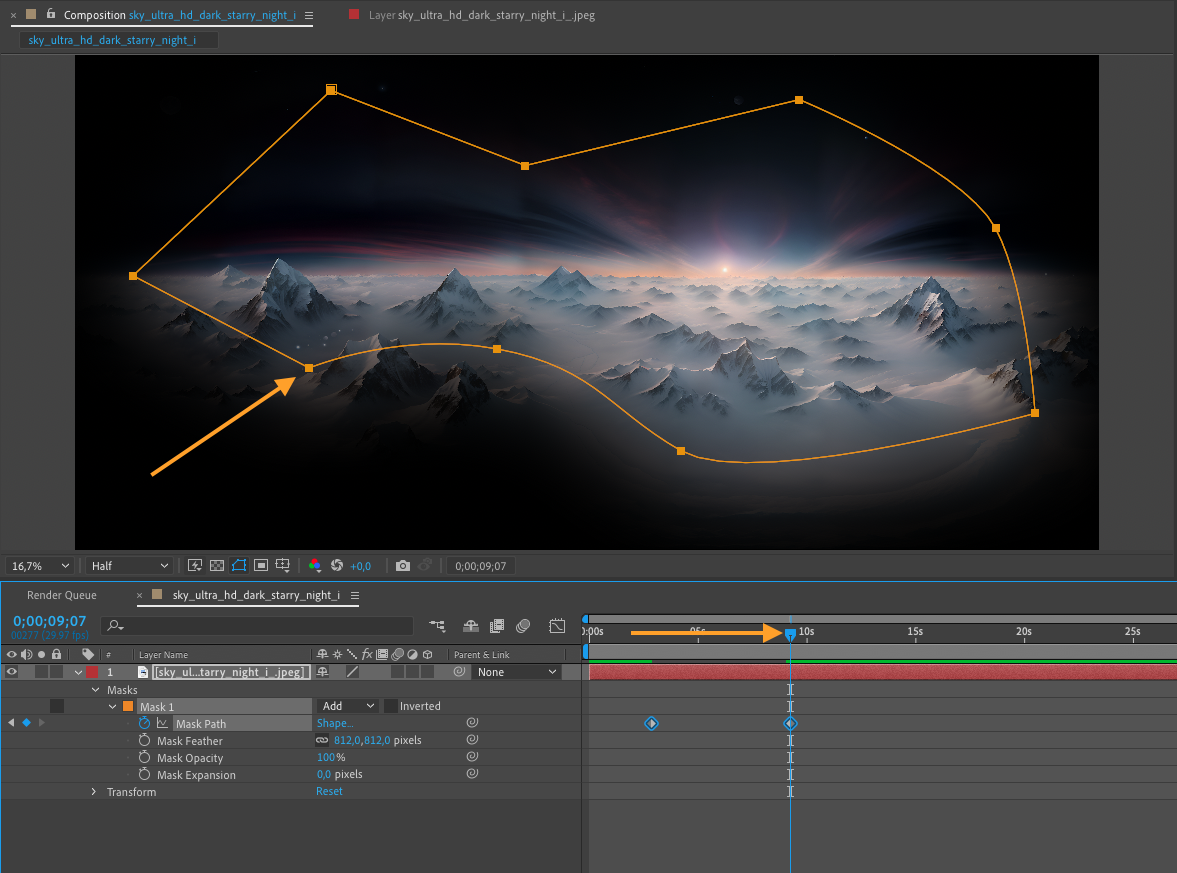
– Move the playhead to a different time in the timeline and adjust the mask shape or position. After Effects will automatically create the necessary keyframes between the two keyframes you set, creating a smooth animation.
Conclusion:
Creating masks in After Effects opens up a world of creative possibilities. Whether it’s isolating a subject, creating complex motion graphics, or adding visual effects, masks allow you to have complete control over what parts of your footage are visible.
By following this step-by-step guide, you can master the art of creating masks in After Effects and take your videos to the next level. So go ahead, experiment, and unleash your creativity with After Effects masks.

