How to Create a Music Video Using After Effects
Crafting Engaging Music Videos with After Effects
Creating a captivating music video with After Effects is an exciting journey that allows you to visually express your creativity and enhance the impact of your music. Technology has made it easier than ever to produce professional-looking music videos right from your home. Adobe After Effects is a popular tool that offers a wide range of features and effects to take your music video to the next level.
Get 10% off when you subscribe to our newsletter

When you start the process of creating a music video with After Effects, it’s crucial to have a clear vision of the concept and style you want to convey in your video. Select the song you want to create a video for and listen to it multiple times to capture the mood and theme. This will help you determine the pacing, transitions, and visual elements that will complement your music.
After establishing a clear concept, gather all the necessary materials for your music video, such as footage of the artist performing, actors or props, and any other visuals you plan to include. High-resolution, well-lit shots will significantly impact the final look of your video.
1. Preparing Your Materials:
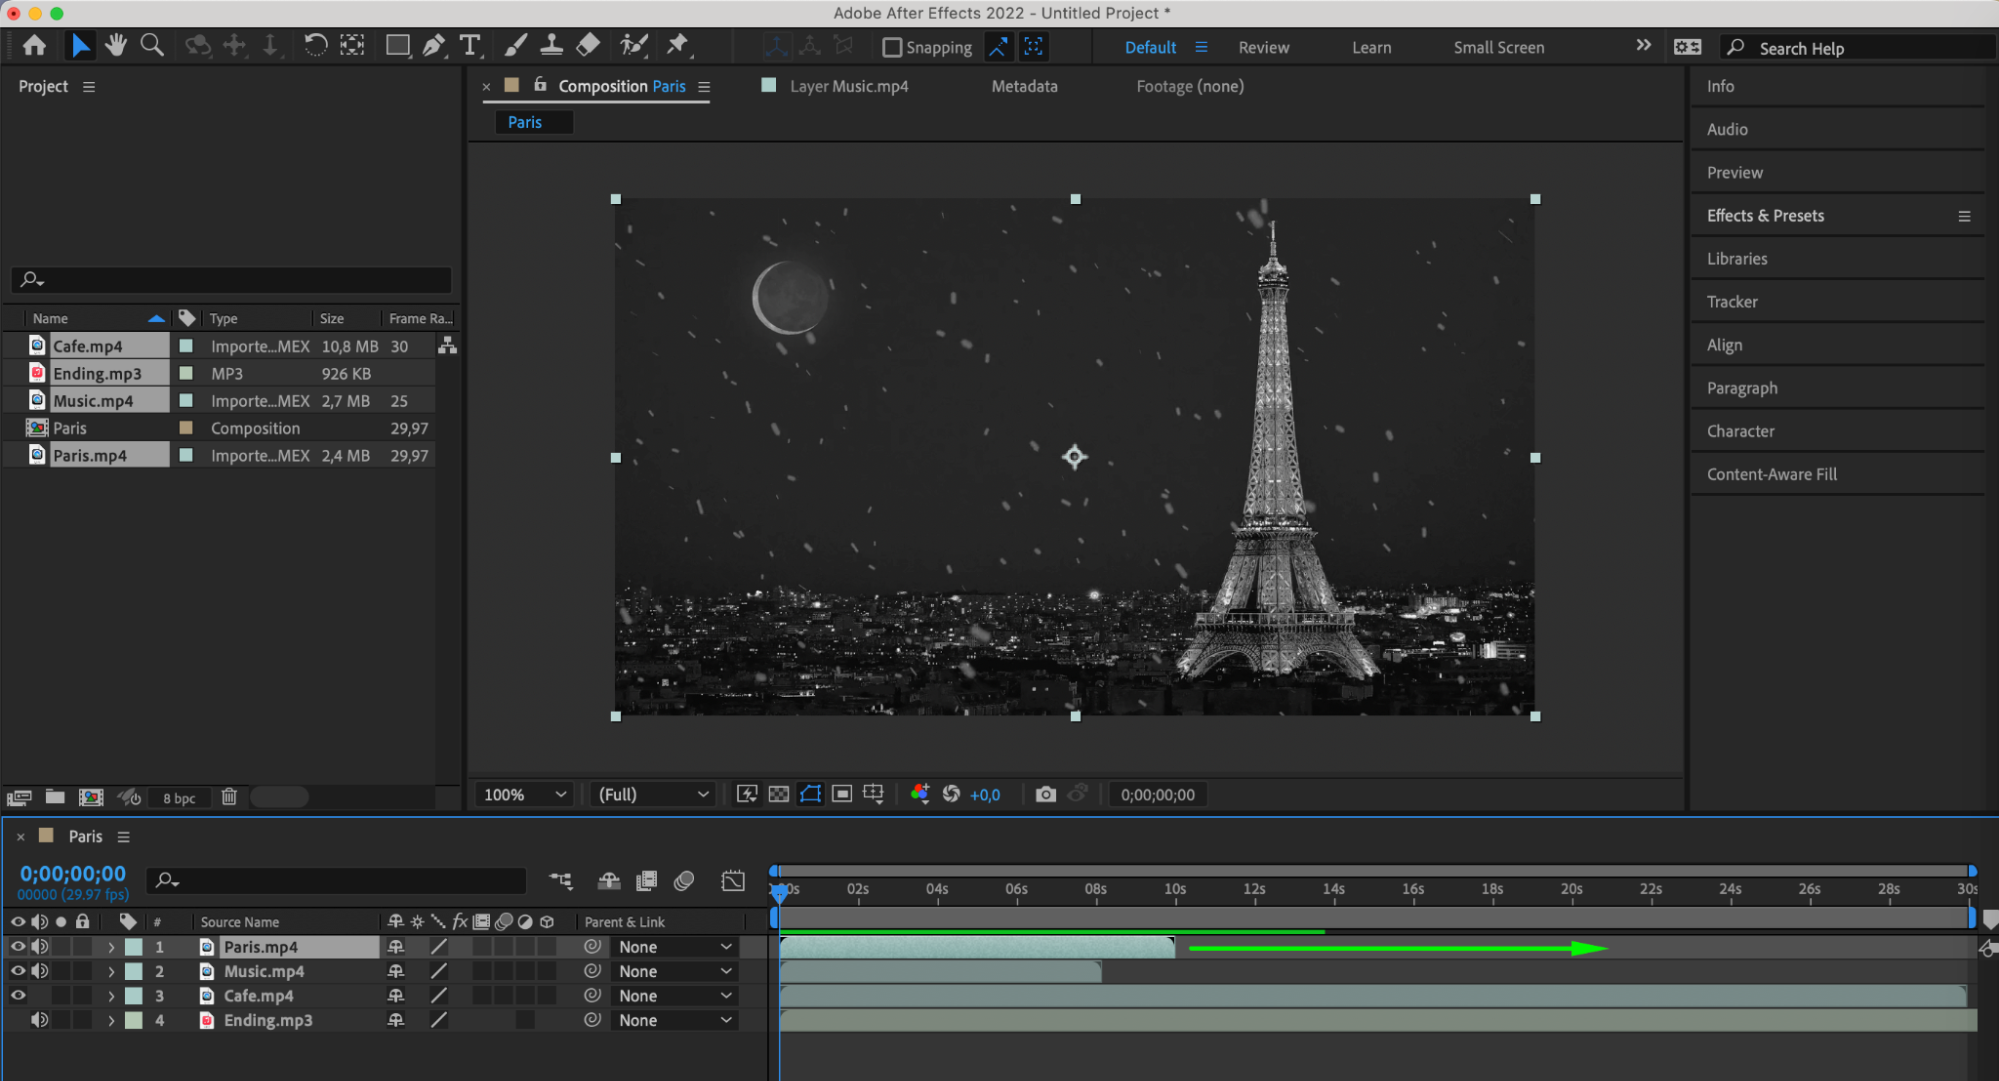
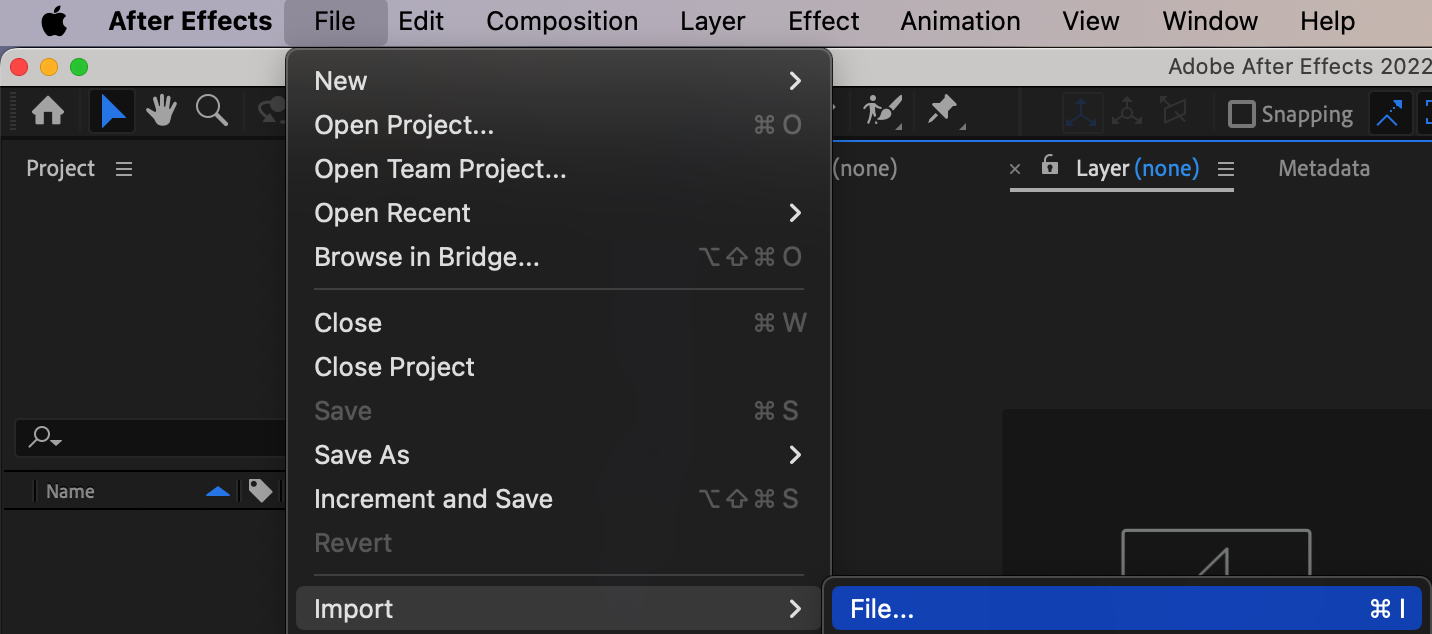
Import your music and video footage into After Effects.
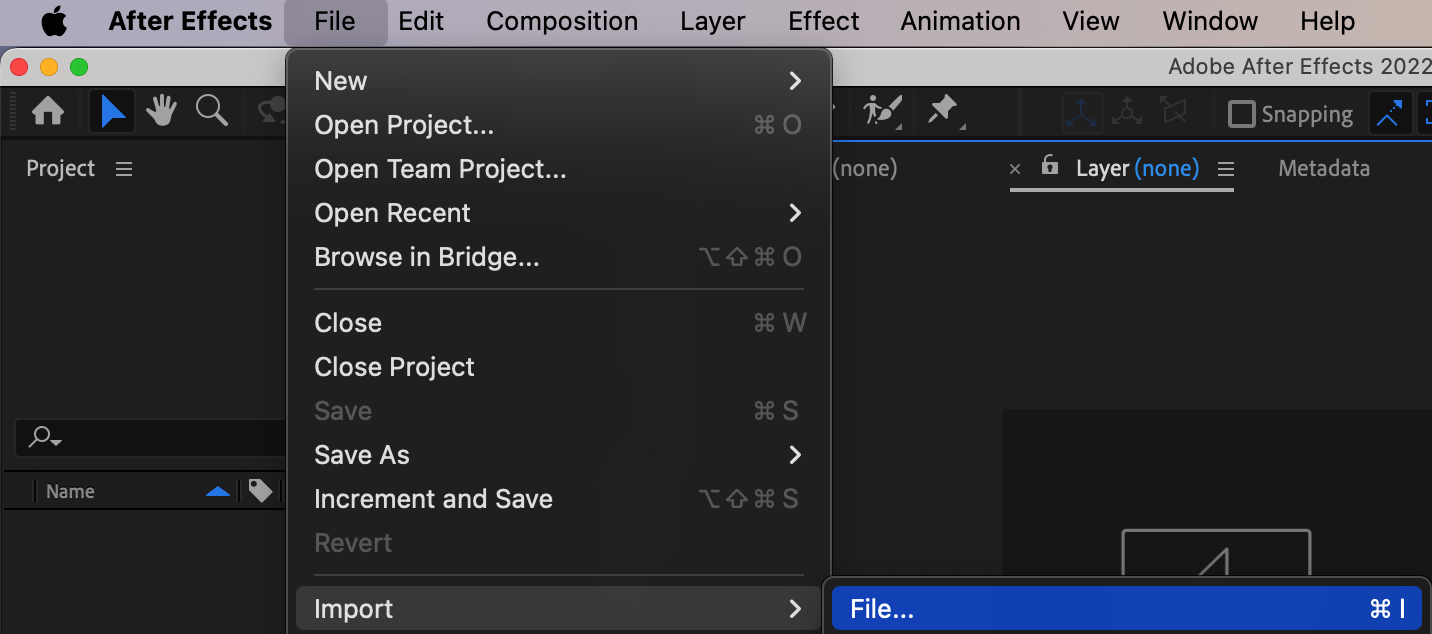
2. Creating the Composition:
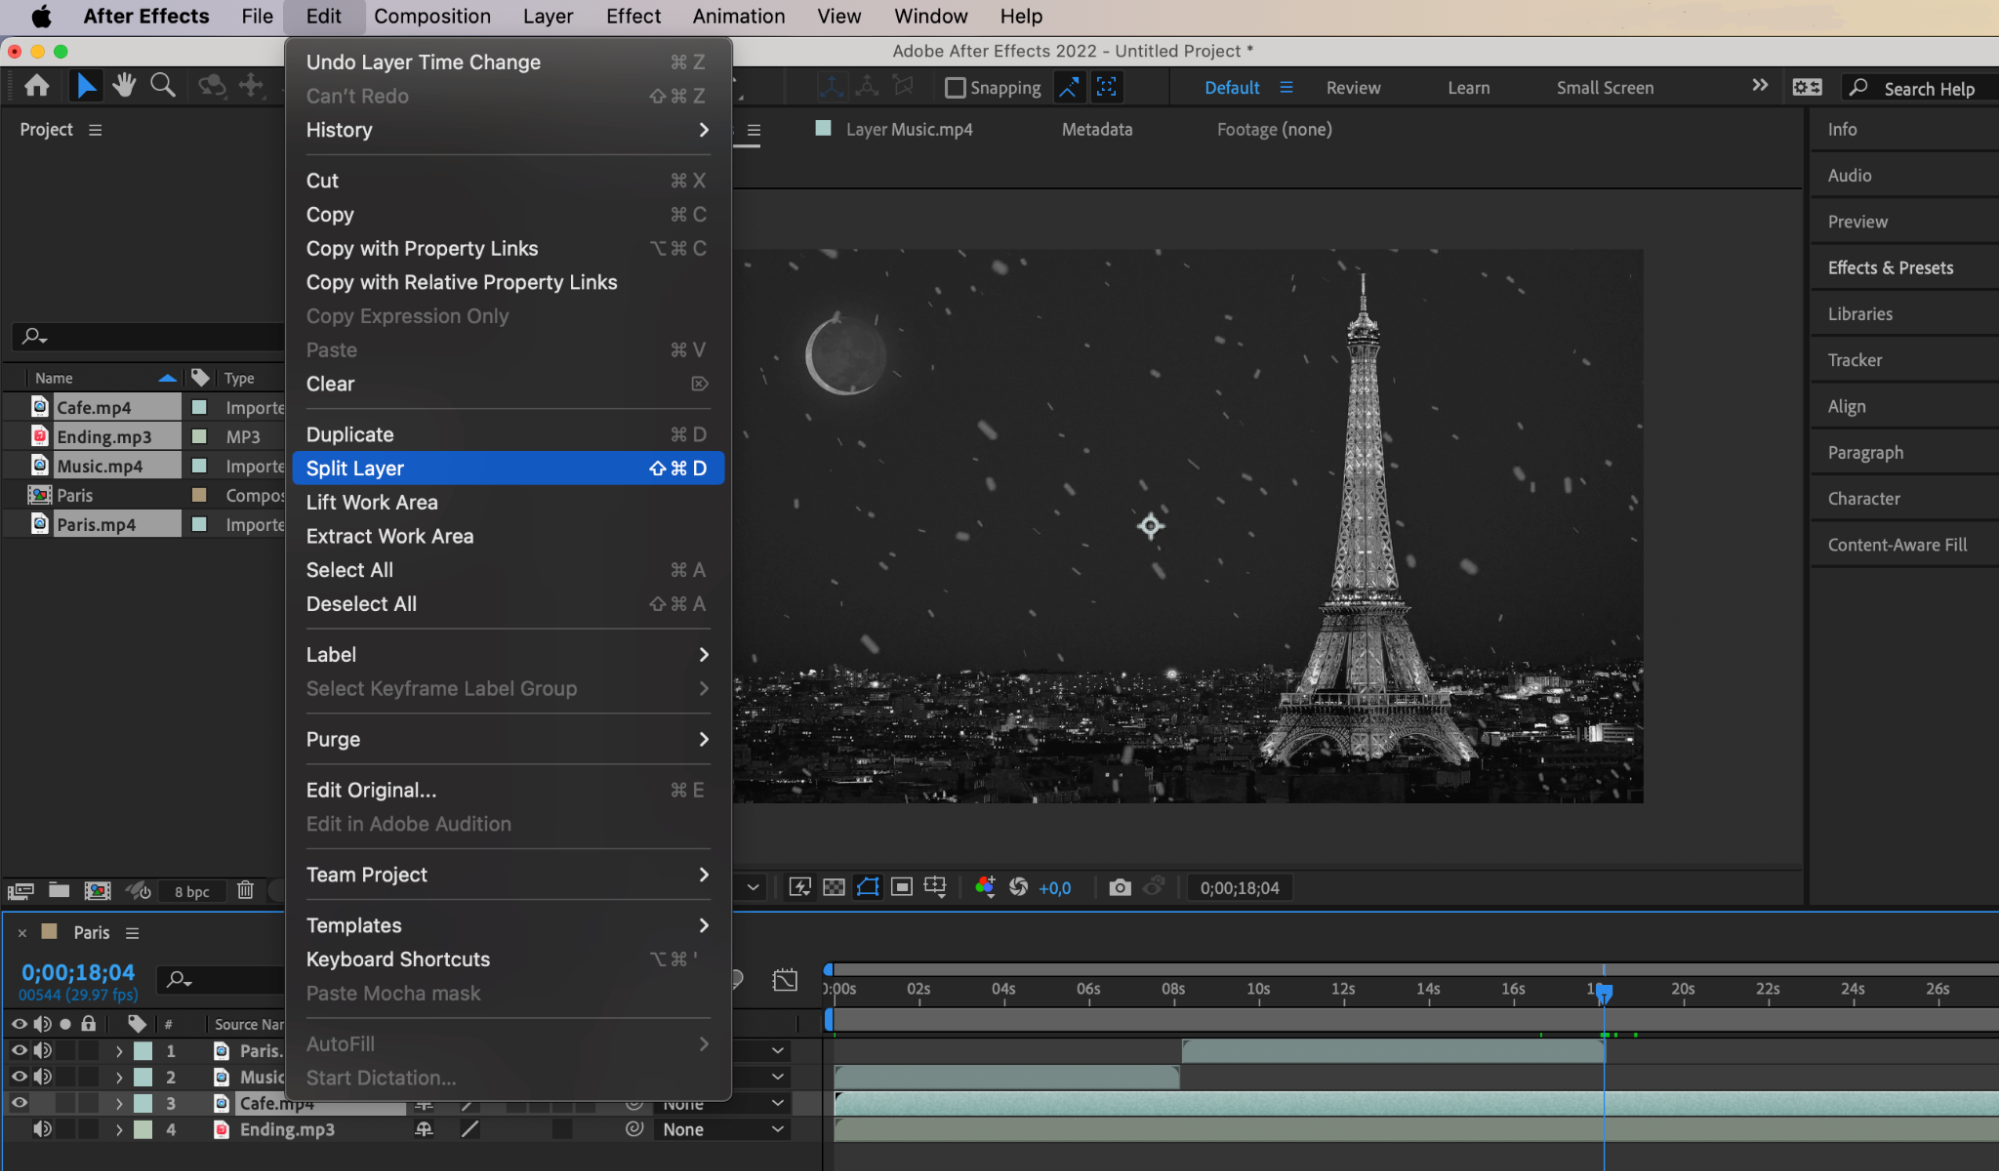
Create a new composition and adjust its size and duration to fit your track. Arrange your imported files on the composition panel and begin the editing process, using shortcuts like “Ctrl/Cmd + Shift + D” for split layer and “Delete” for clear.
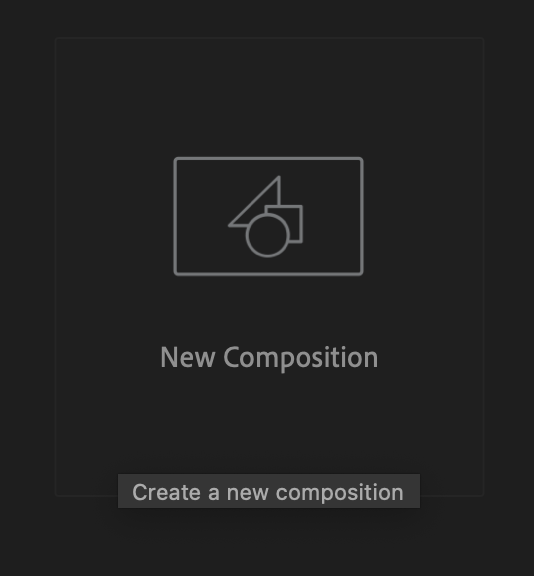
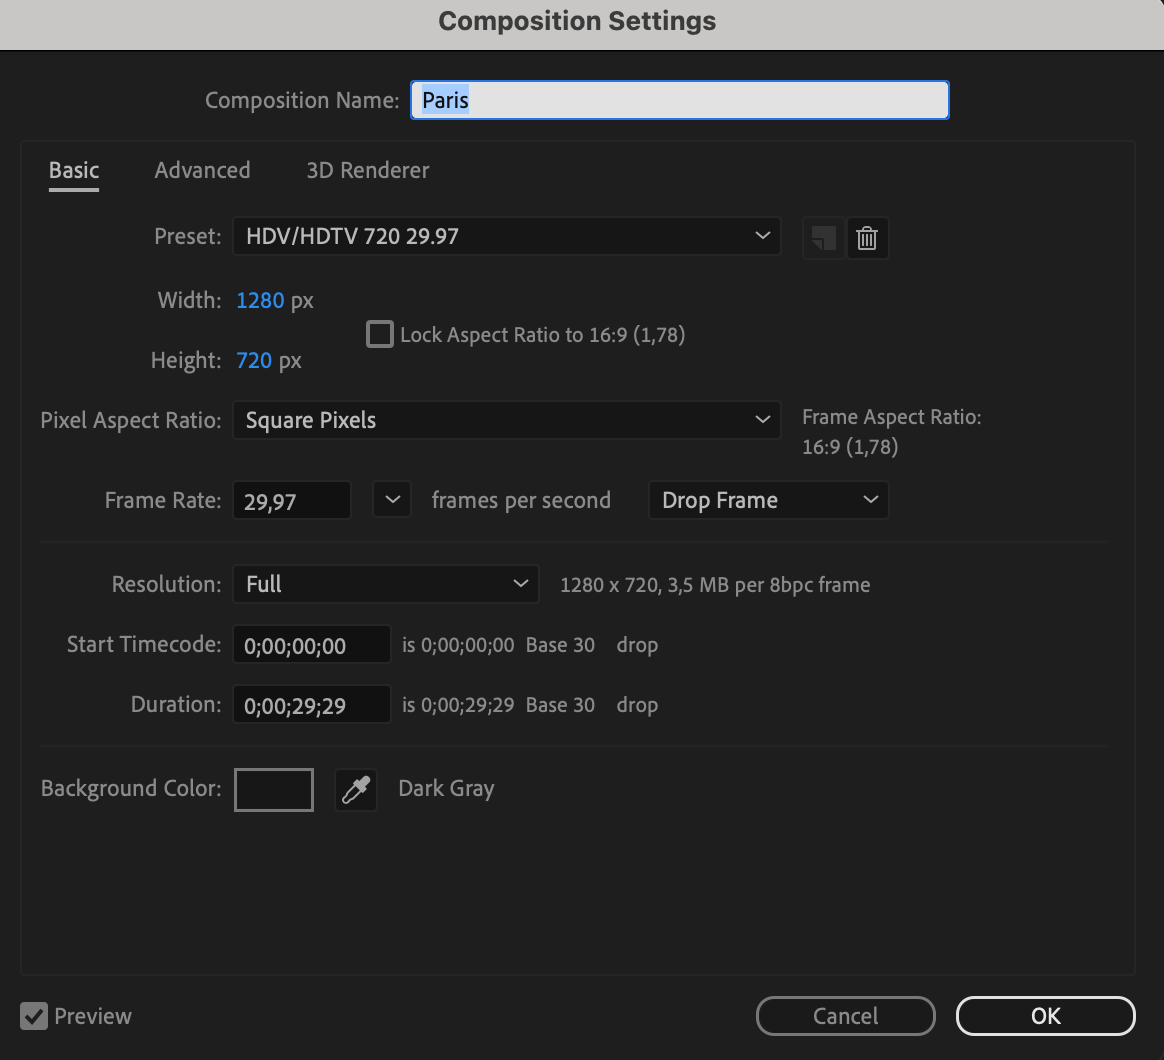
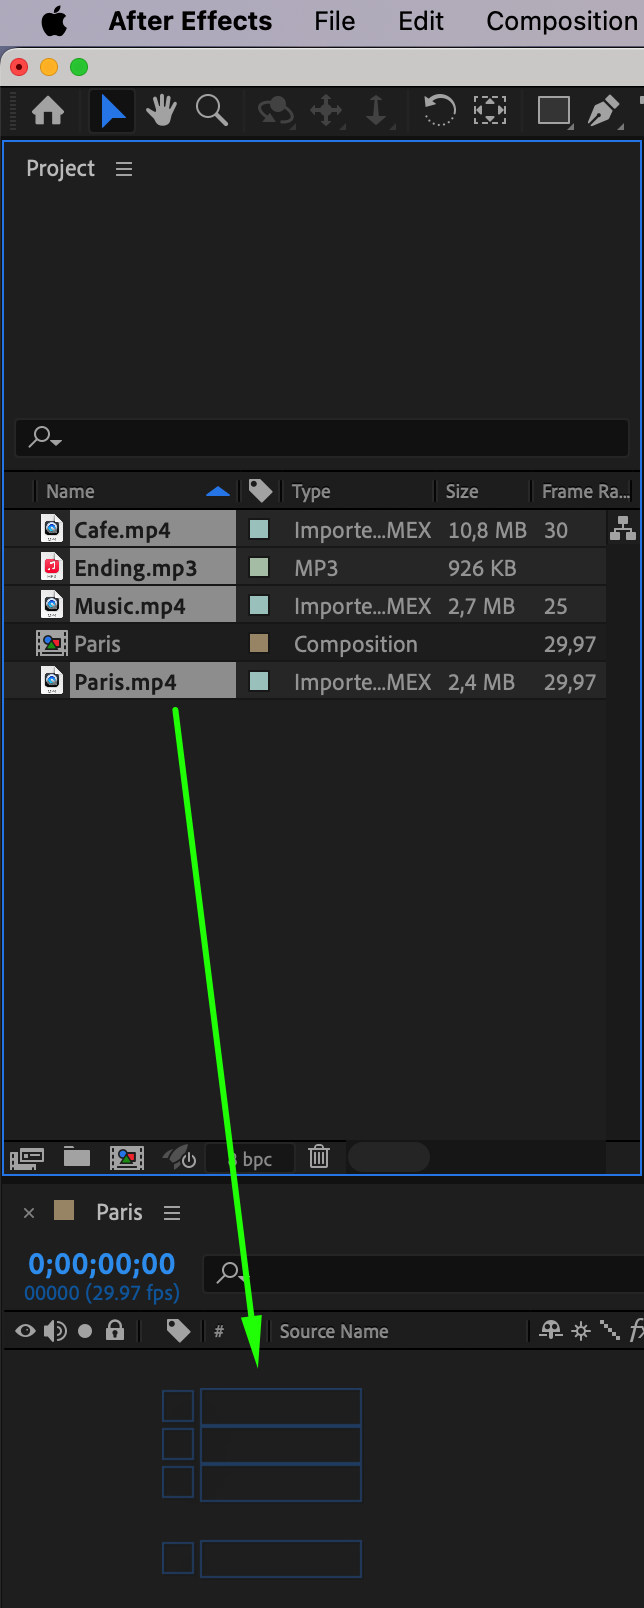


3. Adding Effects:
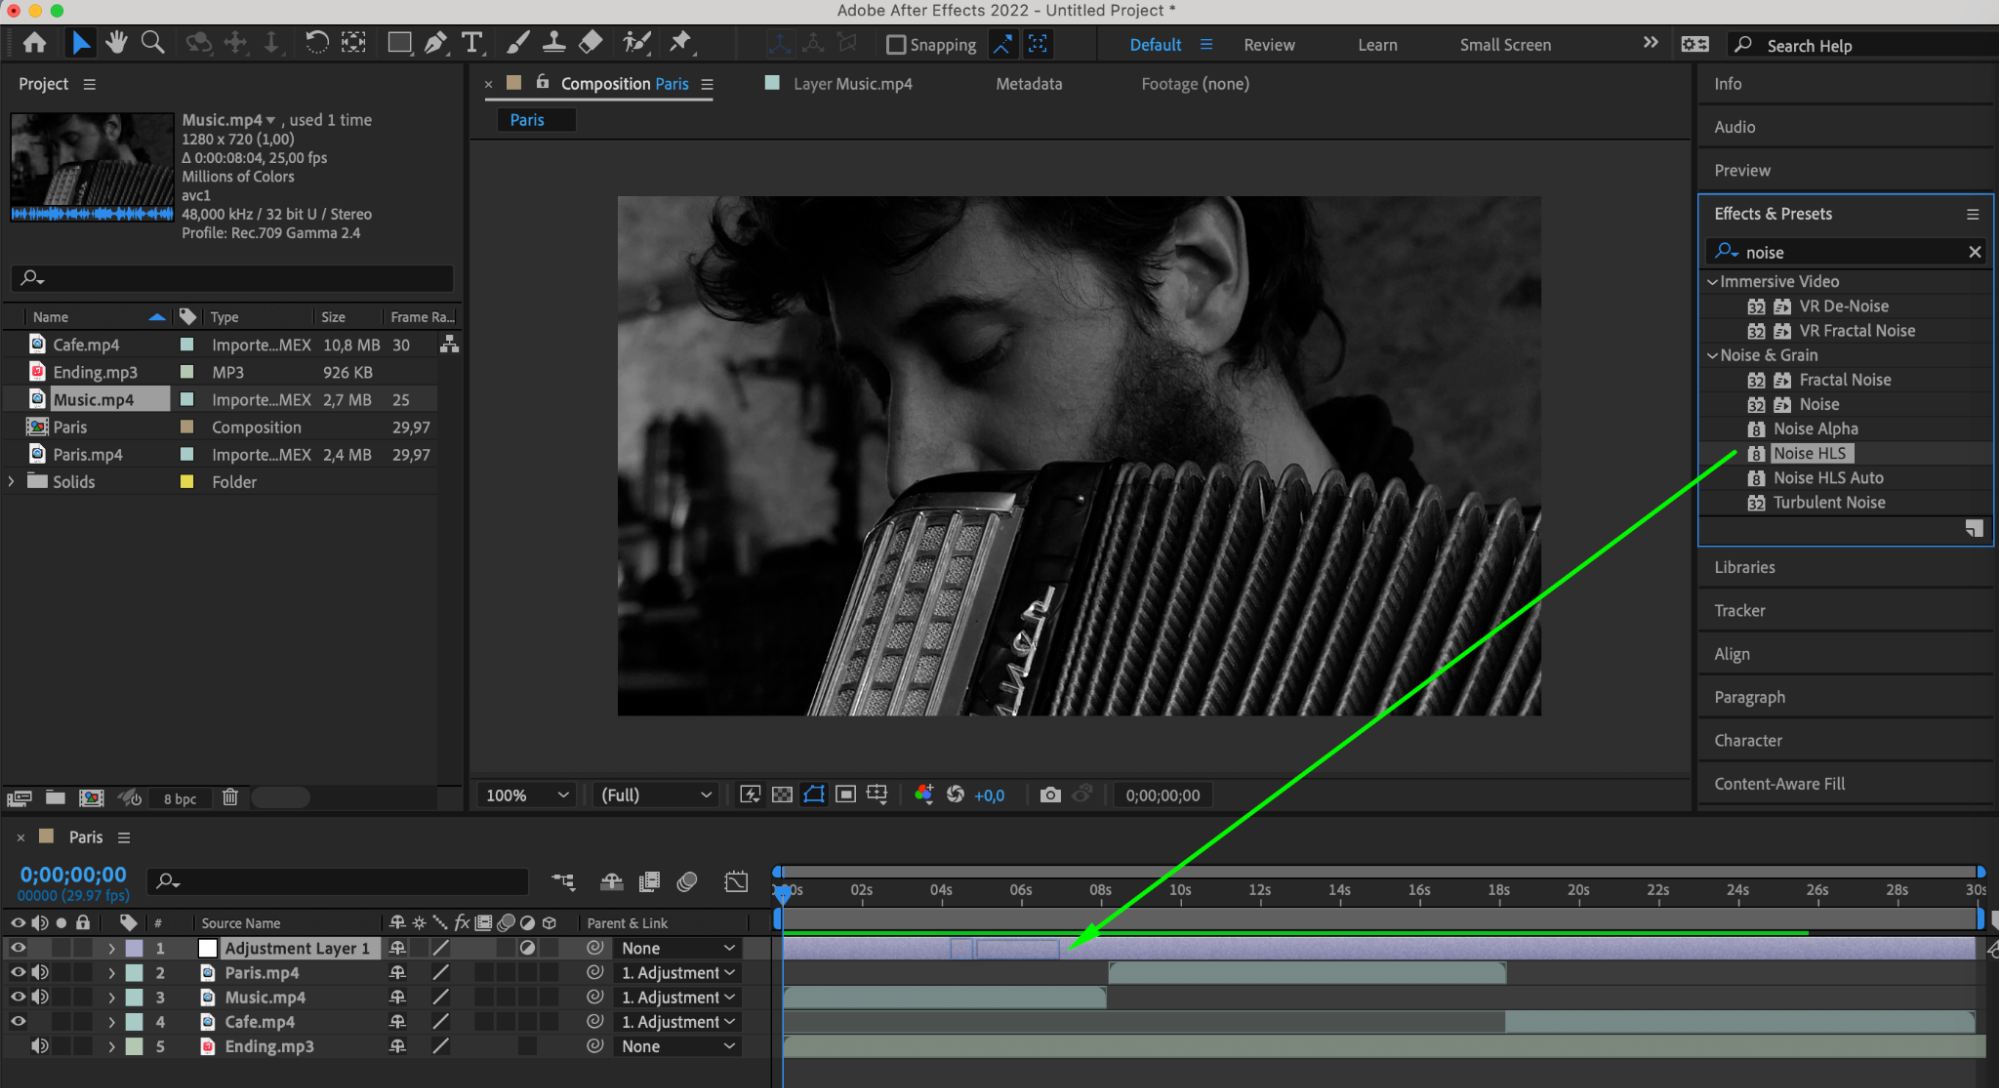
Before applying effects, create an Adjustment Layer. This serves as a central hub for applying effects uniformly across all video layers. Make all video layers children of this Adjustment Layer to ensure consistent application of effects.


Utilize After Effects tools and effects creatively to imbue your video with a unique style and mood. Experiment with various techniques such as color correction, transitions, text animations, and other effects to achieve the desired visual impact and narrative cohesion.
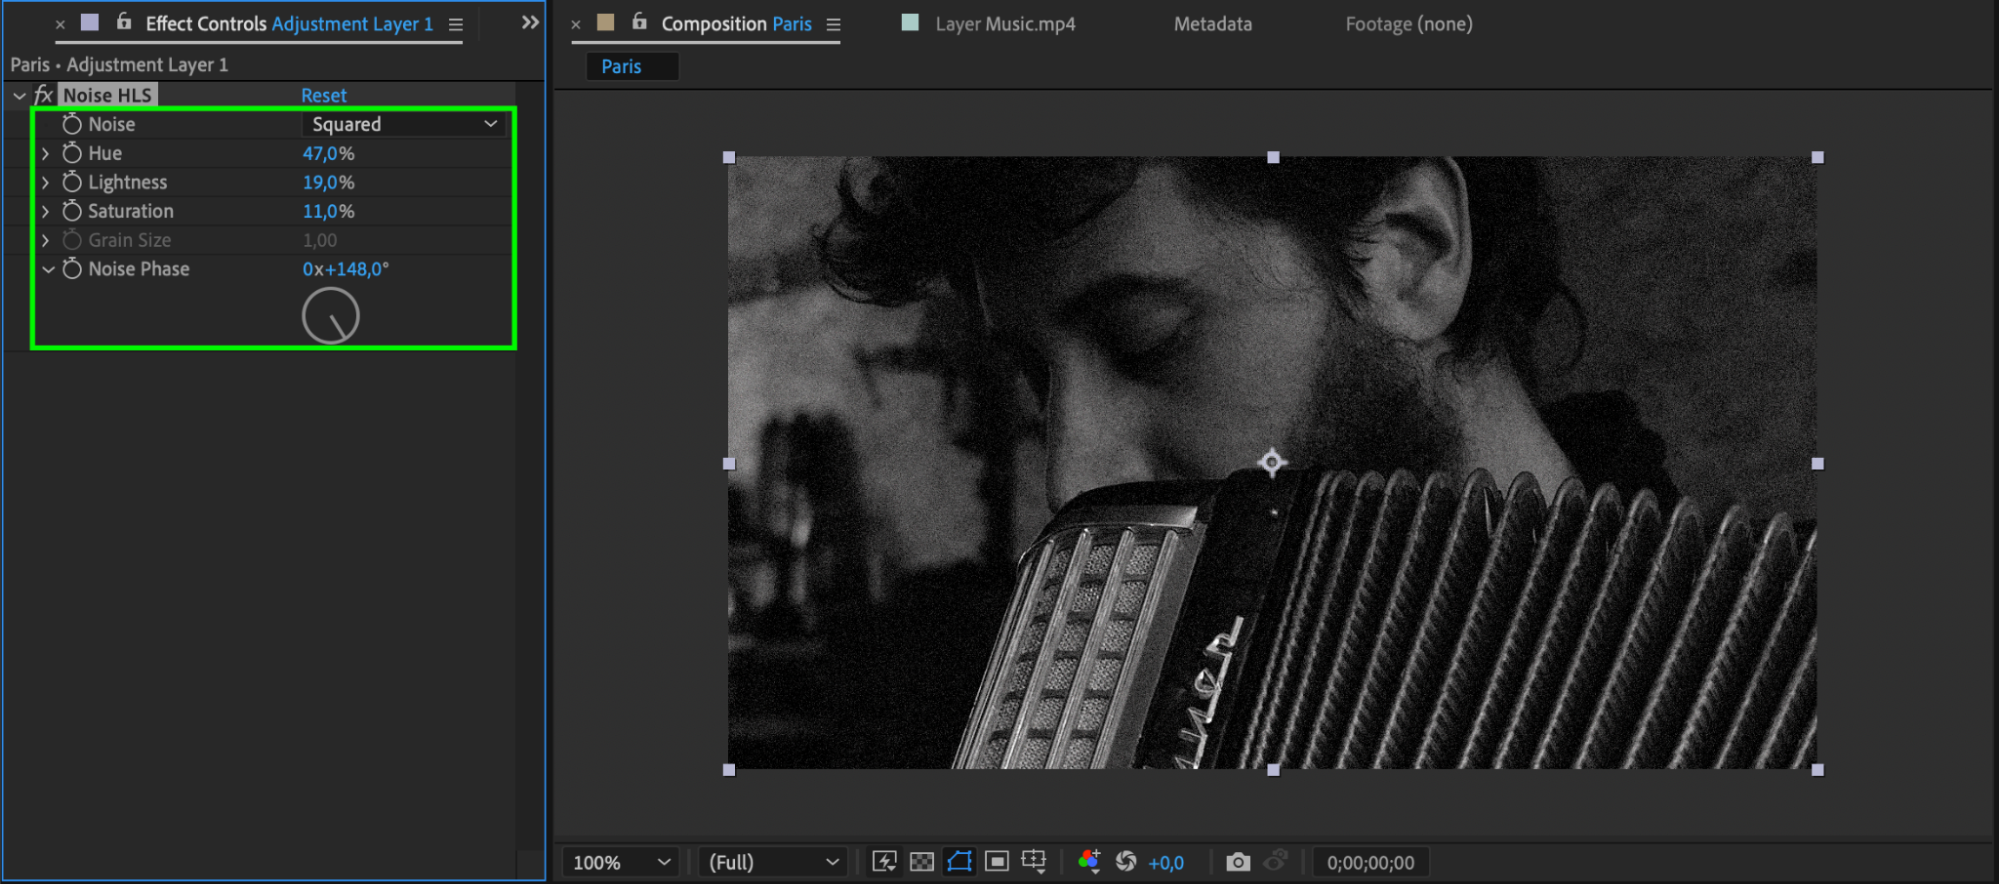
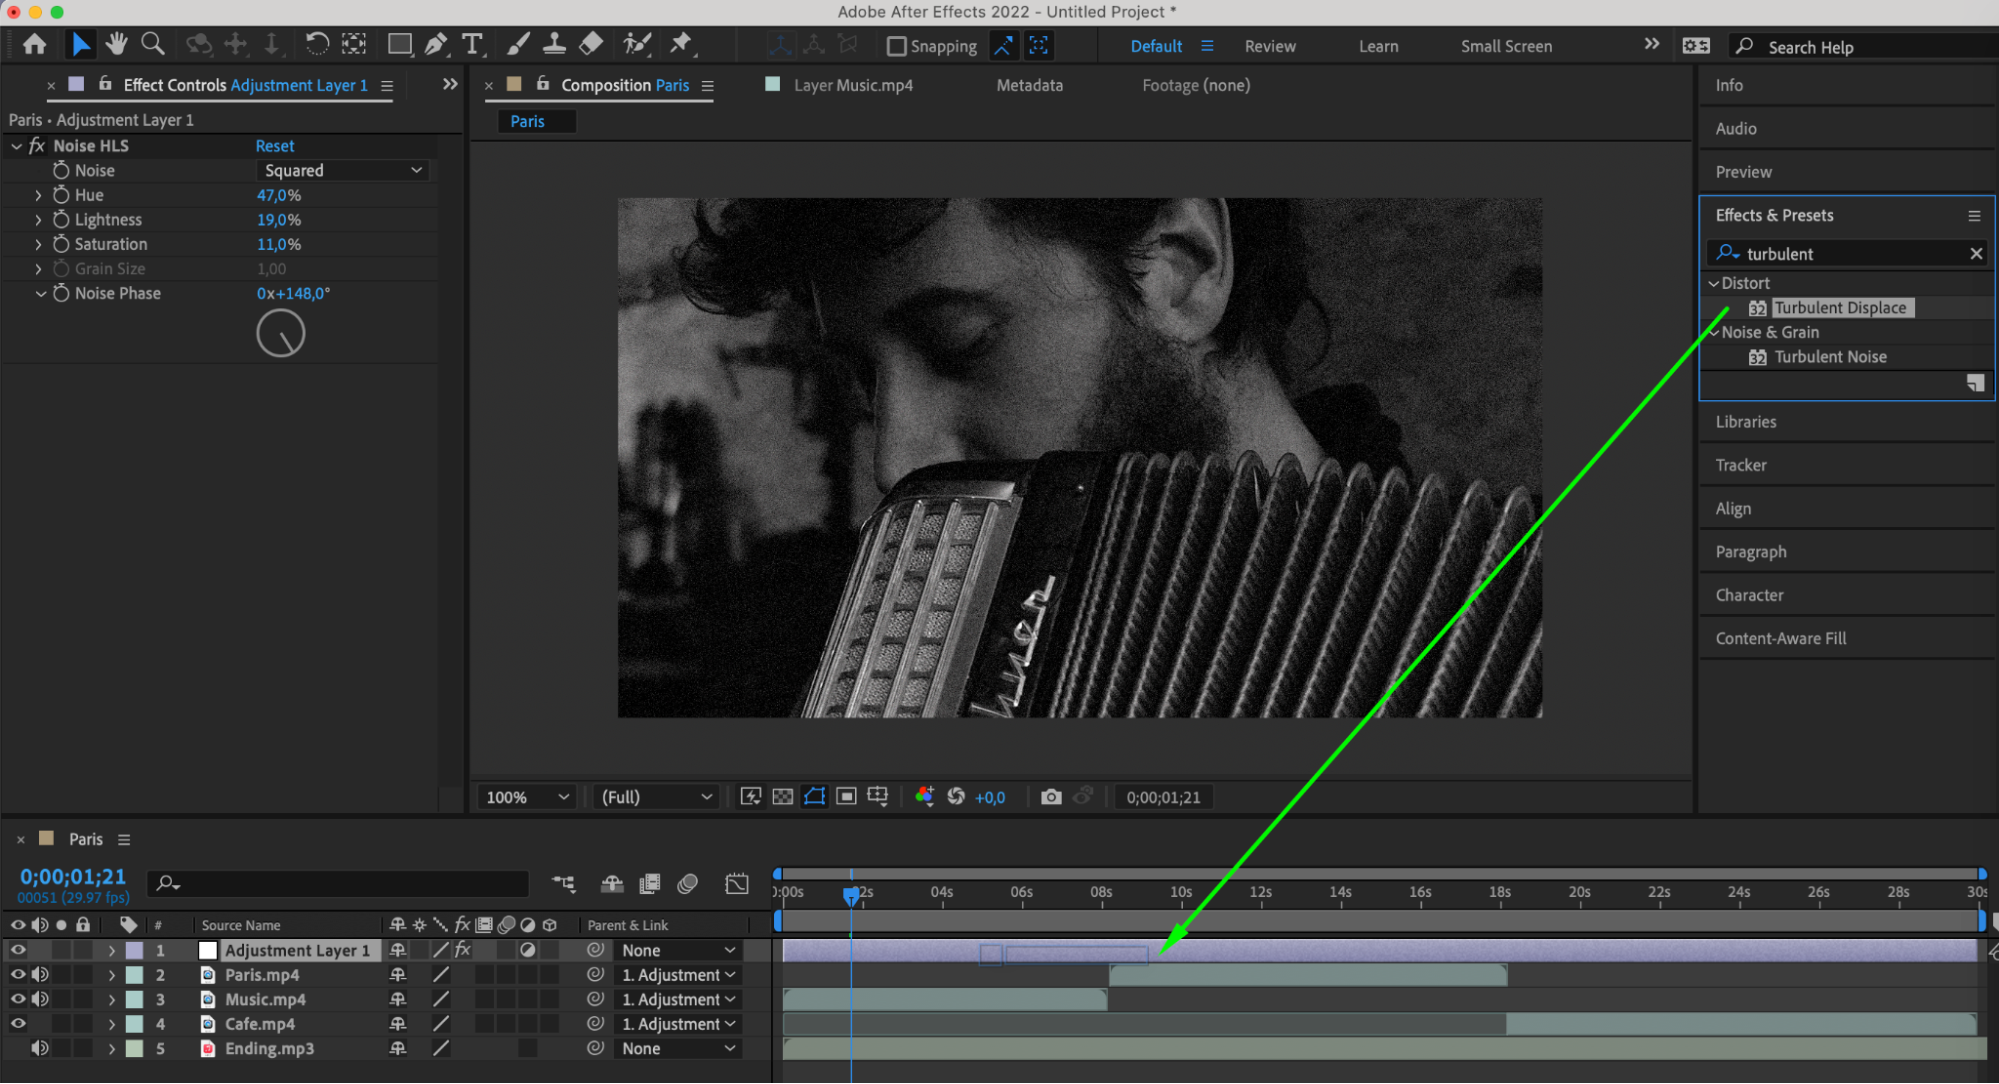
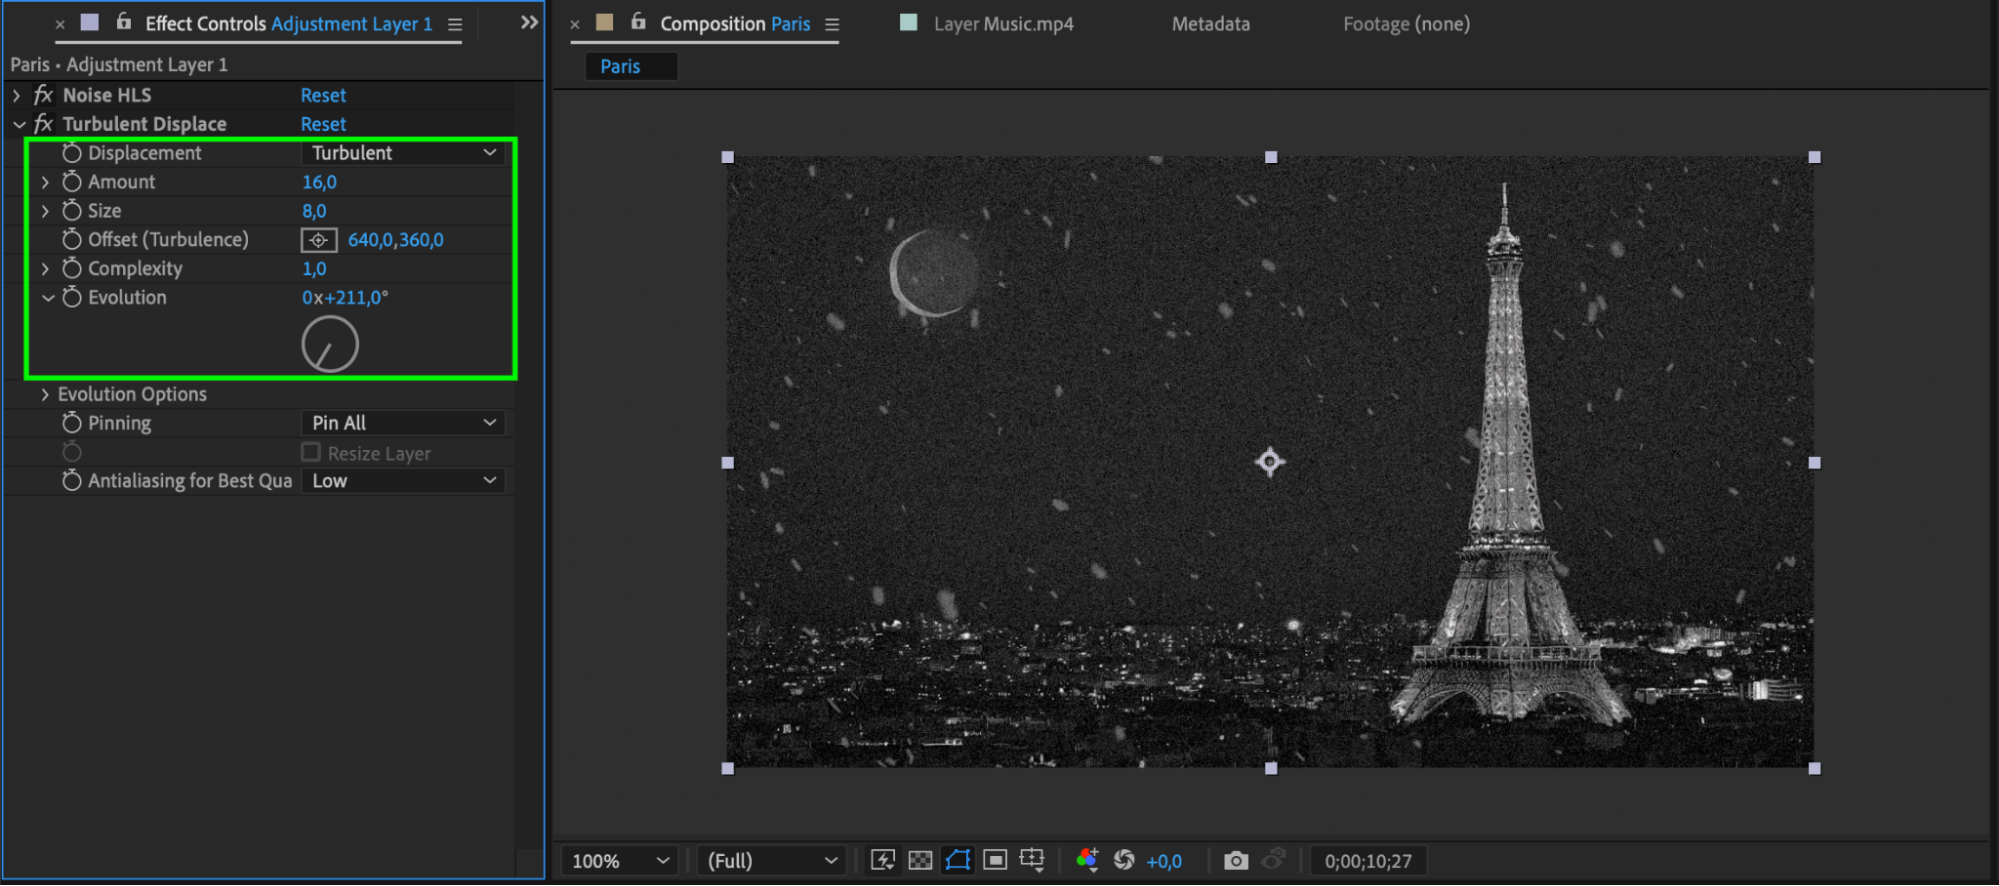
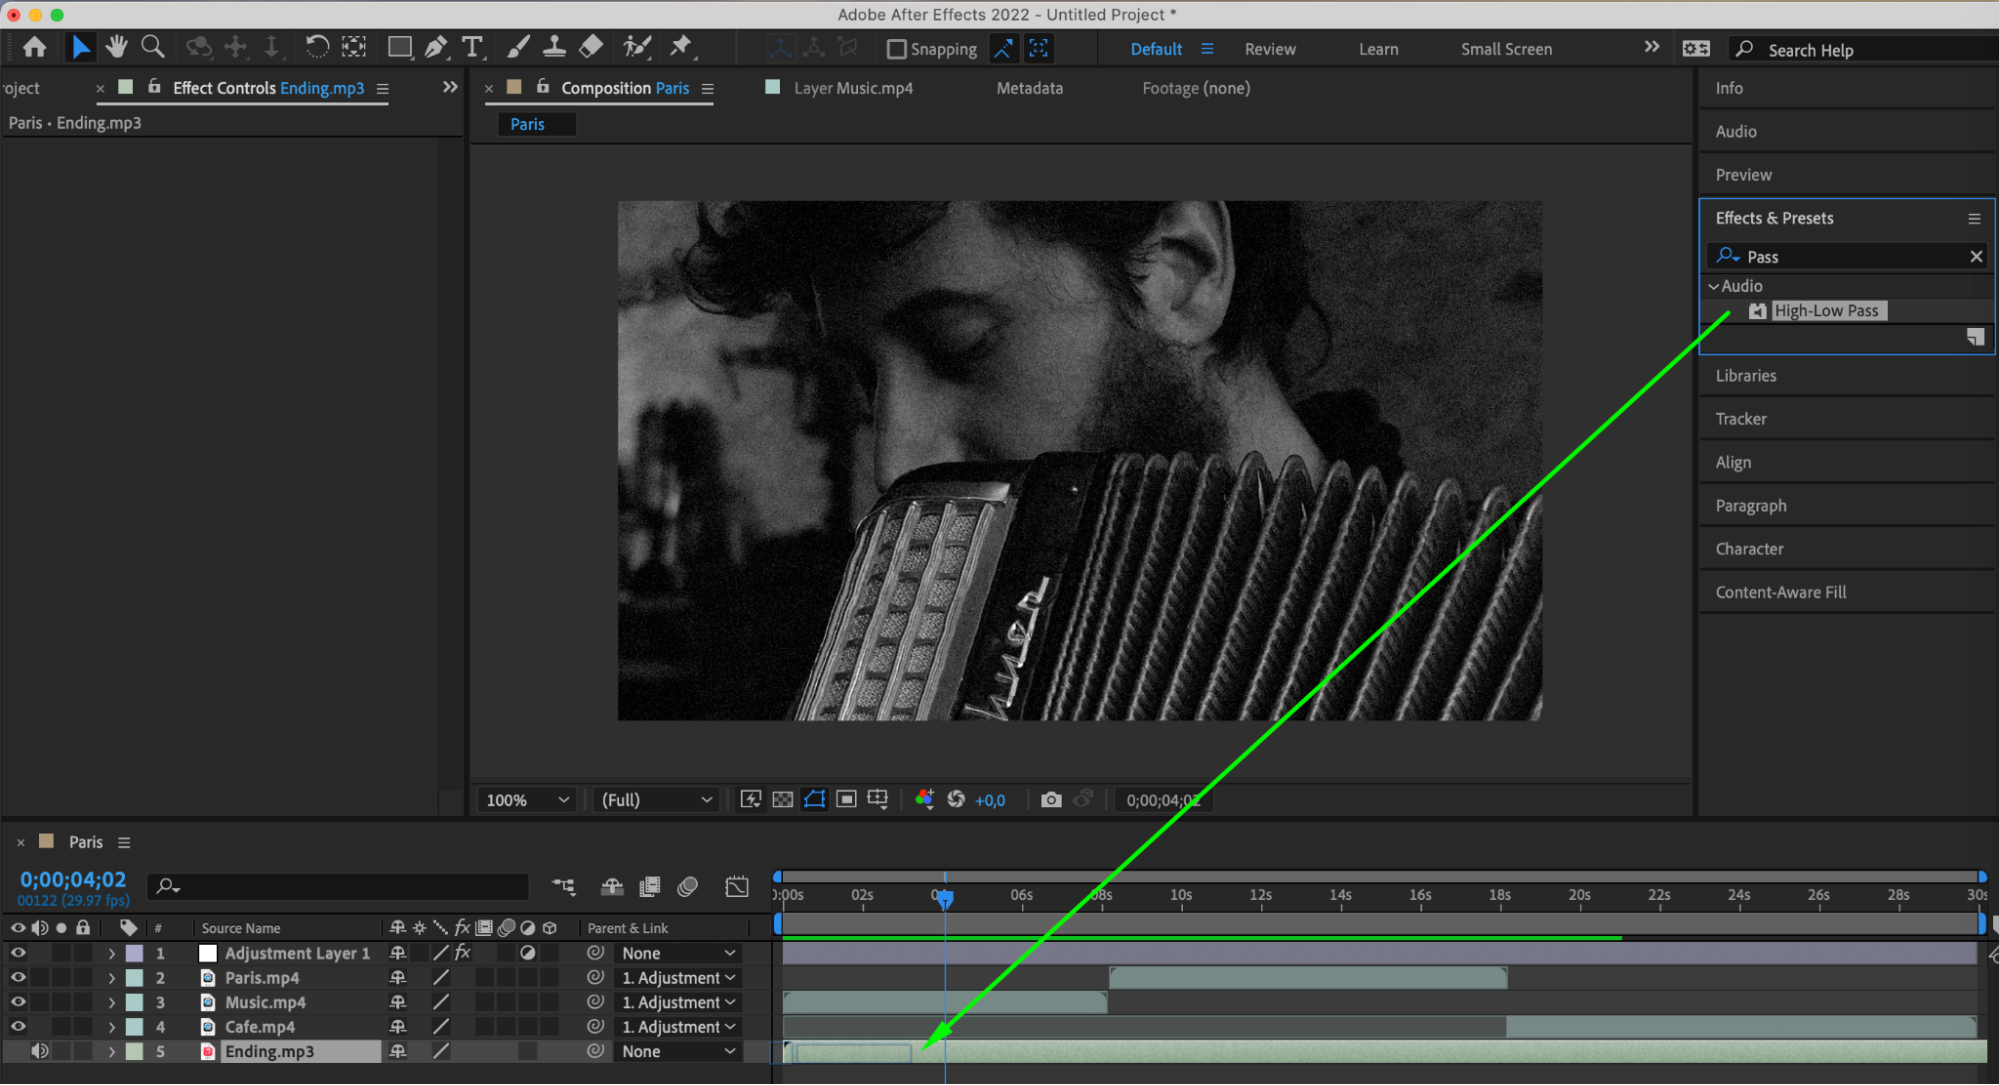
Step 4: Animation:
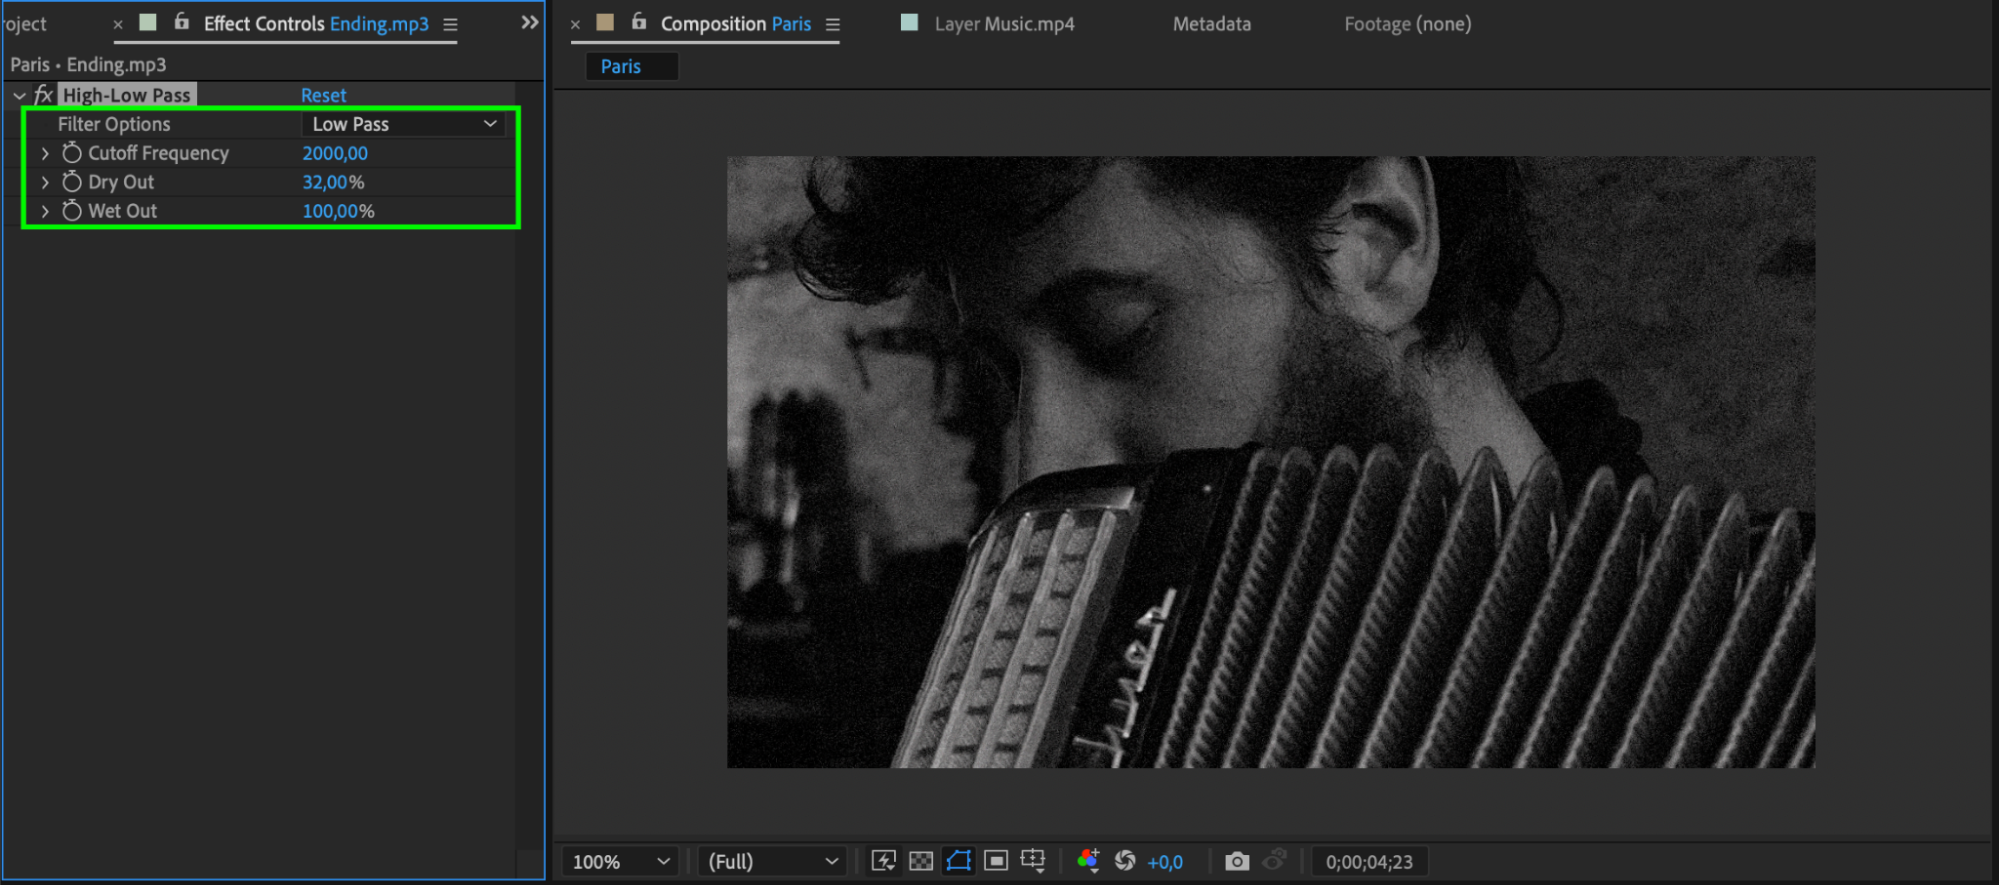
Create animations that synchronize with the rhythm and mood of the music, including text movement, object animation, or camera movement. Utilize keyframes to automate Audio Levels adjustment for the audio layer. This allows you to gradually increase or decrease the volume, aligning it with the dynamics of the music.


Sync animations with the music by using the “LL” shortcut for waveform display, allowing you to visually match the animation to the music’s beats and tempo. Adjust various parameters of video layers to correspond with the musical movement, ensuring seamless integration between visuals and audio.

Step 5: Adding Text and Graphics:
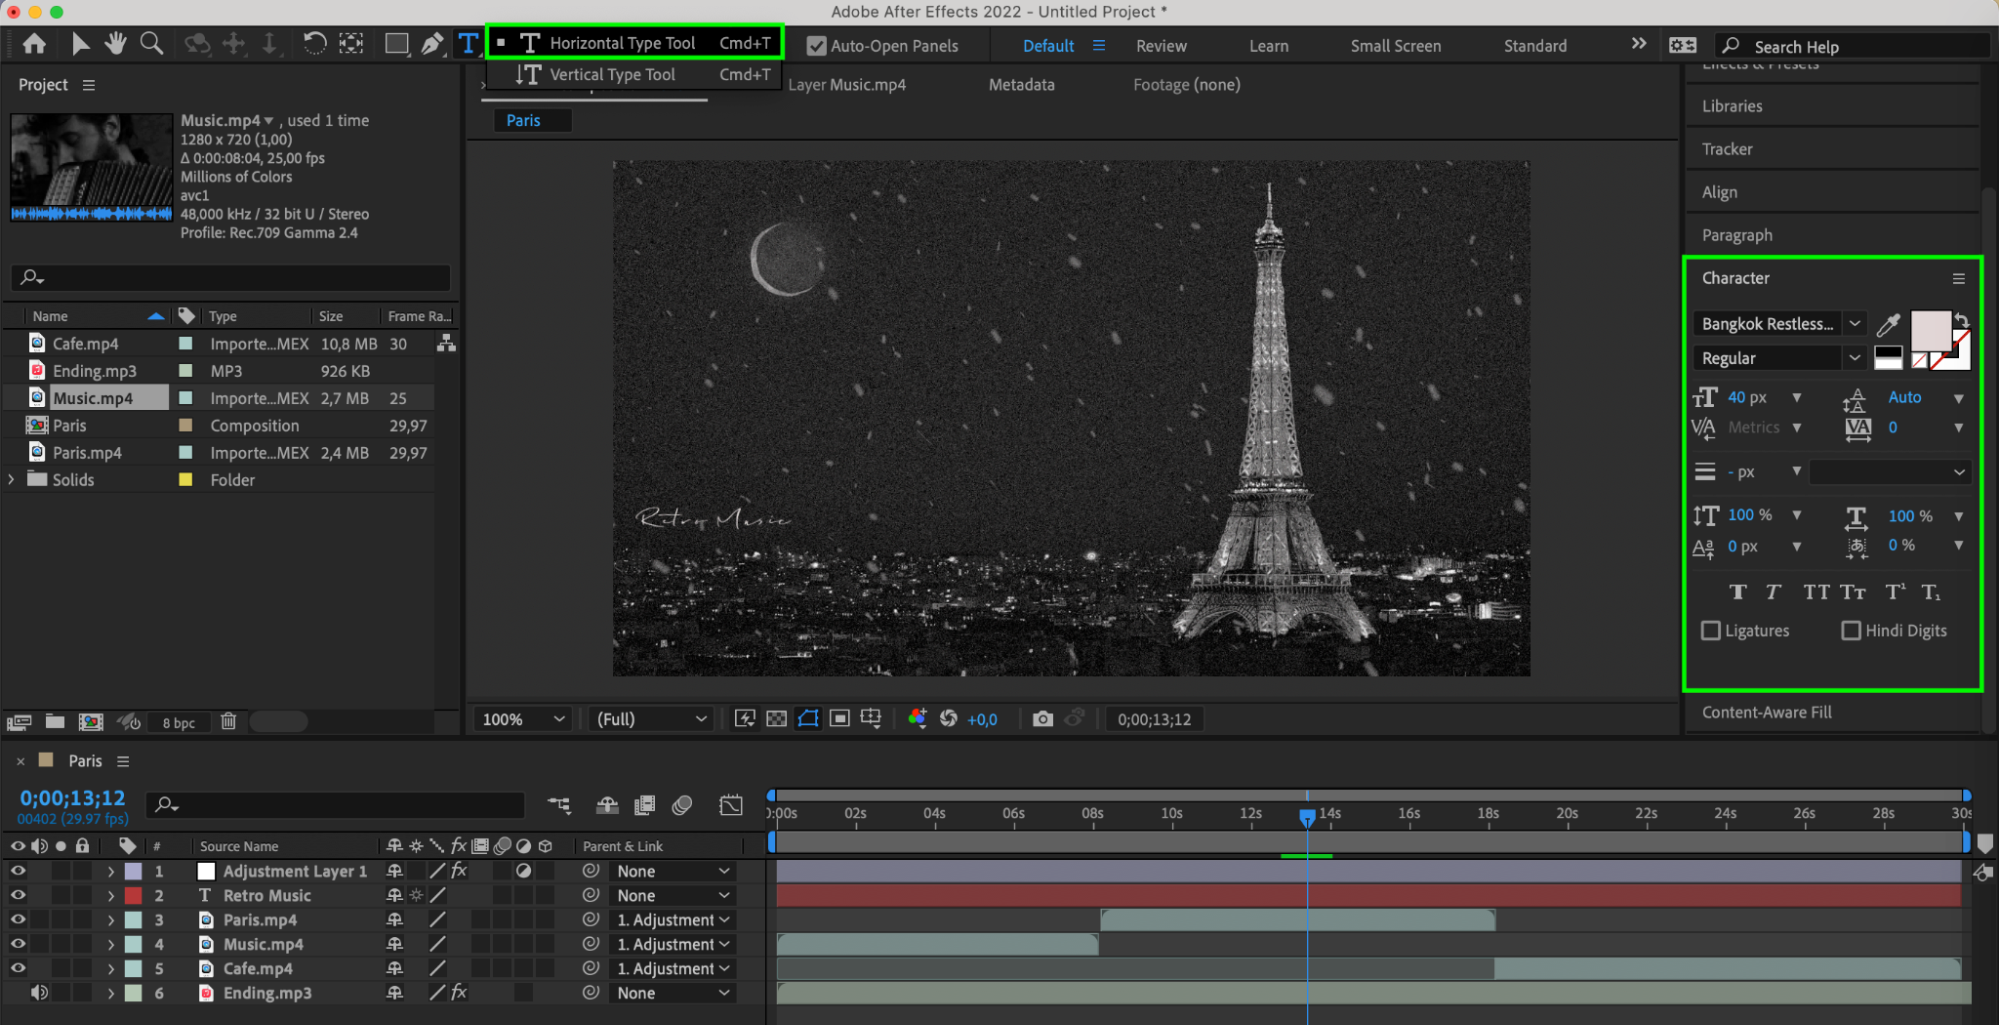
Incorporate text using After Effects tools to emphasize key moments in your music or enhance the storyline. Insert graphics or art elements that align with your vision for the video.
Step 6: Final Touches and Rendering:
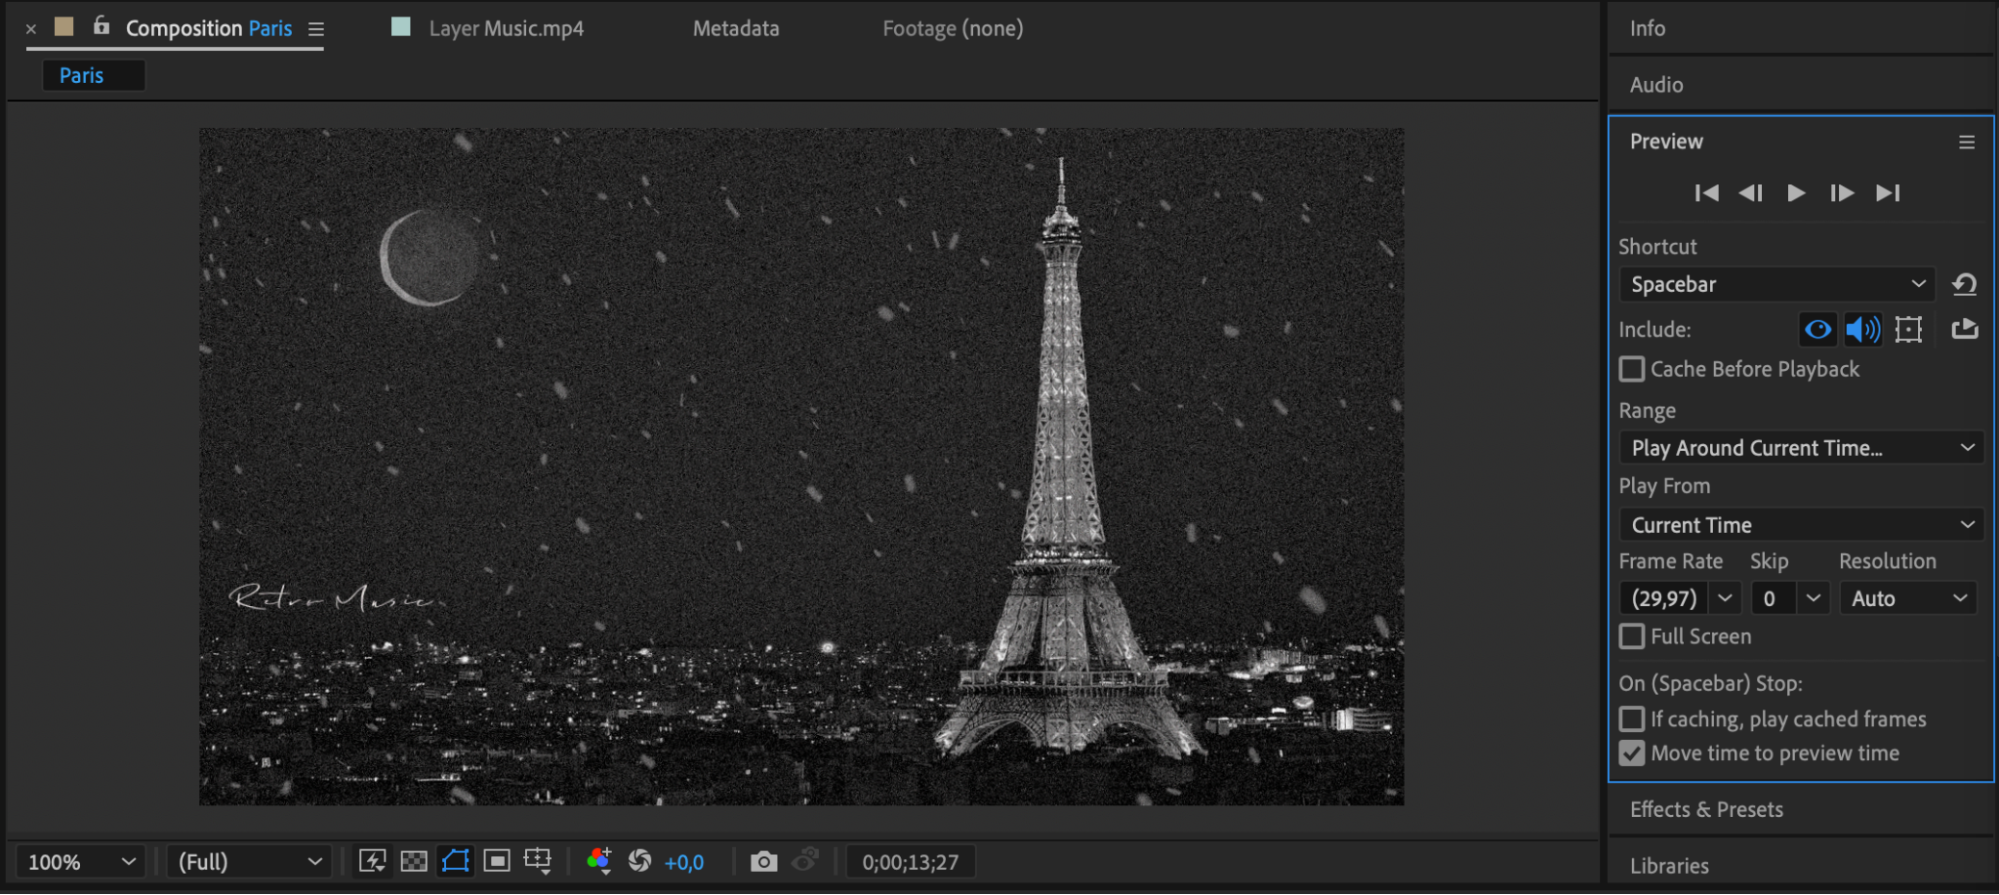
Review the video to ensure it looks and sounds as intended.
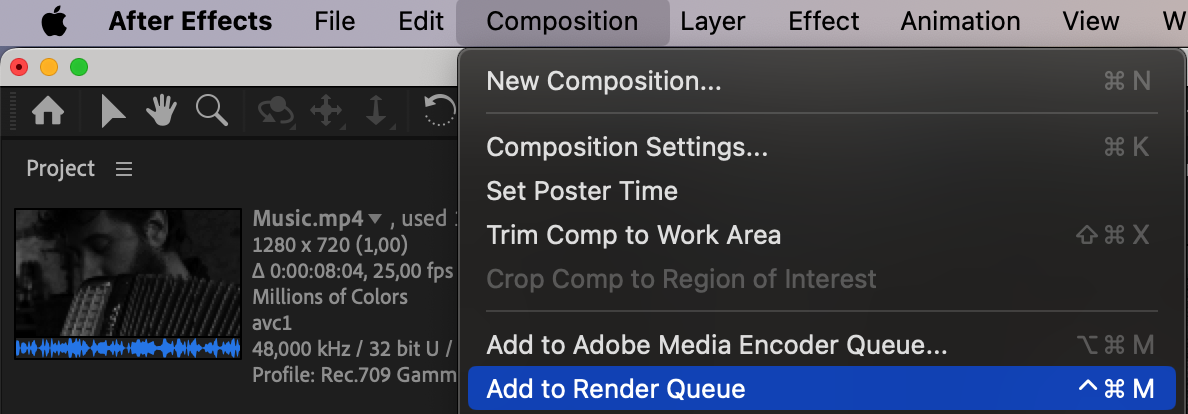
Render the final video in a format suitable for your intended use (e.g., MP4 for online publishing).

Step 7: Publishing and Distribution:
Share your music video on platforms like YouTube, Vimeo, or social media to reach your audience.
These steps outline the process of creating a music video in After Effects. Don’t hesitate to experiment and find your own style!
Conclusion
By embracing the creative possibilities of After Effects, experimenting with different techniques, and staying open to collaboration and feedback, you can create a music video that captivates and inspires audiences worldwide. Uphold ethical and legal standards in your creative endeavors, prioritize transparency and respect in your collaborations, and showcase your unique voice and artistic vision through captivating visuals and storytelling.


