How to Create a Realistic Nuke Explosion in After Effects
Introduction to Making a Nuke Explosion Effect in After Effects
Are you ready to add some serious impact to your videos or motion graphics? In this tutorial, we’ll show you how to create a realistic nuclear explosion effect in Adobe After Effects using the AEJuice plugin and animation techniques. By the end, you’ll have a mind-blowing nuke effect that will leave your audience in awe.
Let’s get started!
Step 1: Import Your Video
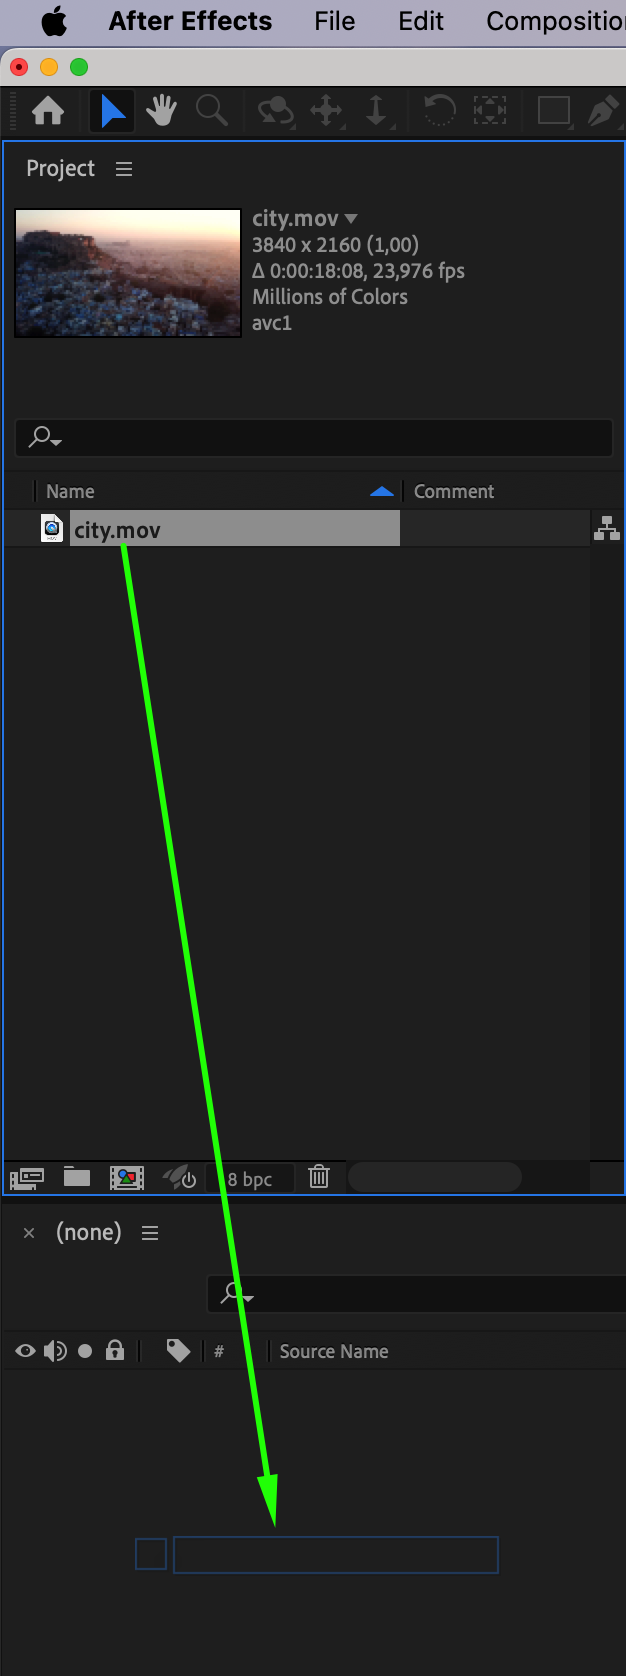
First, import your video footage into After Effects. Go to File > Import > File and select your video. Once it appears in the Project panel, drag it onto the Timeline panel. This will automatically create a composition that matches the video’s settings.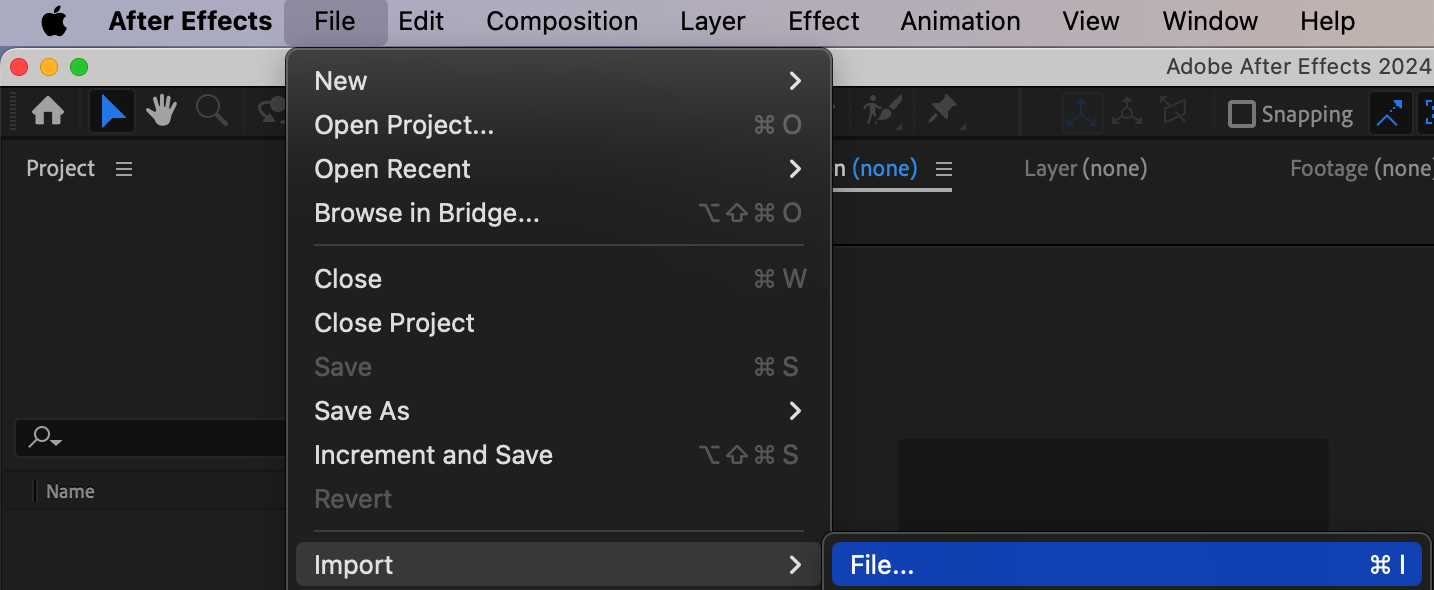
 Step 2: Open AEJuice Pack Manager 4
Navigate to the Window menu and choose AEJuice Pack Manager 4. This will open the AEJuice interface, where you can access various effect packs, including the ones you need for the nuke effect.
Step 3: Download the Warzone Pack
In AEJuice Pack Manager 4, search for the Warzone Pack and click on it. Download the pack by clicking on it. Once downloaded, you will have access to a variety of war-related effects, including explosions and nukes.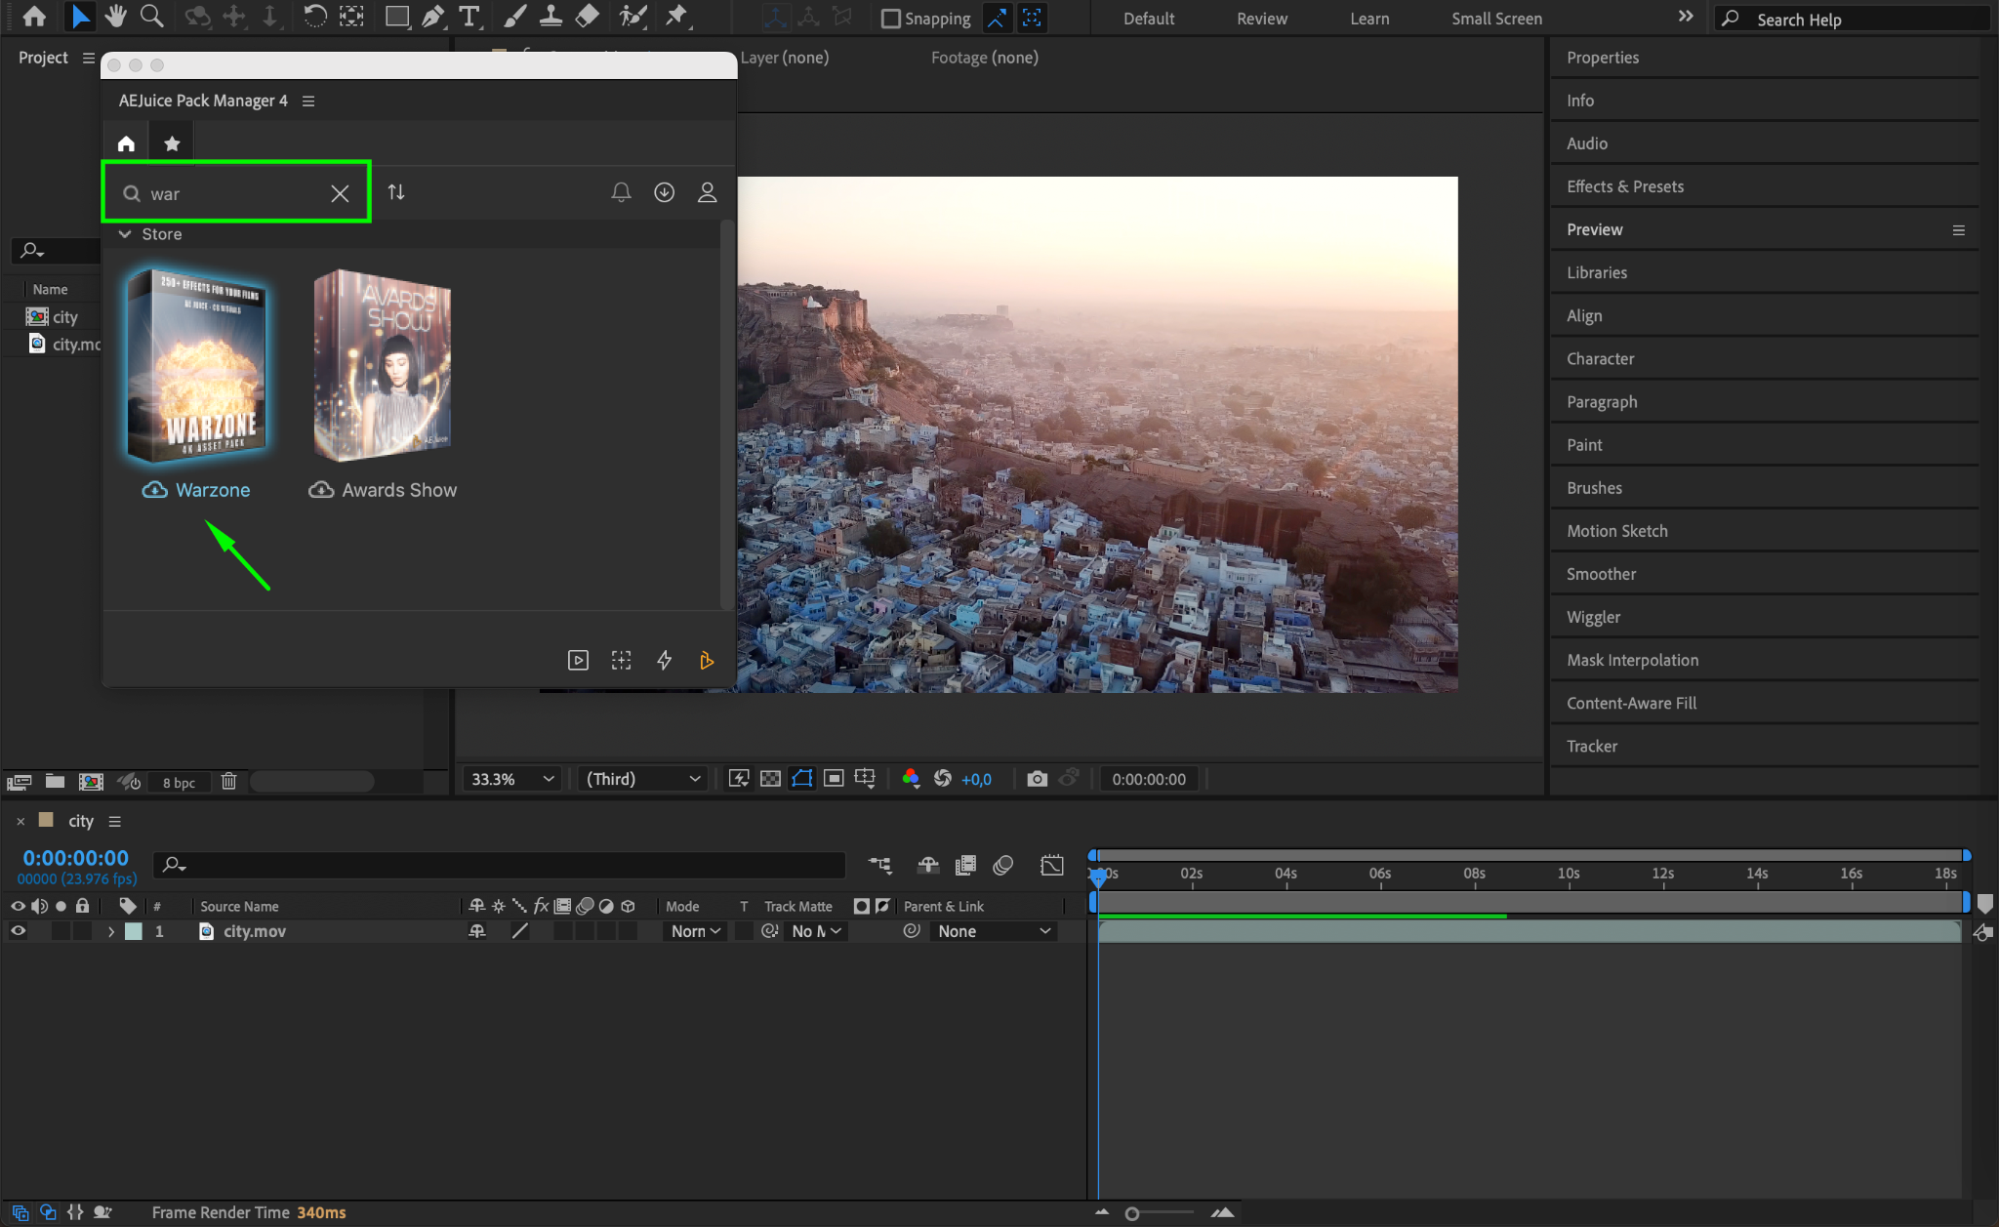
Get 10% off when you subscribe to our newsletter

Step 4: Choose and Download the Nuke Effect
From the Warzone Pack, find the Nuke effect. Download it by clicking the download icon on the effect. After downloading, it will be ready for use in your composition.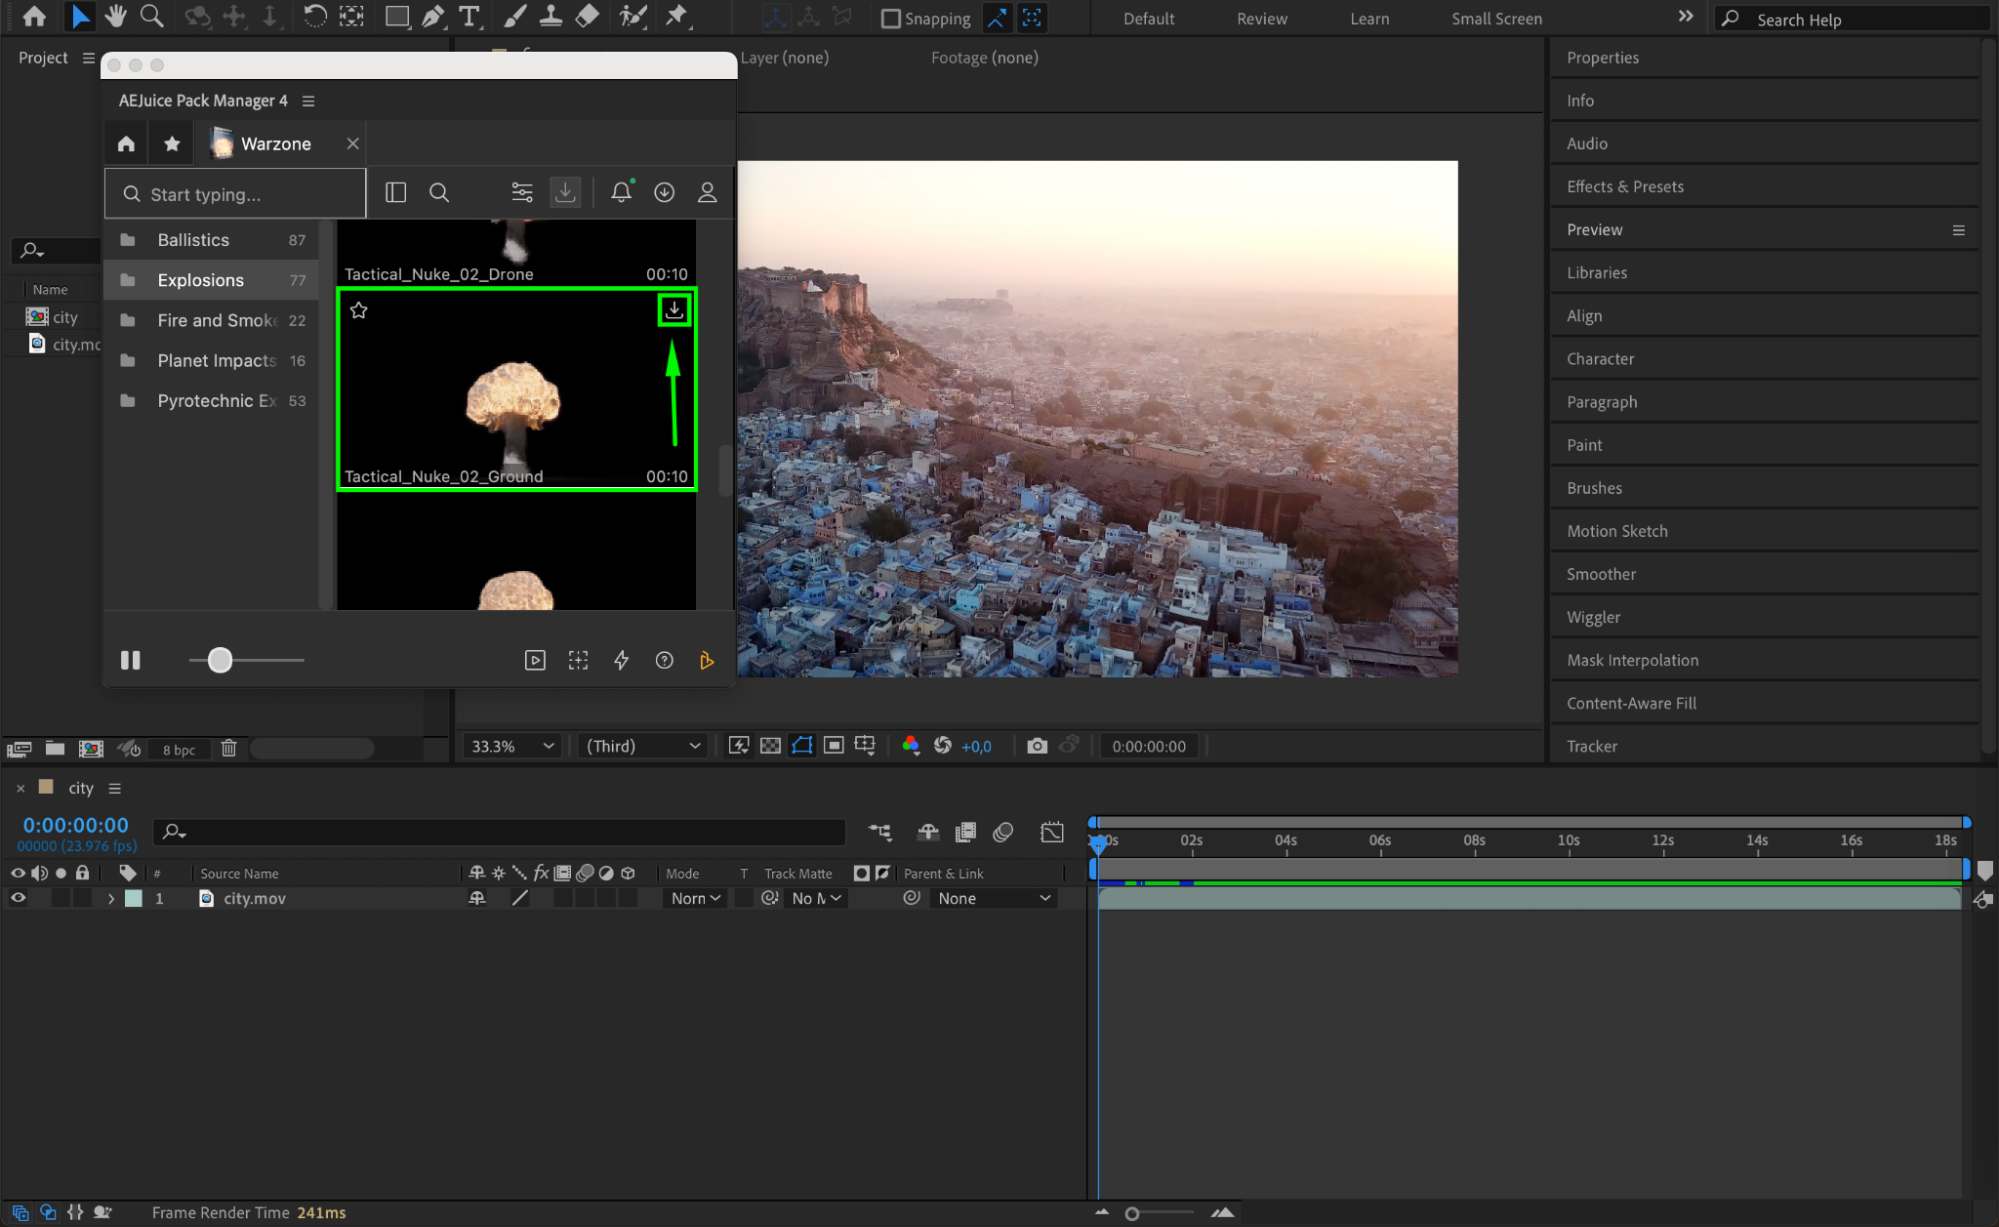
Step 5: Position the Nuke in the Composition
Now, drag the Nuke effect onto your Composition panel. Use the Transform options under the layer, such as Position, Scale, and Rotation, to place the nuke where you want it in the scene. Make sure it aligns realistically with your video background.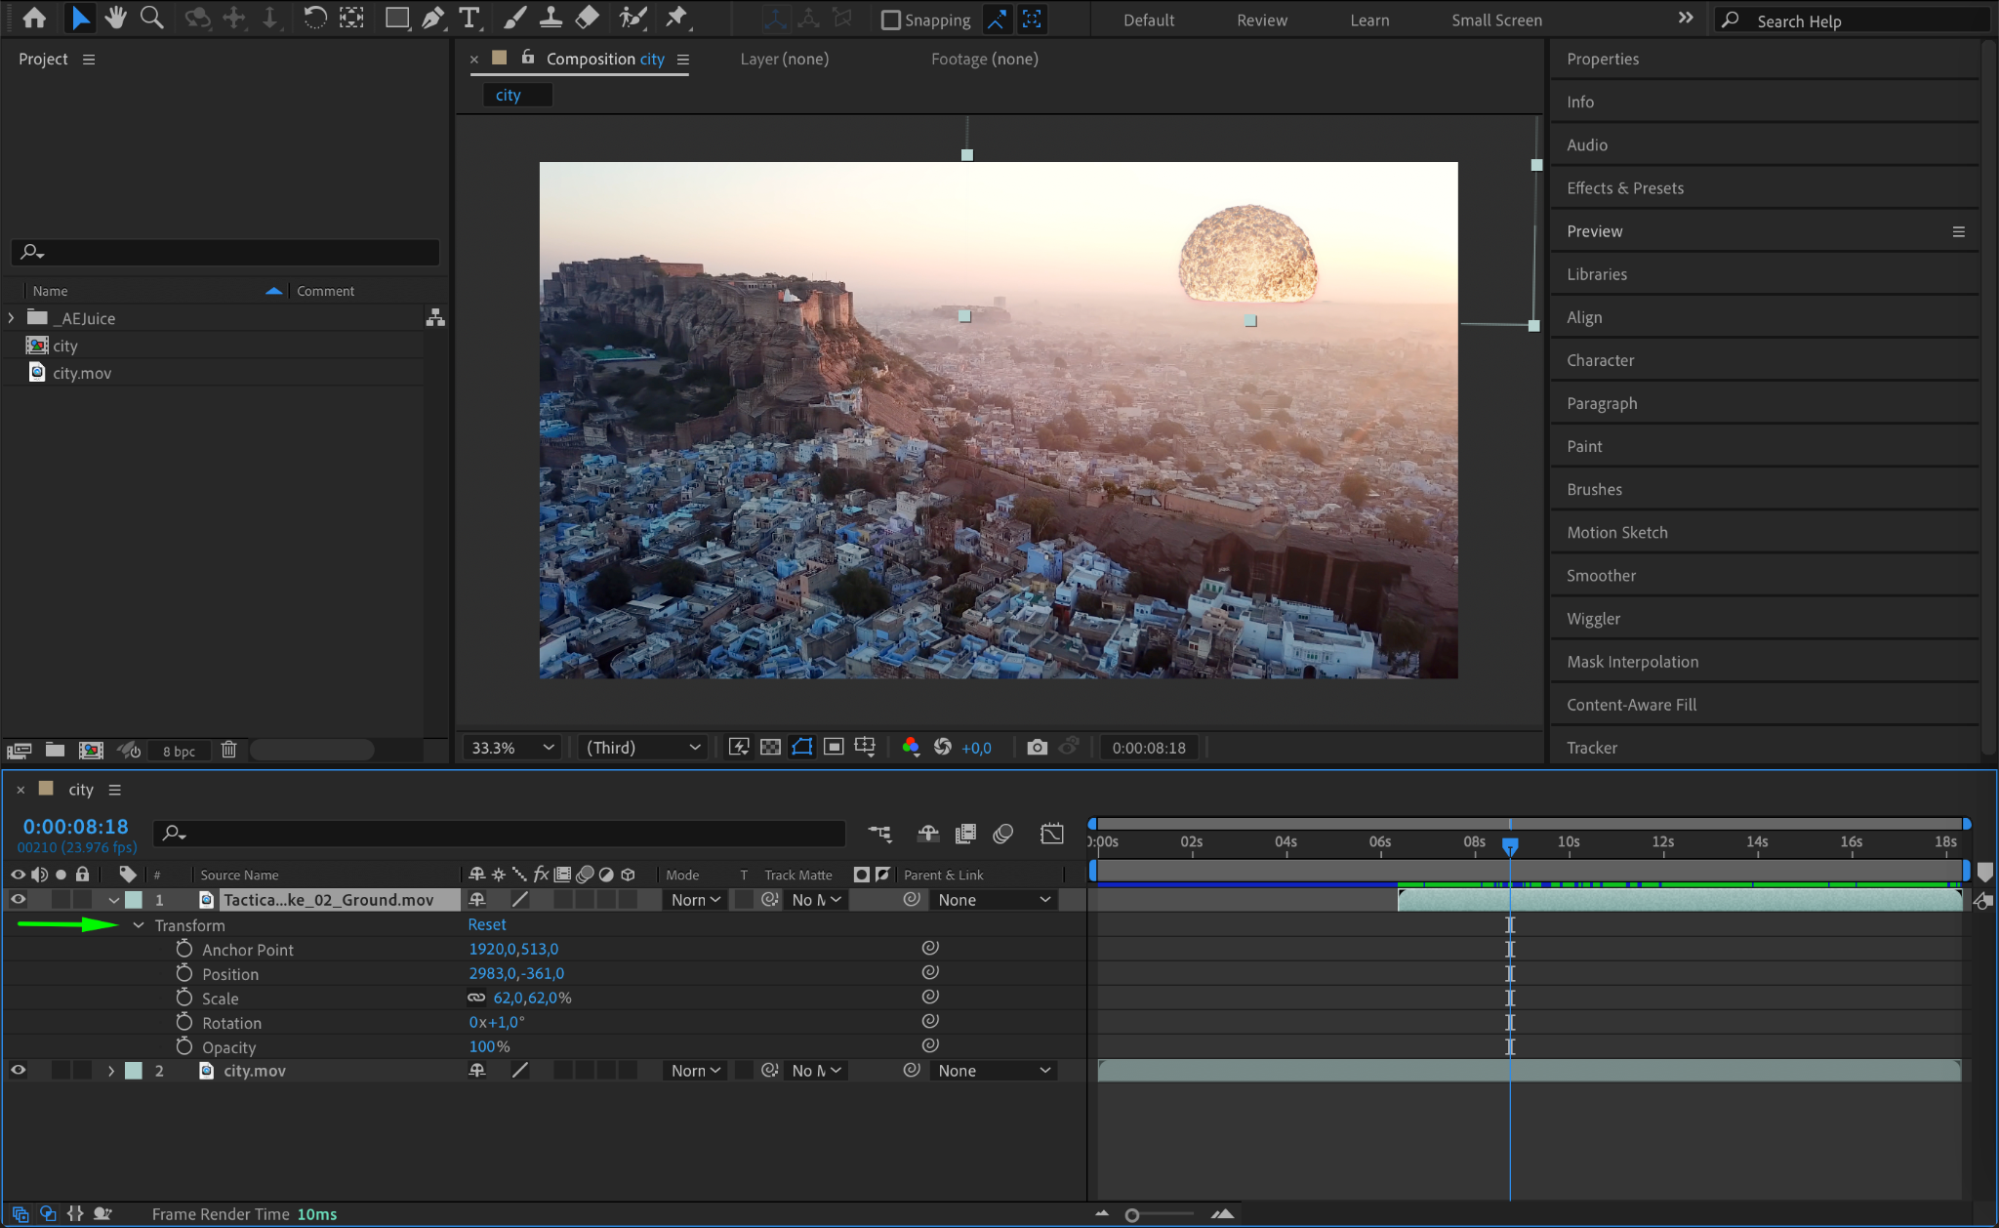
Step 6: Add Dustwave for Additional Realism
For added realism, download and import the Dustwave effect from the Warzone Pack, just like you did with the nuke. Place it in the composition, adjusting the Position and Scale to fit the nuke explosion. The dustwave will simulate debris and give the explosion more depth.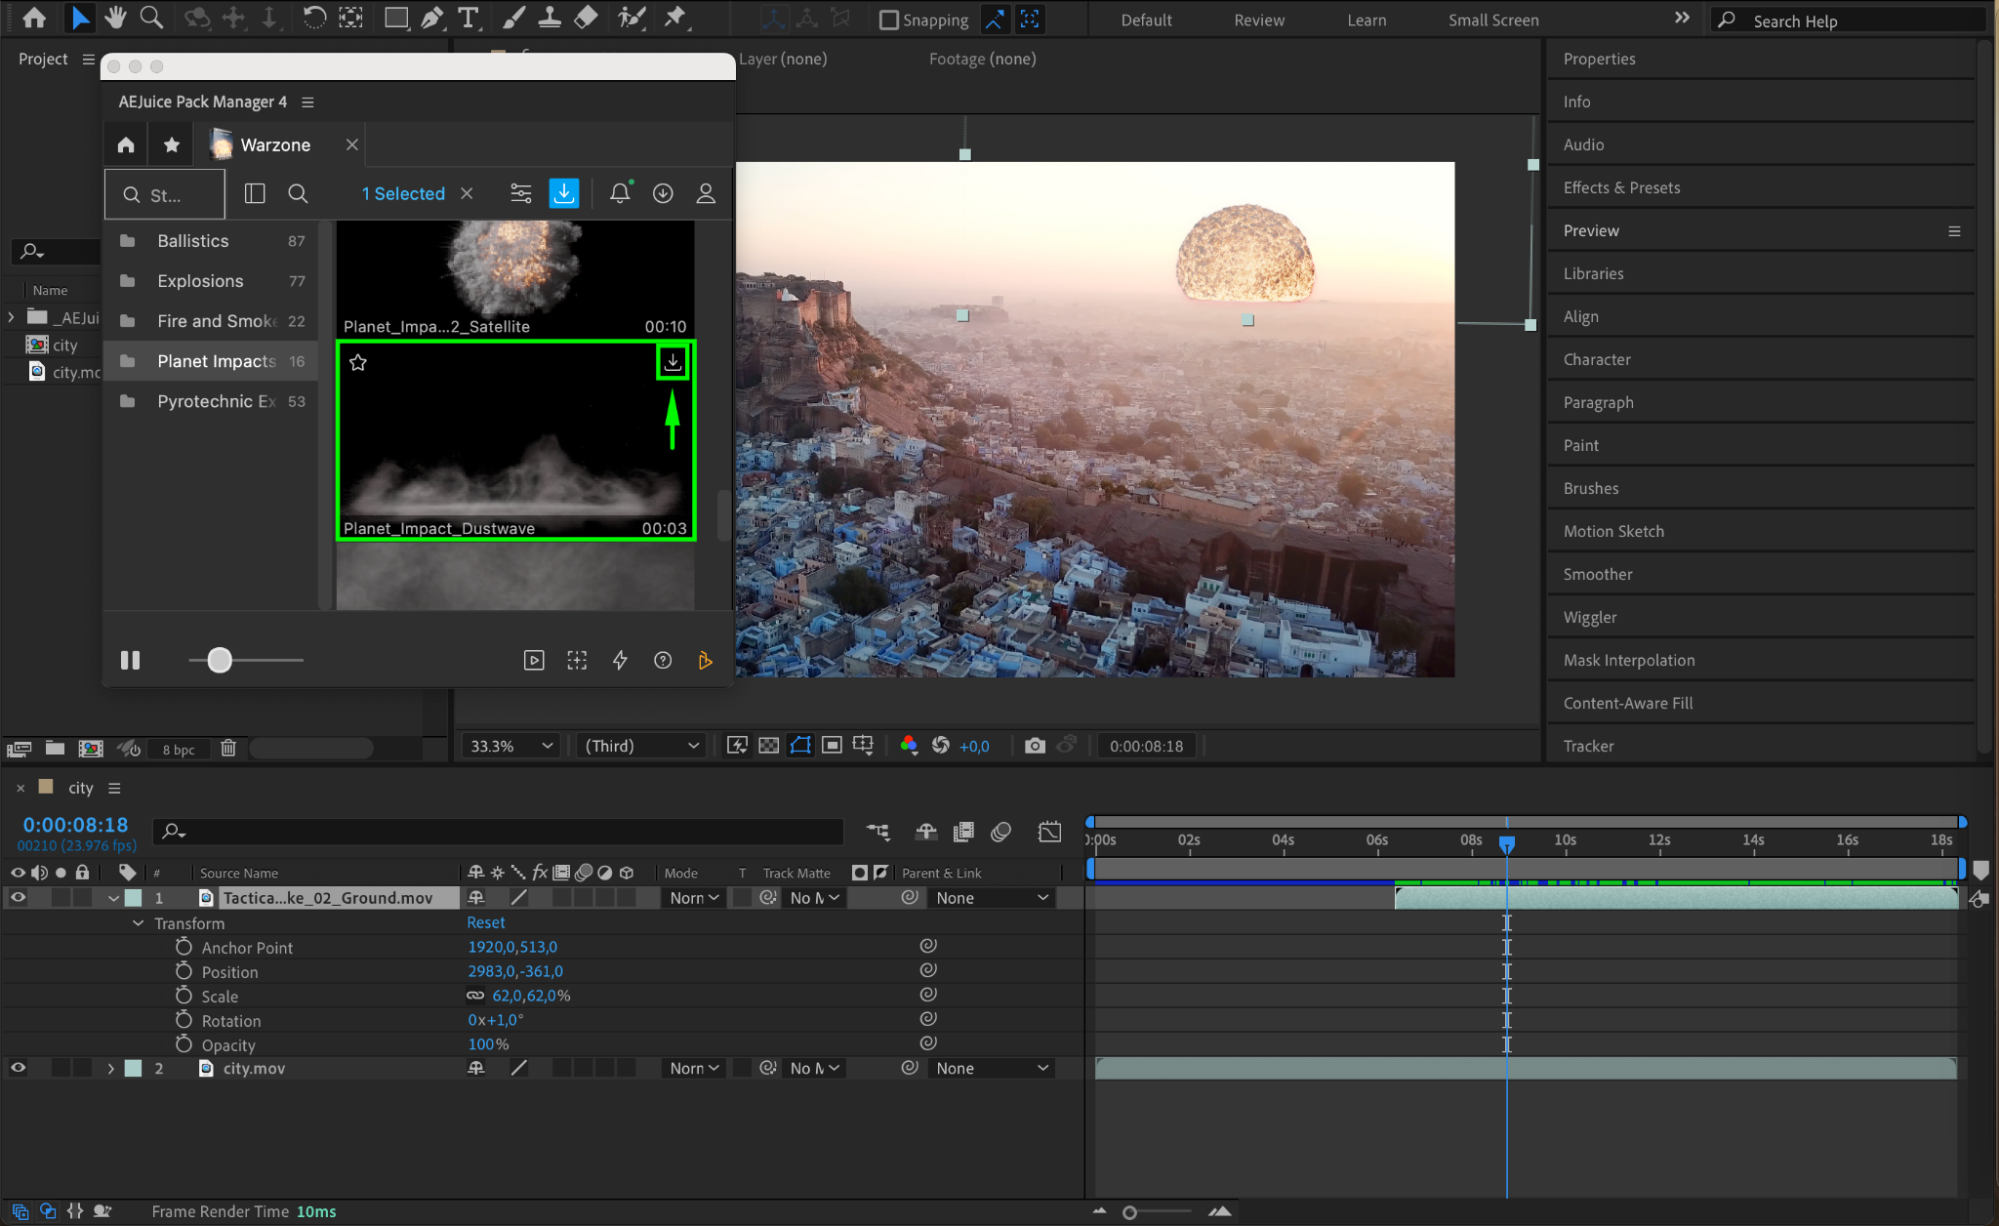
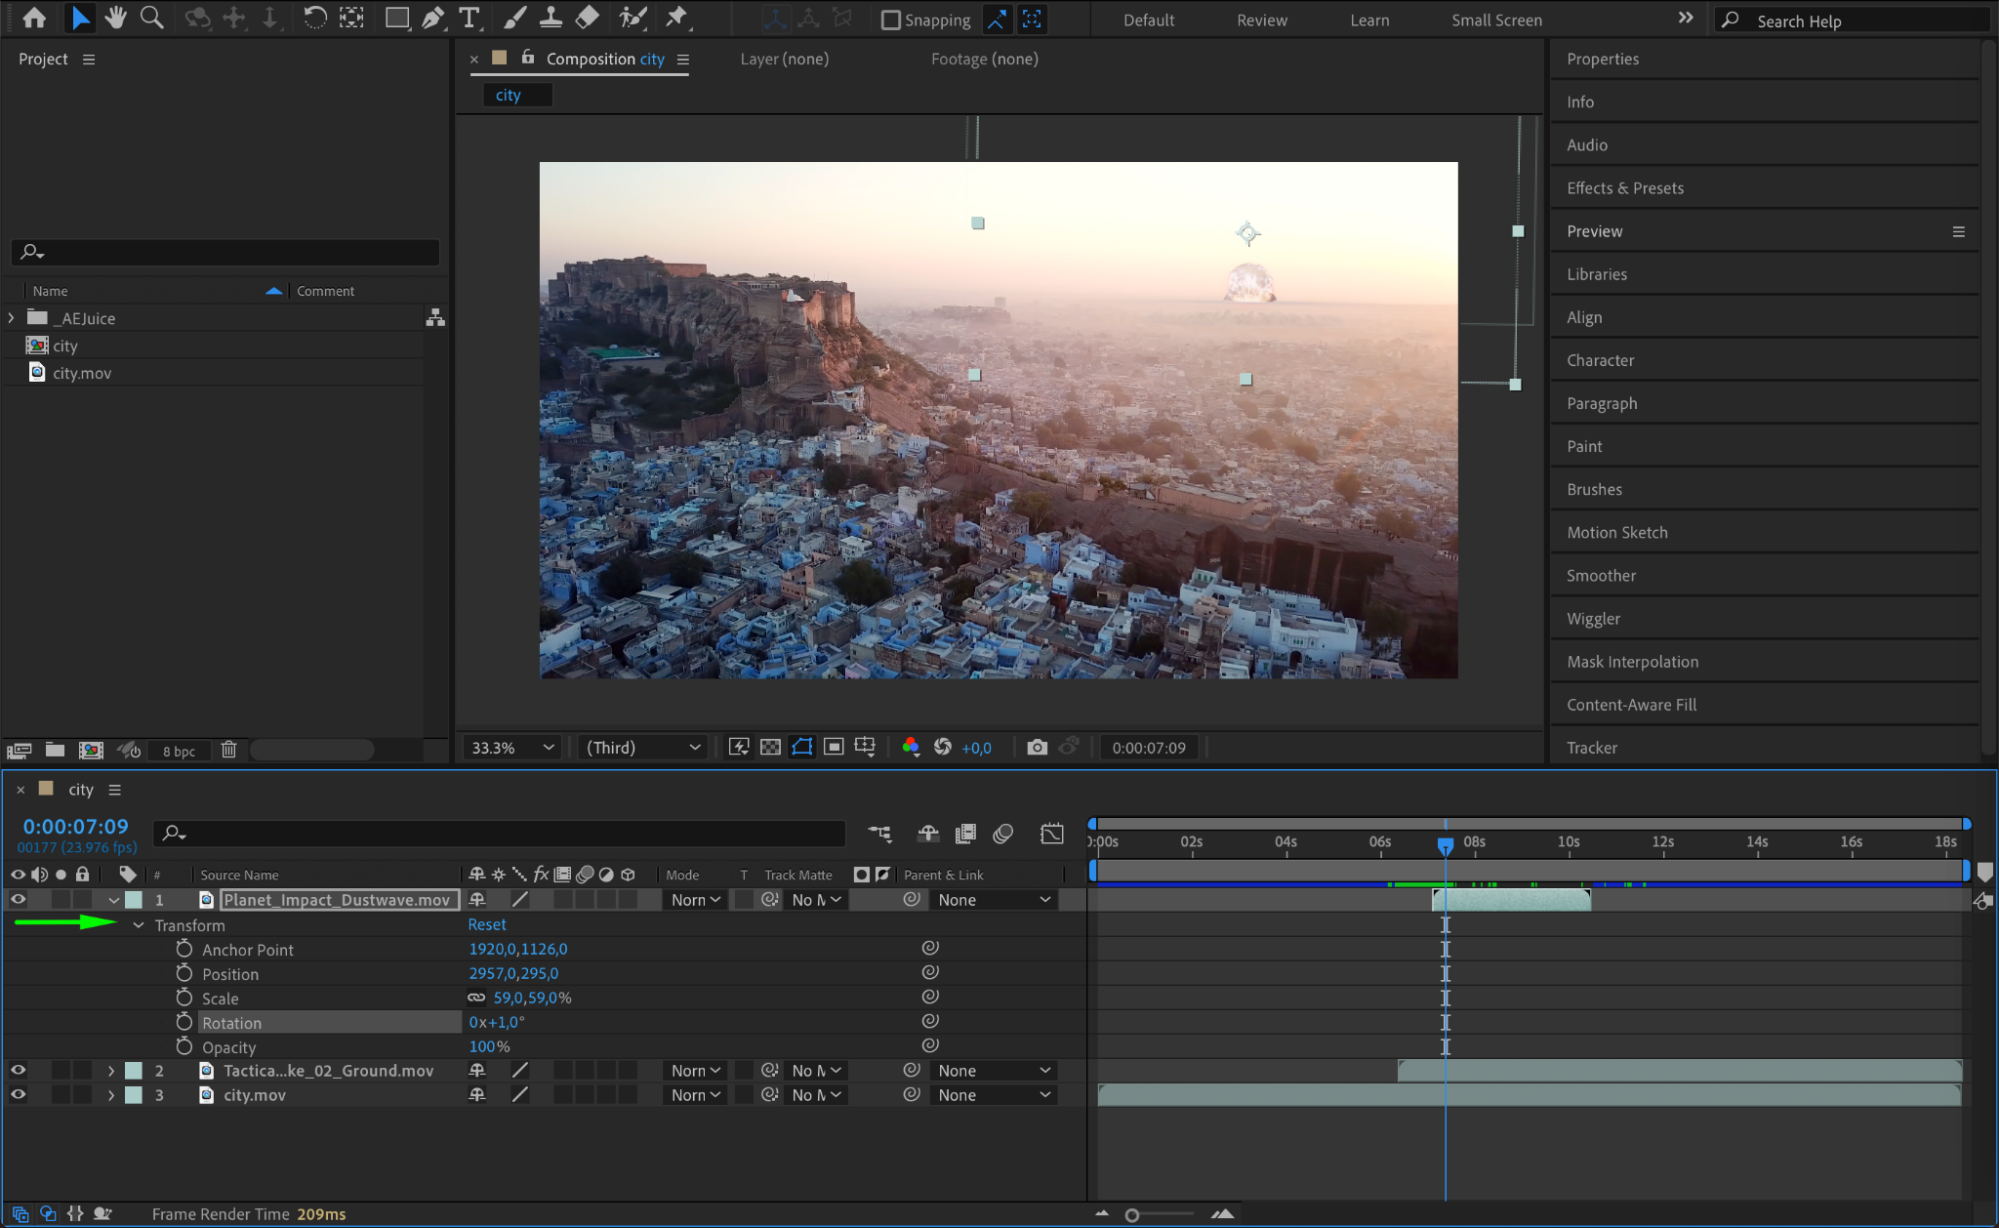
Step 7: Animate Dustwave
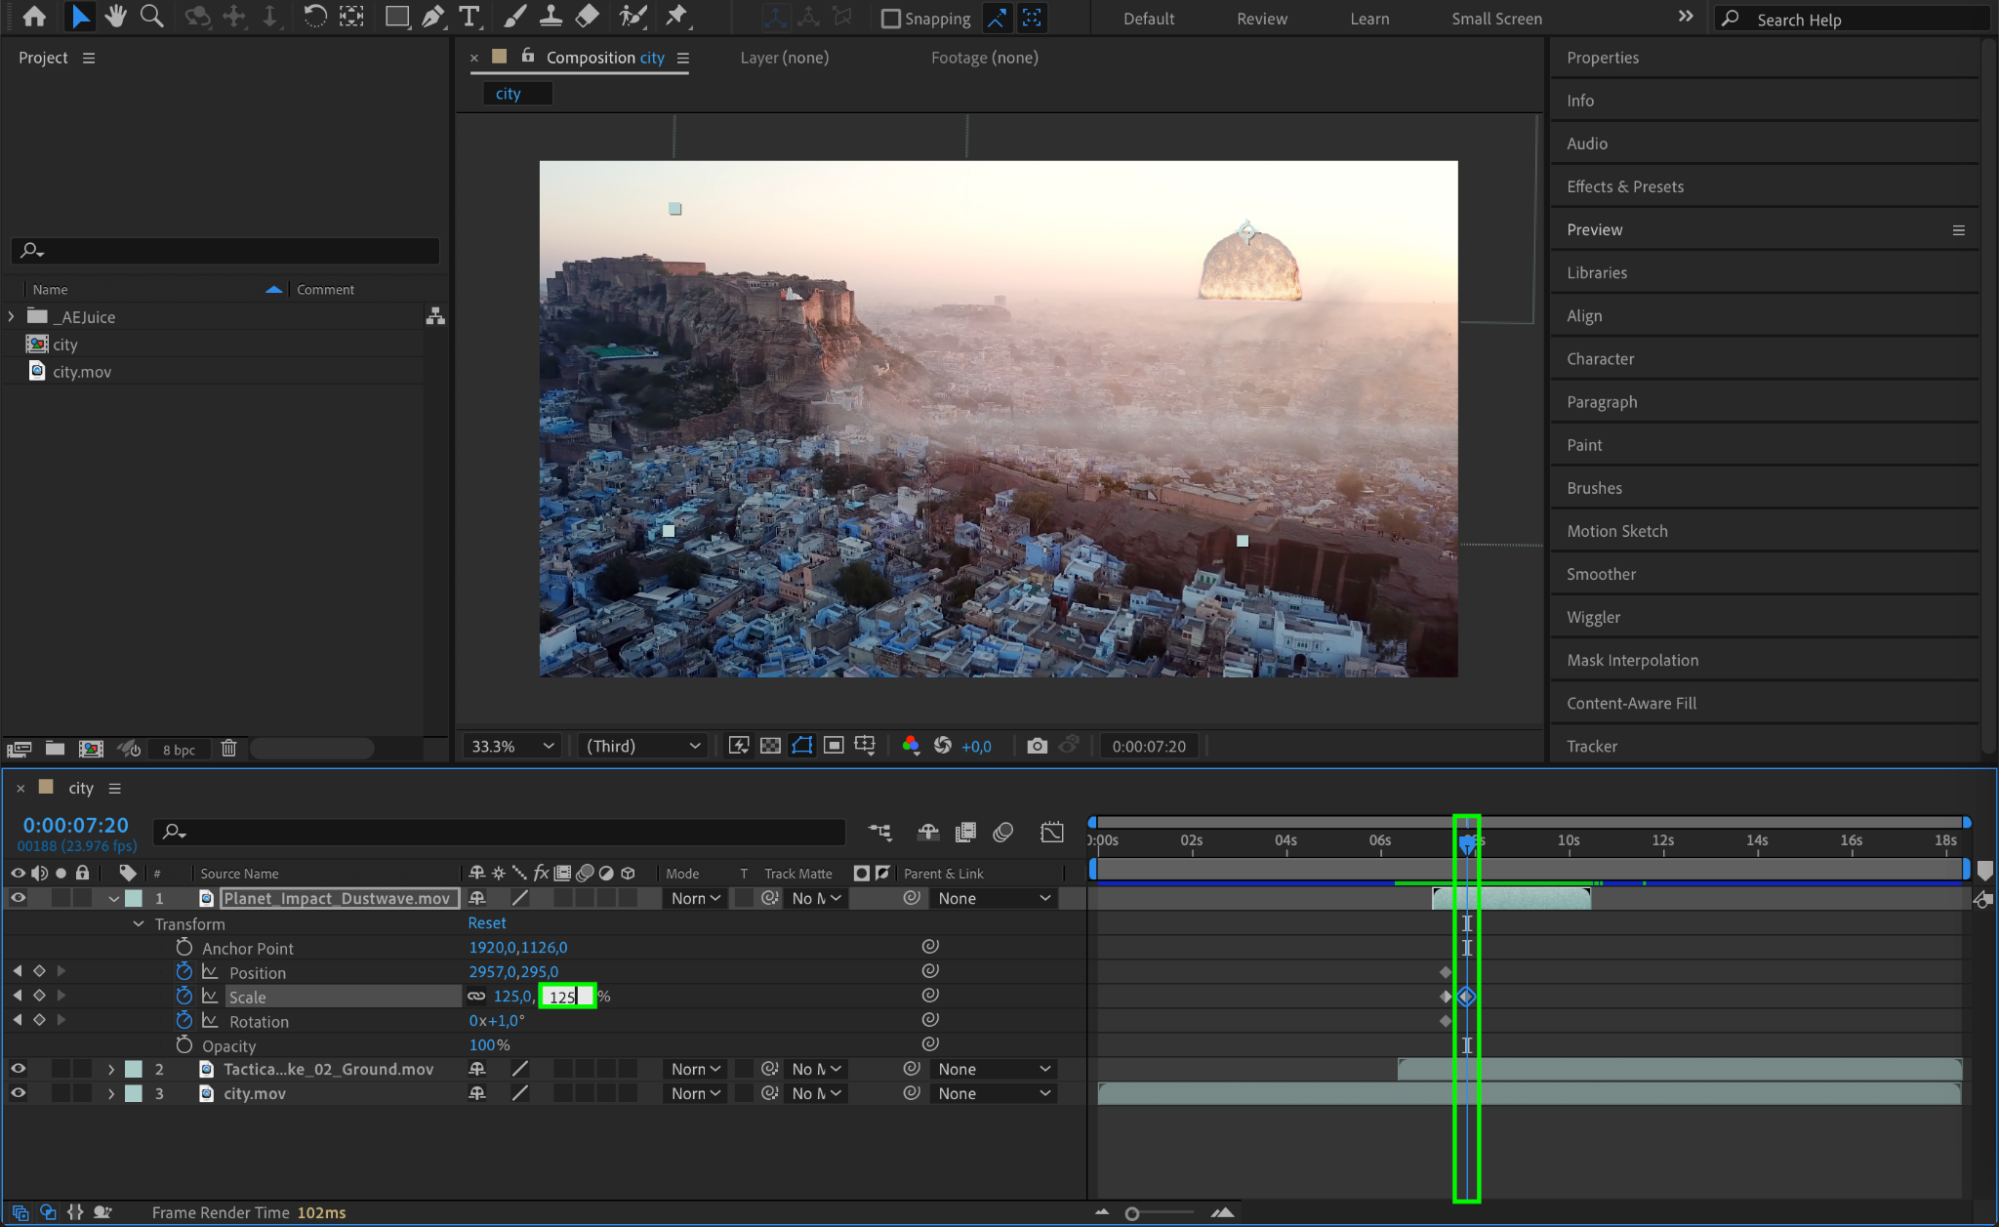
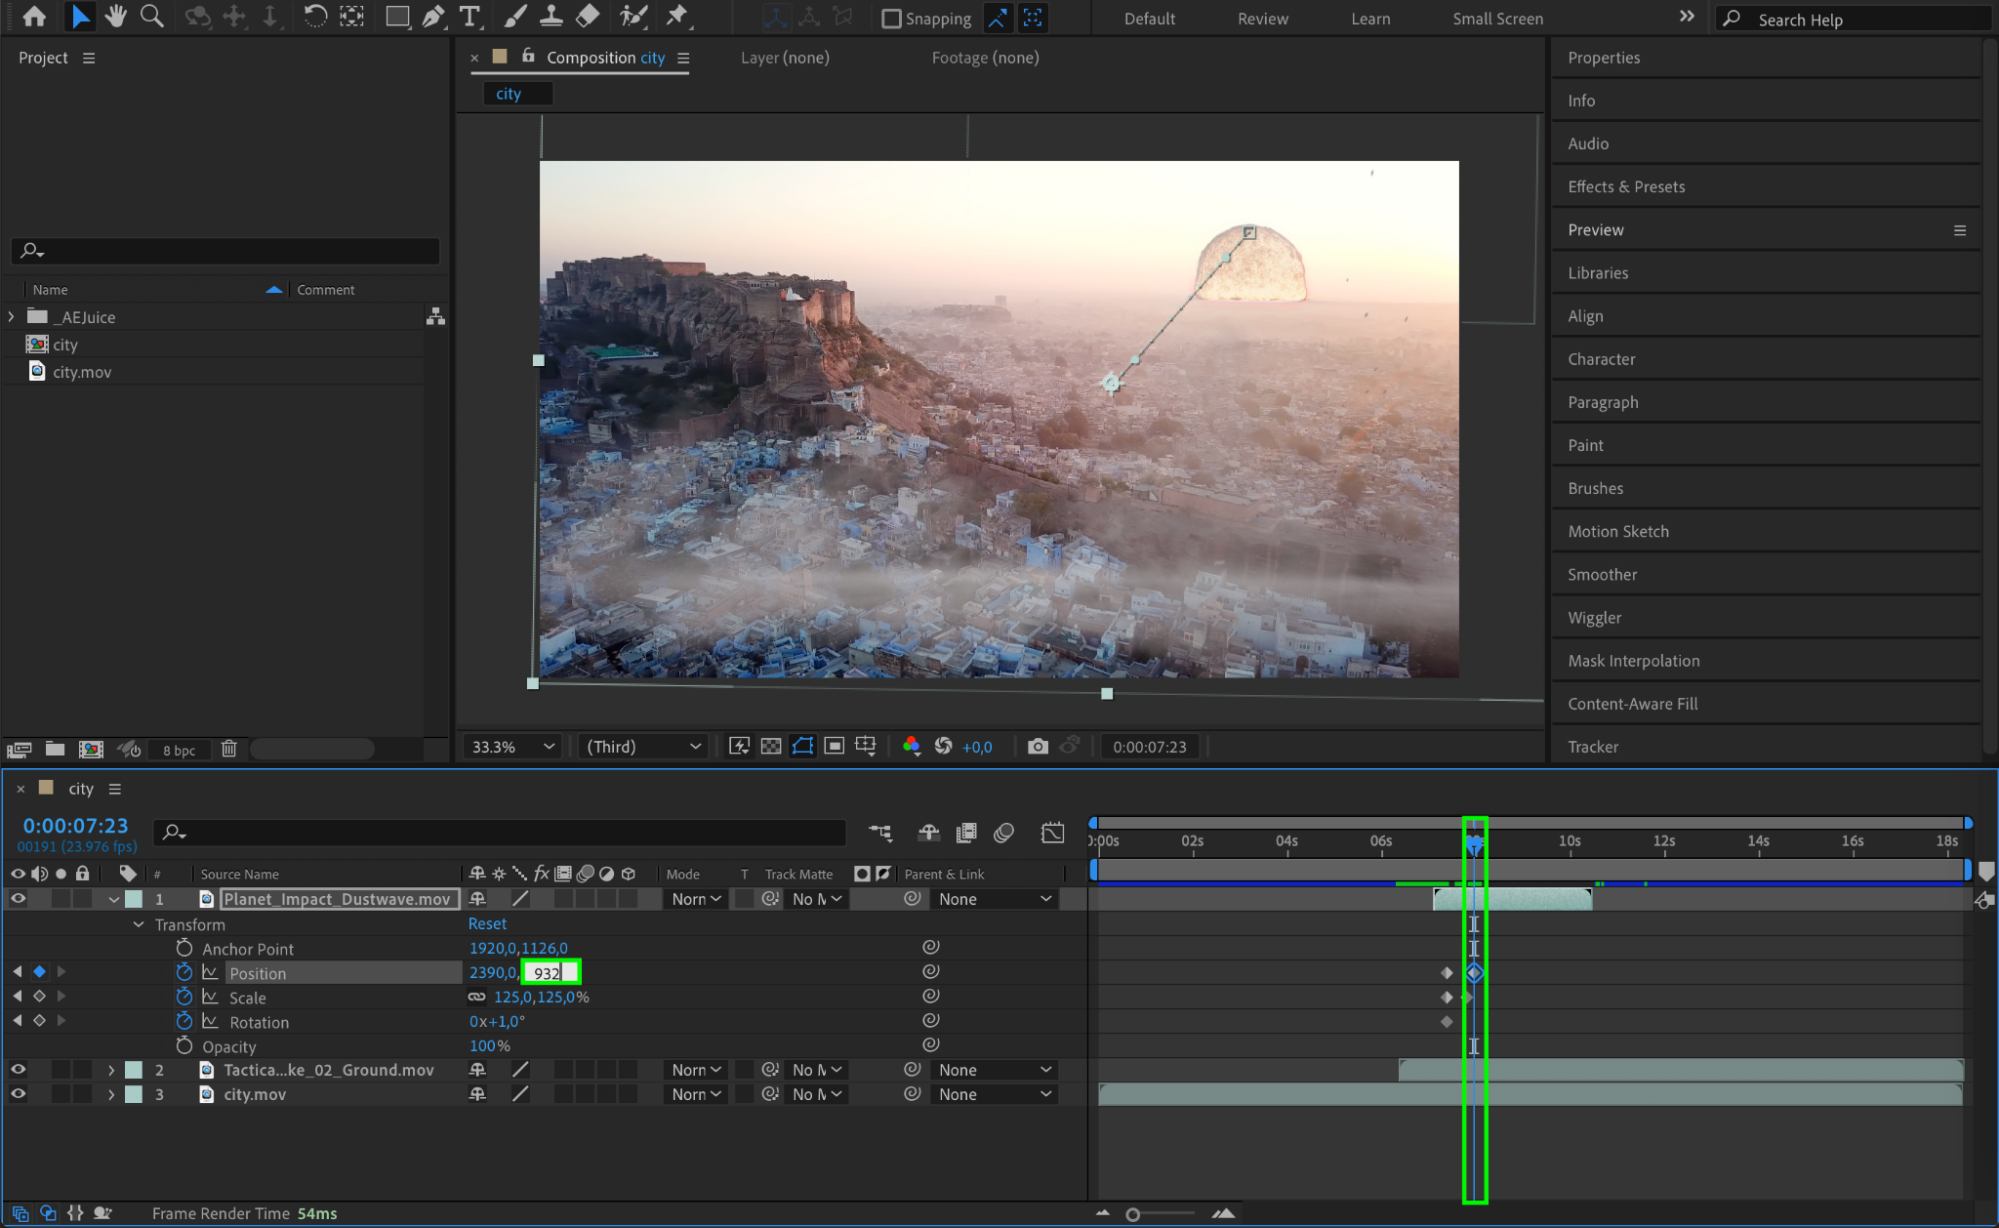
To make the Dustwave look dynamic, animate its Rotation, Scale, and Position. This helps it flow naturally with the explosion. Adjust the timing so that the dustwave expands and follows the nuke explosion for a more cohesive effect.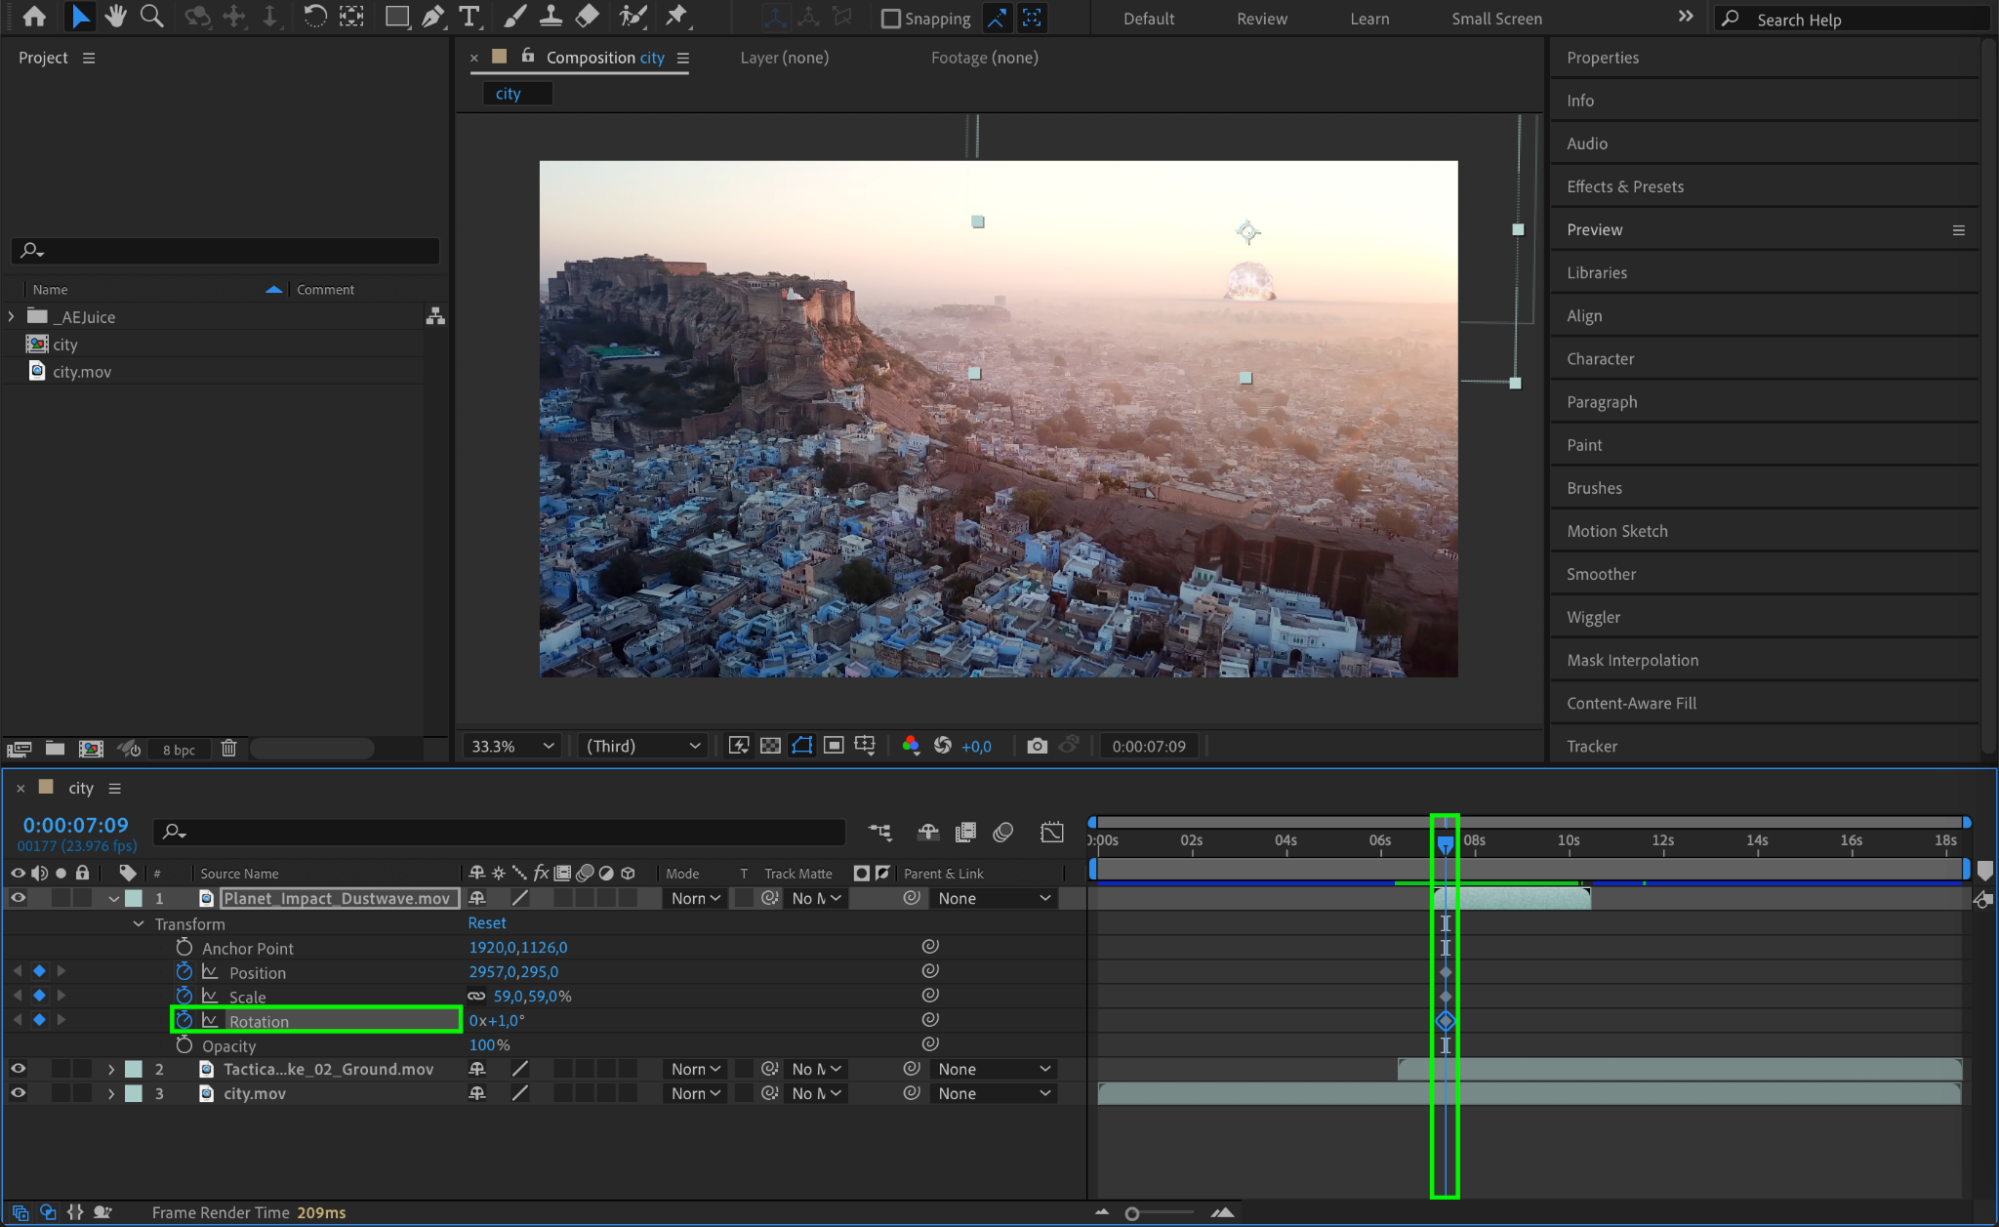
Step 8: Split and Animate the Video Layer
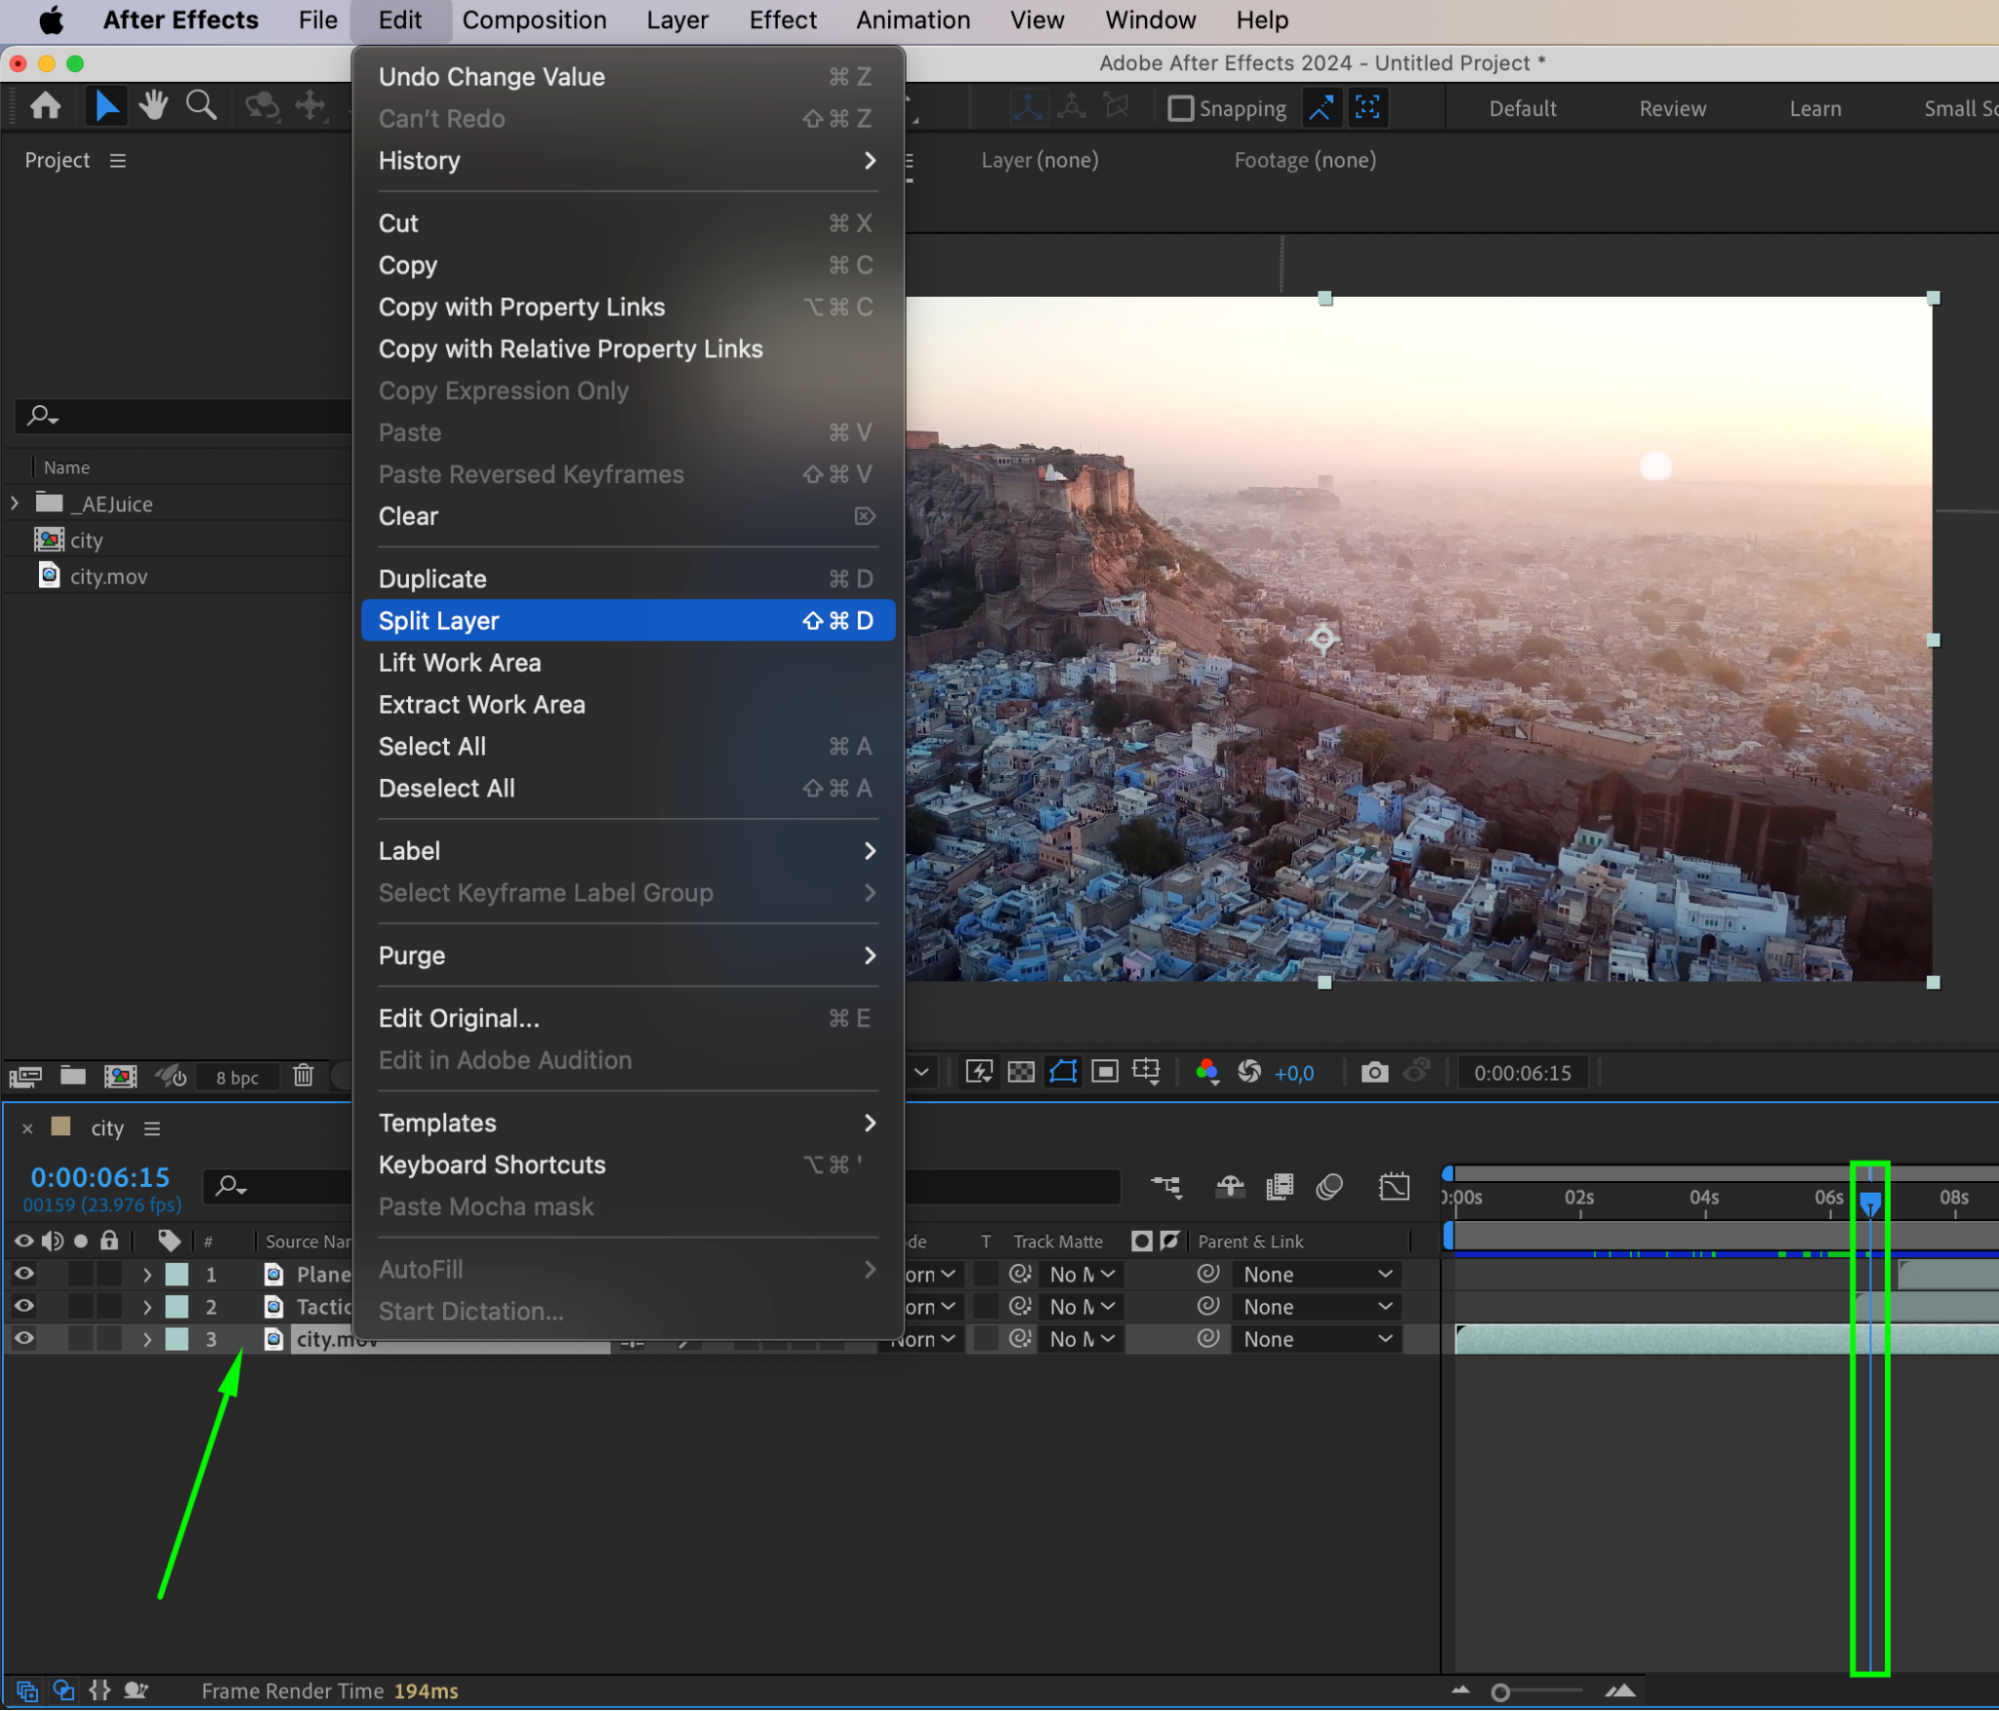
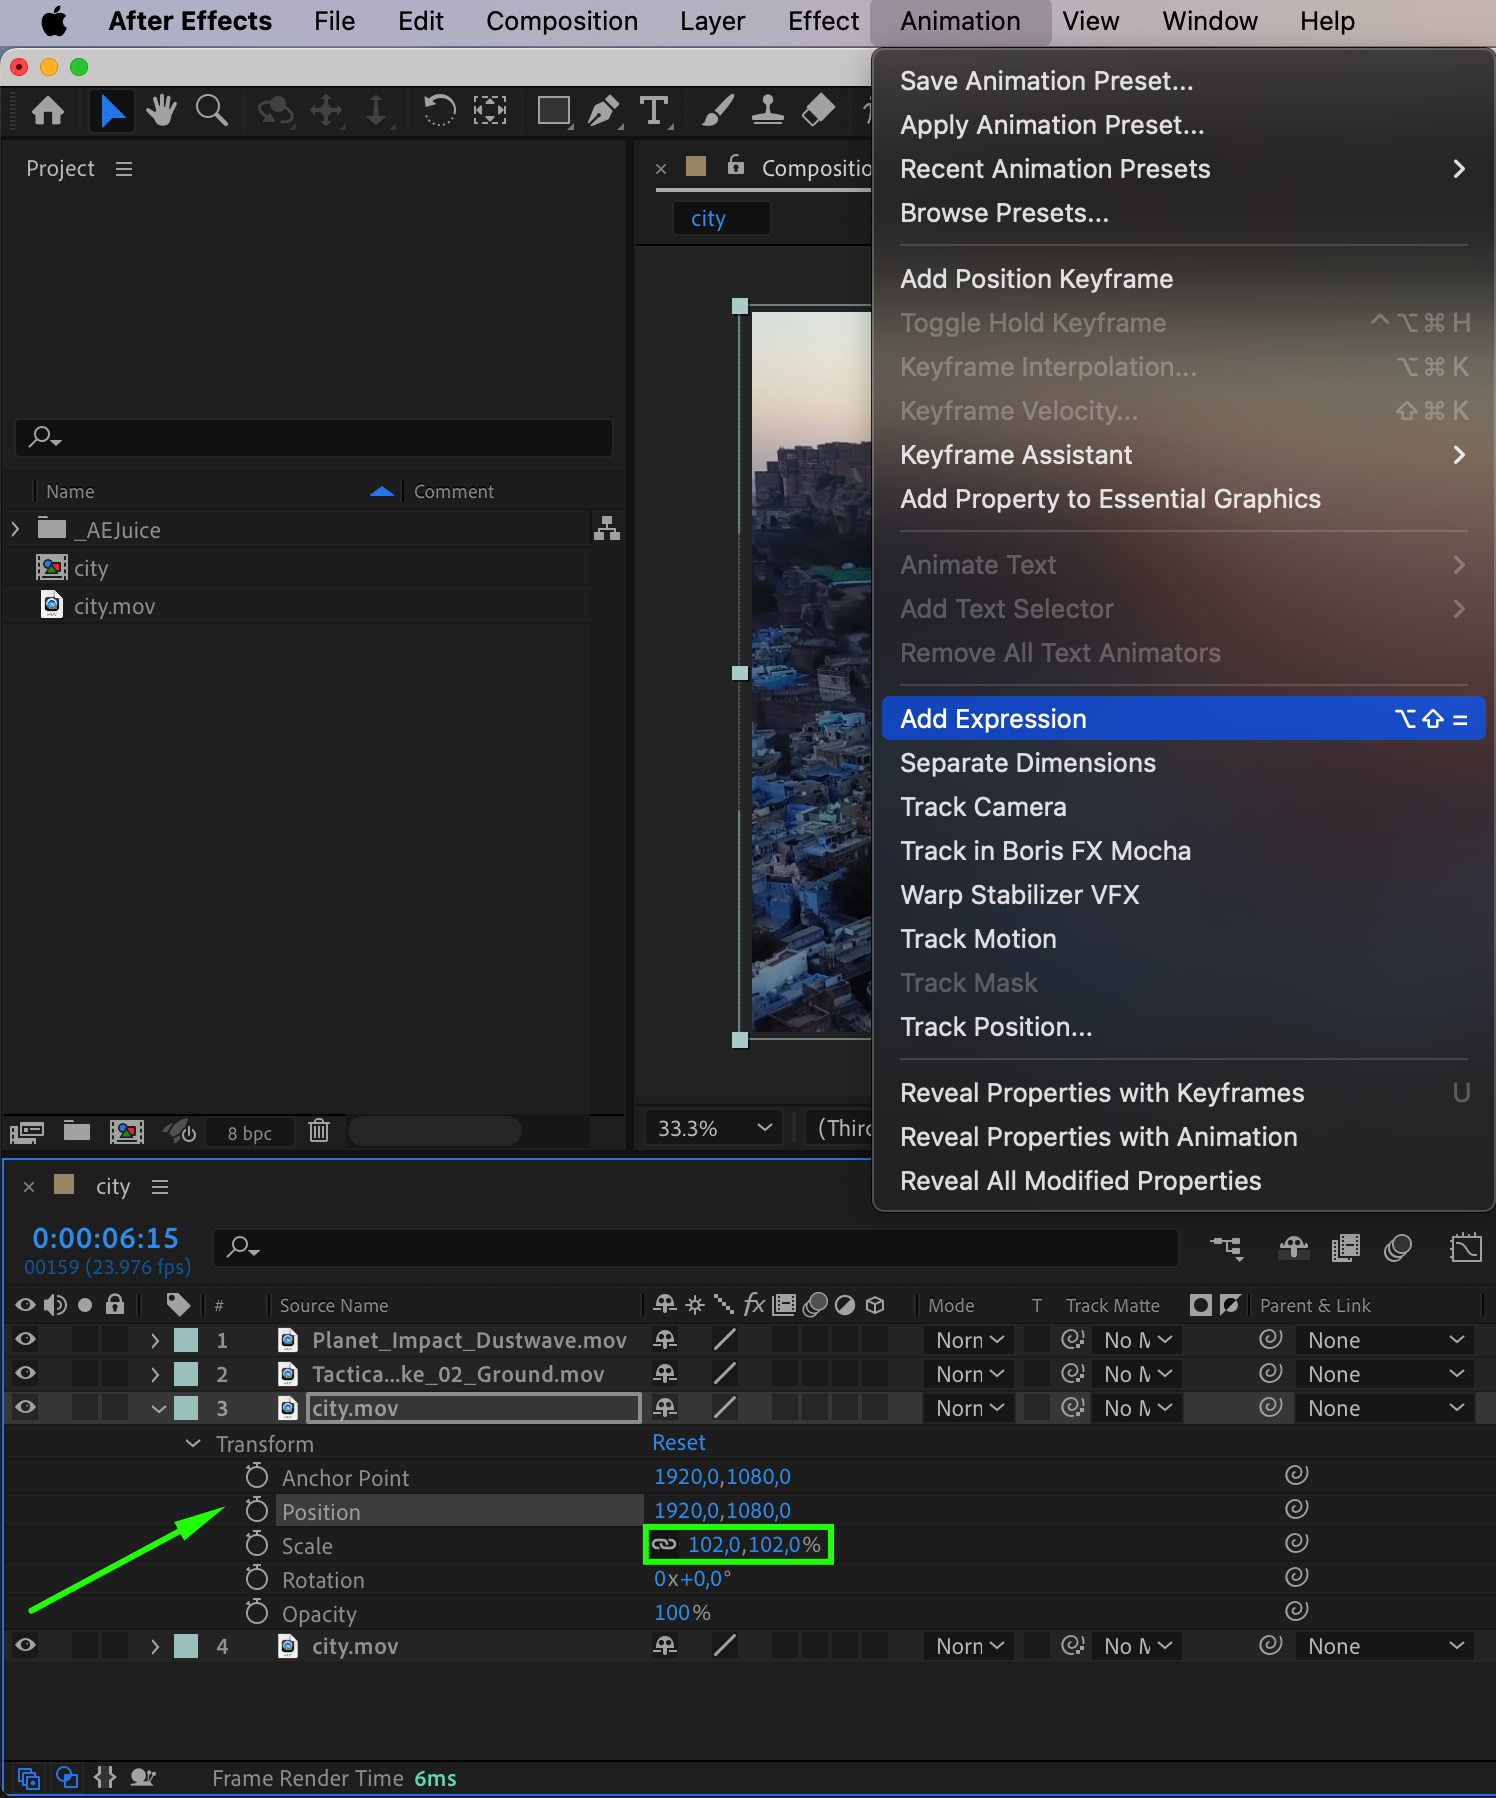
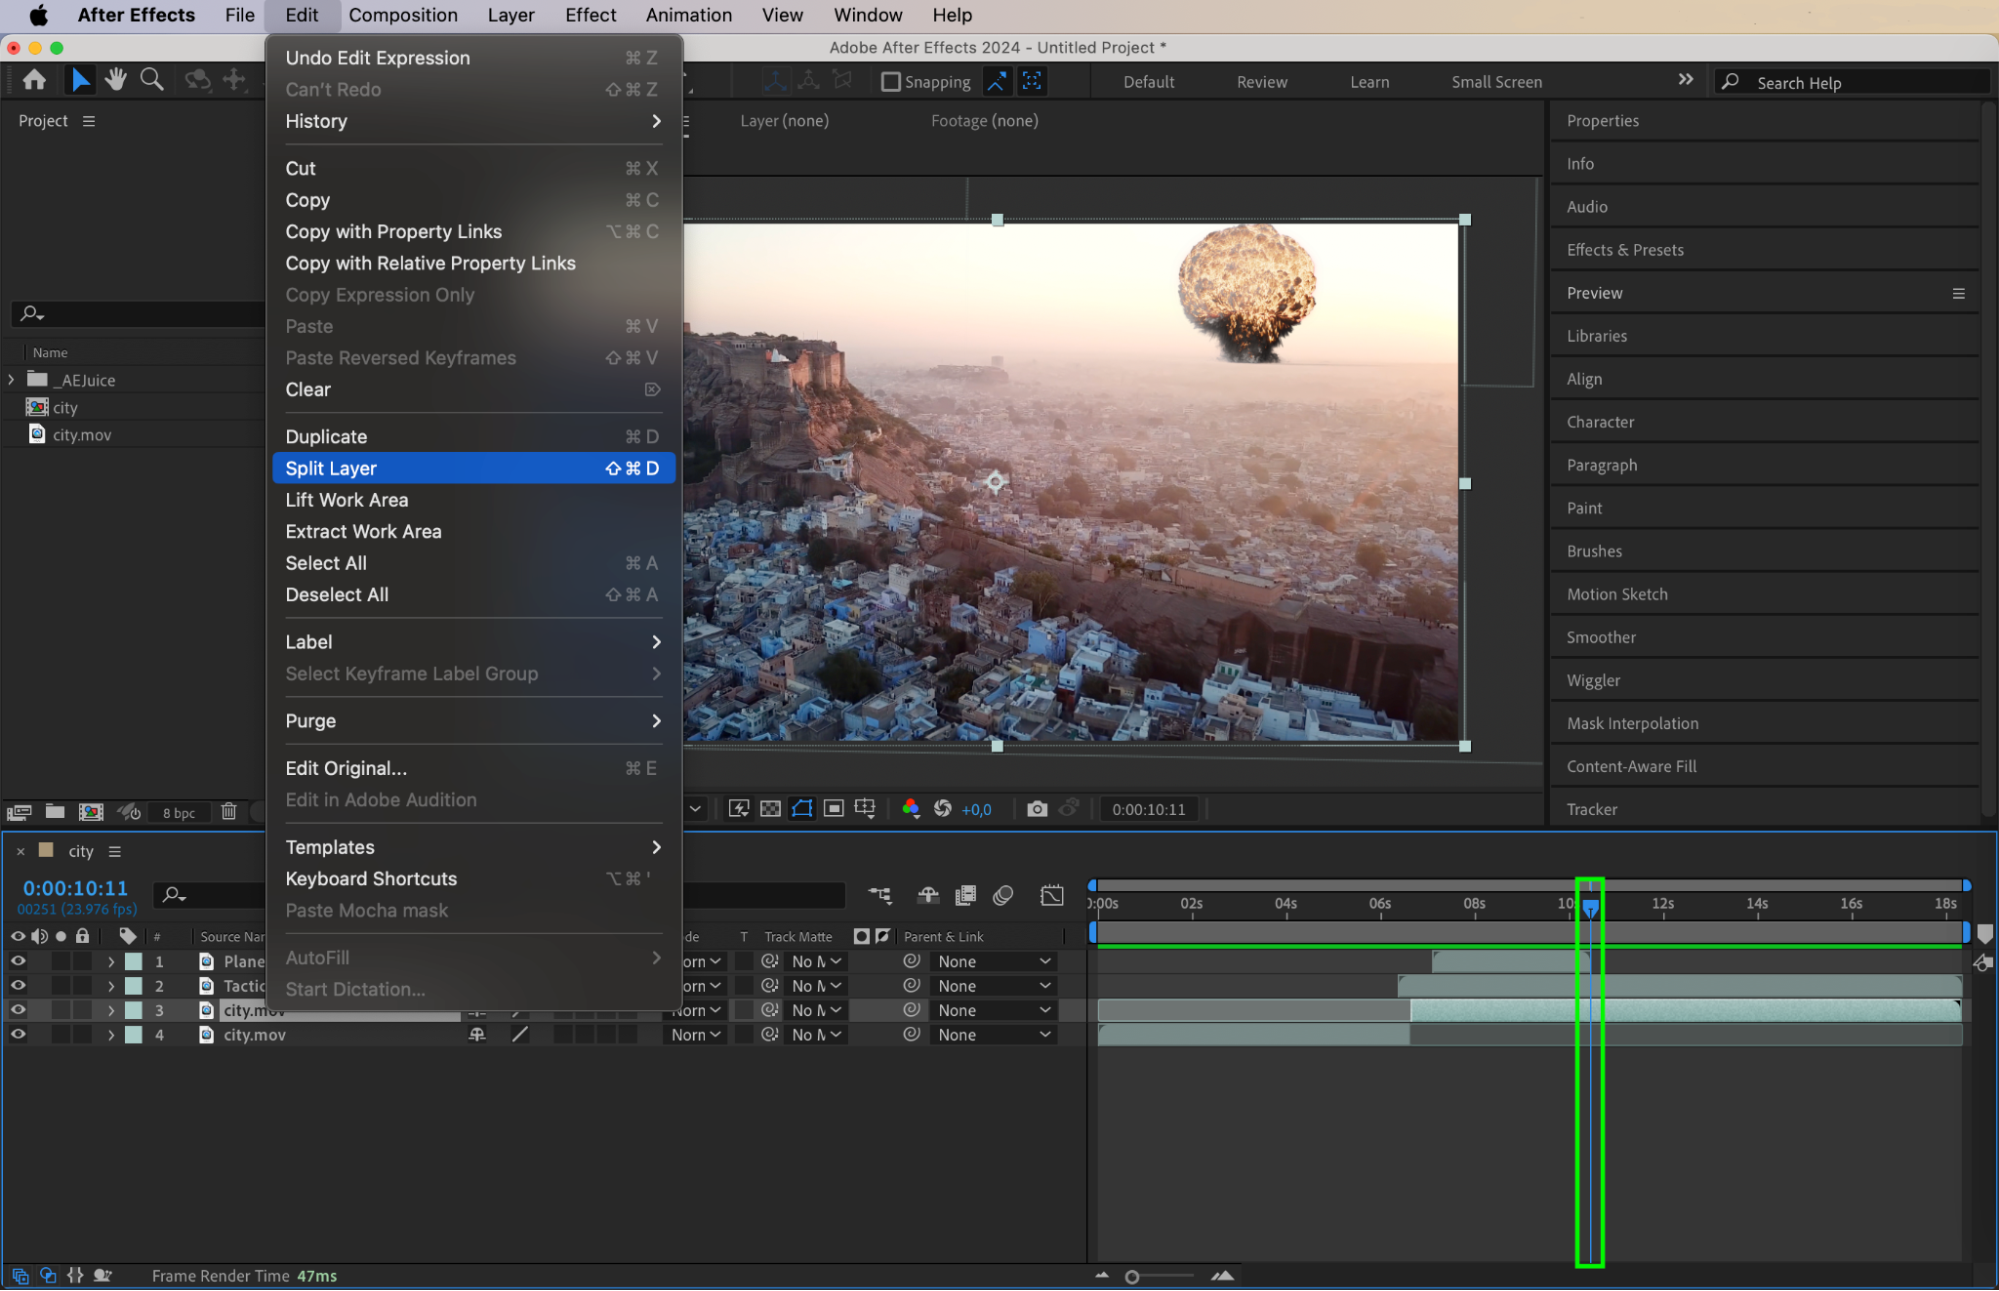
Move the Current Time Indicator (CTI) a few frames after the start of the nuke explosion. Then, split the video layer using the shortcut “Ctrl/Cmd + Shift + D”. On the second part of the layer, increase the scale to 102% and add an expression to the Position parameter: wiggle(10,10). This creates a realistic ground shake effect from the nuke blast.
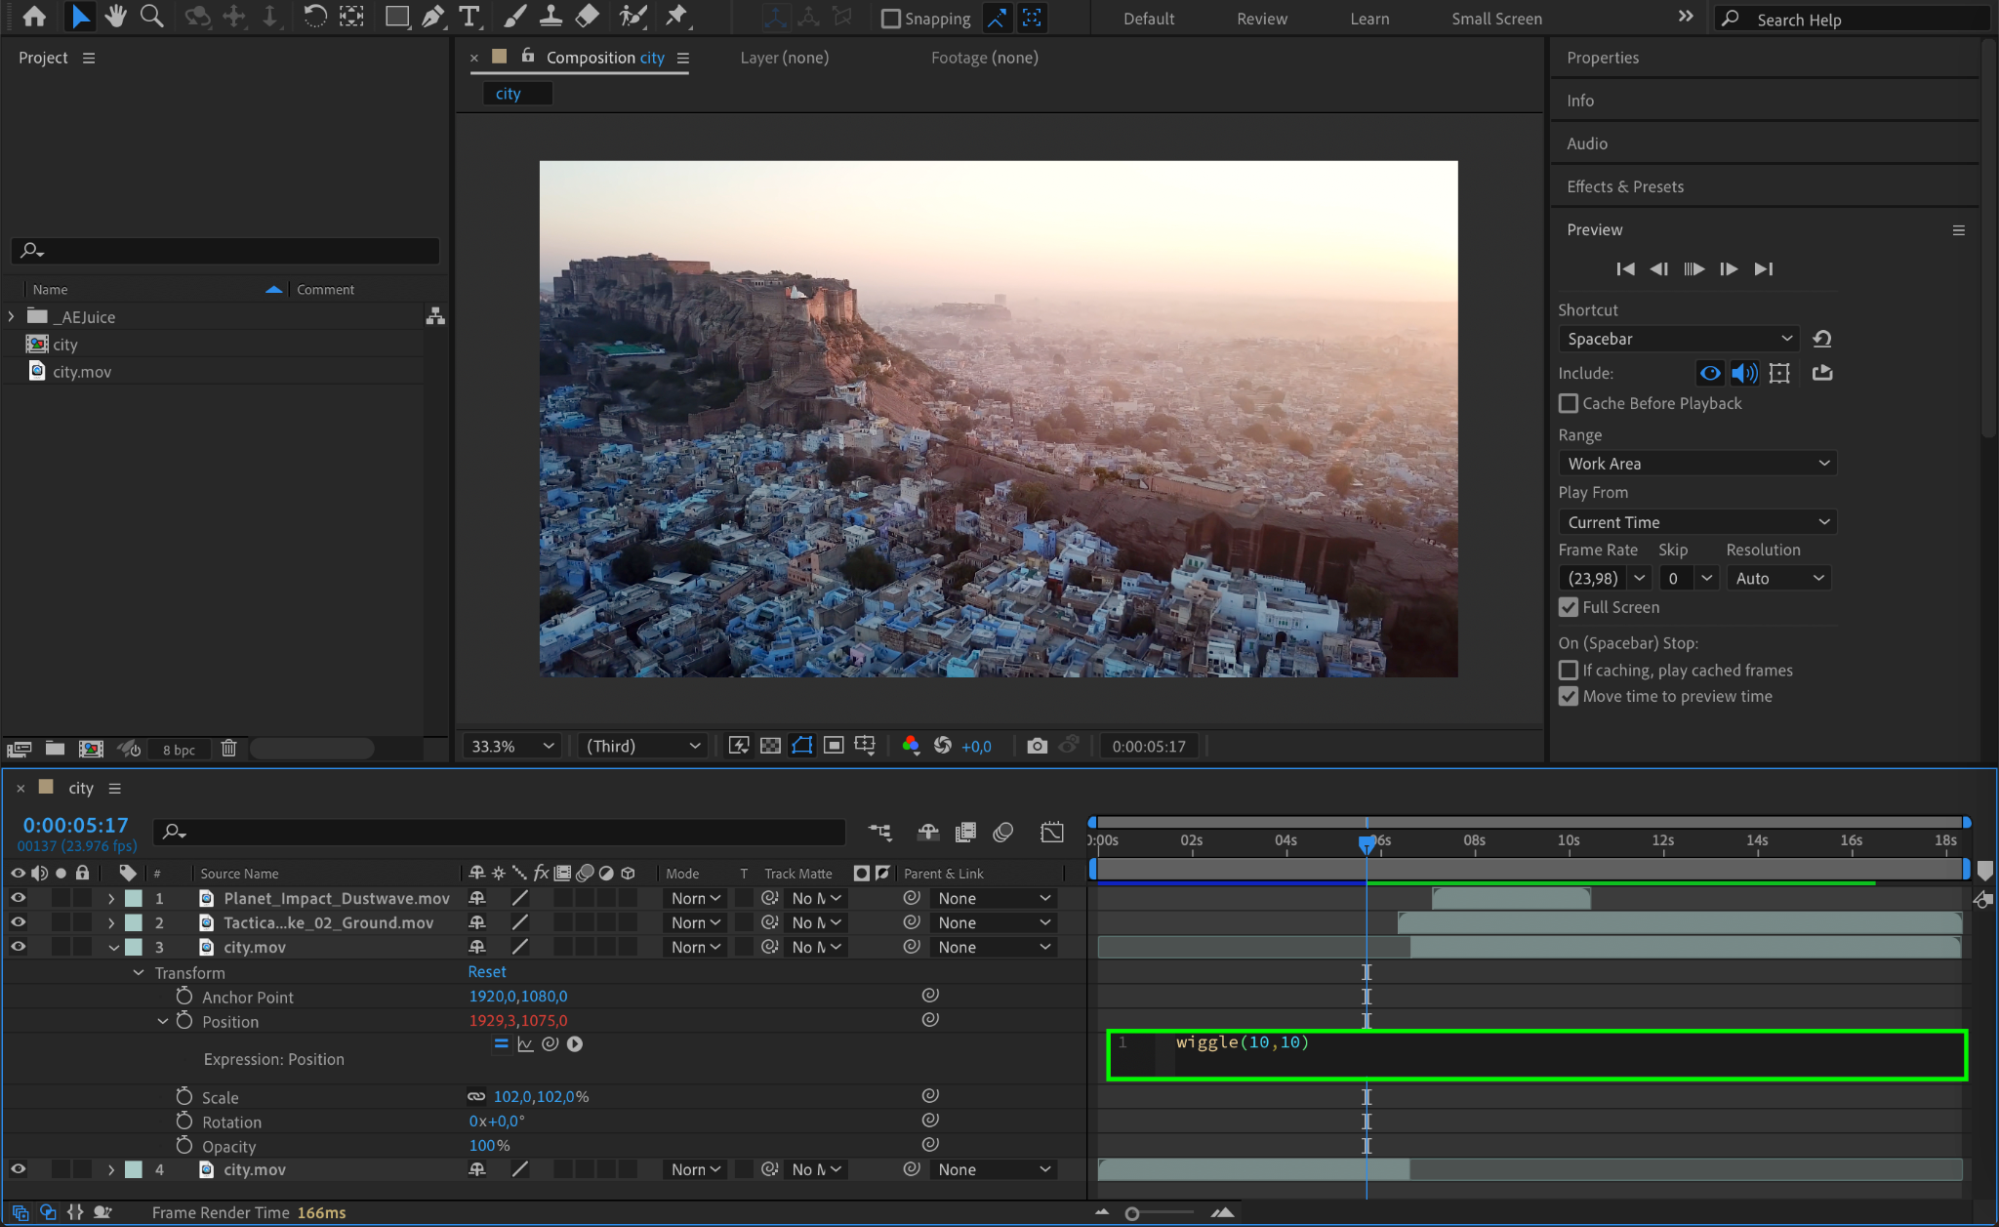
Step 9: Adjust the Scale and Remove Wiggle
When the explosion finishes, split the video layer again. On the third part of the layer, remove the wiggle expression and leave the scale at 102%. This will stabilize the scene after the nuke has finished detonating.
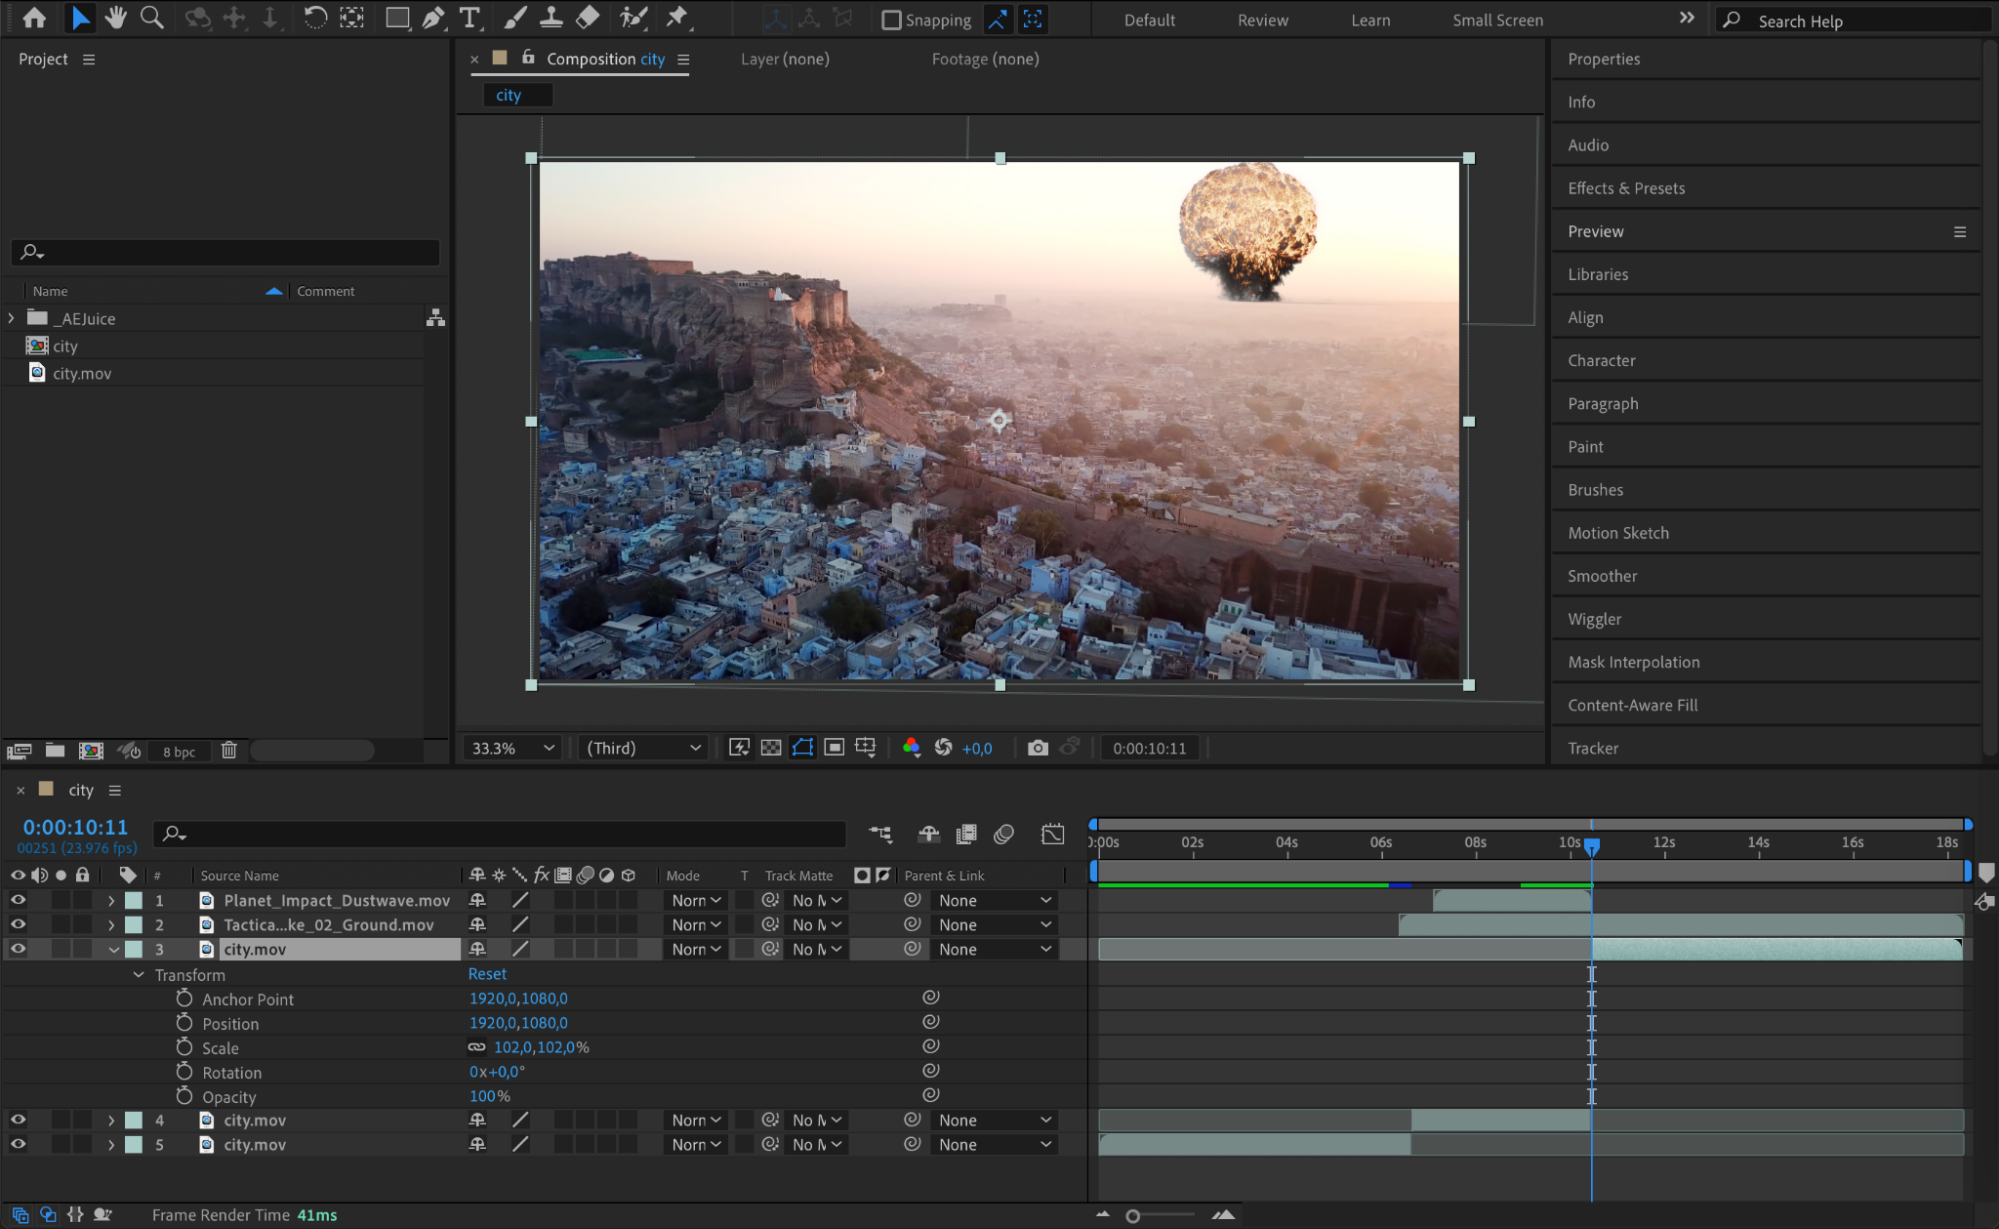
Step 10: Apply Colorize – Gold Dip Effect
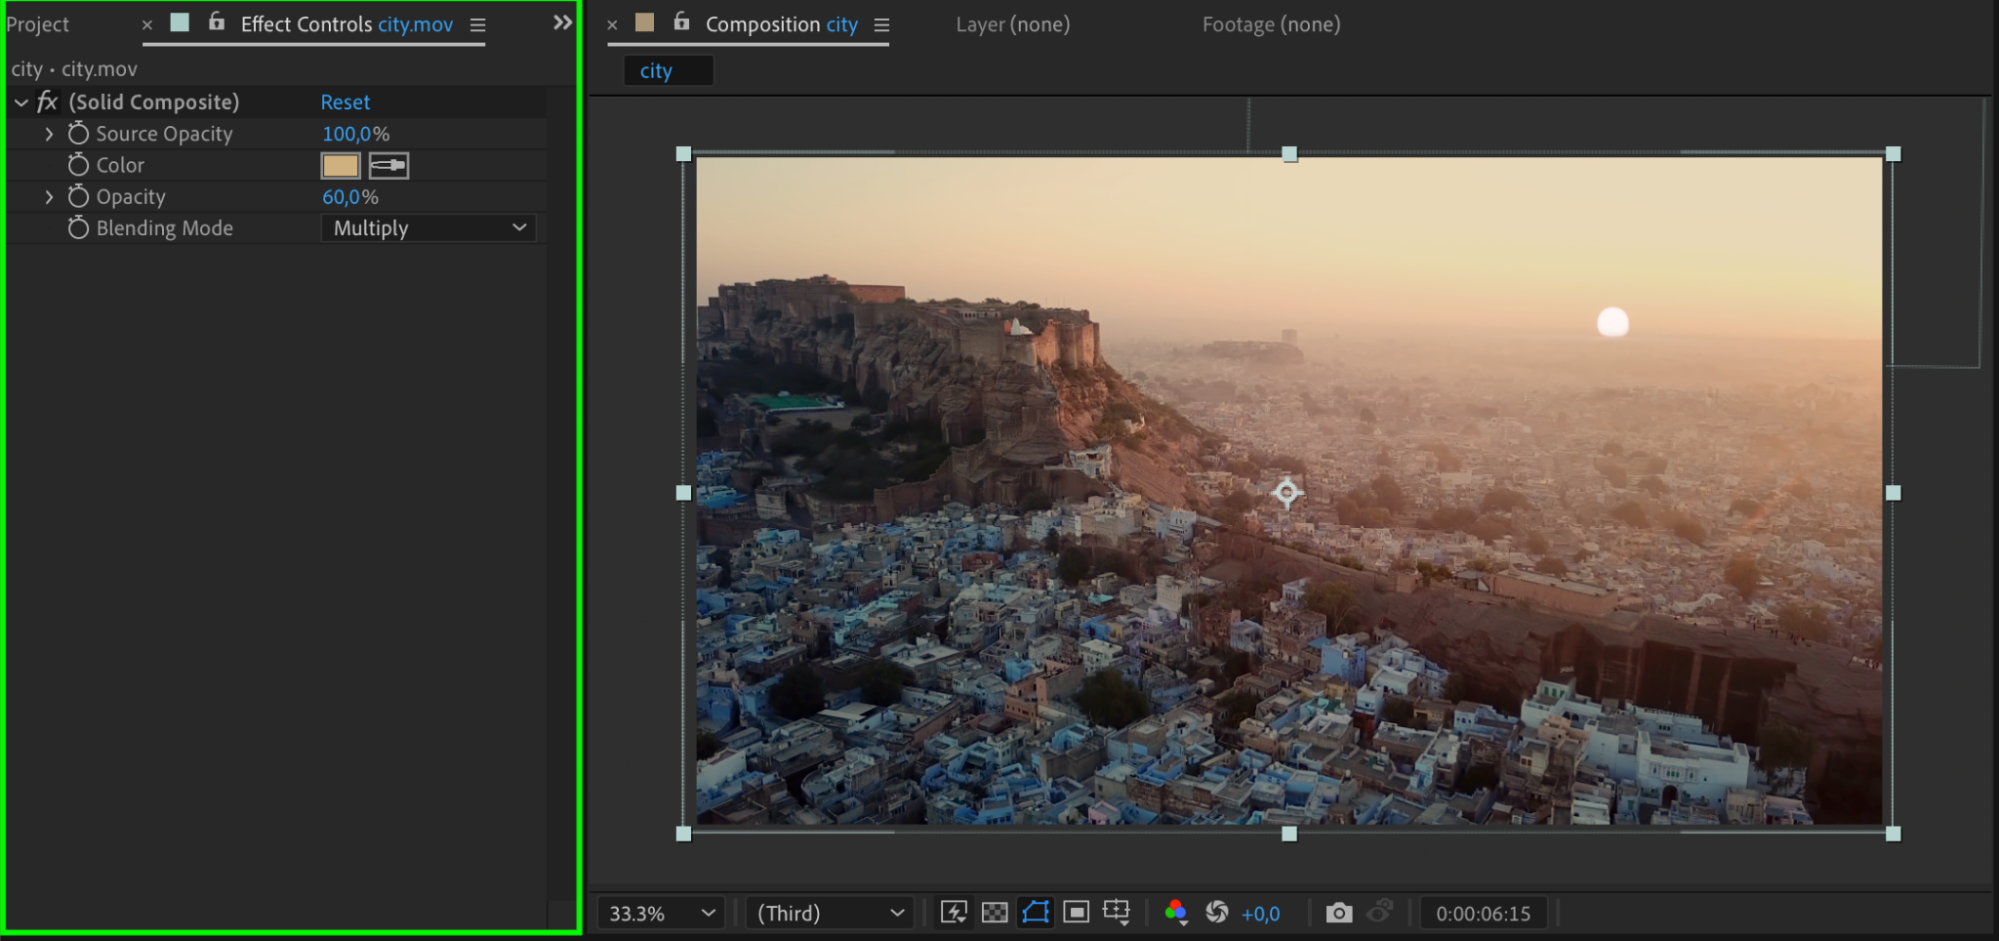
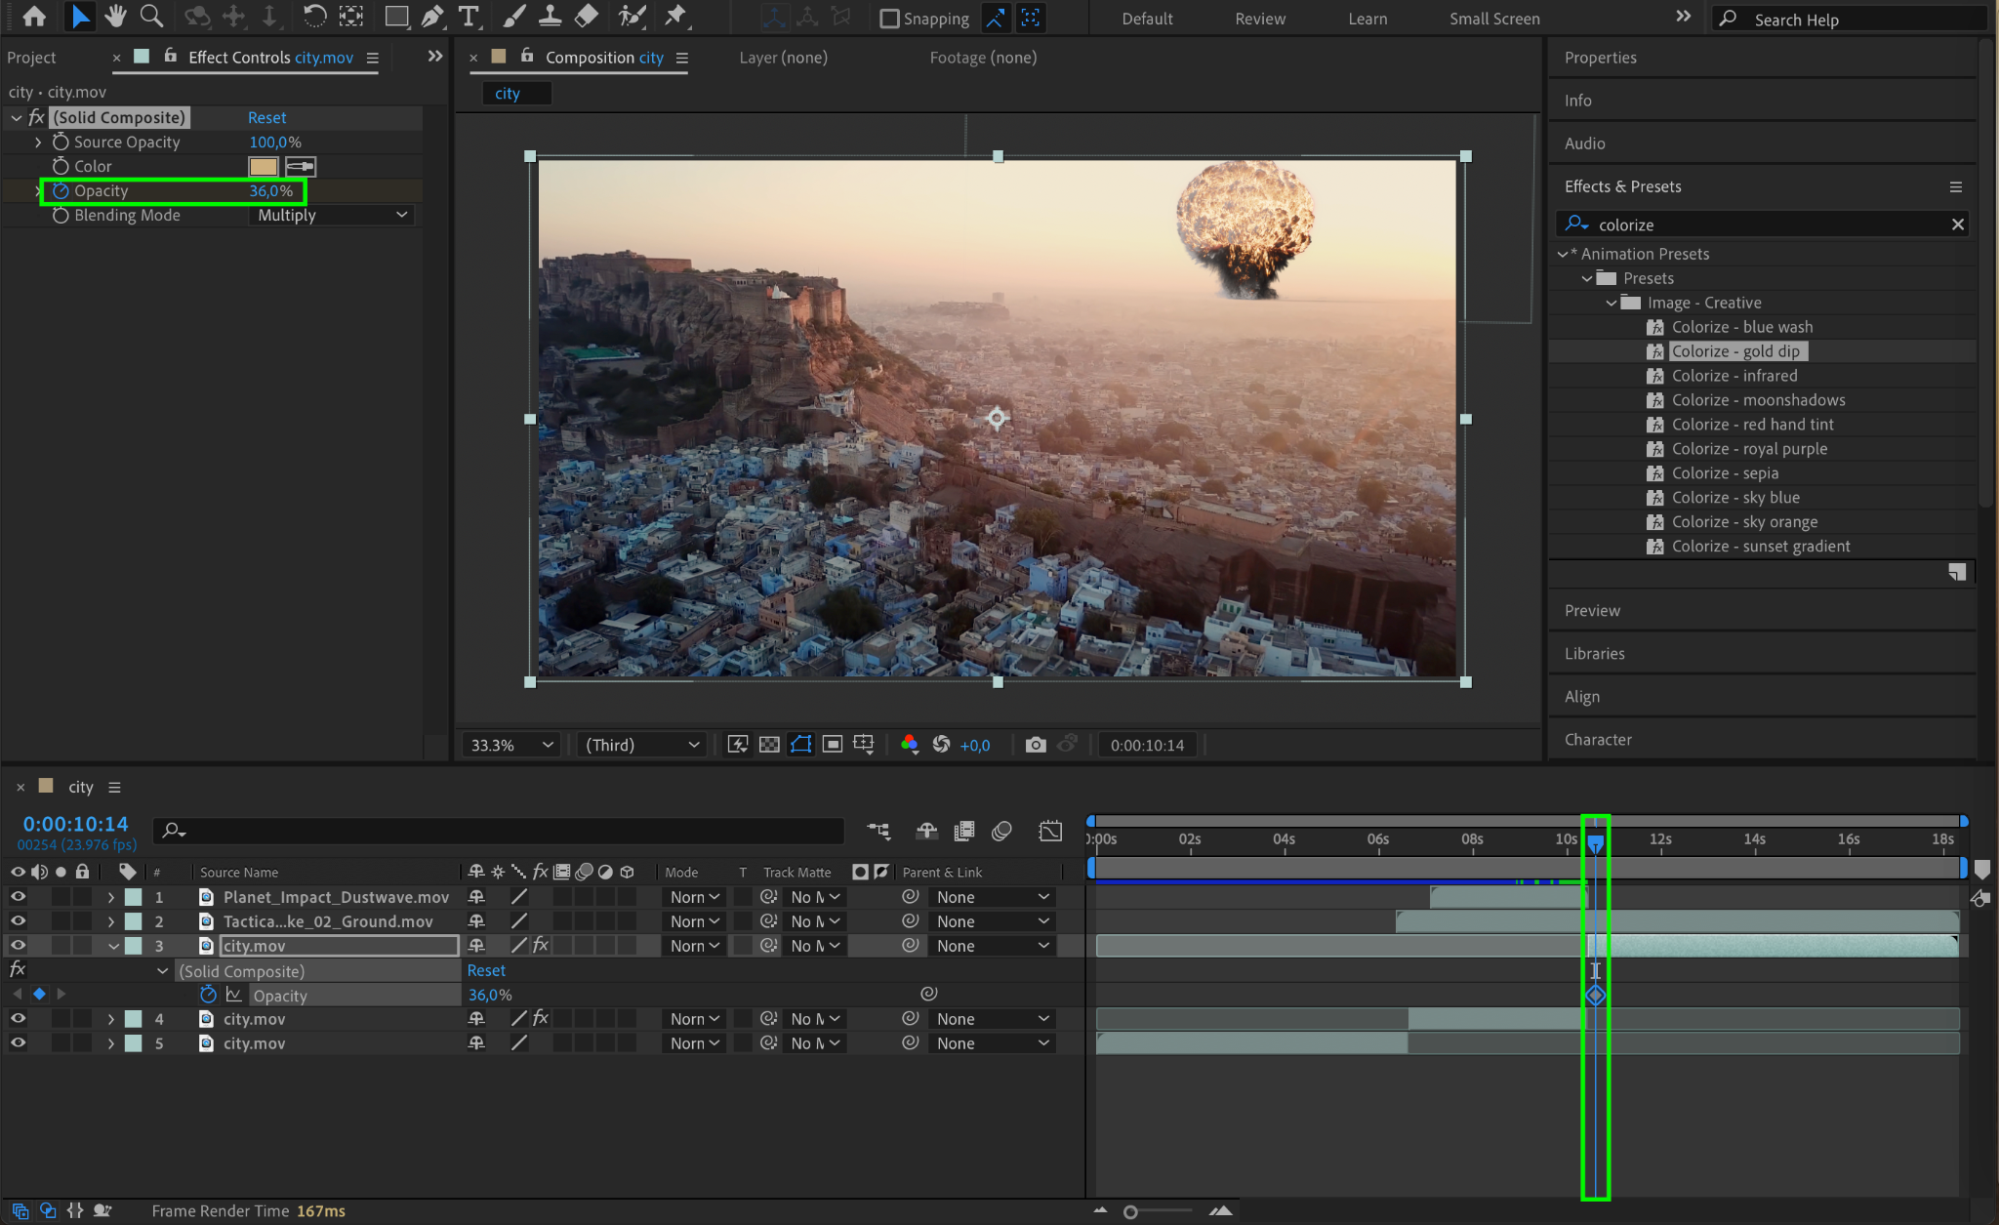
For added intensity, apply the Colorize – Gold Dip effect to the second part of the video layer. In the Effect Controls panel, set the color to a dark yellow and change the Blending Mode to Multiply. Animate the Opacity to gradually increase to 37%, enhancing the look of the explosion.
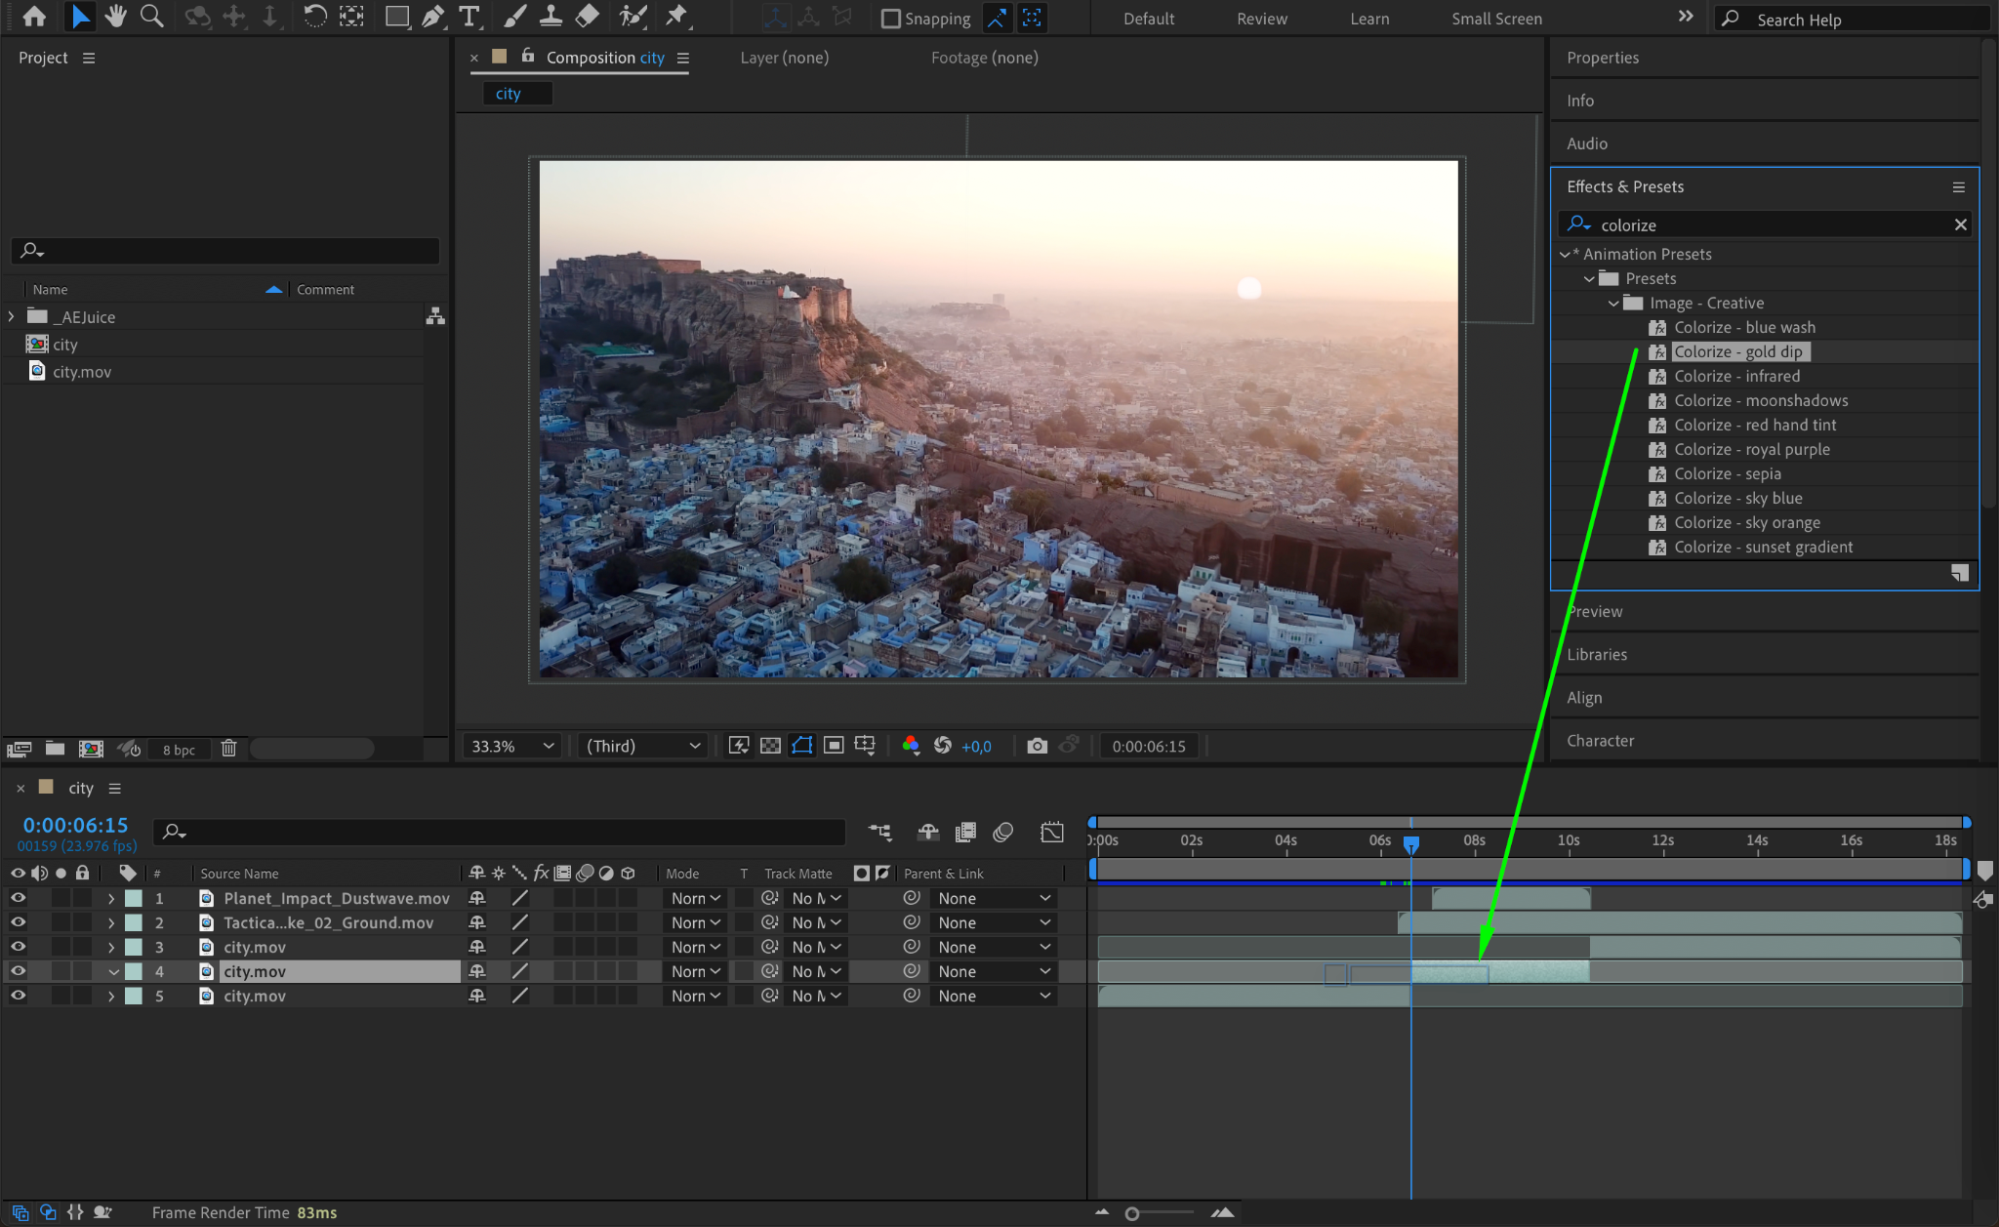
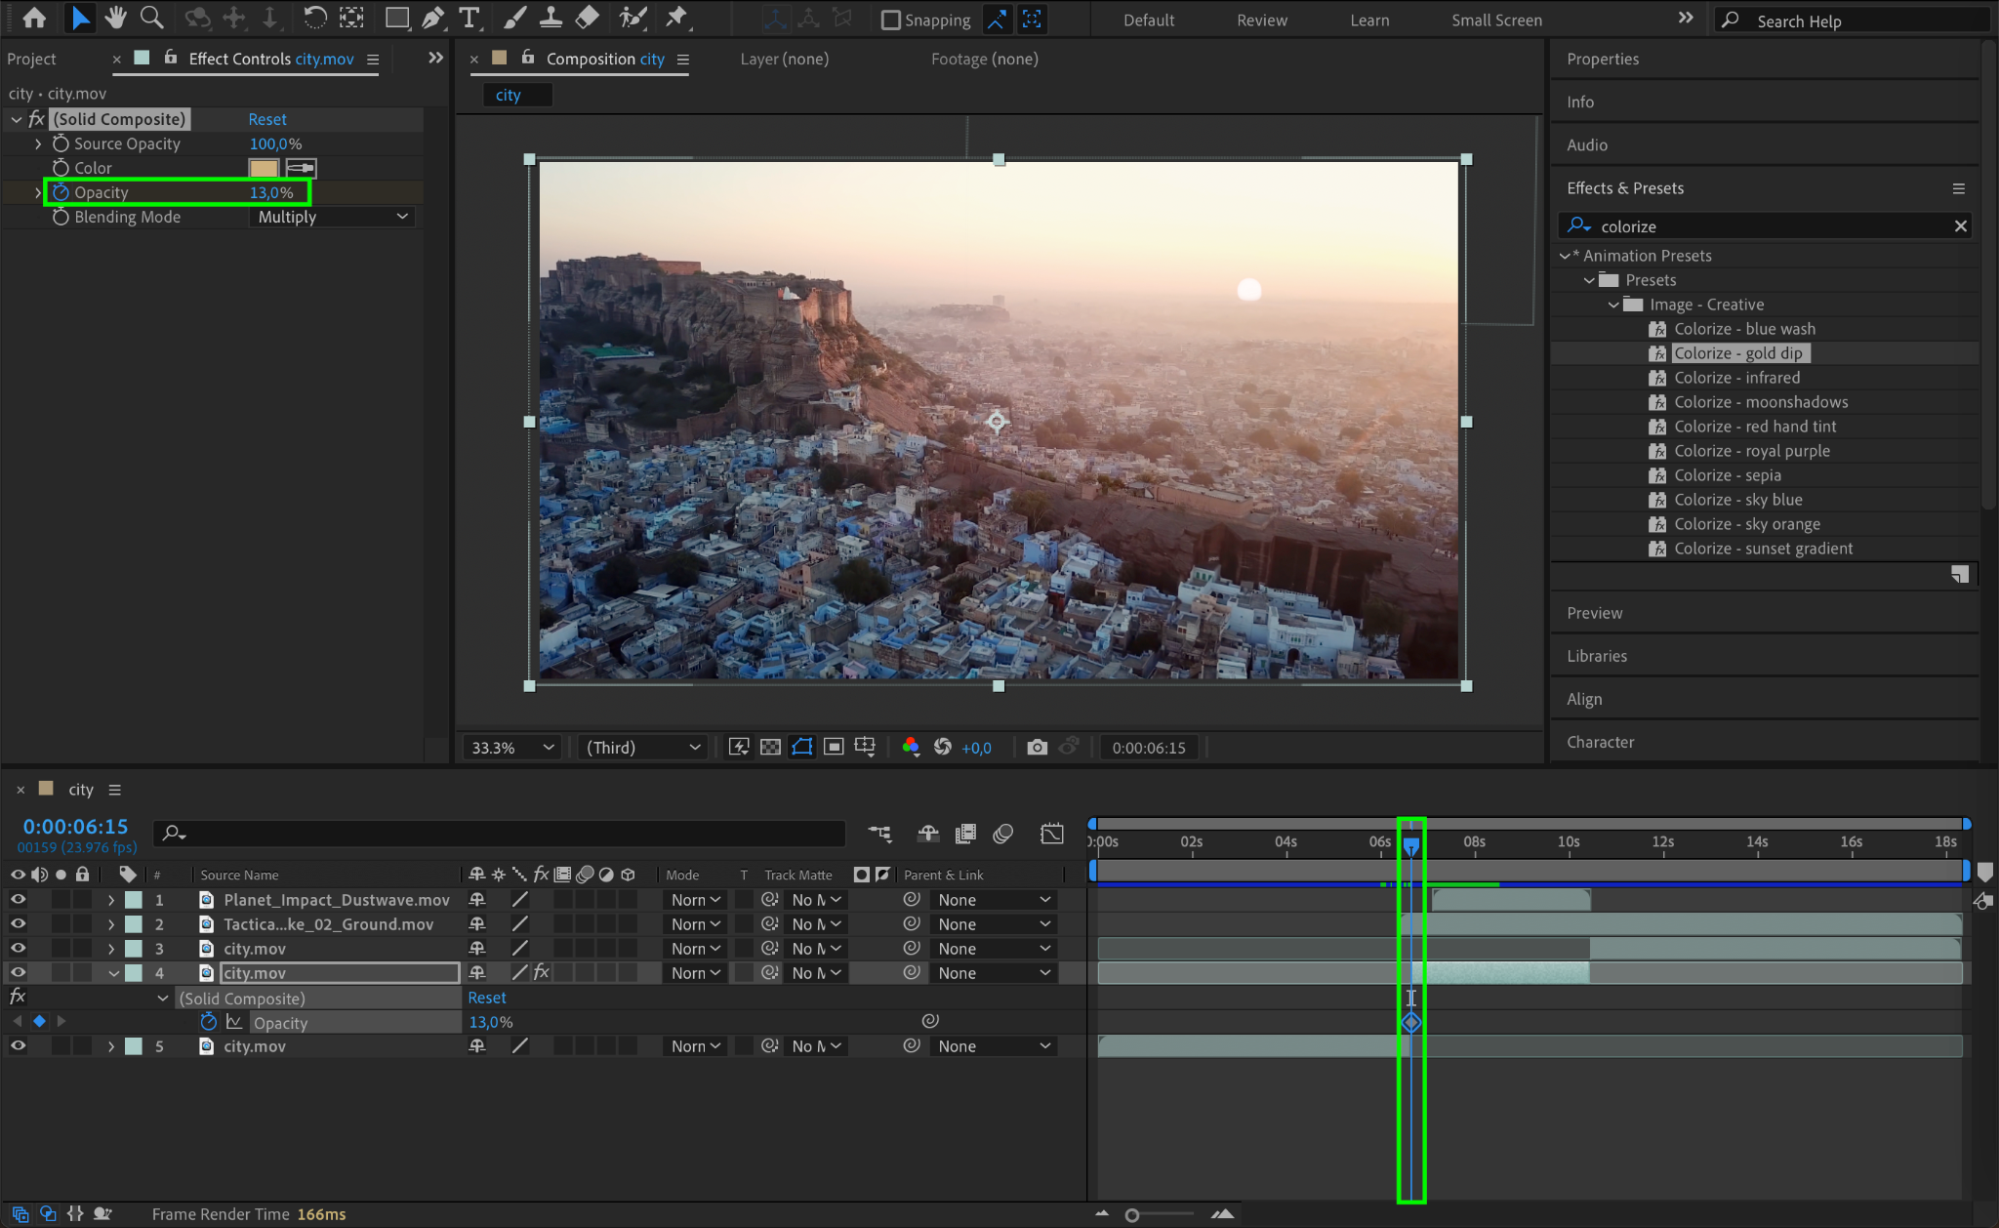
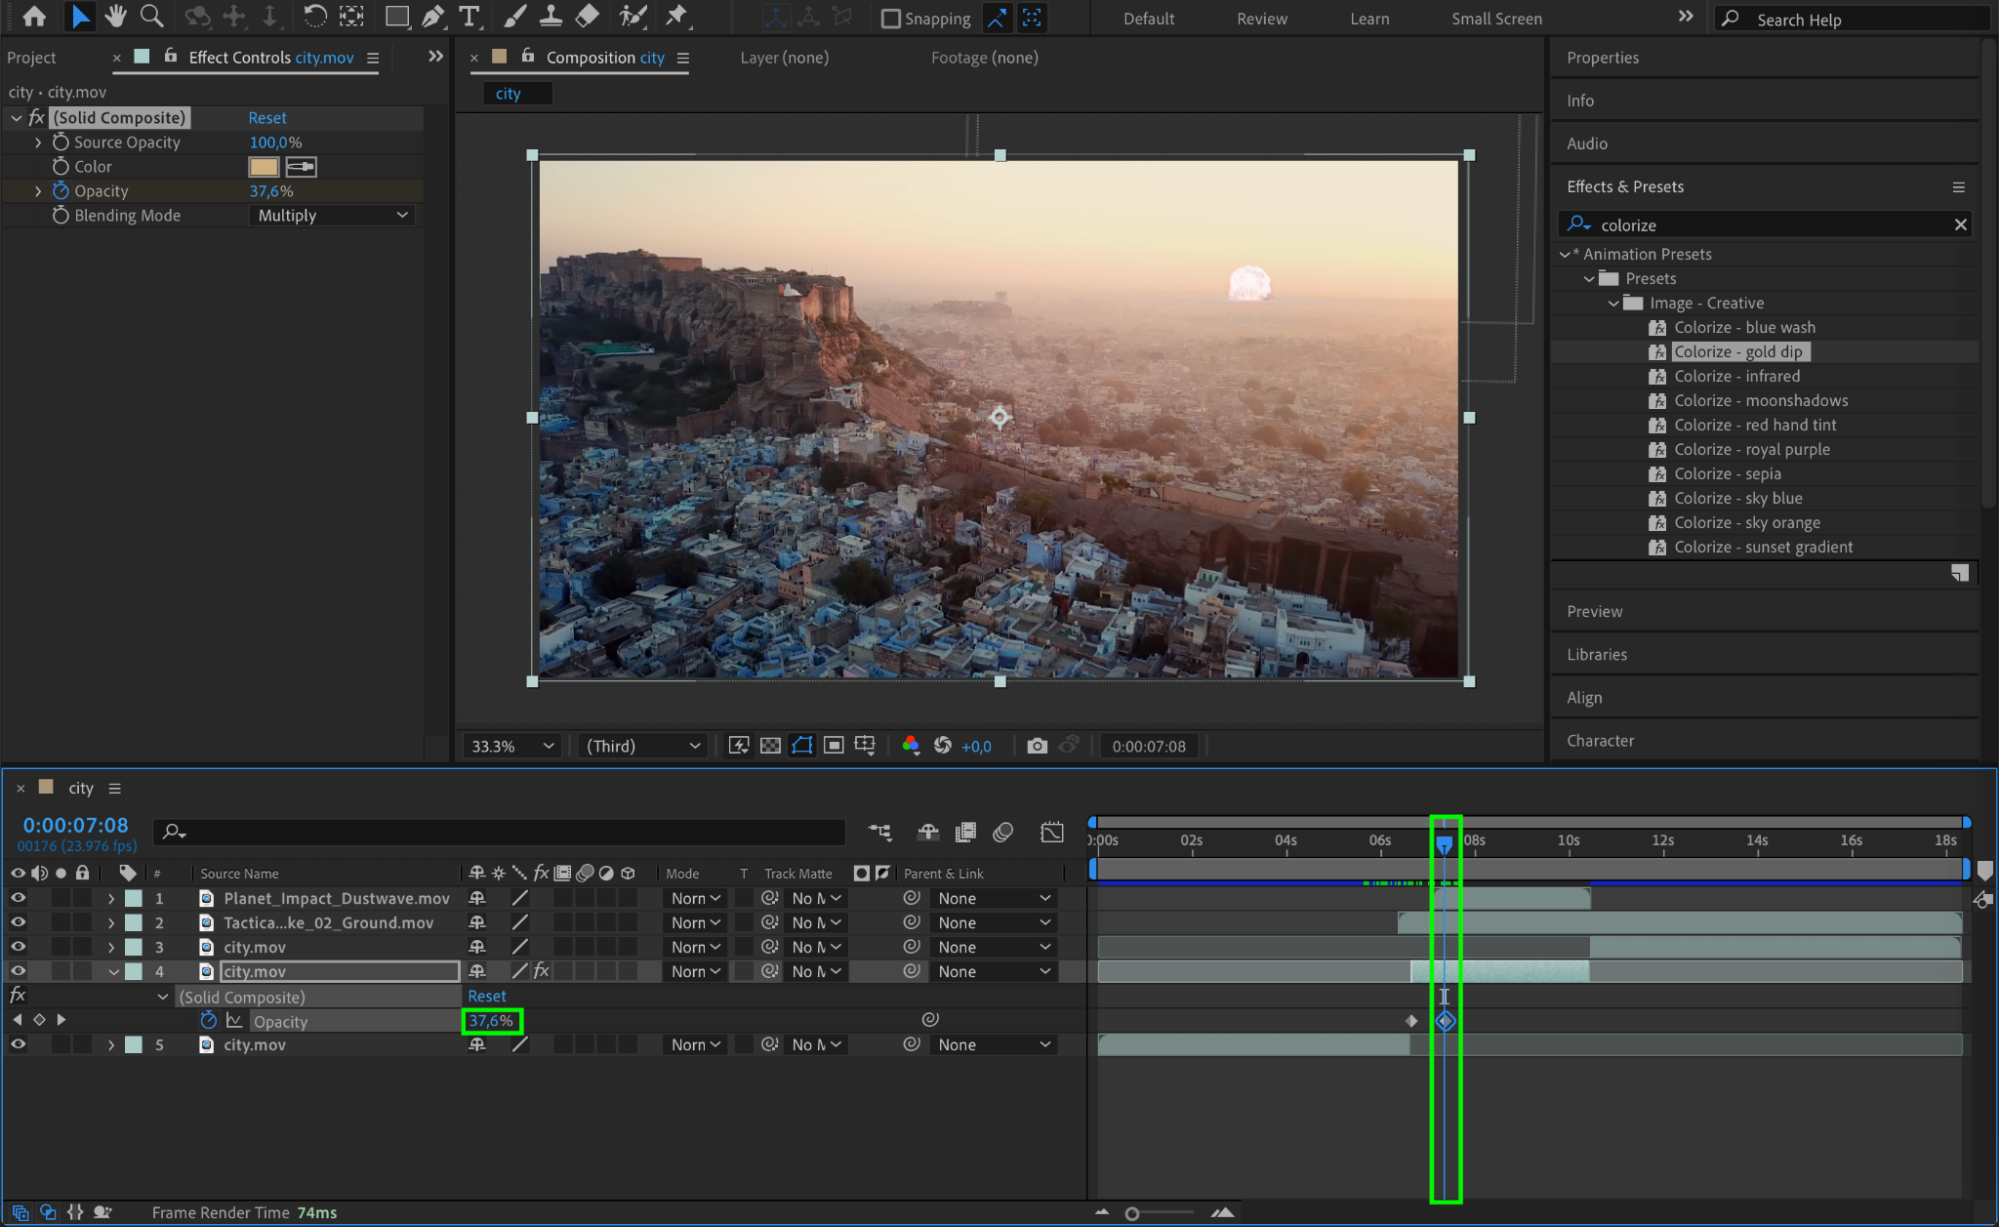
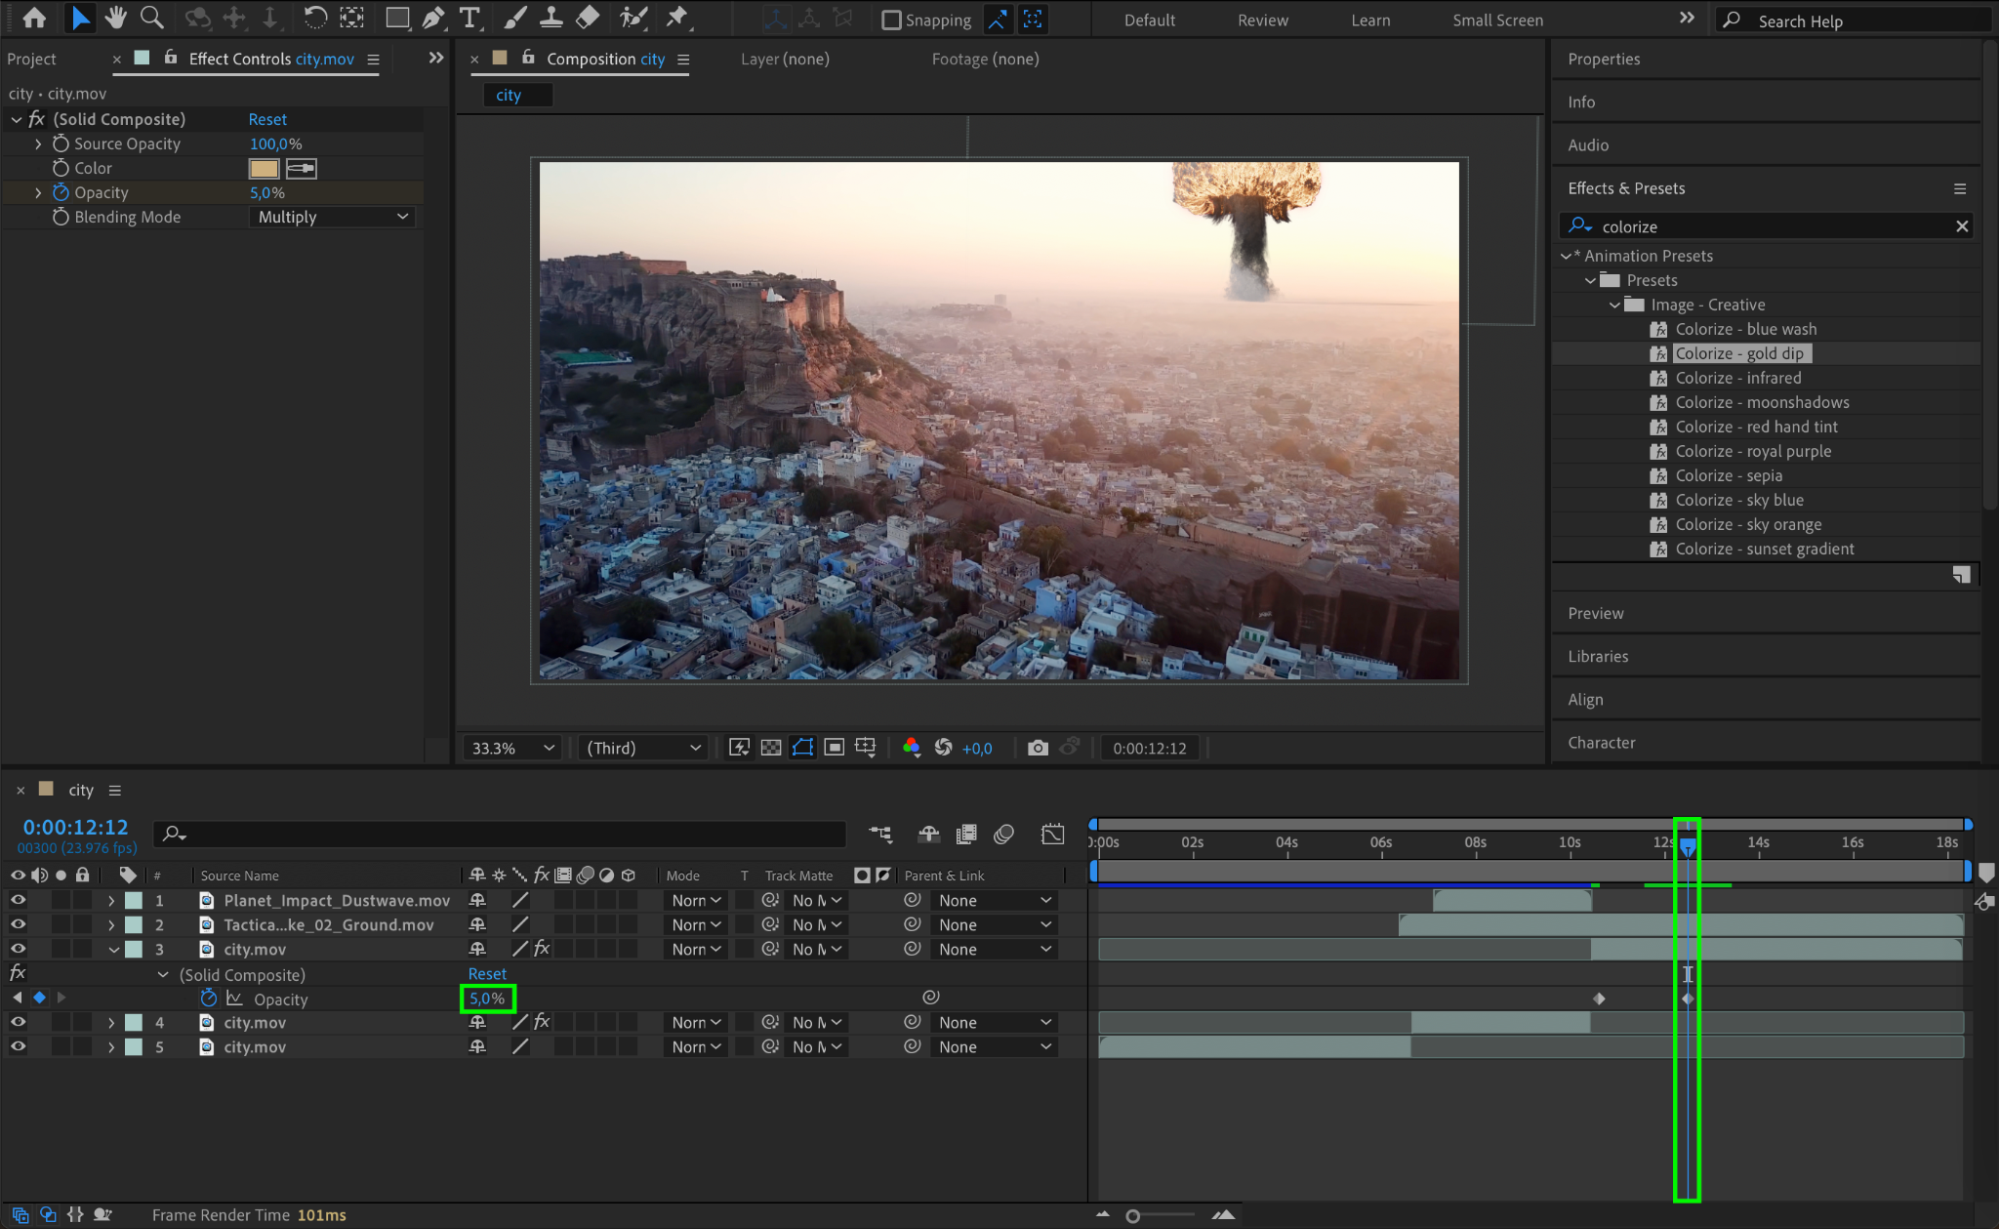
Step 11: Animate the Final Colorize Effect
Apply the Colorize – Gold Dip effect to the third part of the video layer as well. This time, animate the Opacity to gradually decrease to 5%. This effect will simulate the residual glow of the explosion fading out.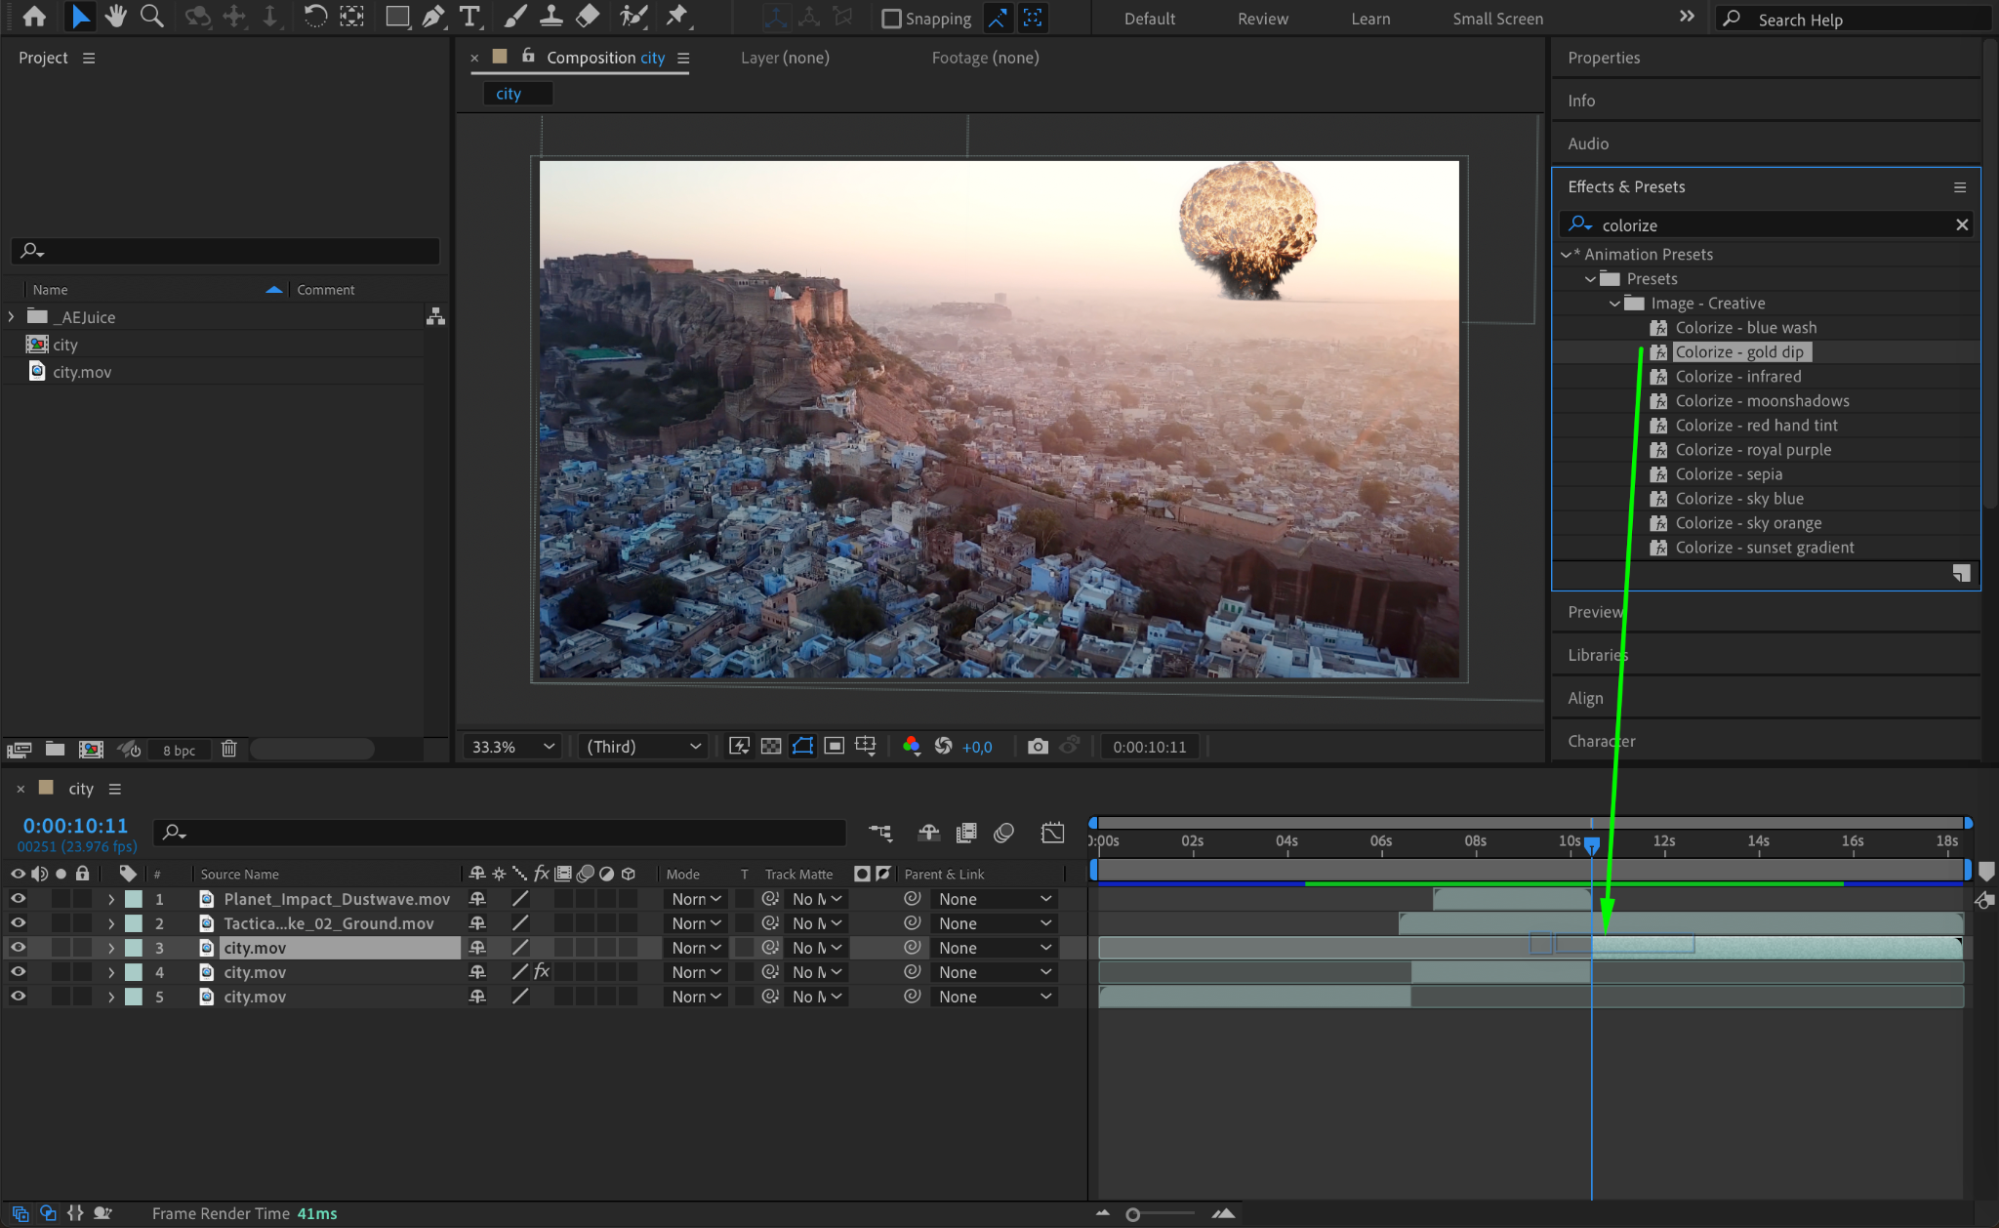
Step 12: Final Touches and Explosion Shake
For the finishing touches, adjust the Opacity of both the Nuke and Dustwave effects to make them blend naturally with your scene. You can also add a subtle shake to the explosion by animating the Position using the wiggle expression. This will give the explosion more impact and make it feel more realistic.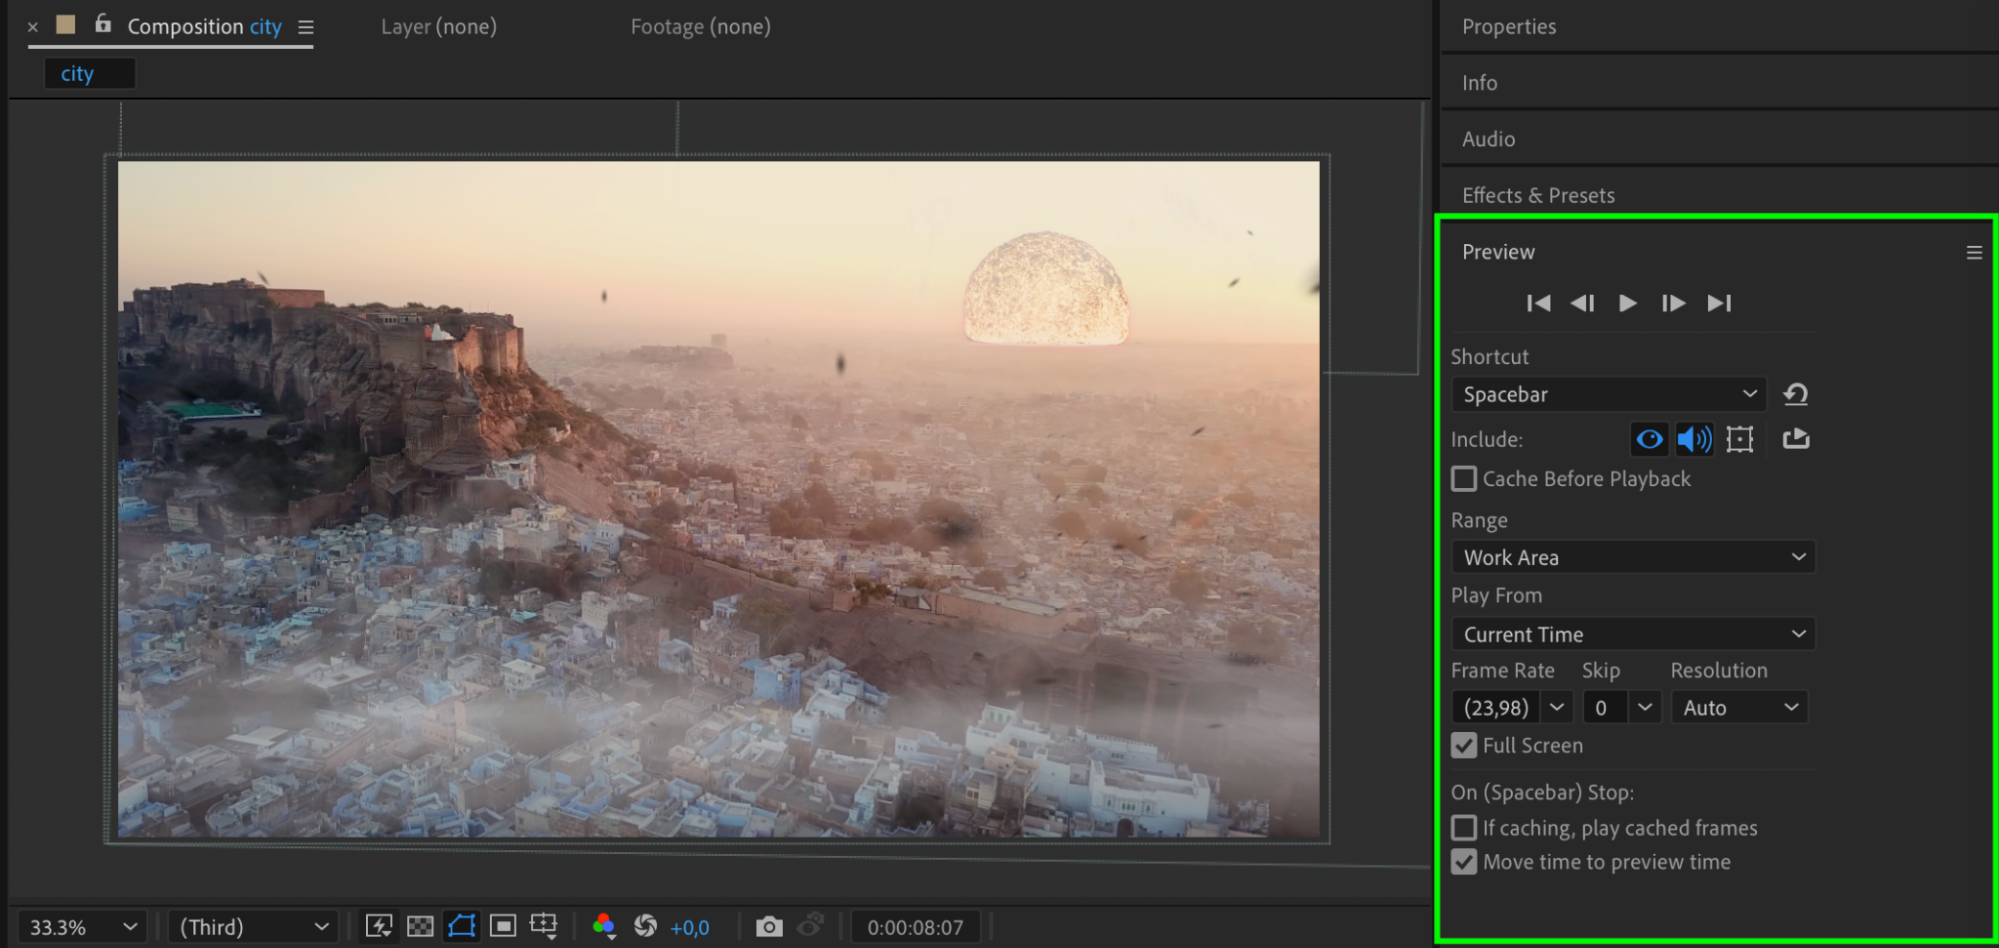
Step 13: Add Sound Effects
Don’t forget to add powerful sound effects to enhance the visual impact. The sound of the explosion and the accompanying rumble will add to the realism and make the overall effect more convincing.
Conclusion
By following these steps and using the AEJuice plugin, you can create an impressive and believable nuke explosion effect in After Effects. Take your time to experiment with the settings and fine-tune your animation to fit your specific project needs. Unleash your creativity and leave your audience speechless with this explosive visual effect!


