How to Create a Winking Effect on a Picture in After Effects
Introduction
Animating a winking effect in After Effects can add personality and realism to a static image. In this guide, you’ll learn how to use masks, keyframes, and 3D transformations to create a smooth and natural-looking wink.
Step 1: Import Your Photo into After Effects
Open After Effects and import your photo. Drag it onto the timeline to create a new composition. Make sure the image is properly positioned and scaled for animation.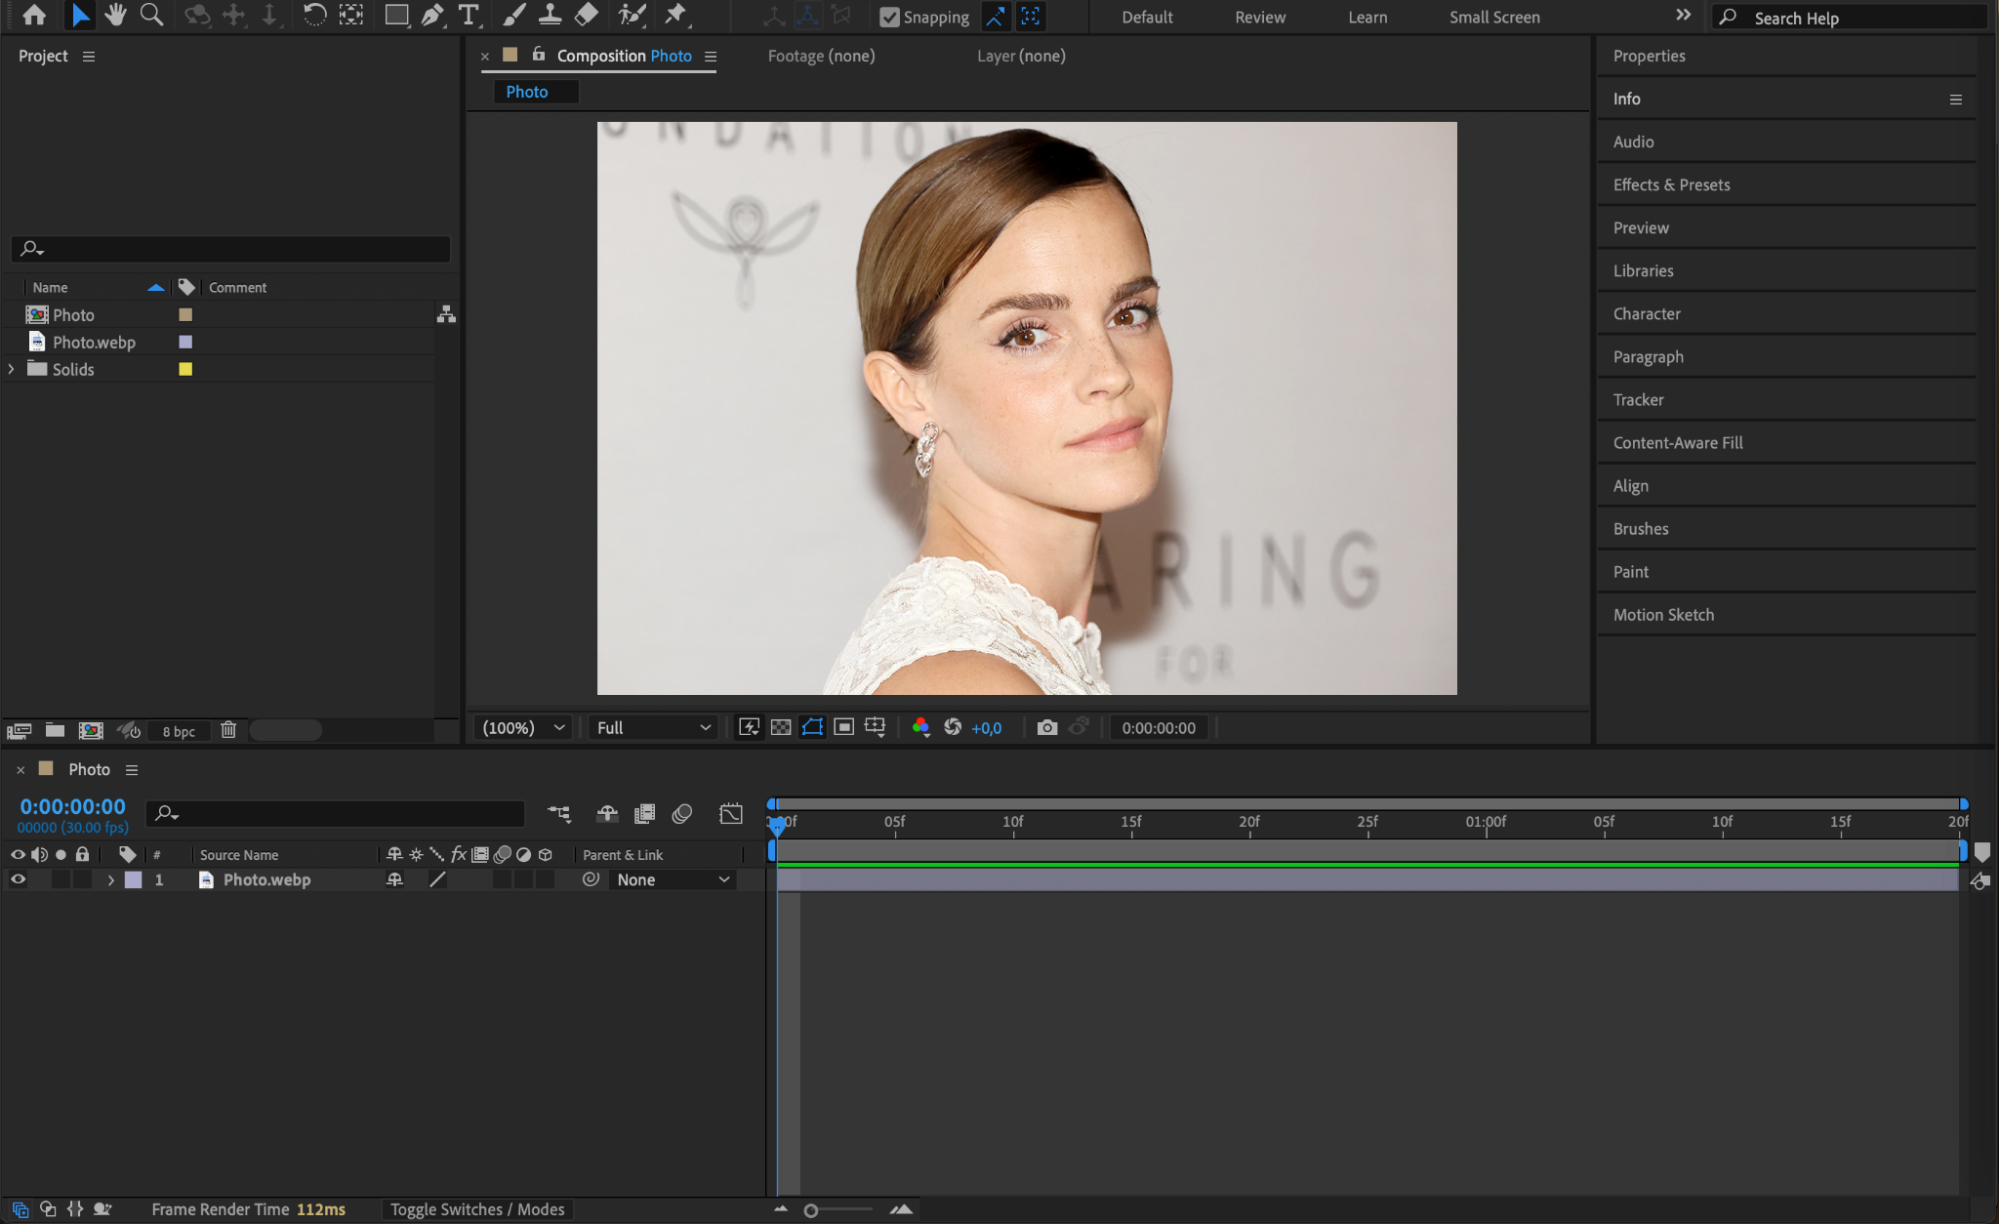 Step 2: Create a Skin-Toned Solid Layer
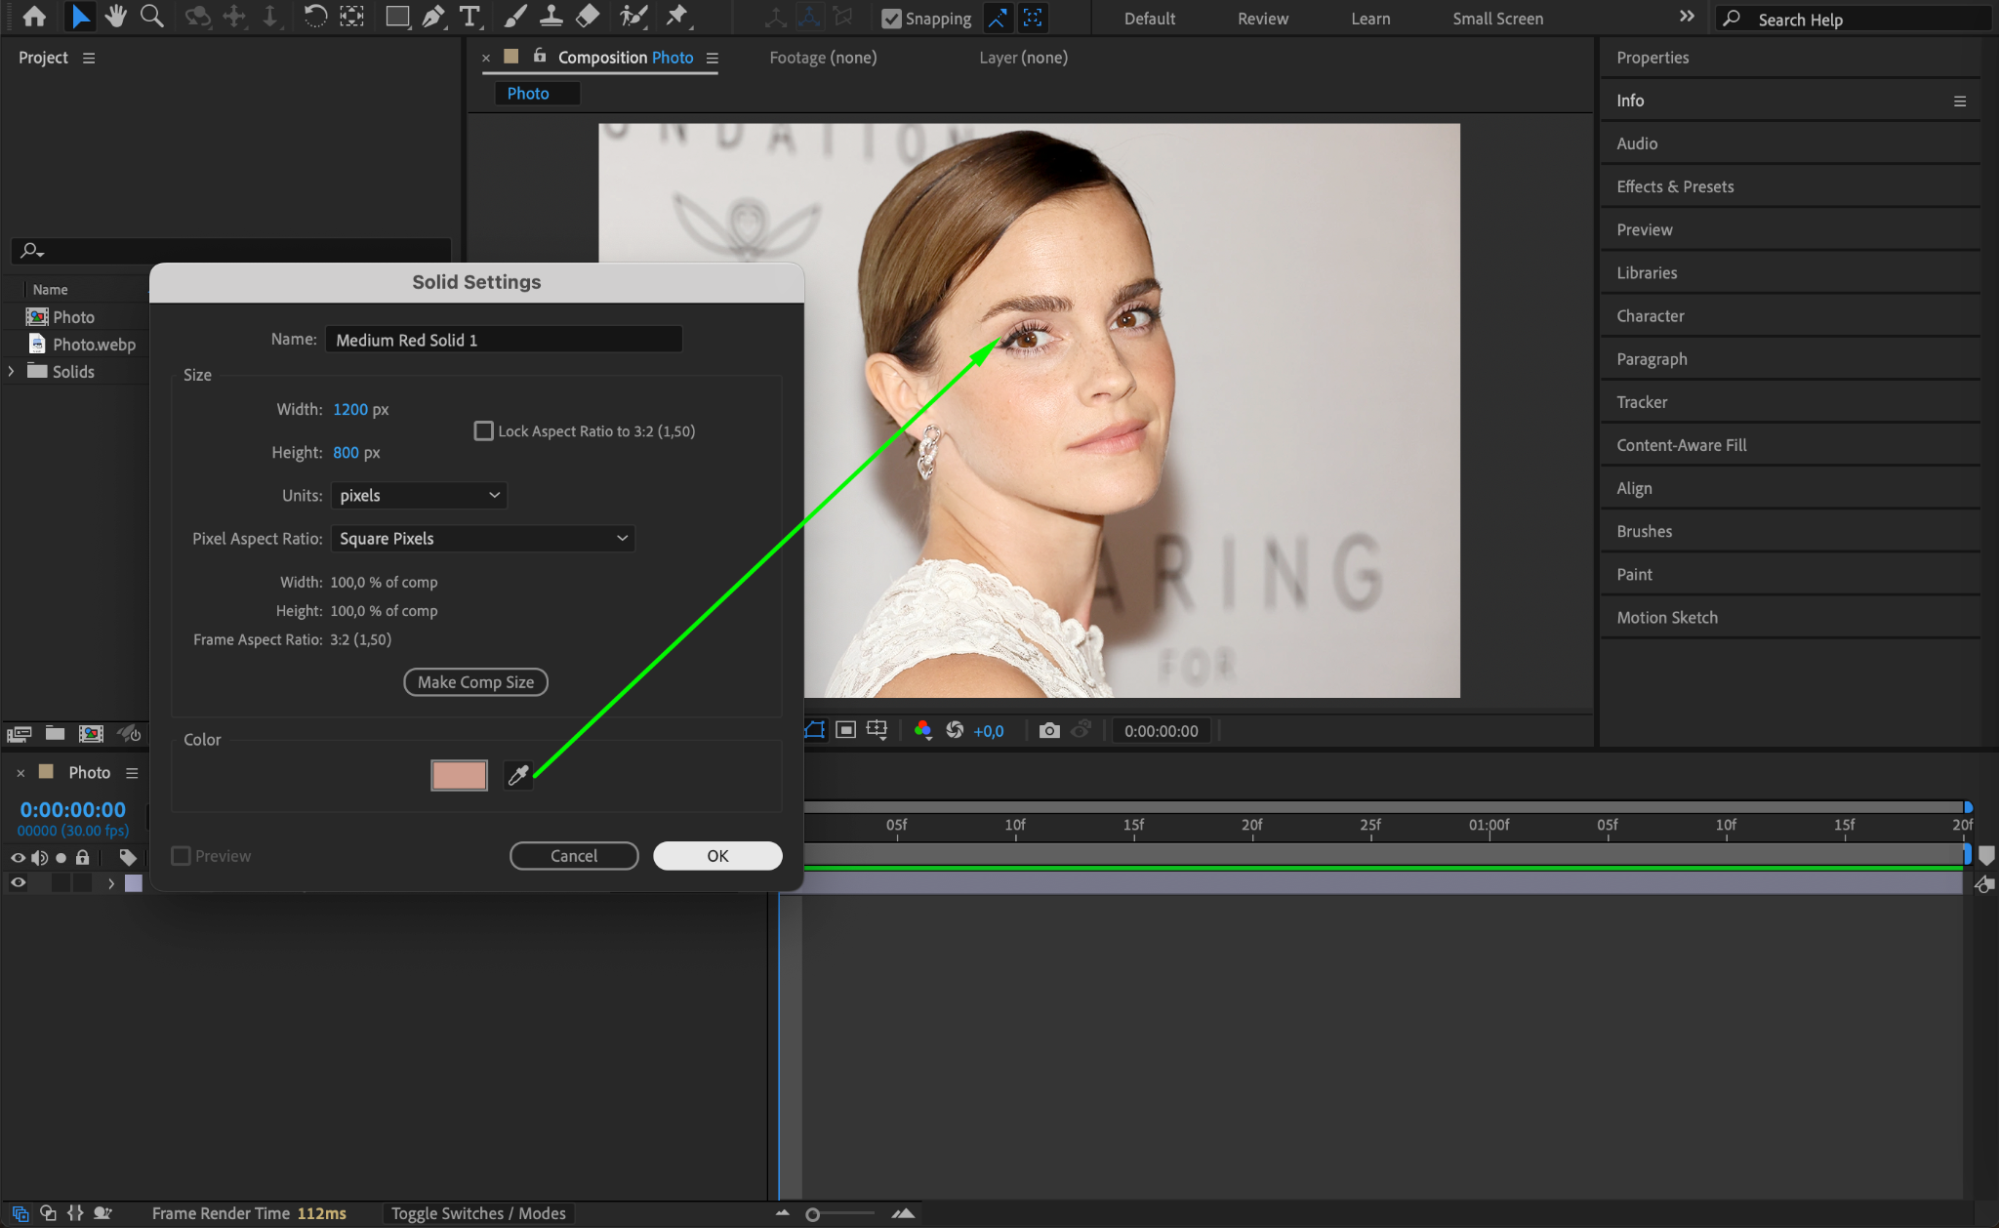
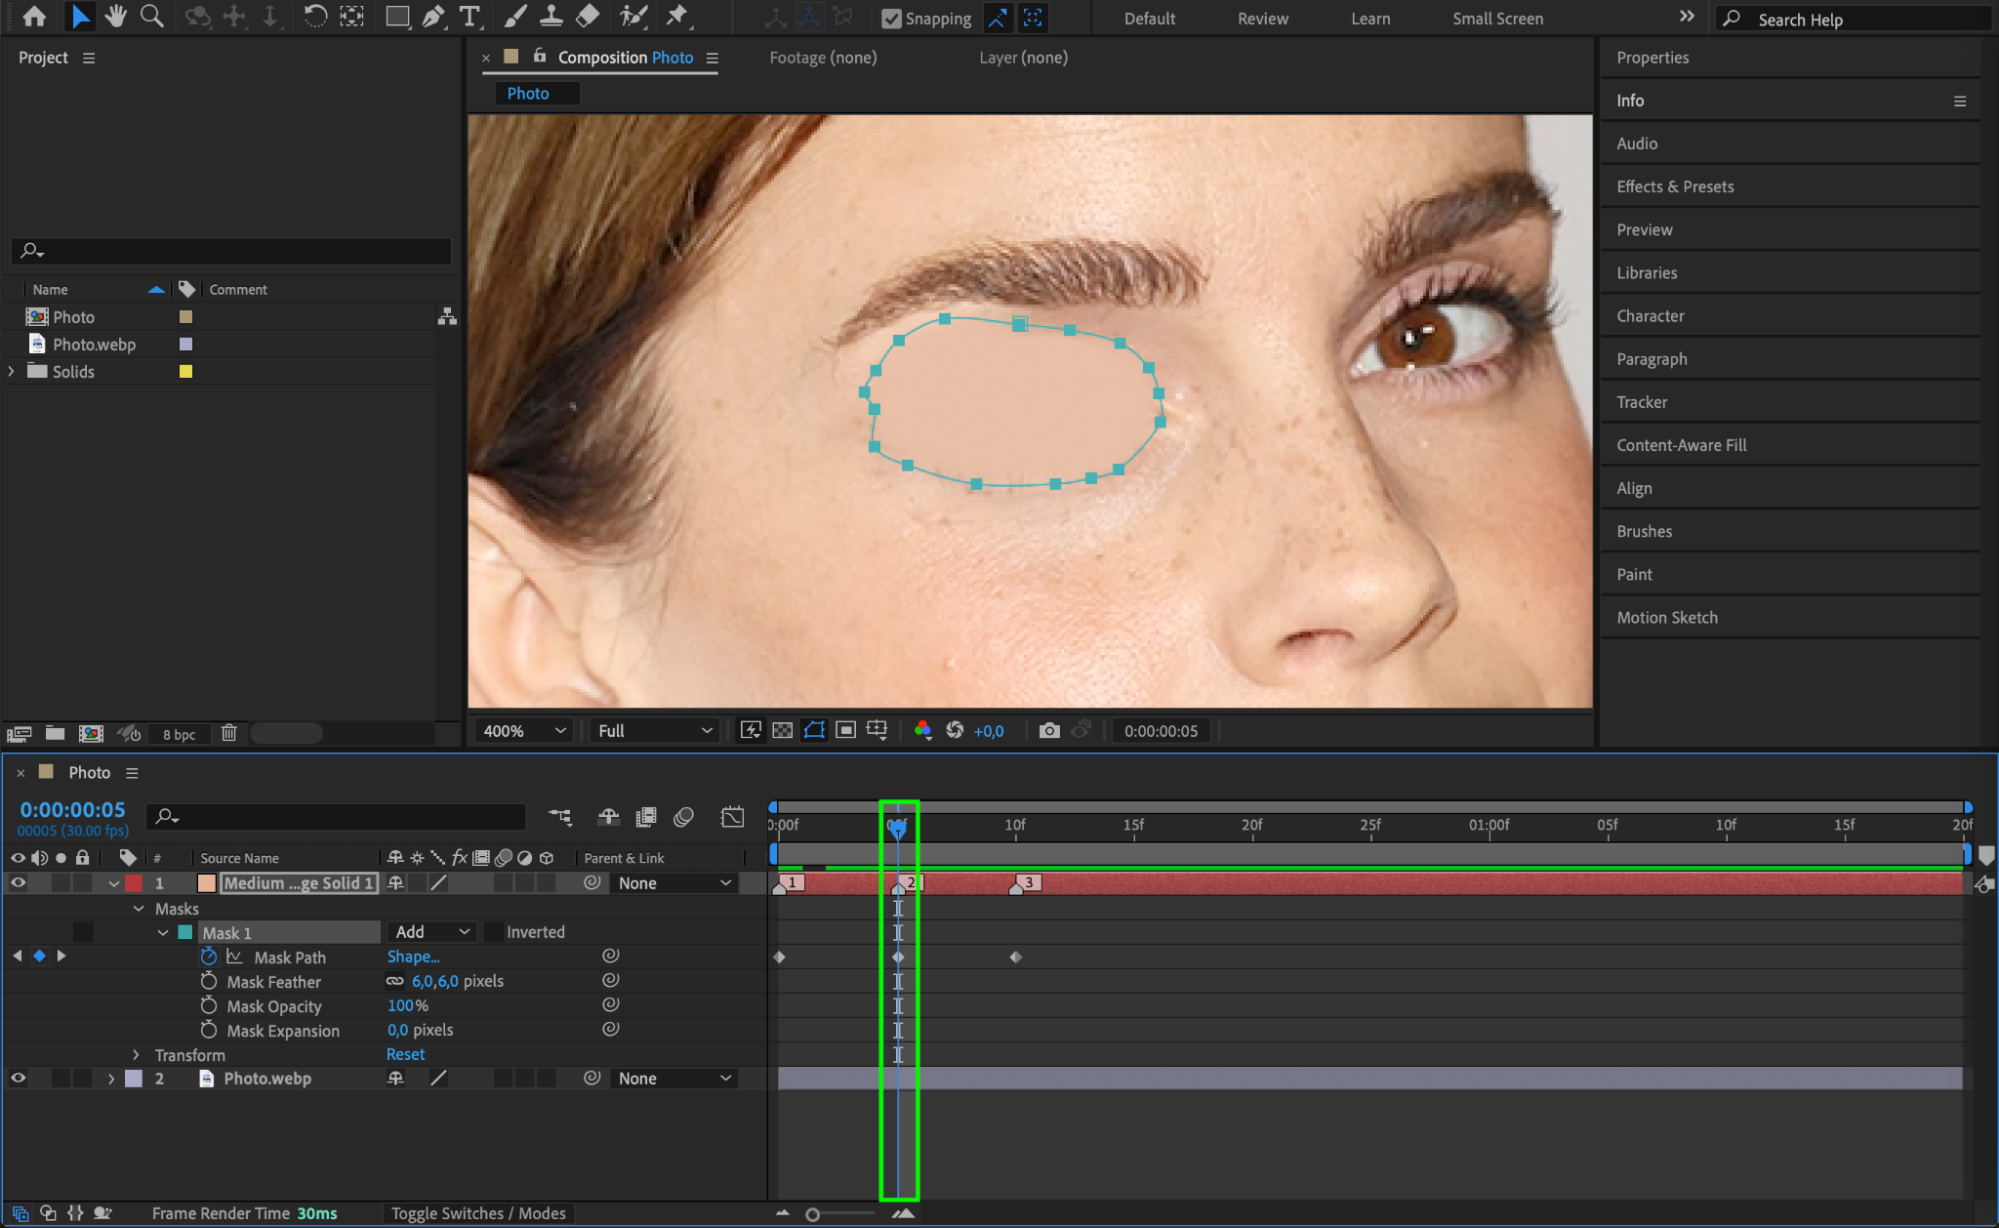
Go to Layer > New > Solid and choose a color that matches the skin around the eye. This solid will be used to blend the closed eyelid naturally.
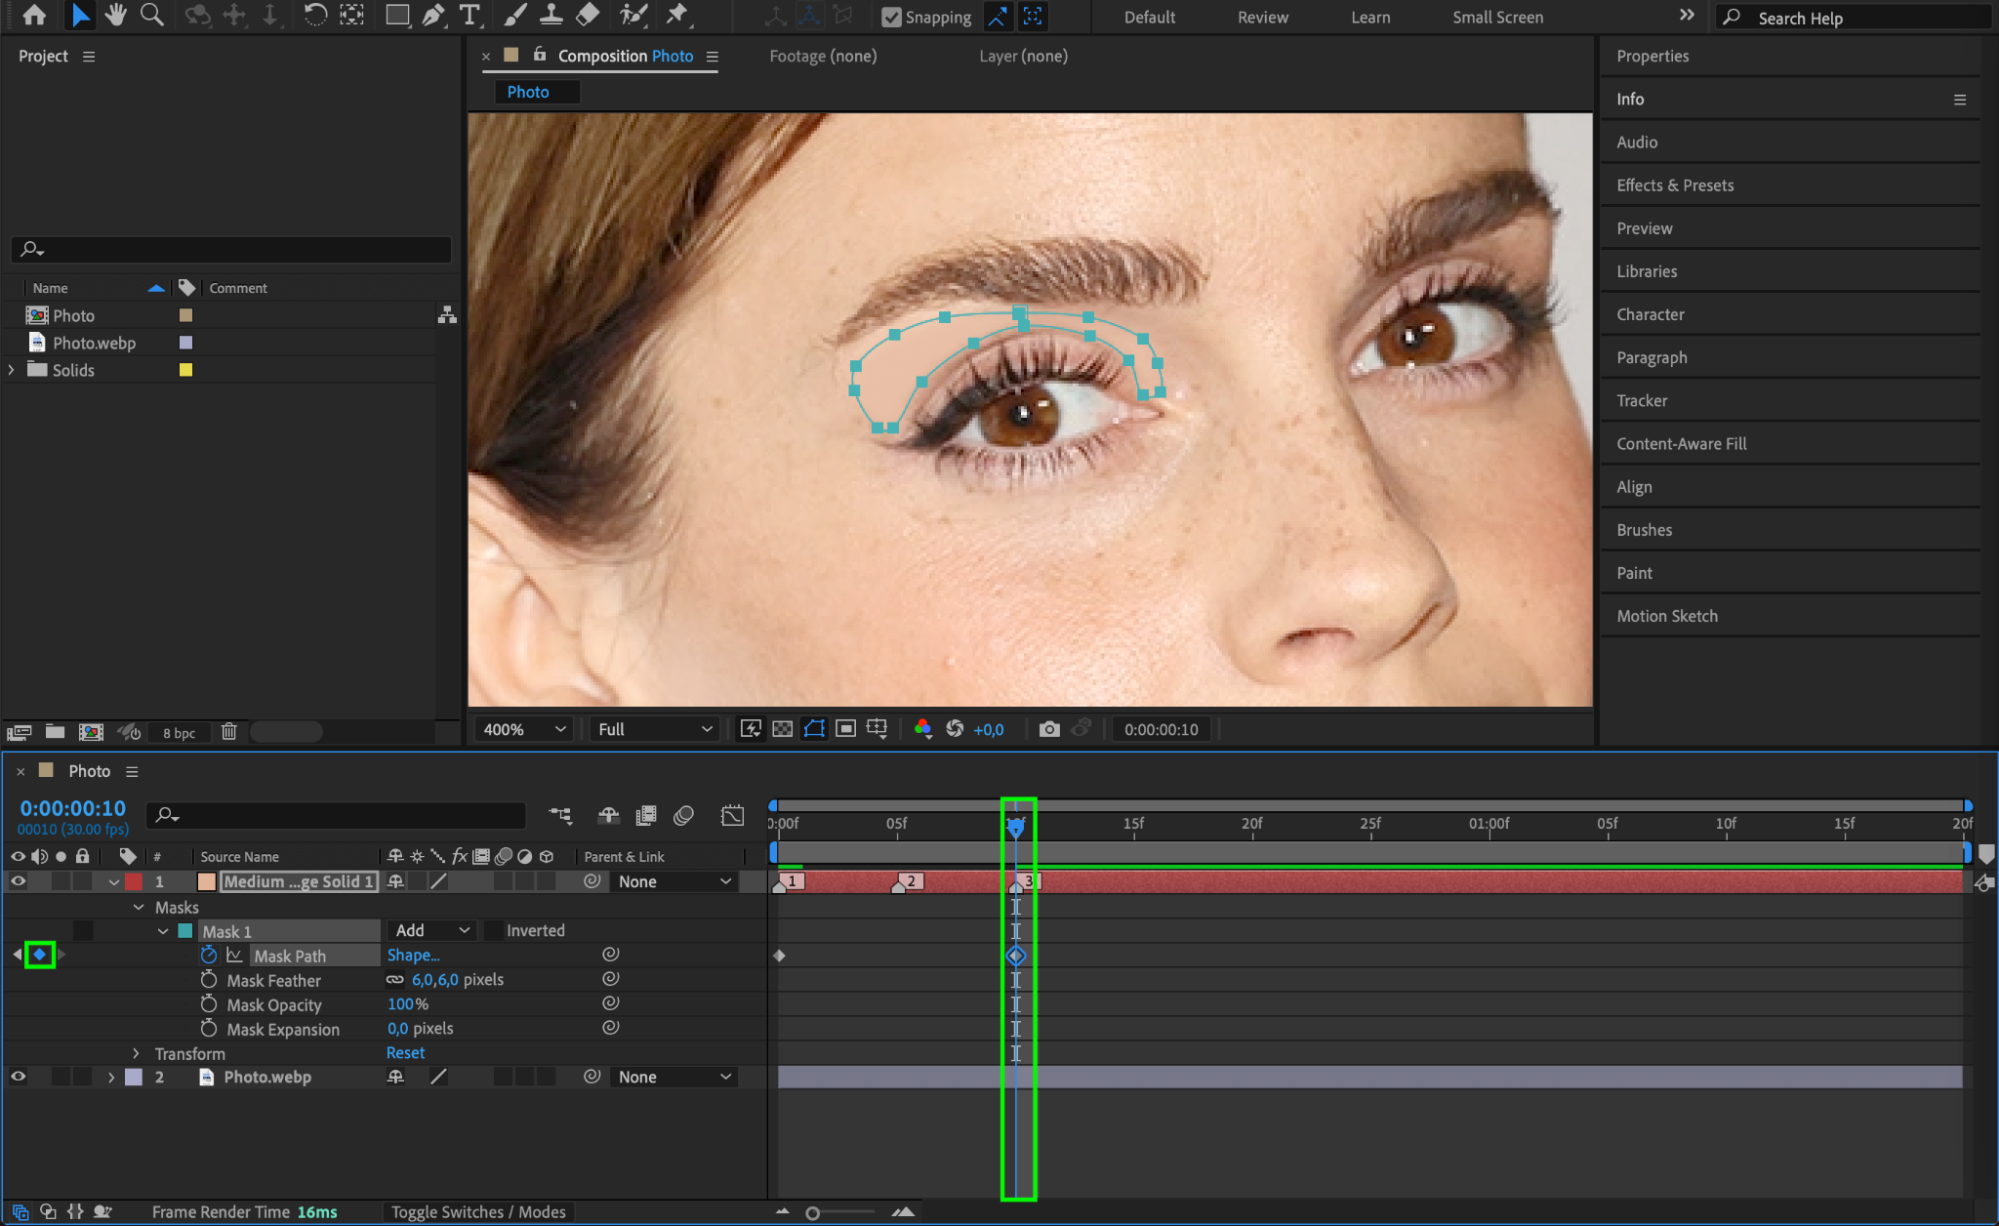
 Step 3: Mask the Eyelid Area
Select the Pen Tool (G) and draw a mask around the upper eyelid. Then, in the mask settings, set the Feather value to 6 to create a smooth transition.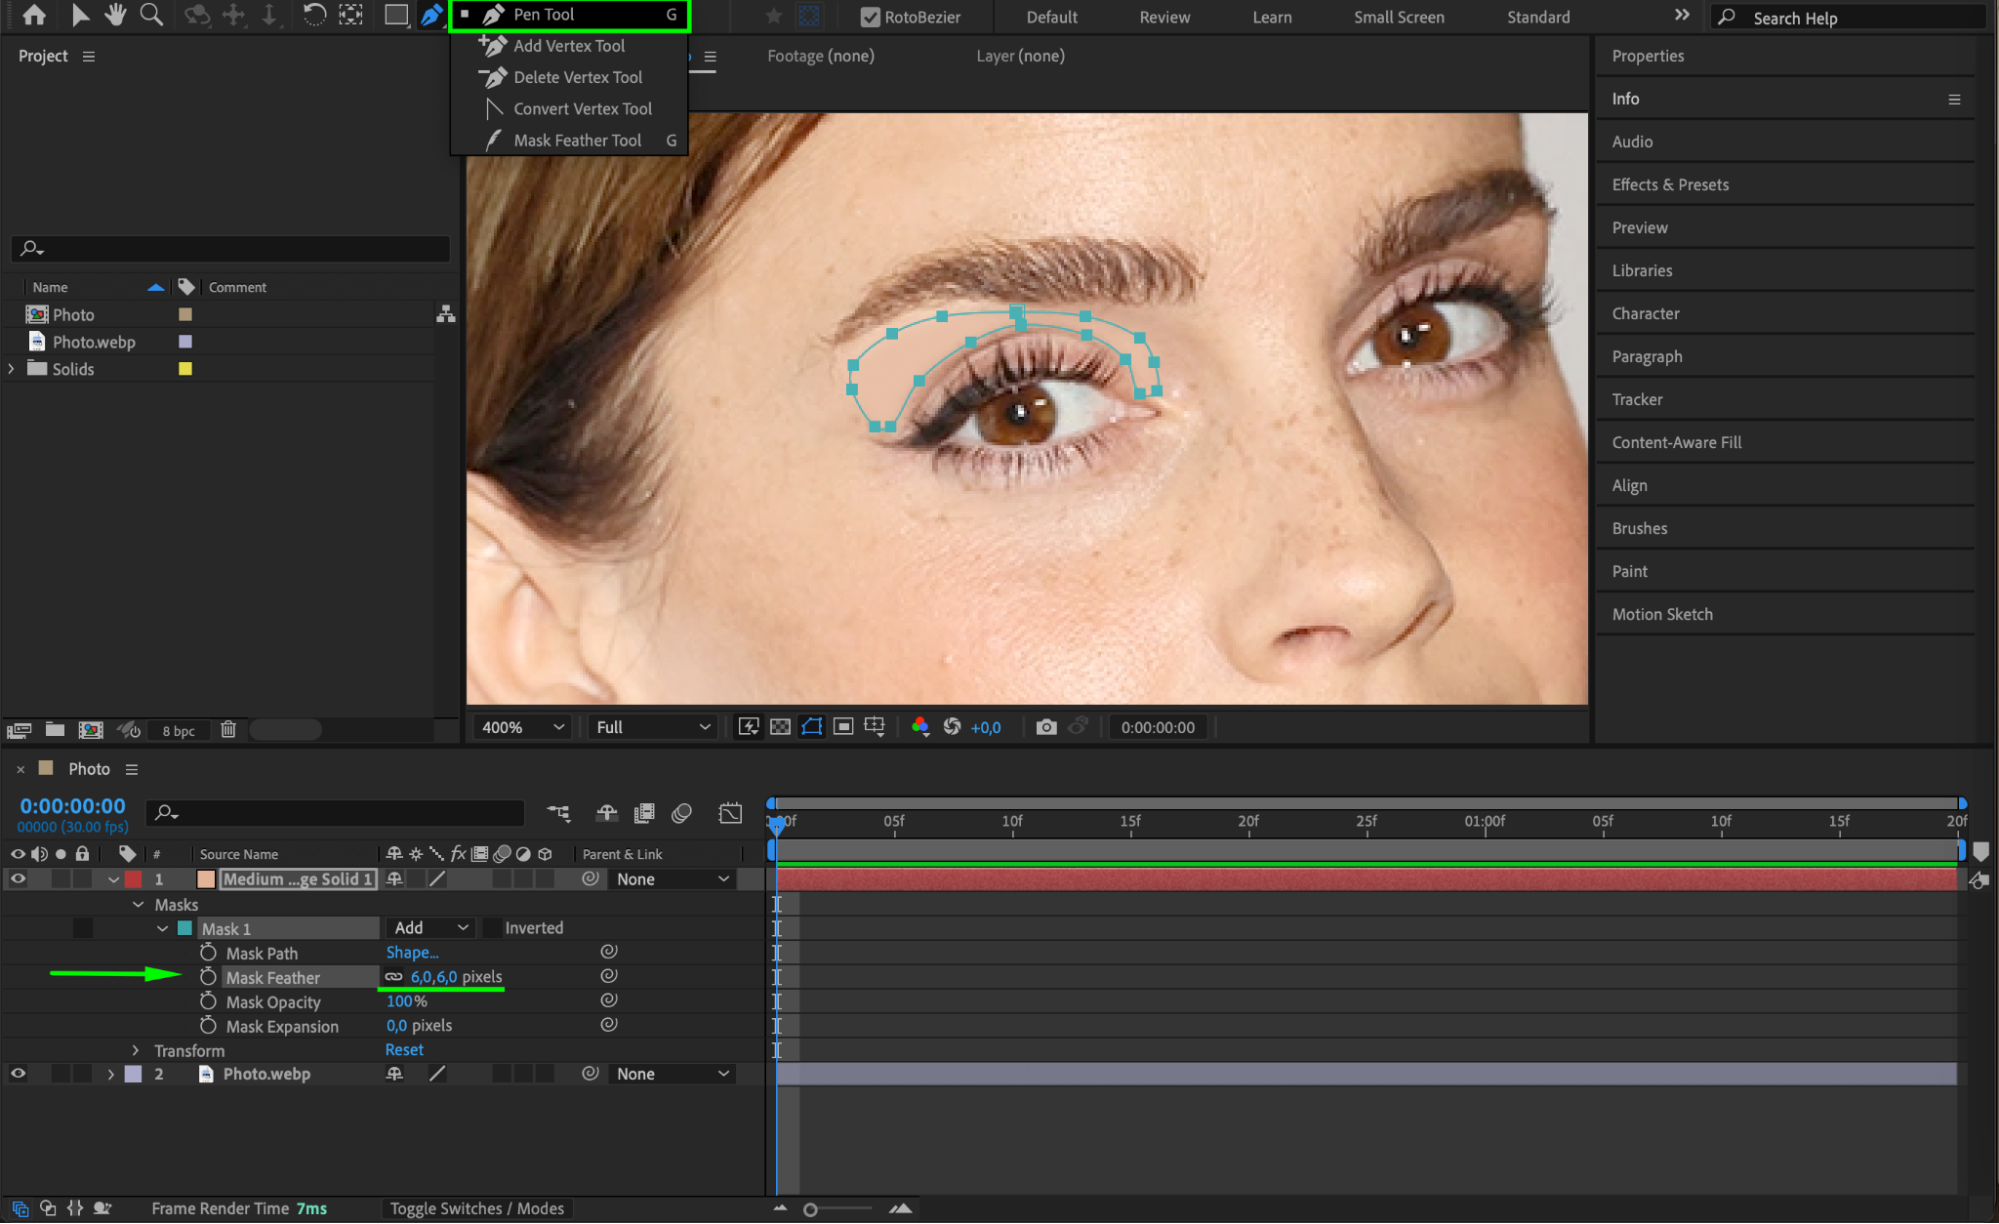 Step 4: Animate the Eyelid Mask
In the timeline, locate the Mask Path property of the solid layer. At position 1, click the stopwatch to create a keyframe. Move to position 3 and add another keyframe without making any changes. Then, go to position 2 and adjust the mask shape so that the eyelid fully covers the eye, creating the closed-eye effect.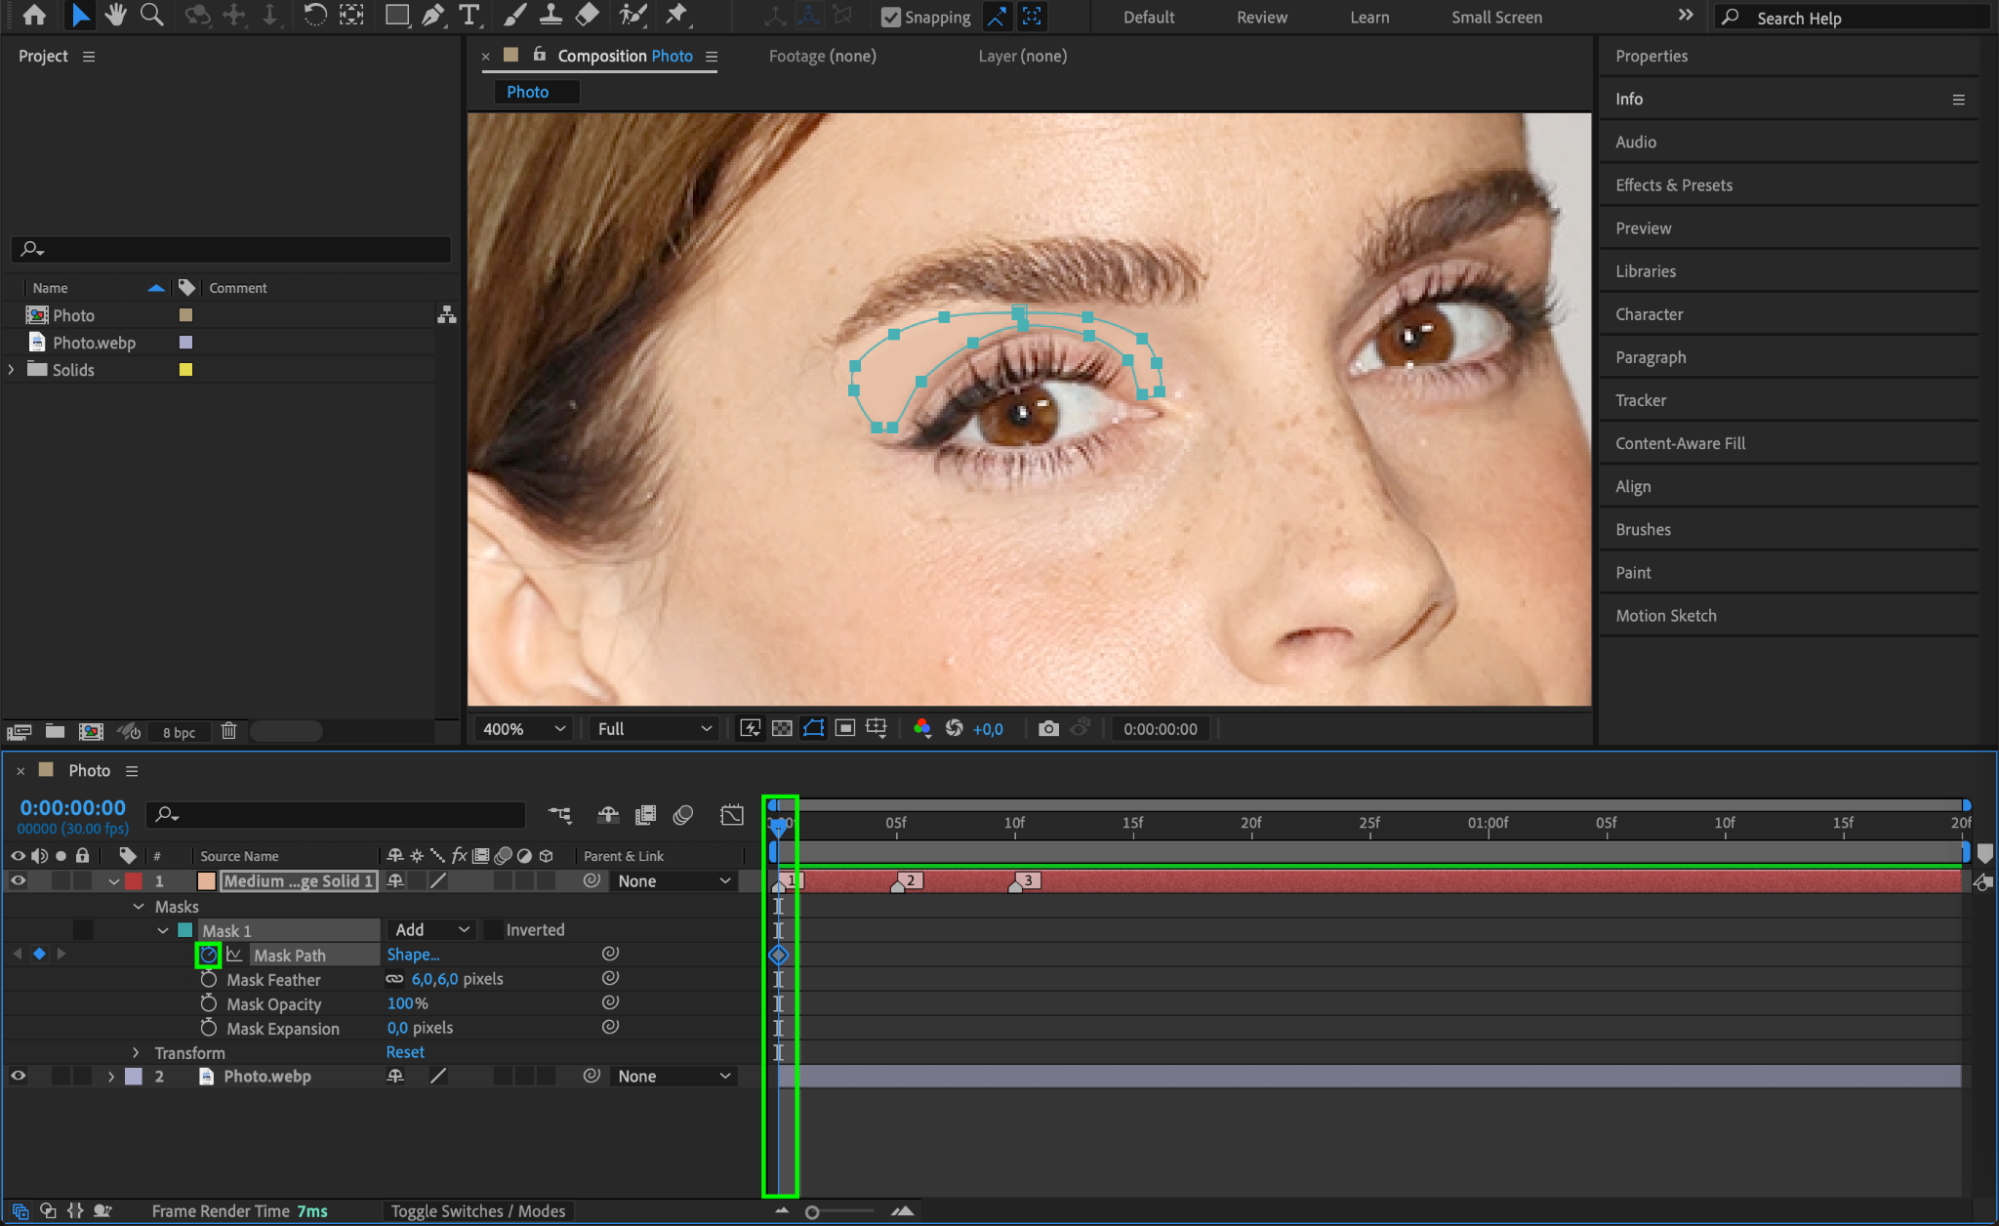
 Step 5: Duplicate the Photo and Mask the Eyelashes
Duplicate the original photo and move it above the other layers. Use the Pen Tool (G) to create a mask around the eyelashes, ensuring they remain visible above the closing eyelid.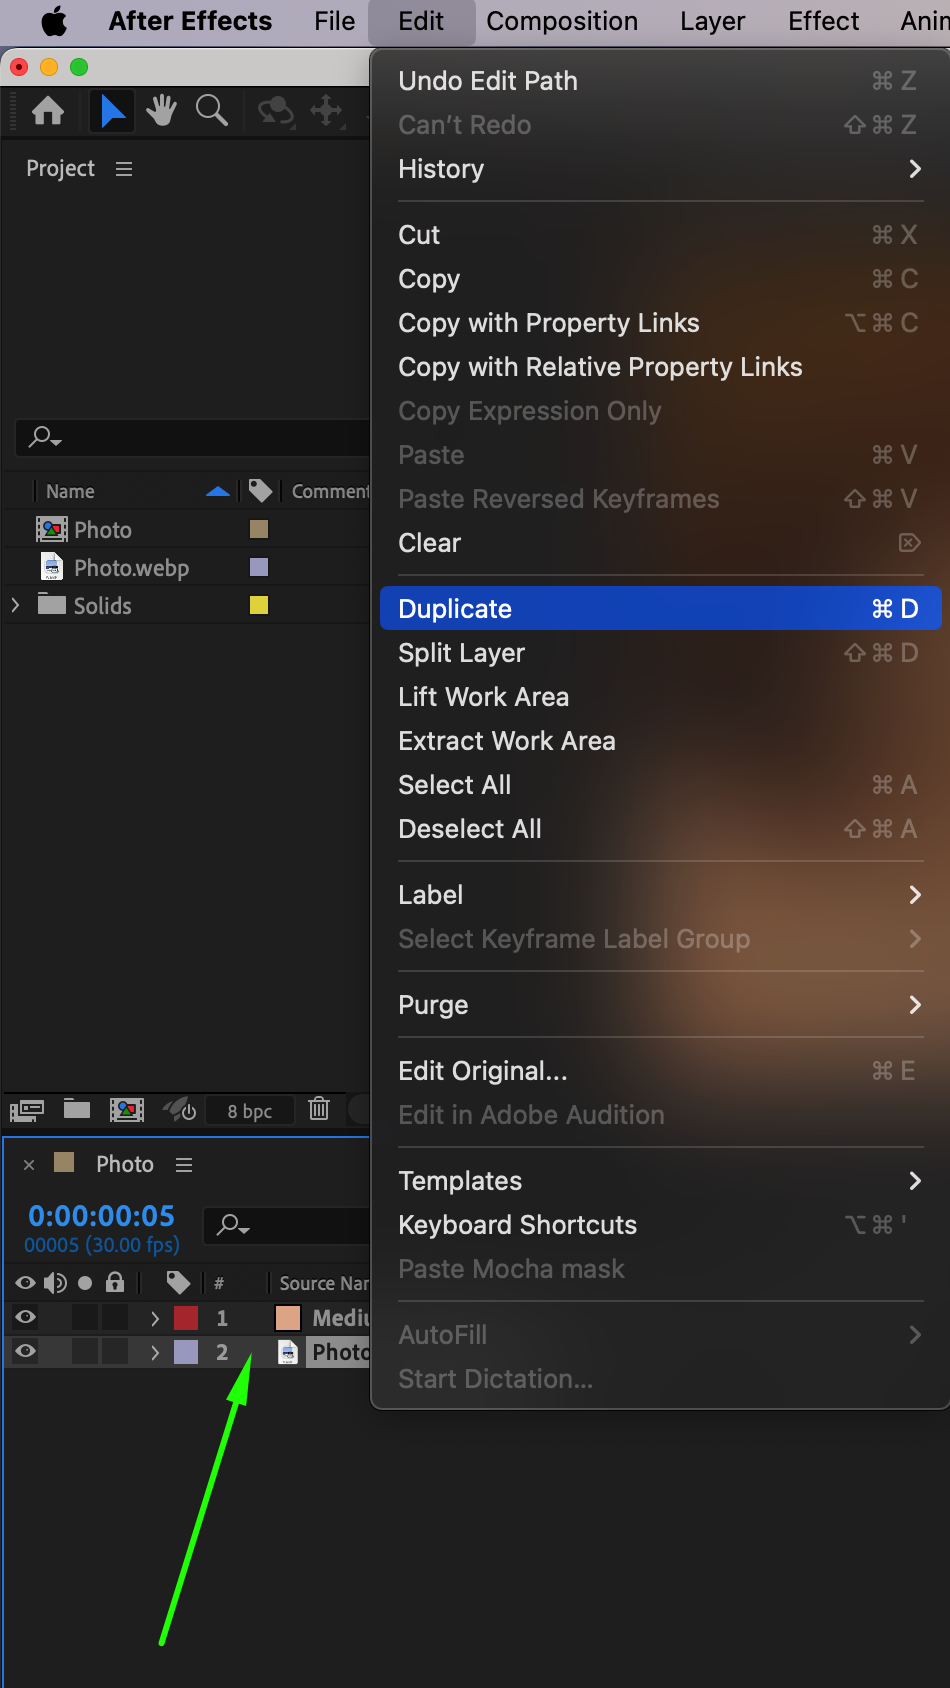
Get 10% off when you subscribe to our newsletter

 Step 6: Convert the Eyelash Layer to 3D
Select the duplicated photo layer and enable the 3D Layer checkbox. Then, right-click and choose Transform > Center Anchor Point in Layer Content to align the anchor point properly.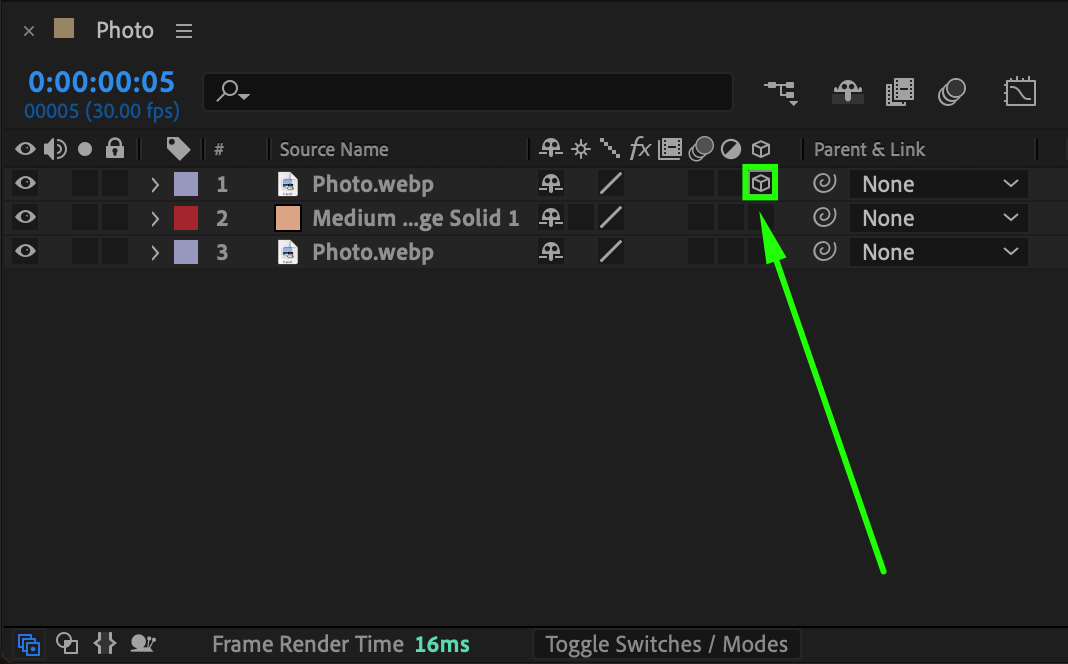
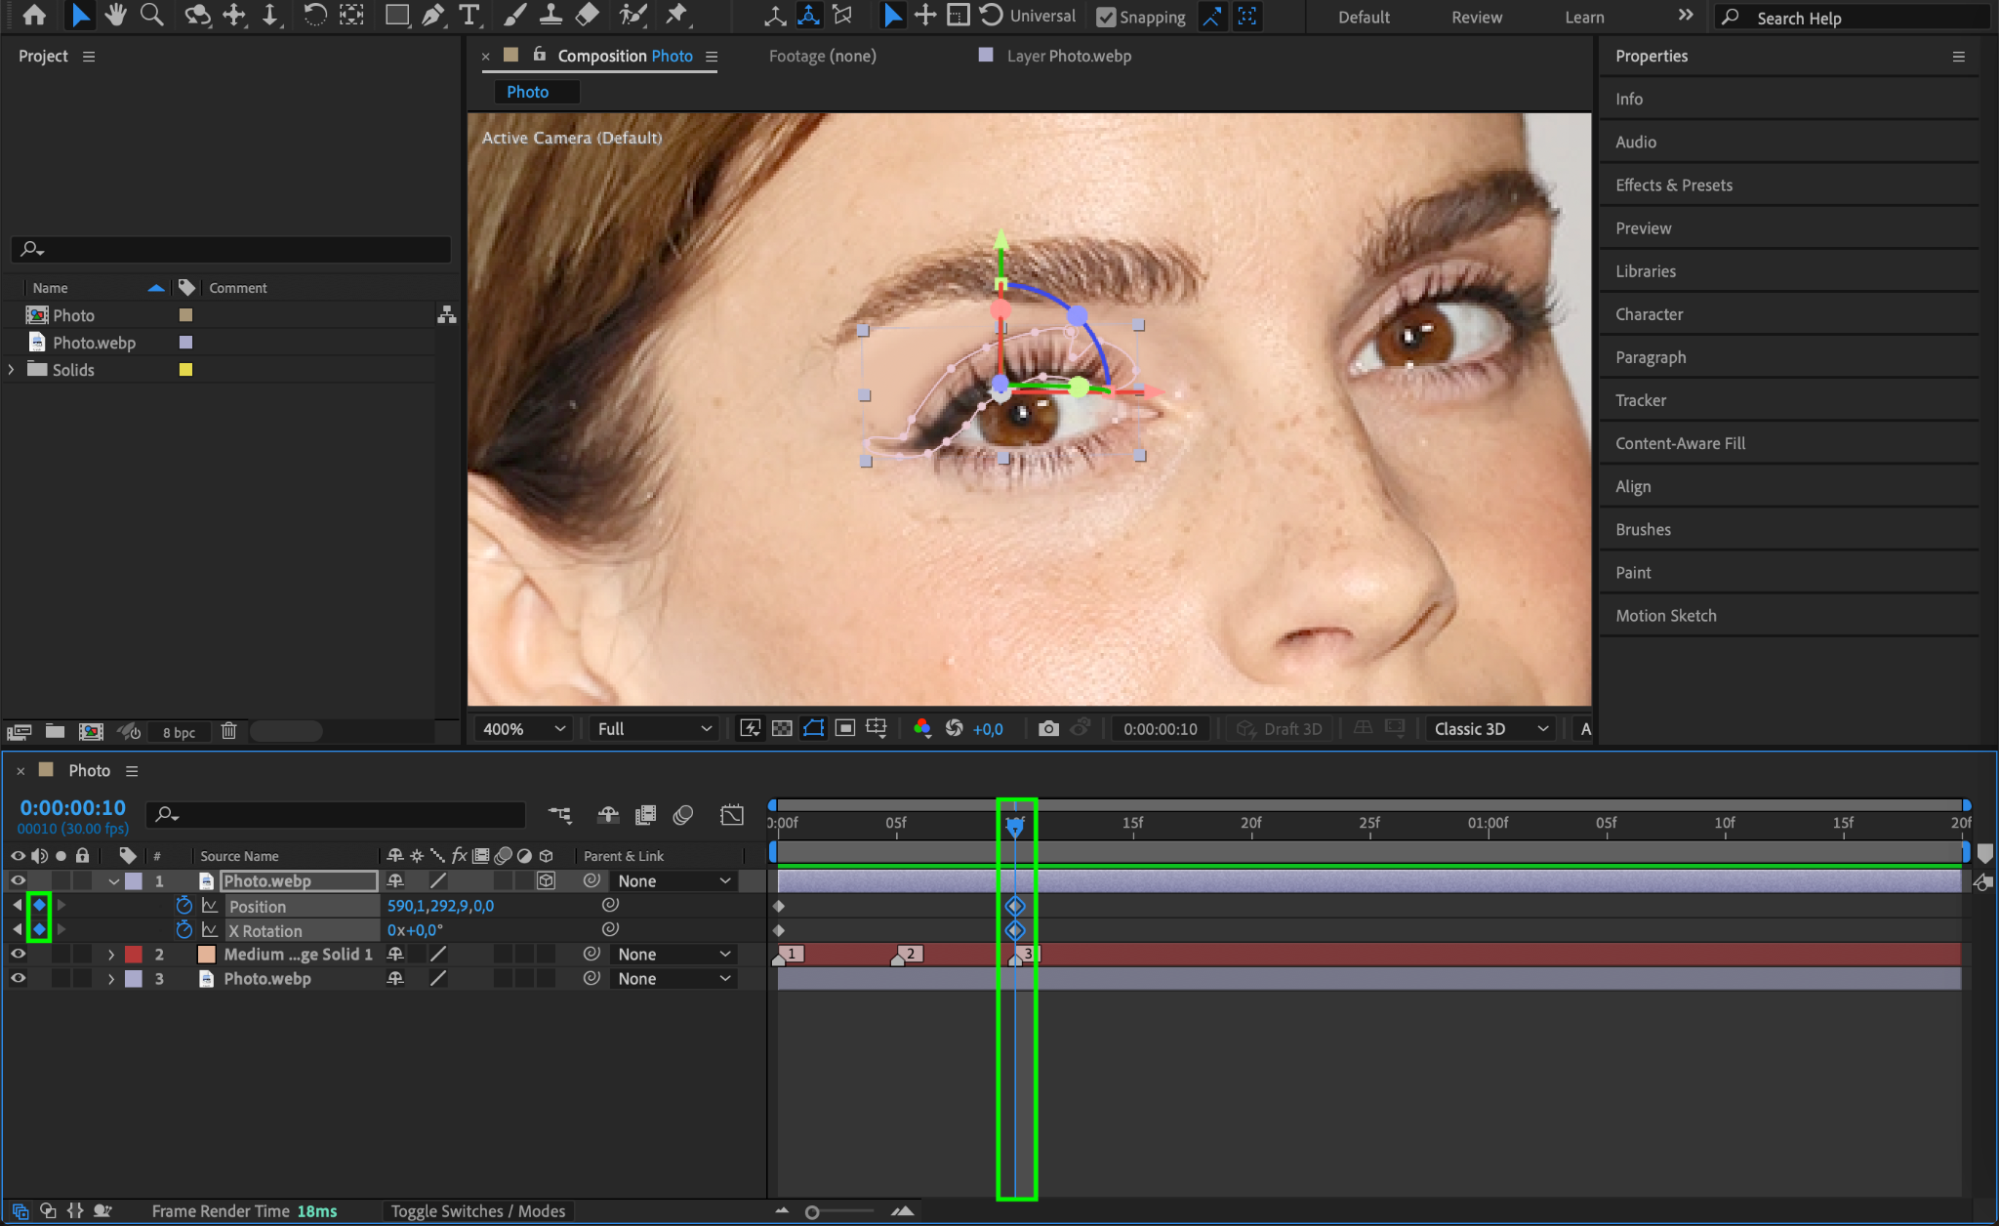
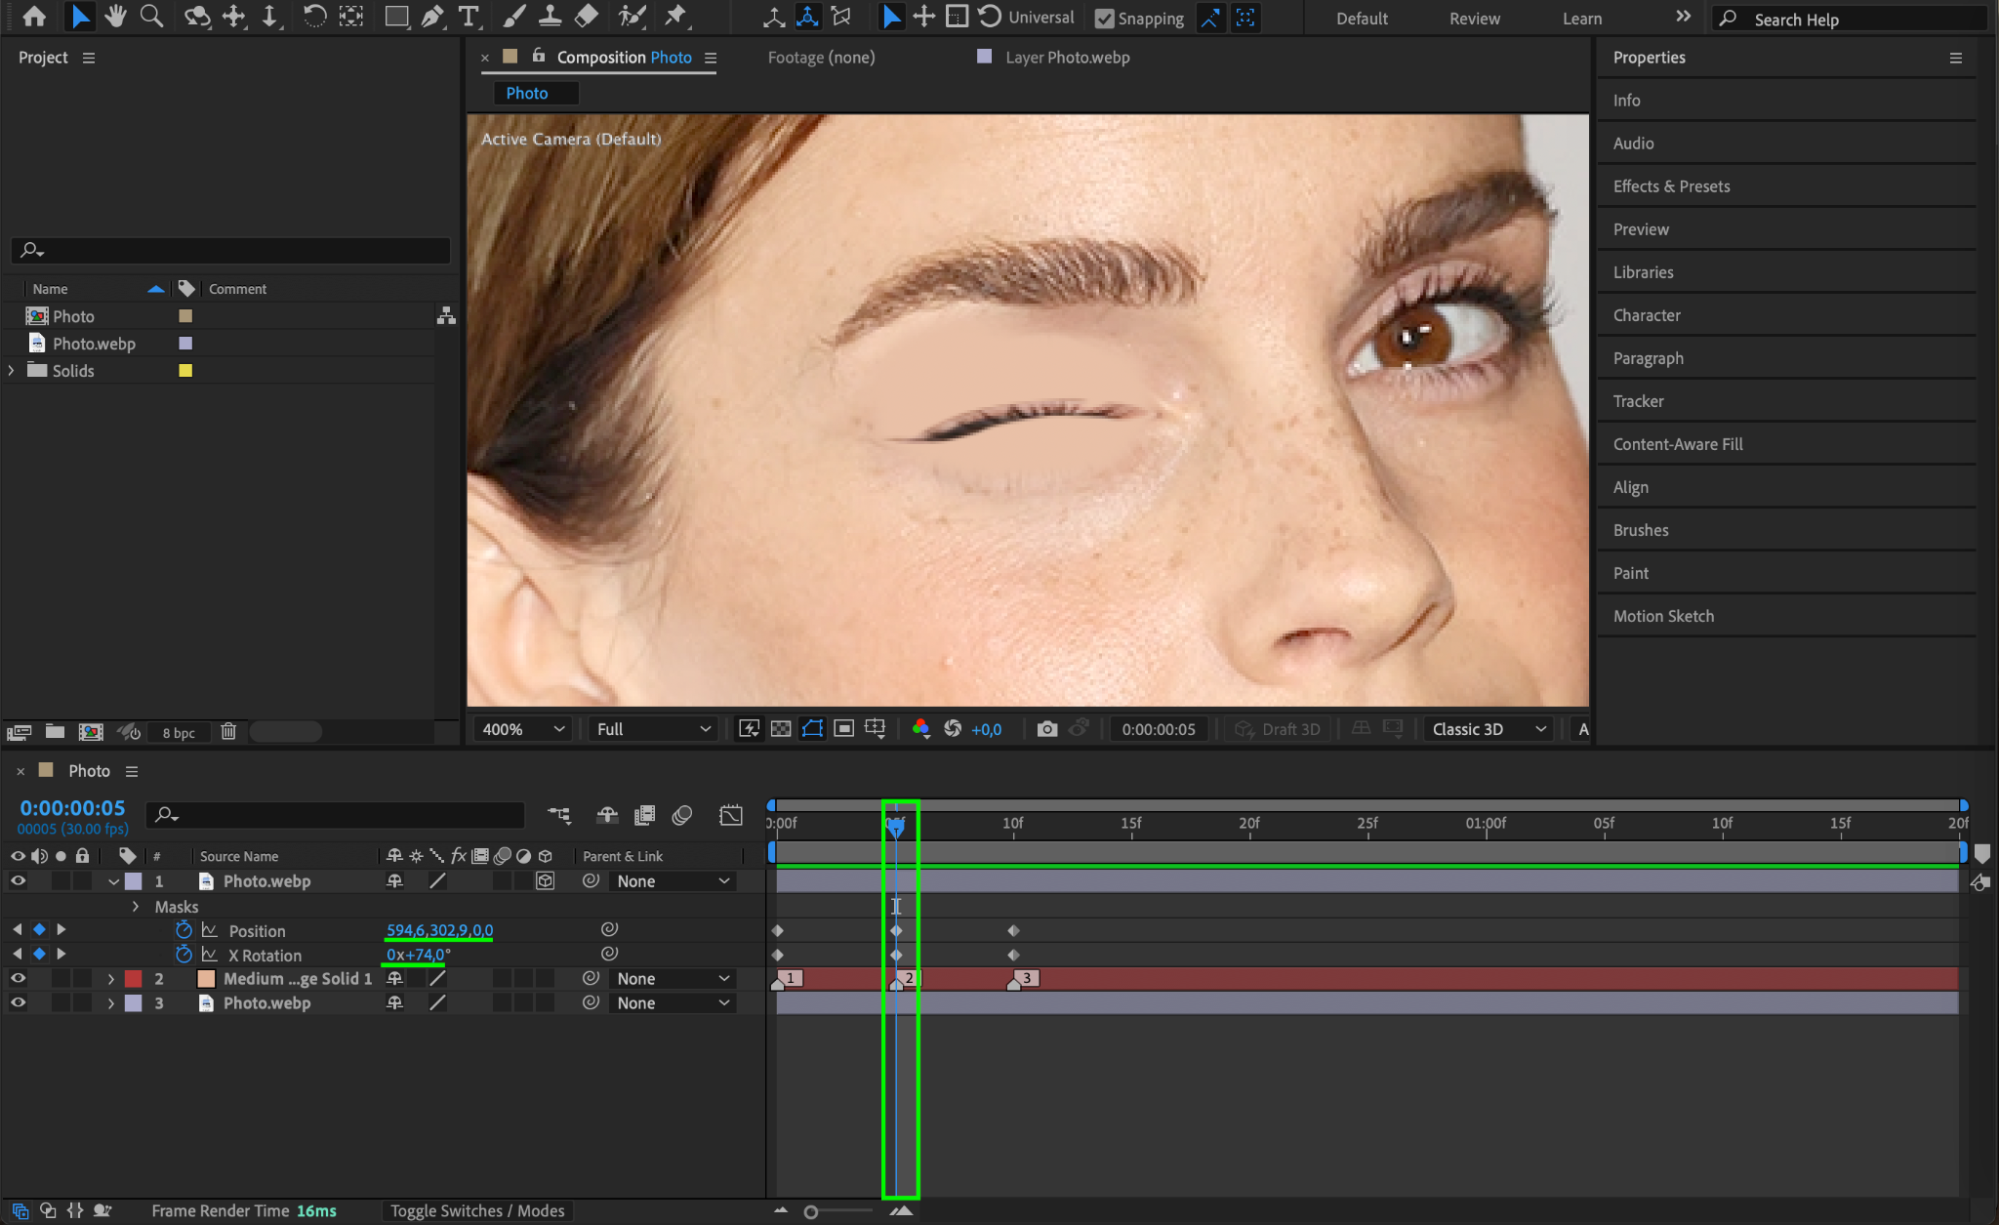
 Step 7: Animate Eyelash Rotation and Position
Select the eyelash layer and enable keyframes for Position and X Rotation at position 1 by clicking the stopwatch. Move to position 3 and add another keyframe without changing the values. Then, at position 2, adjust the X Rotation between 74-90 degrees and slightly shift the position to simulate the natural movement of the eyelashes as the eye closes.
 Step 8: Enable Motion Blur
To enhance realism, enable Motion Blur for the eyelash layer. This will create a natural blur effect as the lashes move.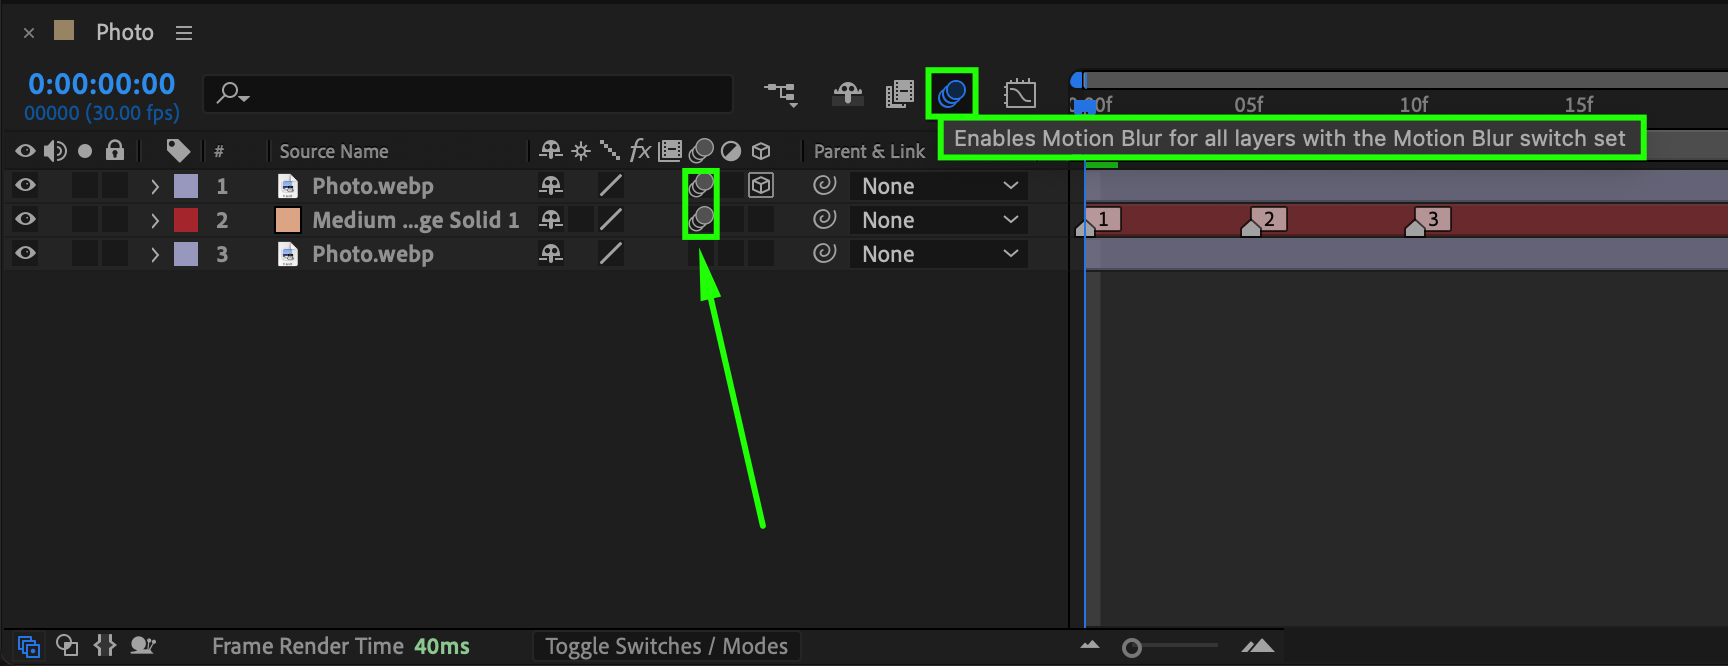 Step 9: Apply Easy Ease for Smoother Animation
Select all keyframes, right-click, and choose Keyframe Assistant > Easy Ease to create a smoother, more natural animation flow.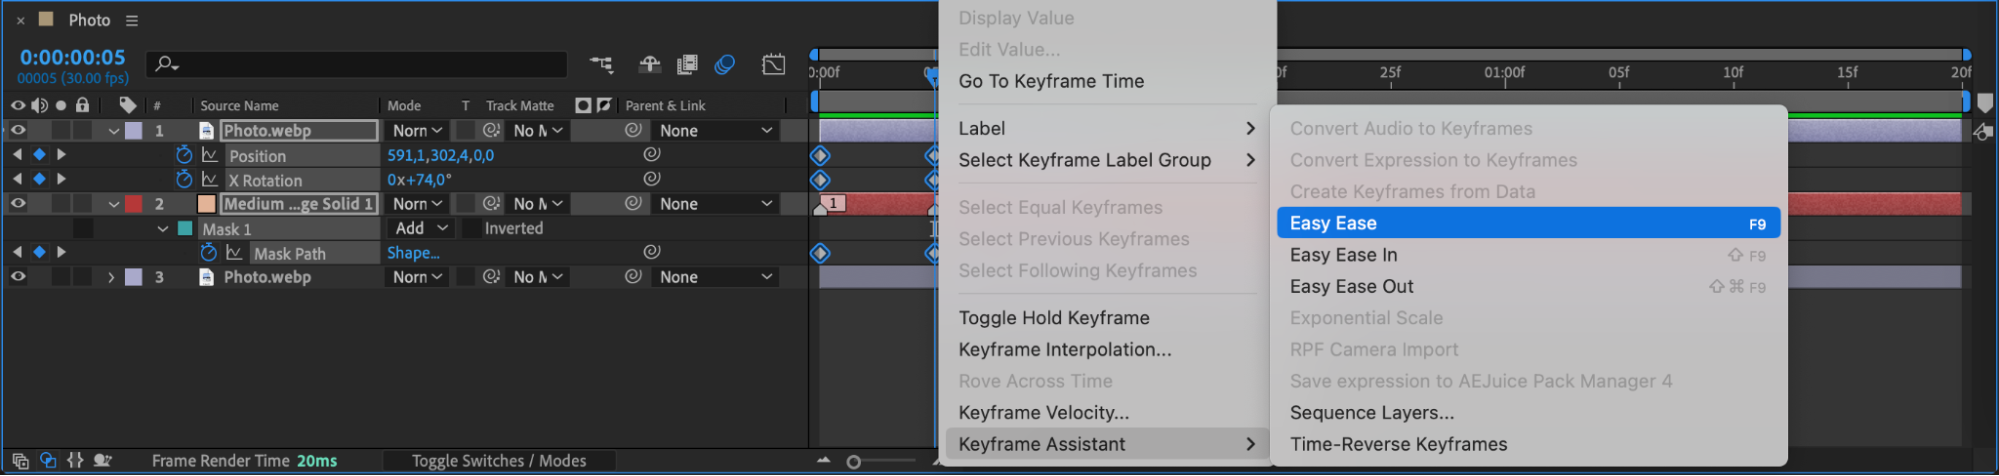 Step 10: Preview the Animation
Press Spacebar to preview the wink animation. Make adjustments if needed to refine the motion and ensure it looks natural.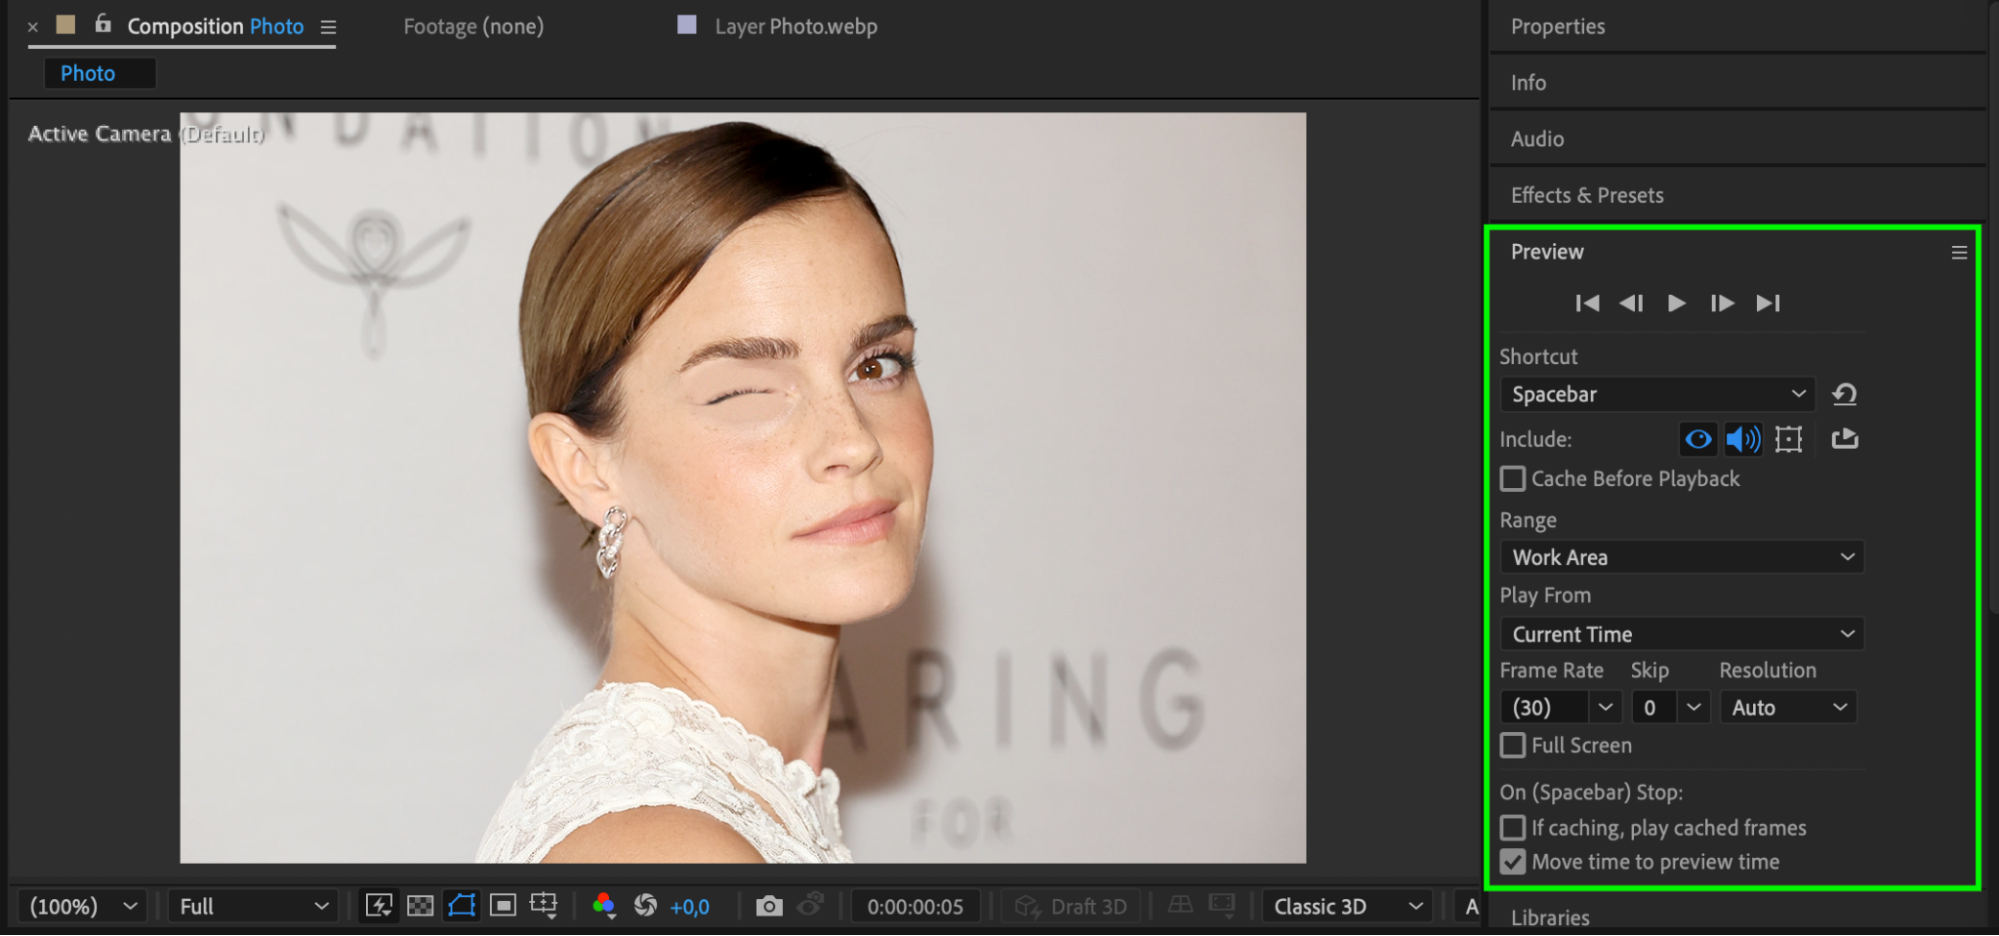 Conclusion
By following these steps, you can create a realistic winking effect in After Effects using masks, keyframes, and 3D rotation. This technique adds life to static images and can be used for creative animations or motion graphics.
Our Bestsellers


