Creating a Realistic Planet in After Effects
Introduction
Have you ever wanted to create your own planet in Adobe After Effects? Whether you’re working on a sci-fi project, an educational video, or simply exploring your creativity, making a realistic planet is an exciting and rewarding process. In this tutorial, we’ll guide you through each step to create a stunning planetary visual, complete with realistic textures, lighting, and rotation. Let’s embark on this intergalactic adventure!
Get 10% off when you subscribe to our newsletter

Step-by-Step Guide: How to Make a Planet in After Effects
Step 1: Import Planetary Textures
First, import the images of Earth and cloud maps, or any other planetary textures in equirectangular projection that you found online. These textures will serve as the surface and atmospheric layers of your planet. Go to File > Import > File and select the images.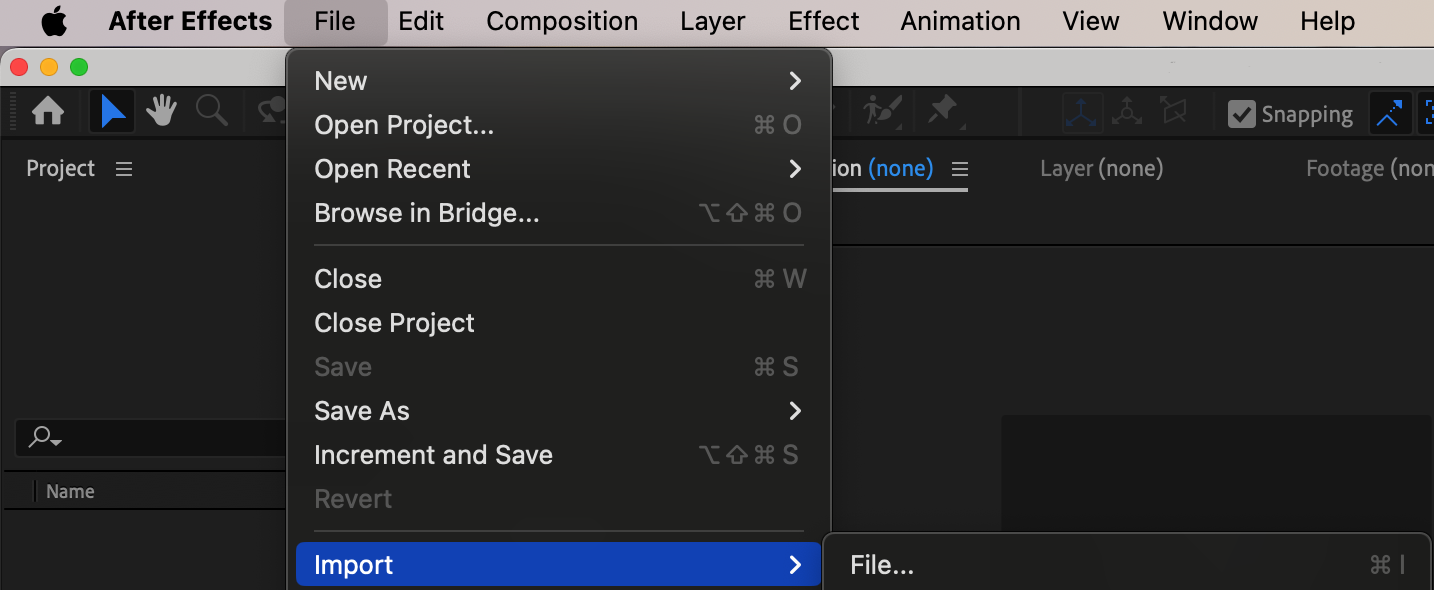 Step 2: Create the Initial Composition
Drag your imported files from the Project panel to the Timeline panel. This will automatically create a composition with the same settings as your files, ensuring the correct dimensions and aspect ratio.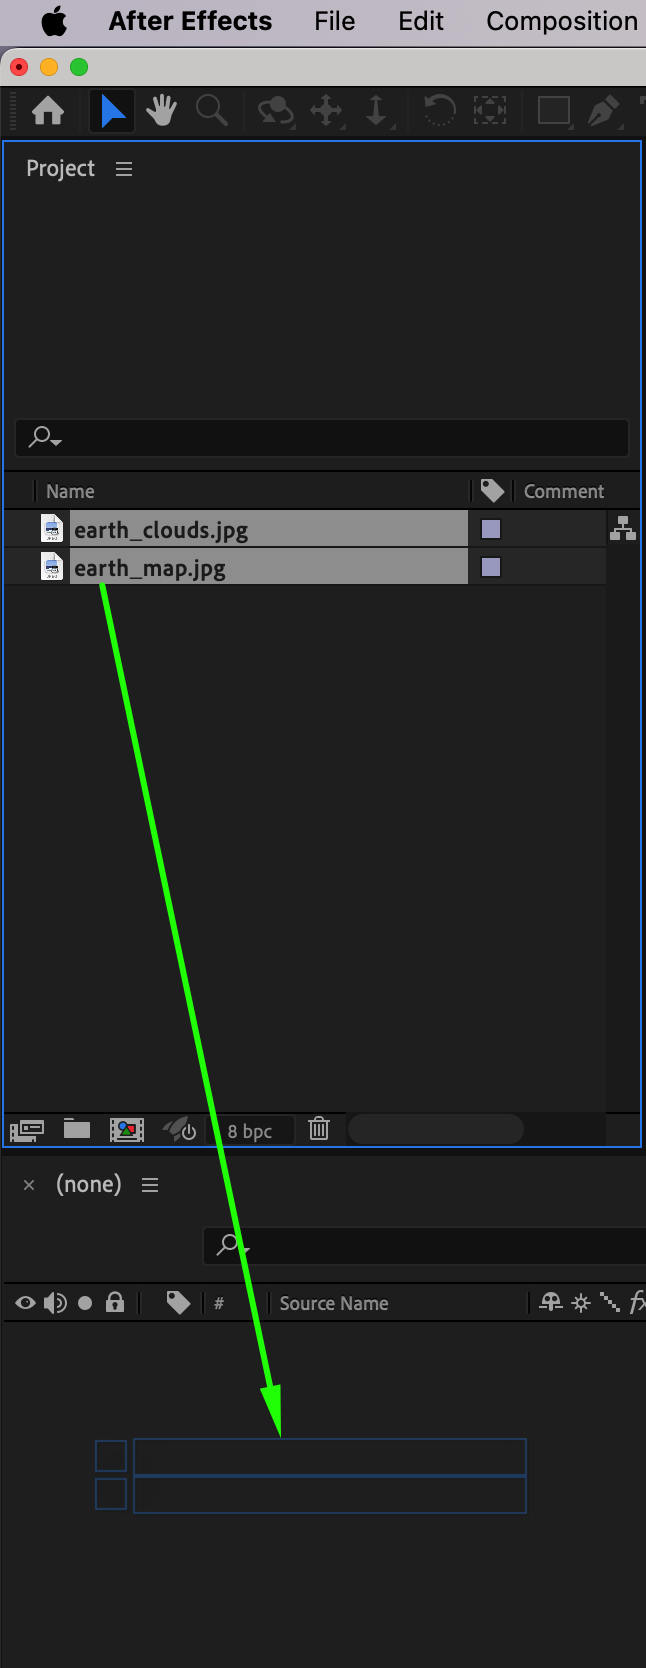
Step 3: Set the Cloud Layer Mode
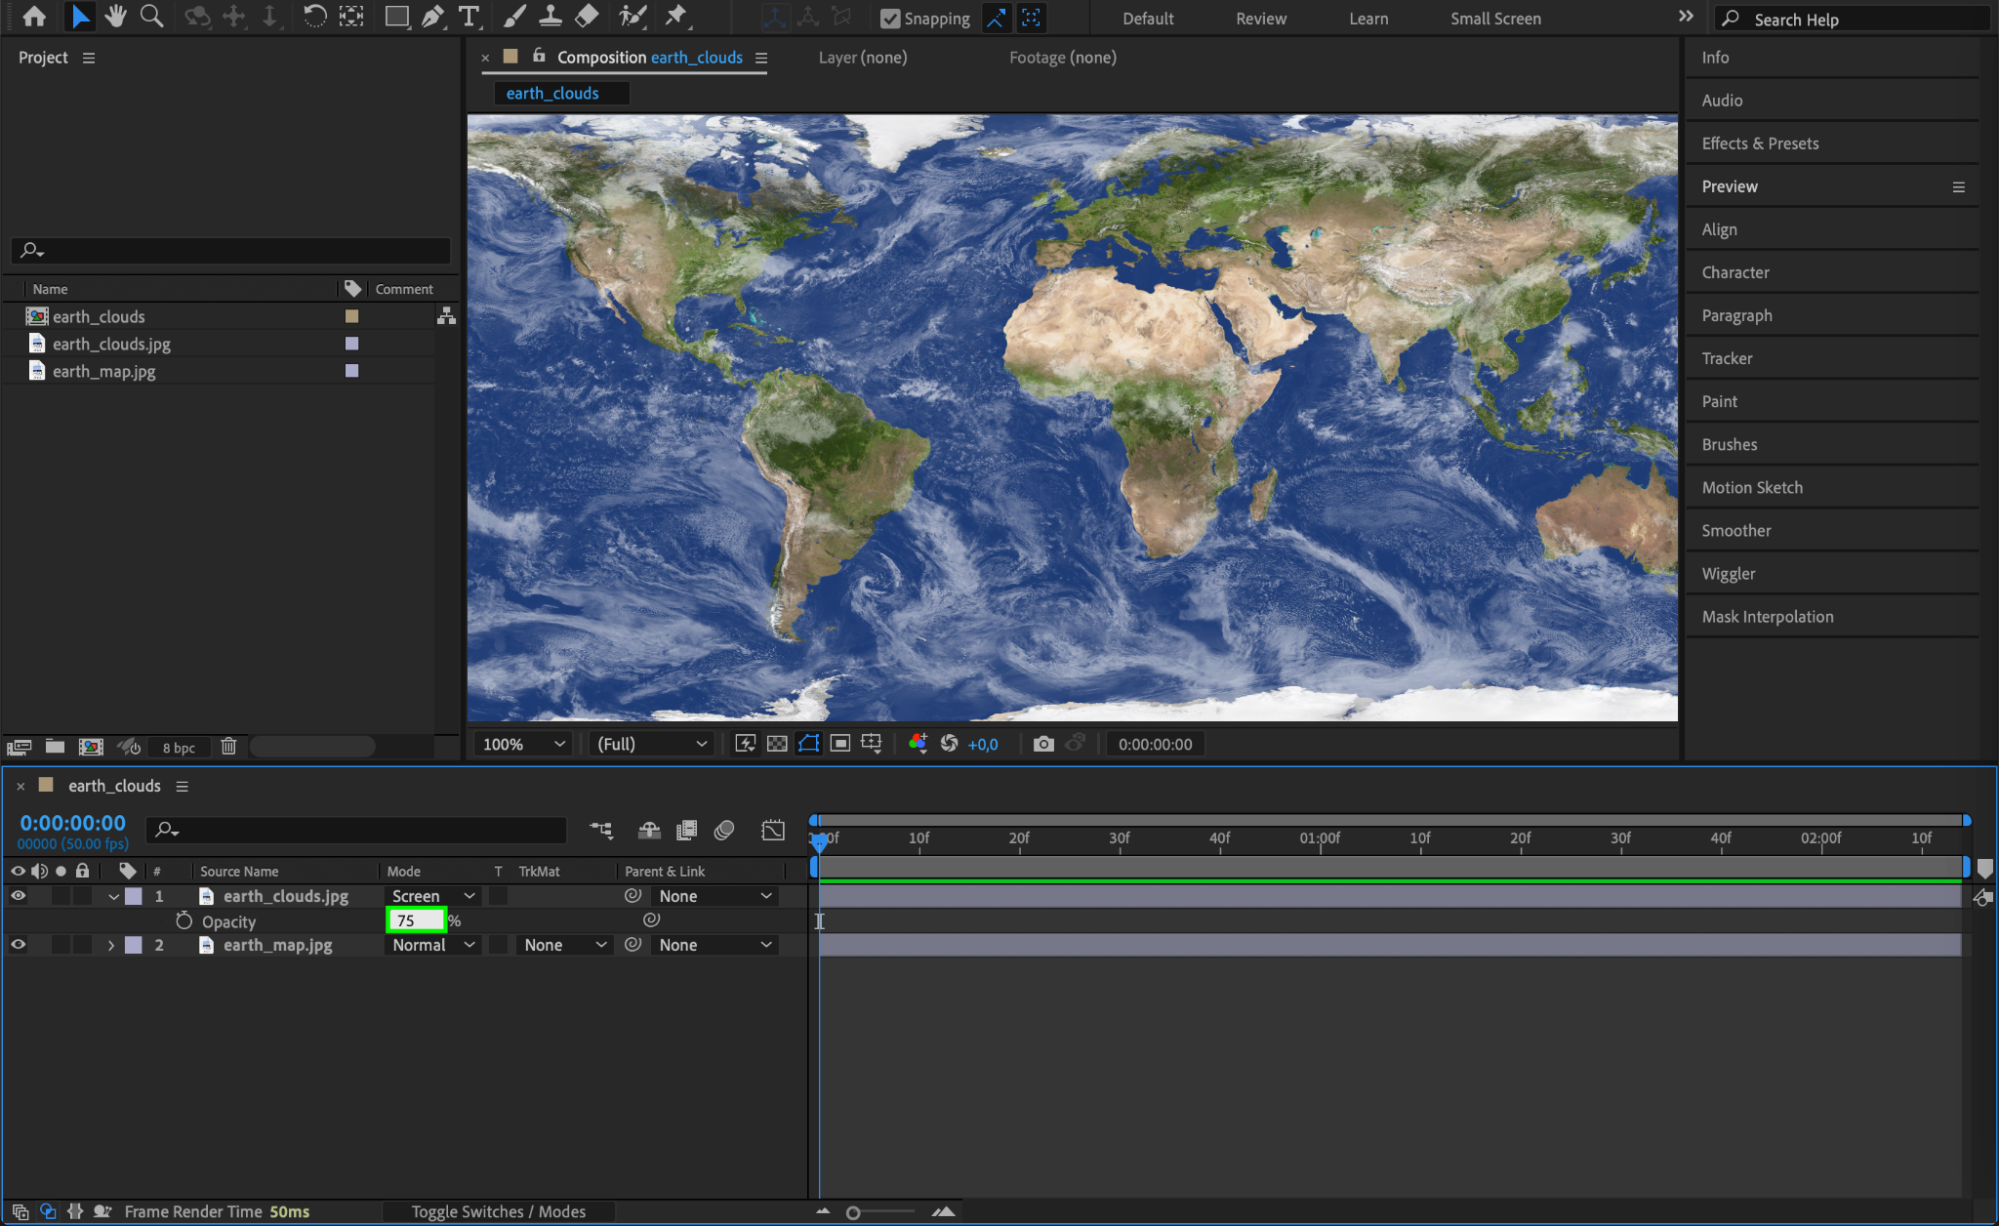
In the Timeline panel, set the blending mode of the cloud layer to Screen. This mode will make the black areas of the cloud texture transparent, allowing the underlying planet surface to show through.
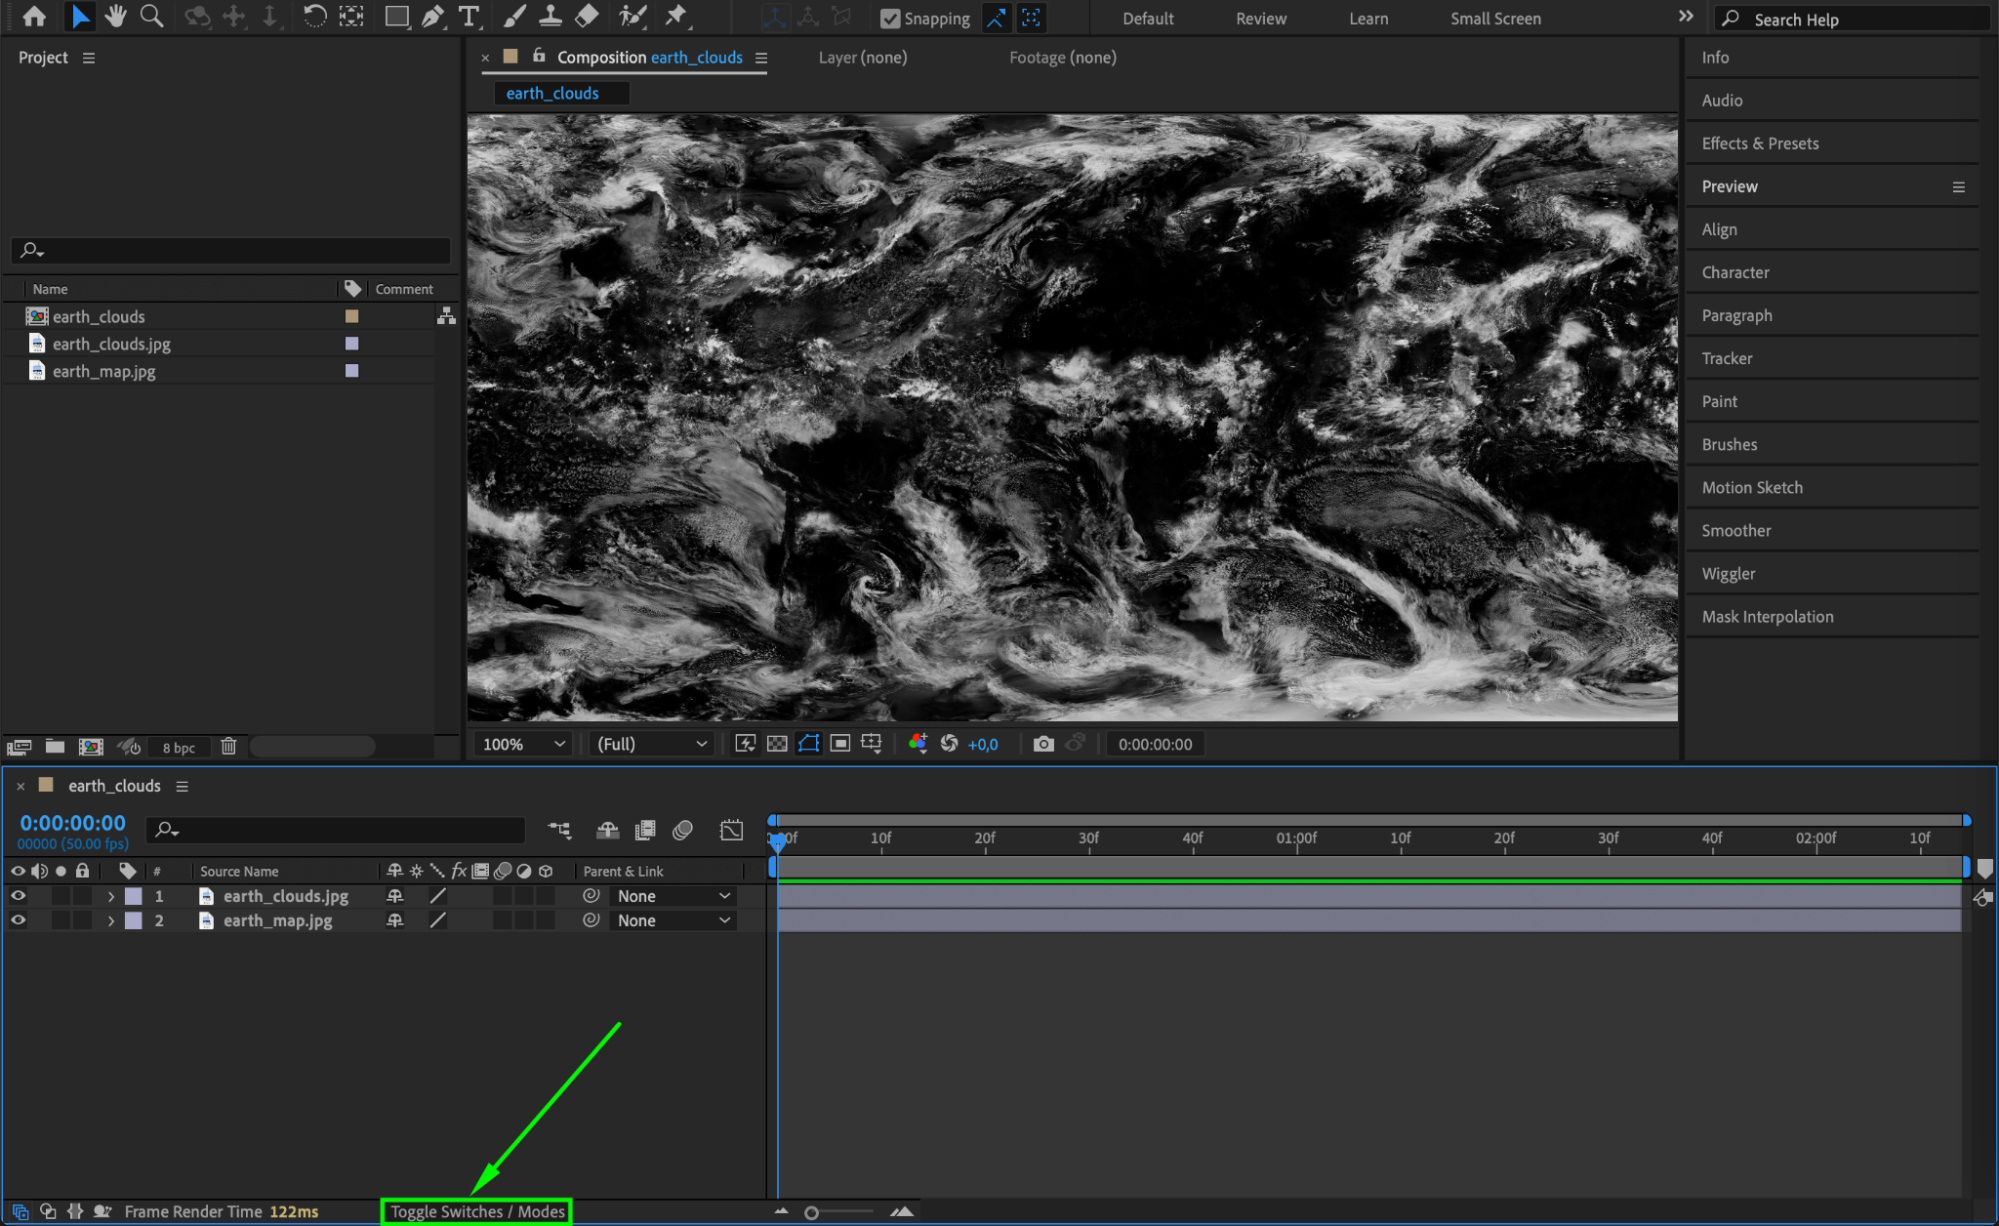

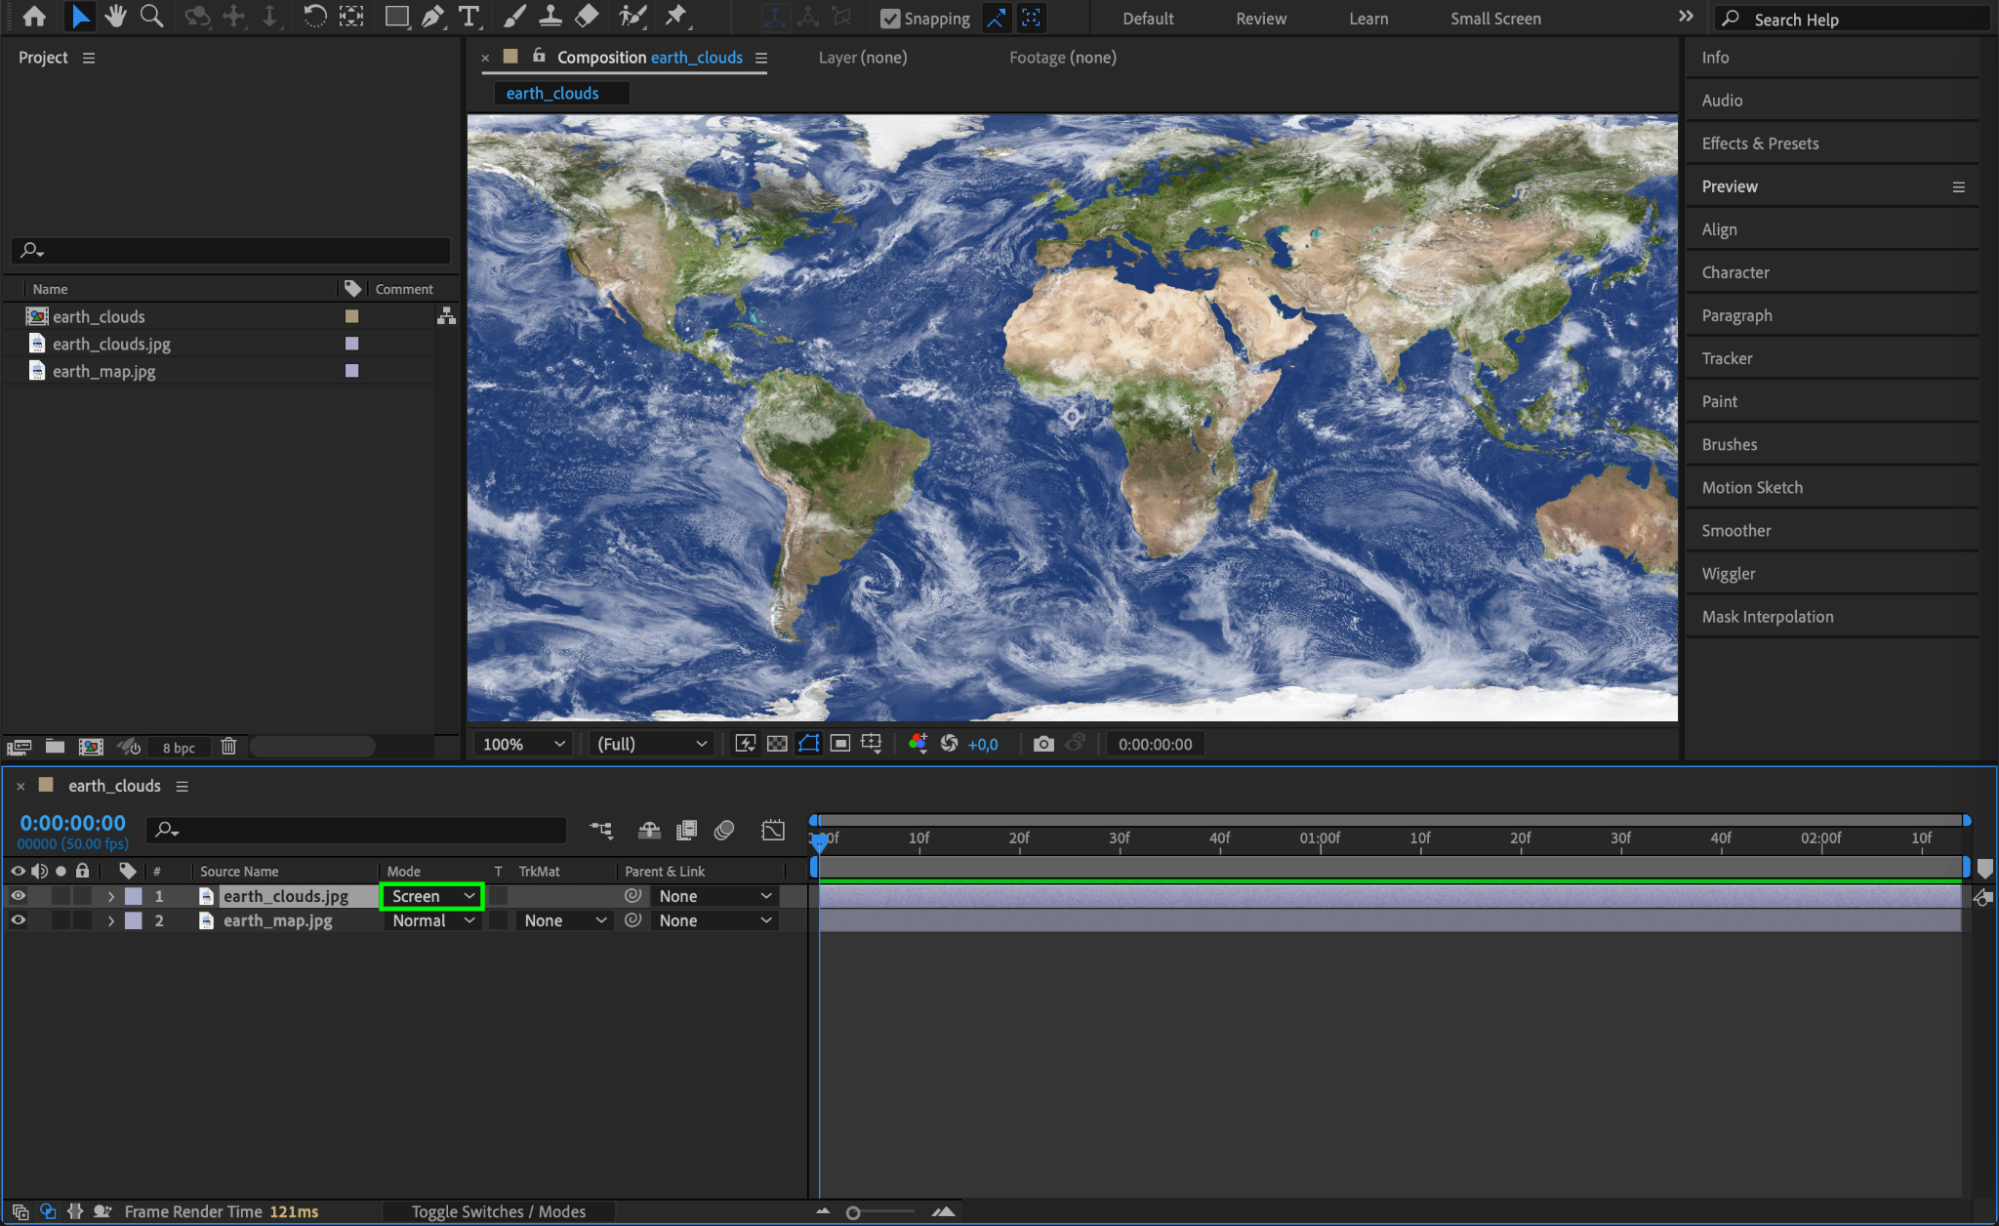 Step 4: Adjust Opacity for Cloud Layer
Select the cloud layer and press “T” to reveal the Opacity property. Set the opacity to 75% to achieve a more realistic and subtle atmospheric effect.
 Step 5: Create a New Composition
Click the “Create a New Composition” button in the Project panel. In the Composition Settings window, set the width to 1920, height to 1080, frame rate to 30, duration to 10 seconds, and background color to black. This new composition will be your main working space.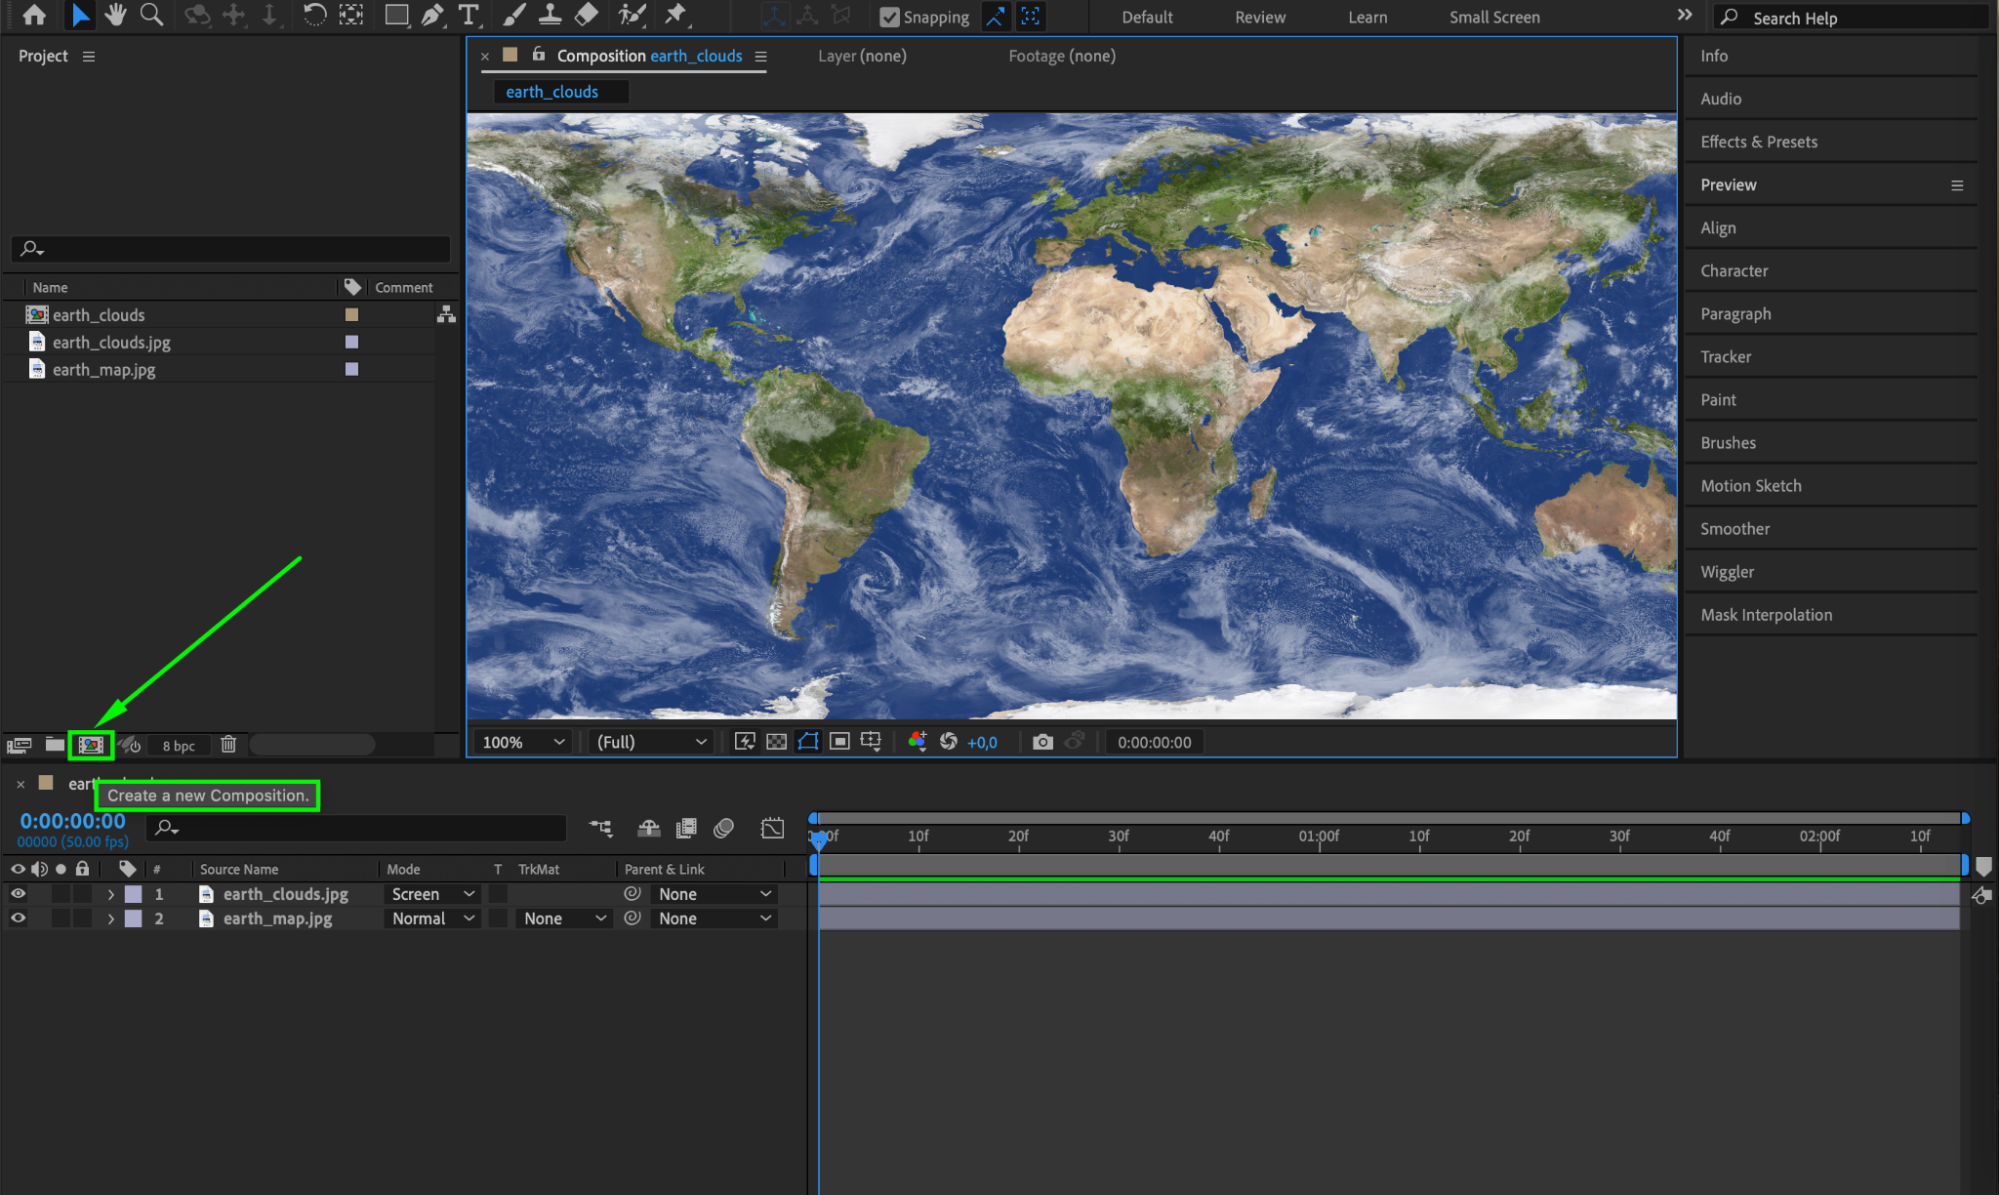
 Step 6: Add the Initial Composition
Drag the initial composition from the Project panel into the new composition’s Timeline panel. This will nest your planetary textures within the main composition as a single layer.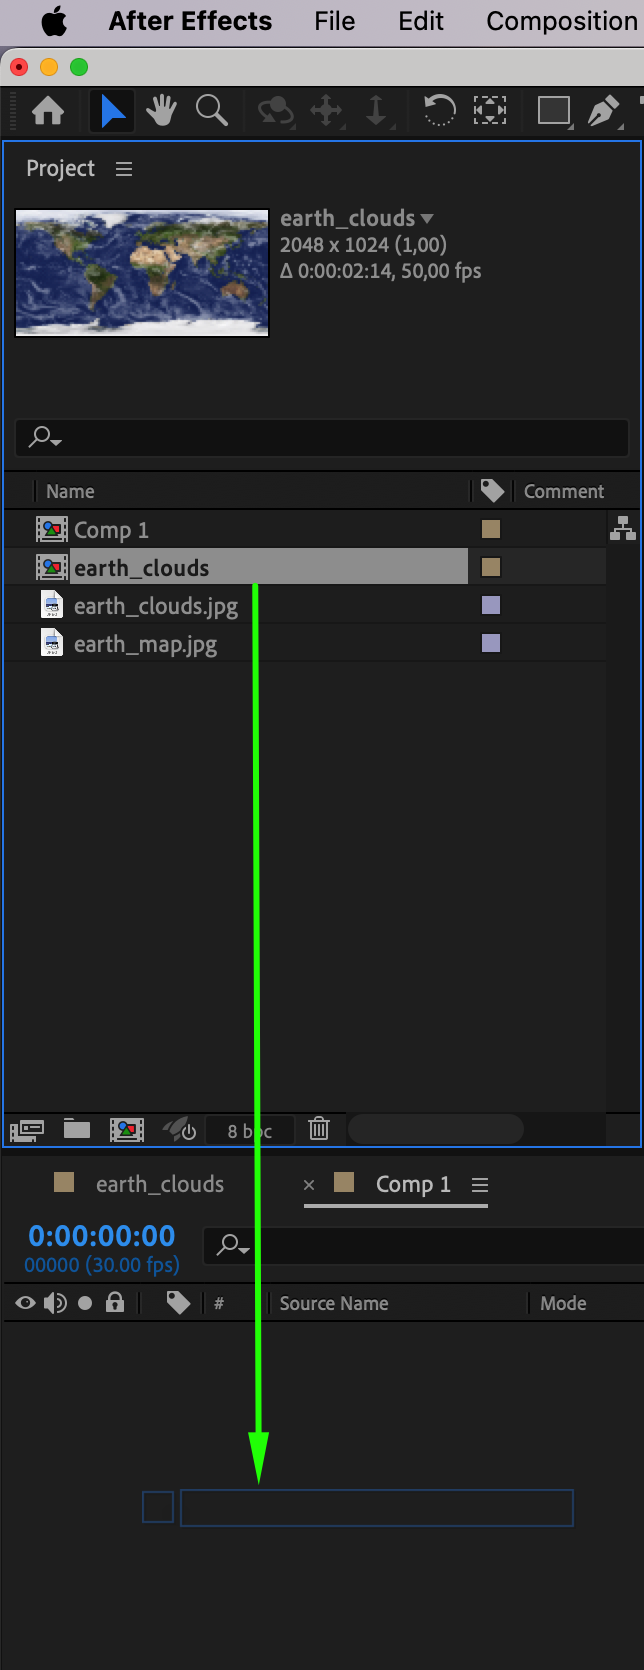 Step 7: Apply the CC Sphere Effect
With the nested composition layer selected, go to the Effects & Presets panel and search for the CC Sphere effect. Drag and drop this effect onto the layer. In the Effect Controls panel, adjust the Radius parameter to set the desired size of your planet.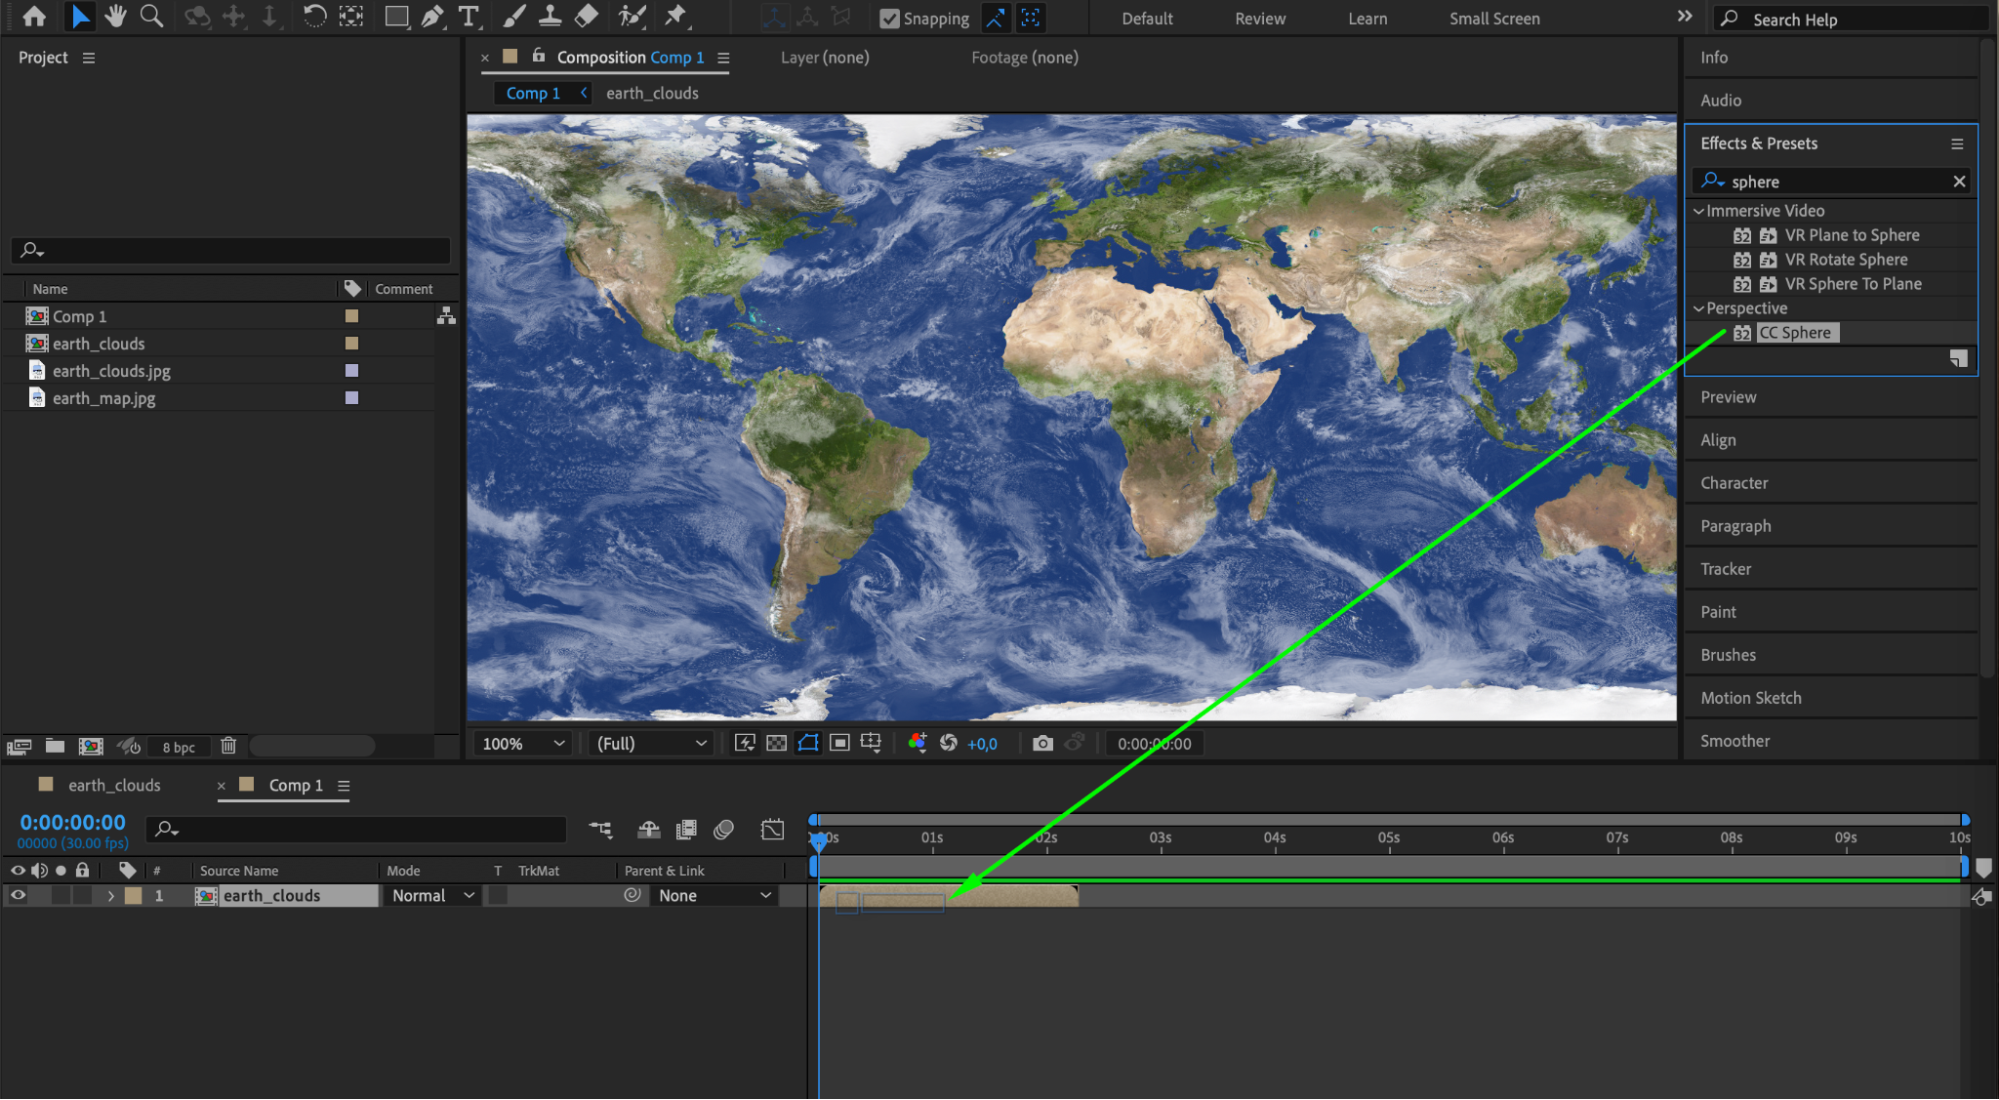
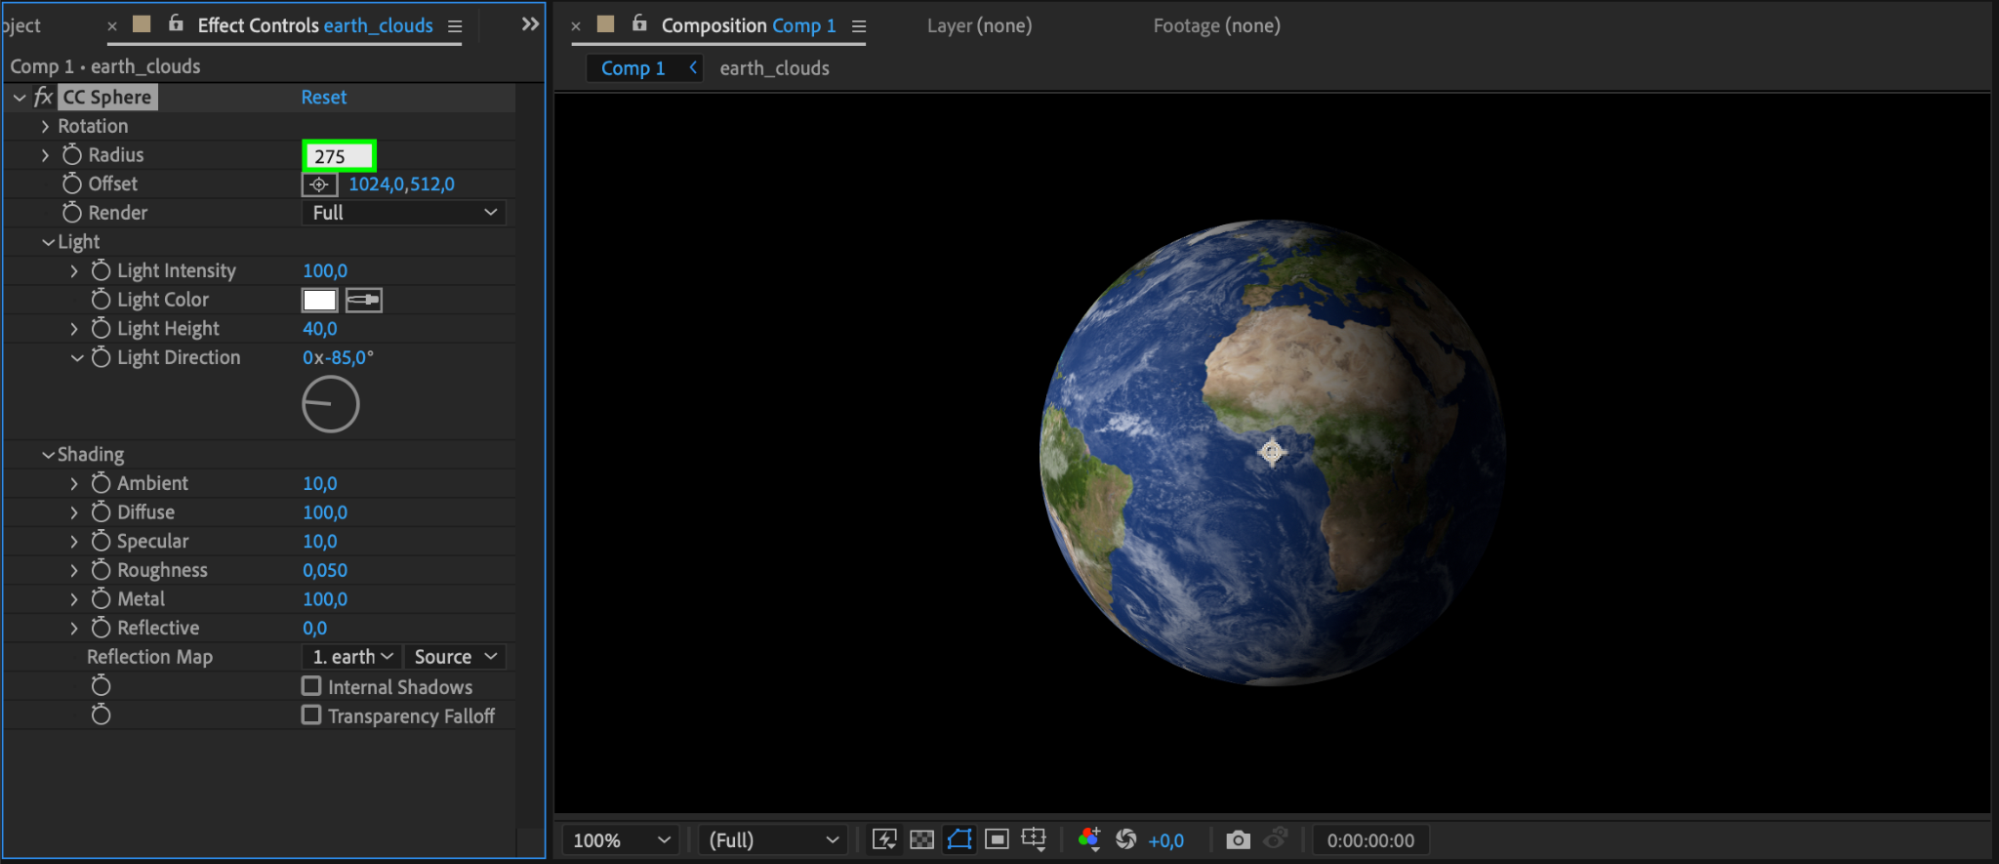 Step 8: Animate the Planet Rotation
To animate the rotation, move the timeline indicator to the beginning of the composition and click the stopwatch icon next to the Y Rotation parameter of the CC Sphere effect, setting the value to 0. Then, move the timeline indicator to the end of the composition and set the Y Rotation value to 359. This will create a smooth rotation animation for your planet.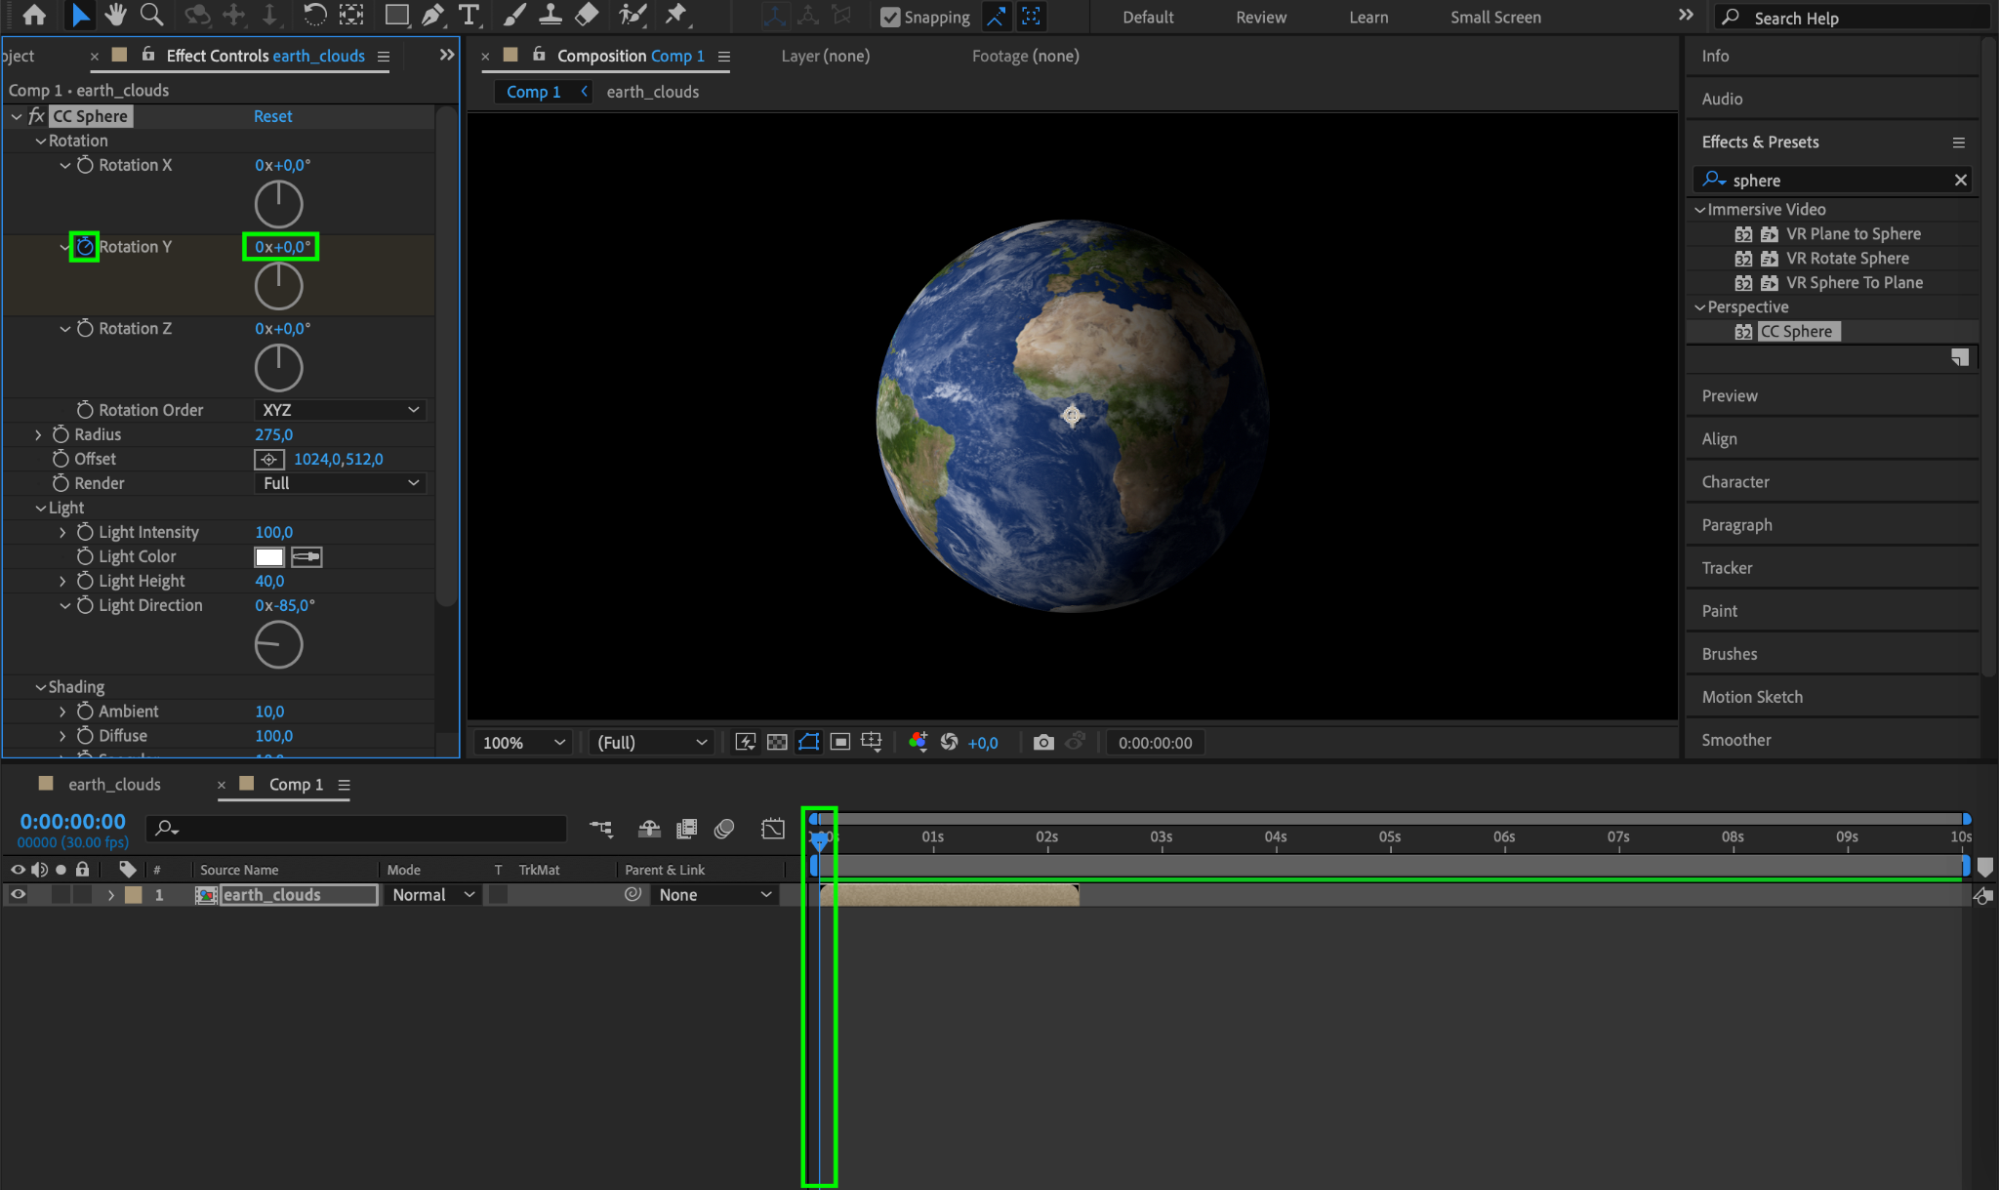
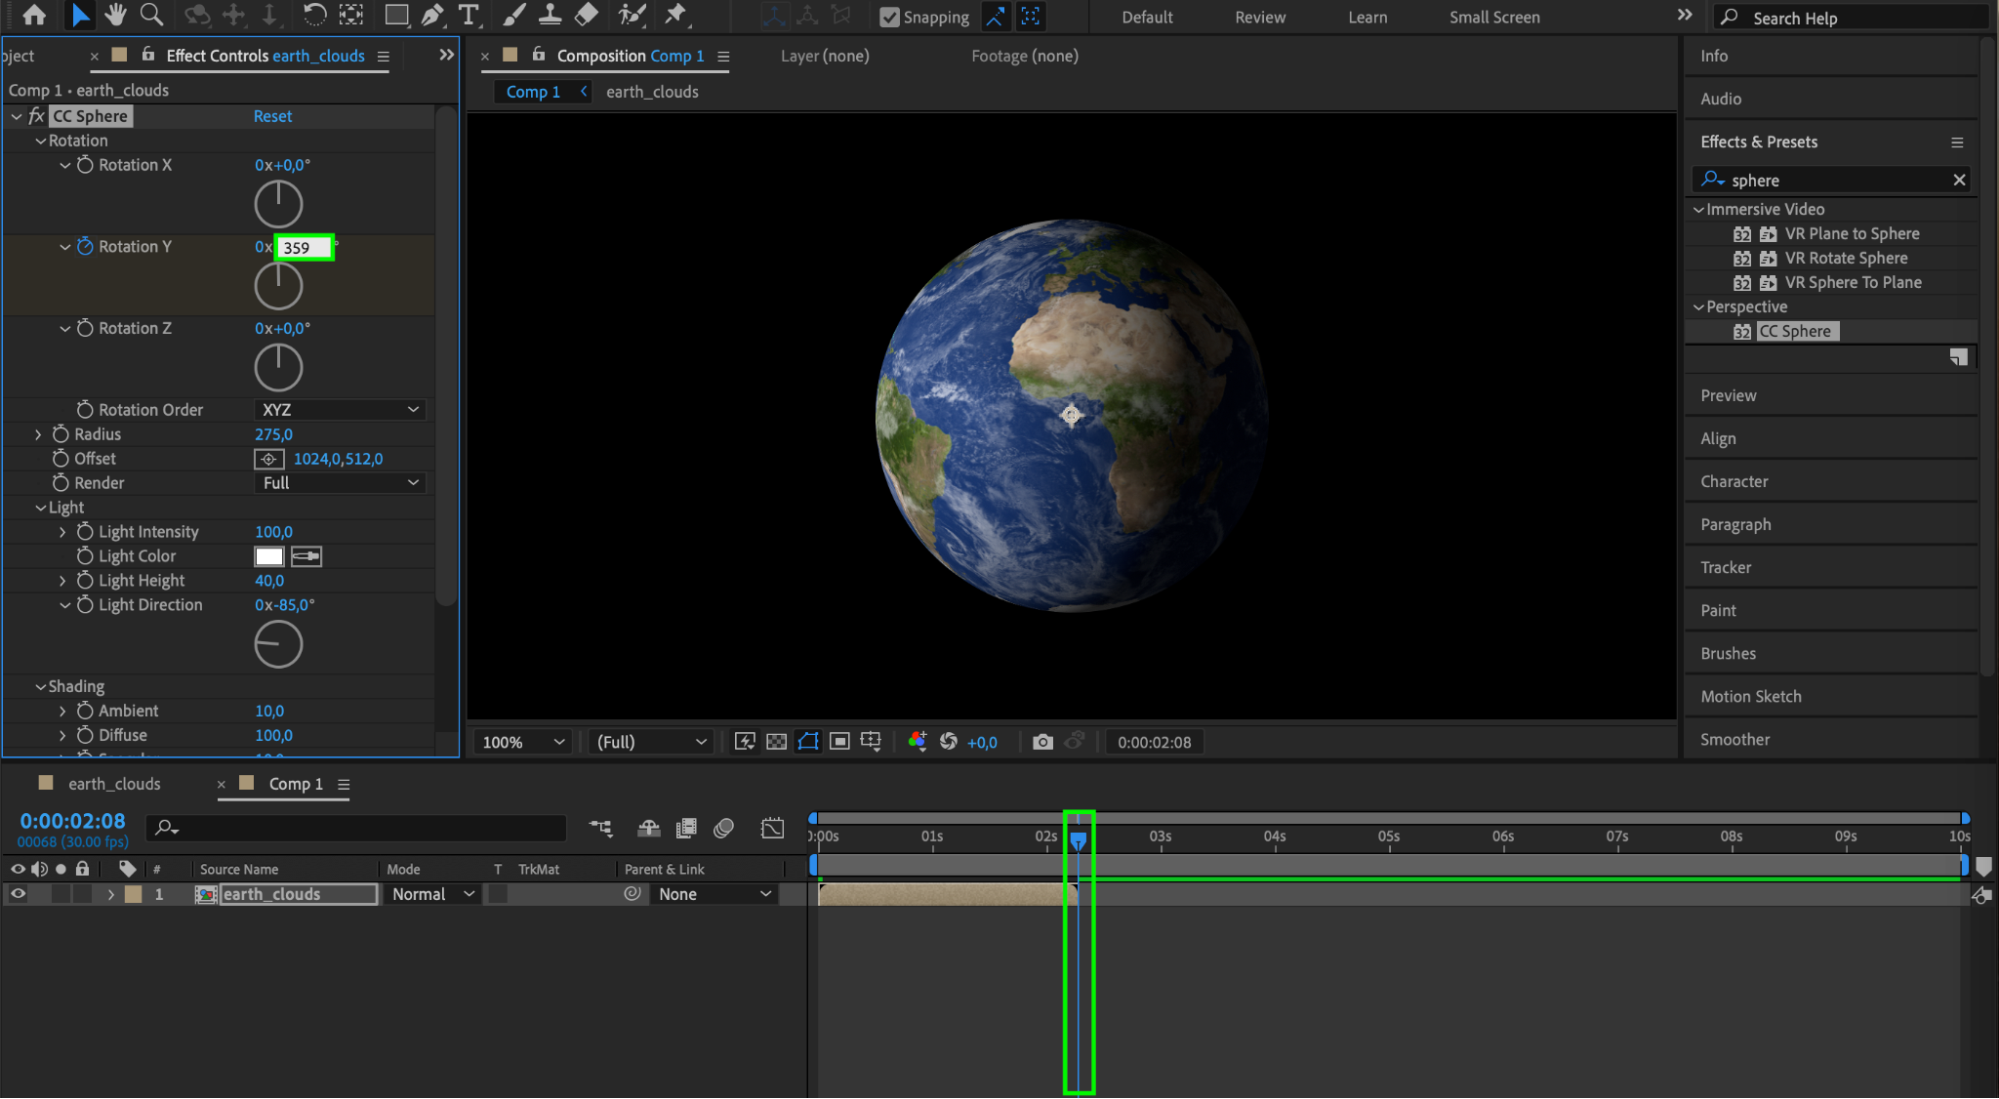 Step 9: Adjust Lighting Settings
In the CC Sphere effect, adjust the lighting settings to enhance realism. Set Light Intensity to 125, Light Height to 75, and Light Direction to -85. These settings will simulate realistic lighting conditions on your planet’s surface.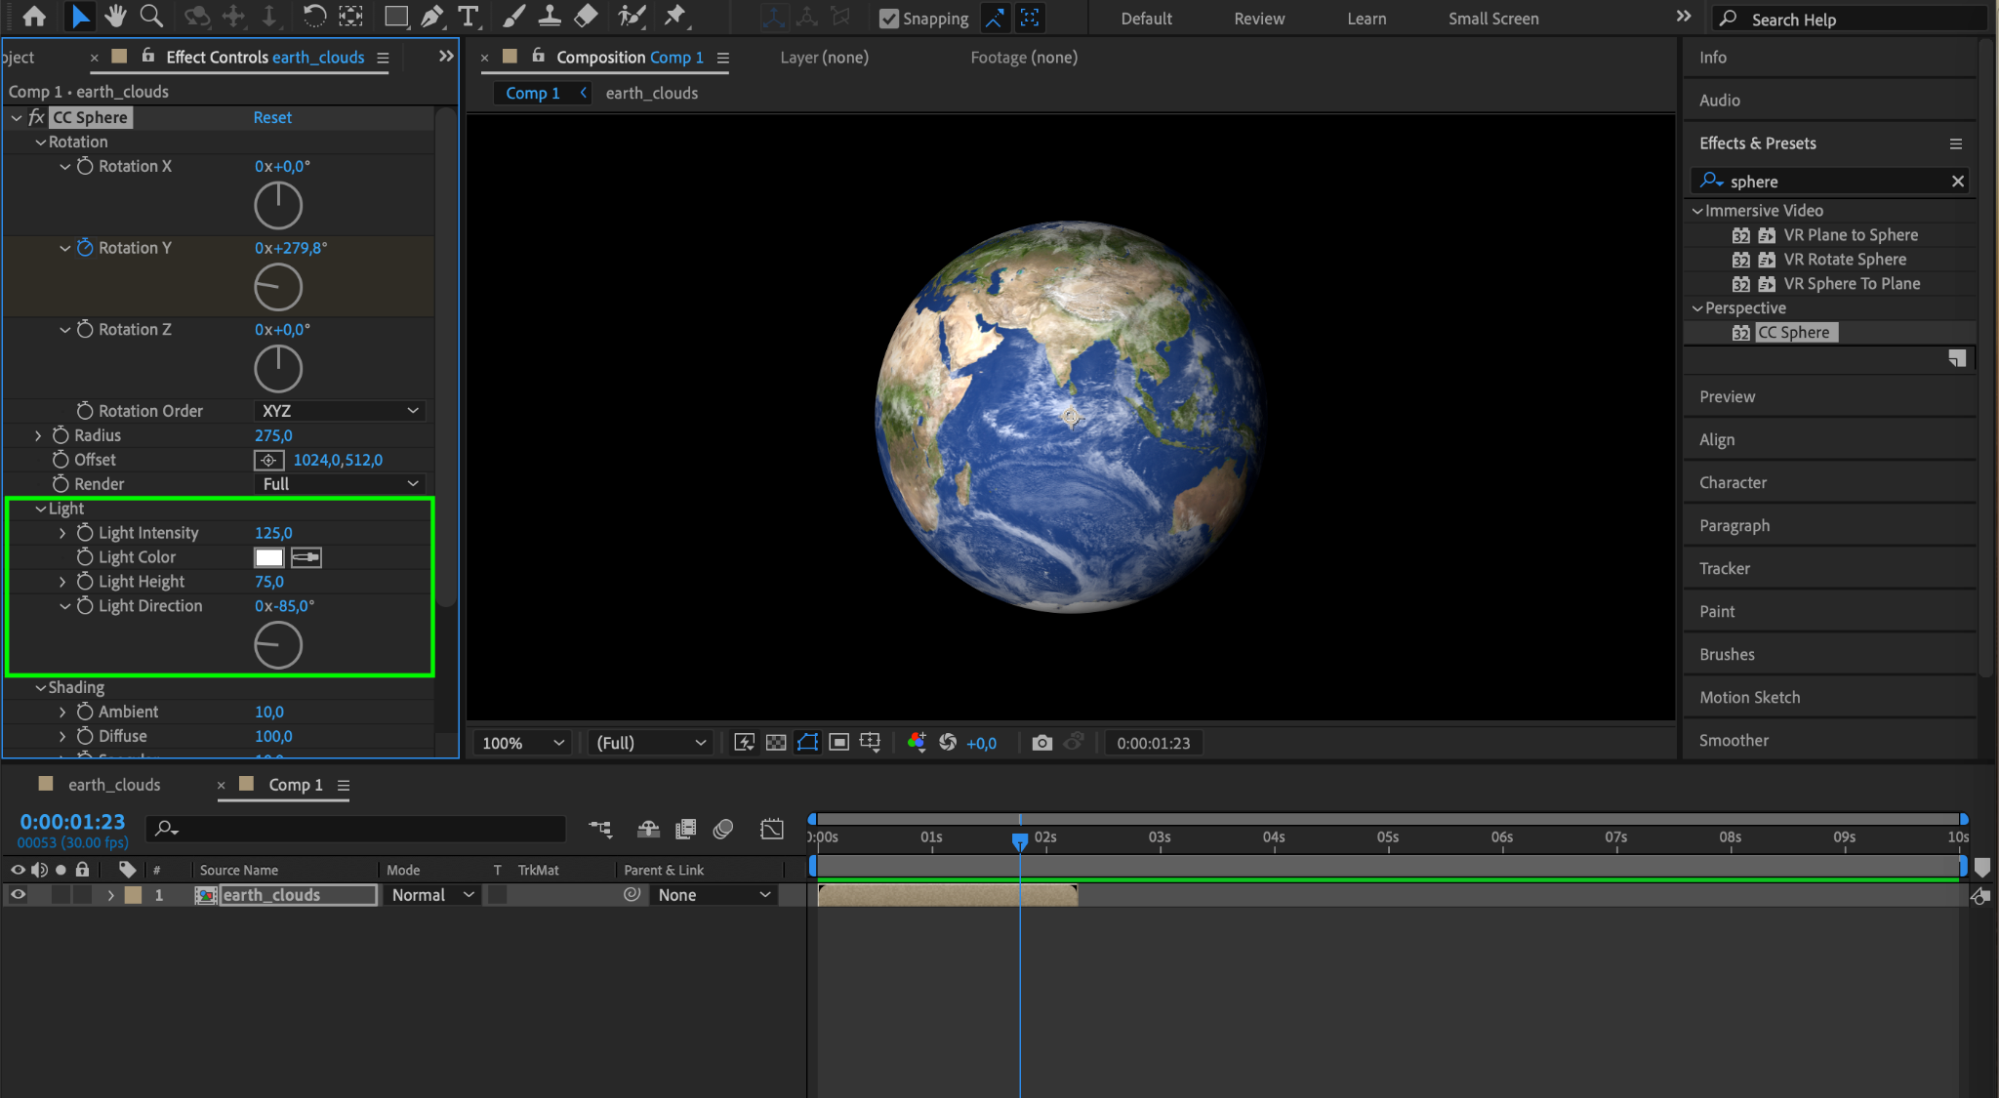
Step 10: Add a Milky Way Background
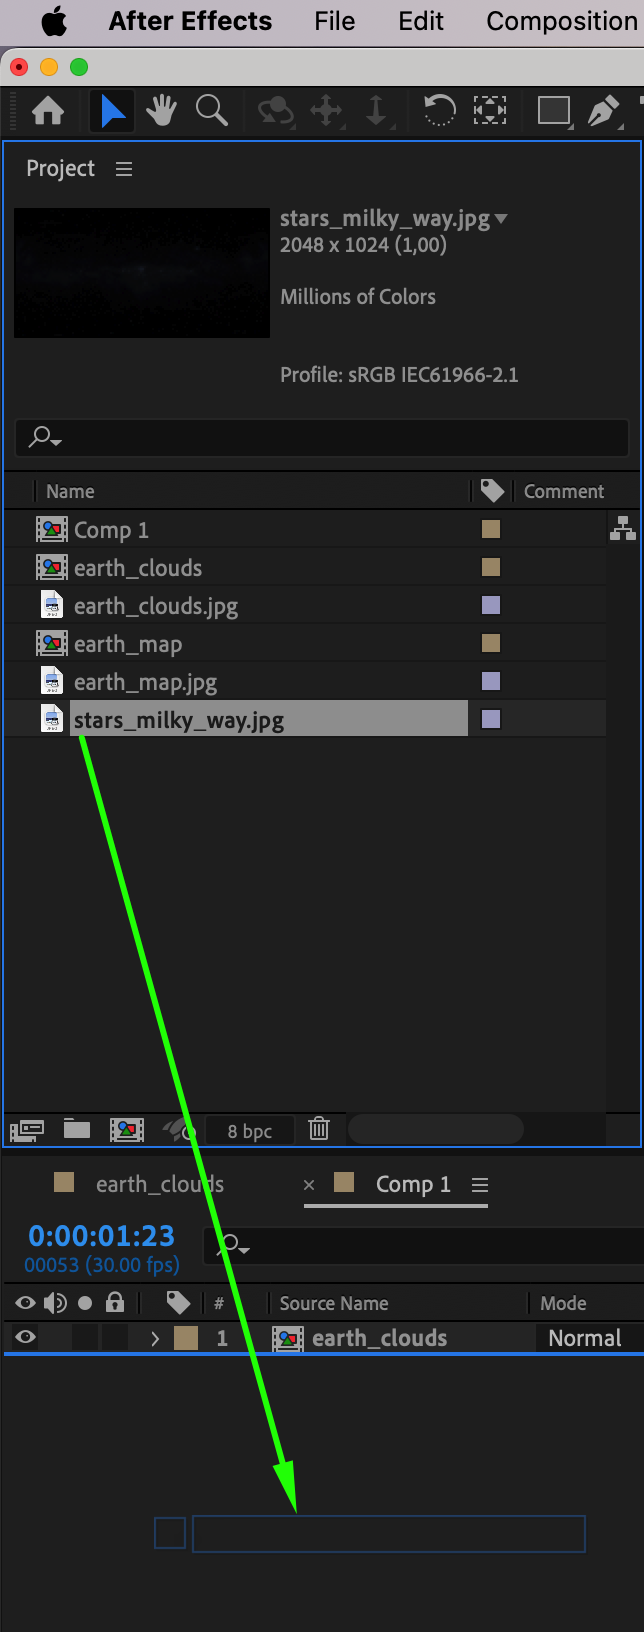
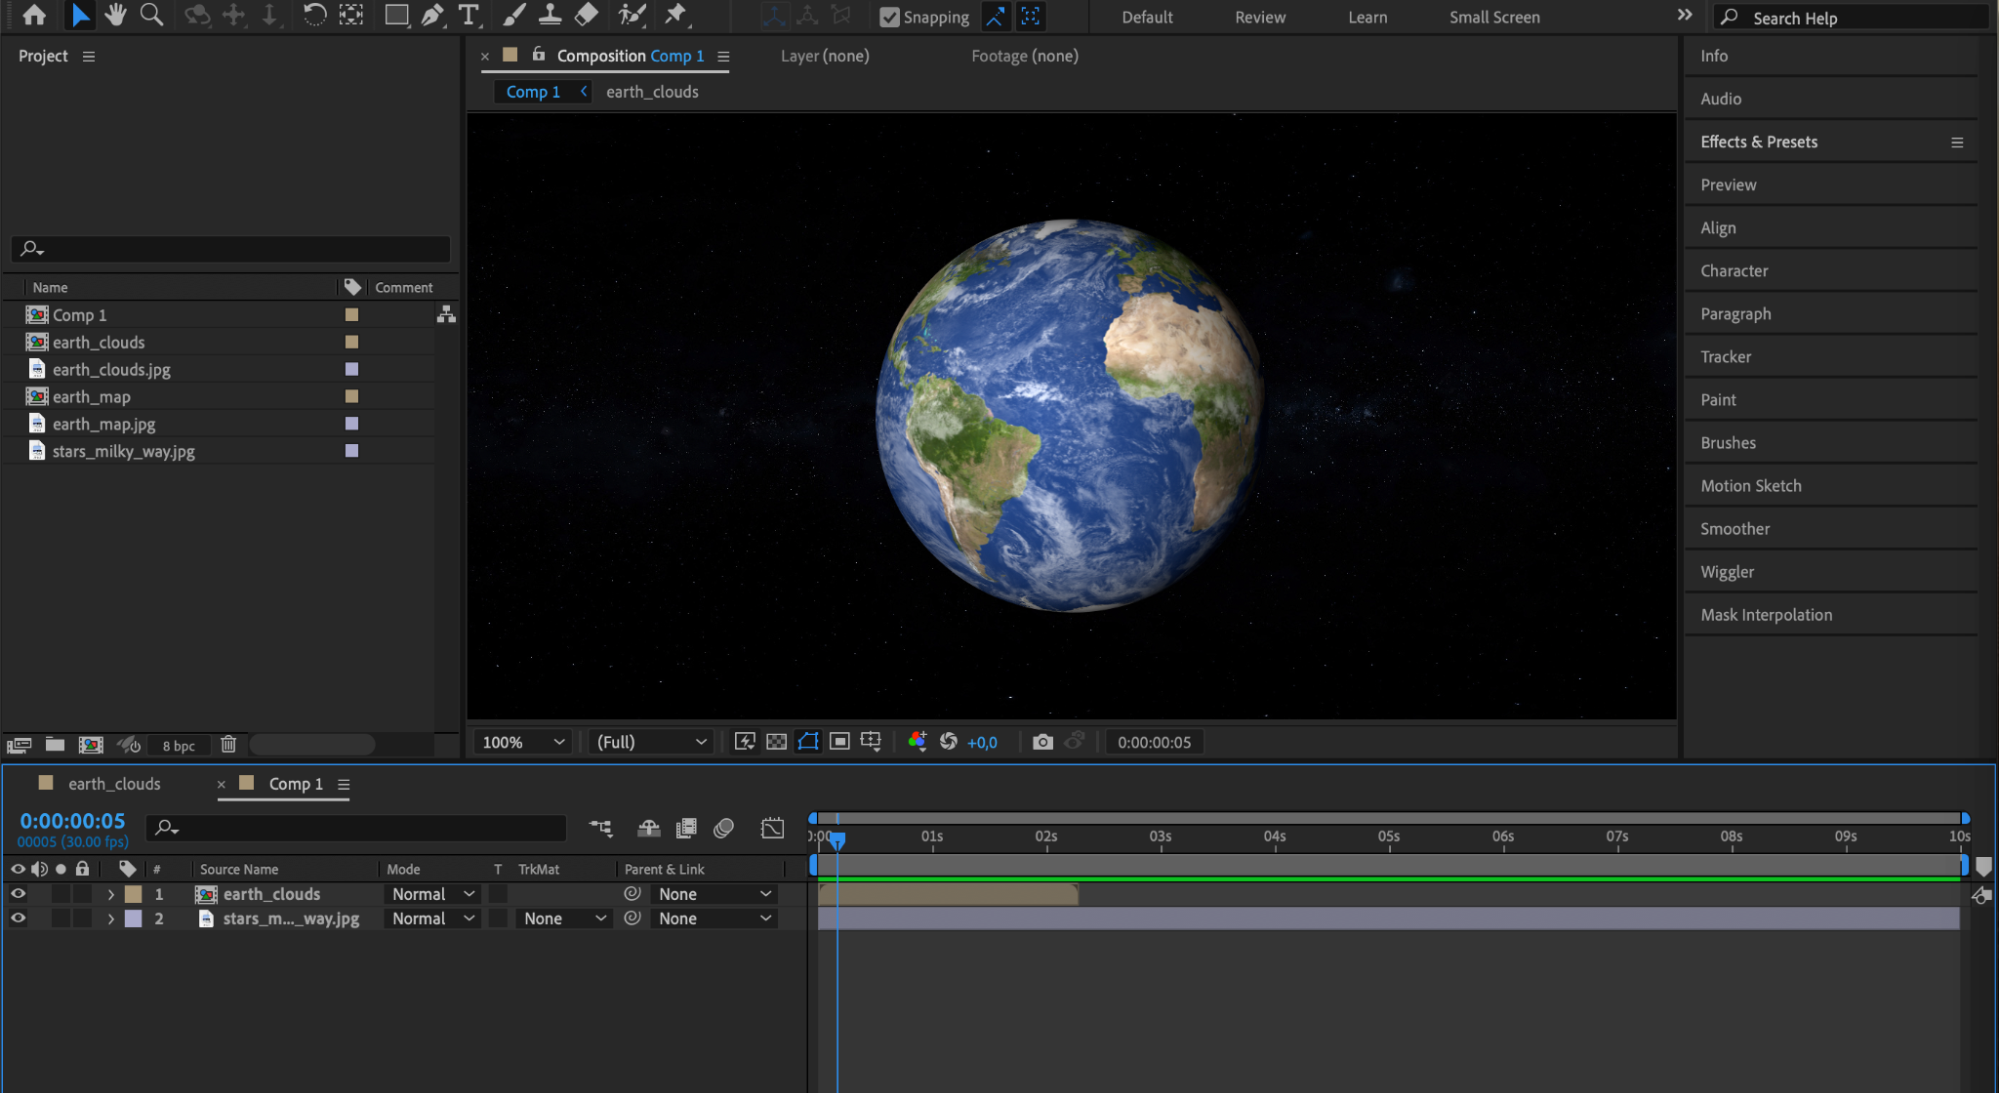
Import an image of the Milky Way and drag it onto the Timeline panel to serve as the background. This will create a natural and stunning backdrop for your planet.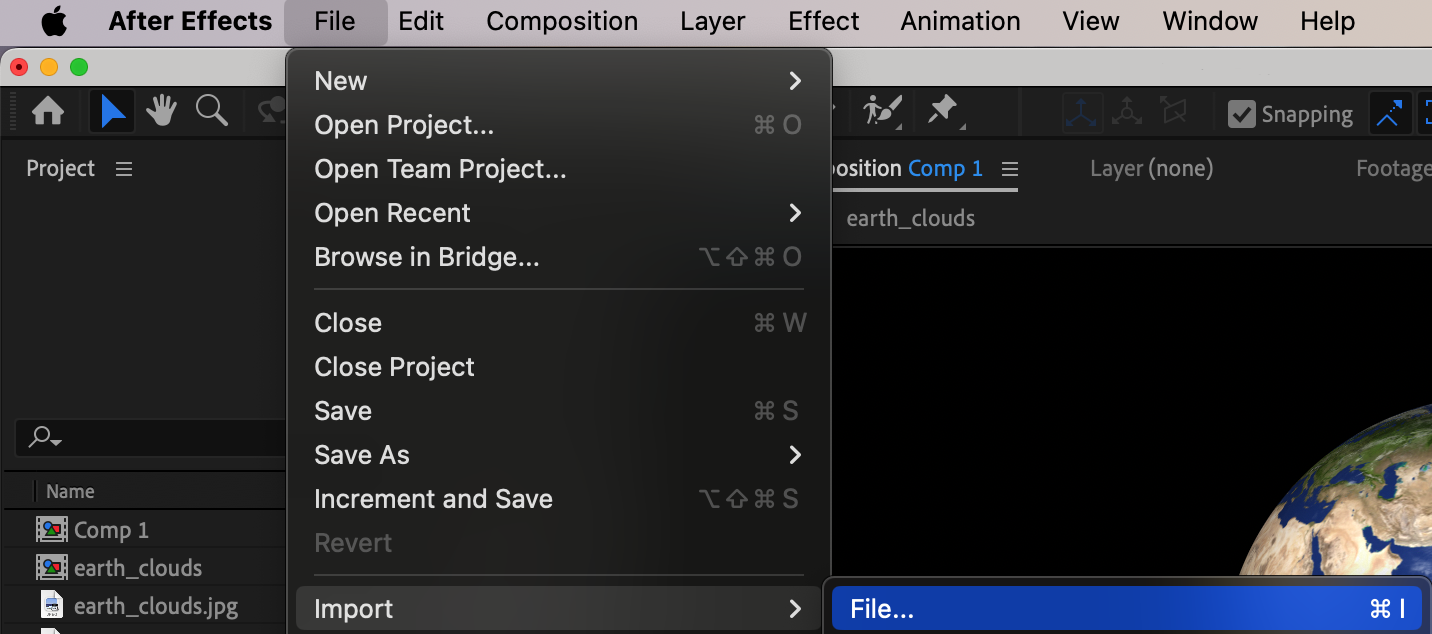
 Step 11: Add Outer Glow Effect
Right-click on the planet layer in the Timeline panel and select Layer Styles > Outer Glow. Expand the layer properties and adjust the Outer Glow settings: set the color to white, size to 200, and opacity to 5. This will create a subtle glow around your planet, enhancing its visual appeal.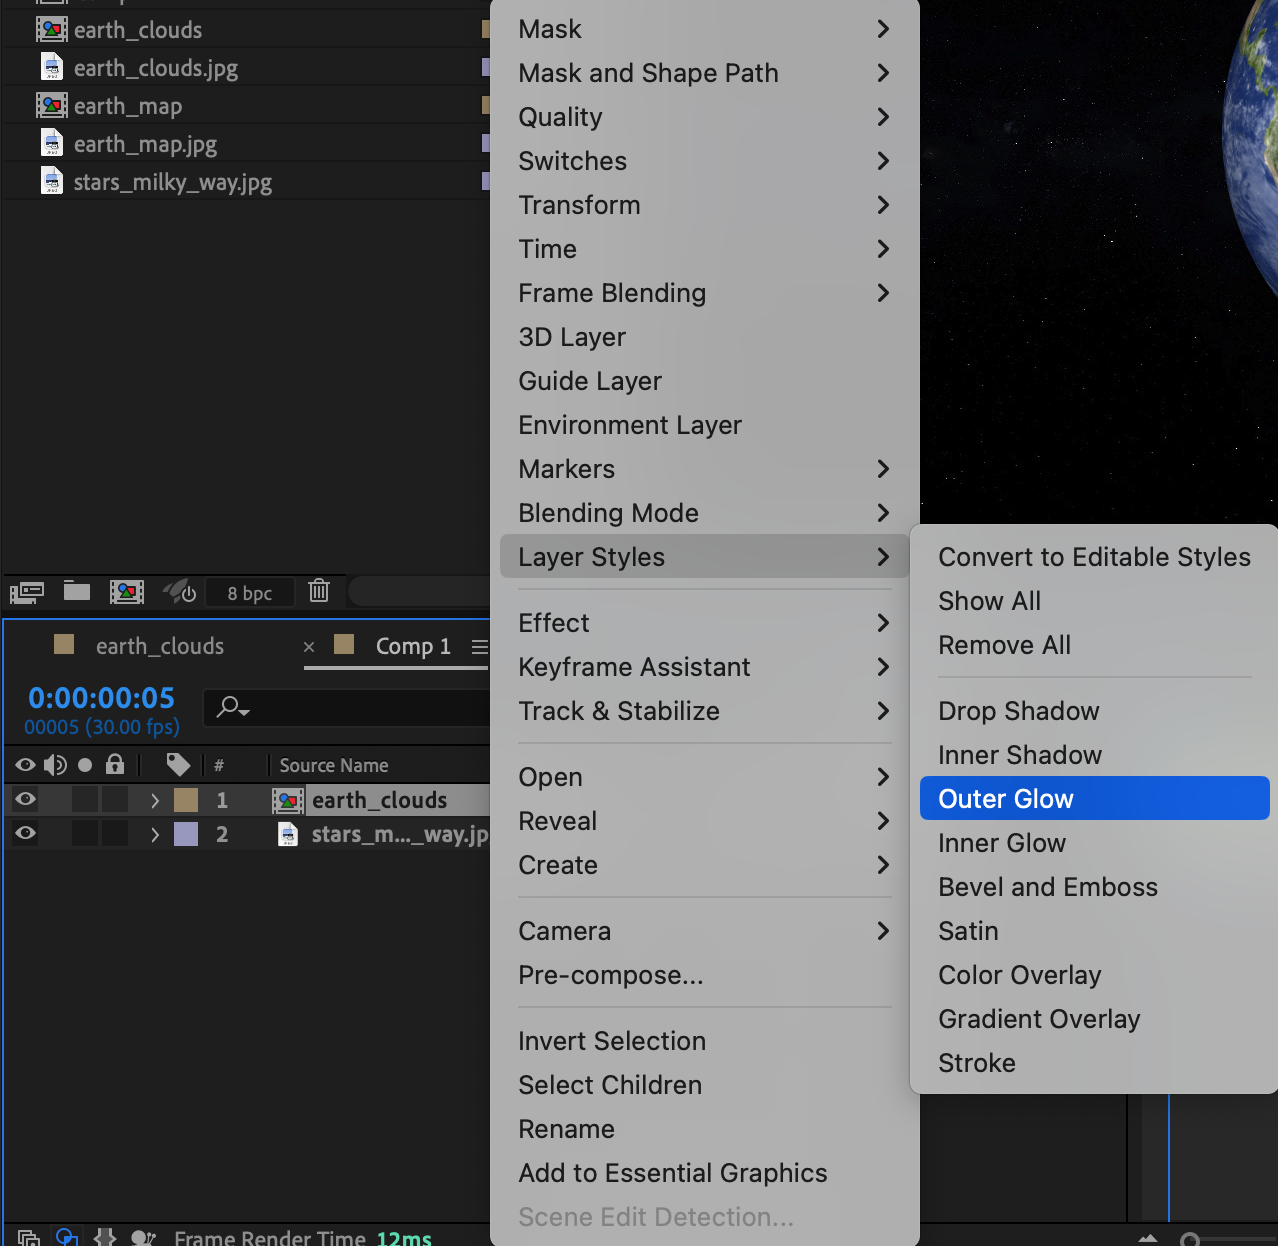
 Step 12: Preview Your Composition
Use the preview function by clicking the Play button in the preview panel to see your planet in motion. Make any necessary adjustments to ensure the final result meets your expectations.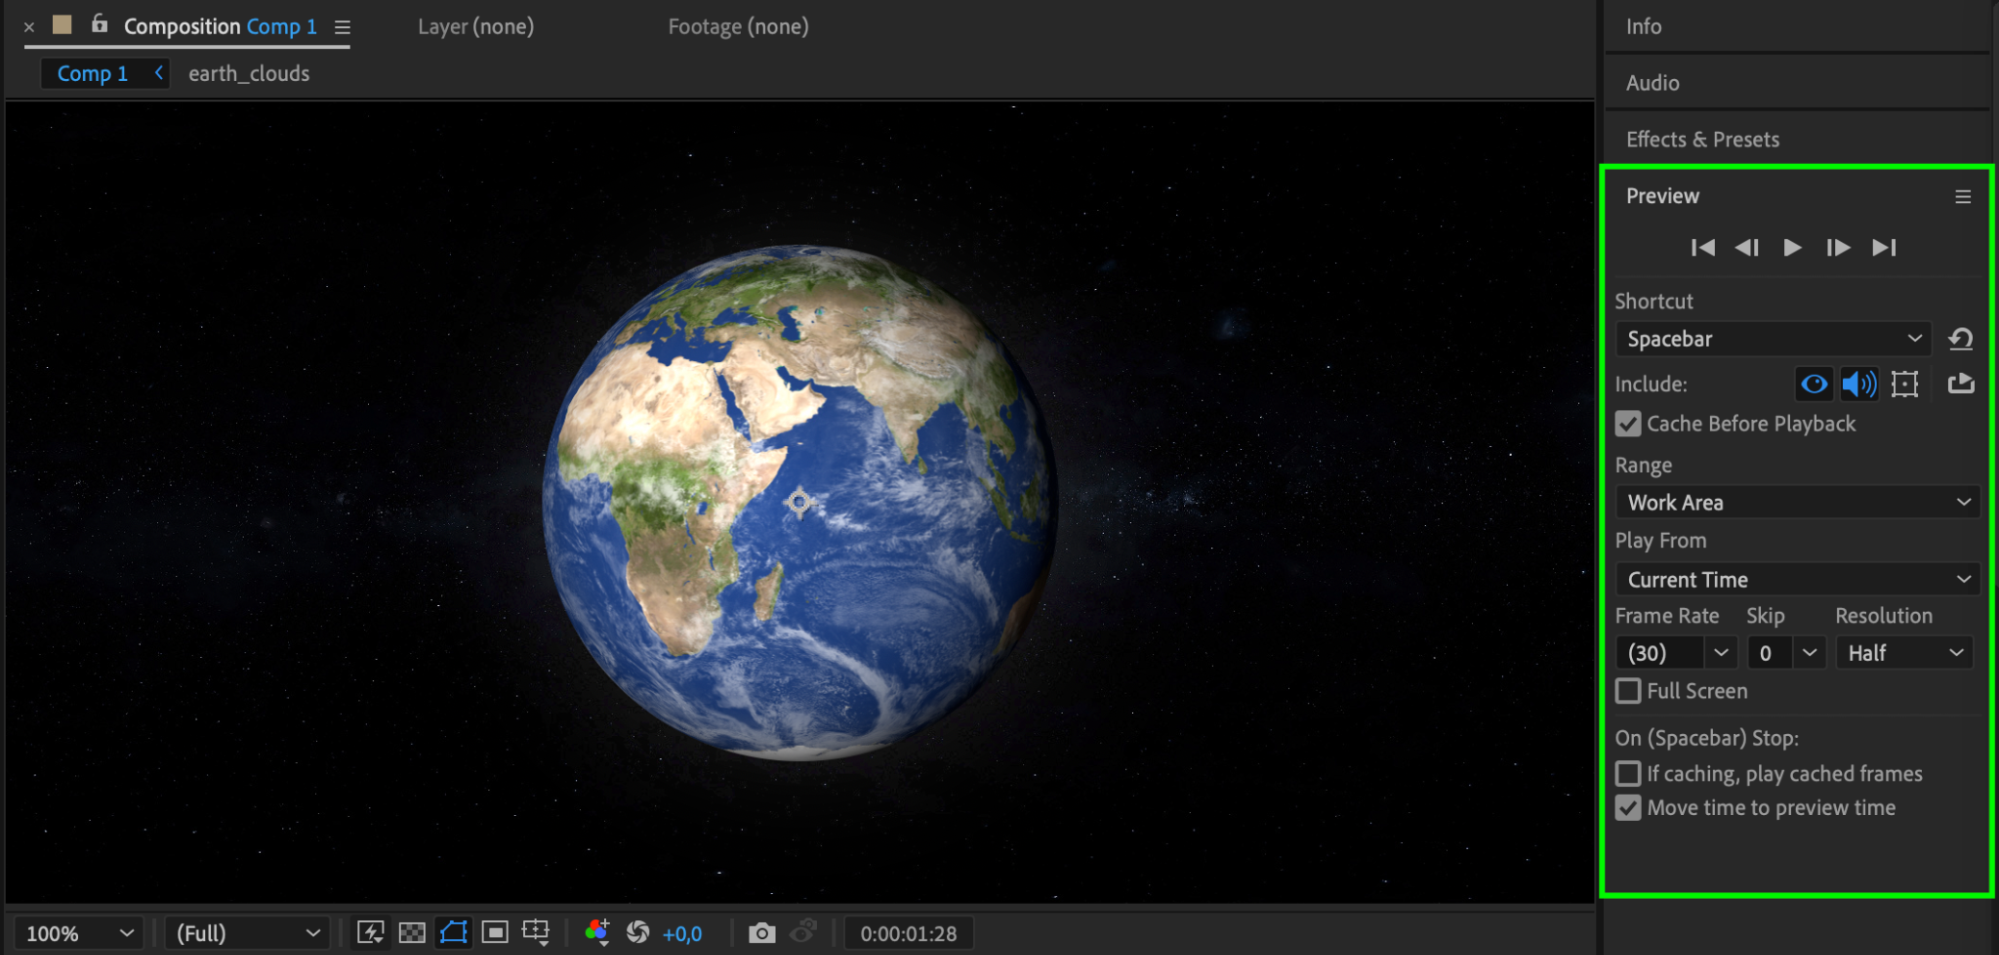 Conclusion
By following these steps, you can create a realistic and visually stunning planet in After Effects. Whether you’re a seasoned professional or just starting out, this tutorial equips you with the knowledge and skills to create impressive visuals. So, why wait? Let your creativity soar and start making your own planets today. Happy creating!


