Crafting an Impactful Presentation in After Effects
Introduction to Creating a Presentation in After Effects
Creating a compelling presentation can elevate your message with dynamic animations and effects using Adobe After Effects. Learn how to harness its capabilities to create visually stunning presentations that captivate your audience.
Get 10% off when you subscribe to our newsletter

Step 1: Planning Your Presentation
Before diving into After Effects, outline your presentation’s structure and key points. Creating a storyboard or outline helps organize your thoughts and ensures a coherent narrative throughout your slides.
Step 2: Gathering Your Assets
Collect all necessary assets-images, videos, logos, and text-that align with your presentation’s theme. Organize them in a dedicated folder for easy access during the design process.
Step 3: Creating a New Composition
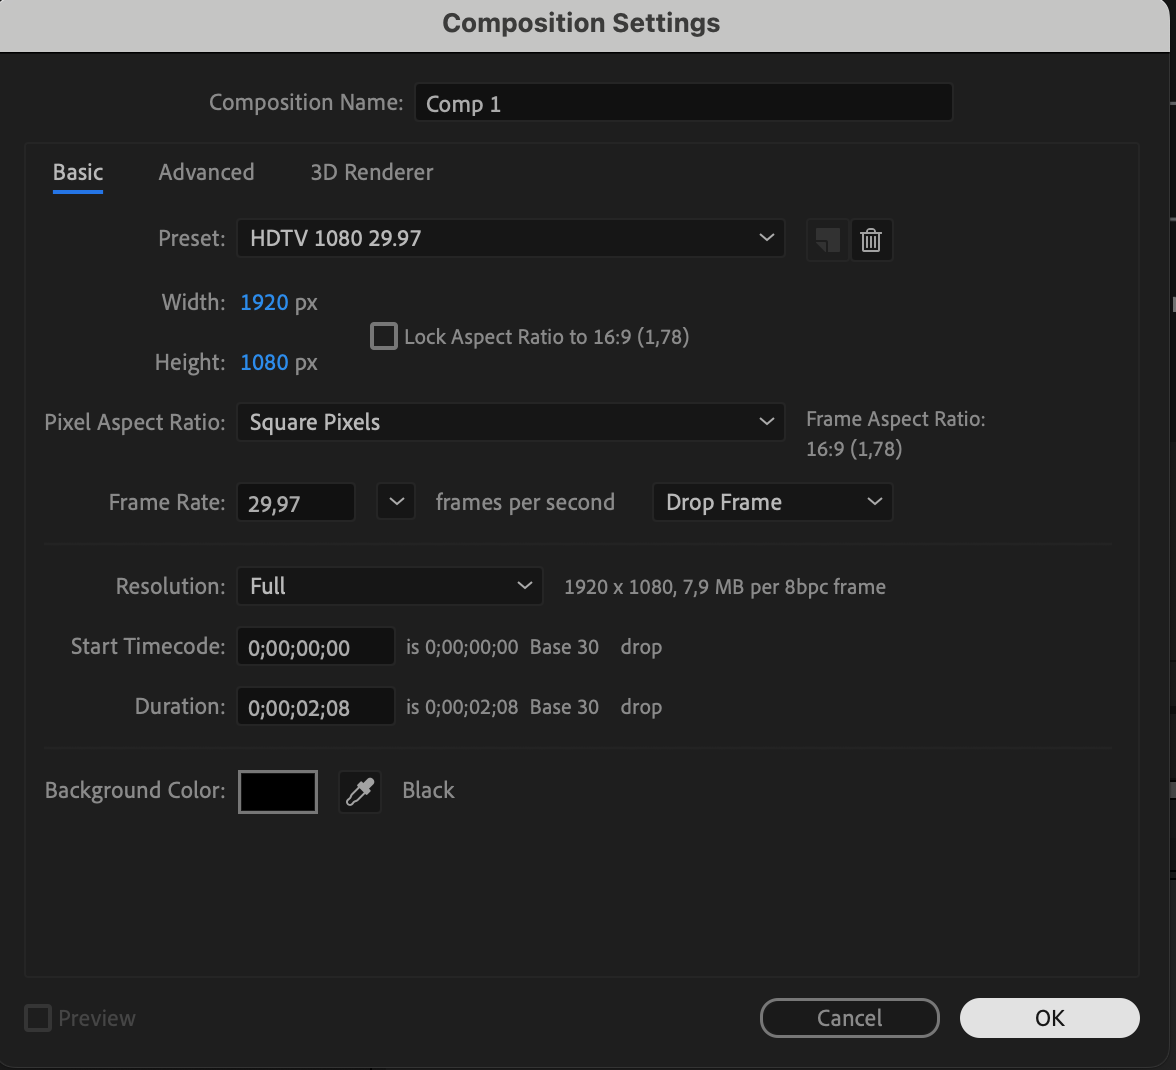
Open After Effects and create a new composition. Define the dimensions, duration, and settings suitable for your presentation, considering the display platform or screen resolution.
 Step 4: Importing Your Assets
Import your gathered assets into After Effects. Navigate to File > Import > File and select your assets. Ensure compatibility by using supported file formats for seamless integration.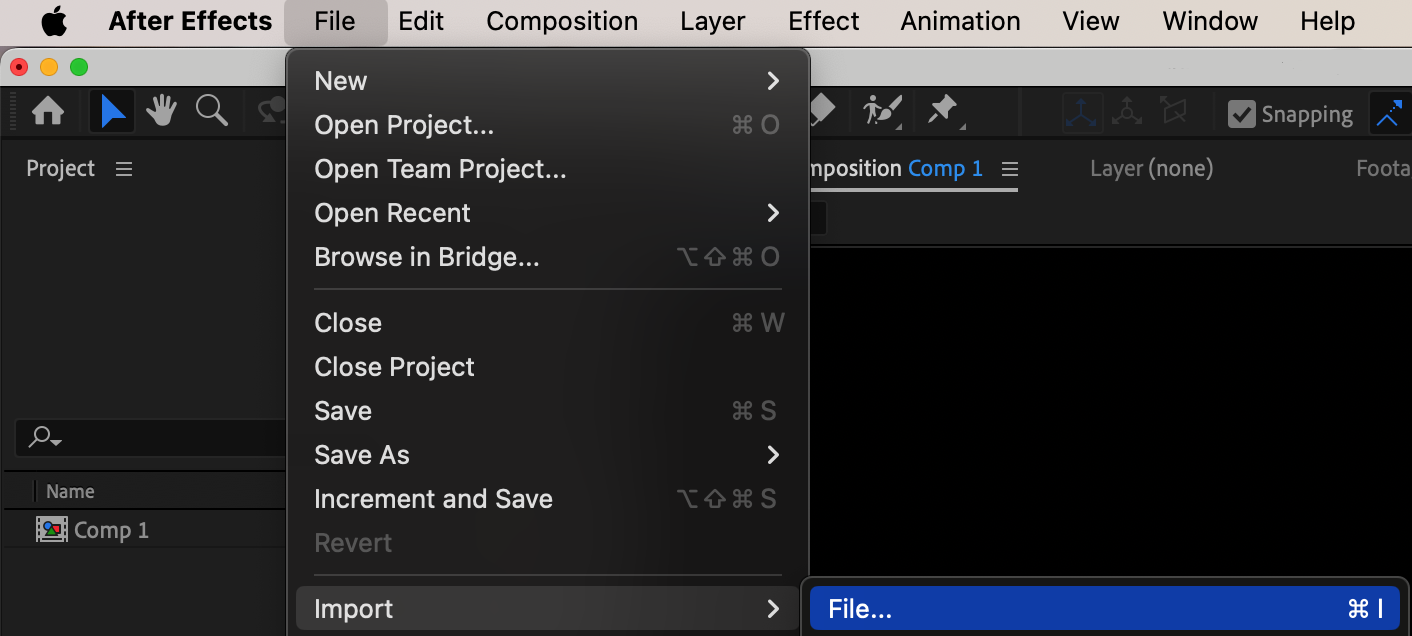
 Step 5: Creating a Solid as Your Canvas
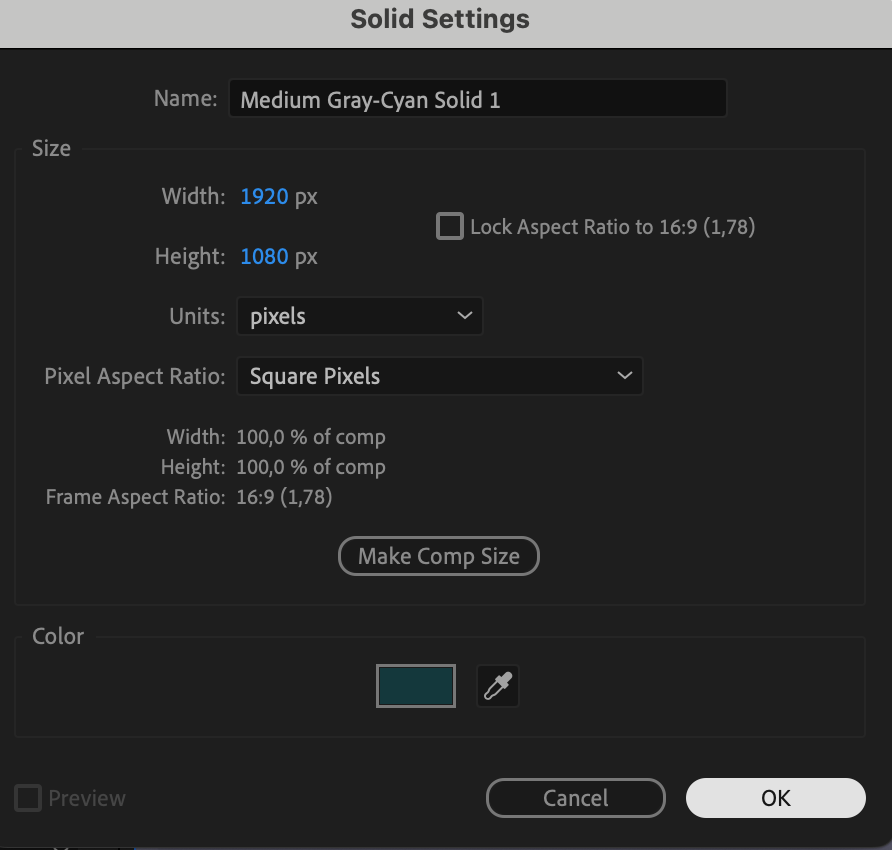
Add a solid layer that serves as the backdrop for your presentation slides. Adjust its properties to match the desired color or texture, providing a cohesive visual foundation.
 Step 6: Arranging and Customizing Your Assets
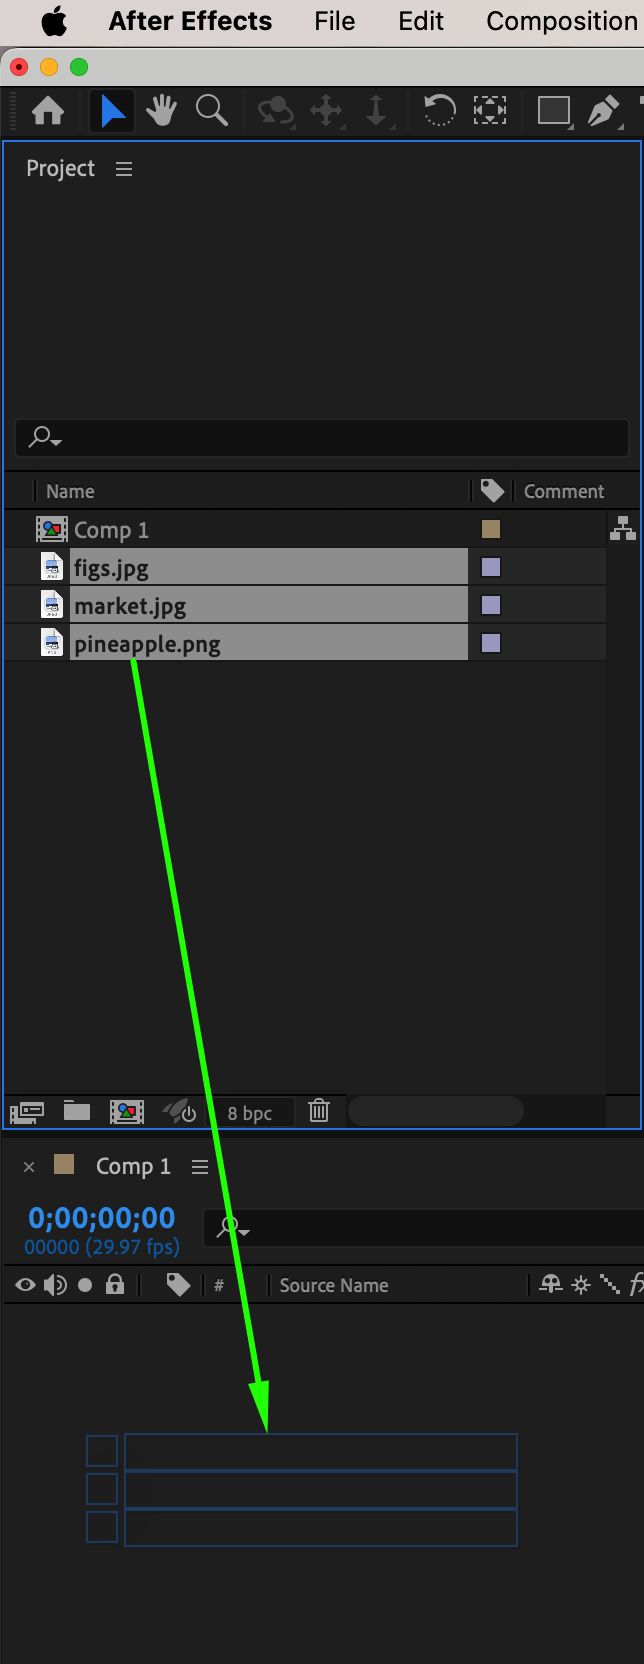
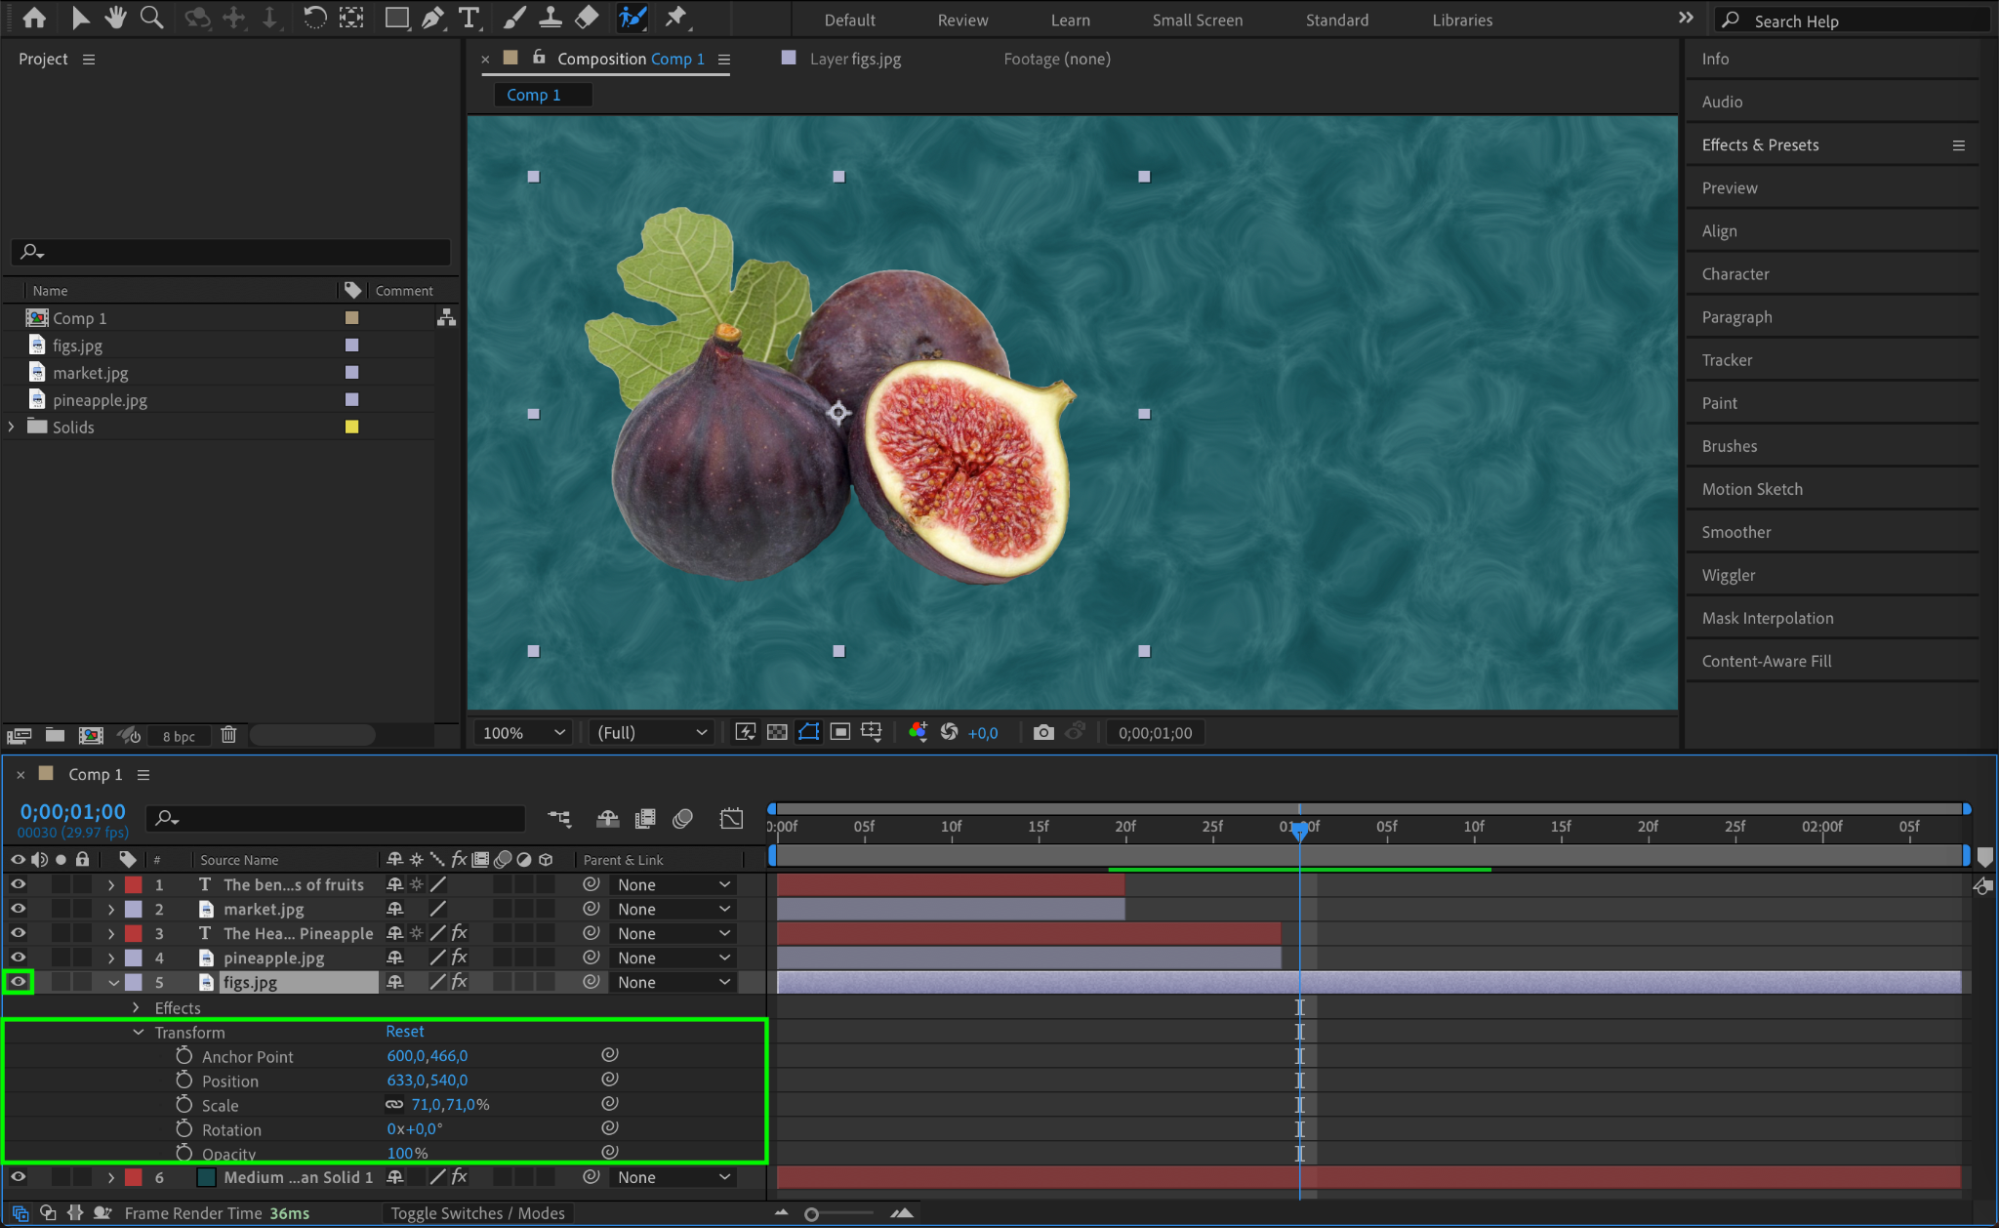
Arrange assets on the composition timeline. Use transform controls to position, scale, and rotate elements effectively. Use the “eye” icon to toggle visibility of layers for focused editing.
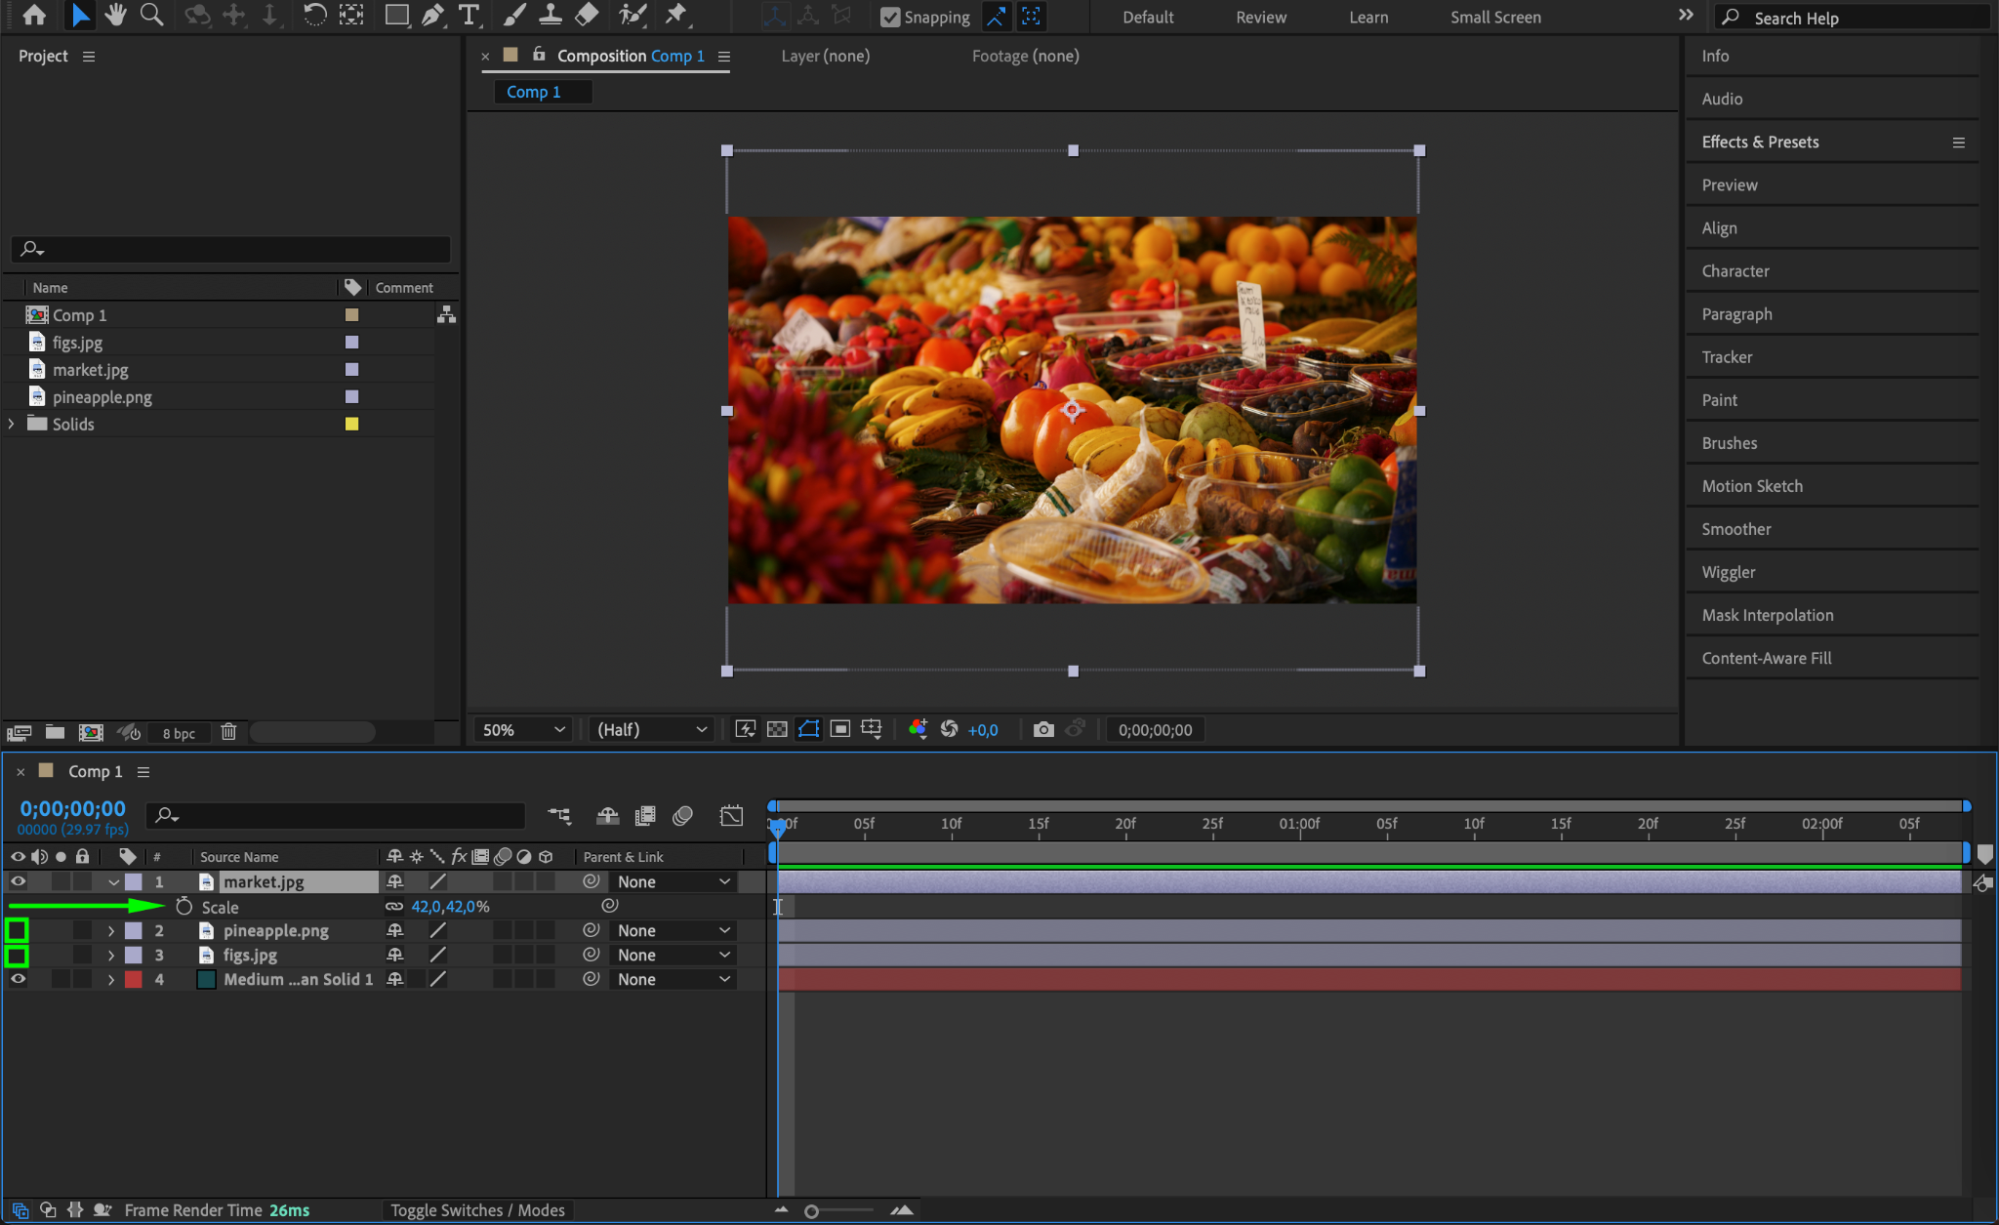 Step 7: Adding Text and Graphics
Incorporate textual information and graphics to clarify and enhance your presentation. Customize fonts, colors, and animations to align with your presentation’s visual style and messaging.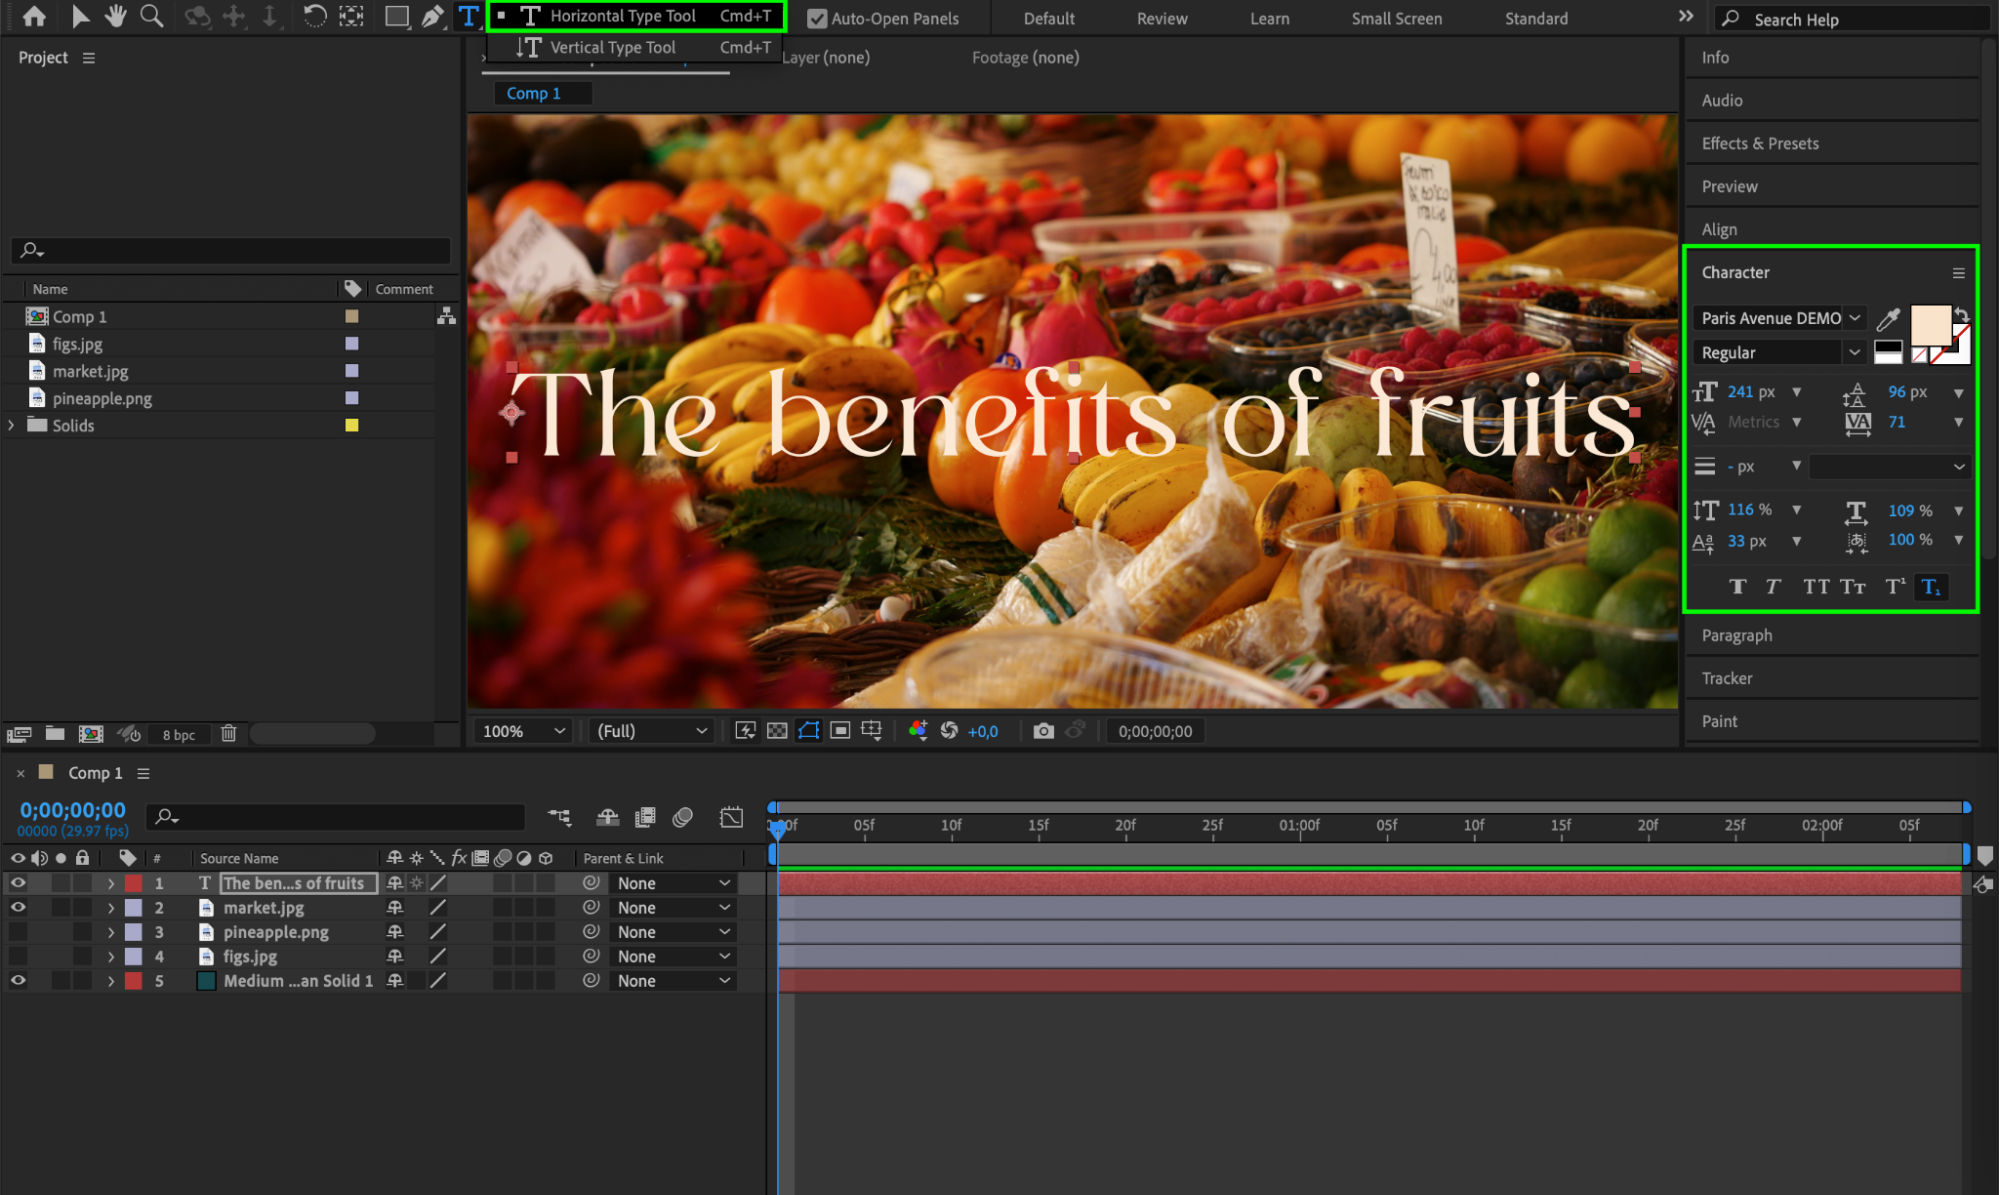 Step 8: Applying Animation Effects
Enliven your presentation with animation effects. Utilize After Effects’ animation tools and presets to create transitions, motion paths, and effects that engage and inform your audience.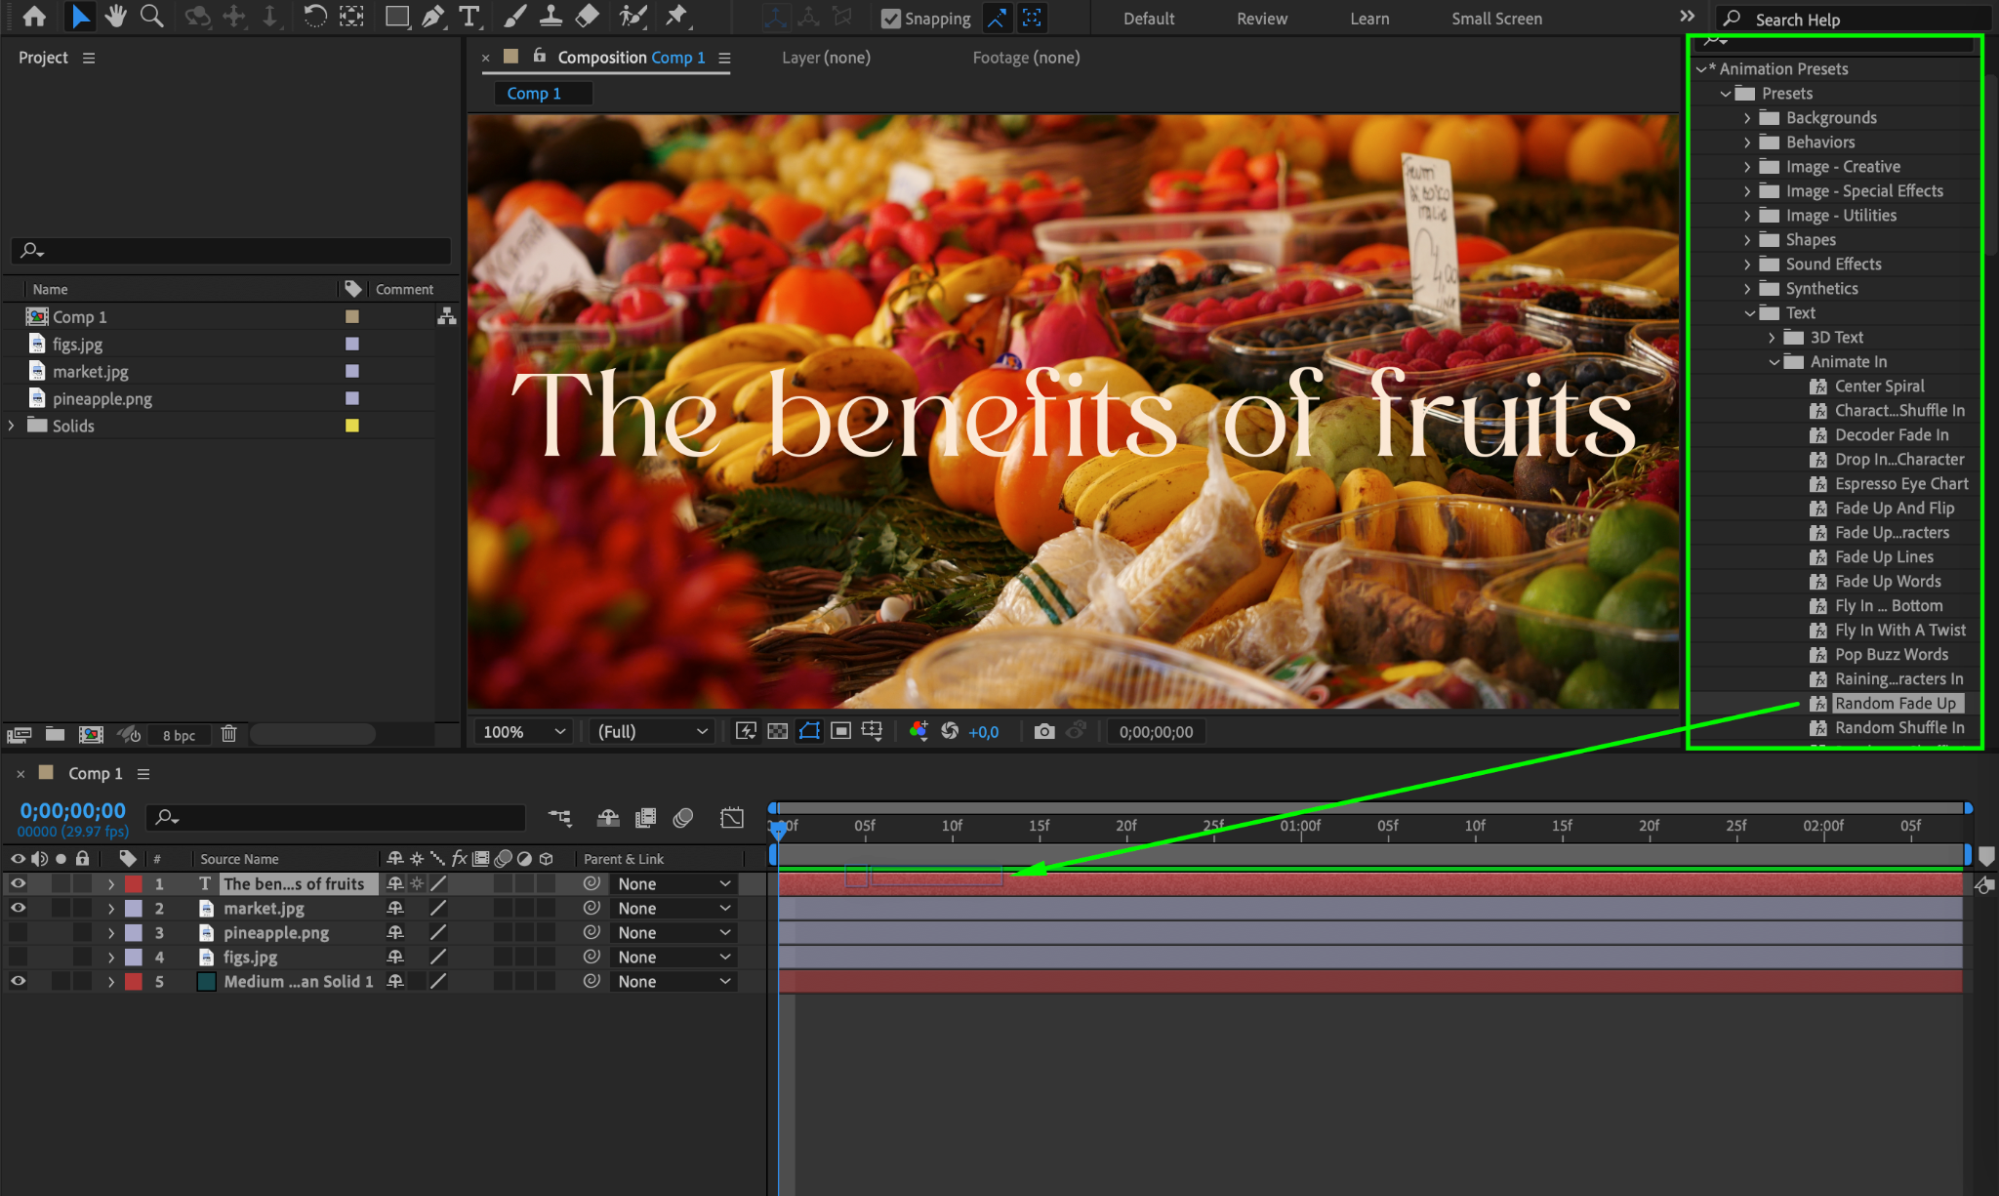
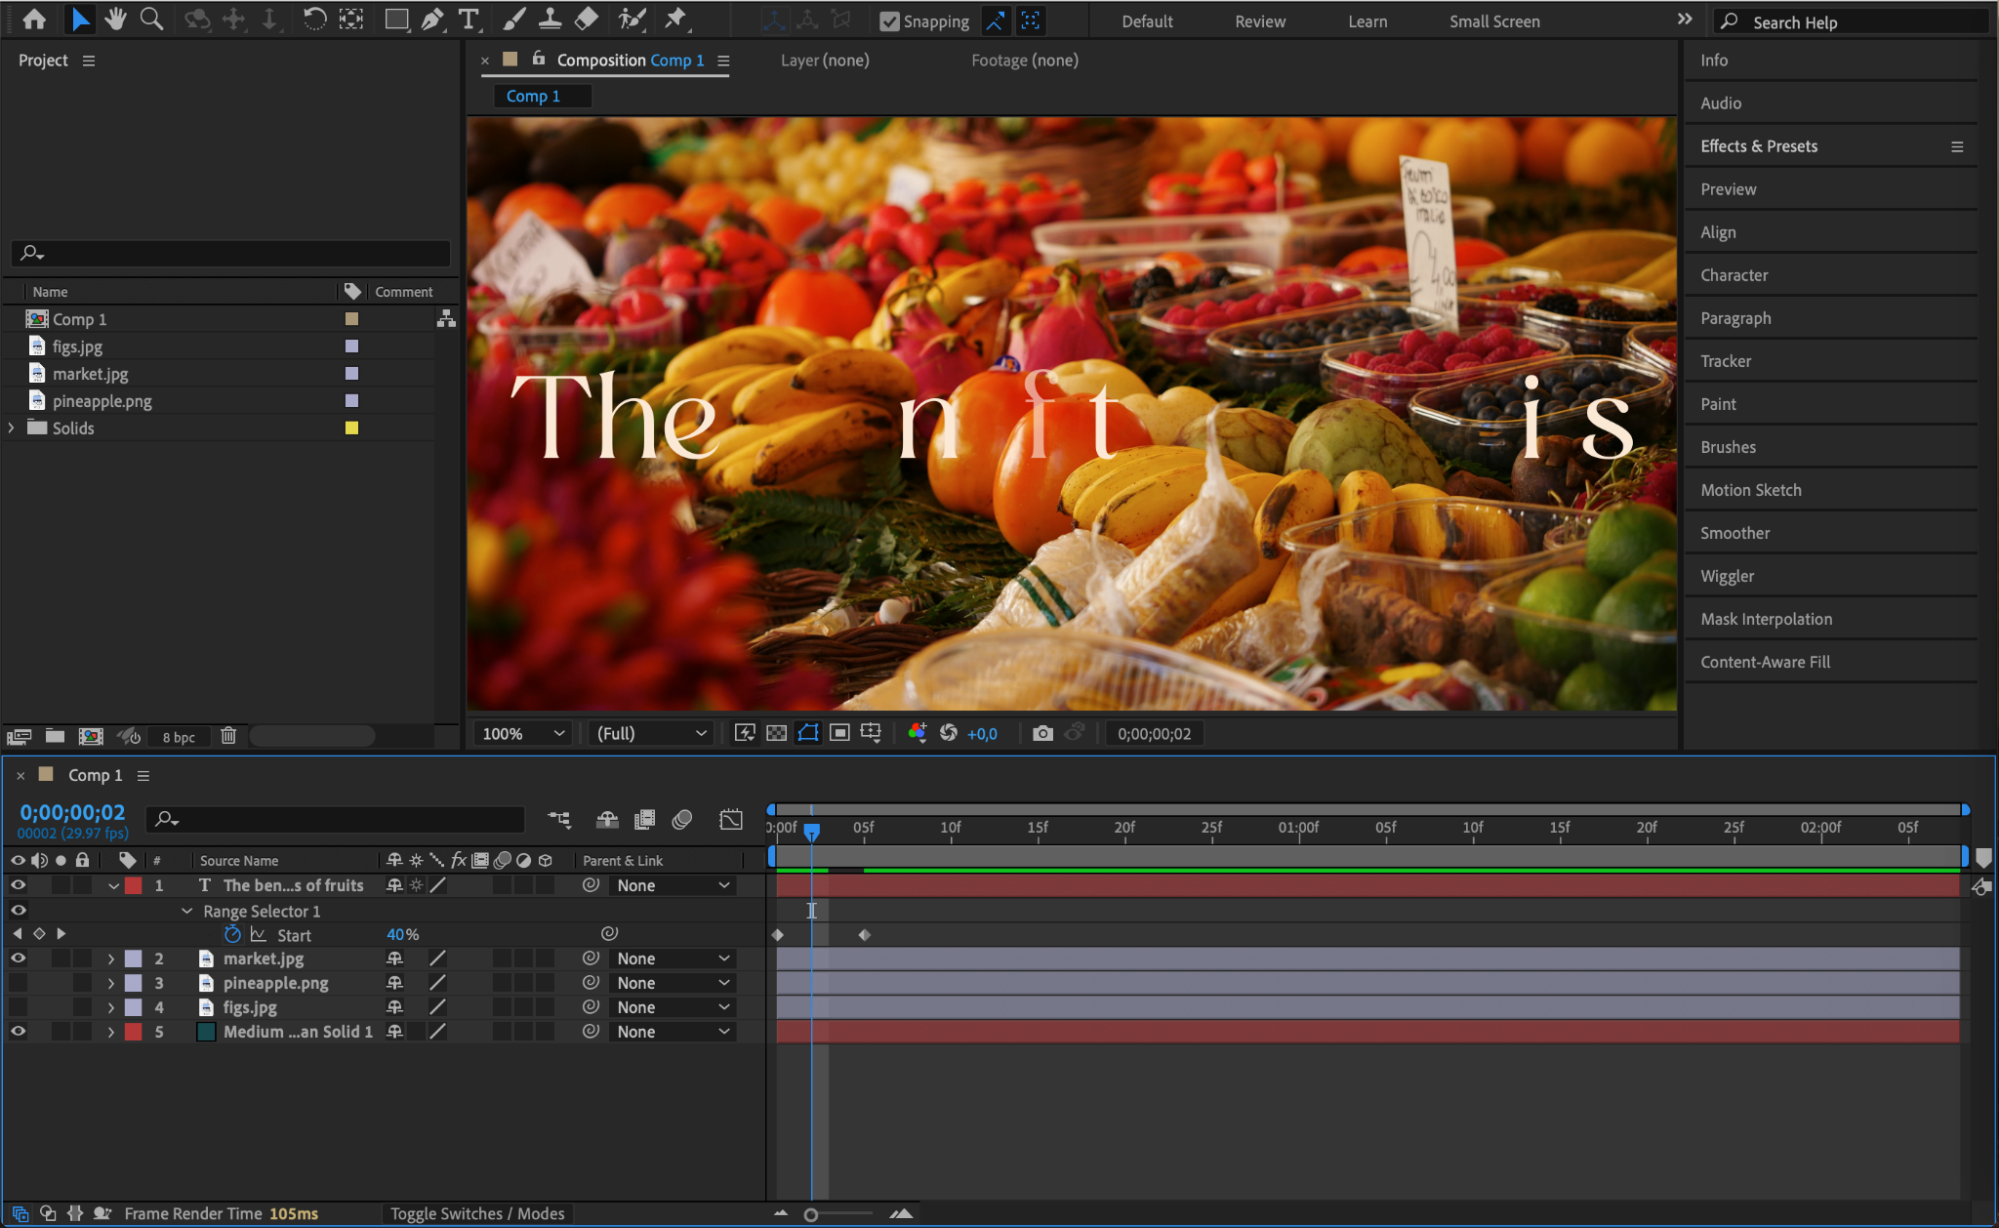 Step 9: Trimming Layers with Time Indicator
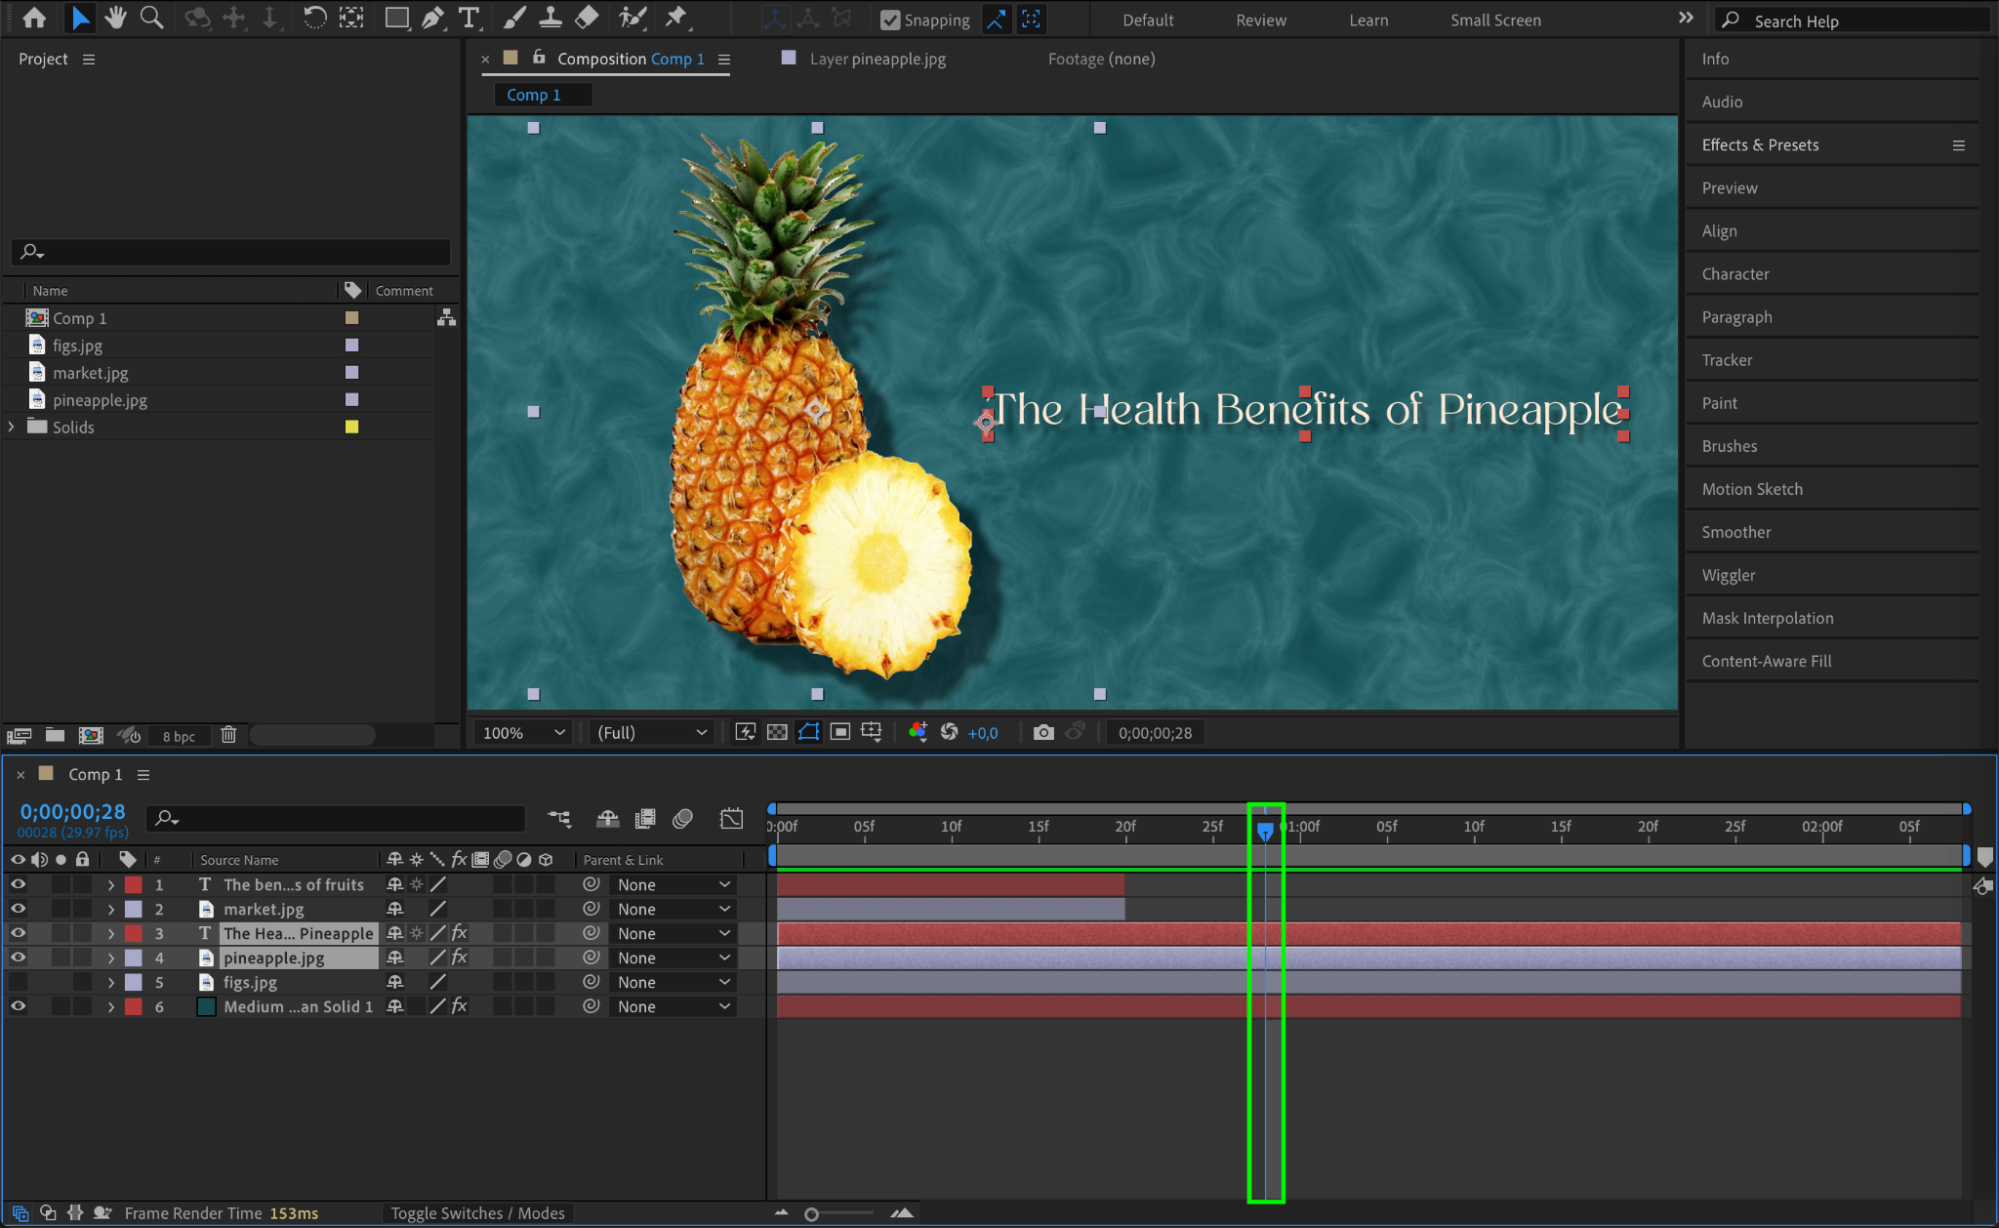
Use the current time indicator and shortcuts “Alt/Option + [” and “Alt/Option + ]” to adjust the duration of your slides effectively.
 Step 10: Creating a New Slide
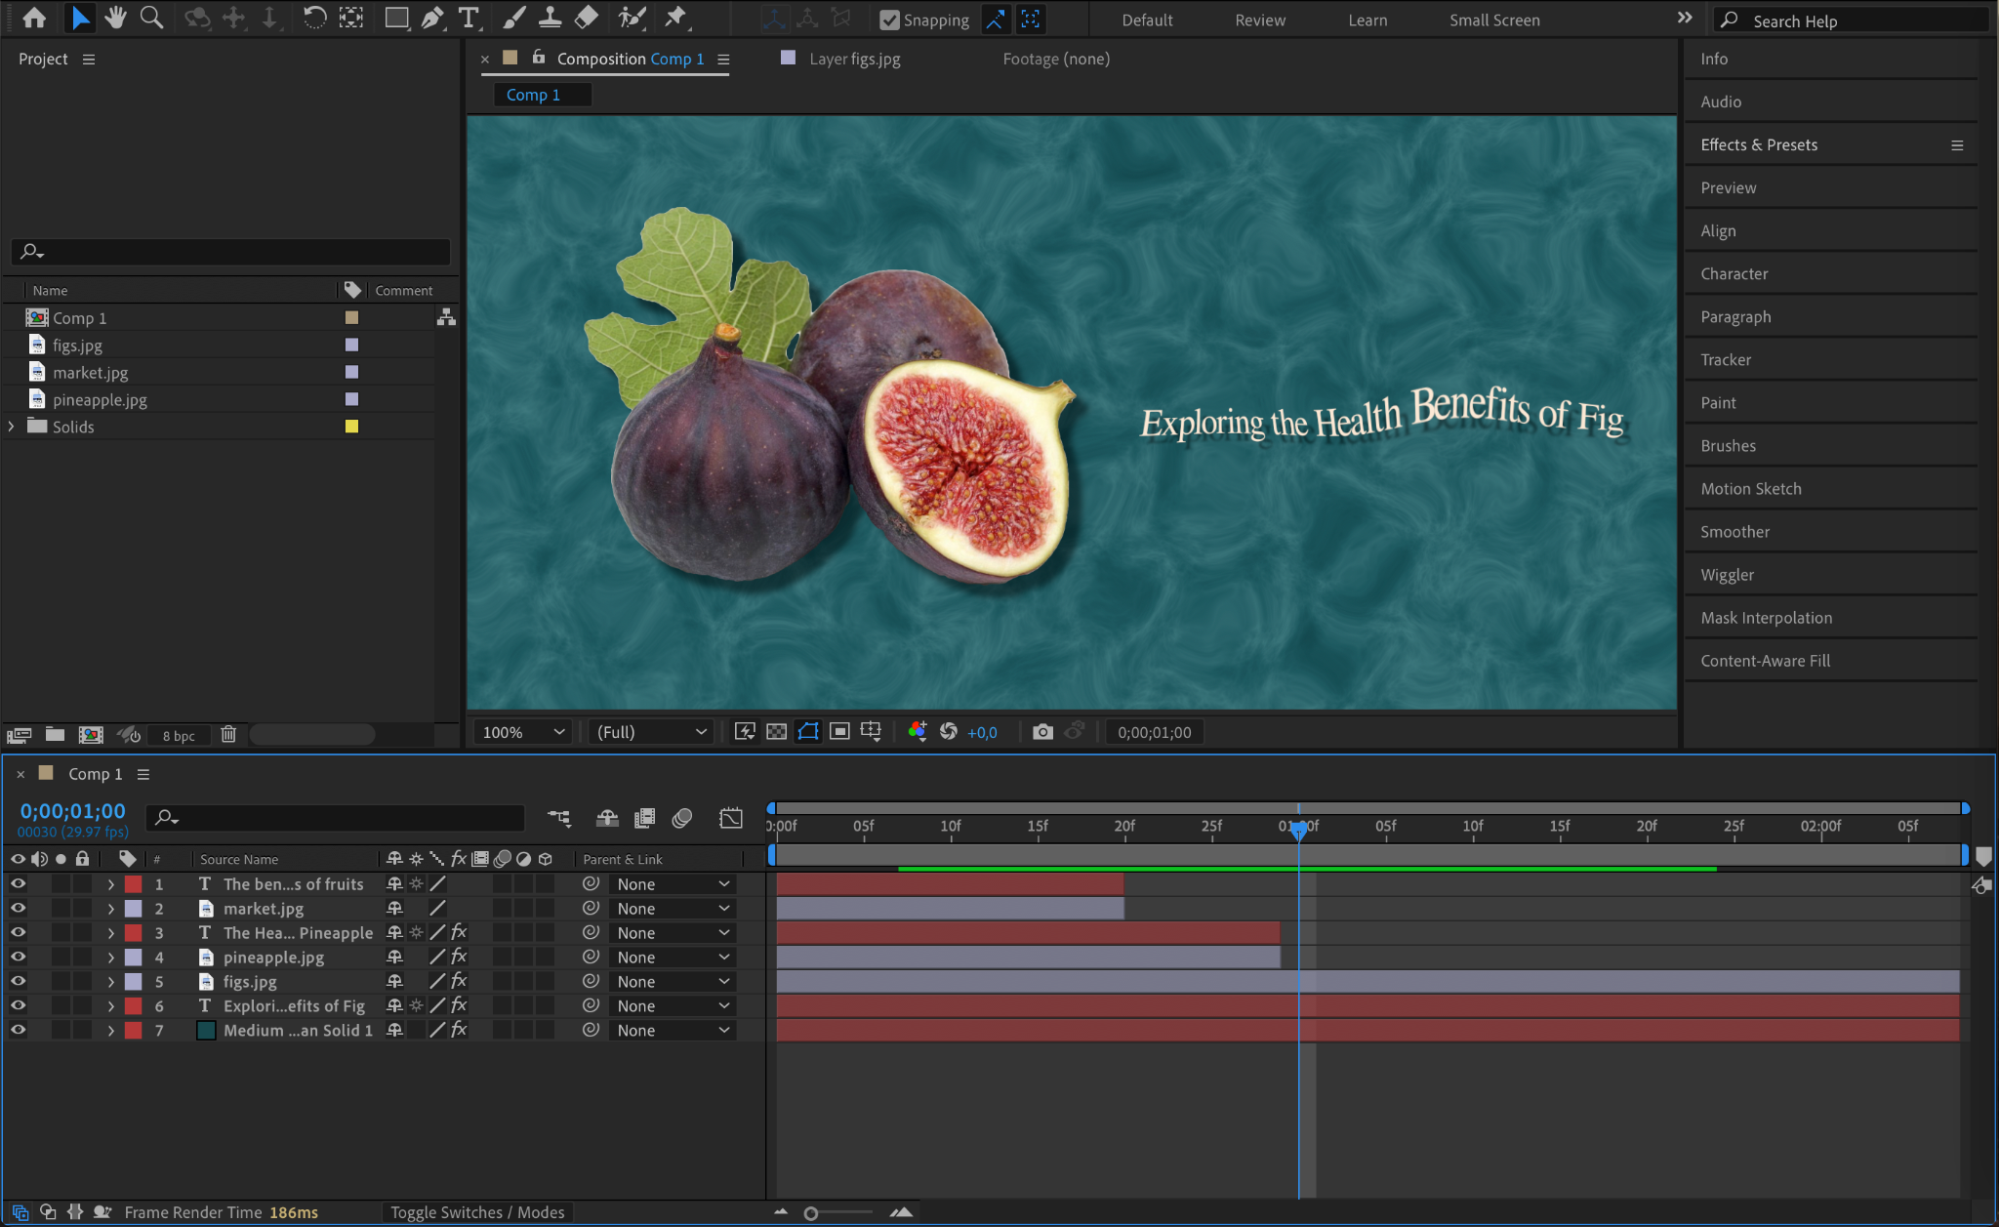
Toggle layer visibility by clicking the eye icon to edit layers. Use expressions to animate images and add visual interest.
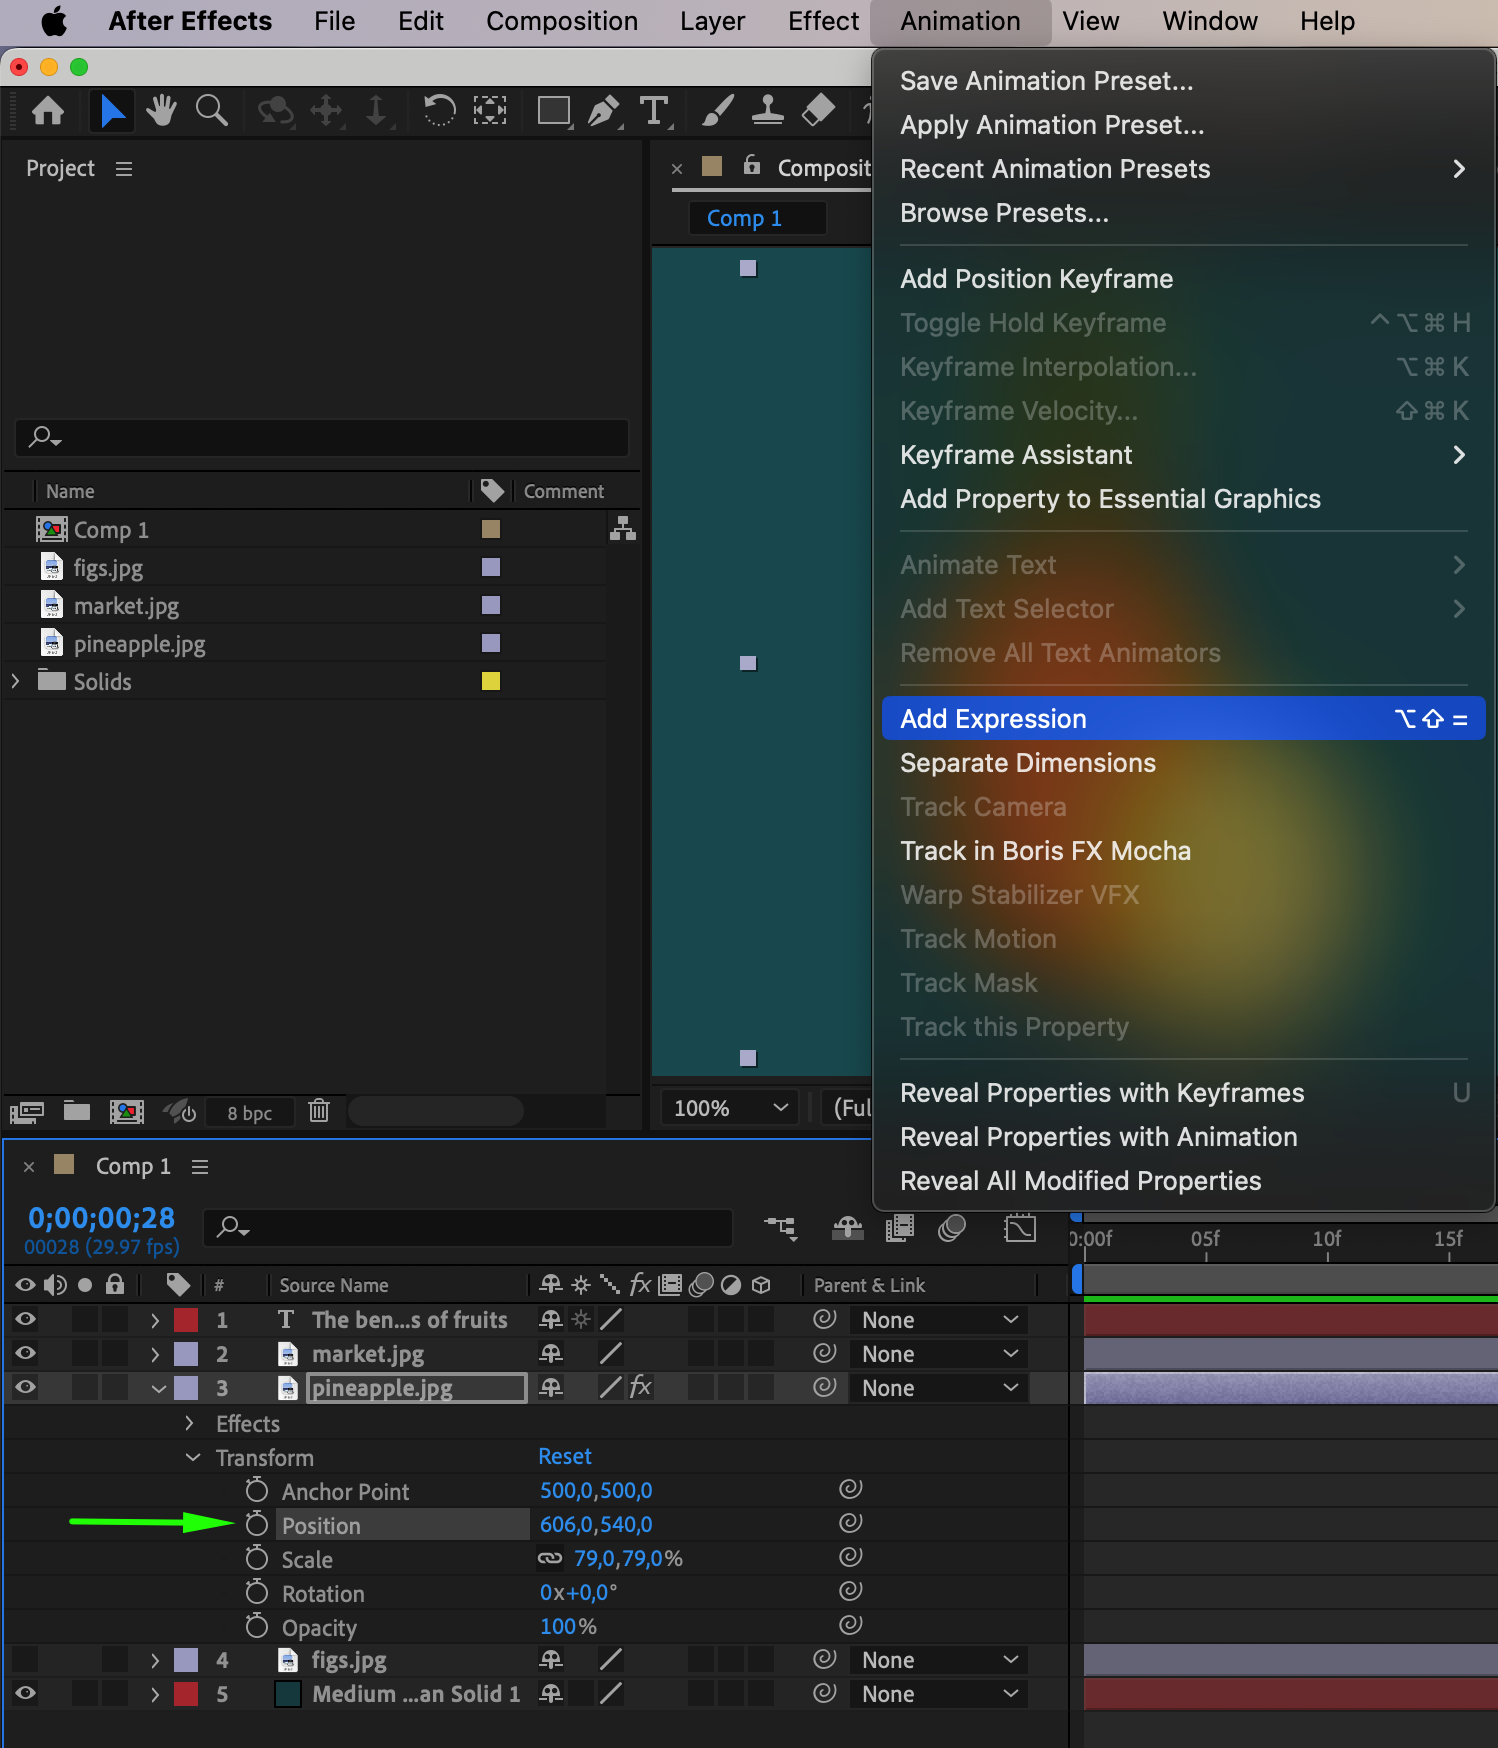
 Step 11: Applying Effects and Presets
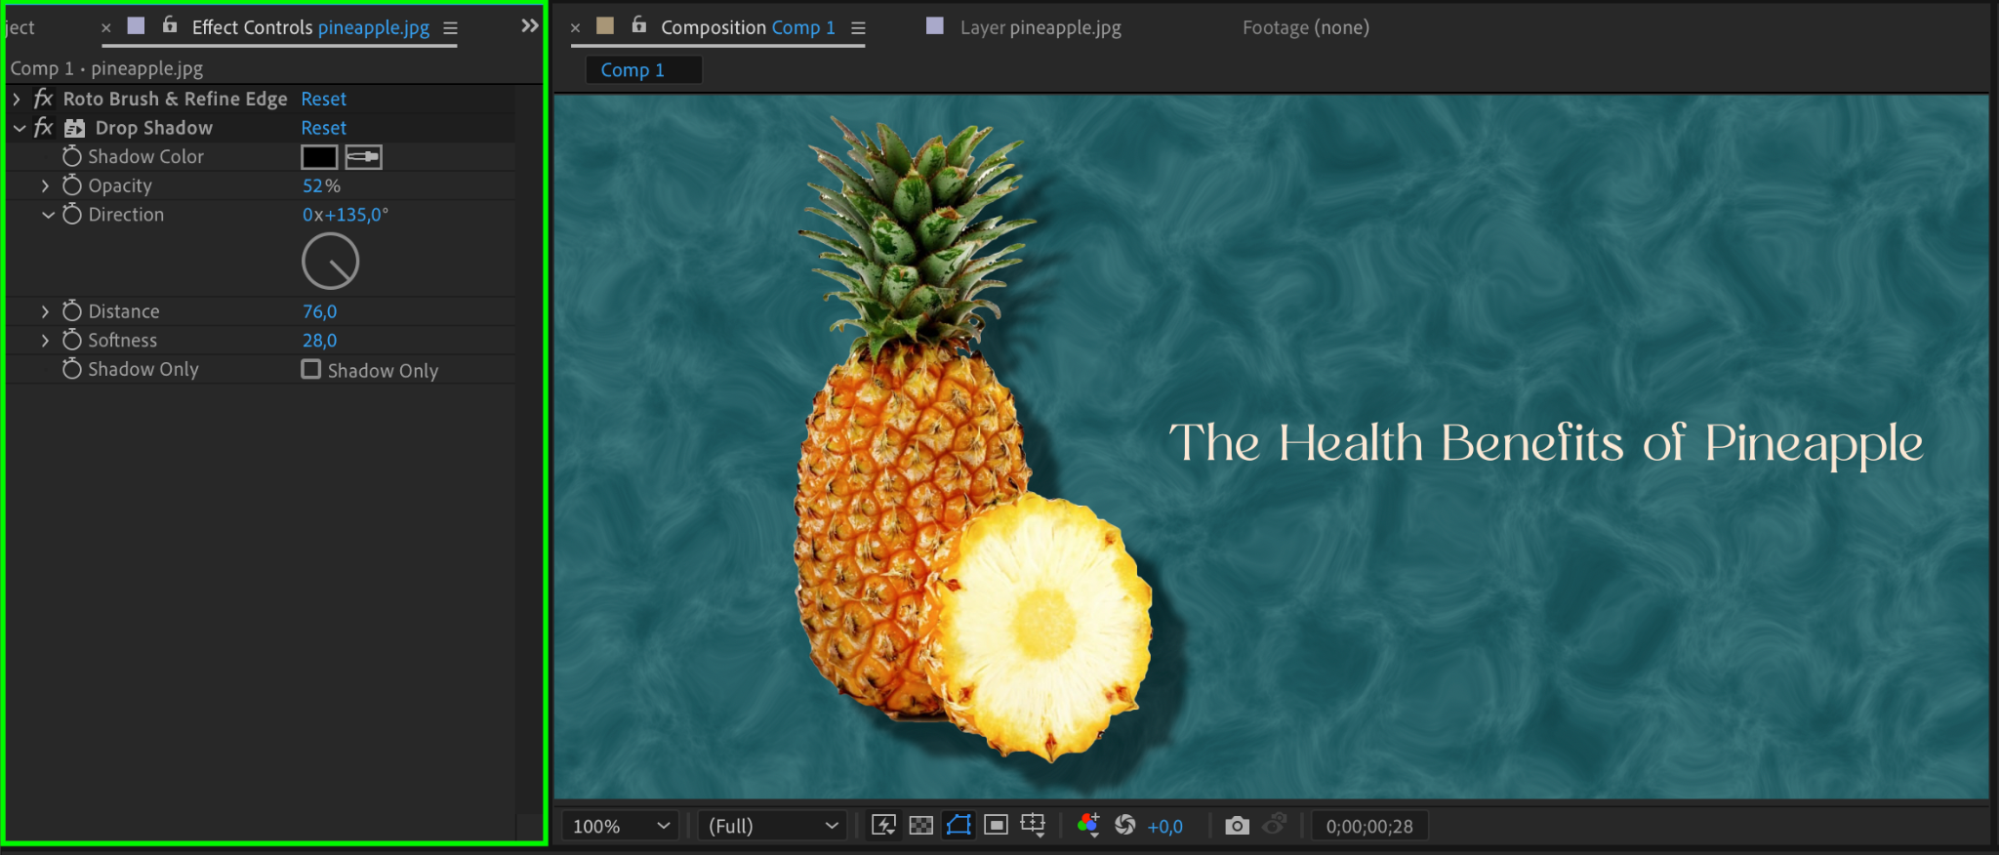
Enhance your canvas with textures, shadows, or color corrections using the Effects & Presets panel.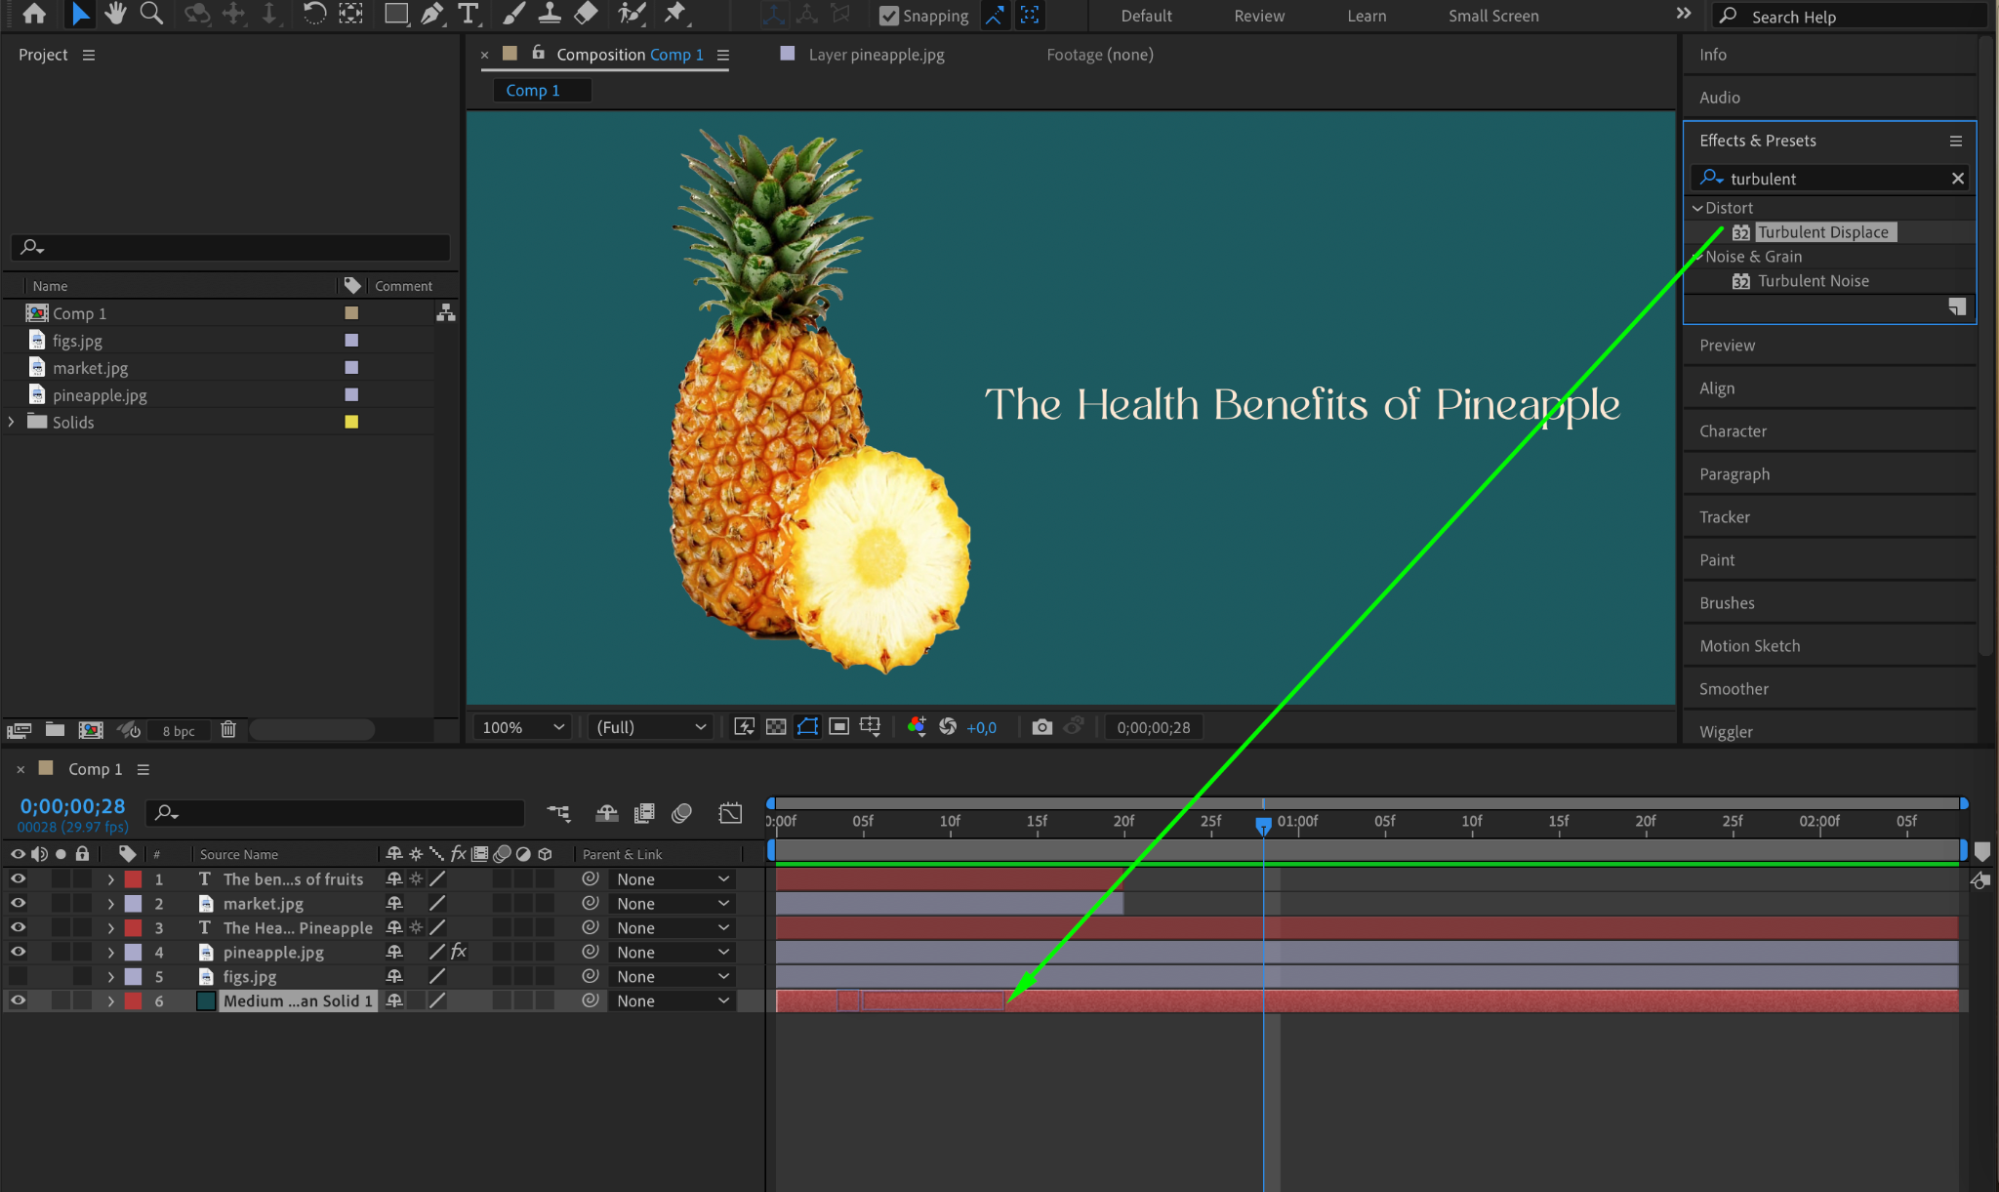
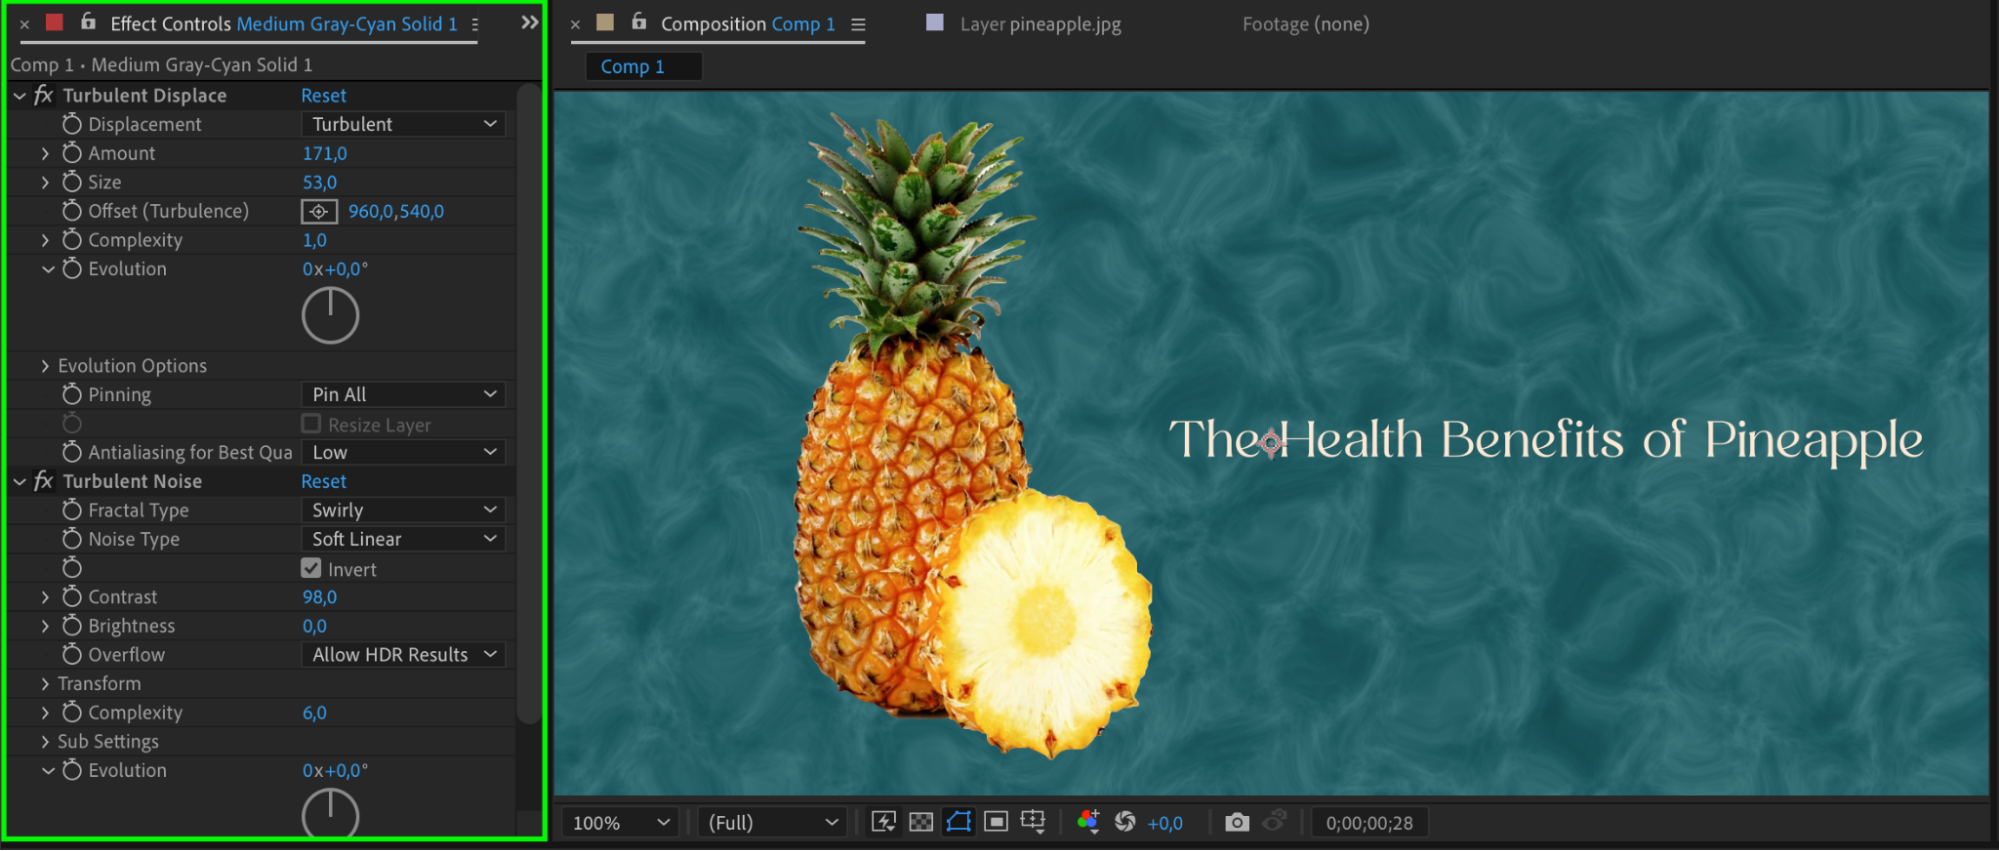
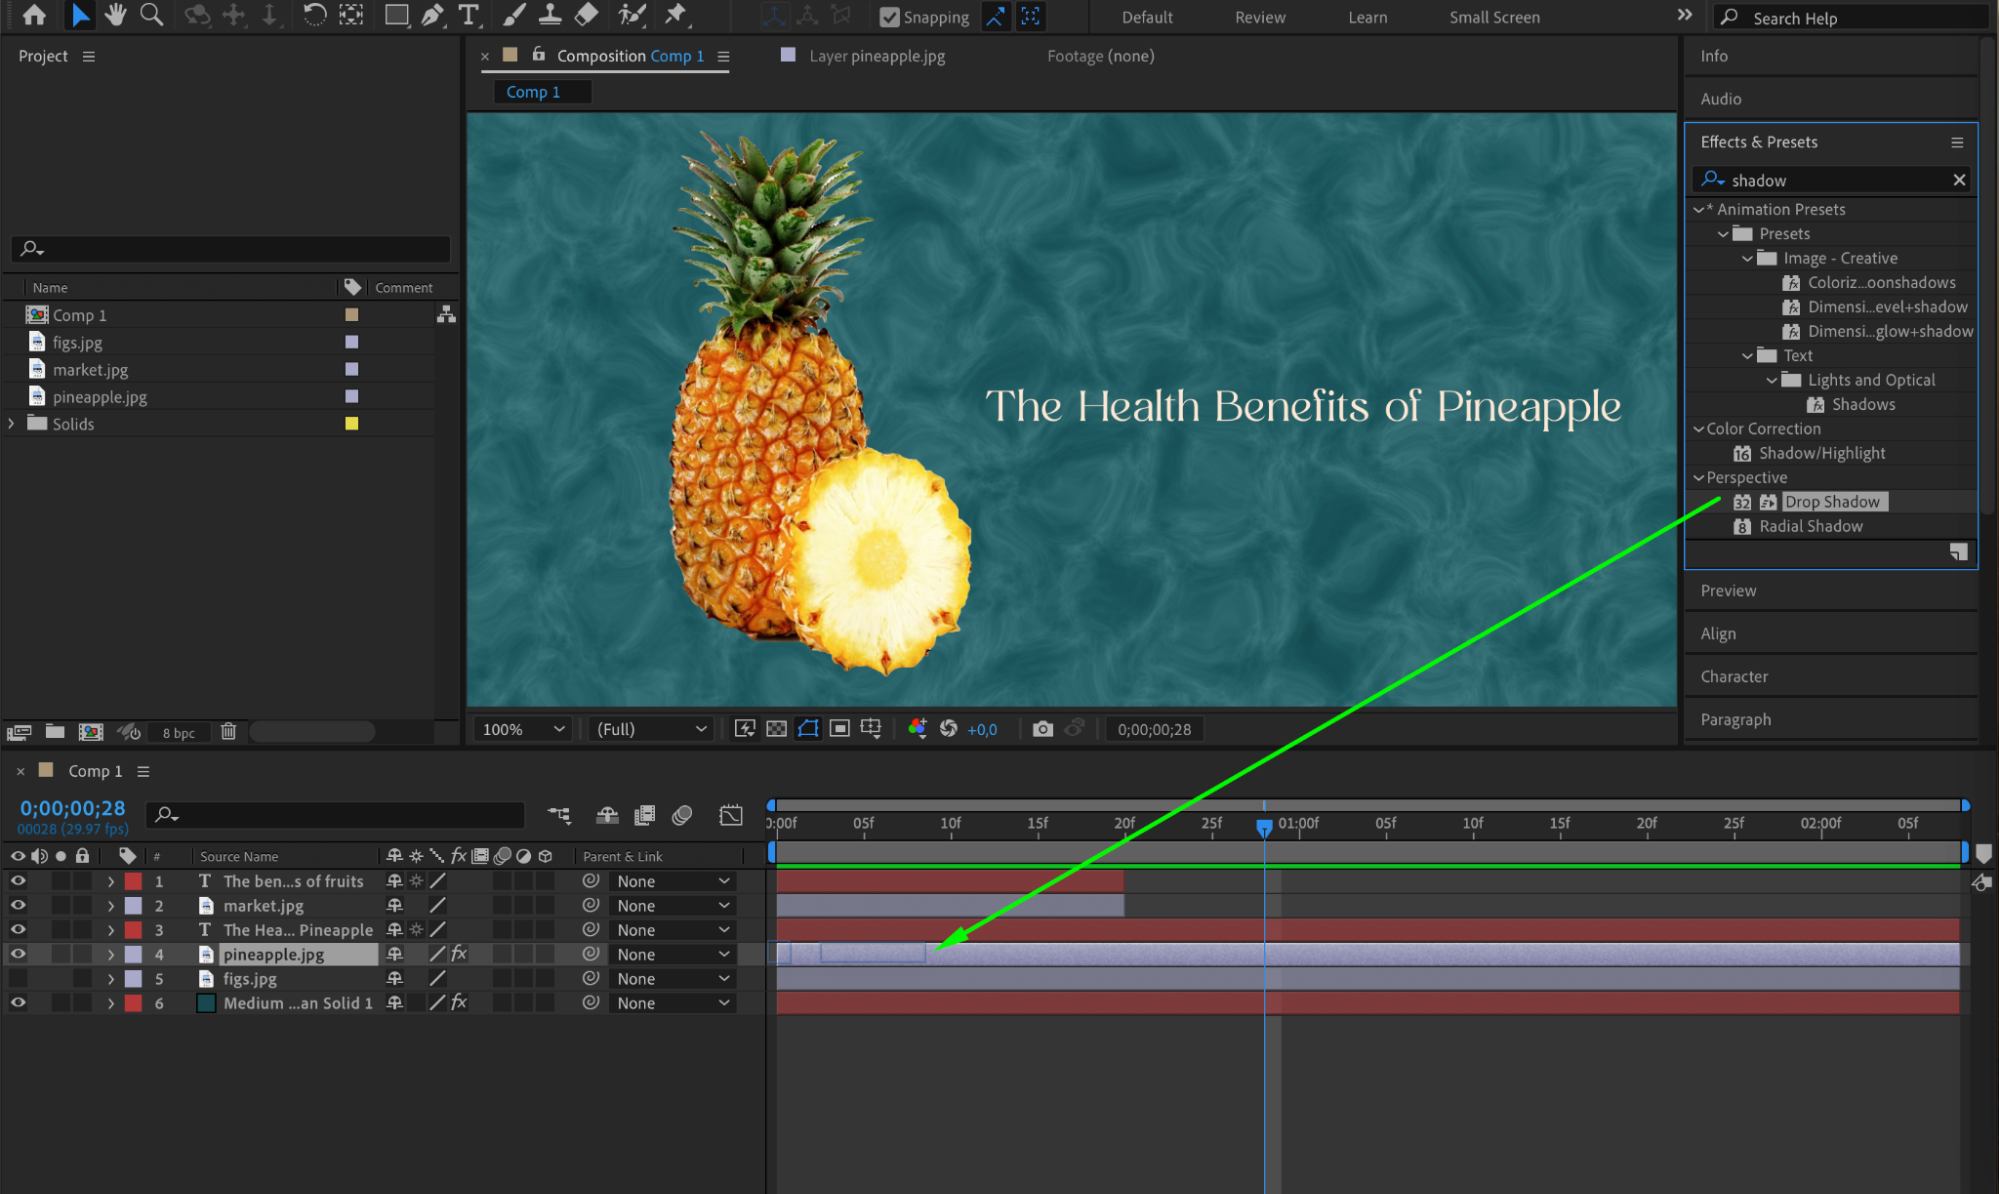
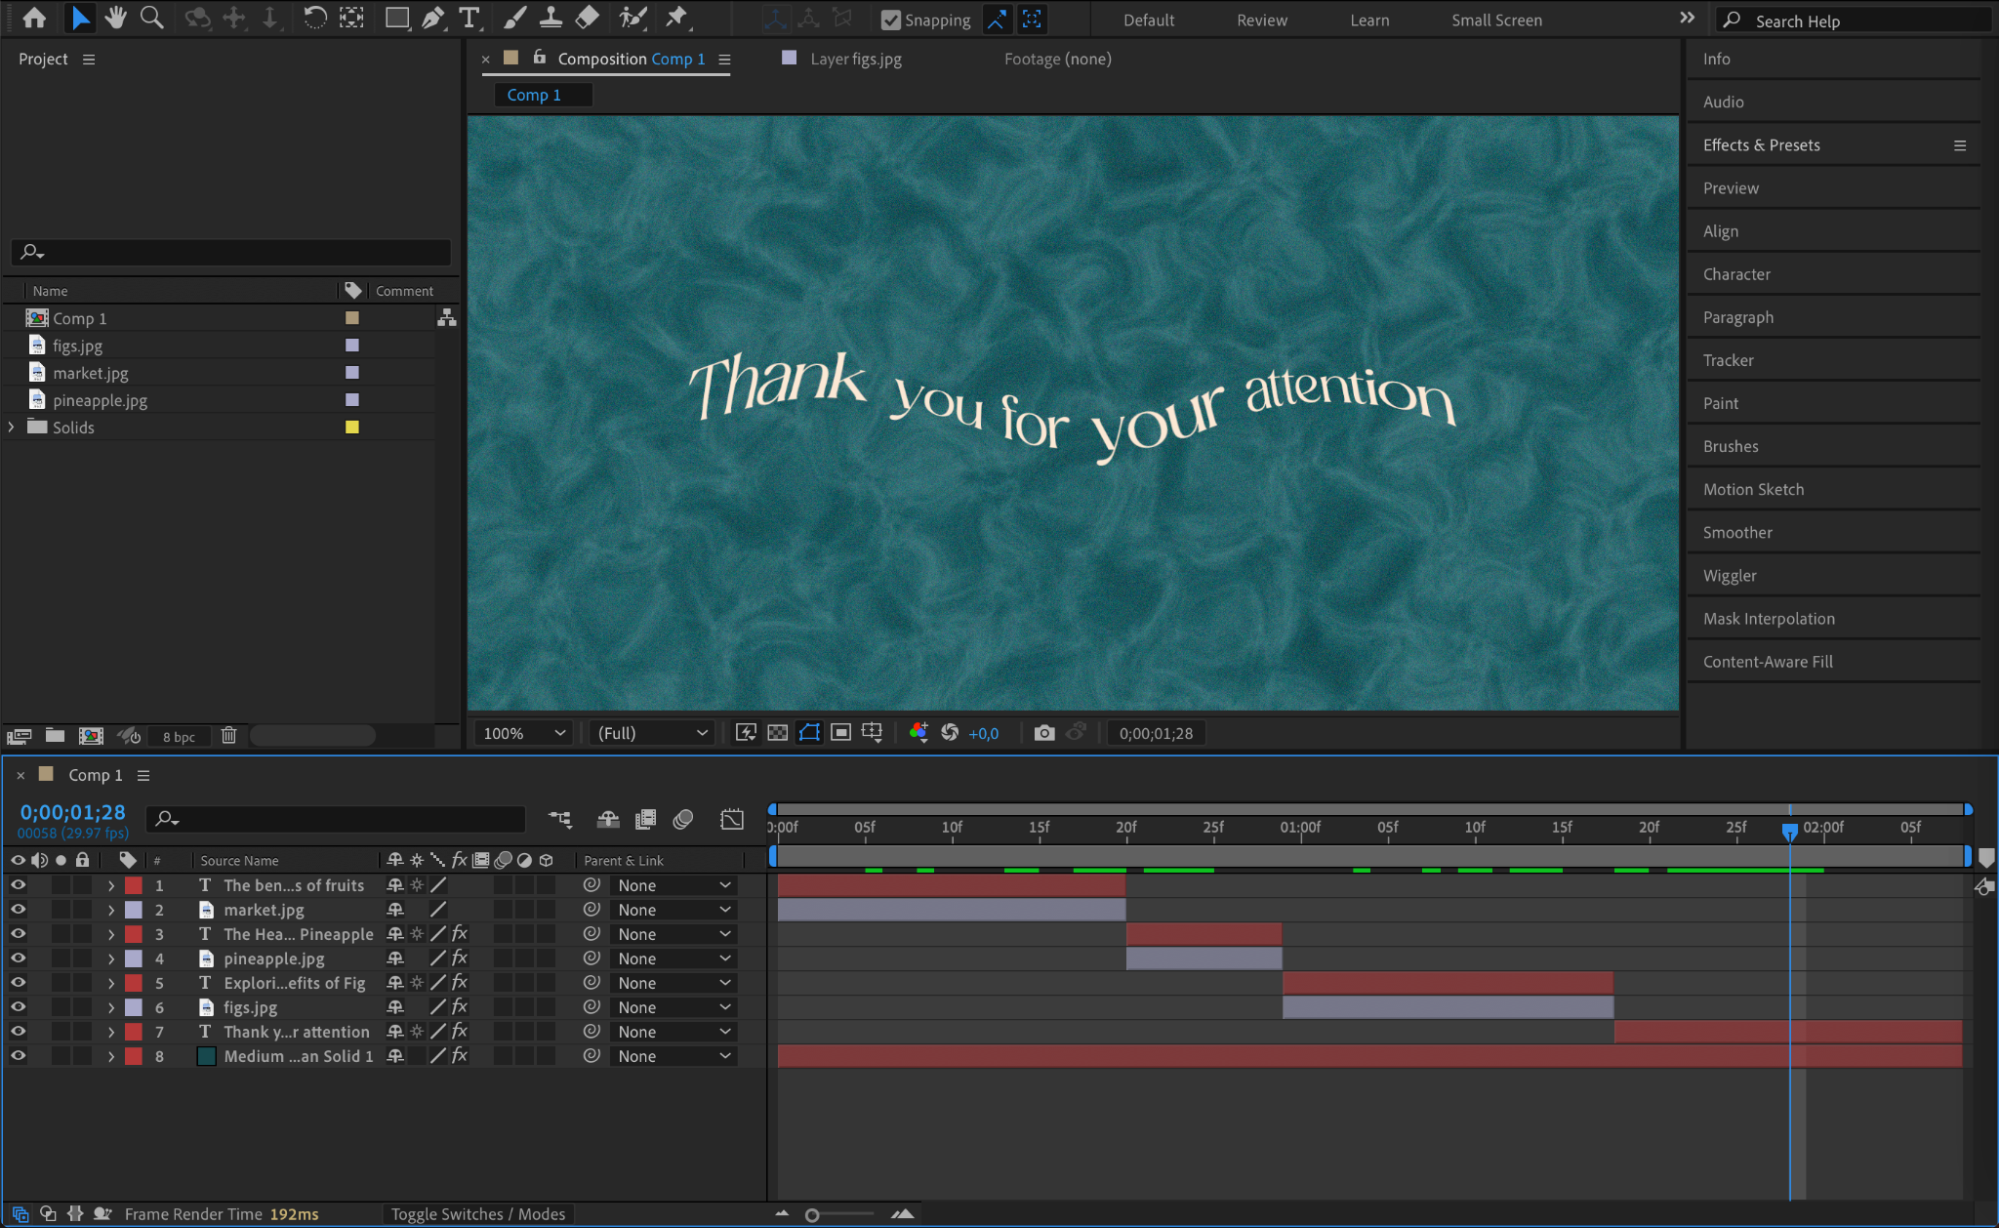 Step 12: Previewing and Refining
Regularly preview your presentation to fine-tune timing, effects, and transitions for a polished flow.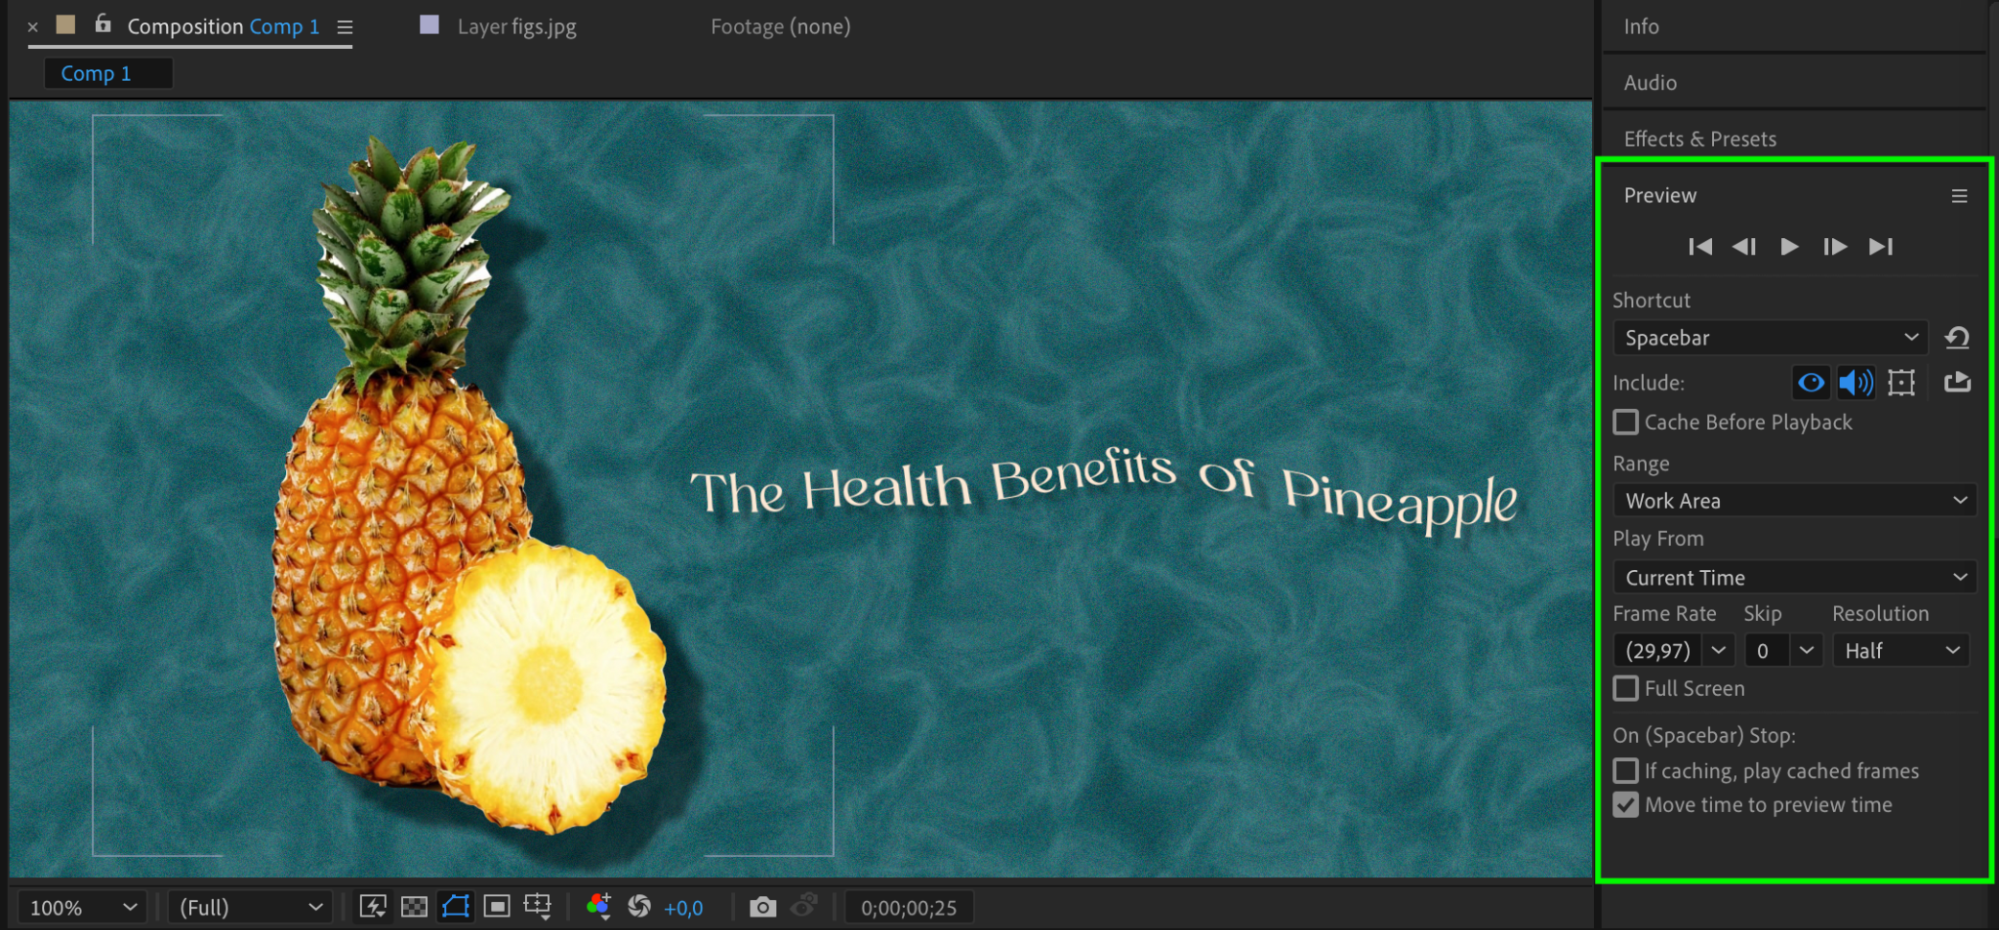 Step 13: Exporting and Sharing Your Presentation
Once satisfied, export your presentation via Composition > Add to Render Queue. Choose suitable settings and click Render to create a video file for sharing or embedding.
 Conclusion
Congratulations! You’ve mastered the art of creating a professional presentation in Adobe After Effects. By following these steps, you’ve learned how to plan, gather assets, apply animations and effects, and export your final product. Now, confidently deliver your message with a visually compelling presentation that leaves a lasting impression.
Keep refining your skills and exploring new techniques in After Effects to continually enhance your presentation design capabilities. Happy presenting!


