Are you looking to add a unique and captivating twist to your videos? Creating a reverse video using After Effects can be a fun and creative way to engage your audience.
In this step-by-step guide, we will explore the process of making a reverse video in After Effects, from importing footage to applying the reverse effect and exporting the final result. Whether you’re a beginner or an experienced user, this article will provide you with all the necessary instructions to accomplish this visually stunning effect.
So, get ready to unleash your creativity, and let’s dive into the world of reverse video editing in After Effects!
1. Importing Your Footage and Setting Up the Project
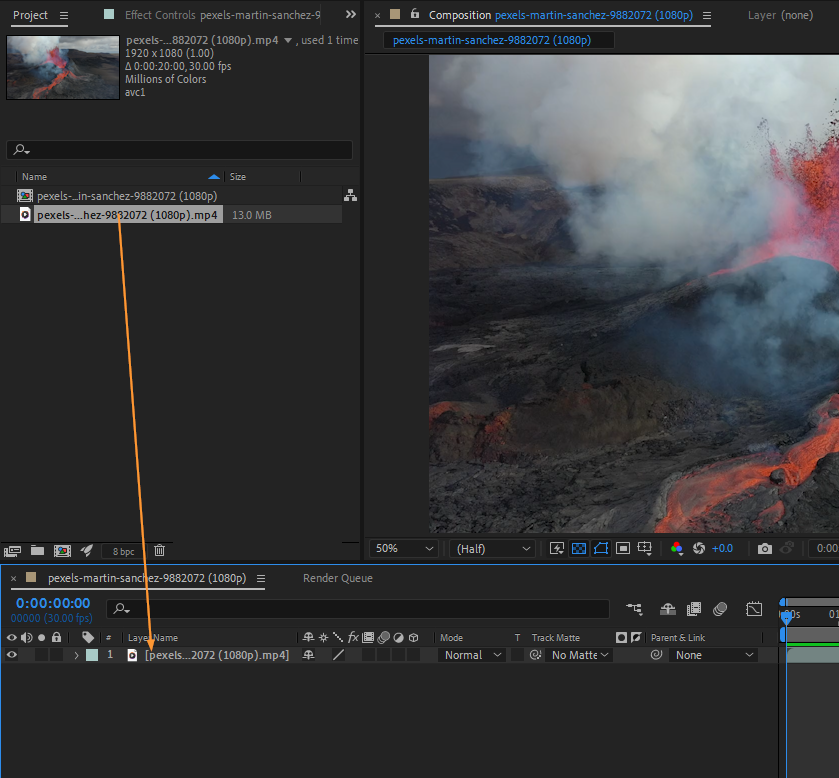
Before we delve into the process of creating a reverse video in After Effects, it’s crucial to have your footage ready. Import the video clip you want to reverse by going to “File” > “Import” > “File” (or simply by pressing Ctrl/CMD+I). Once imported, drag and drop the footage into the composition timeline.
 2. Applying the Reverse Effect
Now that you have your footage imported and your project set up, it’s time to apply the reverse effect. Select the video clip in the composition timeline and go to “Layer” > “Time” > “Time Reverse Layer” (or press Ctrl/CMD+Alt+R). You’ll notice that your clip has now been reversed.
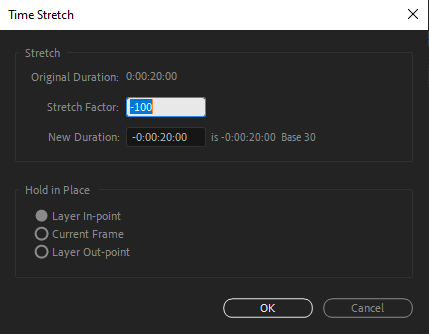
 3. Fine-Tuning and AdjustmentsOnce you have applied the reverse effect, you can further enhance your reverse video by making additional adjustments. For instance, you can adjust the speed of your reversed clip by stretching or compressing it. To achieve this, select your video clip, right-click on the clip and select “Time” > “Time Stretch.” In the dialogue box, modify the percentage accordingly. Increasing the percentage will speed up the reverse video while decreasing it will slow it down.
 Also, if you want to add some visual flair or refine your video, you can experiment with numerous effects and adjustments. After Effects allows you the freedom to be creative and apply several special effects to your reverse video. Here are some adjustments you can try out in your project:
- Color correction
Simply select the desired effect or adjustment from the “Effects & Presets” panel and apply it to your reversed clip.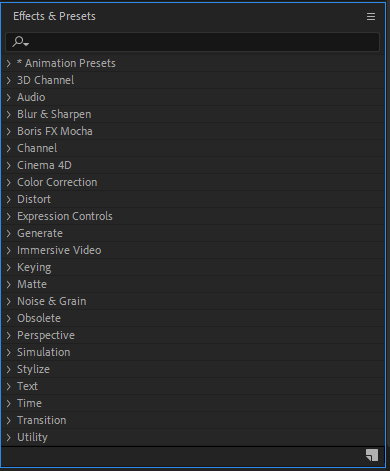 4. Previewing the Reverse Video
You can preview the effects and adjustments separately or apply them simultaneously using the “Preview” button to see how they look in the final result. Pro Tip: To save time and speed up your editing process, you can use pre-made video templates and animated video effects, such as color correction presets and special visual effects.
5. Exporting the Reverse Video
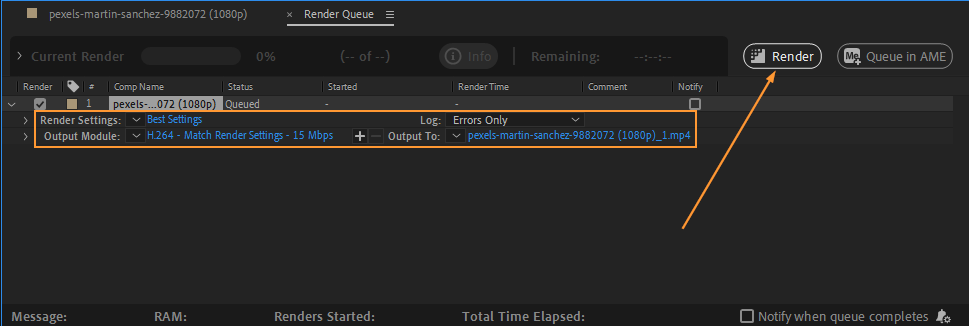
Once you are satisfied with the final result, it’s time to export your reverse video. Go to “Composition” > “Add to Render Queue” (or press Ctrl/CMD+M).
In the Render Queue panel, select the desired output format and location, along with any other settings you want to customize.
Click on the “Render” button and After Effects will begin rendering your reverse video.
Conclusion
In conclusion, learning how to create a reverse video in After Effects opens up a realm of creative possibilities for your video projects. By utilizing the reverse effect and exploring various adjustments, you can captivate your audience and add a striking visual element to your content.
Throughout this guide, we’ve covered essential steps, including importing your footage, setting up the project, applying the reverse effect, making fine-tuning adjustments, and exporting the final result. Remember to experiment and play around with different effects and adjustments to achieve the desired outcome.
Whether you’re a beginner or an experienced video editor, After Effects provides a user-friendly platform for reverse video creation. With a little practice and experimentation, you can transform ordinary footage into visually stunning and attention-grabbing content.
So, what are you waiting for? Start incorporating reverse videos into your projects and let your creativity shine. By embracing this engaging effect, you can leave a lasting impression on your viewers and elevate your video editing skills to new heights.
Now it’s time to unleash your imagination and take your videos to the next level with reverse video editing in After Effects. Get started today and discover the possibilities that await you!
Our Bestsellers

