Creating a Trail Effect in After Effects
Introduction to Trail Effects
Creating a trail effect in After Effects can add a dynamic and captivating touch to your videos, making objects appear as if they leave a trail of motion behind them. This effect is perfect for highlighting movement and adding visual interest. In this guide, we’ll walk you through the steps to create a trail effect, whether you’re new to After Effects or looking to enhance your skills.
Get 10% off when you subscribe to our newsletter

Step 1: Create a New Composition
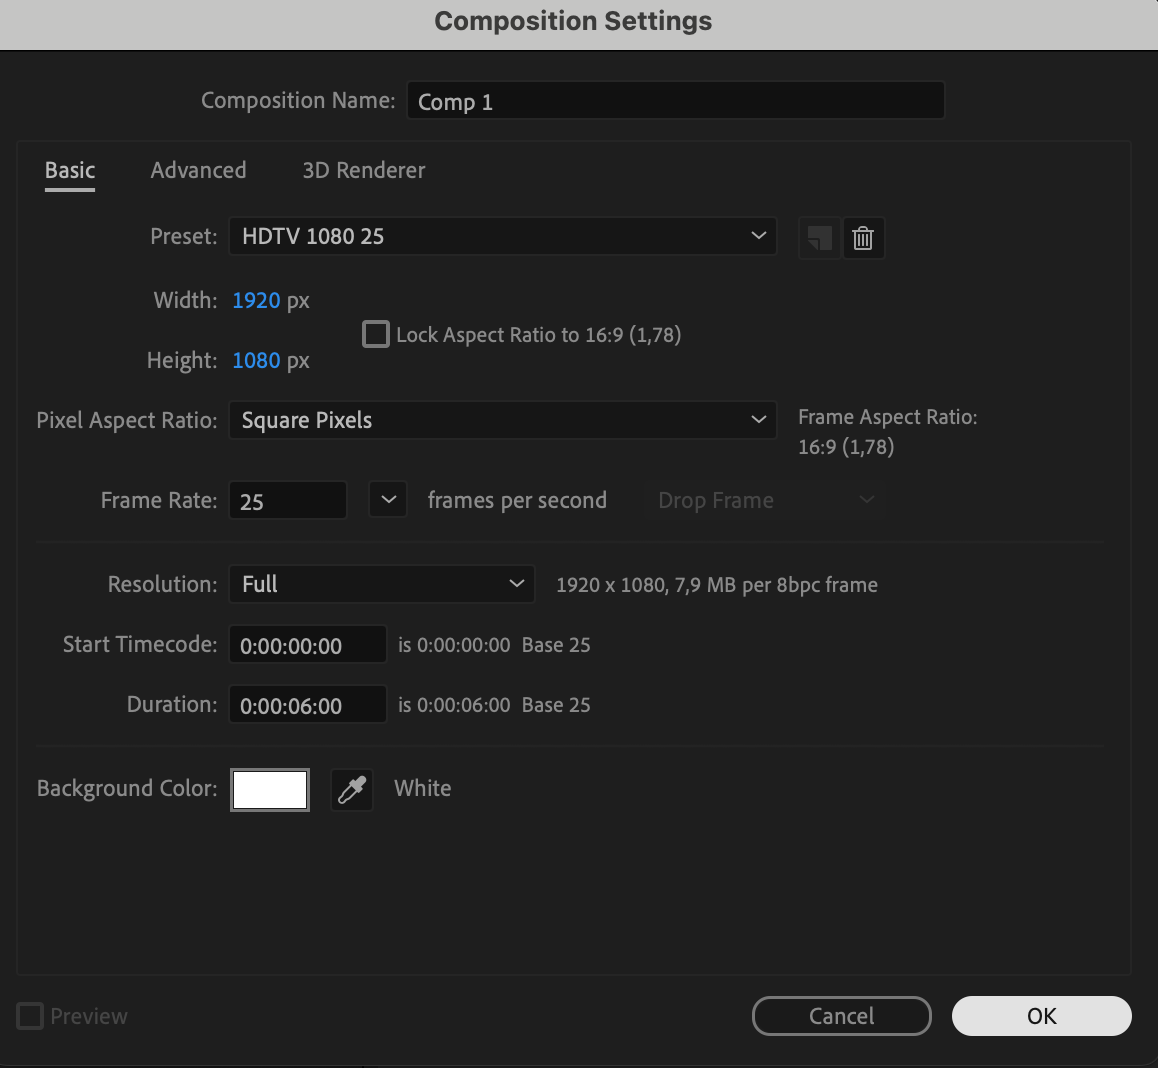
First, open After Effects and create a new composition. Set your desired resolution, frame rate, and duration. This composition will serve as the workspace for your trail effect. Ensure your settings match the requirements of your project to avoid any issues later on.
 Step 2: Import Your File
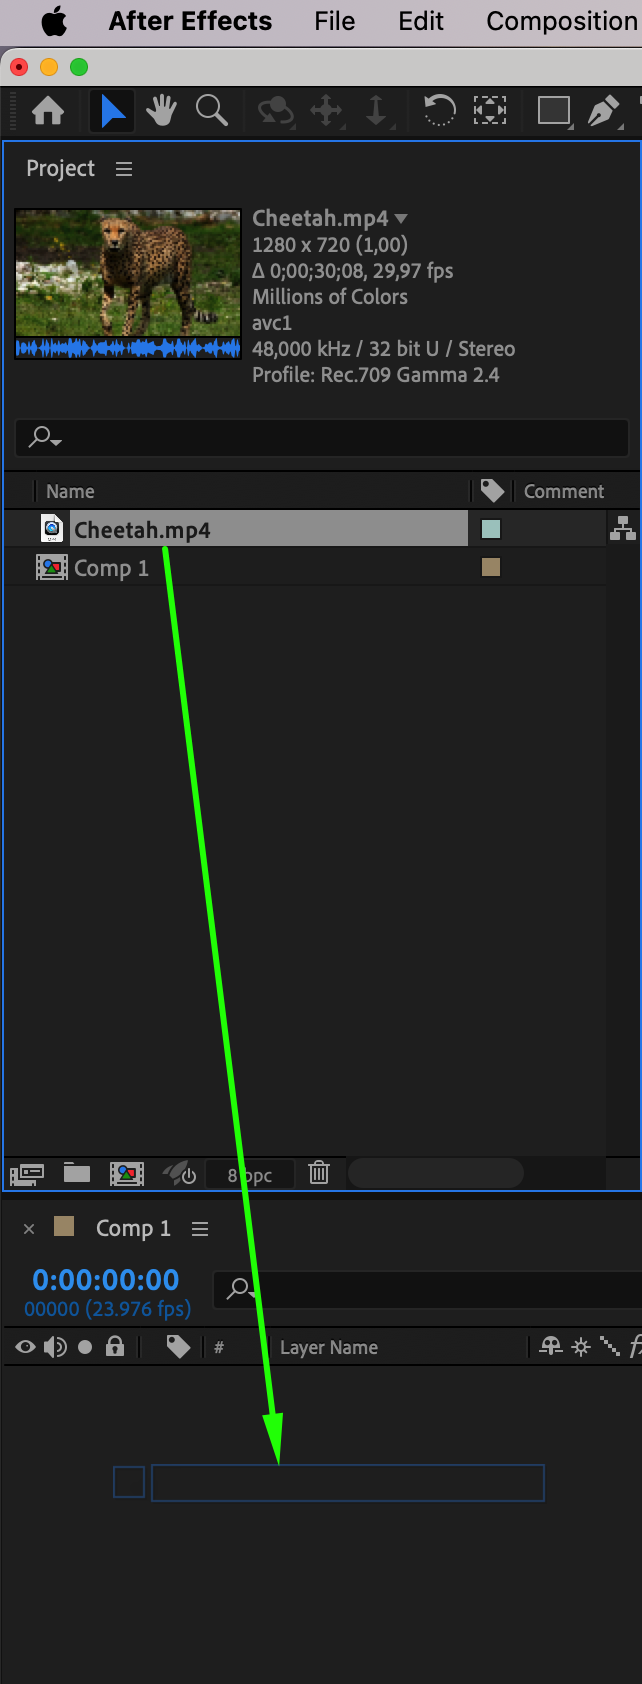
Next, import the file you want to work with. Go to File > Import > File and select your video or image. Once imported, drag and drop it onto the timeline panel. This will be the base layer that you’ll use to create the trail effect.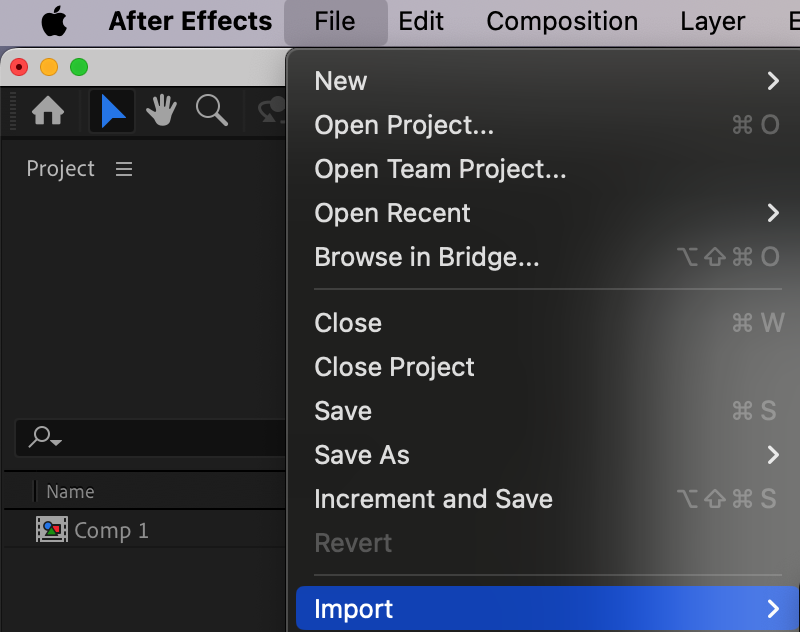
 Step 3: Duplicate Your File
With your file selected in the timeline, press “Ctrl/Cmd + D” to duplicate it. This duplicated layer will be used to create the trail effect, while the original will serve as the background.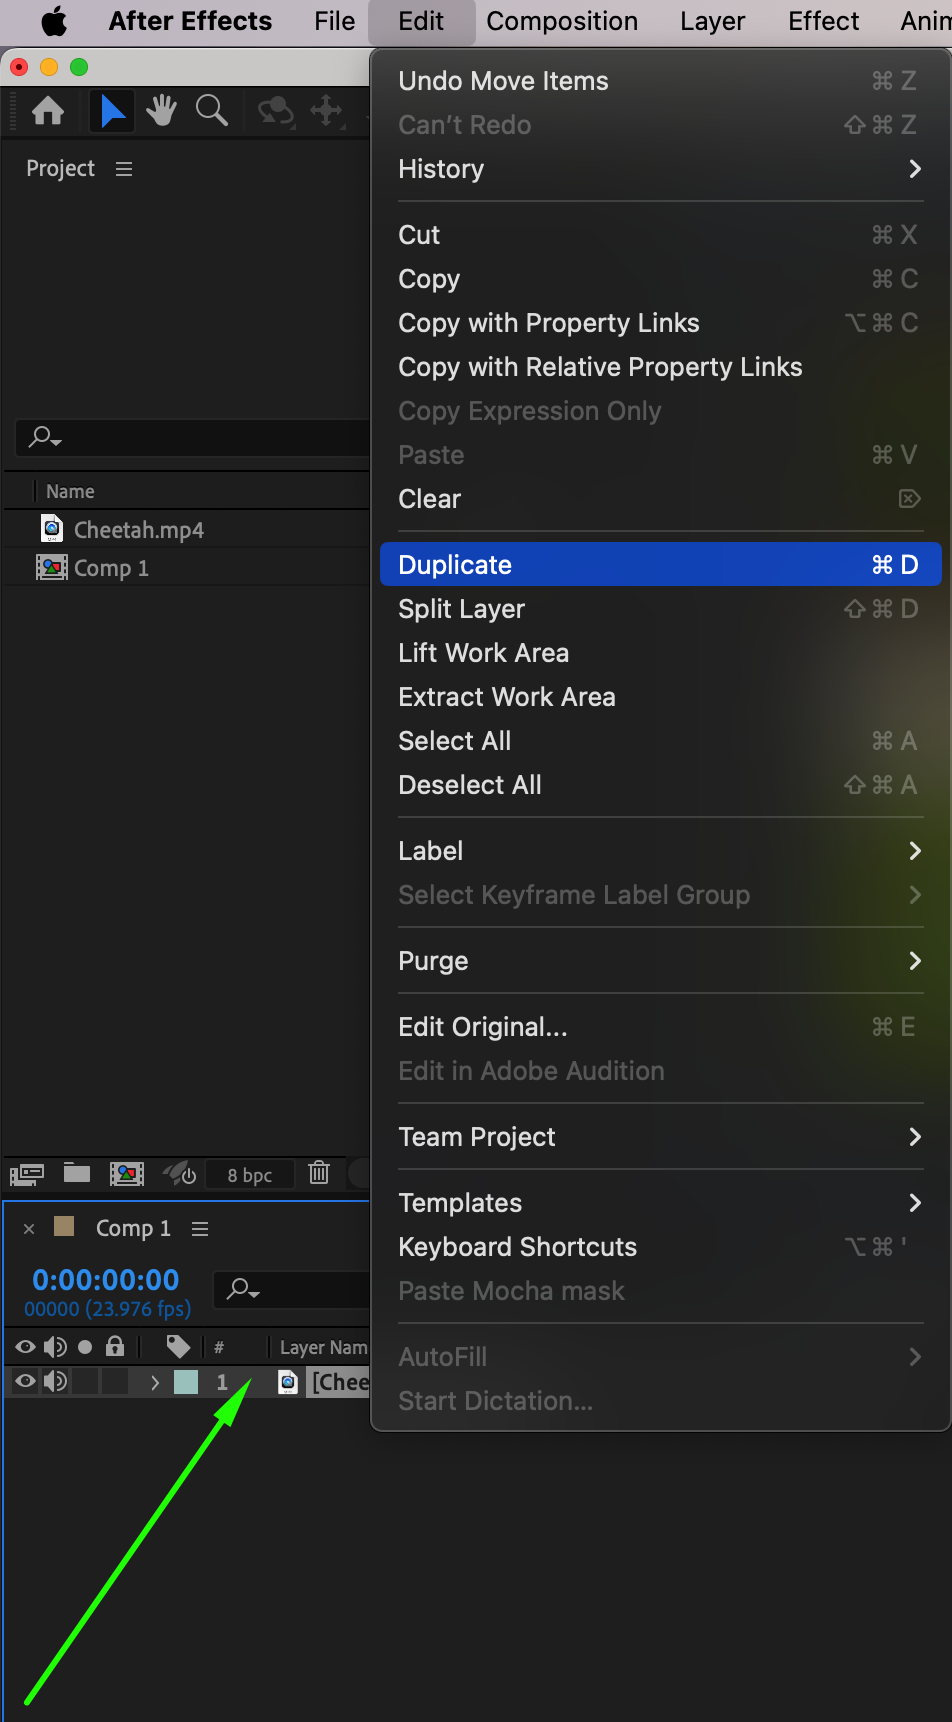 Step 4: Use the Roto Brush Tool
Select the duplicated layer and use the Roto Brush Tool by pressing “Alt/Option + W.” Carefully outline the object you want to have a trail effect. The Roto Brush Tool allows you to separate the object from the background, making it easier to apply effects specifically to it.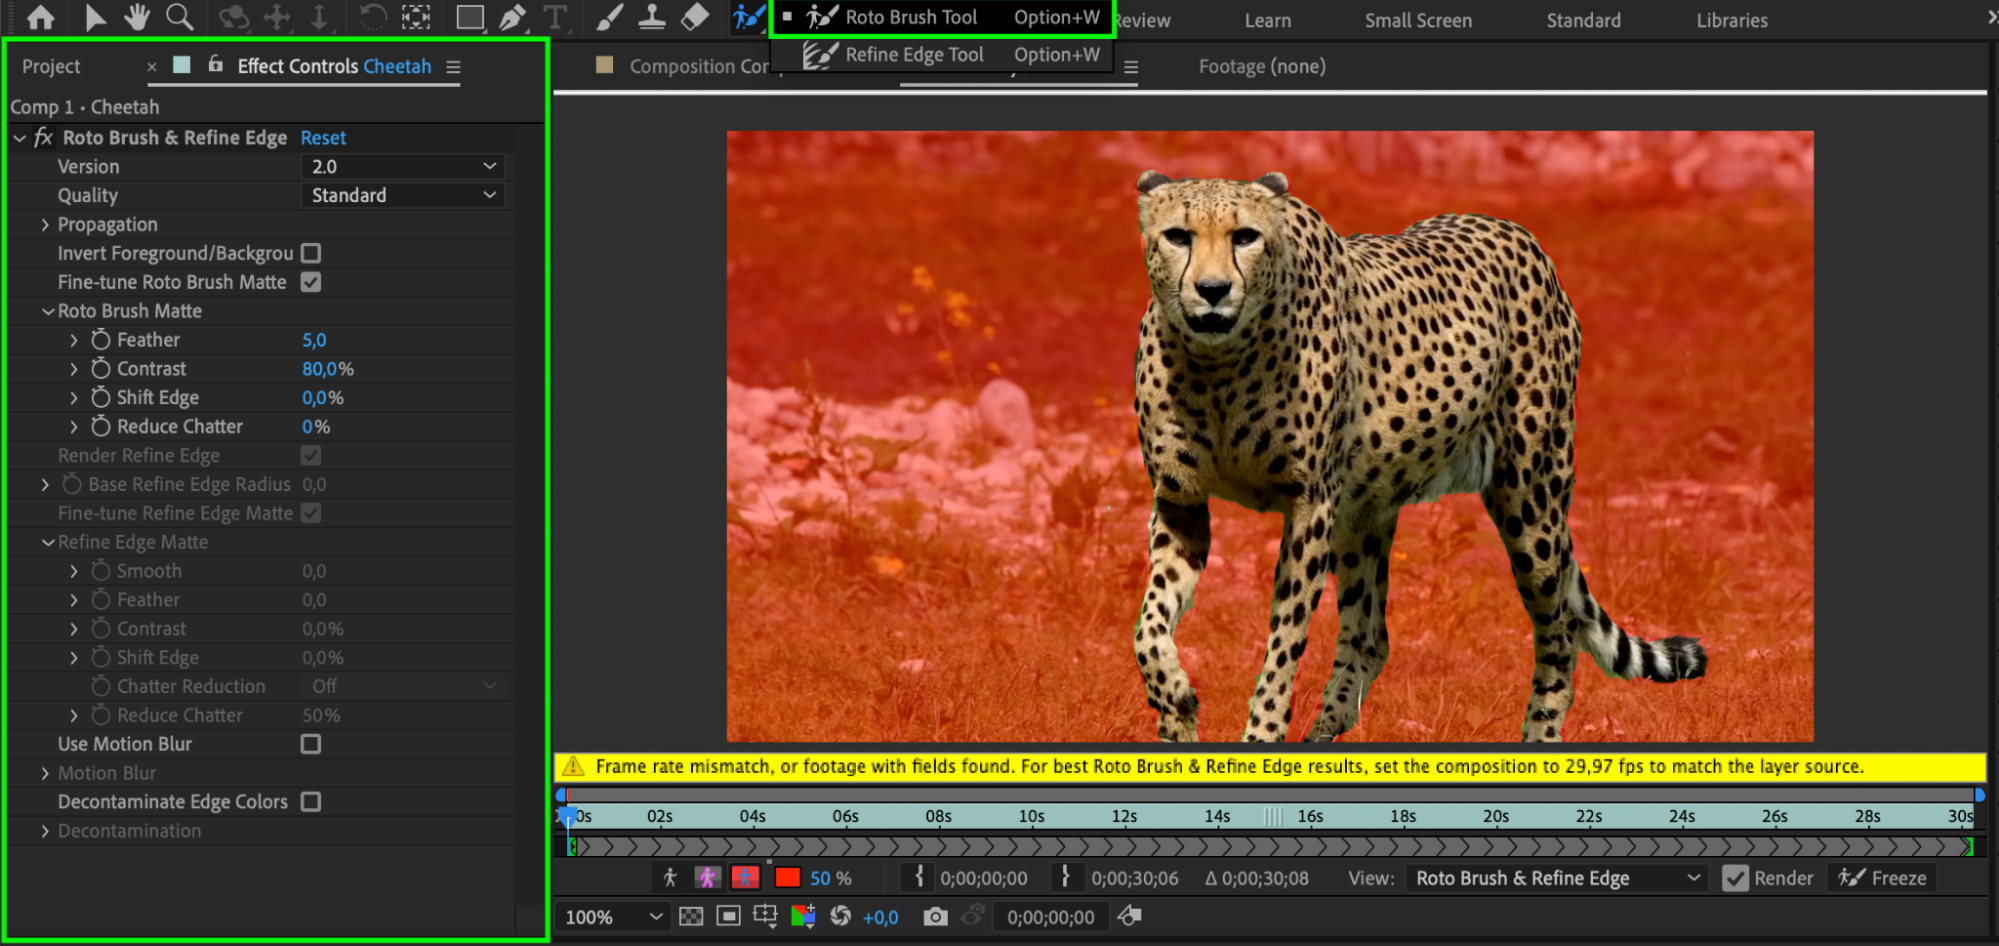 Step 5: Freeze the Roto Brush Selection
Once you’ve finished outlining the object, click the Freeze button at the bottom of the composition panel. This action locks in your selection, ensuring it stays consistent throughout the composition. Freezing the selection prevents any unintended changes as you proceed with the effect.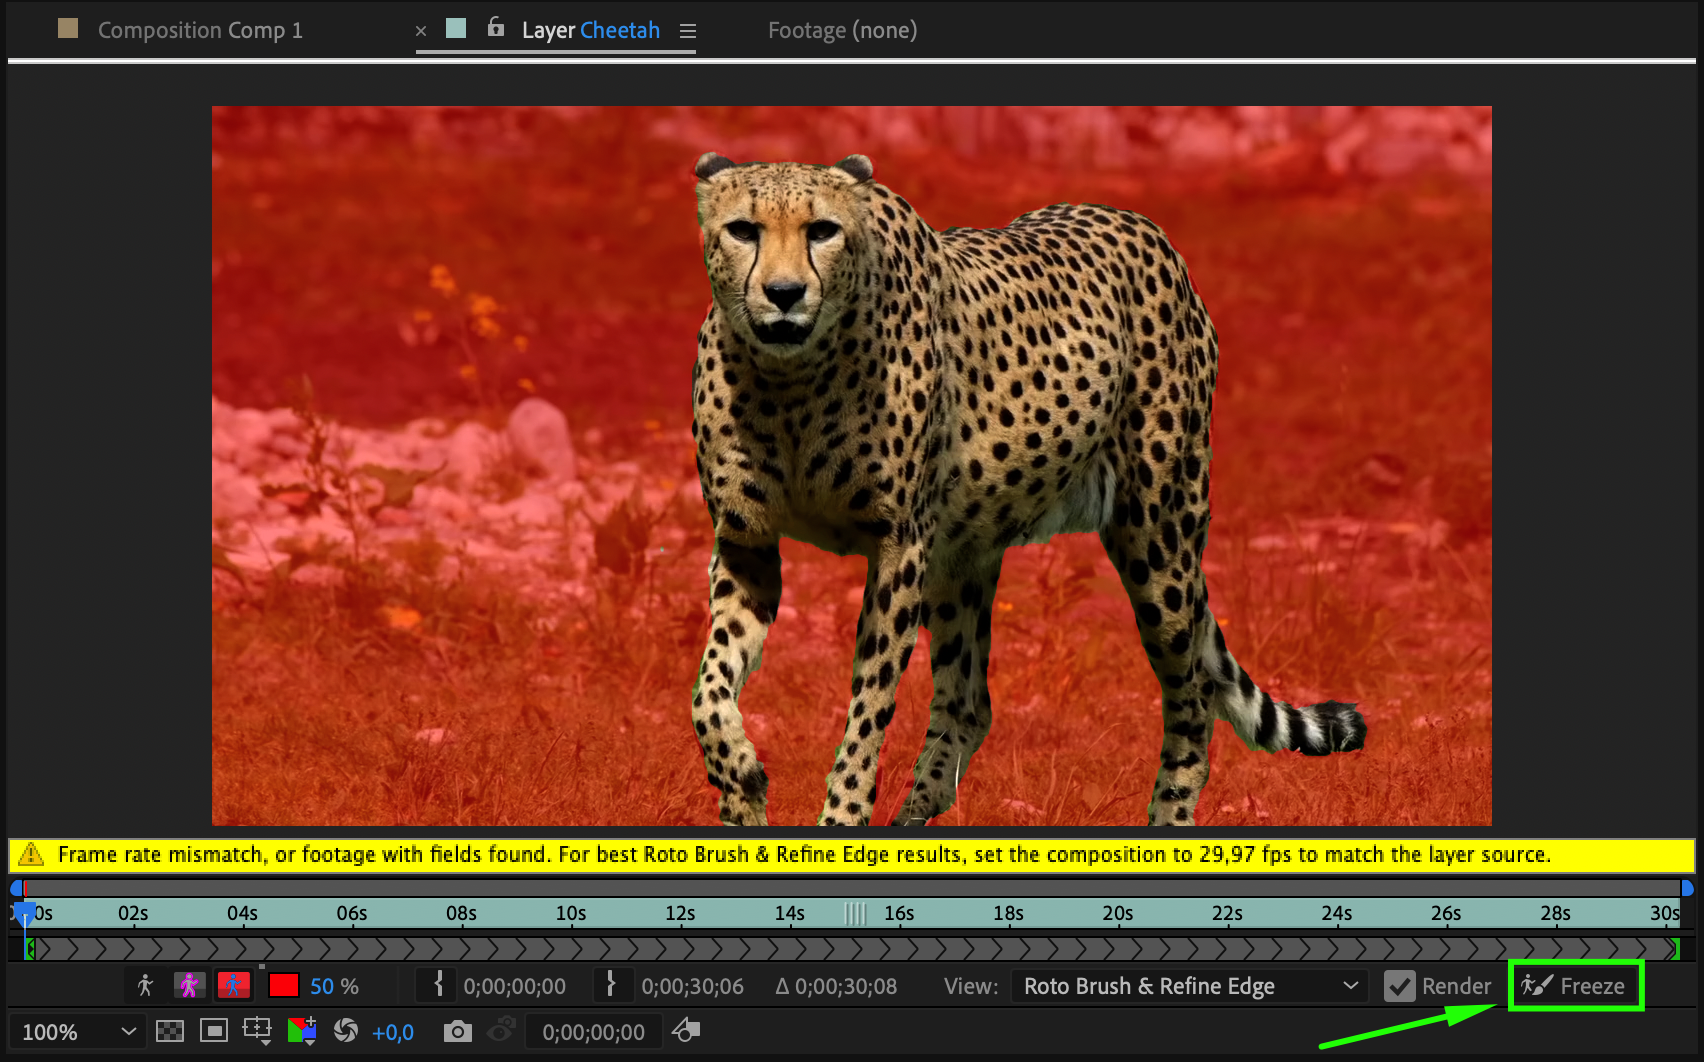 Step 6: Duplicate the Rotoscoped Layer
Now, duplicate the rotoscoped layer by selecting it and pressing “Ctrl/Cmd + D”. This additional layer will enhance the trail effect by allowing more control over the applied effects.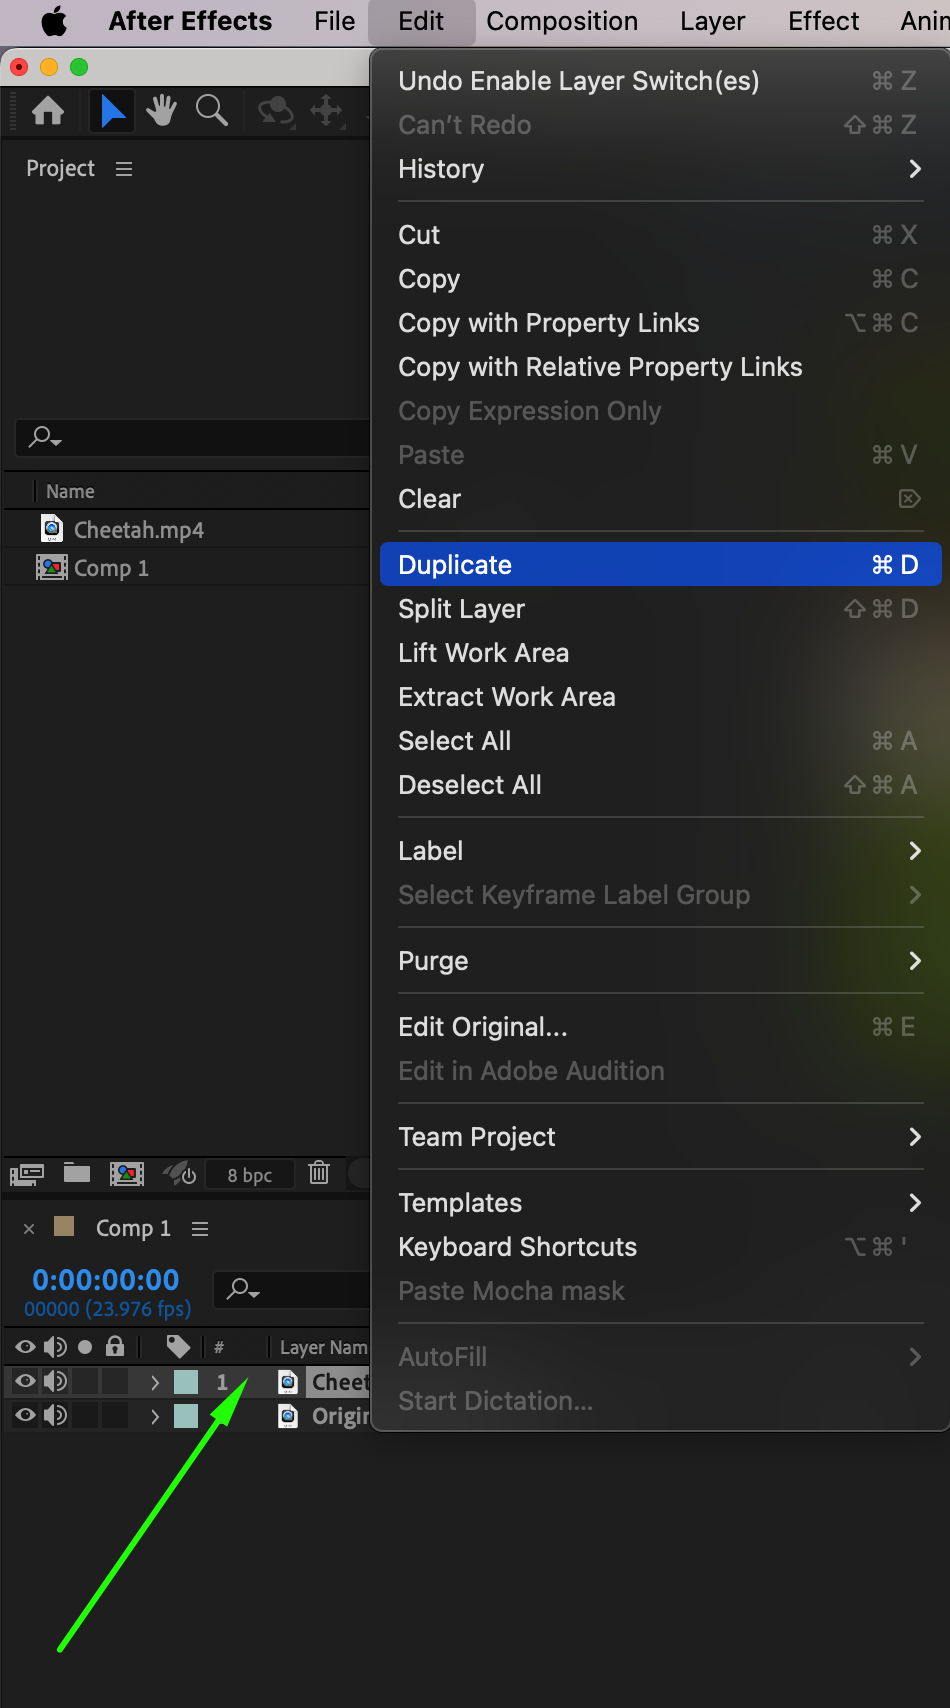 Step 7: Apply the Echo Effect
Select the middle layer (the duplicated rotoscoped layer) and go to the Effects & Presets panel. Search for the Echo effect and drag it onto the selected layer. The Echo effect creates the illusion of motion trails by duplicating the object at different intervals.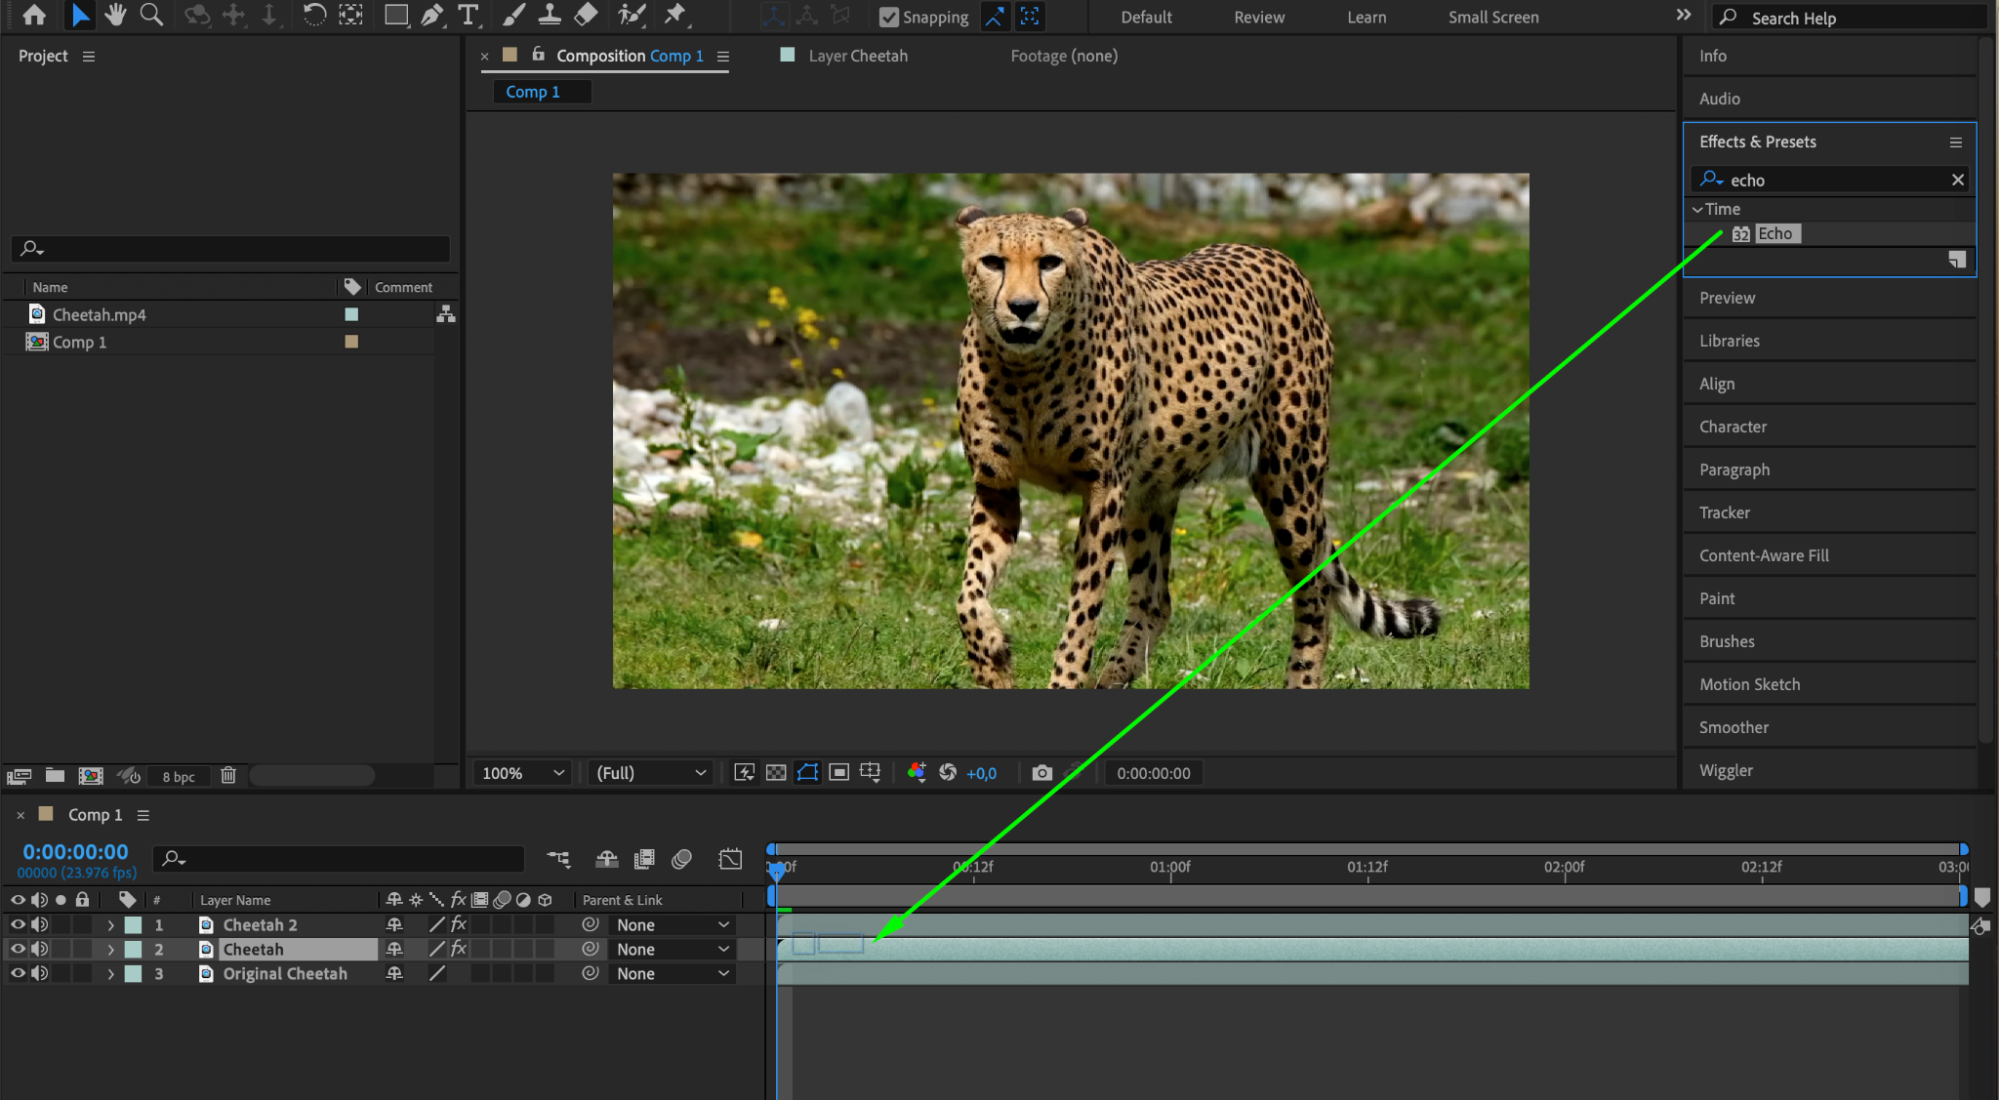 Step 8: Adjust Echo Effect Parameters
In the Effect Controls panel, adjust the Echo effect parameters to achieve your desired trail effect. Modify settings such as Echo Time, Number of Echoes, Starting Intensity, Decay, and Echo Operator. These adjustments control the appearance and behavior of the trail, allowing you to customize it to your liking.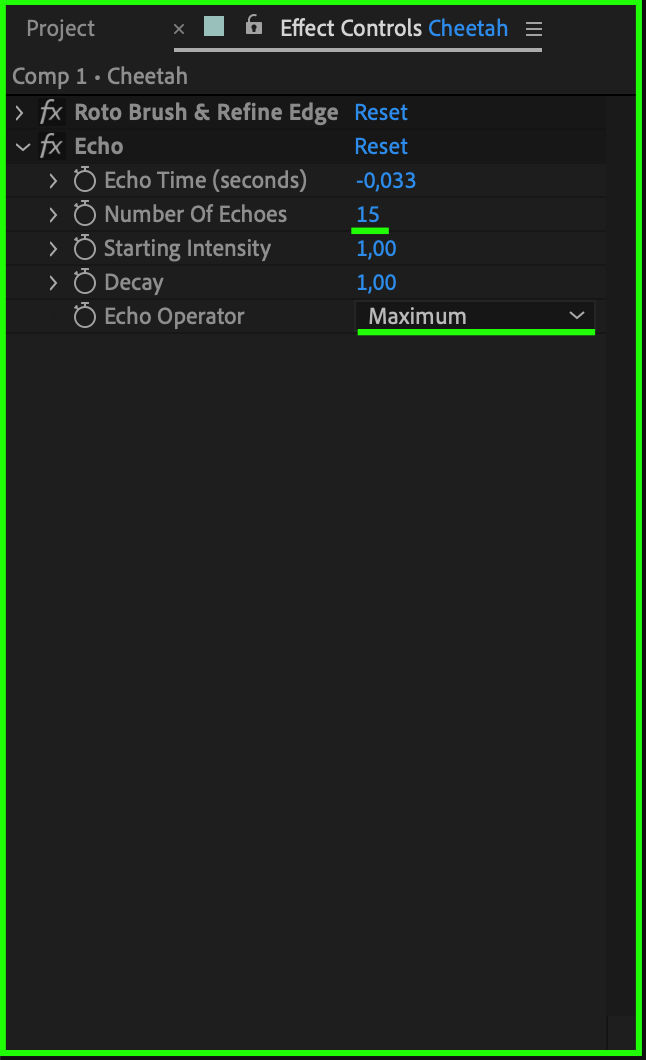 Step 9: Preview Your Trail Effect
Use the preview feature to see the trail effect in action. Press the spacebar to play the composition and observe the trail behind your object. Make any necessary adjustments to the Echo effect parameters to perfect the look.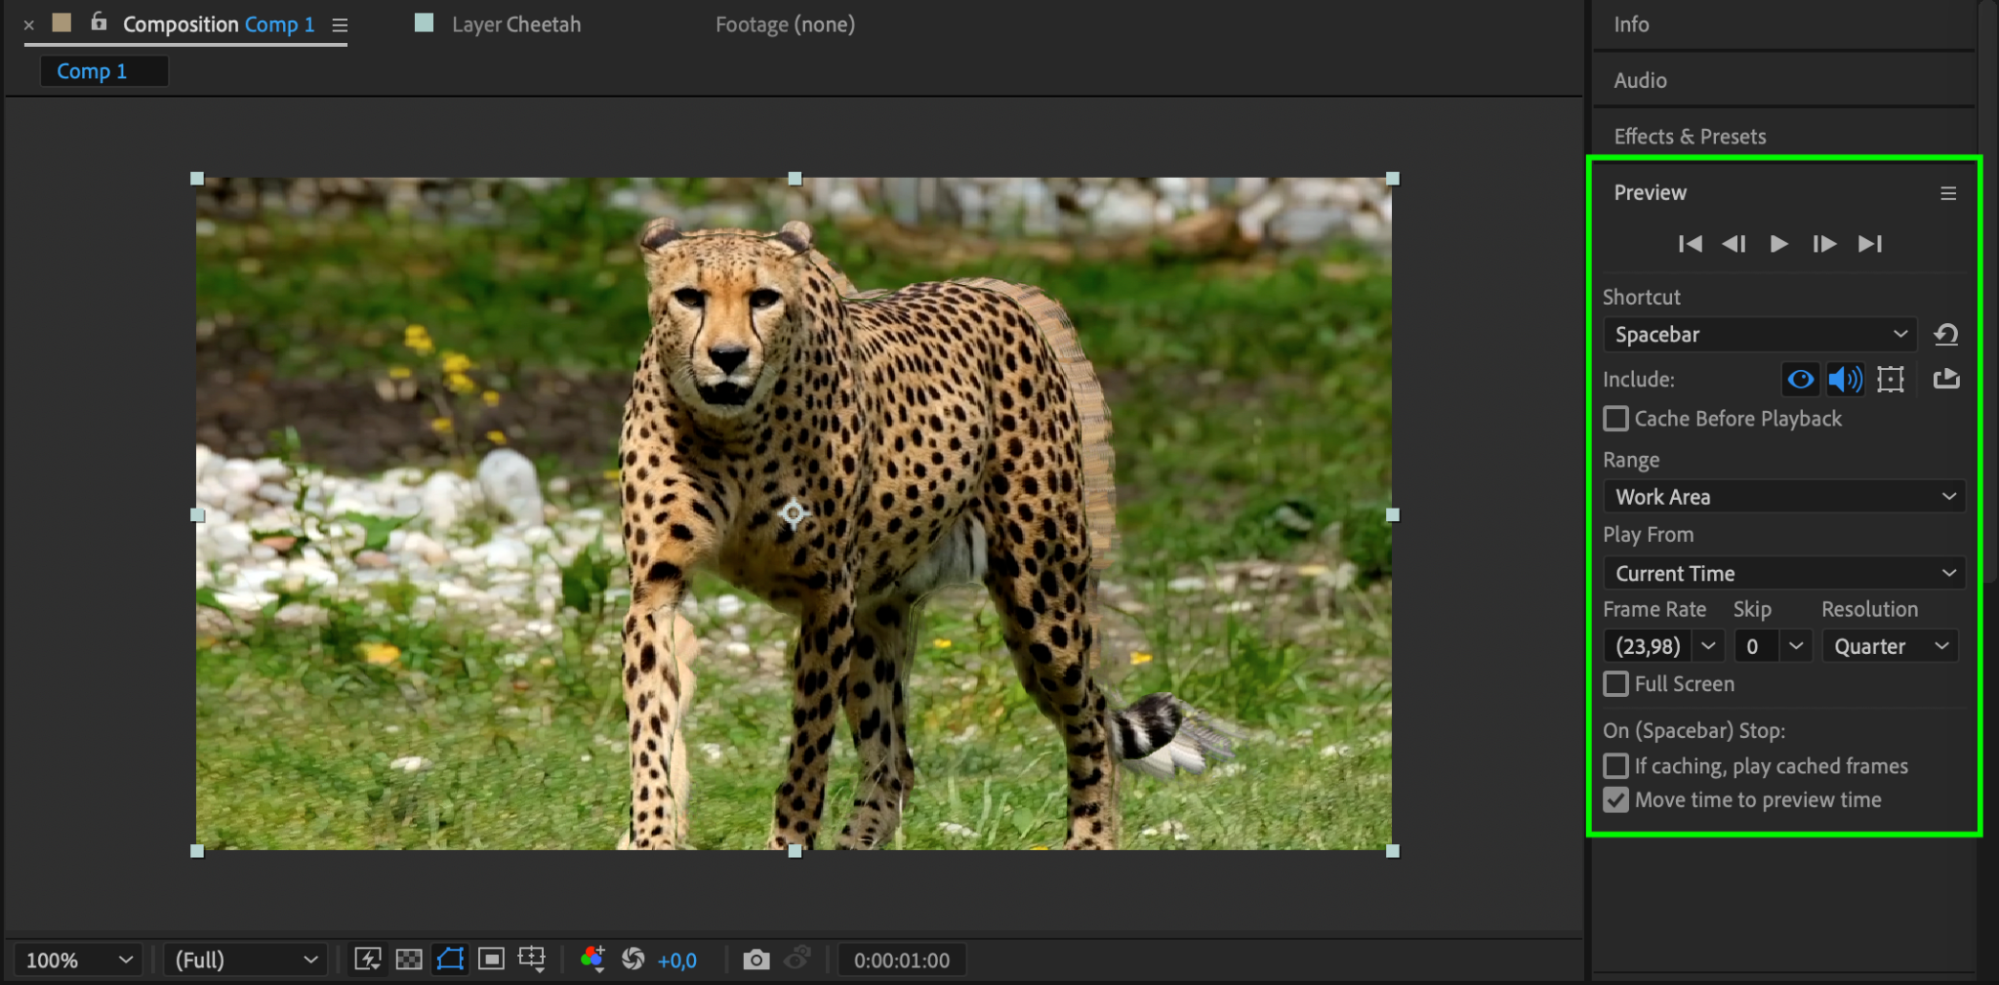 Conclusion
Creating a trail effect in After Effects can elevate your video projects by adding motion and visual interest. By following these steps, you’ll be able to produce stunning trail effects that highlight movement and captivate your audience. Remember to experiment with different settings and techniques to achieve unique results. Enjoy the creative process and have fun bringing your ideas to life with After Effects!


