Crafting a Transparent Background in Adobe After Effects
Introduction to Crafting a Transparent Background in Adobe After Effects
Creating a transparent background in Adobe After Effects can help you achieve a professional and polished look for your videos and animations. By removing the background, you can seamlessly integrate your work into different scenes and backgrounds, making it perfect for logo animations, motion graphics, and visual effects projects.
Get 10% off when you subscribe to our newsletter

To create a transparent background, follow these simple steps:
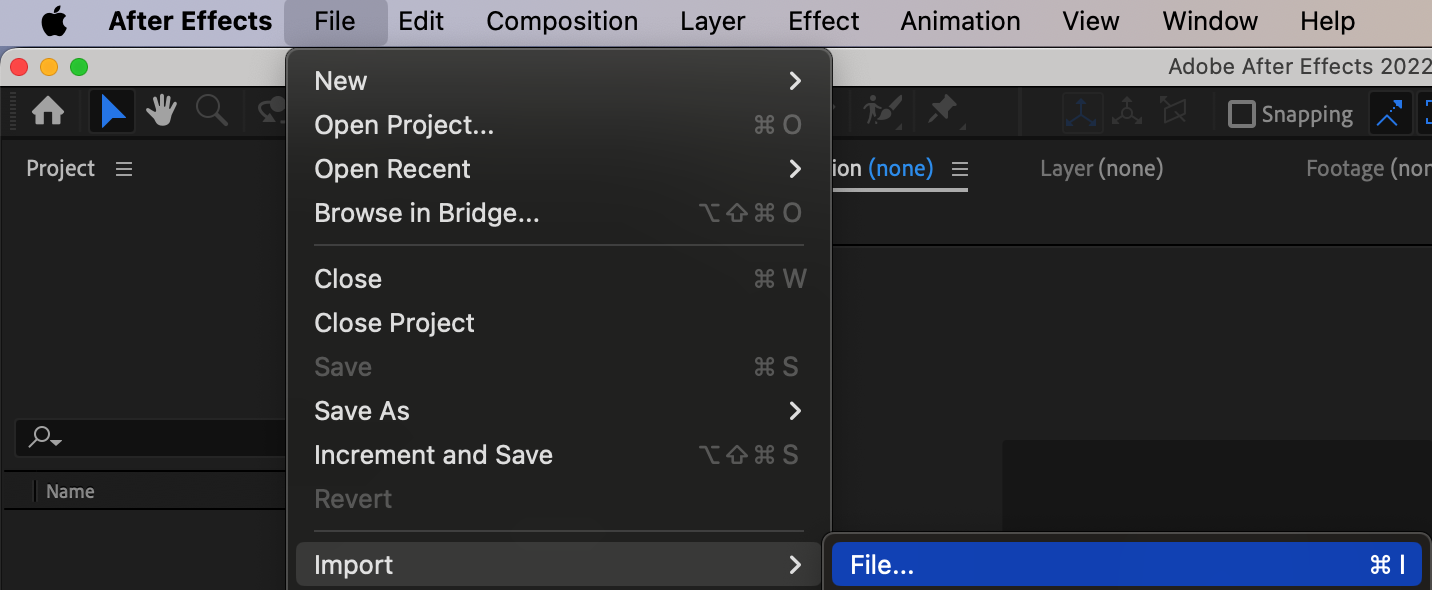
1.Import your footage: Start by importing the footage you want to work with. This can be a video file, an image sequence, or even a composition from another project. Go to the “File” menu and select “Import” > “File” or use the shortcut “Ctrl/Cmd + I”.
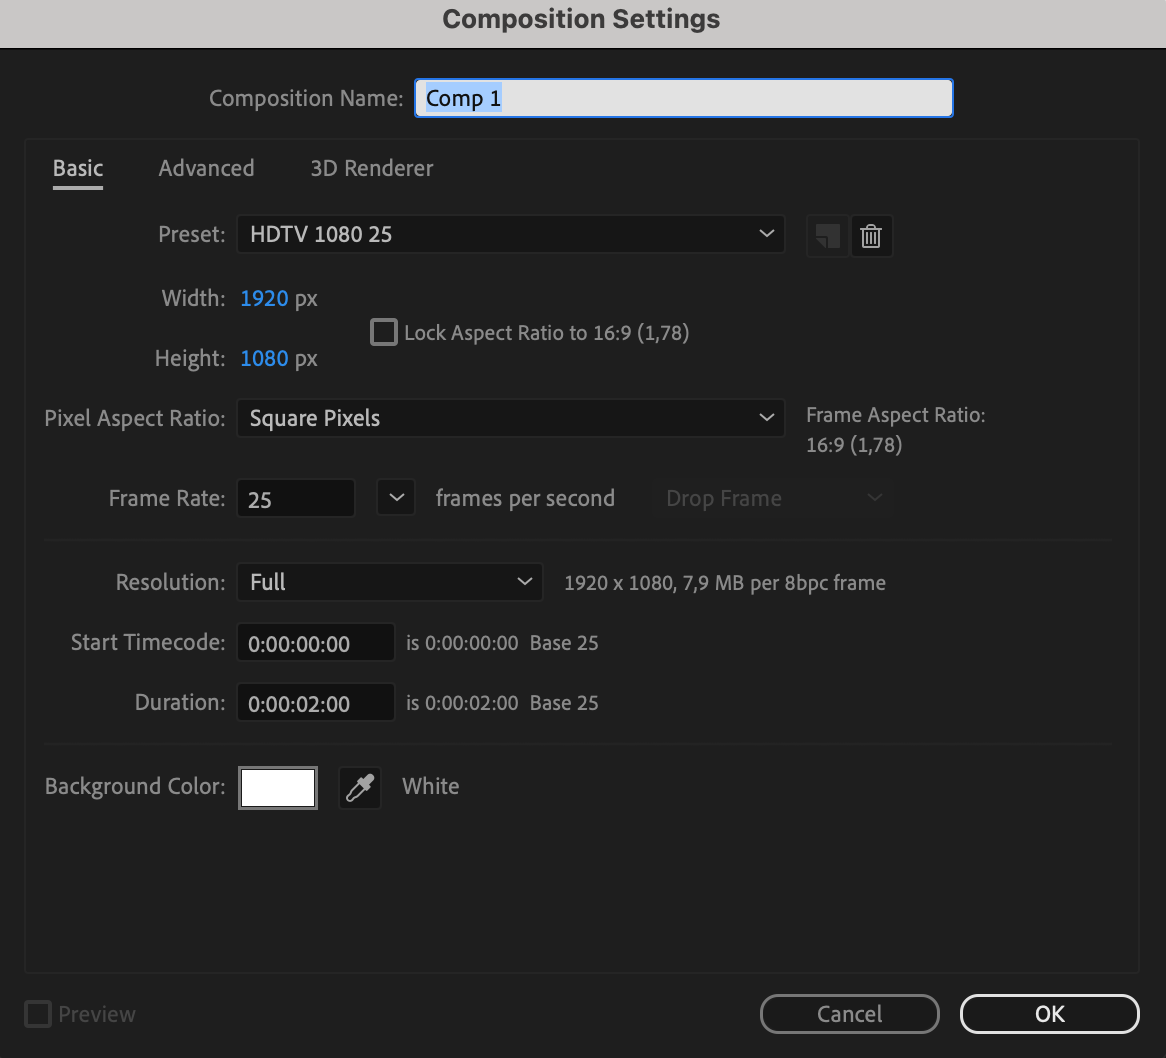
2. Create a new composition: Once your footage is imported, create a new composition by going to the “Composition” menu and selecting “New Composition” or using the shortcut “Ctrl/Cmd + N”. Set the settings for your composition, such as the resolution, frame rate, and duration.

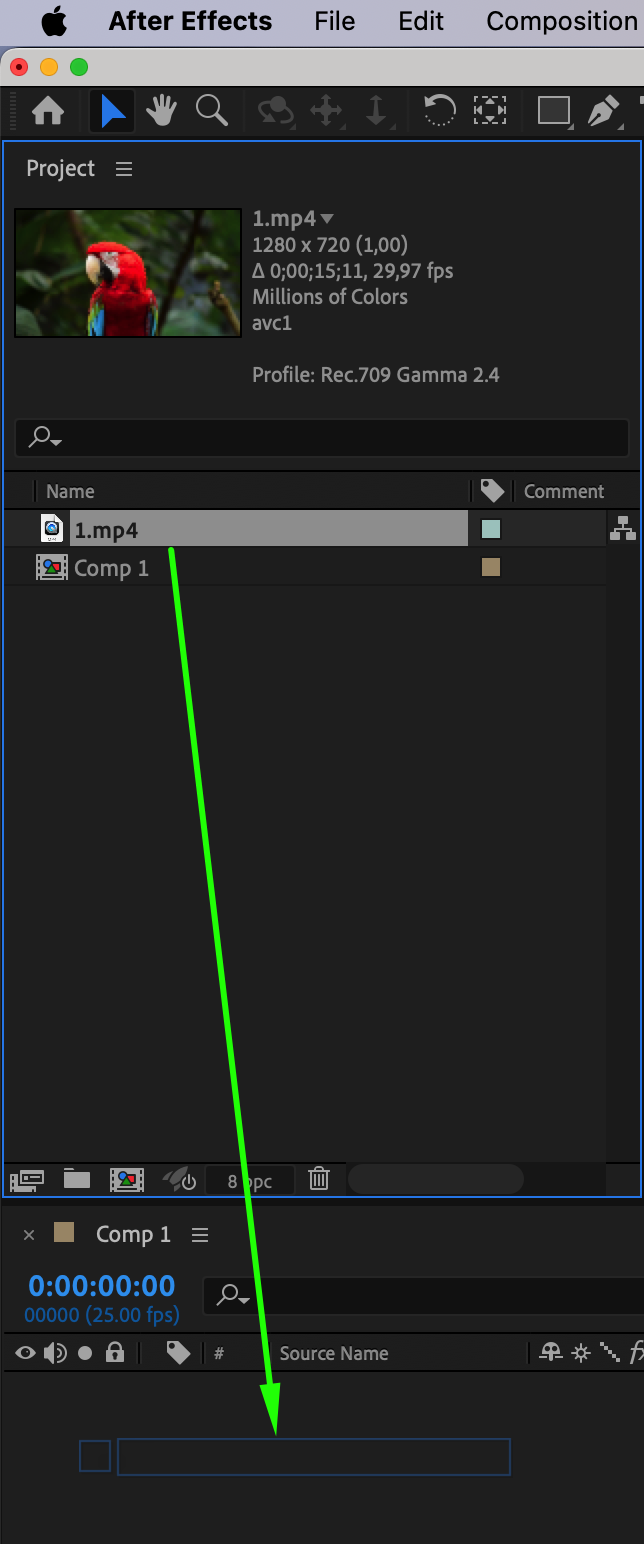
3. Add your footage to the composition: Drag and drop your footage into the newly created composition. Alternatively, you can select your footage in the Project panel and use the shortcut “Ctrl/Cmd + /+” to add it to the composition. Your footage will appear as a layer in the composition timeline.
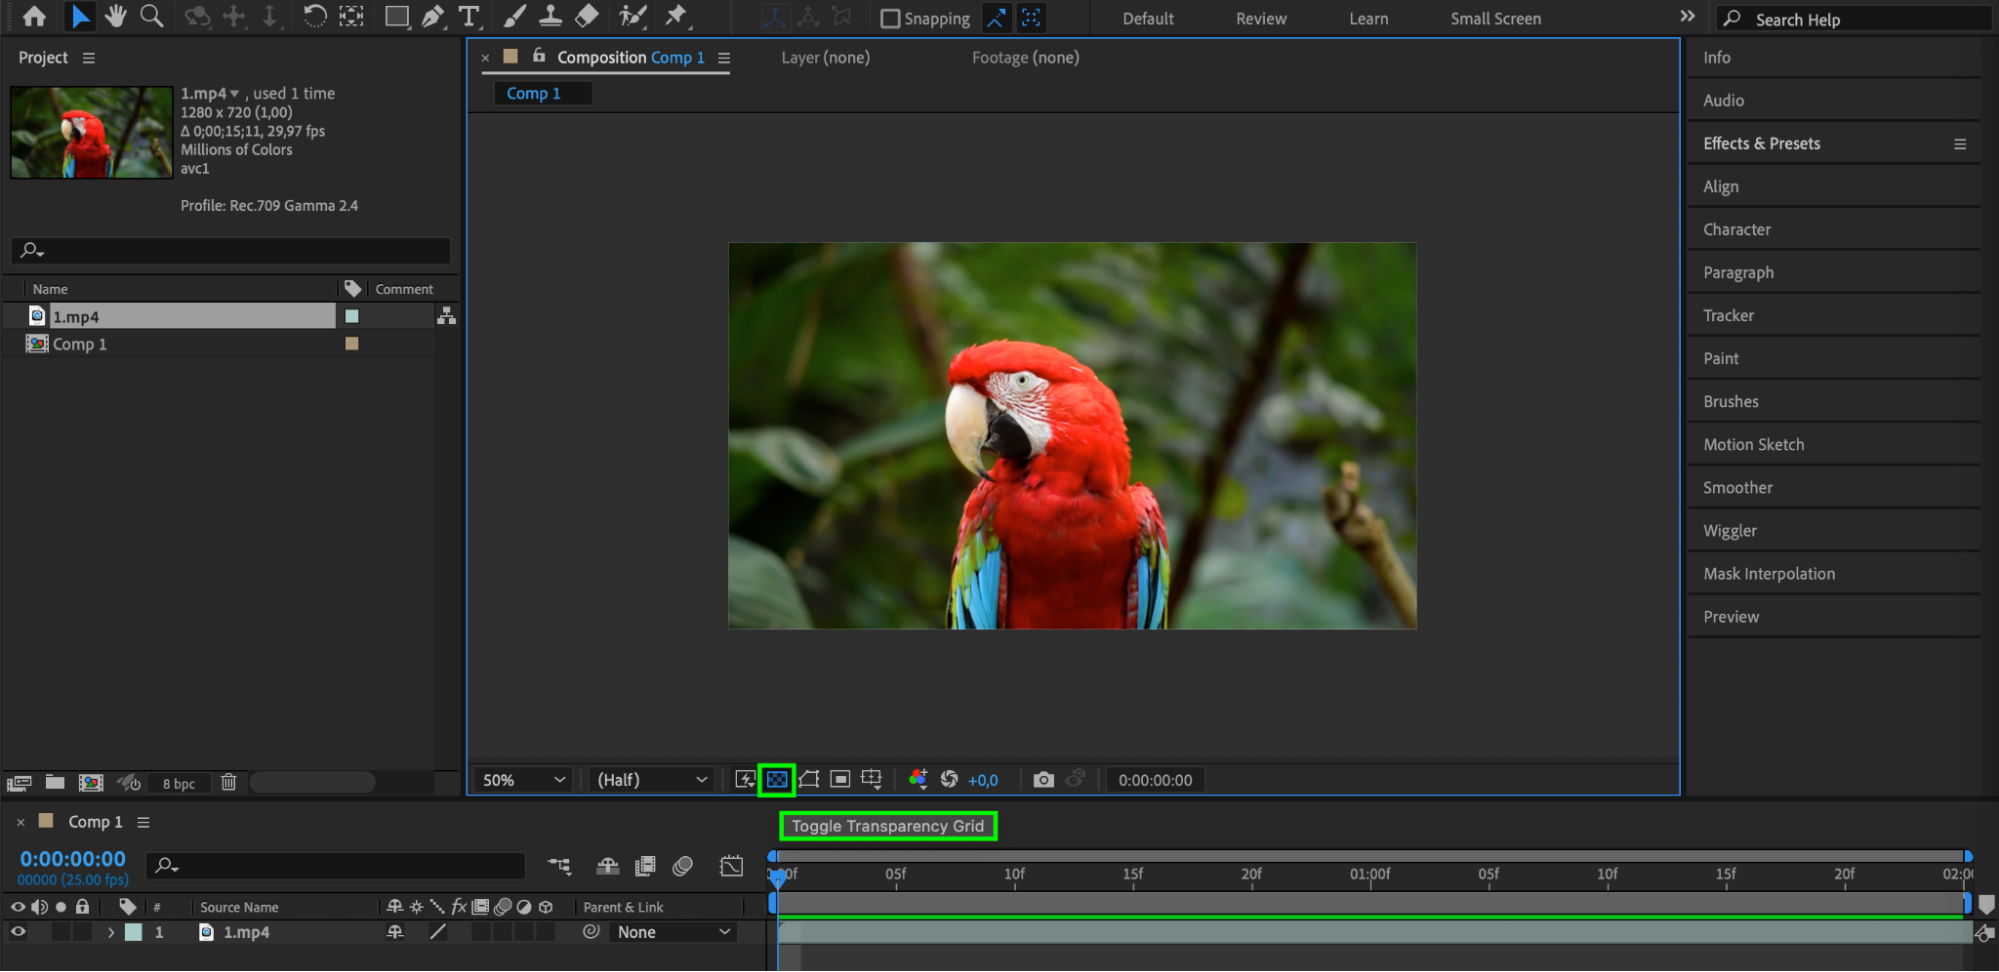
4. Enable the transparent grid: To better visualize the transparency in your composition, click the “Toggle Transparency Grid” button at the bottom of the Composition panel. The transparent grid will allow you to see the transparency in your composition without any background distractions
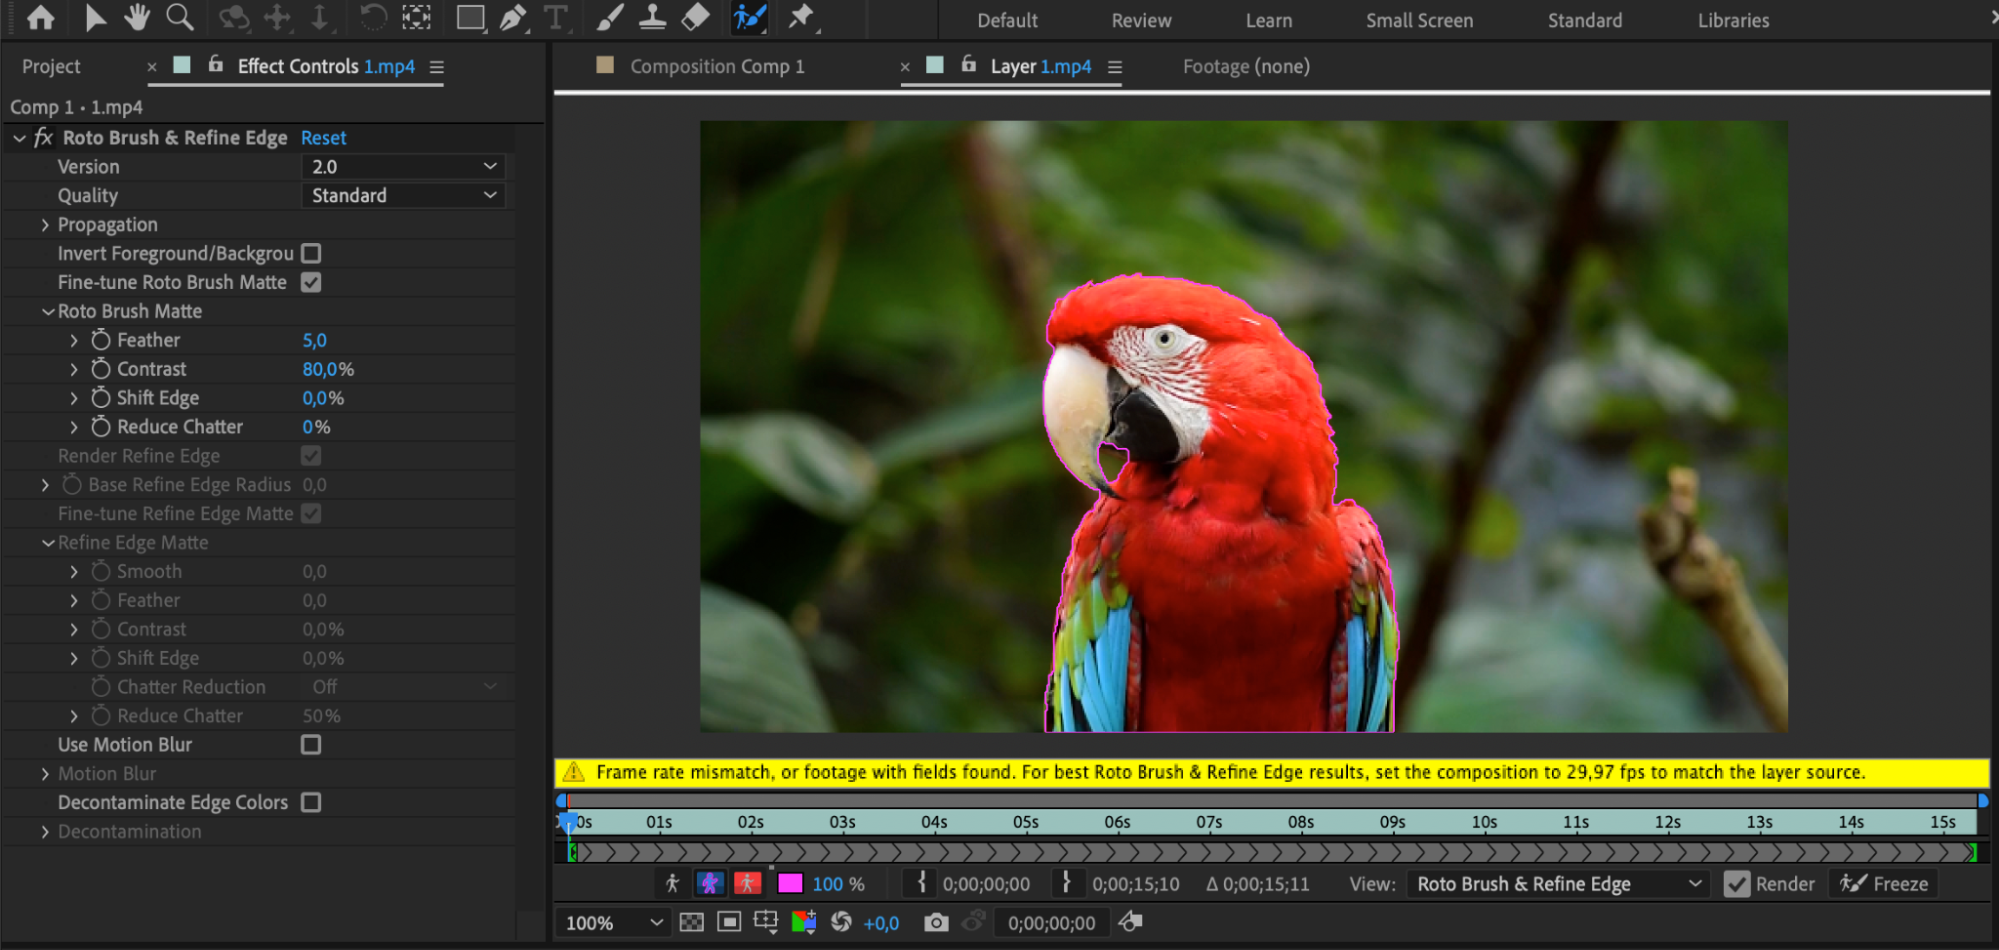
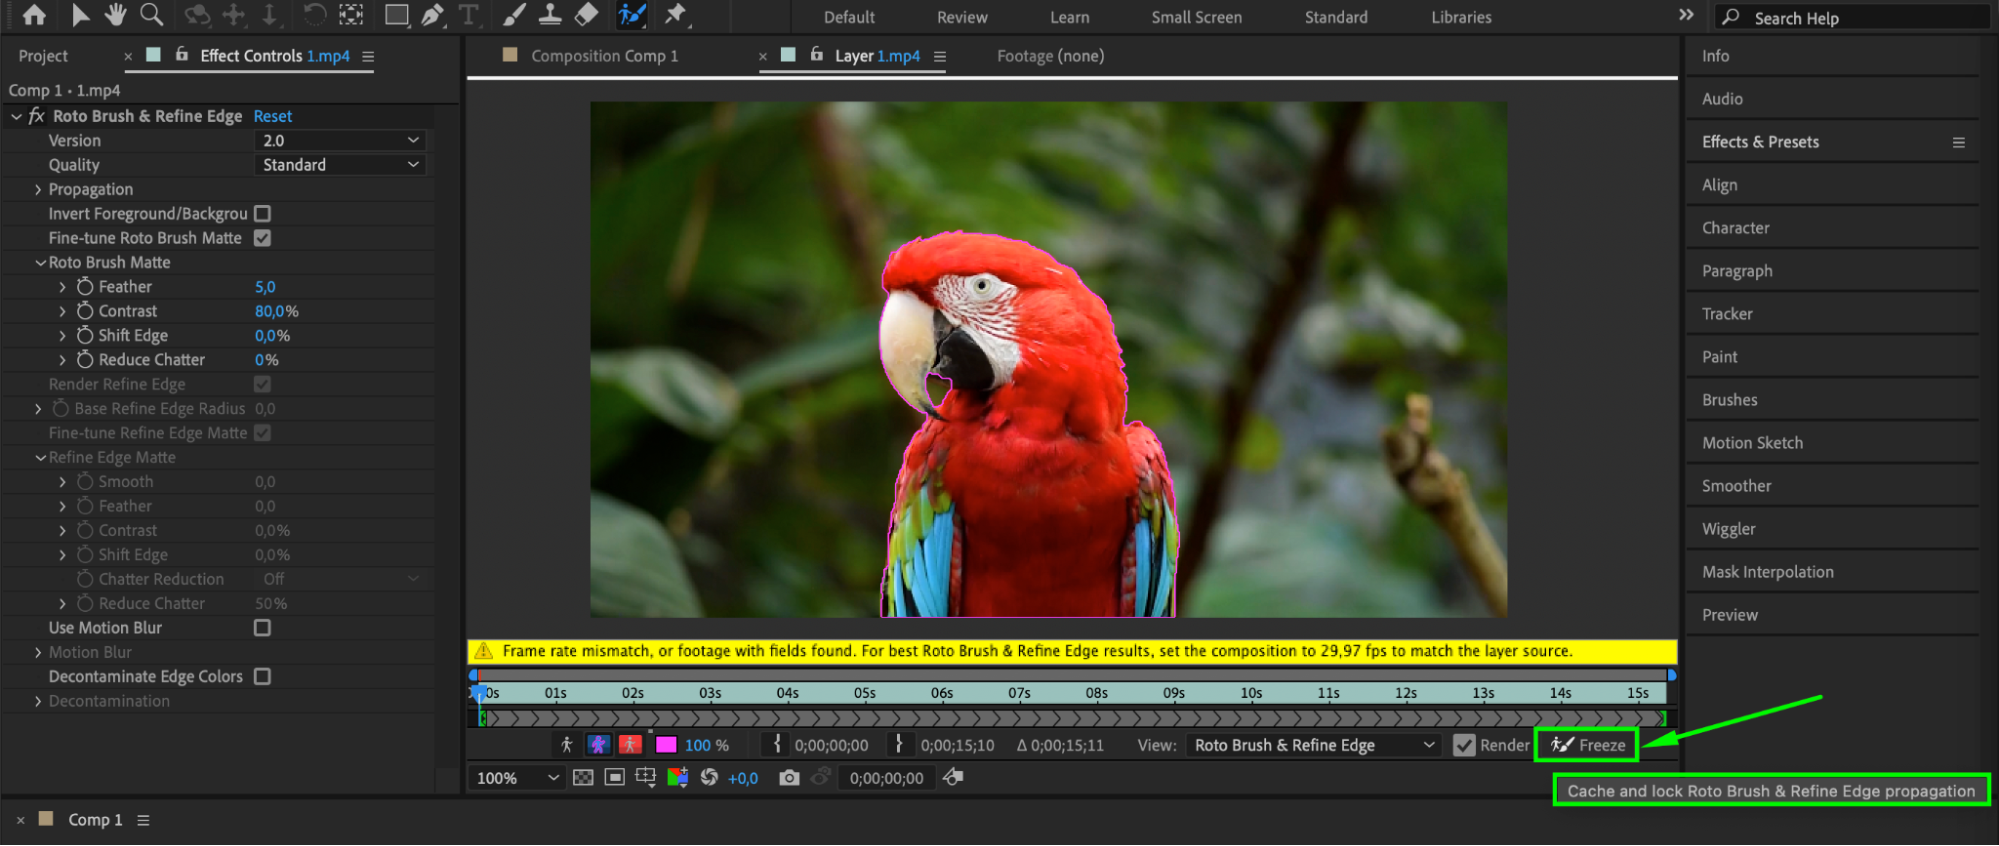
5. Background removal: Utilize tools such as the Roto Brush (“Alt/Option + W”) or Pen Tool (G) to remove the background. To do this, select the object in a way that leaves the background outside the selection area, then click the “Freeze” button to analyze the selection frame by frame.

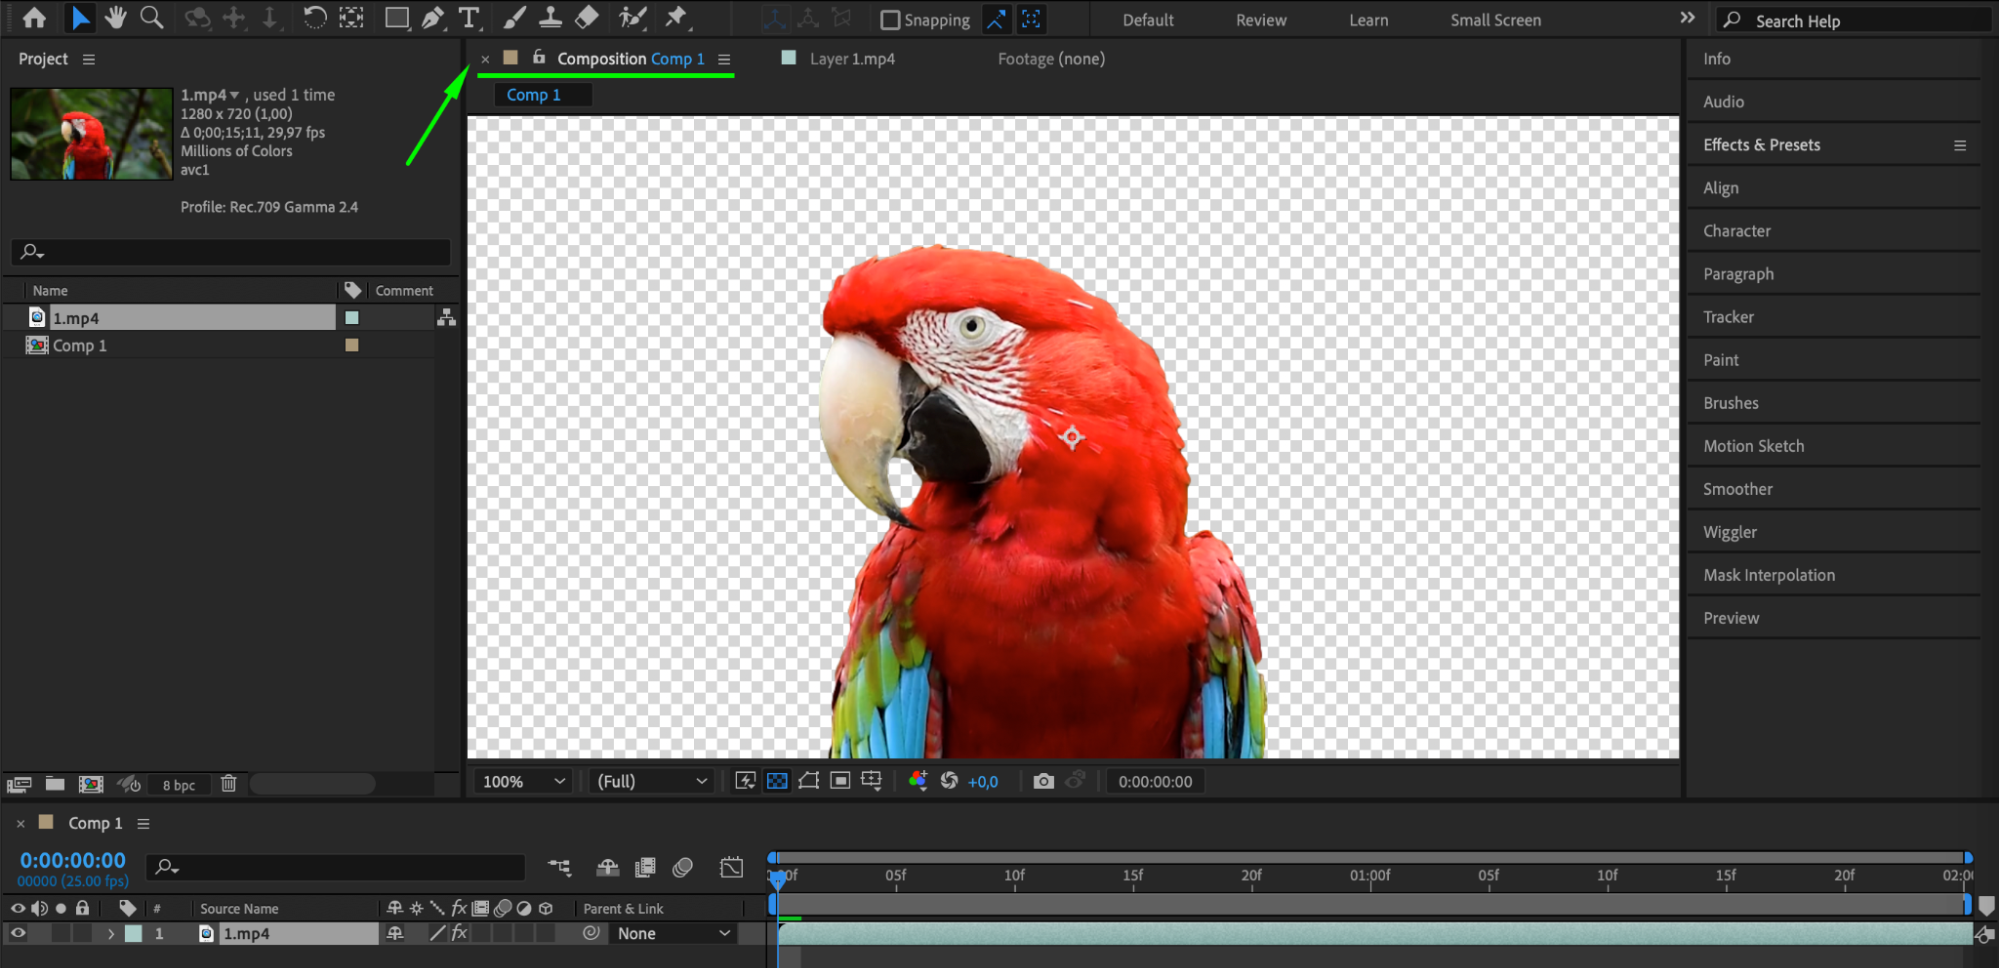
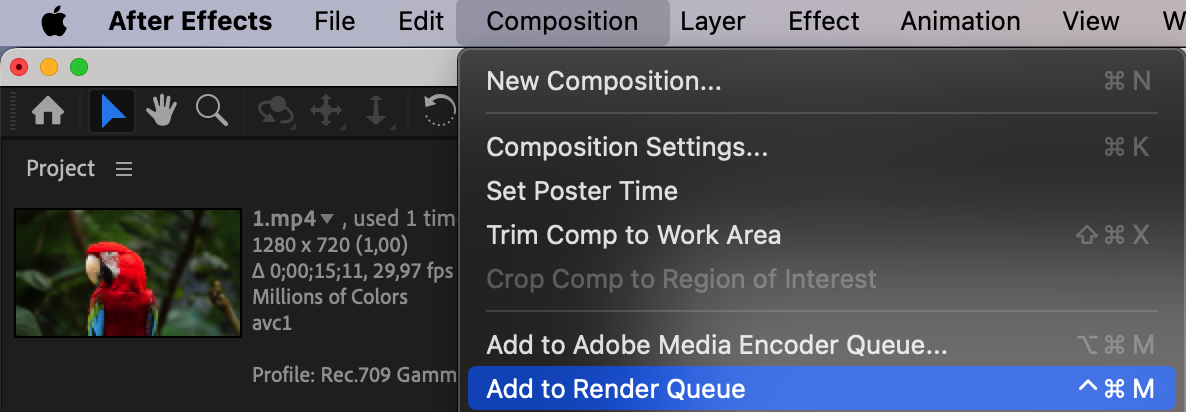
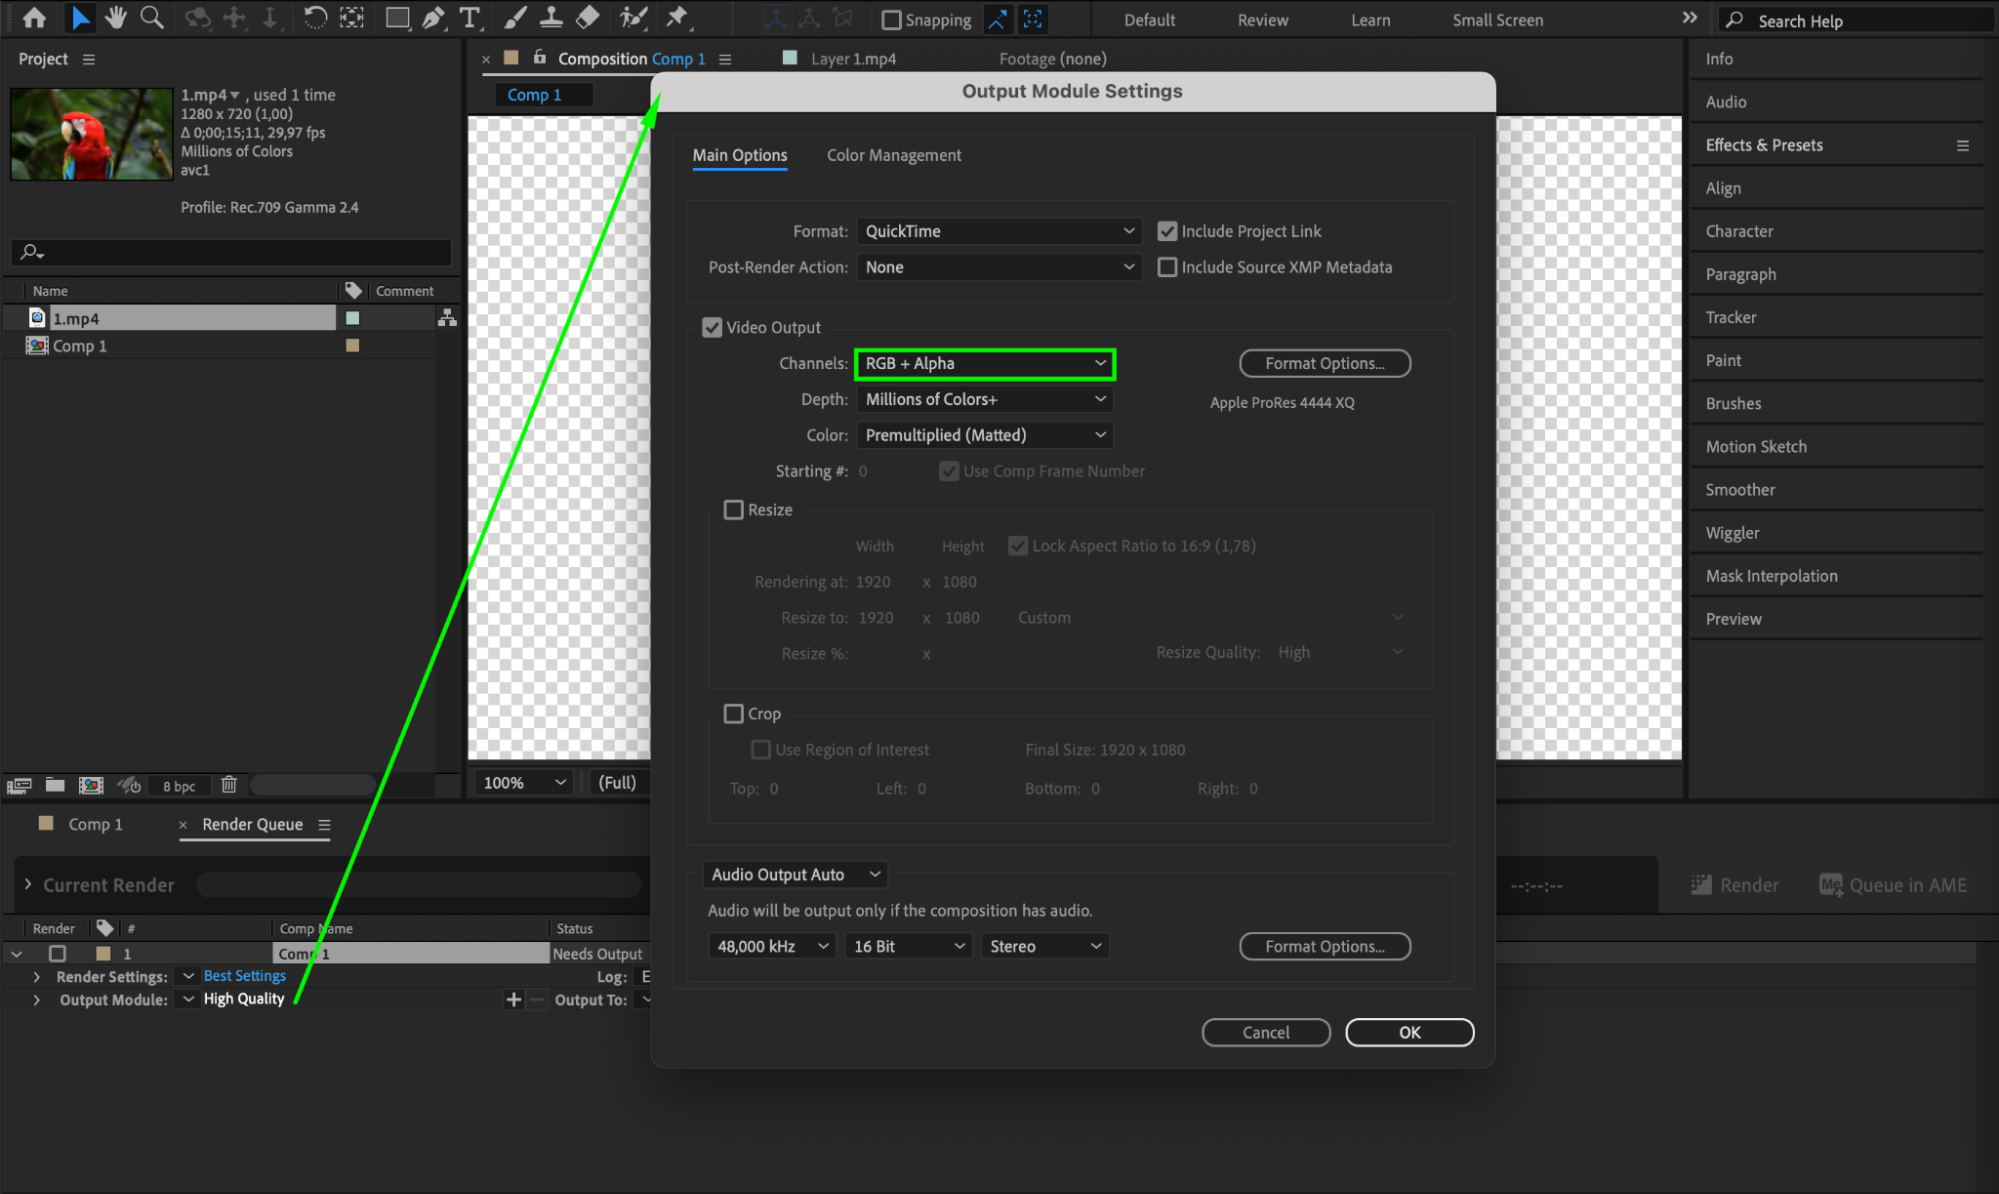
6. Export with a transparent background: Once you’re satisfied with the transparency of your composition, it’s time to export your video with a transparent background. Go to the “Composition” menu and select “Add to Render Queue” or use the shortcut “Ctrl/Cmd + Control + M”. In the Render Queue panel, select the desired output format and codec, then click on the “Output Module” option. In the Output Module Settings dialog box, select the “RGB + Alpha” option for the Channels setting, ensuring that the alpha channel is included in the export. Finally, click “OK” to save the settings and render your composition with a transparent background.

Conclusion
Congratulations! You have successfully created a transparent background in Adobe After Effects. Now you can use your footage in different projects and seamlessly integrate it into any scene or background. Feel free to experiment with different techniques and effects to further enhance your videos and animations.


