Creating a Mosaic Transition in After Effects
Introduction
A mosaic transition is a stylish way to shift between clips by temporarily pixelating the video. This effect can add a modern and dynamic feel to your edits. In this guide, we’ll show you how to create a mosaic transition step by step using an adjustment layer and opacity animation.
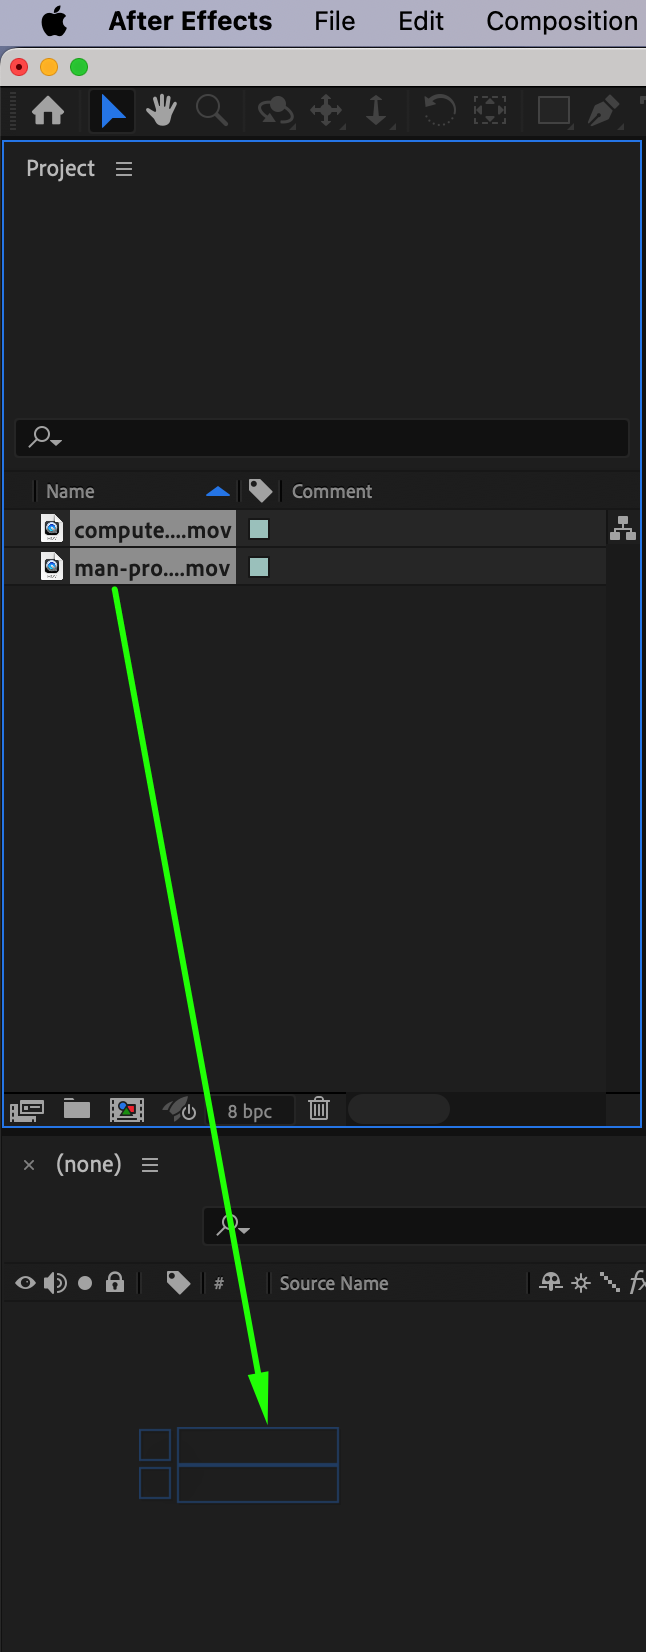
Step 1: Import Your Footage
Go to File > Import > File and select the video clips you want to use. Drag them onto the timeline, placing them sequentially so that one clip follows the other.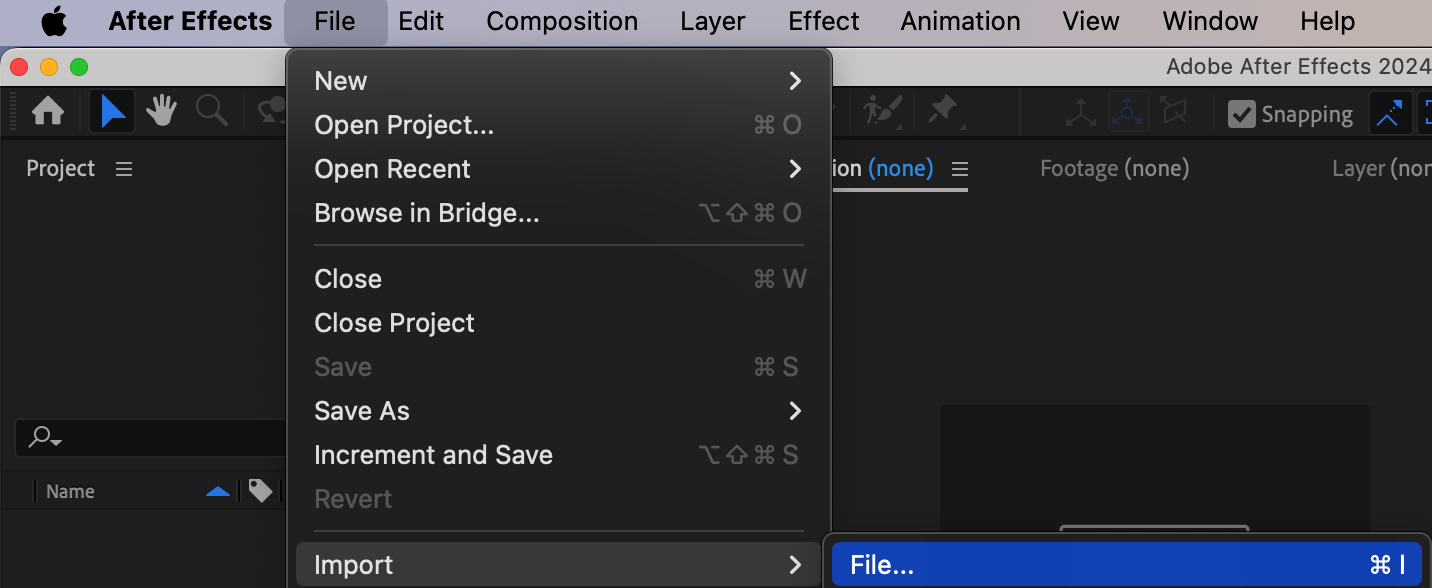
 Step 2: Create an Adjustment Layer
To apply the transition without affecting the original footage, go to Layer > New > Adjustment Layer. This will be the layer where we apply the effect.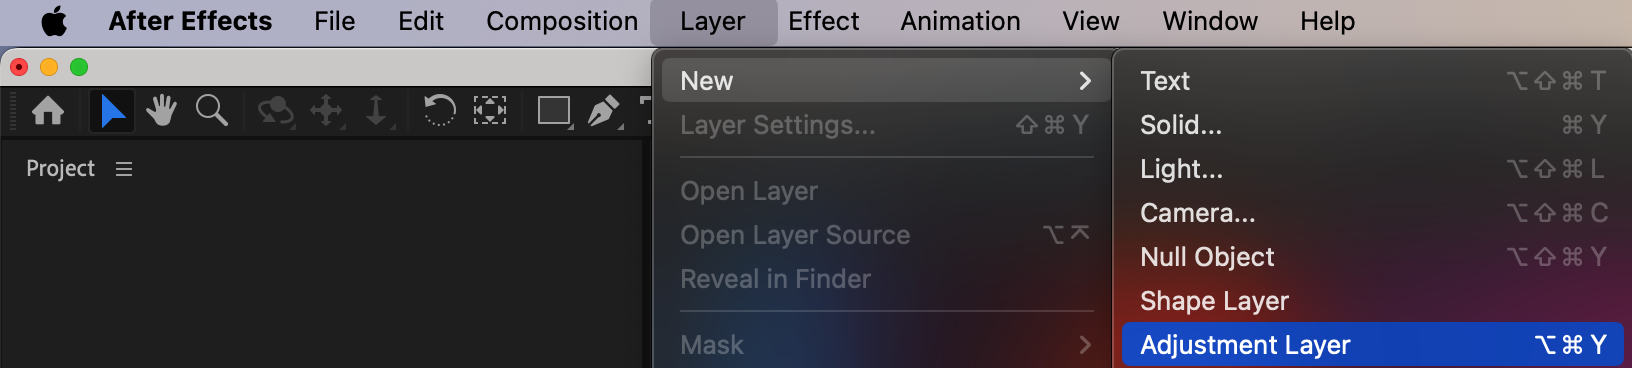 Step 3: Apply the Mosaic Effect
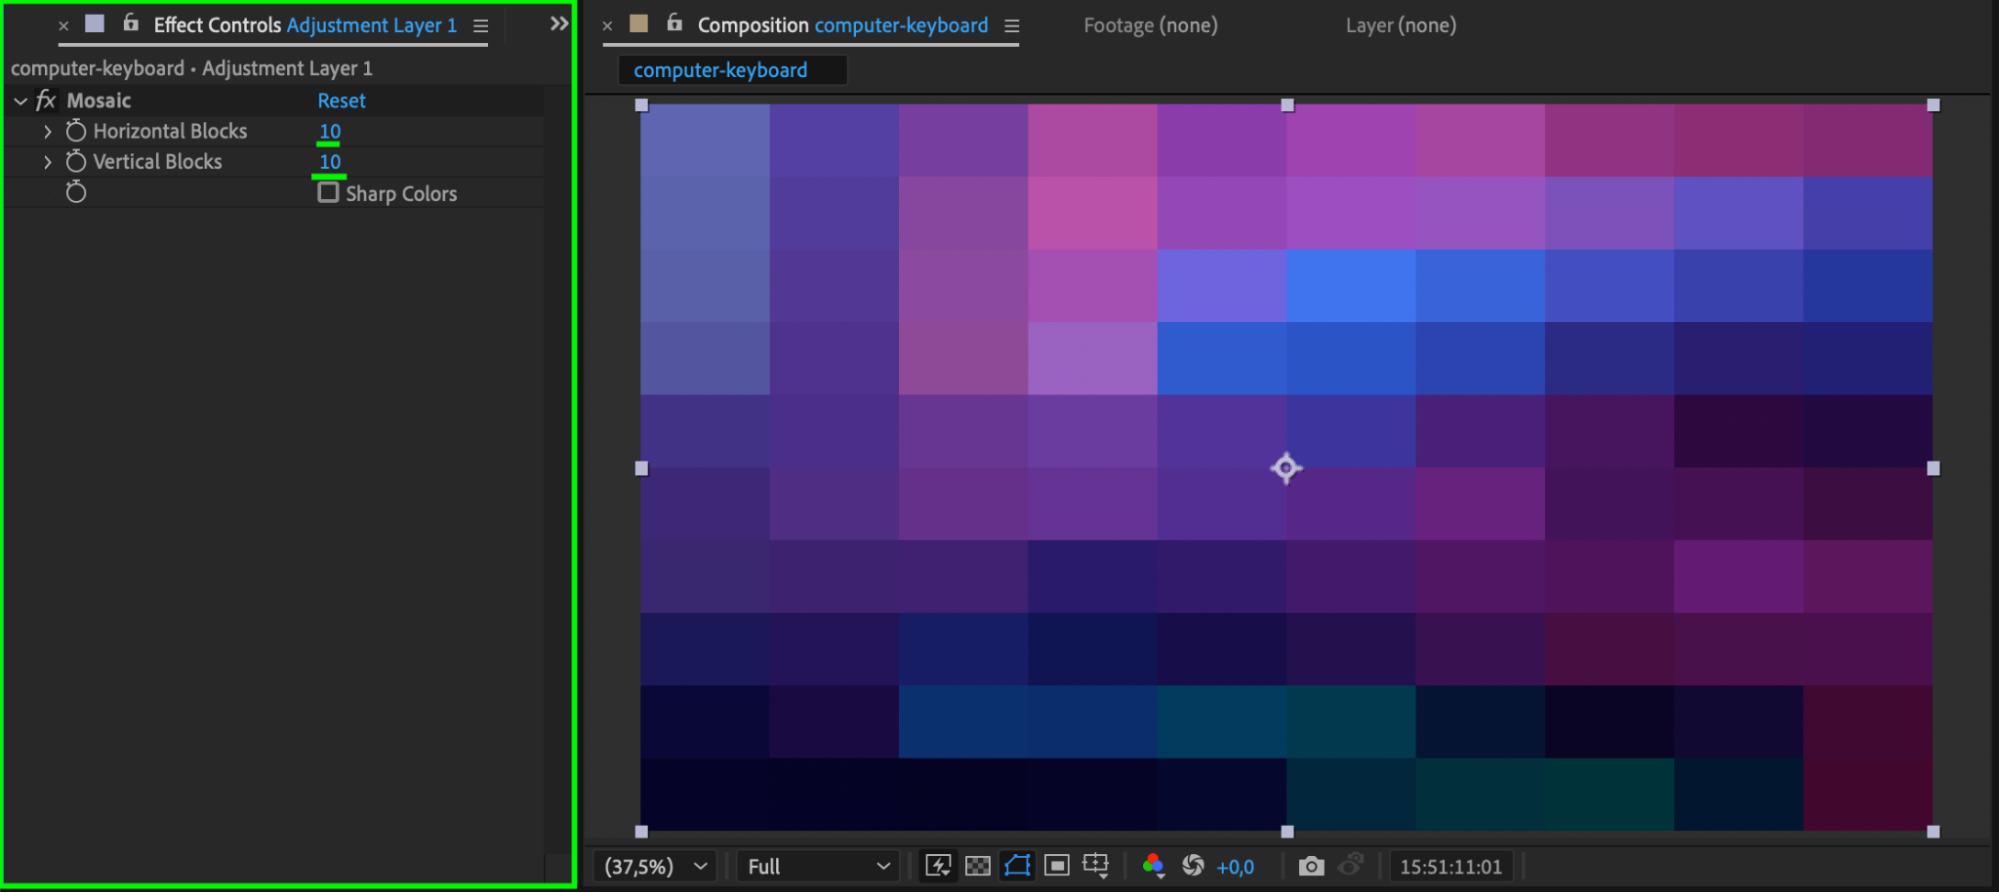
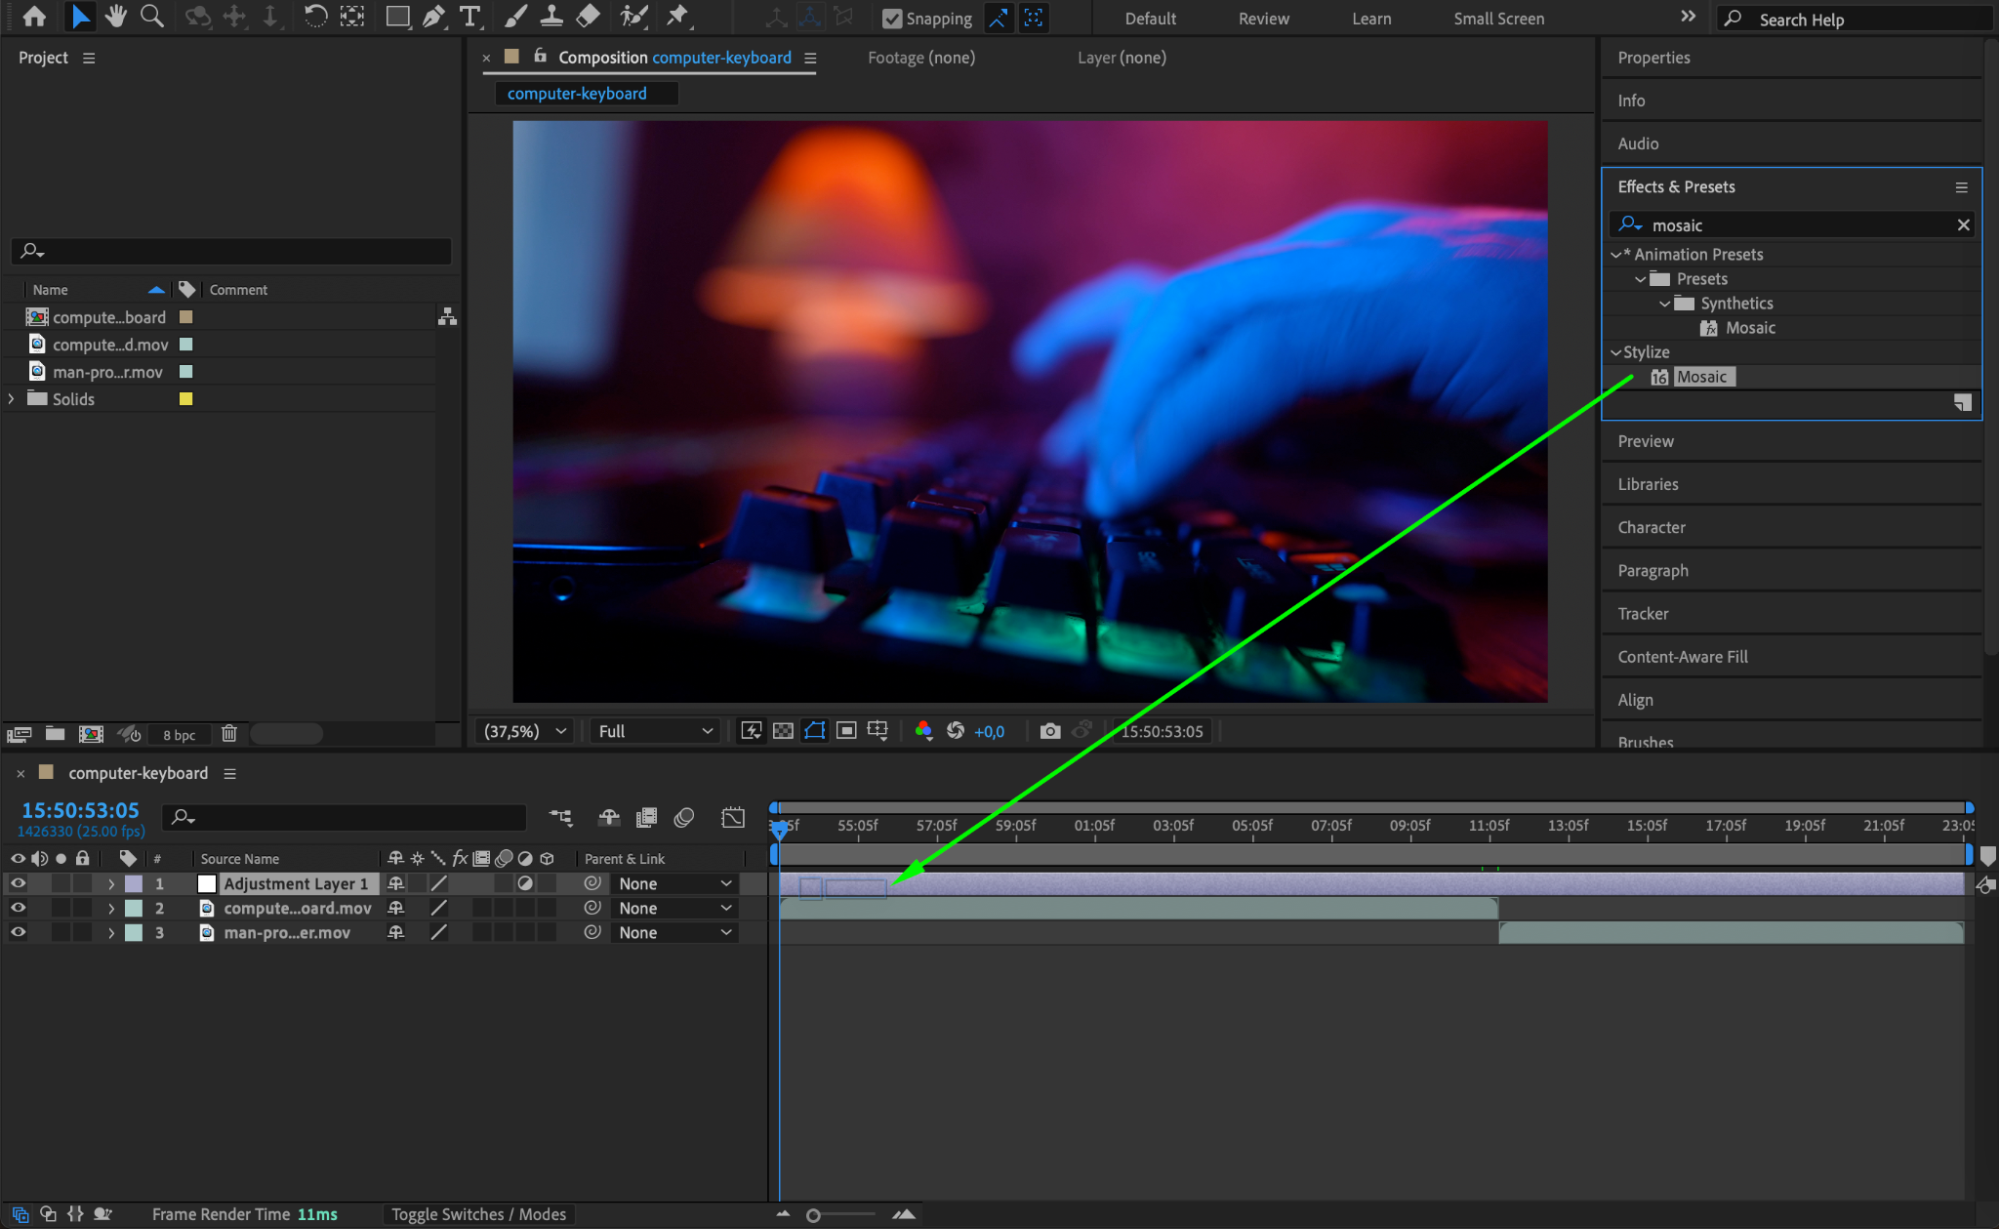
Search for Mosaic in the Effects & Presets panel and drag it onto the adjustment layer. In the Effect Controls panel, set Horizontal Blocks and Vertical Blocks to 10 (or any other value depending on the pixelation intensity you want).
Step 4: Trim the Adjustment Layer
Move the CTI to the point where the first video transitions to the second. Use the shortcuts “Alt/Option + ]” to trim the end and “Alt/Option + [” to trim the beginning, ensuring the adjustment layer spans 10 frames before and 10 frames after the transition (a total of 20 frames).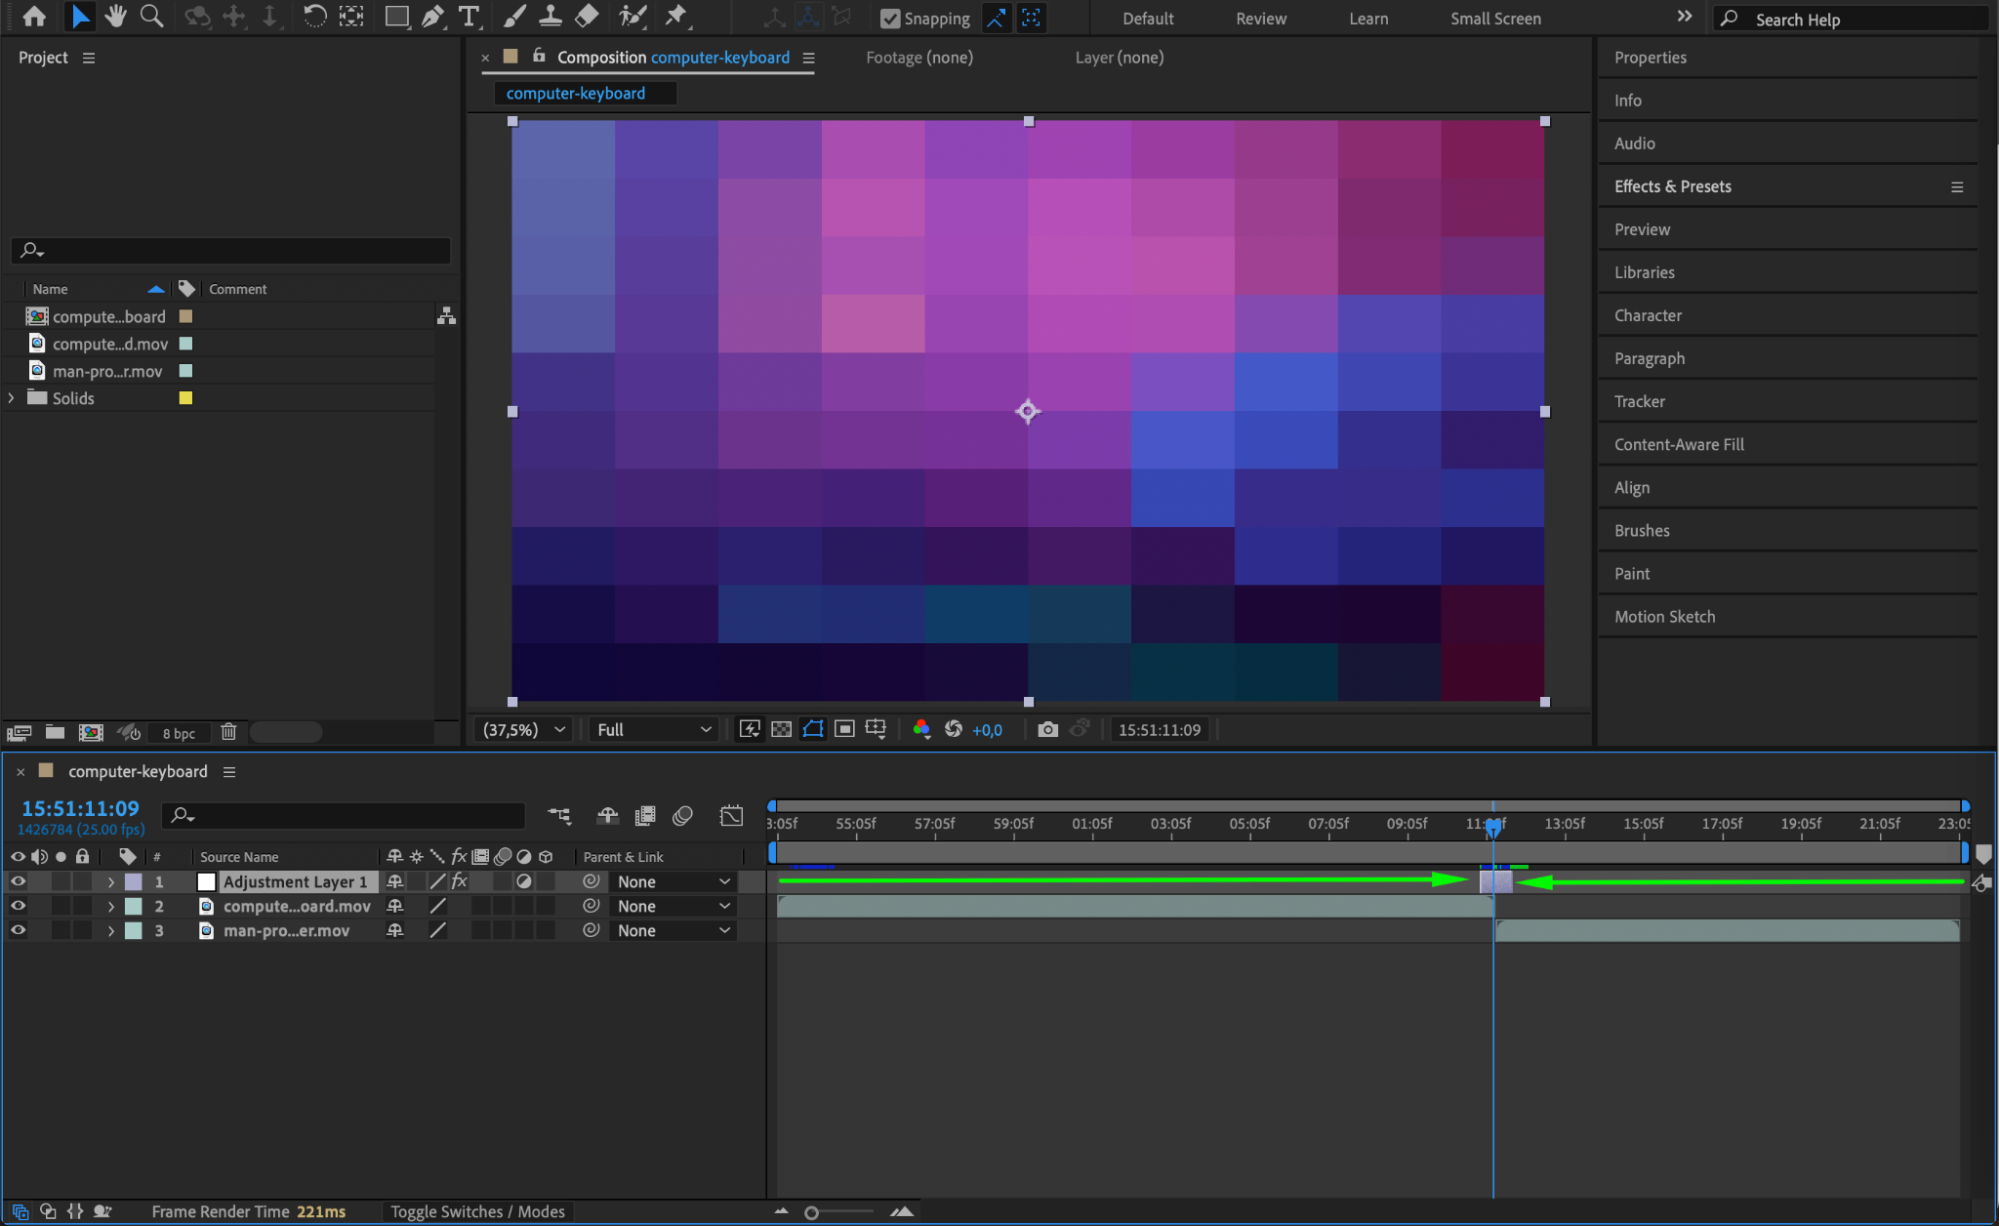
Get 10% off when you subscribe to our newsletter

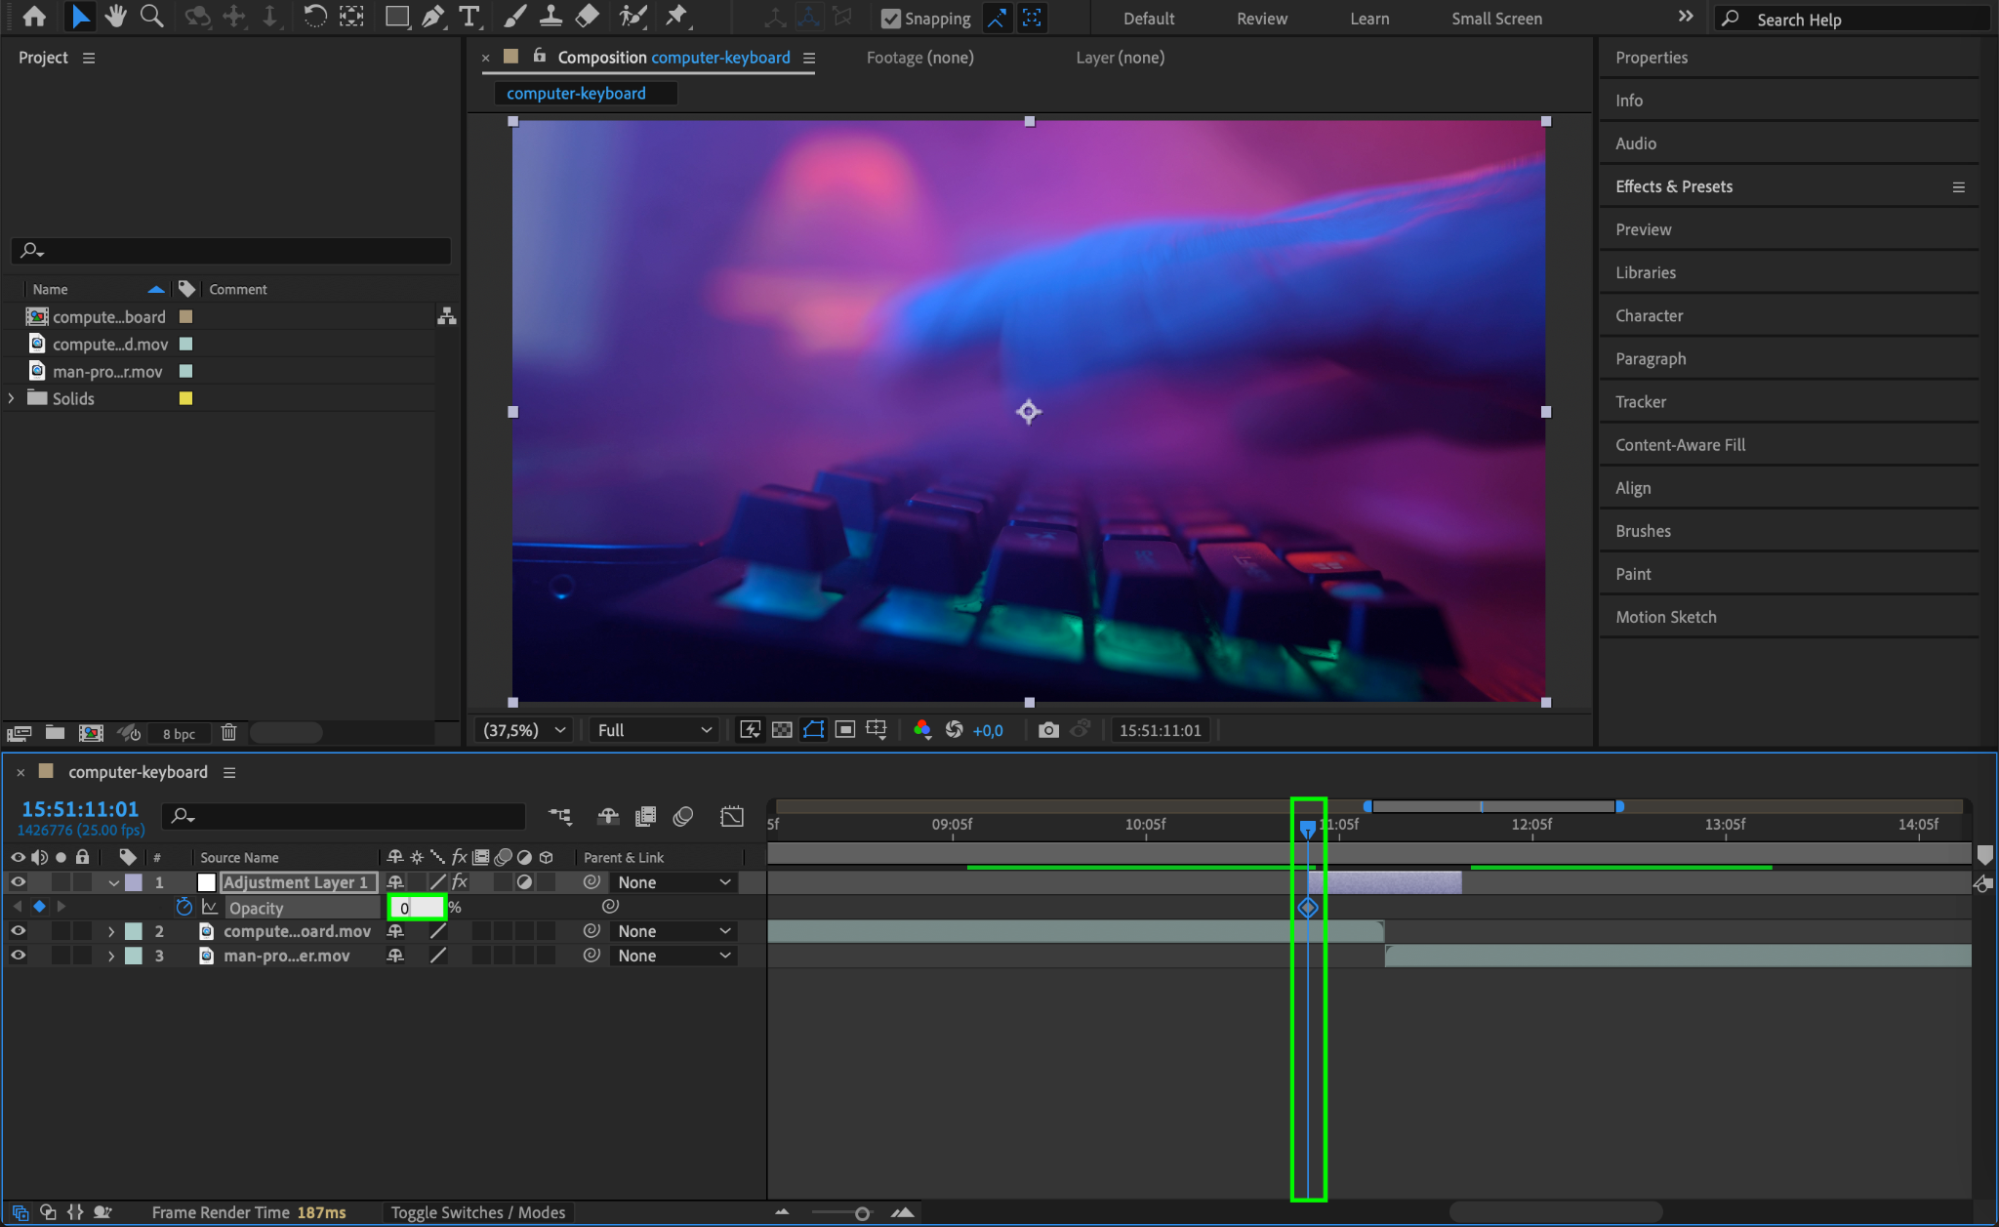
Step 5: Animate Opacity for a Smooth Transition
Select the adjustment layer and press “T” to open the opacity settings. Set keyframes at 0% opacity at the beginning, 100% opacity in the middle, and back to 0% opacity at the end. This will create a fade-in and fade-out effect for the mosaic.

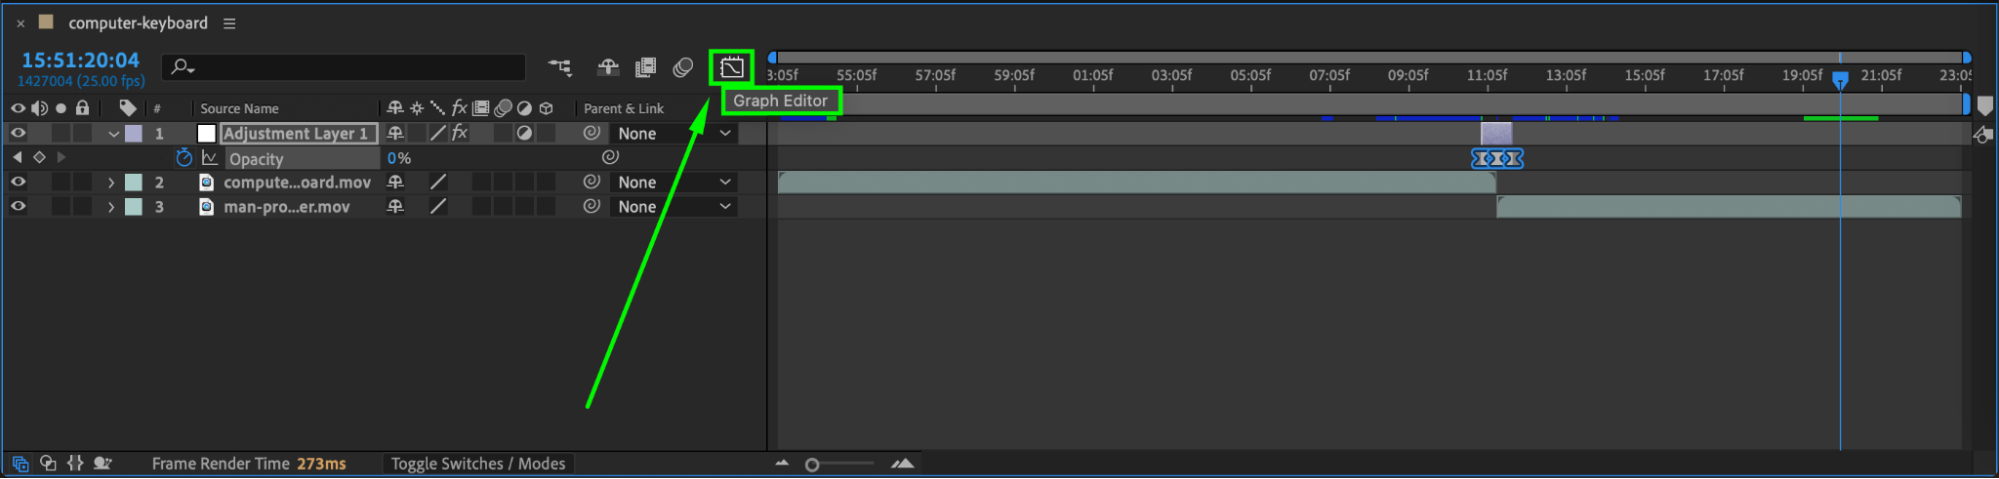
 Step 6: Smooth Keyframes with Easy Ease
Select the opacity keyframes, right-click, go to Keyframe Assistant > Easy Ease, and adjust the motion curve in the Graph Editor to create a smooth animation.
 Step 7: Preview the Transition
Press Spacebar to preview the animation. Make any necessary adjustments to keyframes or effect settings to perfect the transition.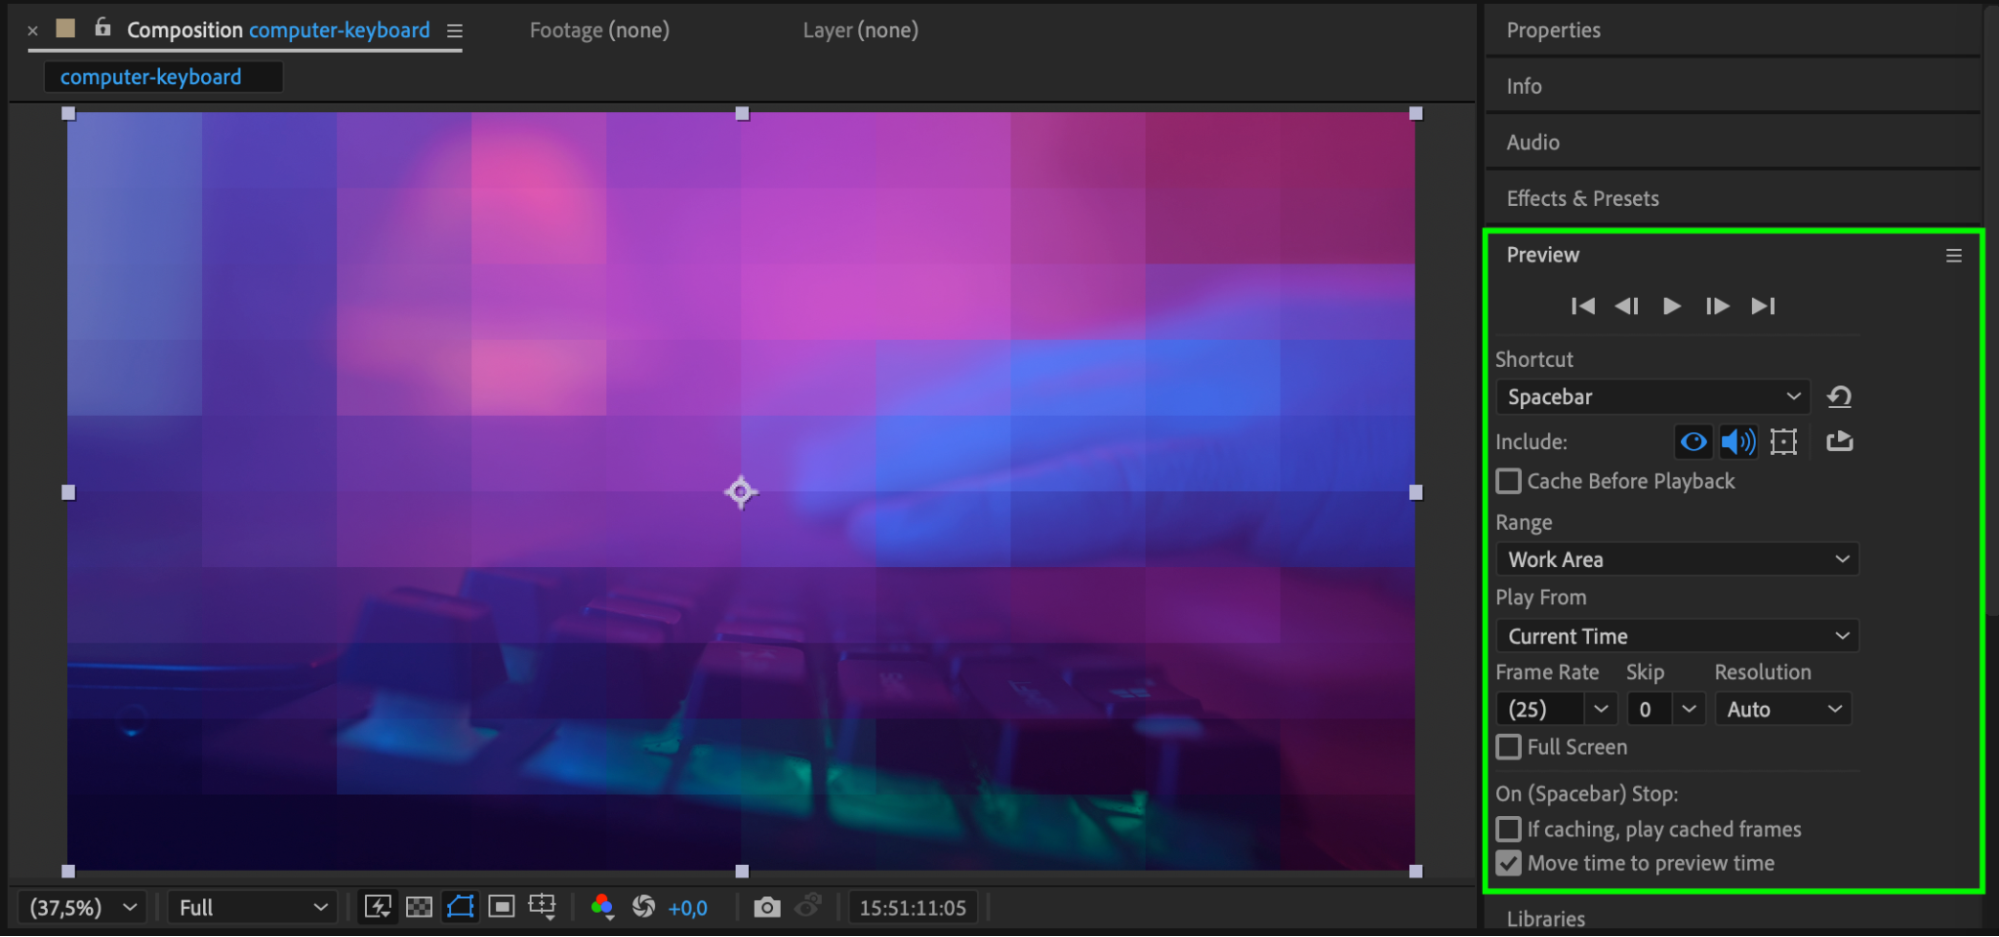 Step 8: Render the Final Video
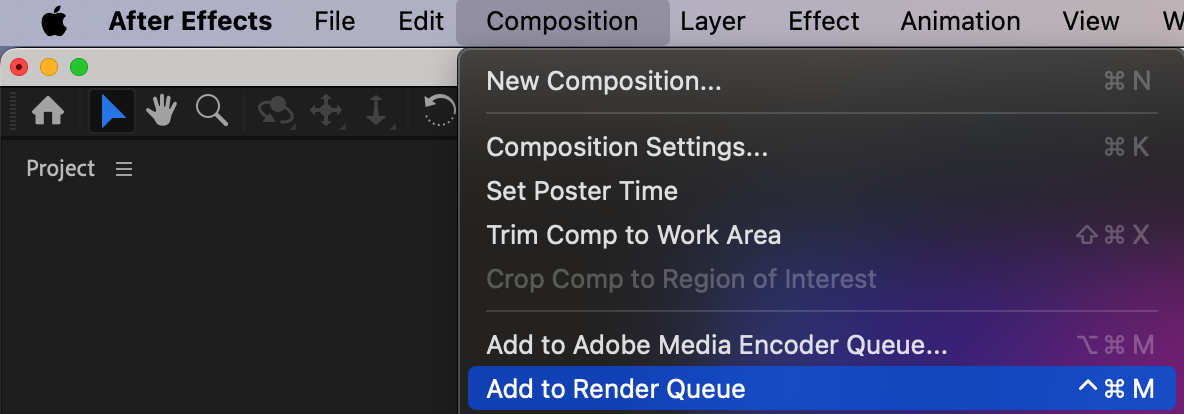
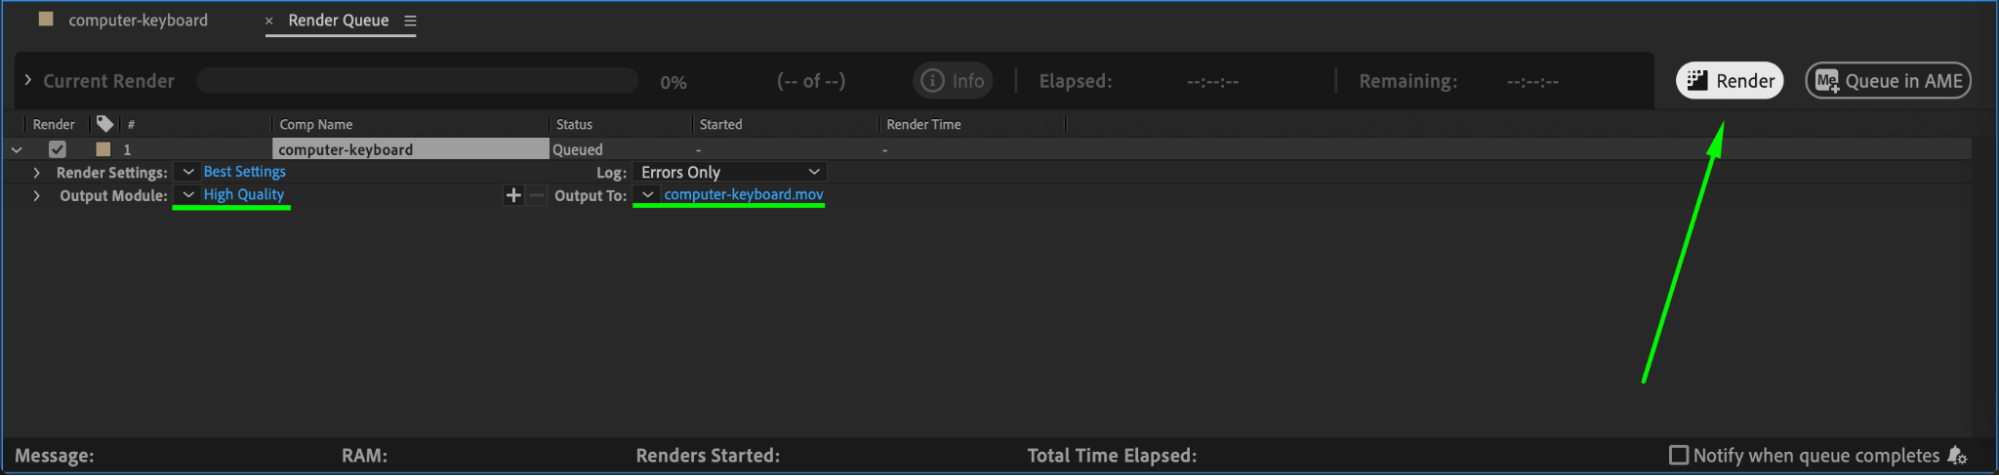
Once you’re happy with the transition, go to Composition > Add to Render Queue, choose your preferred settings, and render the final video.
 Conclusion
Creating a mosaic transition in After Effects is an easy way to add a professional touch to your edits. By using an adjustment layer, animating opacity, and fine-tuning the effect, you can achieve a clean and dynamic transition between clips.
Our Bestsellers

