Creating an Animated GIF in After Effects: Step-by-Step Guide
Introduction
Animated GIFs are a fantastic way to add movement and interactive elements to your designs or to showcase your artwork on social media platforms. After Effects, with its powerful animation tools, is the perfect software to breathe life into your ideas and create stunning GIFs.
In this step-by-step guide, we will explore how to make an animated GIF using After Effects. Whether you’re an experienced professional or new to animation, this tutorial will provide valuable insights and techniques to unleash your creativity.
Let’s jump right in and learn how to make an animated GIF in After Effects!
Step-by-Step Guide: Making an Animated GIF in After Effects
Step 1: Prepare Your Composition
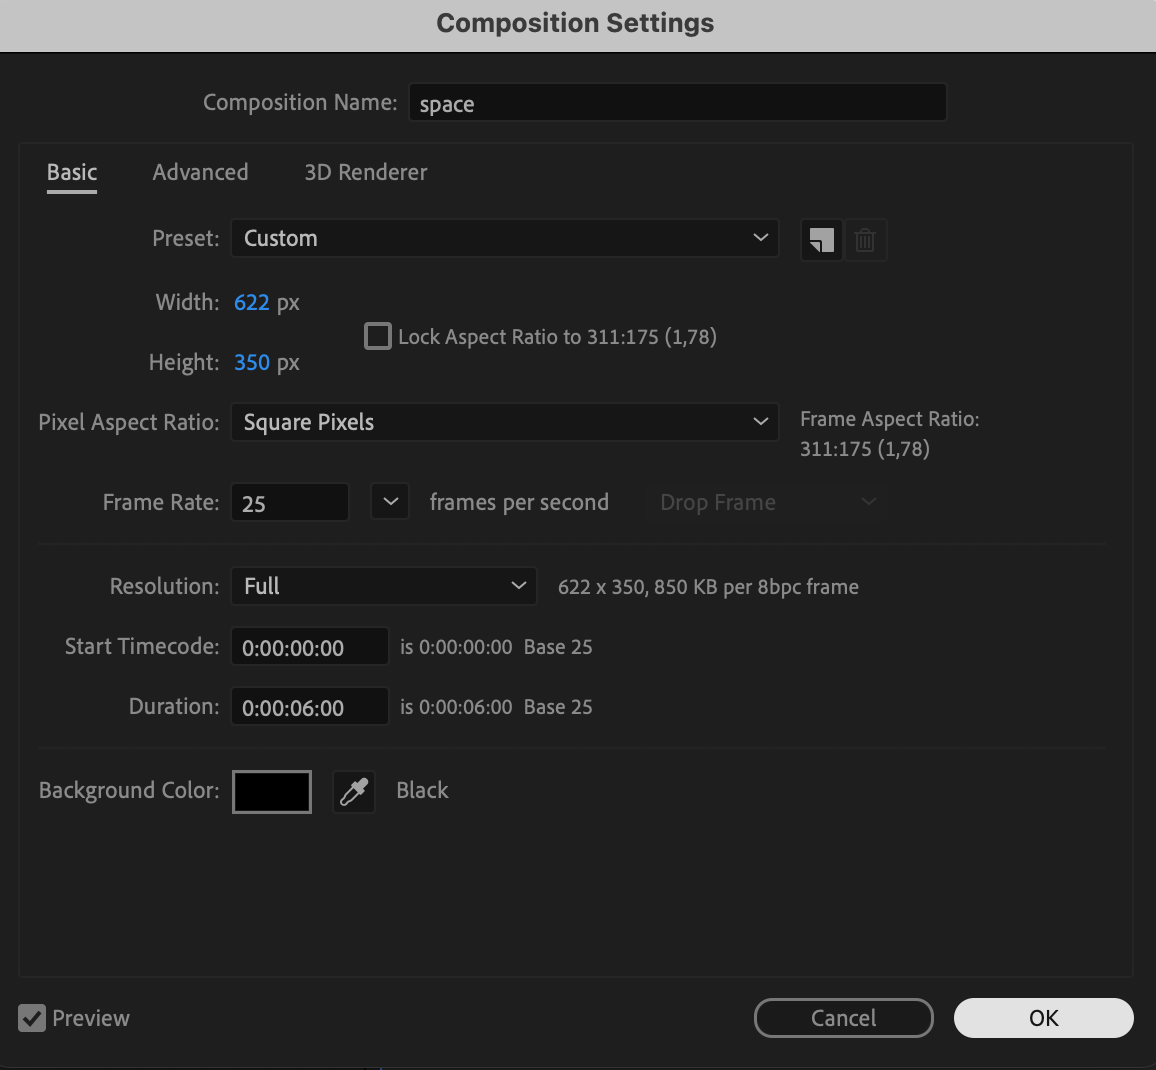
Before diving into animation, it’s important to set up your composition in After Effects. Determine the canvas size and frame rate you want for your GIF. You can choose from preset sizes or customize the dimensions to suit your needs. Navigate to Composition > New Composition and set the parameters according to your project requirements.
 Step 2: Import Your Assets
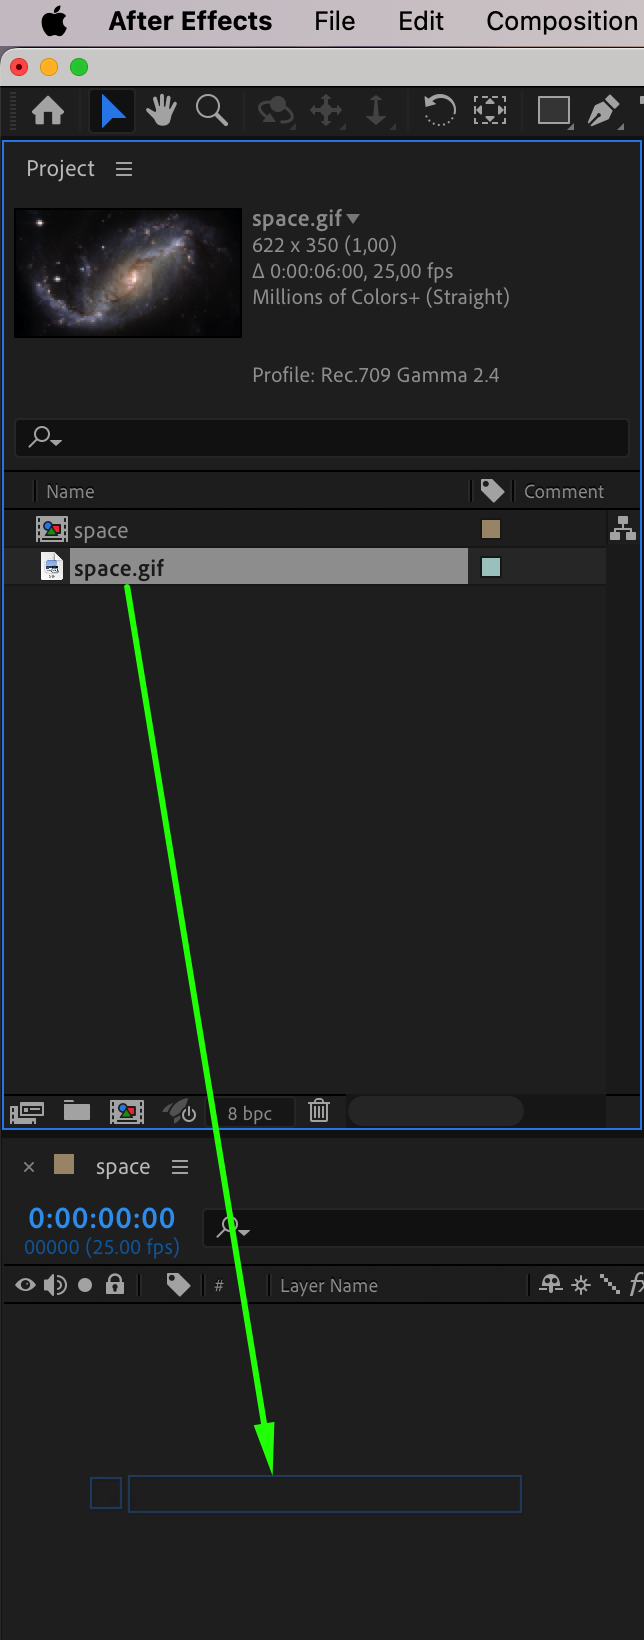
Next, import the assets you want to include in your GIF, such as images, videos, or other GIFs. Simply drag and drop them into your composition timeline or go to File > Import to bring them into your project. Organize these assets in the project panel for easy access.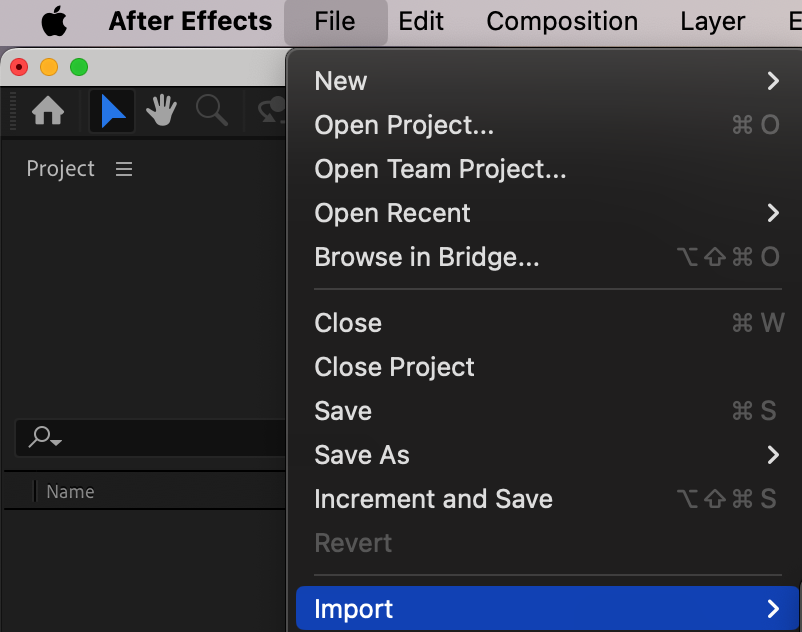
 Step 3: Arrange and Animate Elements
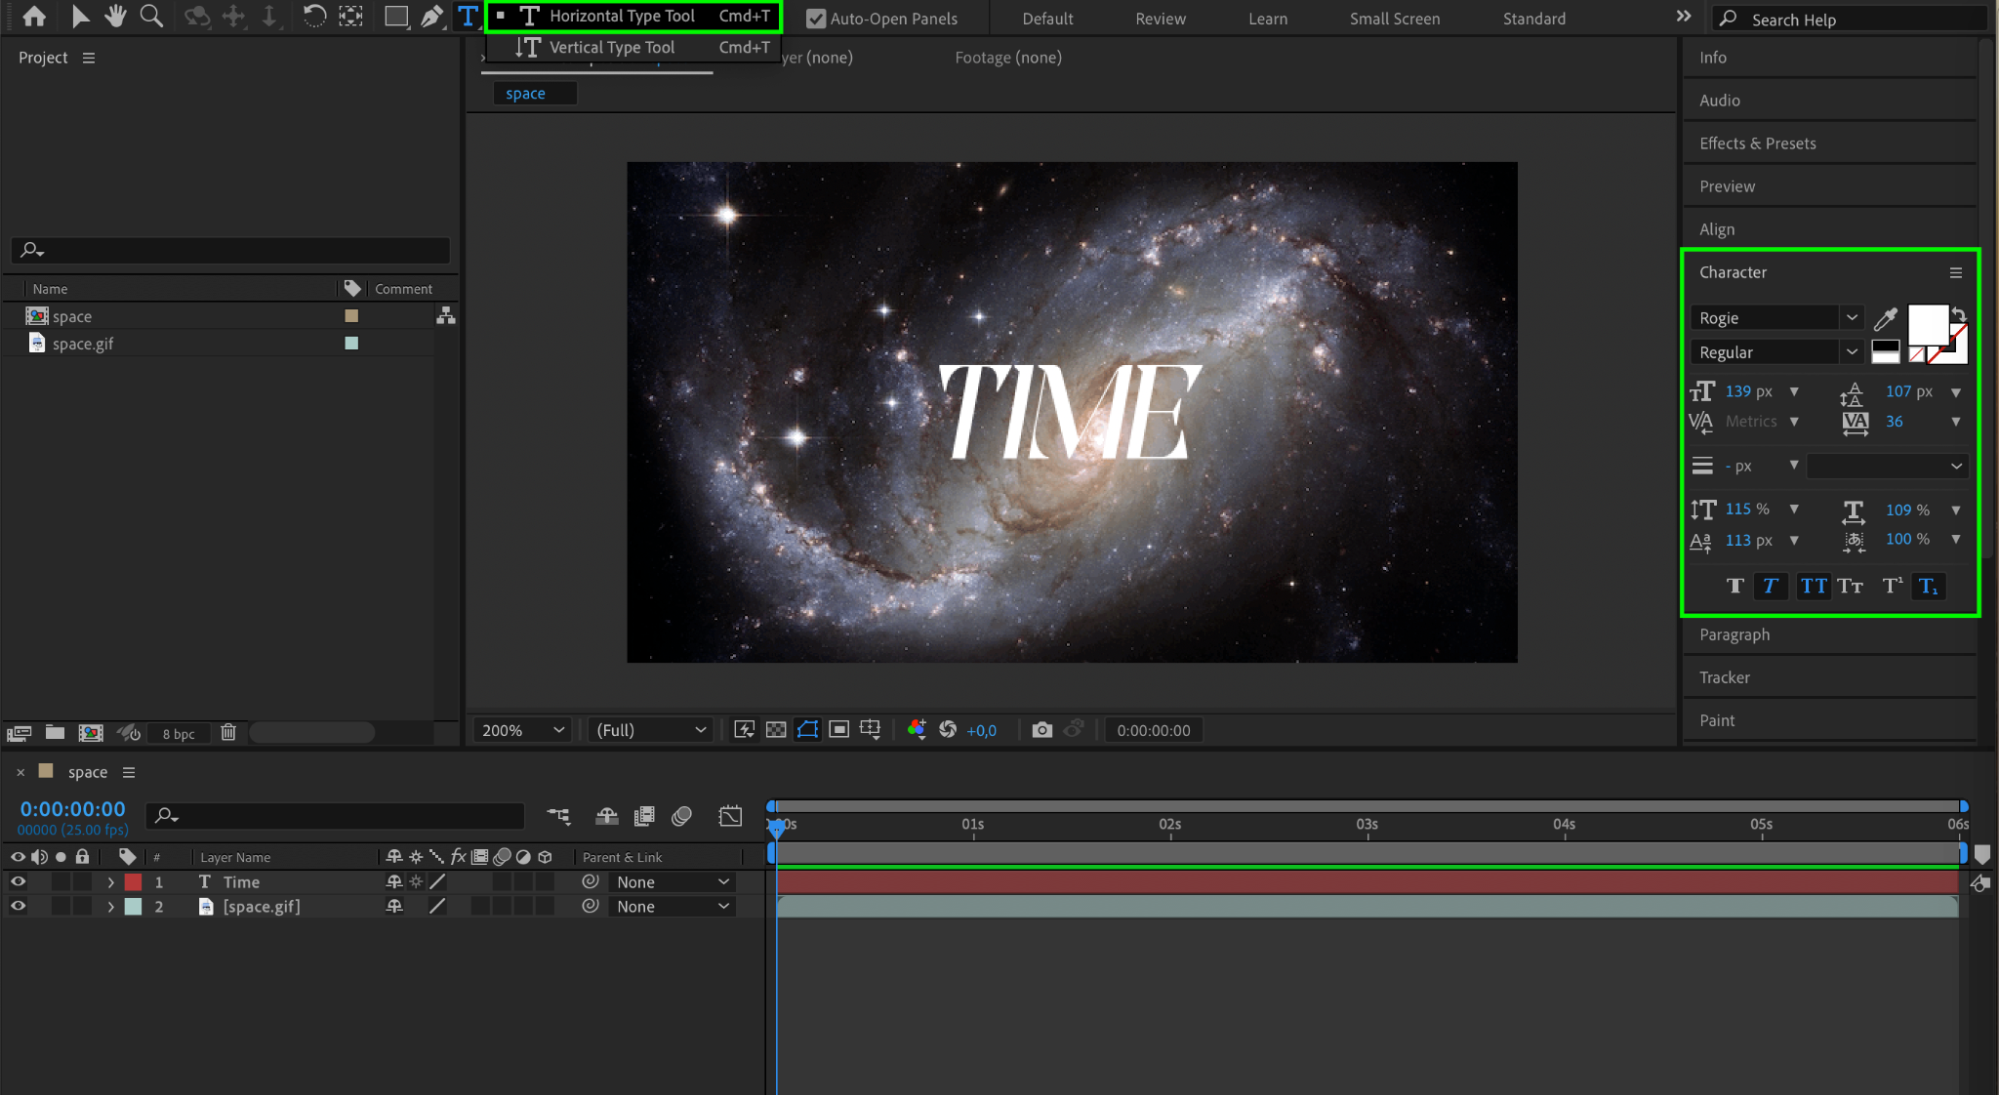
Arrange your assets in the desired order and start animating them. After Effects offers a variety of animation techniques like keyframing, transforms, and effects. Use these tools to create dynamic motion for each element of your GIF. Keyframe the position, scale, rotation, and opacity to bring your elements to life.

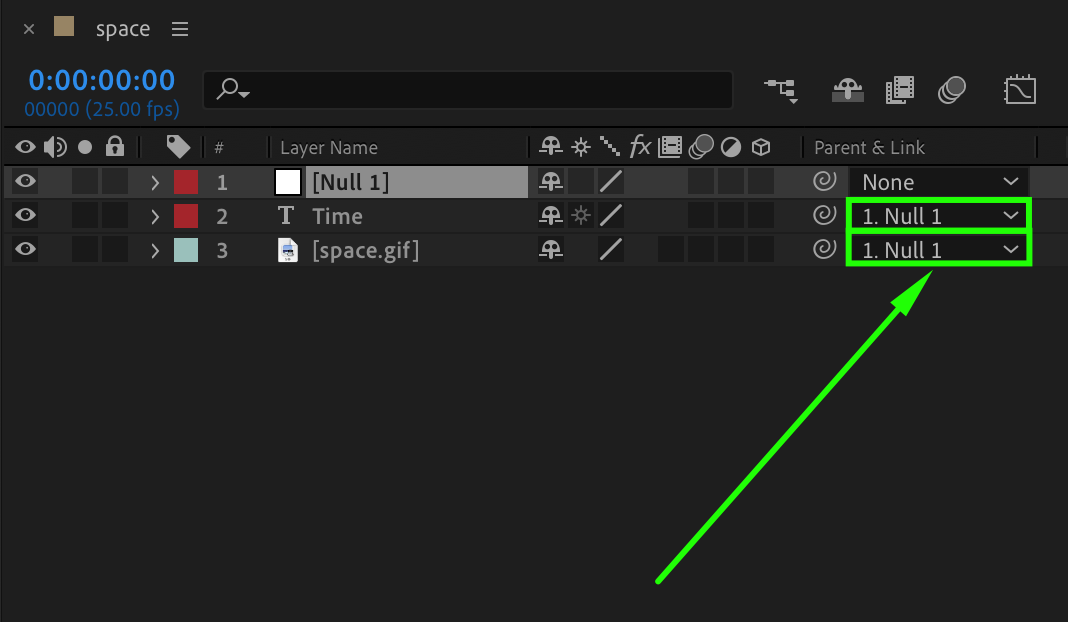
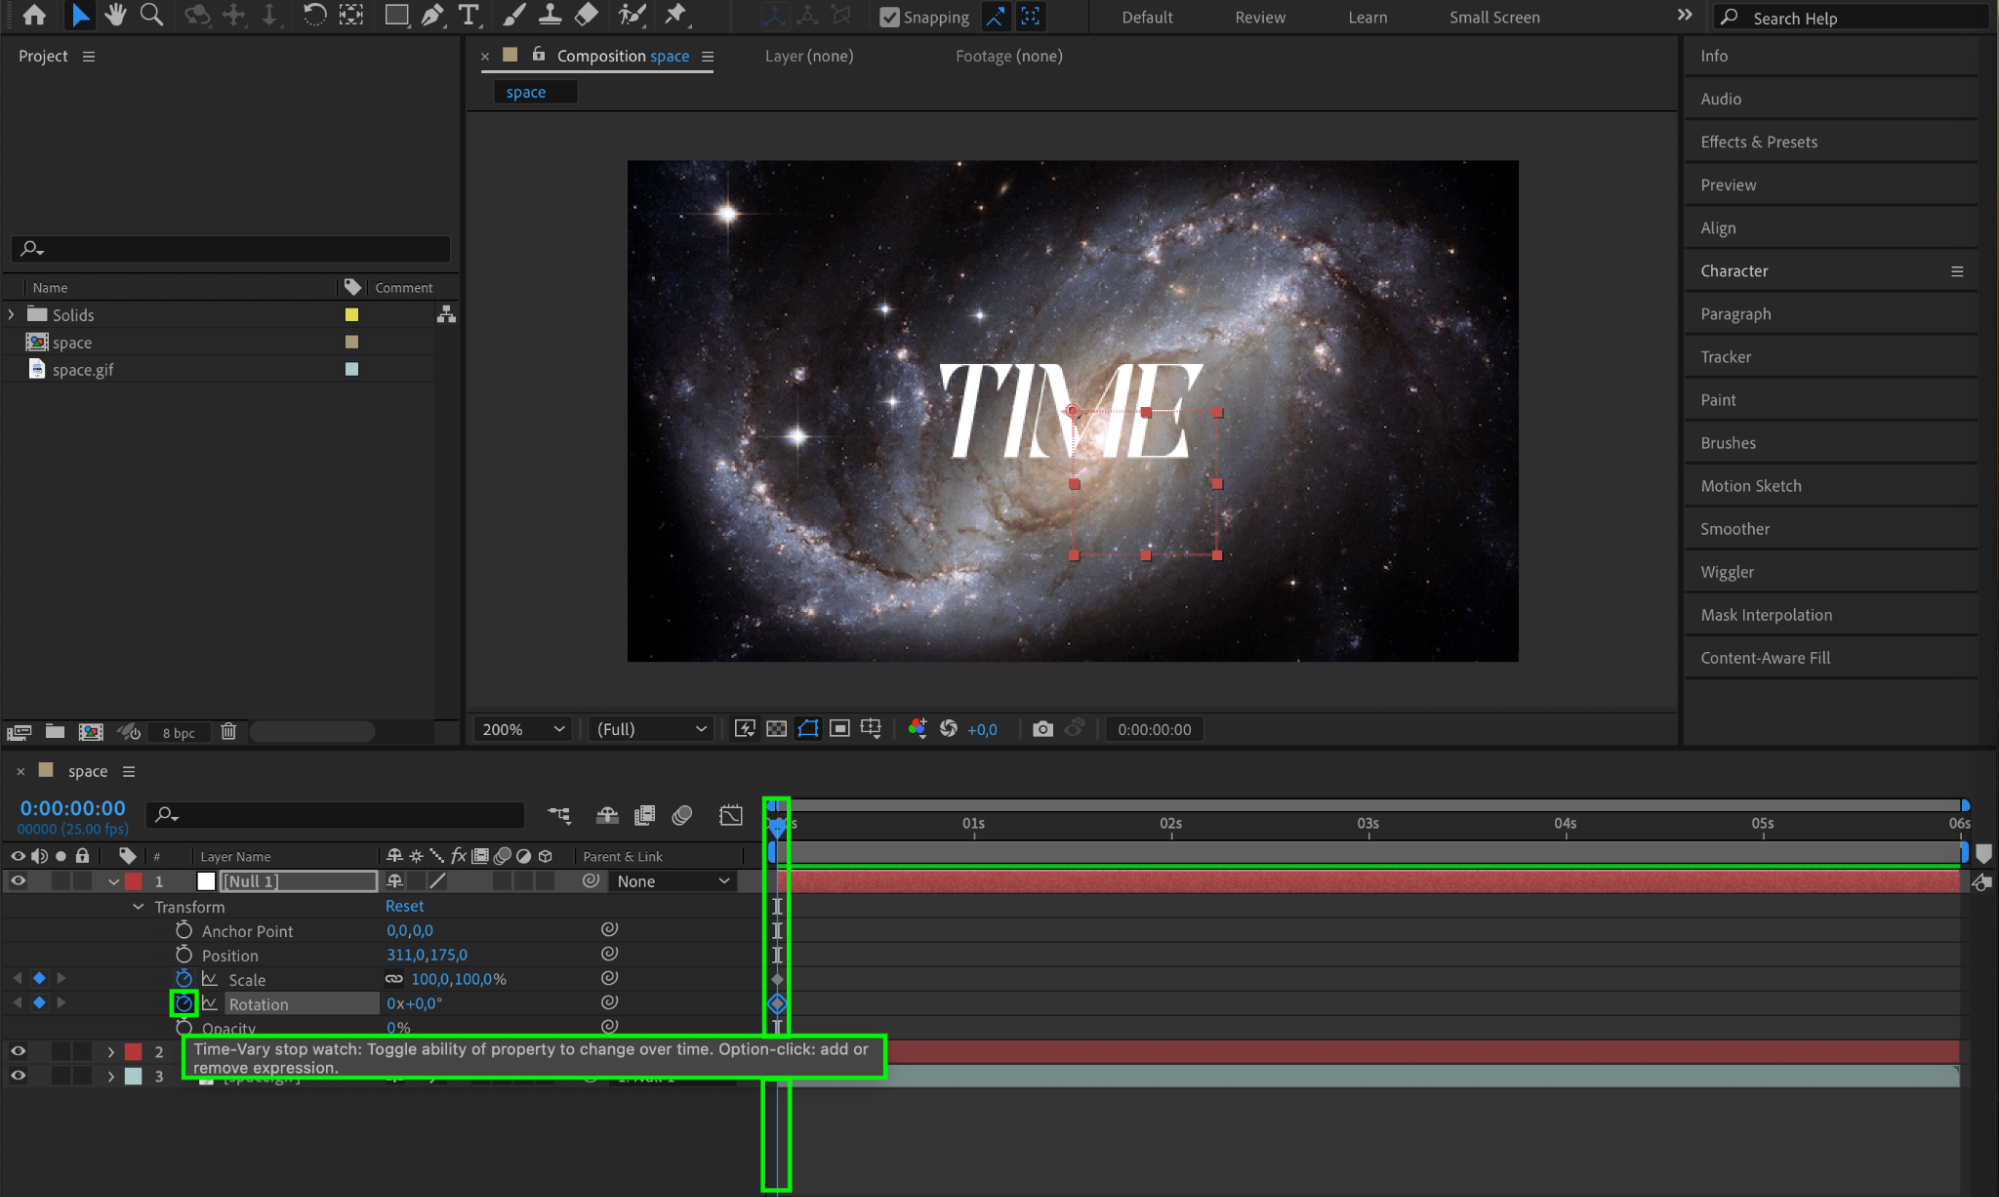
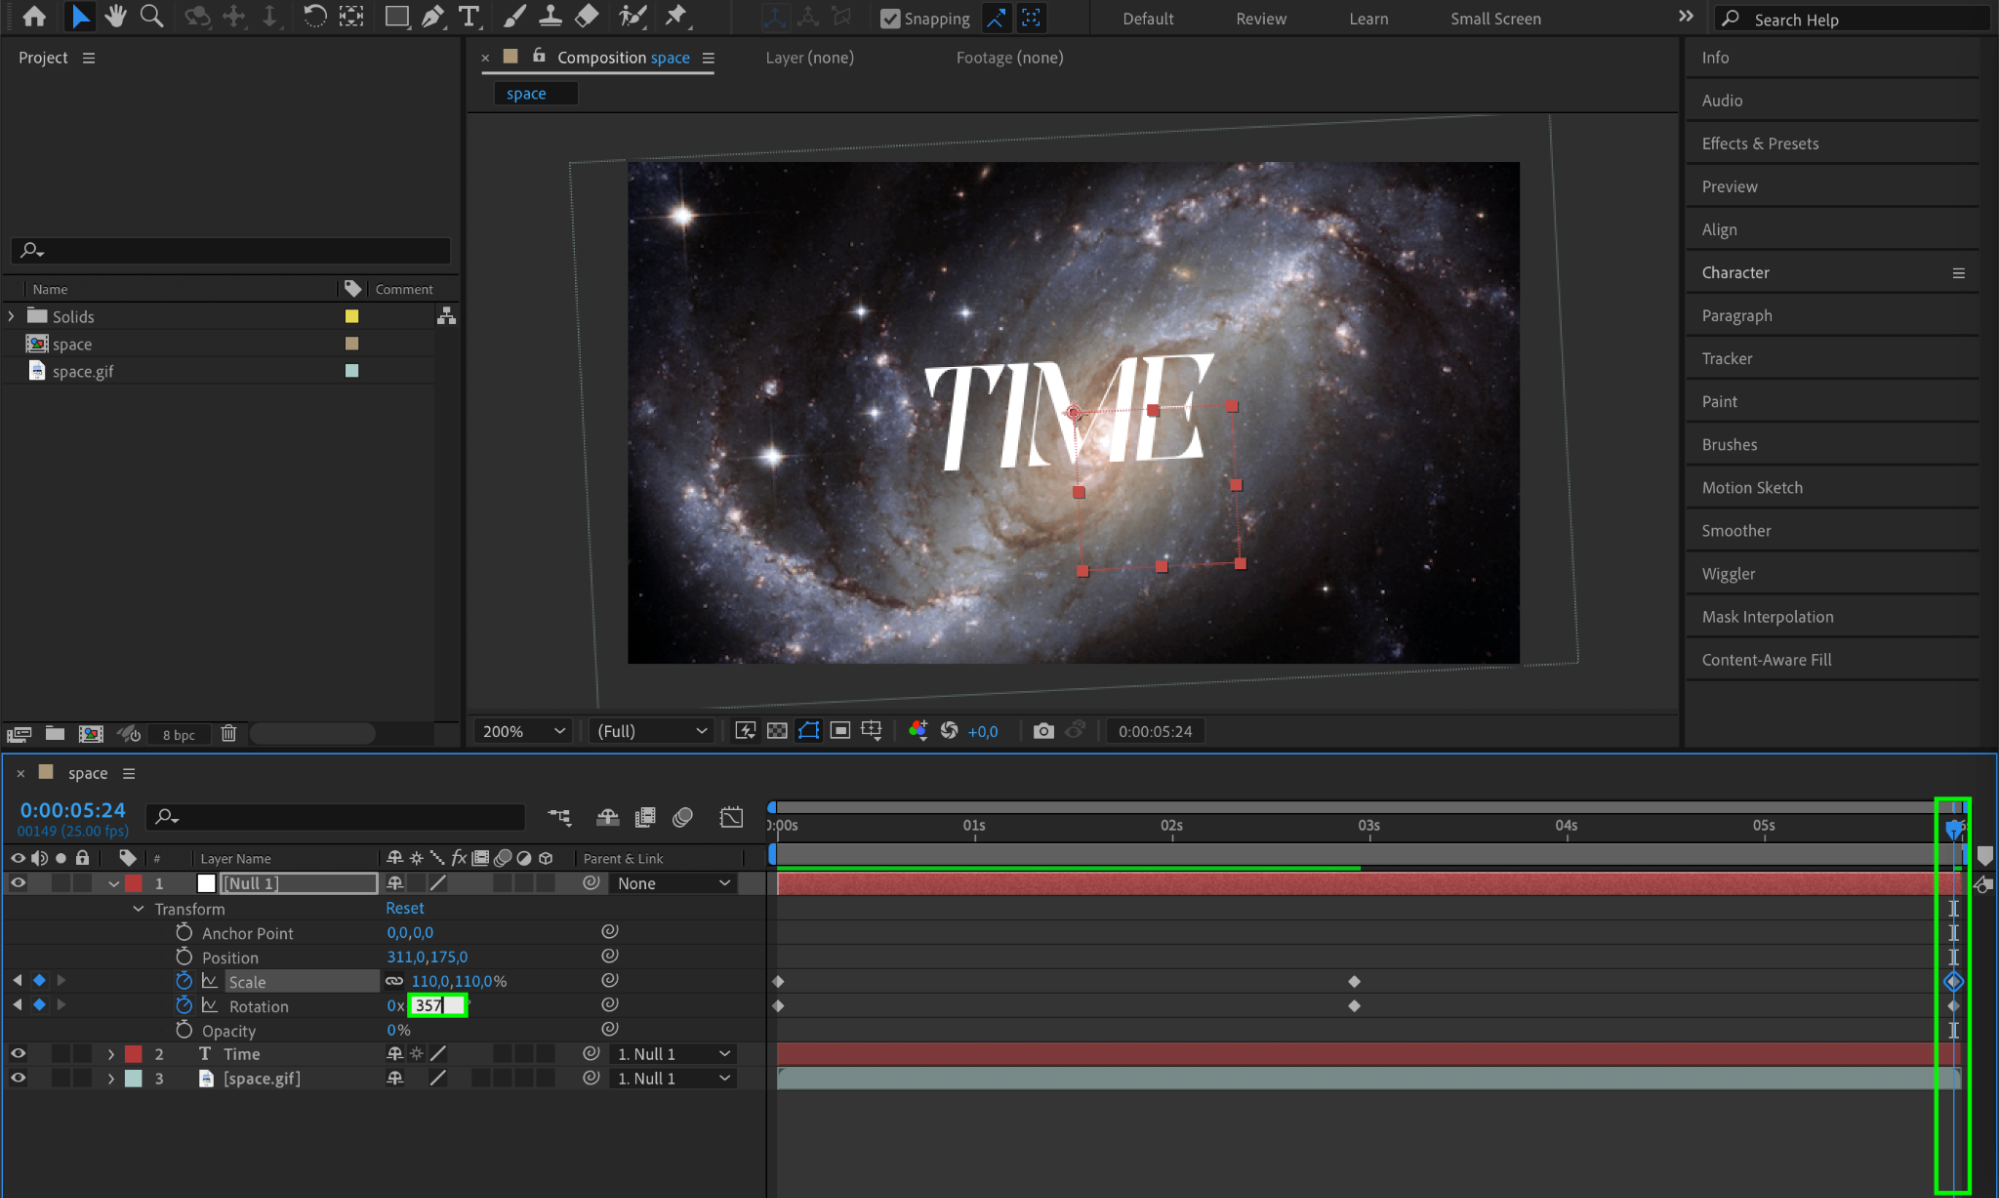
Step 4: Refine Your Animation
Once the main animation is in place, fine-tune the details. Use the graph editor to polish the timing and easing of your animations, giving your GIF a smoother and more professional look. Adjust the speed and flow of your animation to ensure it runs seamlessly.


 Step 5: Apply Adjustment Layers
Create an adjustment layer and place it above all your other layers. Apply effects from the Effects & Presets panel to this adjustment layer. This will ensure that all the layers in your composition are affected by the applied effects, allowing for consistent and cohesive styling.
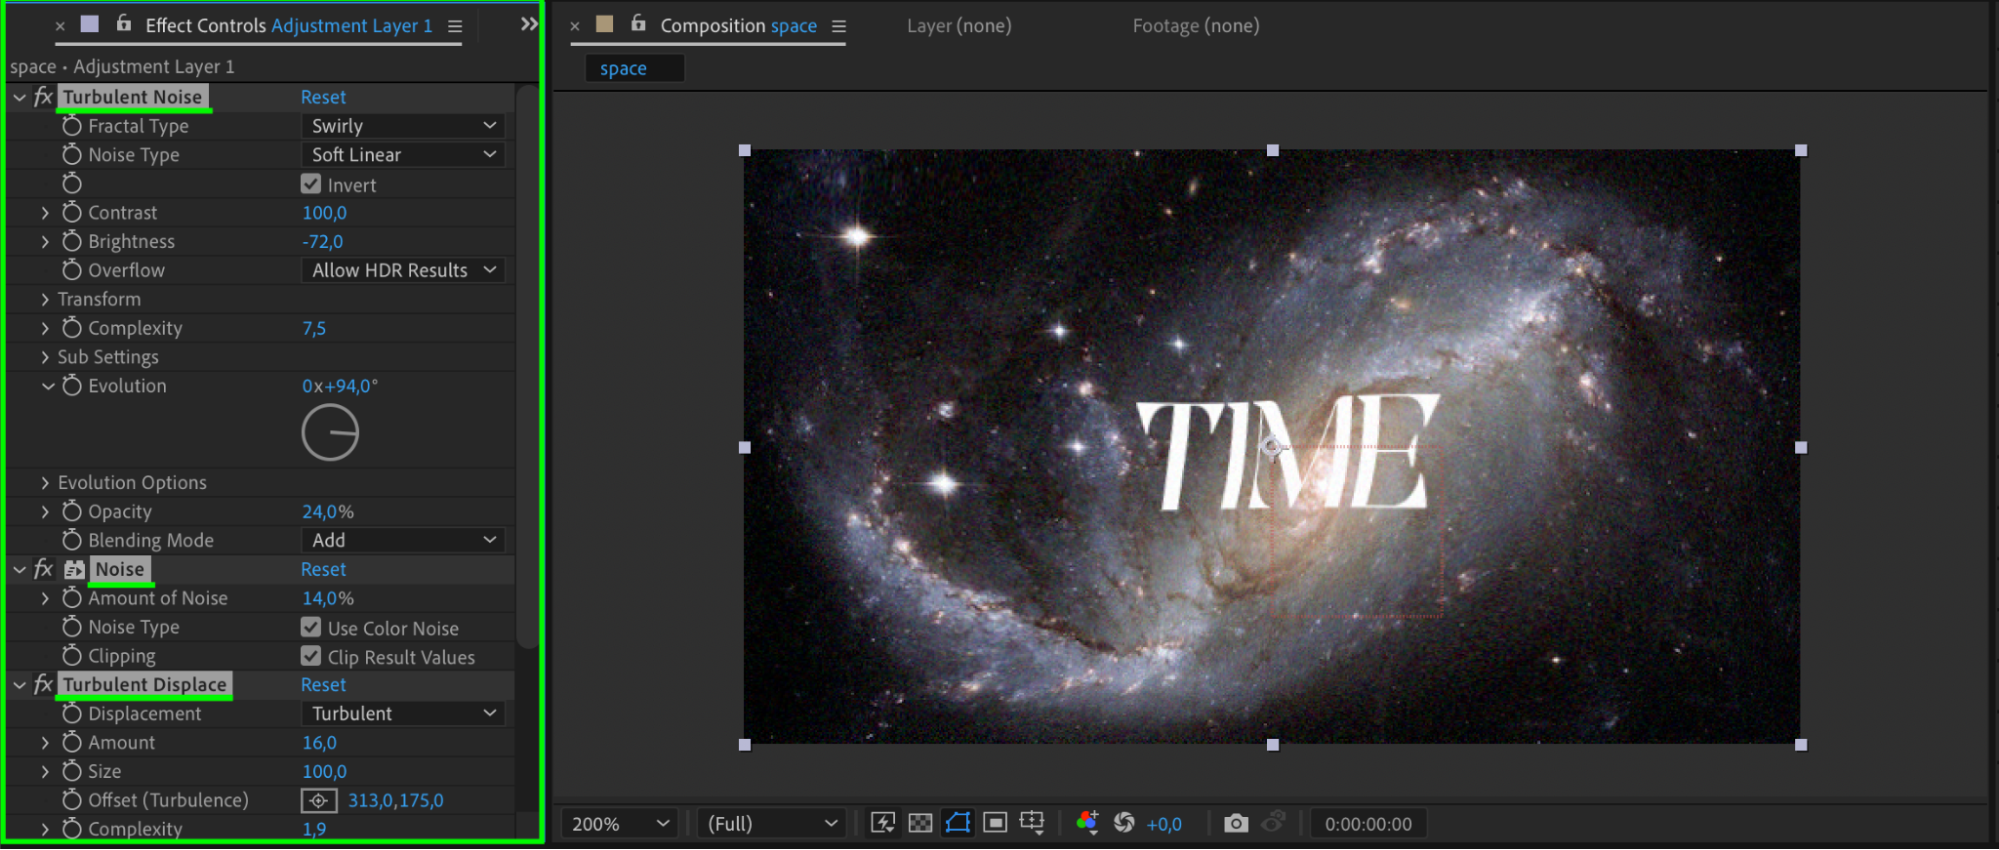 Step 6: Shorten Your GIF (Optional)
Get 10% off when you subscribe to our newsletter

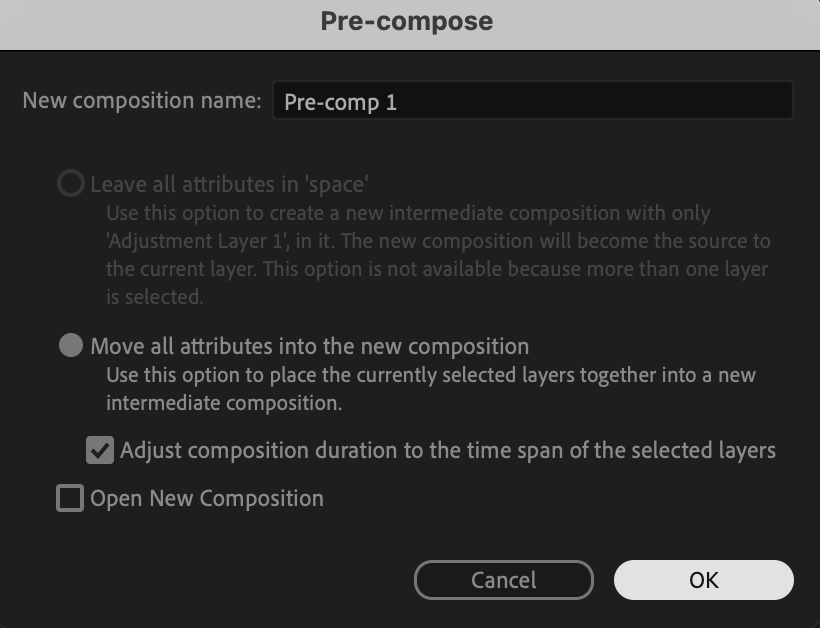
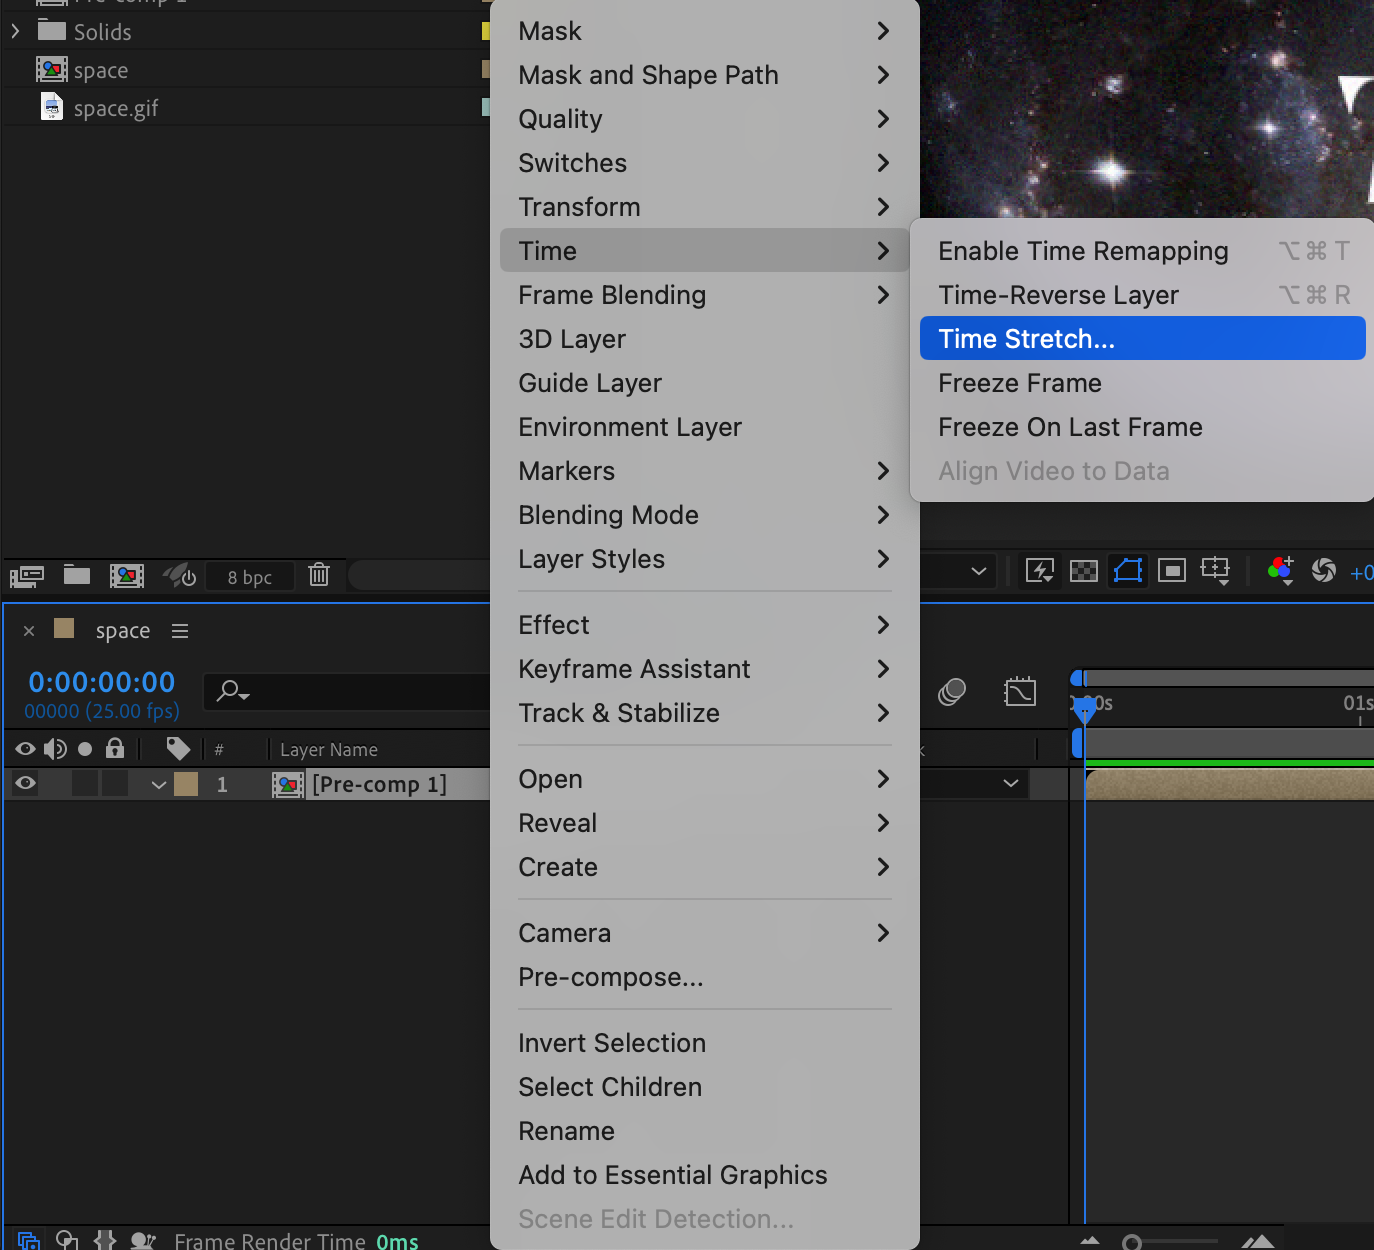
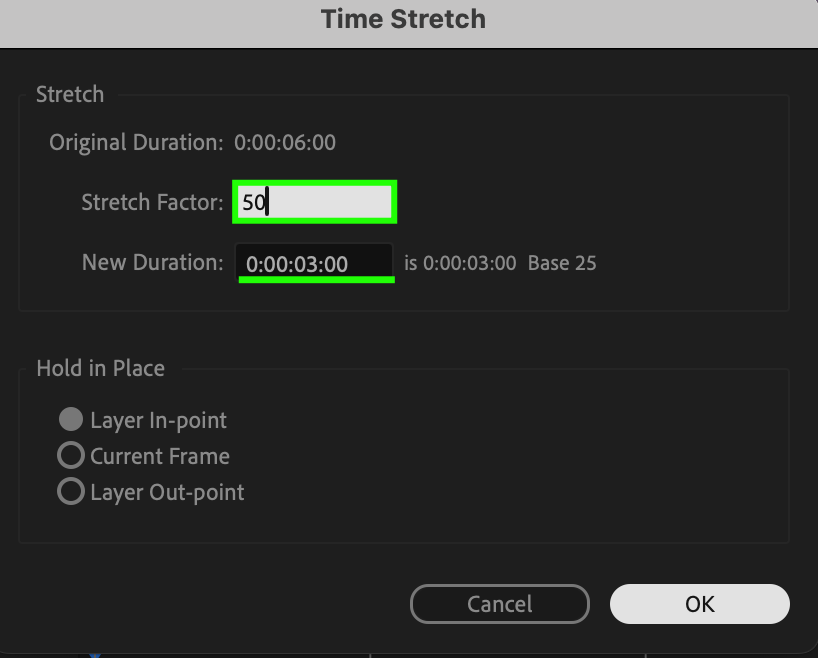
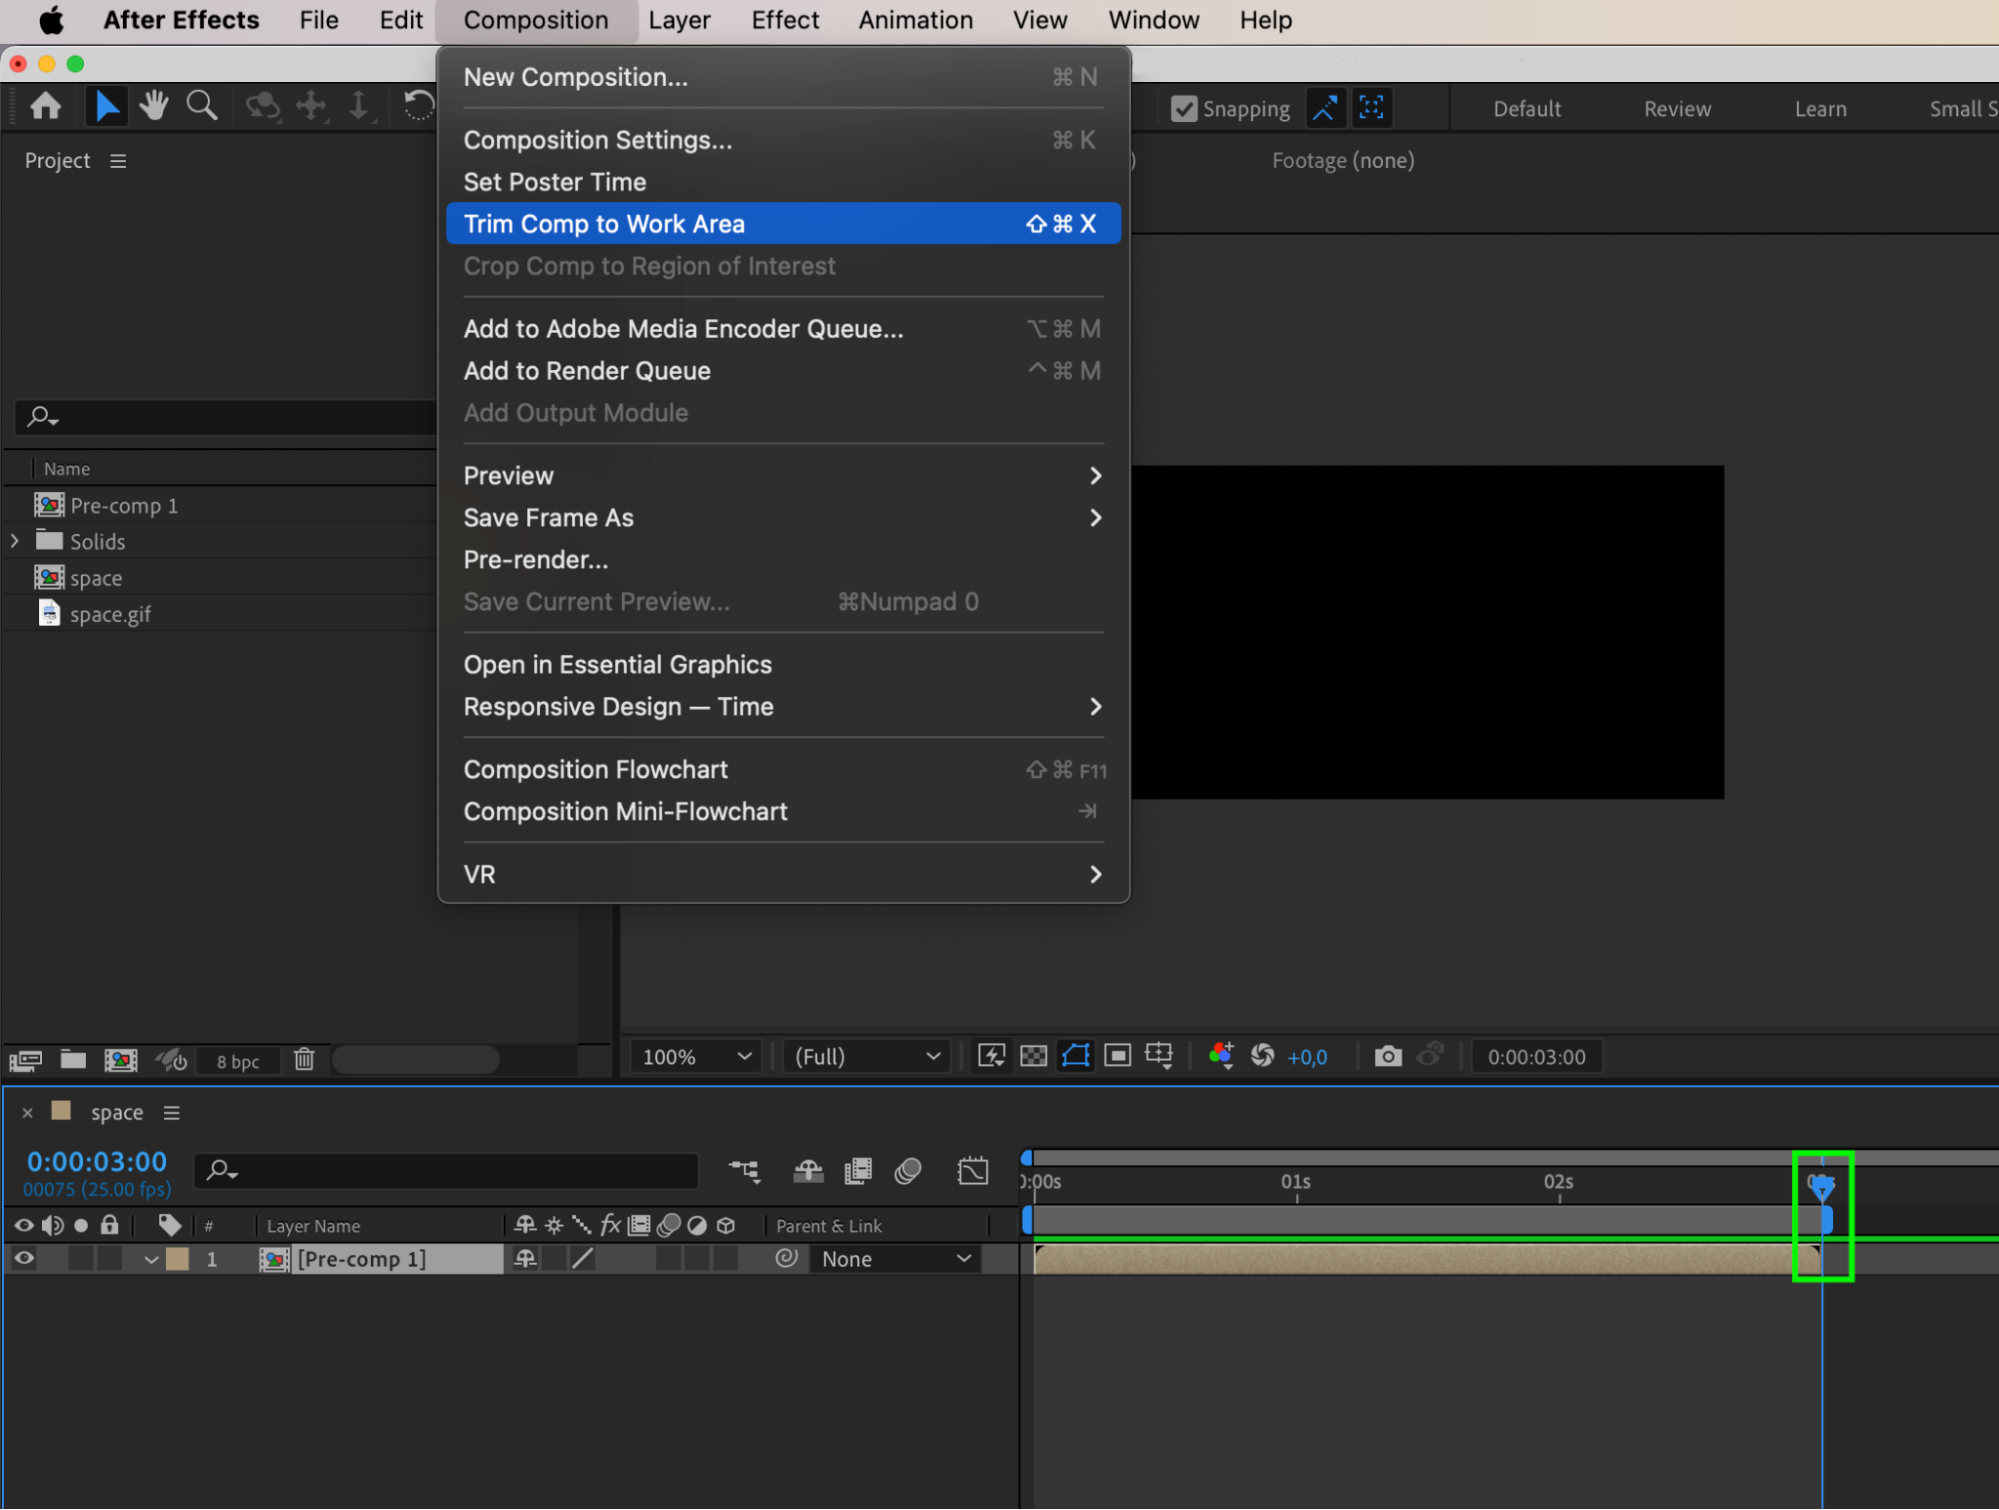
If you want to make your GIF shorter, select all the layers and right-click to choose Pre-compose. After pre-composing, right-click the pre-comp layer and choose Time > Time Stretch. Enter a new stretch factor value and click OK. Adjust the work area end slider and navigate to Composition > Crop Comp to Work Area to trim the composition.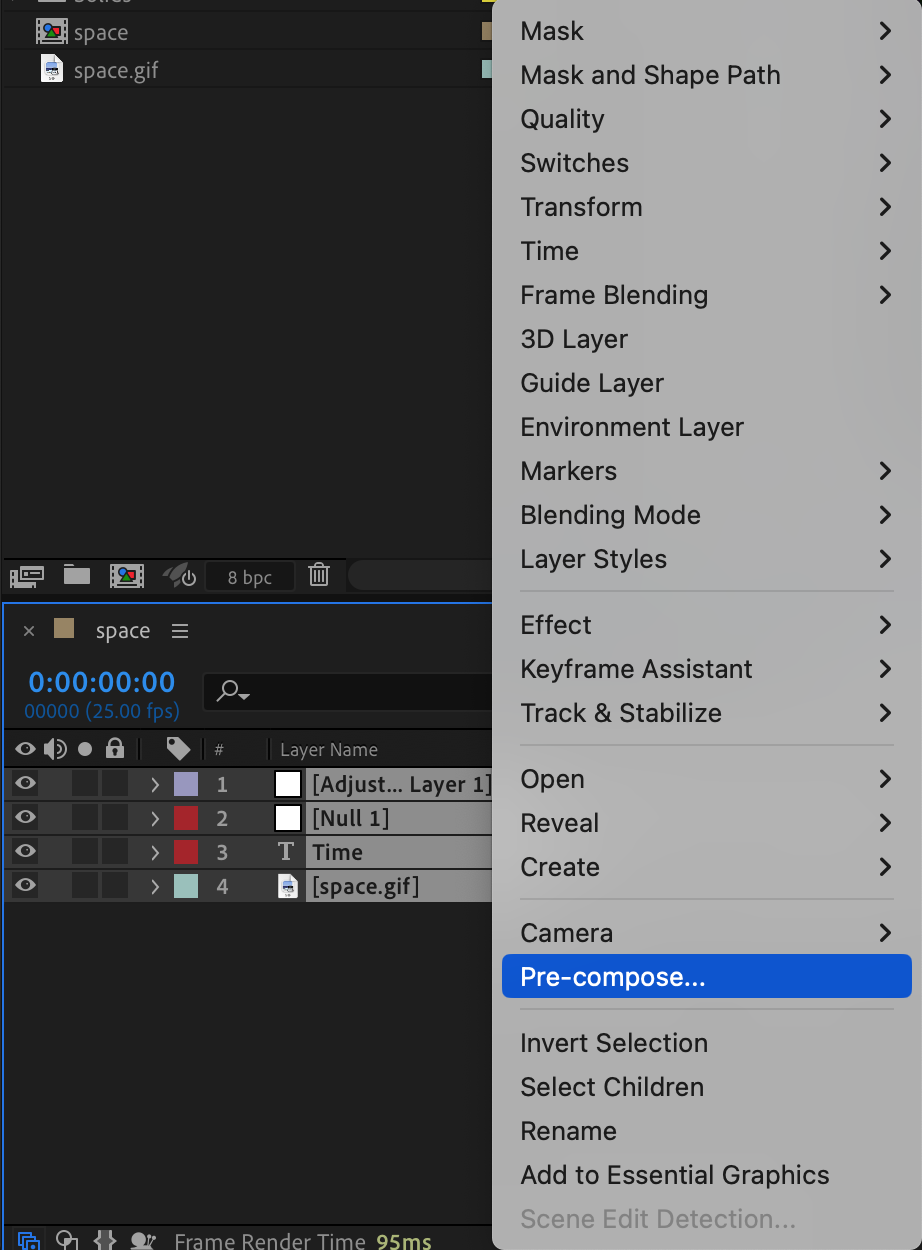

 Step 7: Preview and Export
Preview your GIF animation to ensure everything looks as intended. Use the preview panel or render a small section to check for errors or glitches. Make any necessary adjustments based on the preview. Once you’re satisfied with the animation, navigate to the export settings.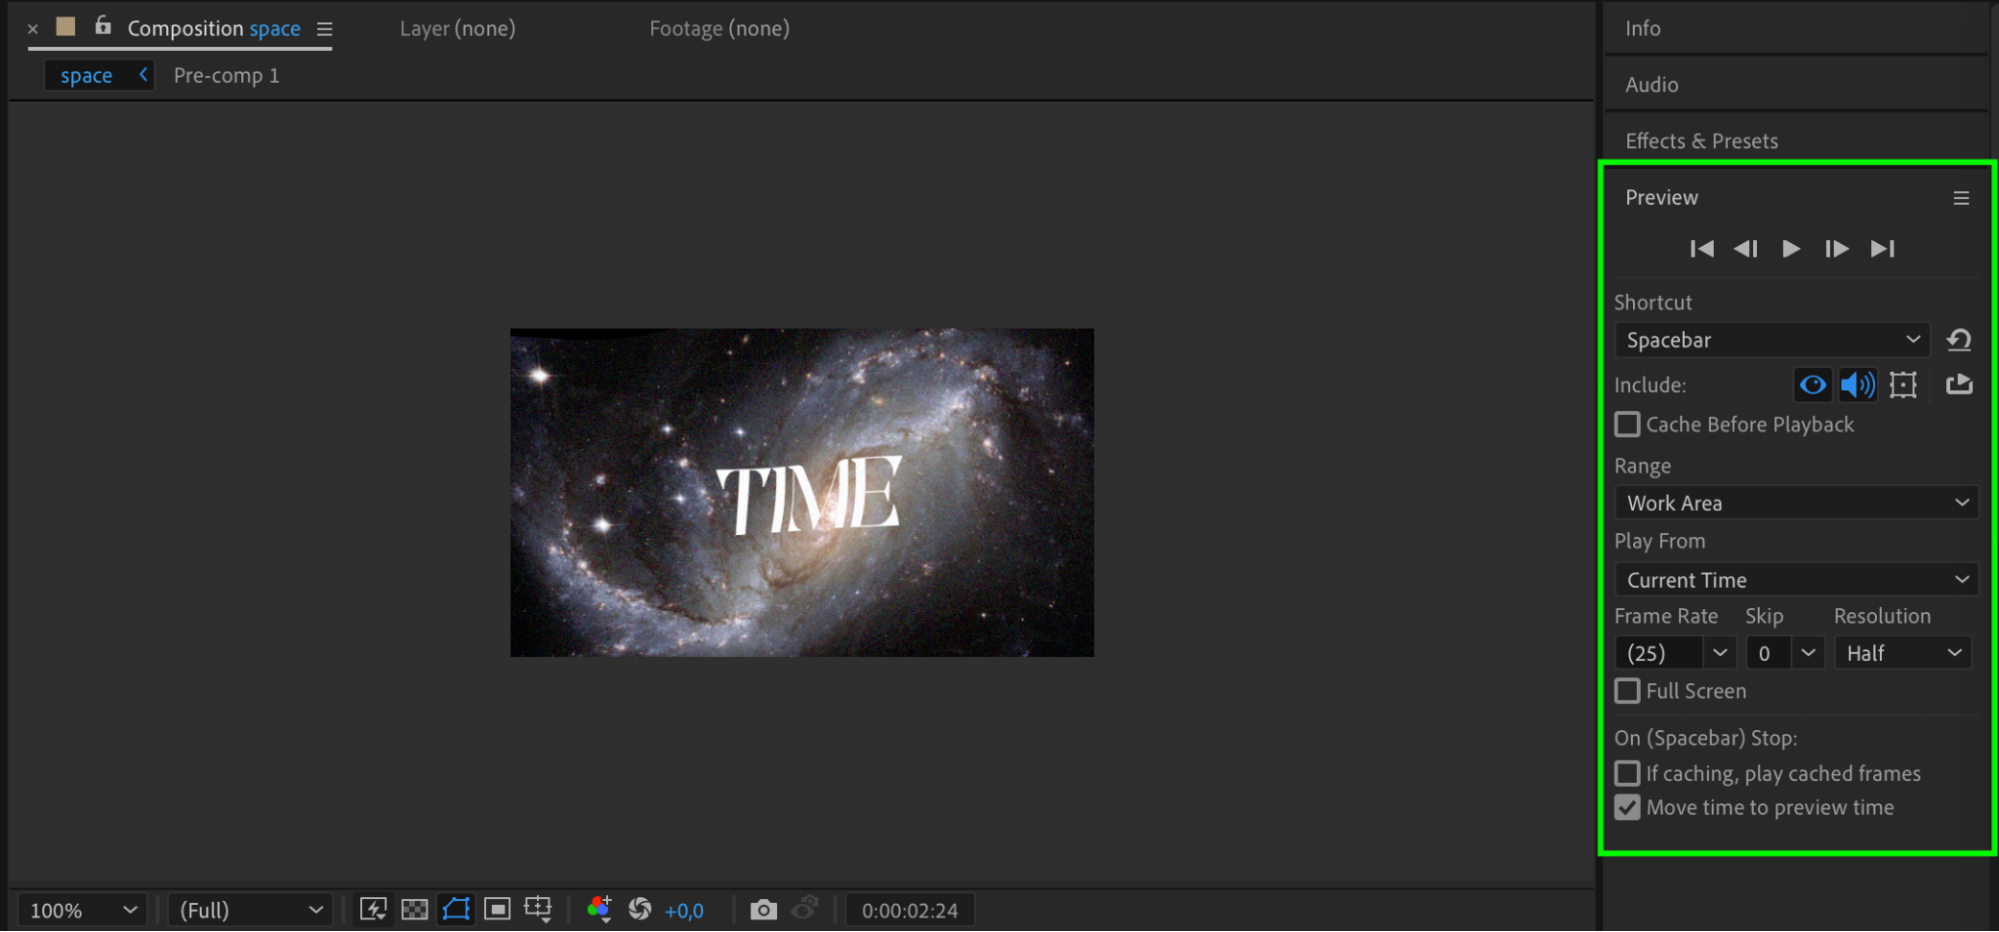 Step 8: Export as GIF
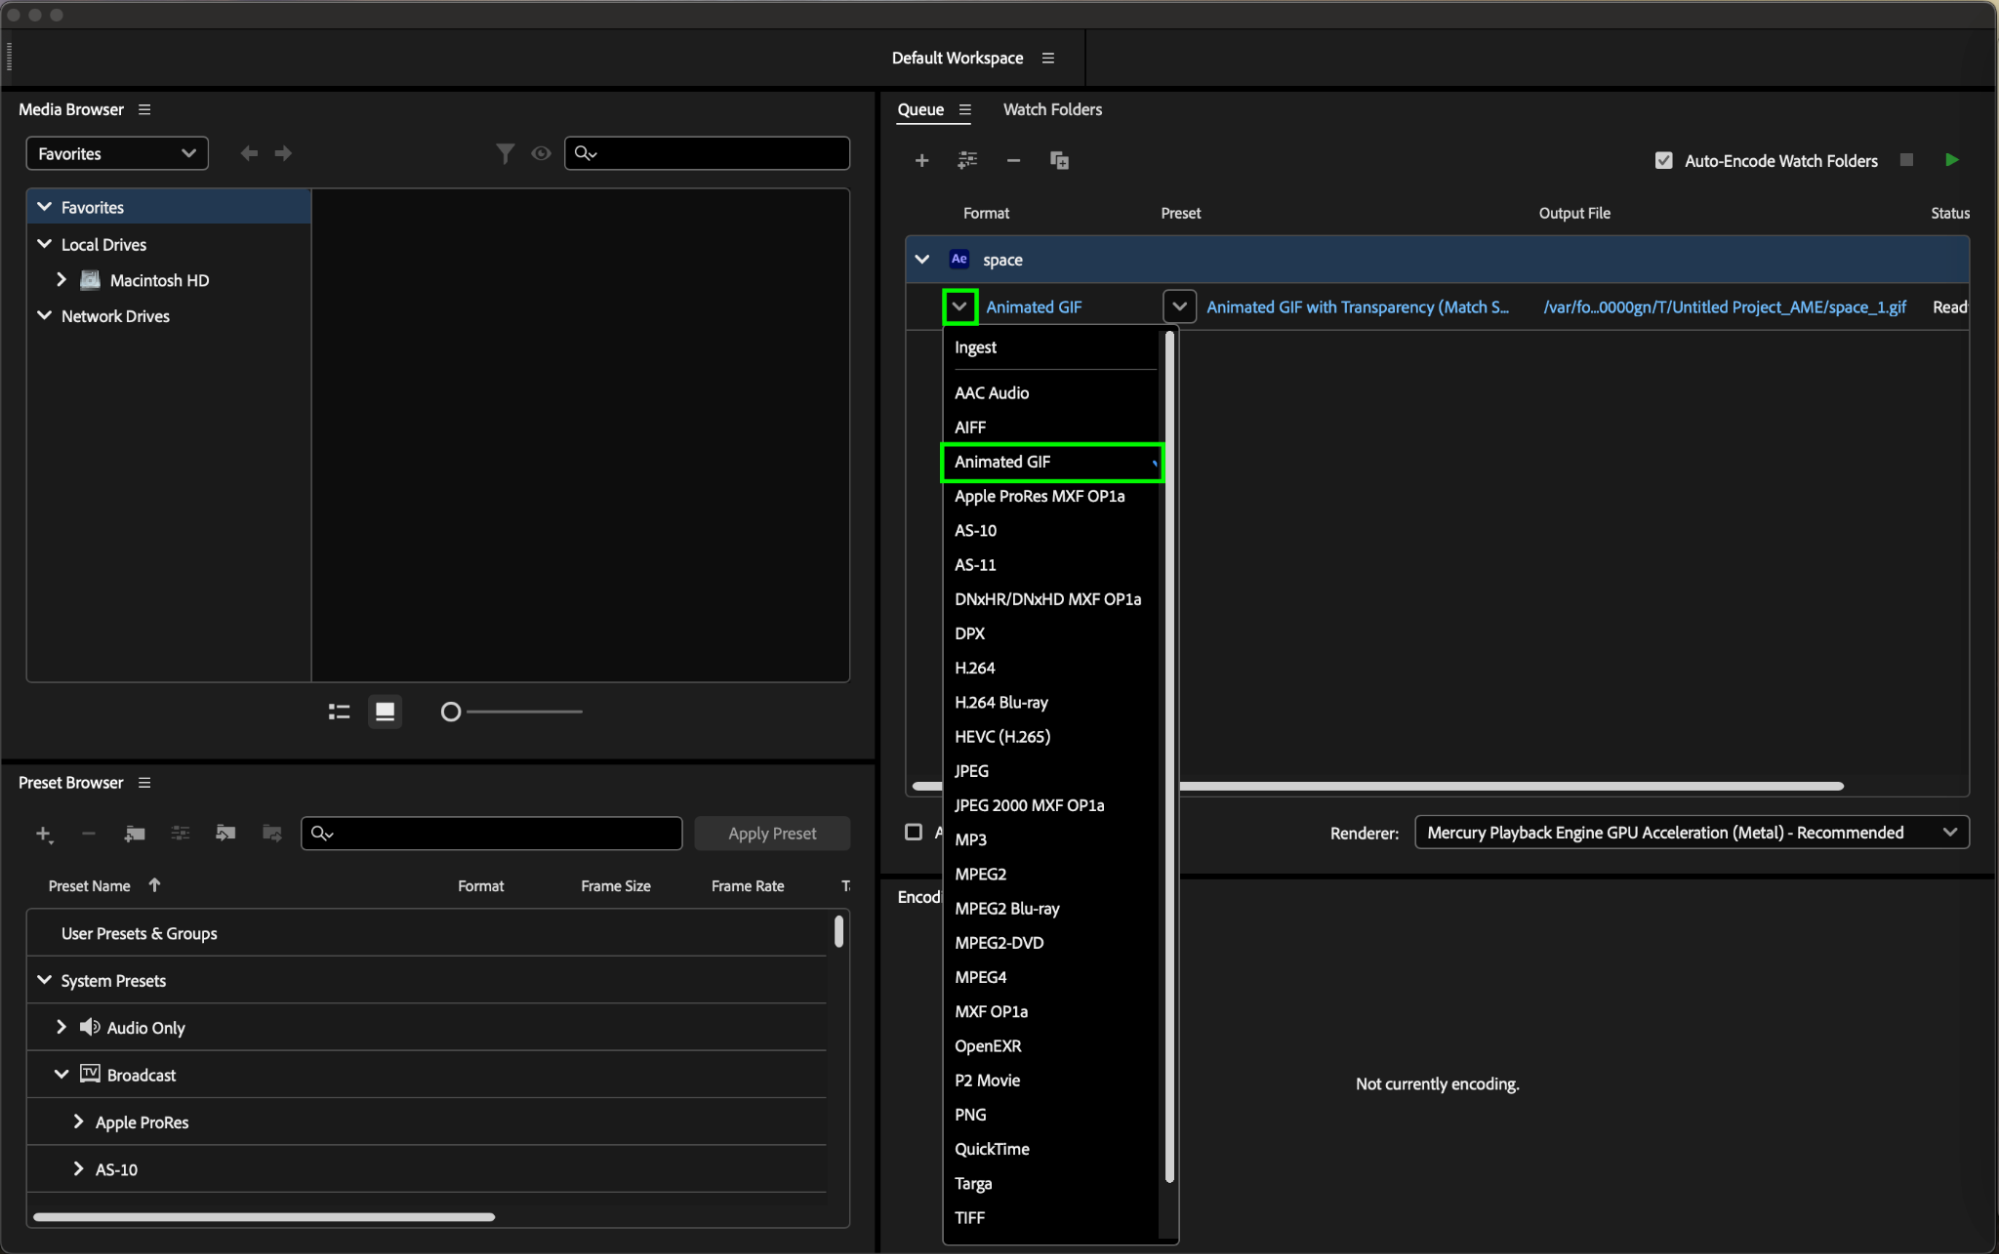
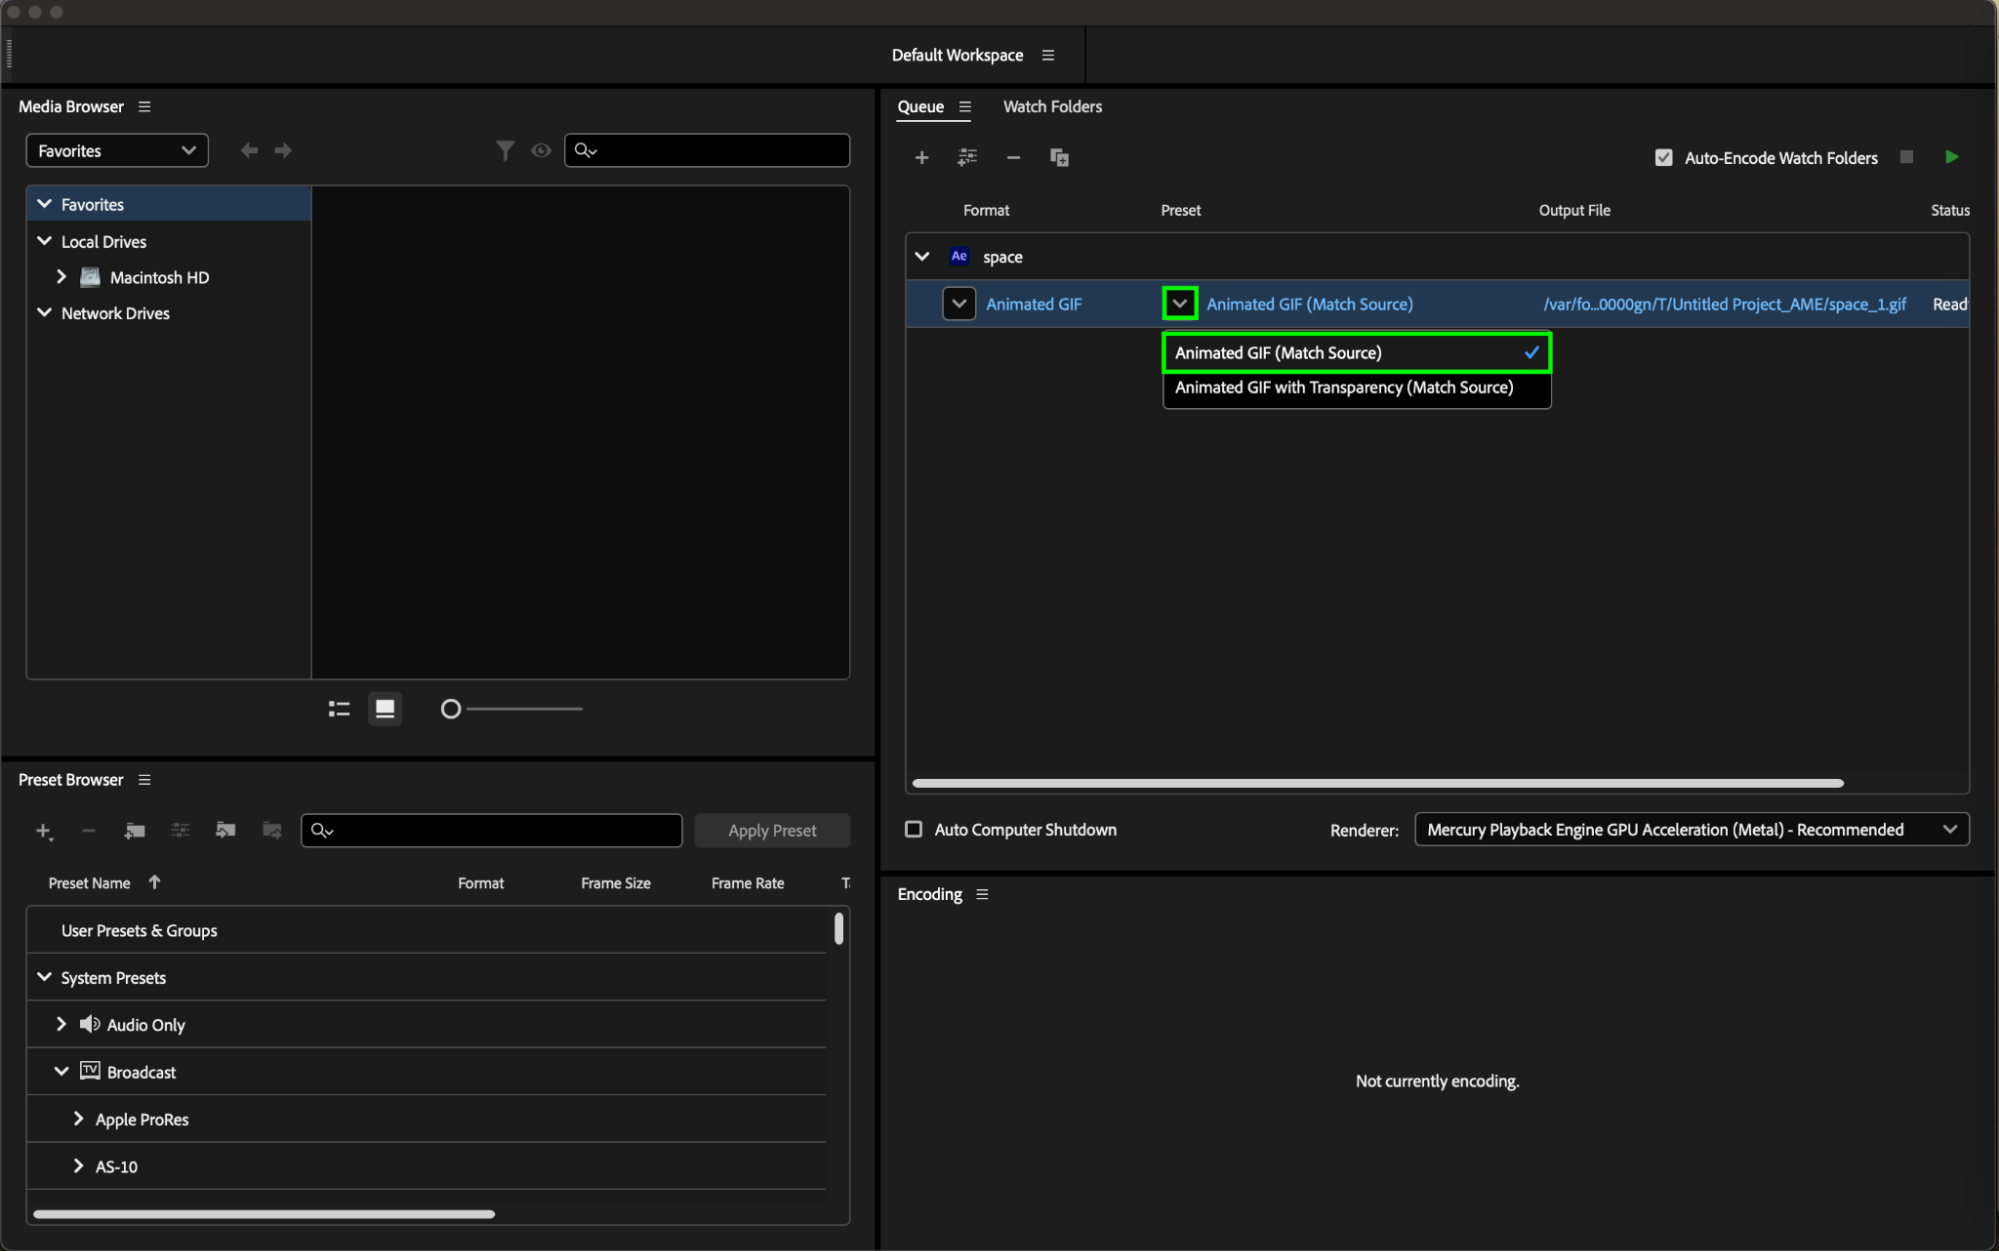
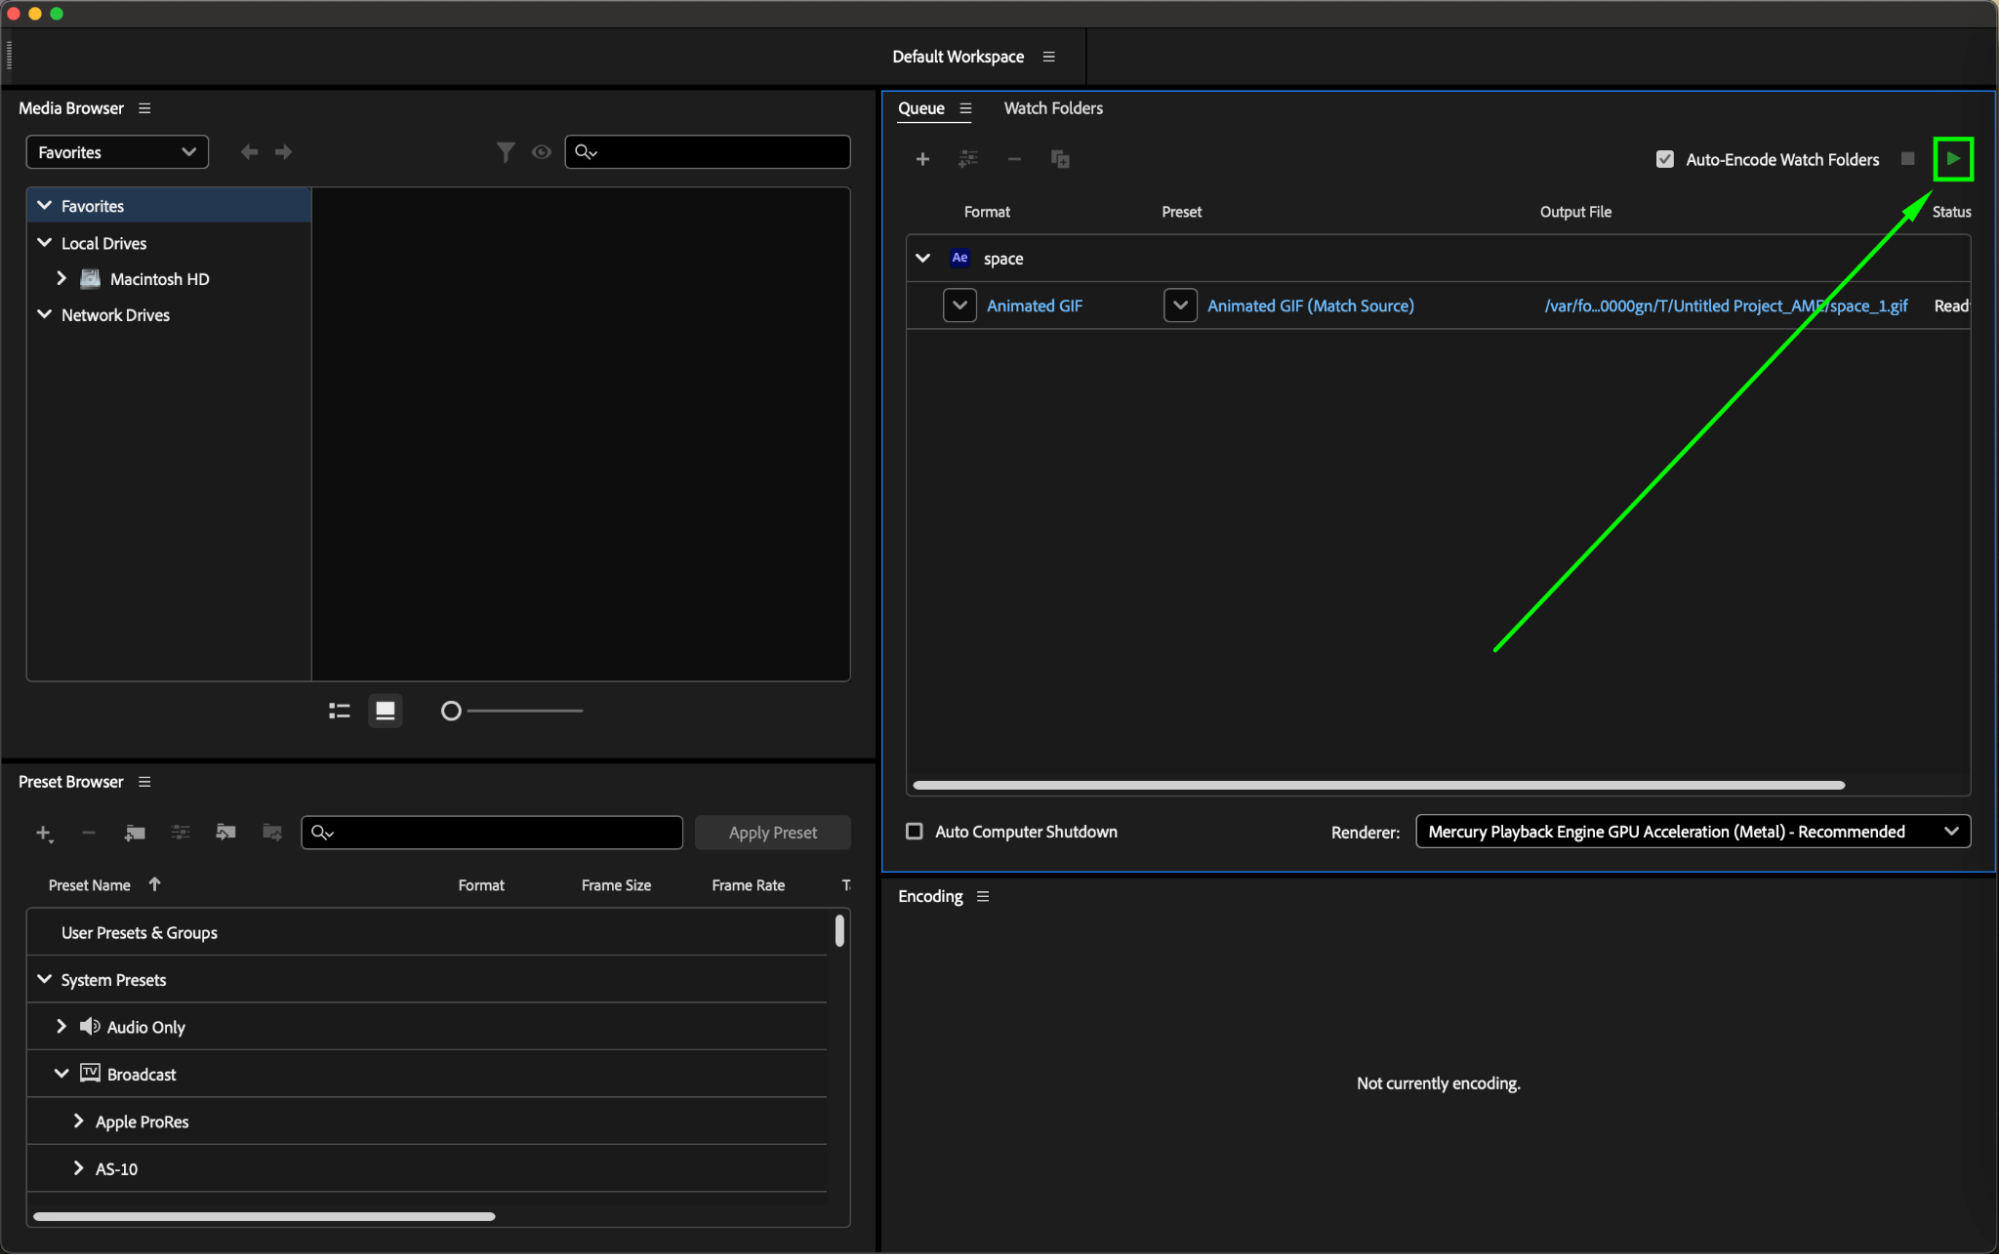
To export your animation as a GIF, select the composition in the project panel and go to Composition > Add to Adobe Media Encoder Queue. In Adobe Media Encoder, choose the correct format and preset for GIF. Press the Start Queue (play) button to begin the rendering process.
 Conclusion
Get 10% off when you subscribe to our newsletter

Congratulations! You have successfully created an animated GIF in After Effects. Share your creation on social media platforms, or use it to enhance designs, presentations, or websites. With endless possibilities, After Effects allows you to push the boundaries of creativity and create captivating animated GIFs.


