A Step-by-Step Guide to Adding a Shake Effect to an Image in After Effects
Introduction – Create Dynamic Motion with Shake Effects
Adding a shaking effect to an image in After Effects can bring energy, intensity, or drama to your projects. Whether you’re simulating an earthquake, adding an action-packed vibe, or emphasizing motion, this effect is simple to achieve. In this guide, we’ll show you how to create a realistic image shake using wiggle expressions and keyframes.
Get 10% off when you subscribe to our newsletter

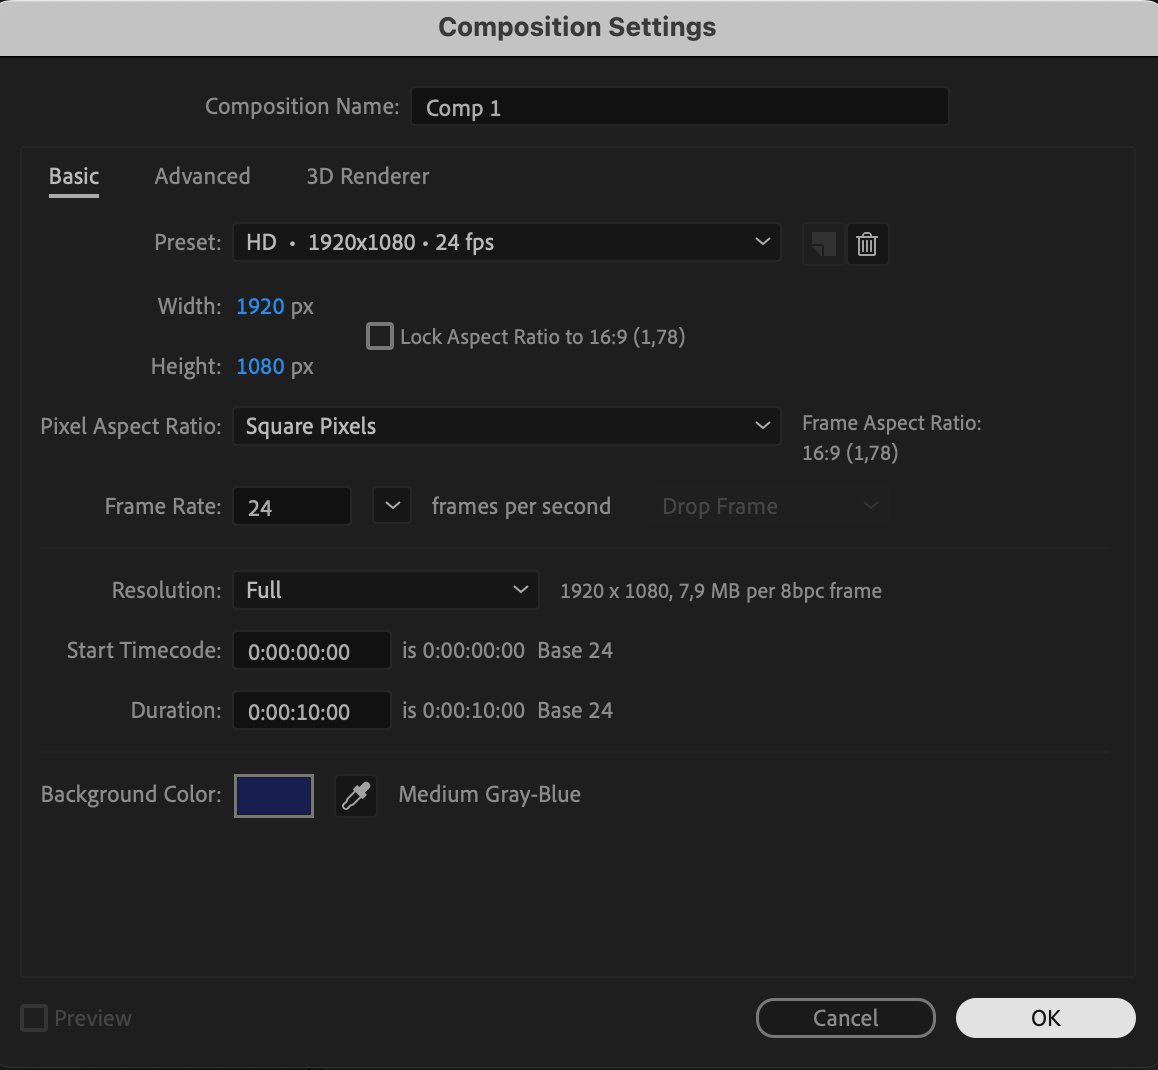
Step 1: Create a New Composition
Start by creating a new composition. Go to Composition > New Composition, set your desired resolution, frame rate, and duration, then click OK. This will be your workspace for creating the shake effect.
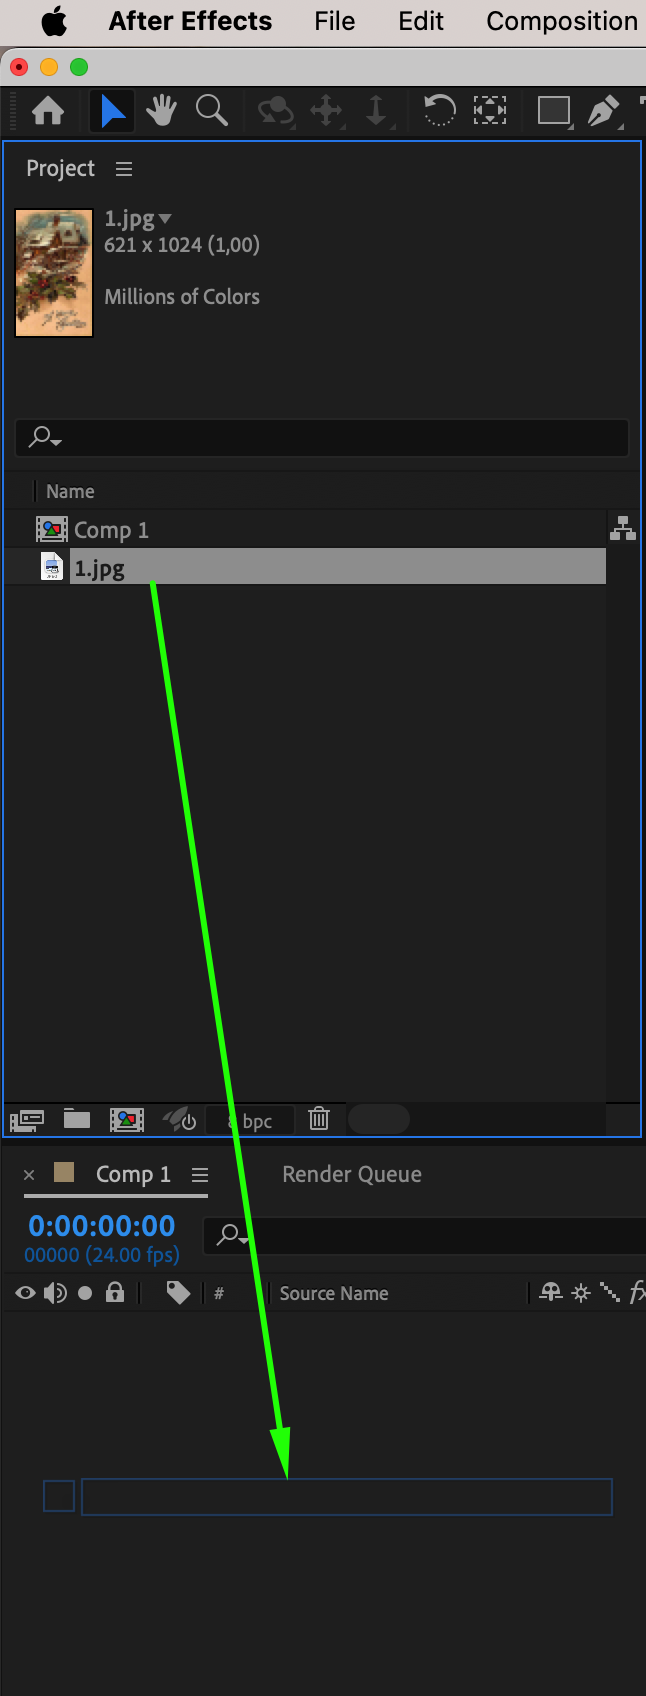
 Step 2: Import and Add Your Image
Get 10% off when you subscribe to our newsletter
Import your image by going to File > Import > File, selecting the desired image, and clicking Open. Drag the image from the Project Panel onto the timeline to add it to your composition.

Step 3: Convert the Layer to 3D (Optional)
For more advanced shake effects, you can convert the image layer to 3D. Select the image layer in the timeline and click the 3D Layer checkbox (the cube icon). This allows you to shake the image on all three axes: X, Y, and Z.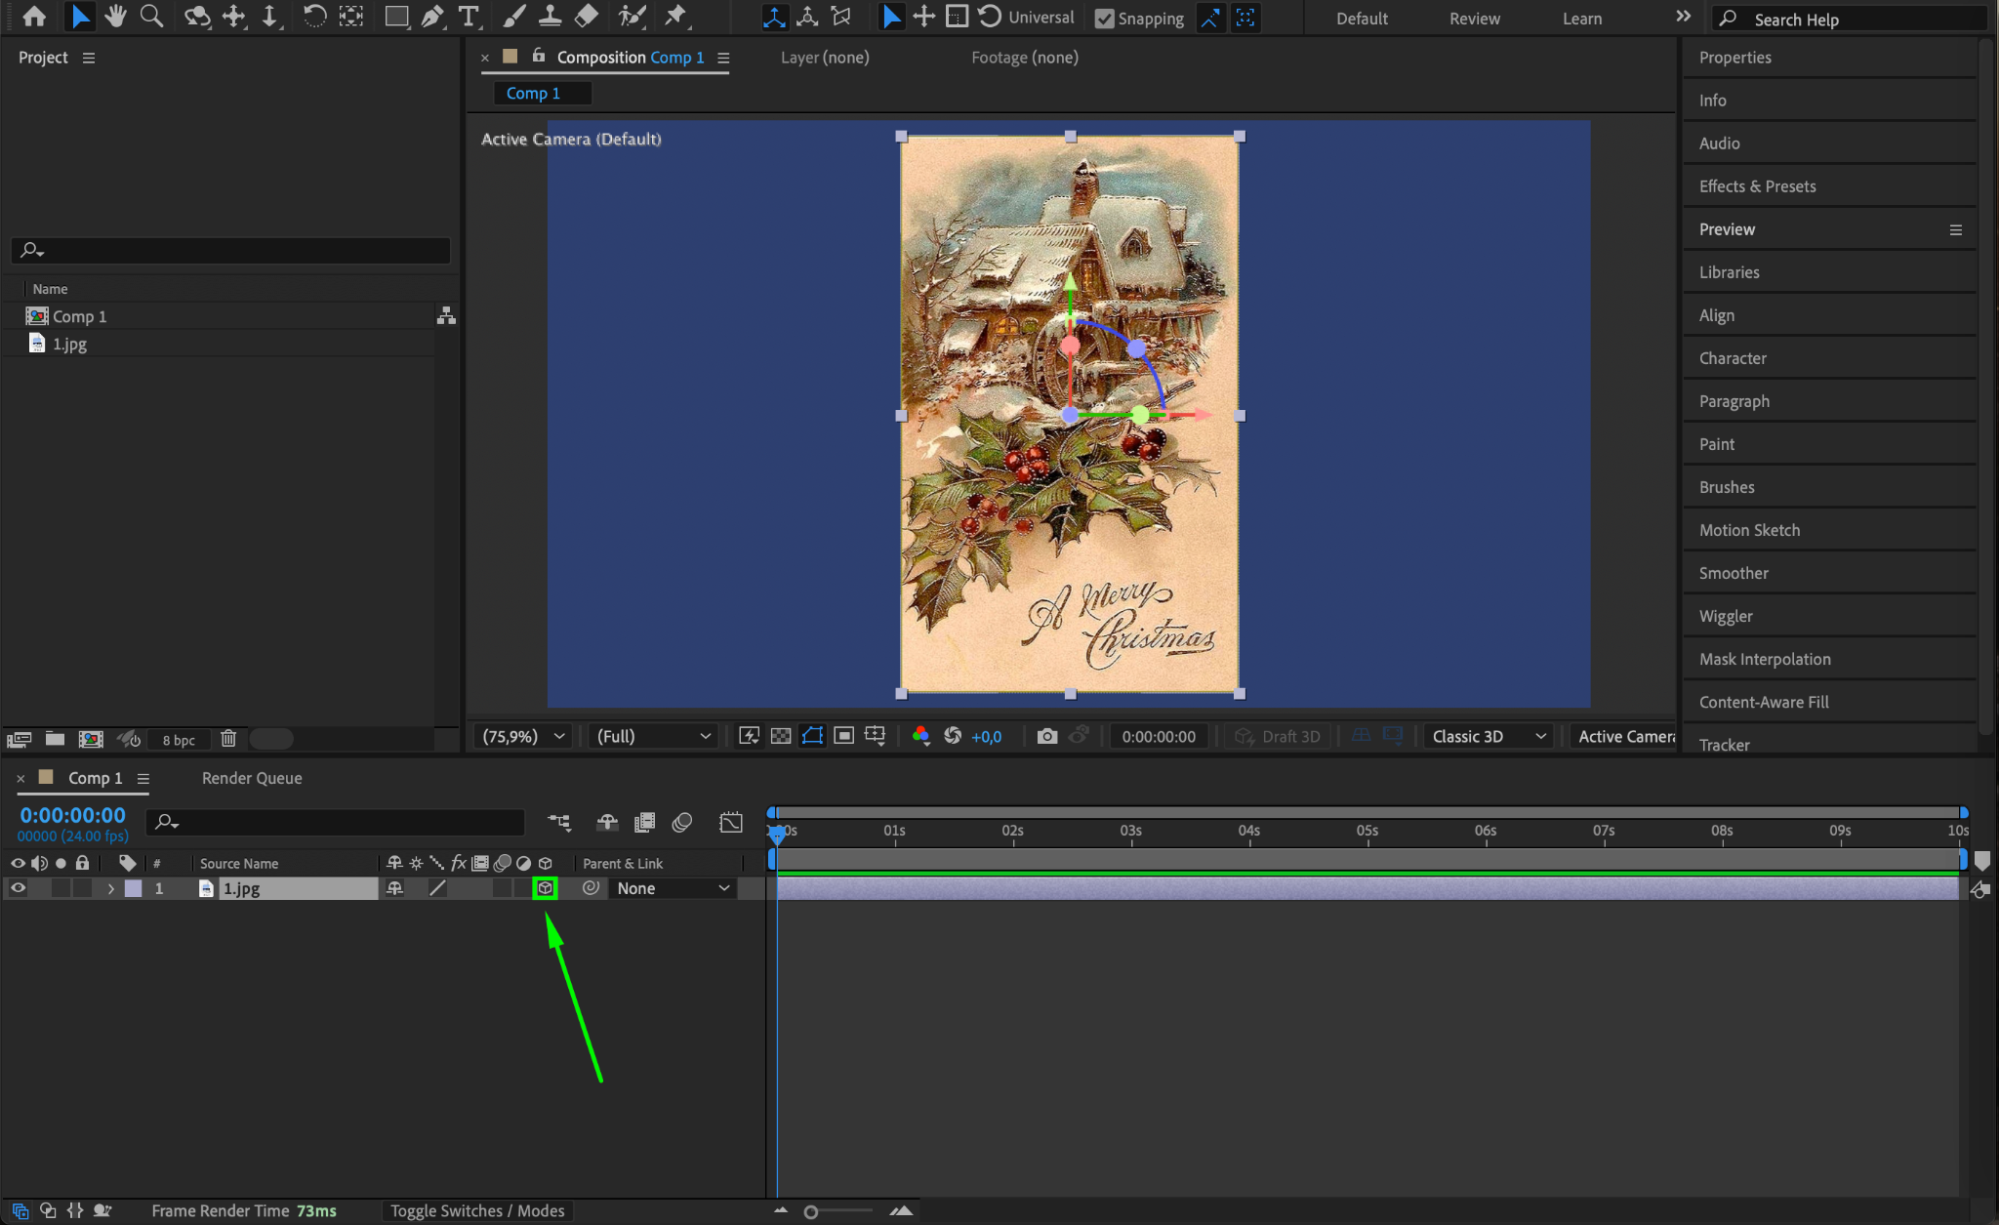
Get 10% off when you subscribe to our newsletter
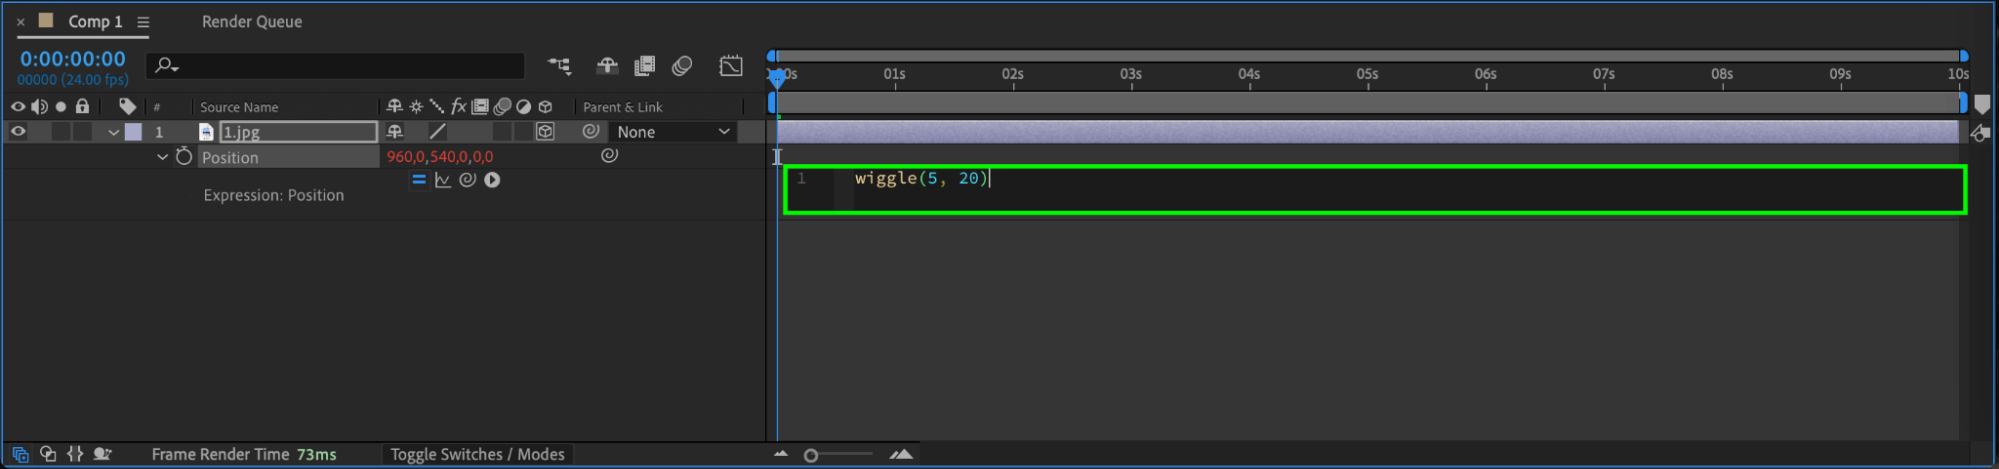
Step 4: Apply the Wiggle Expression
To create the shake effect, you’ll use the wiggle expression:
Select the image layer in the timeline.
Press “P” on your keyboard to reveal the Position property.
Hold Alt (Windows) / Option (Mac) and click on the stopwatch icon next to Position.
In the expression editor, type the following:
wiggle(5, 20)
The first number (5) represents the frequency of the shake (how many times per second). The second number (20) determines the amplitude (how far the image moves). Adjust these values to customize the intensity and speed of the shake.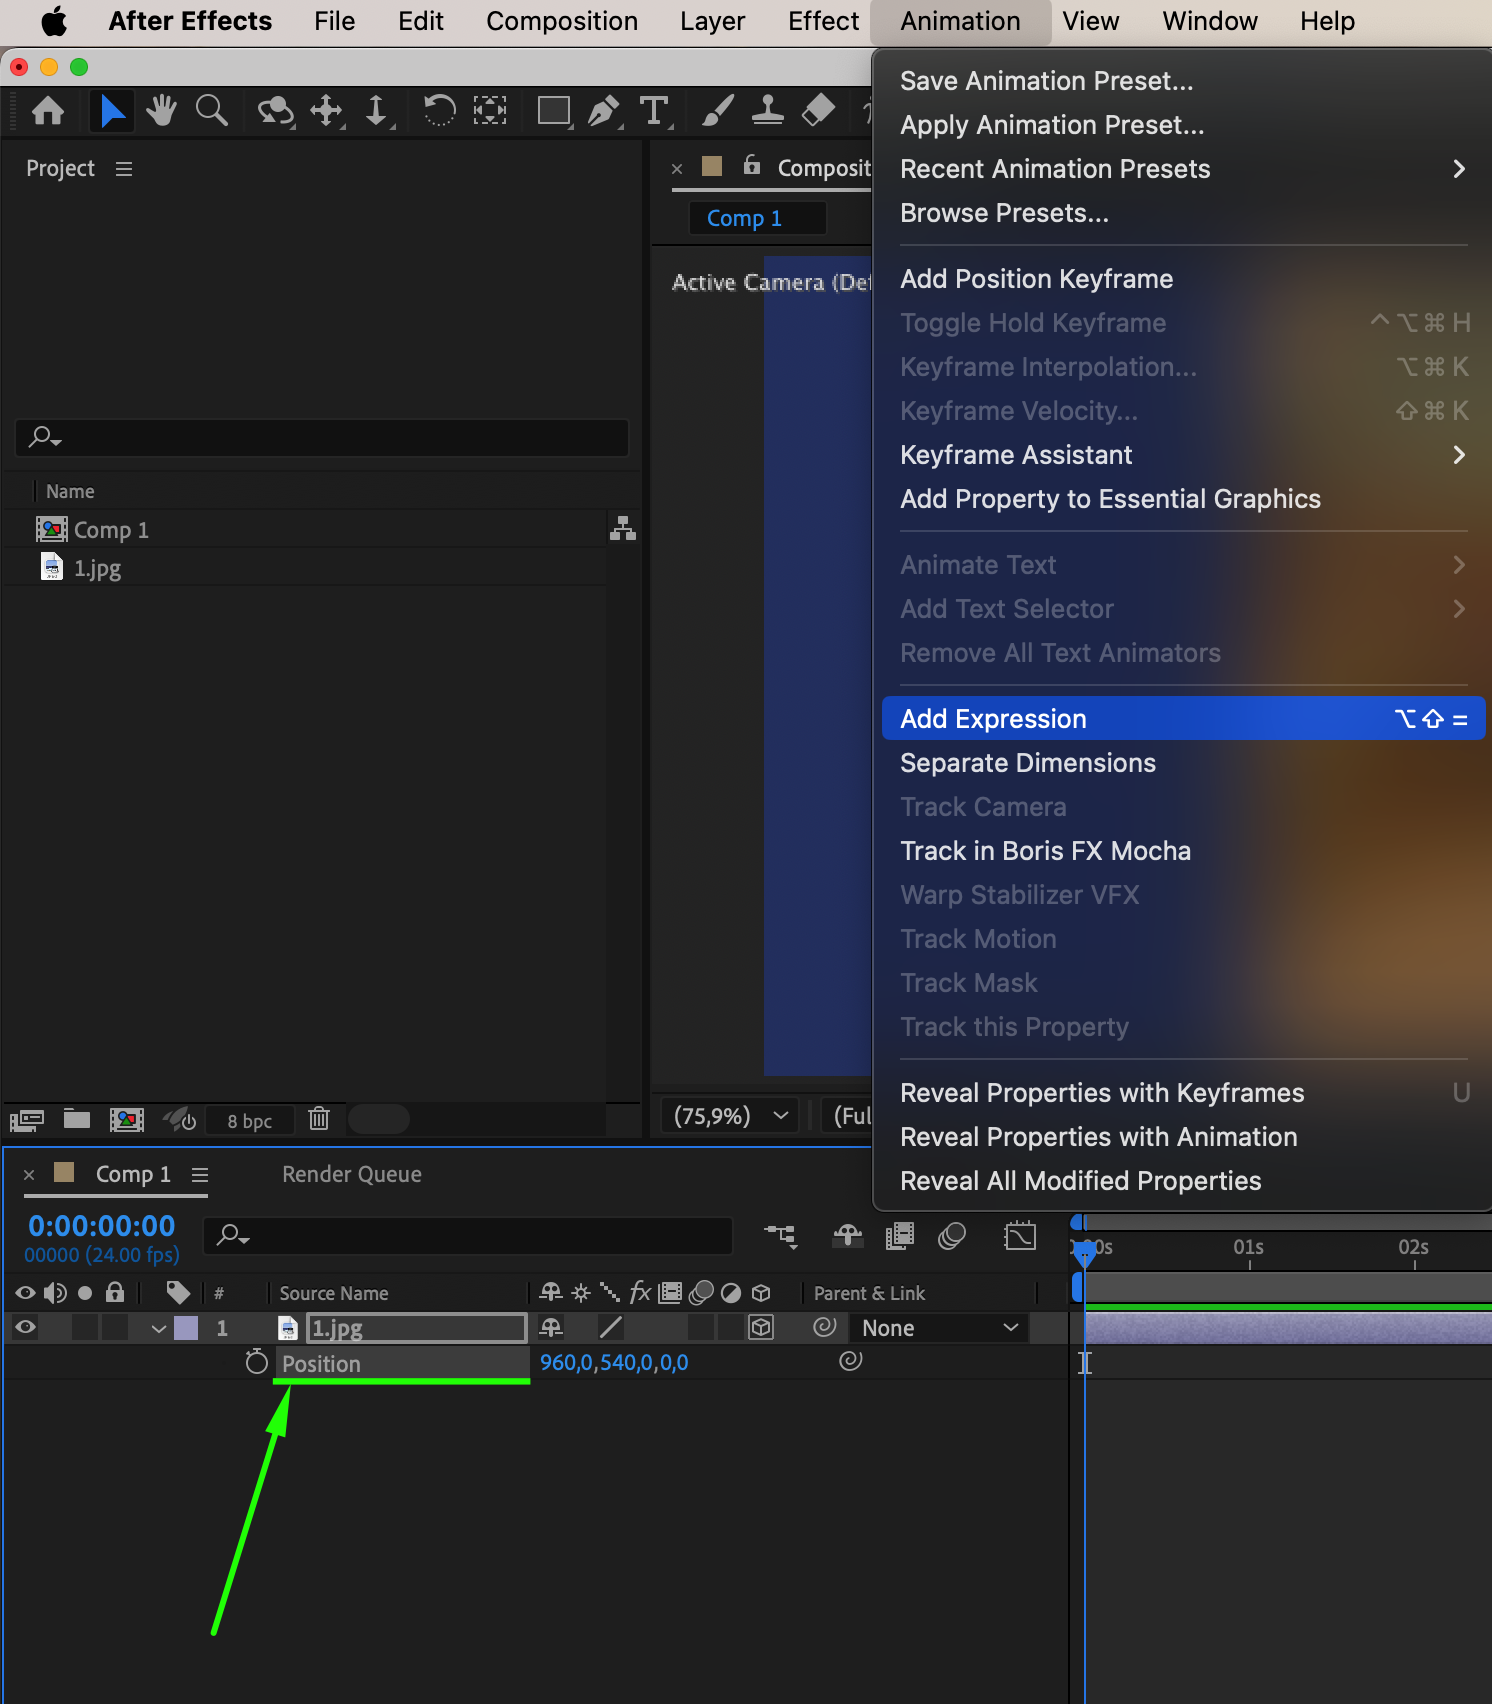
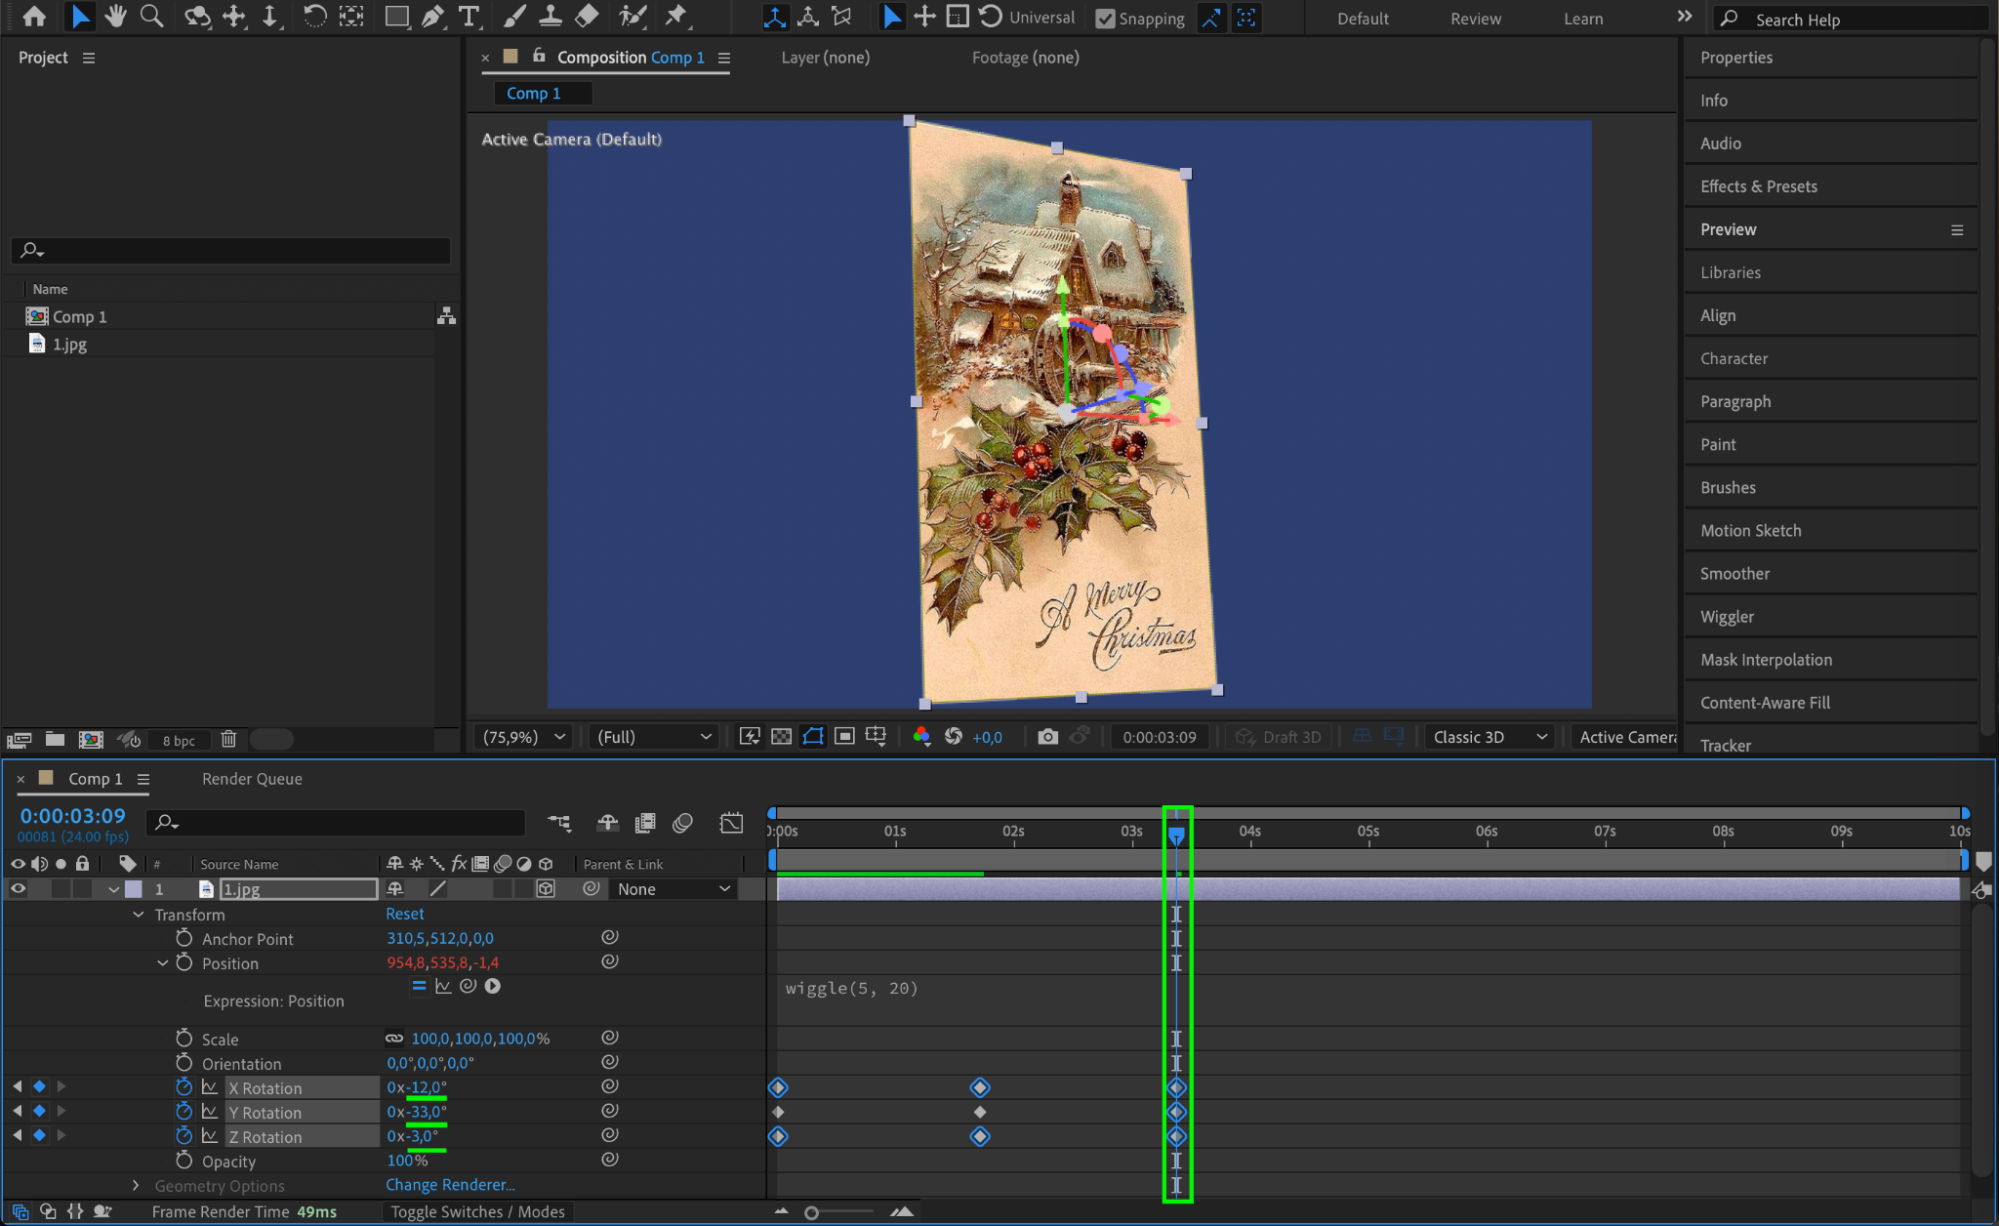
Step 5: Add Keyframes for Rotation (Optional)
For an additional dynamic touch, animate the rotation of the image along the X, Y, and Z axes:
Press “R” to reveal the Rotation properties.
Move the Current Time Indicator (CTI) to the starting point of your timeline.
Click the stopwatch icons next to X Rotation, Y Rotation, and Z Rotation to add keyframes.
Get 10% off when you subscribe to our newsletter
Move the CTI forward in the timeline and adjust the rotation values (e.g., 15 degrees for X, 10 for Y).
Add another keyframe further along the timeline and set the rotation values to their negative equivalents (e.g., -15 for X). This creates a back-and-forth rotation effect.


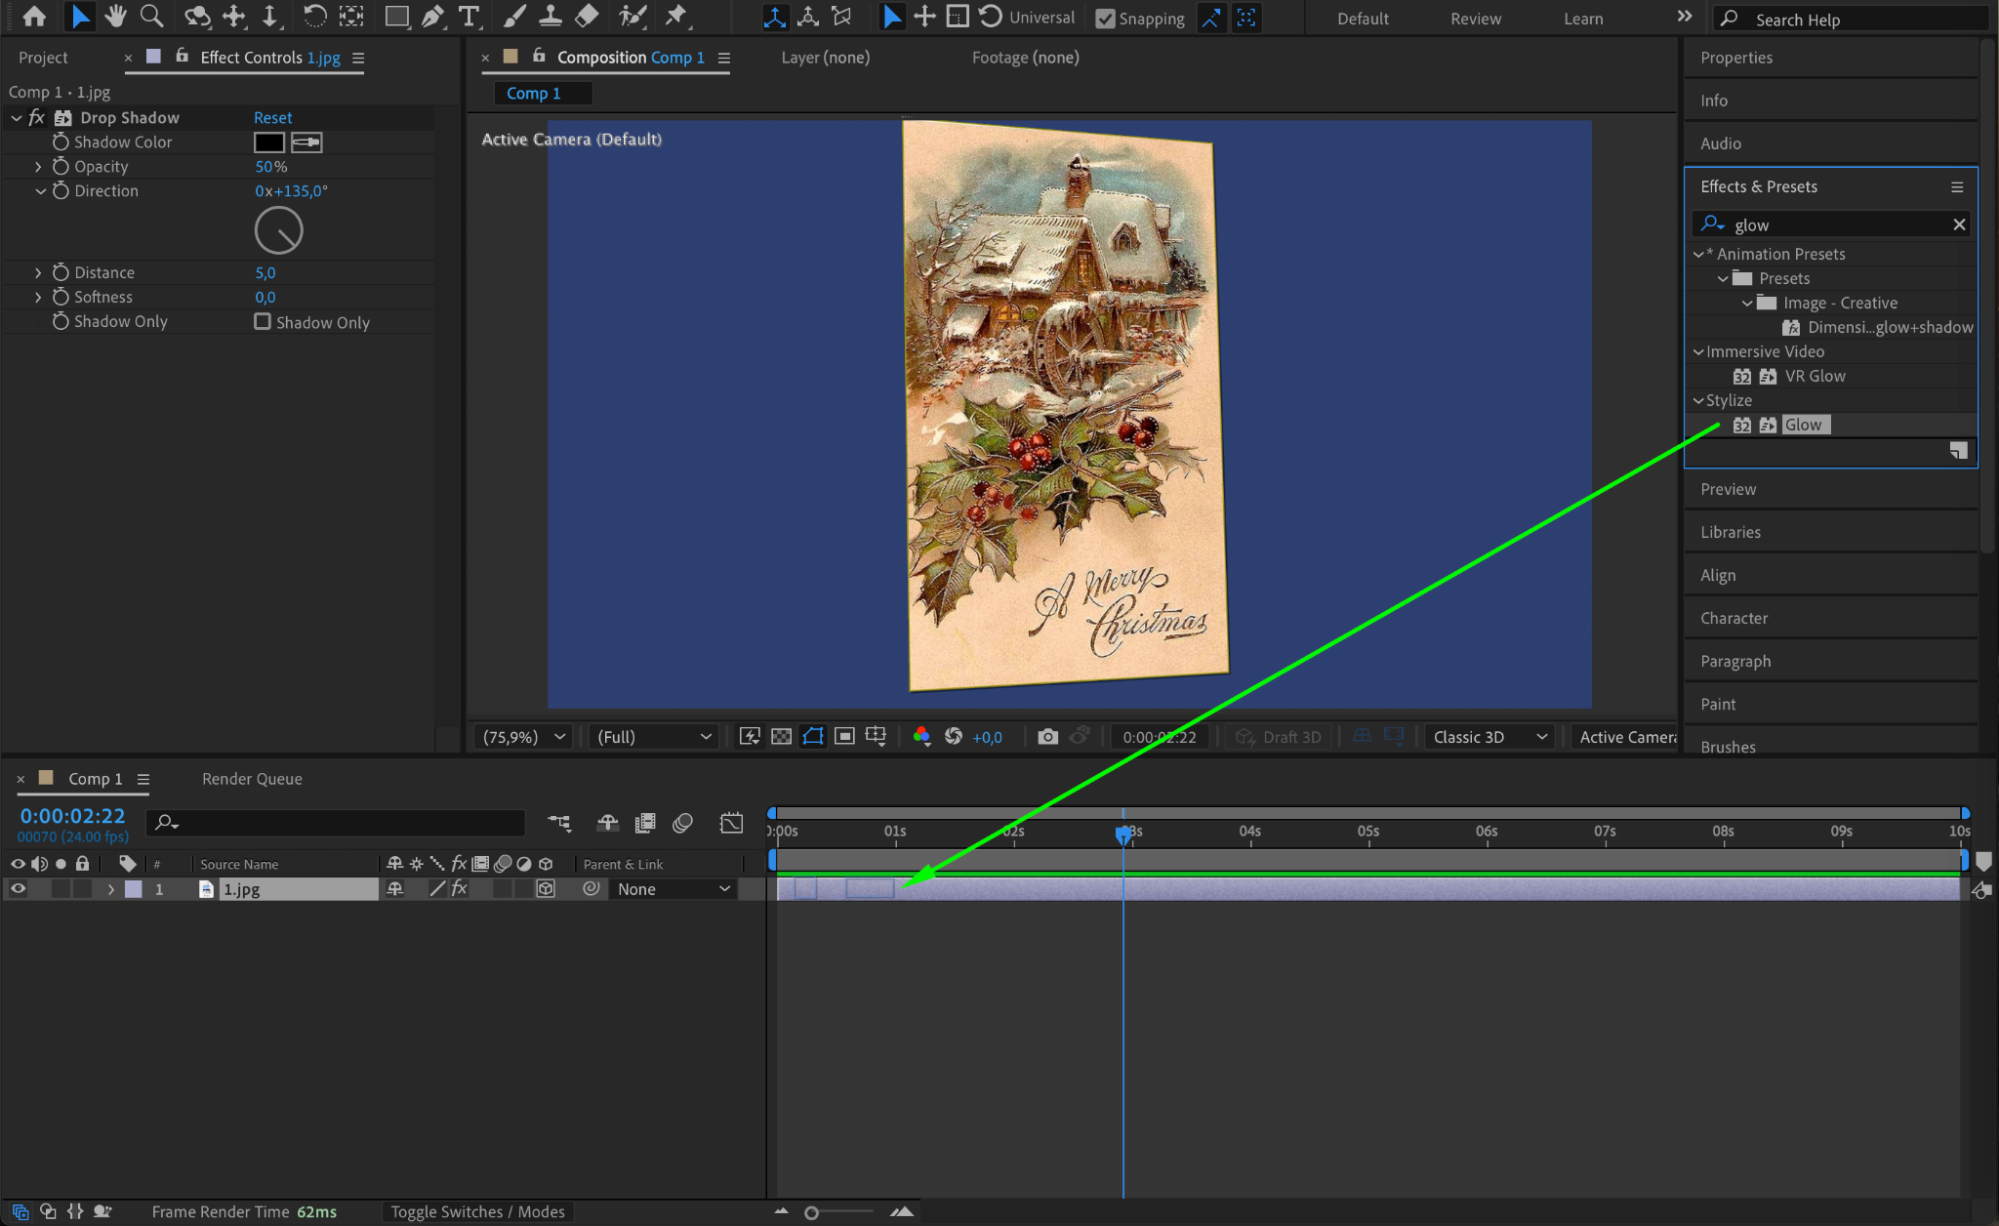
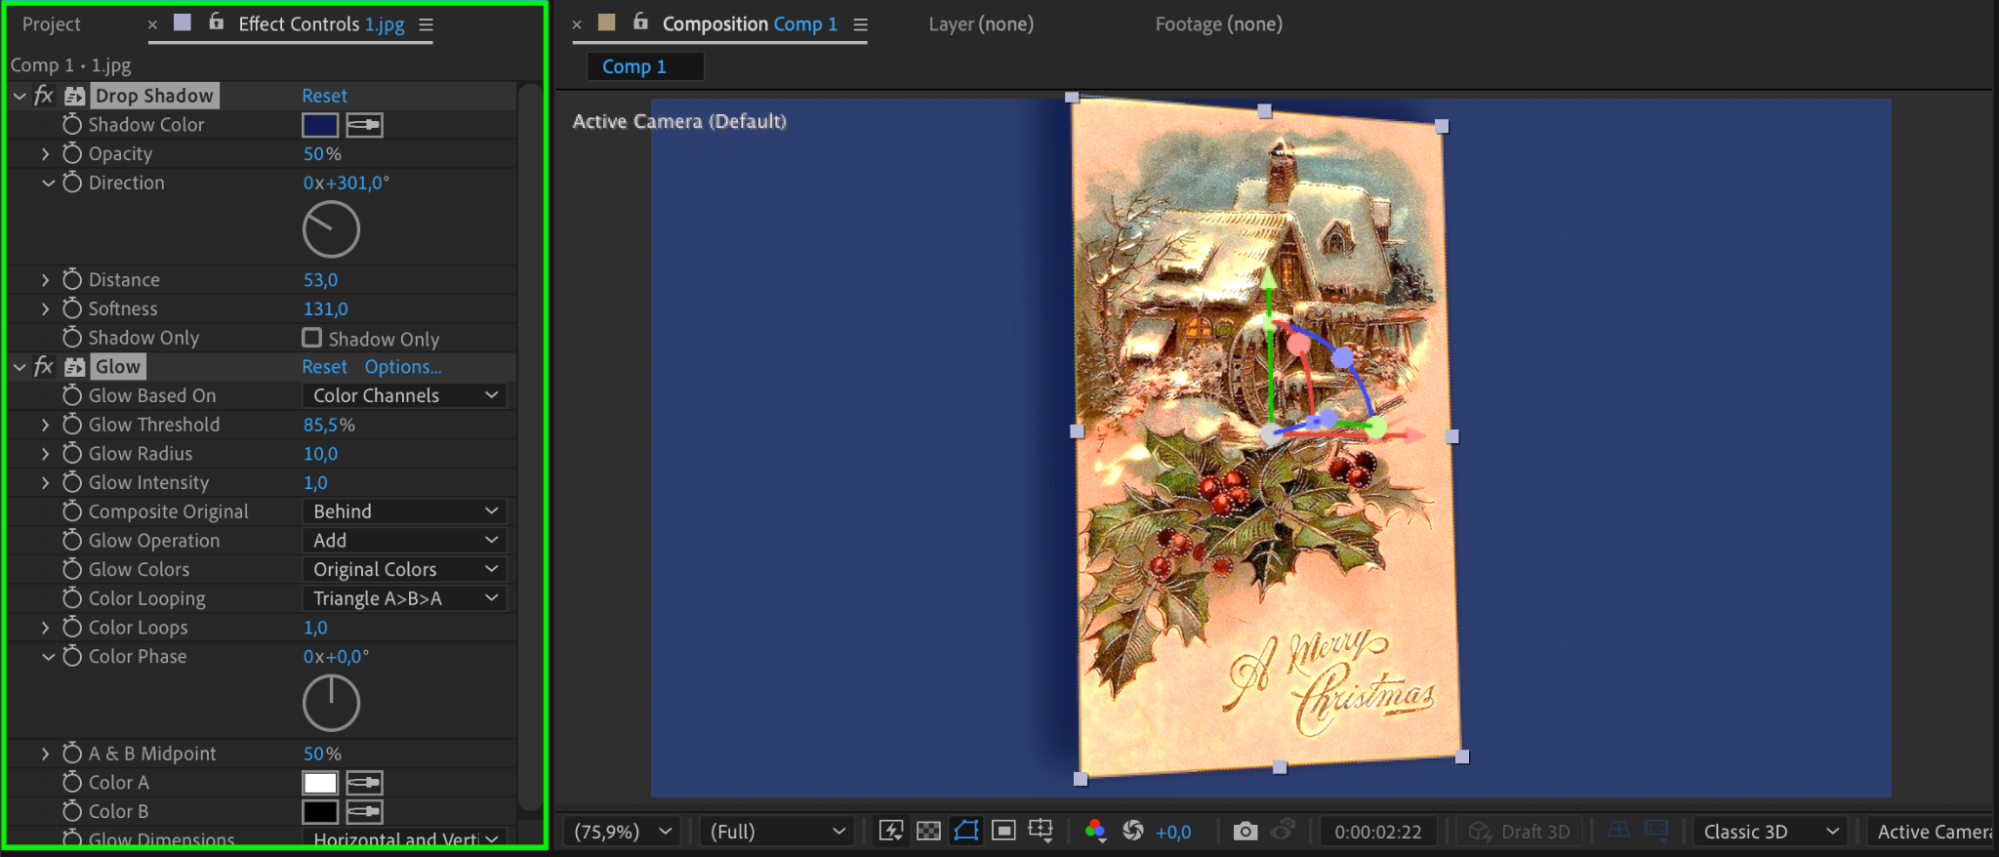
Step 6: Add Glow and Drop Shadow Effects
To enhance the visual impact of the shaking image, you can add effects:
Go to the Effects & Presets Panel and search for Glow. Drag and drop it onto the image layer. Adjust the Glow Intensity and Glow Radius in the Effect Controls Panel to highlight the image edges.
Search for Drop Shadow and apply it to the image layer. Adjust the shadow’s Opacity, Distance, and Softness to create a subtle depth effect.
 Step 7: Preview the Shake Effect
Get 10% off when you subscribe to our newsletter
Press the Spacebar to preview your composition. Watch how the image shakes dynamically based on your wiggle settings. Make adjustments to the frequency and amplitude if necessary.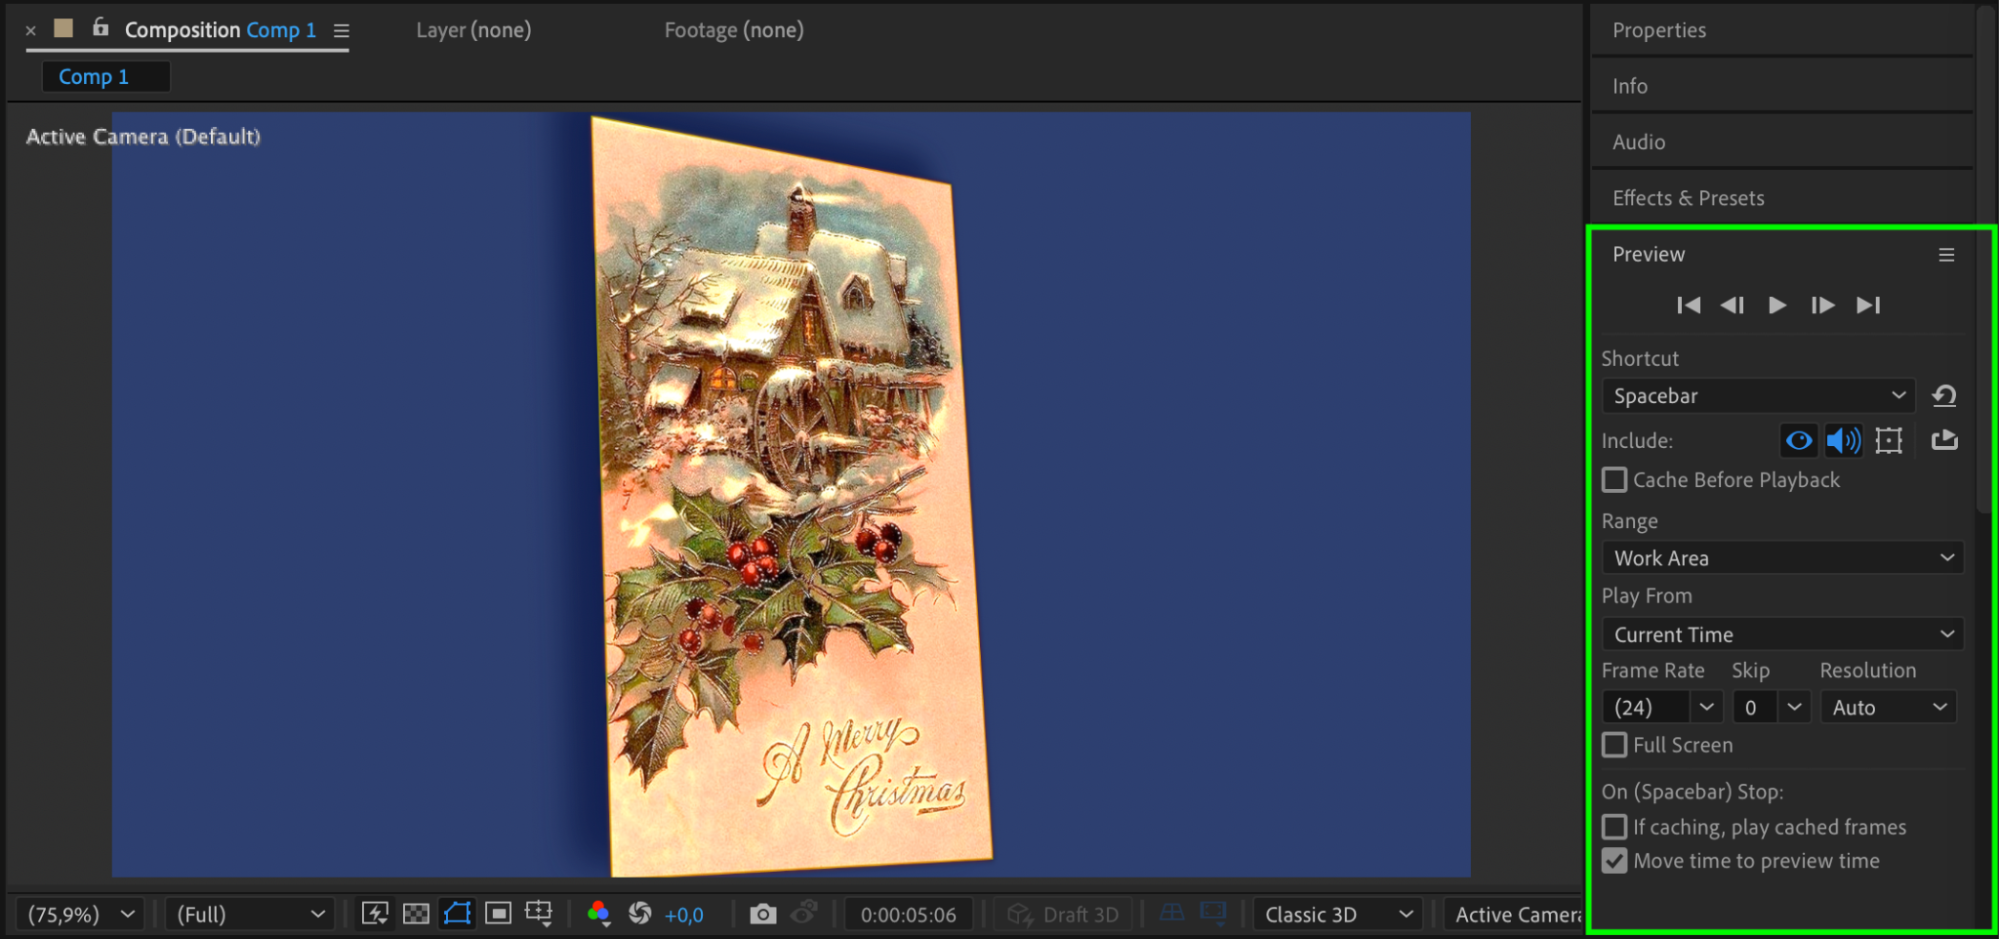
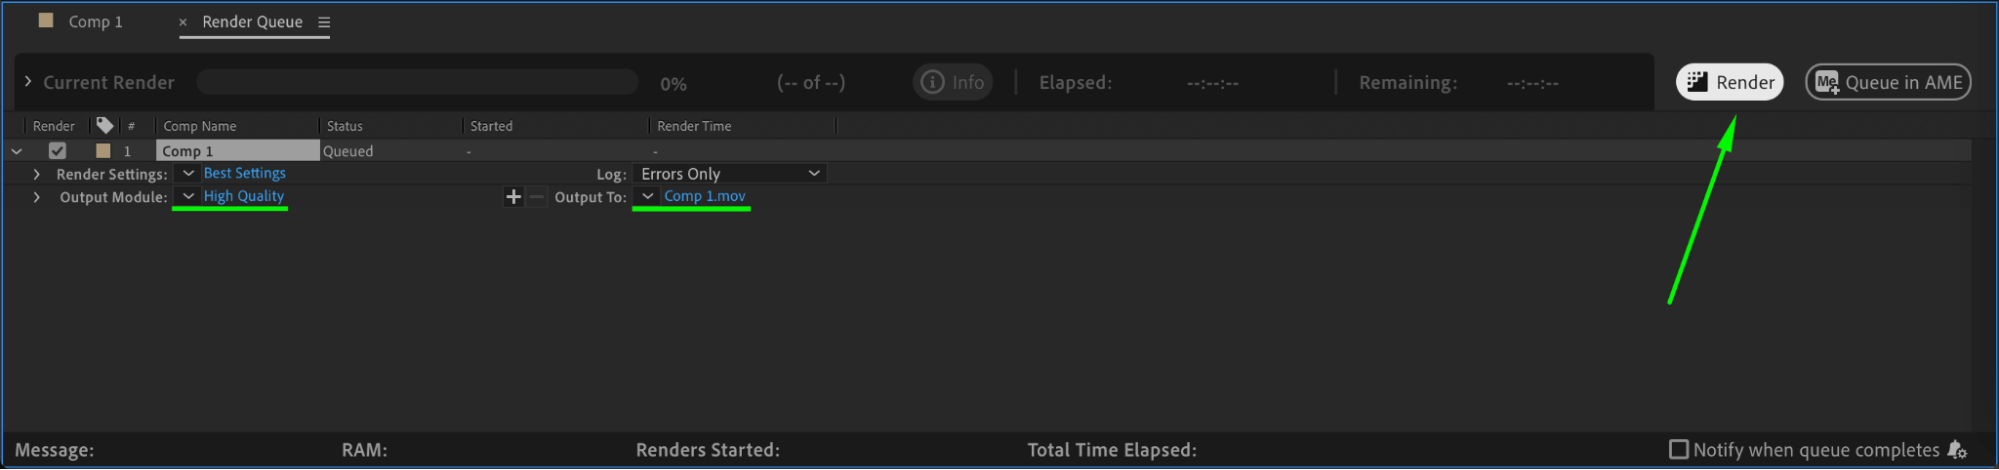
Step 8: Render Your Composition
Once satisfied, render your project. Go to Composition > Add to Render Queue, adjust your render settings, and click Render. This will export your composition with the shake effect applied.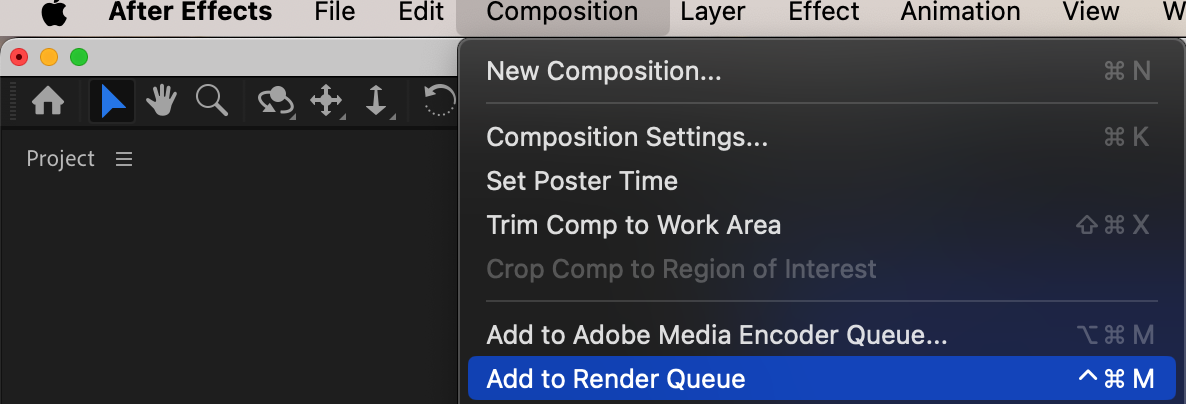
Conclusion
Adding a shake effect to an image in After Effects is a quick and effective way to enhance motion and bring more energy to your projects. With the wiggle expression and keyframes, you have complete control over the intensity and timing of the shake. Experiment with the settings to create the perfect dynamic look for your composition!
Our Bestsellers


