Mastering Intro Creation in After Effects
Getting Started with Intro Creation
Creating an engaging intro in After Effects is an essential part of making your videos stand out. A well-crafted intro sets the tone for your content and grabs your audience’s attention. In this guide, we’ll walk you through the steps to create a visually appealing and dynamic intro using After Effects.
Get 10% off when you subscribe to our newsletter

Step 1: Import Your Footage
Begin by importing the media you want to use in your intro. To do this, go to File > Import > File and select the video or images. After Effects supports a wide variety of file formats, making the process seamless. Once imported, your files will appear in the project panel.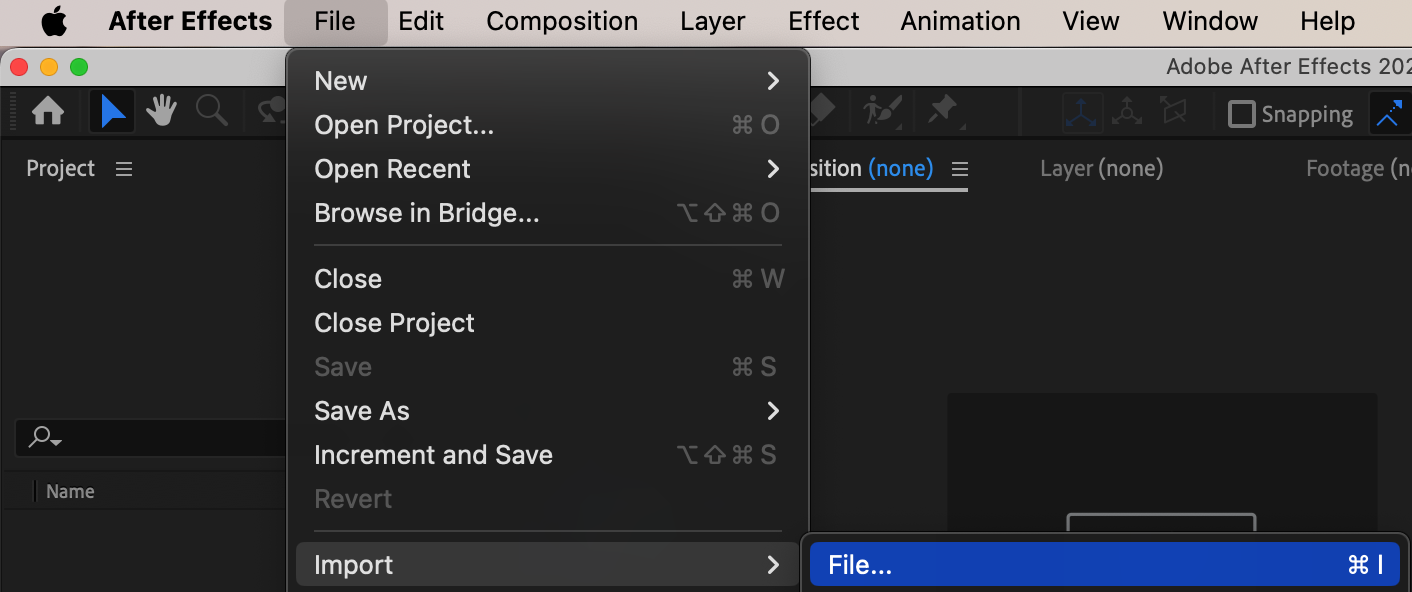
Get 10% off when you subscribe to our newsletter

Step 2: Organize Your Timeline
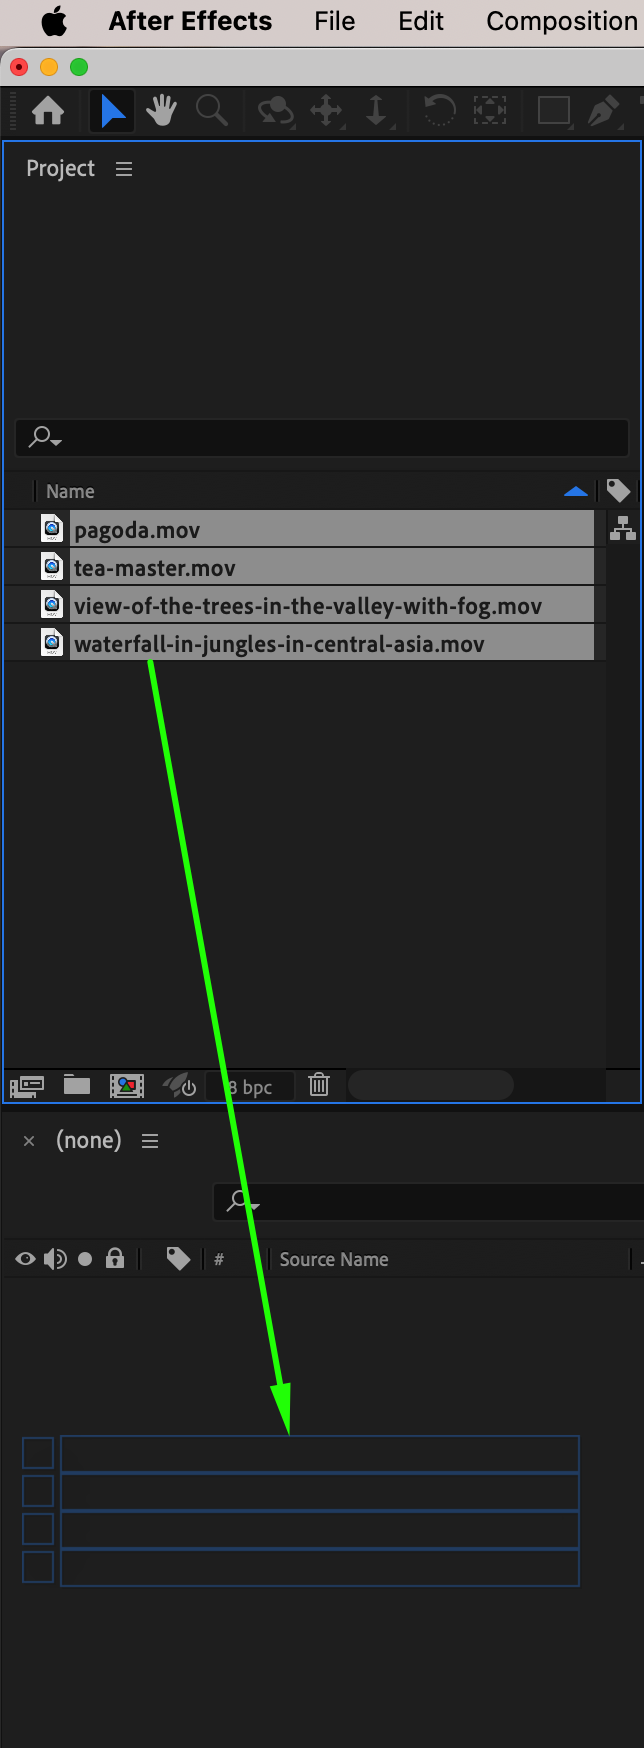
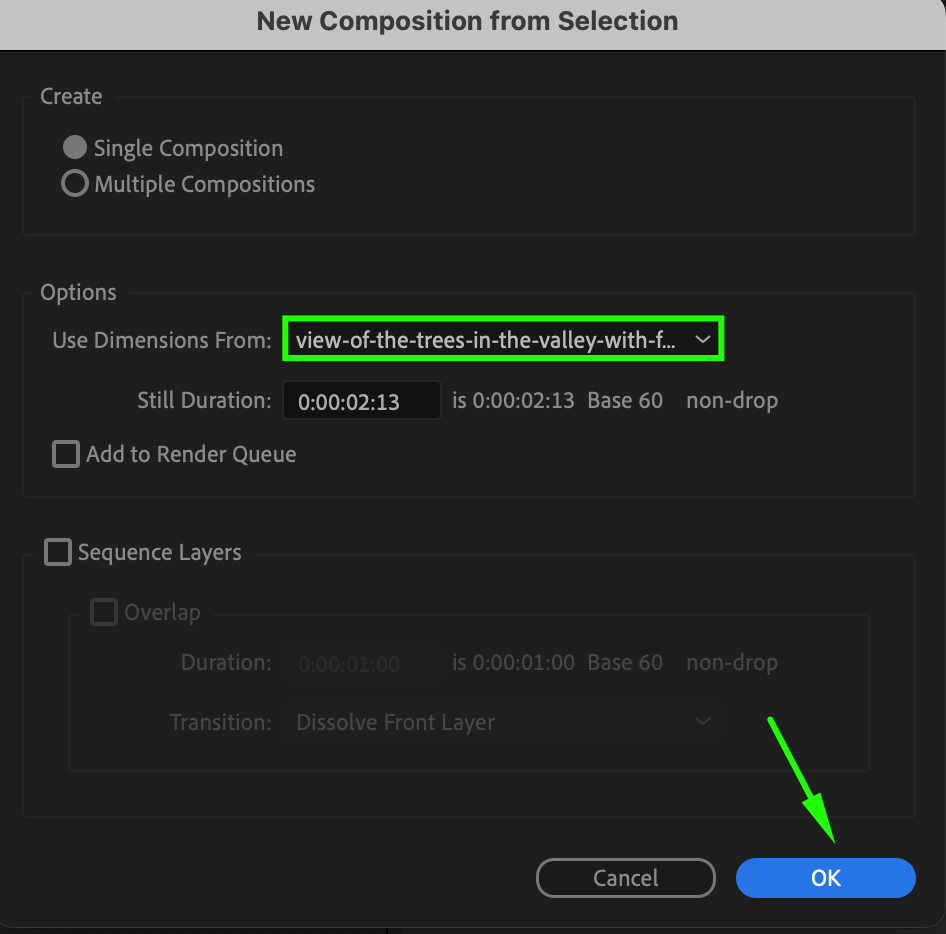
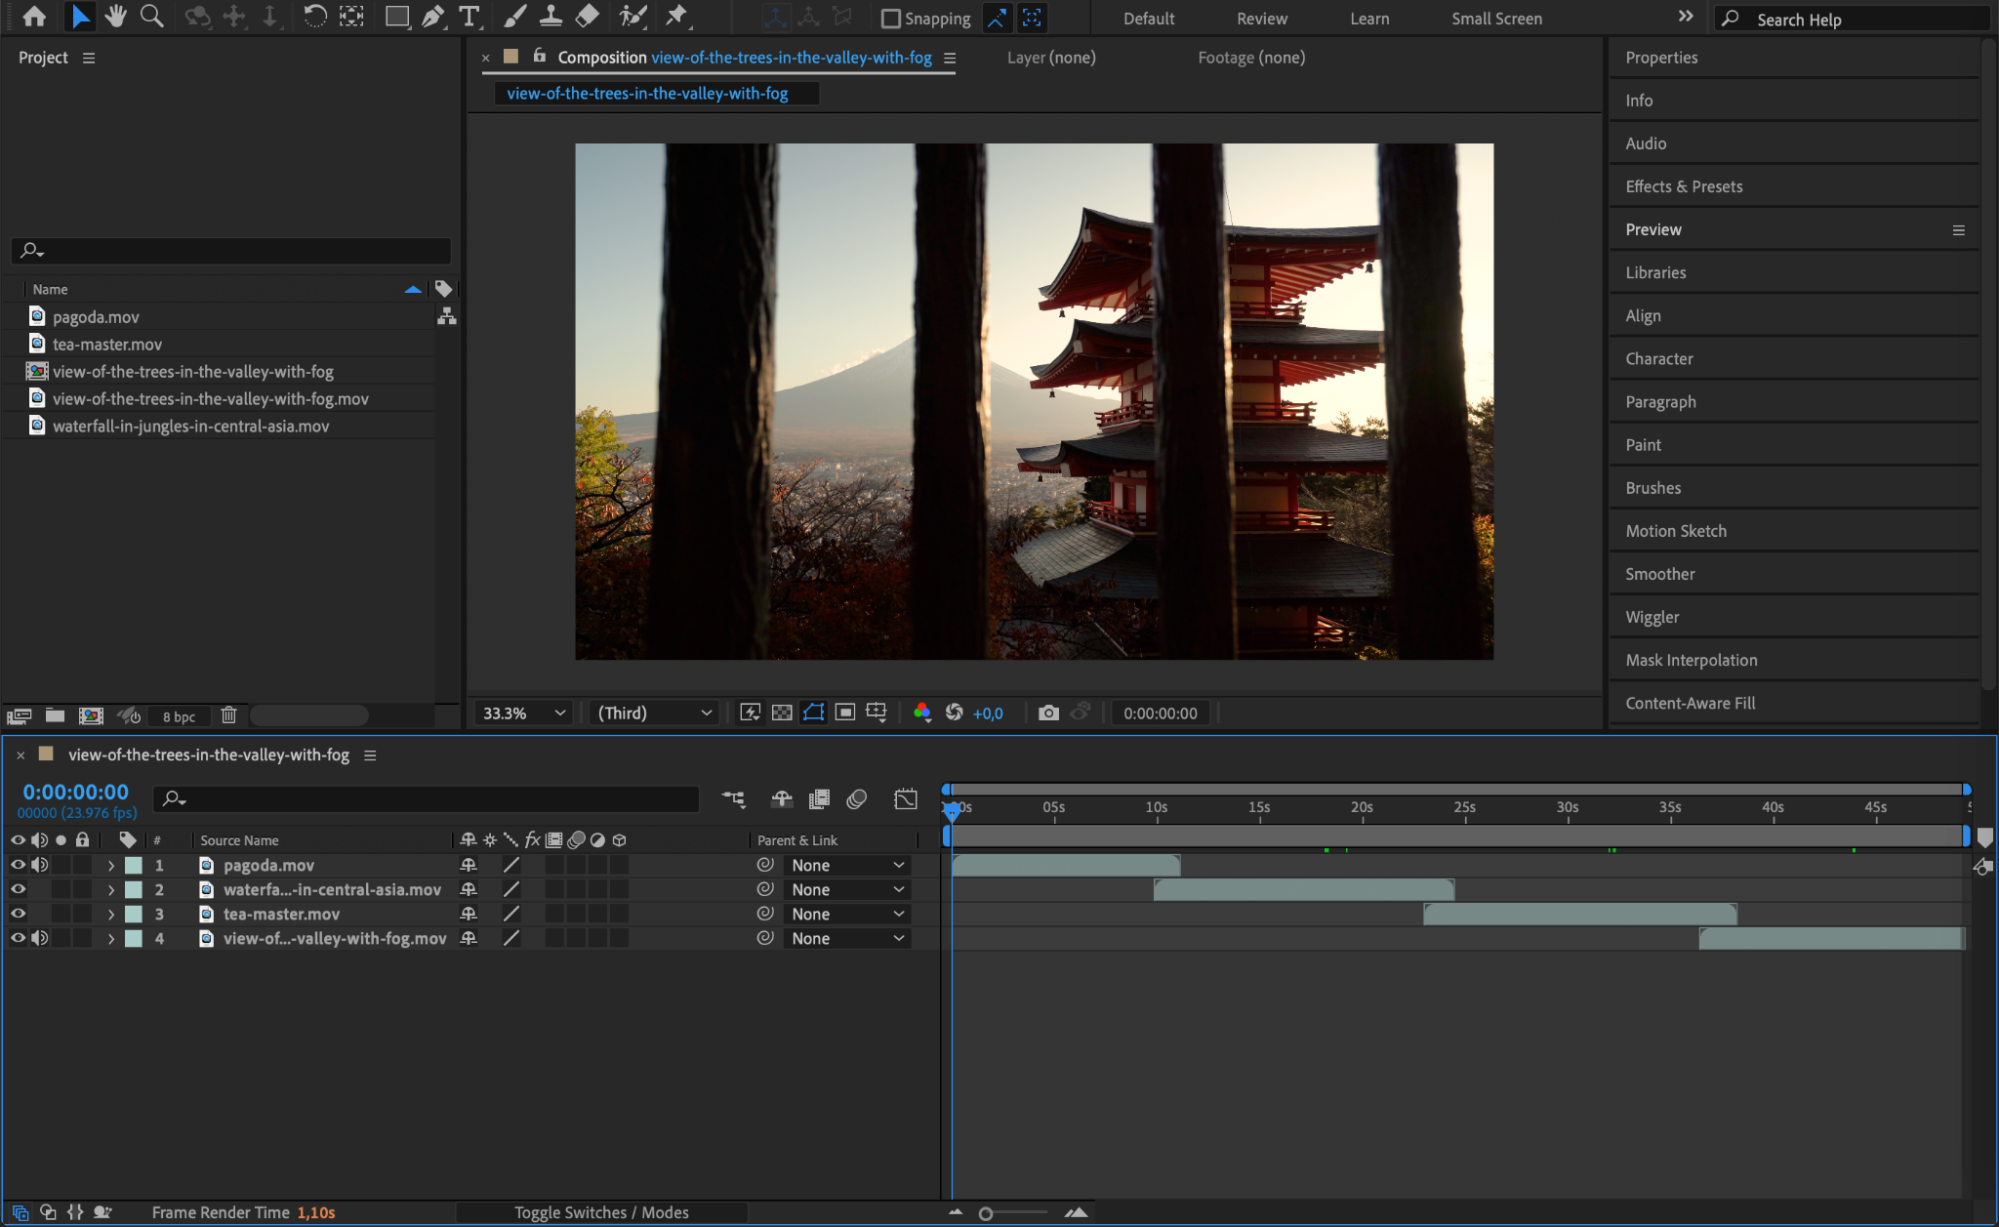
Once your footage is imported, drag and drop it onto the timeline. Here, you’ll arrange the clips or images in the order you want them to appear. Organize the layers carefully and adjust the duration of each clip to fit the intro’s overall timing. This is a crucial step in ensuring your intro flows smoothly.
Step 3: Add Text and Graphics
Next, add titles and graphics. Use the Text Tool (Ctrl/Cmd + T) to add your intro text – such as your channel or brand name – and customize it to suit your style. After Effects allows you to experiment with different fonts, sizes, and color schemes. You can also add shapes and graphics that complement your text. Be creative, but keep it simple to avoid clutter.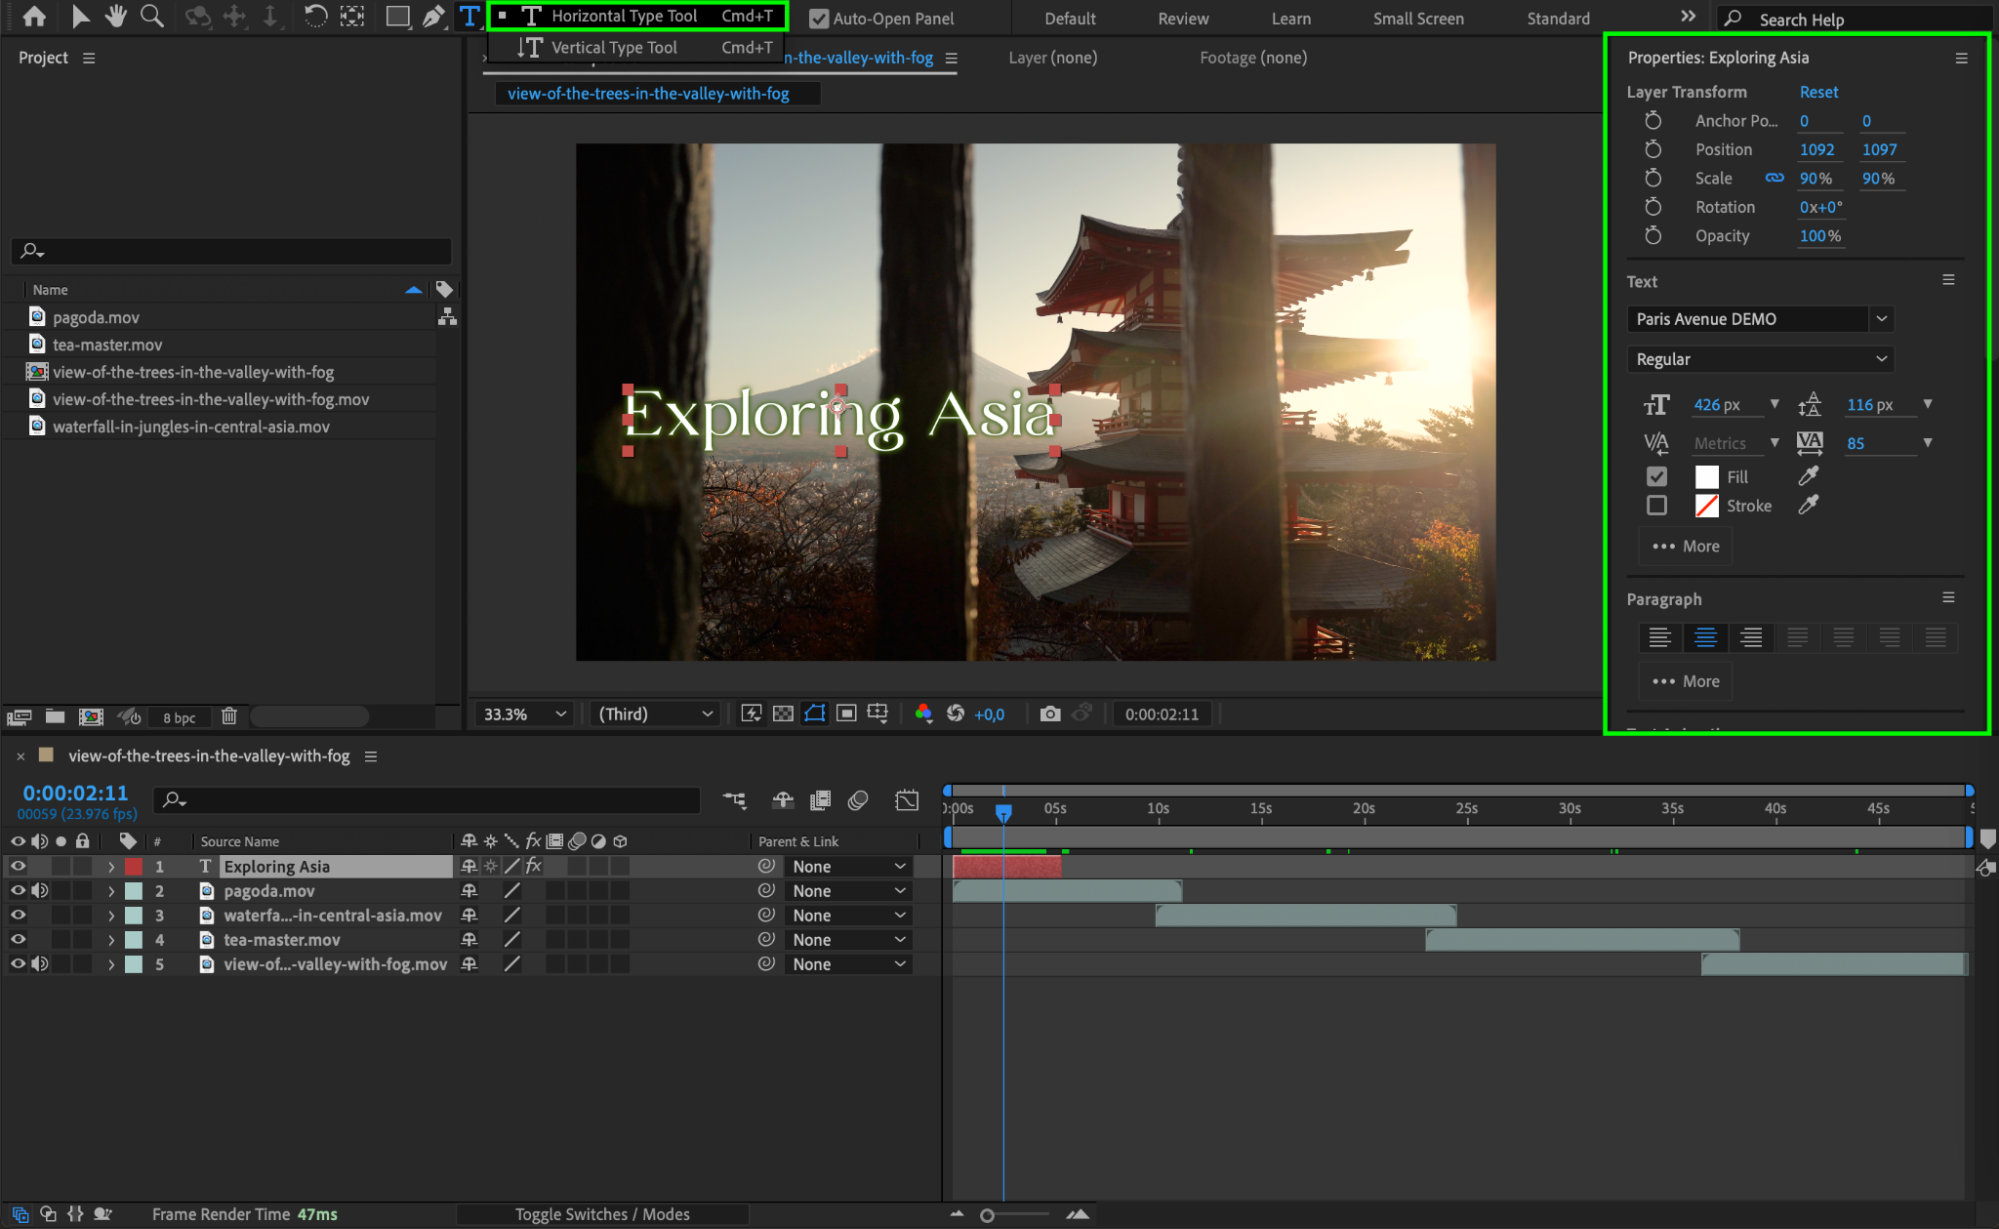
Step 4: Animate Text and Graphics
After adding text and graphics, it’s time to animate them. You can do this by applying keyframes to the position, scale, and opacity properties. Use animation presets to speed up the process, or create custom animations for more control. 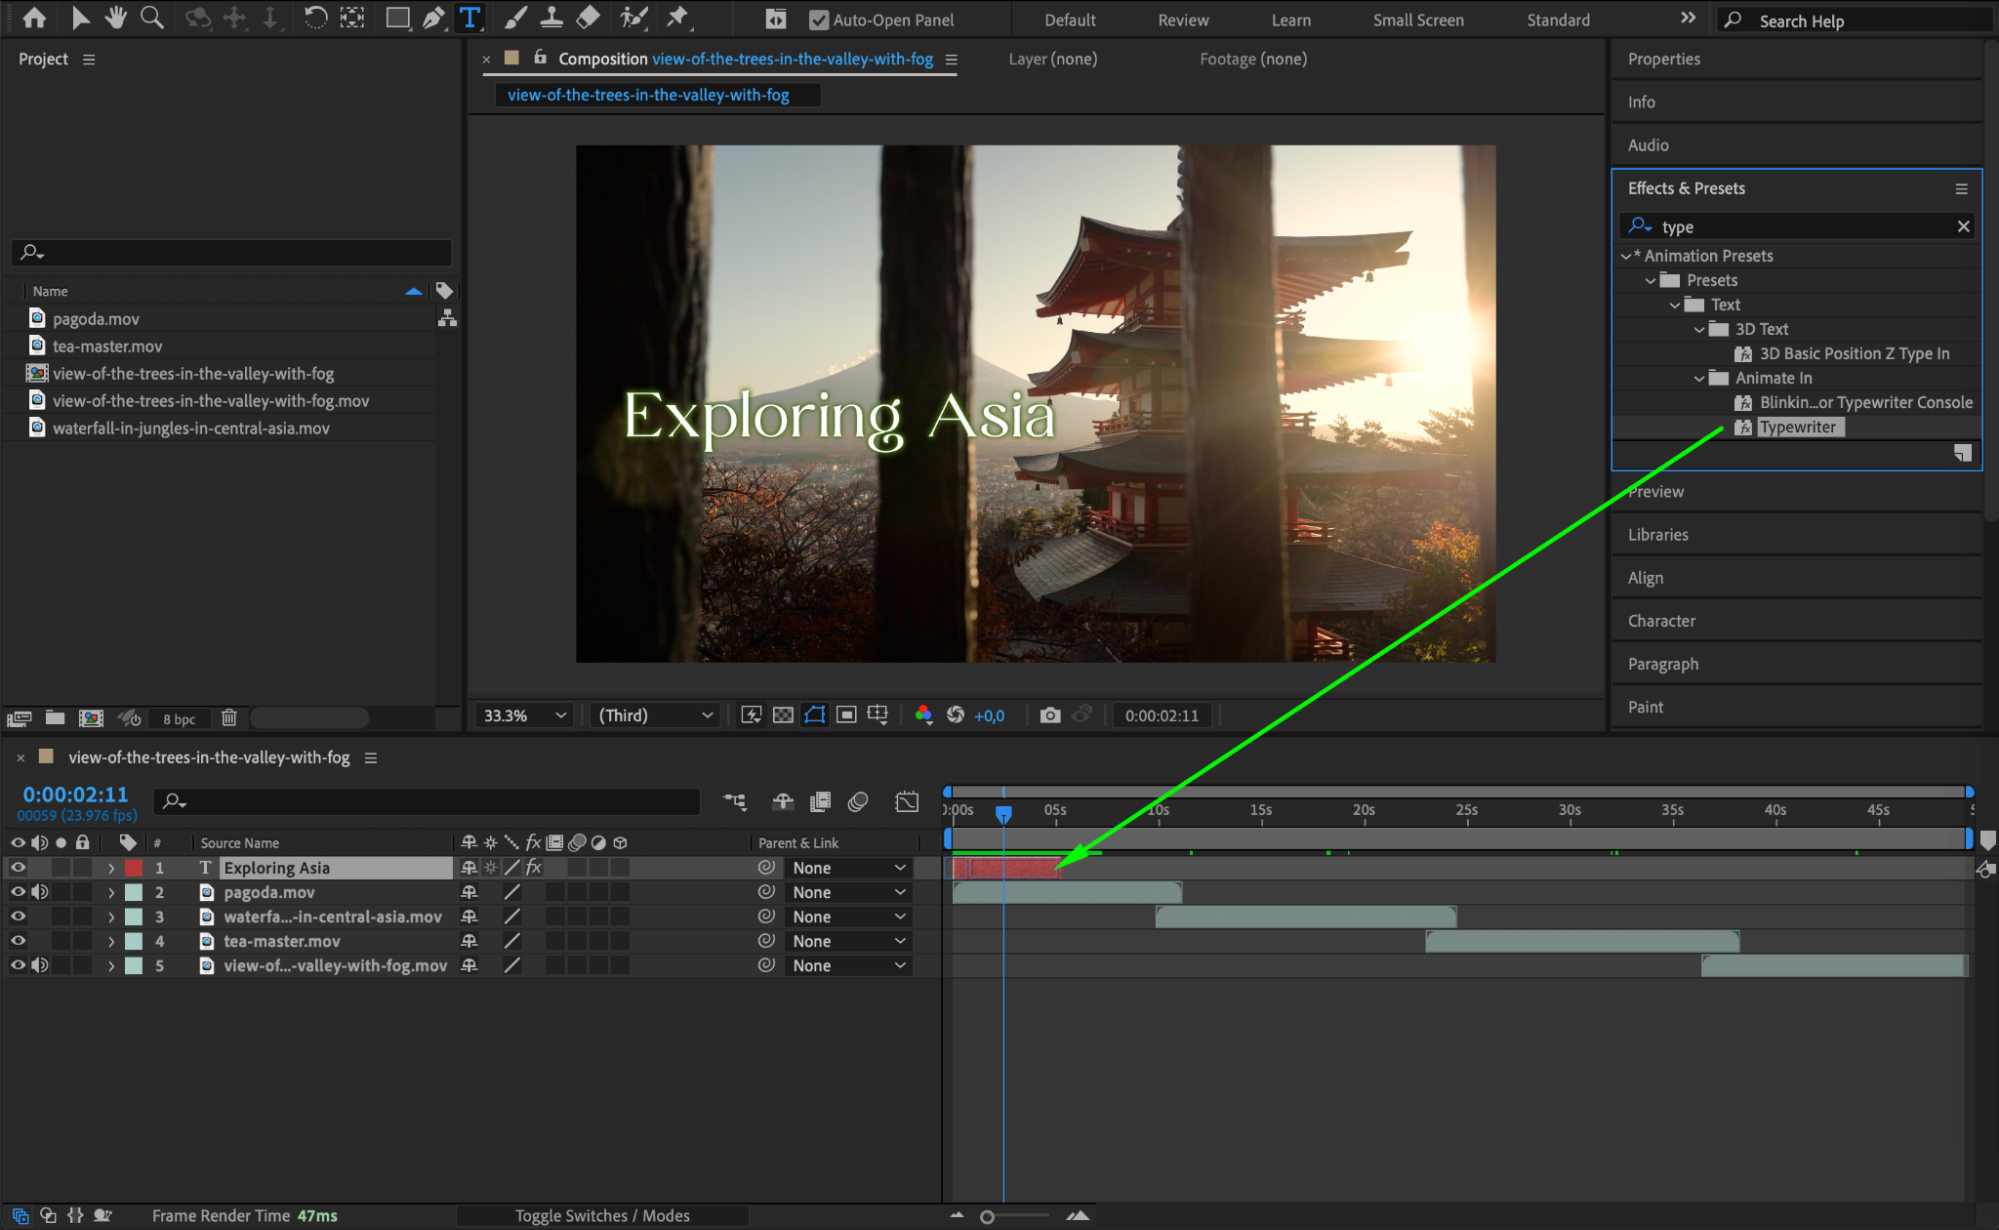
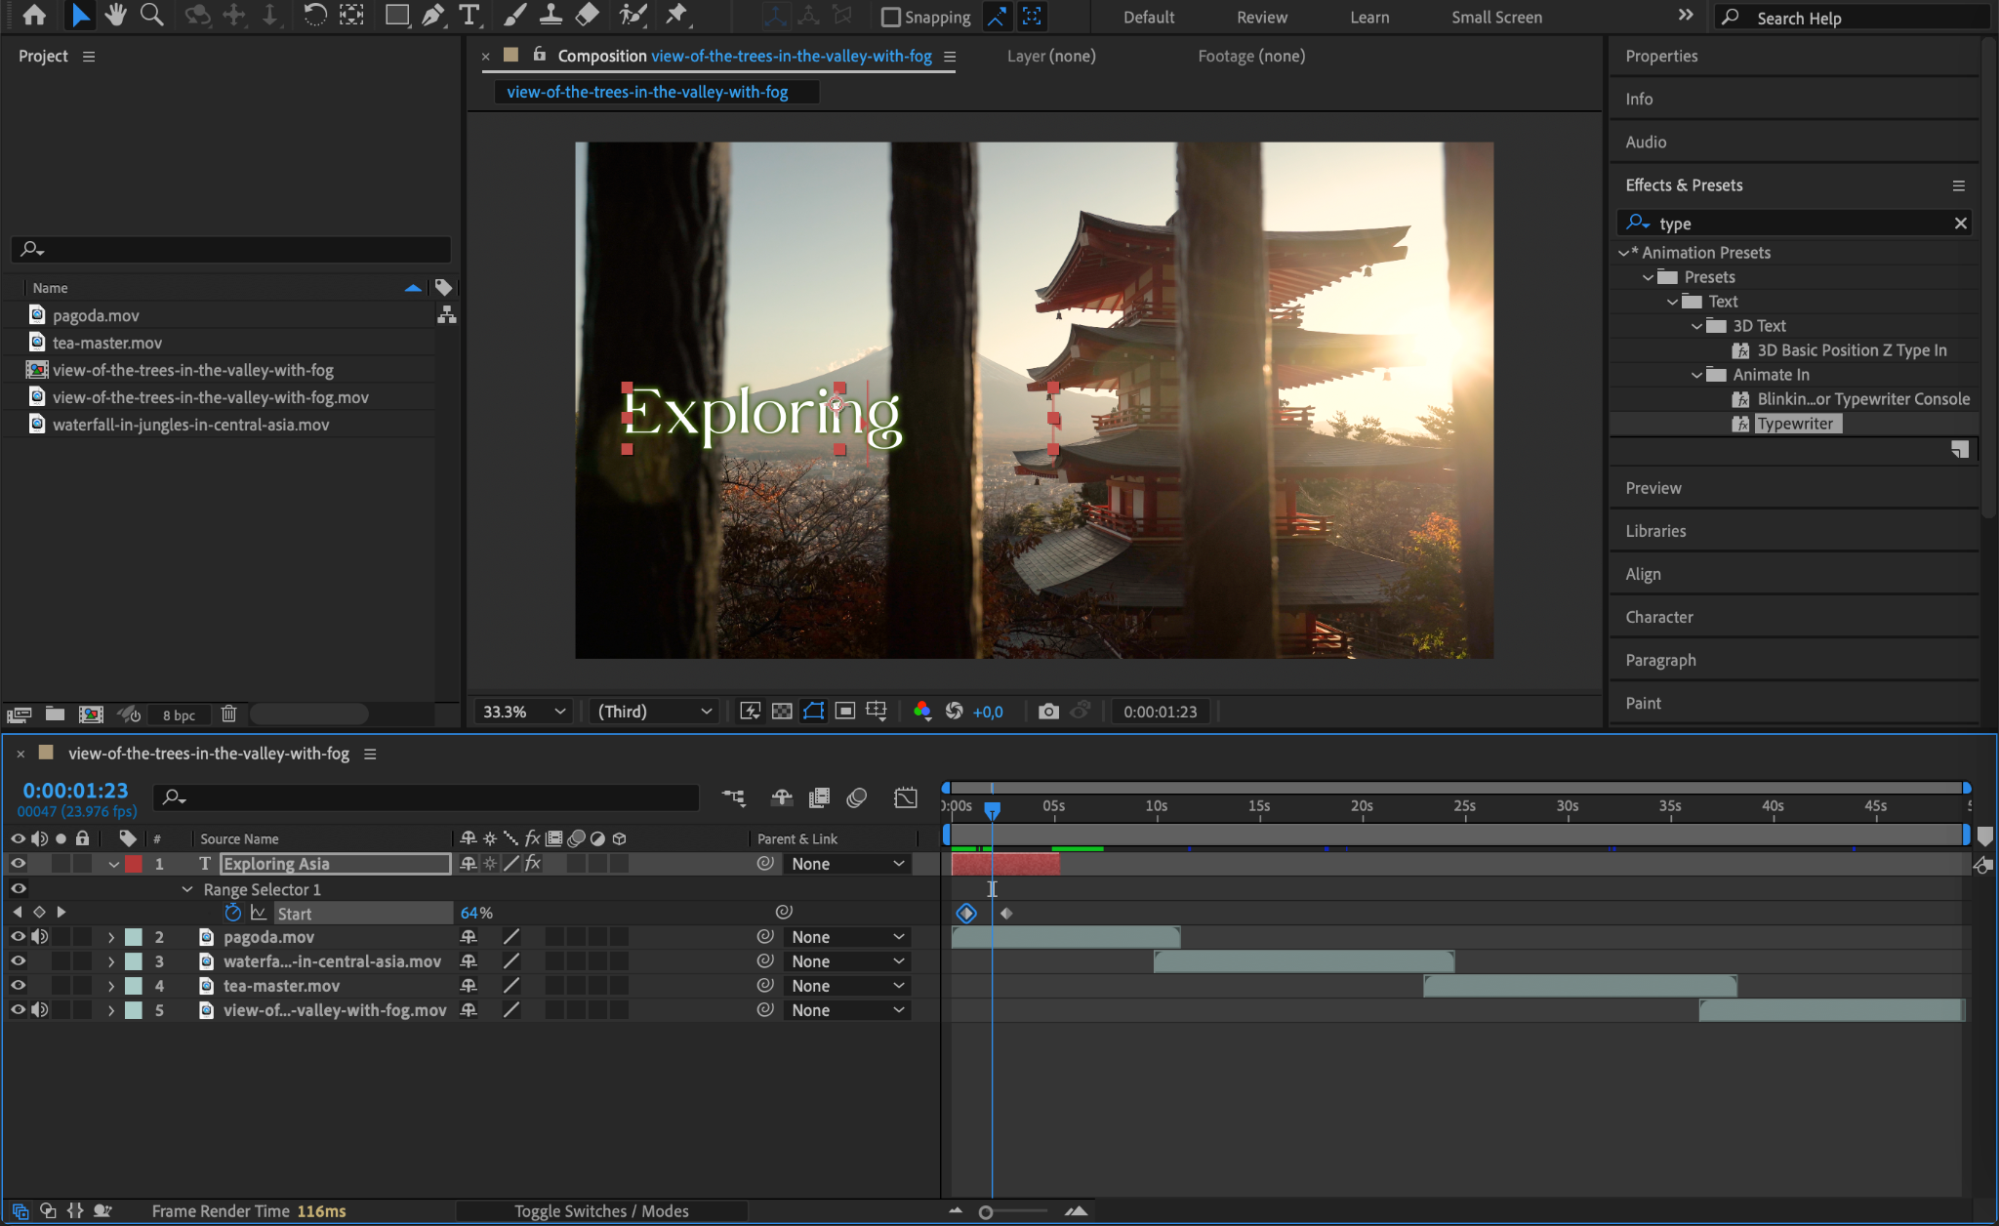 Step 5: Apply Effects and Transitions
Get 10% off when you subscribe to our newsletter

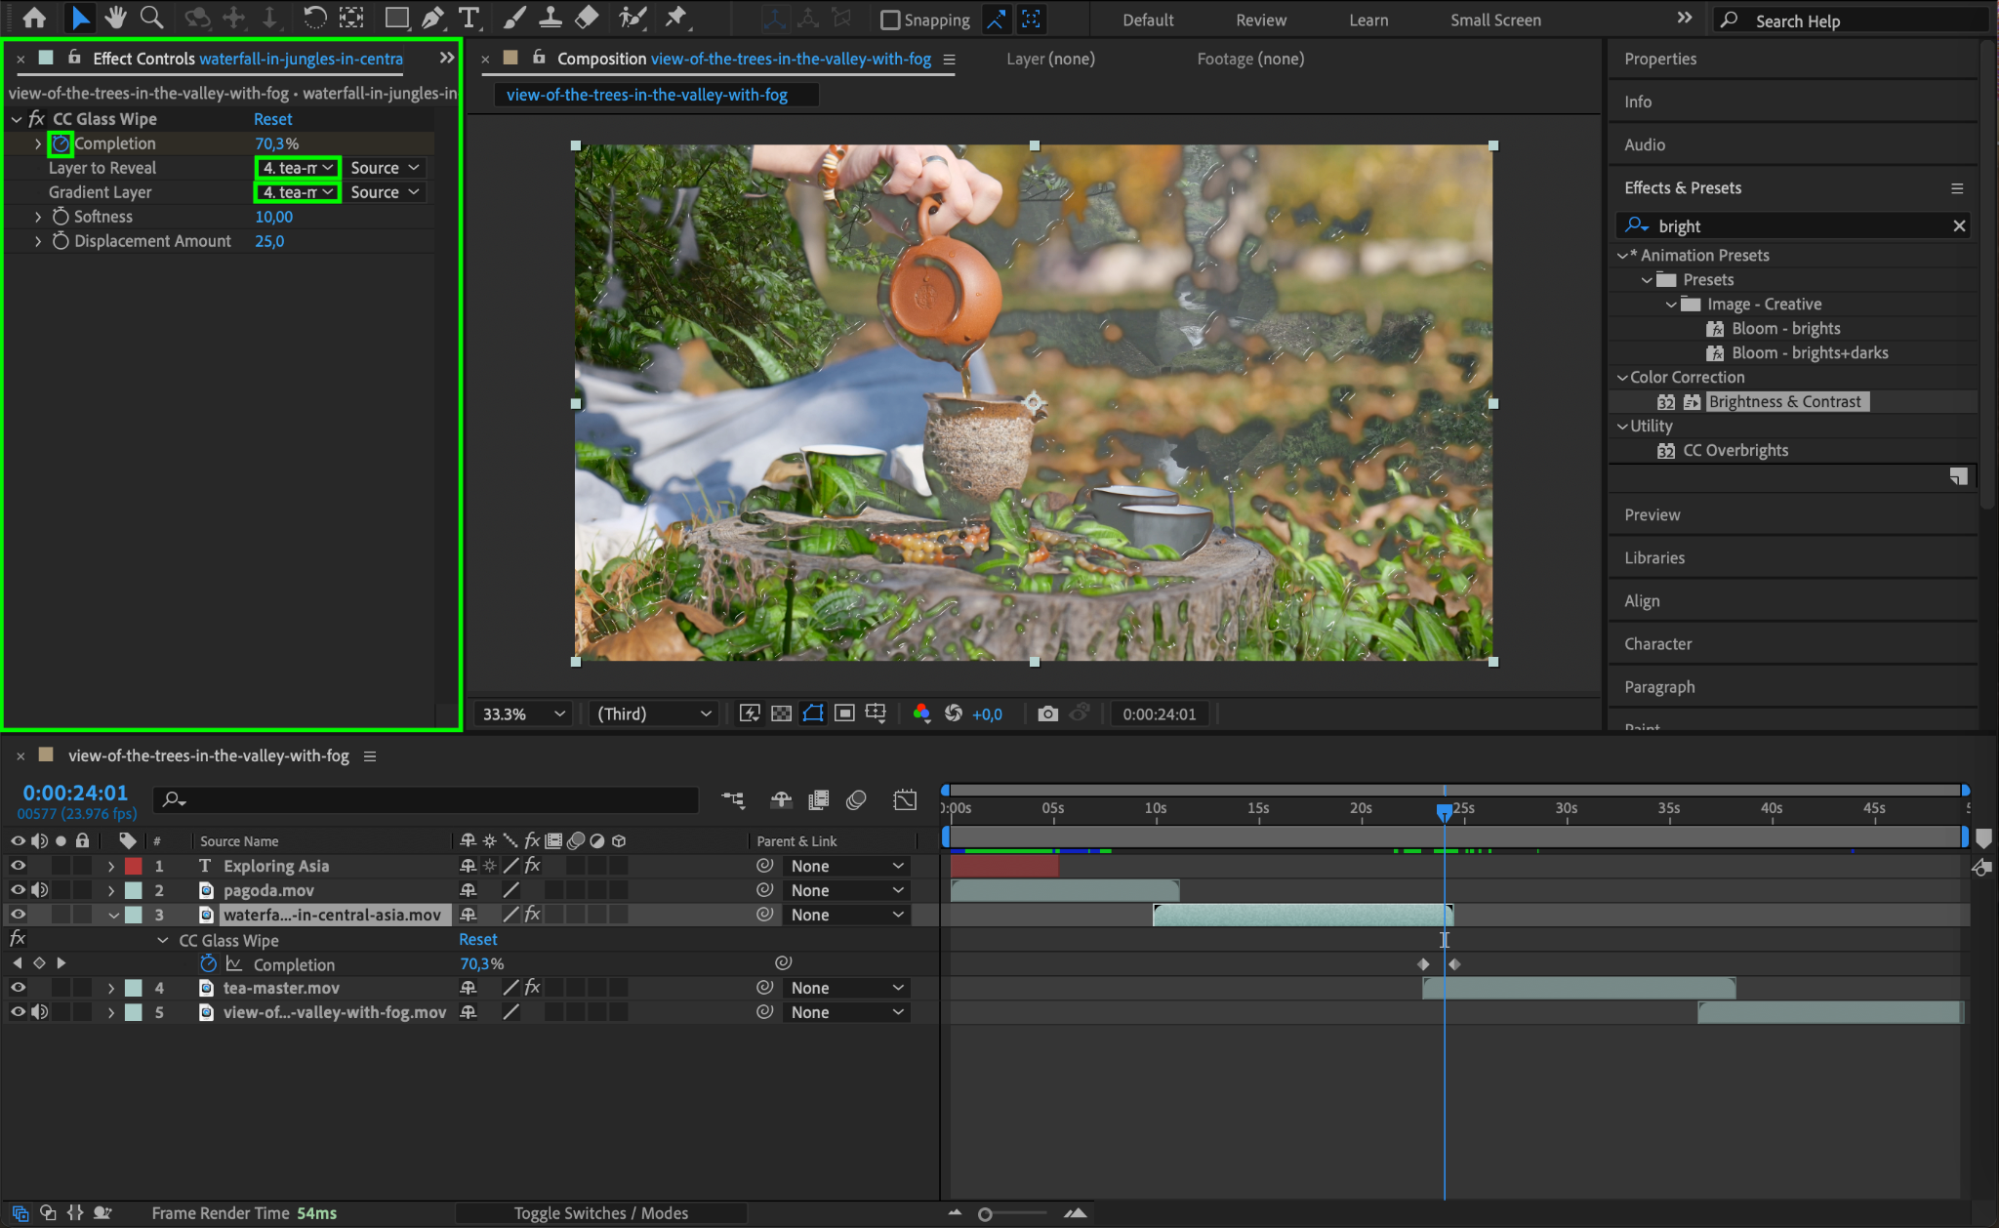
To give your intro a more professional look, apply visual effects and transitions. Add motion blur, adjust the color grading, or use fade in/out effects to smooth transitions between clips. You can also experiment with effects like light leaks or lens flares to make your intro visually striking. Make sure the effects don’t overwhelm the content but rather enhance the overall aesthetic.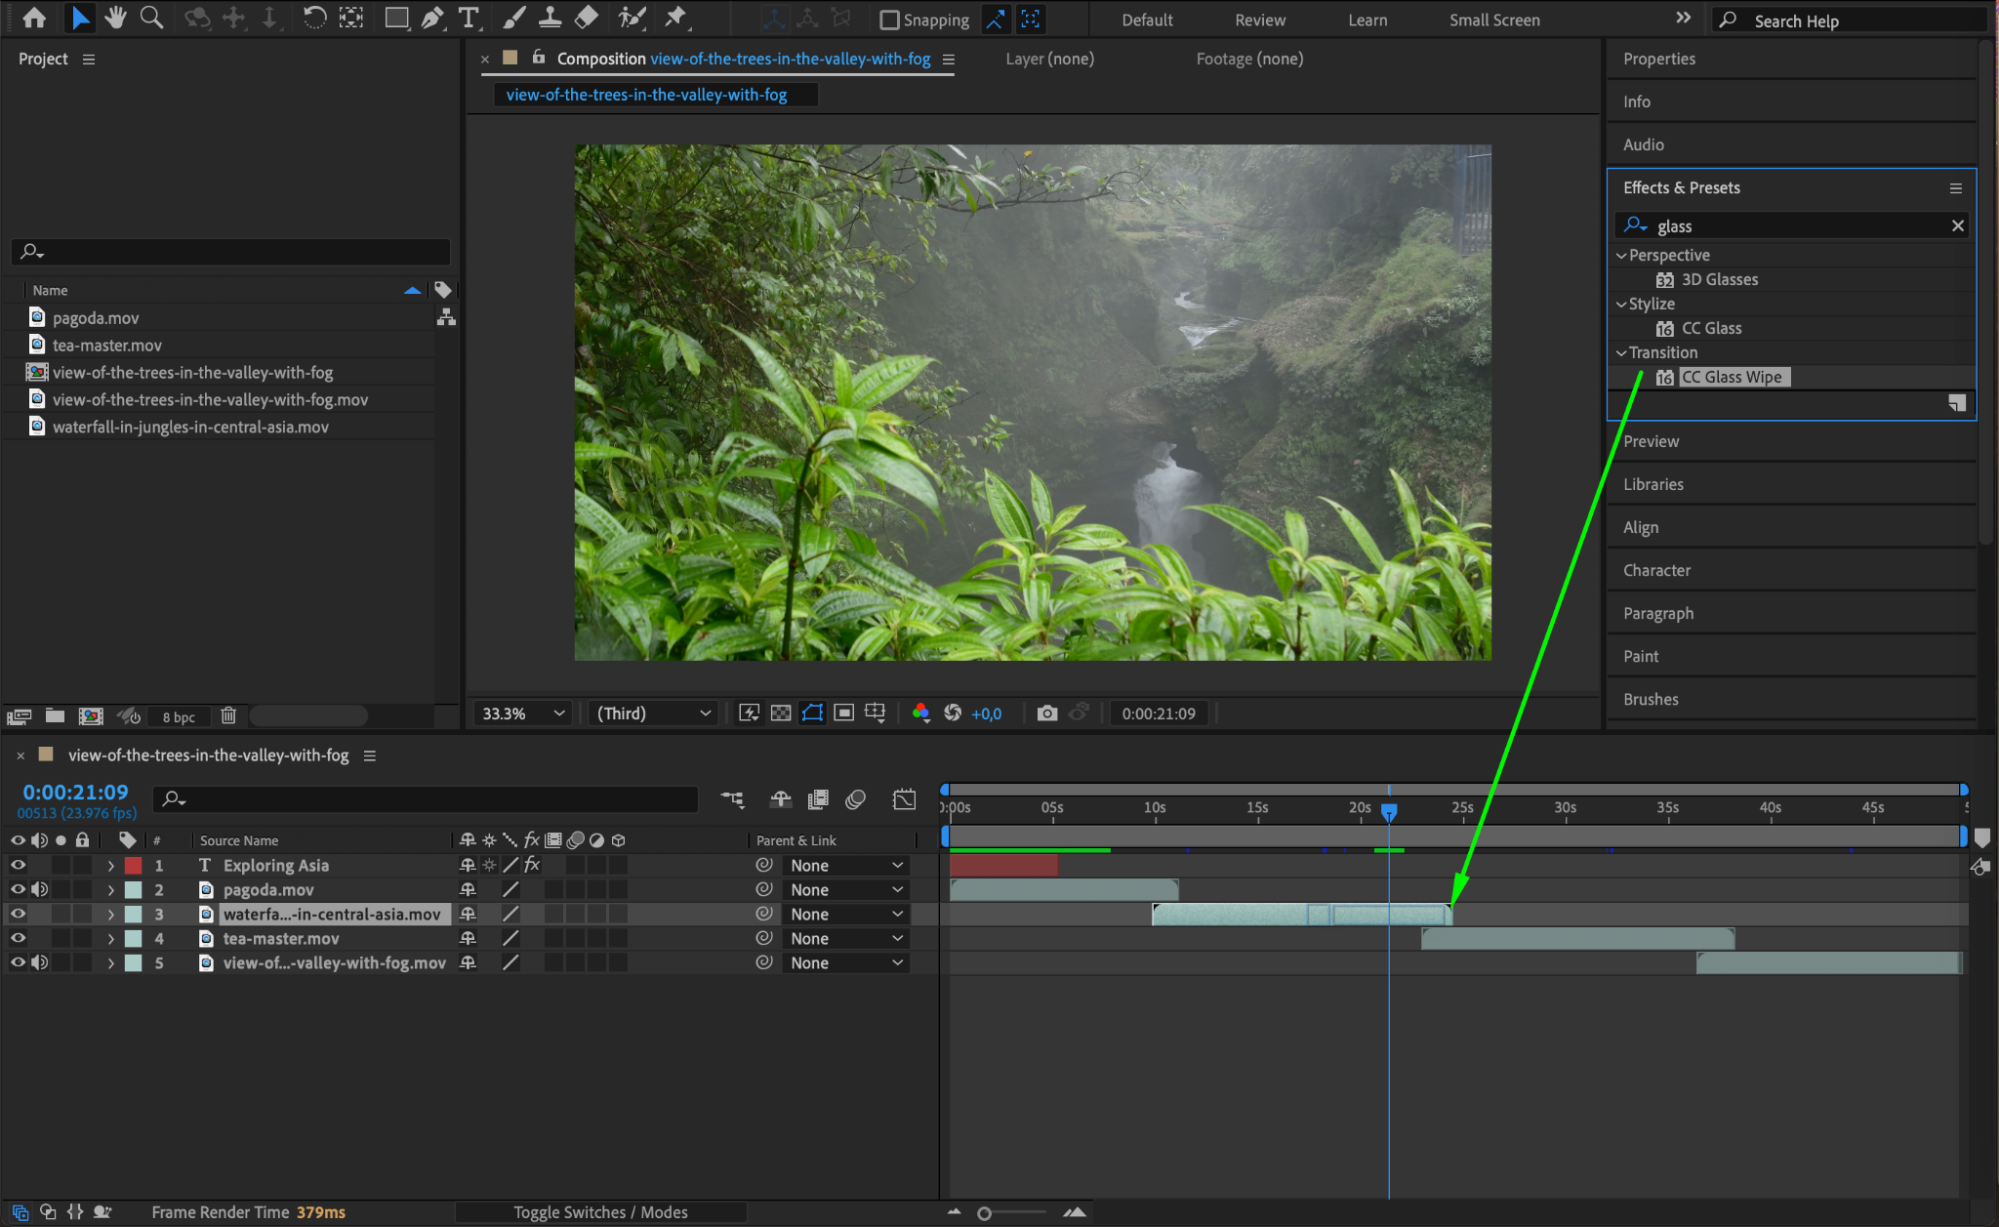
 Step 6: Animate Video with Keyframes
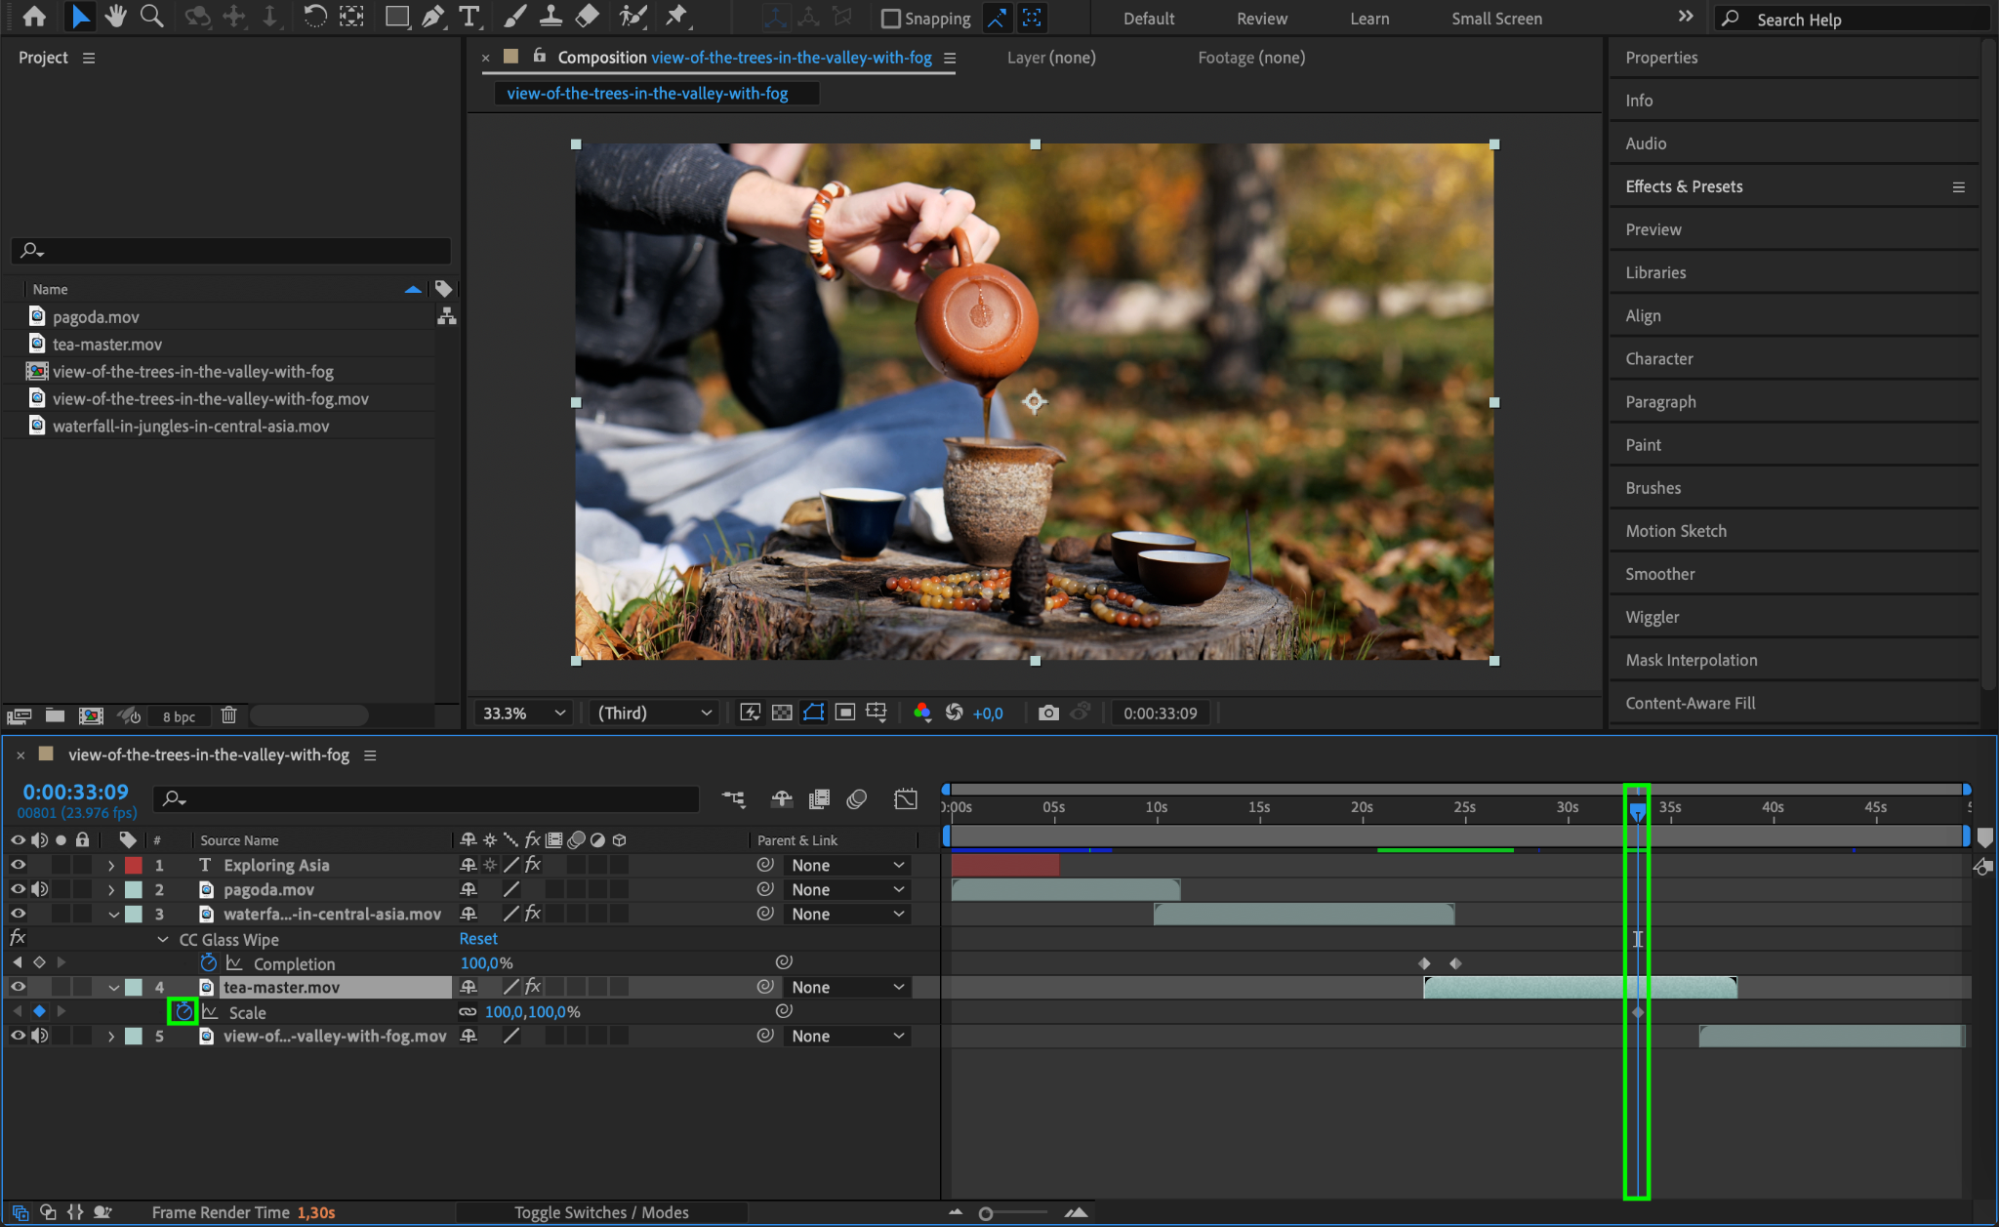
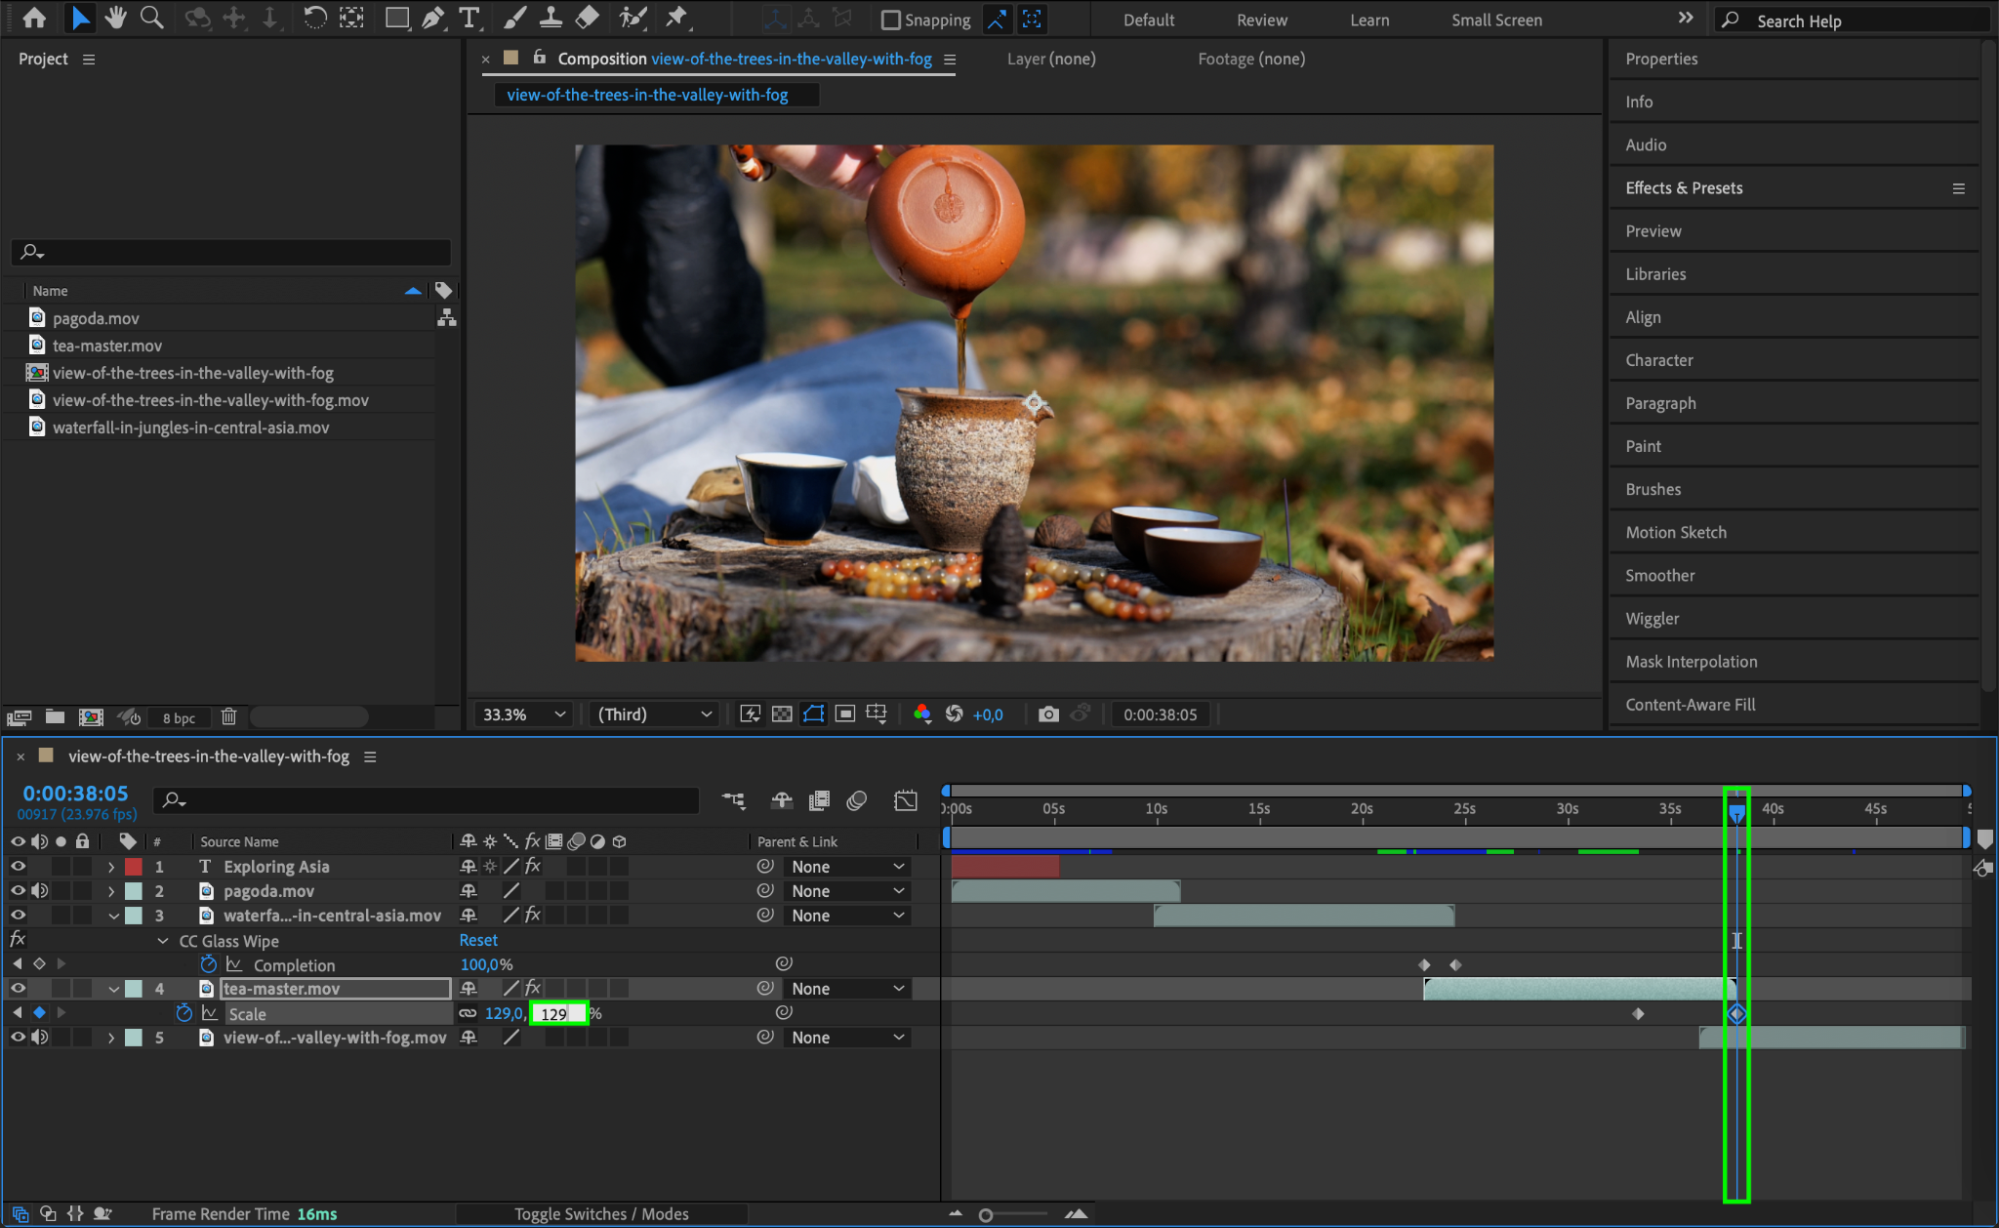
To add dynamic motion to your video, use keyframes to animate properties like position, scale, rotation, and opacity. Select your video layer in the timeline and expand the Transform options. Click the stopwatch icon next to the property you want to animate (e.g., Scale), move the Current Time Indicator to a different time, and adjust the value. After Effects will automatically create keyframes at each point, creating smooth transitions.
 Step 7: Preview and Adjust
Once all elements are in place, use the Preview button to play through your intro and check for any needed adjustments. This is the time to spot any timing errors, check transitions, and ensure the animations are smooth. Make any necessary tweaks to perfect your intro before exporting it.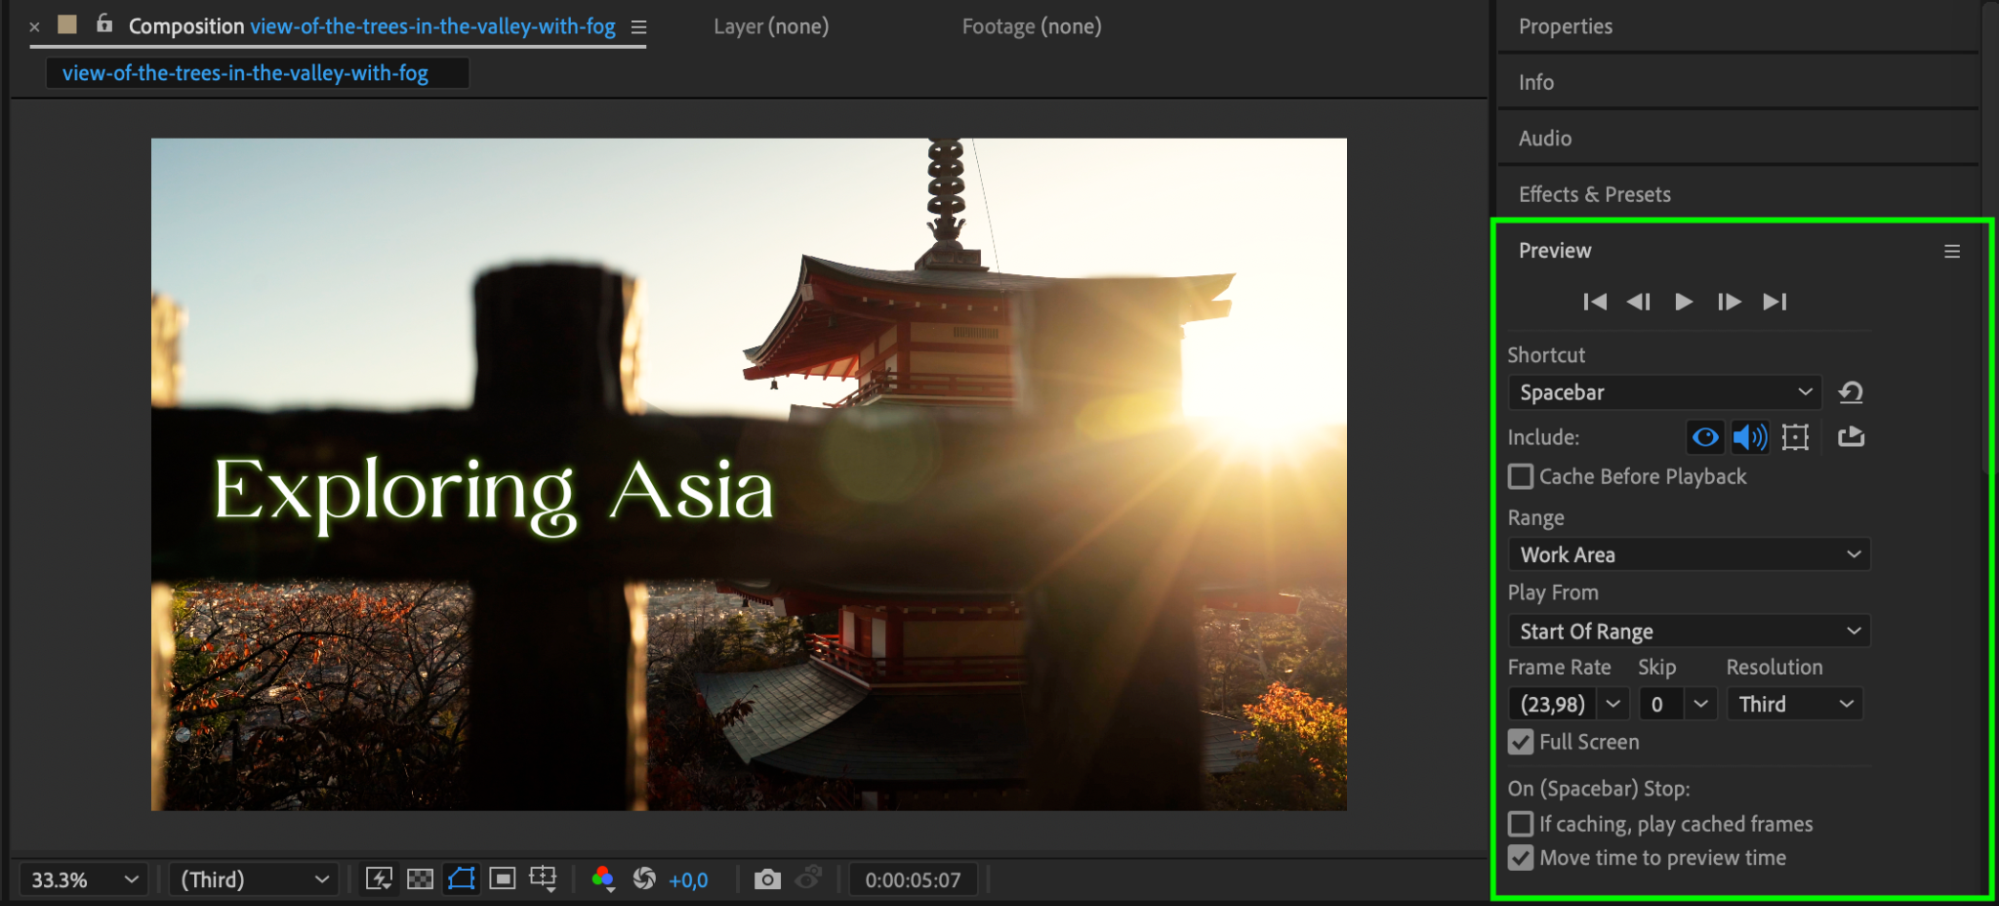
Conclusion
Get 10% off when you subscribe to our newsletter

Creating an intro in After Effects gives you the opportunity to showcase your brand or channel in a visually stunning way. By following these steps, you can design intros that capture your audience’s attention and set the tone for your content. With practice, you’ll be able to customize and experiment with new effects and styles, making each intro uniquely yours. Dive in and get creative!


