Creating a Smooth and Engaging Outro in After Effects
Introduction
An outro is an important element for videos, providing a smooth ending while reinforcing branding or messages like “Thanks for Watching.” In this guide, we will go through the process of creating a dynamic outro using text animation, background effects, and seamless transitions.
Step 1: Prepare Your Timeline
Open your After Effects project and make sure there is enough space at the end of your timeline for the outro. Adjust the composition length if needed to fit your outro duration.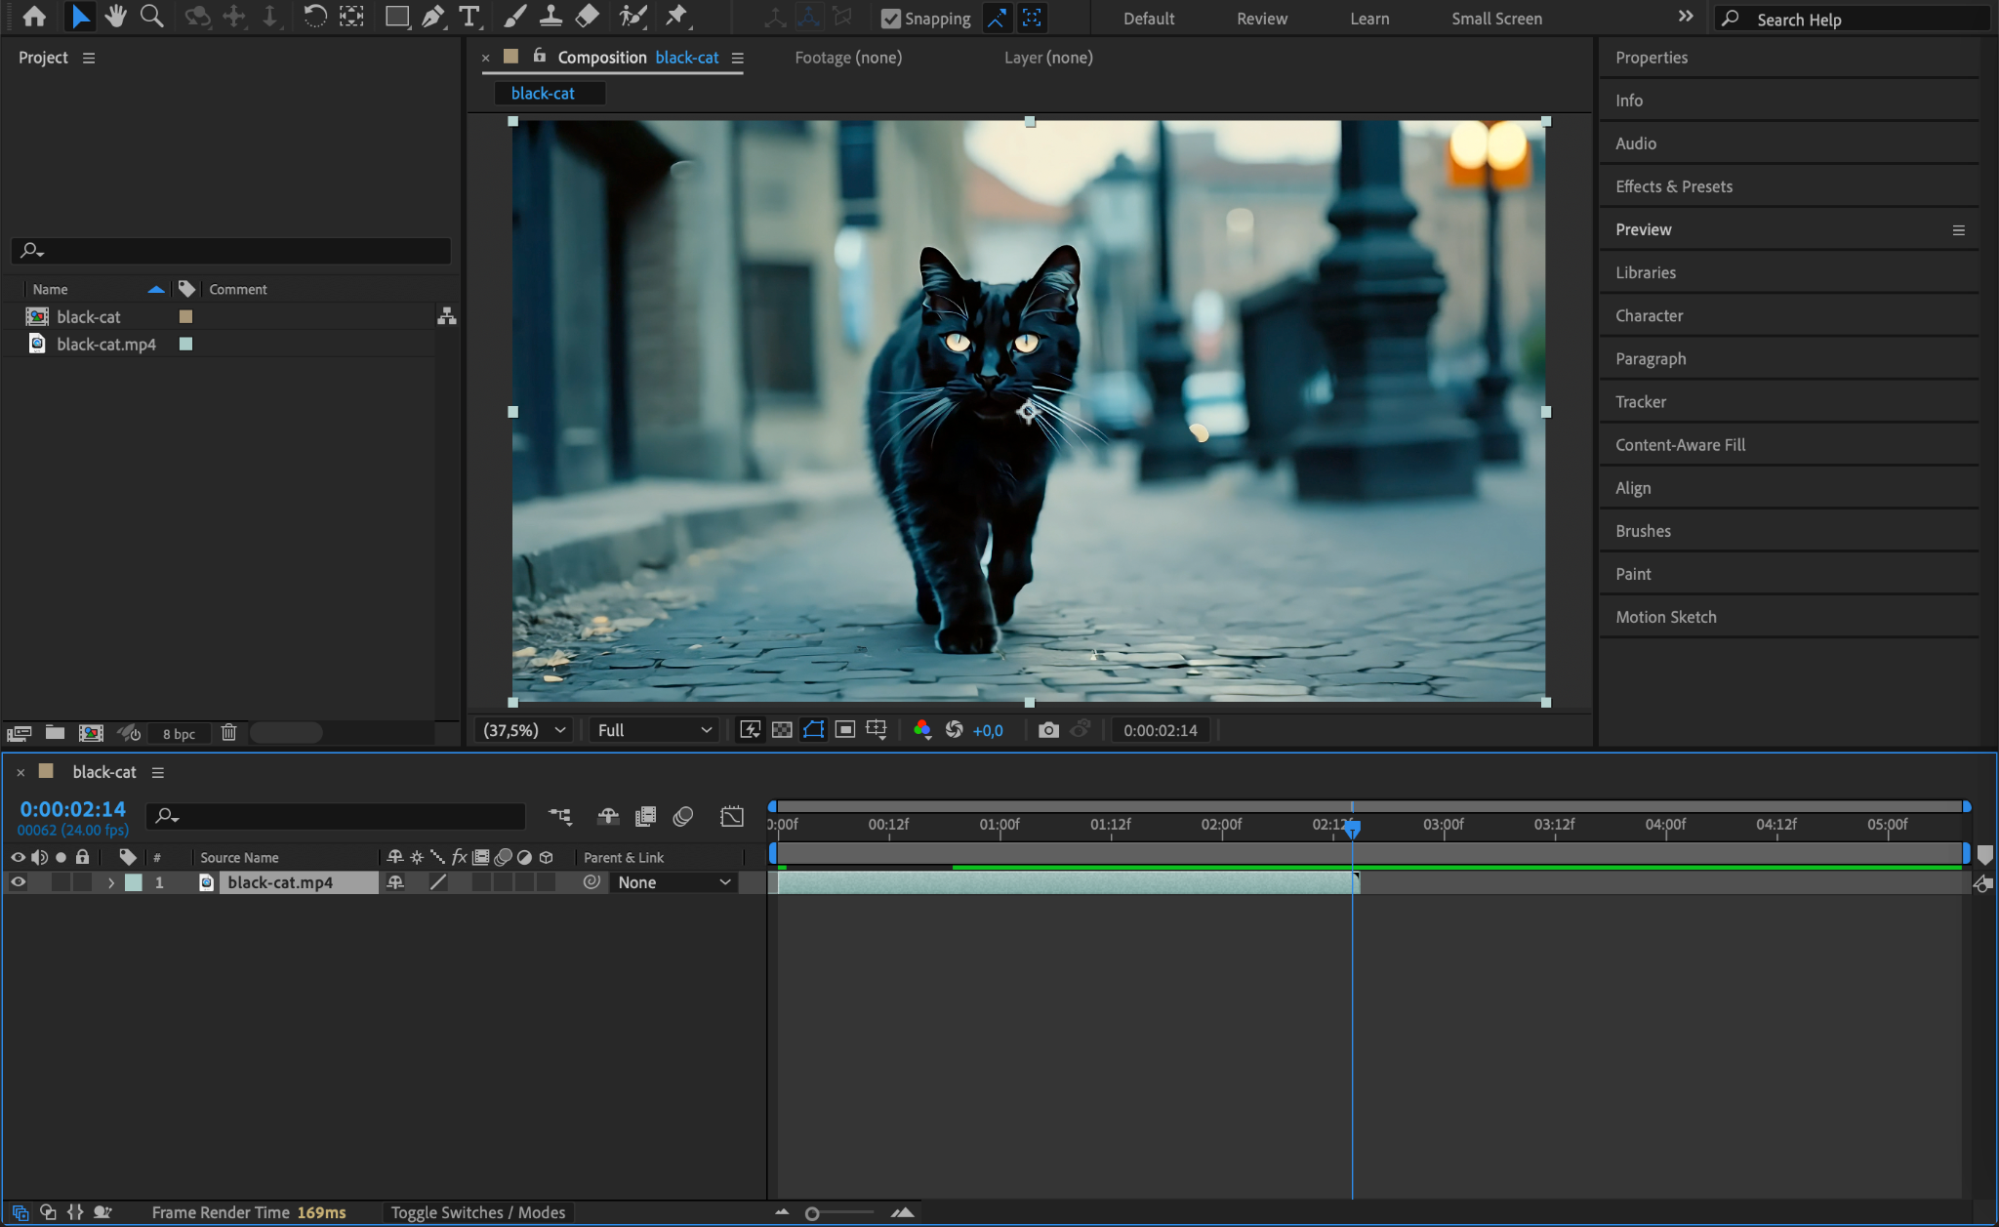 Step 2: Add Text or Logo
Use the Type Tool (Ctrl/Cmd + T) to create a text layer. This could be your logo, channel name, or a simple “Thanks for Watching.” Use the Properties Panel to customize the font and size, and align it properly using the Align Panel.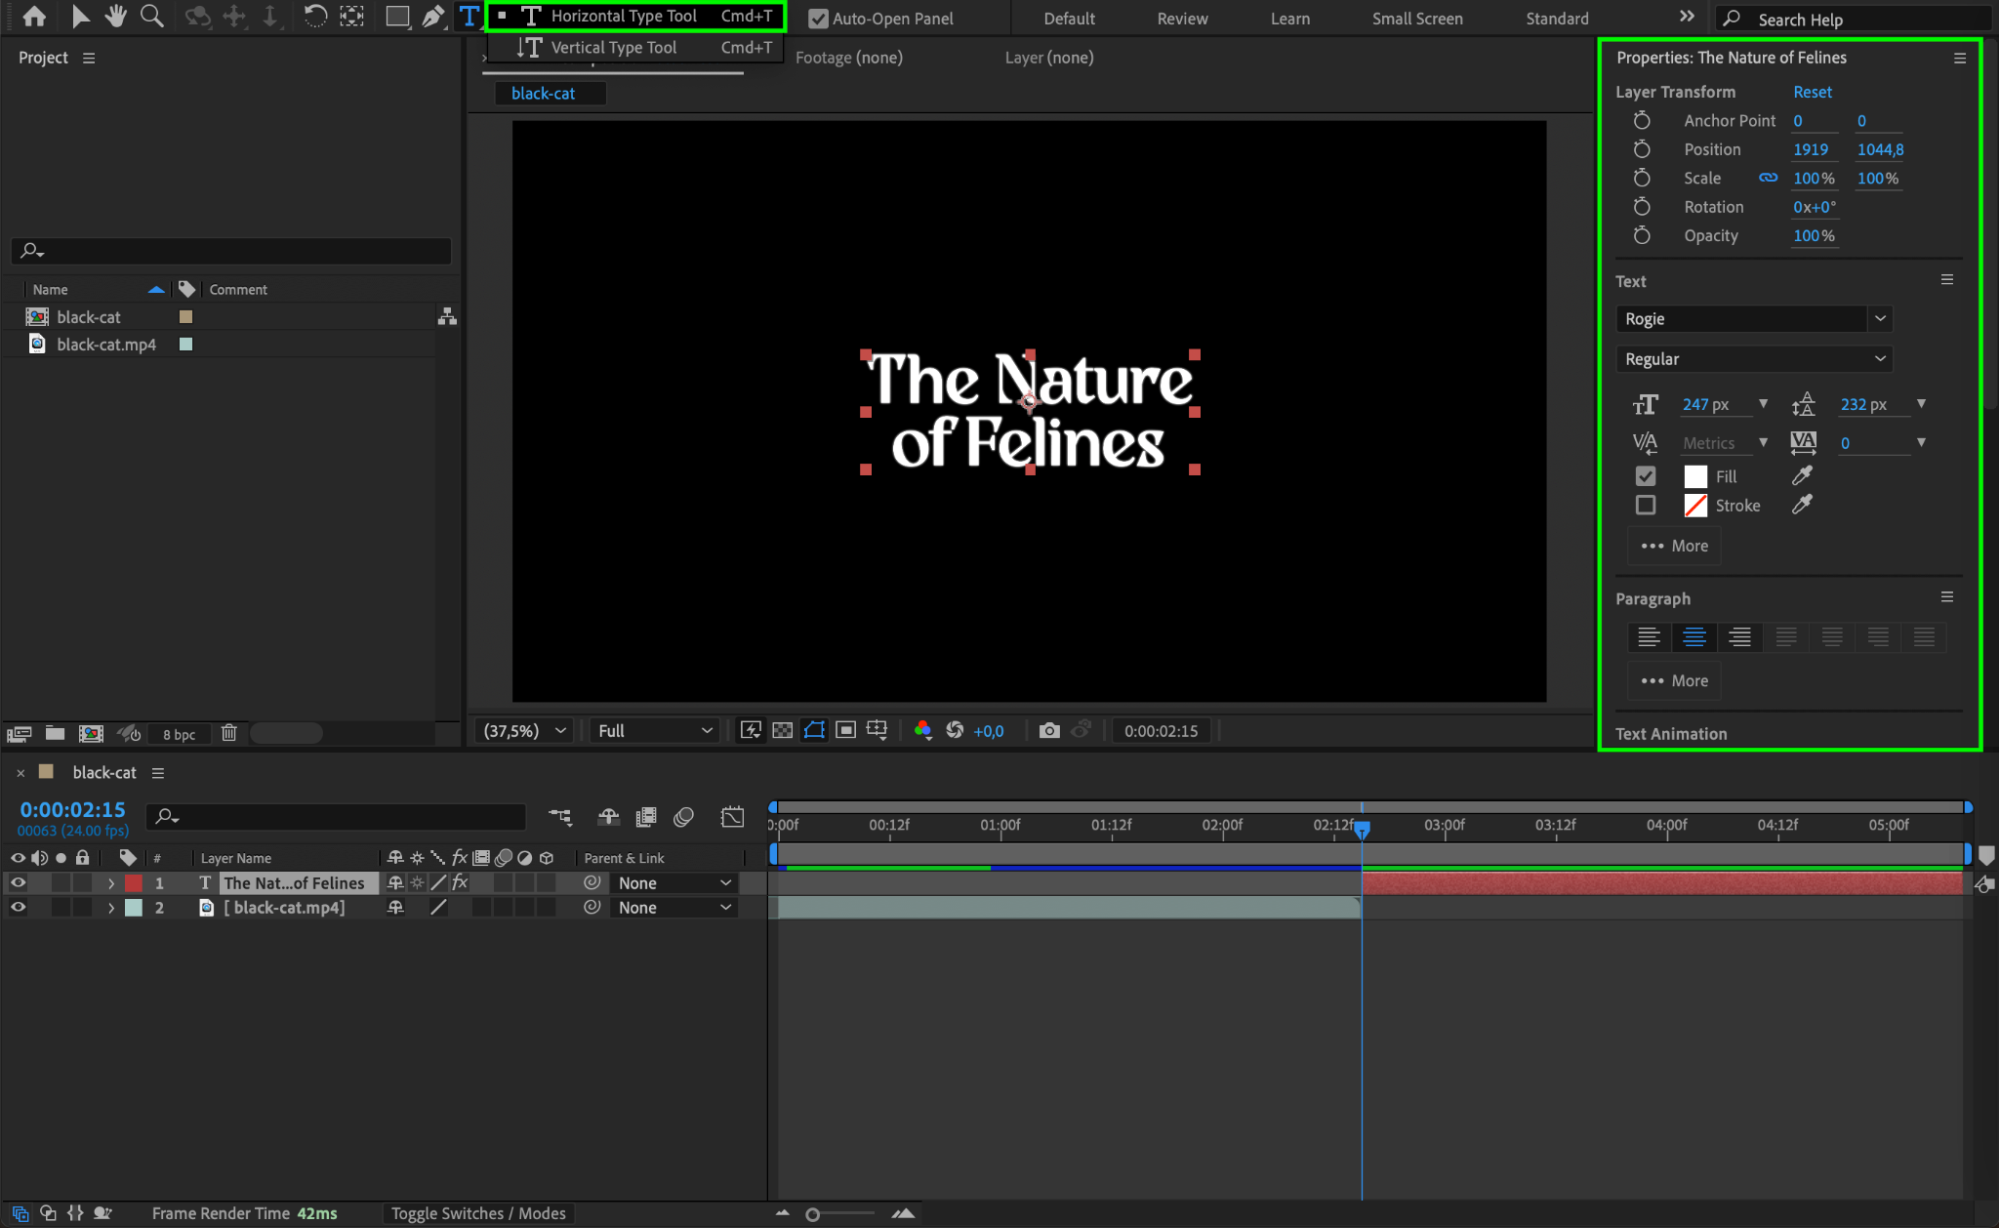 Step 3: Animate the Text Scale
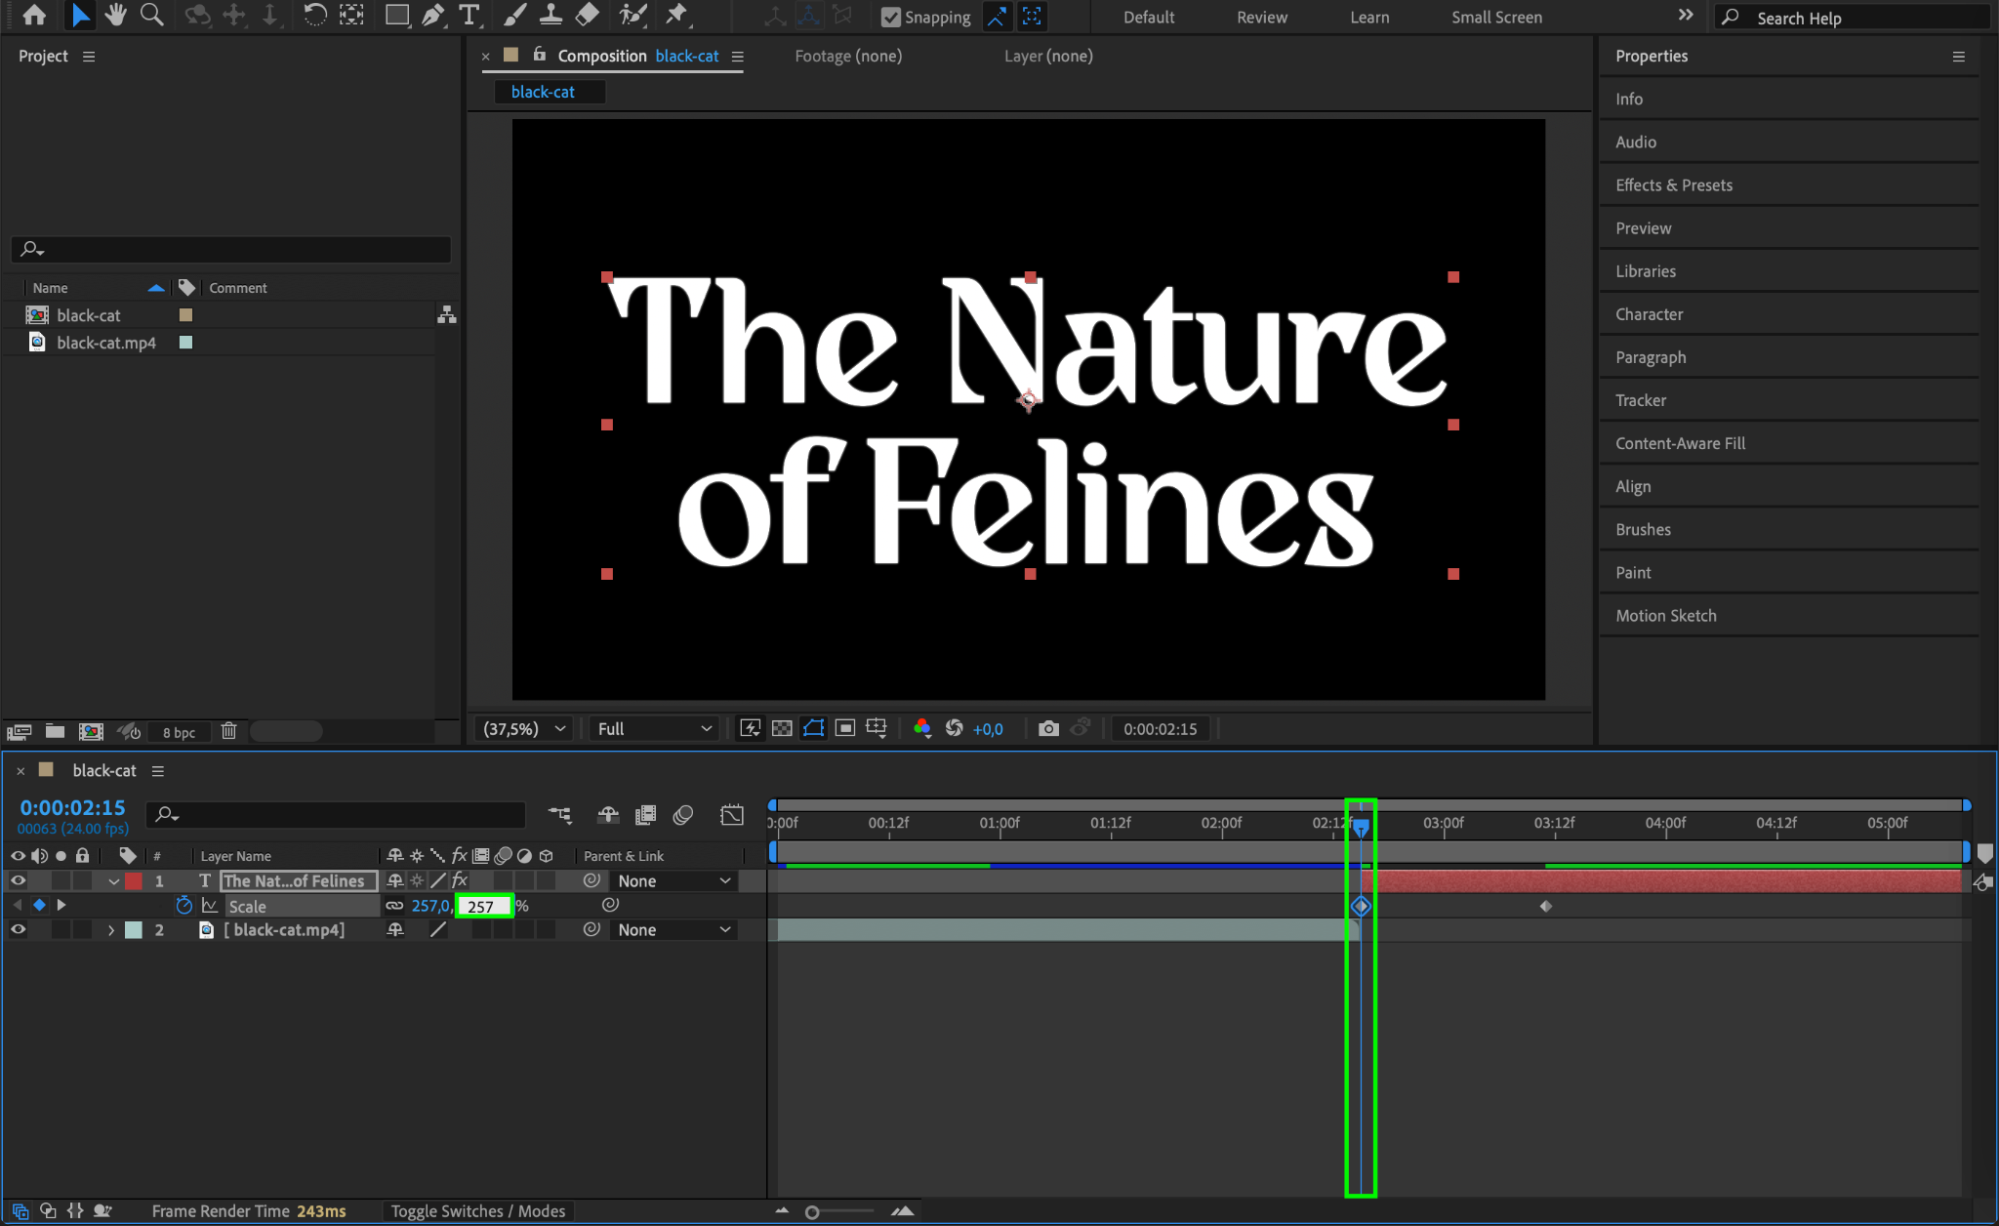
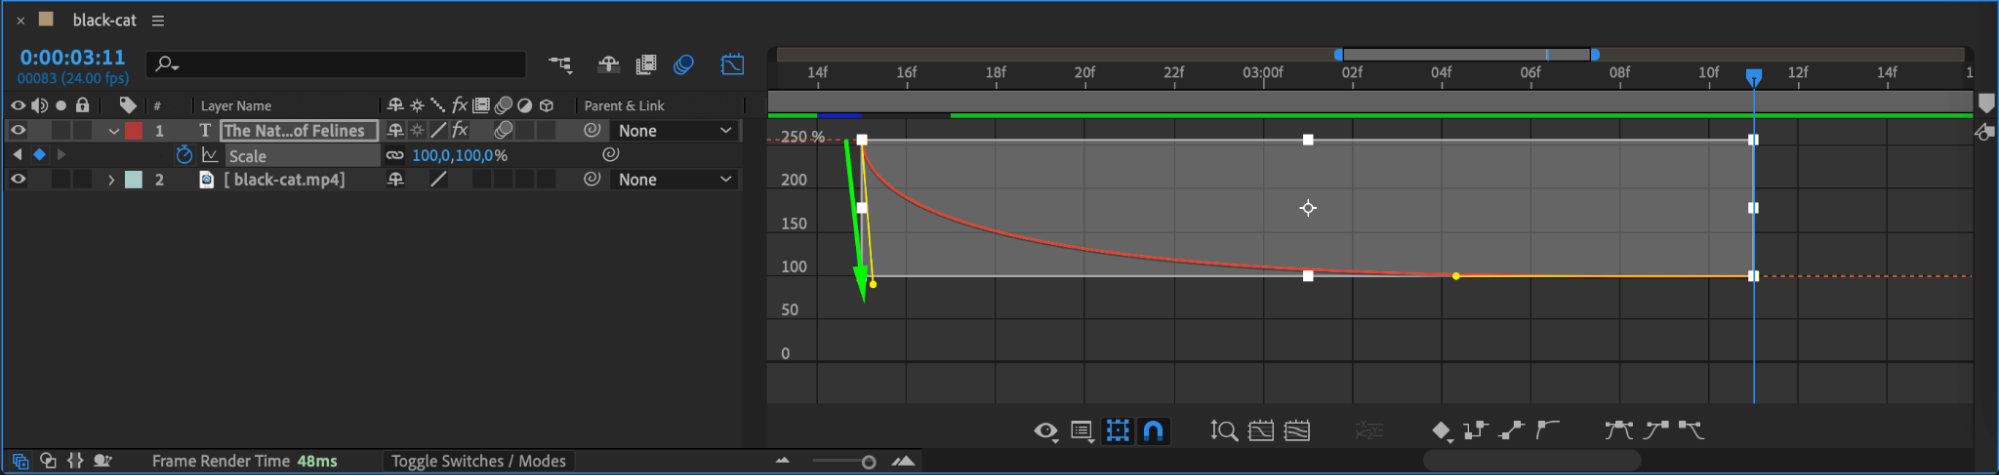
Set the text scale at the start of the layer to a much larger size (e.g., 257%). Move forward about 20 frames and set another keyframe with the original scale. This will create a smooth zoom-out effect.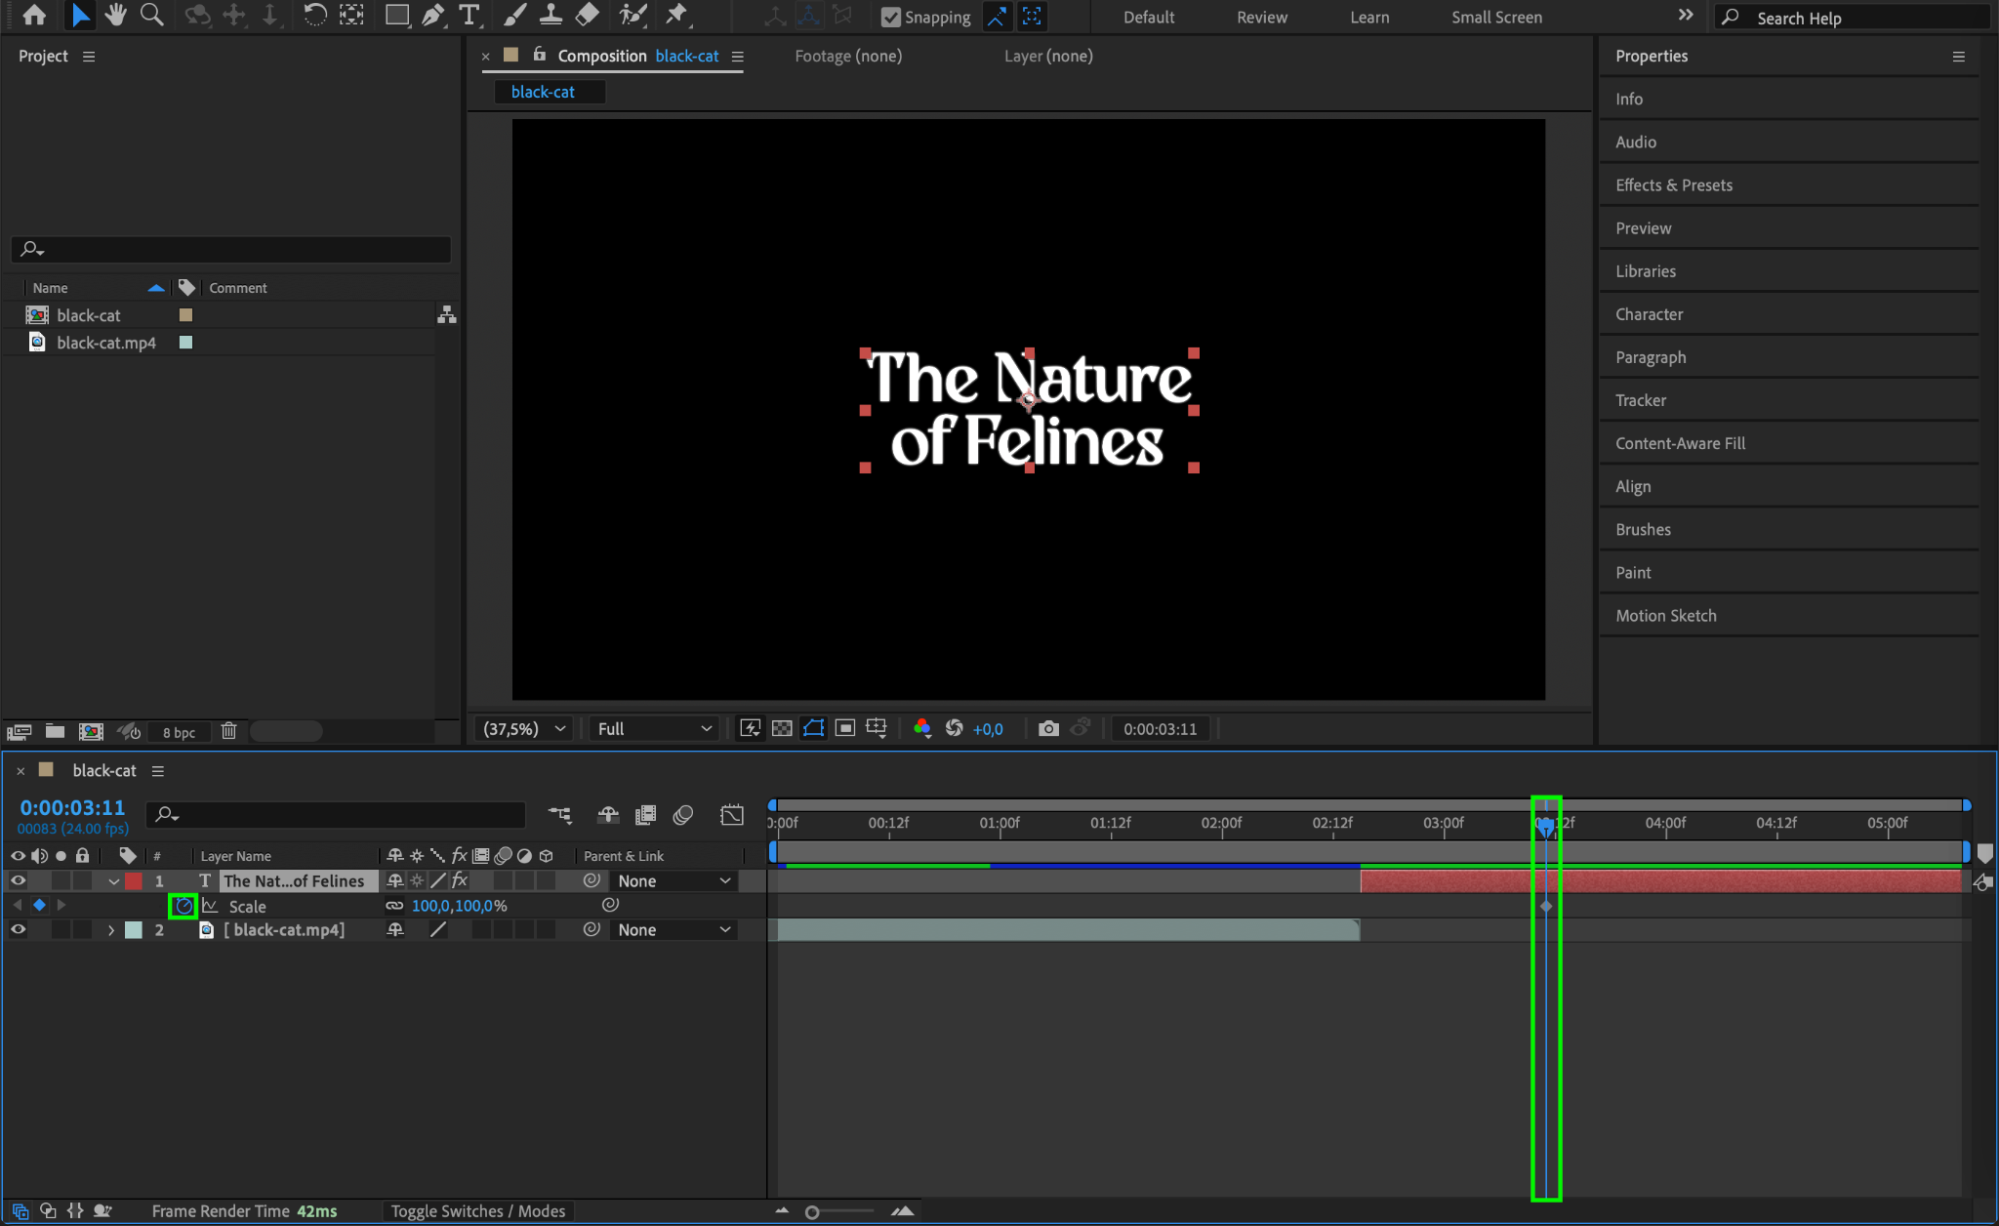
 Step 4: Enable Motion Blur
Enable Motion Blur for the text layer to make the animation look more natural. Also, turn on the Motion Blur toggle in the Timeline Panel.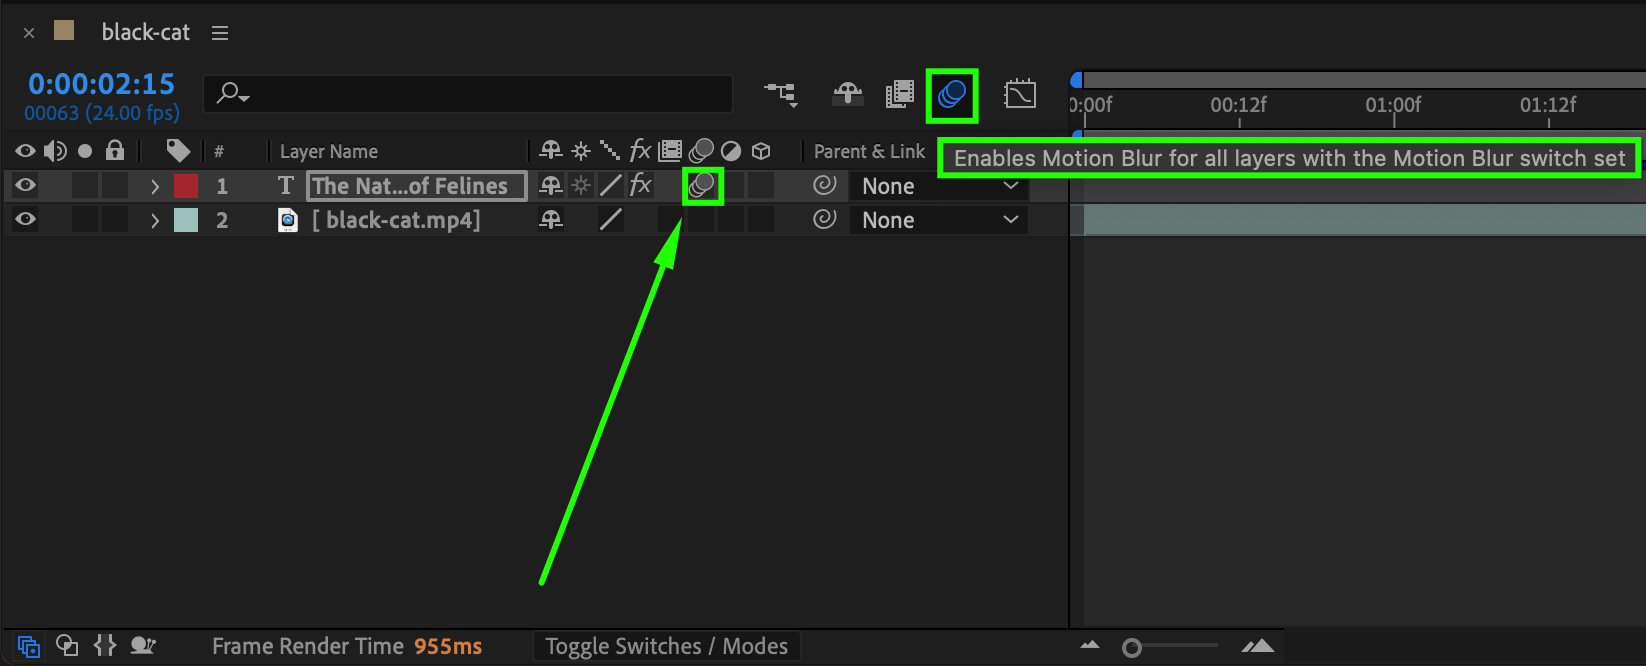
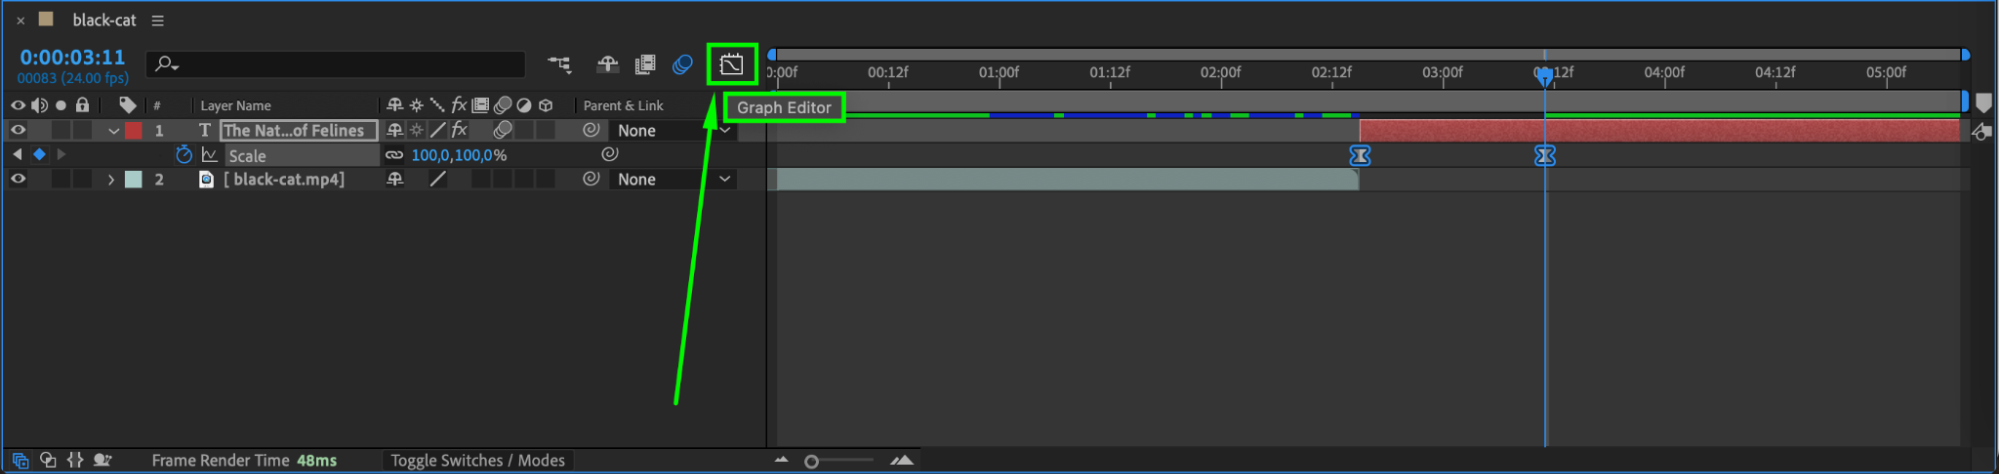
Step 5: Smooth Keyframes with Easy Ease
Right-click the scale keyframes, go to Keyframe Assistant > Easy Ease, then open the Graph Editor to adjust the speed for a smoother animation.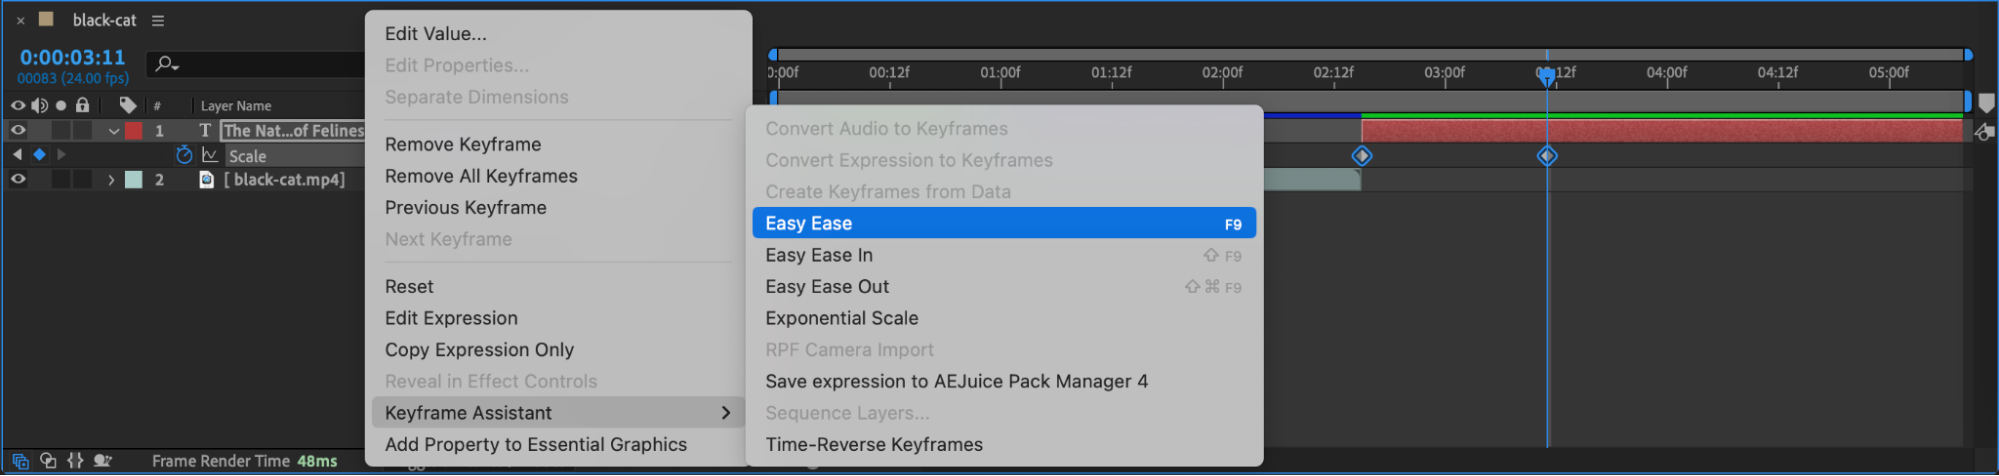
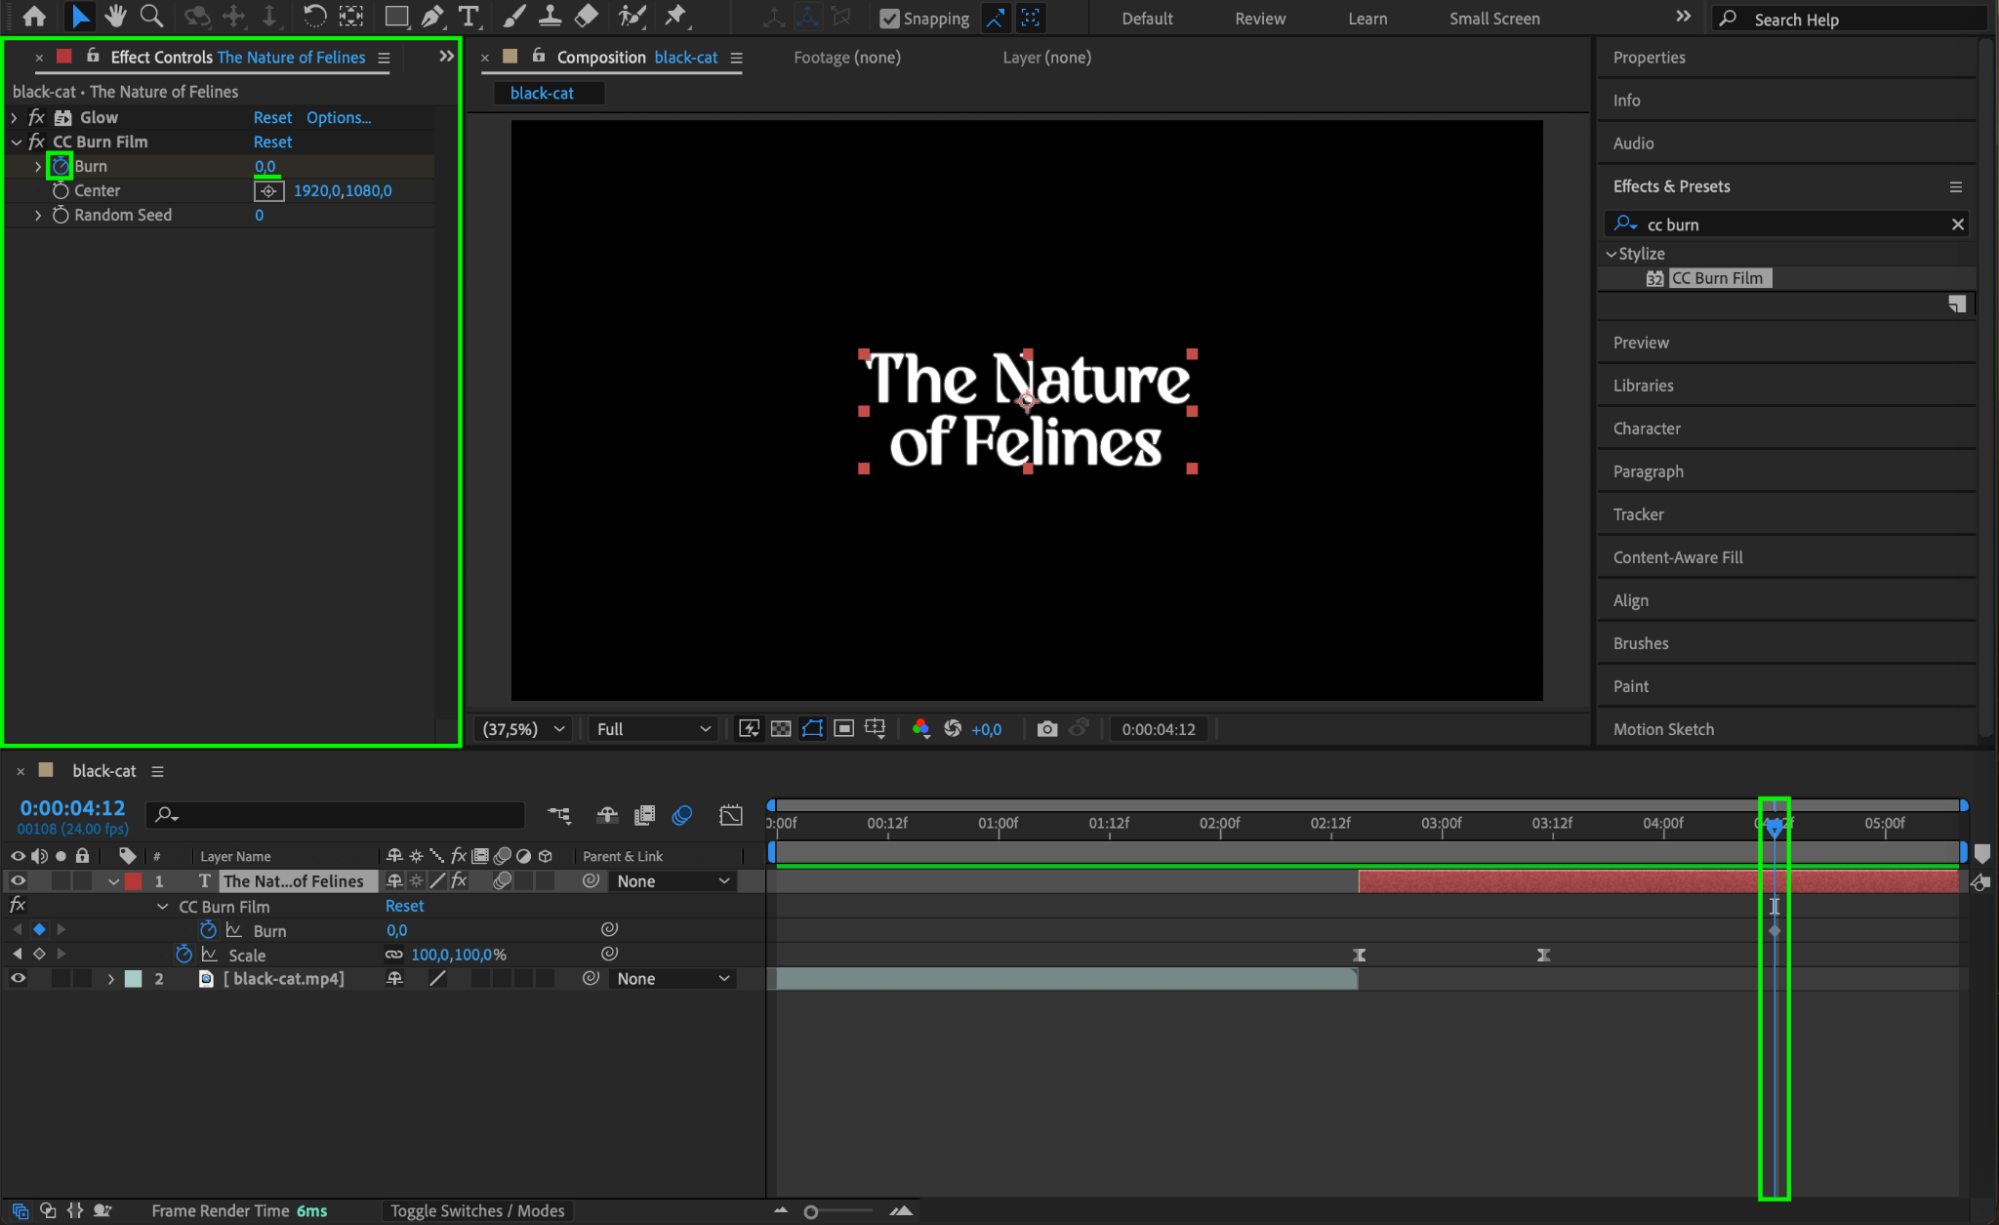
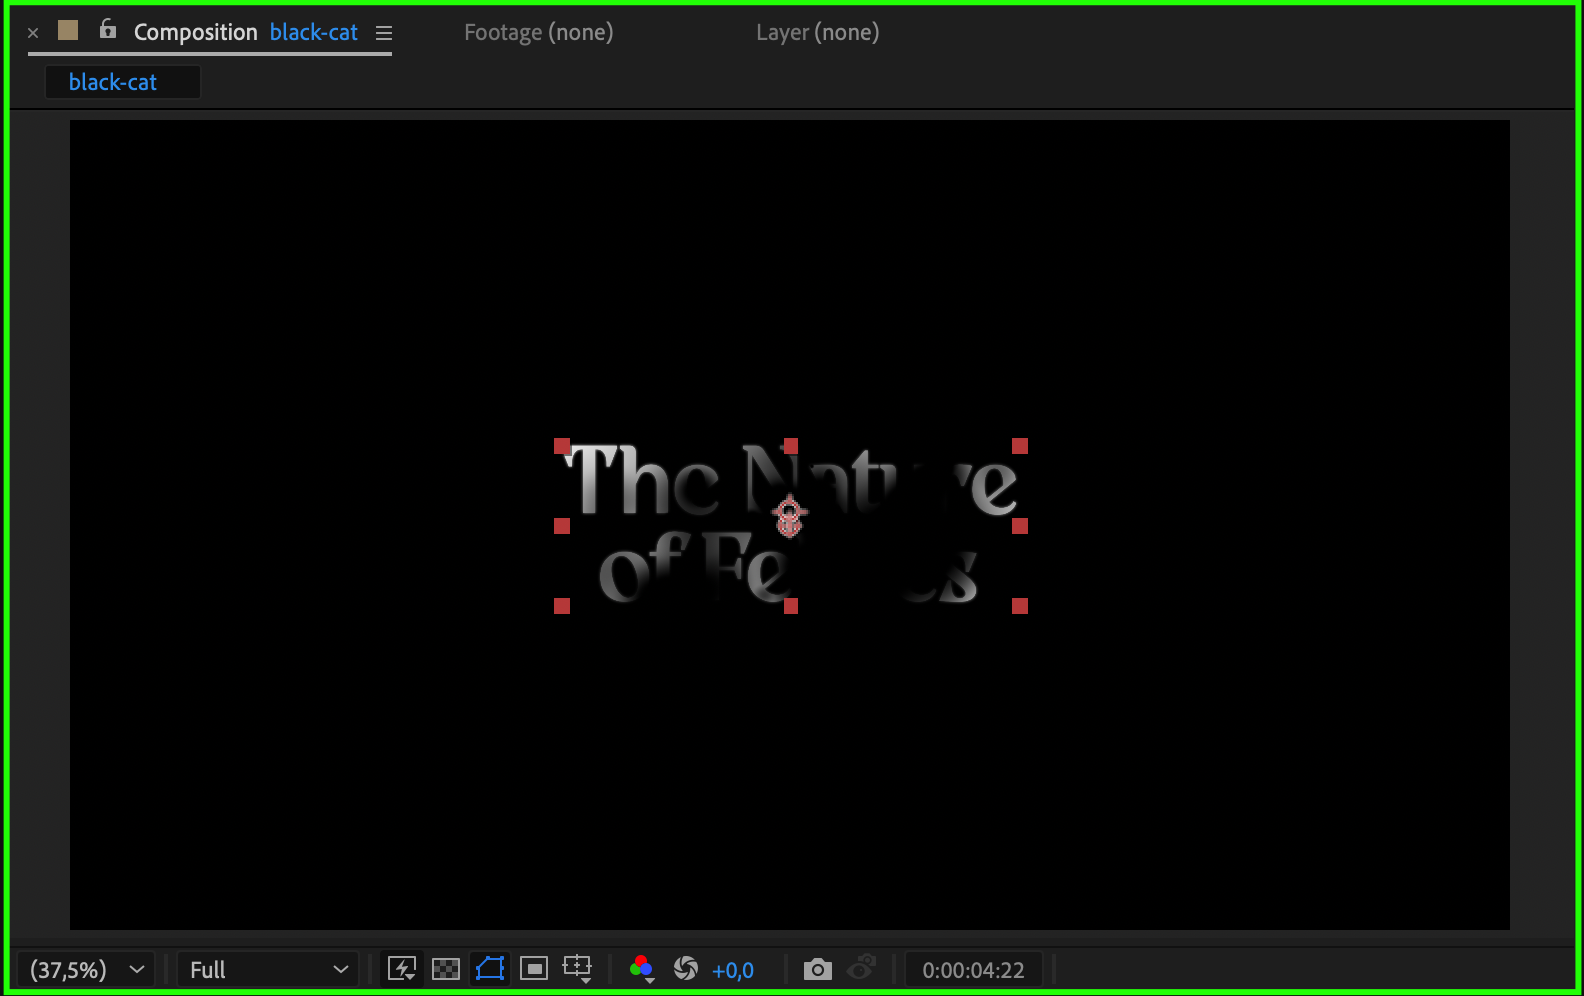
 Step 6: Apply the Burn Film Effect
Apply CC Burn Film to the text layer. Set the Burn amount to 0% at the point where the text starts to fade out and 100% at the end of the animation. This creates a seamless disappearing effect.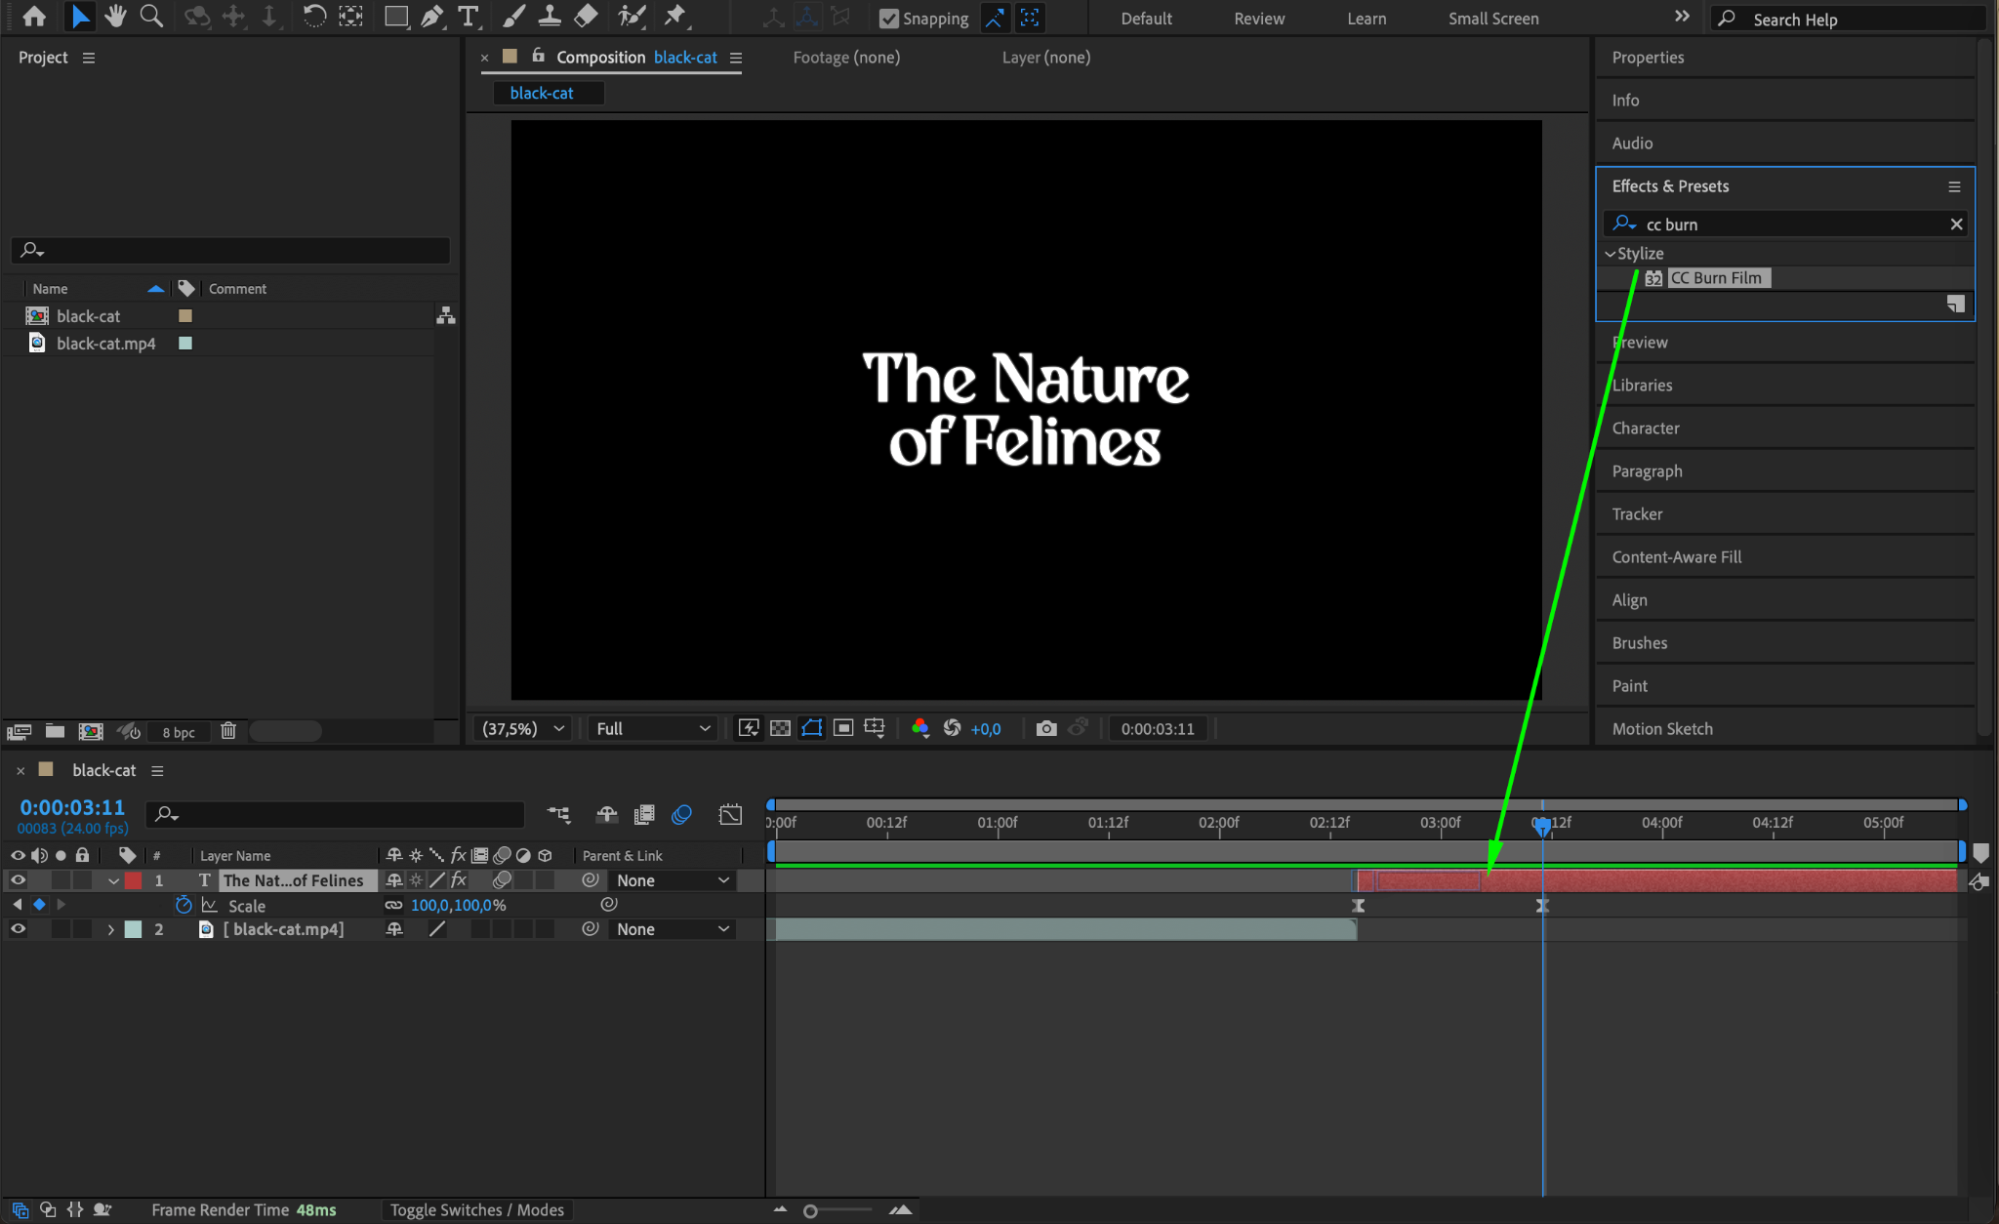

Get 10% off when you subscribe to our newsletter

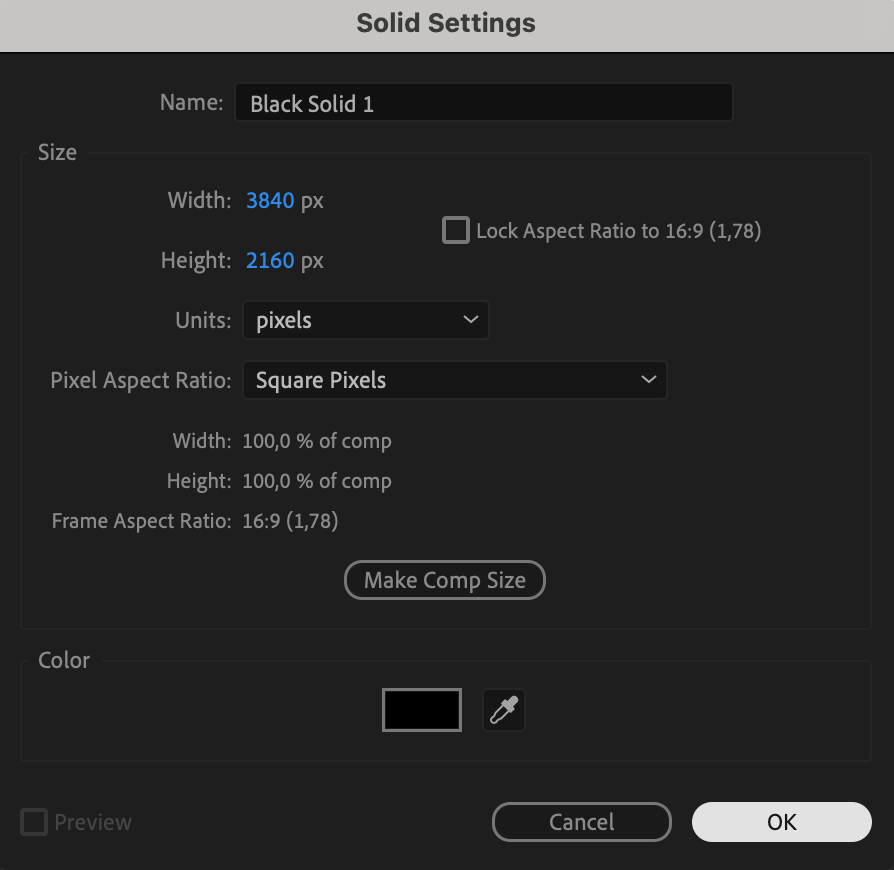
Step 7: Create a Background Layer
Go to Layer > New > Solid to create a background. Choose a color that matches your outro theme.

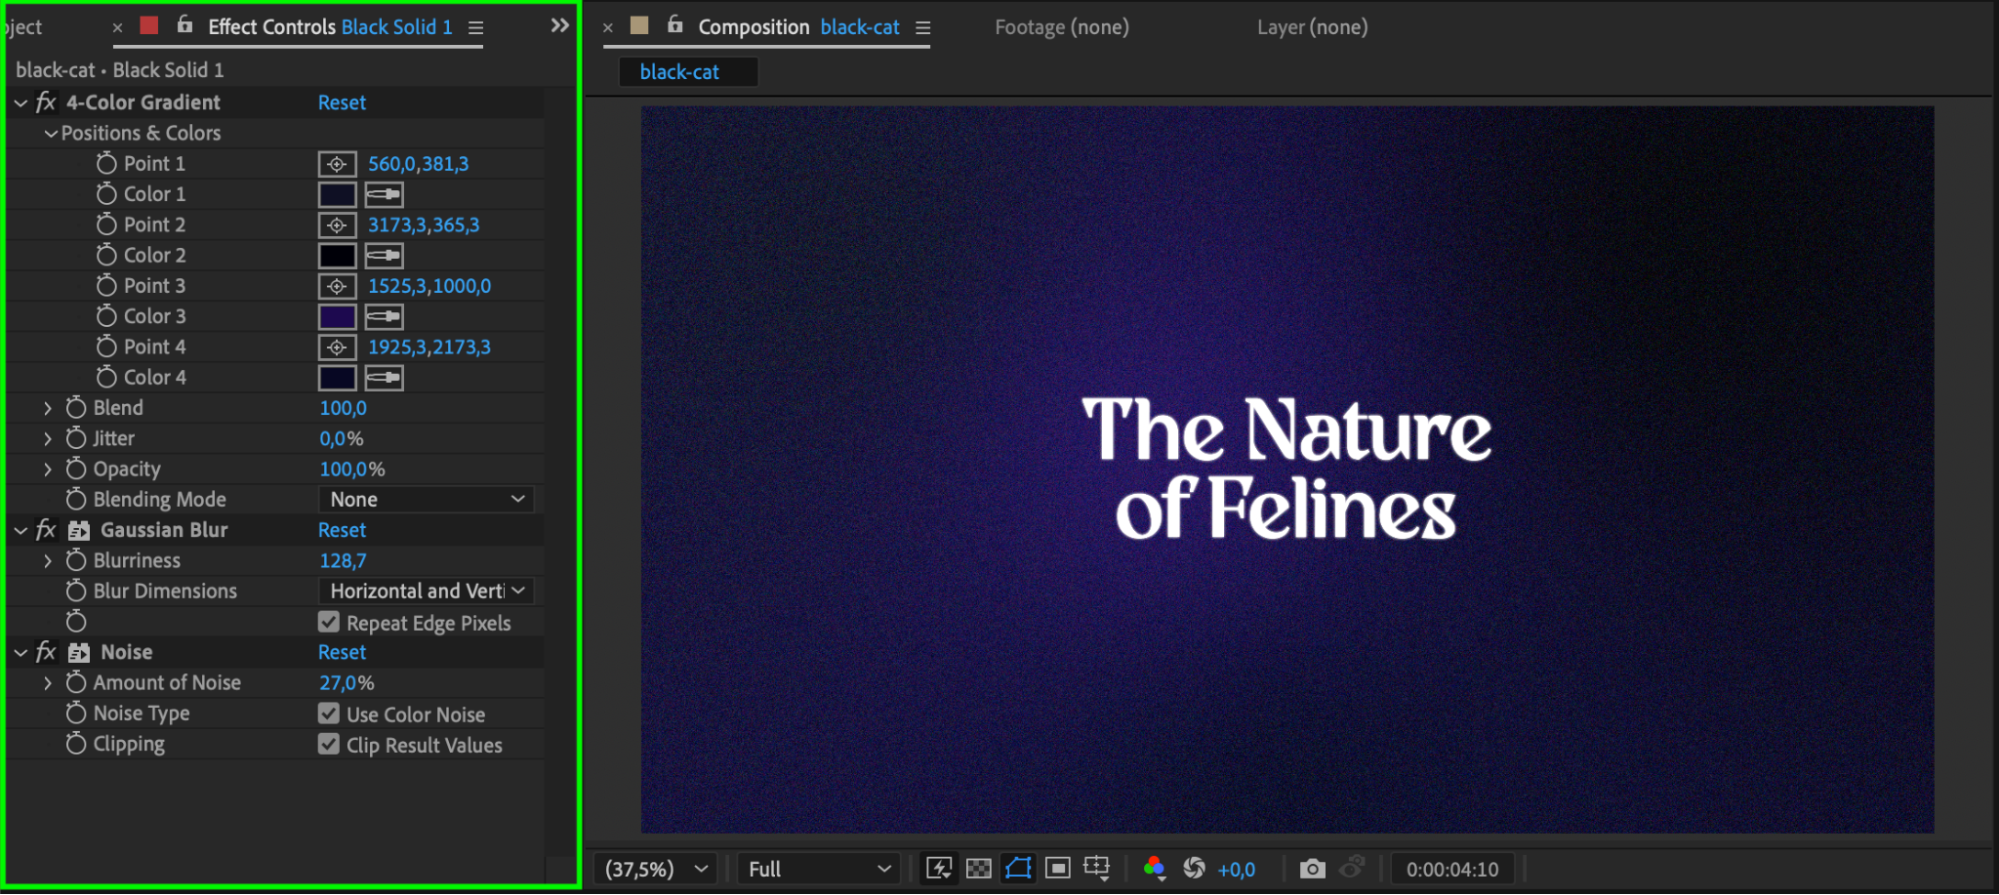
 Step 8: Enhance Background with Effects
Apply 4-Color Gradient to the solid layer to add depth. You can also add a Noise effect for extra texture.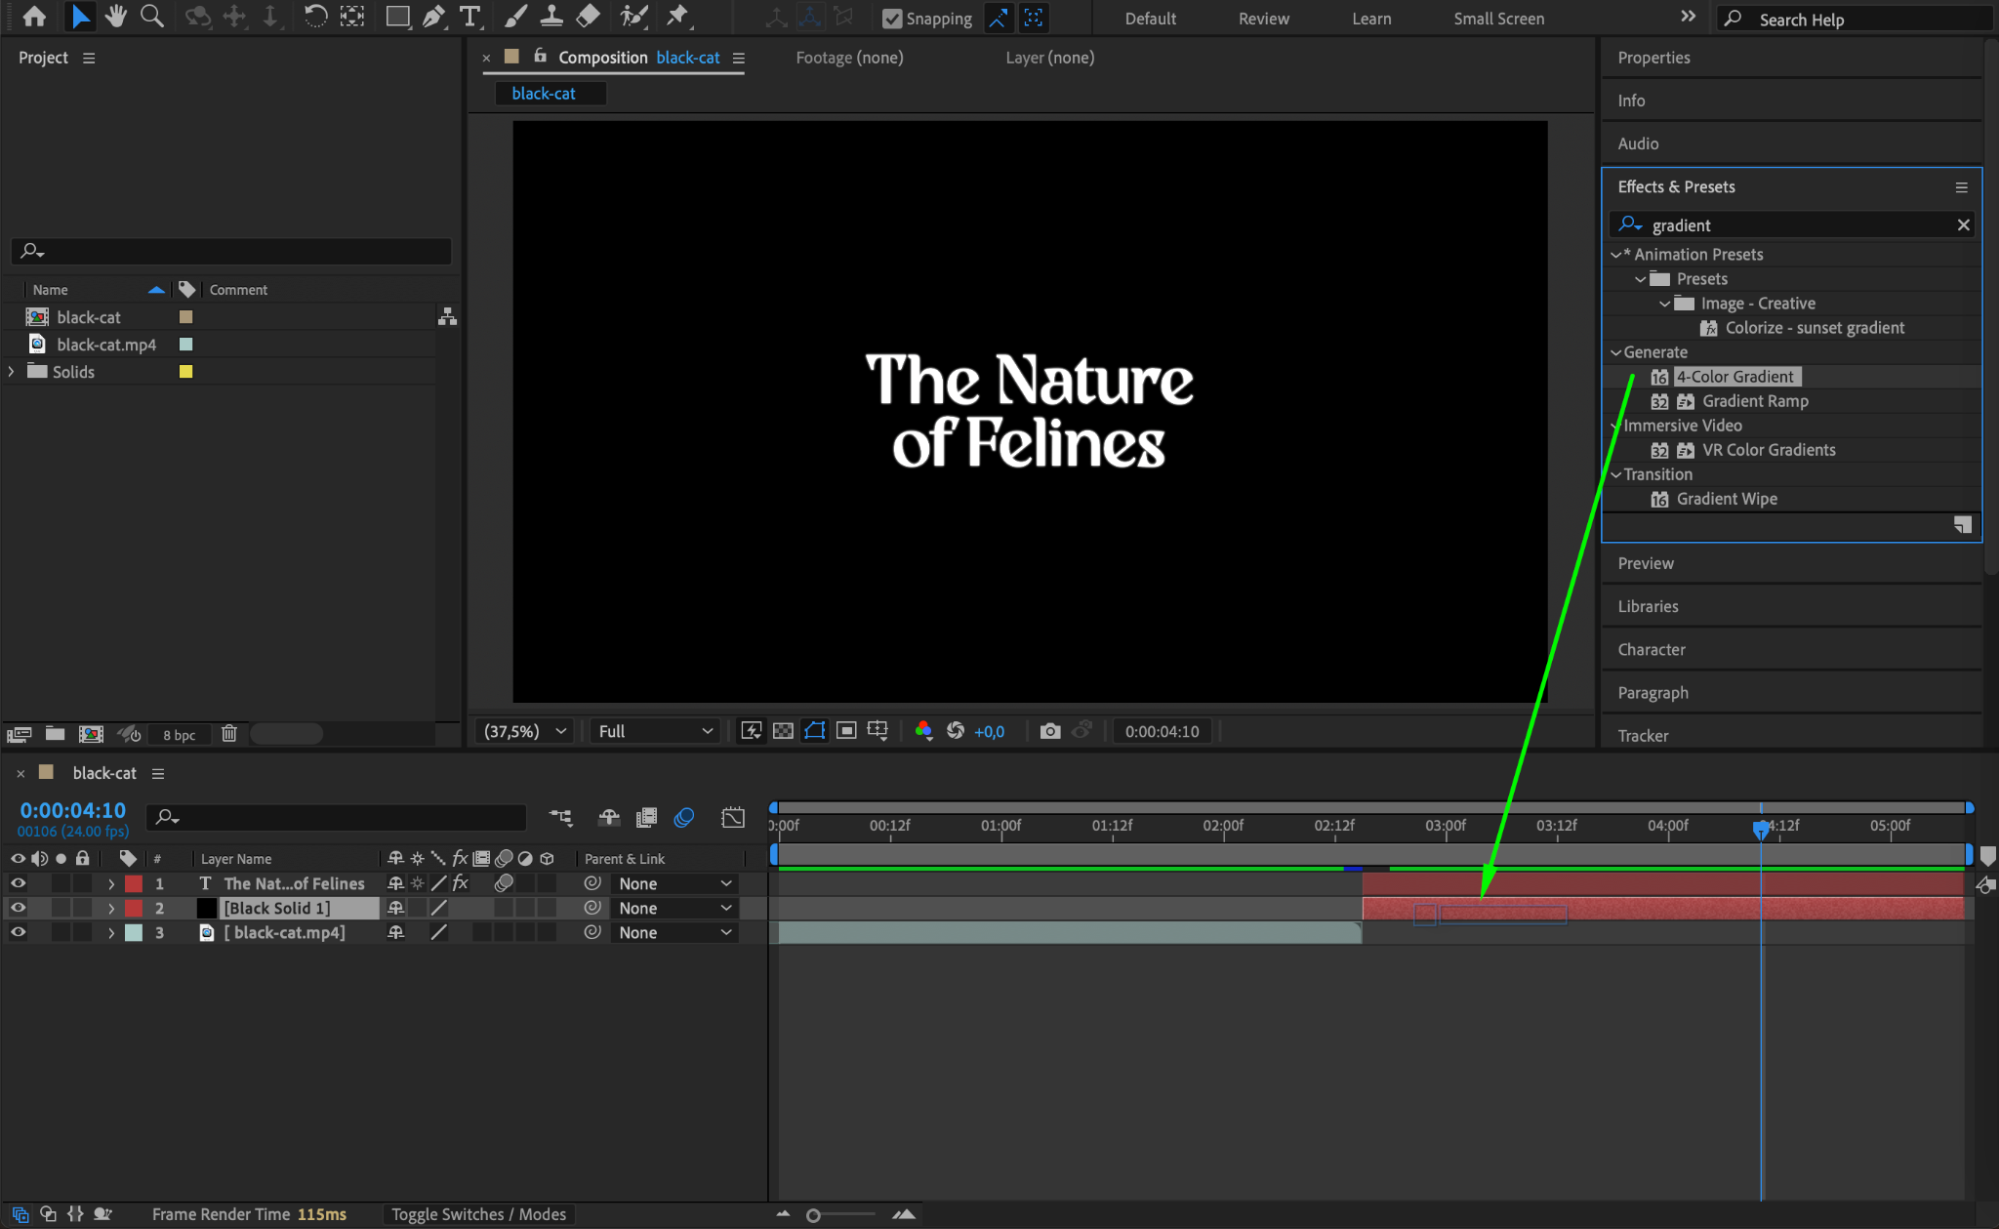
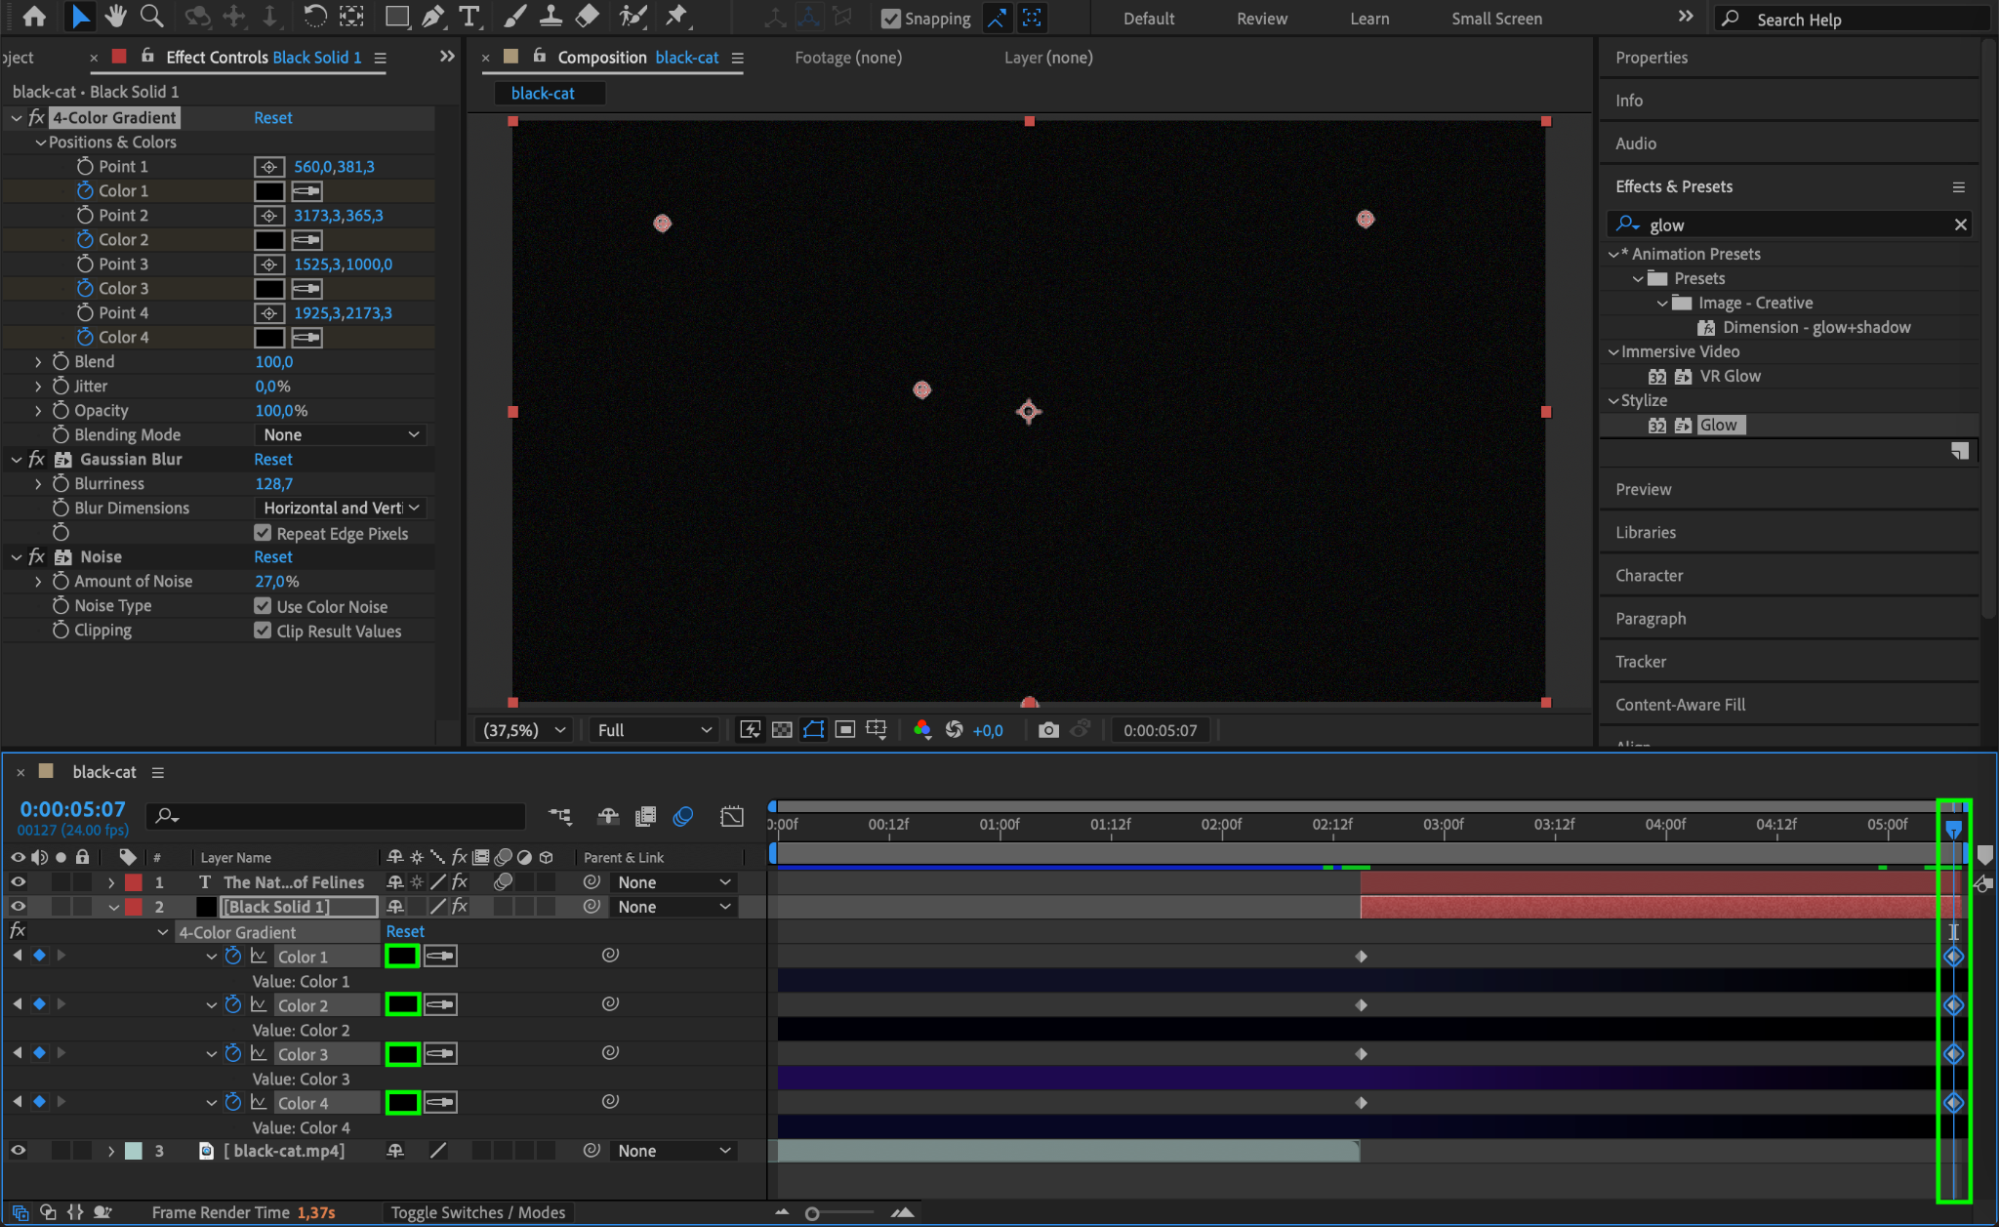
 Step 9: Animate a Color Fade to Black
To create a seamless transition, animate the background colors gradually turning black as the text burns away.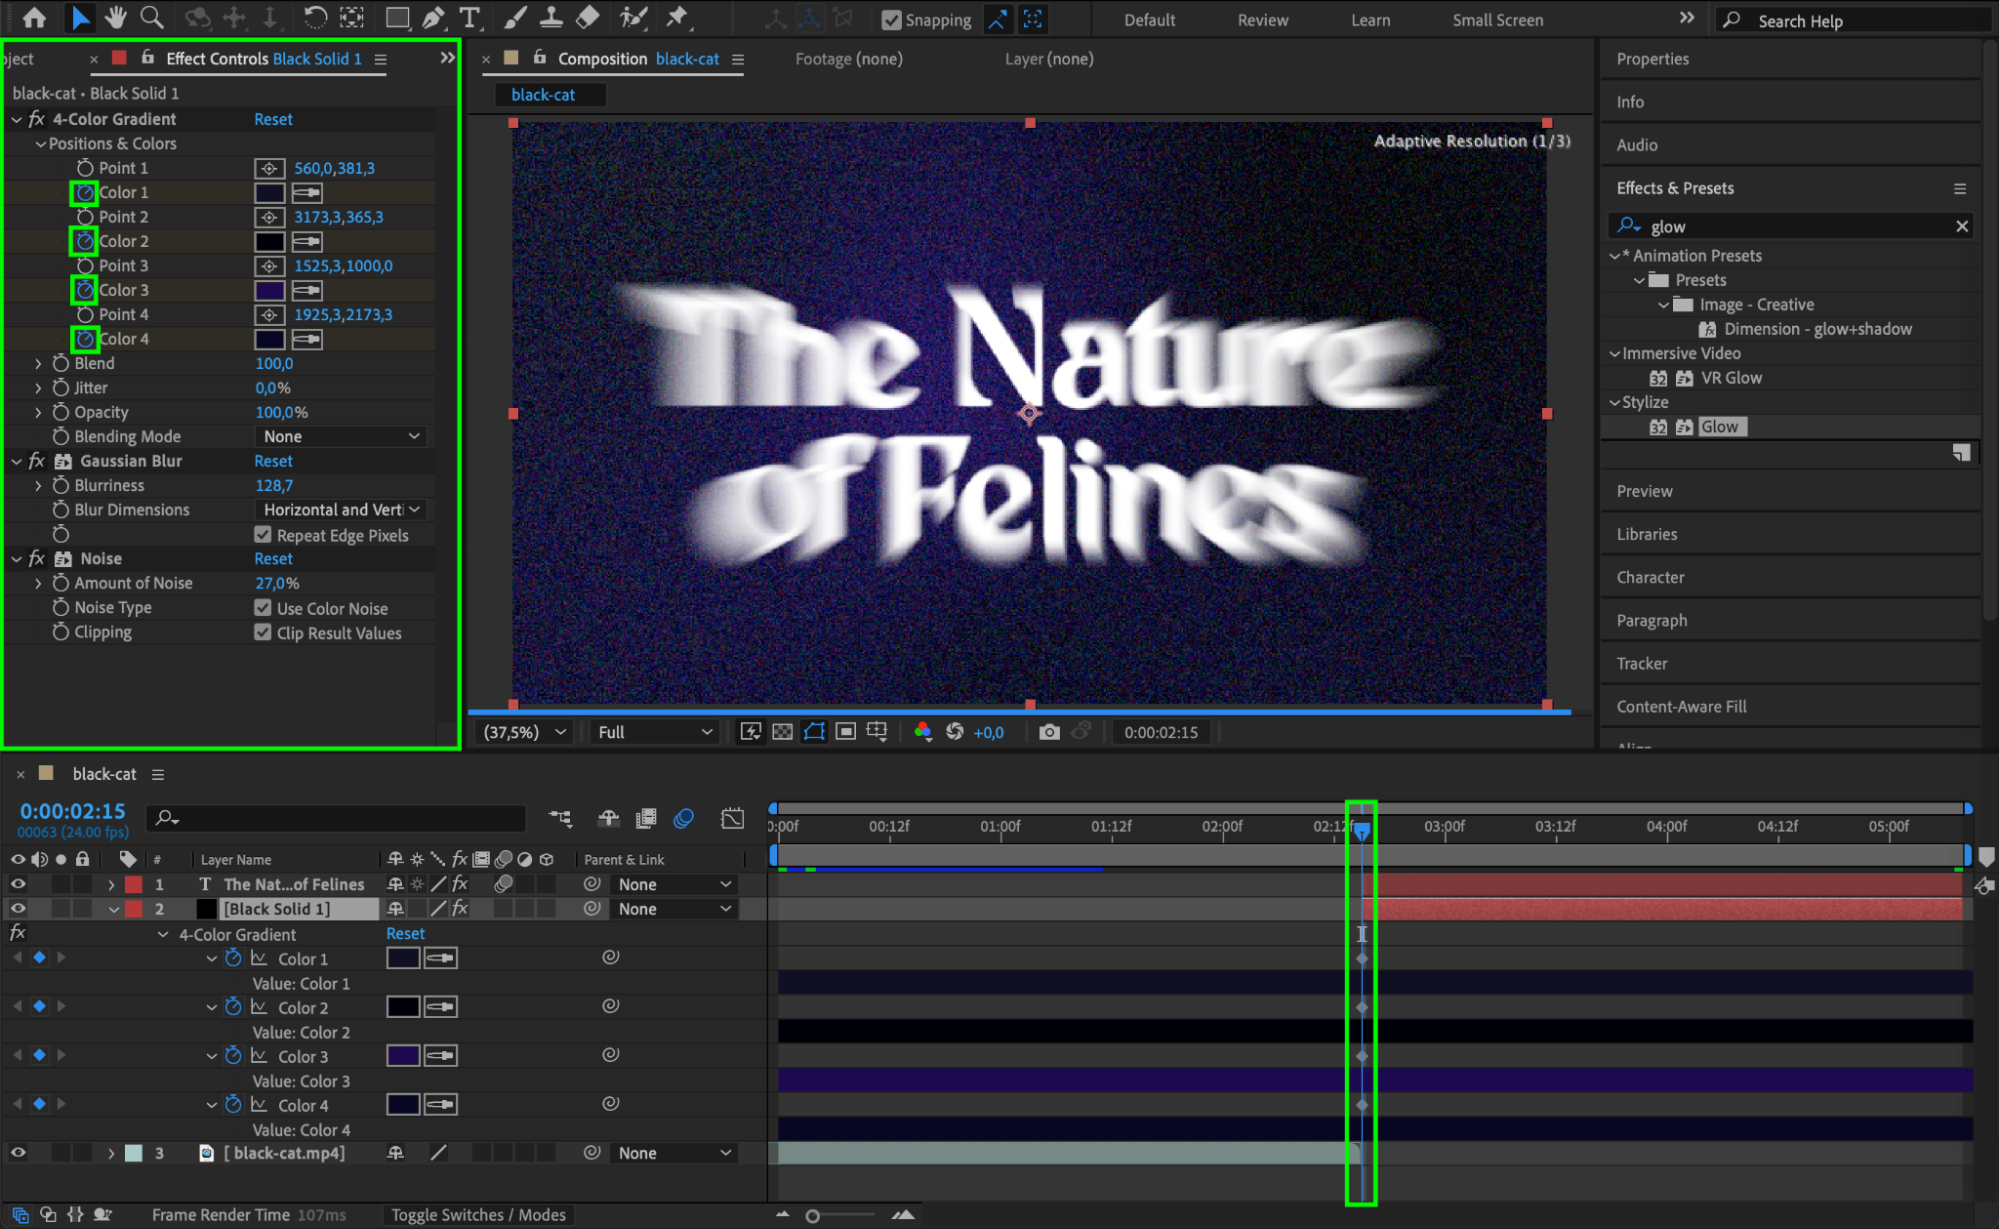
 Step 10: Refine with Easy Ease
Apply Easy Ease to all keyframes to ensure smooth transitions and natural movement.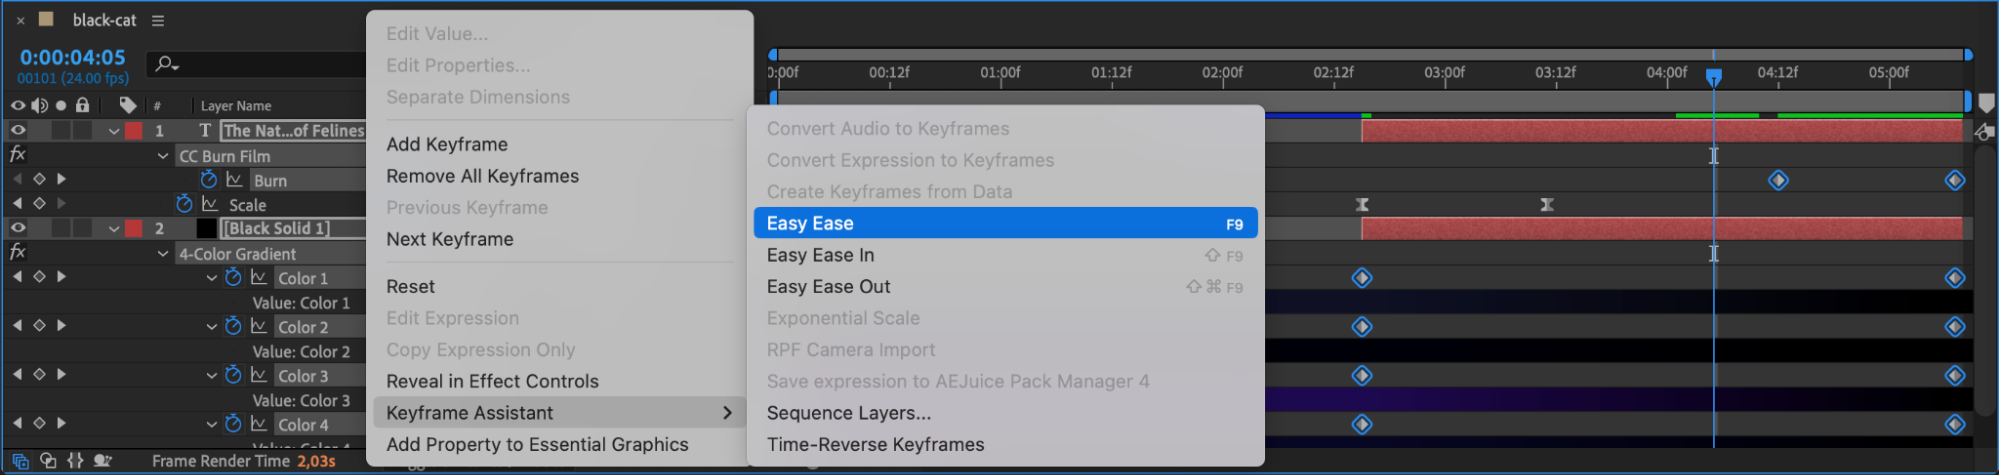 Step 11: Preview the Outro
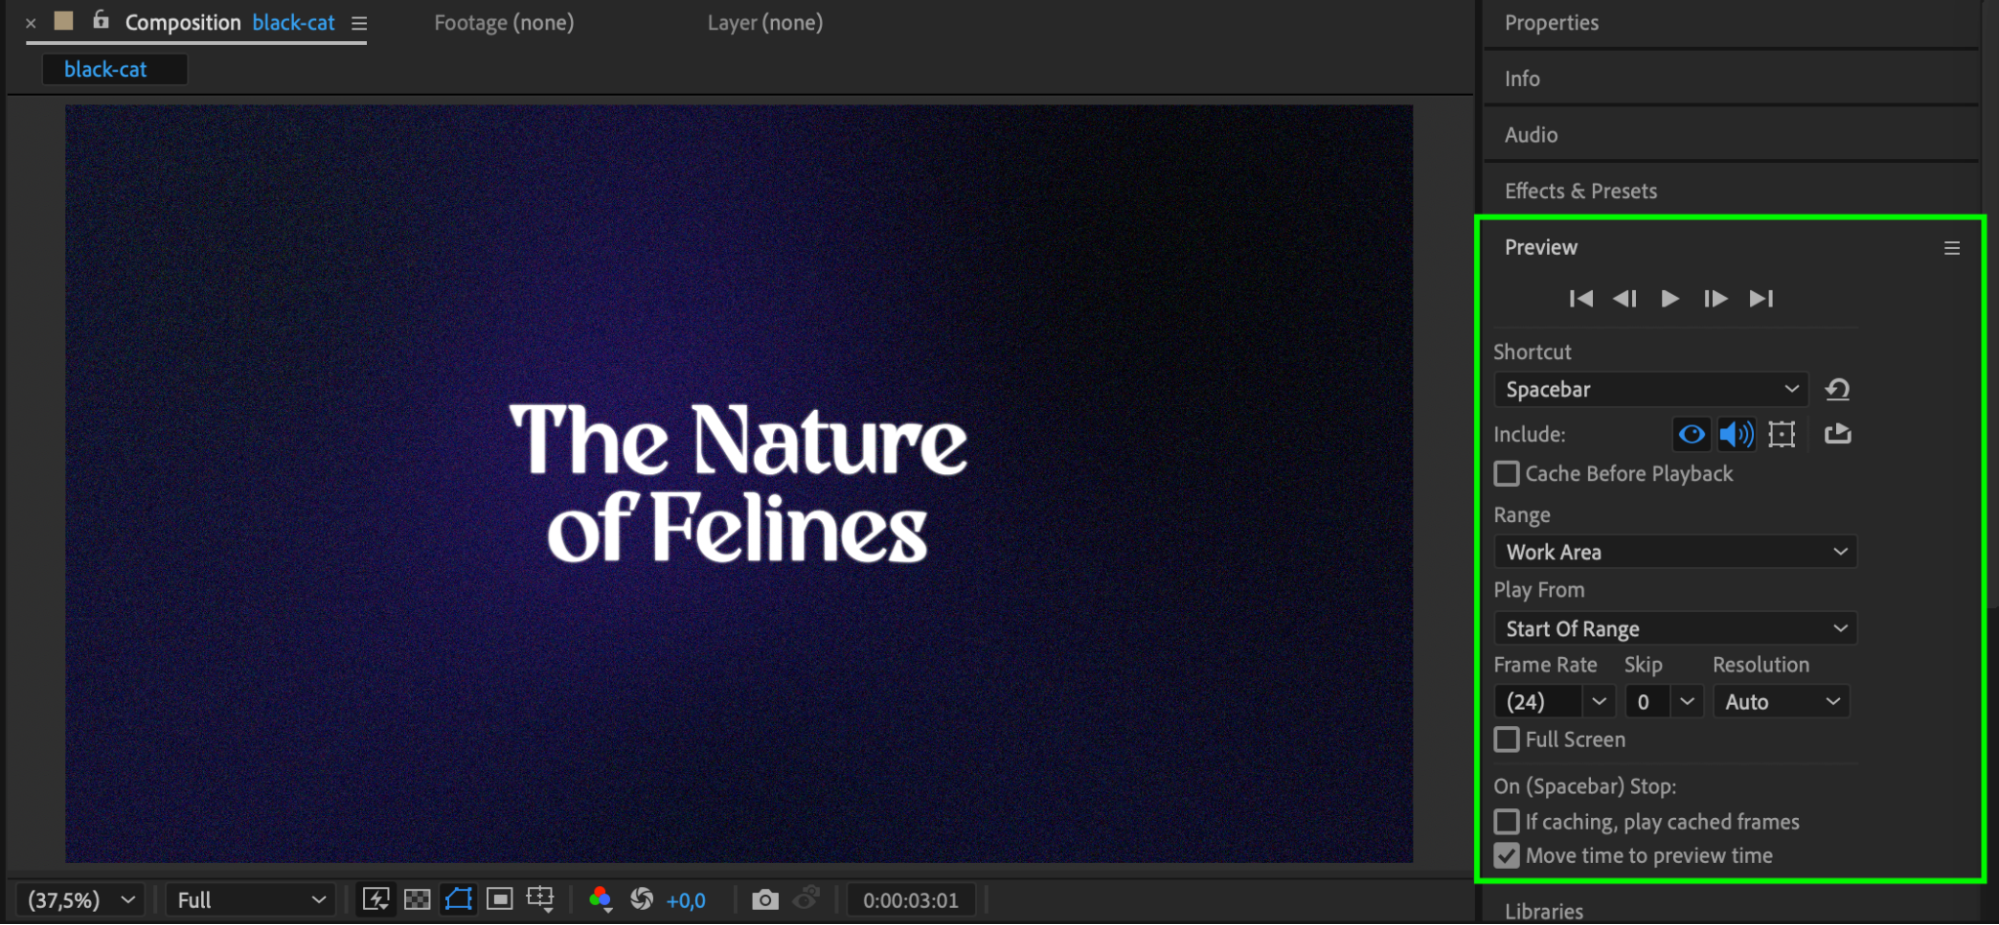
Press Spacebar to preview the animation and make adjustments if needed. Ensure the outro flows smoothly with the rest of the video.
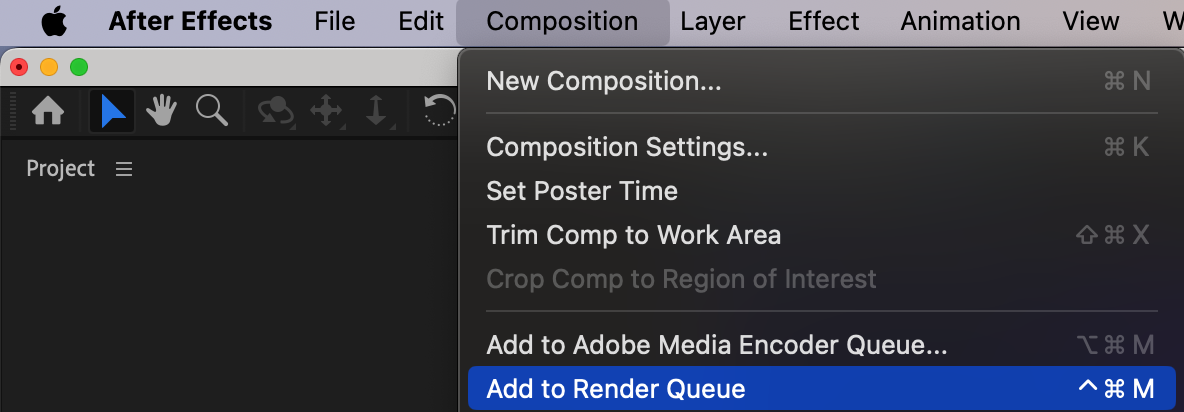
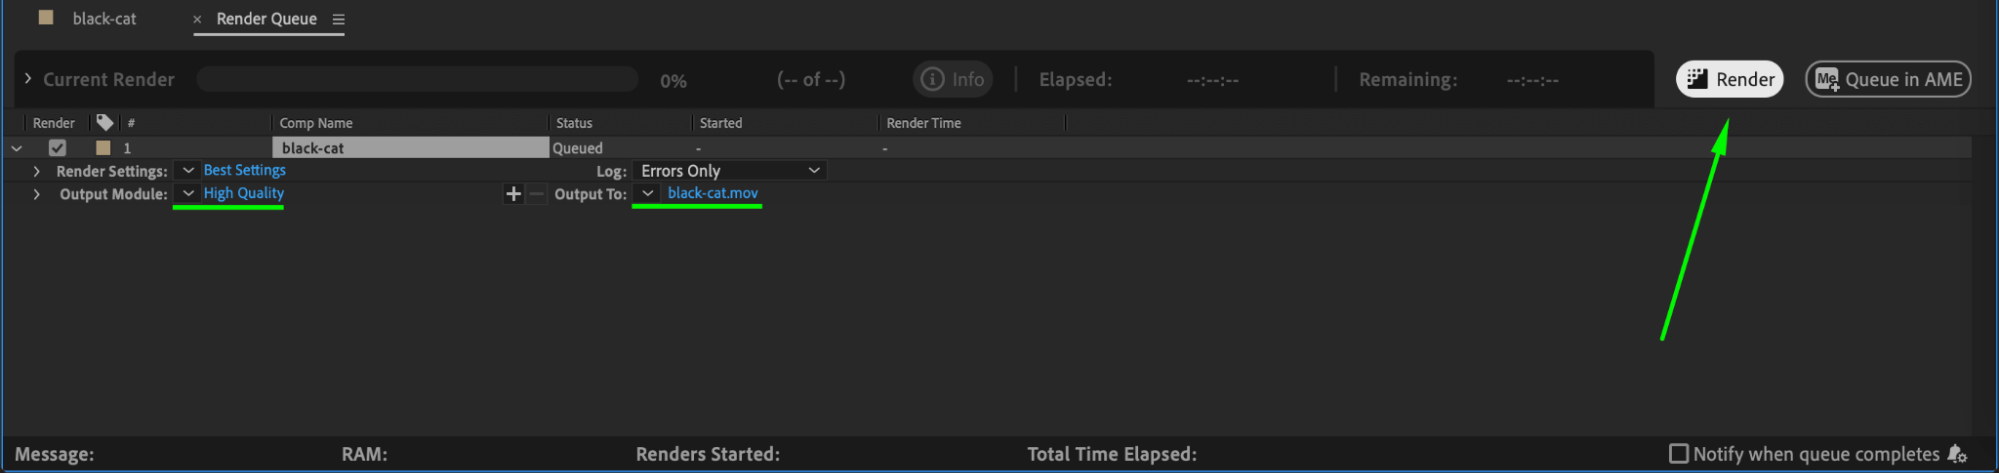
 Step 12: Render the Outro
Once satisfied, go to Composition > Add to Render Queue, choose your preferred settings, and render the final outro.
Conclusion
Creating a high-quality outro in After Effects is simple with the right animations and effects. By animating text, using motion blur, and applying seamless transitions, you can make a professional-looking outro that enhances your video.
Our Bestsellers


