The saying “first impressions matter” holds true in the business world, and it’s no different when it comes to your brand’s logo. A well-designed and captivating logo can make a lasting impact and set your brand apart from the competition. But why settle for a static image when you can bring your logo to life with stunning animations?
In today’s digital landscape, animated logos have become increasingly popular as they add dynamism and visual interest to a brand’s identity. By utilizing After Effects, a powerful motion graphics and compositing software, you can create captivating logo animations that leave a lasting impression on your audience.
If you’re ready to take your brand to the next level and create an animated logo that truly stands out, you’ve come to the right place. In this comprehensive guide, we will walk you through the step-by-step process of creating an animated logo in After Effects. Whether you’re new to motion graphics or an experienced designer looking to enhance your skills, this tutorial will provide you with the knowledge and tools you need to bring your logo to life.
We’ll start by exploring the fundamentals of After Effects, including keyframes, layers, and effects. Then, we will guide you through the process of importing your logo into After Effects and setting up the composition. From there, we’ll dive into the exciting world of animation, exploring techniques such as position, scale, rotation, and opacity keyframing, as well as utilizing shape layers and masks for more advanced effects.
Get 10% off when you subscribe to our newsletter

But we won’t stop there. We’ll also cover how to apply visual effects, transitions, and text animations to take your logo animation to the next level. Along the way, we’ll share tips and tricks to ensure your logo animation is visually striking and effectively communicates your brand’s message.
So, whether you’re a business owner looking to enhance your brand’s visual identity or a creative professional seeking to add a valuable skill set to your repertoire, keep reading. By the end of this guide, you’ll have the knowledge and confidence to create stunning animated logos in After Effects that perfectly reflect your brand’s unique personality and captivate your audience.
Get 10% off when you subscribe to our newsletter
Get ready to unlock the power of animation and elevate your brand with an eye-catching animated logo created in After Effects!
Creating a captivating animated logo in After Effects may seem like a daunting task, but with the right guidance and tools, it’s easier than you might think. To help you navigate the process smoothly, here is a step-by-step guide that will take you from importing your logo to adding dynamic animations and polished effects.
Get 10% off when you subscribe to our newsletter
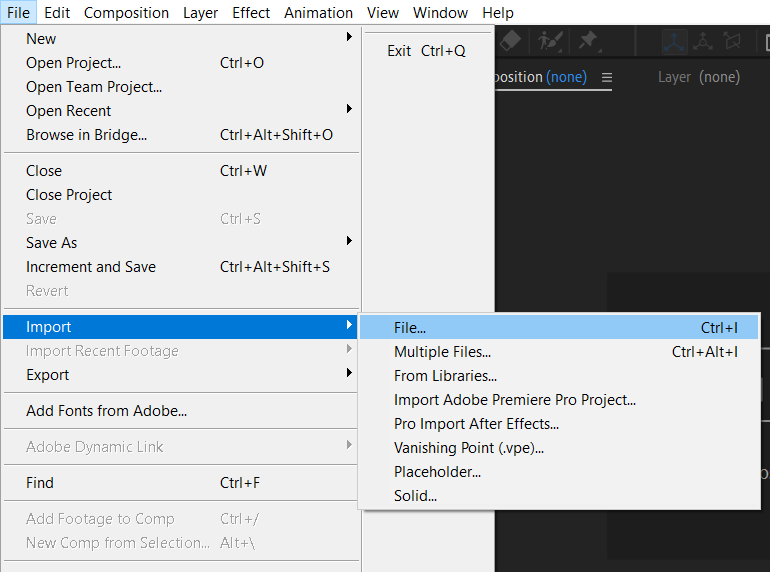
1. Import your logo: Start by launching After Effects and importing your logo file. Use the hotkey “Ctrl+I” (or “Cmd+I” for Mac users) to open the import dialogue box. Navigate to your logo file and select it, then click “Open” to import the logo into your composition.
2. Set up the composition: Once your logo is imported, create a new composition that matches your logo’s dimensions and desired animation duration. To create a new composition, press the hotkey “Ctrl+N” (or “Cmd+N”) and customize the composition settings in the dialogue box. Ensure the composition duration provides enough time for your logo animations to shine.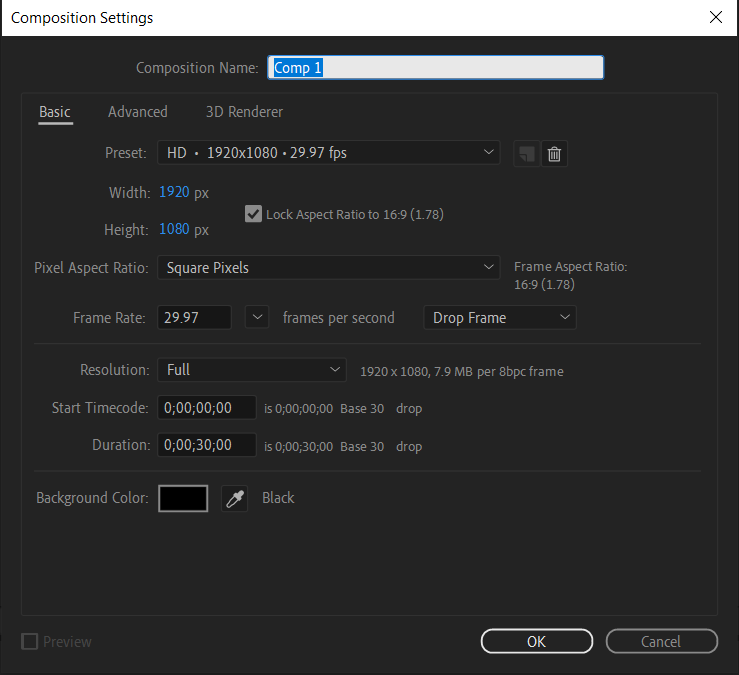
3. Arrange layers and add keyframes: In the timeline panel, drag your logo file onto the composition timeline. This will create a new layer for your logo. To add movement or animation to your logo, enable keyframes by selecting the layer and pressing “P” to reveal the position property. Place the playhead at the desired starting point, set a keyframe by clicking the stopwatch icon next to the position property, then move the playhead to the desired endpoint and adjust the position accordingly.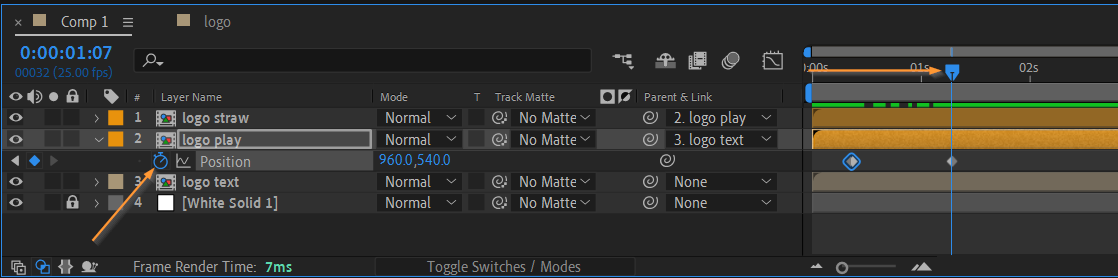
Get 10% off when you subscribe to our newsletter
4. Experiment with anchor points and scale: To pivot or rotate your logo, use the hotkey “A” to reveal the anchor point property. Adjust the anchor point to the desired pivot point for your logo’s rotation using the Anchor Point Tool or the hotkey “Y”. Additionally, you can use the hotkey “S” to reveal the scale property and animate the size of your logo over time.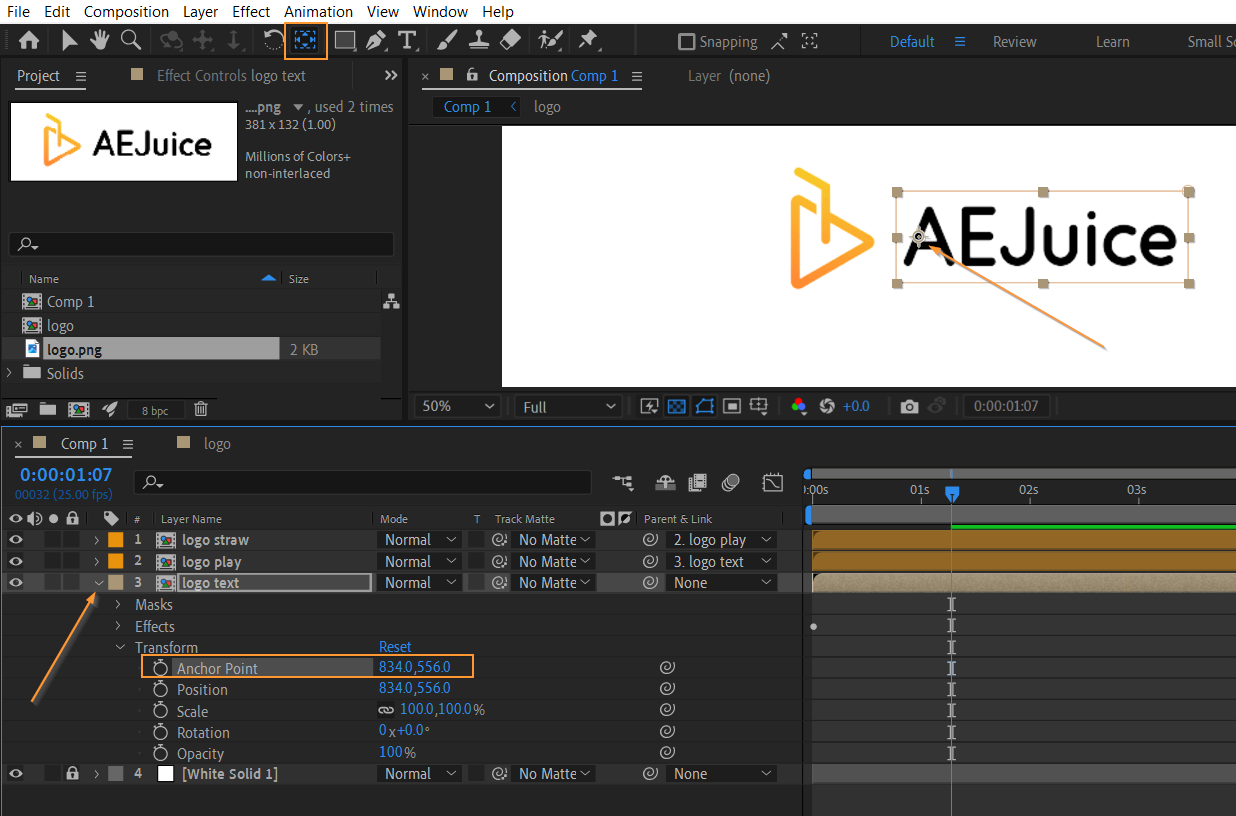
Get 10% off when you subscribe to our newsletter
5. Add visual effects: To make your logo animation more visually appealing, consider adding effects such as shadows, glows, or gradients. Right-click your logo layer, go to “Layer Styles” and choose an effect from the menu. Experiment with different effects and customize their settings to achieve the desired visual impact.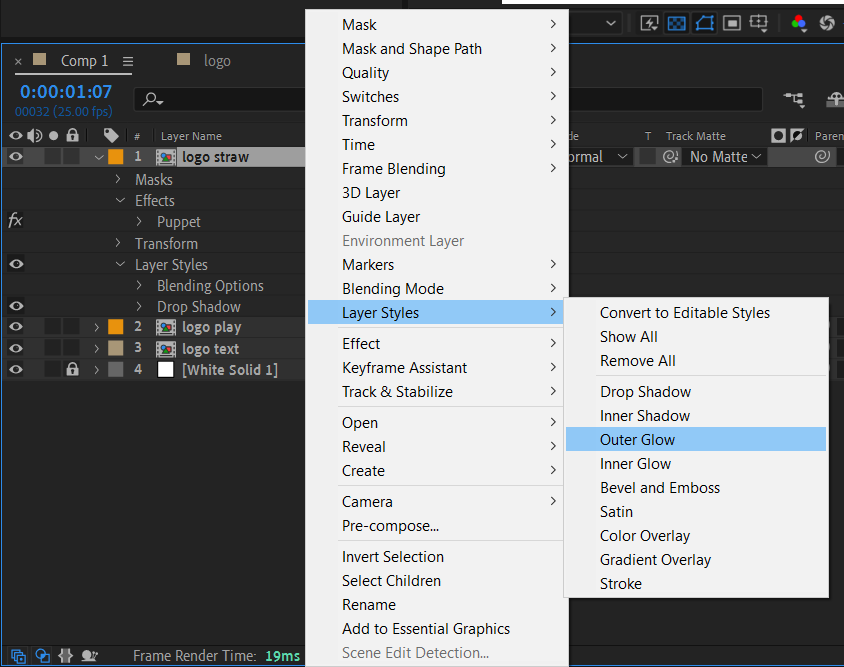
Get 10% off when you subscribe to our newsletter
6. Polish with transitions and text animations: To add a professional touch to your logo animation, incorporate transitions and text animations. Utilize effects like “Slide” or “Fade” to smoothly introduce or exit your logo. For text animations, use the hotkey “Ctrl+Shift+D” (or “Cmd+Shift+D”) to split your logo layer, apply the text animation to the new text layer, and customize it using the Effect Controls panel.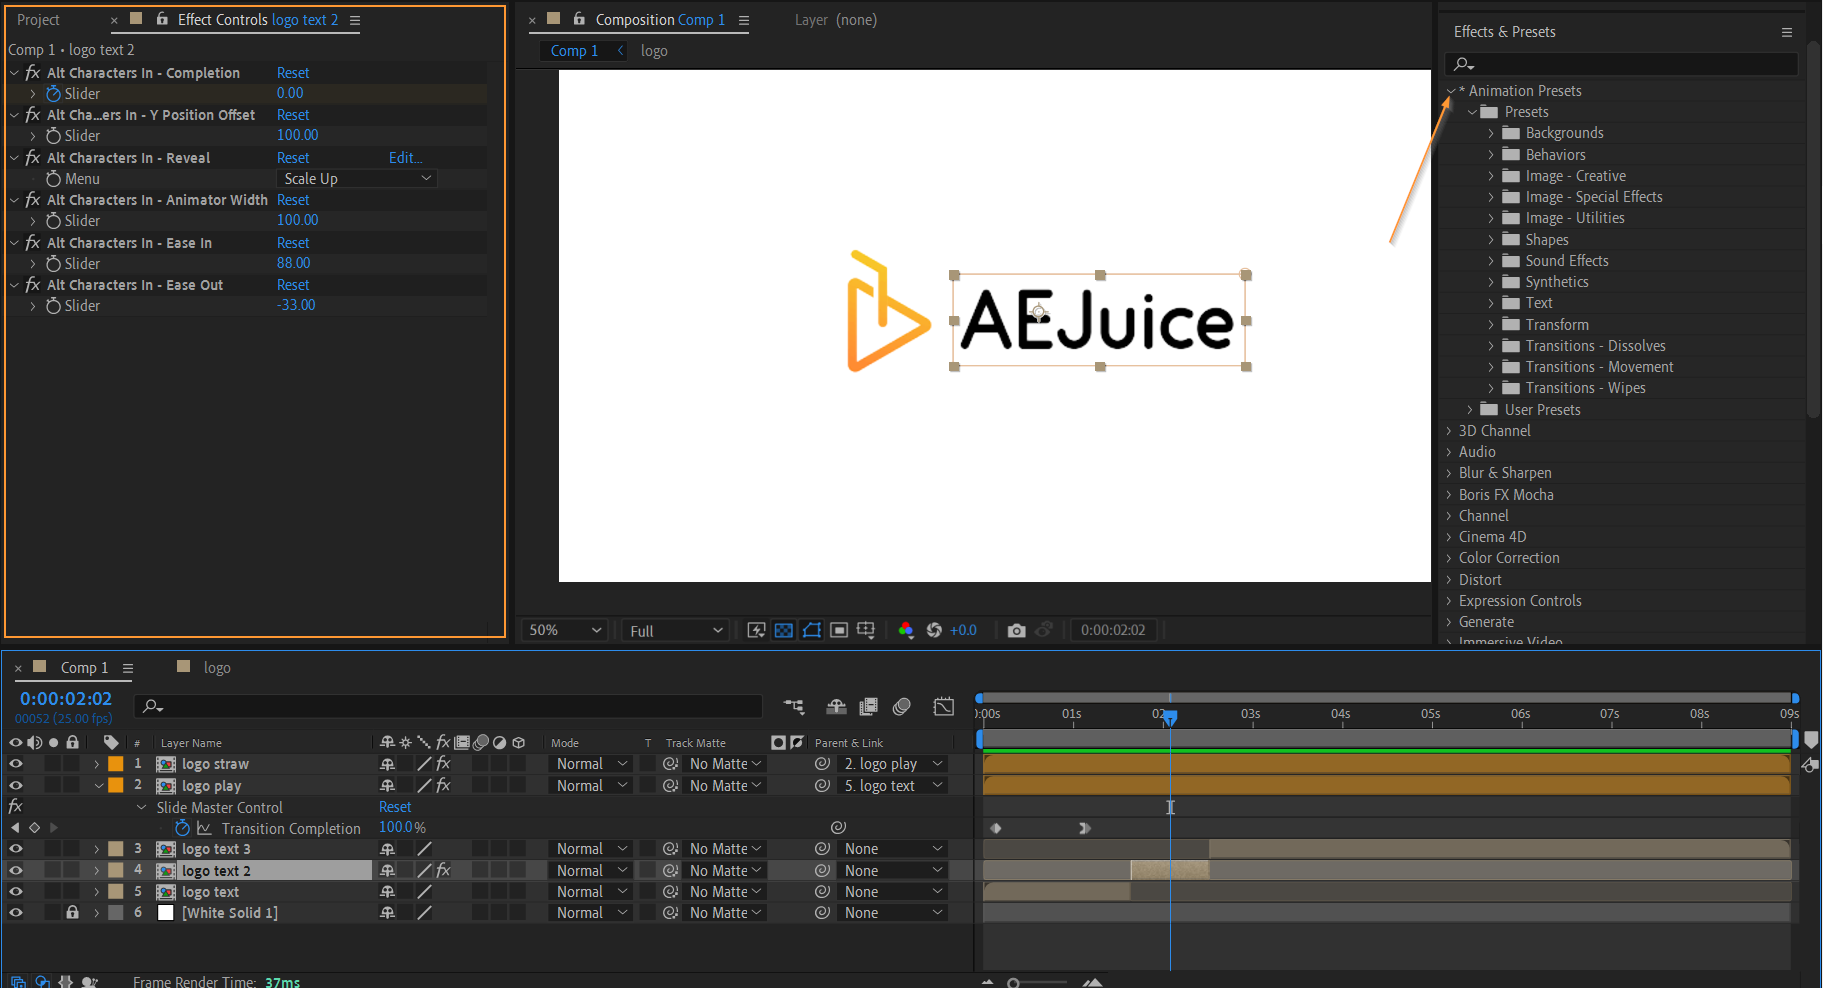
Get 10% off when you subscribe to our newsletter
7. Preview and export: Before finalizing your animated logo, preview it by pressing the hotkey “0” on the numeric keypad. If you’re satisfied with the result, it’s time to export. Use the hotkey “Ctrl+M” (or “Cmd+M”) to add Comp to the Render Queue. Configure the export settings as per your requirements, select the desired file format, and click “Render” to save your animated logo.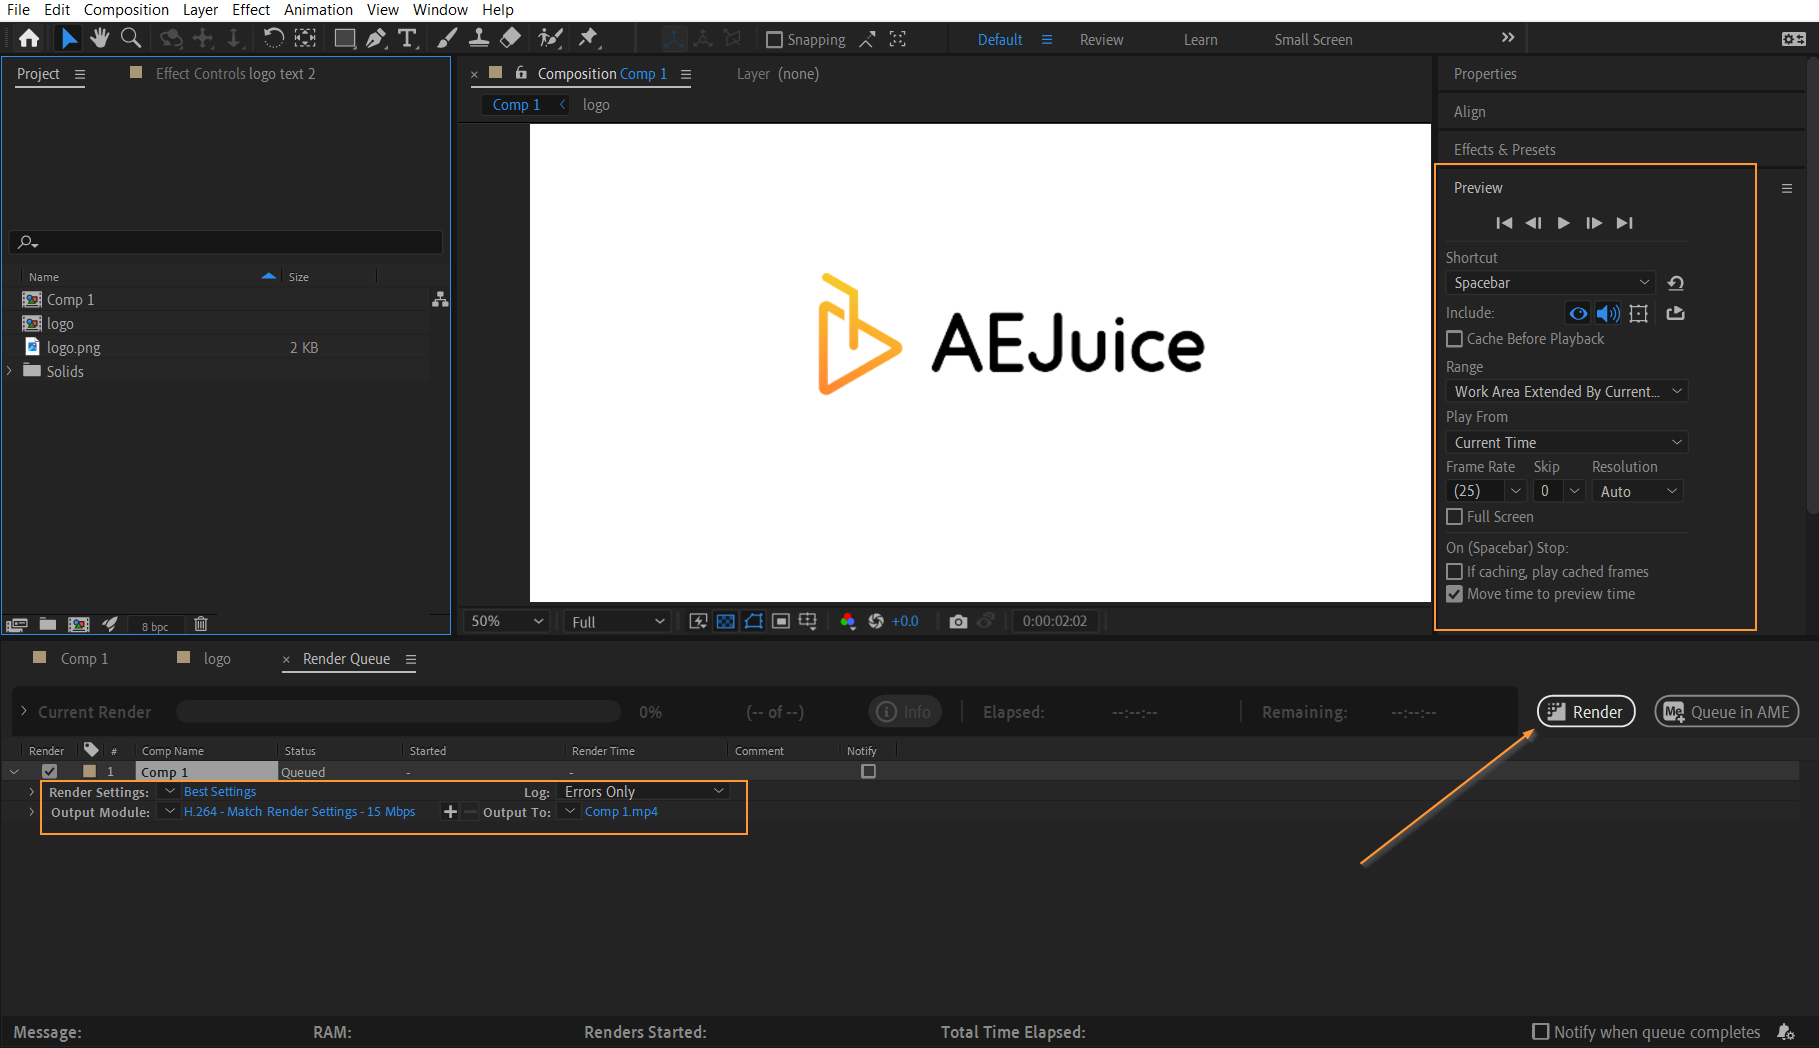
Remember to save your project periodically as you work through the steps. With practice and experimentation, you’ll soon discover endless possibilities for creating unique and captivating animated logos in After Effects.
So, take these tips and start breathing life into your brand’s identity with mesmerizing animated logos that will make a lasting impression on your audience. Let your creativity soar and showcase your brand in style, using the power of After Effects!
Congratulations! You’ve successfully learned how to create stunning animated logos in After Effects. By following this comprehensive step-by-step guide, you’ve gained the necessary knowledge and tools to bring your brand’s identity to life with captivating animations.
Animated logos not only add a touch of professionalism and creativity, but they also help your brand stand out in a crowded marketplace. With After Effects, you have the power to unleash your creativity and turn your logo into a dynamic, eye-catching visual masterpiece.Throughout this guide, you’ve explored essential techniques like keyframing, layer organization, visual effects, and transitions. You’ve also learned to use hotkeys to streamline your workflow and save time. By mastering these skills, you can continue to enhance your logo animations and create mesmerizing effects that truly captivate your audience.Remember, practice makes perfect. Don’t be afraid to experiment and explore different animation styles, effects, and typography. The more you practice and experiment with After Effects, the more you’ll discover its vast capabilities and the unique ways you can bring your logo to life.Now, armed with the knowledge and skills you’ve acquired, it’s time to take your brand to new heights! Create animated logos that leave a lasting impression, convey your brand’s personality, and elevate your visual identity.So go ahead, unleash your creativity, and make your brand shine with stunning animated logos created in After Effects. Your audience will be captivated, and your brand will leave a lasting impression in their minds. Happy animating!
Our Bestsellers

