Accelerating Your Animation Workflow in After Effects
Introduction
Are you tired of spending countless hours working on animations in Adobe After Effects? Do you wish there was a way to make the process faster and more efficient? Well, you’re in luck! We’ve got some expert tips and techniques that will help you speed up your animation workflow in After Effects.
Step 1: Optimize Your Project Settings
Get 10% off when you subscribe to our newsletter

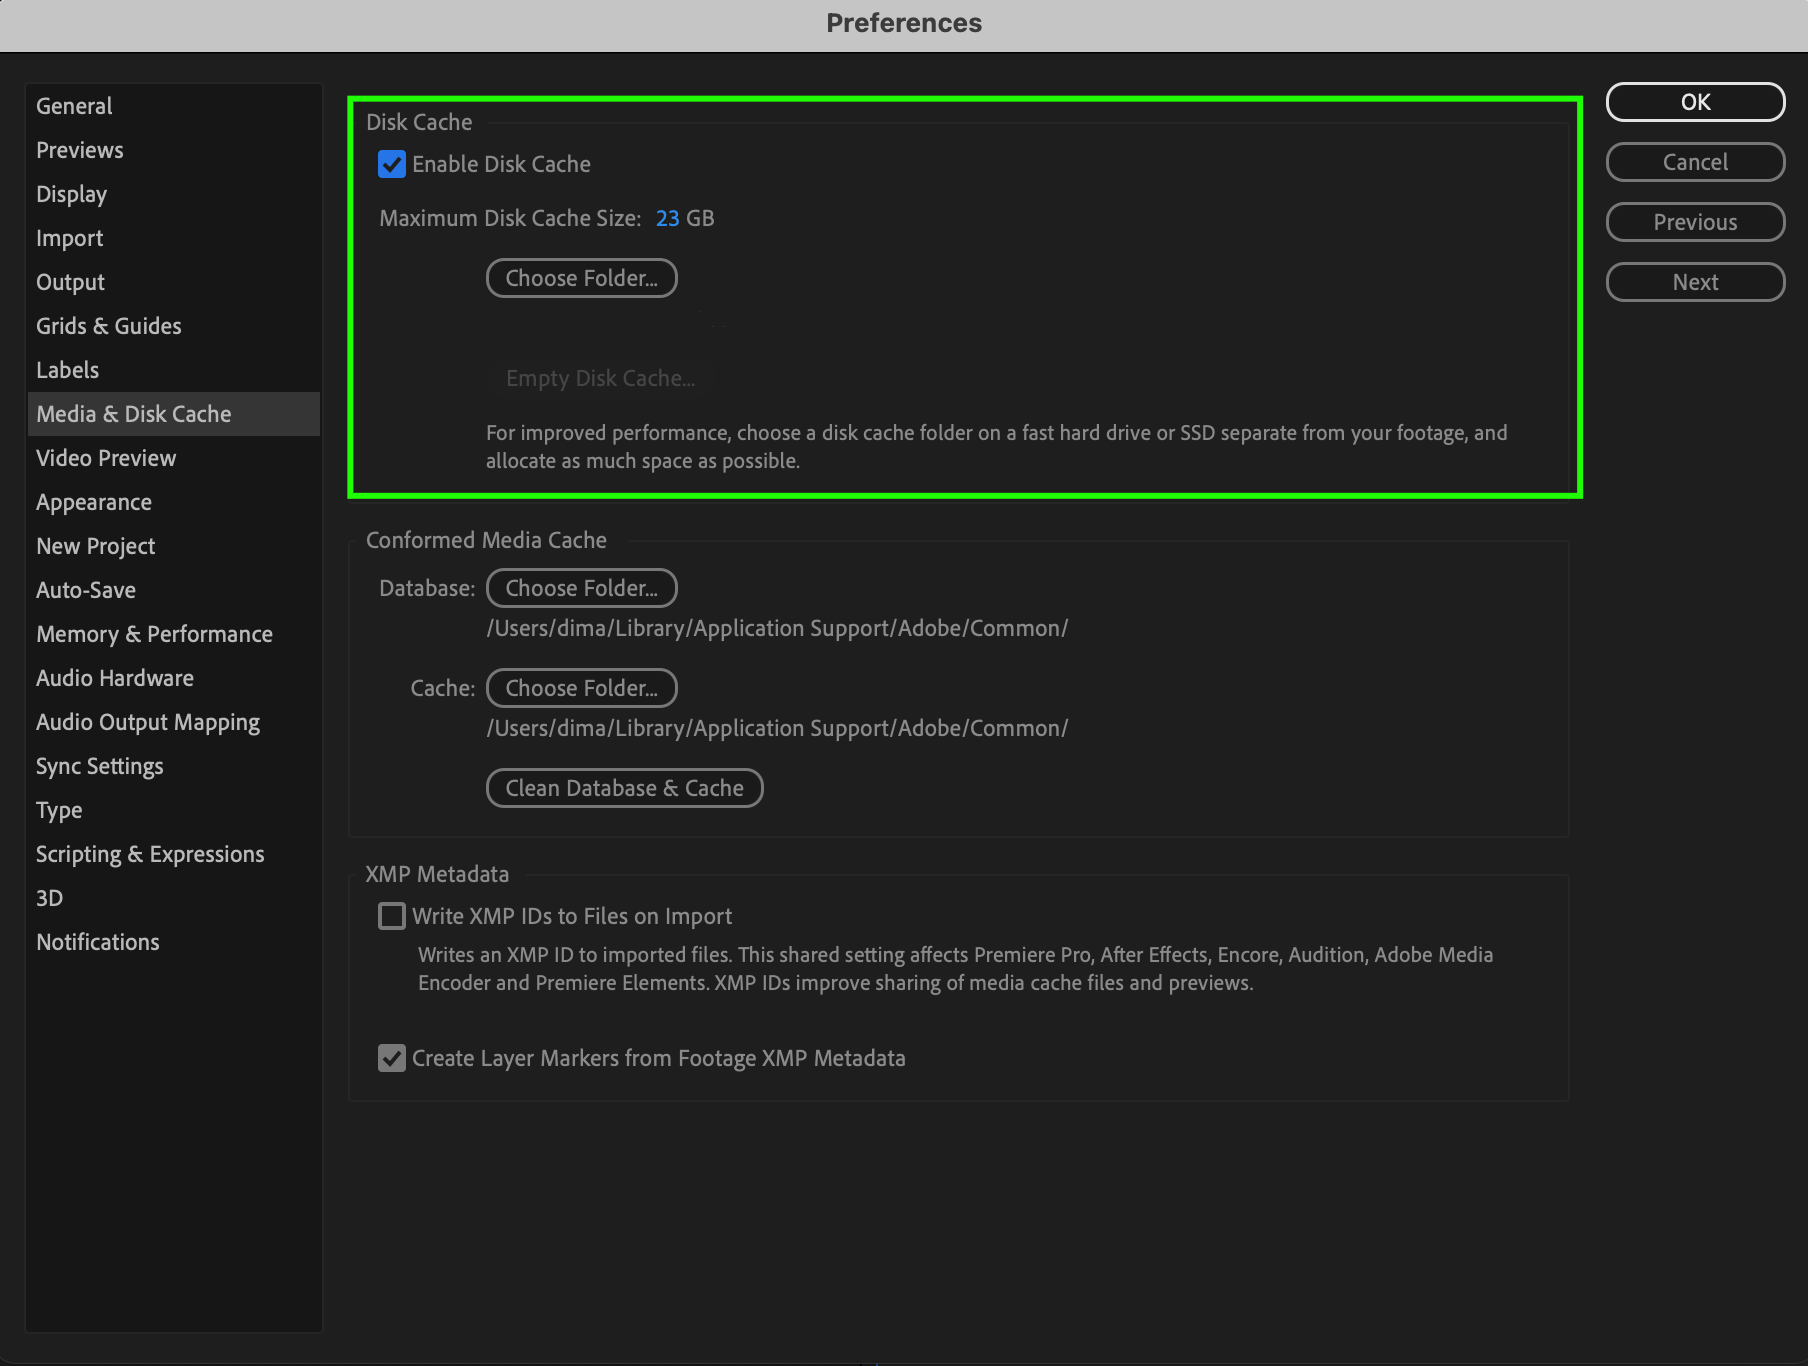
First things first, let’s optimize your project settings. By adjusting your disk cache settings, you’ll have more resources available for rendering and previewing, resulting in faster performance. Increase your disk cache size to minimize the need to regenerate frames. To do this, go to Edit > Preferences > Media & Disk Cache (Windows) or After Effects > Settings > Media & Disk Cache (Mac), and adjust the settings according to your system capabilities. This will help After Effects utilize your system resources more efficiently, leading to a smoother workflow.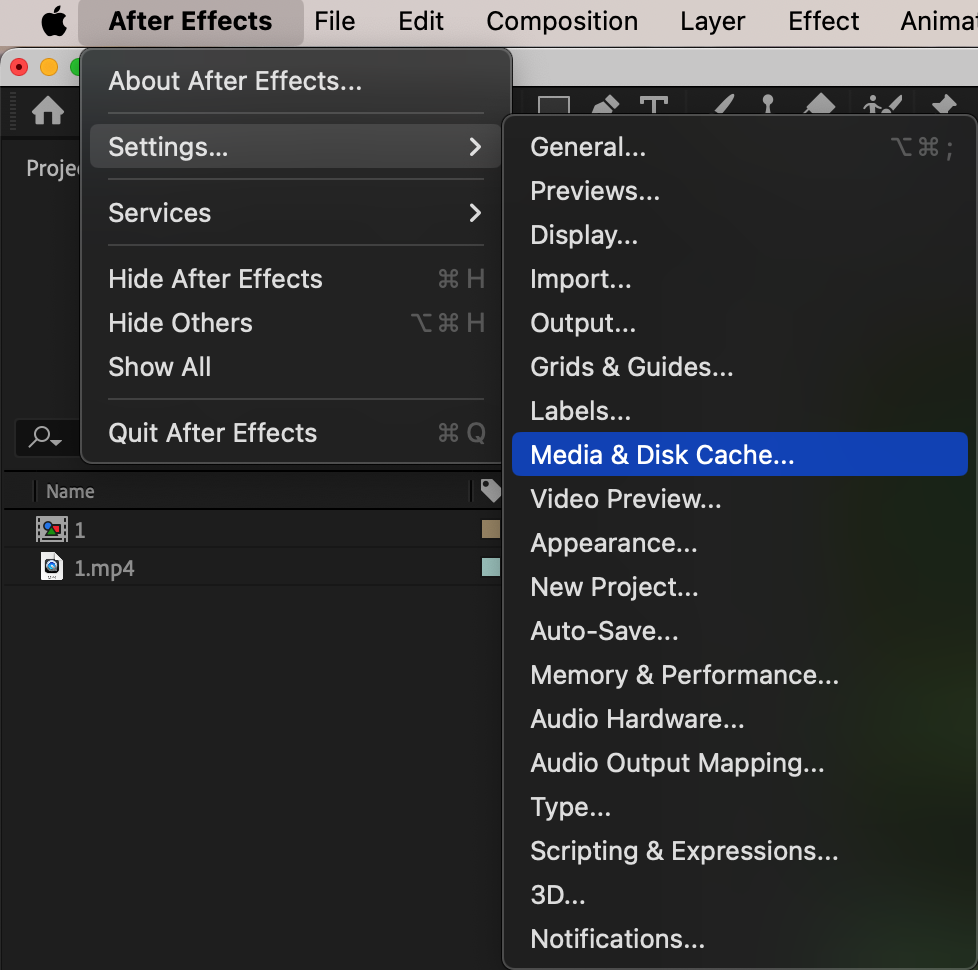
 Step 2: Master Keyboard Shortcuts
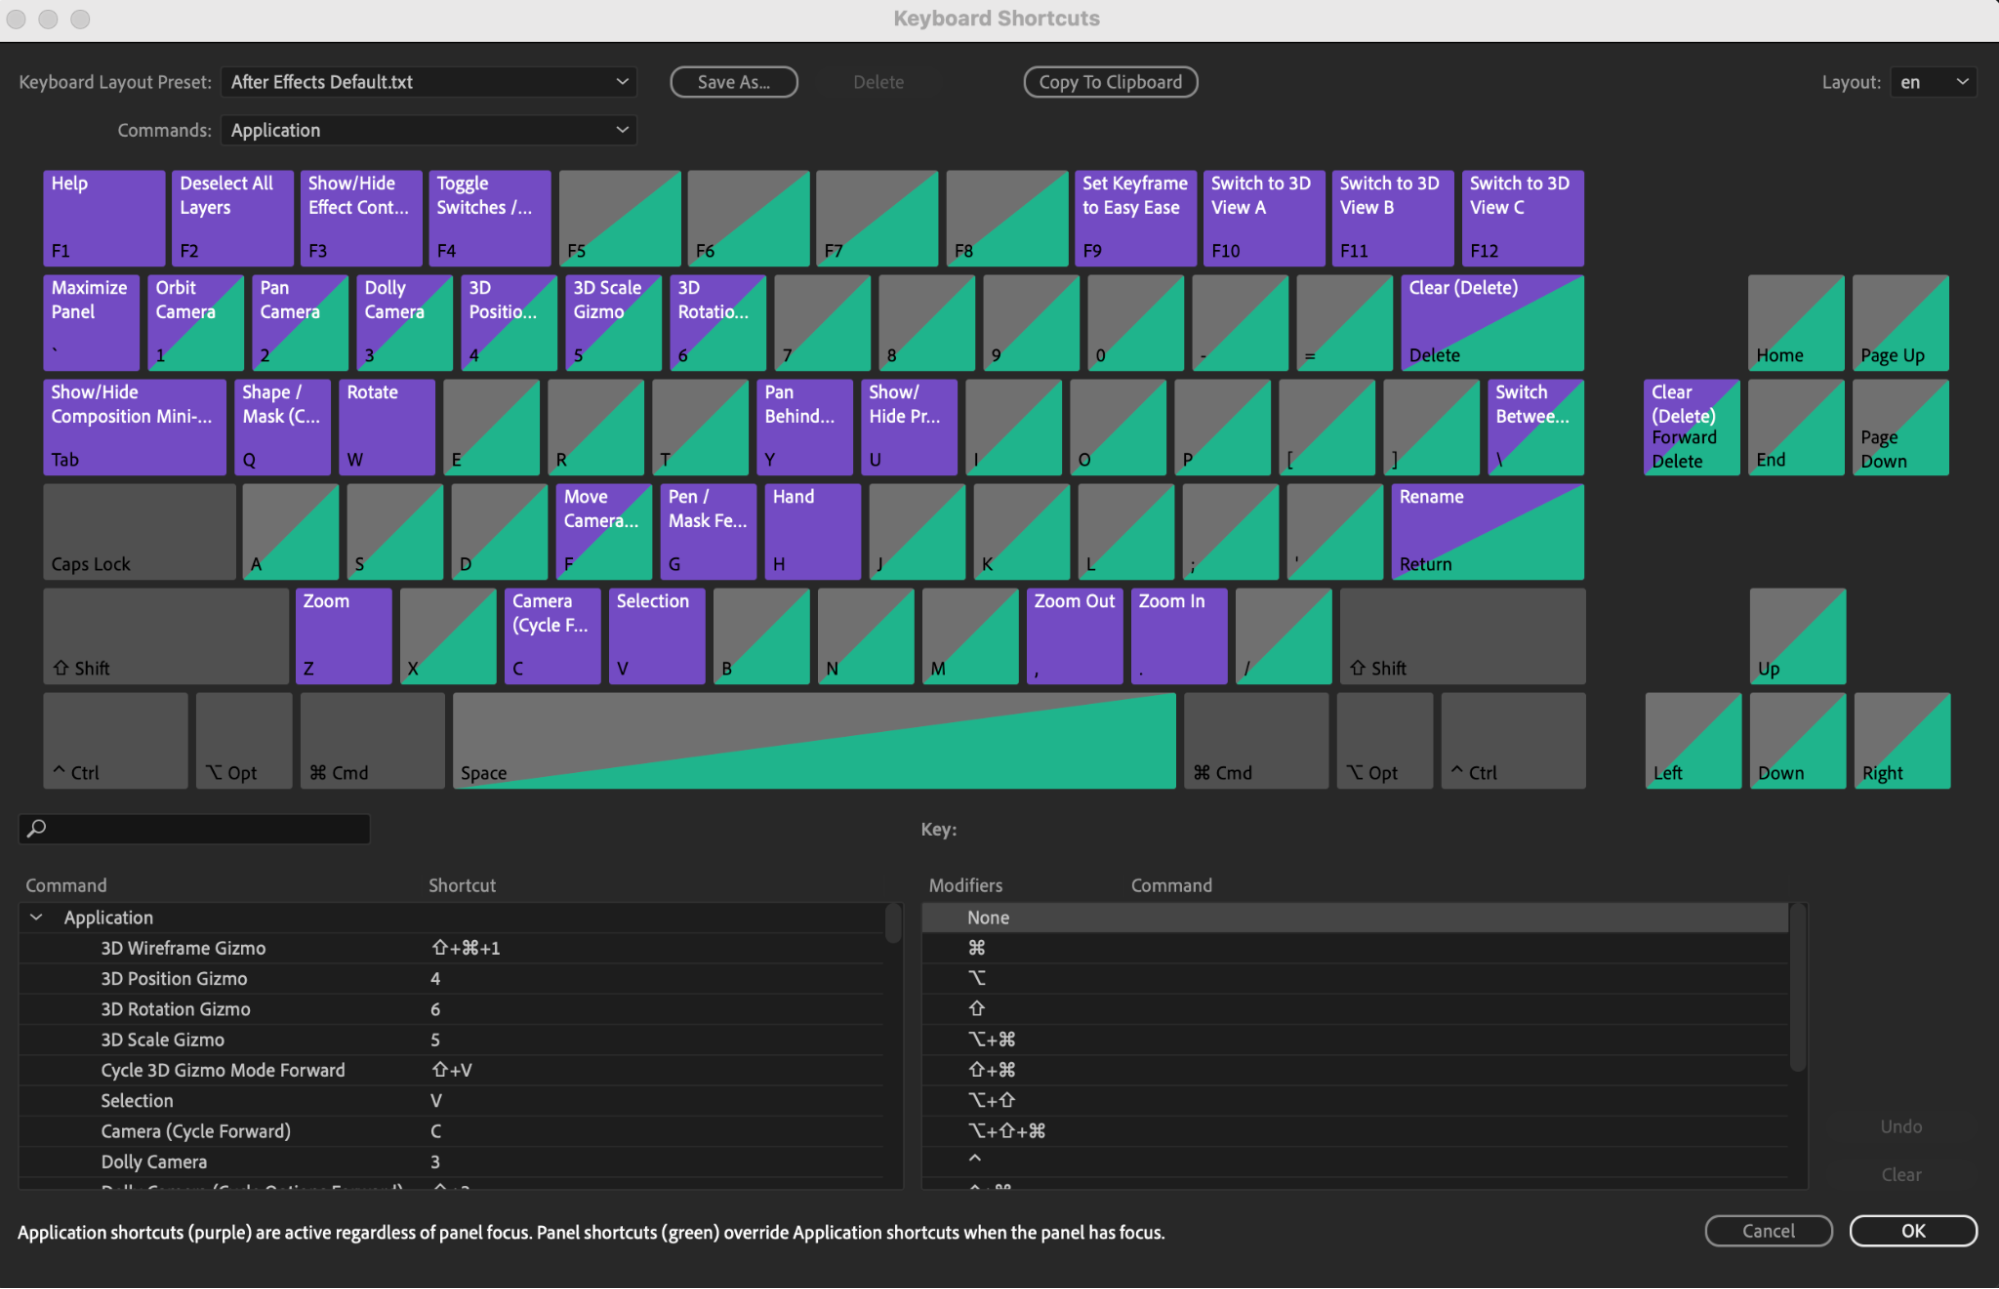
Next, let’s talk about keyboard shortcuts. Learning and using shortcuts can be a game-changer when it comes to speeding up your animation process. Memorize commonly used shortcuts for tasks like selecting layers, adding keyframes, and toggling options. You can even customize shortcuts to fit your preferences and work even faster. To view and customize shortcuts, go to Edit > Keyboard Shortcuts.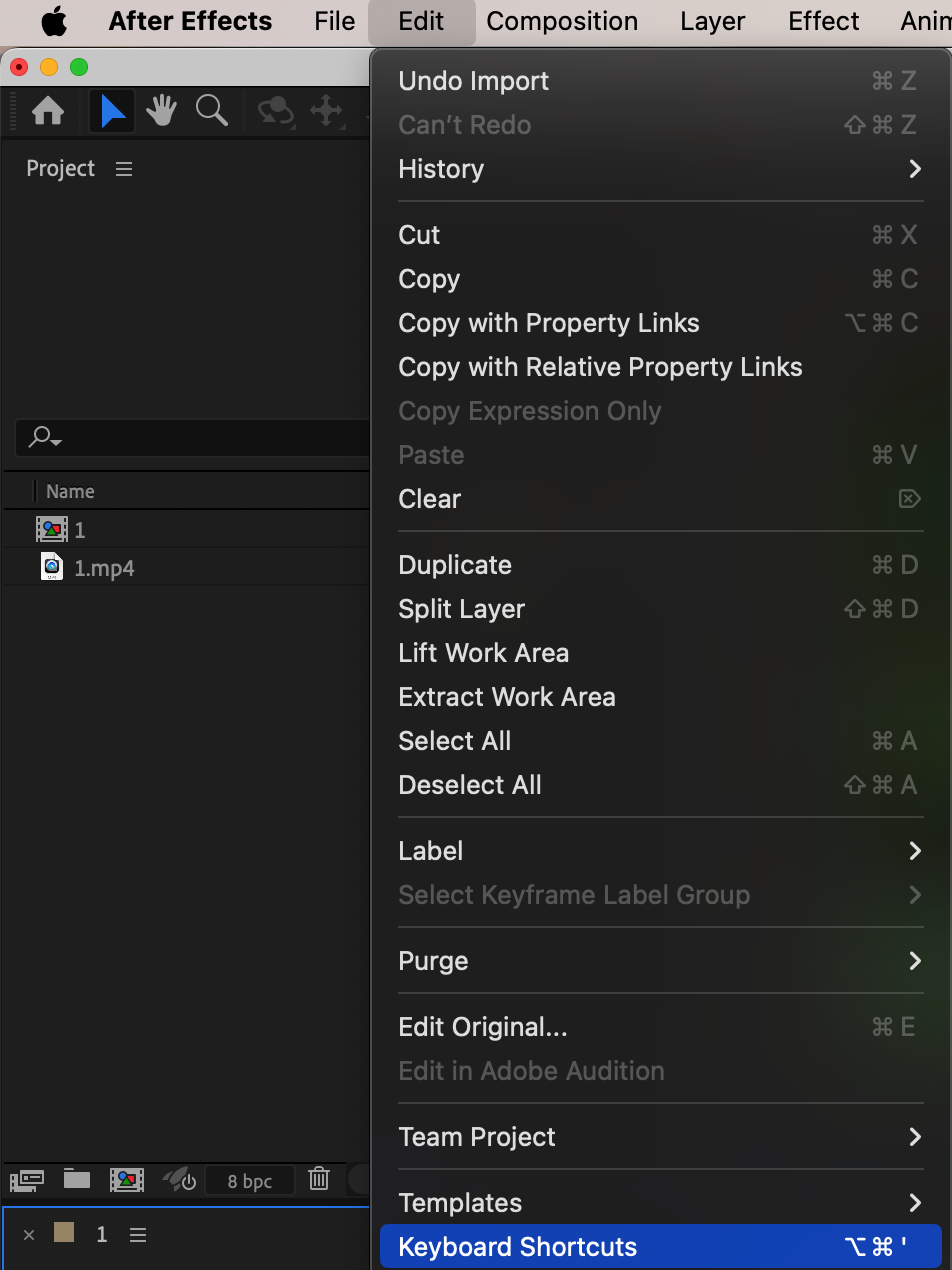
 Step 3: Utilize Pre-Composing and Pre-Rendering
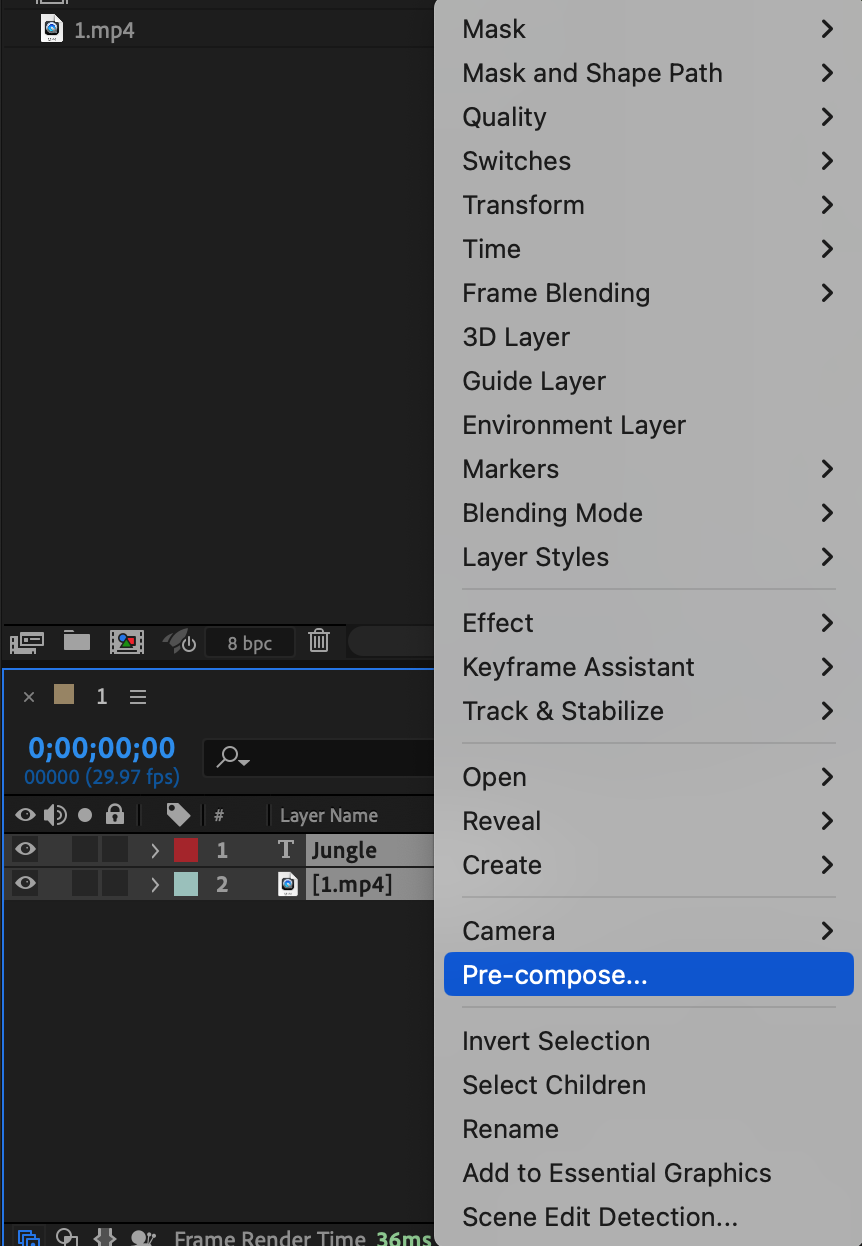
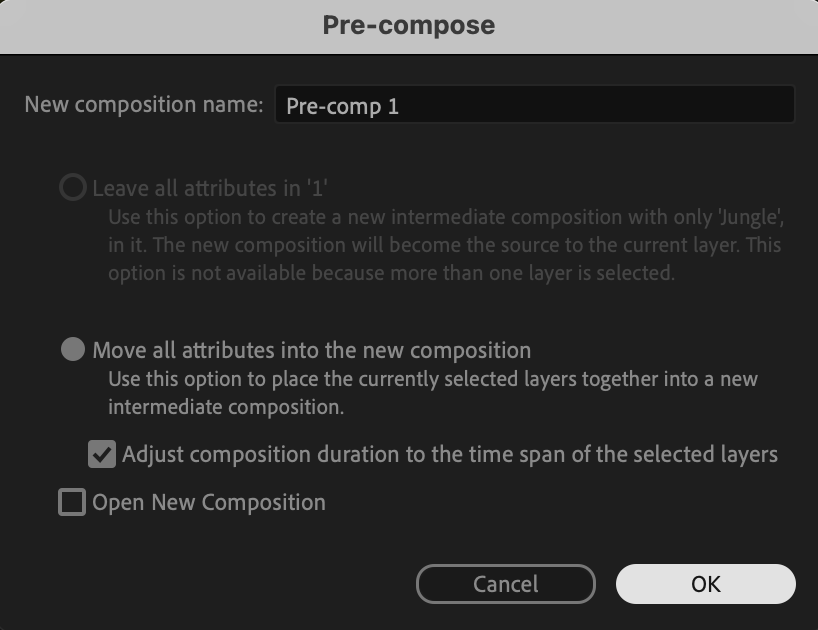
Another technique that can save you time is pre-composing and pre-rendering. By pre-composing layers with certain effects applied, you can reduce the number of calculations After Effects needs to make. For complex effects or calculations, consider pre-rendering them as image sequences or video files. Replace resource-intensive compositions with simpler pre-rendered files, leading to faster playback and rendering.
 Step 4: Enable Proxy Previews
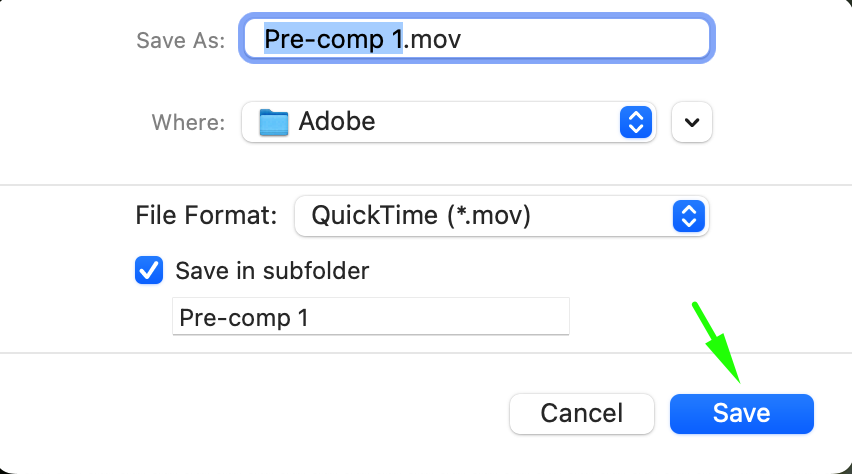
Working with high-resolution footage? Enable proxy previews. Proxy files are lower-resolution versions of your source footage that allow After Effects to playback and render with reduced strain on your system. Create proxies directly in After Effects or use third-party tools like Adobe Media Encoder to generate optimized versions of your footage. When you’re ready for the final render, switch back to the original high-resolution files. 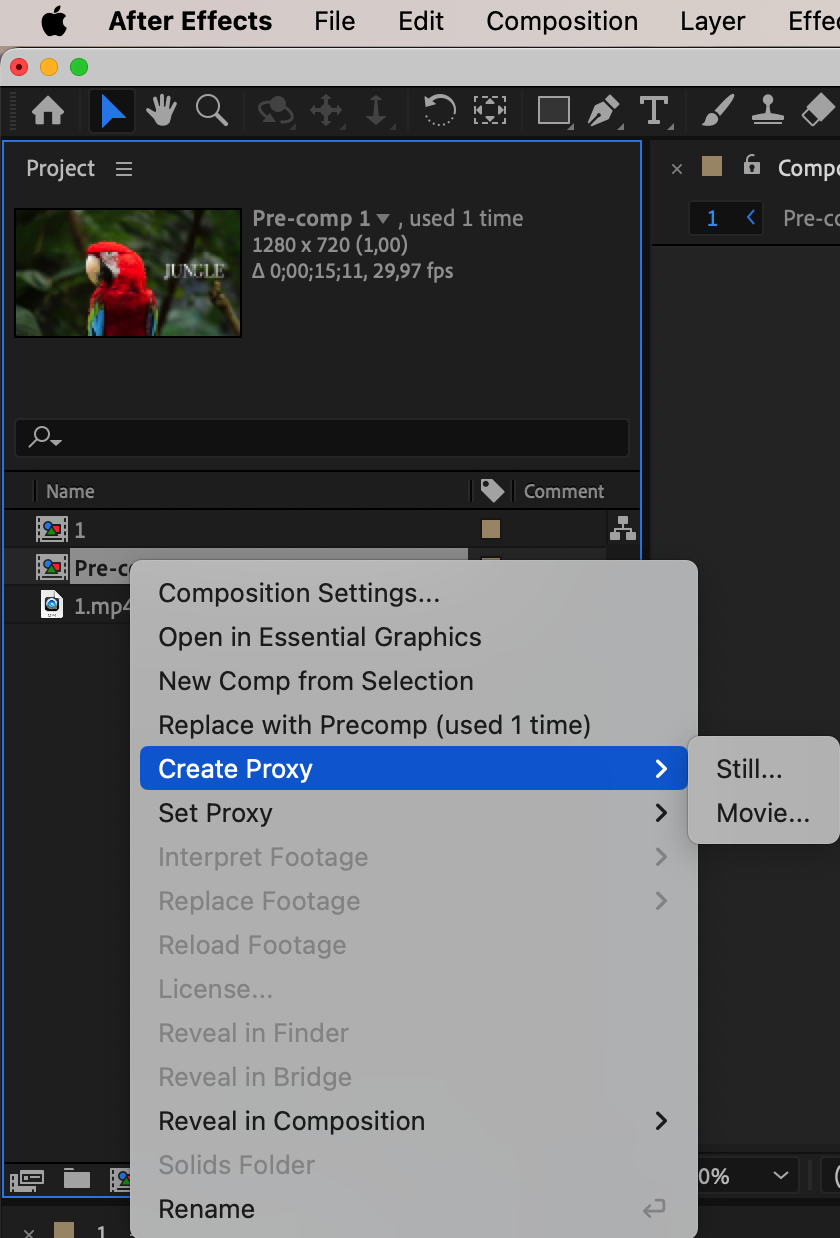
 Step 5: Leverage Third-Party Plugins
Don’t forget about the power of third-party plugins. There are plugins available that offer pre-built animations and presets, saving you from manually keyframing everything. Take advantage of these plugins to speed up your workflow and customize animations to fit your needs.
Step 6: Automate with Expressions and Scripts
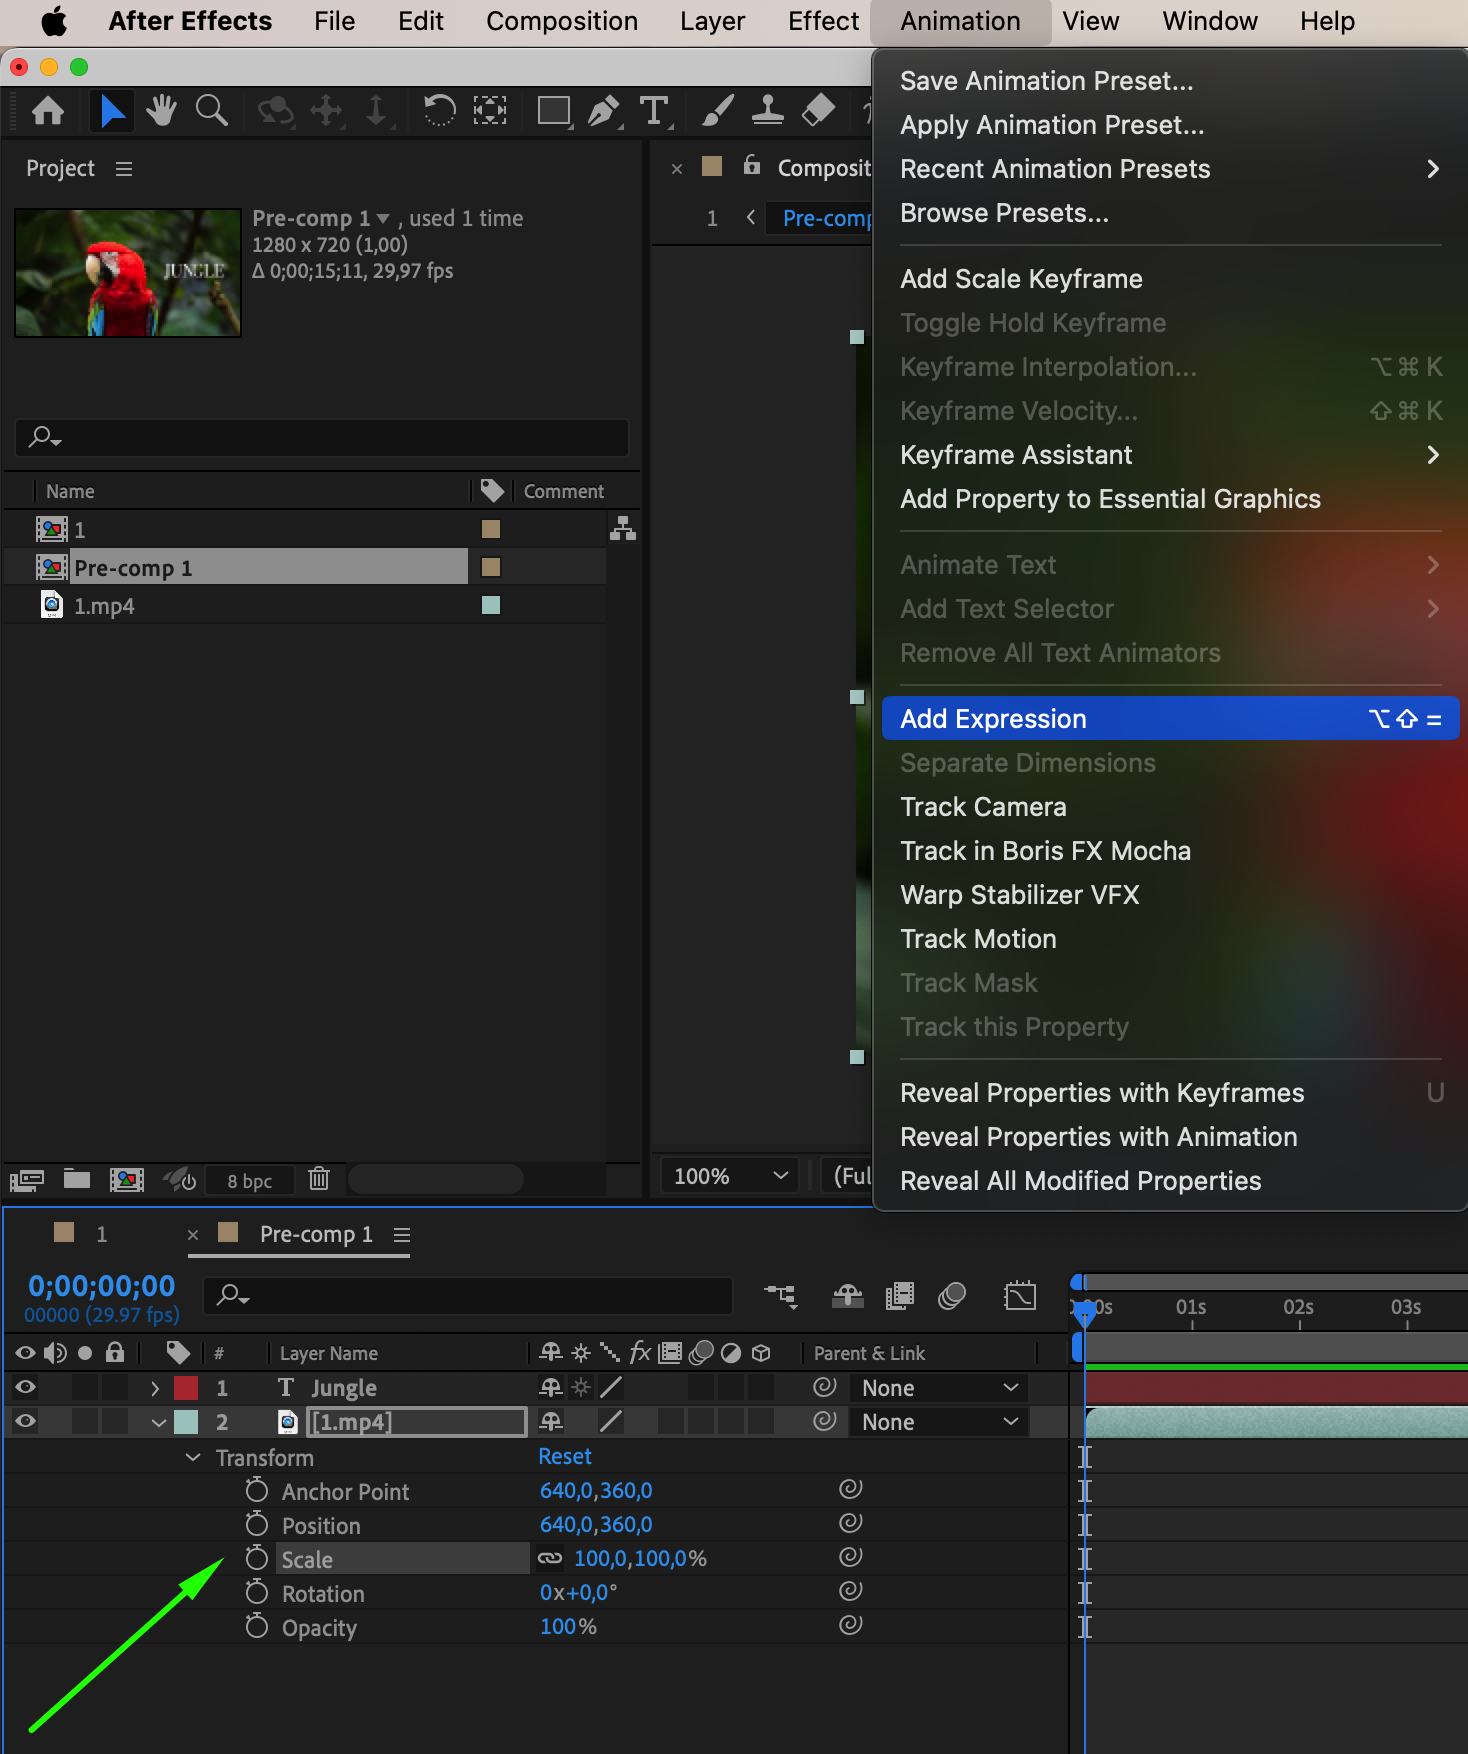
Expressions and scripts are also valuable tools in After Effects. By using expressions, you can automate tasks and create dynamic animations that adapt to changes automatically. Explore scripts created by the After Effects community to automate repetitive tasks and save time. To use a script, go to File > Scripts > Run Script File… and select the script you want to use.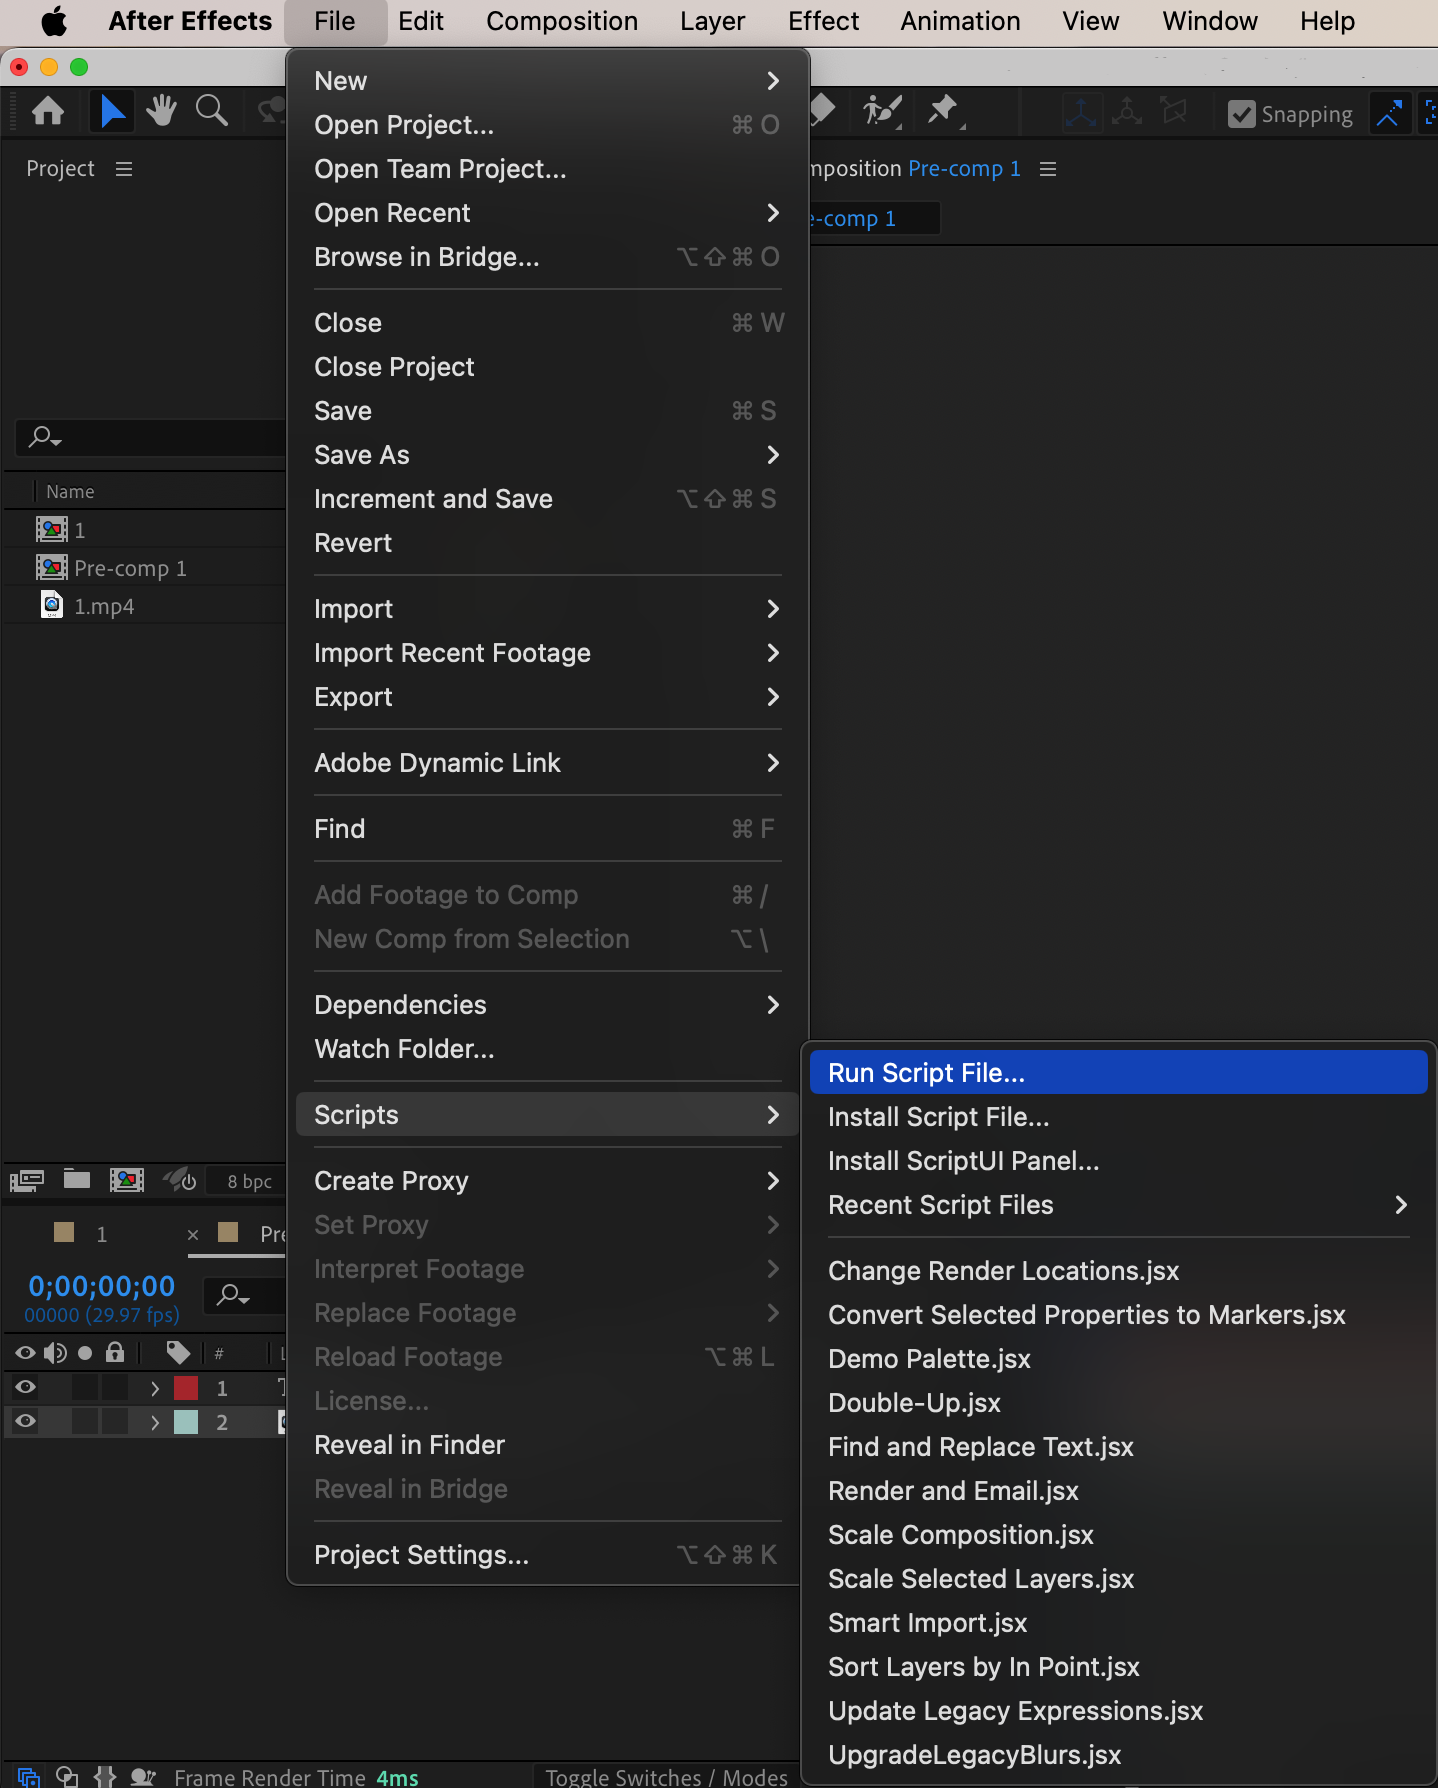
 Step 7: Utilize Background Rendering
And finally, don’t waste time waiting for renders to complete. Utilize After Effects’ background rendering feature so you can continue working on other projects or tasks while your animation is rendering. Start the rendering process through Adobe Media Encoder and return to editing other projects in After Effects. This allows you to maximize productivity by multitasking. Conclusion
By implementing these tips and techniques, you’ll be able to speed up your animation process in After Effects and save valuable time. Efficiency is key, so find the tools, shortcuts, and optimizations that work best for you. Happy animating!


