How to Create a Background Blur Effect in After Effects
Introduction: Achieving Professional Background Blur in After Effects
Would you like to learn how to create a stunning background blur effect in Adobe After Effects? It’s a great technique for adding depth and focusing attention on your subject in videos and animations. In this guide, we’ll walk you through the step-by-step process and share key techniques and tools to help you achieve professional-looking results.
Get 10% off when you subscribe to our newsletter

First, import your footage into After Effects and create a new composition. Make sure your subject is clearly visible and positioned in front of a distinct background. Next, duplicate your video layer to create a separate layer for the background blur effect.
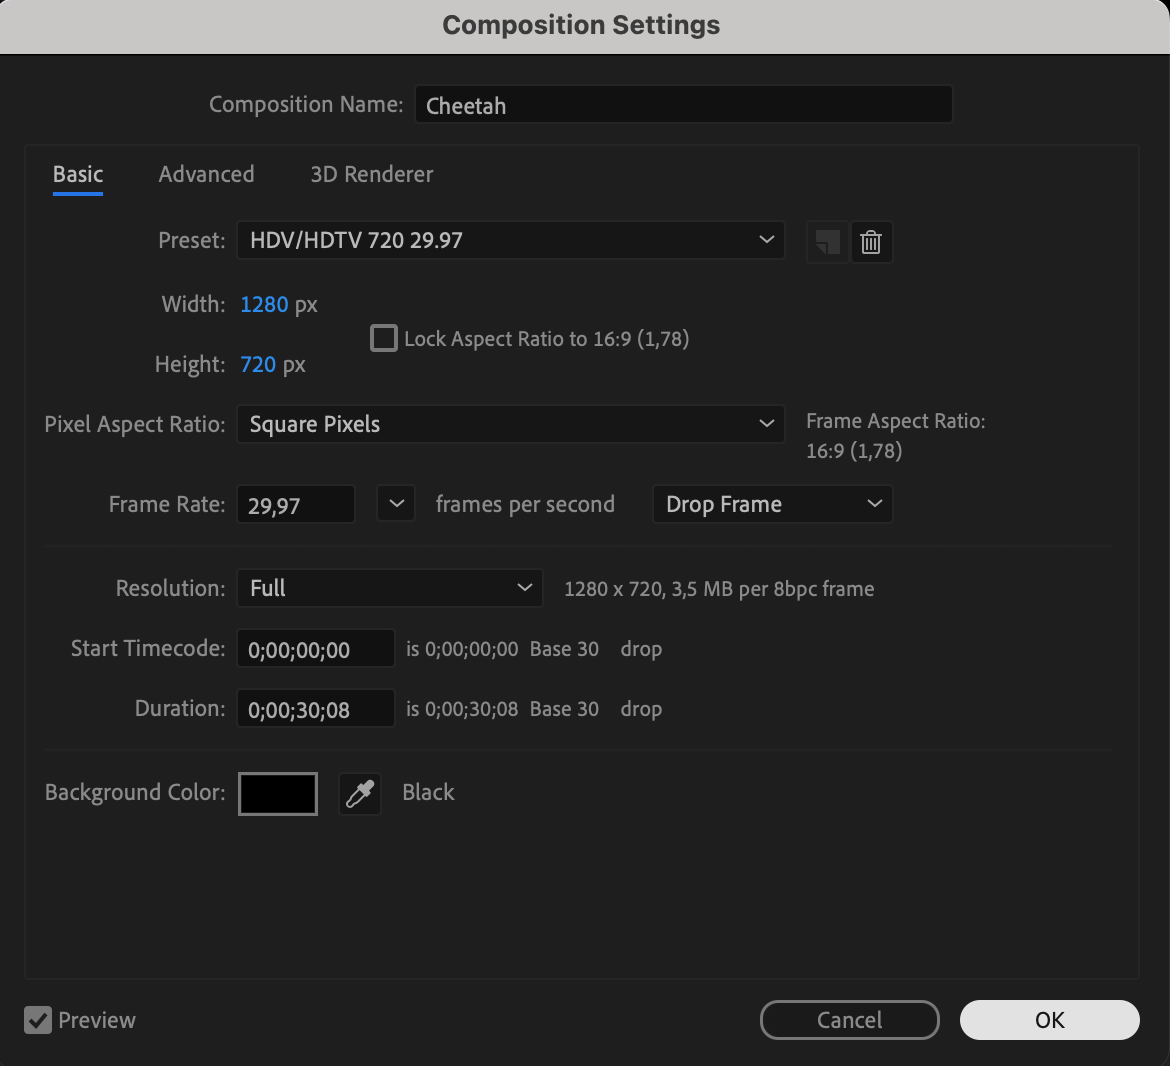
Step 1: Import Your Video File and Create a New Composition
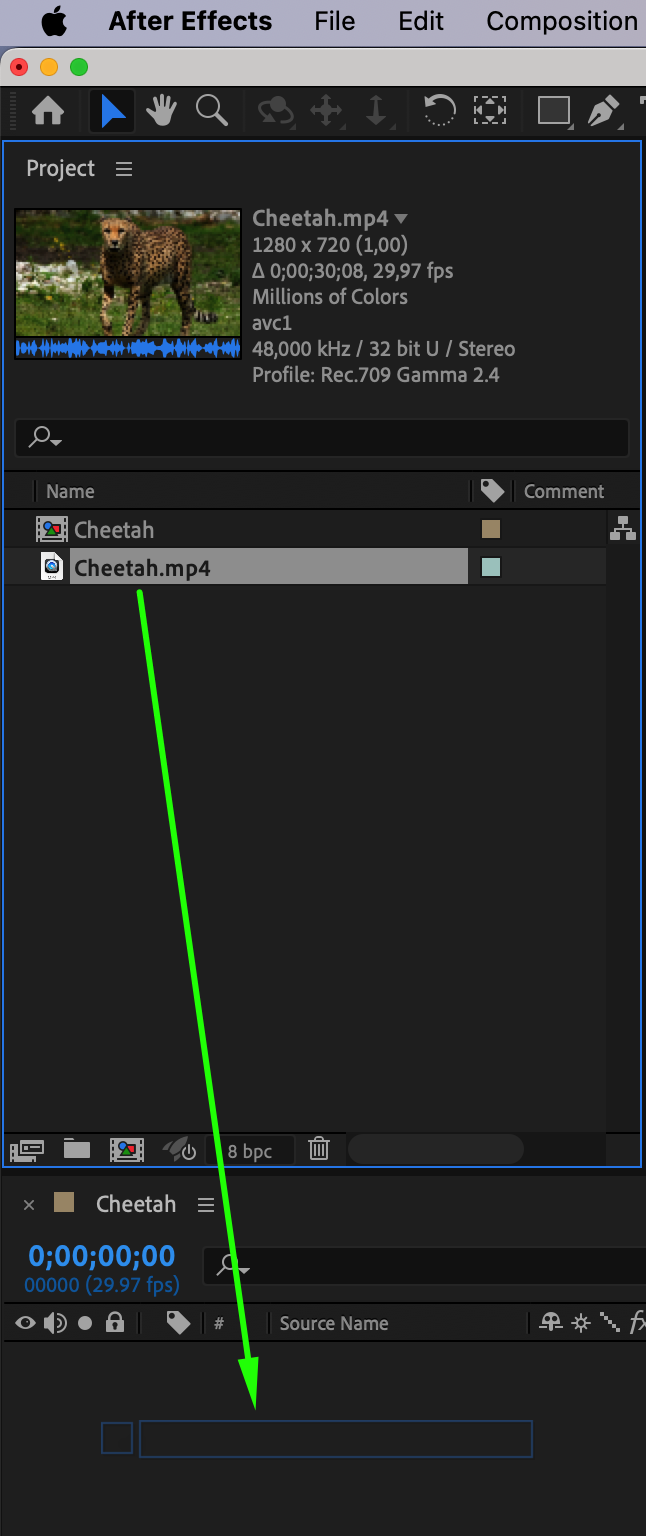
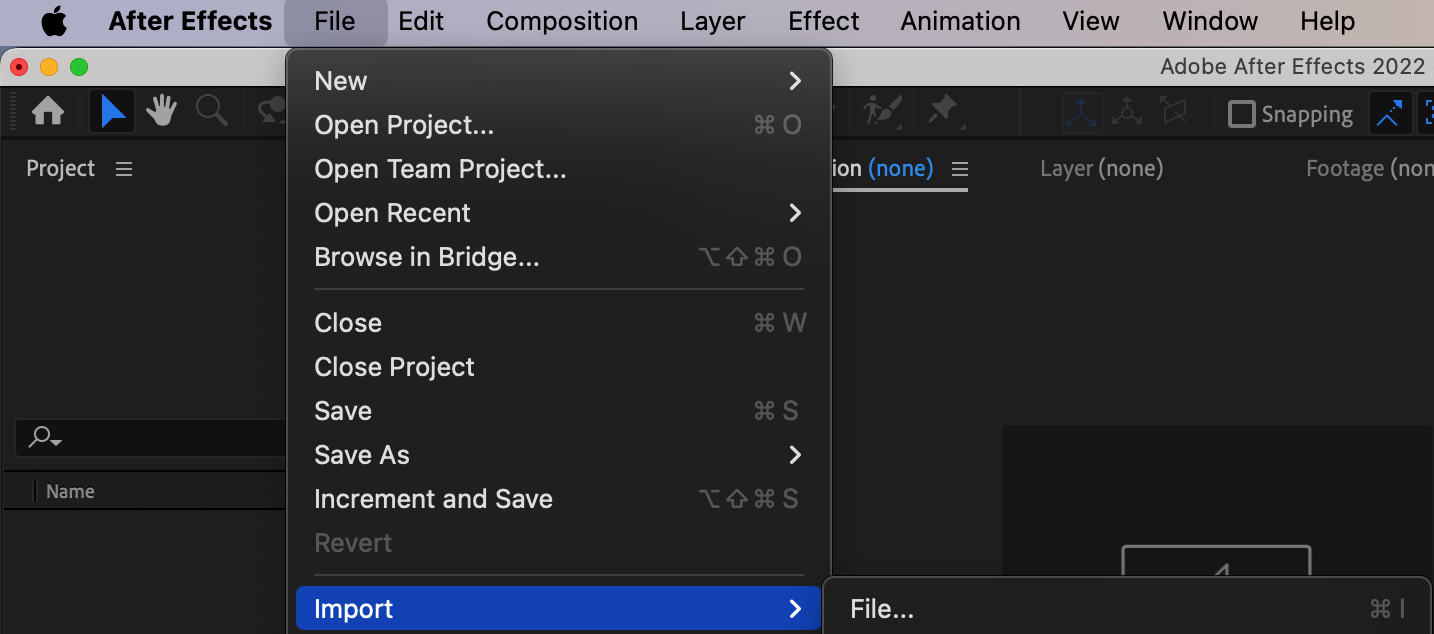
Begin by importing your video file into After Effects. To do this, go to File > Import > File and select your video. Create a new composition and drag your video from the Project panel to the Timeline panel.
Get 10% off when you subscribe to our newsletter


 Step 2: Duplicate Your Video Layer
Get 10% off when you subscribe to our newsletter

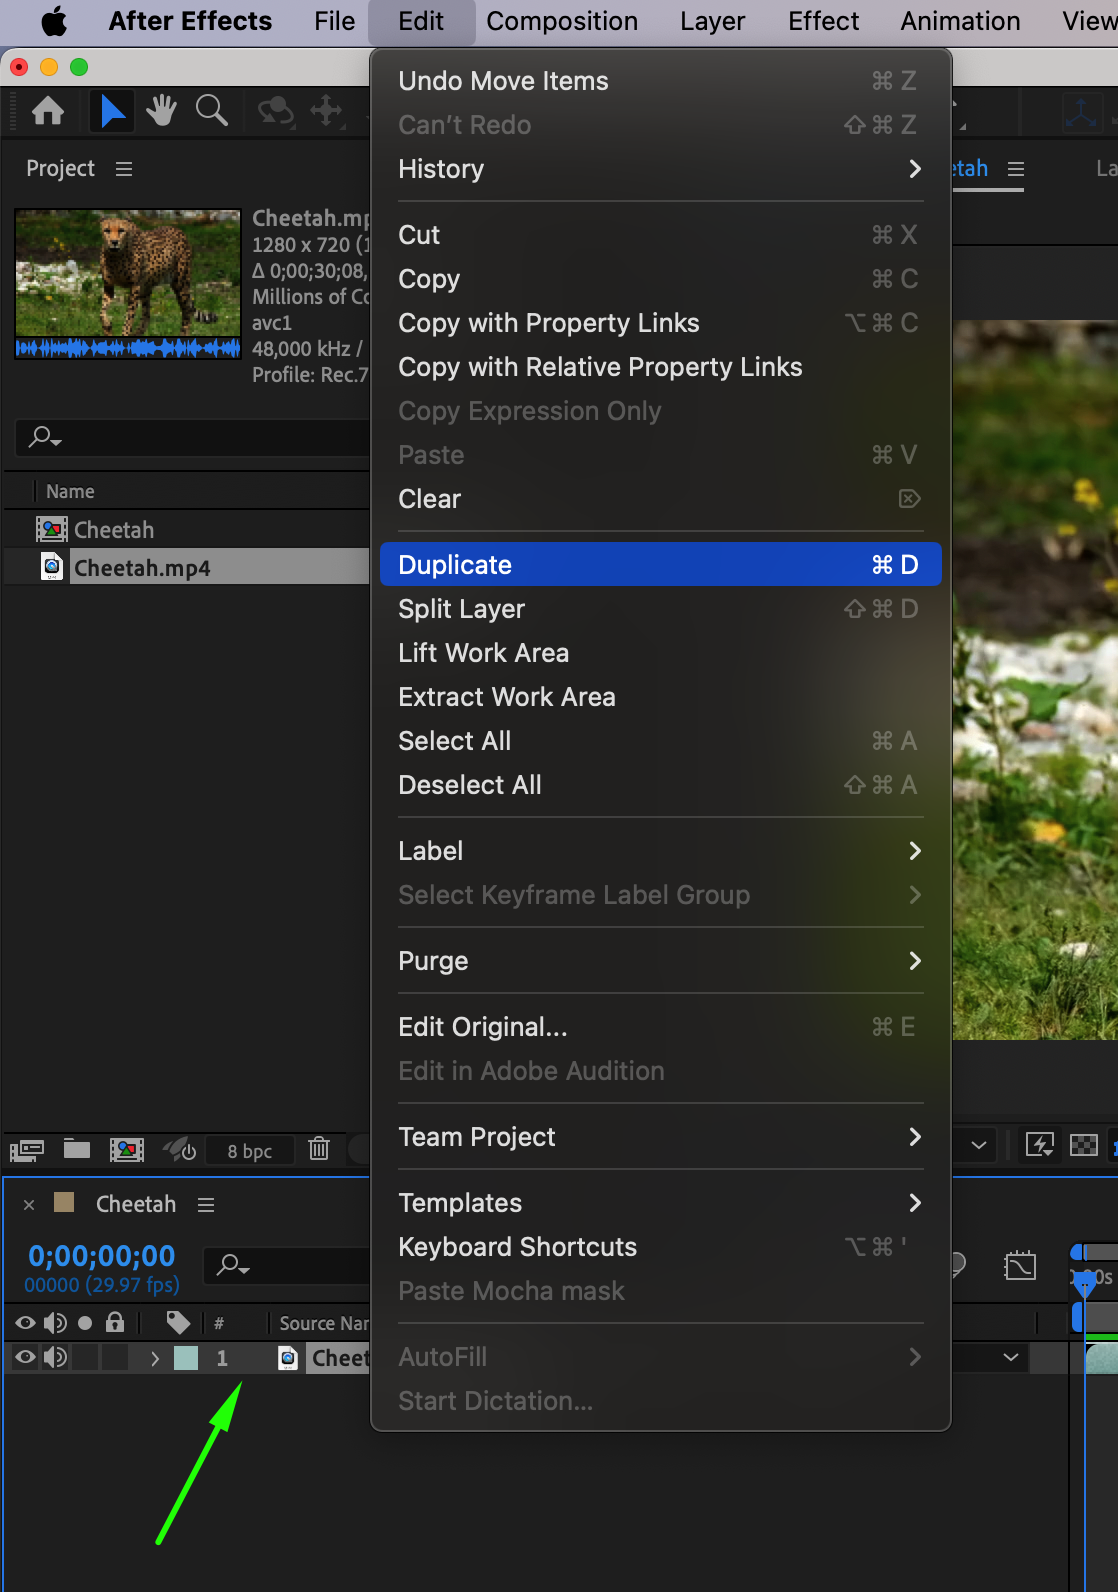
Next, you’ll need to create a duplicate of your video layer. Select your video layer in the Timeline panel, then press “Ctrl/Cmd + D” to duplicate it. This duplicate layer will be used to apply the background blur effect.
 Step 3: Apply Gaussian Blur to the Duplicated Layer
Get 10% off when you subscribe to our newsletter

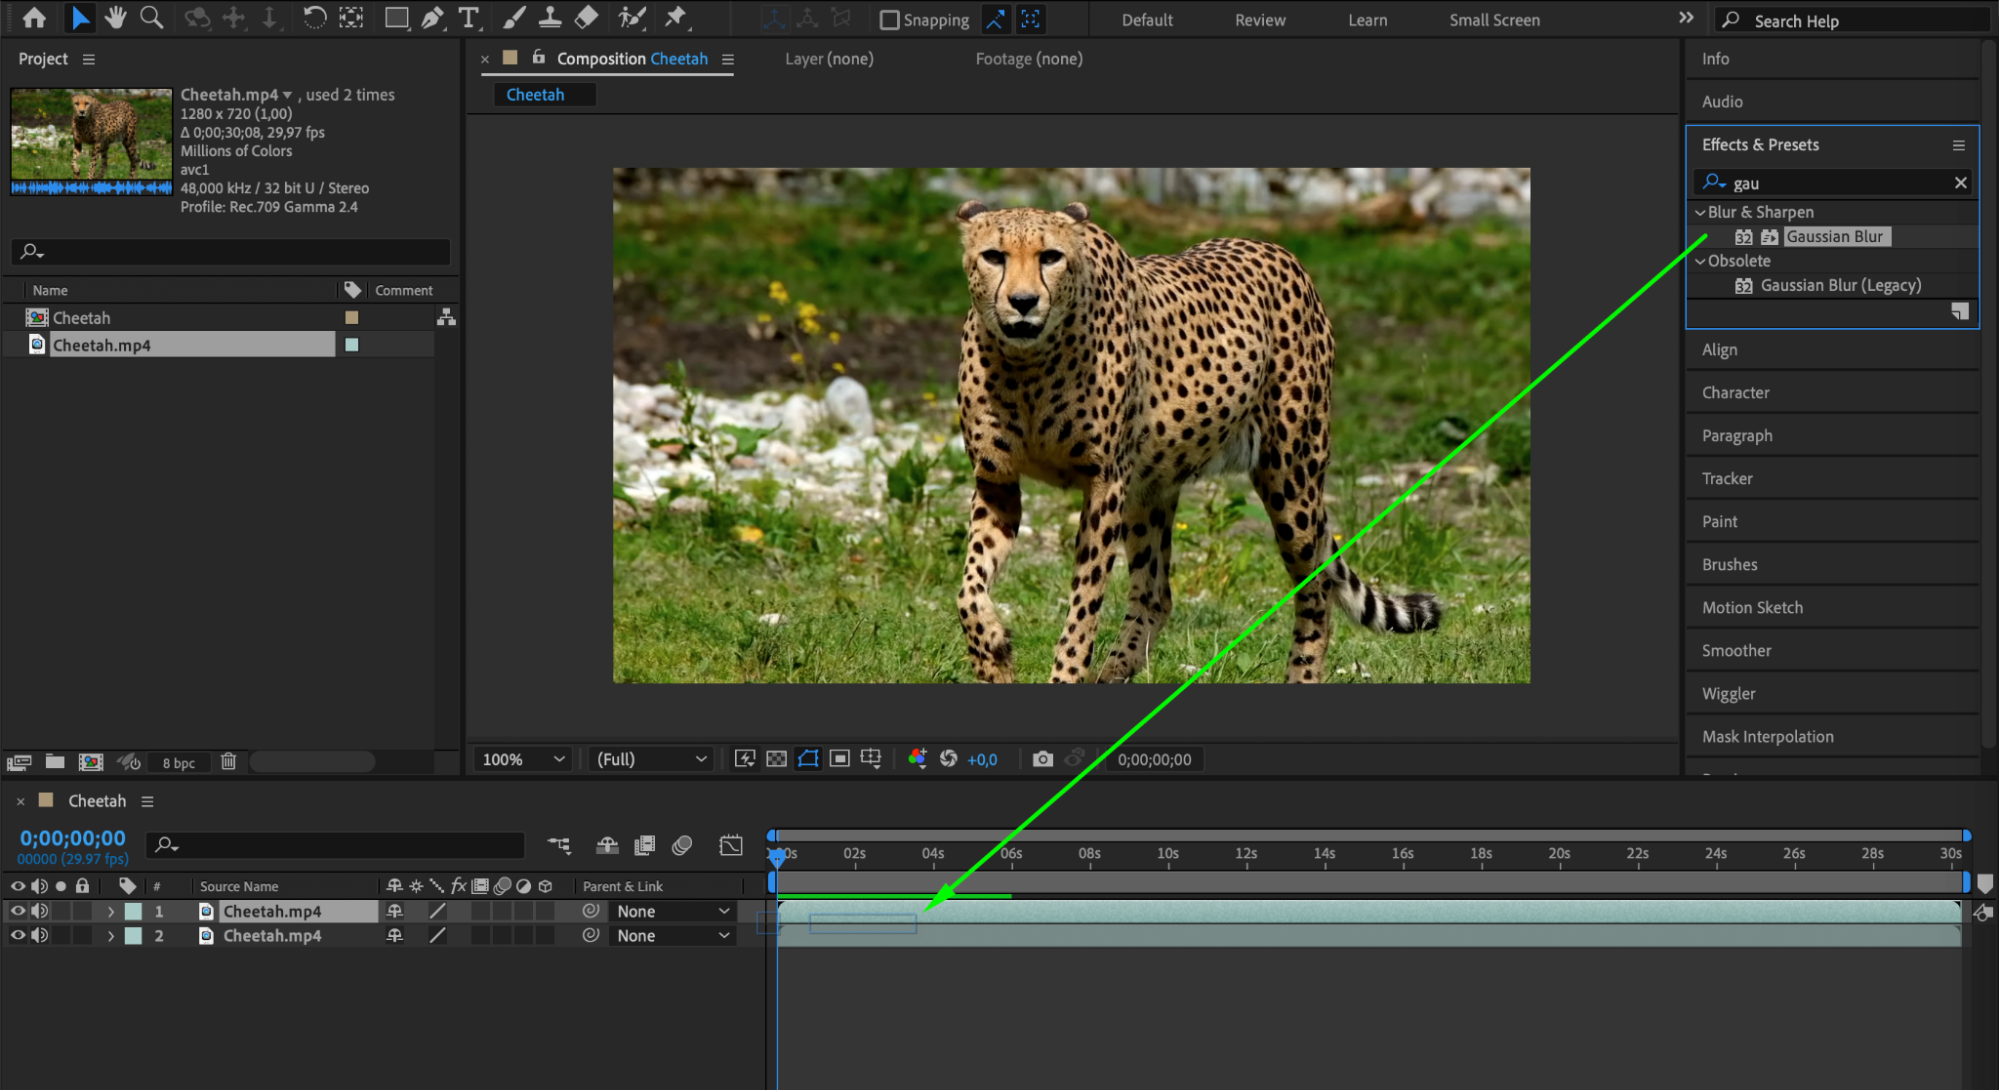
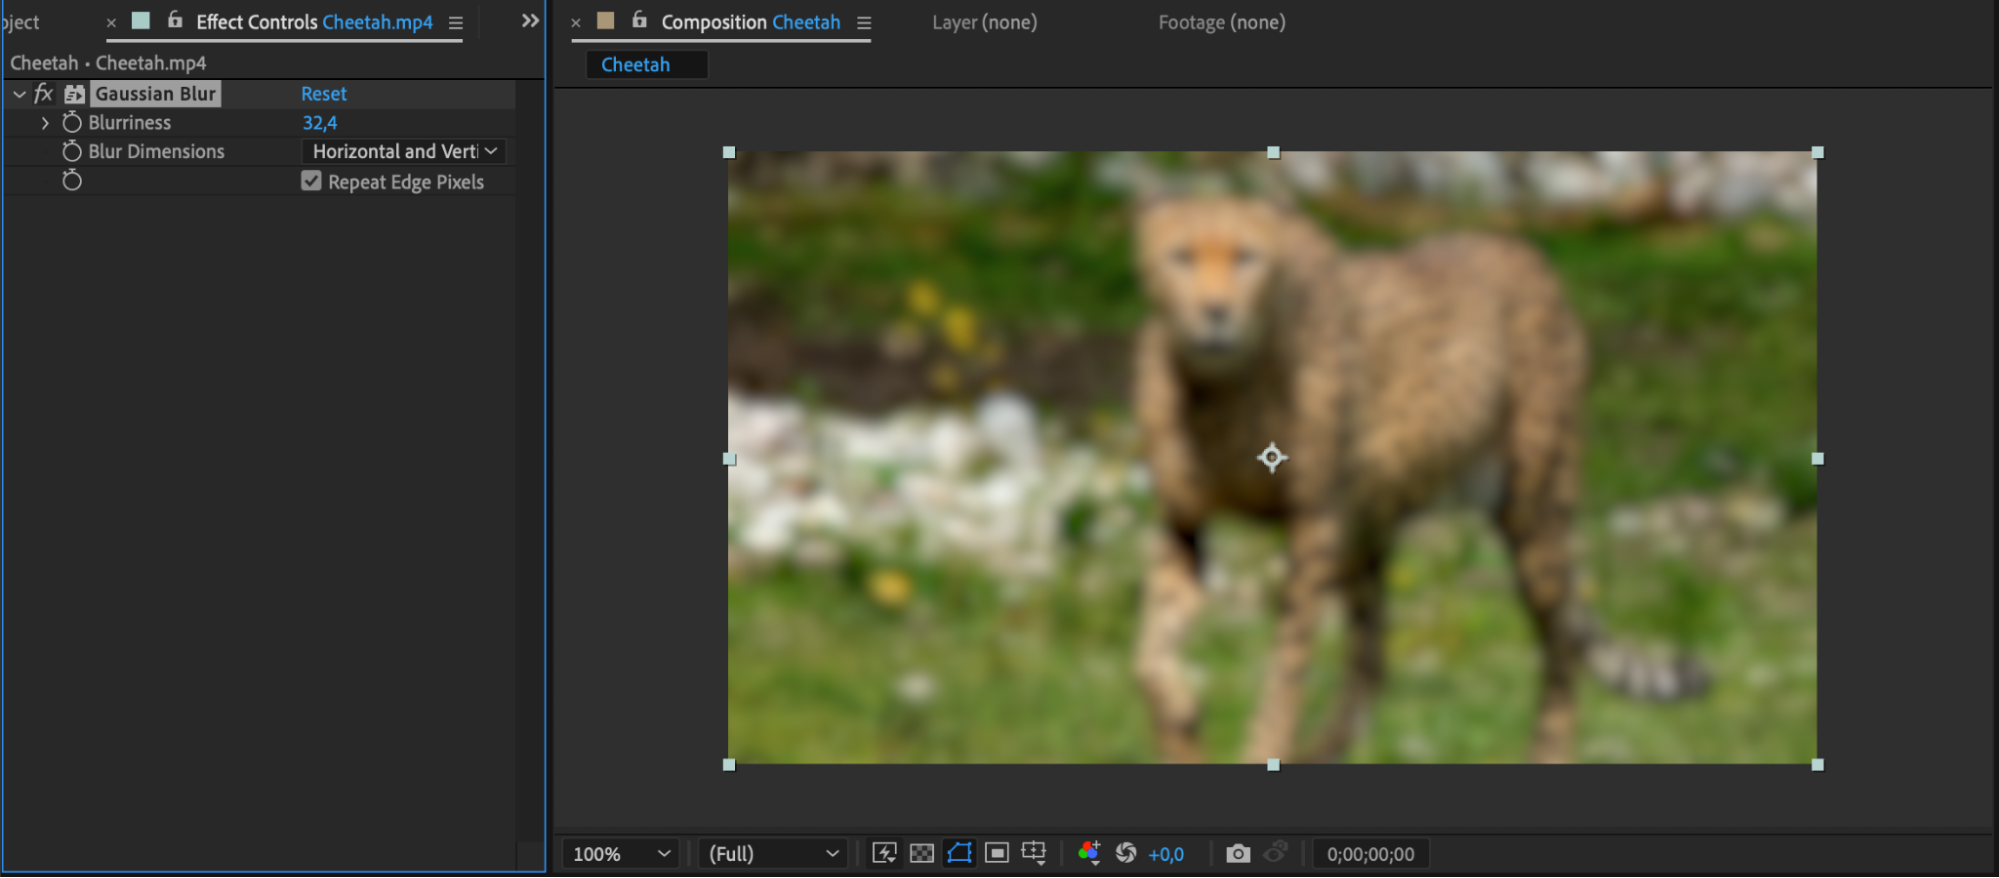
With the duplicated layer selected, navigate to Effect > Blur & Sharpen > Gaussian Blur. In the Effect Controls panel, adjust the Blurriness parameter until the background blur looks satisfactory. This will create the desired blur effect on the entire duplicated layer.
Get 10% off when you subscribe to our newsletter

Step 4: Isolate the Subject with the Roto Brush Tool
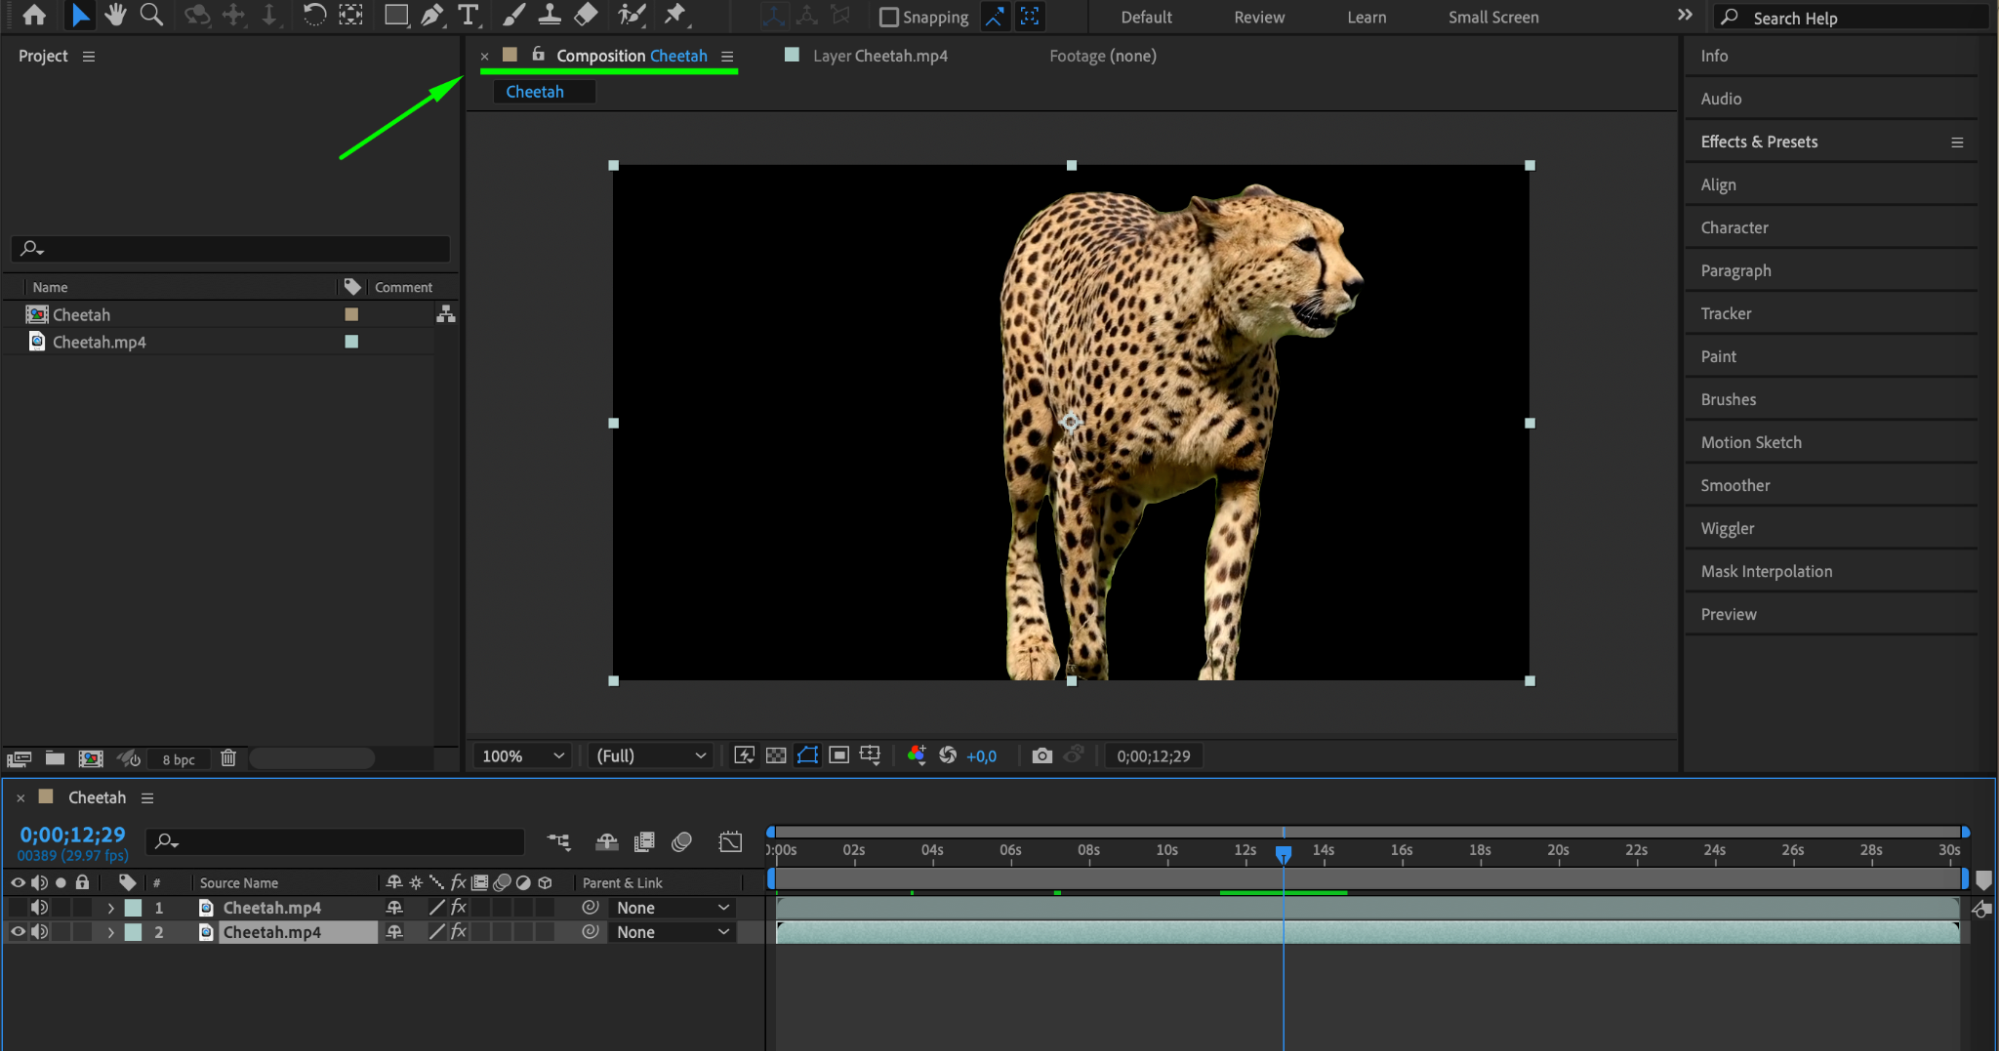
Switch back to the original video layer. For ease of editing, make the duplicated layer invisible by clicking the eye icon next to it in the Timeline panel. Select the Roto Brush Tool from the toolbar, then use it to paint over the object you want to keep in focus. Adjust your selection using the Effect Controls panel for precision.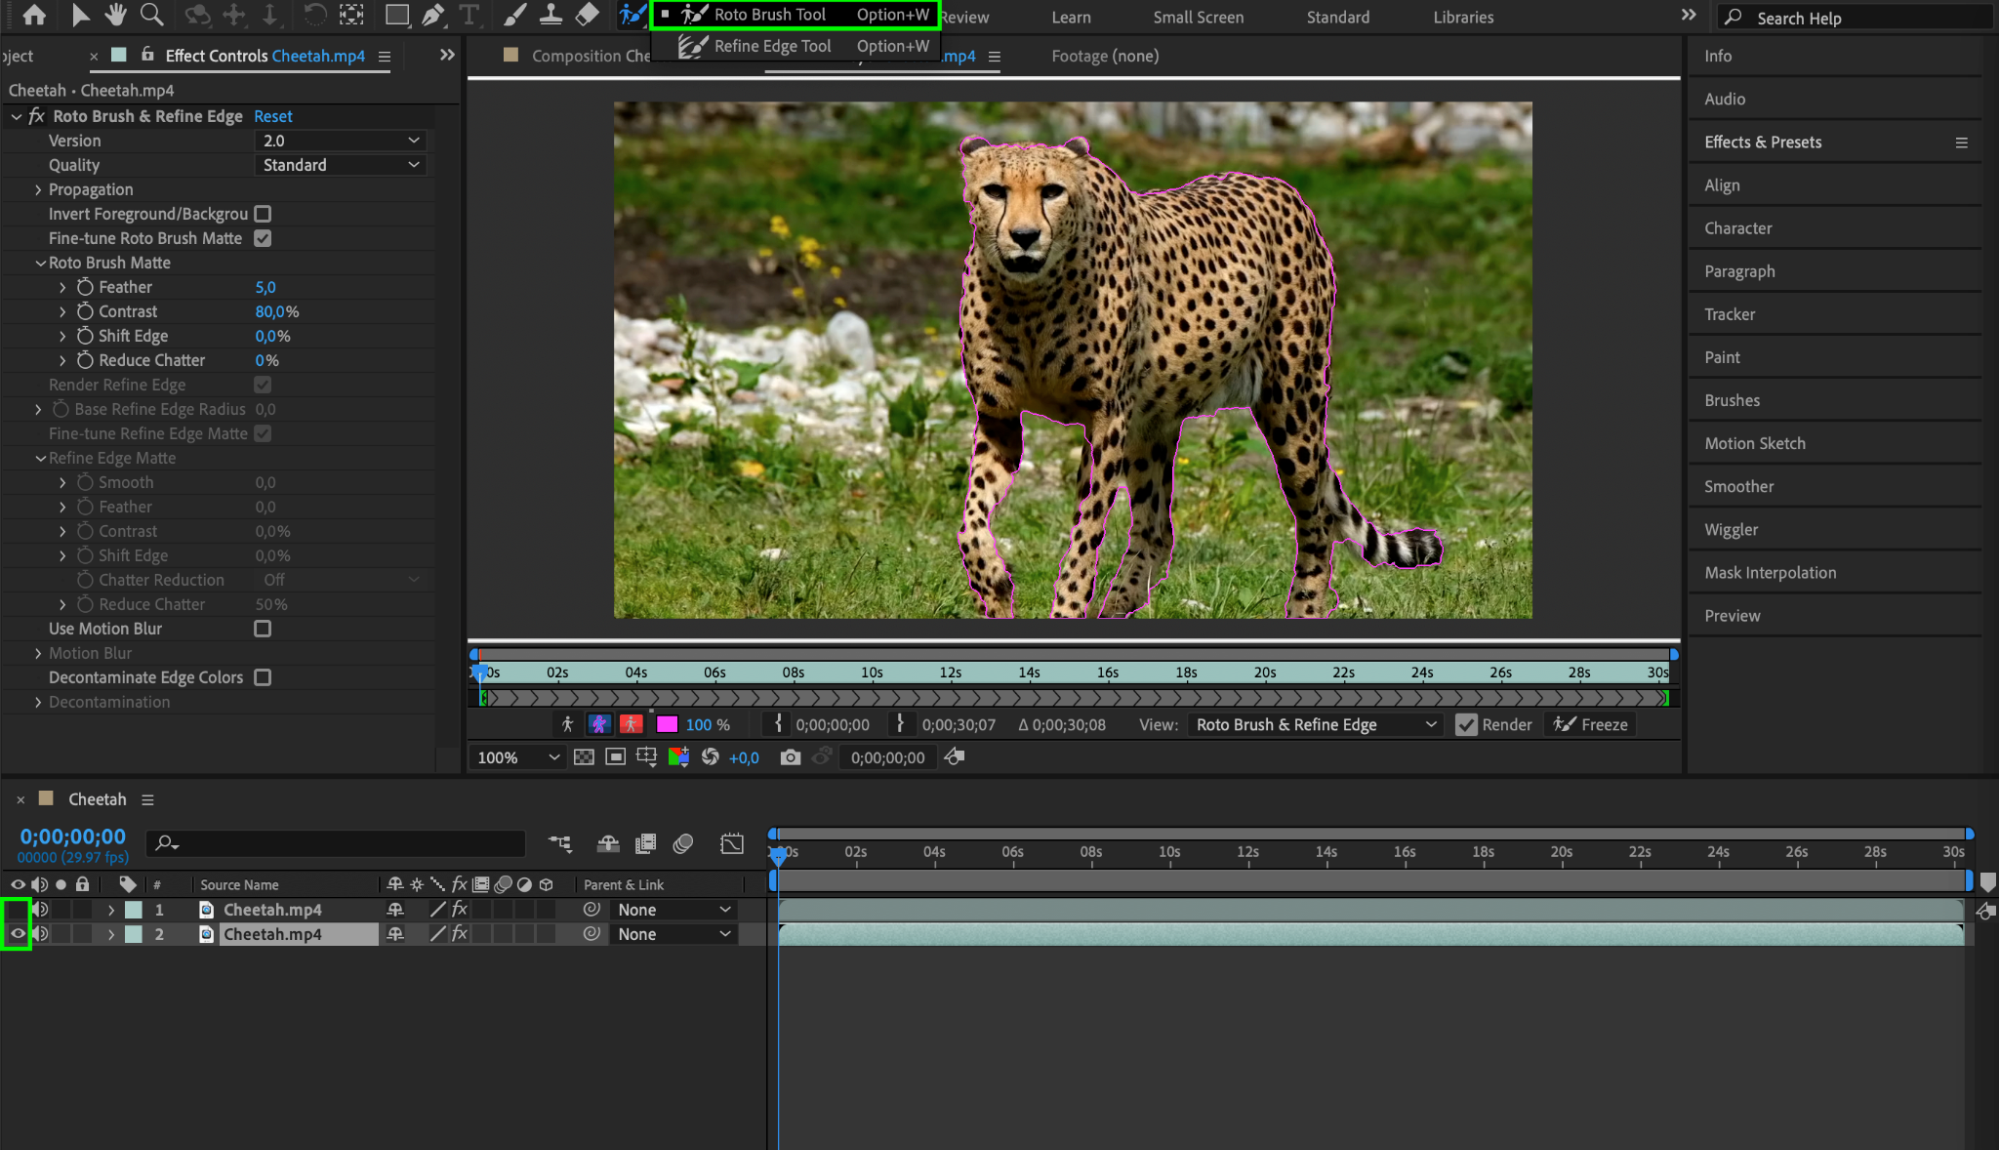 Step 5: Freeze the Roto Brush Selection
Get 10% off when you subscribe to our newsletter

After making your selection, click the Freeze button at the bottom of the Composition panel. This action locks your selection and ensures it remains consistent throughout the duration of the clip.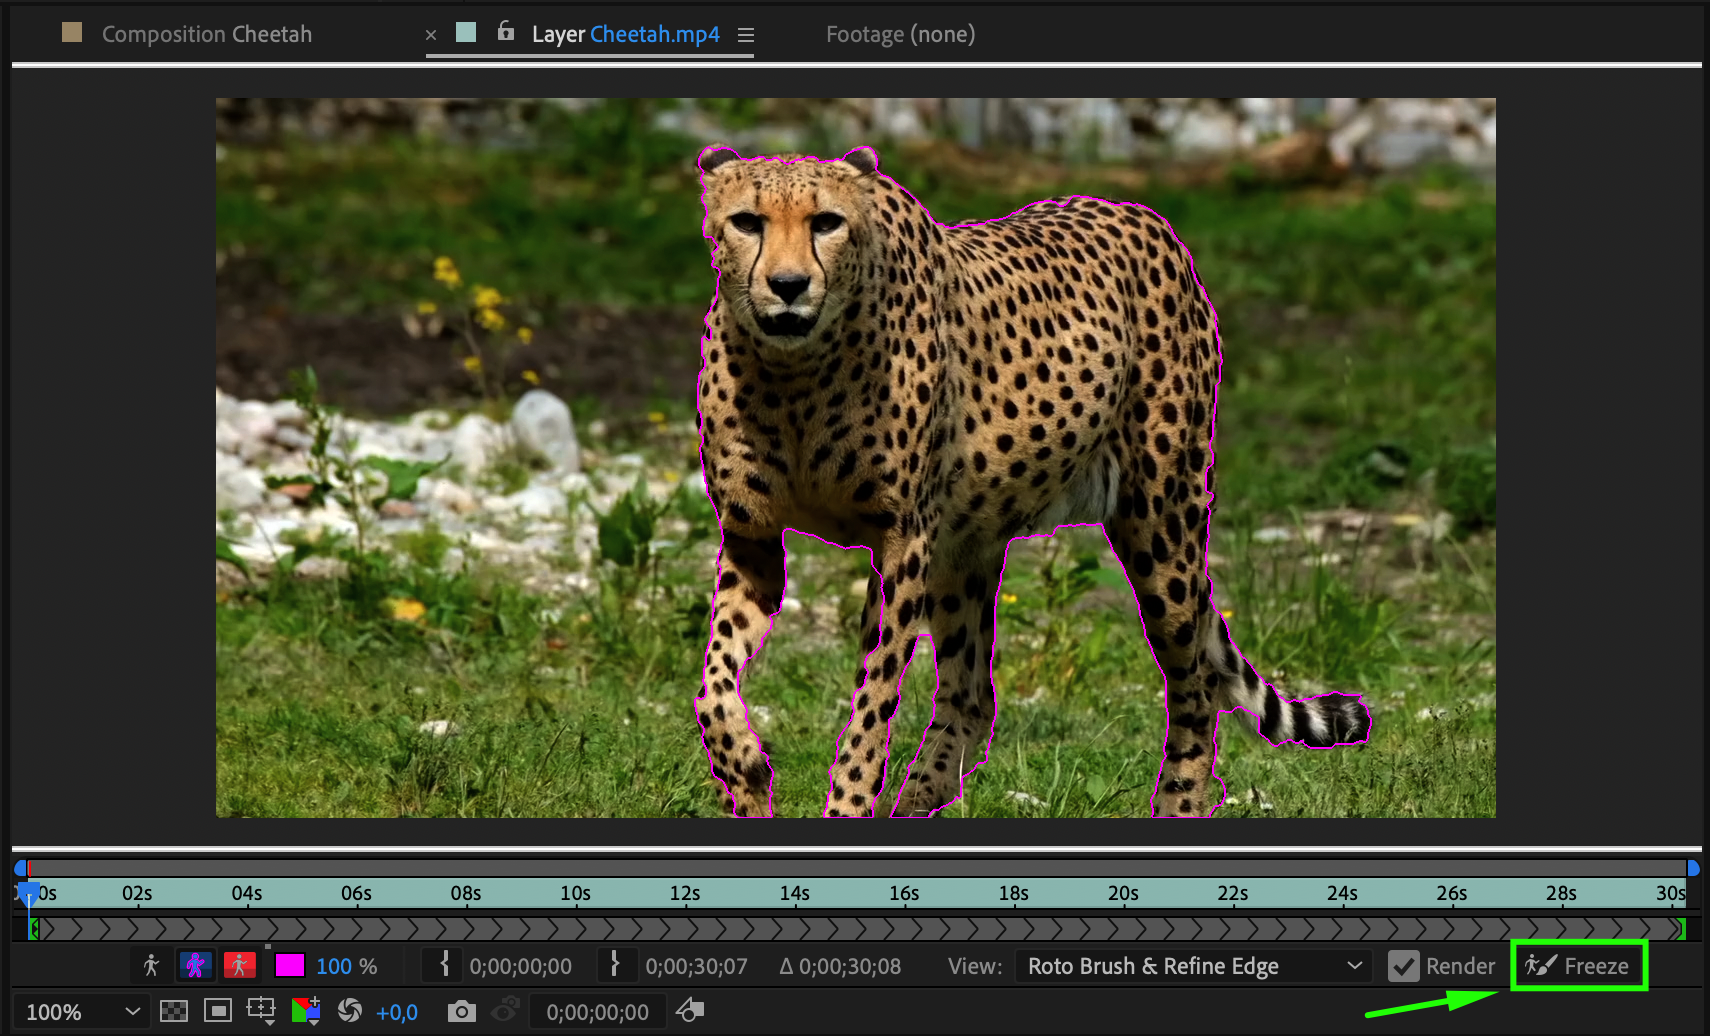
 Step 6: Make the Duplicated Layer Visible and Position It
Make the duplicated layer visible again by clicking the eye icon next to it in the Timeline panel. Ensure that the duplicated layer is placed underneath the original layer in the layer stack. This setup ensures that the blurred background appears behind the focused subject.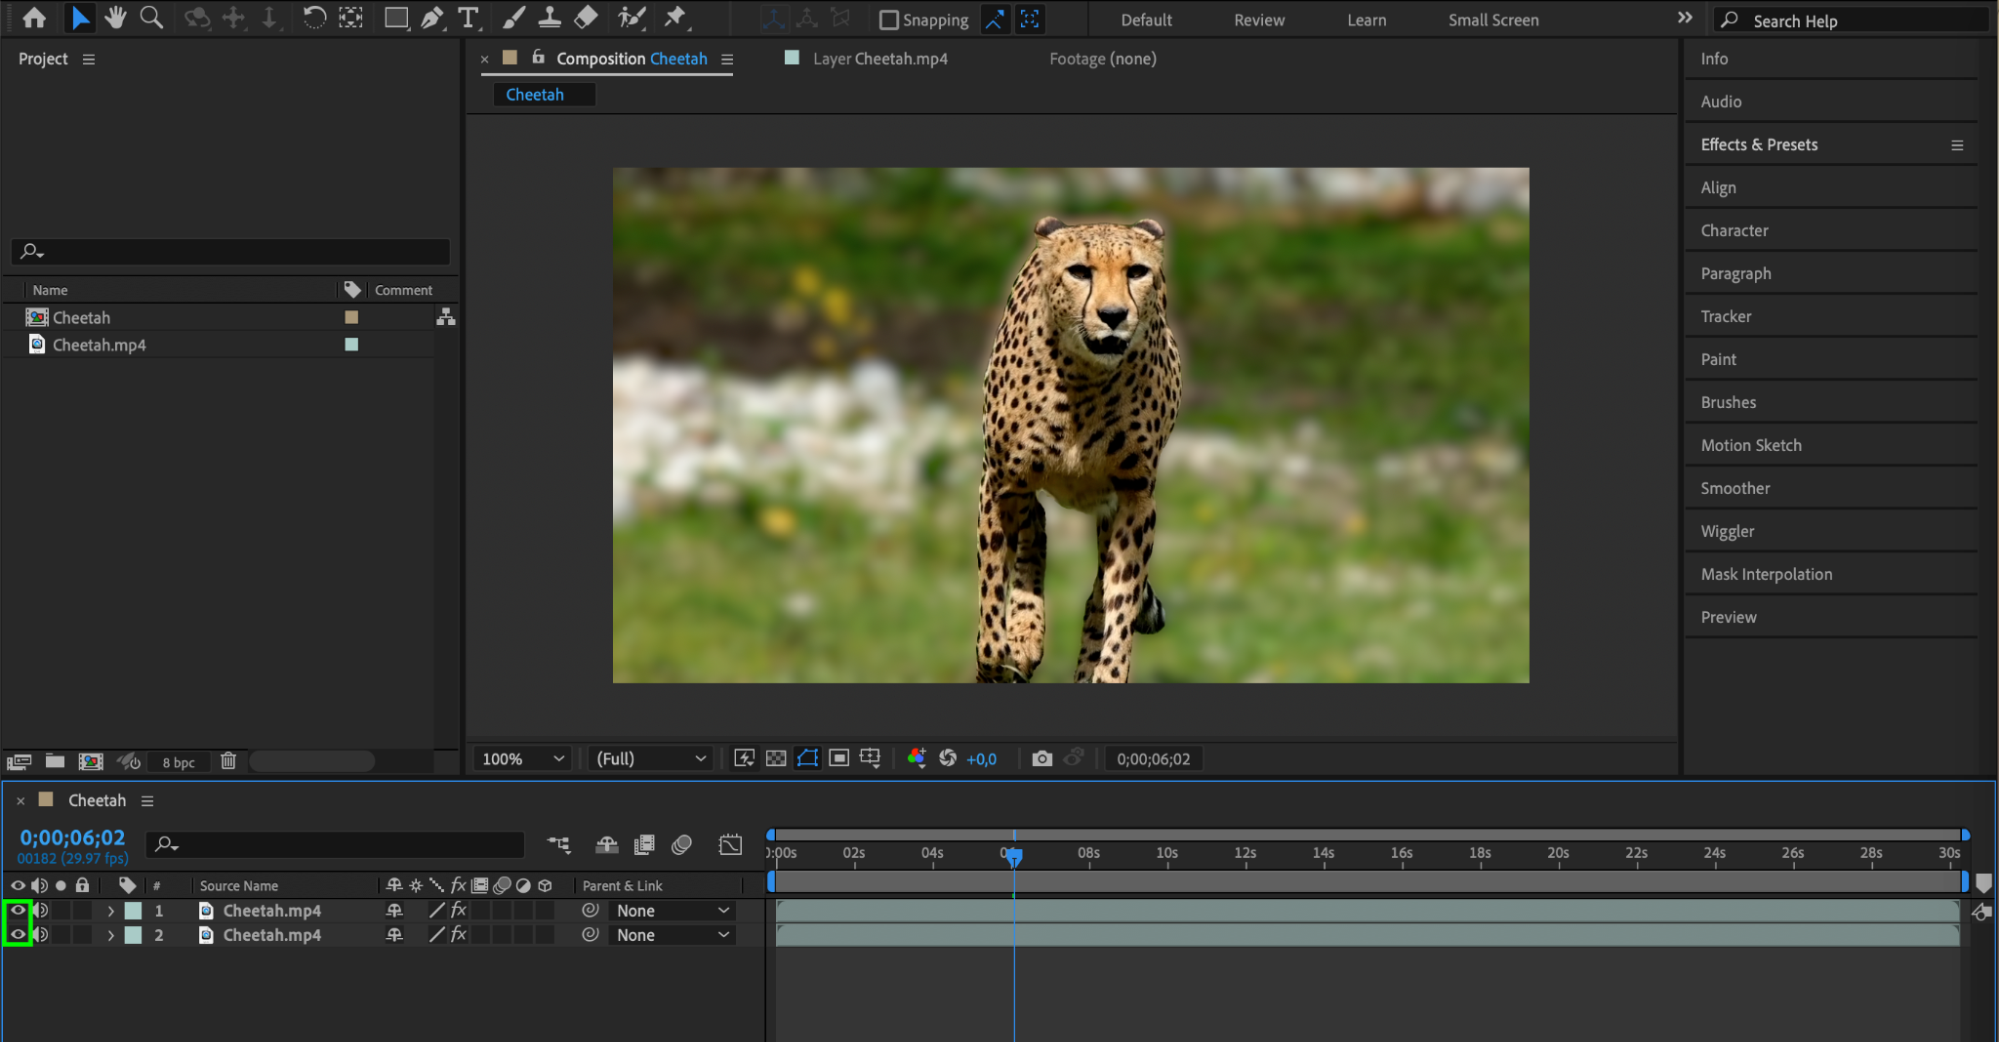 Step 7: Preview the Result
Get 10% off when you subscribe to our newsletter

Use the Preview panel to play back your composition and review the background blur effect. Make any necessary adjustments to the blur or the roto brush selection to achieve the desired look.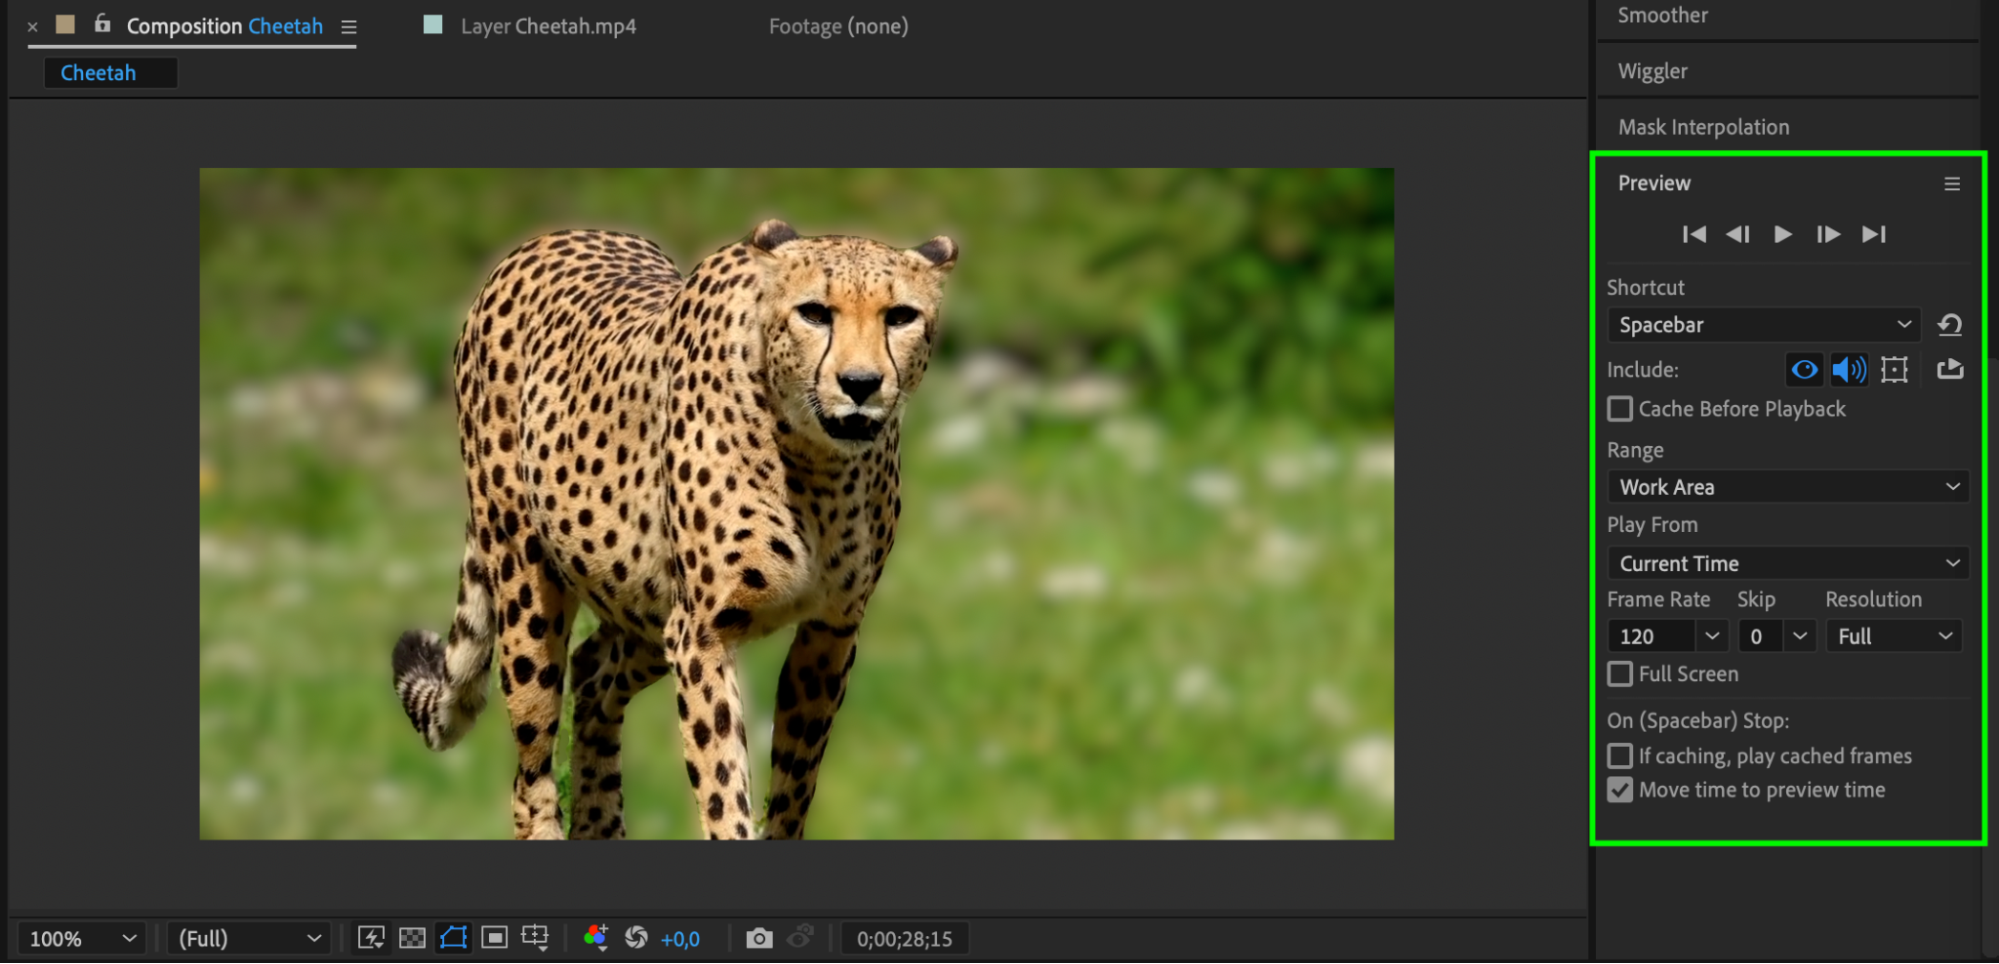 Step 8: Render and Export Your Composition
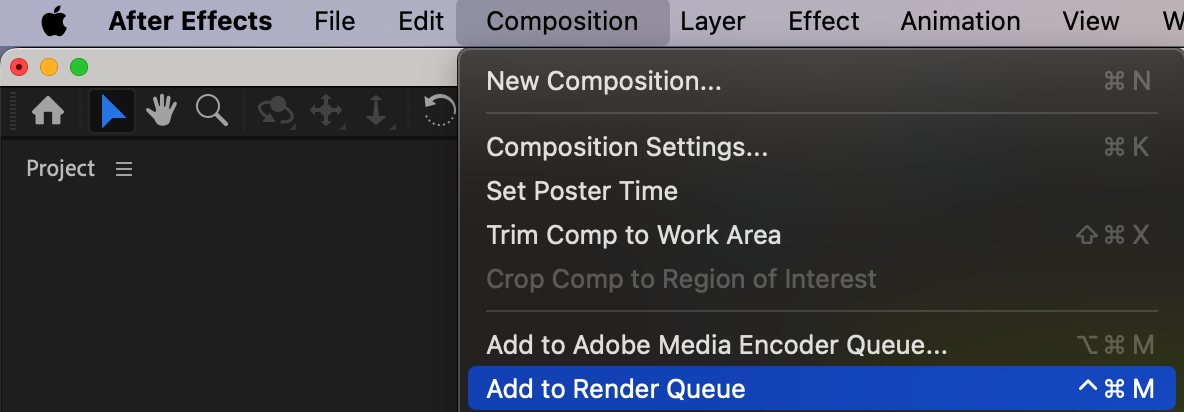
Once you are satisfied with the background blur effect, it’s time to render and export your composition. Go to the Composition menu, select Add to Render Queue. In the Render Queue panel, adjust the output settings according to your needs and click Render. After Effects will process your composition and produce the final video file with the background blur effect intact.
 Conclusion
Creating a background blur effect in After Effects is a straightforward process that can significantly enhance the visual quality of your video. By following these steps, you can easily blur the background and keep your subject in sharp focus, adding a professional touch to your projects. Practice these techniques to master the art of background blurring and elevate your video editing skills.
For more video editing tutorials, tips, and resources, visit our website aejuice.com and stay tuned for more exciting content. Happy creating!


