How to Create a Clipping Mask in After Effects
Introduction to Clipping Masks in After Effects
Do you want to take your video designs to the next level? One way to do that is by using clipping masks in After Effects. Clipping masks give you control over how your content is revealed within a specific shape or area, allowing you to create stunning effects and add depth to your compositions.
Get 10% off when you subscribe to our newsletter

In this blog post, we will guide you through the process of creating and using clipping masks in After Effects. Whether you’re a beginner or an experienced designer, this tutorial will give you the knowledge and skills to master this powerful feature.
Step-by-Step Guide to Creating a Clipping Mask in After Effects
Step 1: Create the Mask
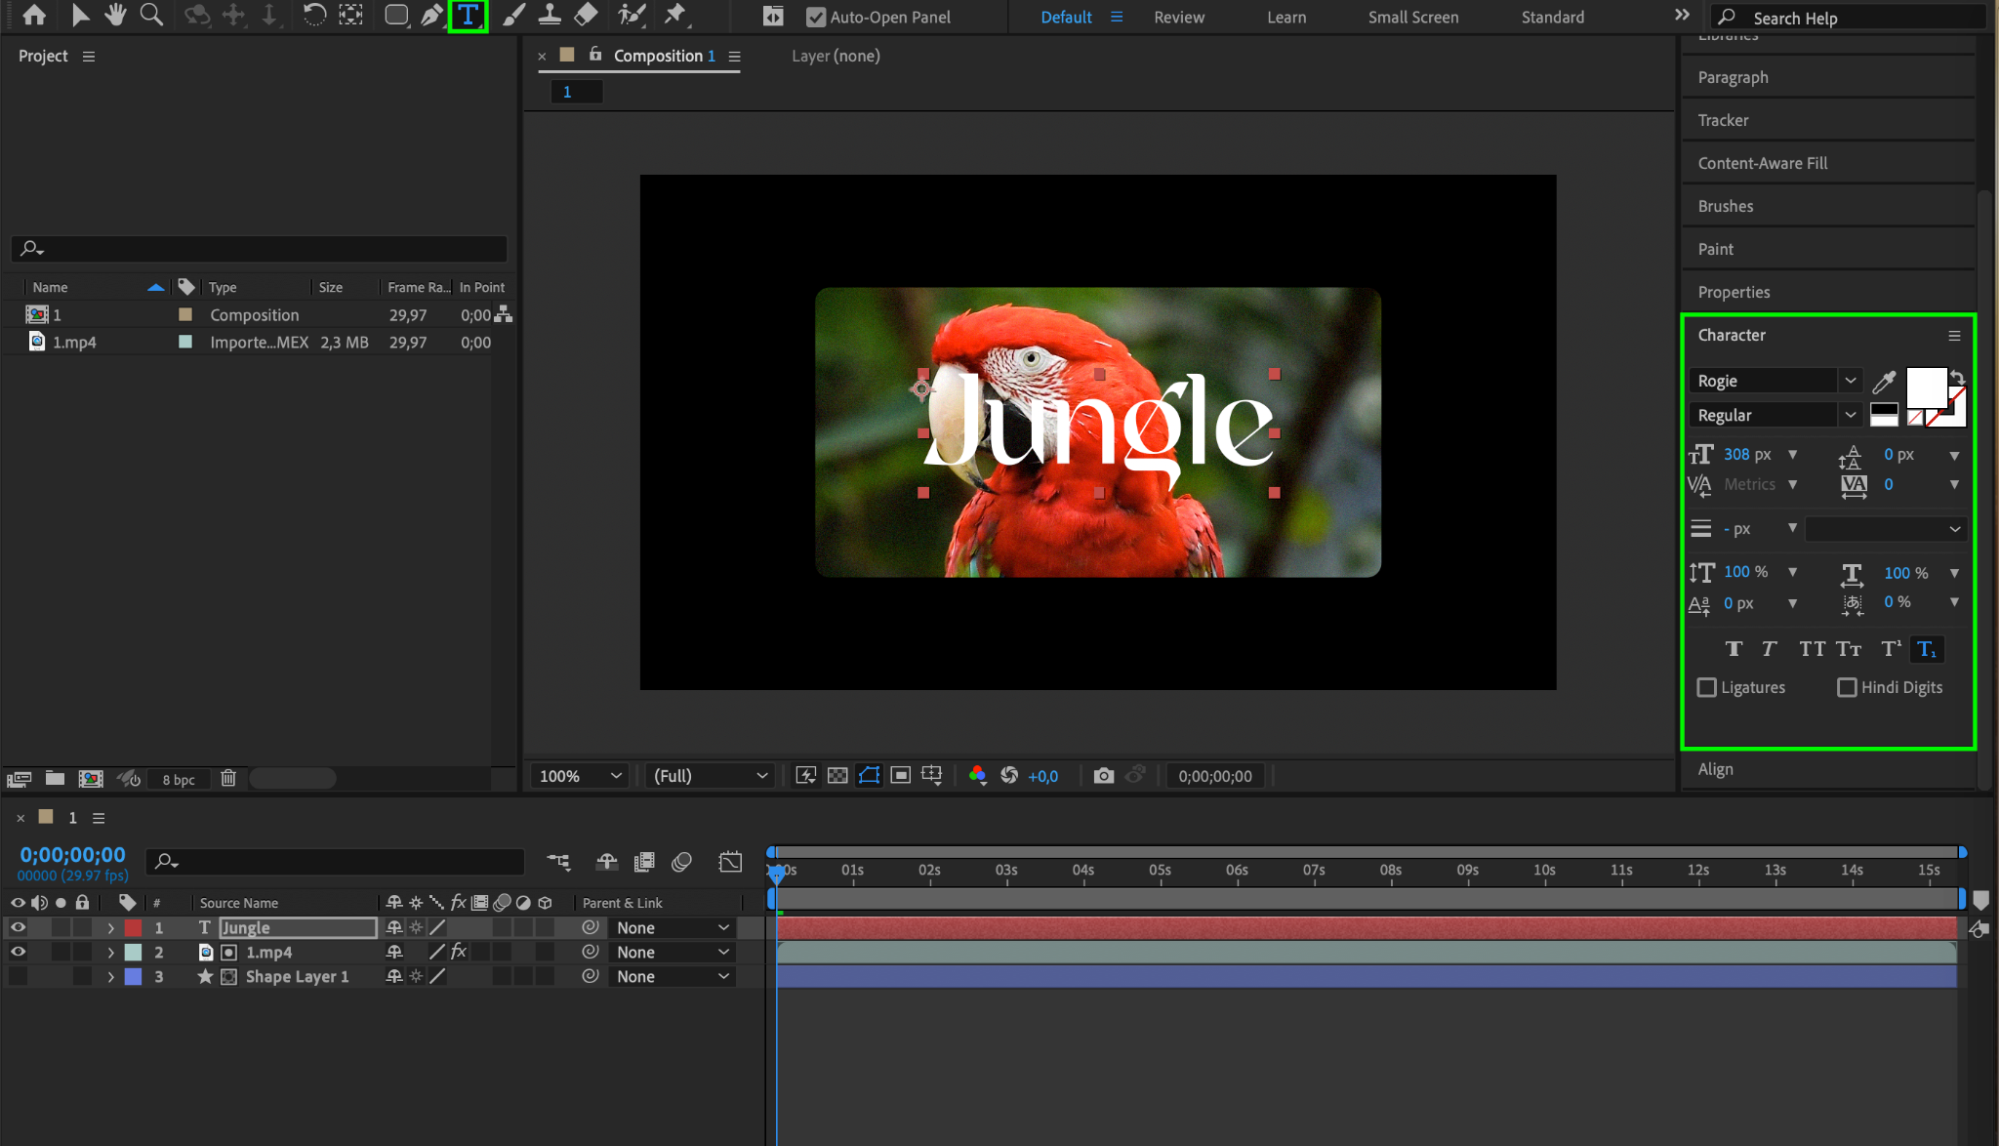
To get started with clipping masks, you’ll need to have a composition ready in After Effects. Once you have your composition set up, choose a shape or layer that you want to use as the mask. It can be a simple shape or a pre-existing layer. You can use the shape tools (Q) in the toolbar or import a custom shape. This shape will define the visible area of your content.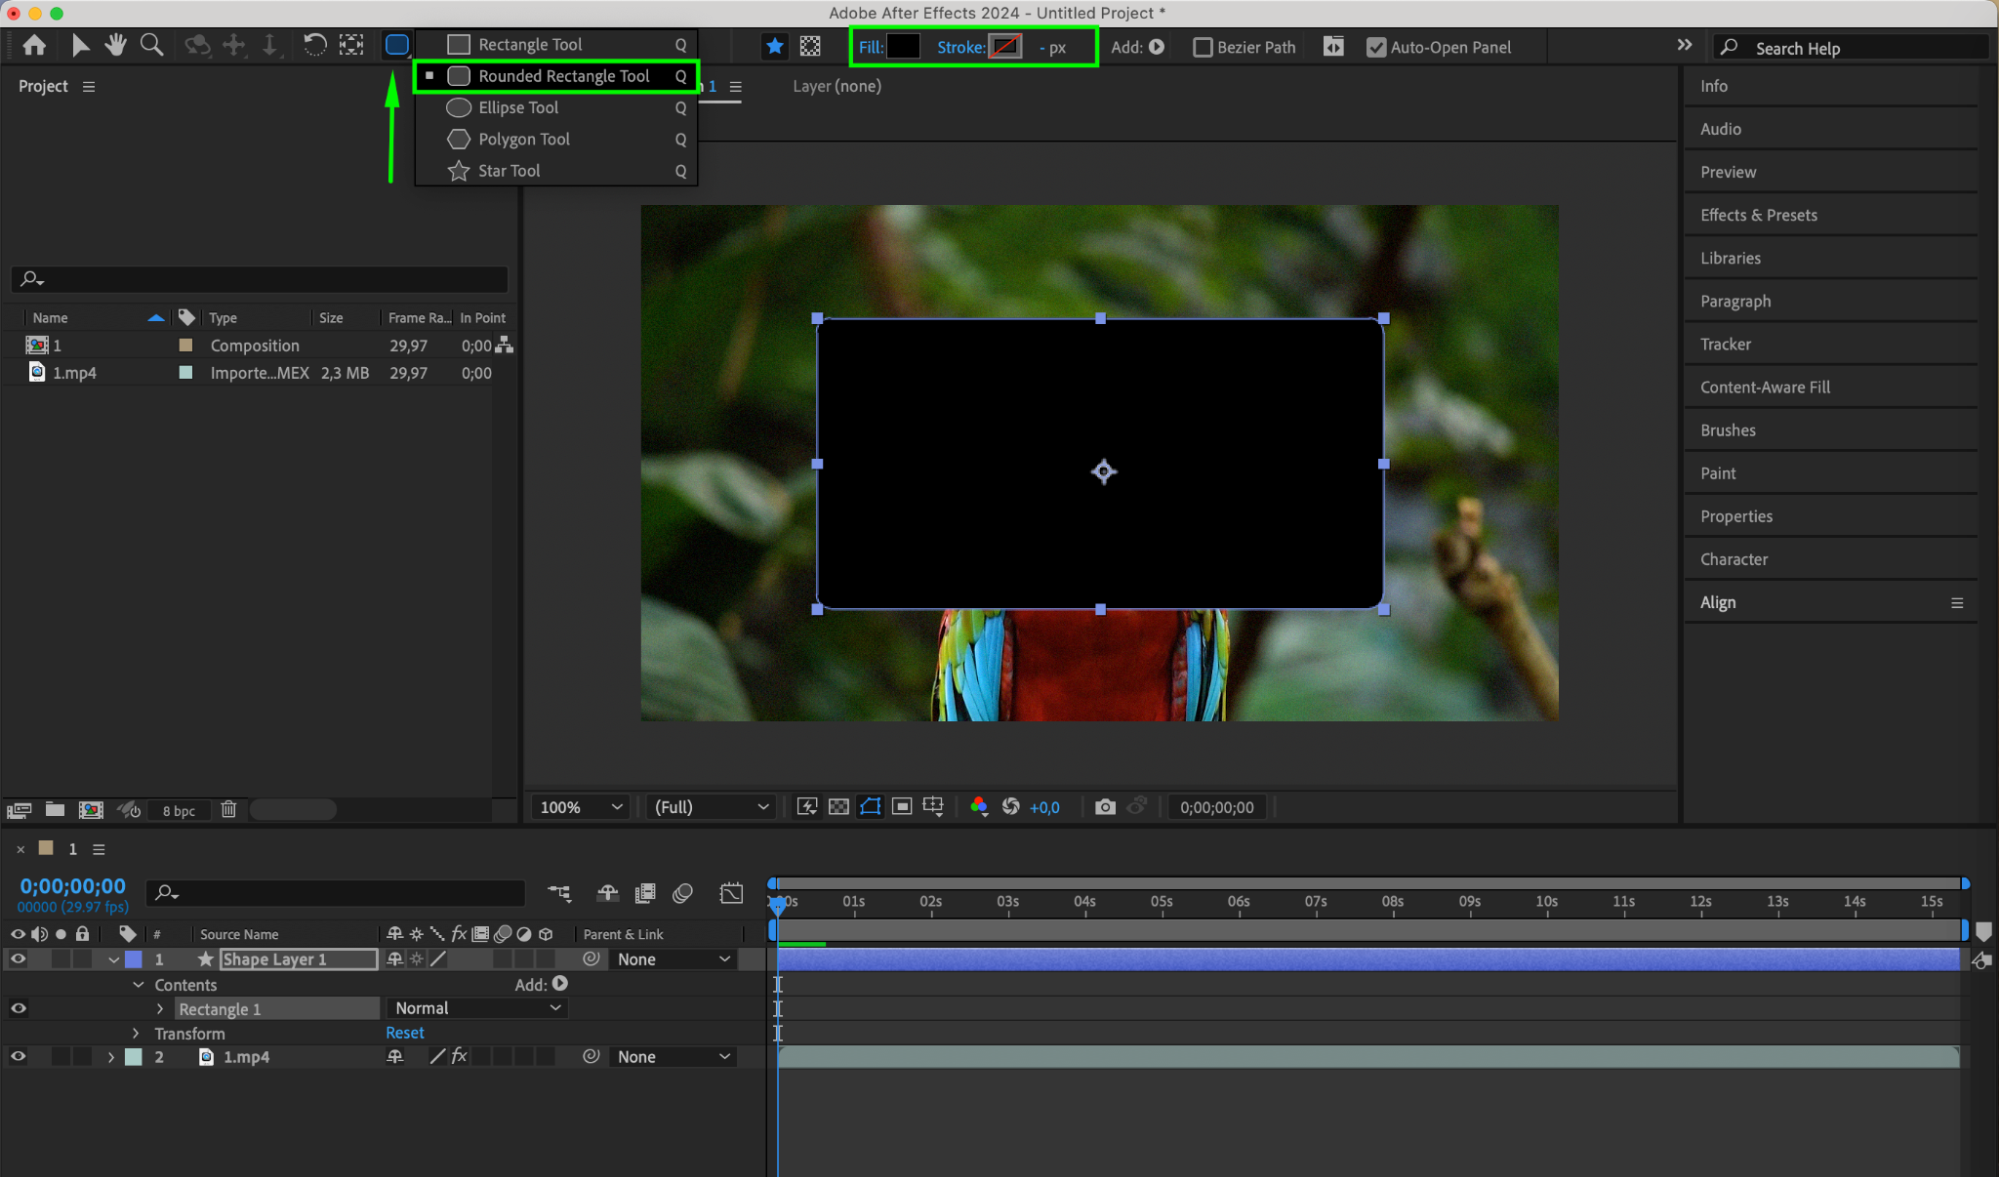 Step 2: Arrange the Layers
Next, make sure the layer you want to clip is above the mask layer in the layer panel. The layer on top will be the one that gets clipped. Proper layer arrangement is crucial for the clipping mask to work correctly, as the mask layer acts as a stencil for the layer above it.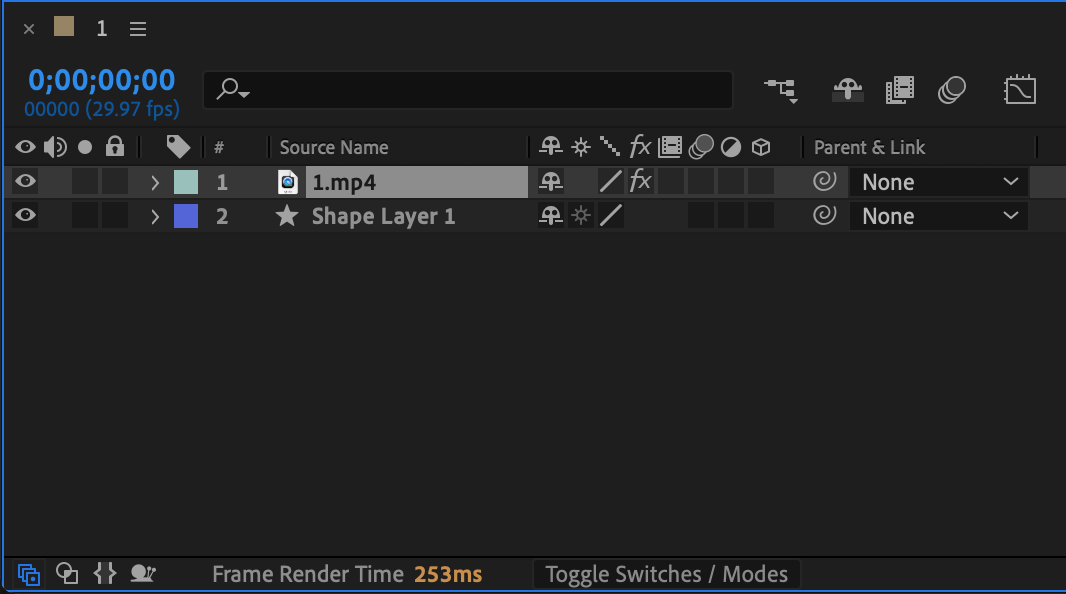 Step 3: Apply the Clipping Mask
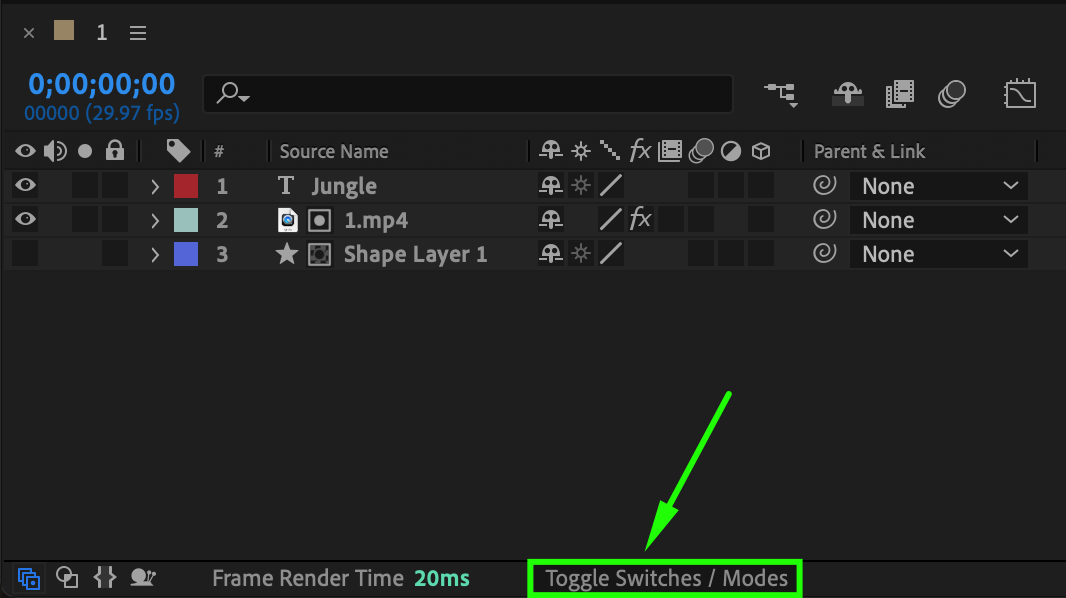
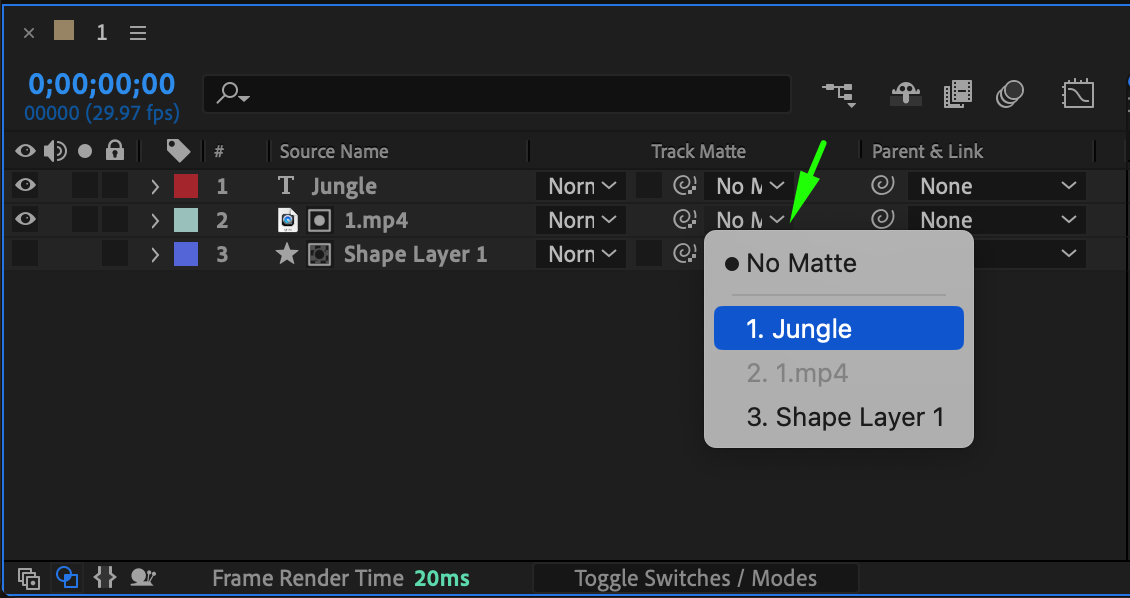
Select the layer you want to clip. Go to the Effects & Presets panel, and find the “Set Matte” effect in the Channel submenu. Apply this effect and choose the mask layer as the matte source. The “Set Matte” effect uses the mask layer to determine which parts of the clipped layer are visible.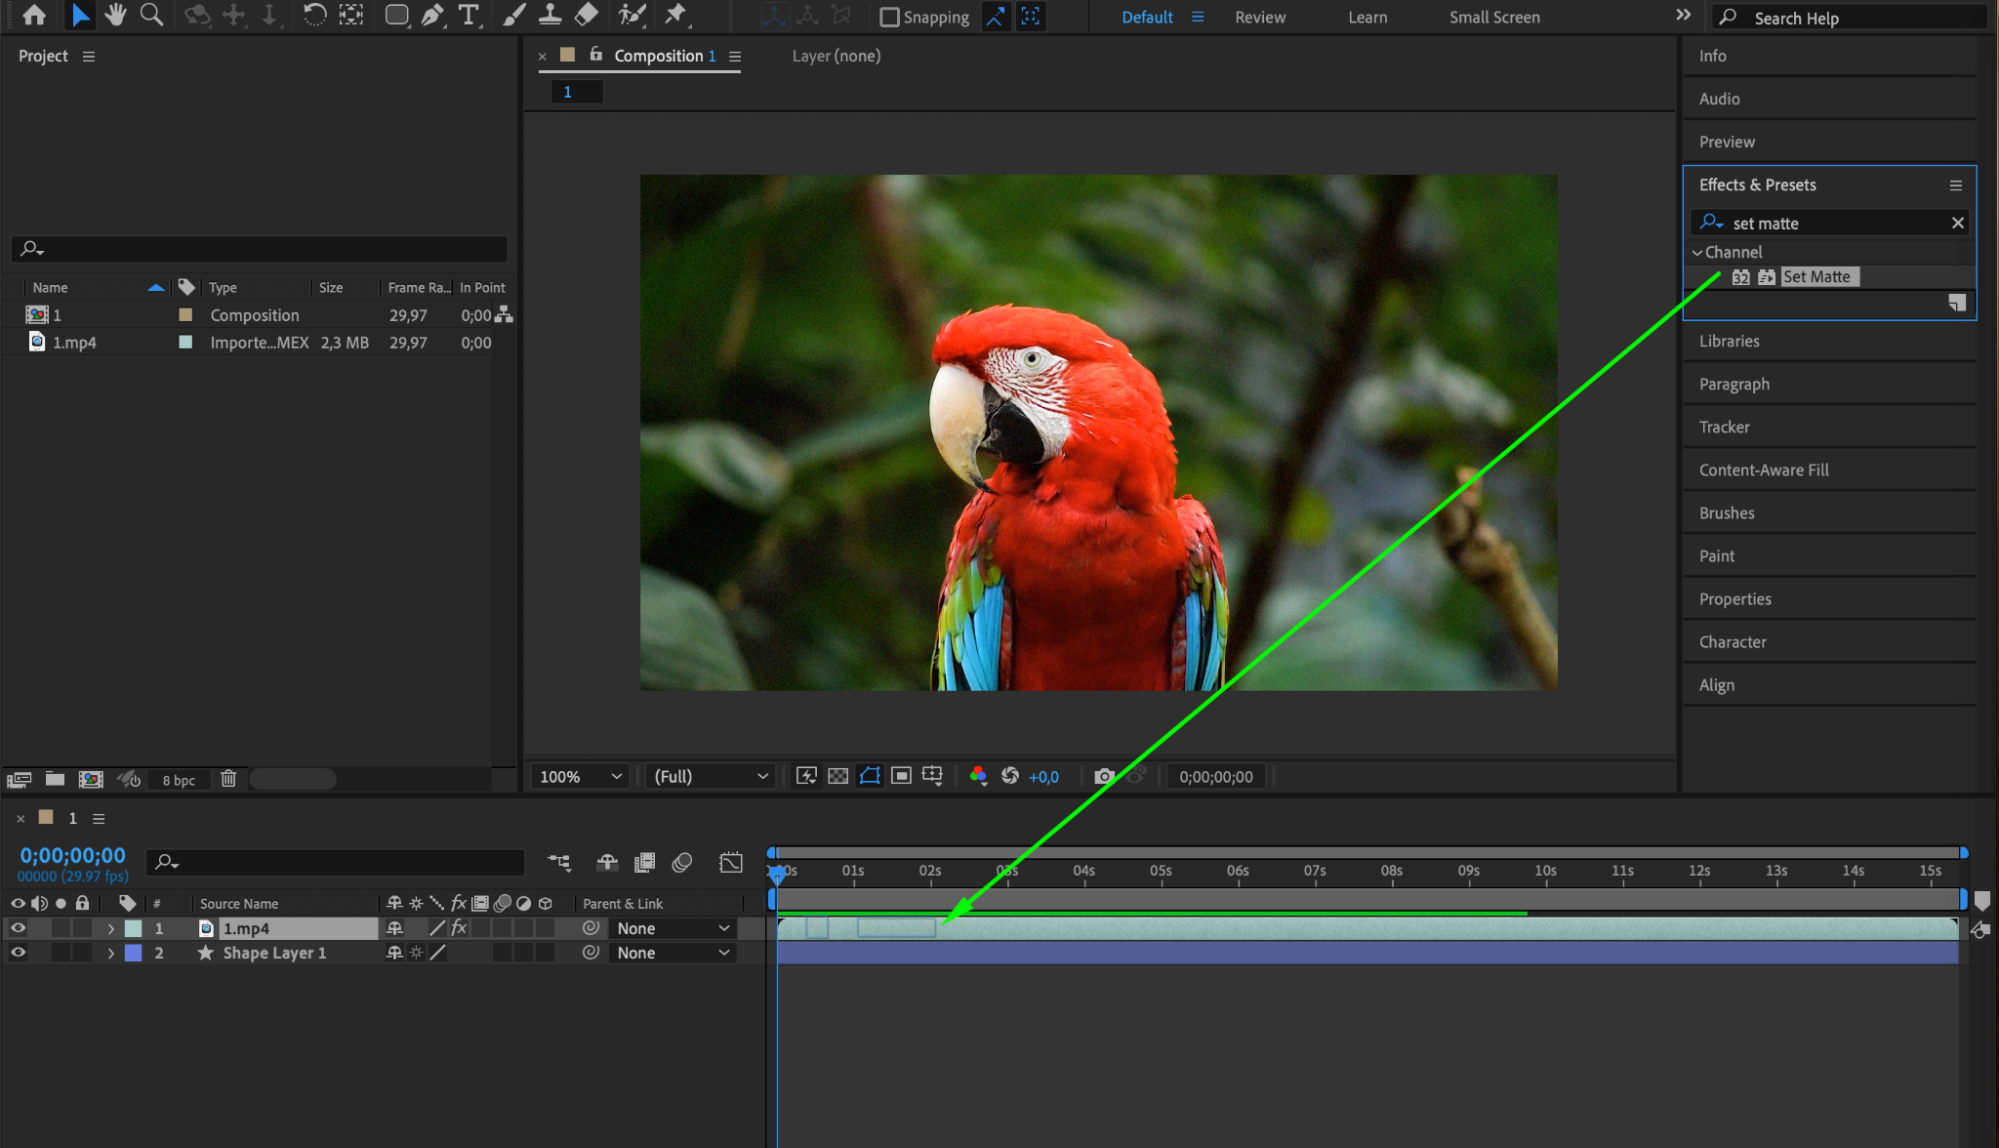 Step 4: Customize the Mask
Get 10% off when you subscribe to our newsletter

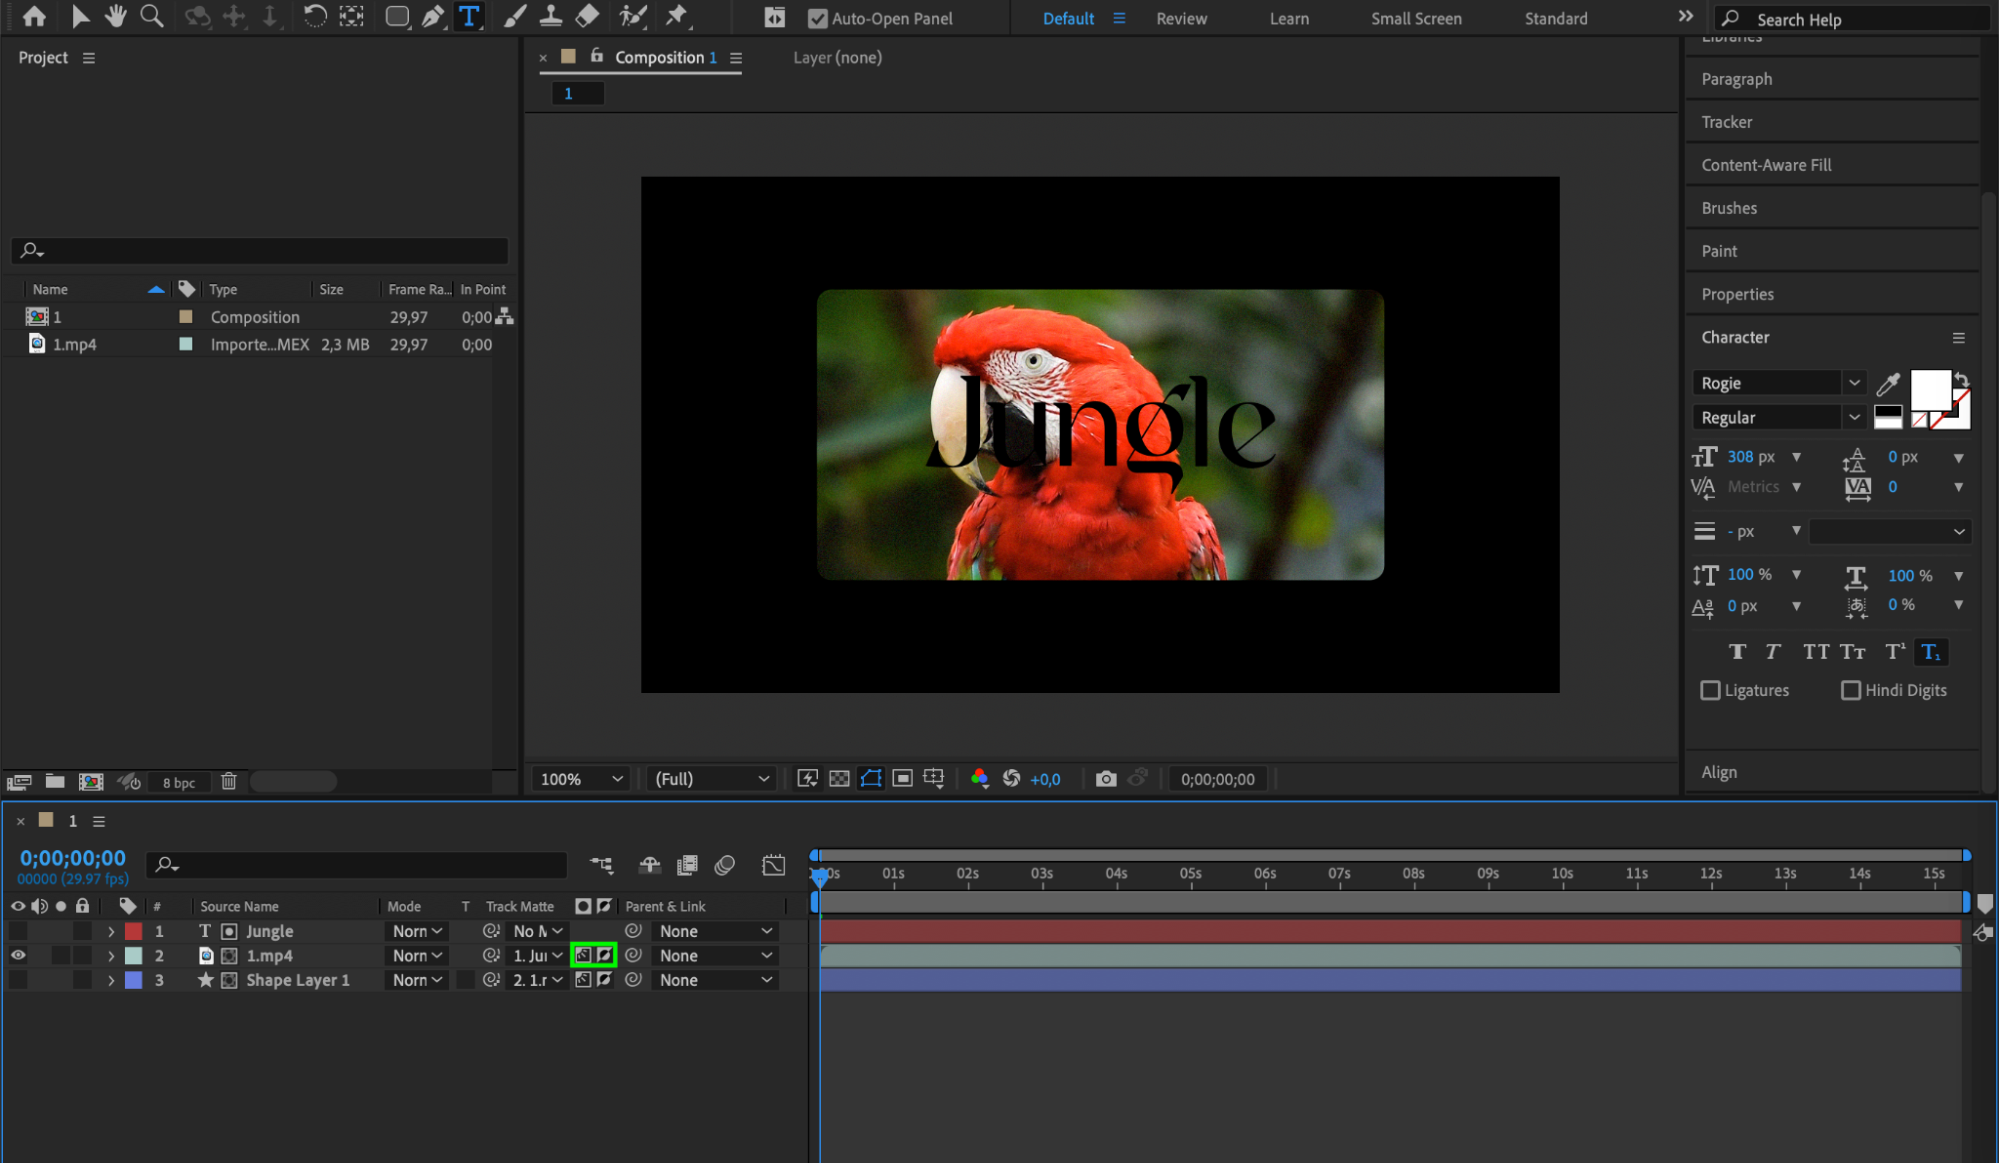
Adjust the settings of the “Set Matte” effect to control the visibility of the clipped layer. You can try options like “Alpha Matte” to use the transparency of the mask layer, or use “Luma Matte” to base the visibility on the brightness of the mask layer. Experimenting with these settings allows you to achieve different visual effects and tailor the mask to your design needs.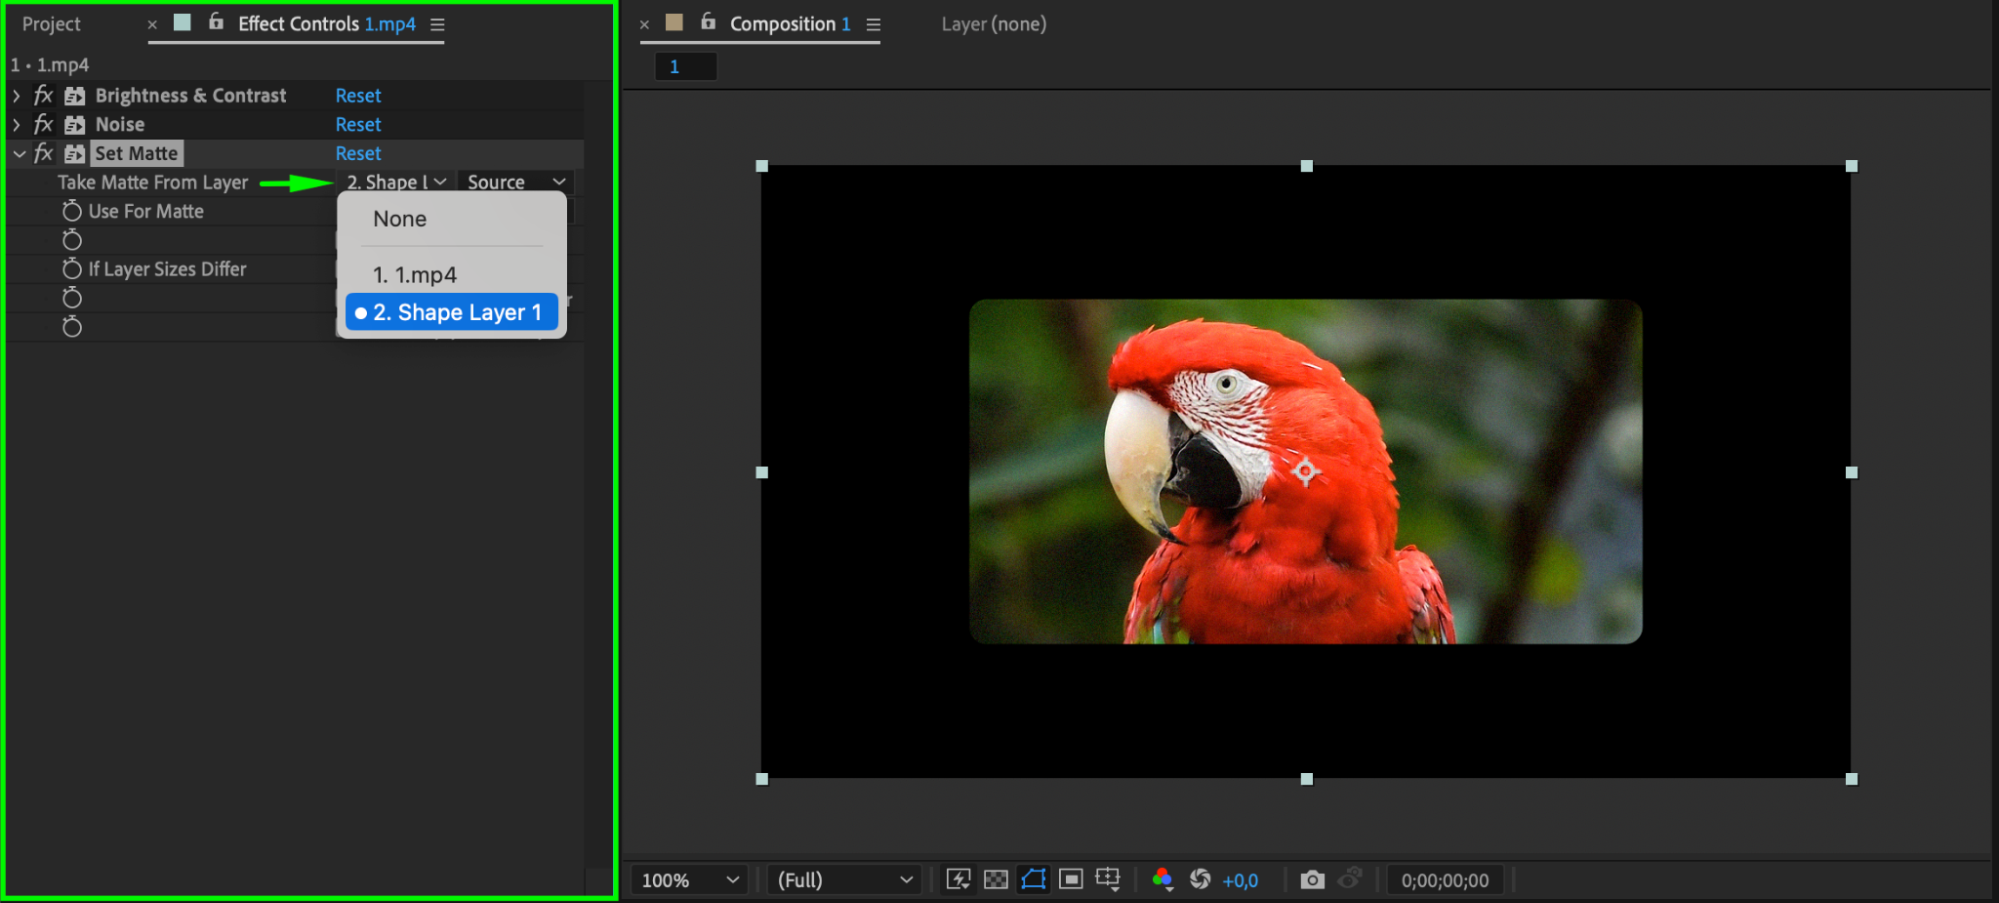
 Step 5: Animate the Clipping Mask
Clipping masks also offer endless possibilities for animating your designs. You can animate the mask itself to reveal or hide content dynamically. Use keyframes to change the mask shape or position over time, or even automate the animation process with expressions. This adds an extra layer of creativity and complexity to your projects.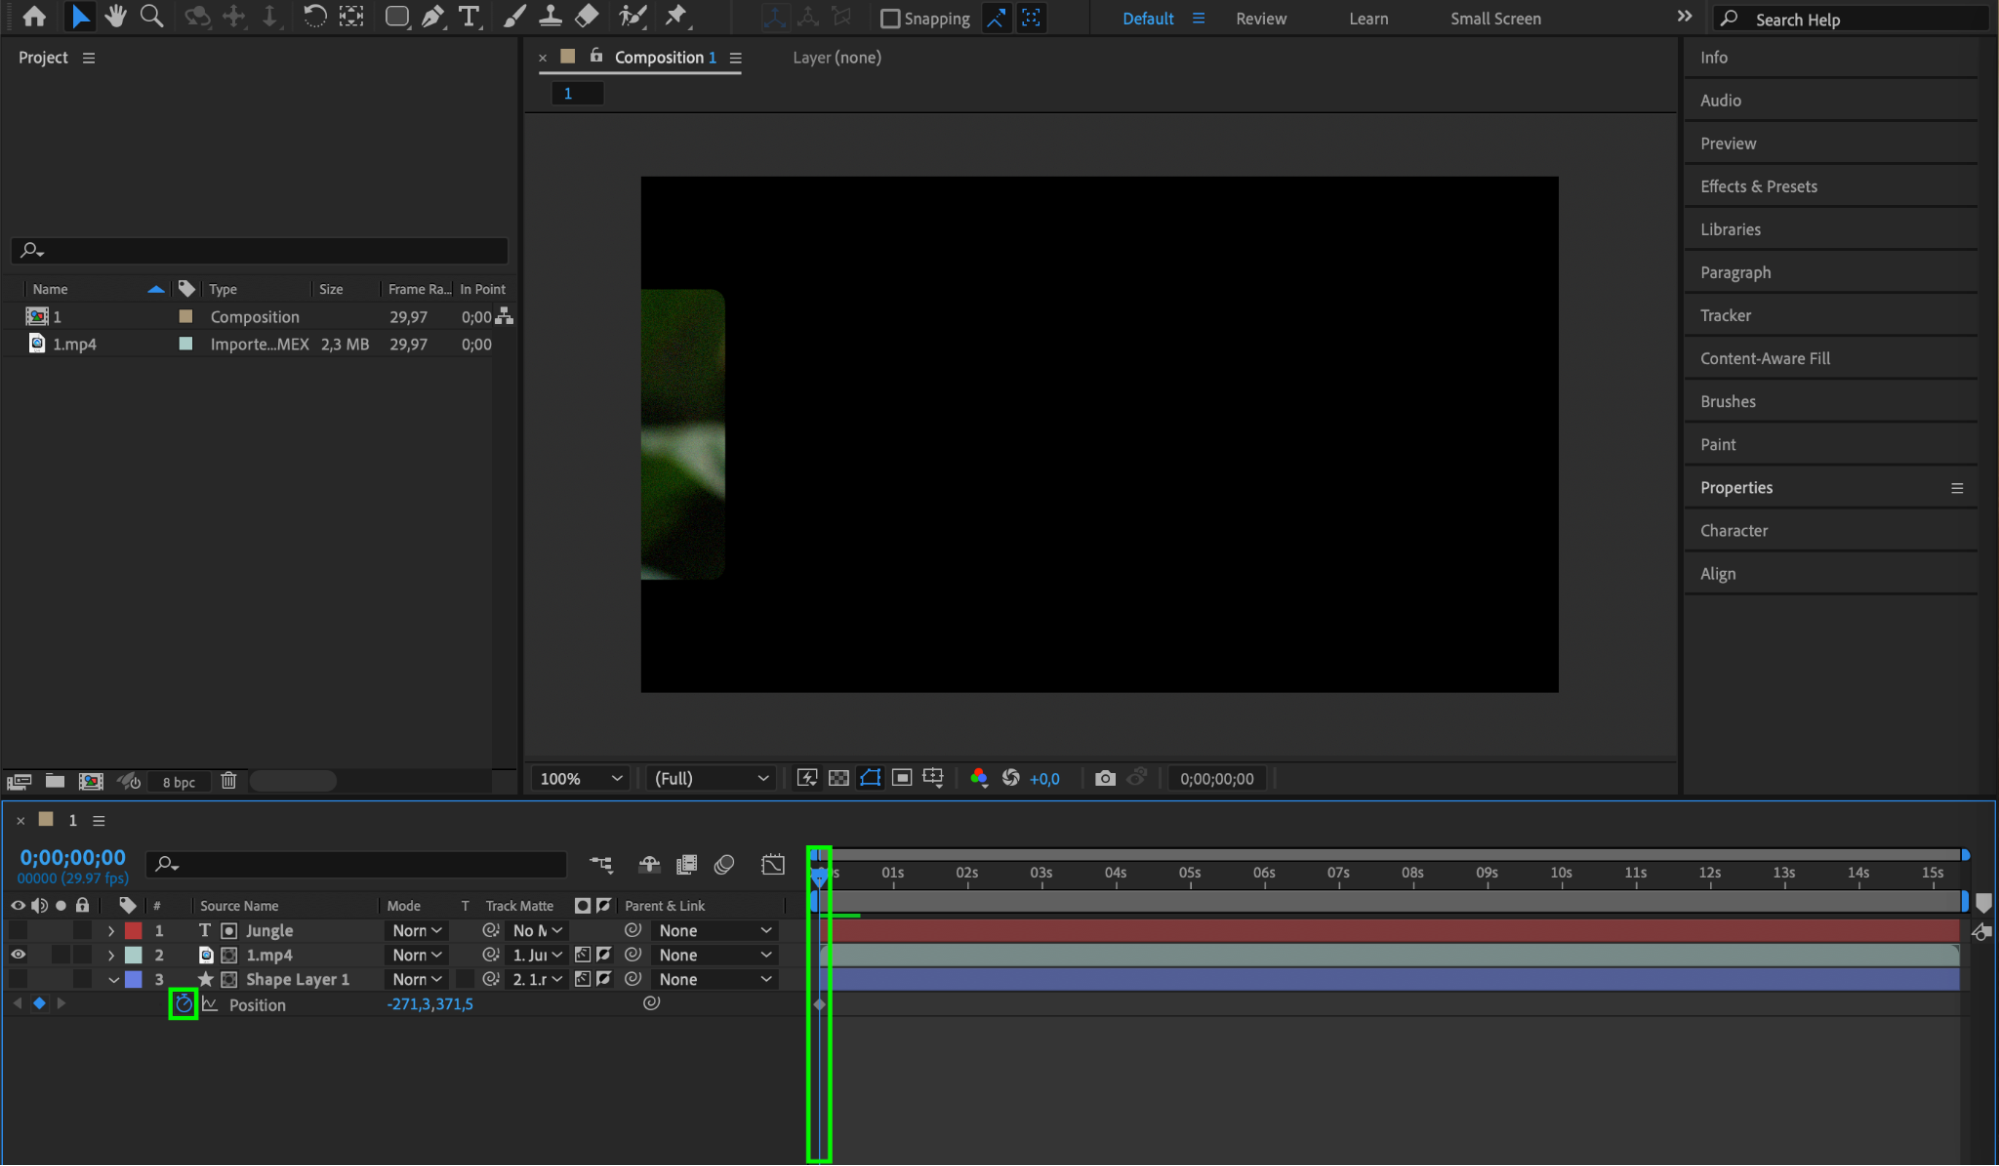
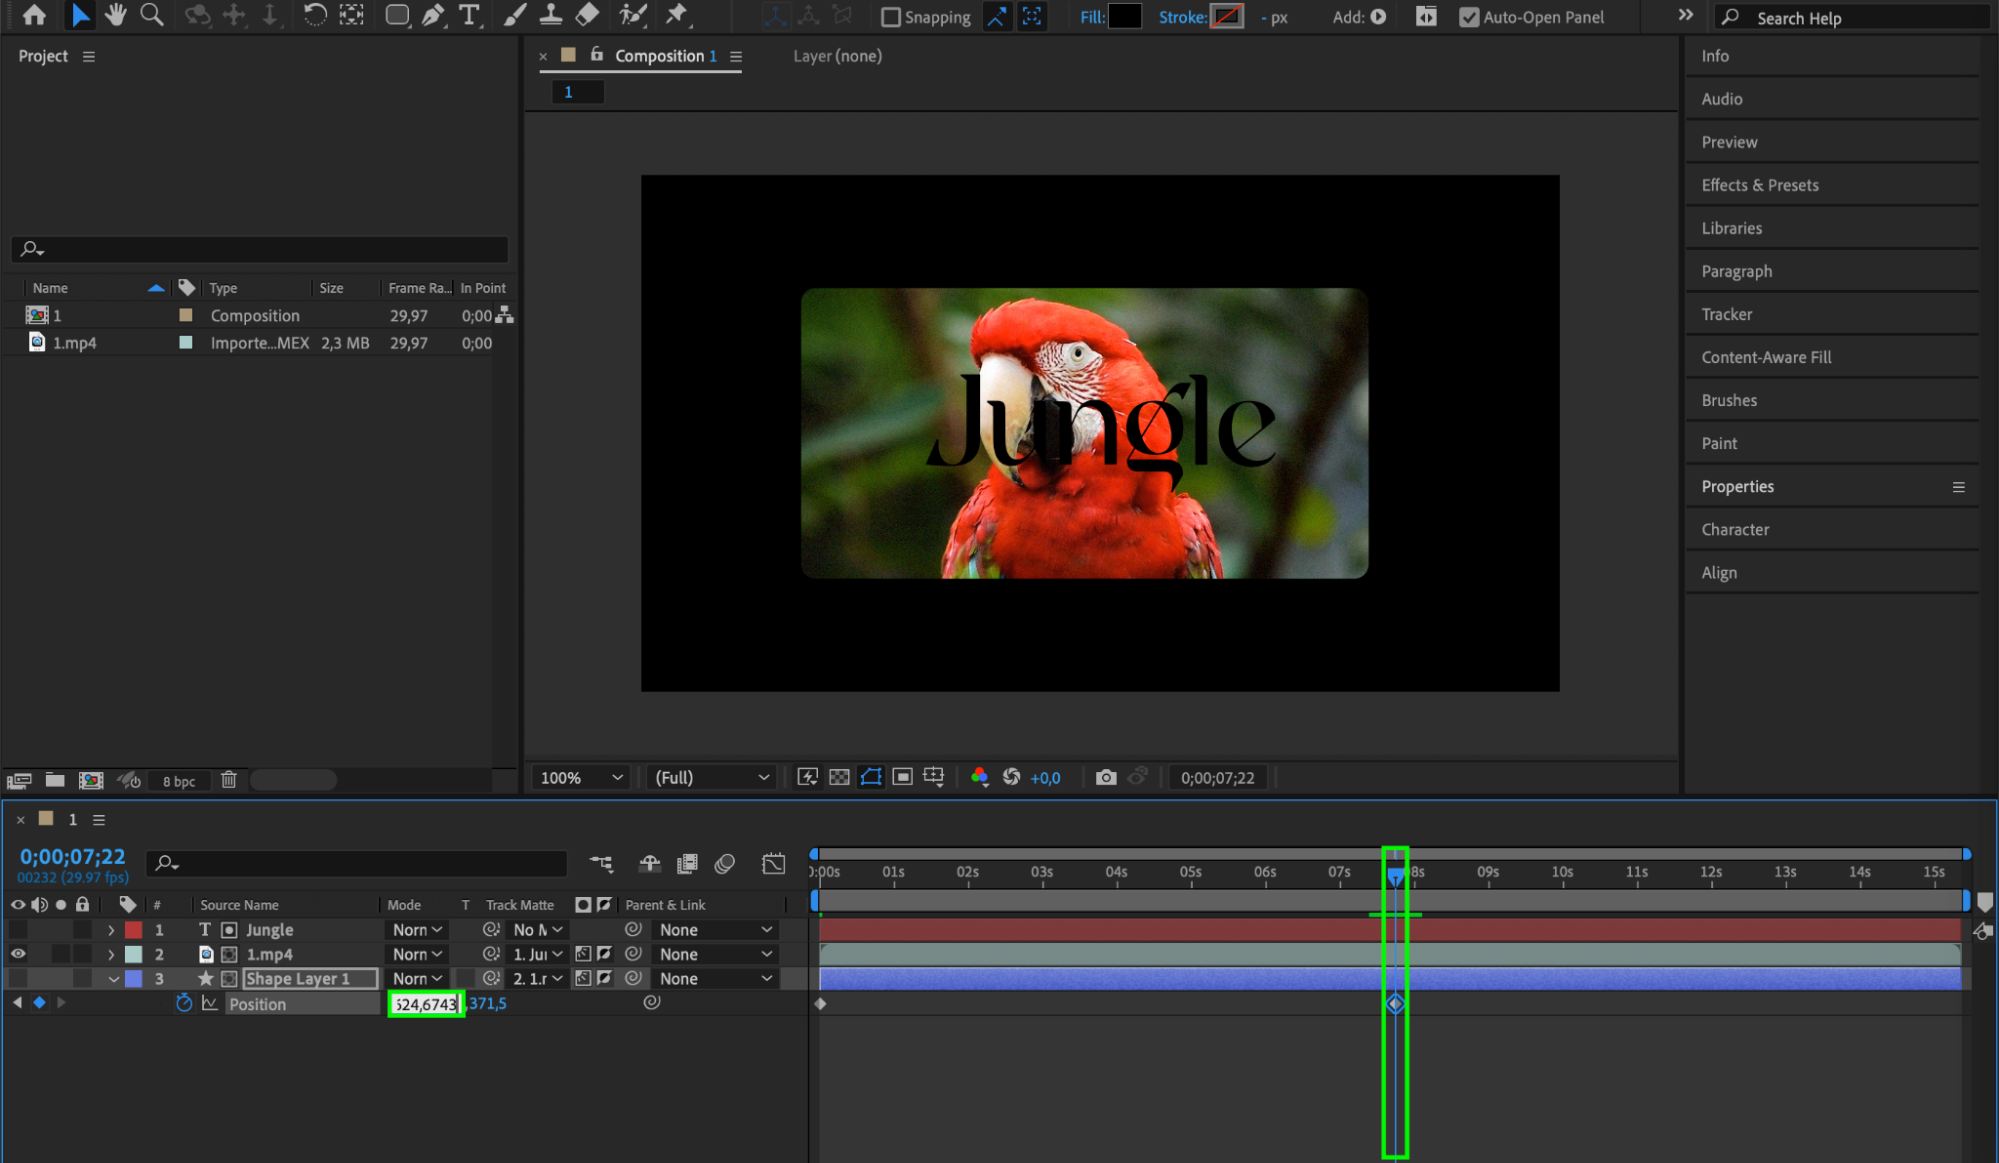
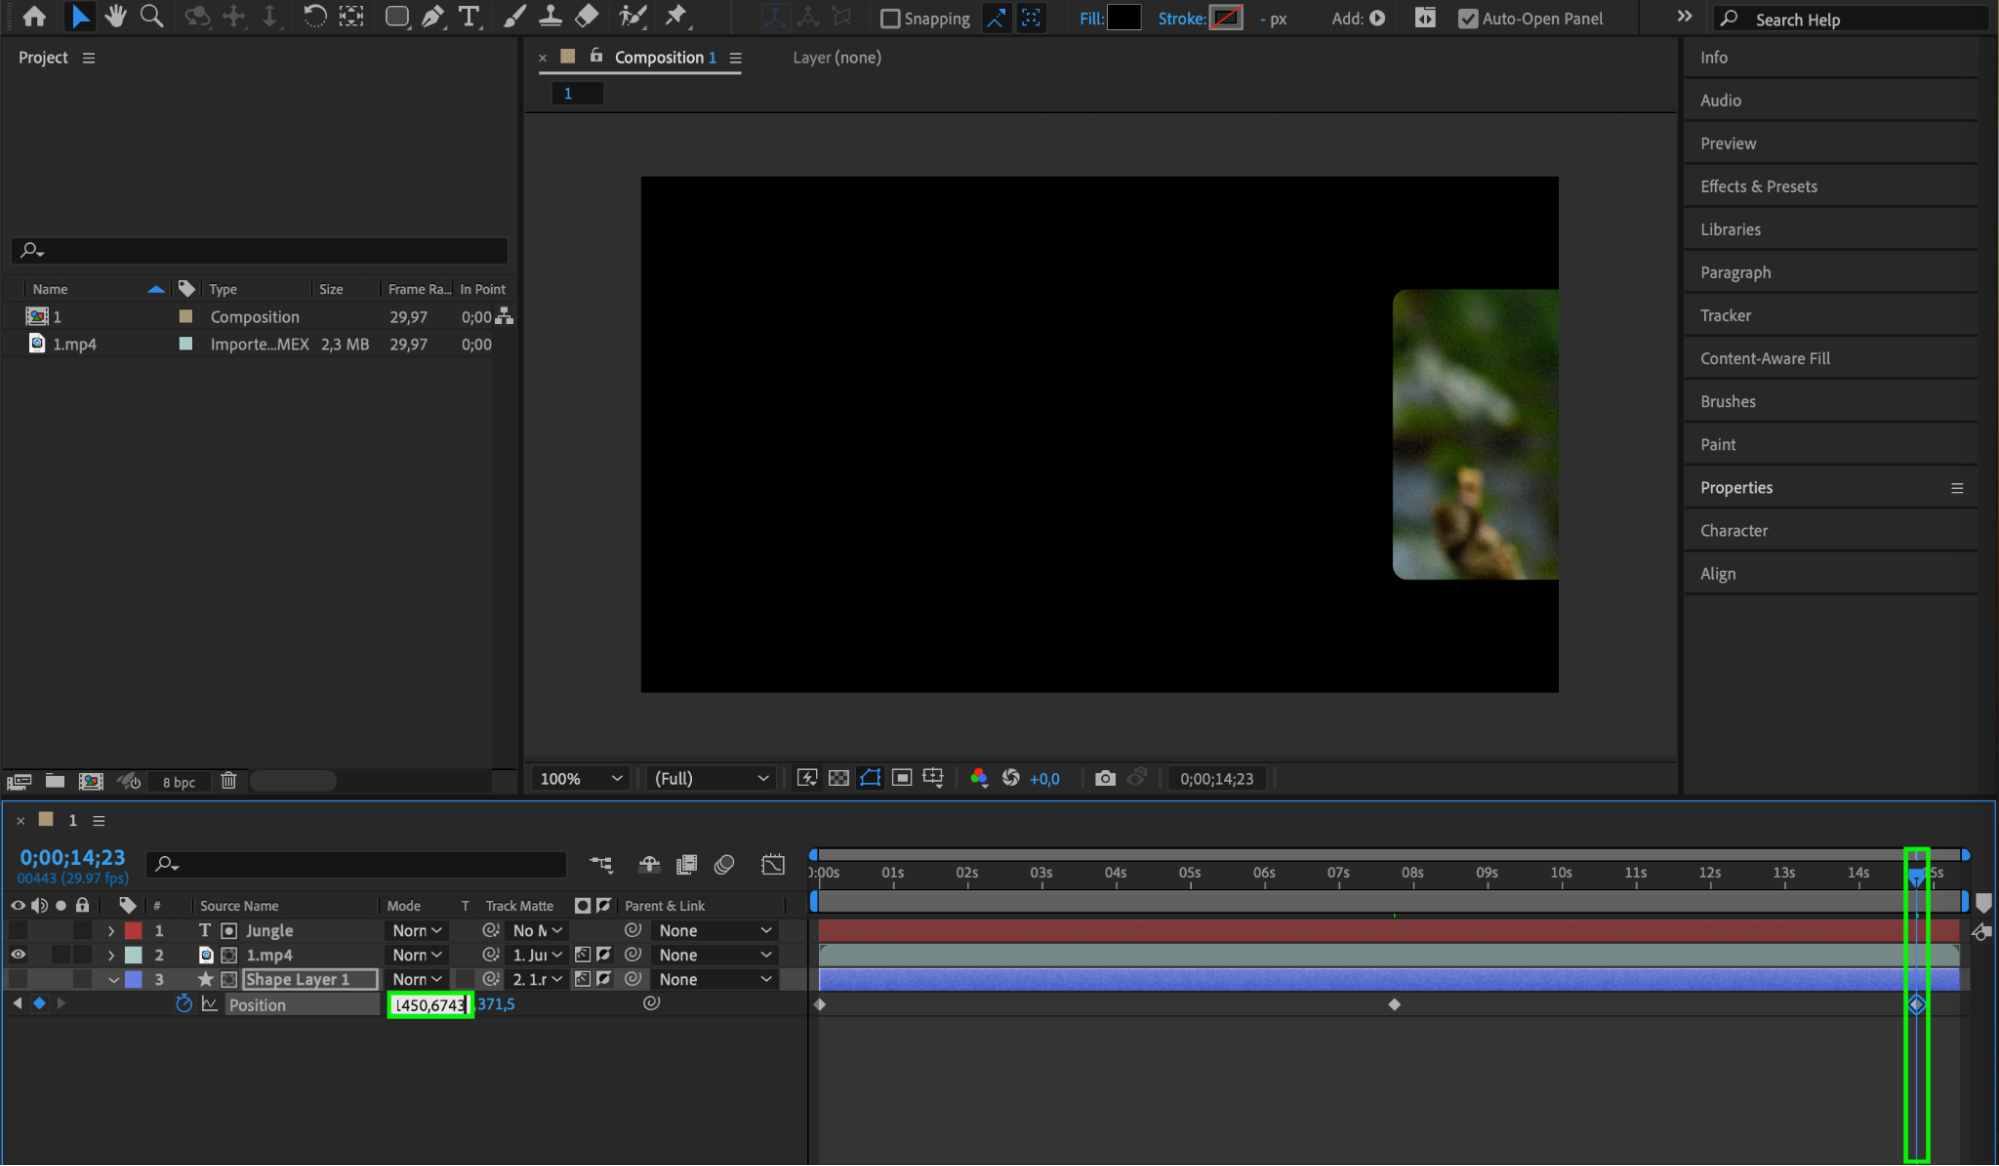 Once you’ve mastered the basics of clipping masks, you can explore advanced techniques like nesting masks or combining multiple masks to create intricate designs.
Get 10% off when you subscribe to our newsletter

Conclusion
In summary, clipping masks in After Effects are a powerful tool for adding depth and precision to your video designs. This tutorial has provided you with the knowledge and skills to get started with clipping masks and explore their endless possibilities.
So, why wait? Start experimenting with clipping masks in After Effects today and unlock the full potential of your video designs!


