How to Create a Drop Shadow Effect in After Effects
Introduction – Enhance Depth and Realism with Drop Shadows in After Effects
In motion graphics and visual effects, adding a drop shadow effect can significantly enhance the realism and three-dimensional quality of your projects. By simulating how light interacts with objects, a drop shadow creates the illusion that an object is raised above its background or floating in space. In this tutorial, we will guide you through the process of creating a drop shadow effect in Adobe After Effects, a powerful tool used by industry professionals to add depth and dimension to their designs.
Get 10% off when you subscribe to our newsletter

Step 1: Import Your Footage or Object
Start by opening After Effects and importing the footage or object you wish to apply the drop shadow effect to. You can import various types of media, including images or videos. To import, go to File > Import > File, then select your media and click Open. 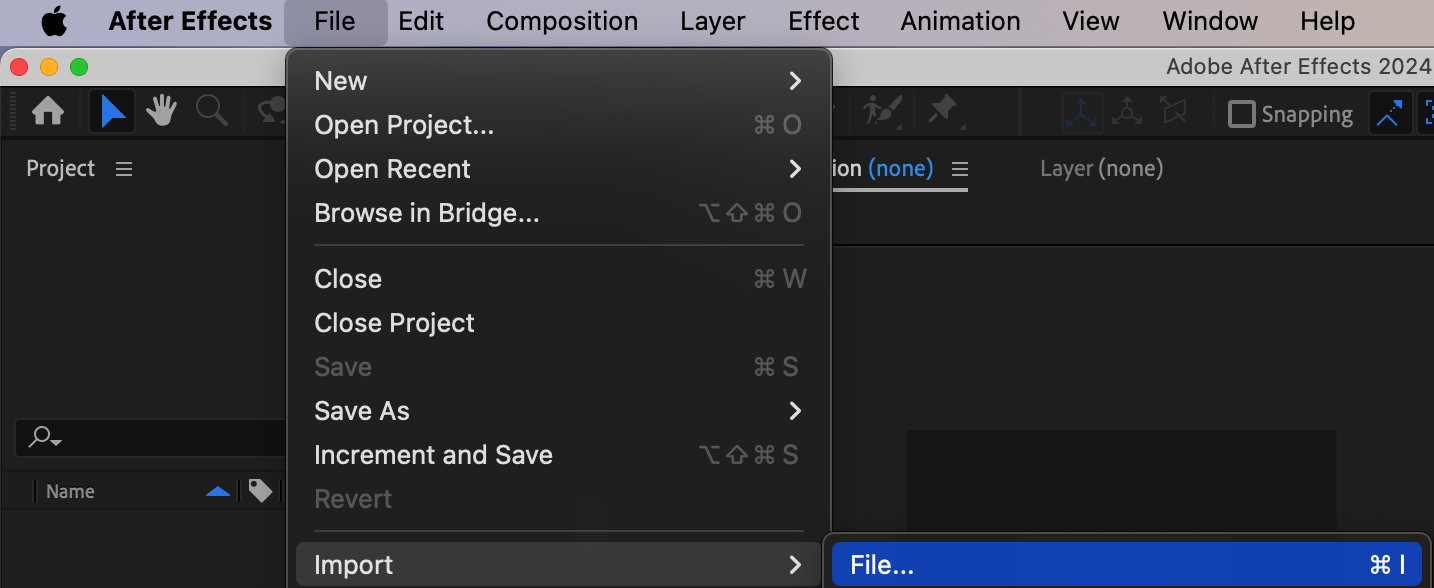 Step 2: Create a New Composition
Get 10% off when you subscribe to our newsletter

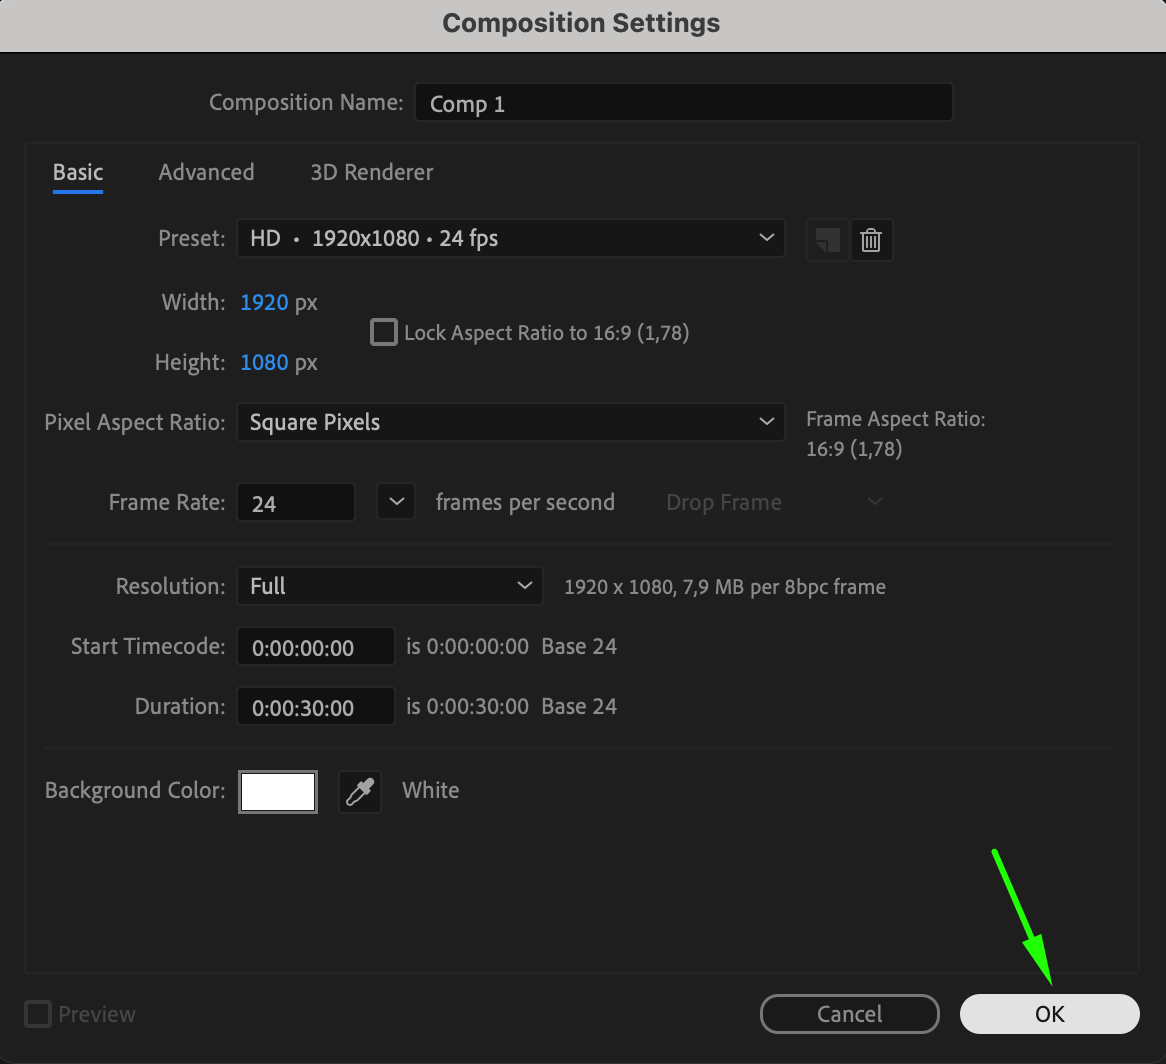
Create a new composition to contain your imported footage. Navigate to Composition > New Composition. Set the composition dimensions and duration according to your project needs. This step establishes the canvas where your media will be edited and effects will be applied.
 Step 3: Place the Footage on the Timeline
Get 10% off when you subscribe to our newsletter

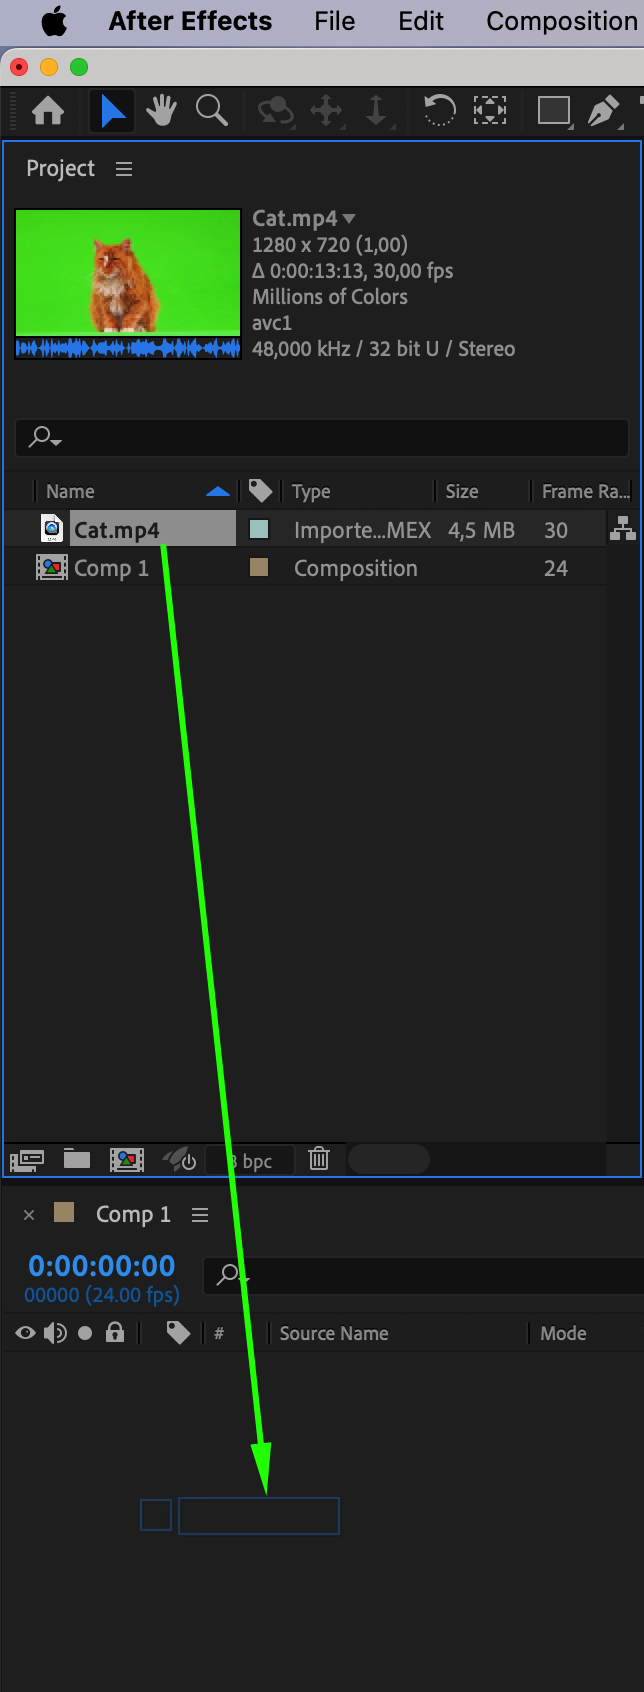
Drag the imported footage or object onto the timeline. This action will add the media to your composition, where you can now apply effects and make adjustments. Arrange it as needed within your composition to ensure proper placement.
Step 4: Remove the Background (if necessary)
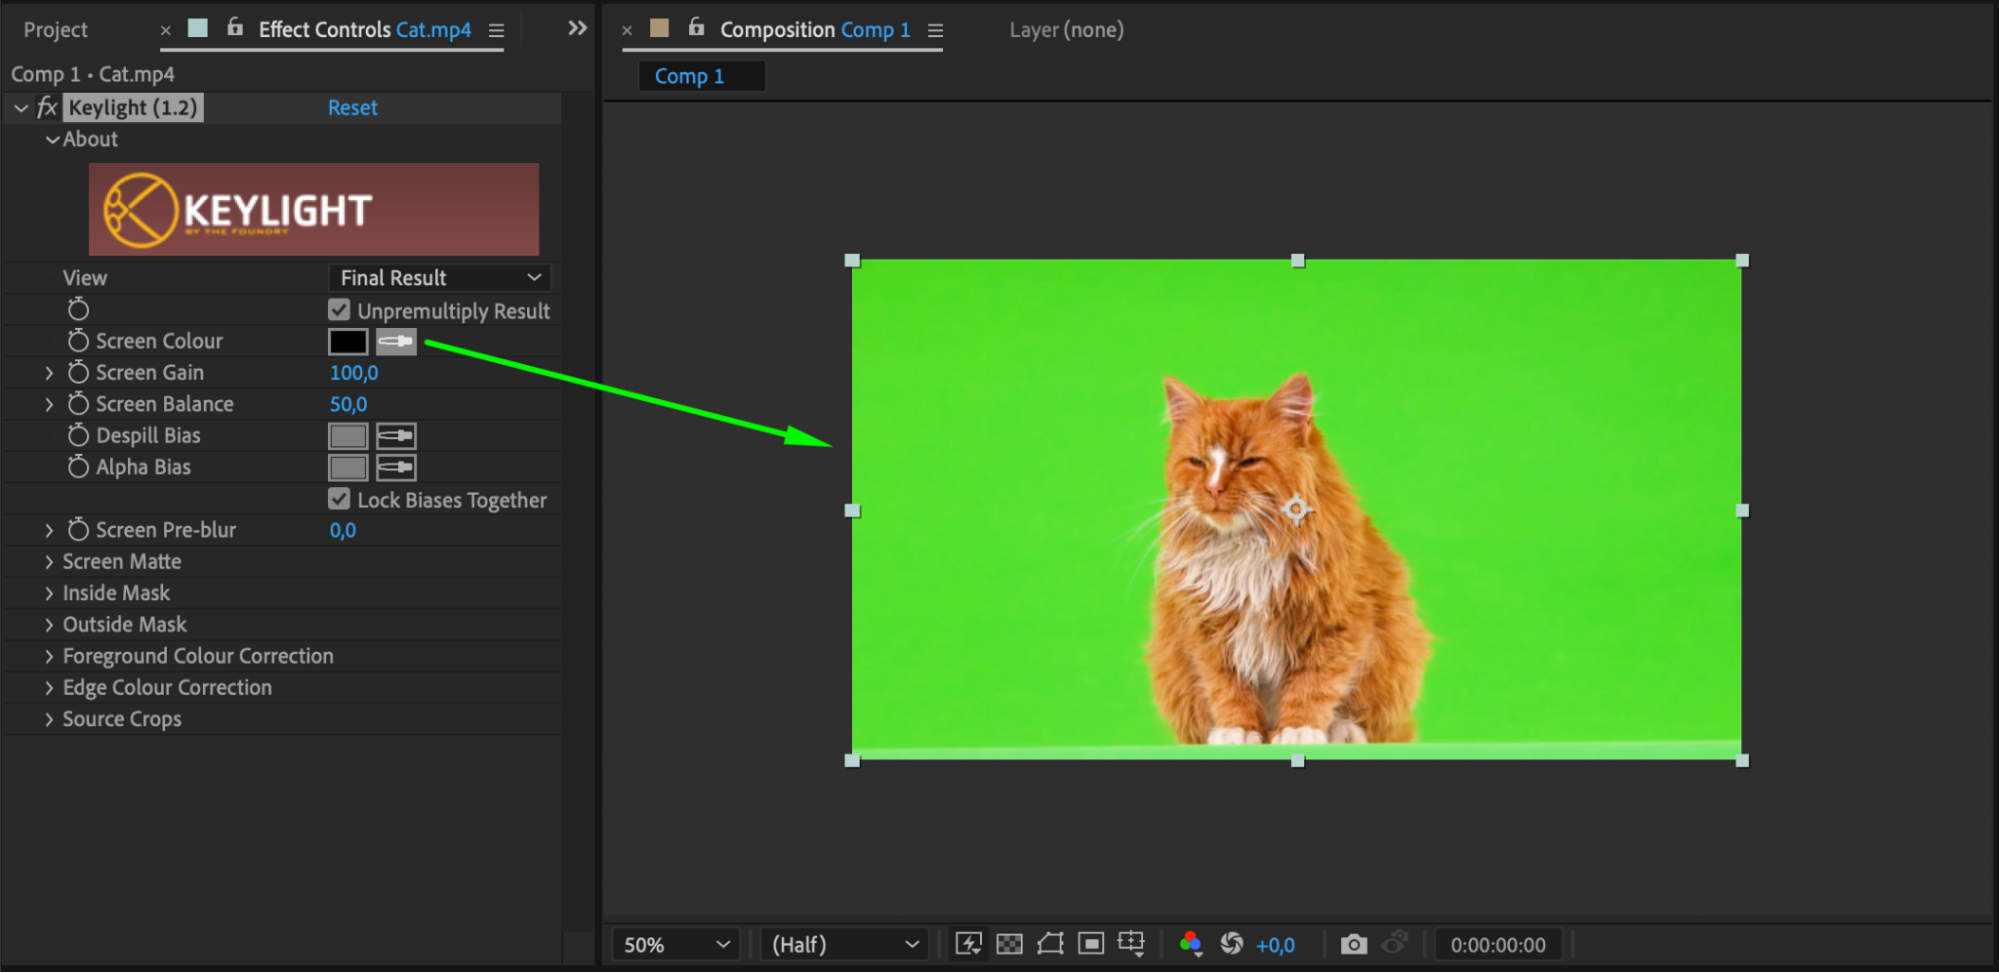
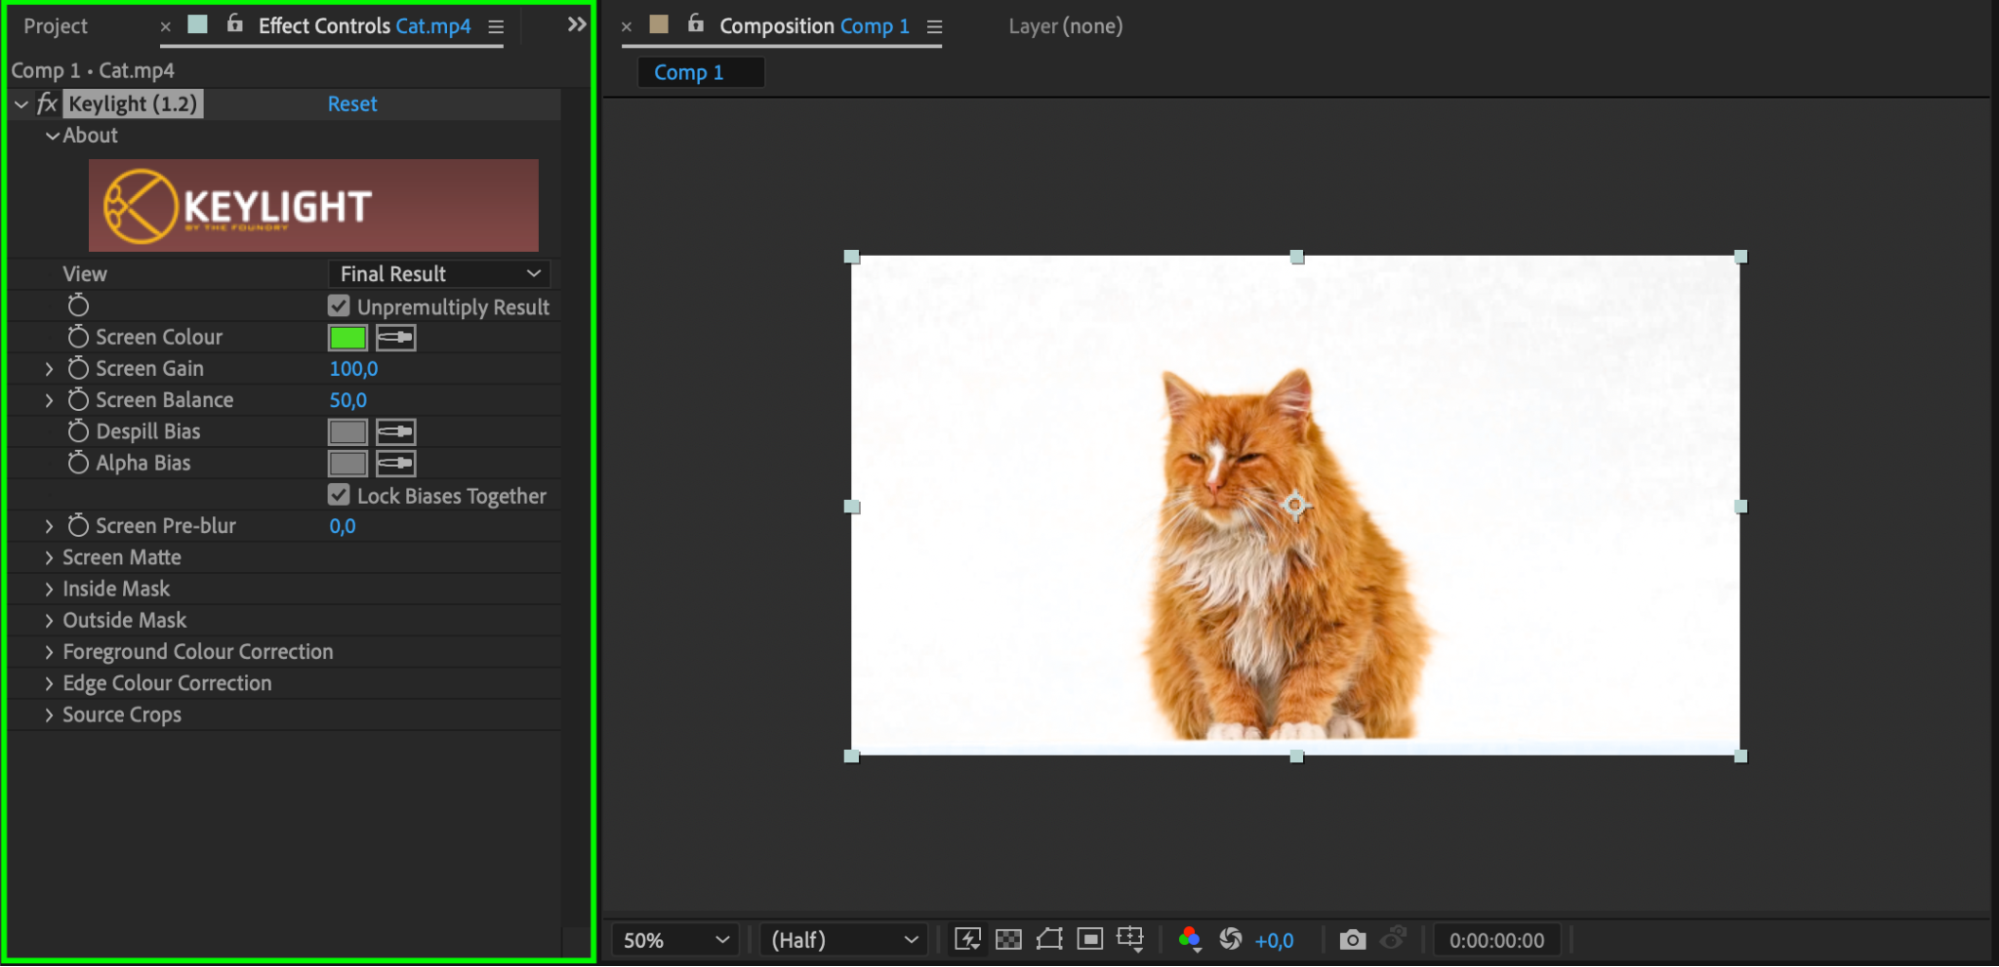
If your imported file includes a background that you want to remove, use After Effects’ built-in tools. For green screen footage, use the Keylight effect found in the Effects & Presets panel. Apply it to the layer and adjust the settings to remove the background.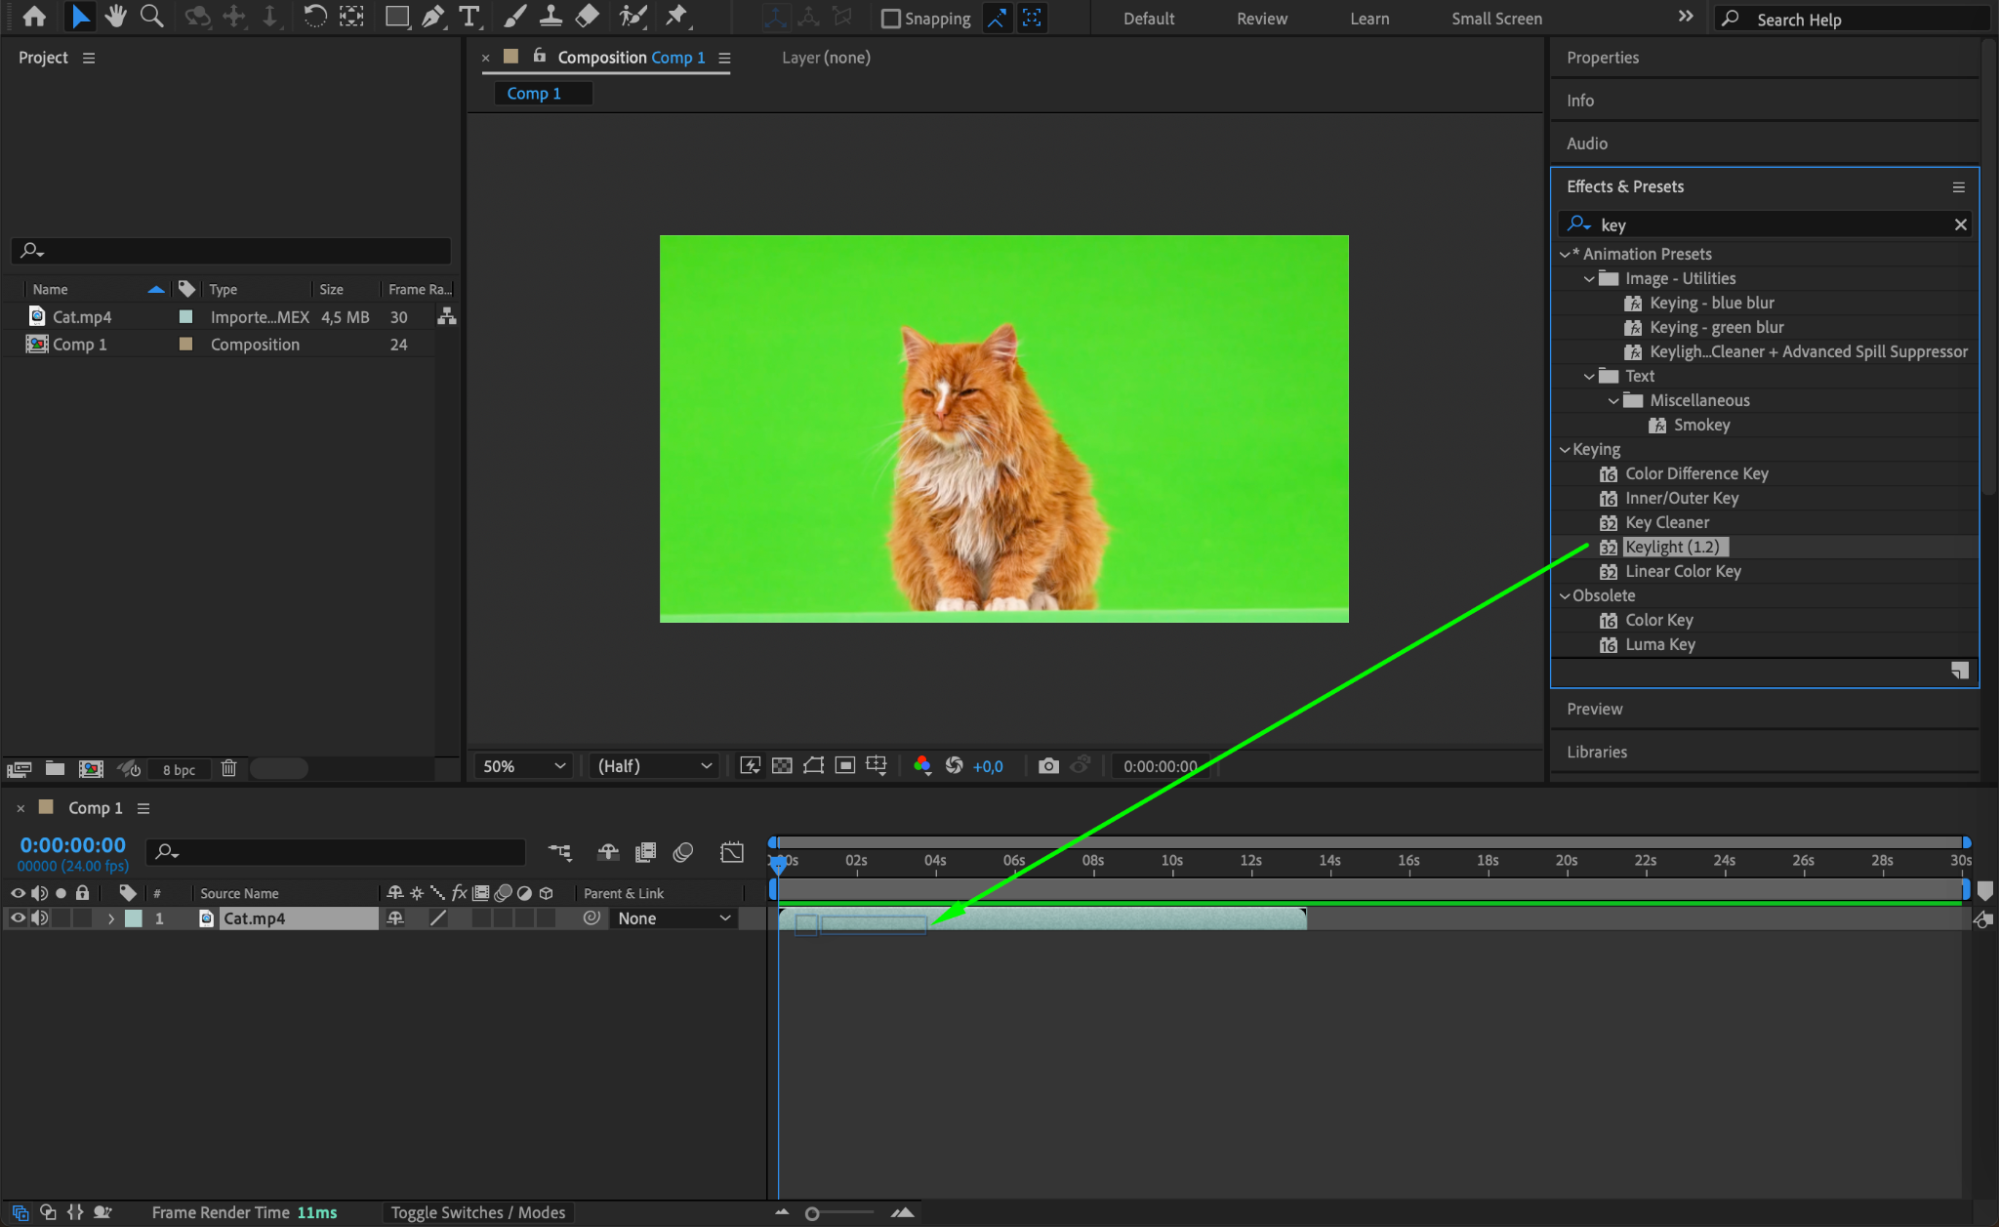
 Step 5: Add the Drop Shadow Effect
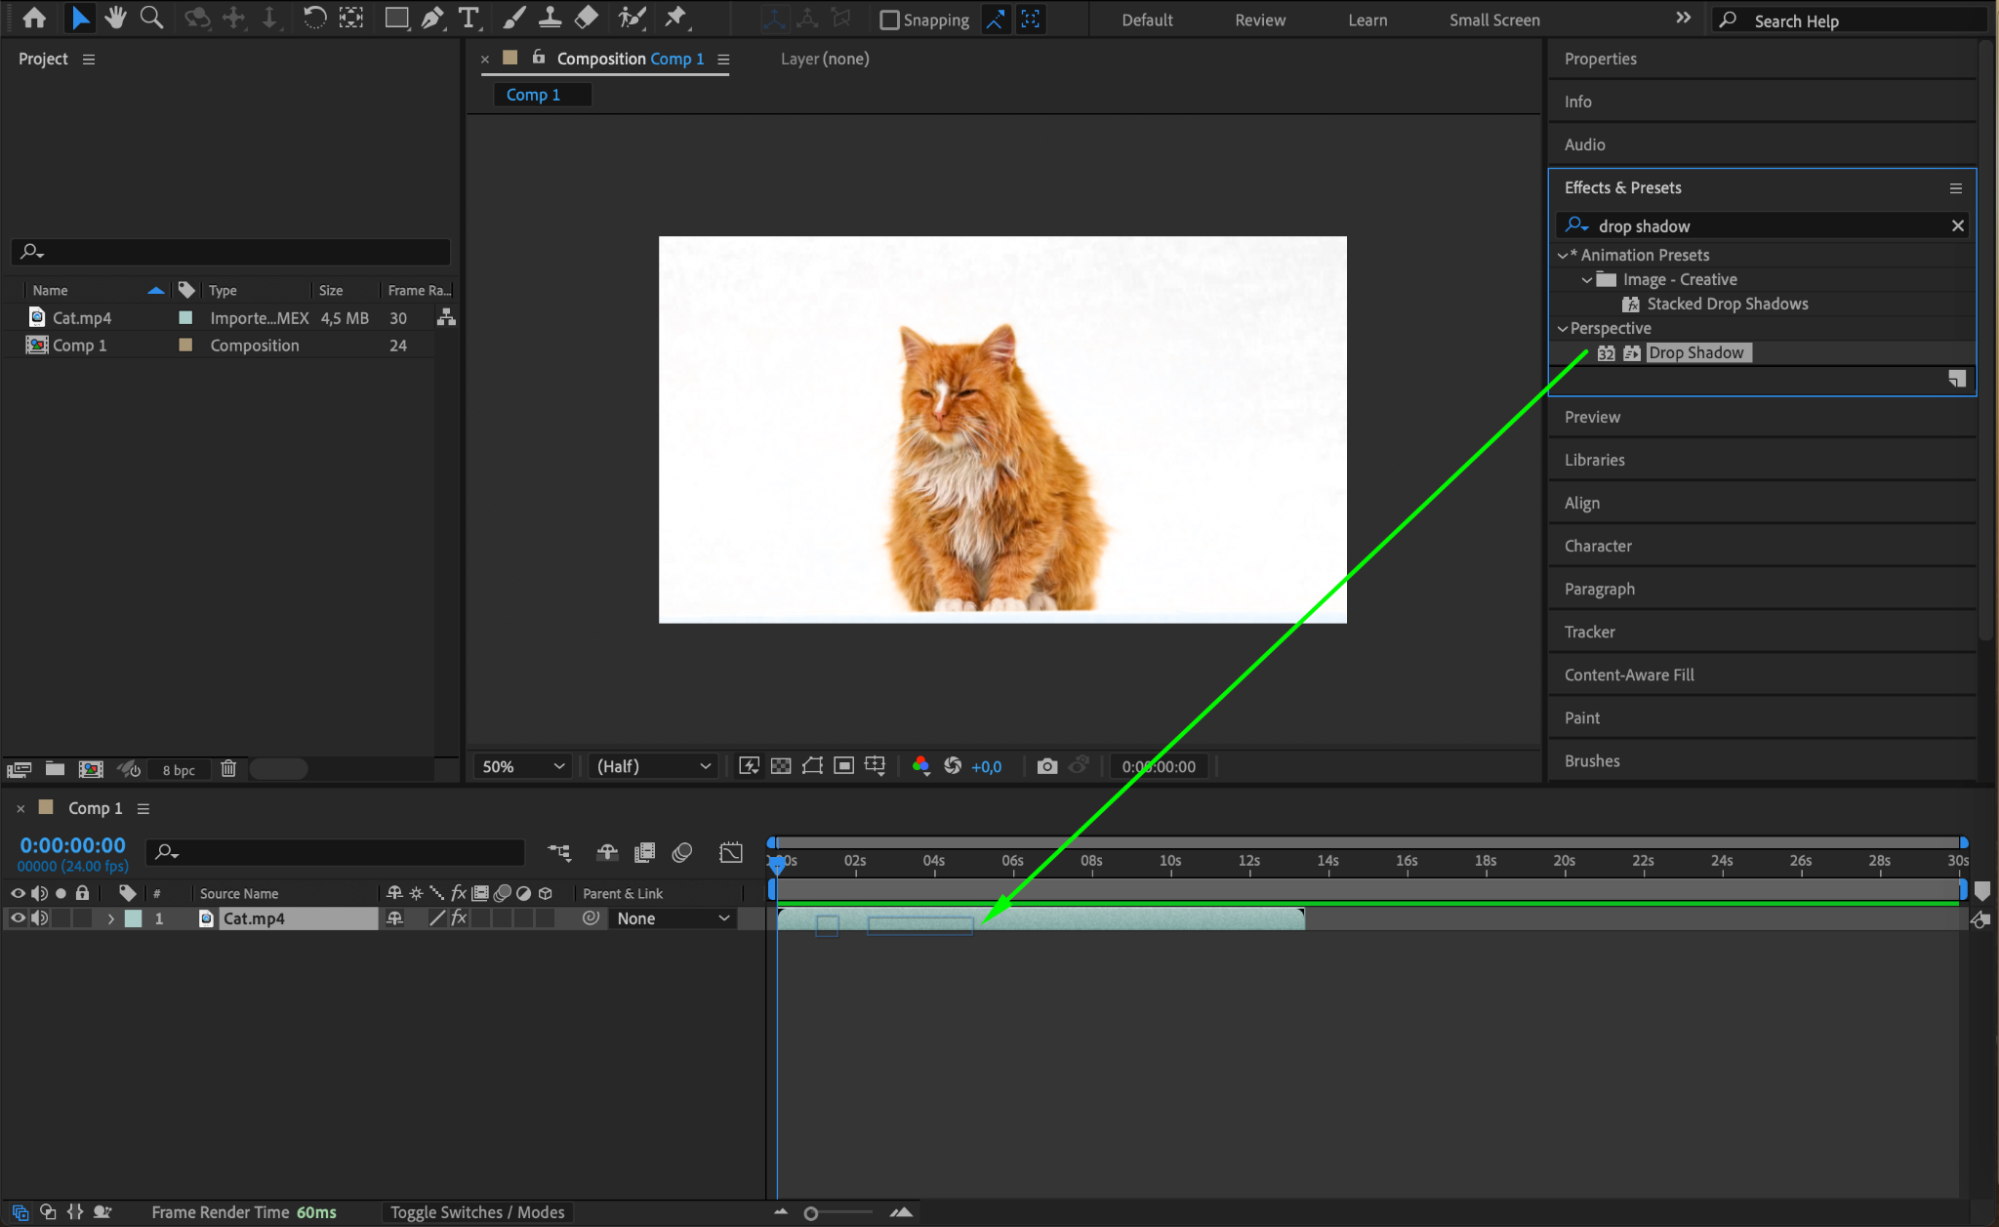
Select the layer you want to apply the drop shadow effect to. Go to the Effects & Presets panel and search for Drop Shadow. Drag the Drop Shadow effect onto your selected layer. This will apply the effect and enable you to customize its appearance.
 Step 6: Adjust Drop Shadow Settings
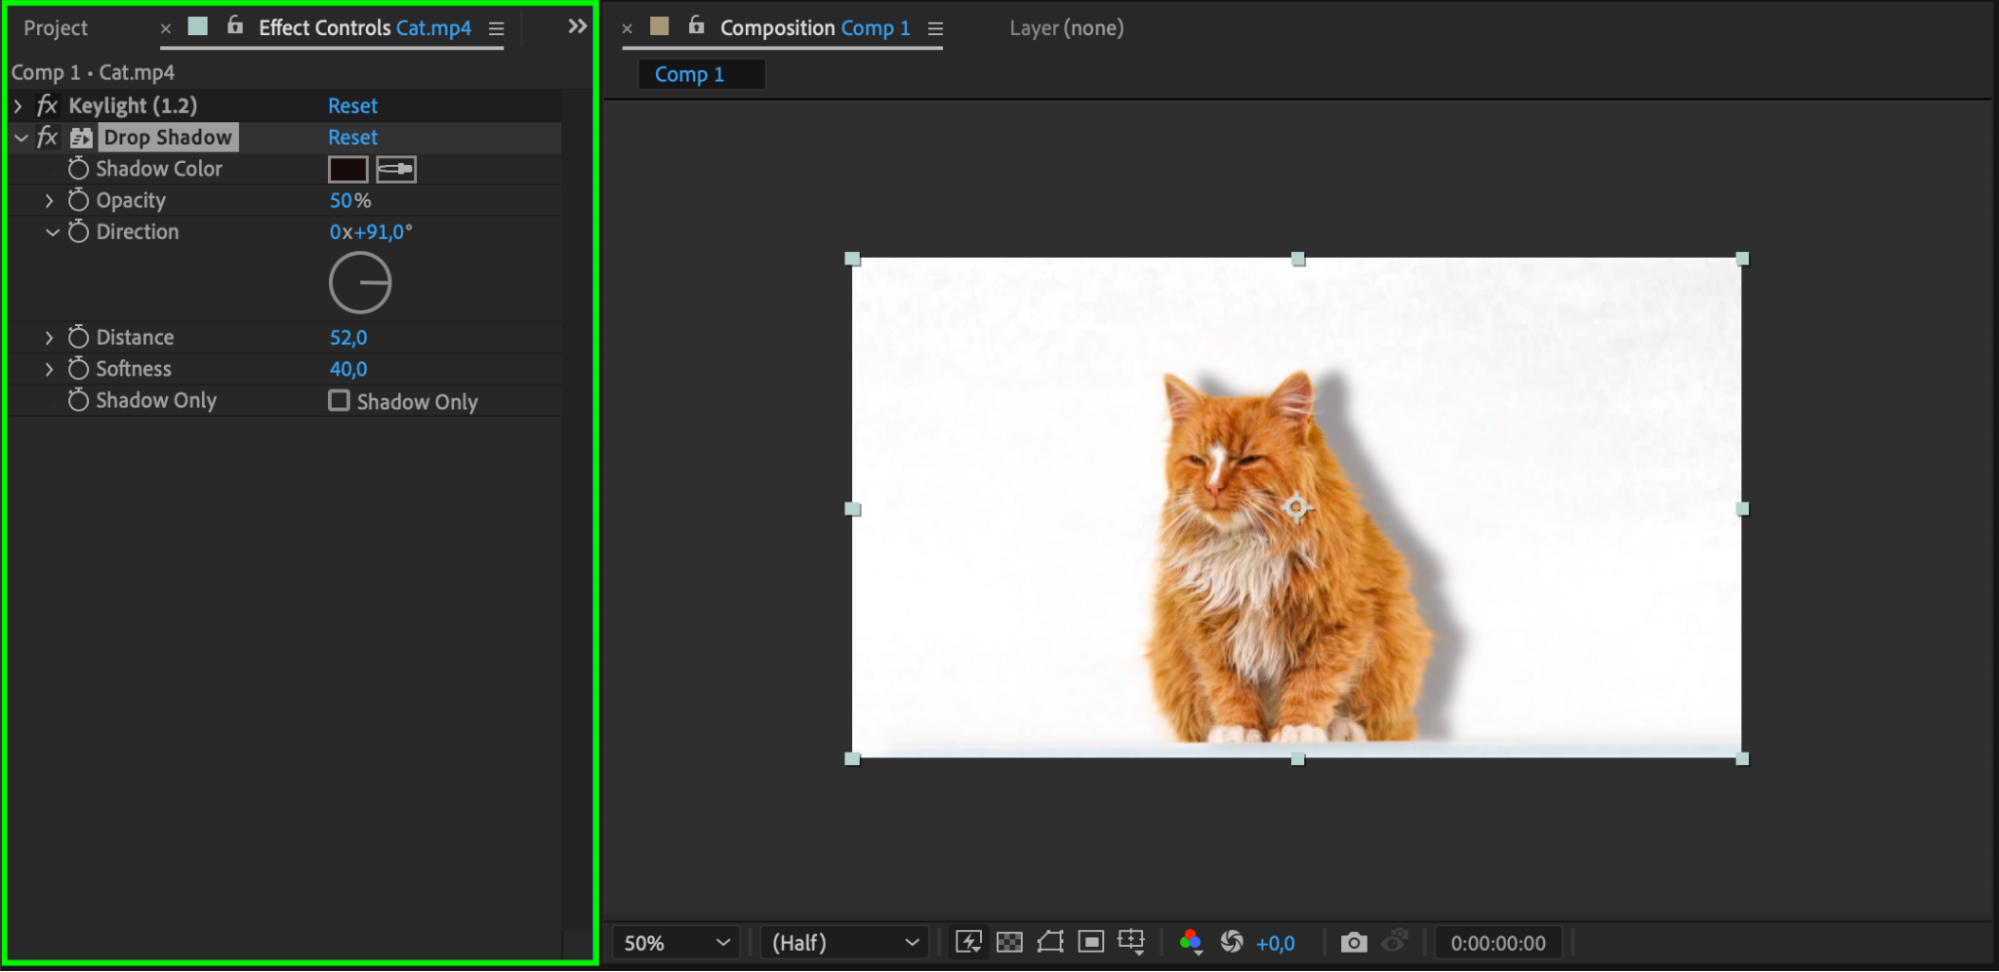
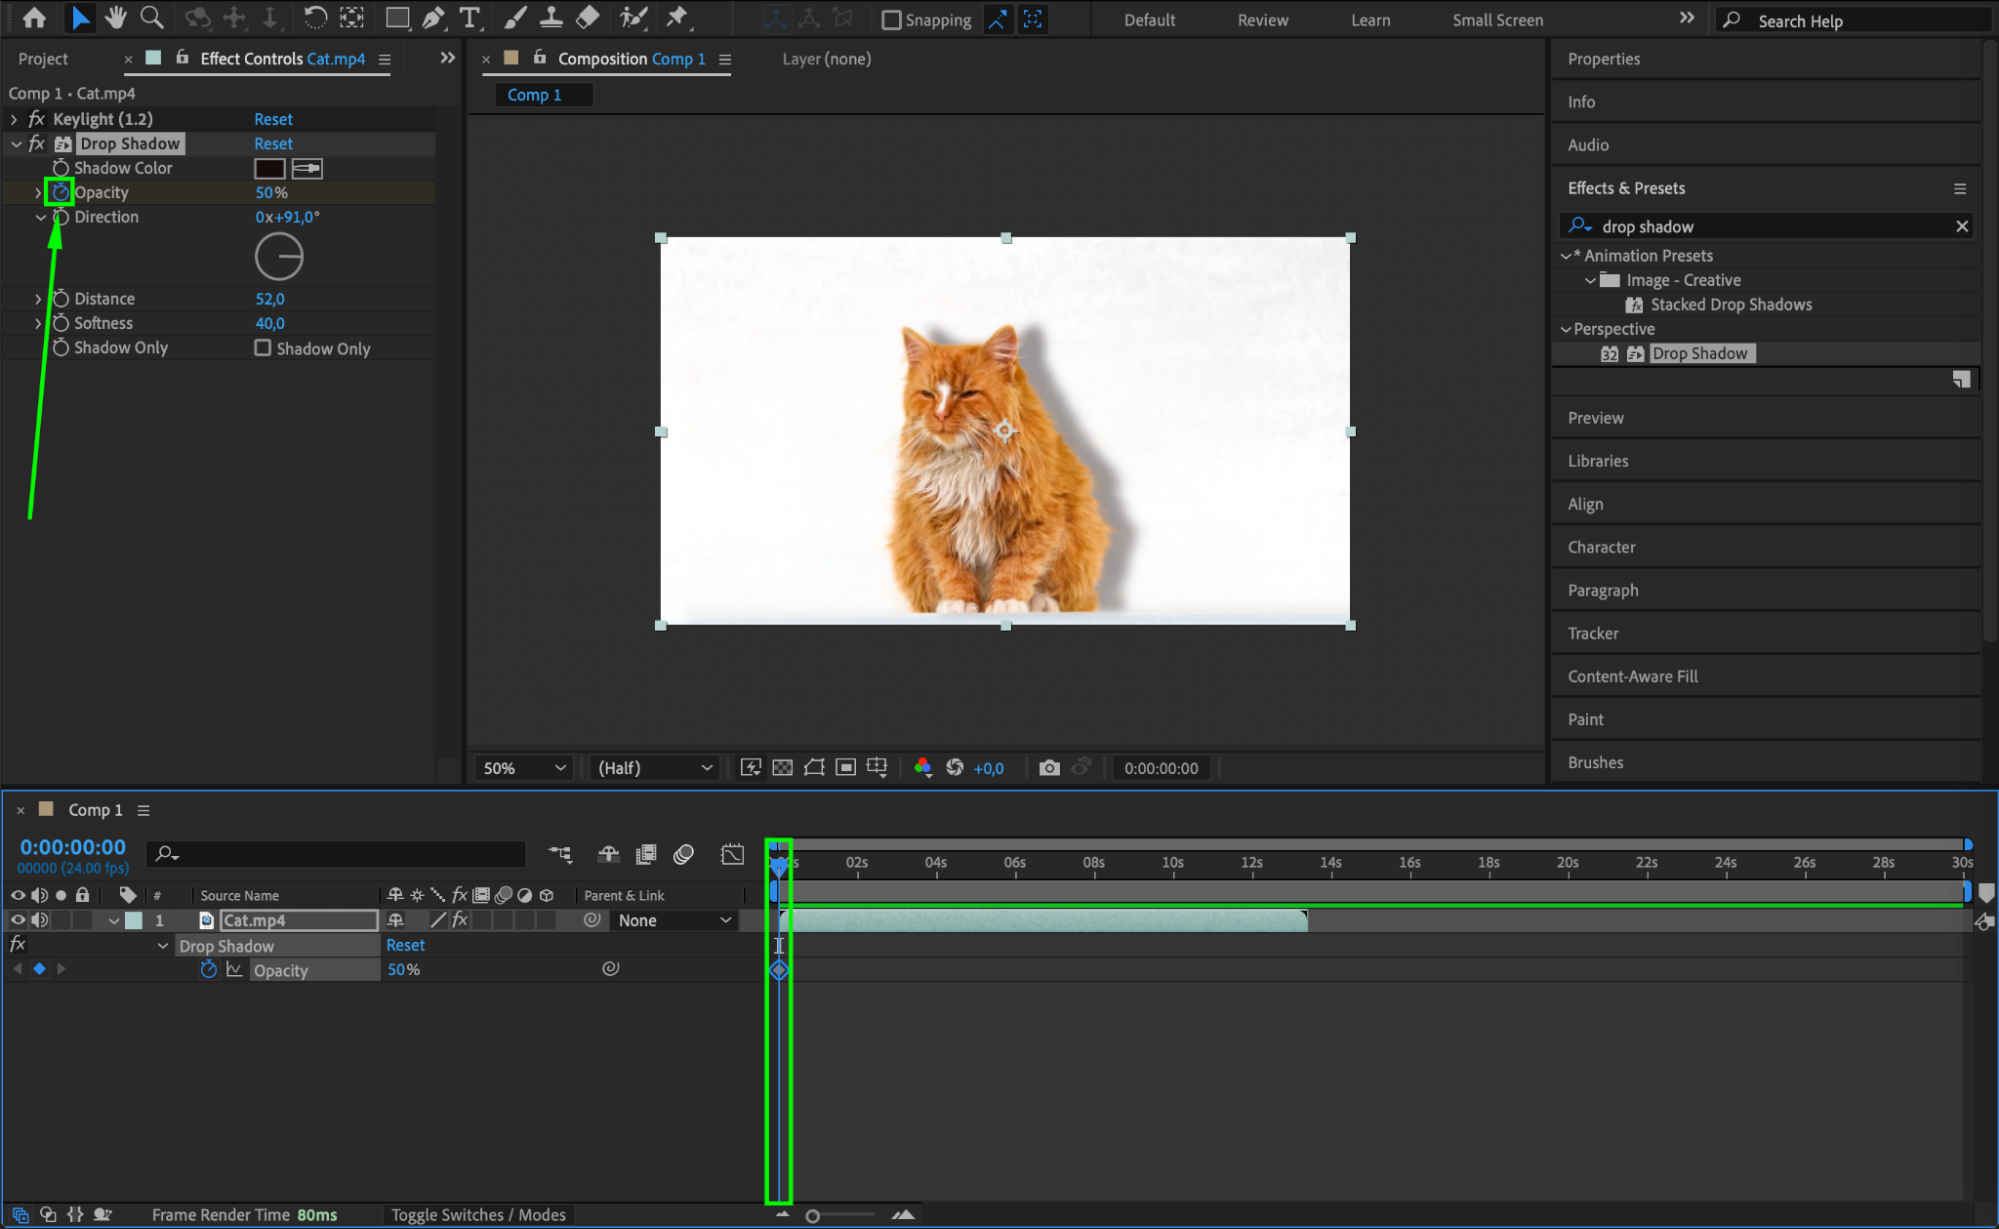
With the layer selected, navigate to the Effect Controls panel to fine-tune the drop shadow settings. Here, you can adjust the Opacity to control the transparency of the shadow, the Direction to set the angle at which the shadow is cast, the Softness to modify the blurriness of the shadow’s edges, the Distance to determine how far the shadow is from the object, and the Color to match the shadow’s hue with the scene’s lighting. Experimenting with these parameters will help you achieve a realistic and visually appealing shadow effect tailored to your project’s needs.
Get 10% off when you subscribe to our newsletter

 Step 7: Create Animation (Optional)
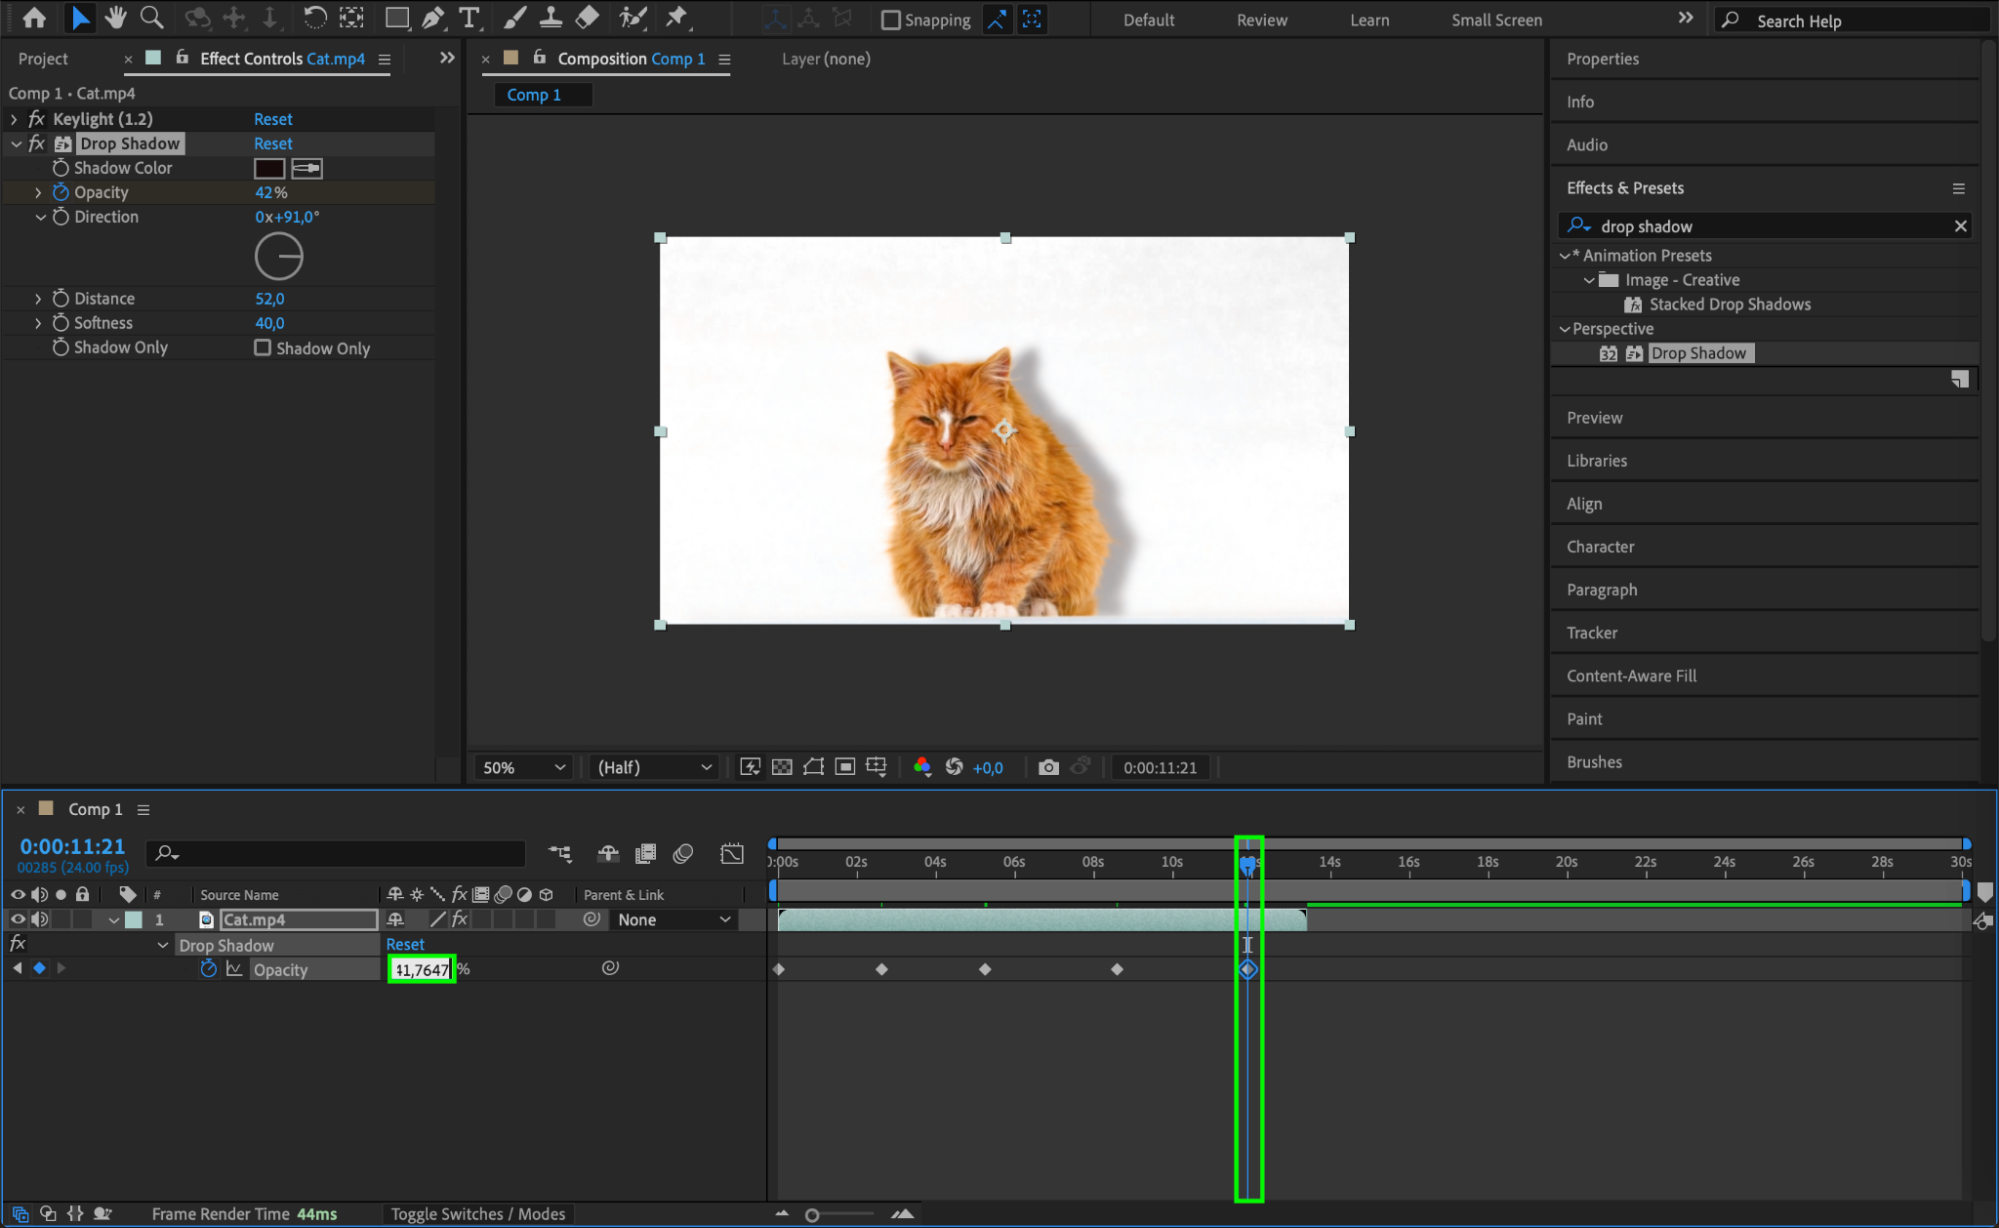
For added realism, you can animate the drop shadow effect. Adjust parameters such as opacity and distance over time using keyframes. This can simulate effects like moving light sources or changing shadow intensity, making your animation more dynamic.
Get 10% off when you subscribe to our newsletter

Step 8: Preview and Render
Preview your composition by pressing the spacebar or using the Preview function to see how the drop shadow looks in action. Make any final adjustments if needed. Once satisfied, go to Composition > Add to Render Queue to render your final composition to a suitable format.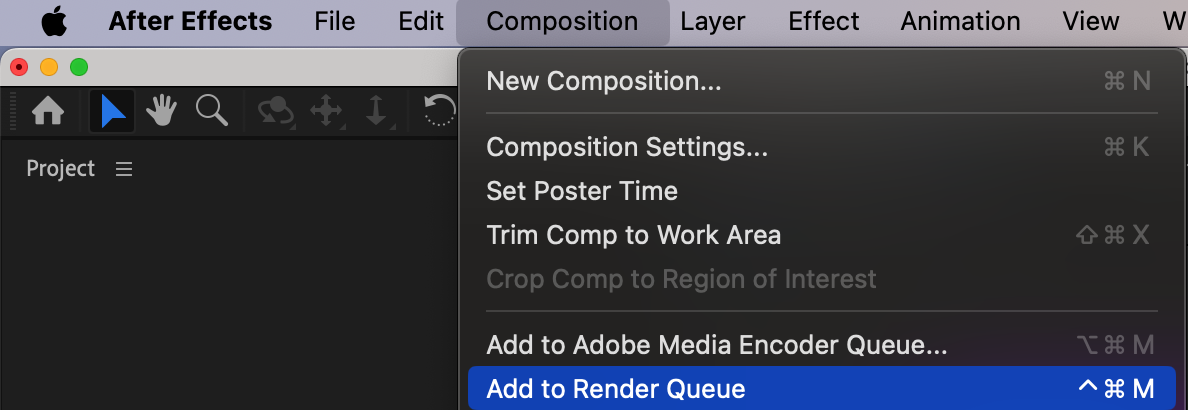
 Conclusion
Get 10% off when you subscribe to our newsletter

By following these steps, you can effectively create and customize a drop shadow effect in After Effects. The ability to adjust opacity, direction, softness, and distance allows you to enhance the depth and realism of your motion graphics. Experiment with different settings and take advantage of After Effects’ powerful tools to achieve the perfect look for your projects. Whether you’re working on a simple graphic or a complex animation, mastering the drop shadow effect will add a professional touch to your work.


