Creating Realistic Eye Blinks in After Effects
Introduction to Creating Eye Blinking Effects in After Effects
In this tutorial, we’ll walk through the steps to make eyes blink realistically in After Effects. Mastering this technique can add life to animated characters and improve the quality of your video projects. Let’s dive into the process step by step.
Step 1: Create a New Composition
Get 10% off when you subscribe to our newsletter

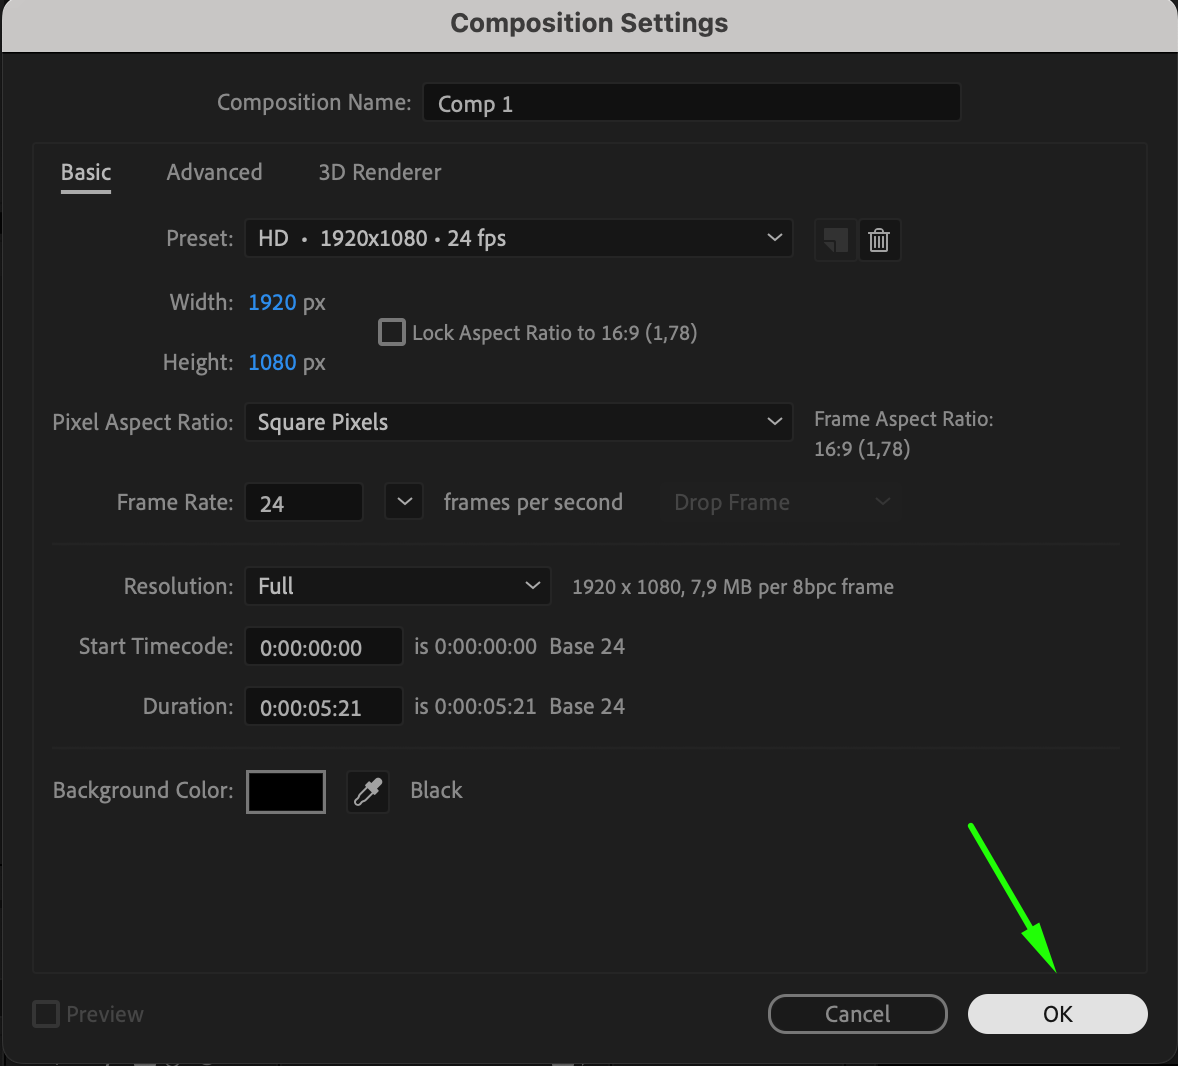
To begin, create a new composition by navigating to Composition > New Composition. This will be the workspace for your project. Set the dimensions and frame rate according to your needs. A typical HD composition is 1920×1080 pixels, and a frame rate of 24fps works well for smooth animations. Name your composition to keep things organized.
 Step 2: Create a Solid for the Background
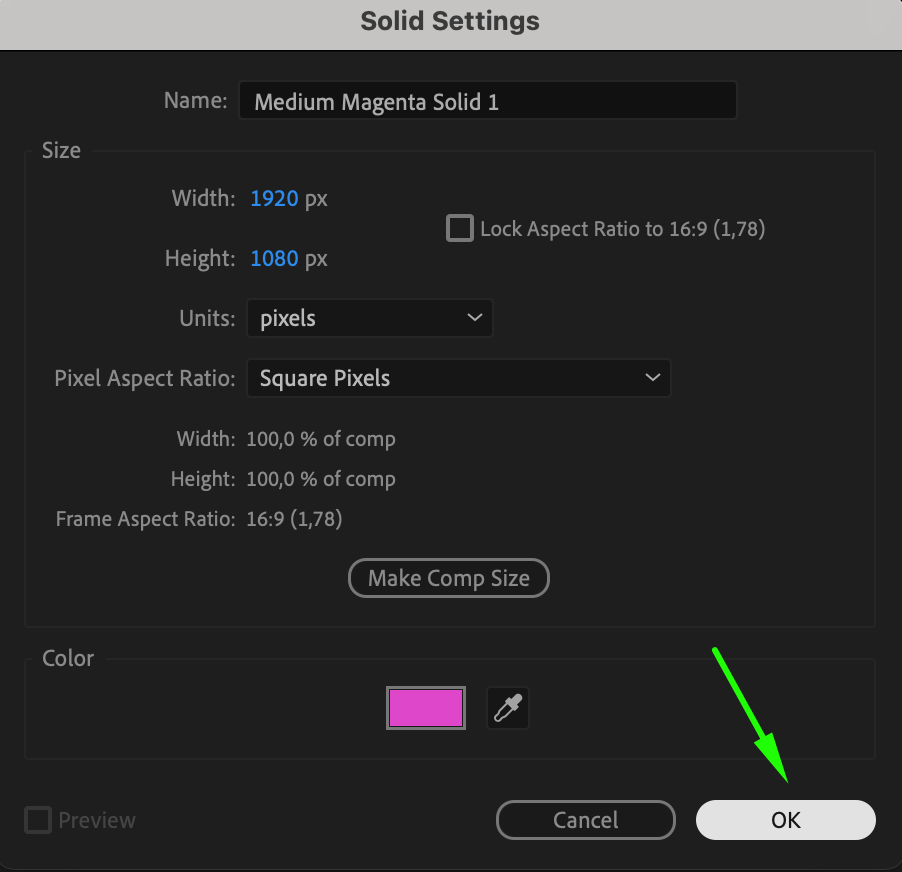
Next, create a solid layer that will serve as the background for your animation. Go to Layer > New > Solid and choose a color that contrasts well with the eyes you’ll be animating. You can always change this later if needed.

Step 3: Draw the Eyes Using the Ellipse Tool
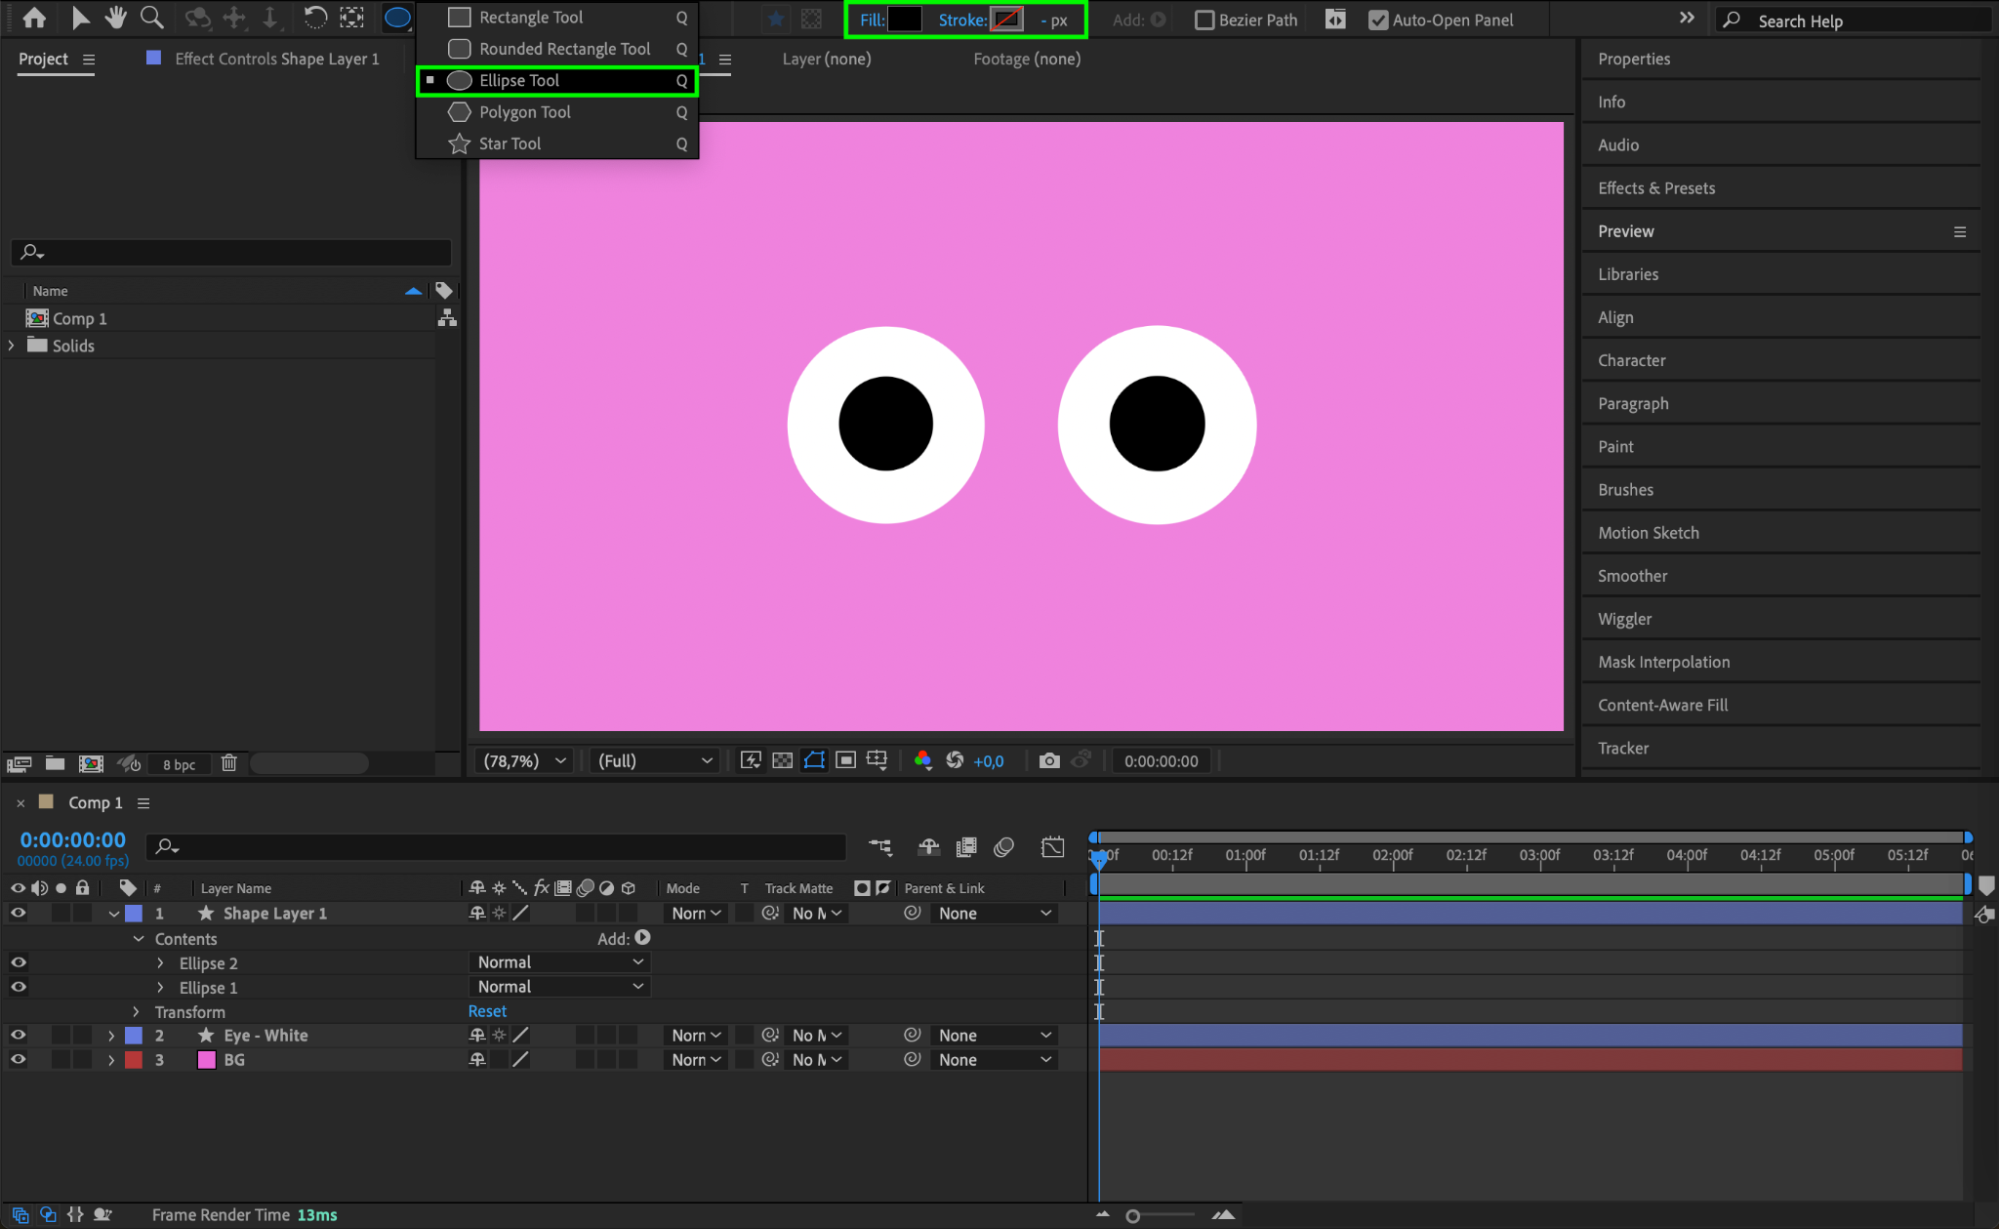
With the Ellipse Tool (Q) selected, draw two white circles to represent the eyes. Hold Ctrl/Cmd + Shift to create perfect circles. After drawing the white eyes, create smaller black circles inside each one to act as pupils. This step is essential for creating the basic look of the eyes. Place the pupils inside the white circles so they resemble natural eyes.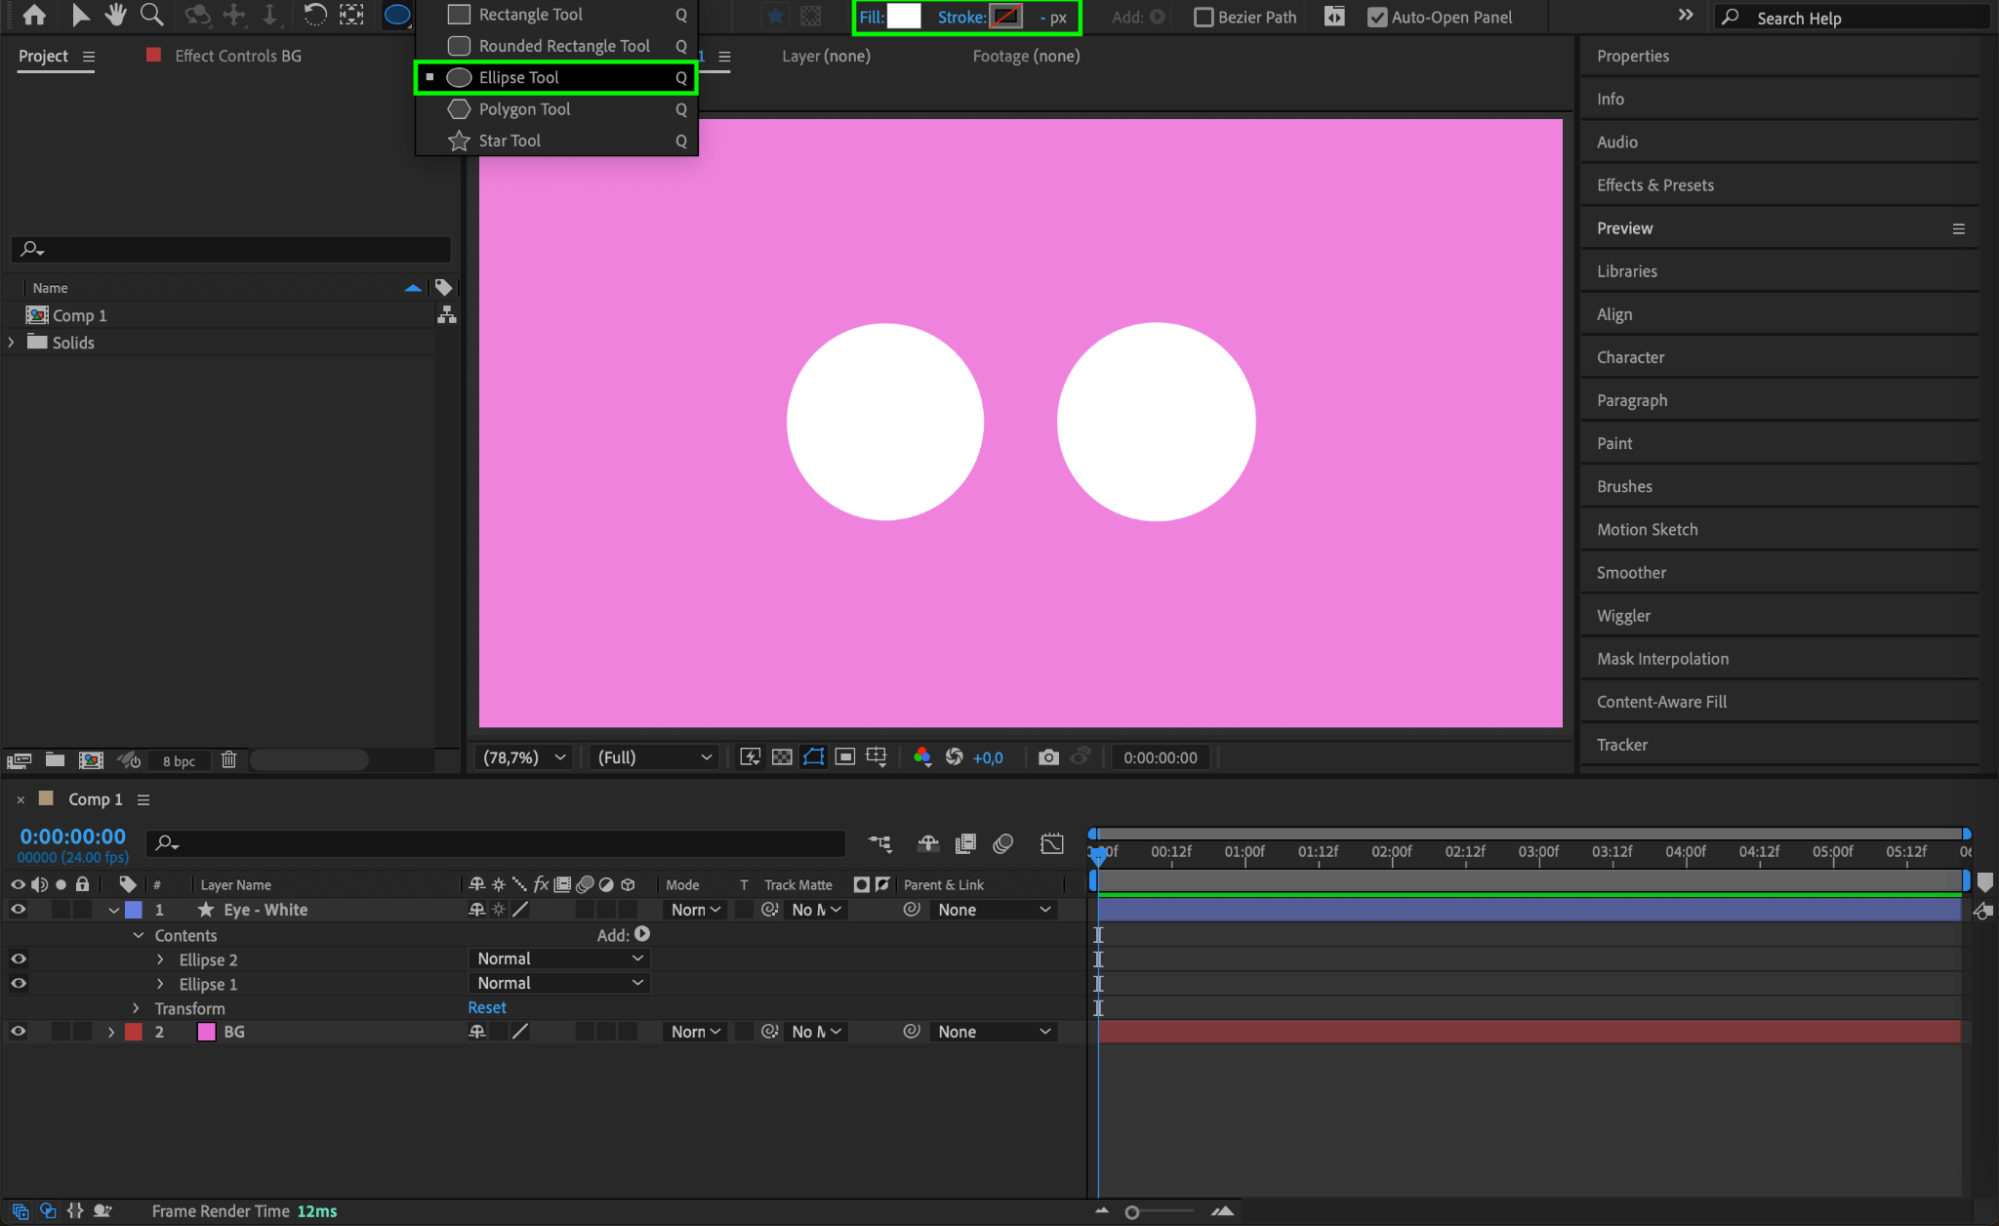
 Step 4: Create a Null Object for Control
Now, we’ll need a Null Object to control the eye movements and blinking animation. Create one by selecting Layer > New > Null Object. This invisible layer will serve as the central point for manipulating the pupils and other layers later in the process. Step 5: Adjust the Anchor Point of the Null Object
To ensure precise control over your eye animation, adjust the Anchor Point of the null object. Select the null object, then use the Pan Behind Tool (Y) to move the anchor point to the exact center of the null object. This will make sure that any movements or rotations applied to the null object will affect the eyes evenly and smoothly, as the anchor point now acts as the central control point for the animation.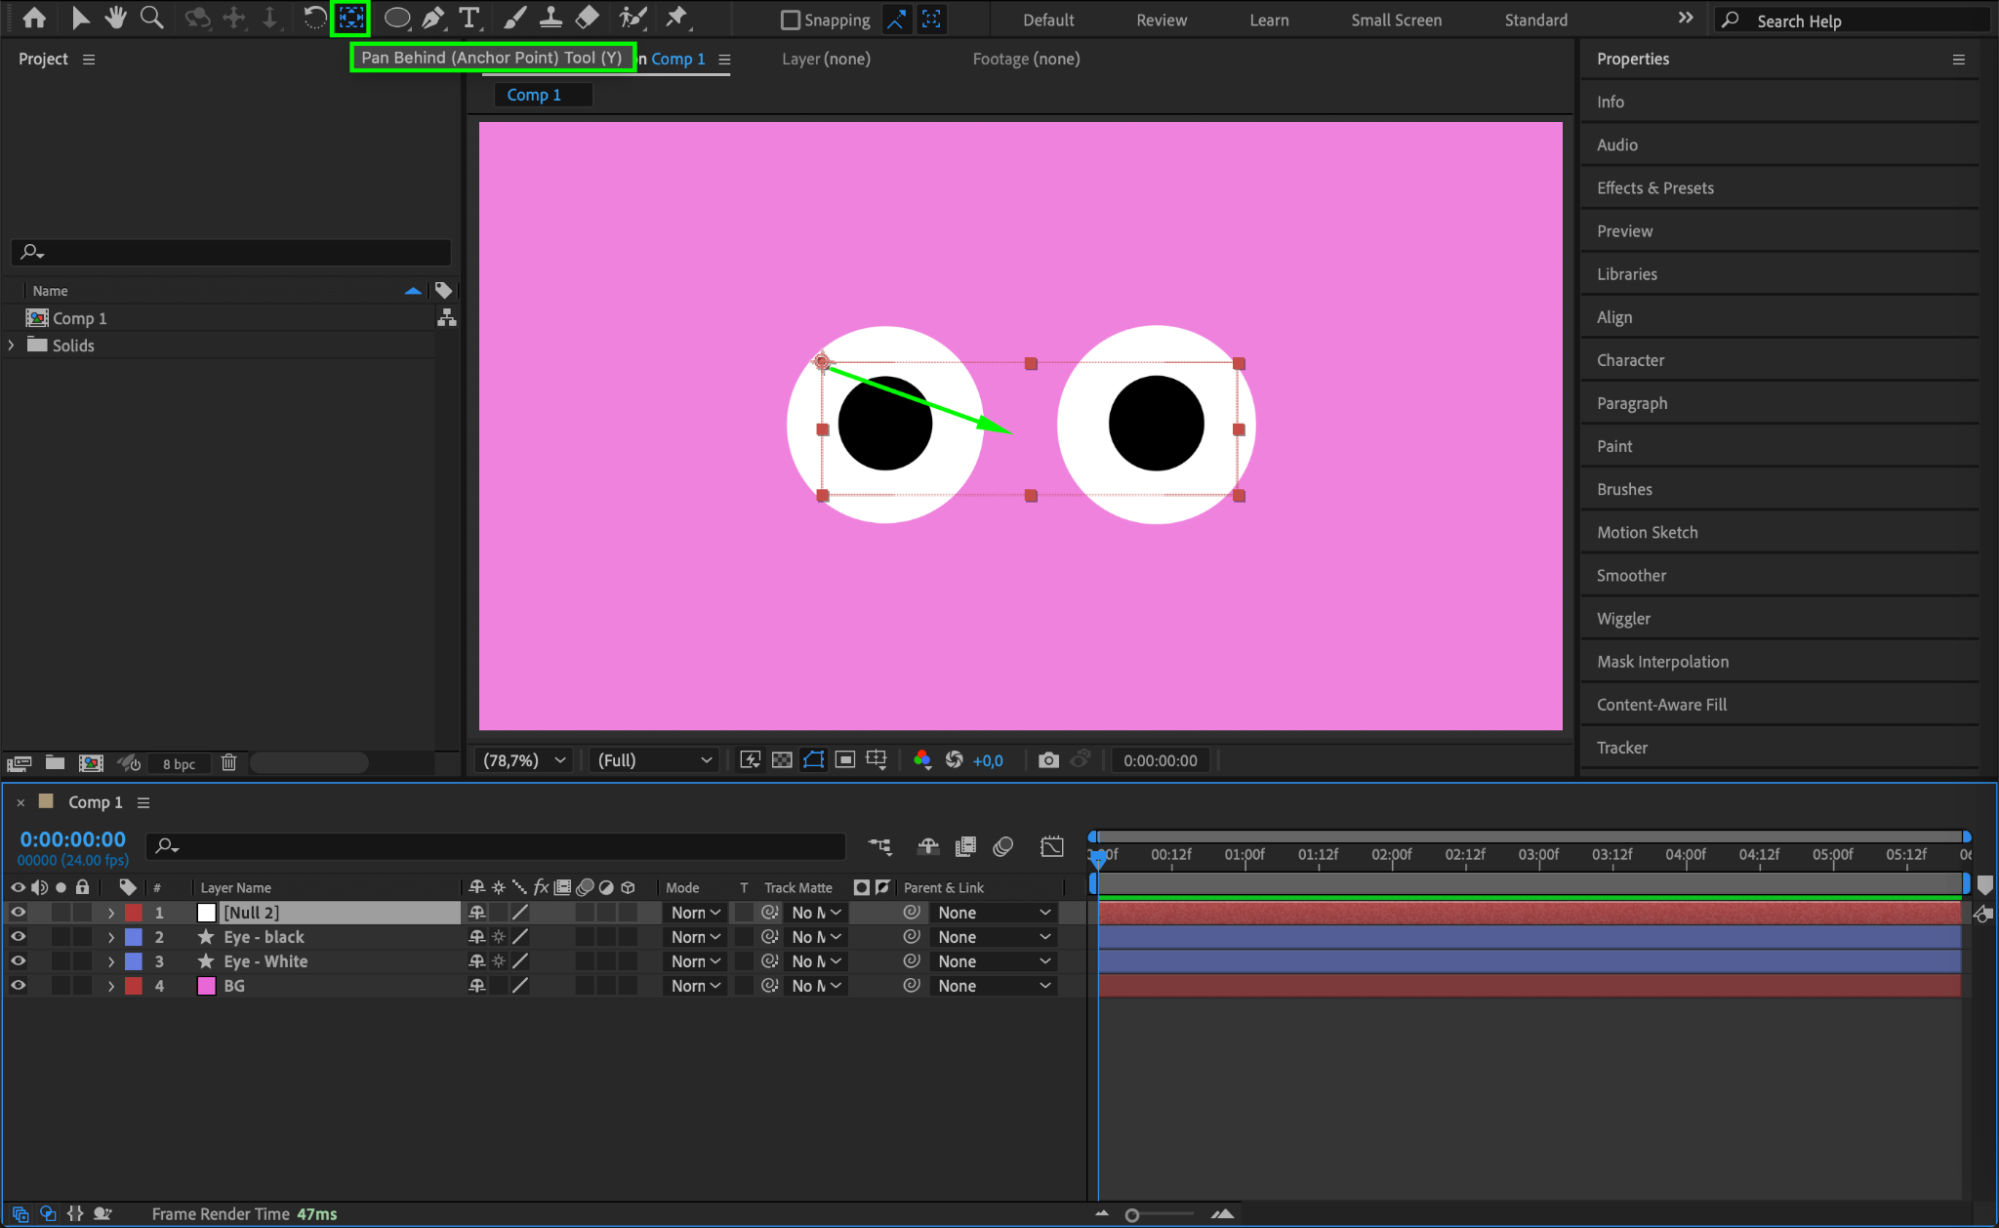
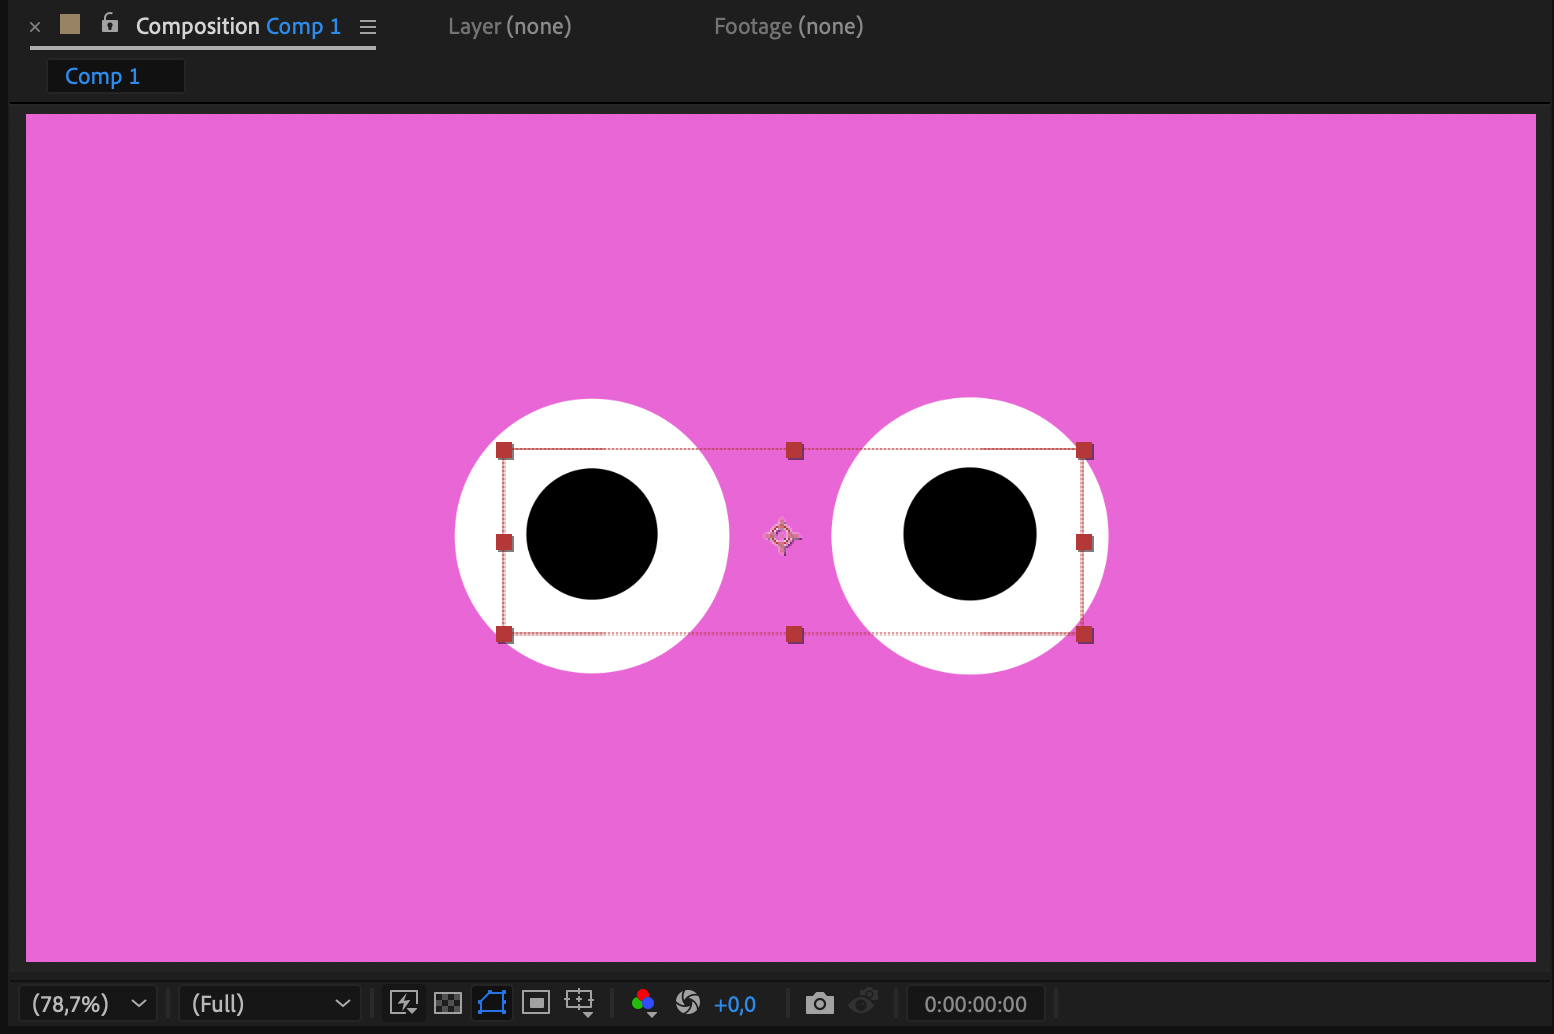 Step 6: Rename the Null Object and Parent the Eyes to It
Rename the null object to “Controller” to stay organized. In the Parent & Link column, select the pupils and eyes, and parent them to the null object. This way, any movements or transformations applied to the null object will affect both the eyes and the pupils.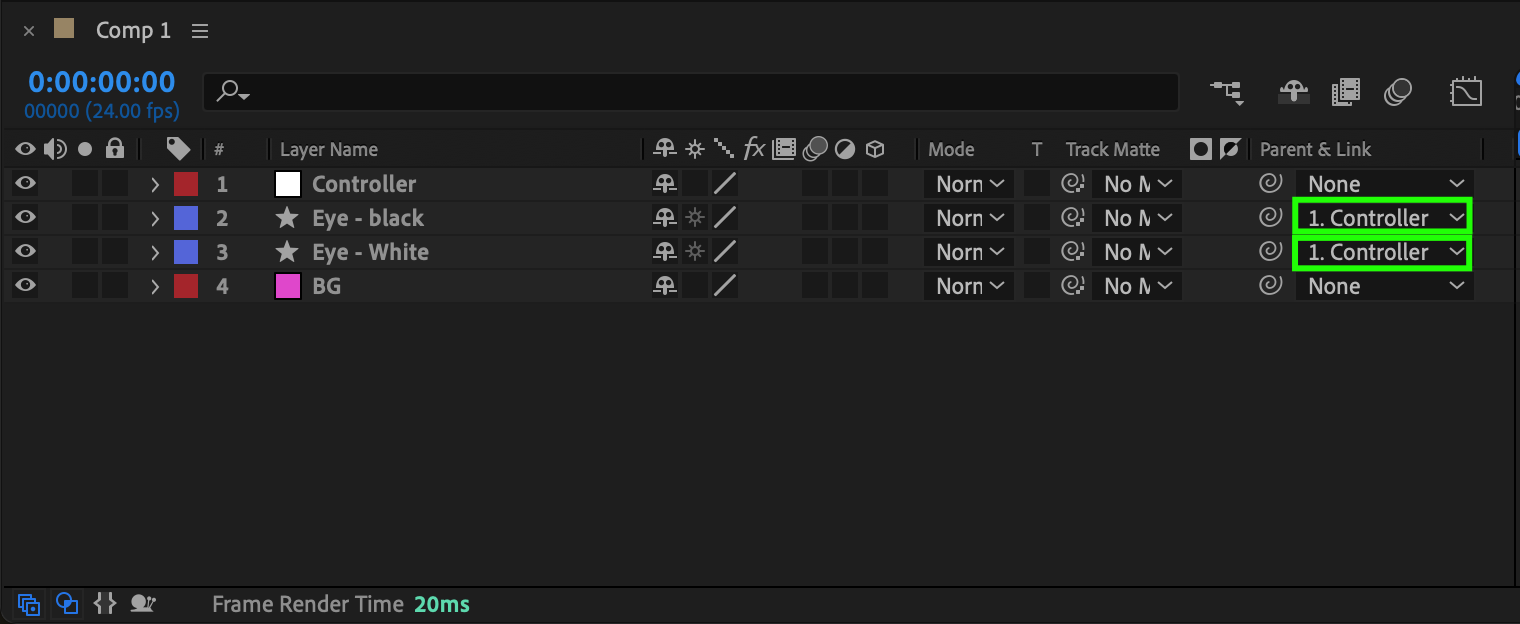 Step 7: Set Up Track Matte for the Pupils
Go to the Track Matte column for the pupil layers, and choose the eye layer as the matte. This will ensure that the pupils only appear within the boundaries of the eyes. If the track matte column isn’t visible, enable it by clicking the toggle switches at the bottom of the timeline.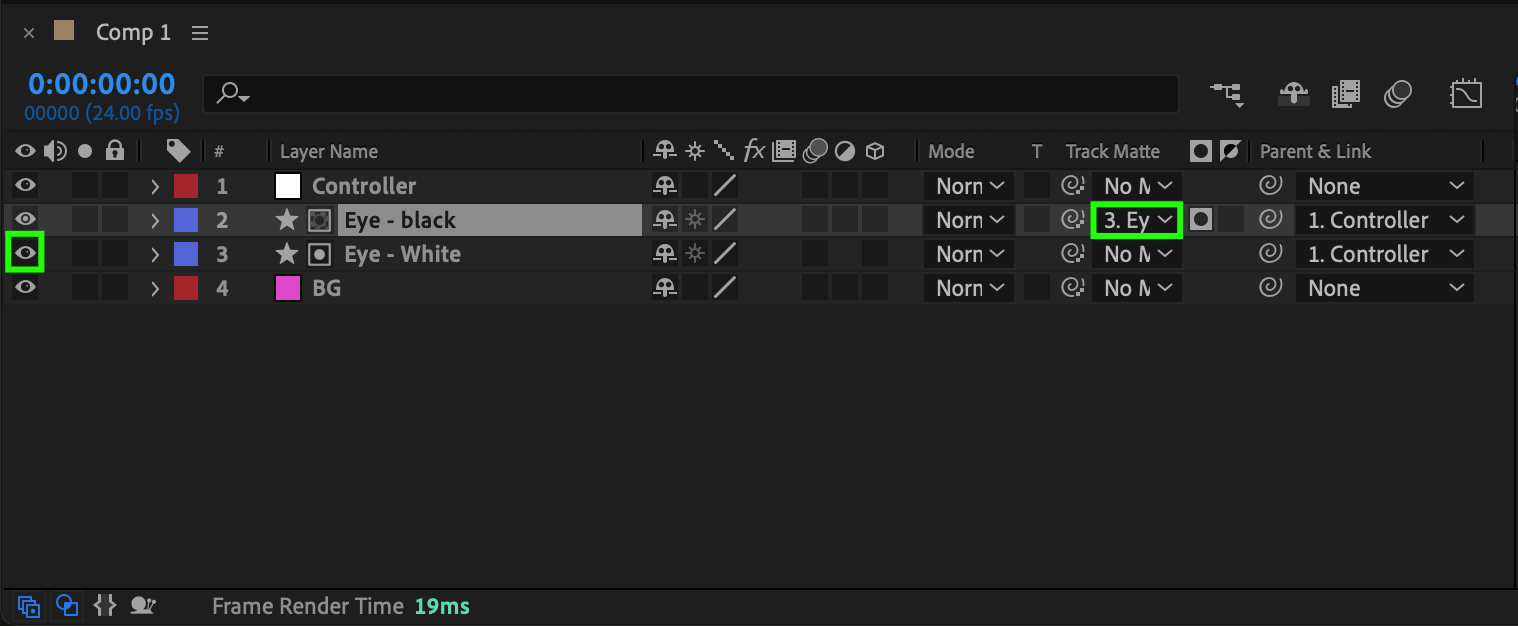 Step 8: Adjust Work Area and Trim Composition
Before we dive into the animation, set the Work Area End closer to the start of the composition to focus only on the keyframes we’ll be working with. Then, use Composition > Trim Comp to Work Area to cut down any excess space, making the timeline easier to navigate.
 Step 9: Animate the Blinking Eyes
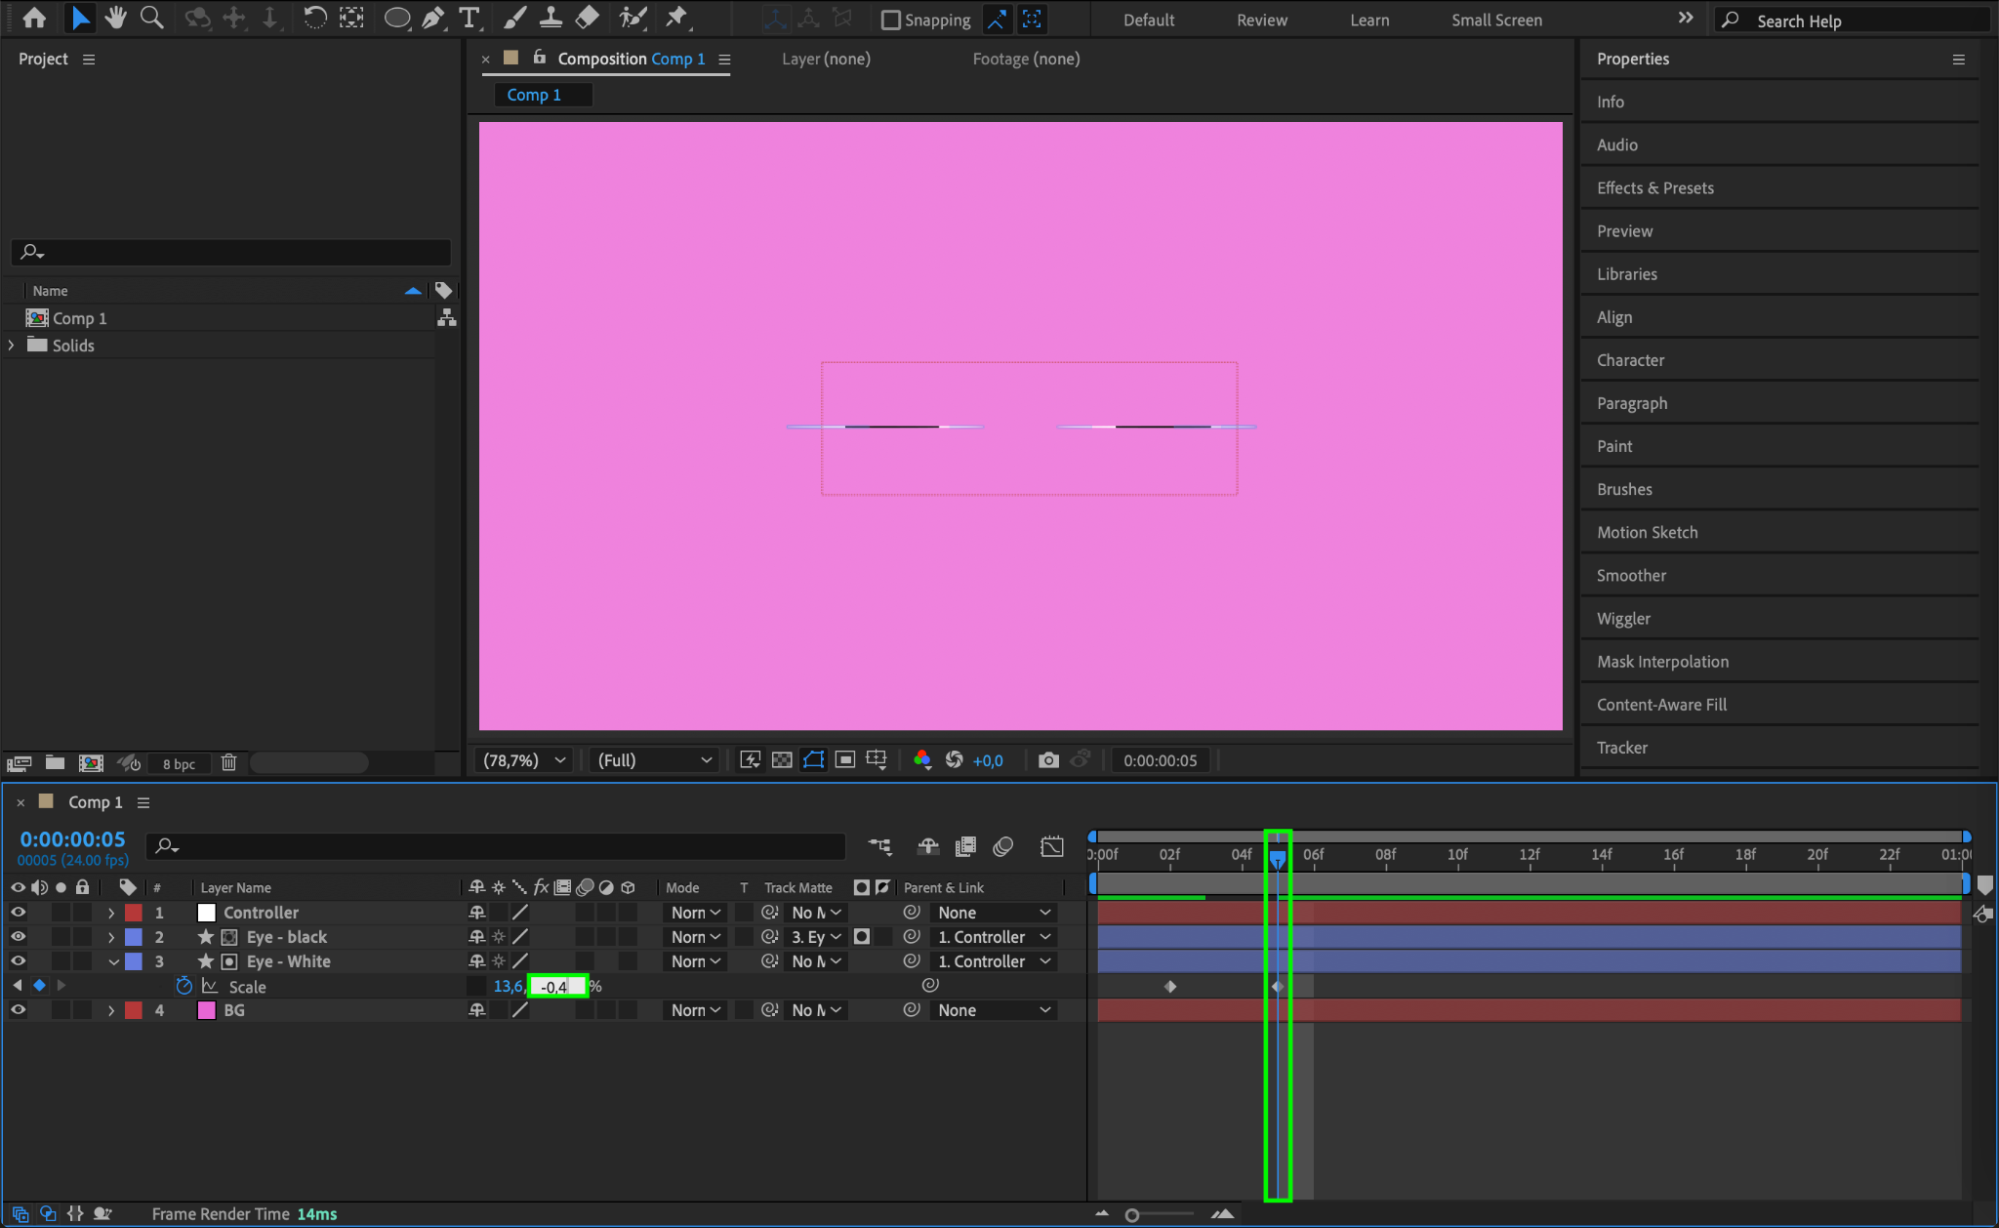
For the blinking effect, select the eye layer, unlink the Scale property by clicking the chain icon, and move the CTI (Current Time Indicator) forward by two frames. Create a keyframe by clicking the stopwatch icon next to Scale. Then, move the CTI forward by three frames, and adjust the scale values so the eyes appear closed. Move the CTI forward by another three frames and revert the scale values to the original, effectively opening the eyes back up. Now, you’ve created the basic blinking animation.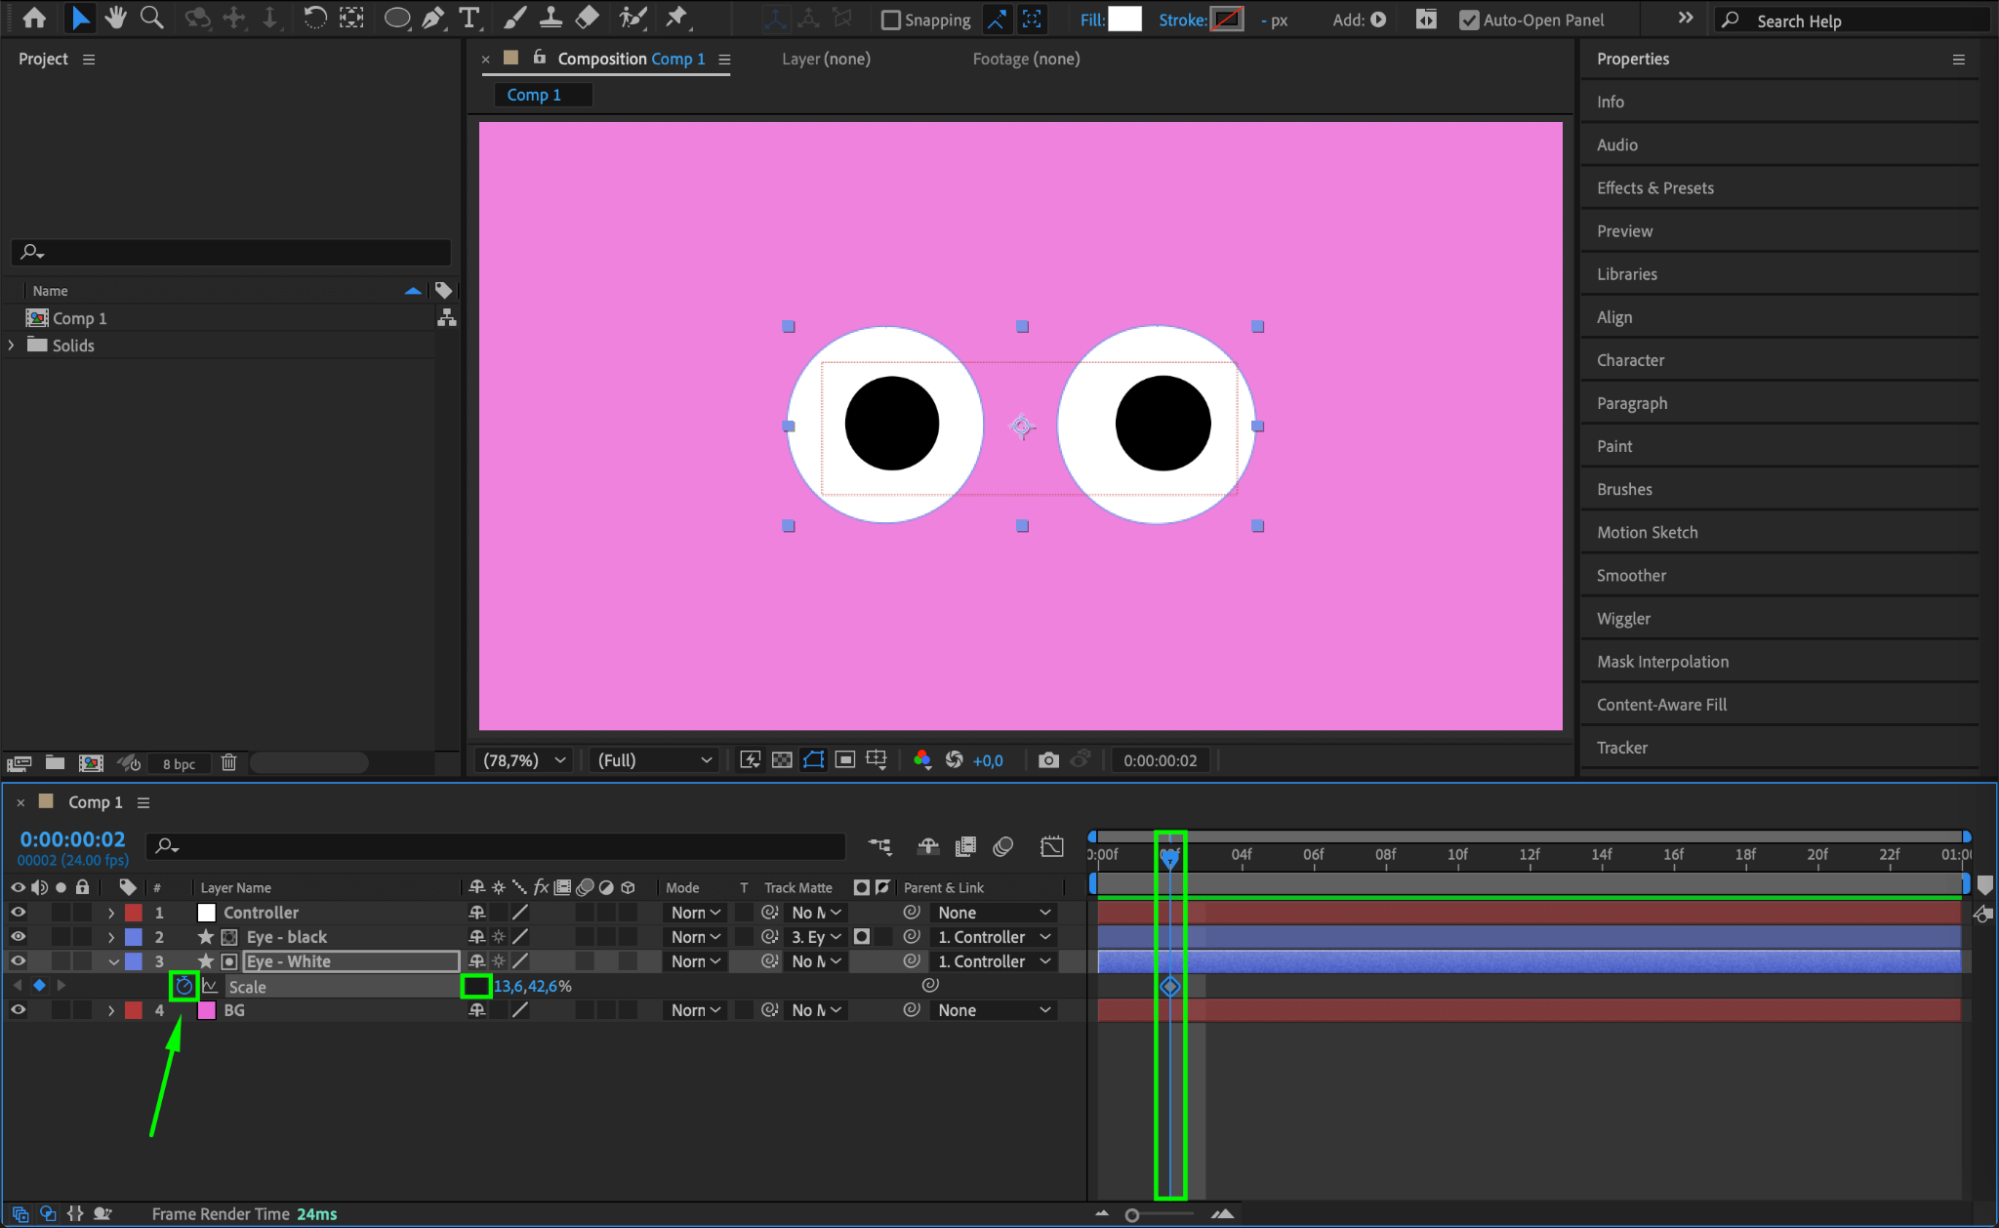
 Step 10: Animate the Pupils’ Movement
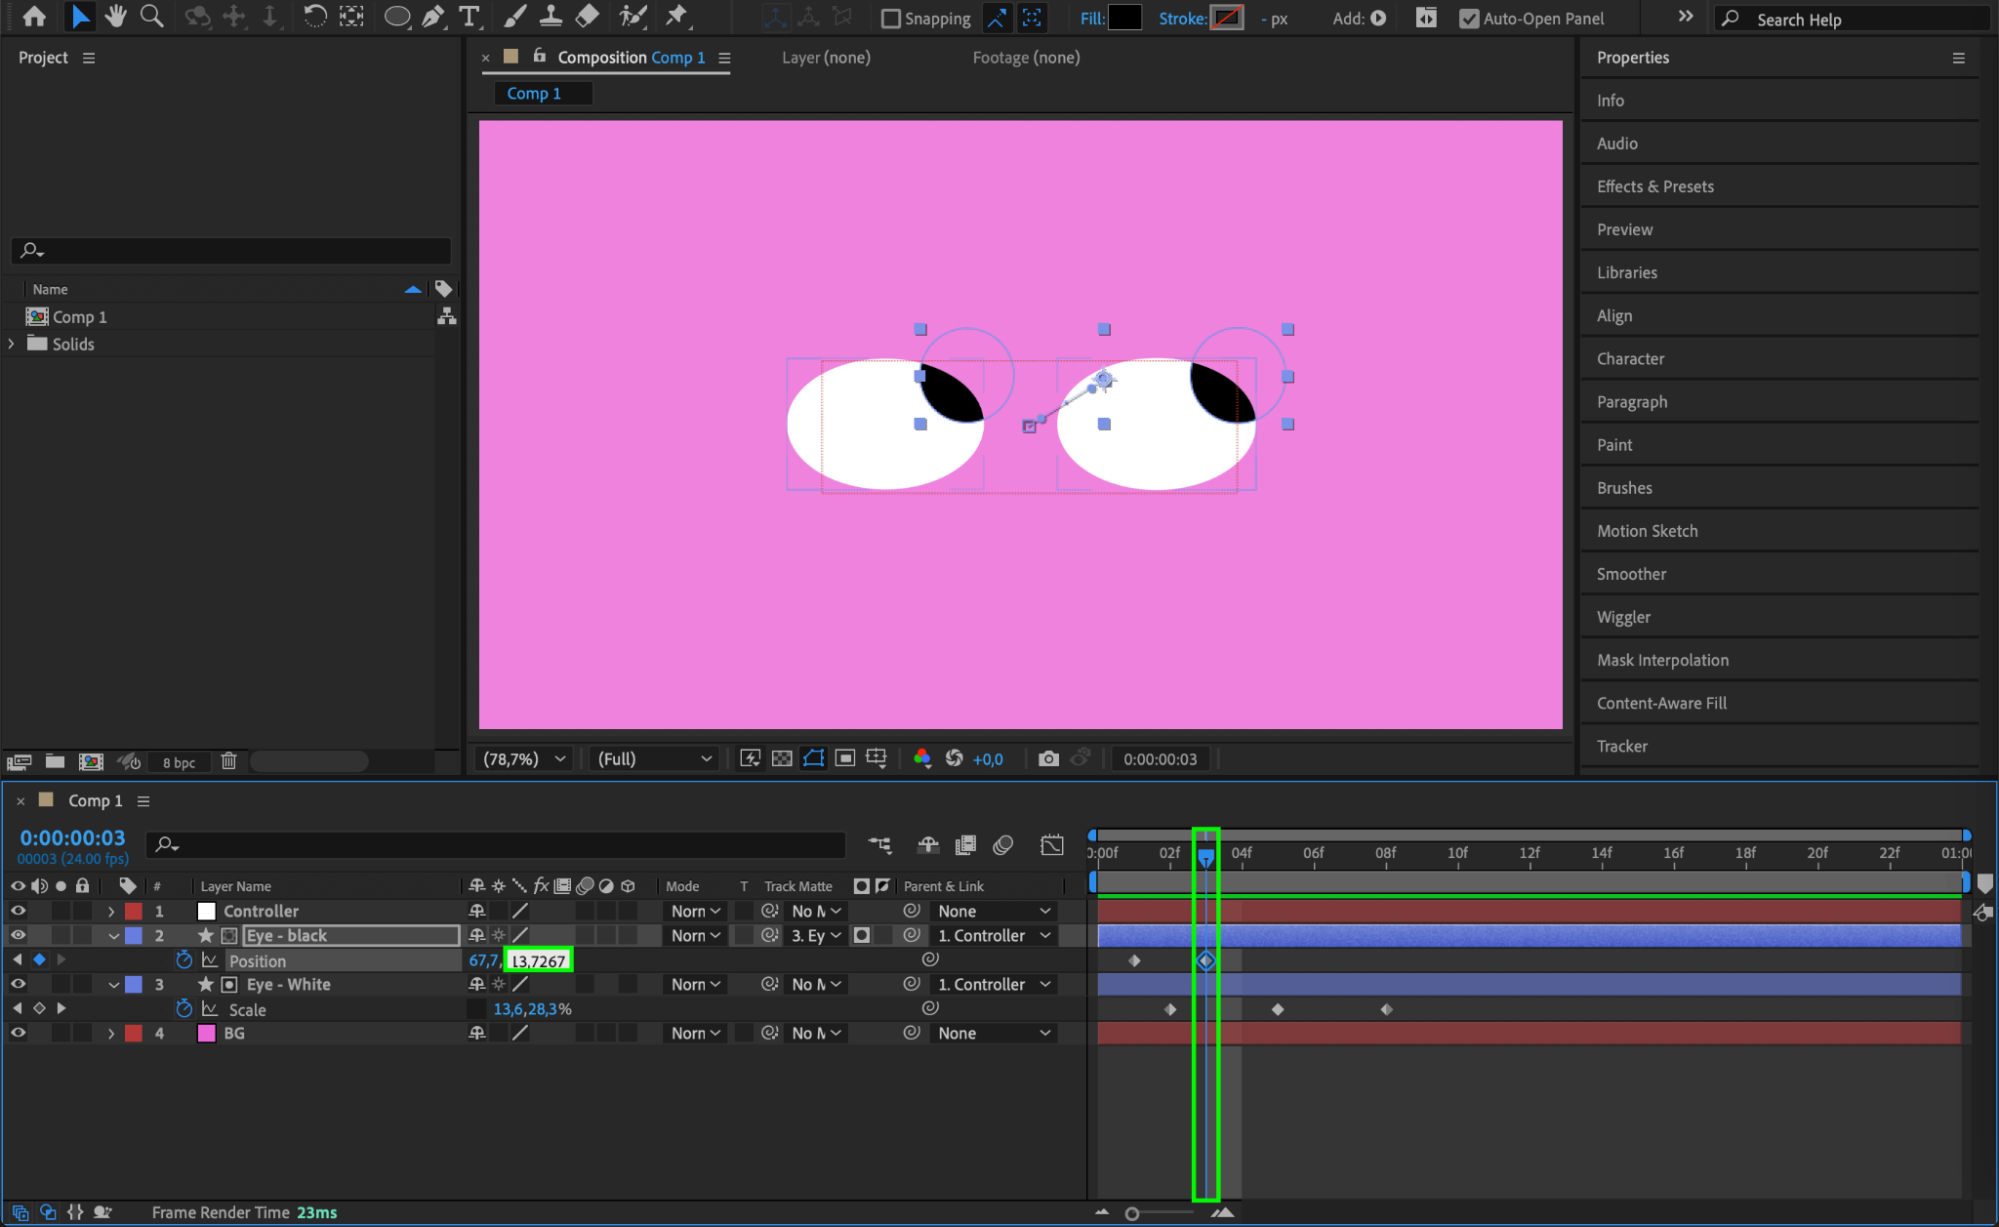
Select the pupil layer and animate its Position. Move the CTI forward by two frames and create a keyframe. Then, move it forward by another two frames, adjusting the pupils so they look up and to the right. Position these keyframes above the keyframes for the blinking animation to synchronize the eye movement.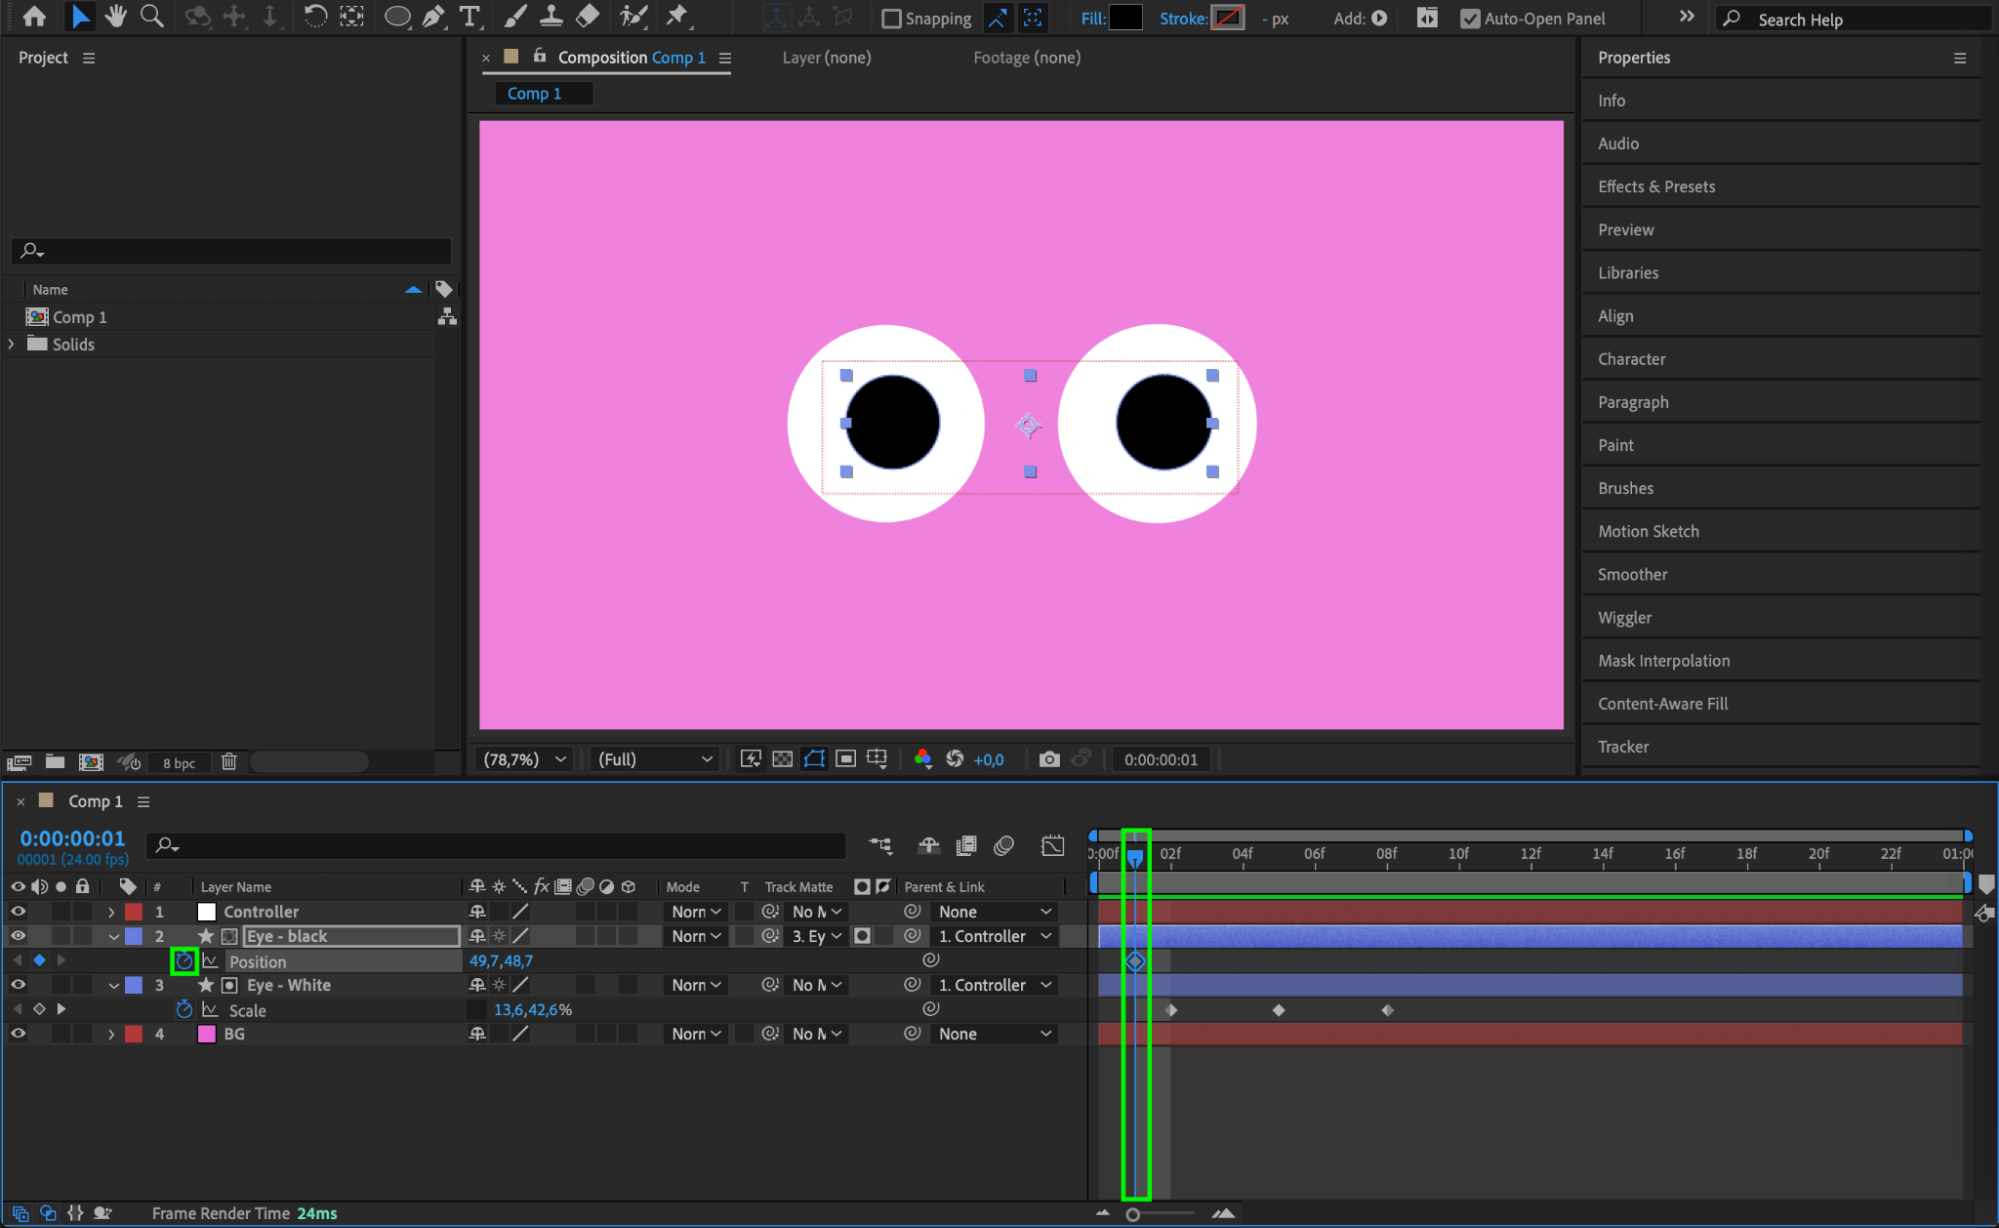
 Step 11: Copy and Paste Keyframes for Repeated Blinks
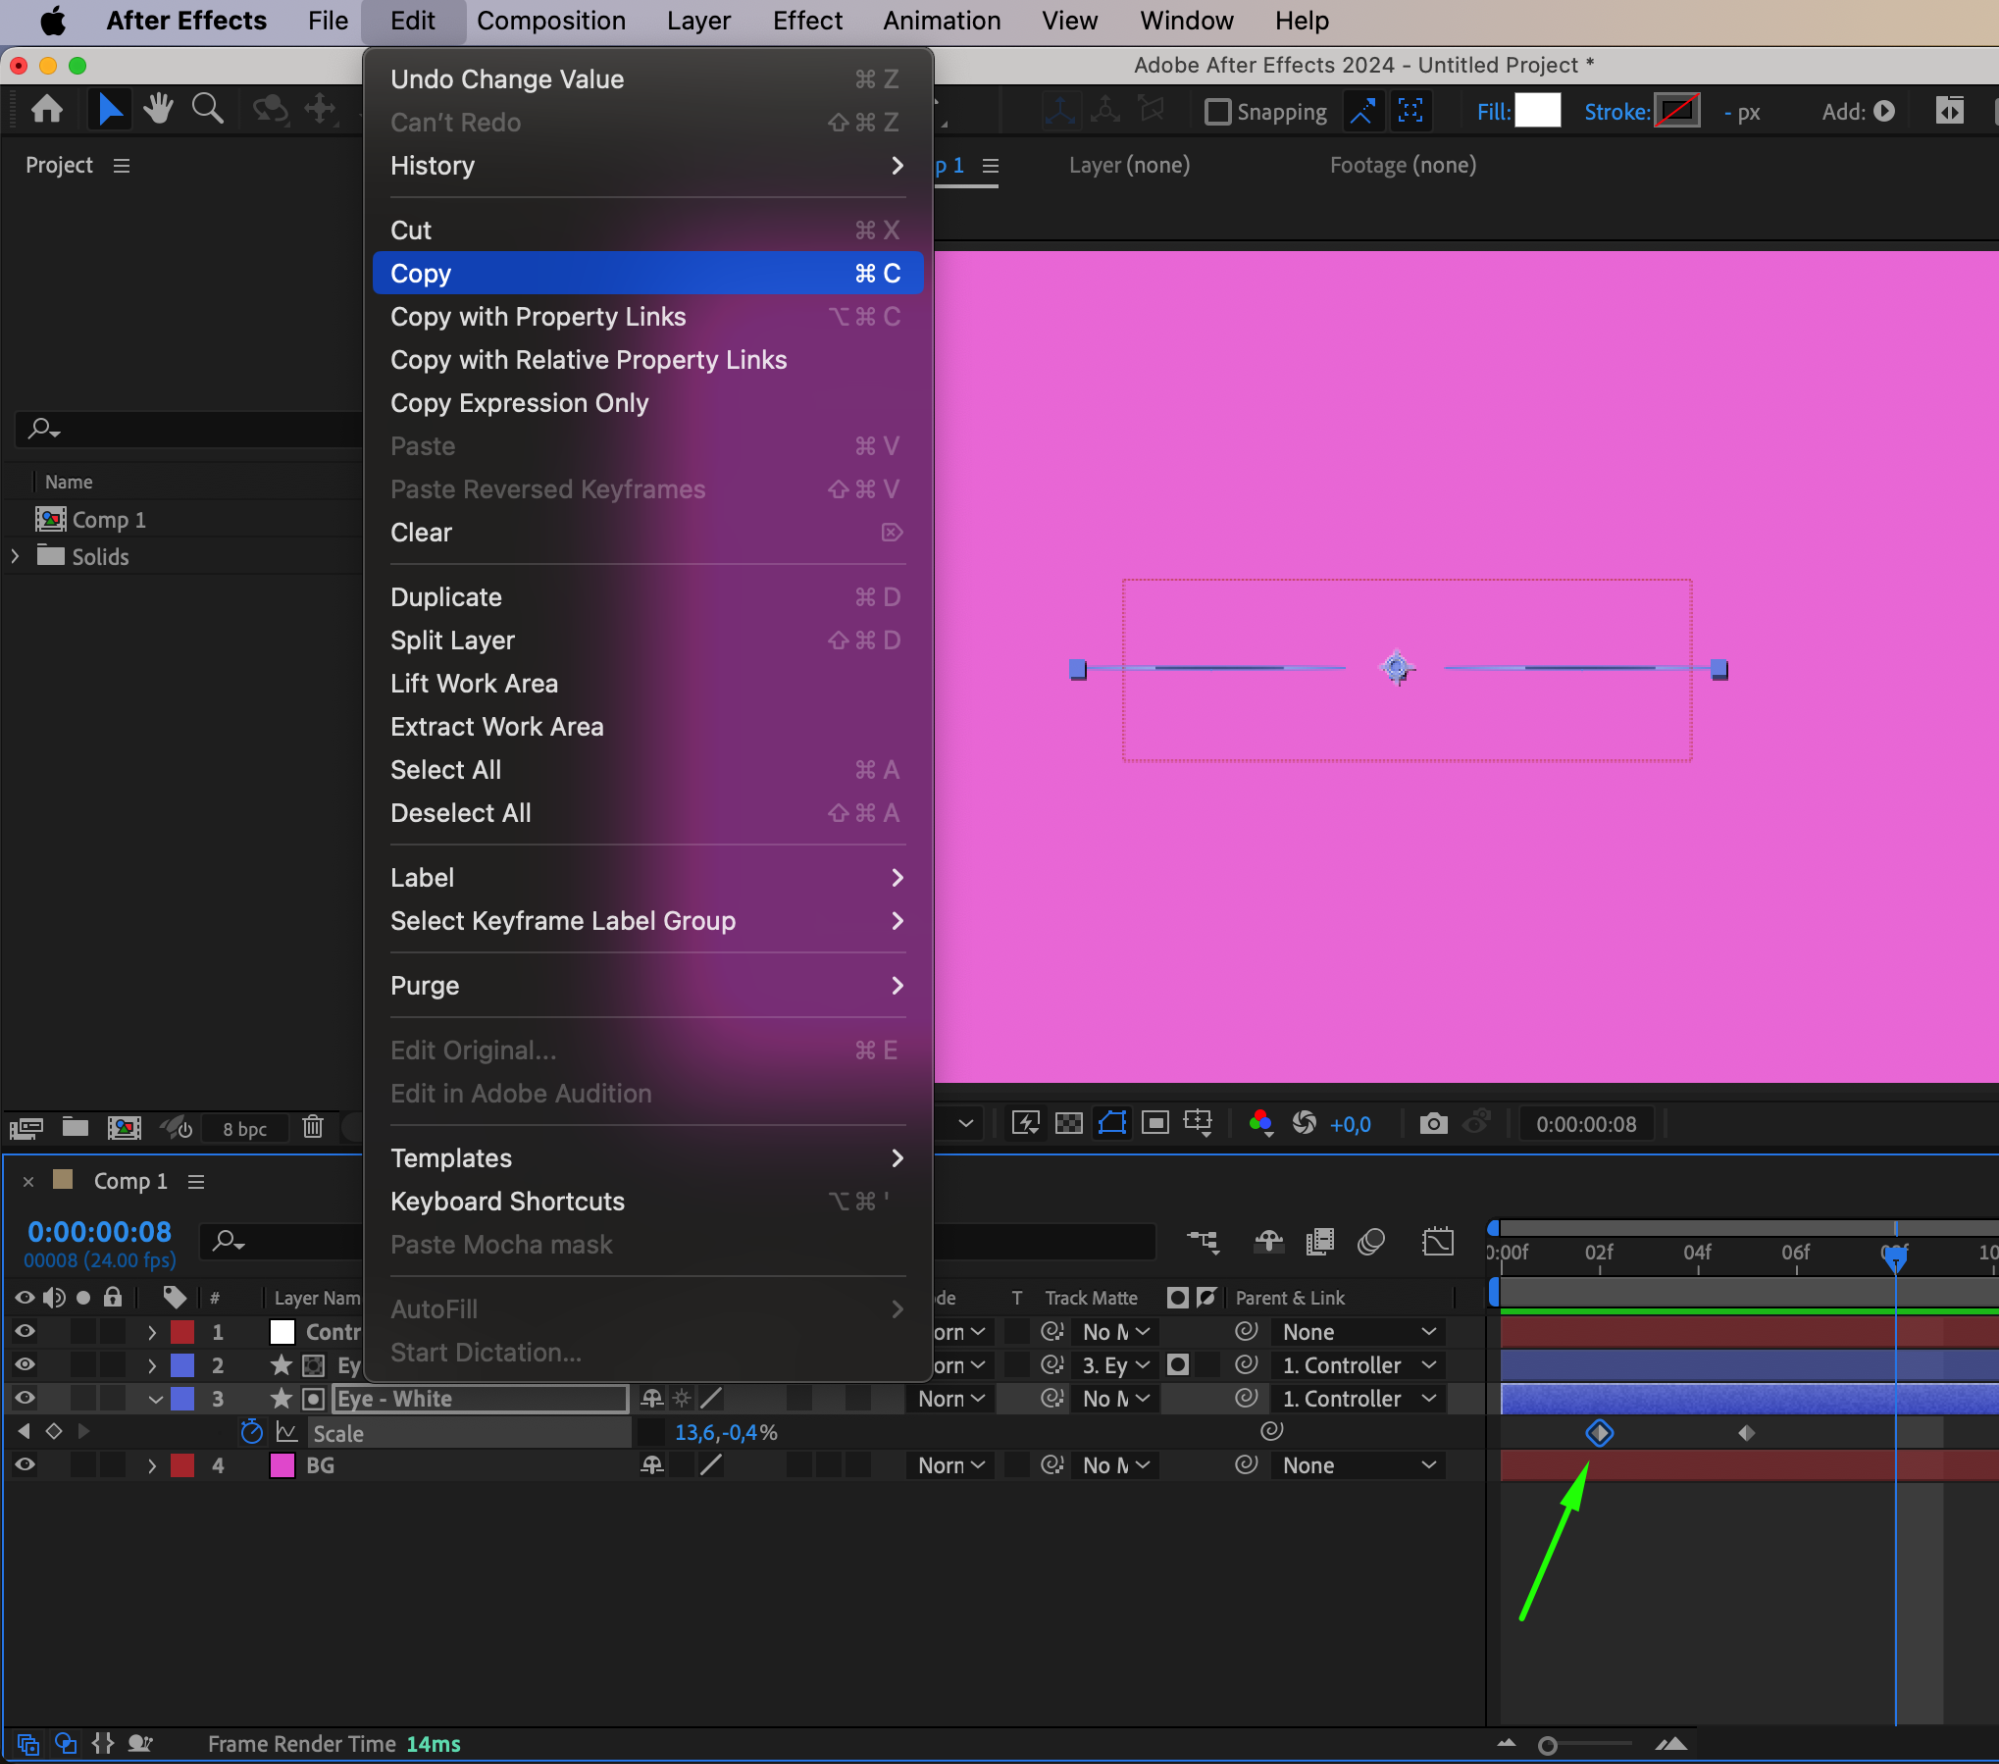
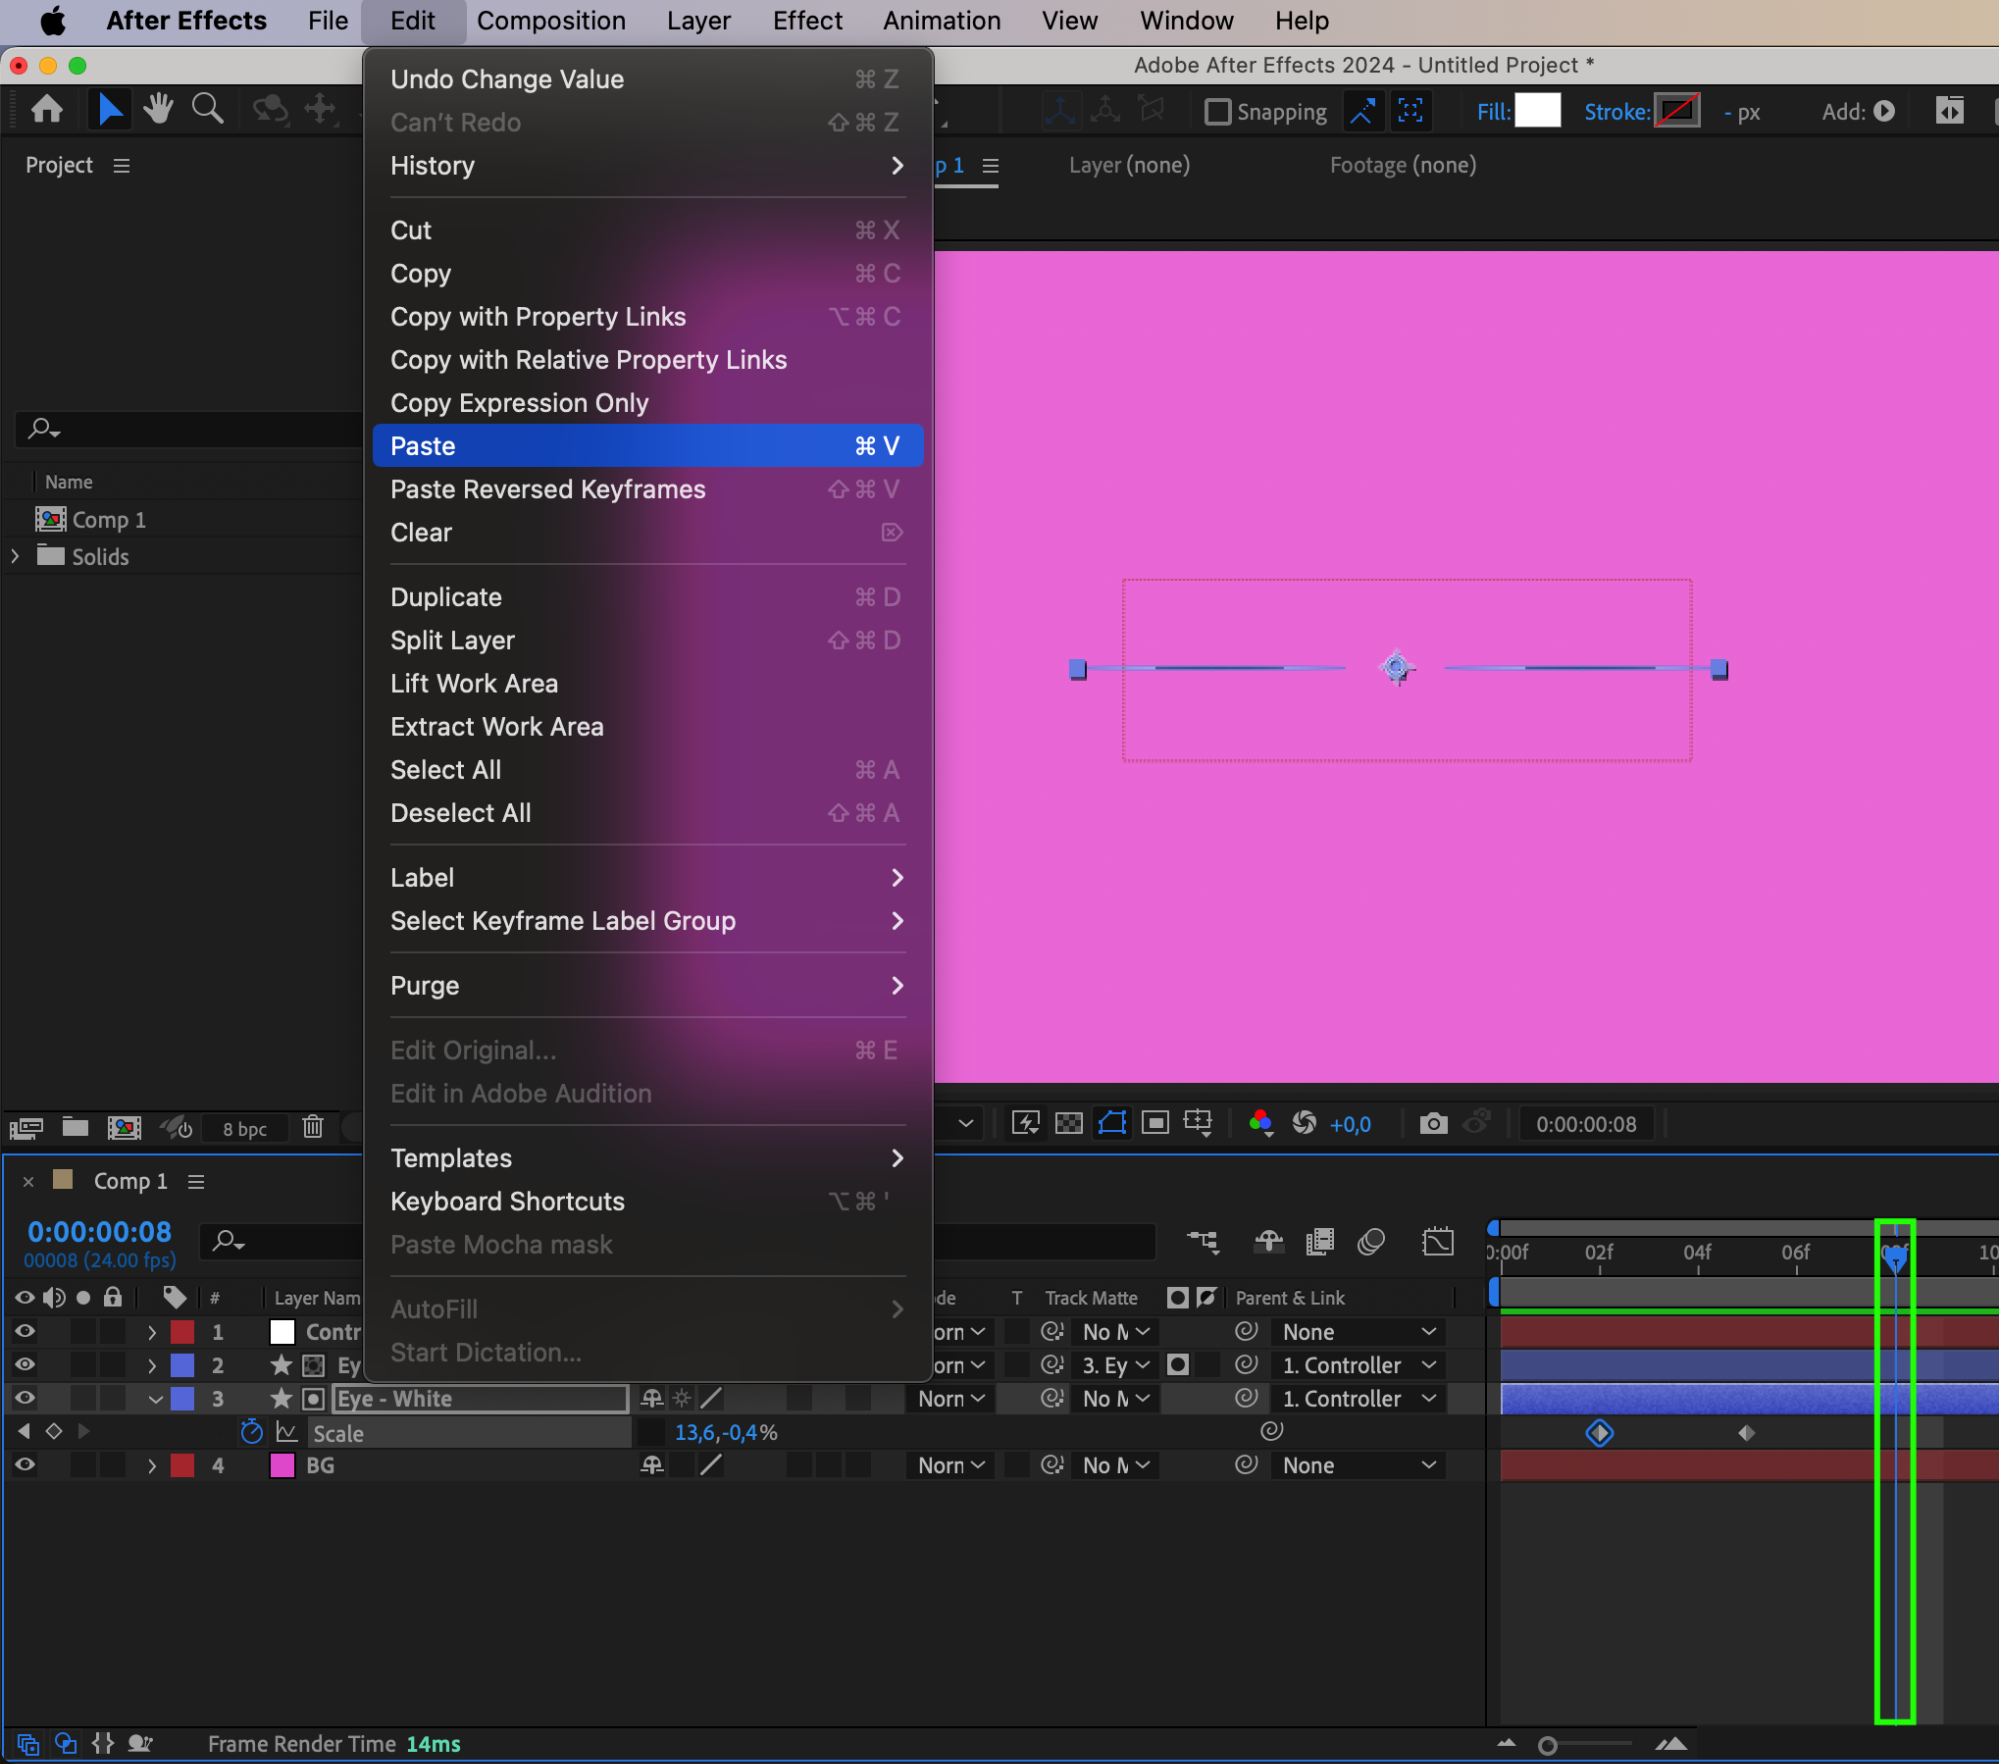
To create additional blinks, copy the keyframes for the eye layer and paste them six frames apart from the first blink. This will create a natural sequence of multiple blinks, adding depth to the animation.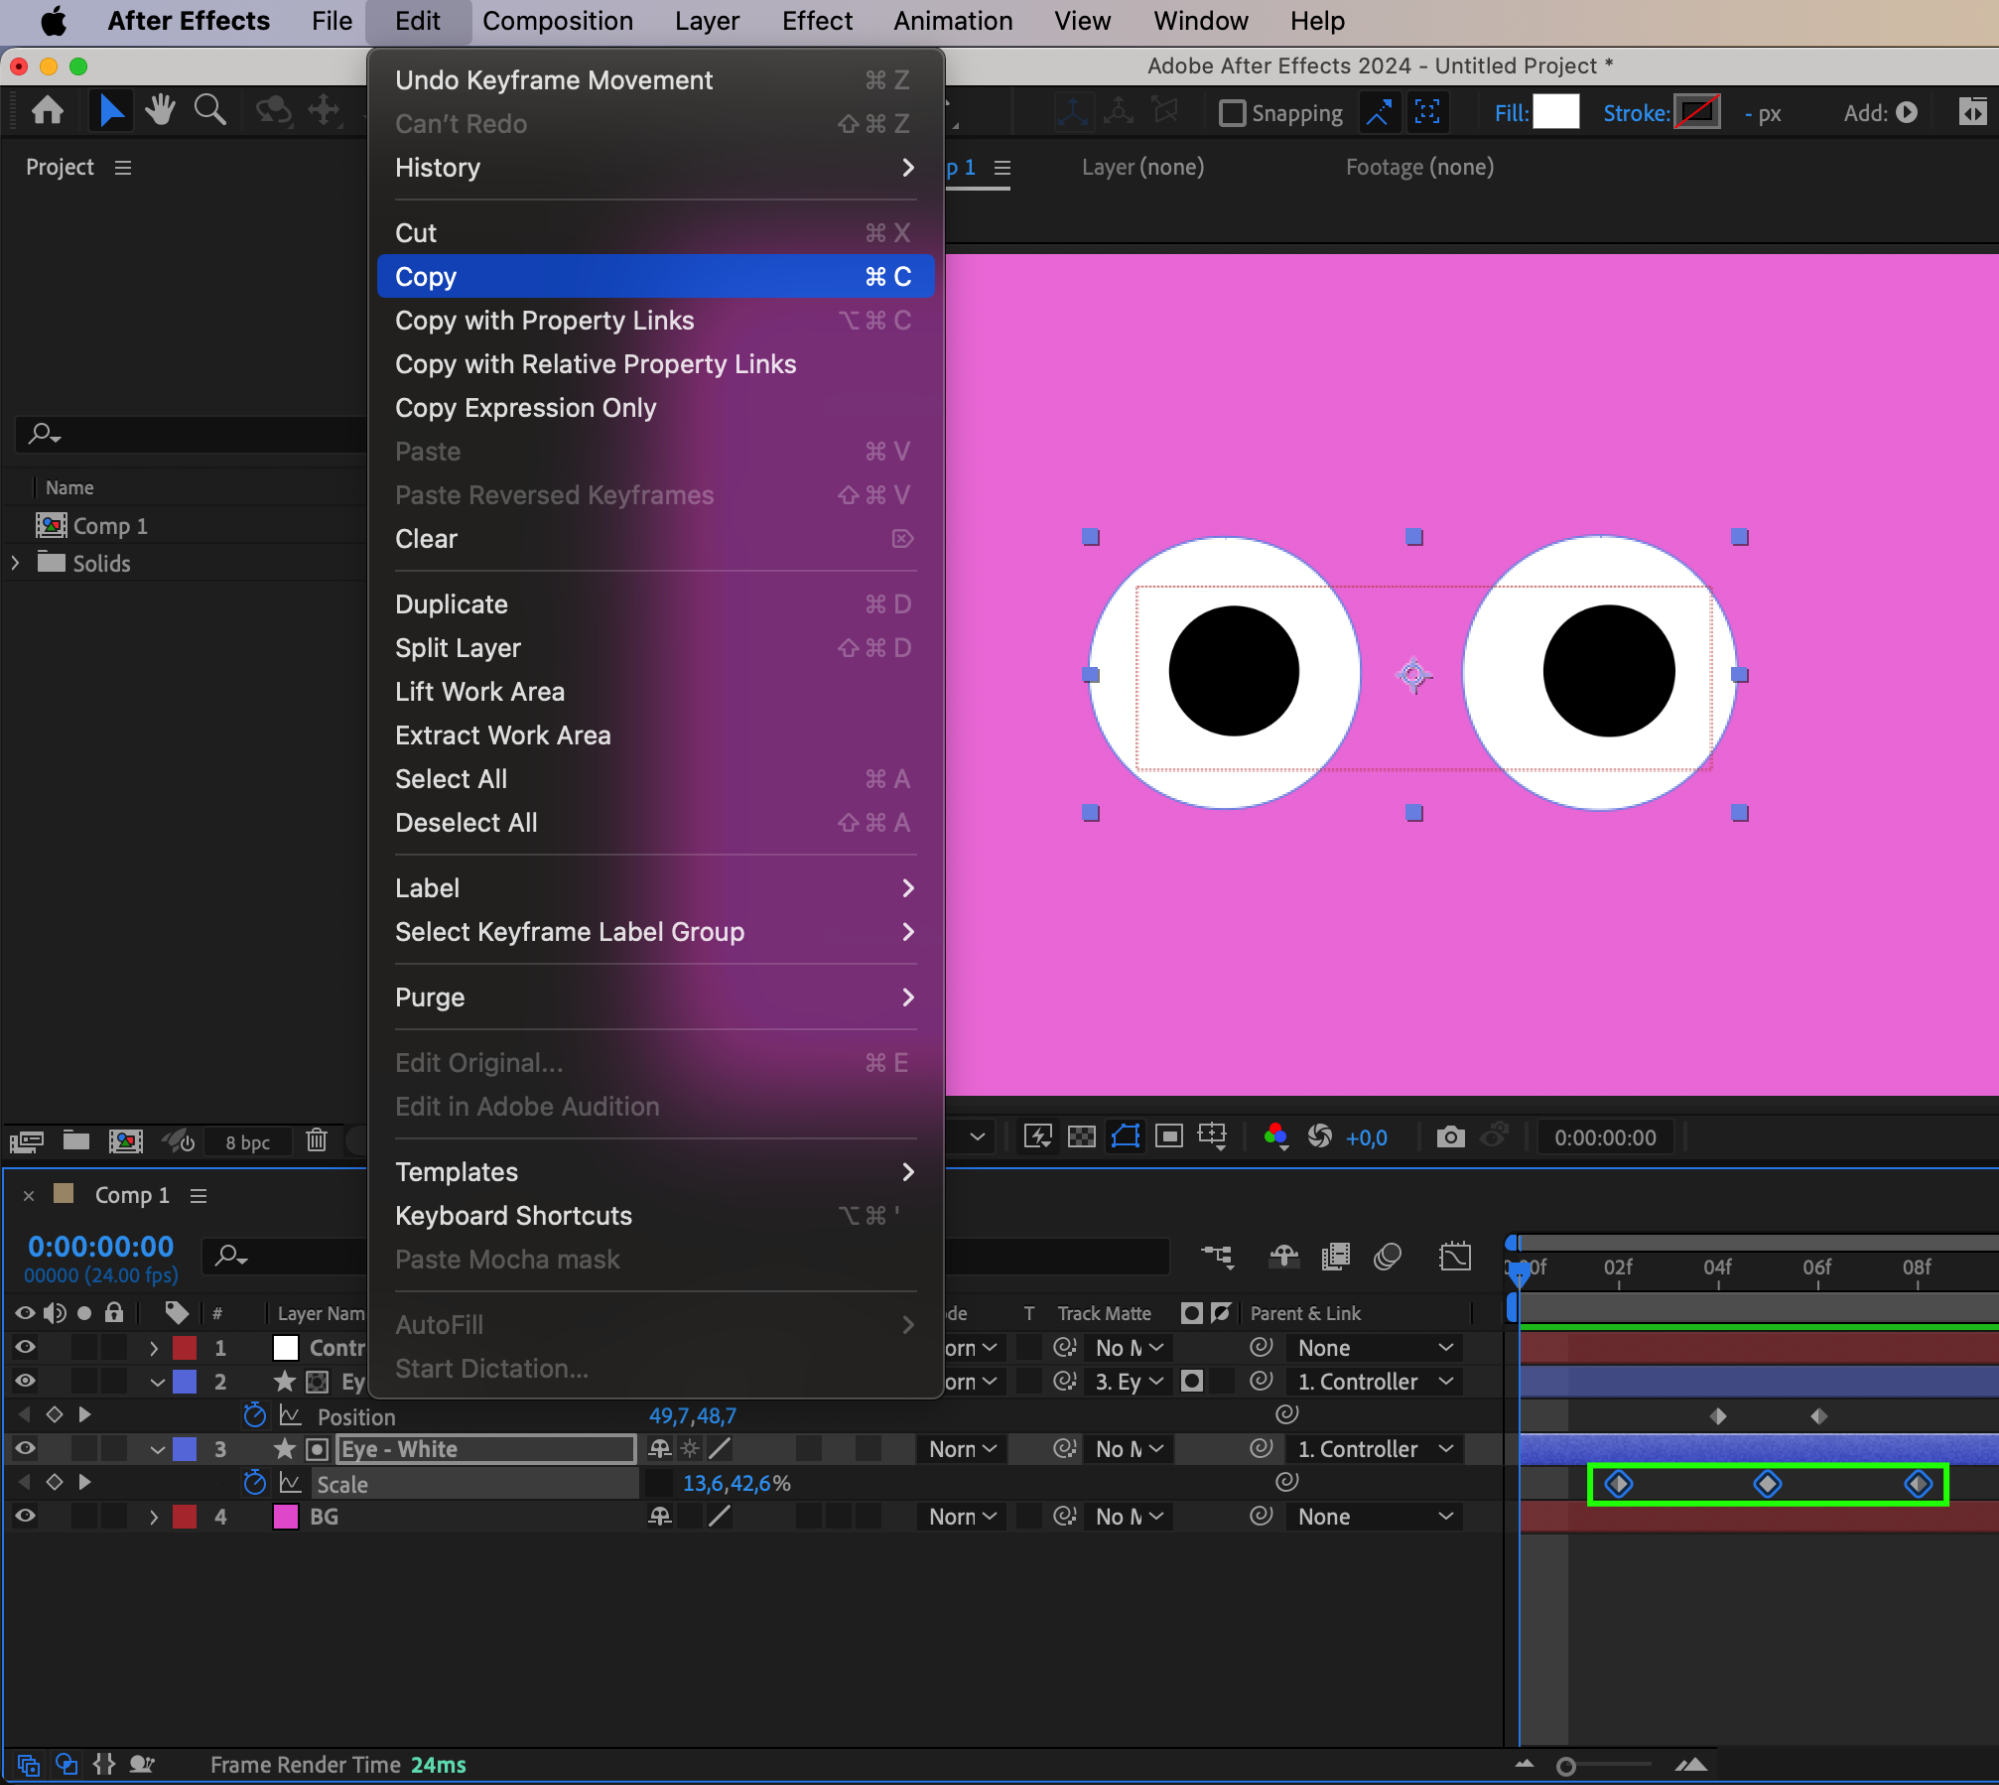
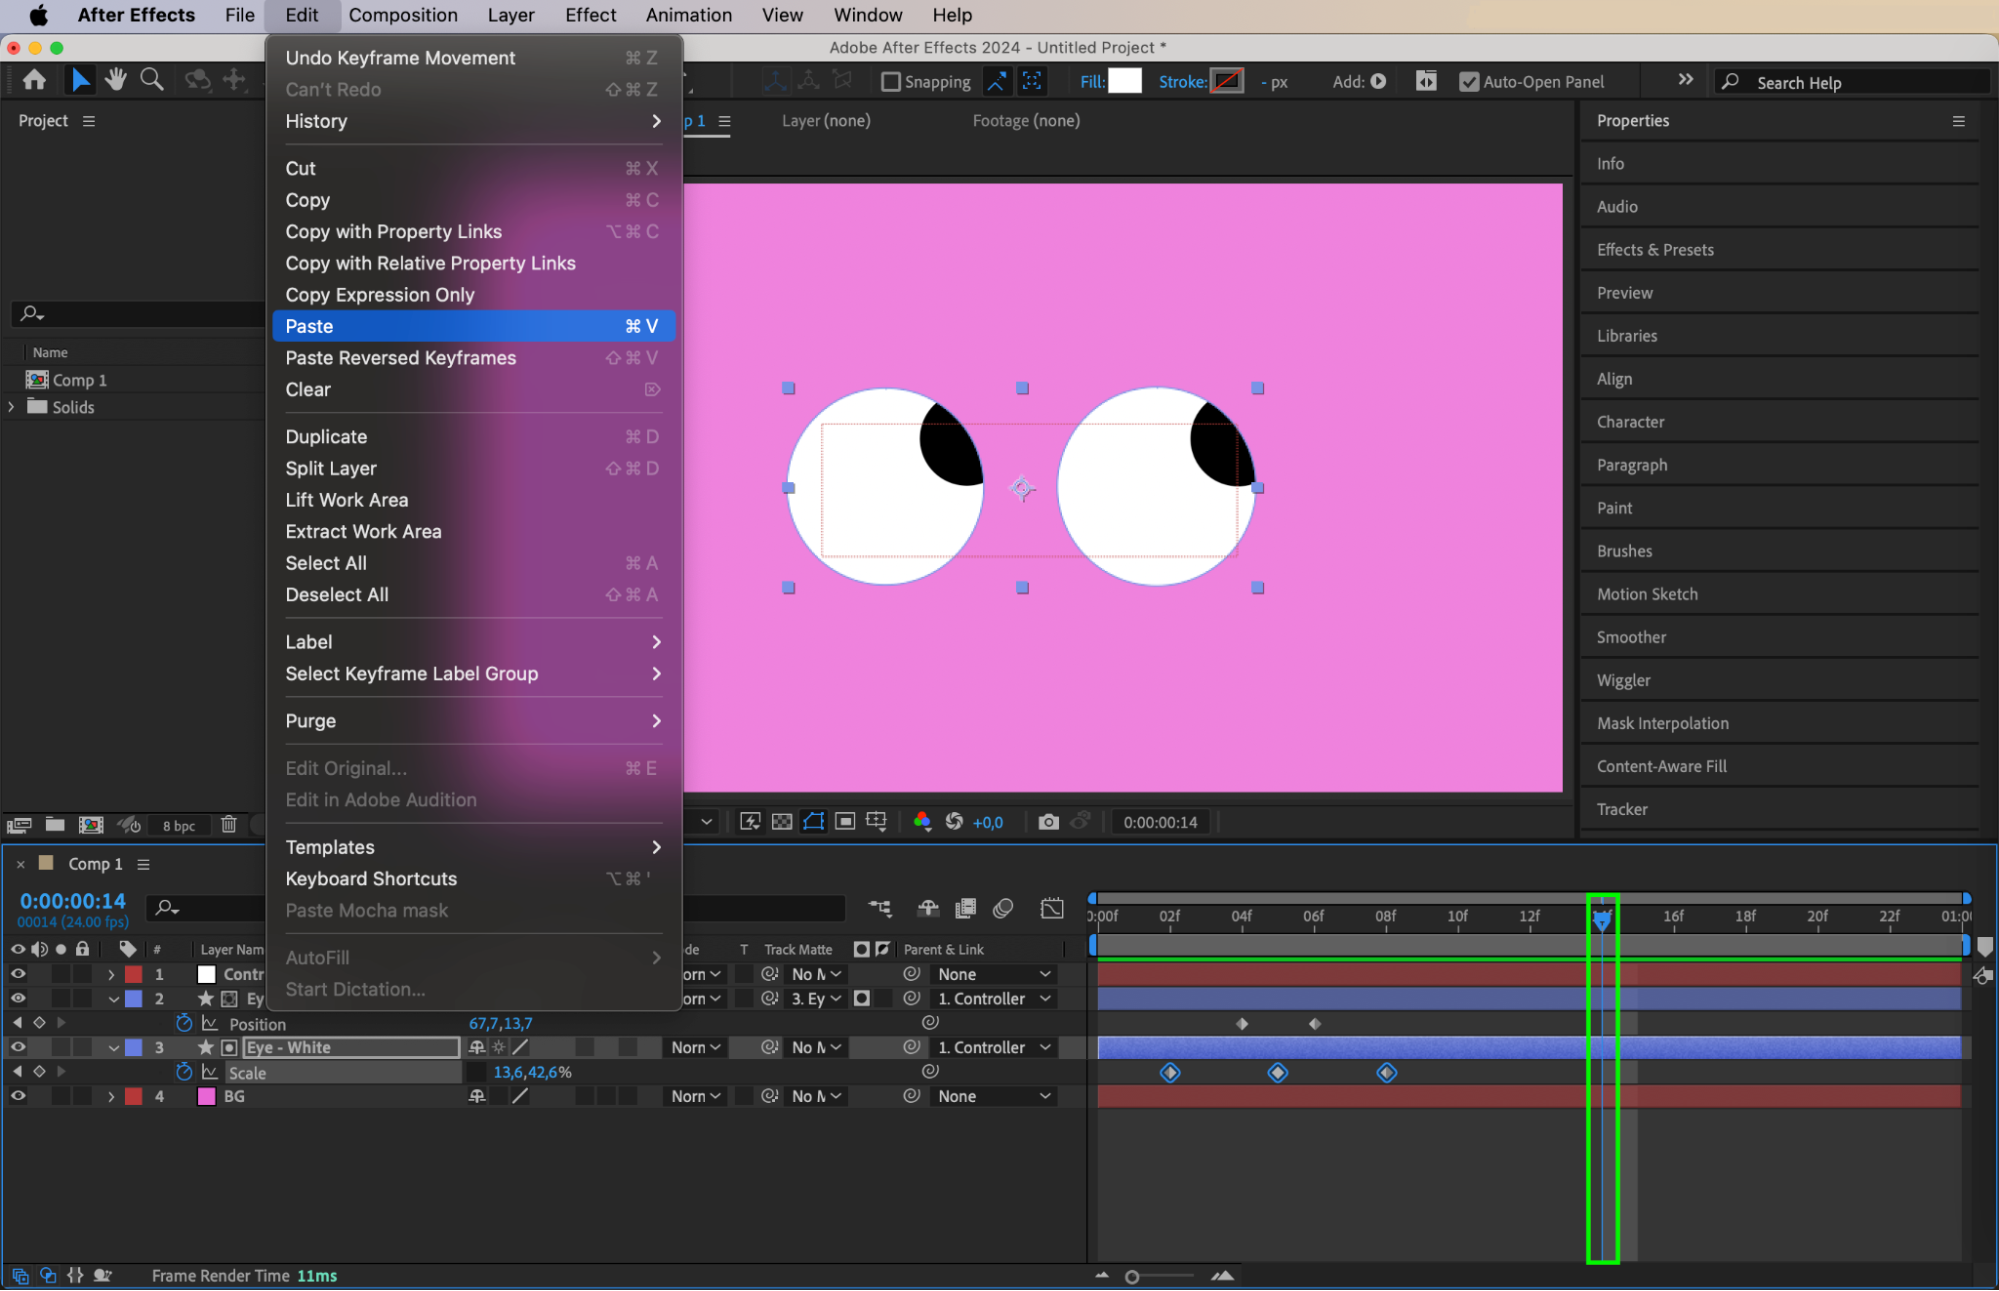 Step 12: Add More Keyframes for Pupils’ Position
Between the blinks, add additional position keyframes for the pupils. For example, after the first blink, have the pupils look up and to the right, and after the second blink, they should look down and to the left. This adds variety to the movement and enhances realism.
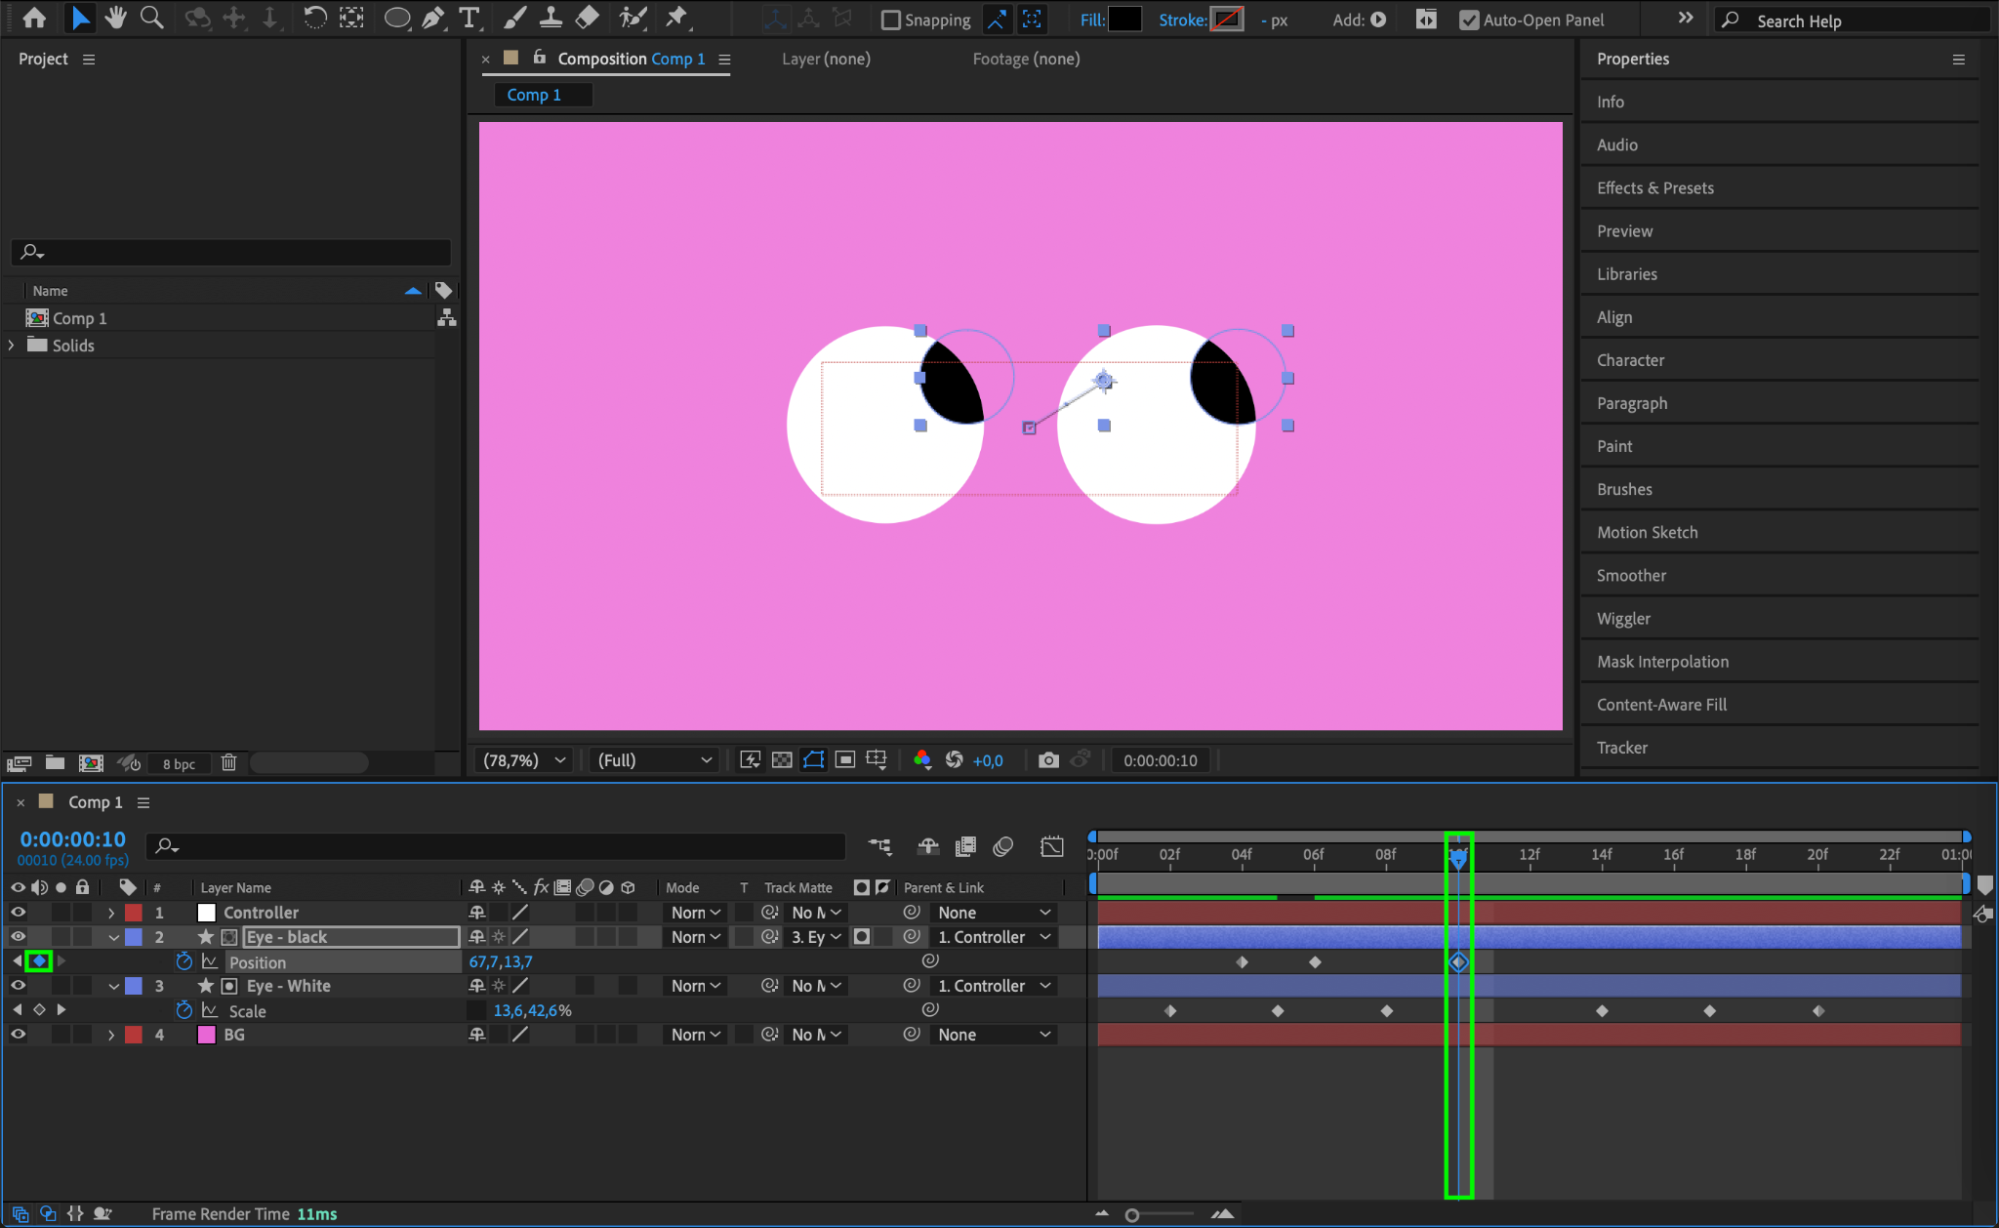
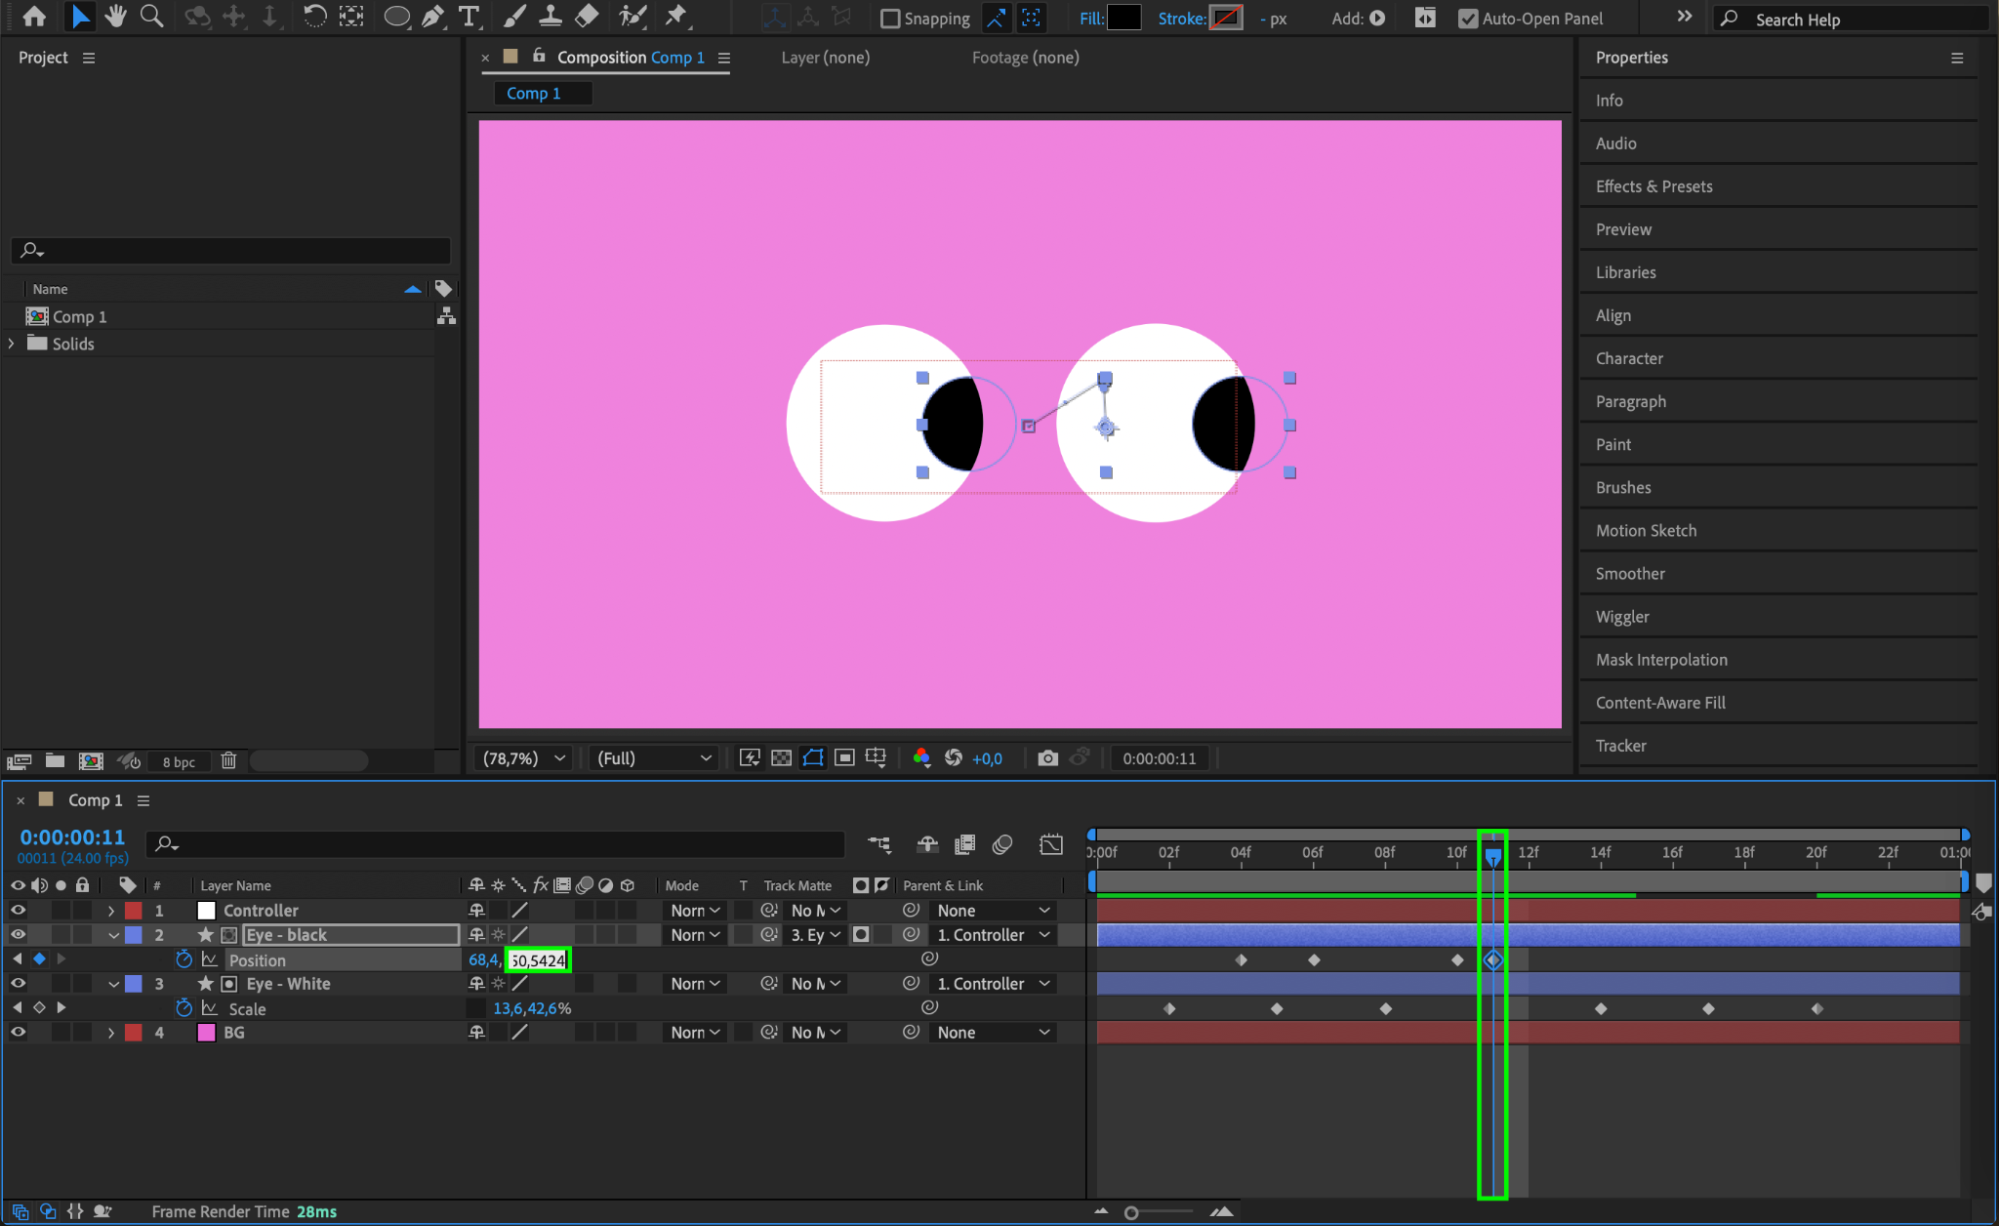
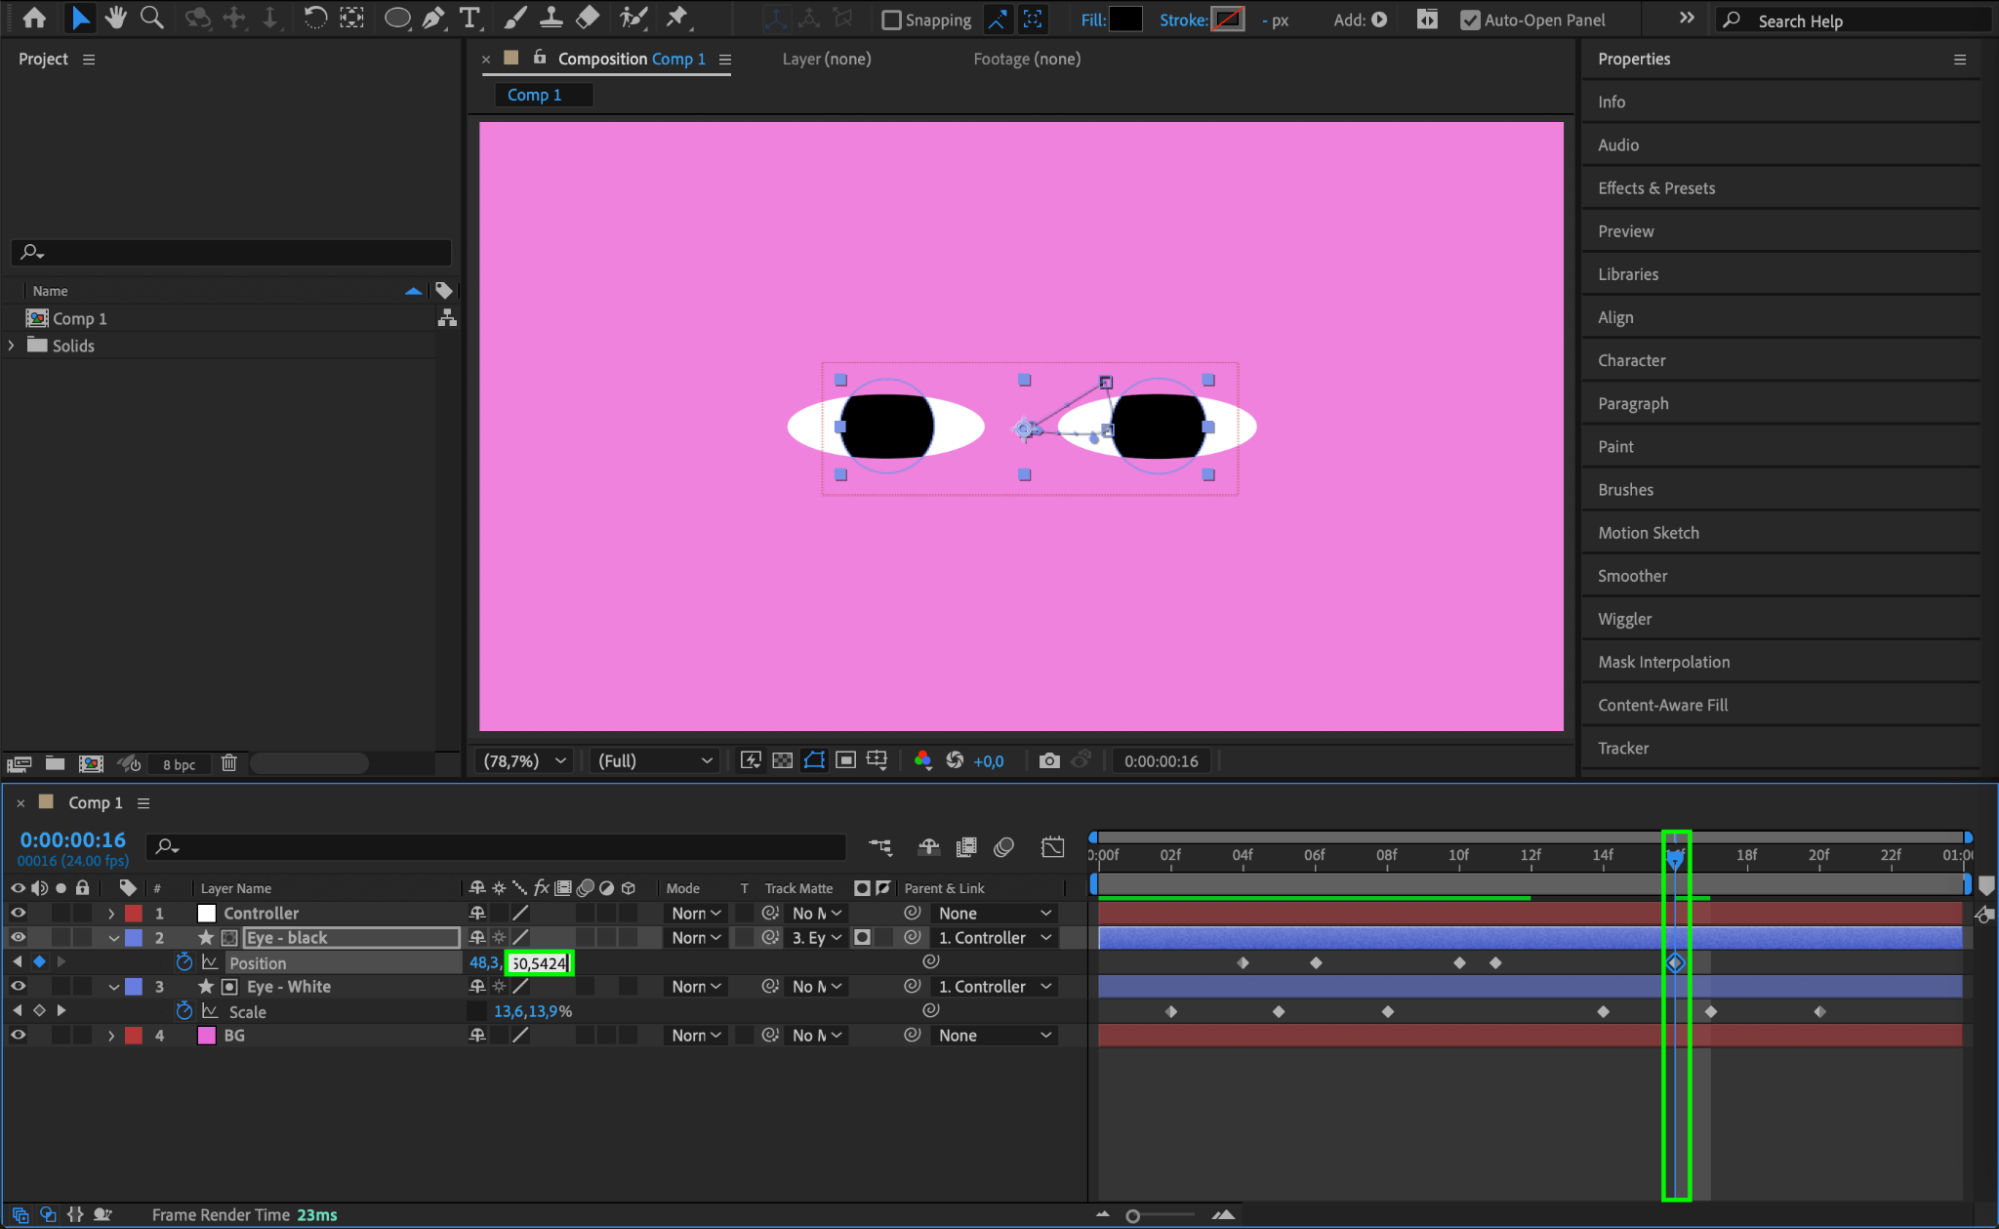
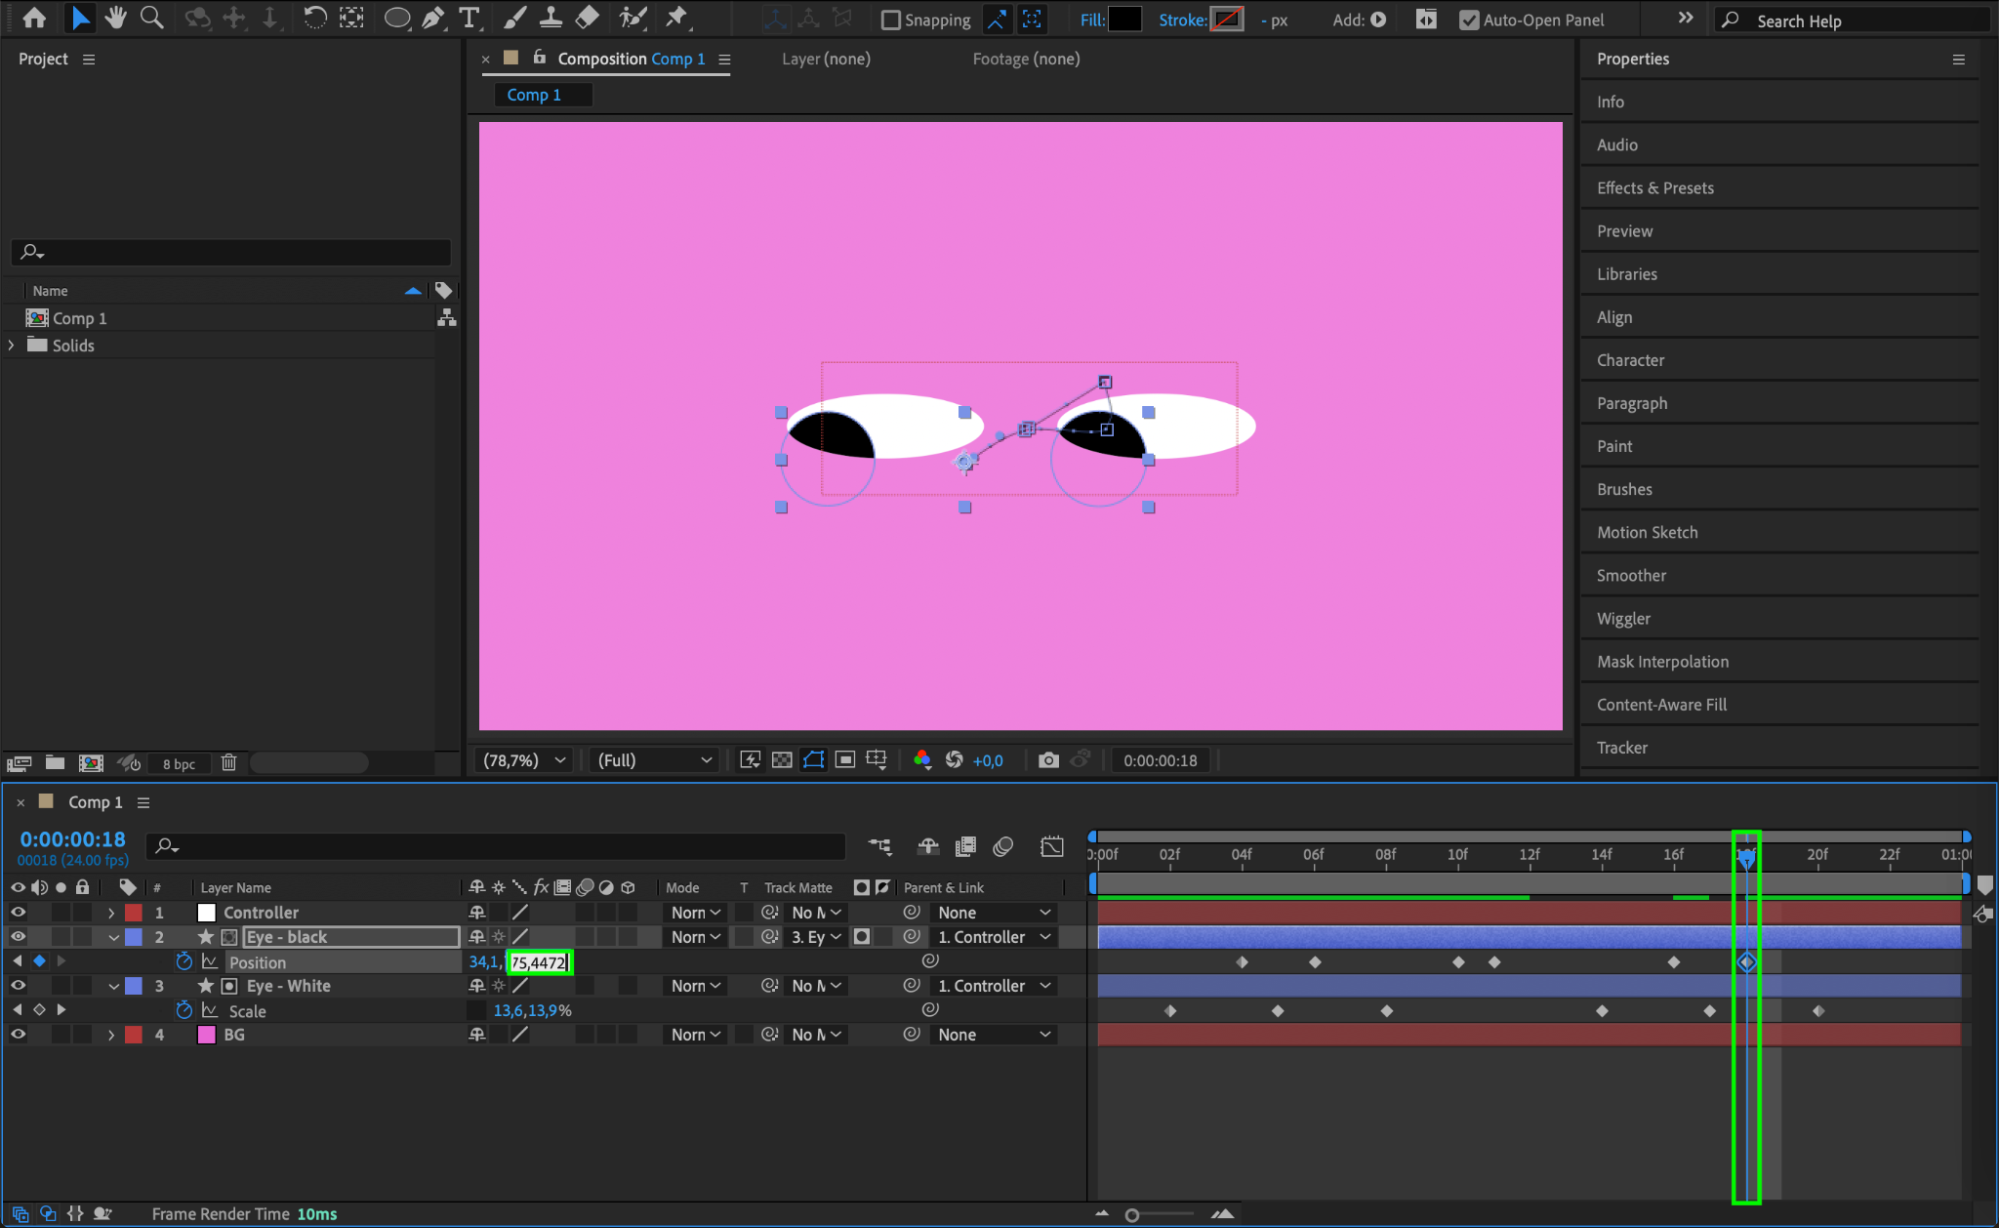

Step 13: Apply Easy Ease to Keyframes
Right-click on the keyframes for both the eyes and pupils, then select Keyframe Assistant > Easy Ease. This will smooth the transitions between the keyframes, making the movement feel more fluid and natural.
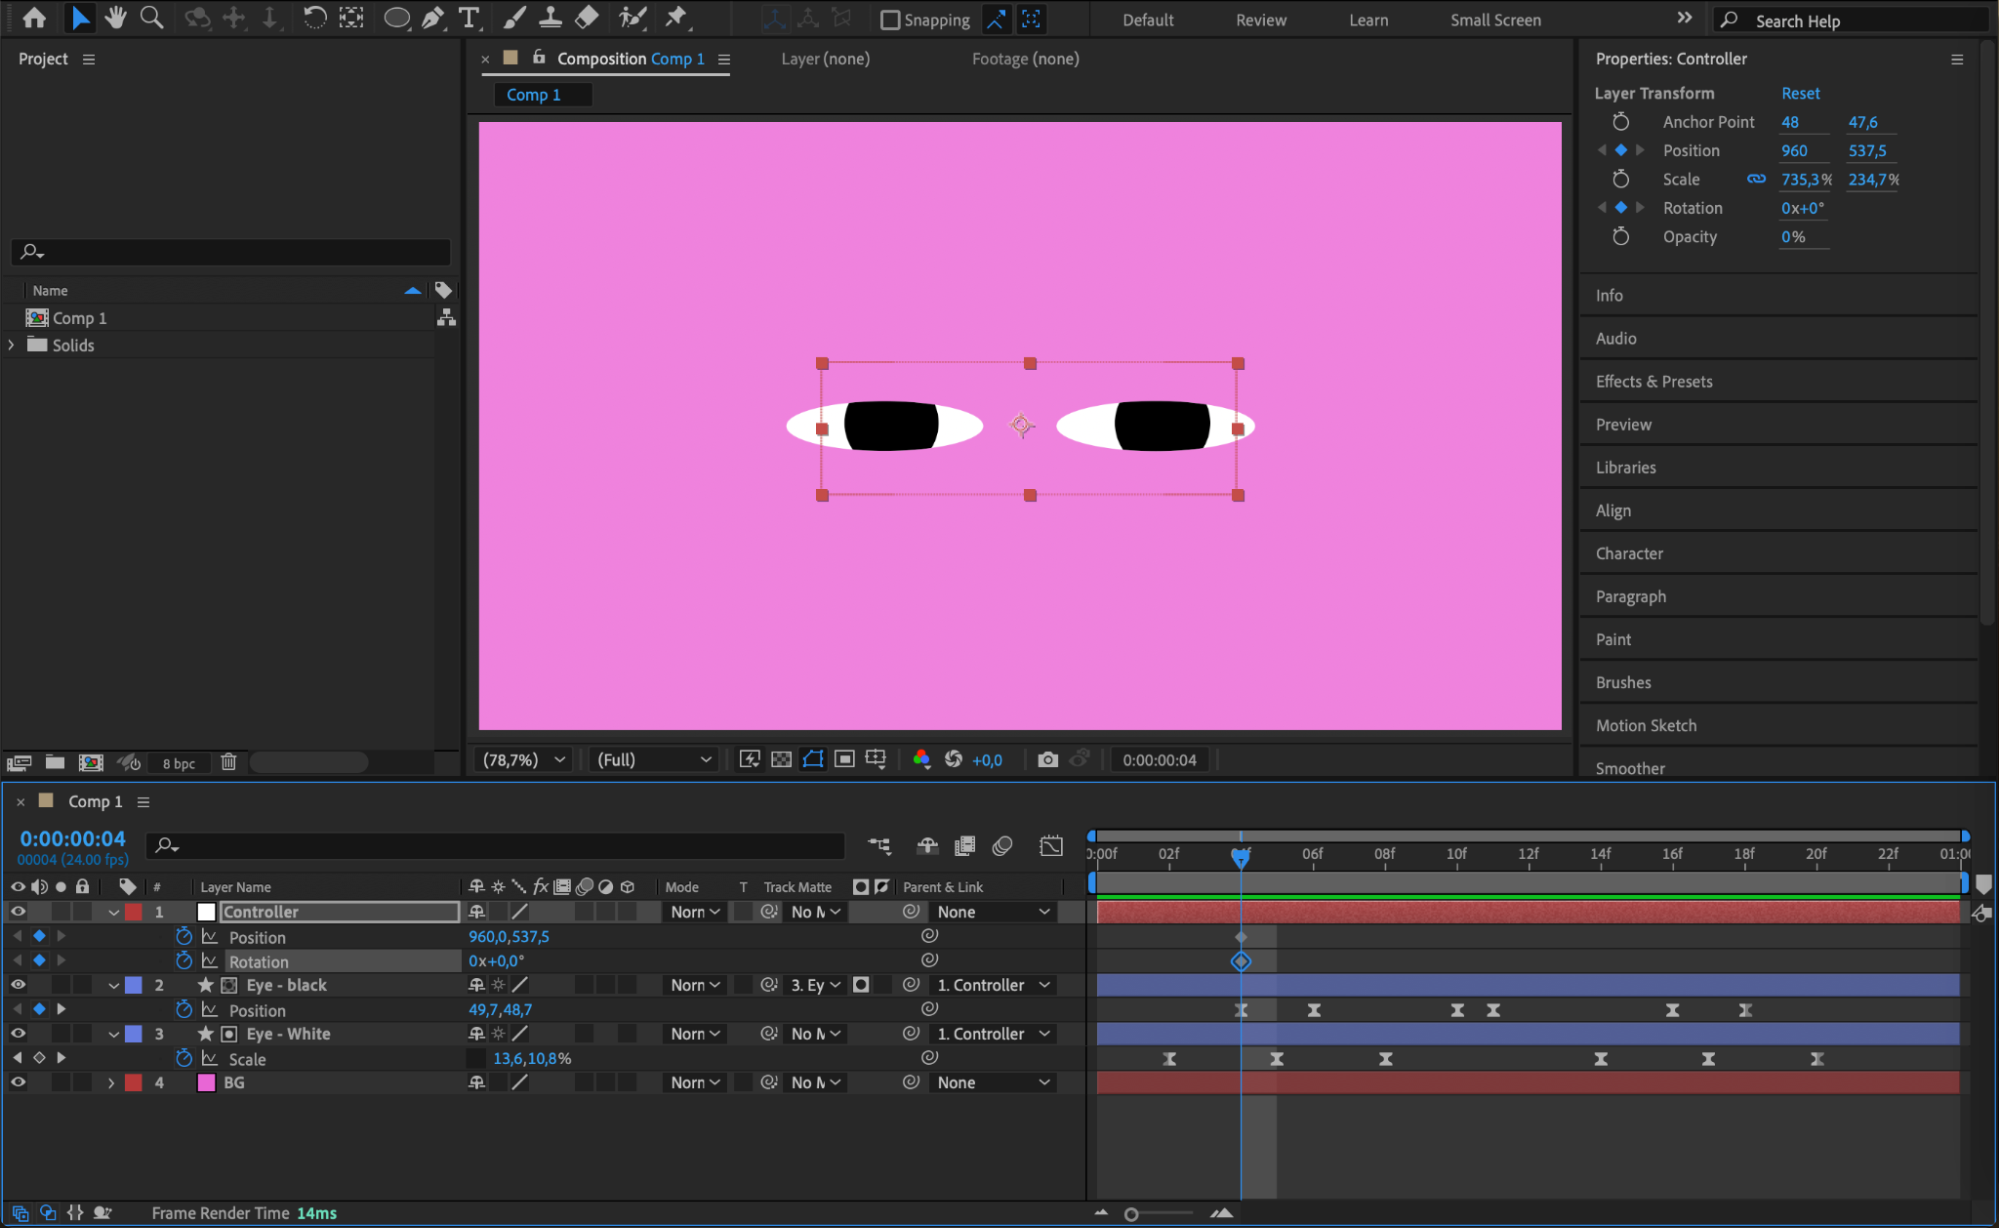 Step 14: Animate the Rotation and Position of the Controller
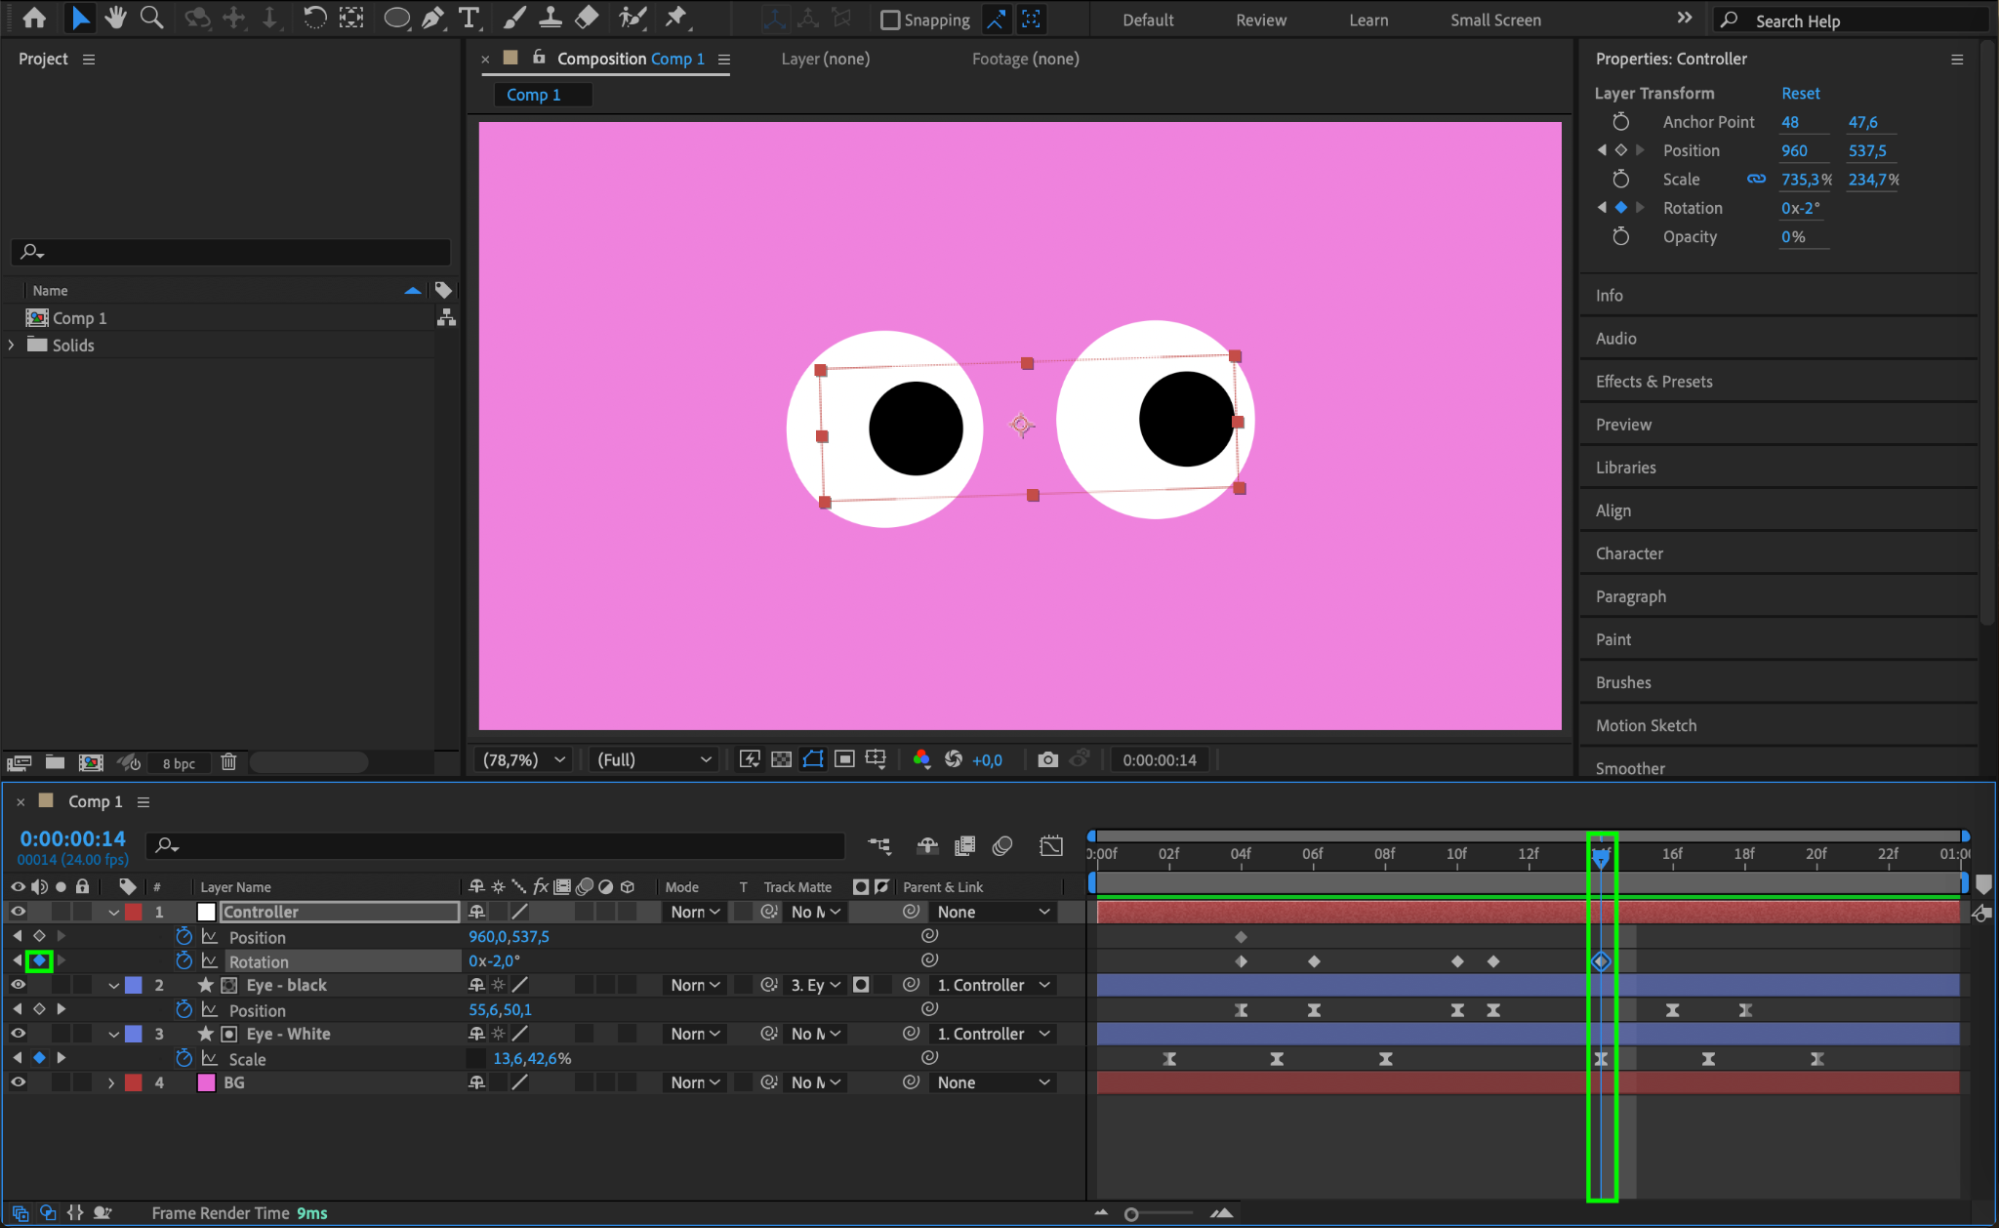
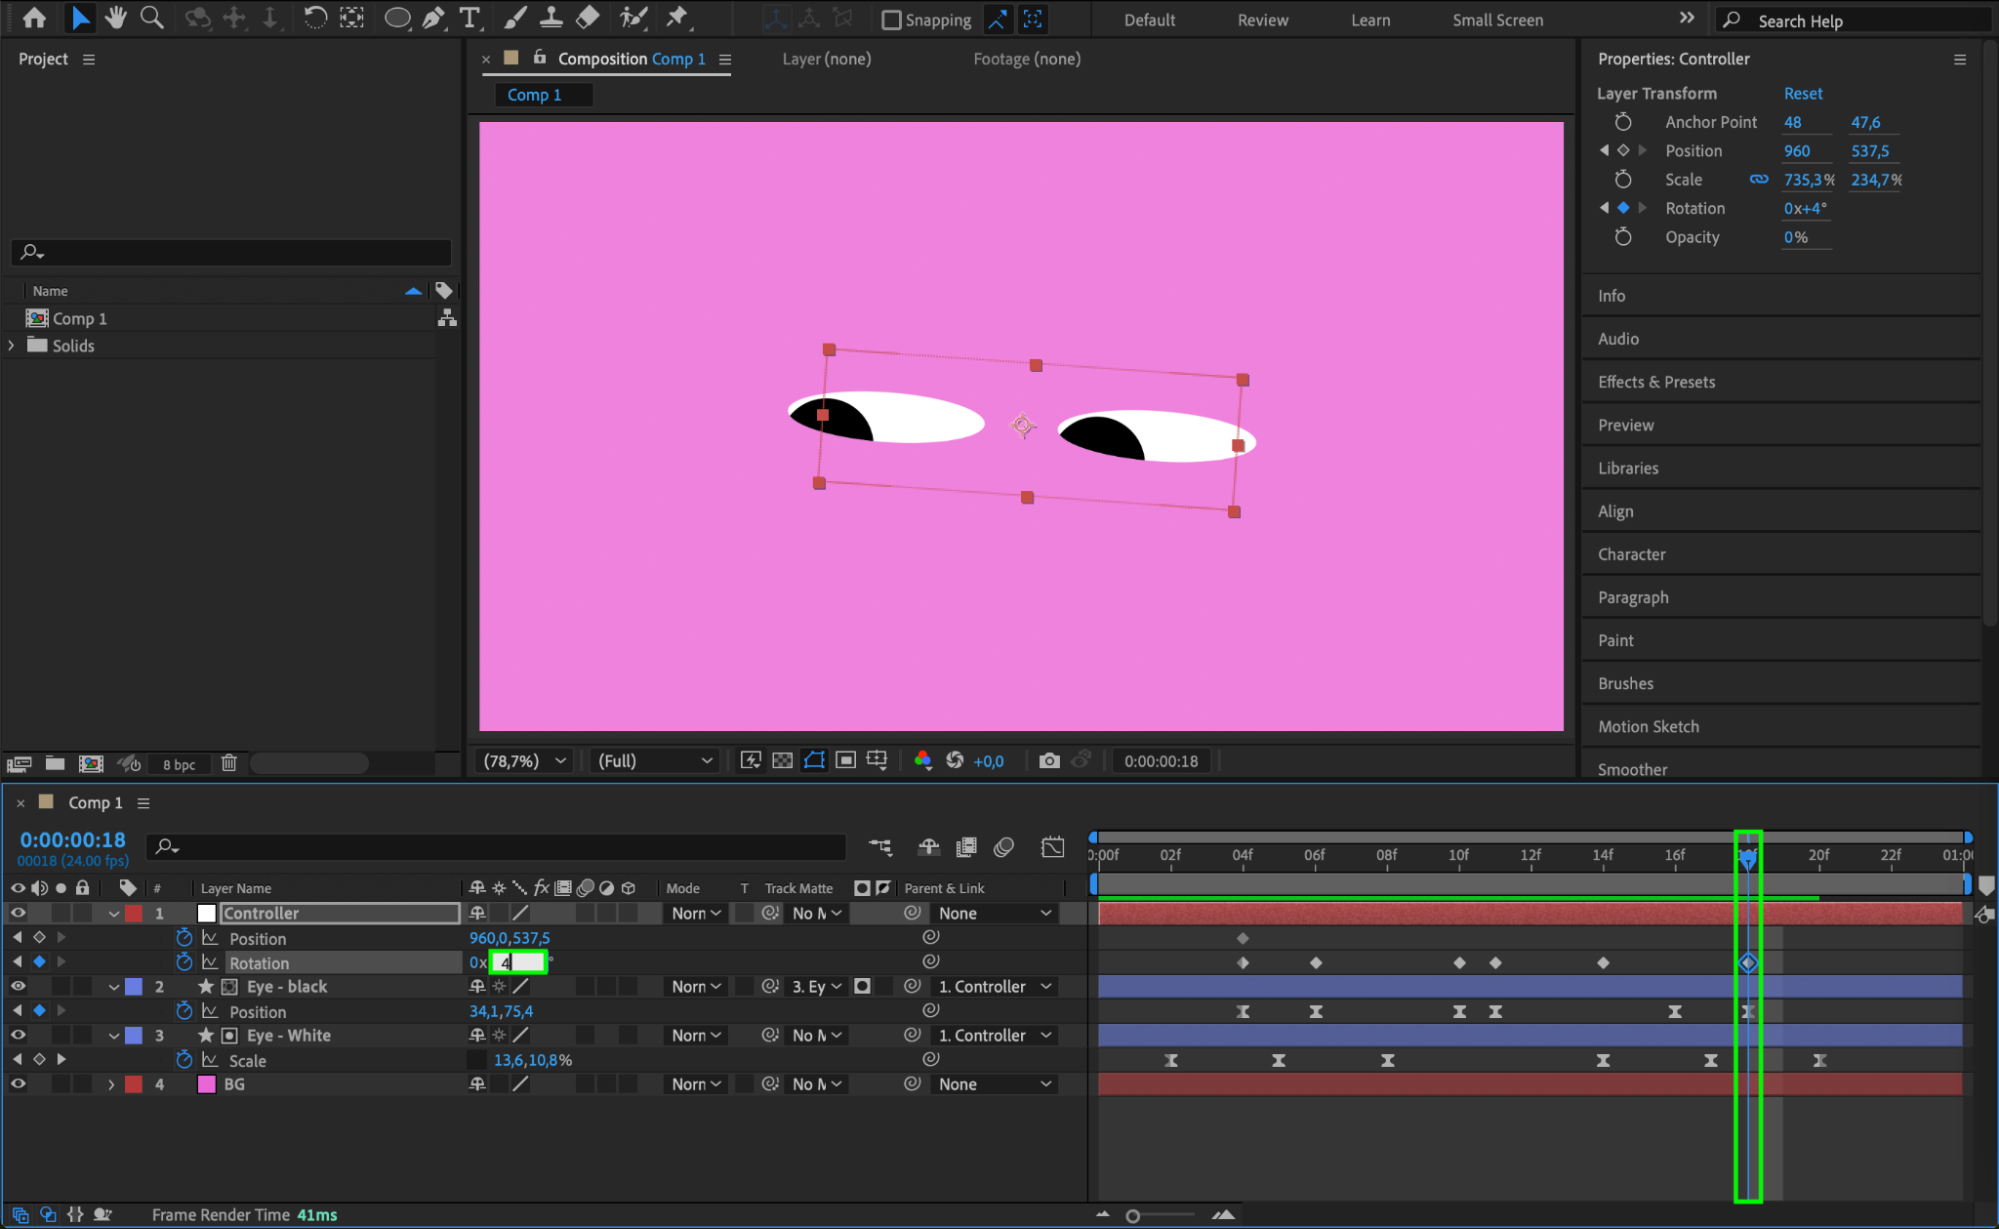
For added realism, animate the Rotation and Position properties of the controller (null object). Subtle movements of the eyes in different directions, combined with slight tilts, will give the eyes a more lifelike appearance as they blink and move.
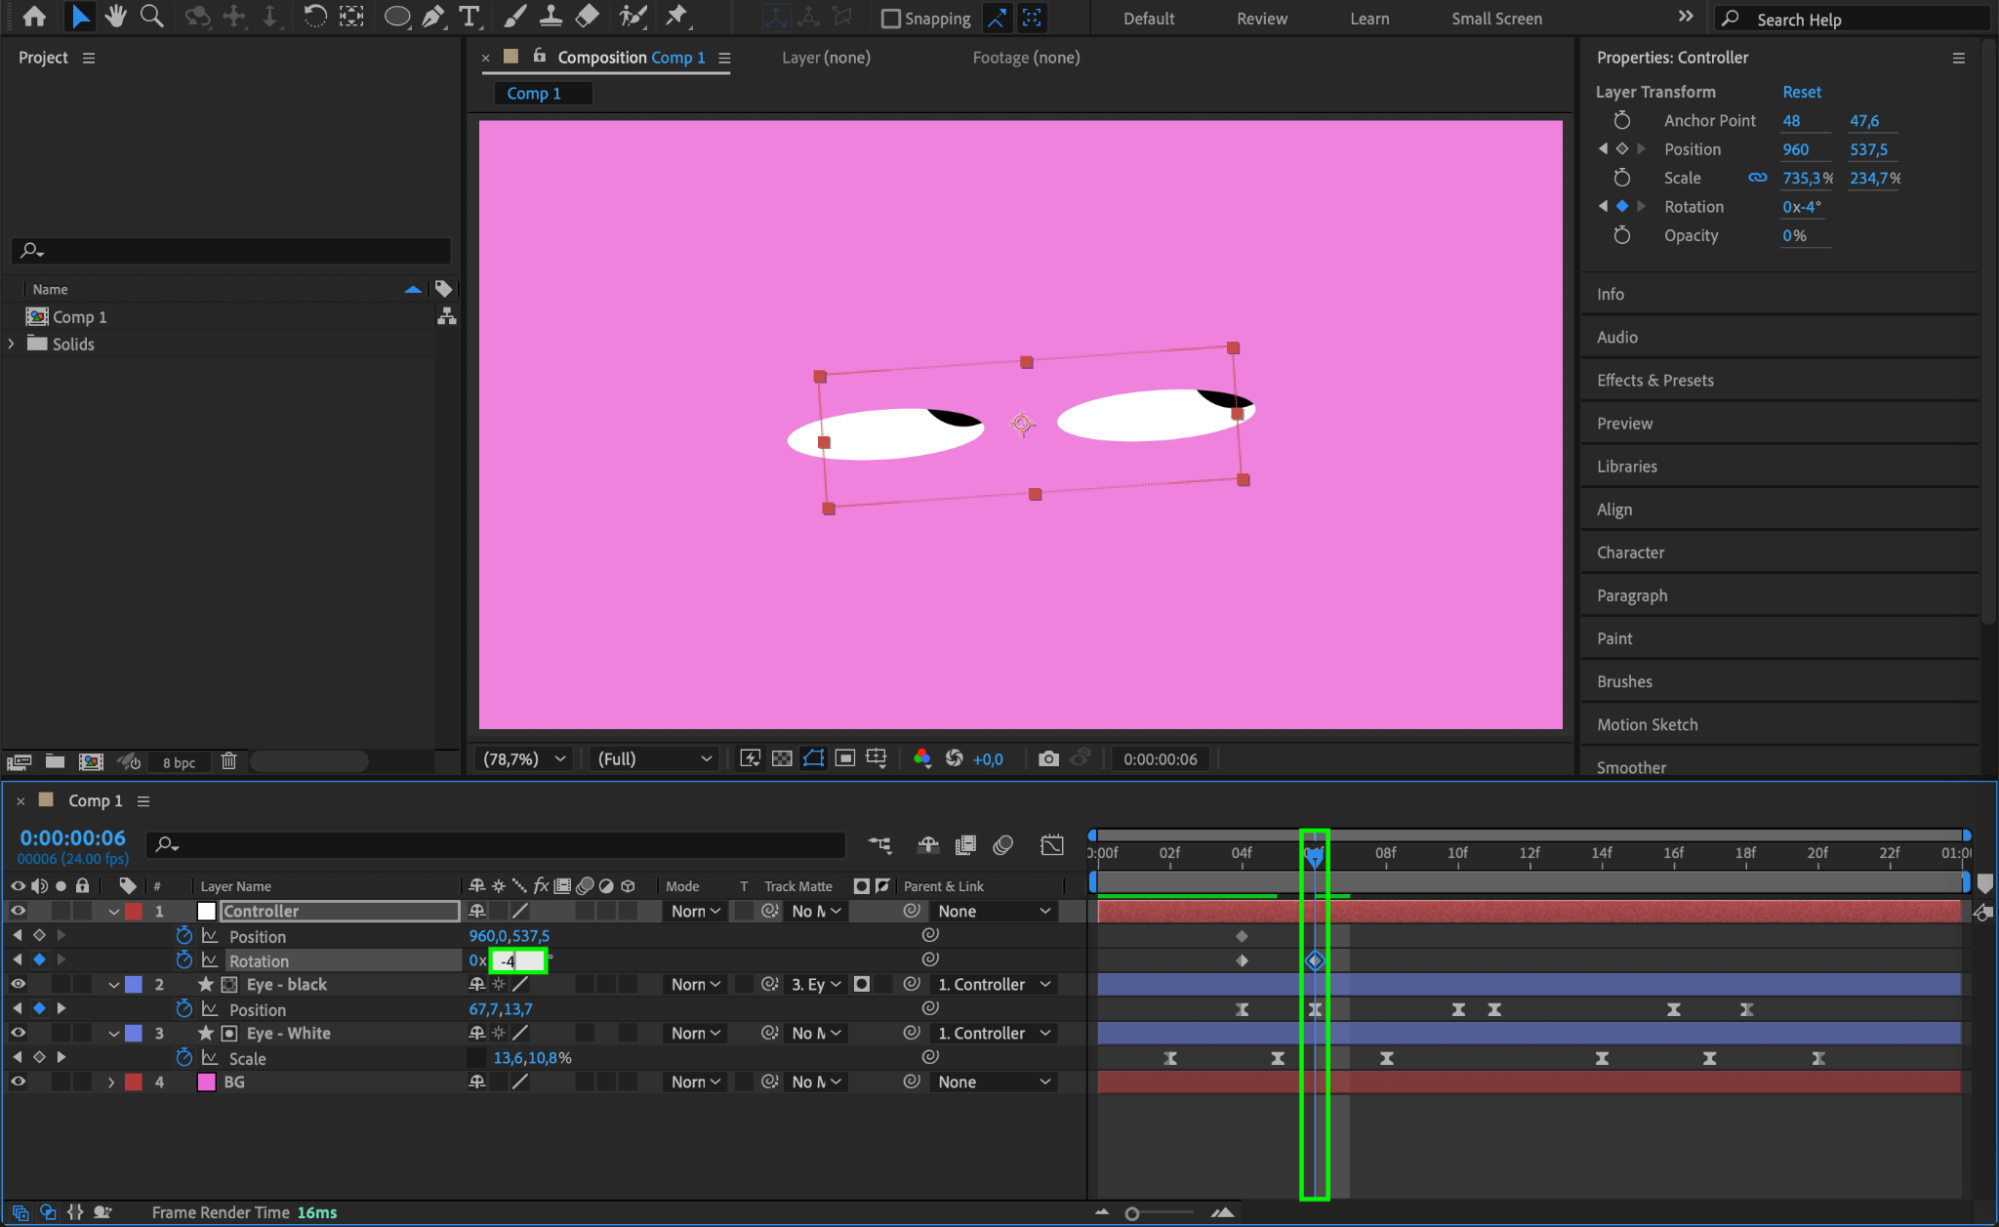
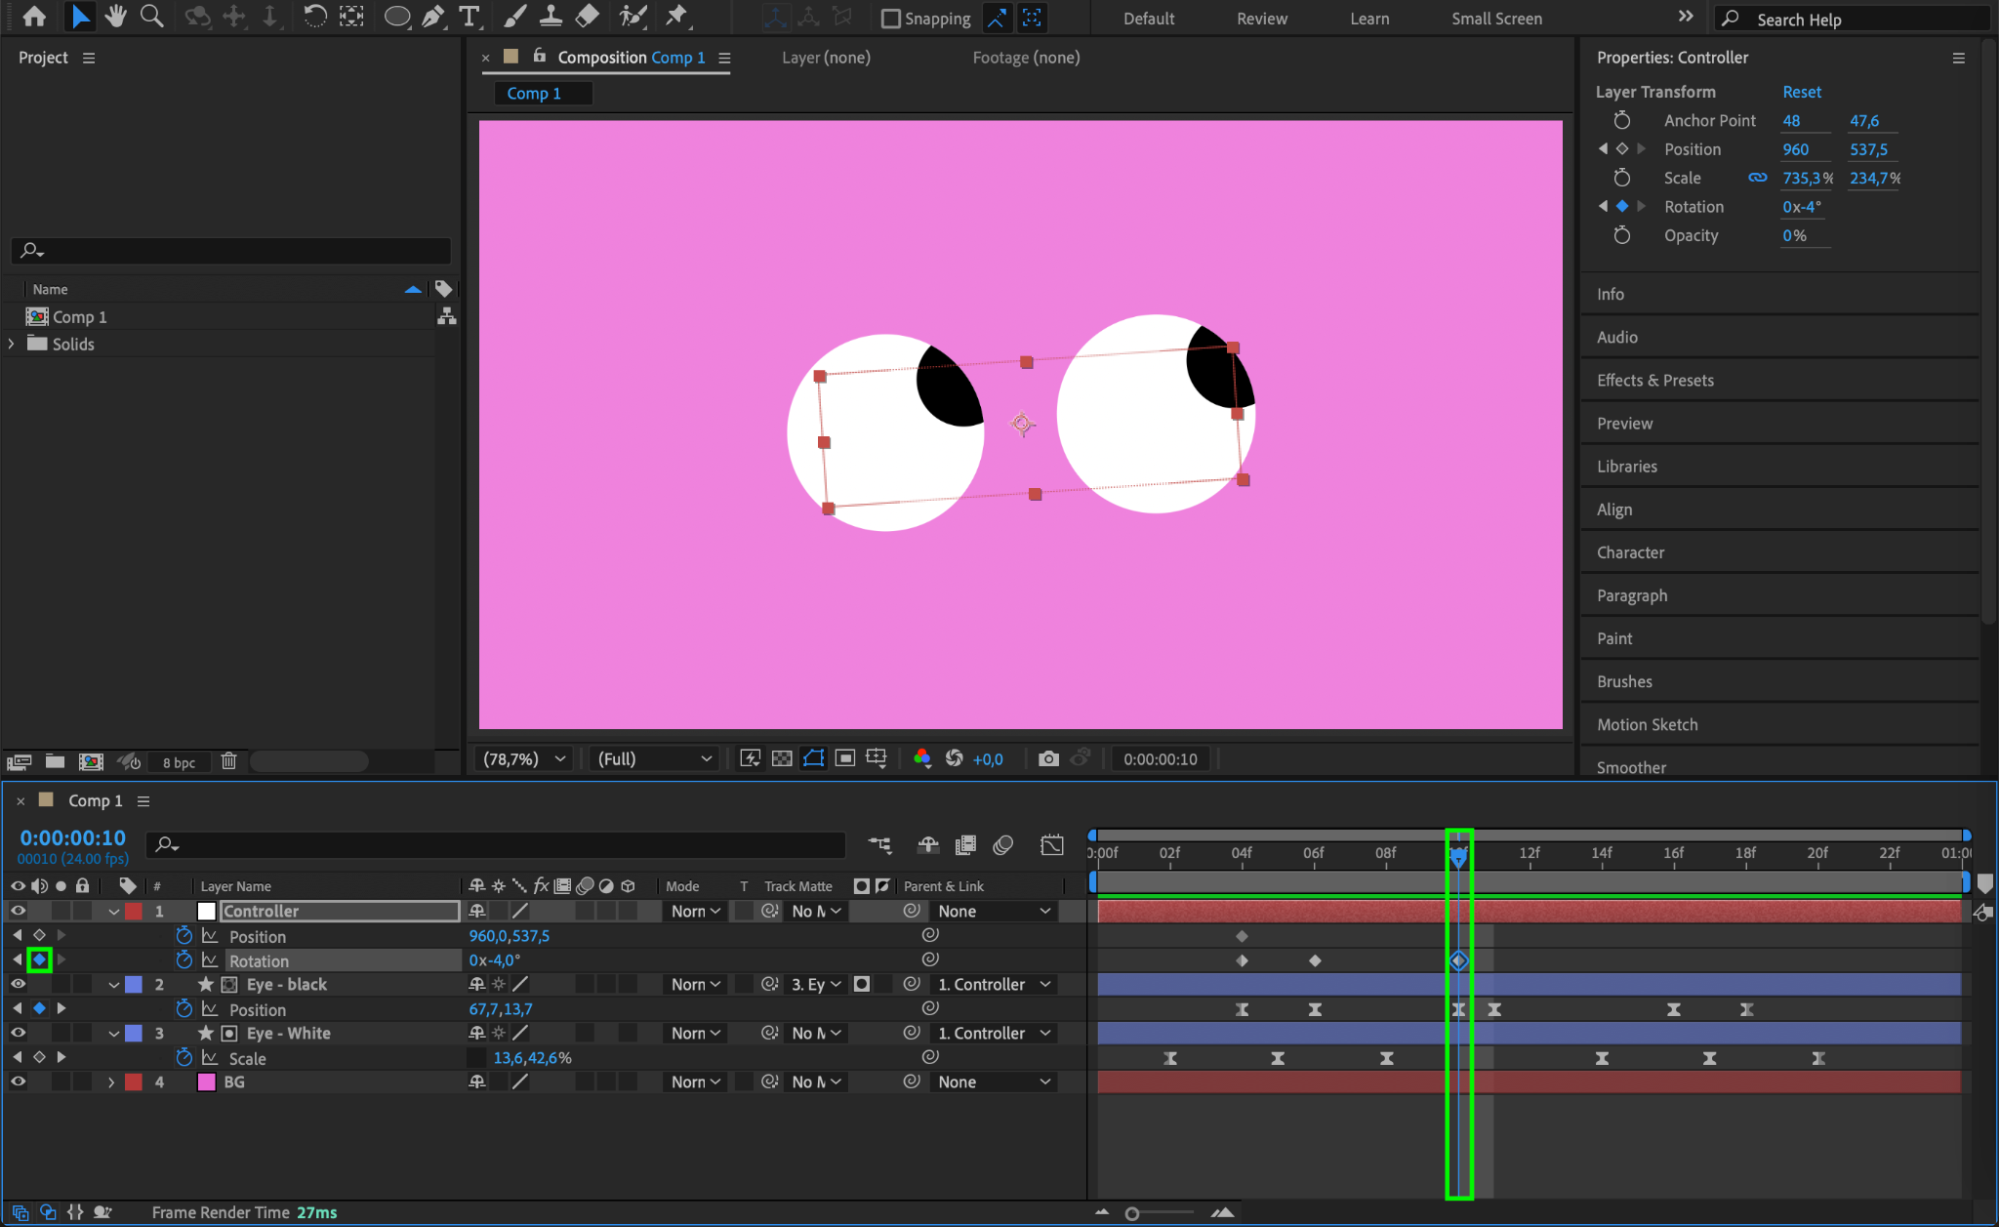
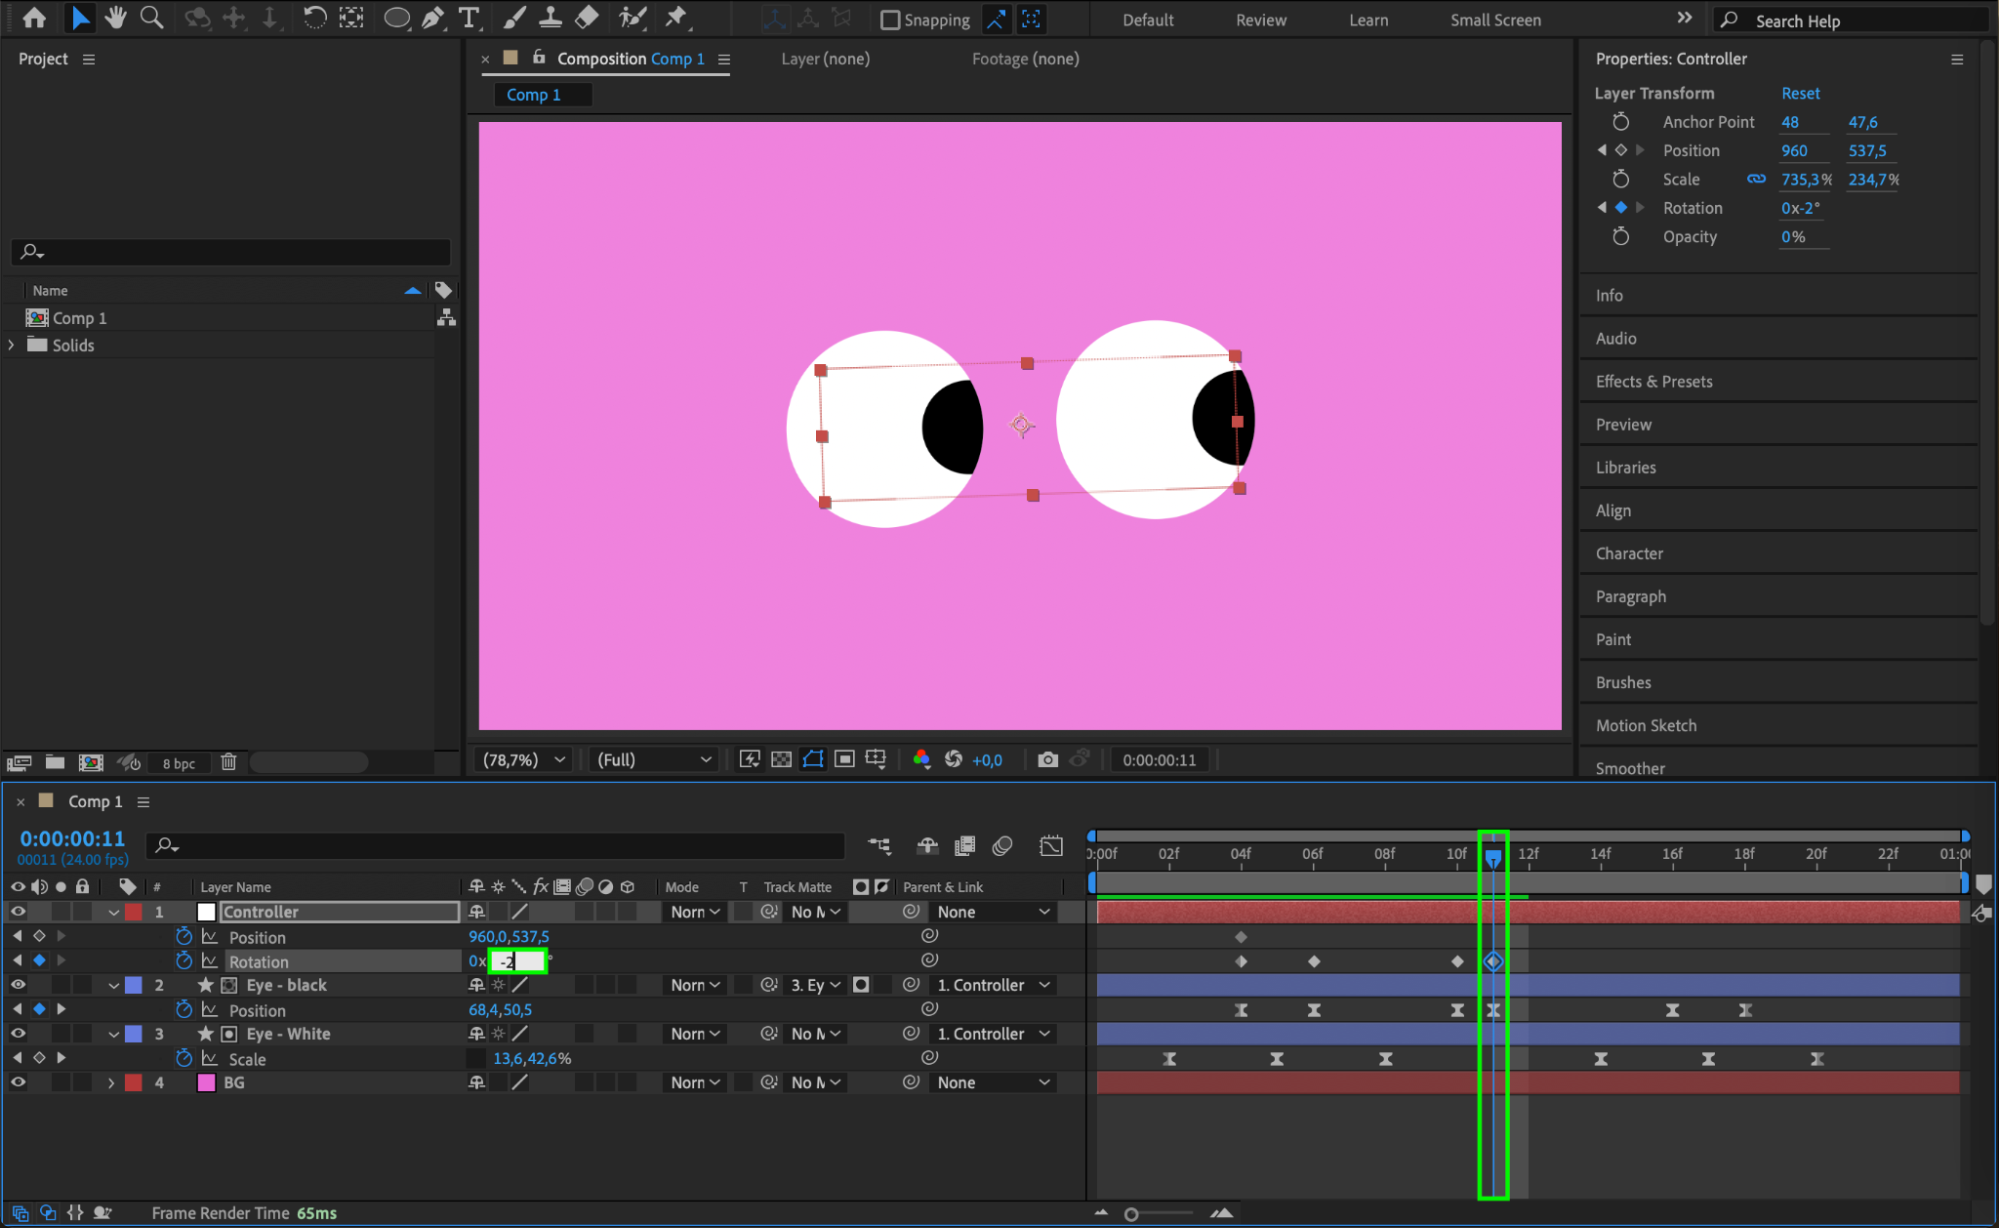

 Step 14: Enable Motion Blur
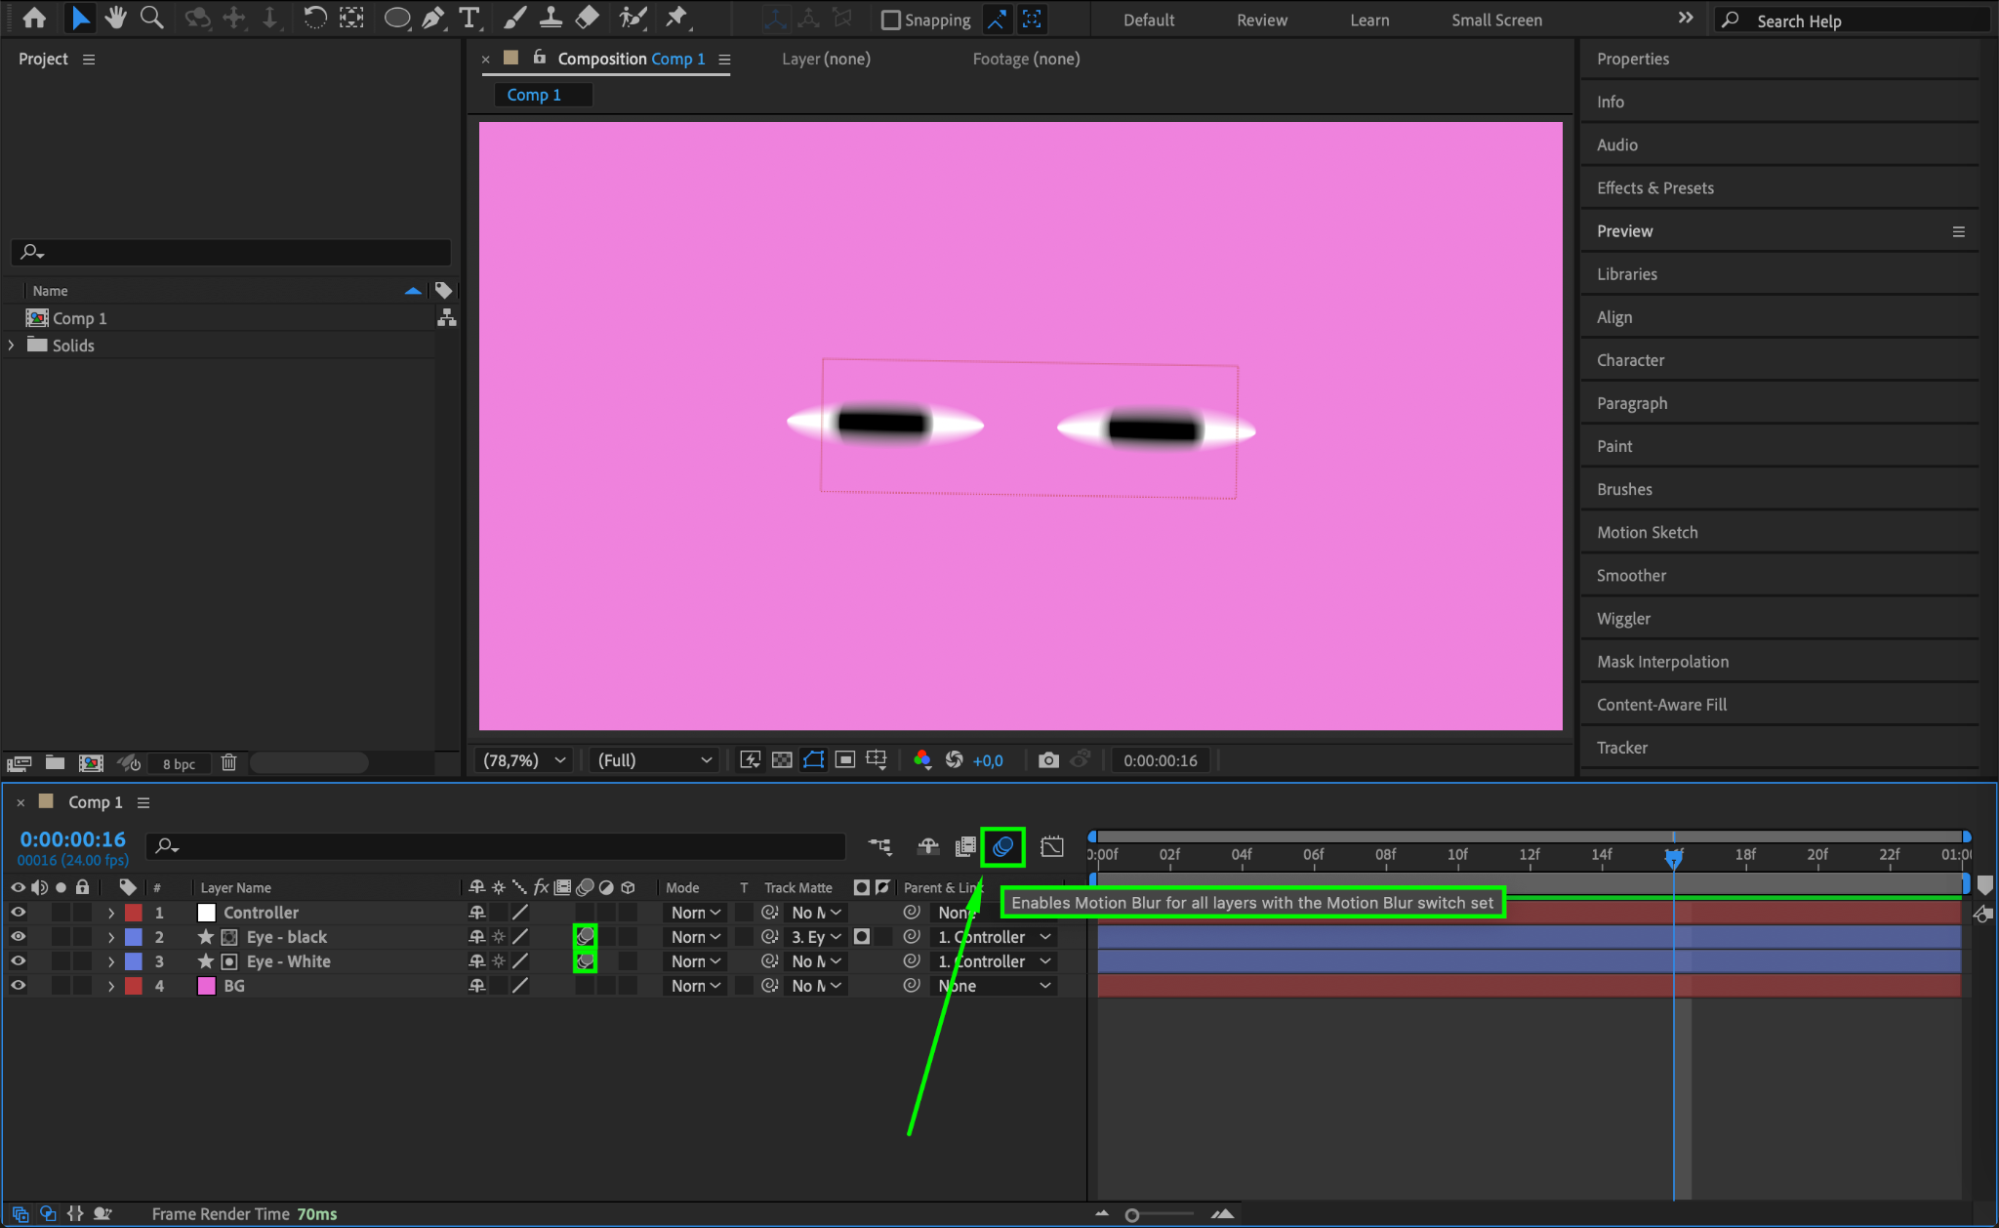
To enhance the realism of your blinking effect, enable Motion Blur for your layers. This will simulate the natural blur that occurs during fast movements, such as blinking. To do this, click the Motion Blur icon (represented by a series of overlapping circles) for each layer involved in the animation. Also, make sure the Motion Blur switch is enabled for the composition by clicking the Motion Blur icon at the top of the timeline panel. This will apply a realistic blur effect to your animation, making the blinking look smoother and more natural.
 Step 15: Preview
Before finalizing your project, preview the blinking animation by pressing the spacebar. Make any necessary tweaks to timing or movement if needed.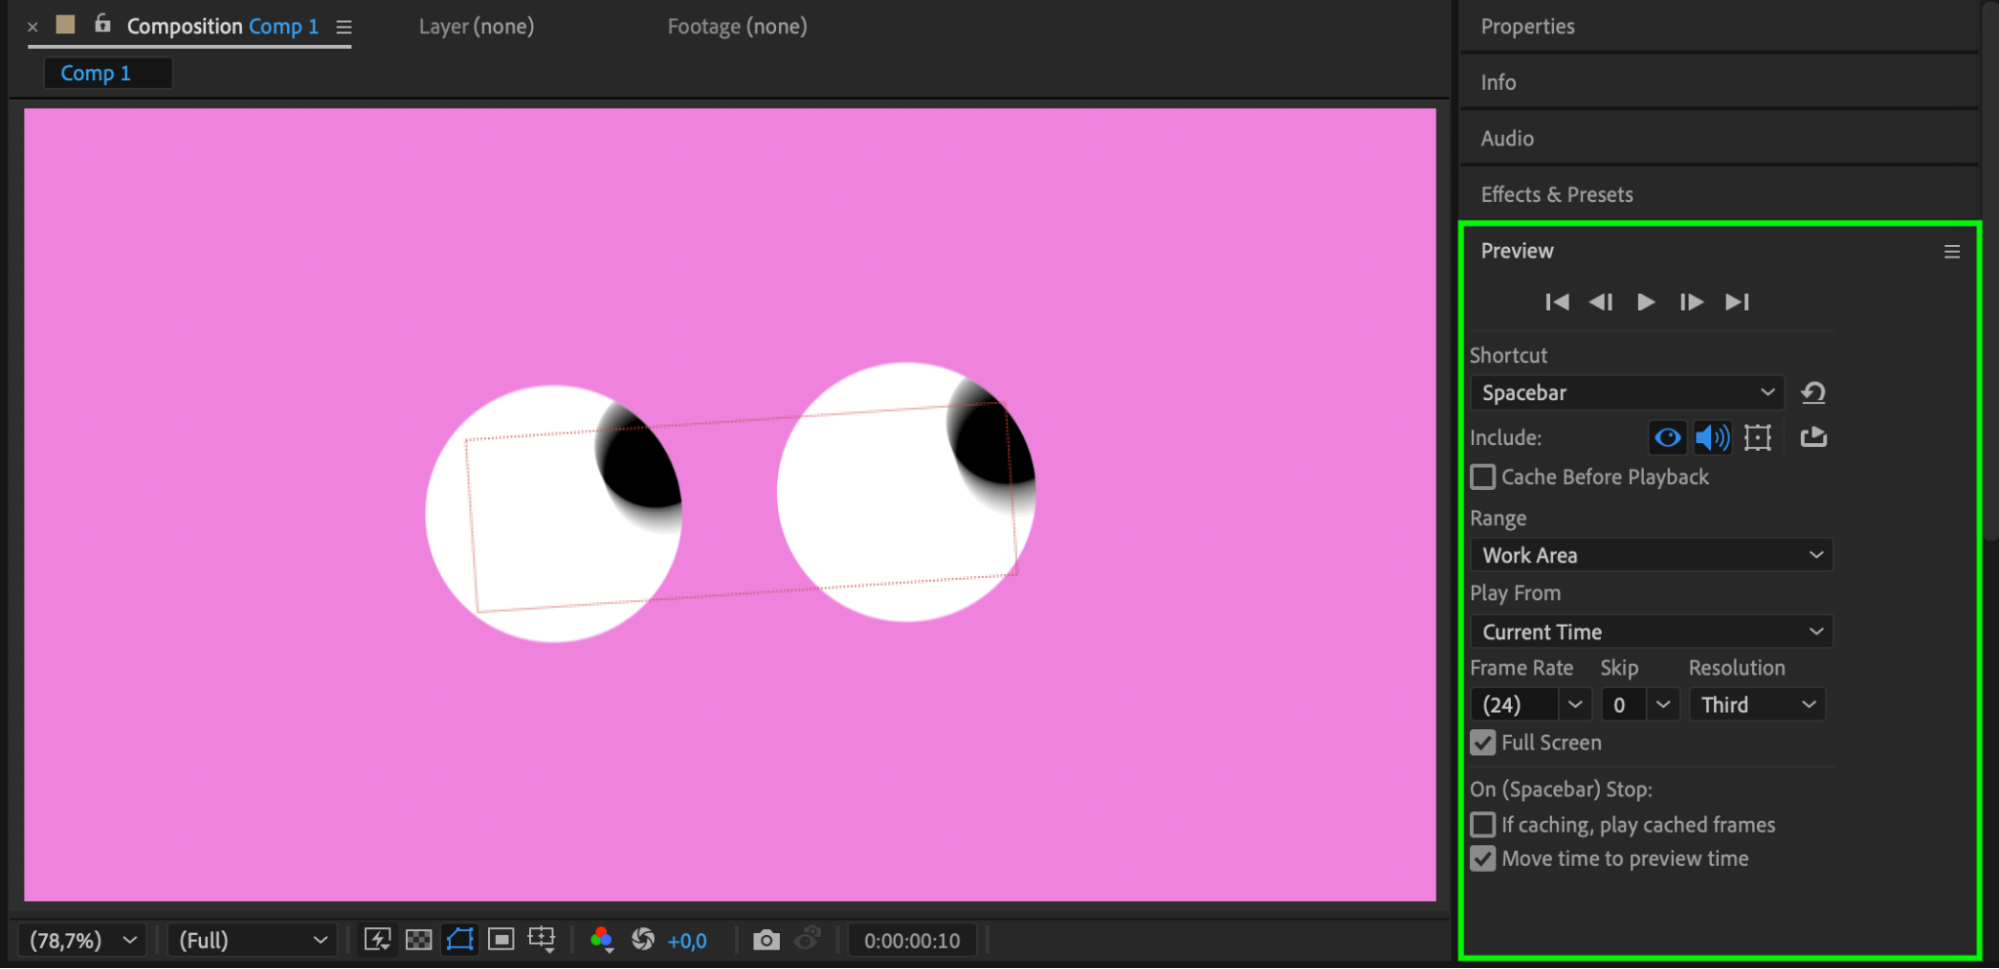 Conclusion
In conclusion, creating a blinking eye effect in After Effects is an excellent way to add life to your animations. By following these steps and using keyframes, null objects, and careful layering, you can bring static characters to life with realistic blinks and eye movements. Keep experimenting with these techniques to refine your skills and explore other creative possibilities. Happy animating!2


