Creating a Smooth Fade-Out Effect in After Effects
Introduction
Creating a fade-out effect in After Effects is a straightforward process that can give your videos and animations a polished and professional ending. This popular transition gradually reduces the opacity of an element until it disappears, adding sophistication and elegance to your project. In this tutorial, we’ll guide you through the step-by-step process of creating a stunning fade-out effect in After Effects.
Get 10% off when you subscribe to our newsletter

Step-by-Step Guide: How to Make a Fade-Out Effect in After Effects
Step 1: Import Your Footage
To begin, import your footage or animation into After Effects. You can do this by dragging and dropping the media file into the Project panel or using the File > Import > File menu. 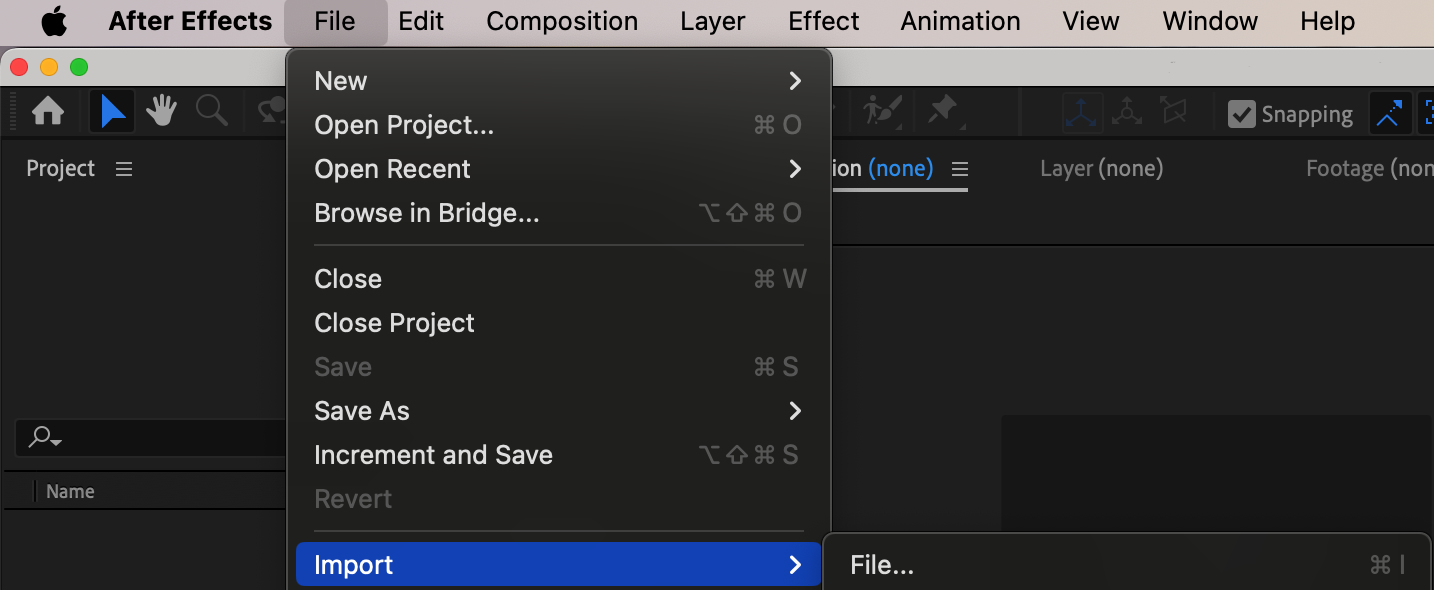 Step 2: Create a New Composition
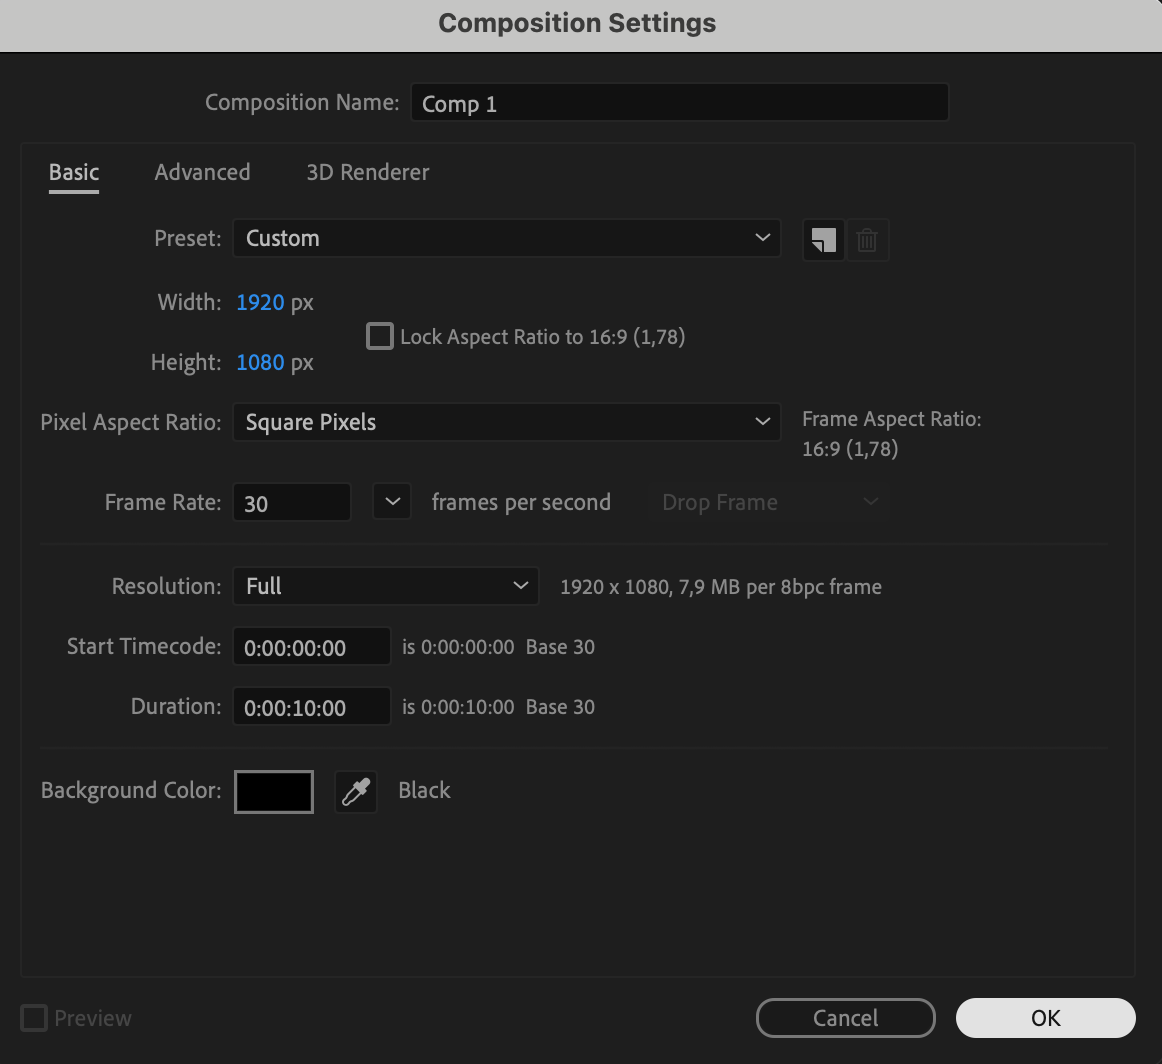
Next, create a new composition by clicking the “Create a New Composition” button in the Project panel. Set the desired settings, such as resolution, frame rate, and duration, and click “OK.” Make sure the composition settings match the requirements of your project.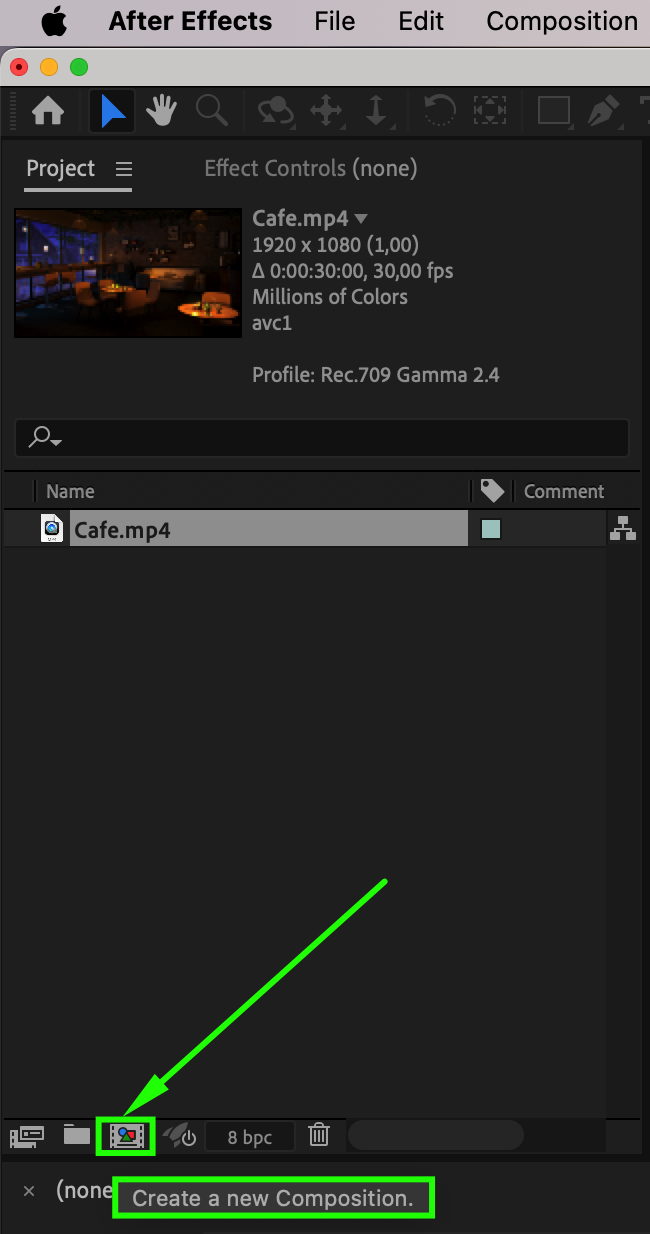
 Step 3: Add Media to the Timeline
Once you have your composition set up, add your media to the timeline by dragging and dropping it from the Project panel to the Timeline panel. This will create a new layer for your media in the composition.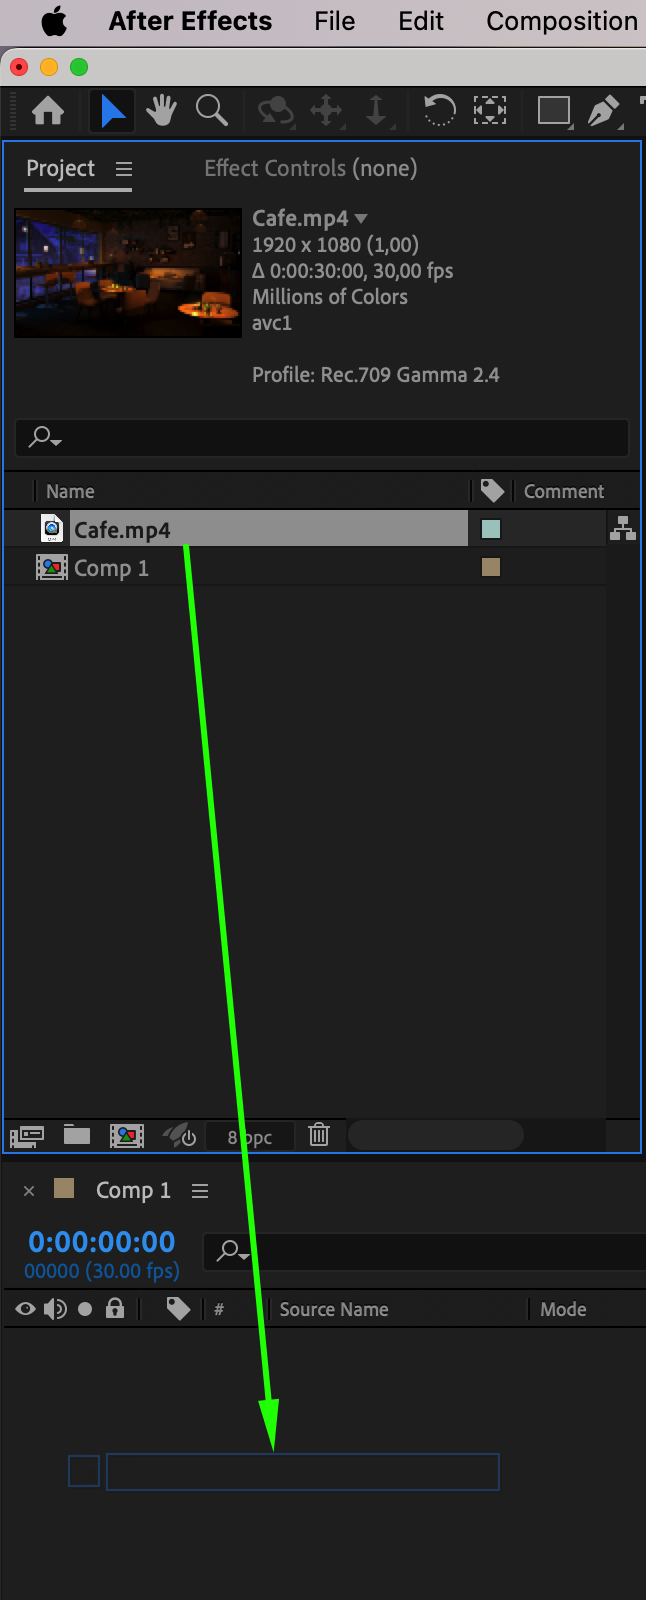 Step 4: Reveal Layer Properties
Expand the layer properties by clicking on the small triangle next to your media layer. This will reveal additional properties such as Transform, where you can adjust various attributes of your layer. Find the Opacity property under the Transform section of your layer. 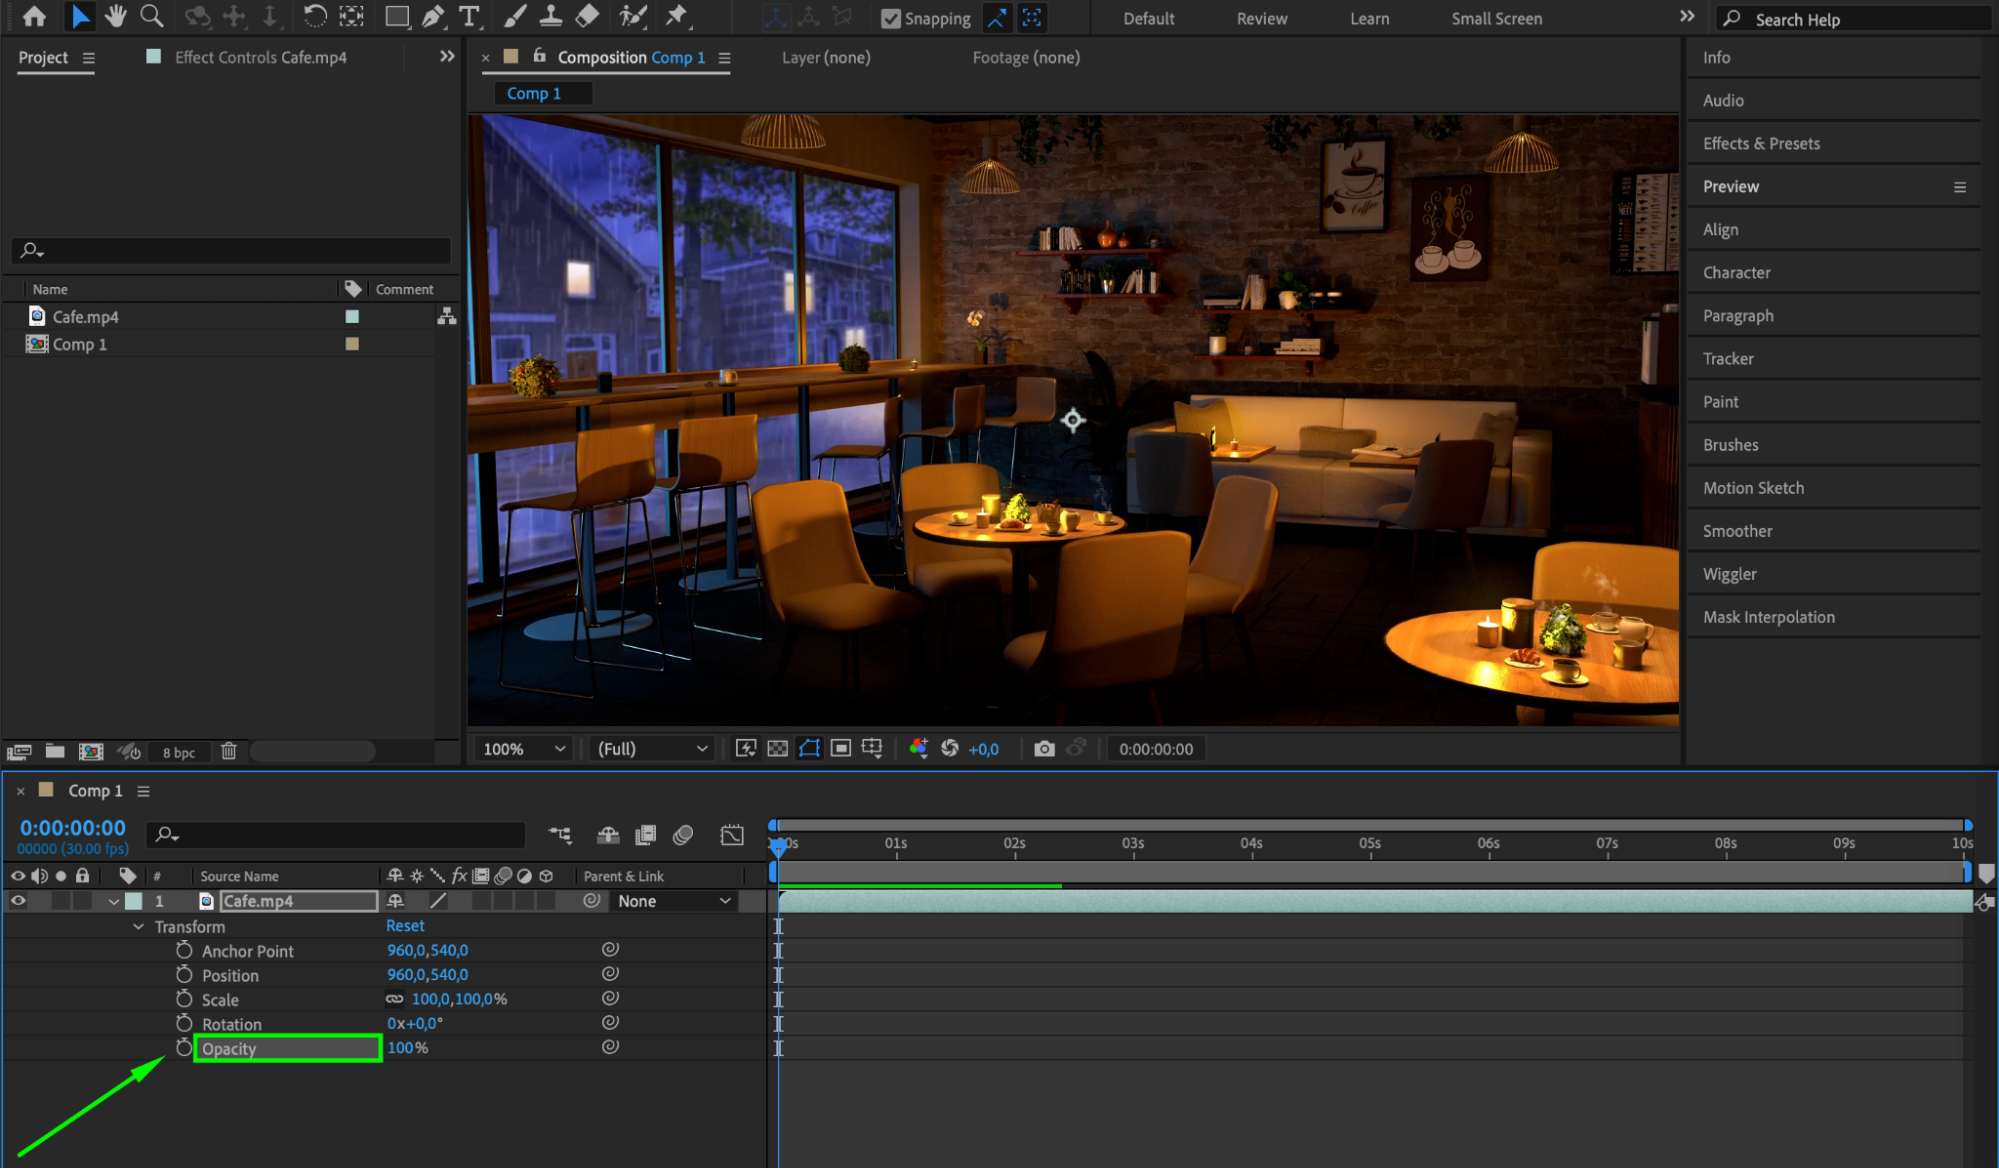 Step 5: Create the Fade-Out Keyframe
Move the Current Time Indicator (CTI) to the point in the timeline where you want the fade-out effect to begin. Set the initial opacity to 100% to ensure your media is fully visible at this point. Click the stopwatch icon next to the Opacity property to create the first keyframe.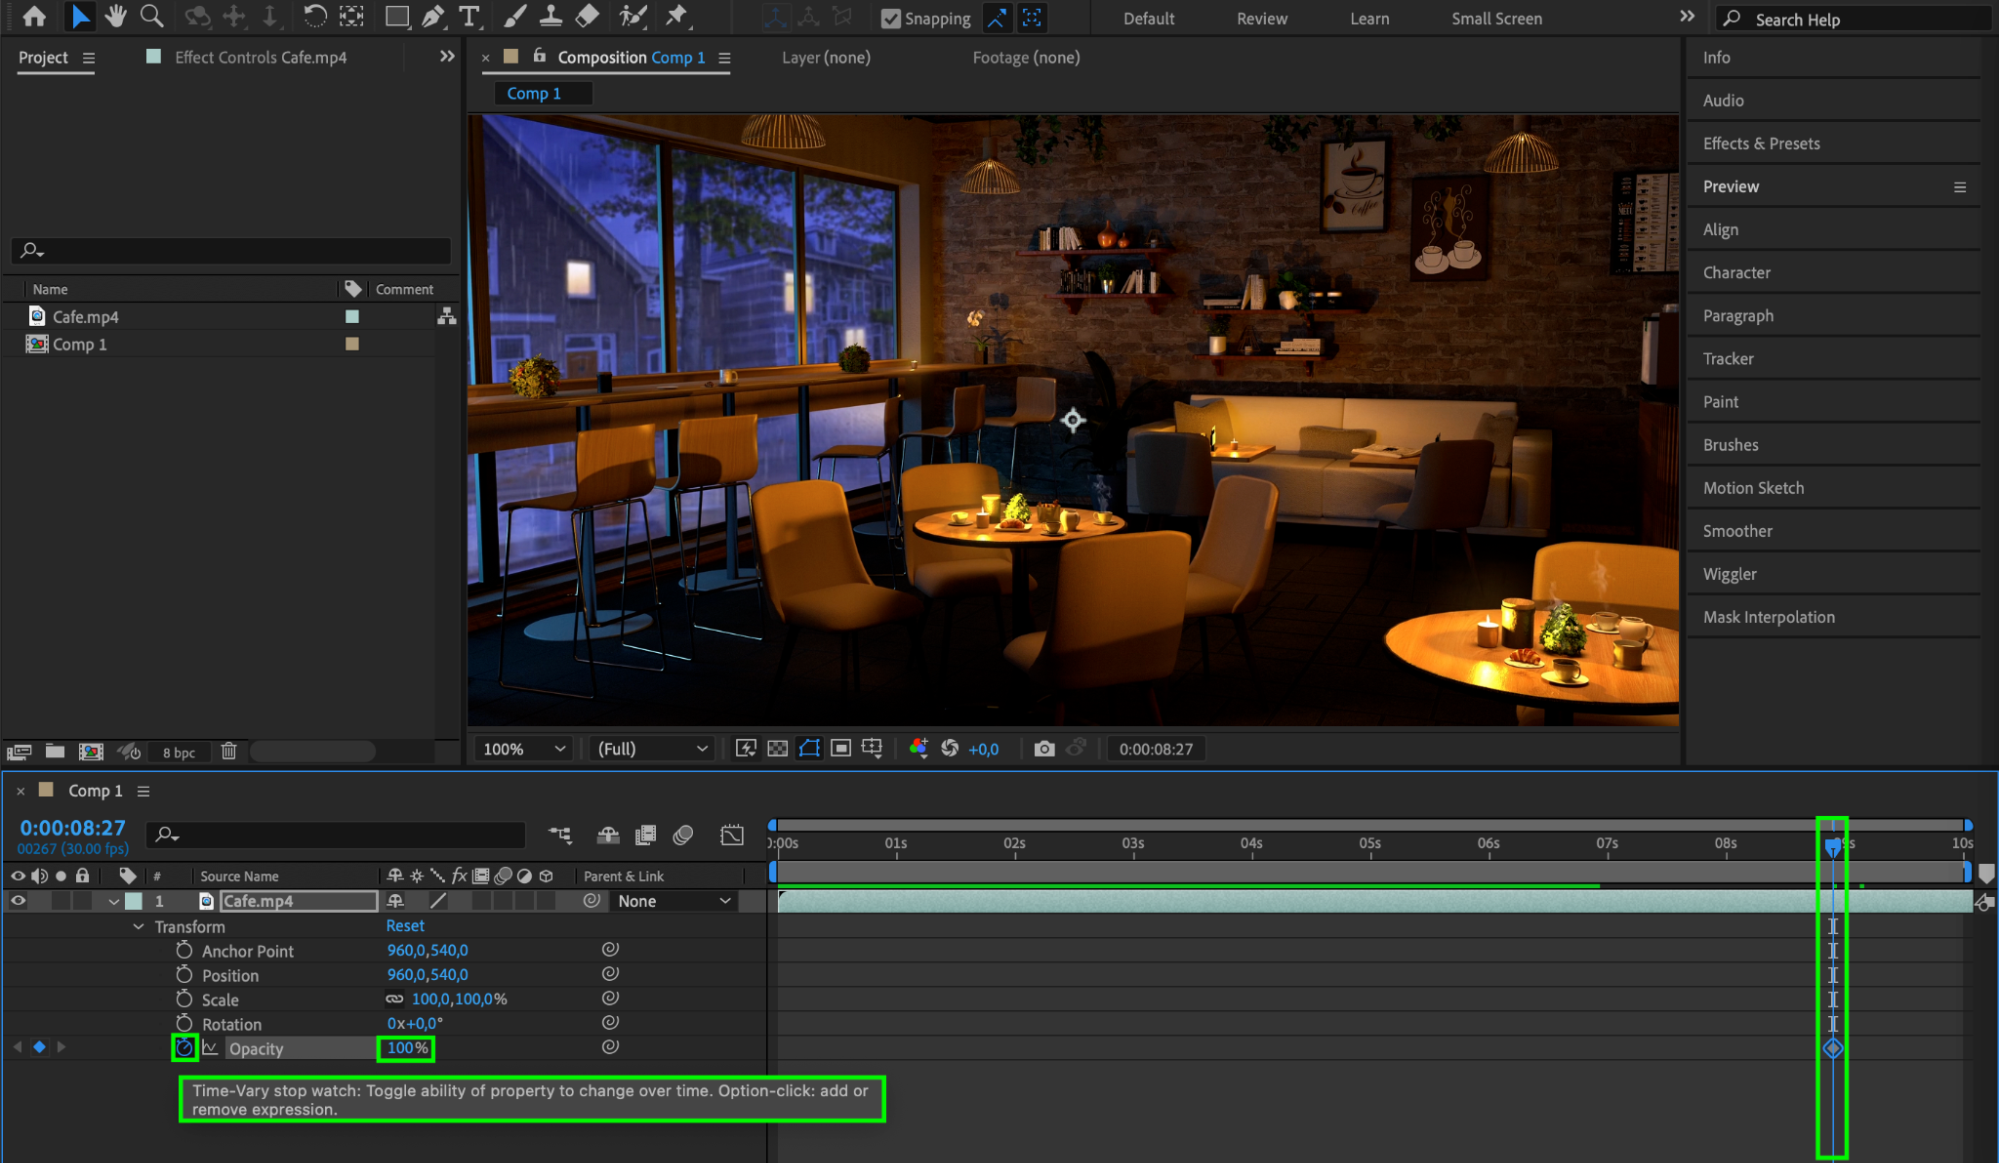 Step 6: Set Final Opacity
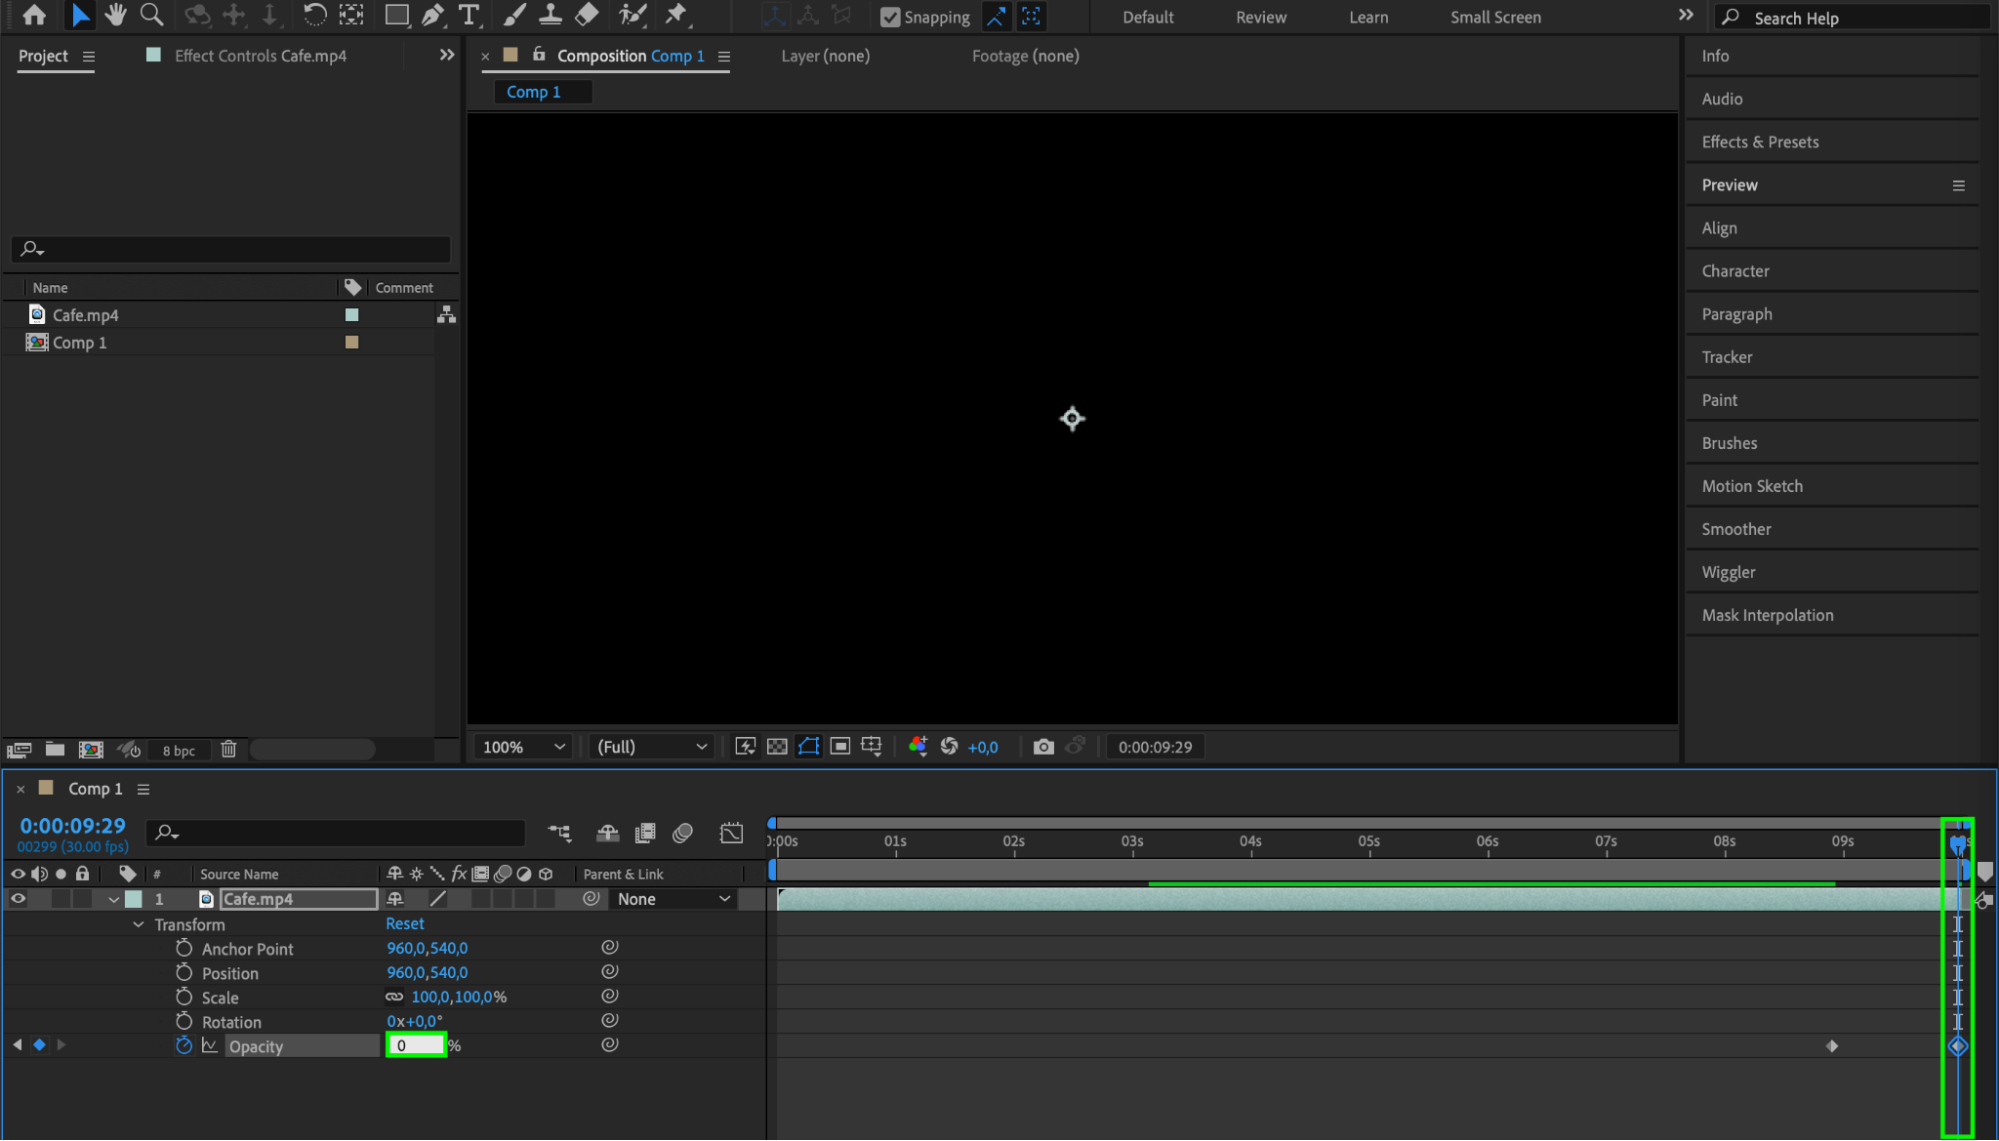
Move the CTI to the end of the timeline or to the desired point where you want the fade-out effect to be complete. Change the Opacity value to 0%. This will create a new keyframe, and After Effects will automatically interpolate the opacity between the two keyframes, creating a smooth fade-out effect.
 Step 7: Use Easy Ease for Smooth Transition
To make the transition smoother, select both keyframes (click and drag to select) and right-click. Go to Keyframe Assistant > Easy Ease. This will make the fade-out effect more natural and less abrupt.

 Step 8: Preview Your Composition
Preview your composition by pressing the spacebar. This will play the timeline and allow you to see the fade-out effect in action. If necessary, make adjustments to the timing or opacity values to achieve the desired result.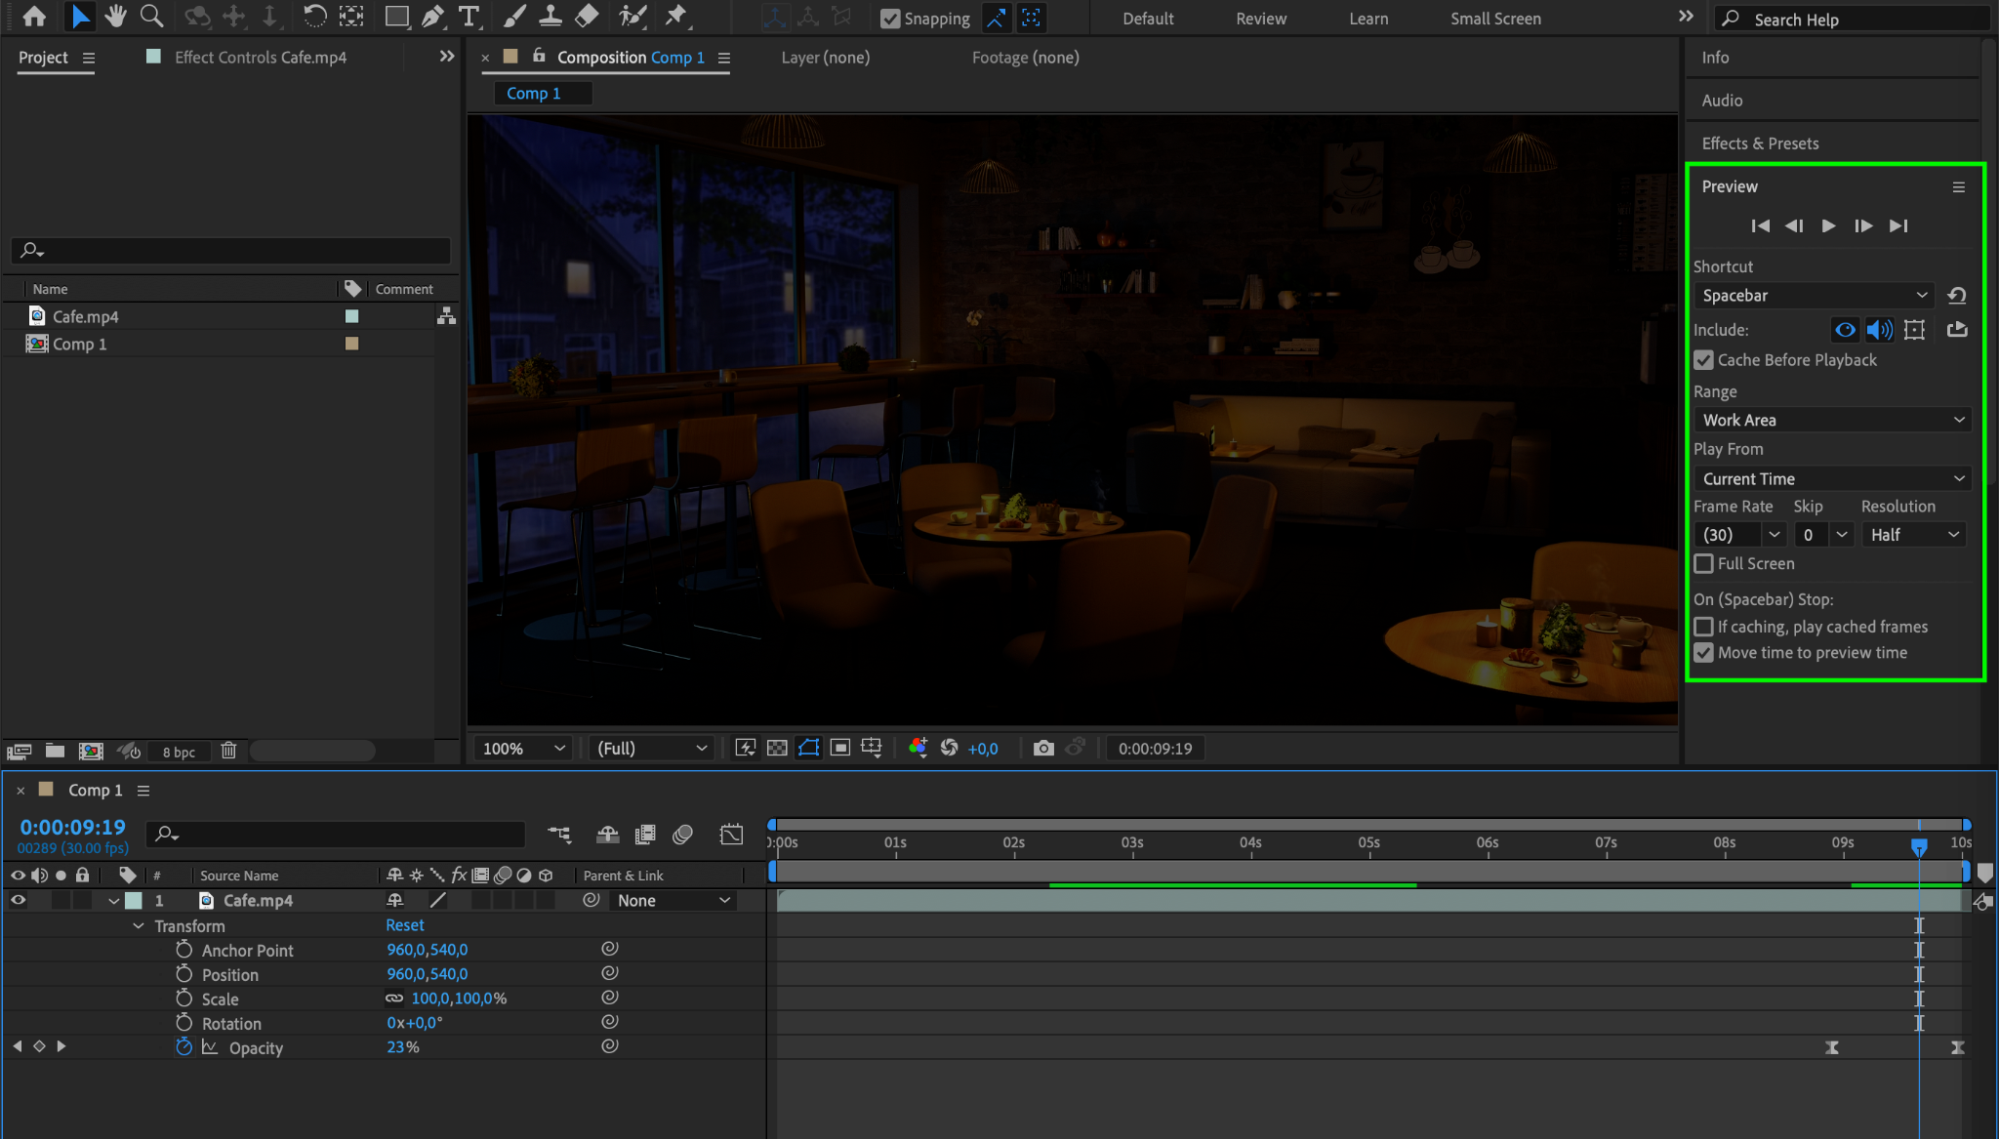 Step 9: Render Your Composition
If you’re satisfied with the result, render the composition by going to the Composition > Add to Render Queue. In the Render Queue panel, choose your desired output settings, such as file format and destination, and click “Render.”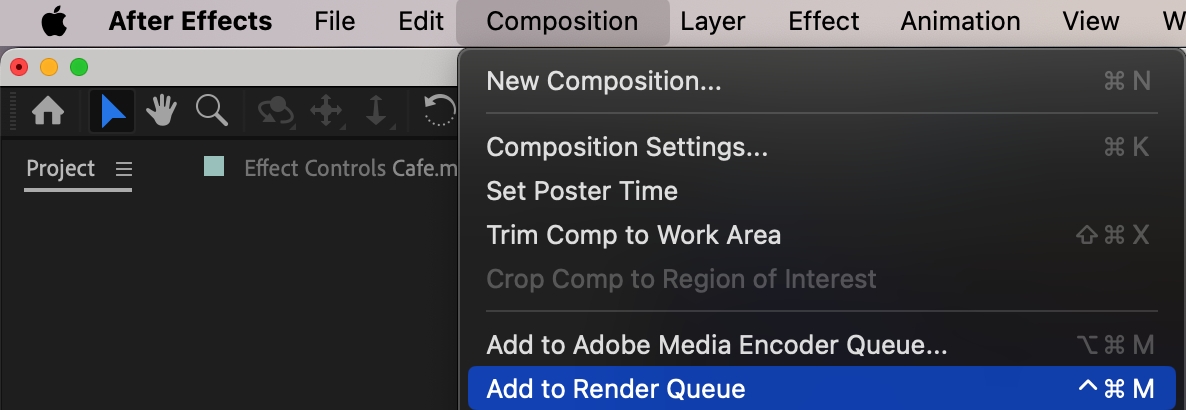
 Conclusion
By following these steps, you can easily create a beautiful fade-out effect in After Effects. Experiment with different settings and timings to achieve the perfect fade-out for your next video or animation. Don’t be afraid to add your own creative touch to make your projects stand out. Give it a try and see how this simple technique can elevate the visual appeal of your videos and animations. Happy editing!


