How to Create Fan Edits in Adobe After Effects
Introduction to Fan Editing
Creating fan edits with Adobe After Effects allows you to craft exciting, personalized versions of your favorite films, TV shows, or music videos. Whether you’re reimagining scenes, adding custom effects, or telling a new story, fan edits offer limitless possibilities for creativity. This guide will walk you through the entire process – from selecting your footage to finalizing and exporting your fan edit.
Get 10% off when you subscribe to our newsletter

Step 1: Choose Your Footage
The first step in making a fan edit is selecting the right footage. You could choose scenes from movies, clips from TV shows, or moments from music videos. Make sure to source high-quality clips to ensure the best visual results. It’s also essential to respect copyright laws and ensure that you have permission or fair use rights to use the footage. Thoughtful selection of key moments will set the tone for your fan edit.
Step 2: Import Footage into After Effects
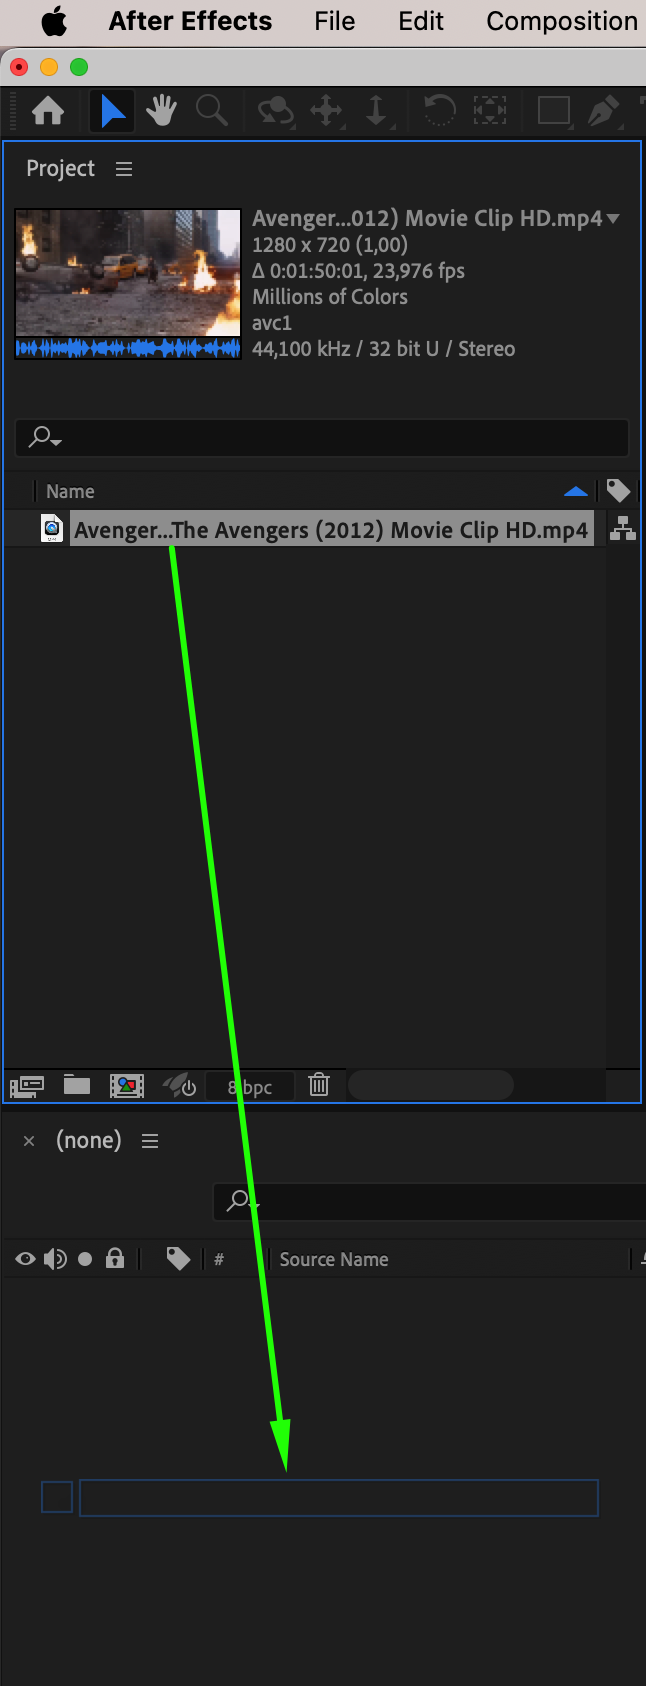
To begin working with your footage in After Effects, go to File > Import > File. Browse for your video files, select them, and import them into the project panel. Once imported, drag the clips onto the timeline panel to begin editing. Organizing your files in the timeline from the start will save you time later, ensuring smooth navigation through different layers of clips.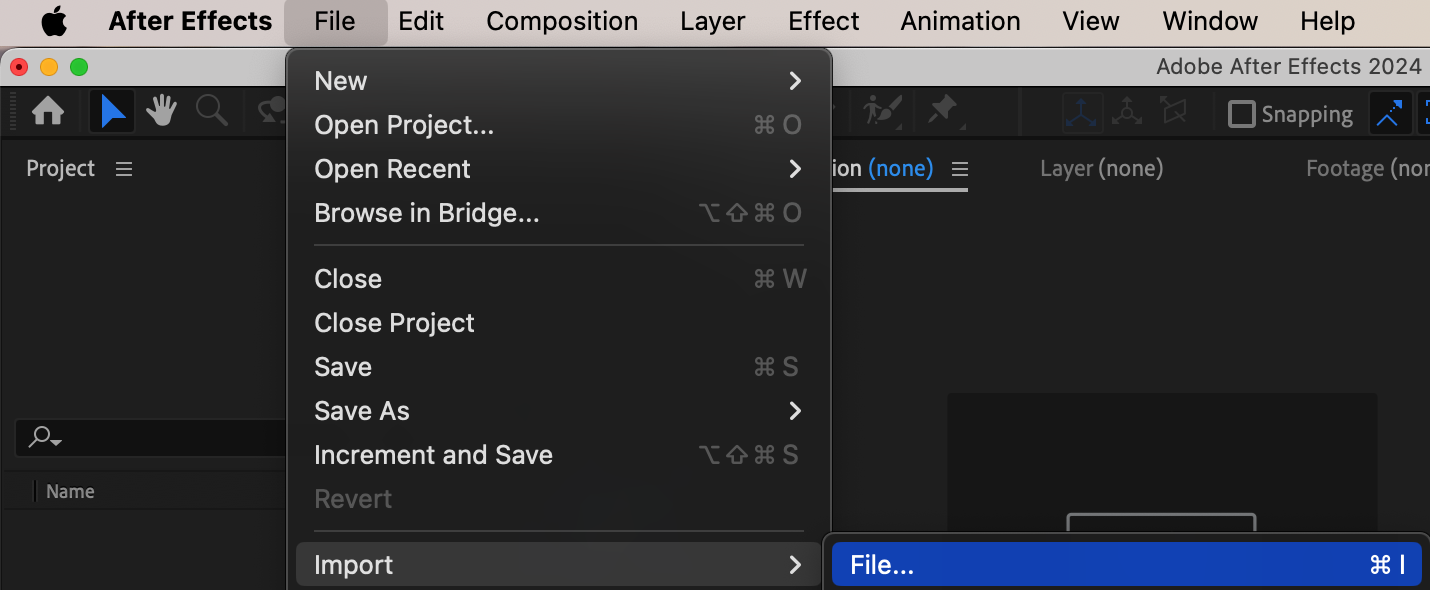
Step 3: Organize and Split Layers
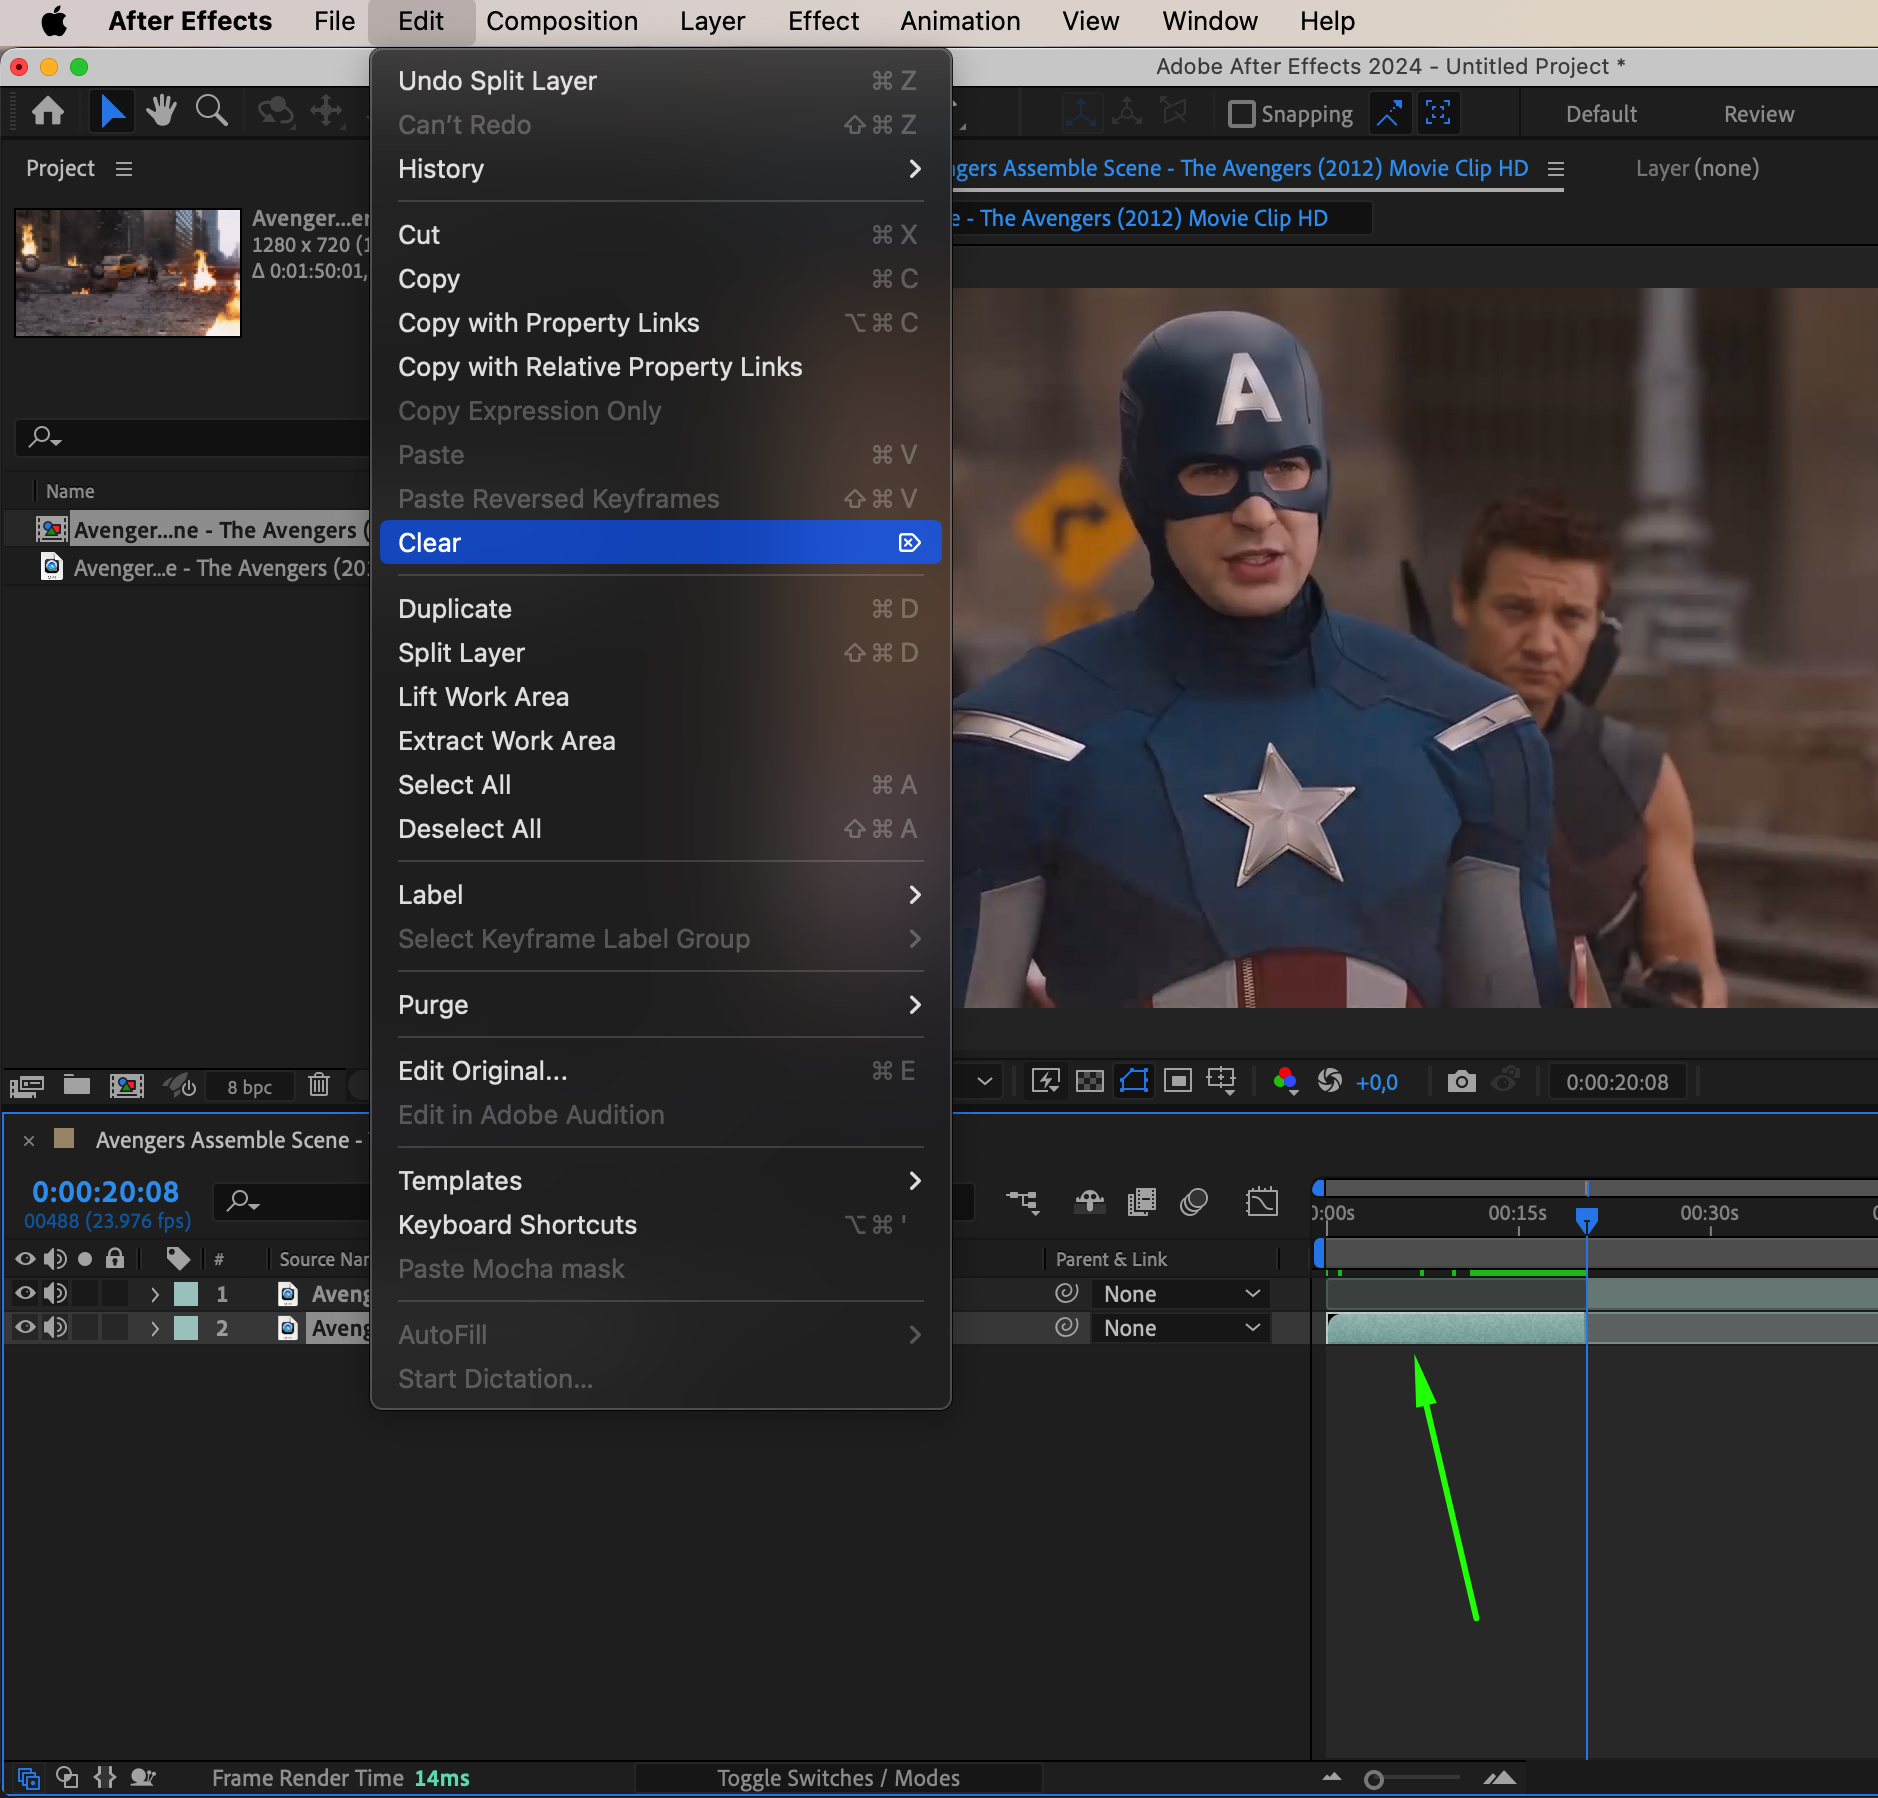
Now that your footage is on the timeline, you need to organize the layers. Use shortcuts like “Ctrl/Cmd + Shift + D” to split layers, allowing you to break down the video into manageable segments. Delete unnecessary parts by simply selecting them and hitting the delete key. Organizing clips into individual layers gives you more flexibility in editing, helping you control each scene or element independently.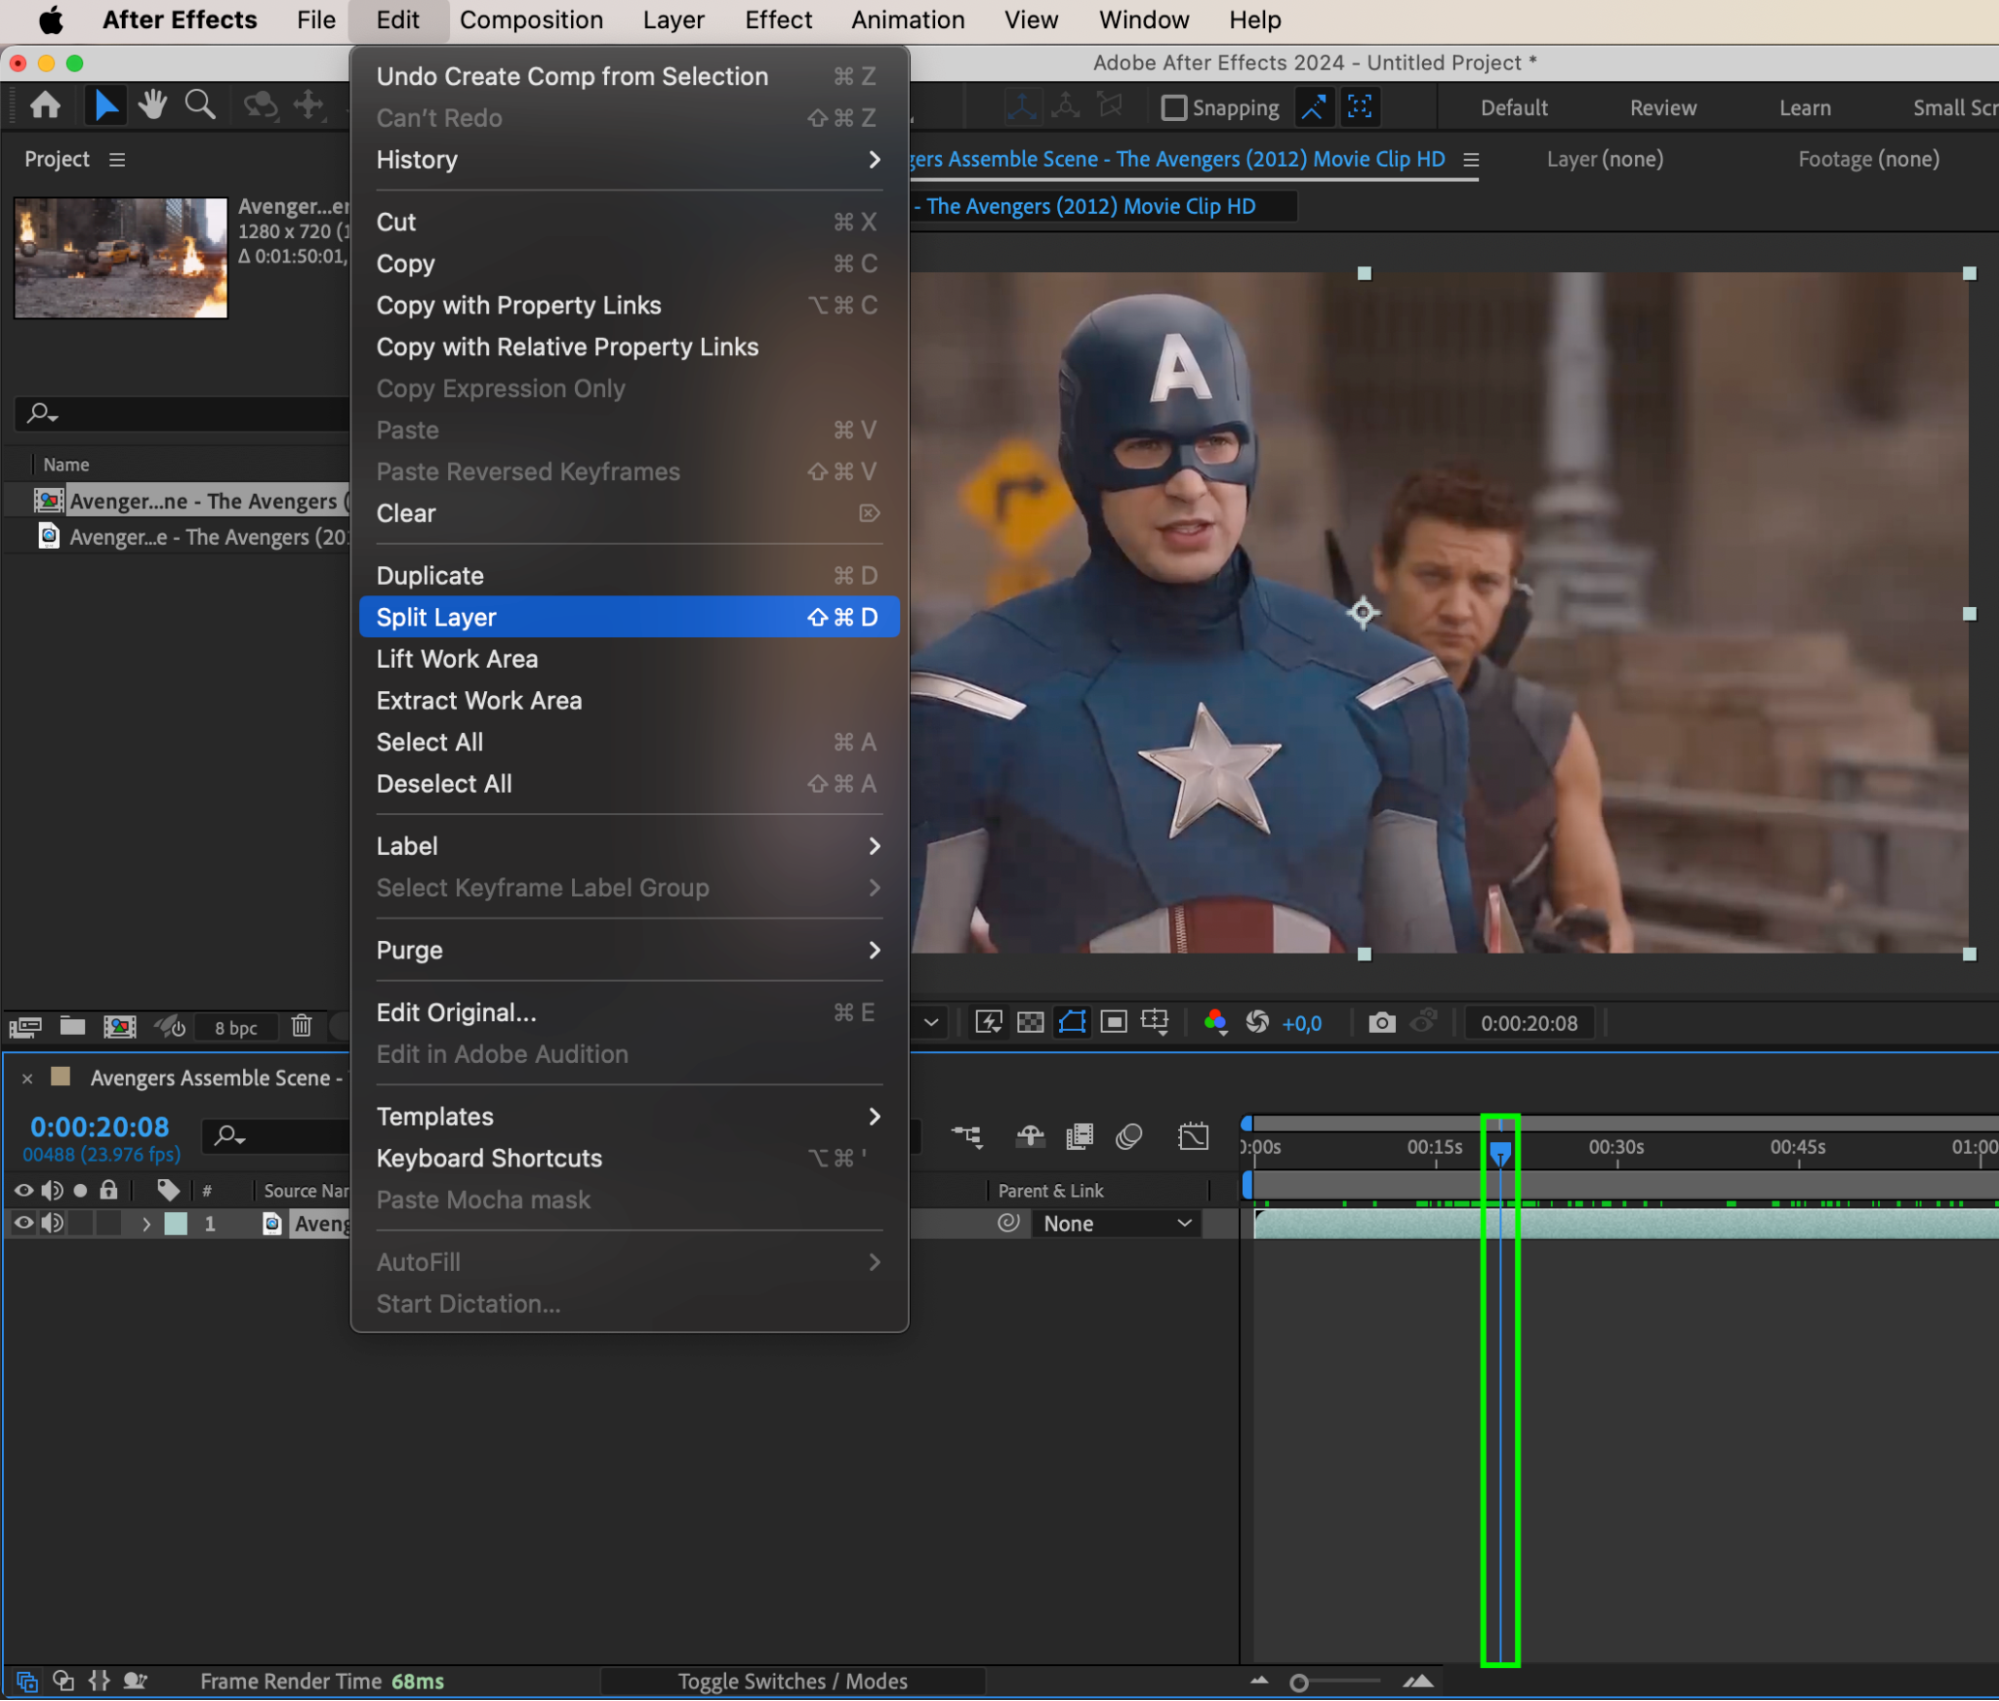
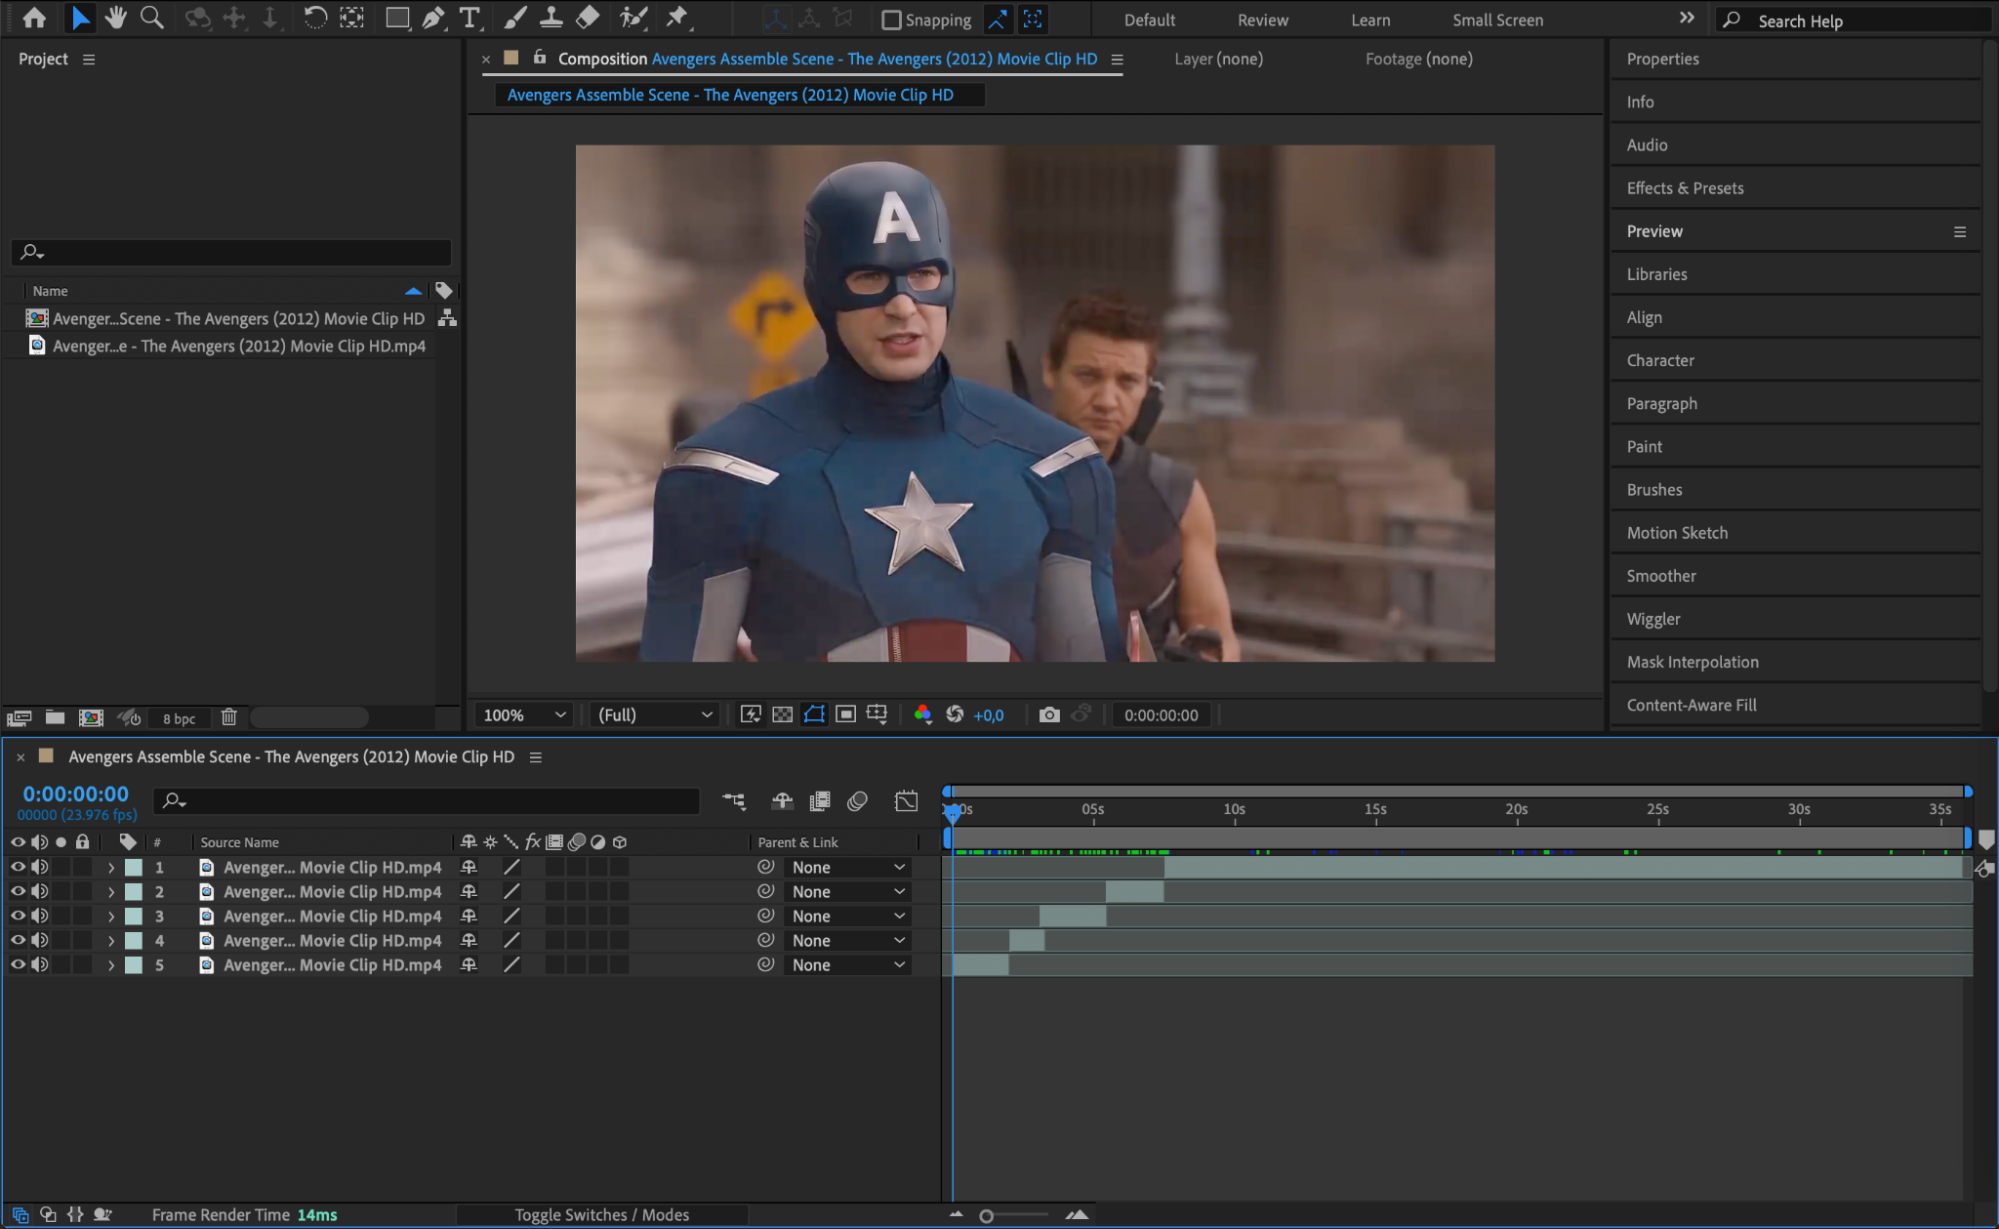 Step 4: Add Effects and Transitions
One of the most exciting parts of making a fan edit is applying effects and transitions. Experiment with visual effects like color grading to give your footage a unique look, or add motion blur to enhance fast-paced scenes. You can use transitions like fades, cuts, or dissolves to maintain a seamless flow between clips. Consider using adjustment layers to apply uniform effects across multiple clips for a consistent look throughout the edit.
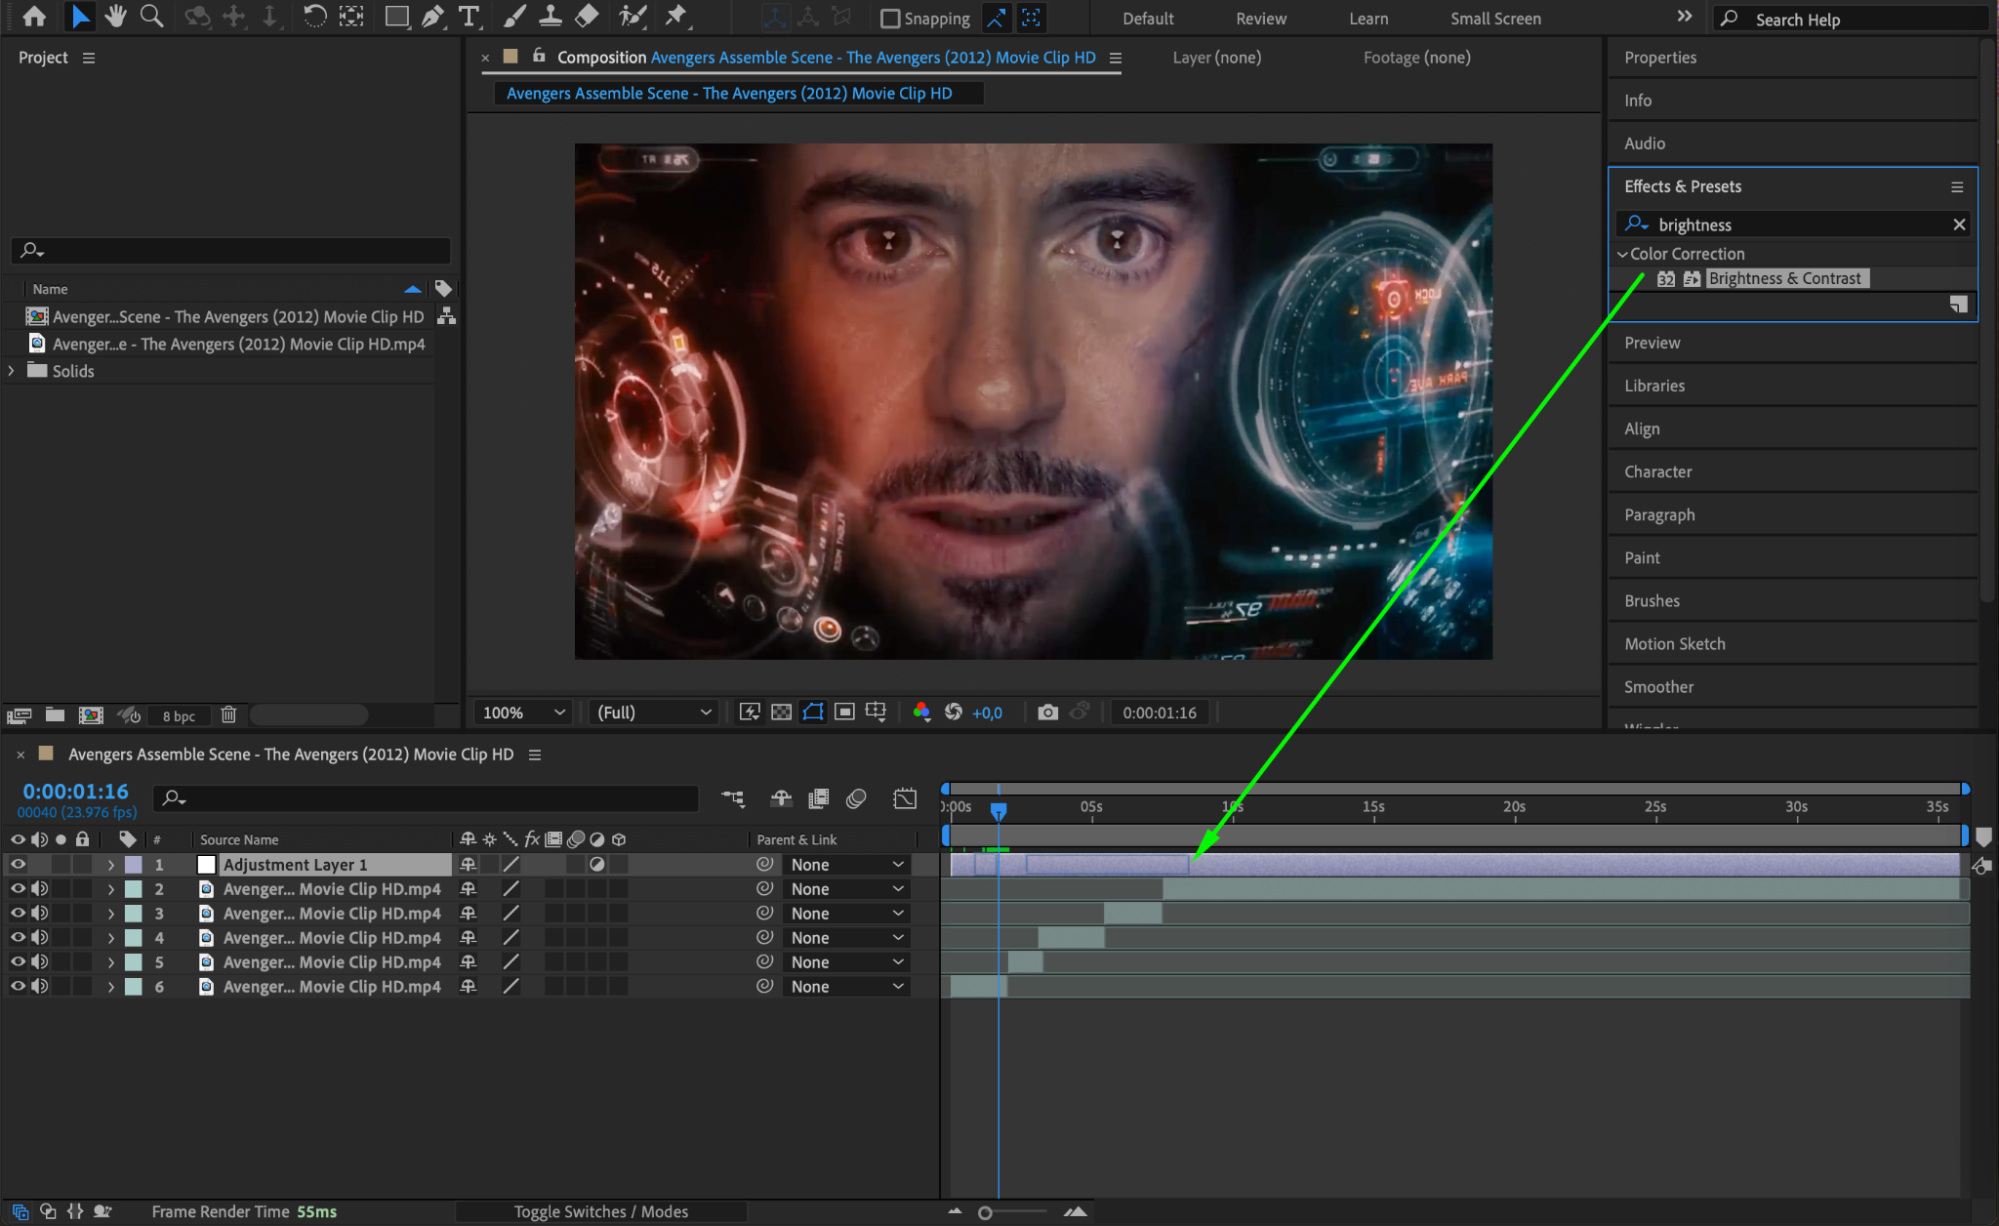

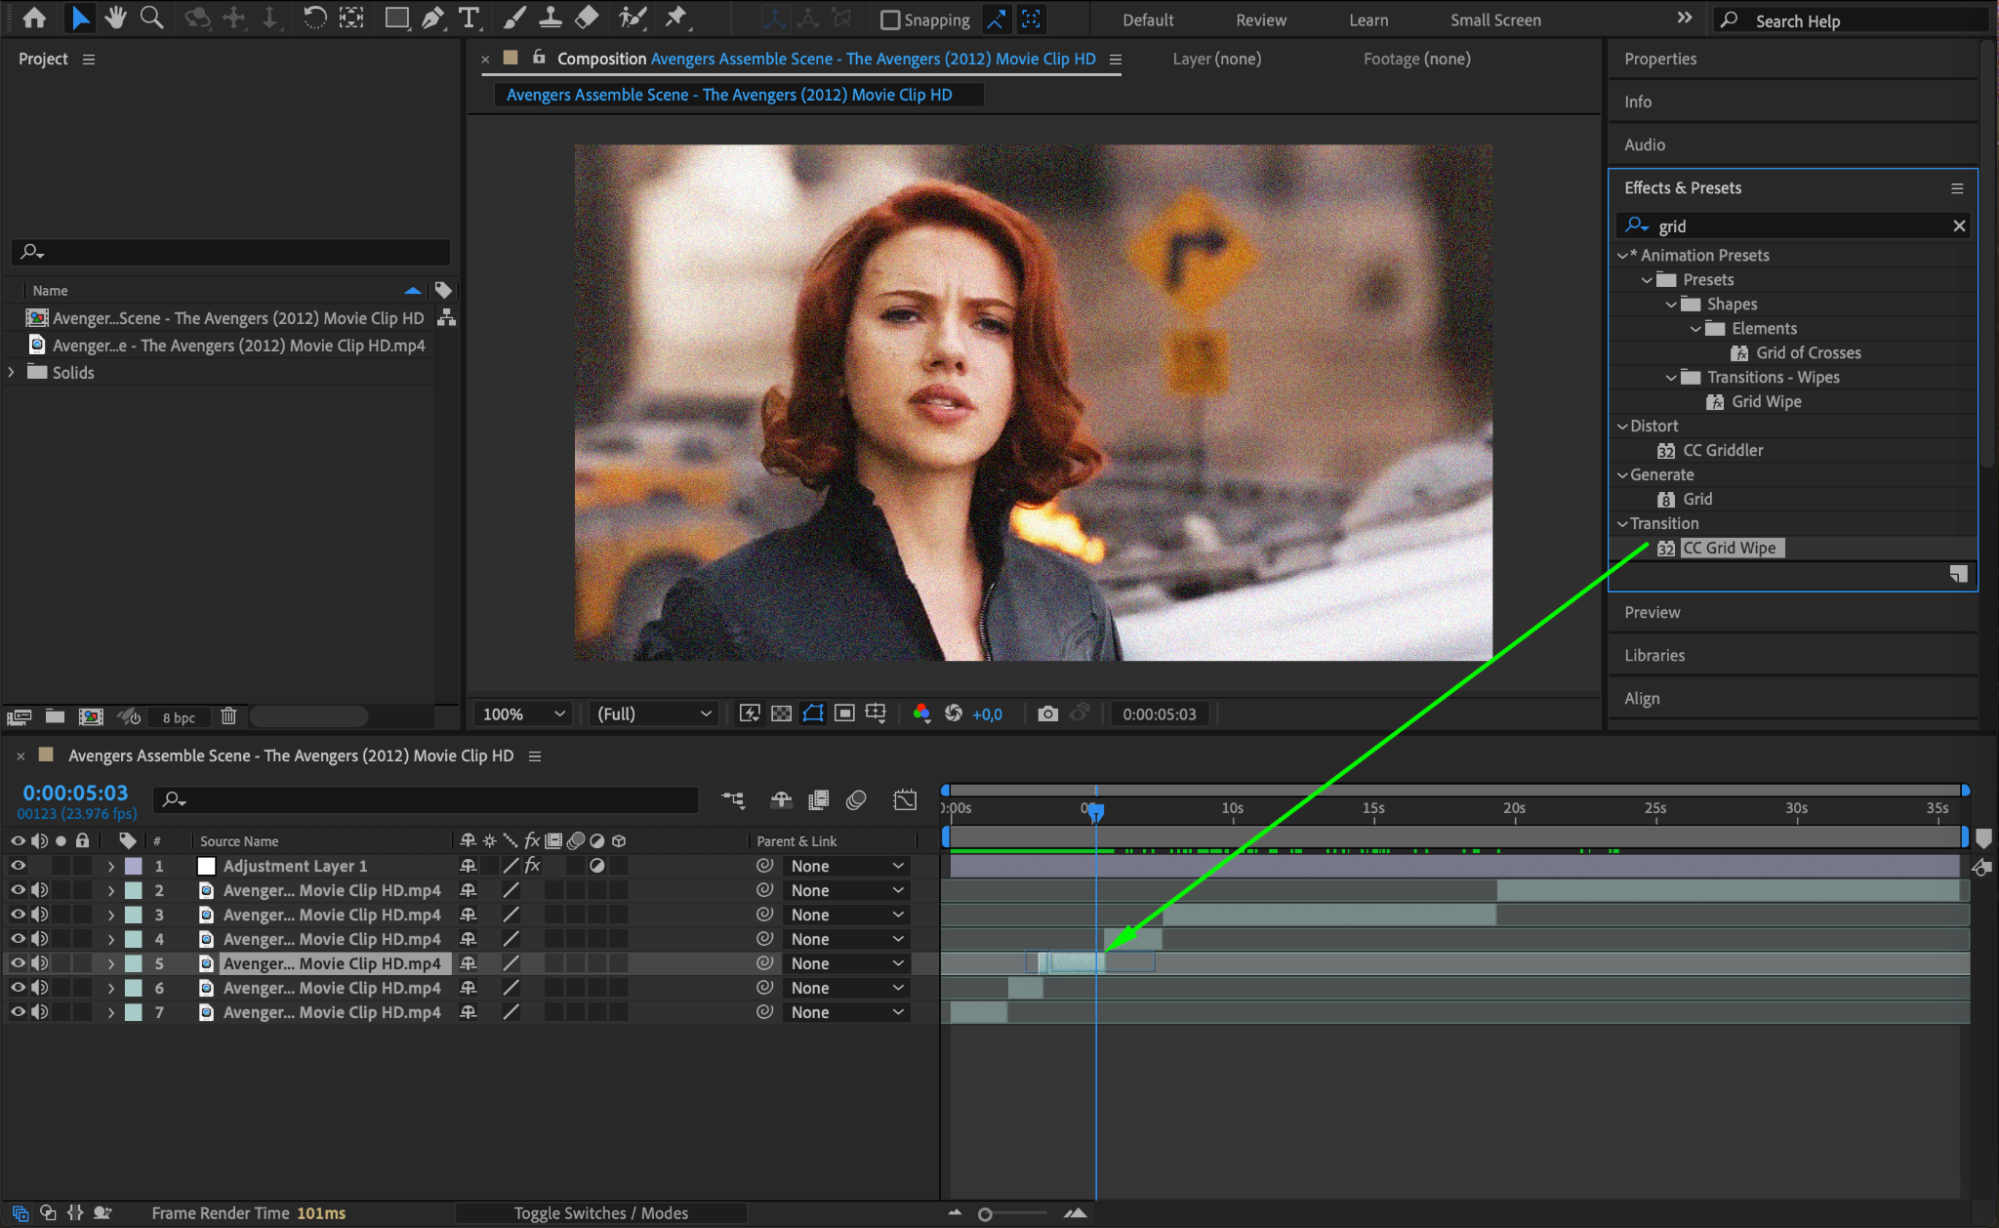
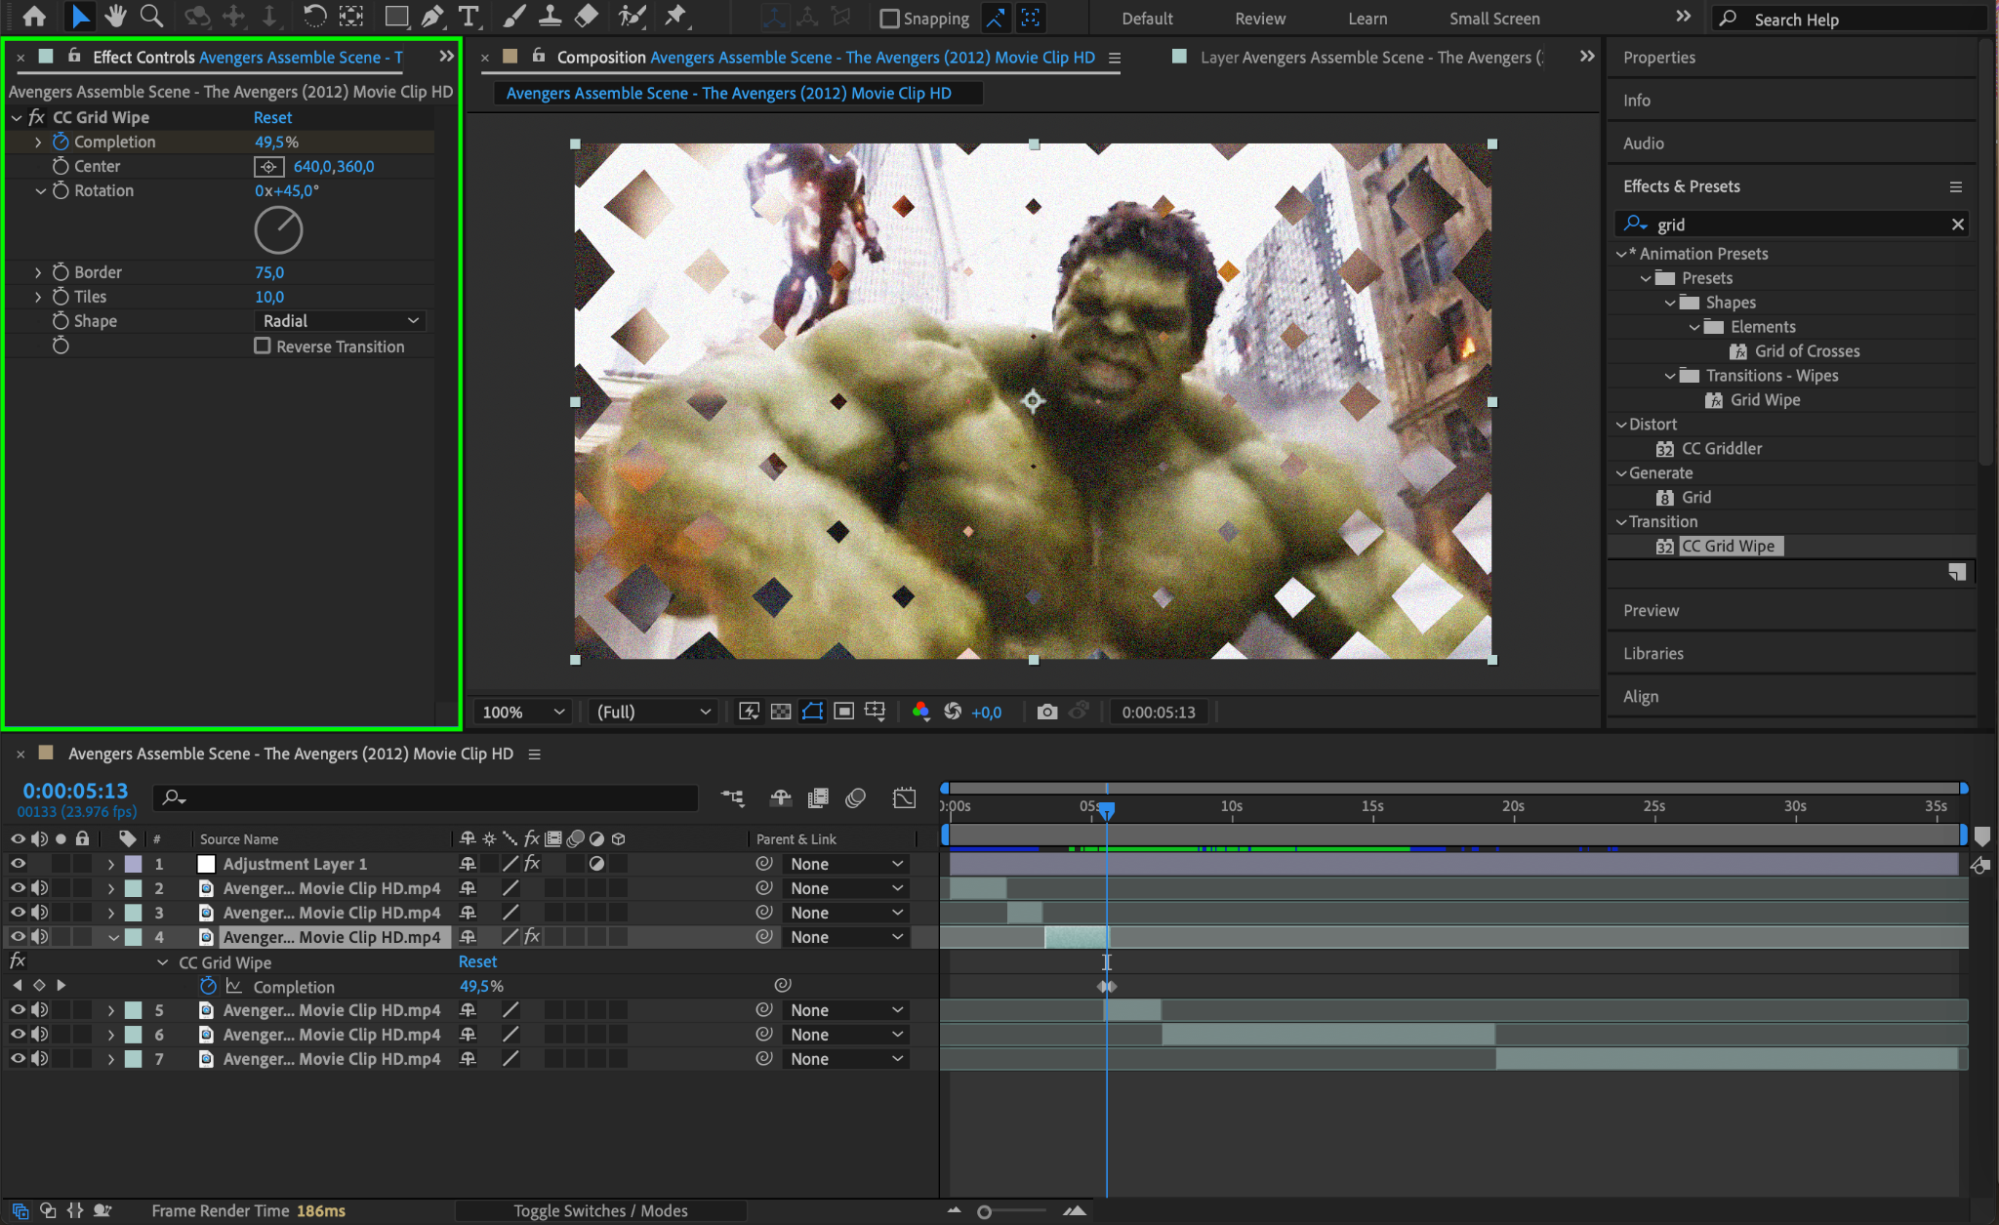 Step 5: Customize with Text and Graphics
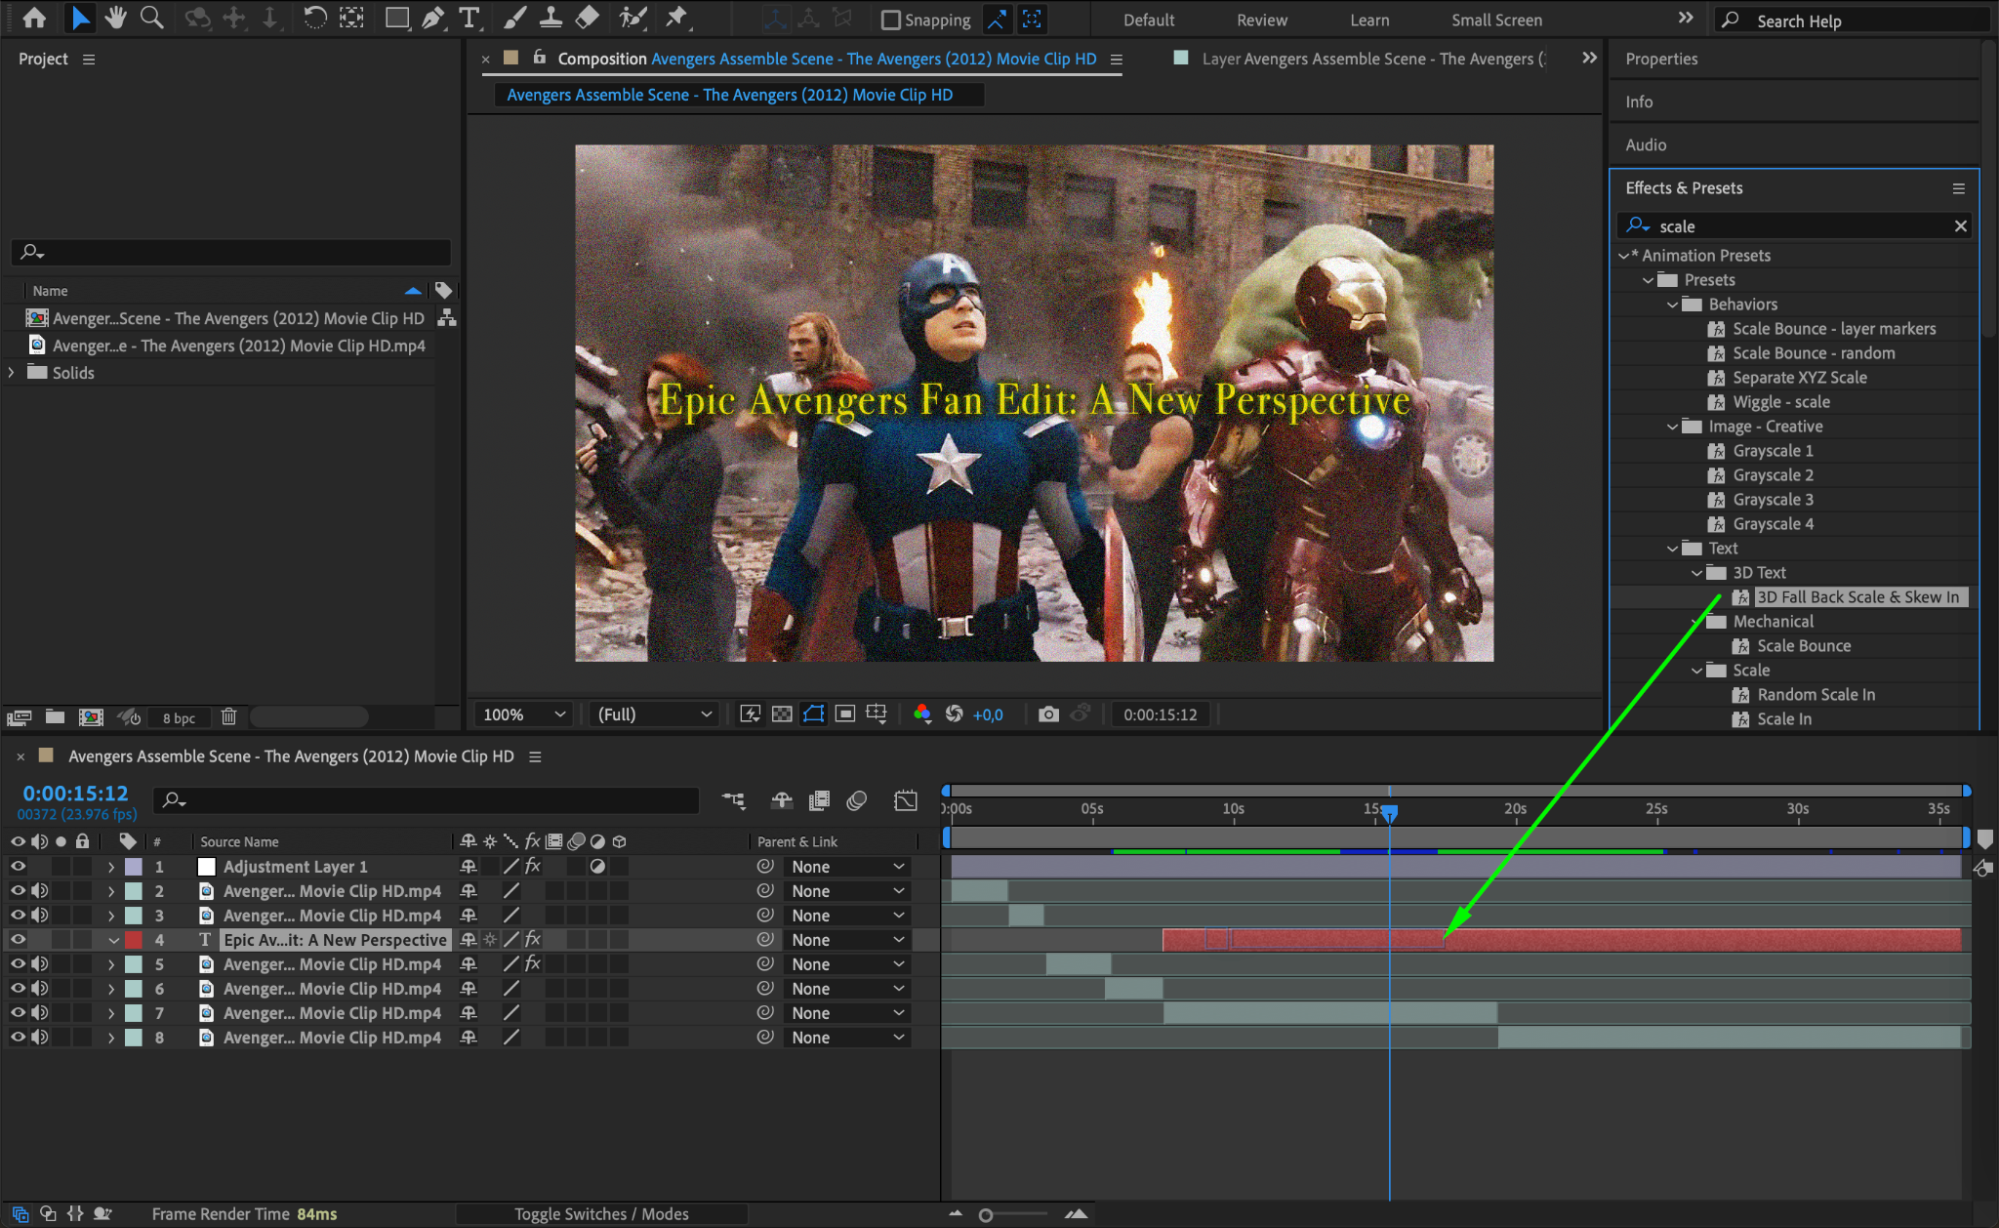
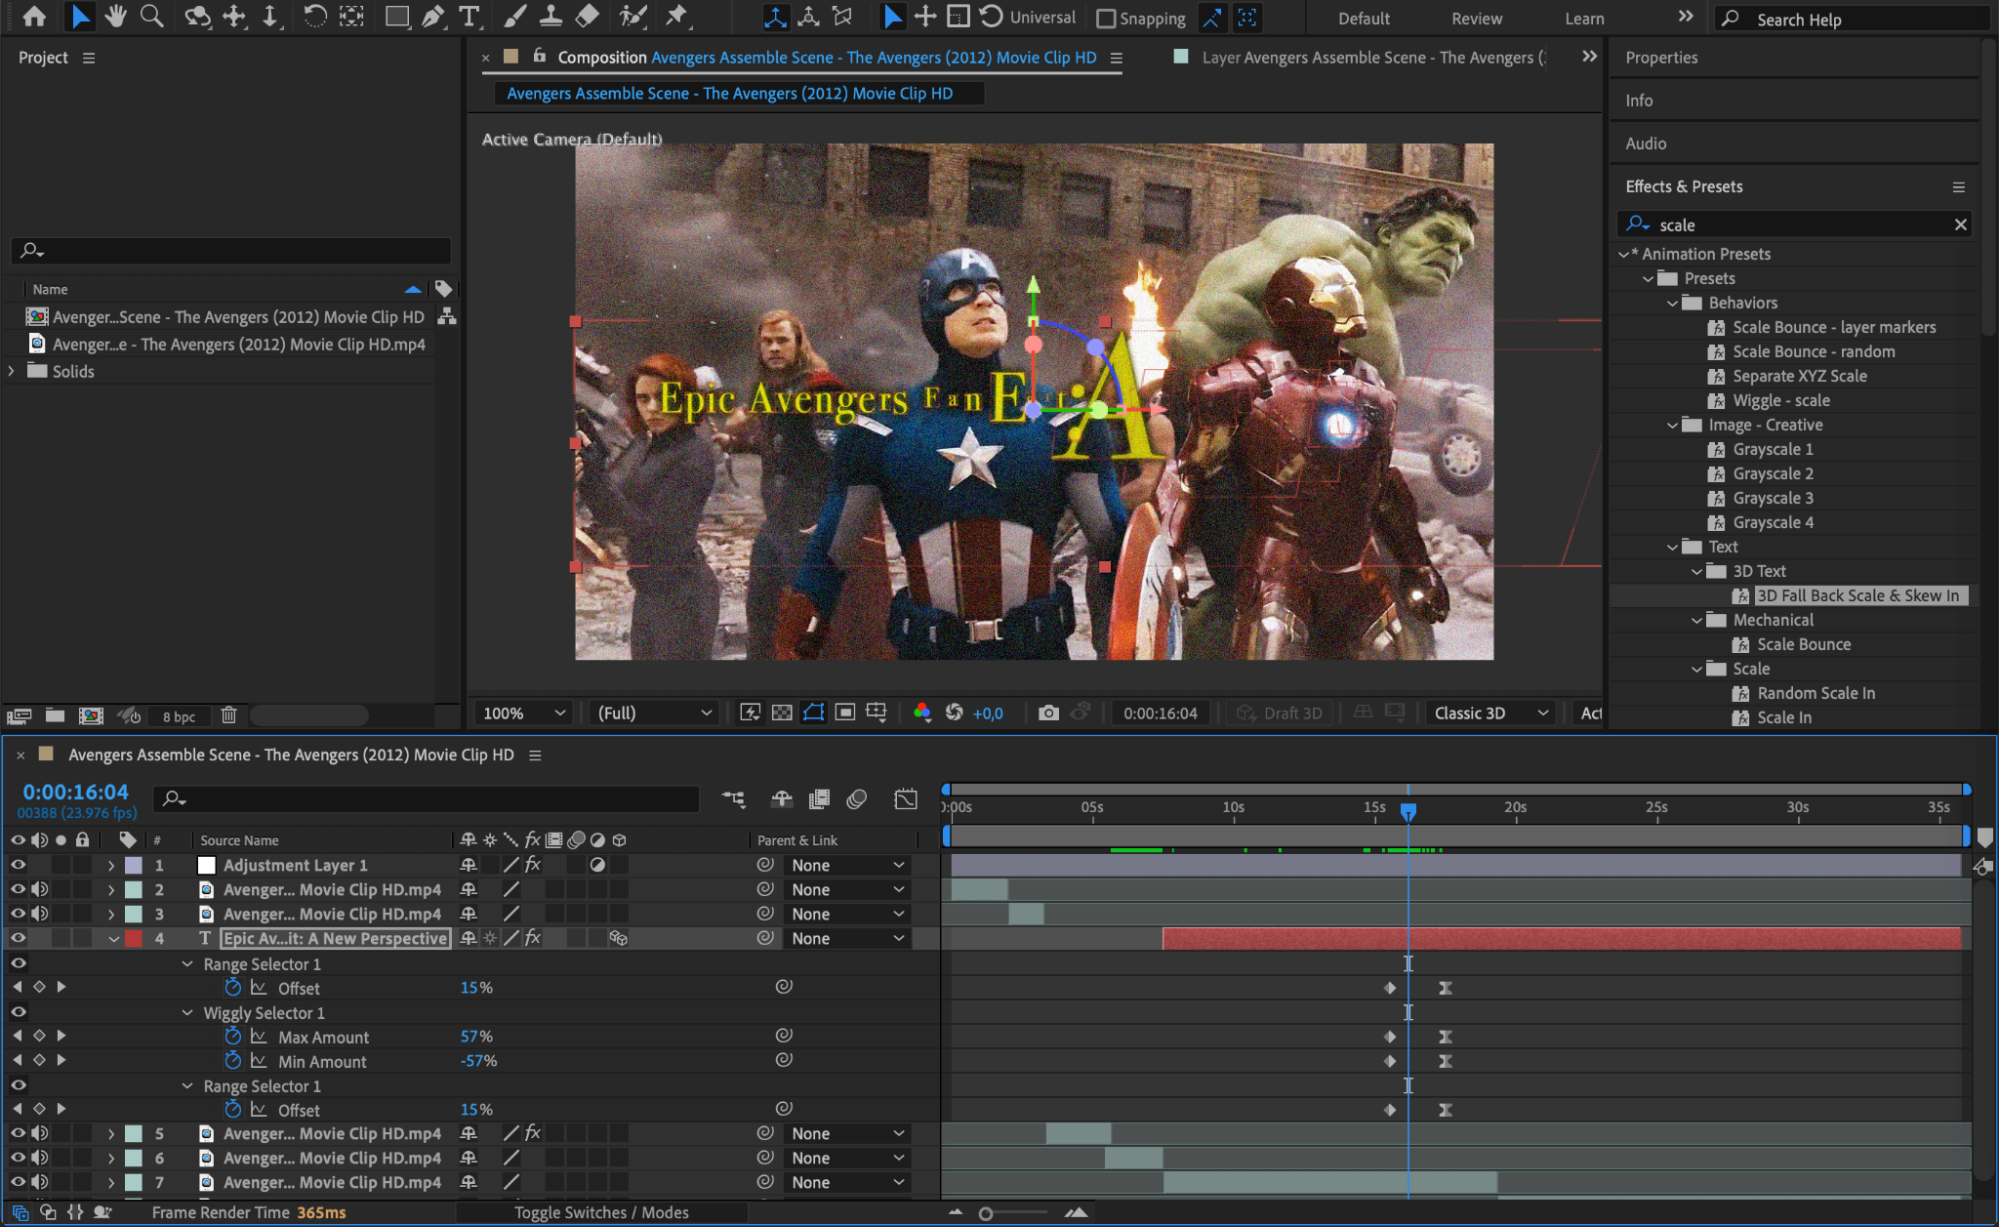
Personalize your fan edit by adding text, logos, or custom graphics. You can animate the text using After Effects’ animation presets to make it visually engaging. Adding graphics or logos further enhances your edit, whether you’re creating symbolic visuals or integrating branding. These elements can emphasize key moments or add a unique signature to your fan edit.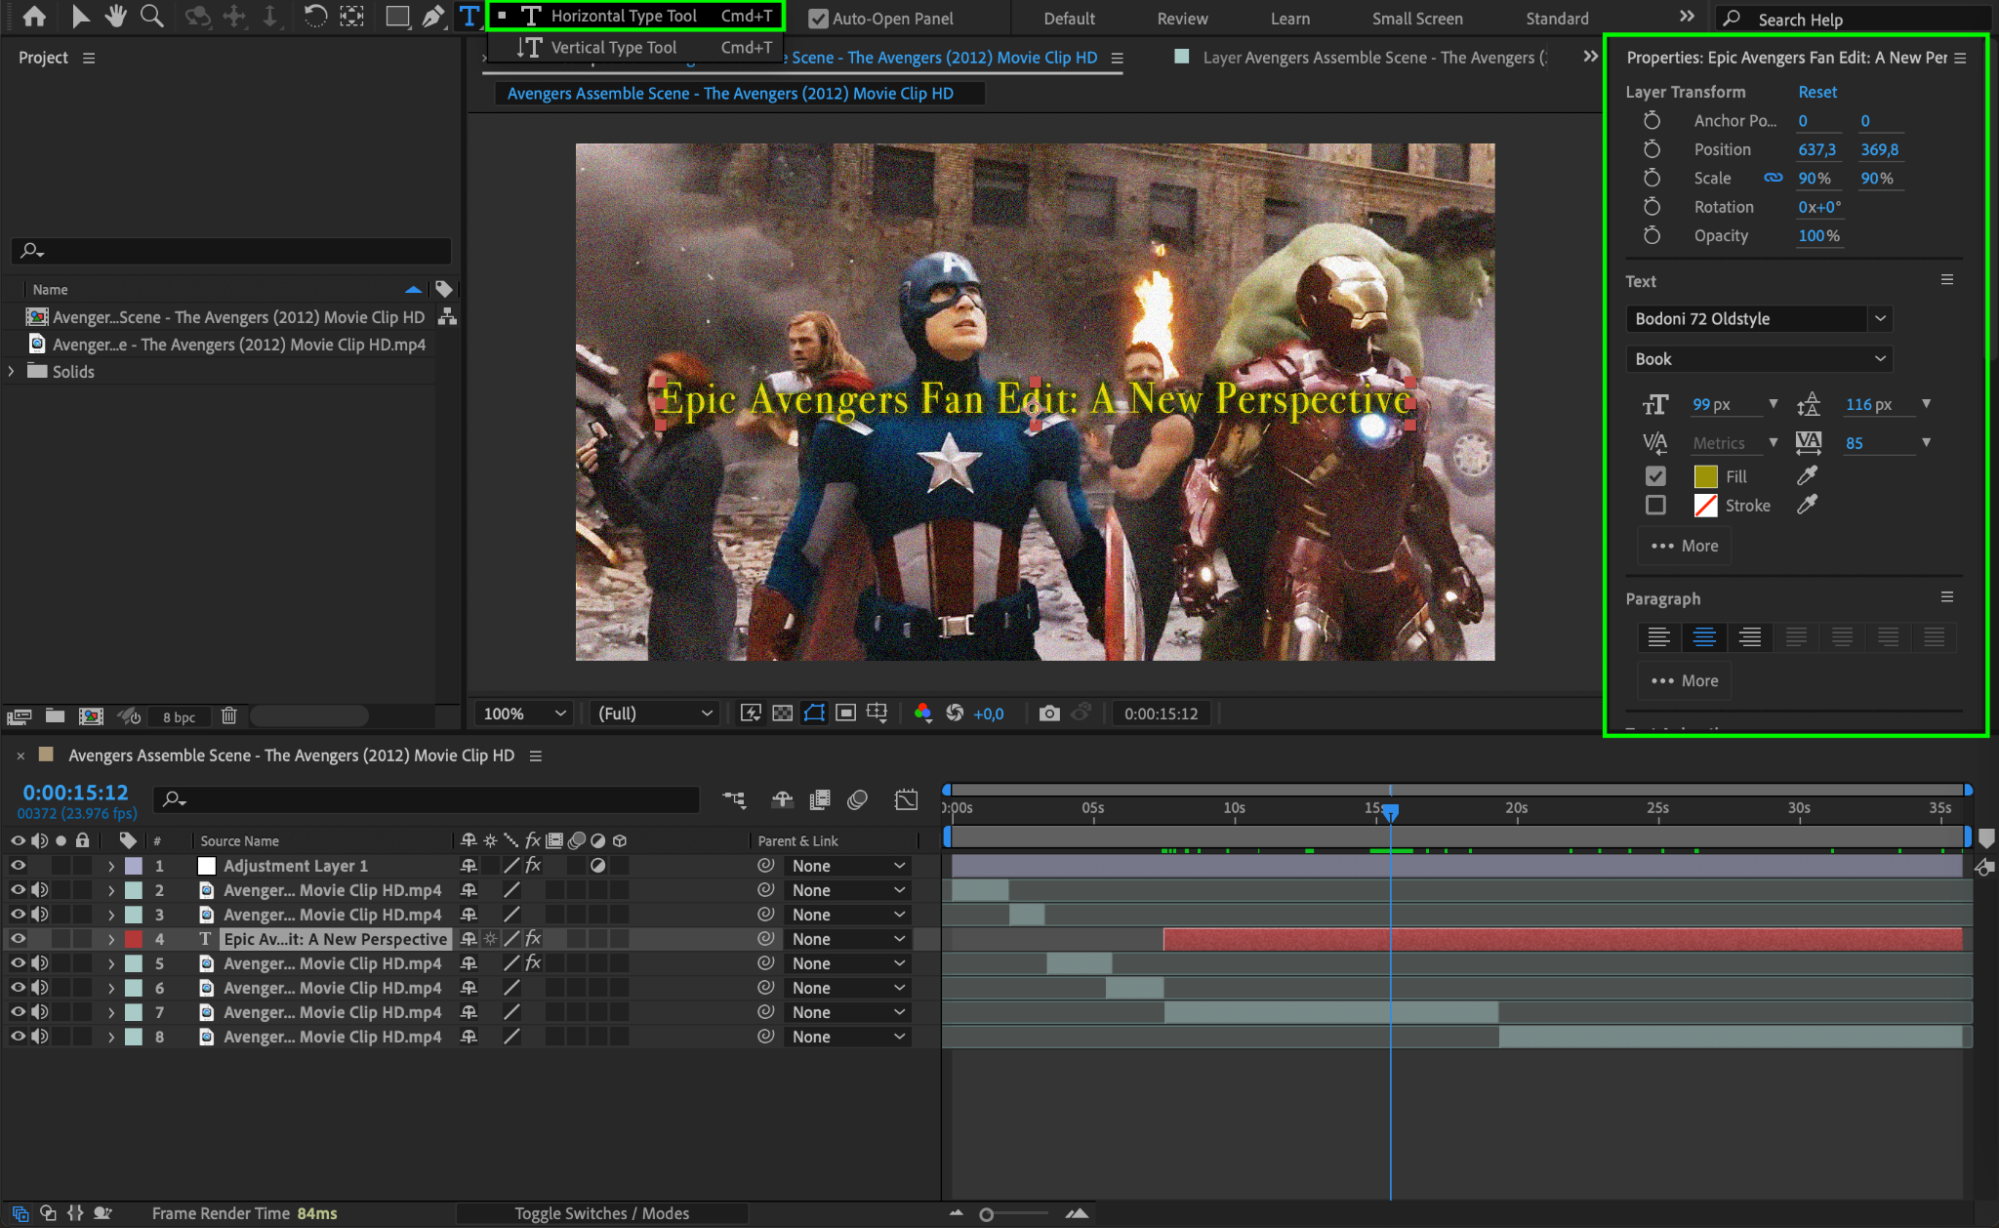
 Step 6: Enhance with Sound and Music
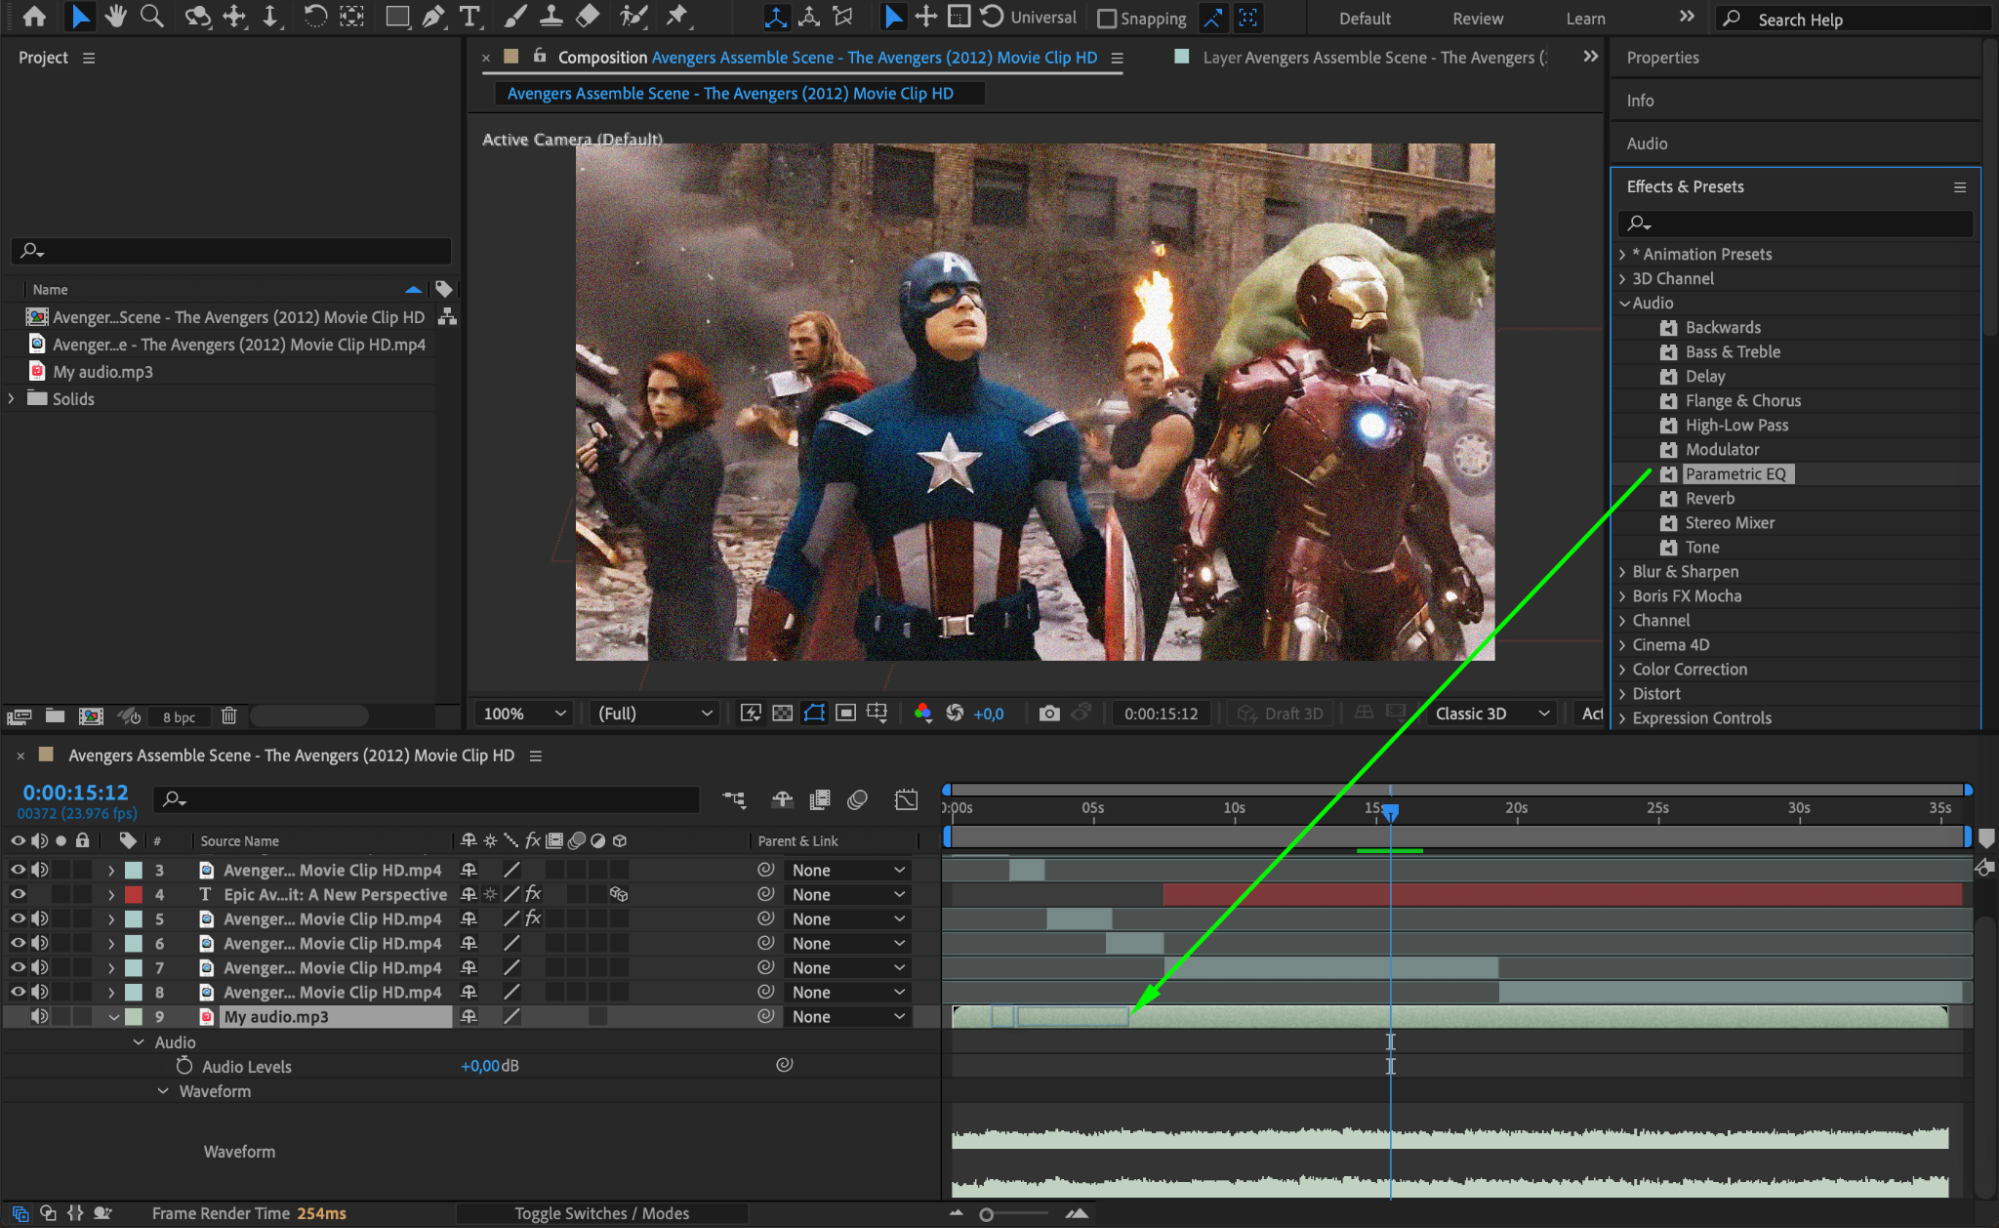
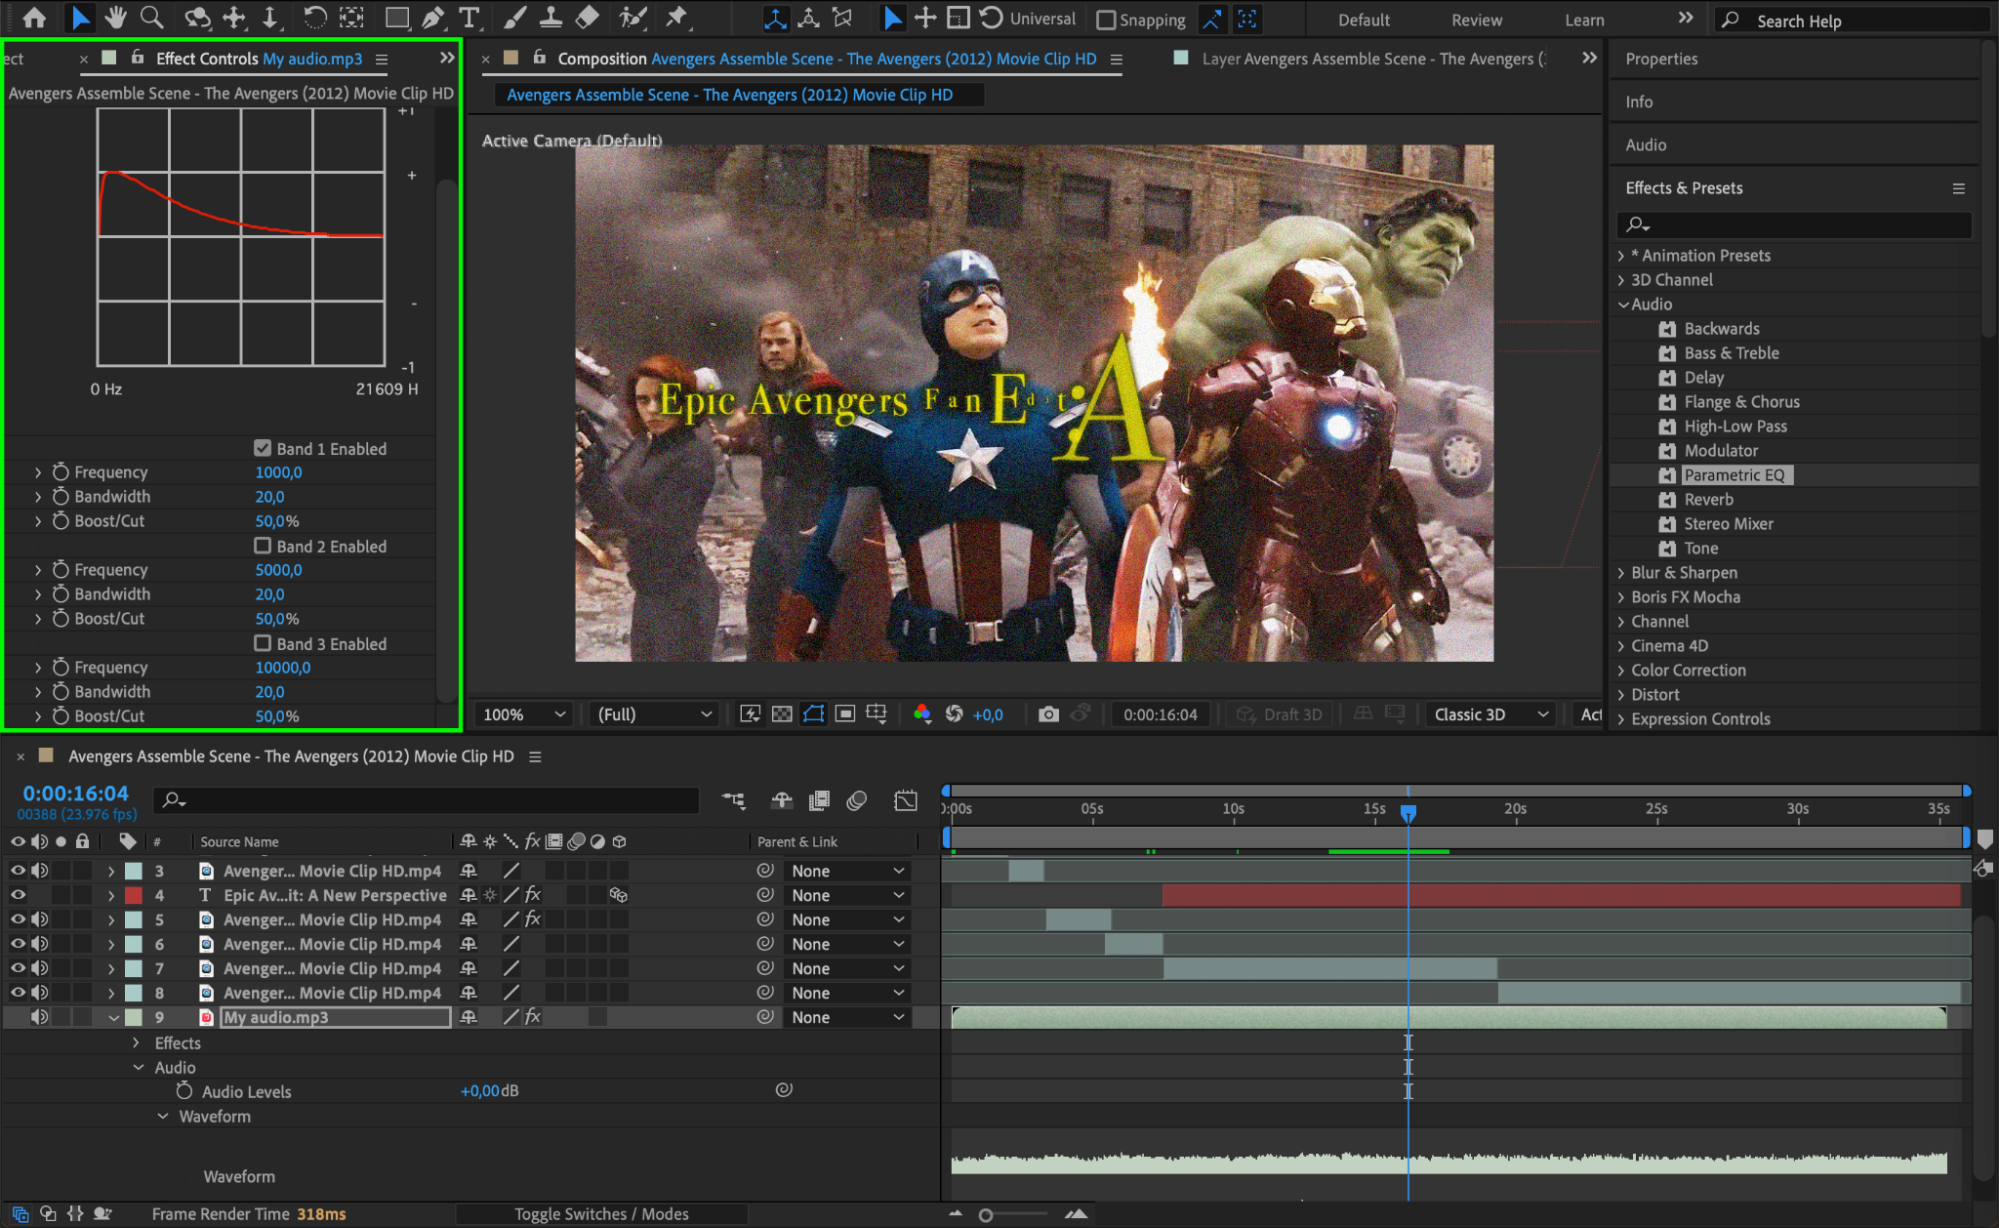
Sound design plays a crucial role in evoking emotion and setting the mood in fan edits. Import your music, dialogue, or sound effects by going to File > Import > File and selecting your audio tracks. After Effects allows you to sync sound with visual elements, enhancing the impact of the scenes. Use audio keyframes to adjust audio levels or apply sound effects that enhance the atmosphere and align with the energy of your edit.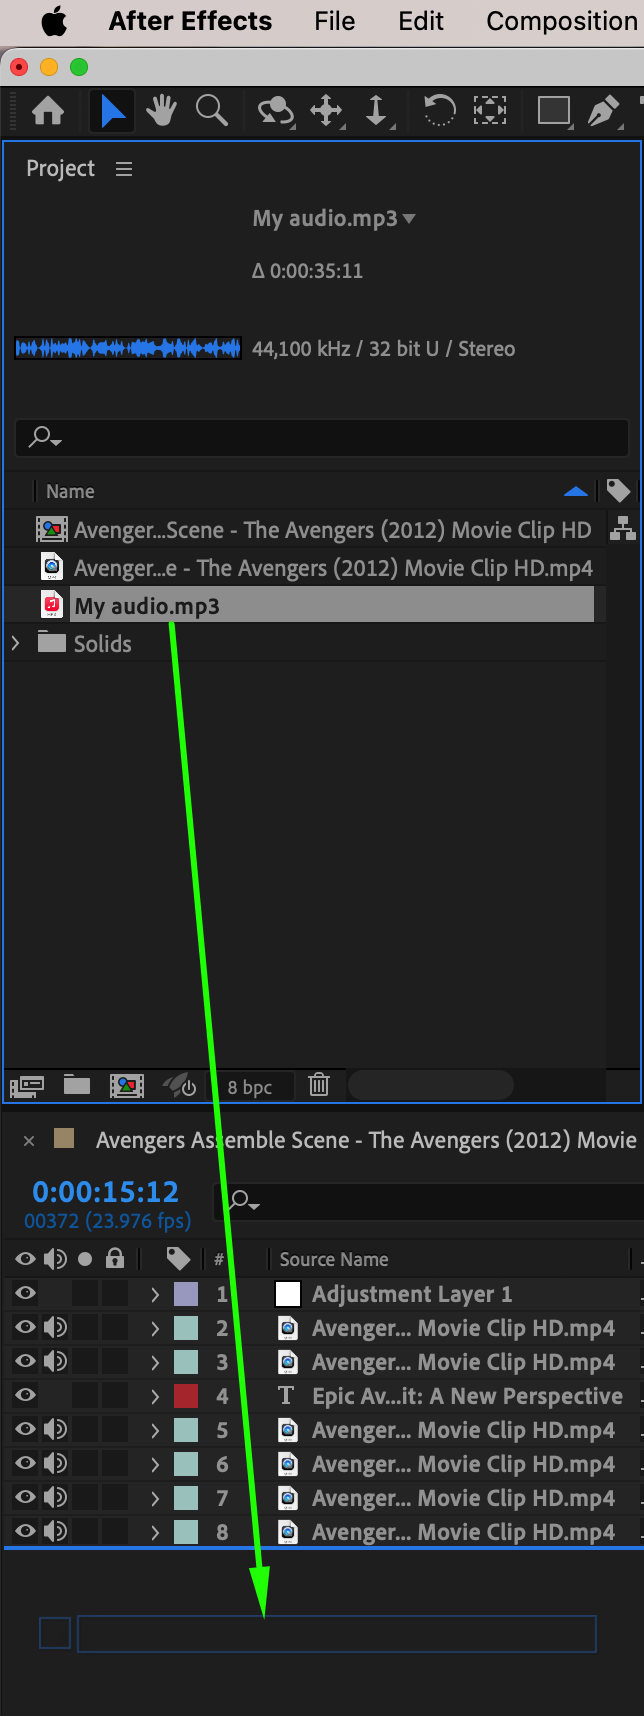
 Step 7: Polish and Preview
Once your visual and audio elements are in place, it’s time to fine-tune your fan edit. Preview the entire timeline to ensure smooth transitions, proper timing, and consistent visual effects. You may need to make small adjustments to improve the pacing or correct color inconsistencies. Utilize RAM Preview to check playback speed and ensure the quality meets your expectations. This is your chance to polish the edit before finalizing it.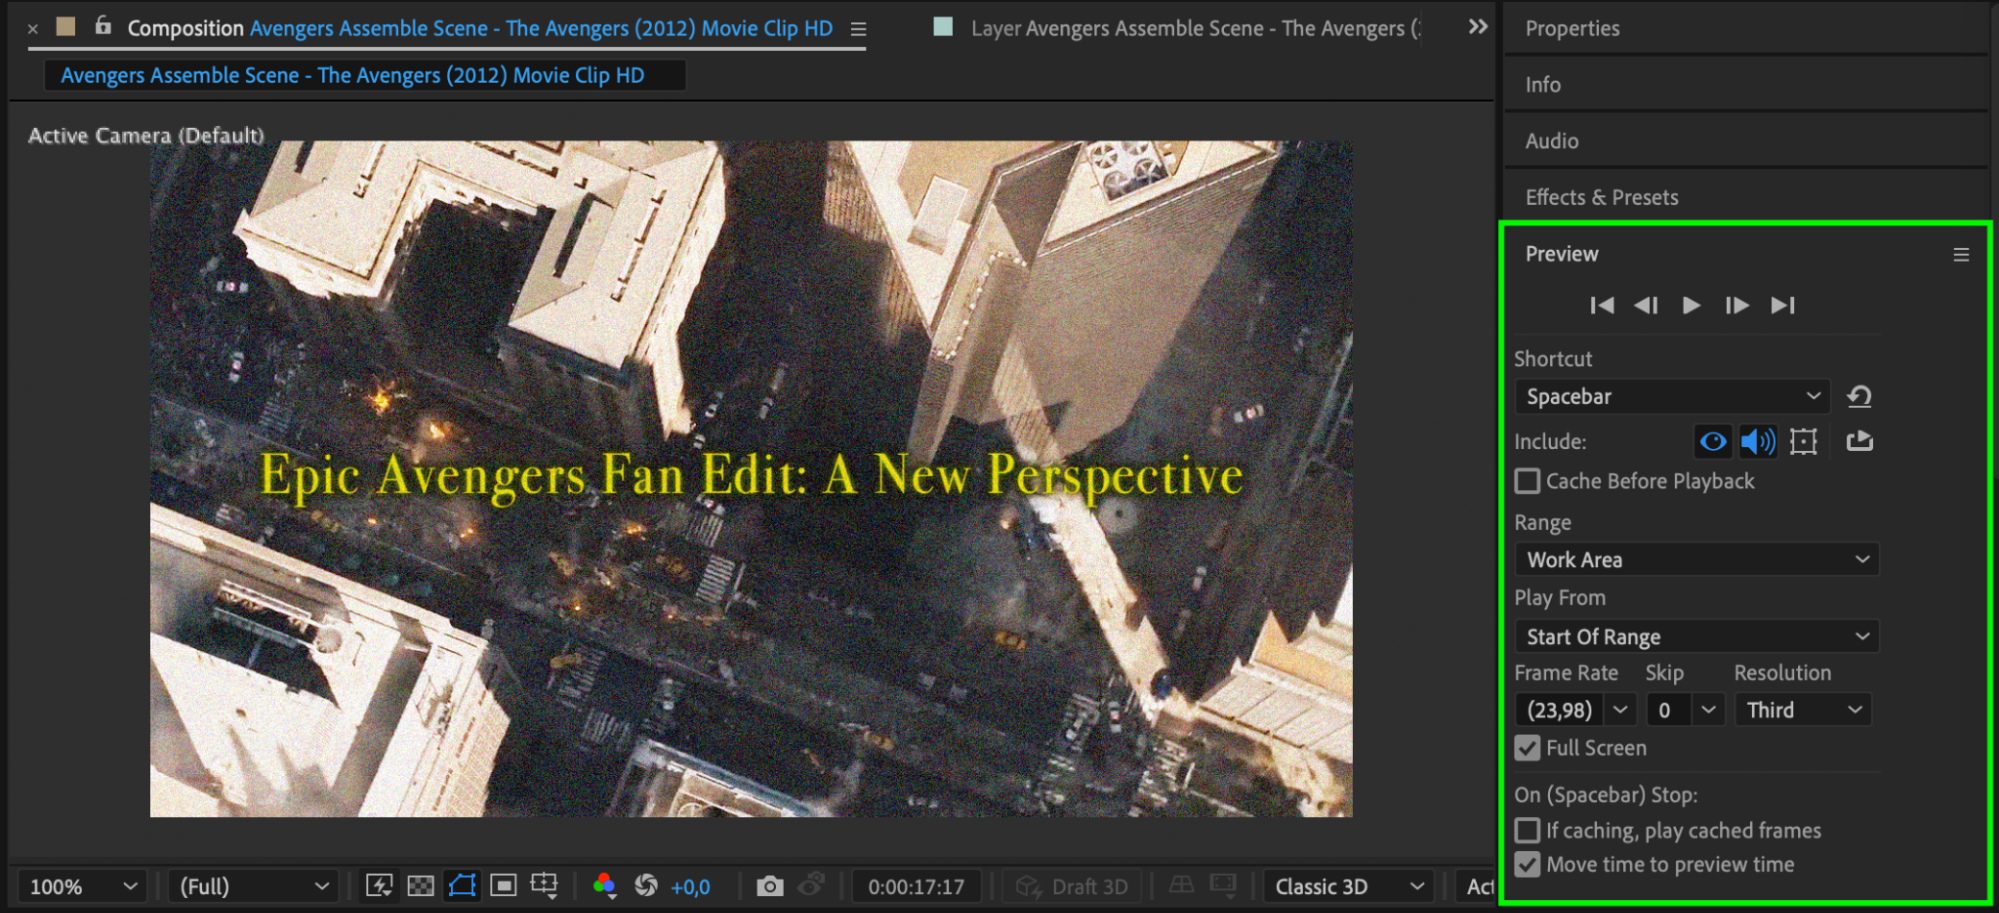
Step 8: Export Your Fan Edit
After all adjustments are made, it’s time to export your fan edit. Go to Composition > Add to Render Queue. Choose the appropriate export settings based on your intended platform. For example, you can select H.264 format for a high-quality MP4 file, which is suitable for most online platforms. Make sure to set the desired resolution (e.g., 1080p or 4K) to maintain video quality during playback.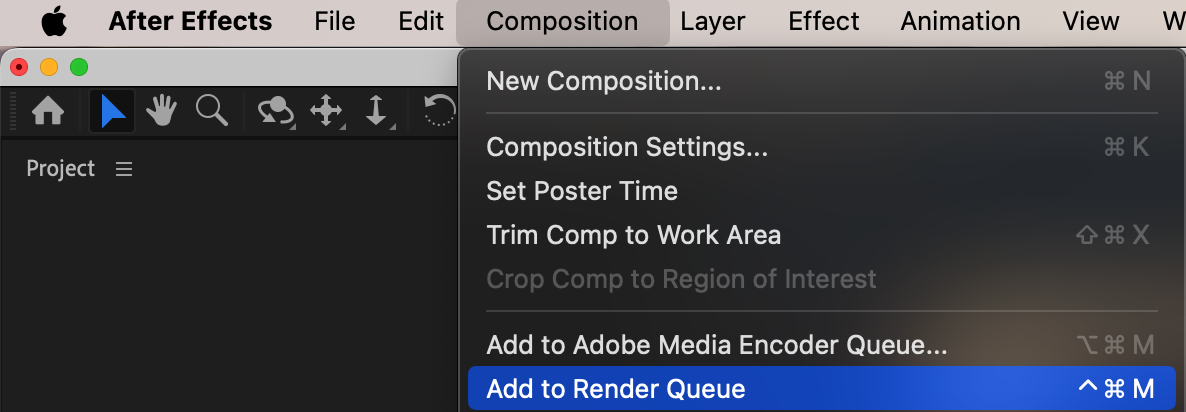
 Conclusion
With Adobe After Effects, your fan editing possibilities are limitless. Follow these steps to create fan edits that will impress your audience. Remember to respect copyright laws and give credit to the original creators. So, what are you waiting for? Grab your favorite footage, fire up After Effects, and start crafting your own unique fan edits today!
Please note that this guide provides a general overview, and the actual process may vary depending on your specific project and creative vision.


