Creating Realistic Fire Effects in After Effects
Introduction to Fire Effects in After Effects
Creating fire effects in After Effects can add a touch of magic to any video project. Whether you want to simulate a blazing inferno or a small flickering flame, After Effects provides a variety of tools to help you achieve stunning results. In this guide, we’ll walk you through the process of creating a realistic fire effect.
1. Set Up Your Composition
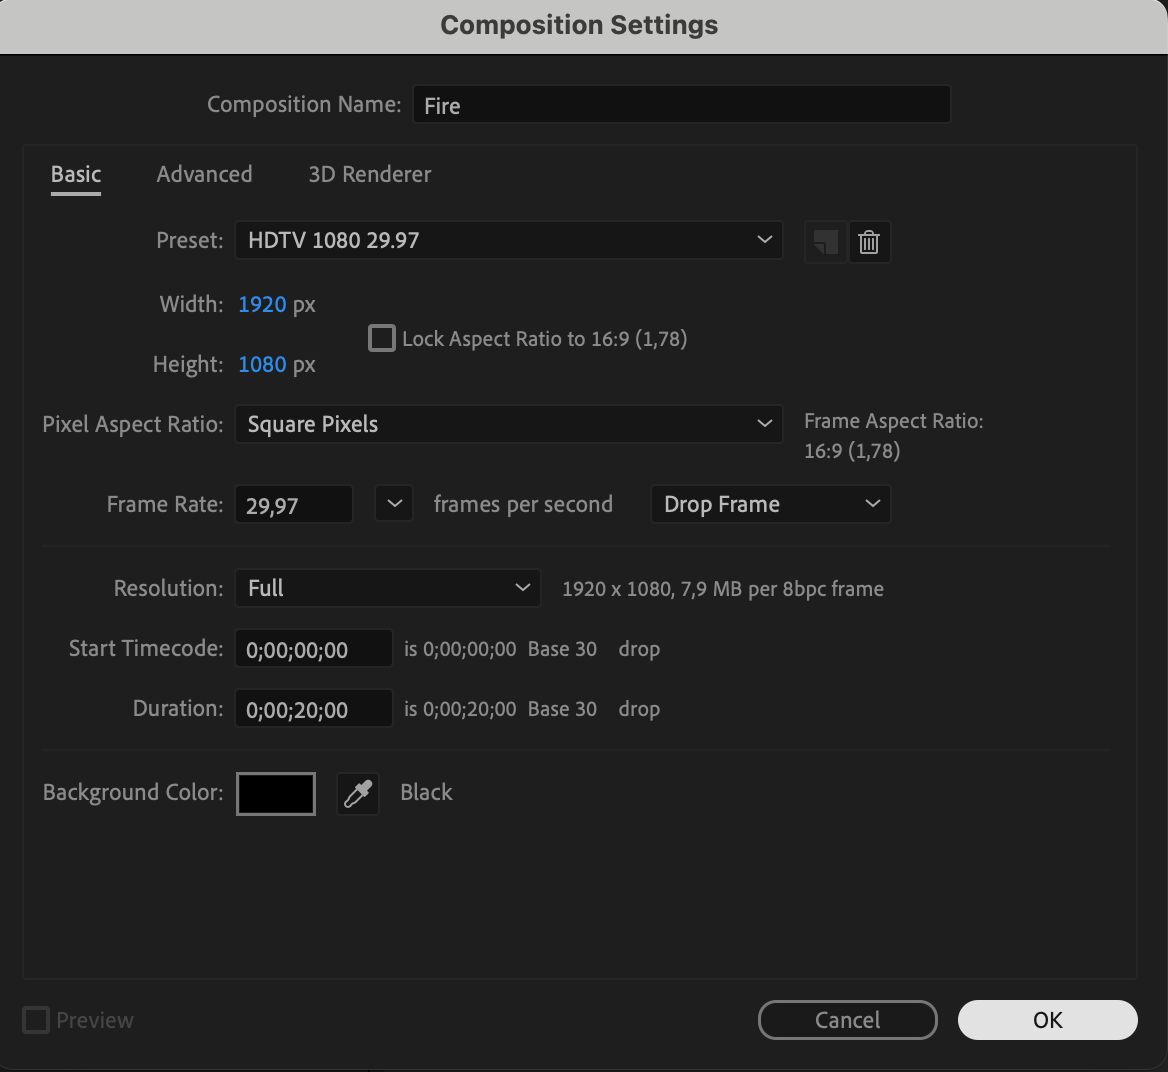
To begin, start by setting up your composition. Determine the resolution, frame rate, and duration of your project. Consider the overall mood and style you want to achieve with the fire effect, as this will guide your creative choices.

 2. Create a New Solid Layer
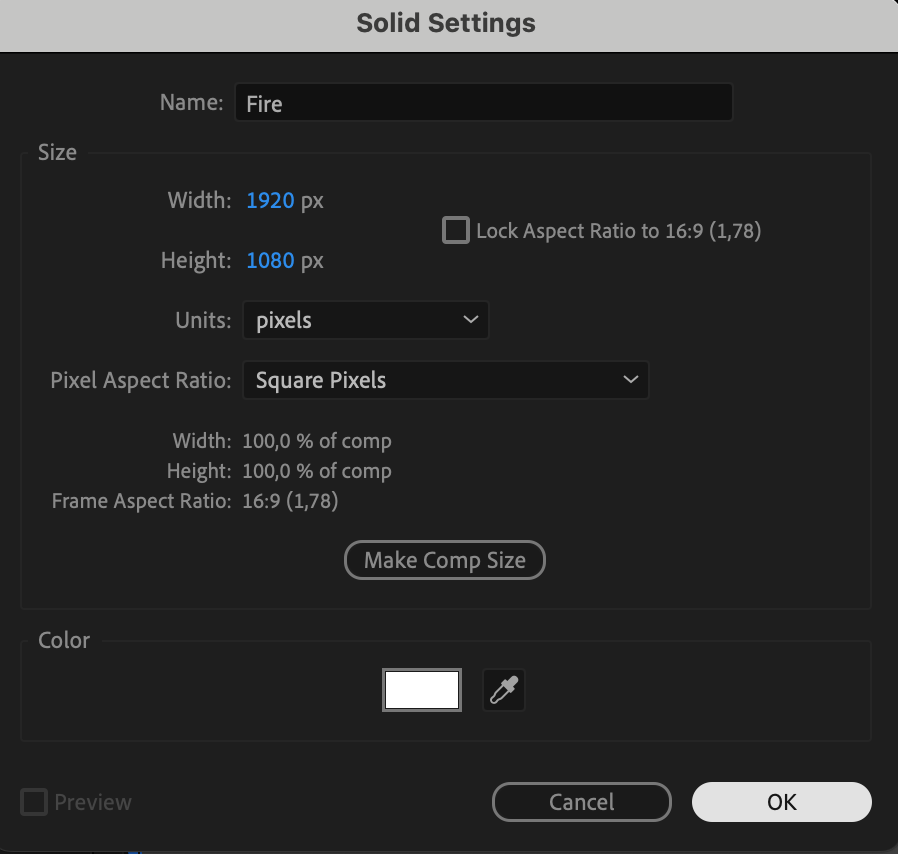
From the menu, choose Layer > New > Solid. Name this solid “Fire” and ensure its color is white. This solid will serve as the base for your fire effect.
 3. Create a Rectangle
Use the Rectangle Tool to create a rectangle in the middle of the composition panel. This shape will serve as the foundation for your fire effect.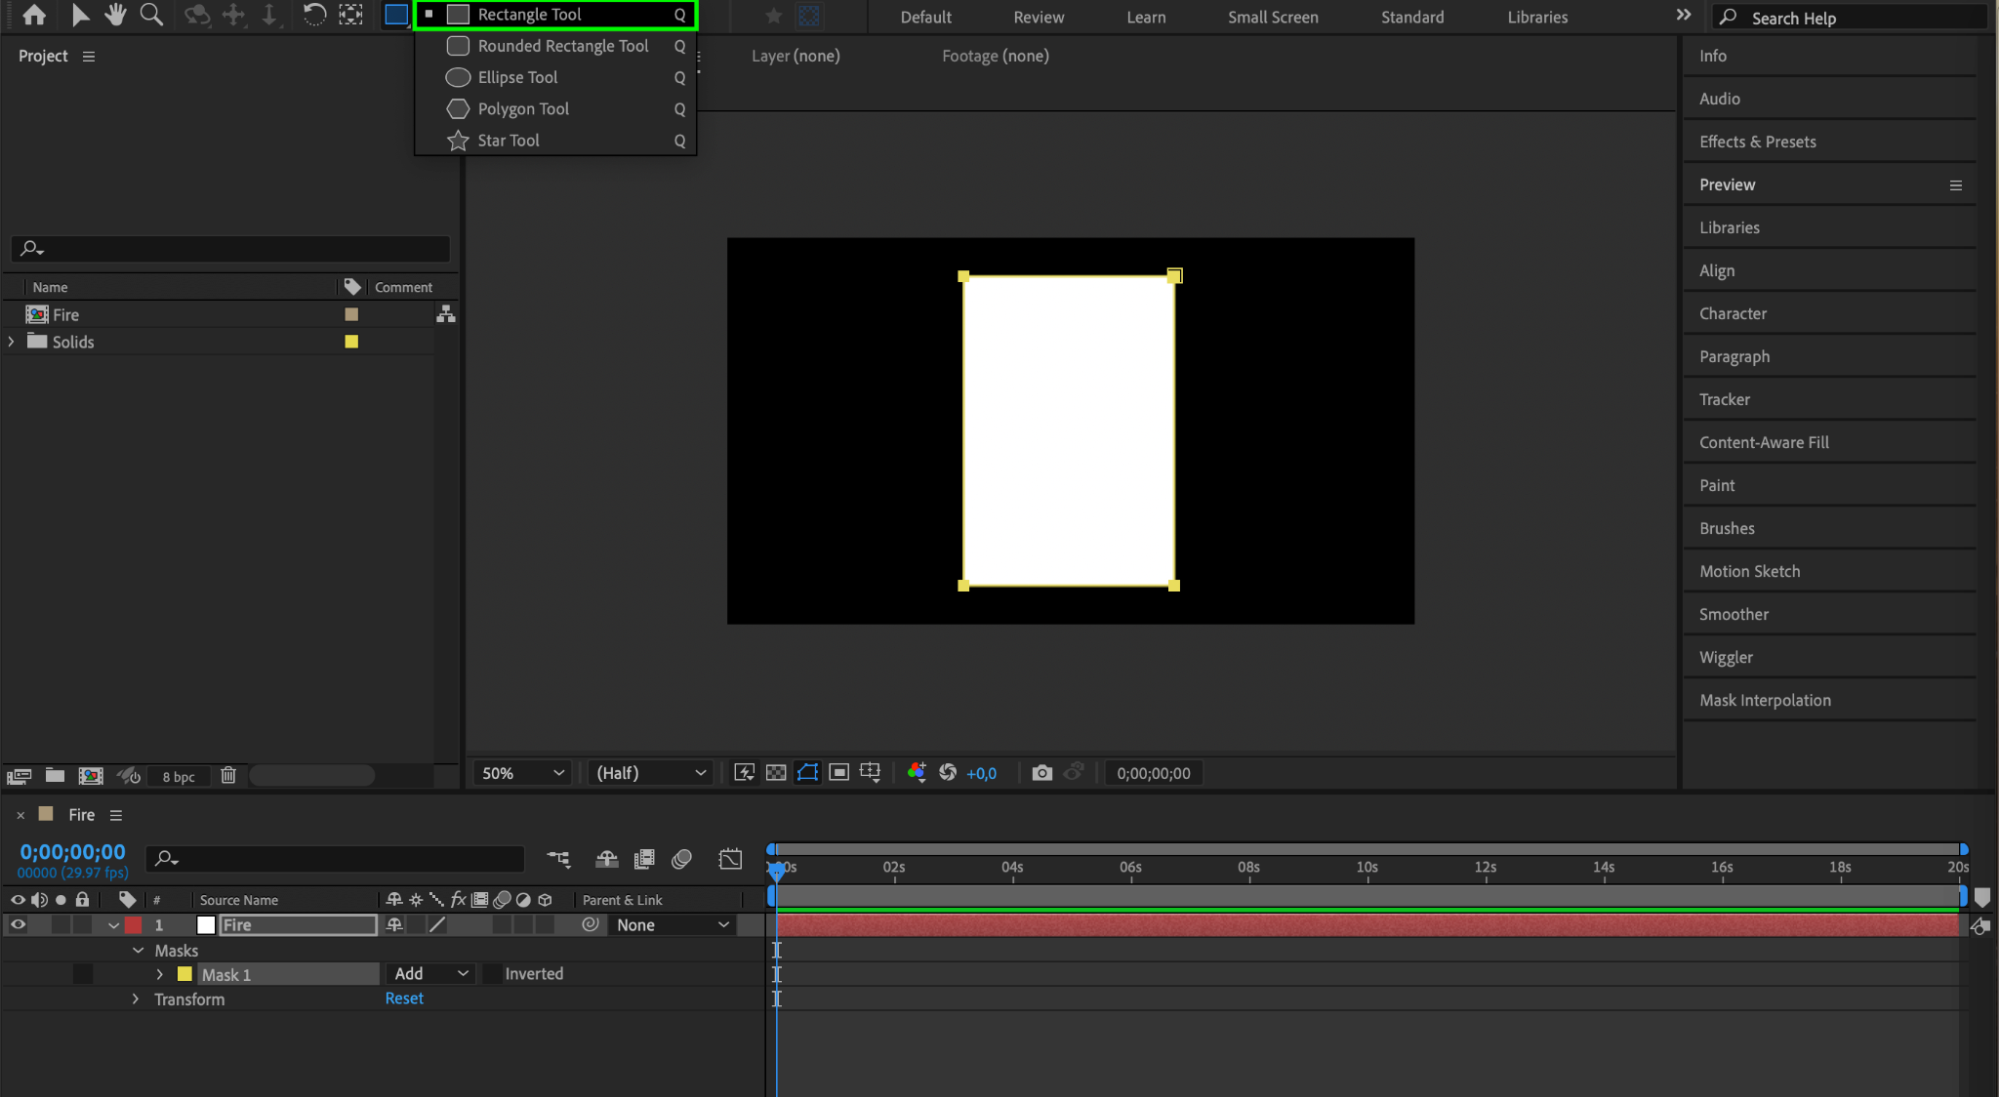 4. Transform the Rectangle into a Triangle
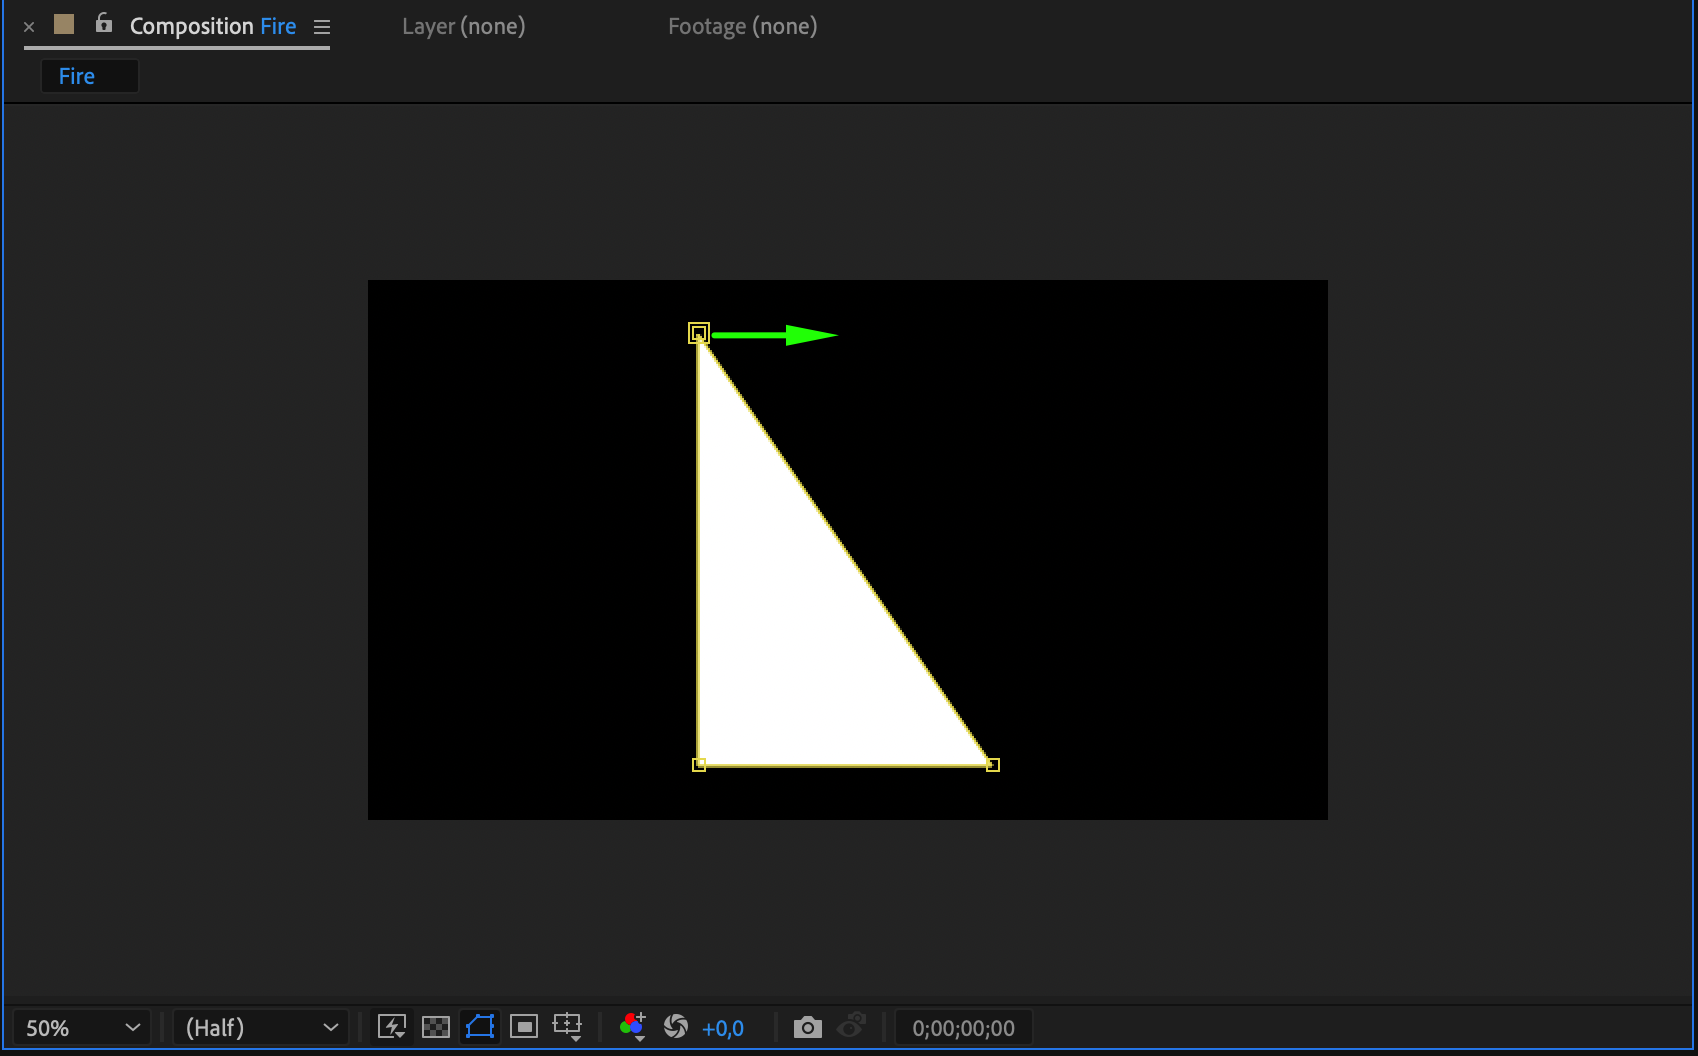
Delete one of the corners of the rectangle and adjust the points to form an isosceles triangle. This will start shaping the basic form of your flame.
Get 10% off when you subscribe to our newsletter

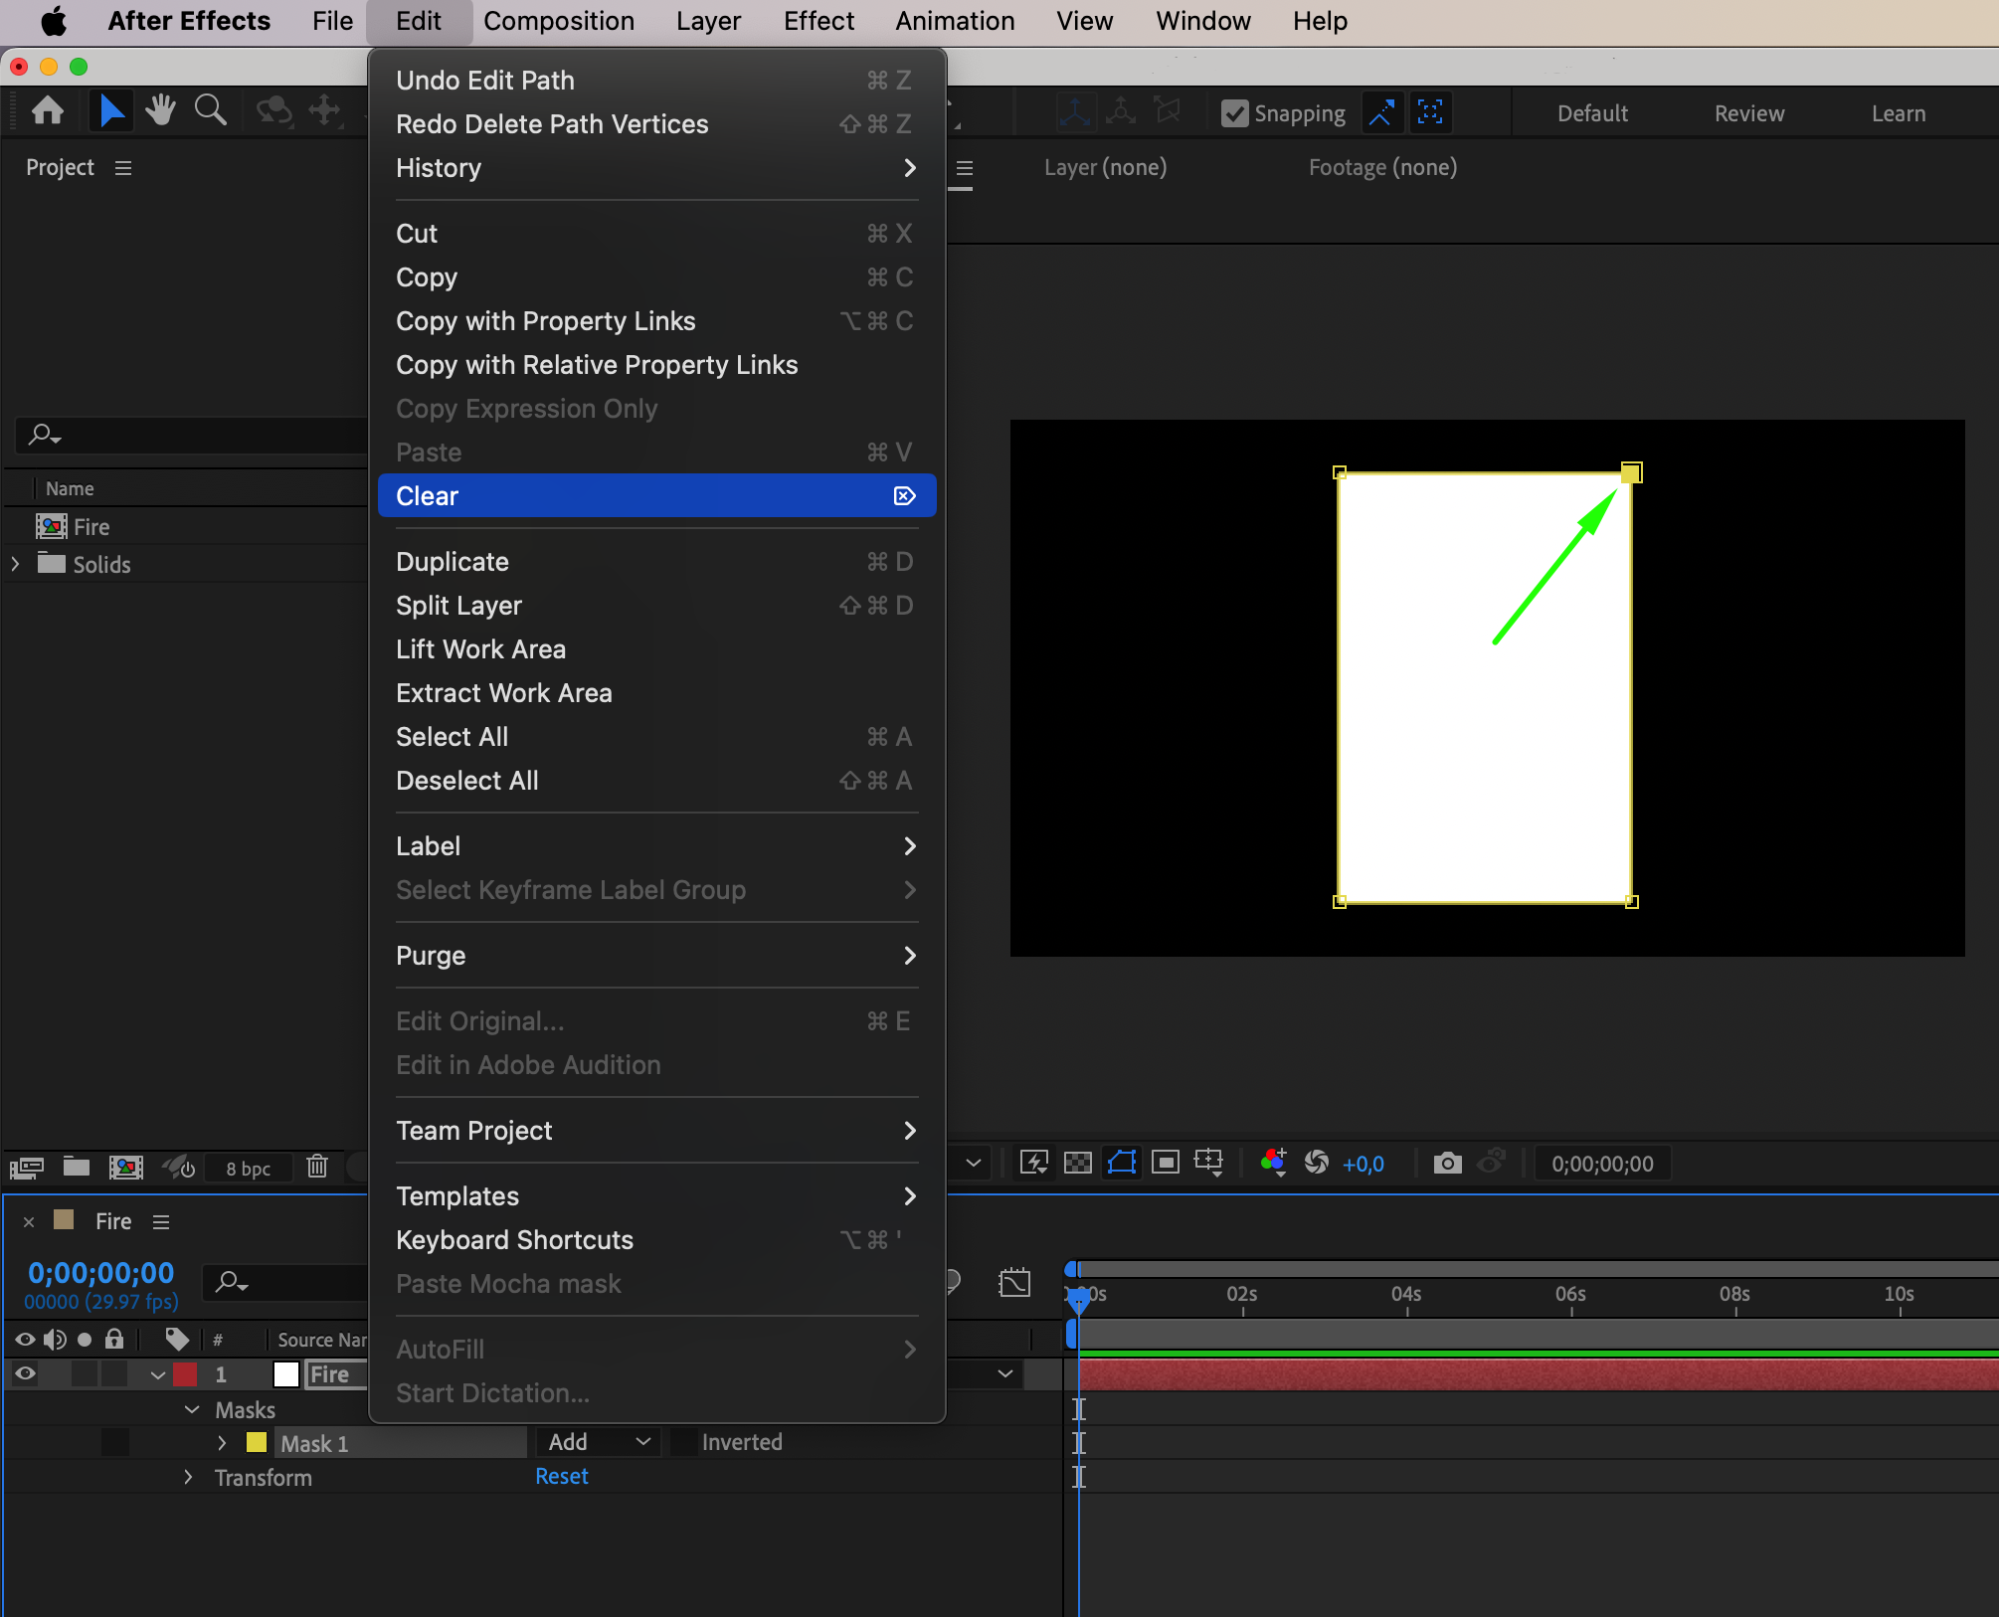 5. Adjust the Triangle with the Convert Vertex Tool
Use the Convert Vertex Tool to create a narrow arc at one of the triangle’s corners. This will give the shape a more organic, flame-like appearance.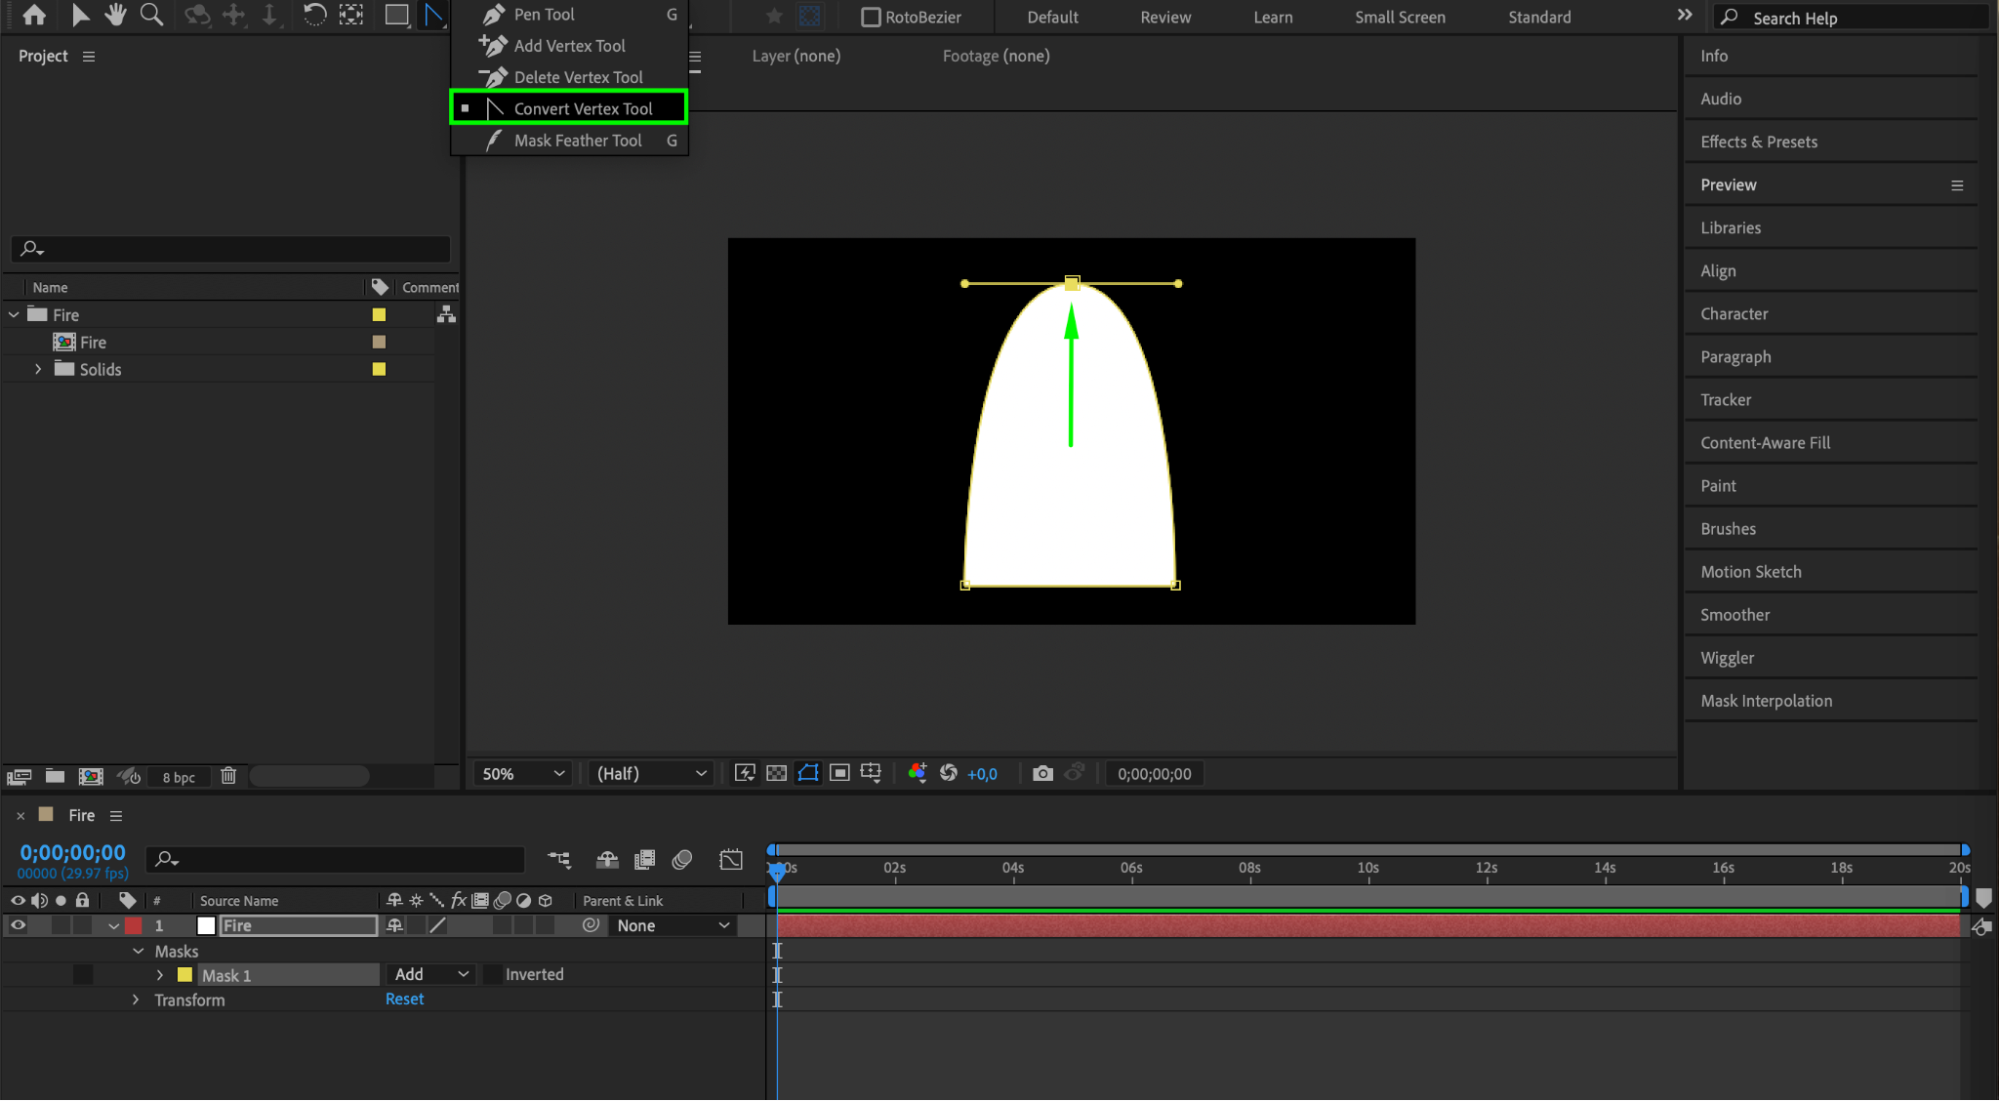
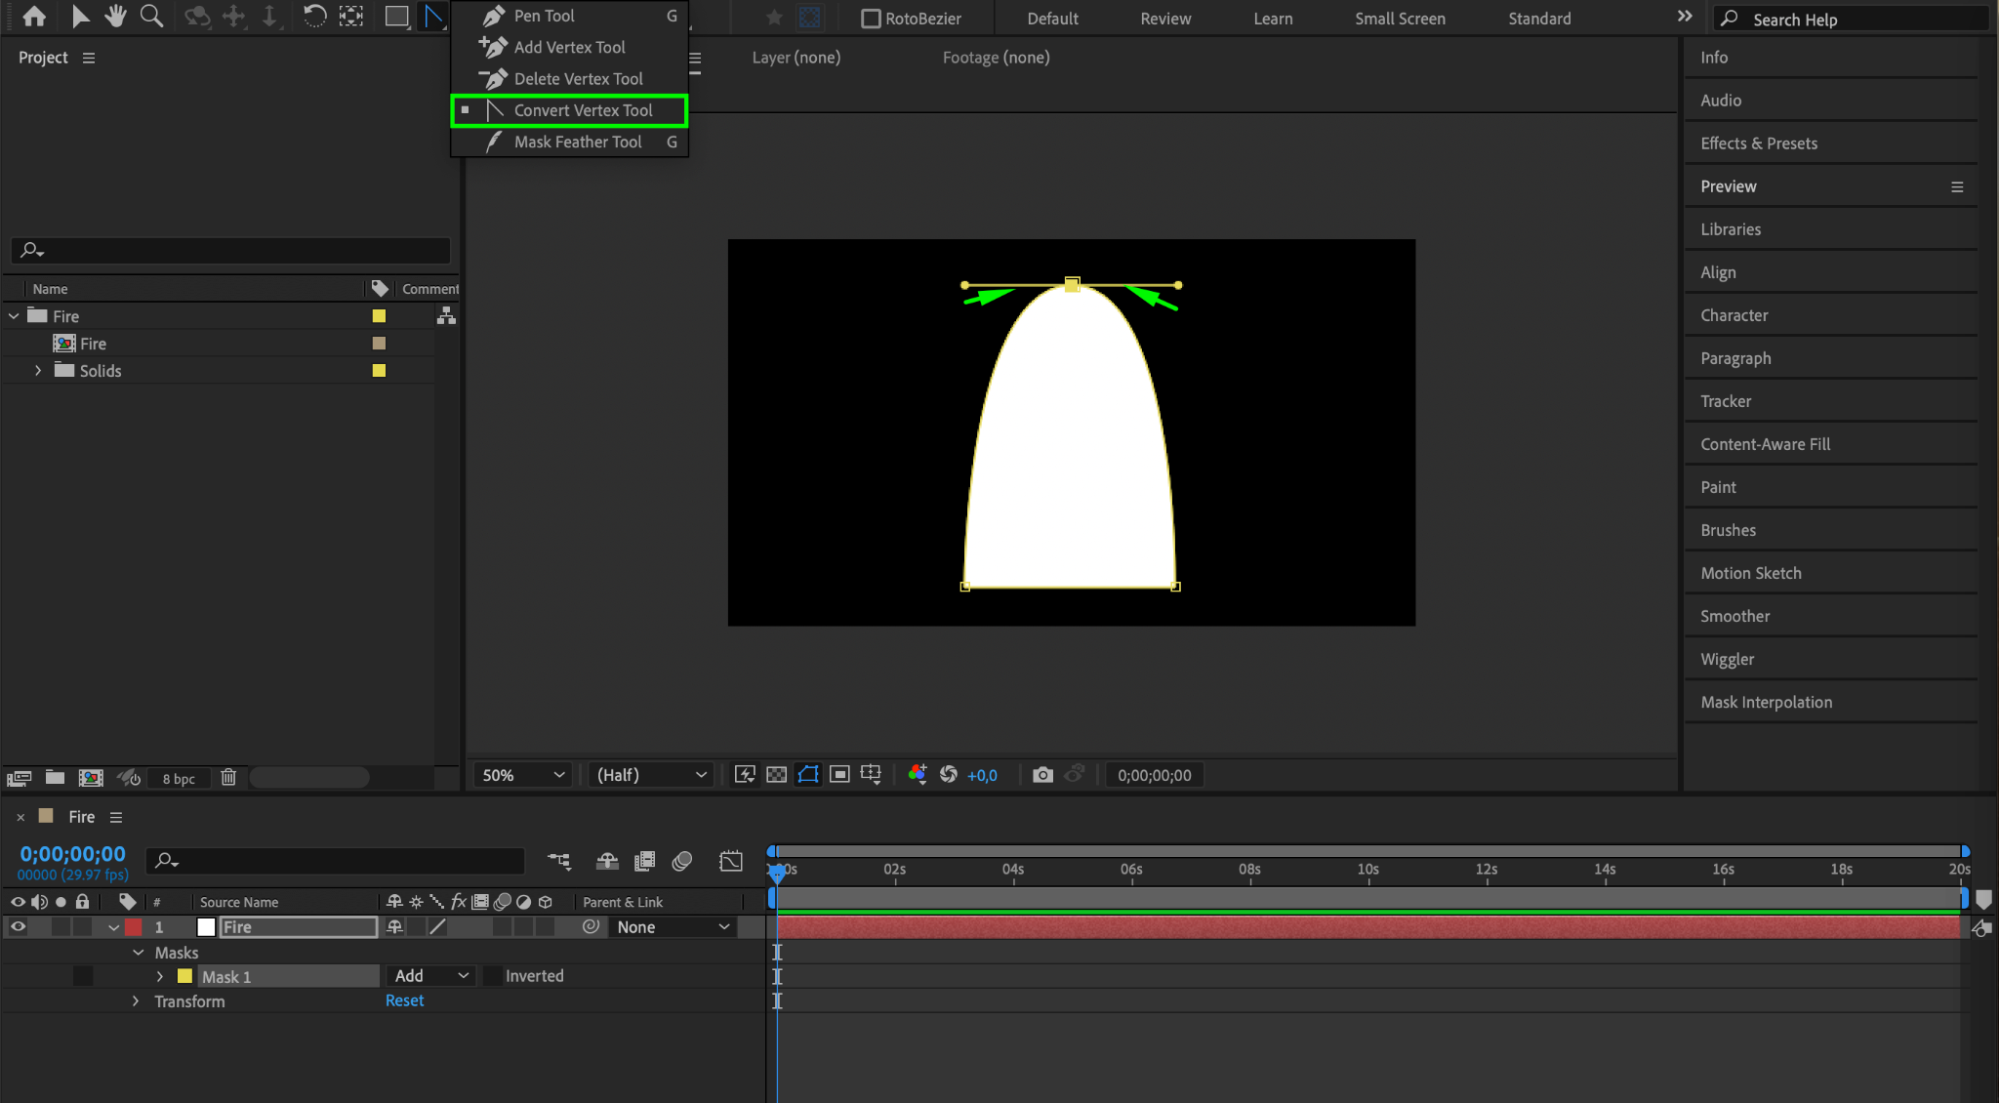
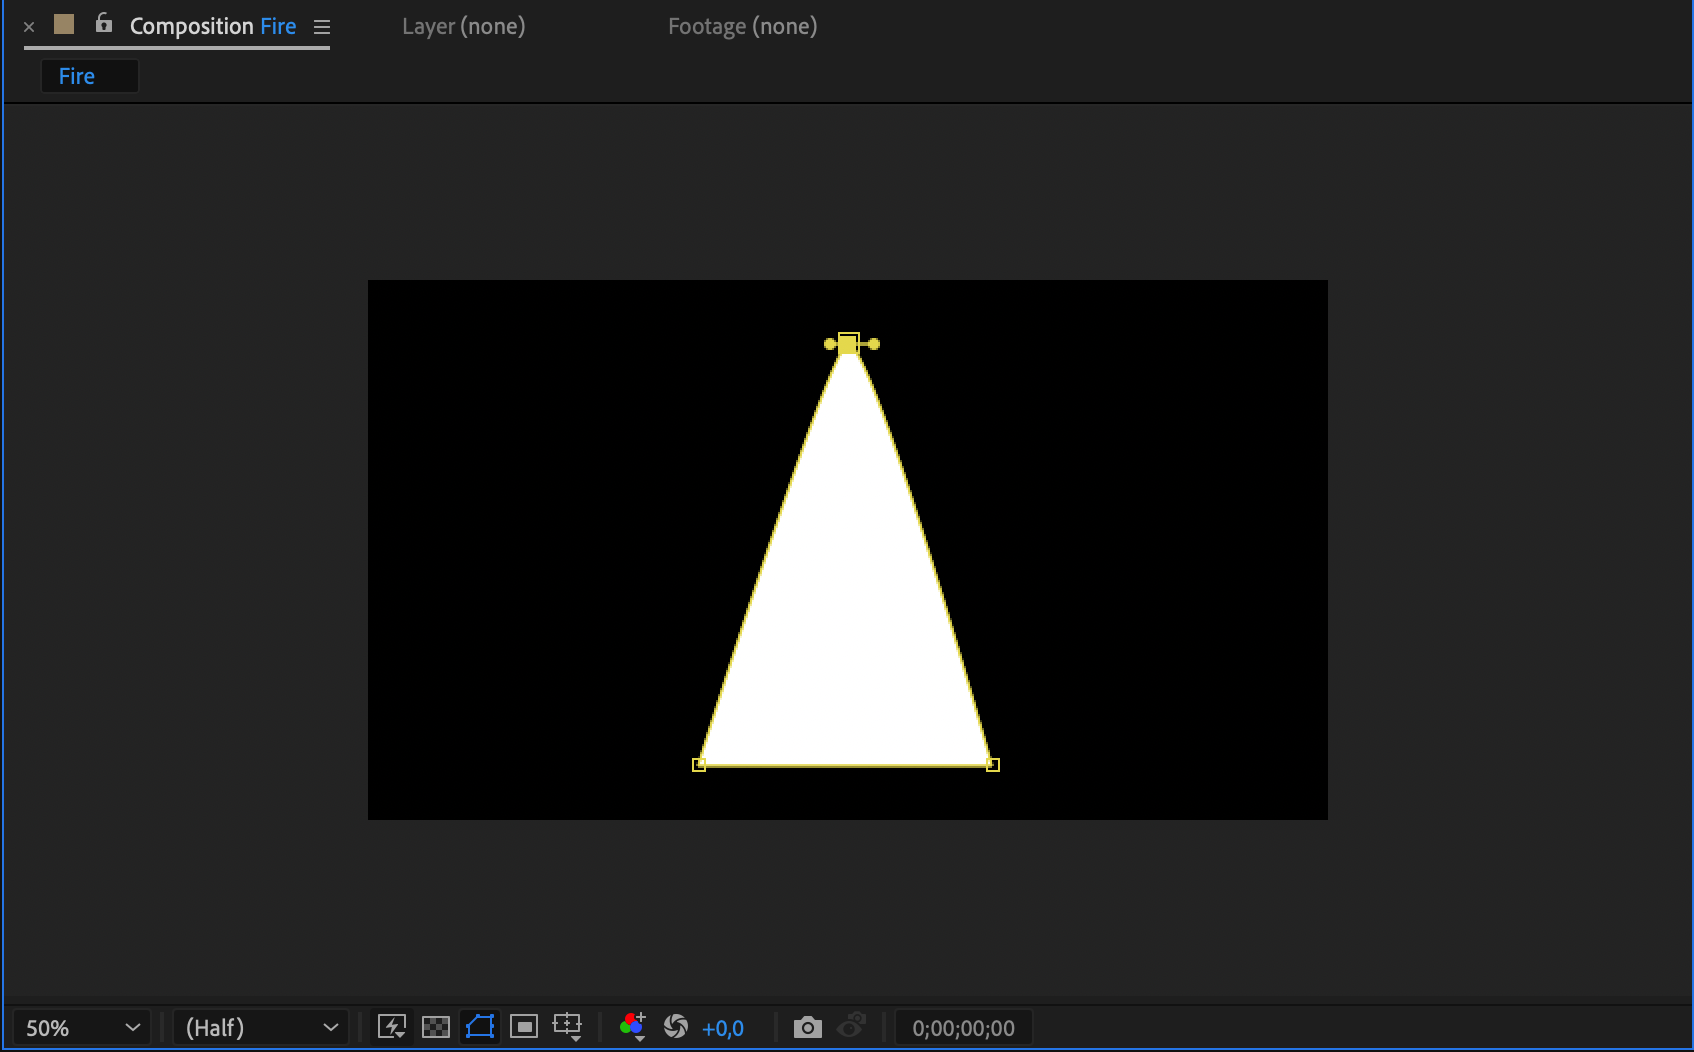 6. Refine the Shape with the Pen Tool
With the Pen Tool, add two points slightly above the base of the triangle to further refine the shape into a flame. Adjust these points to create a realistic flame outline.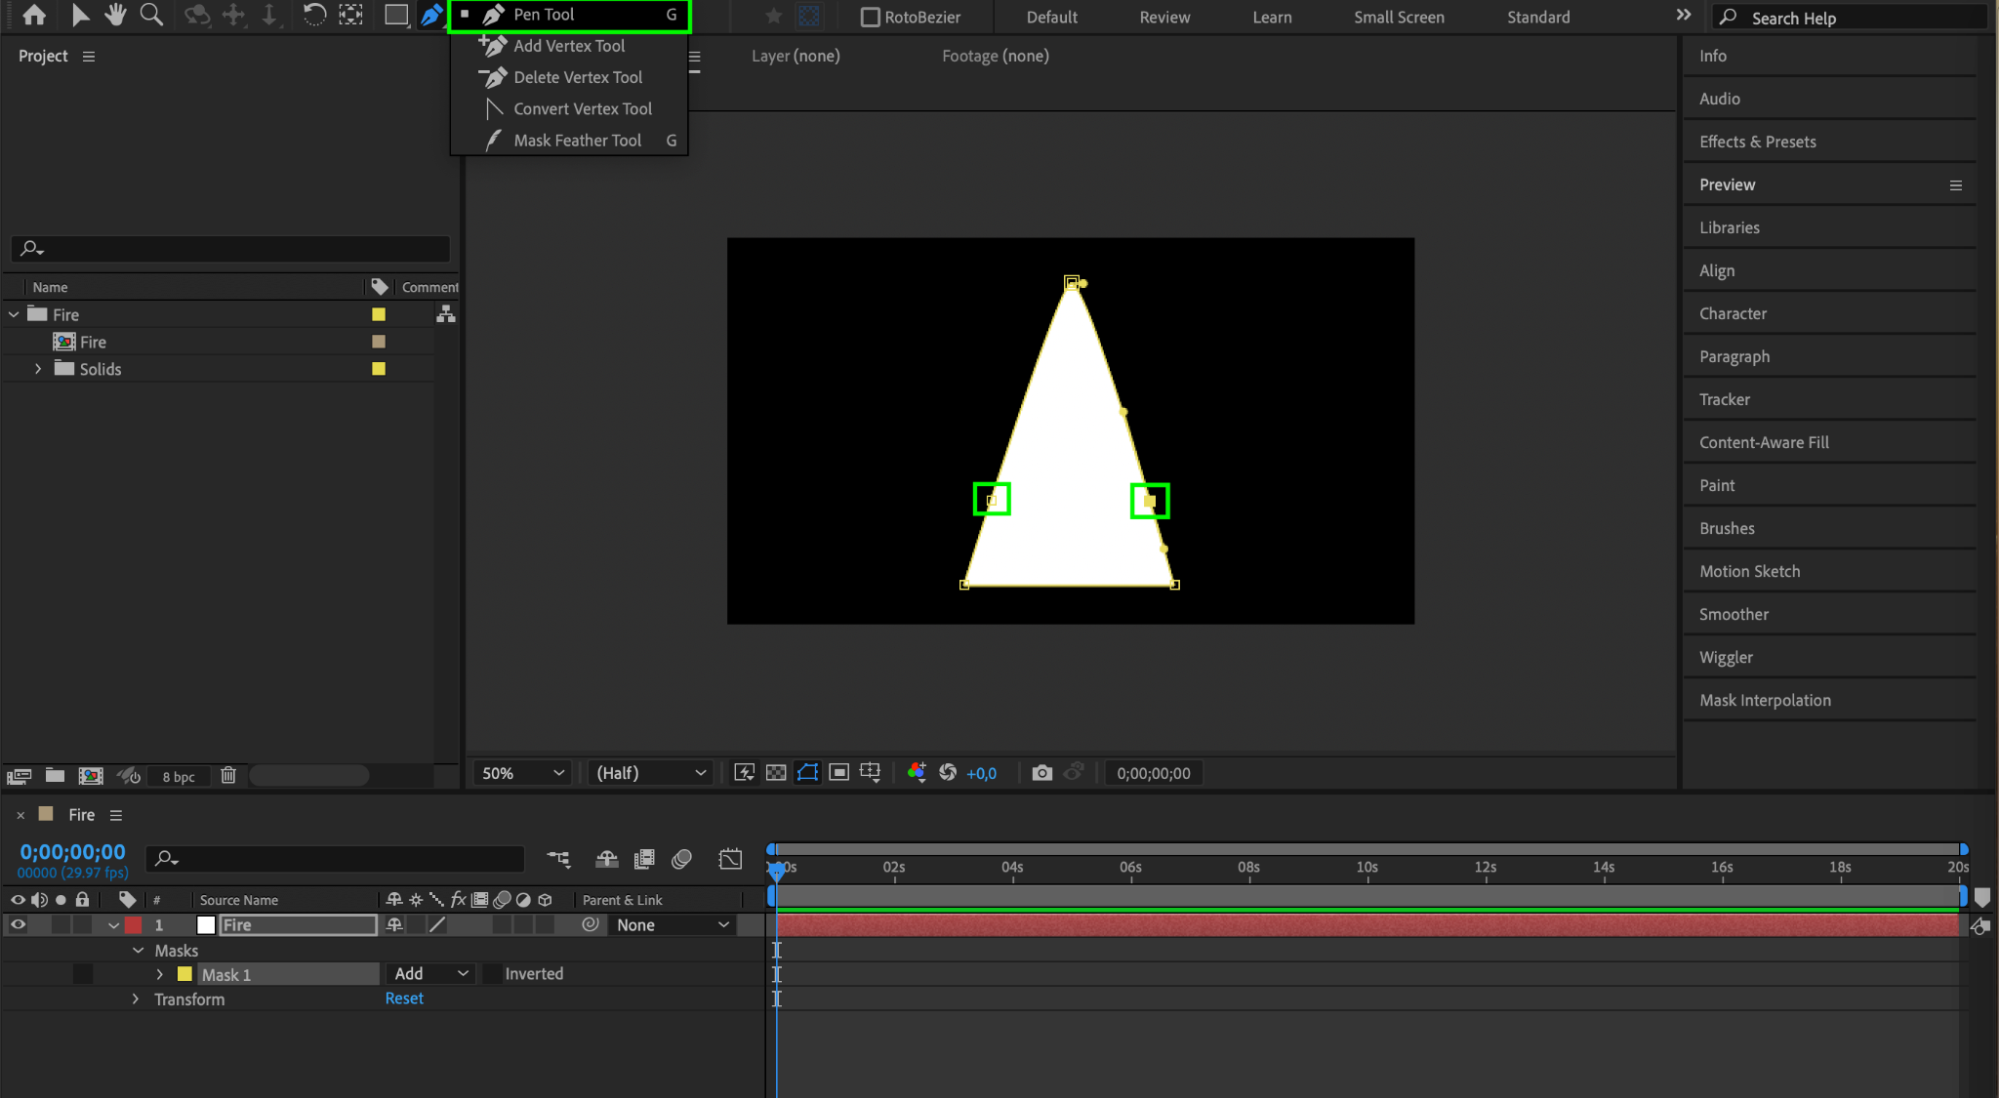
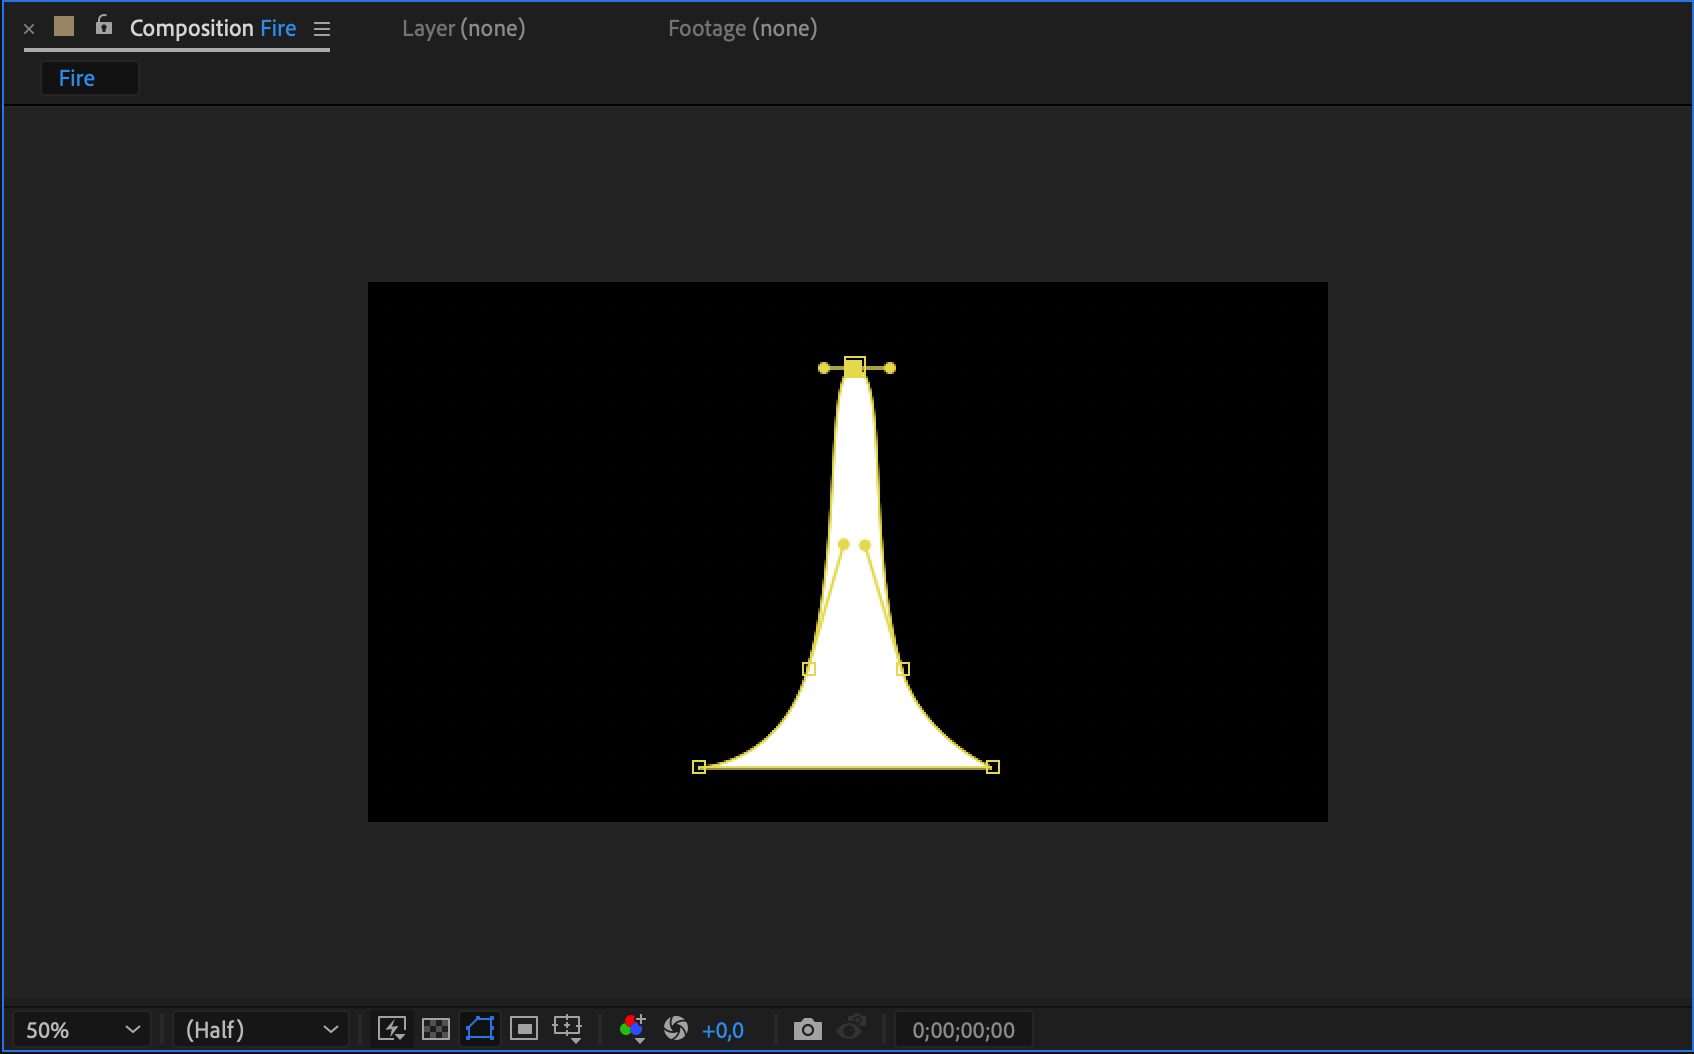 7. Apply the Fast Box Blur Effect
Right-click on the solid layer, then choose Effect > Blur & Sharpen > Fast Box Blur. Adjust the blur settings to soften the edges of your flame shape.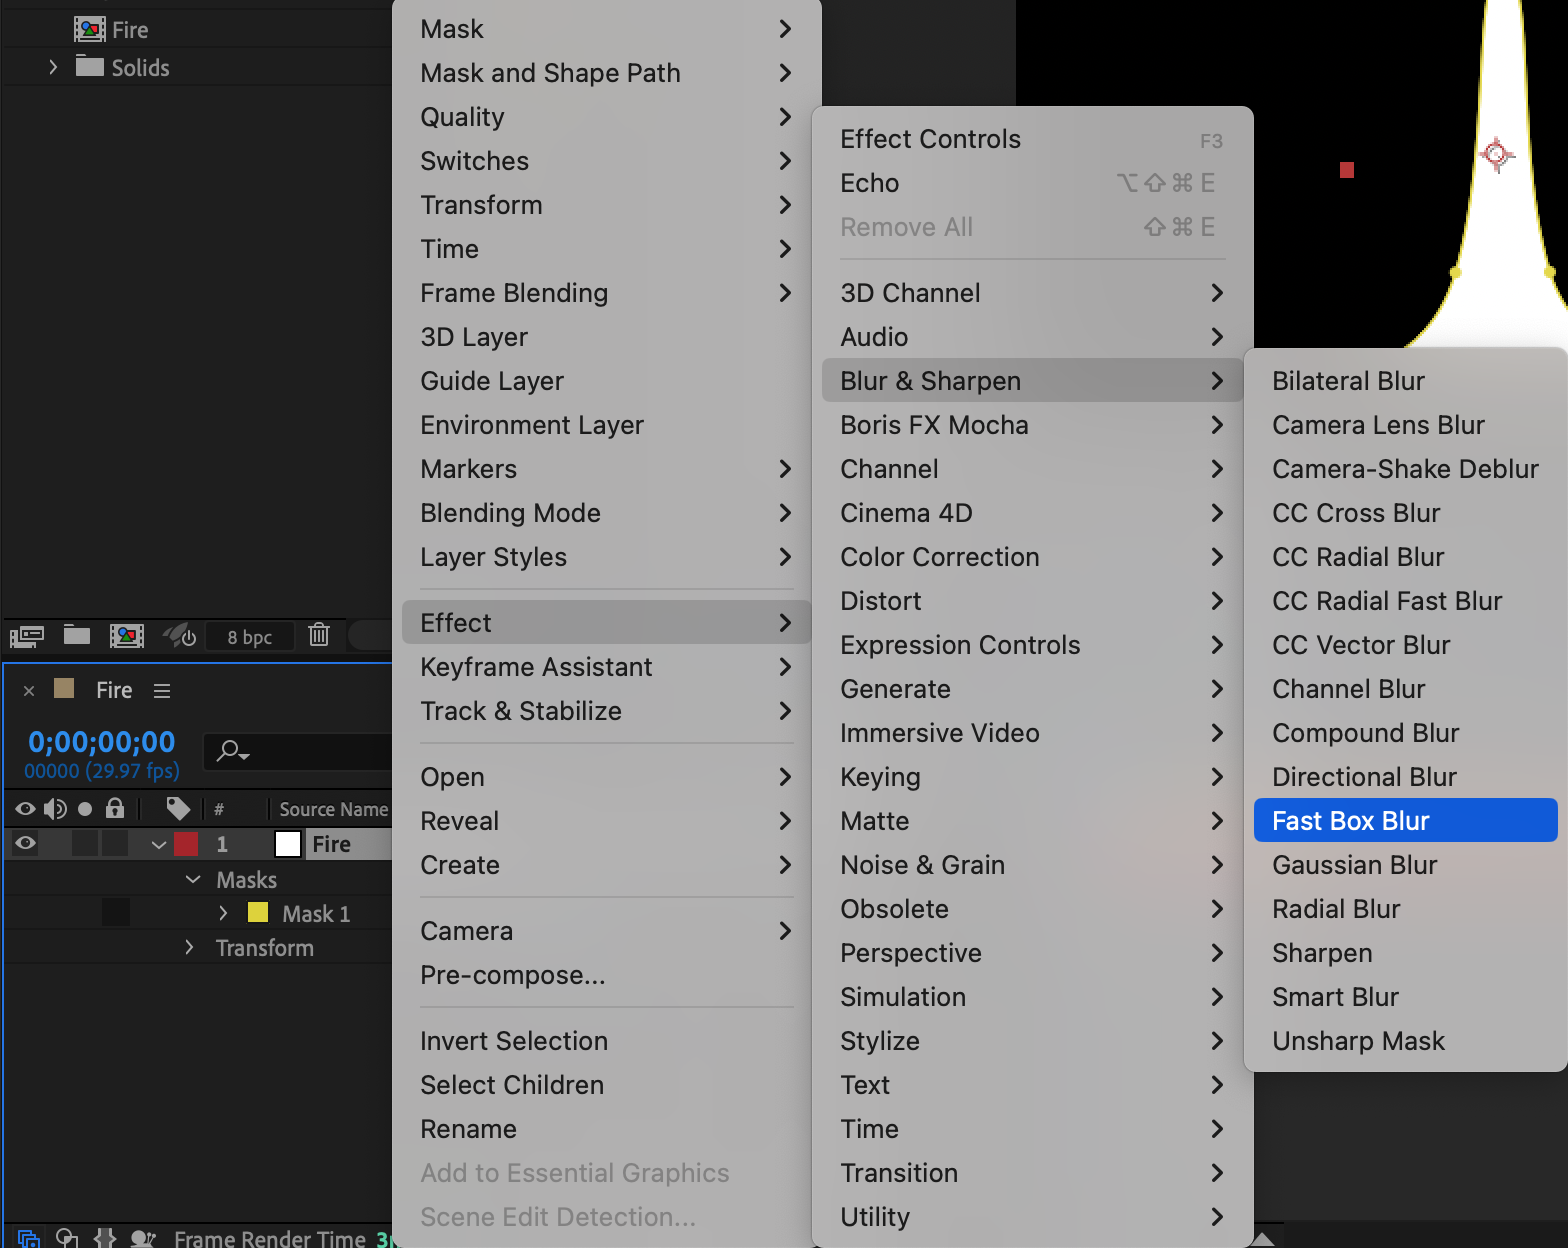
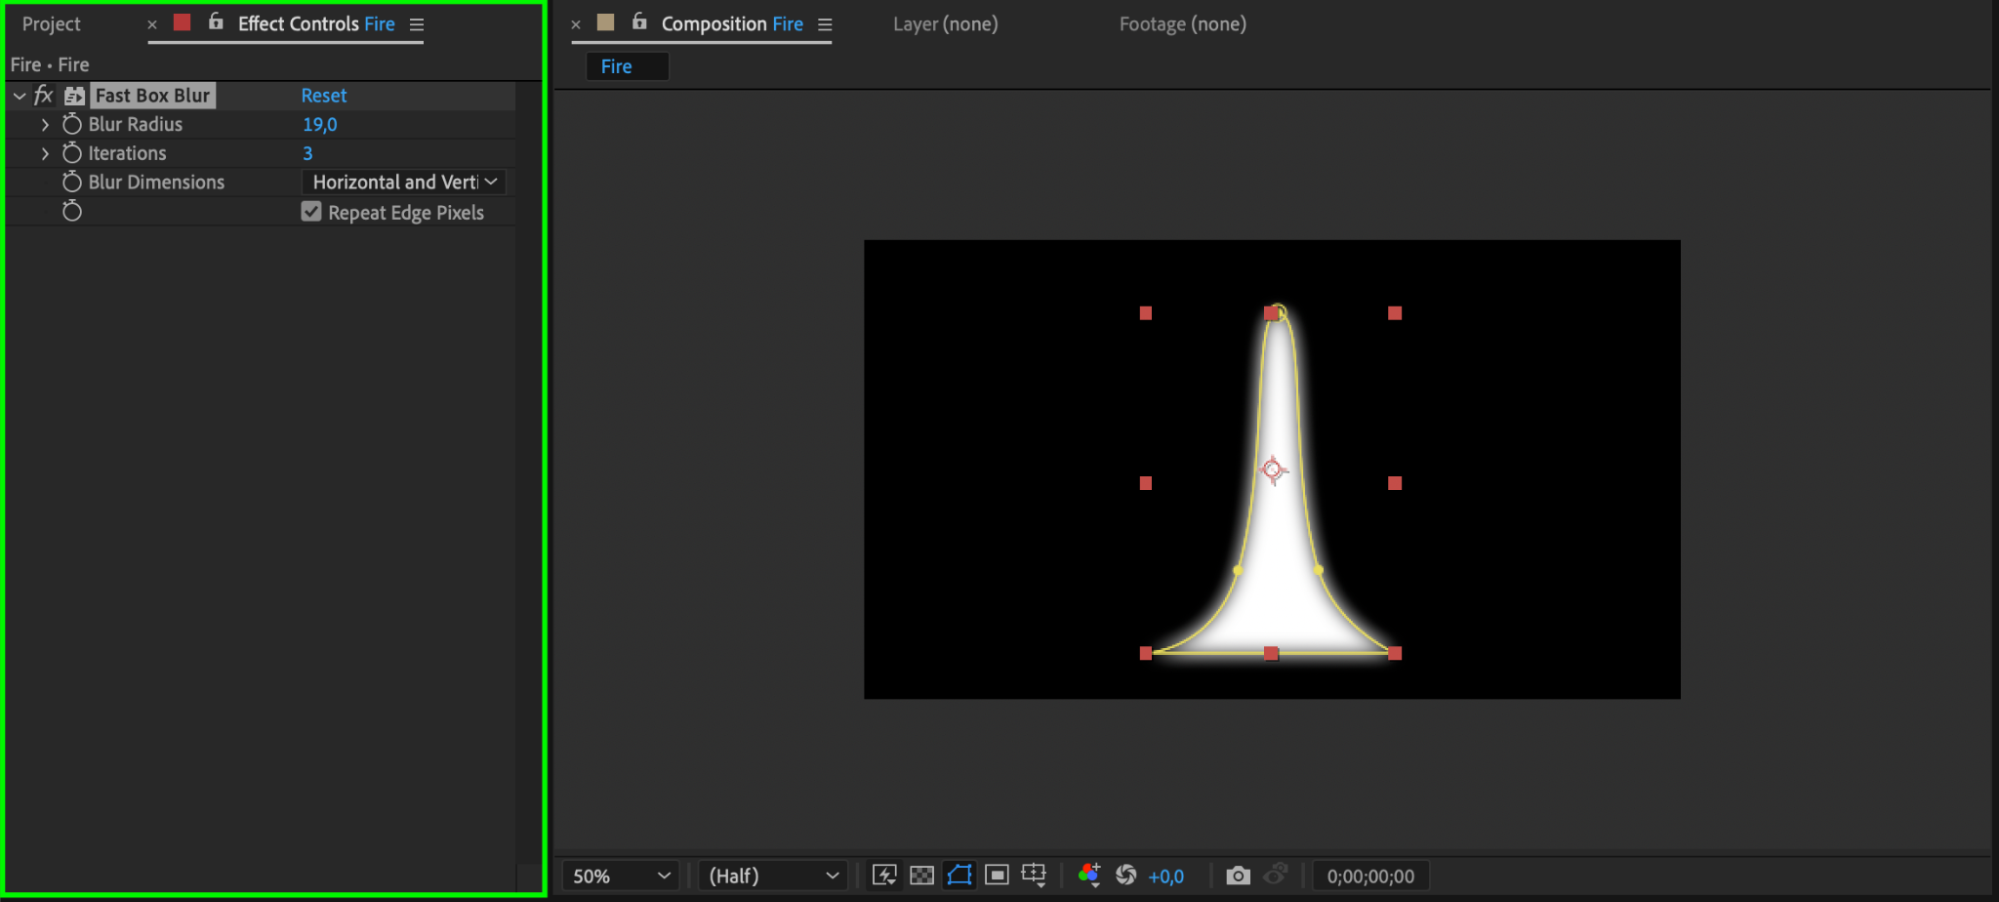 8. Create a Second Mask
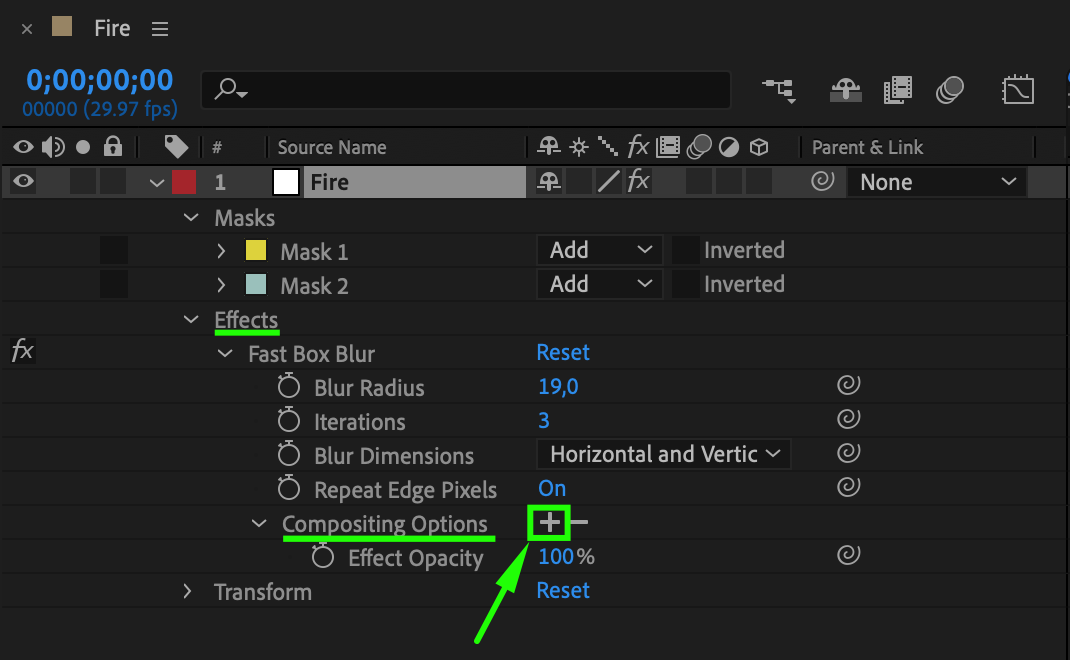
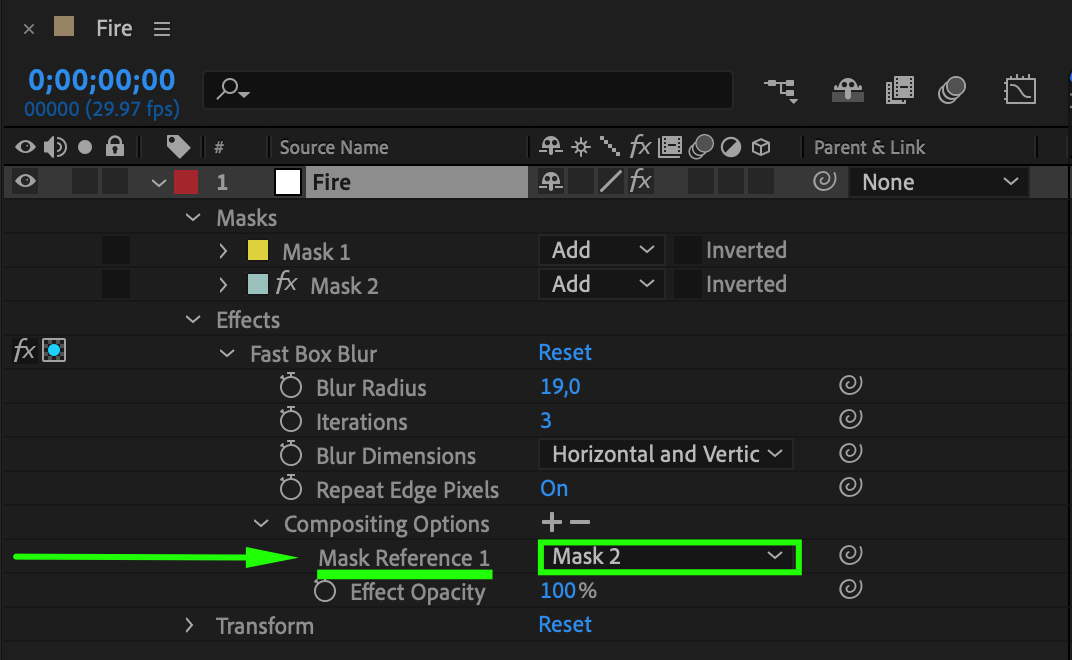
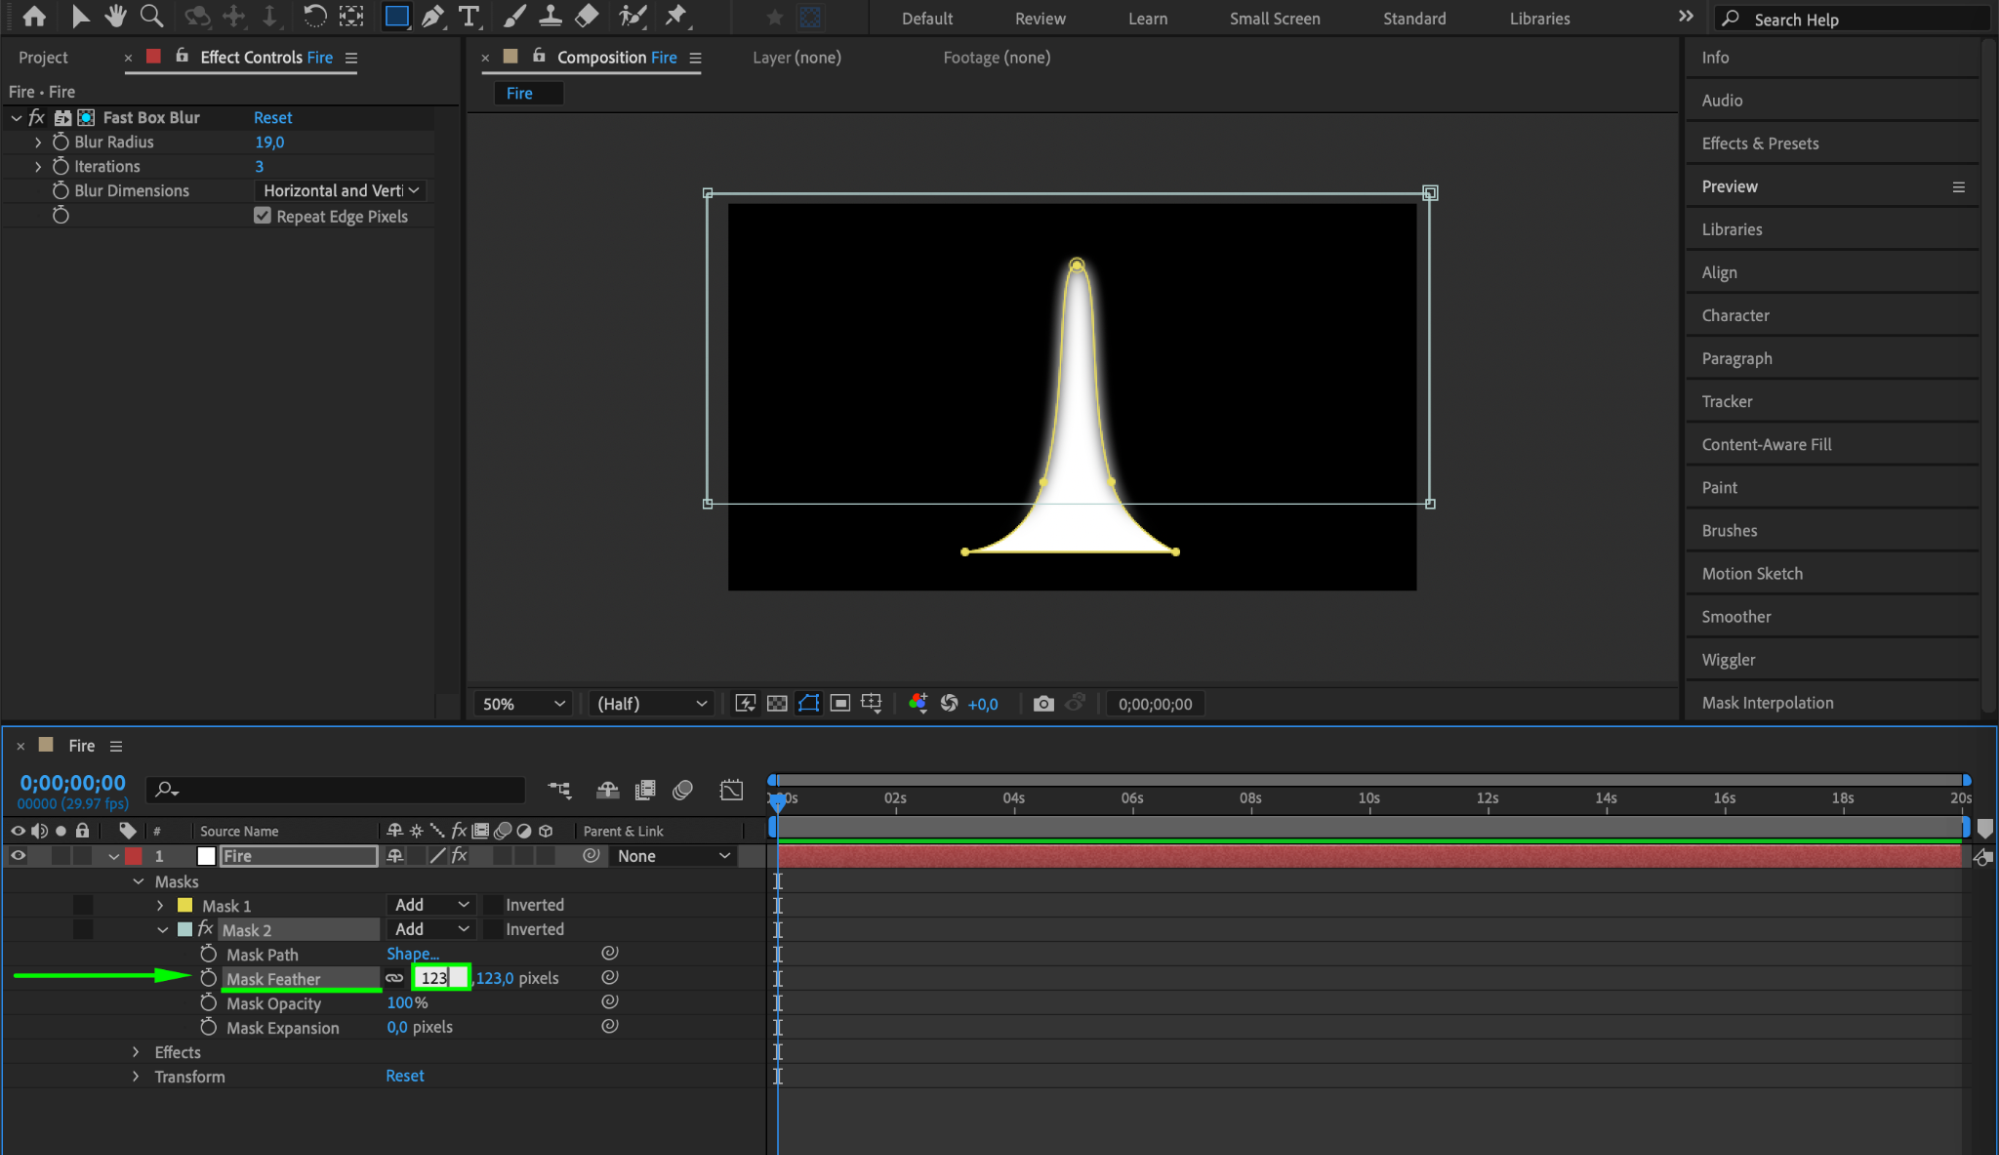
Use the Rectangle Tool to create a second mask on your solid layer. Adjust the composition options and mask feather settings to blend the edges smoothly.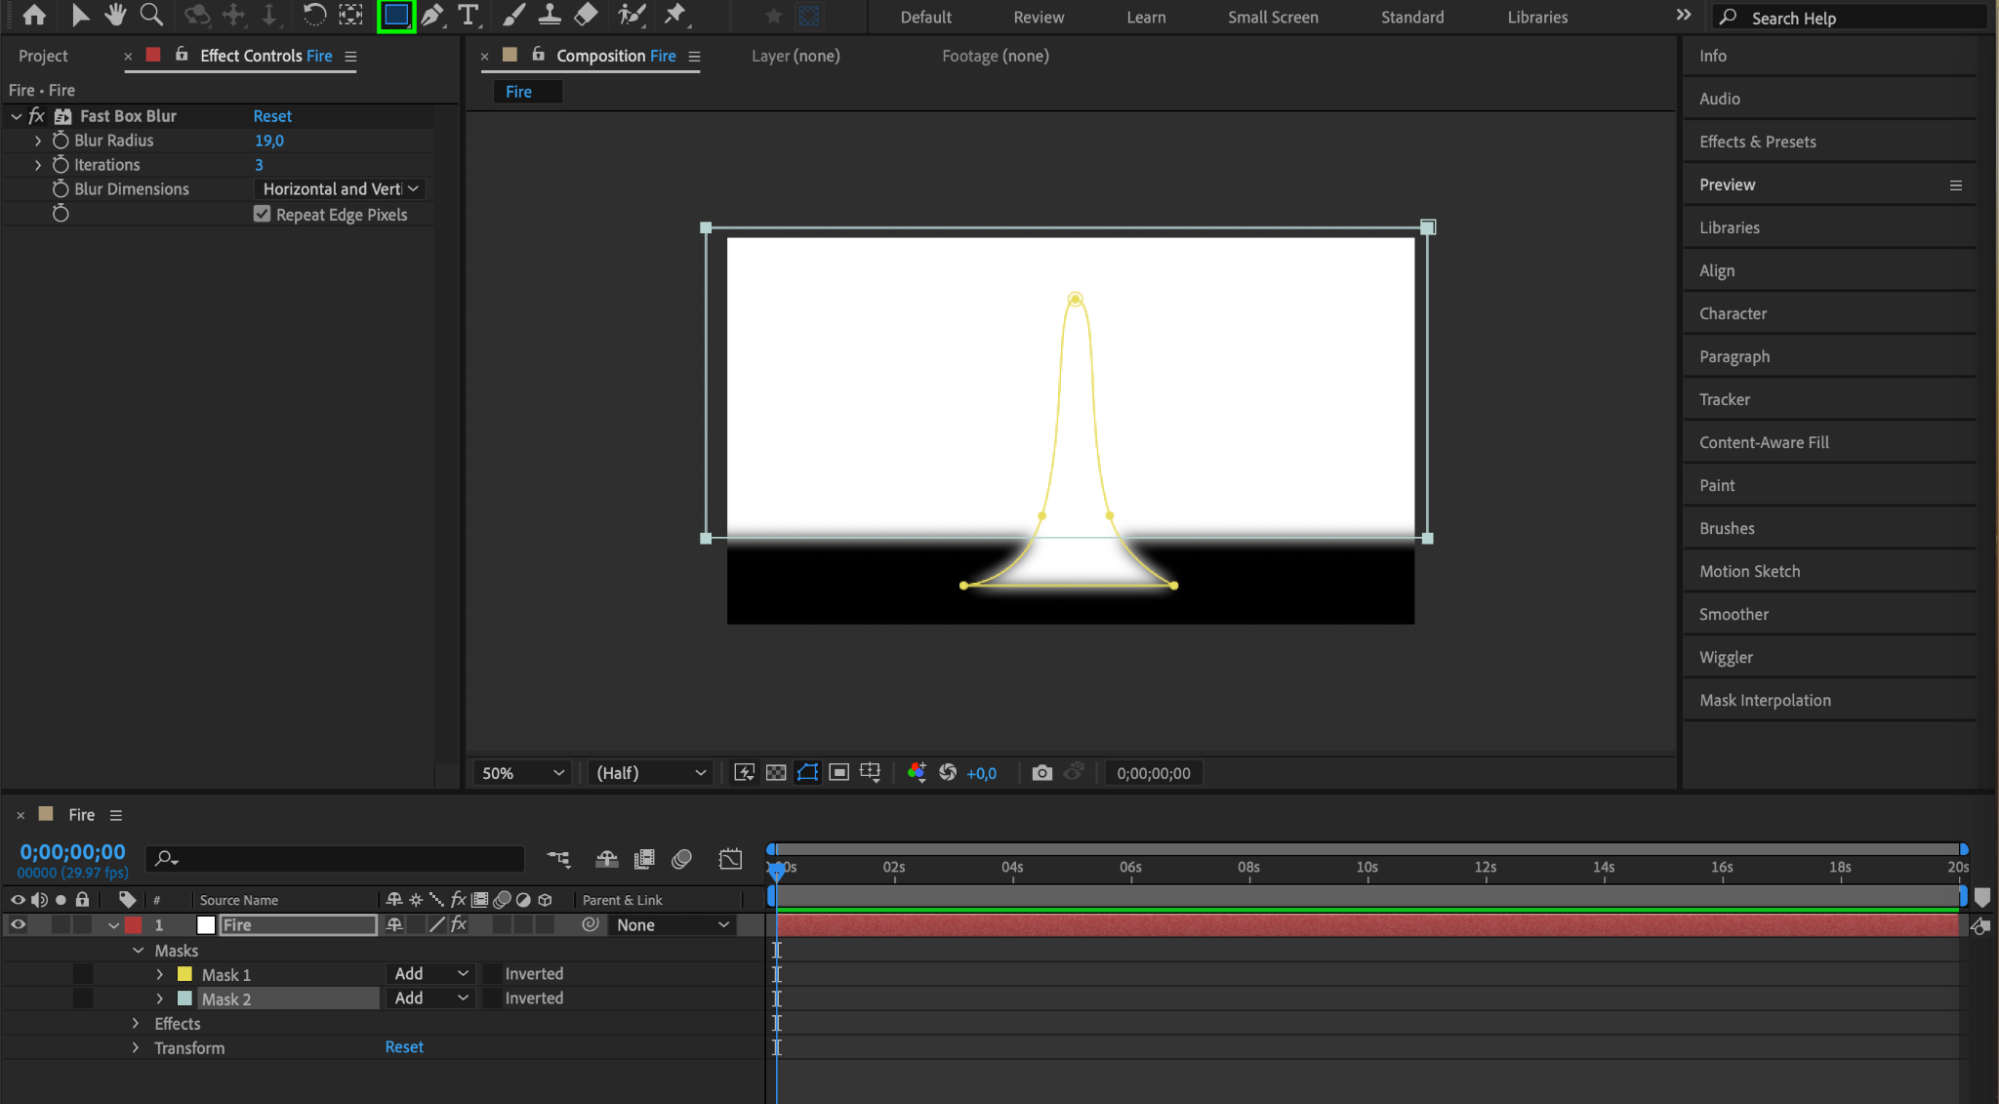
 9. Apply the Fast Box Blur Effect Again
Right-click on the solid layer again and choose Effect > Blur & Sharpen > Fast Box Blur. Apply the effect to the second mask to further refine the edges.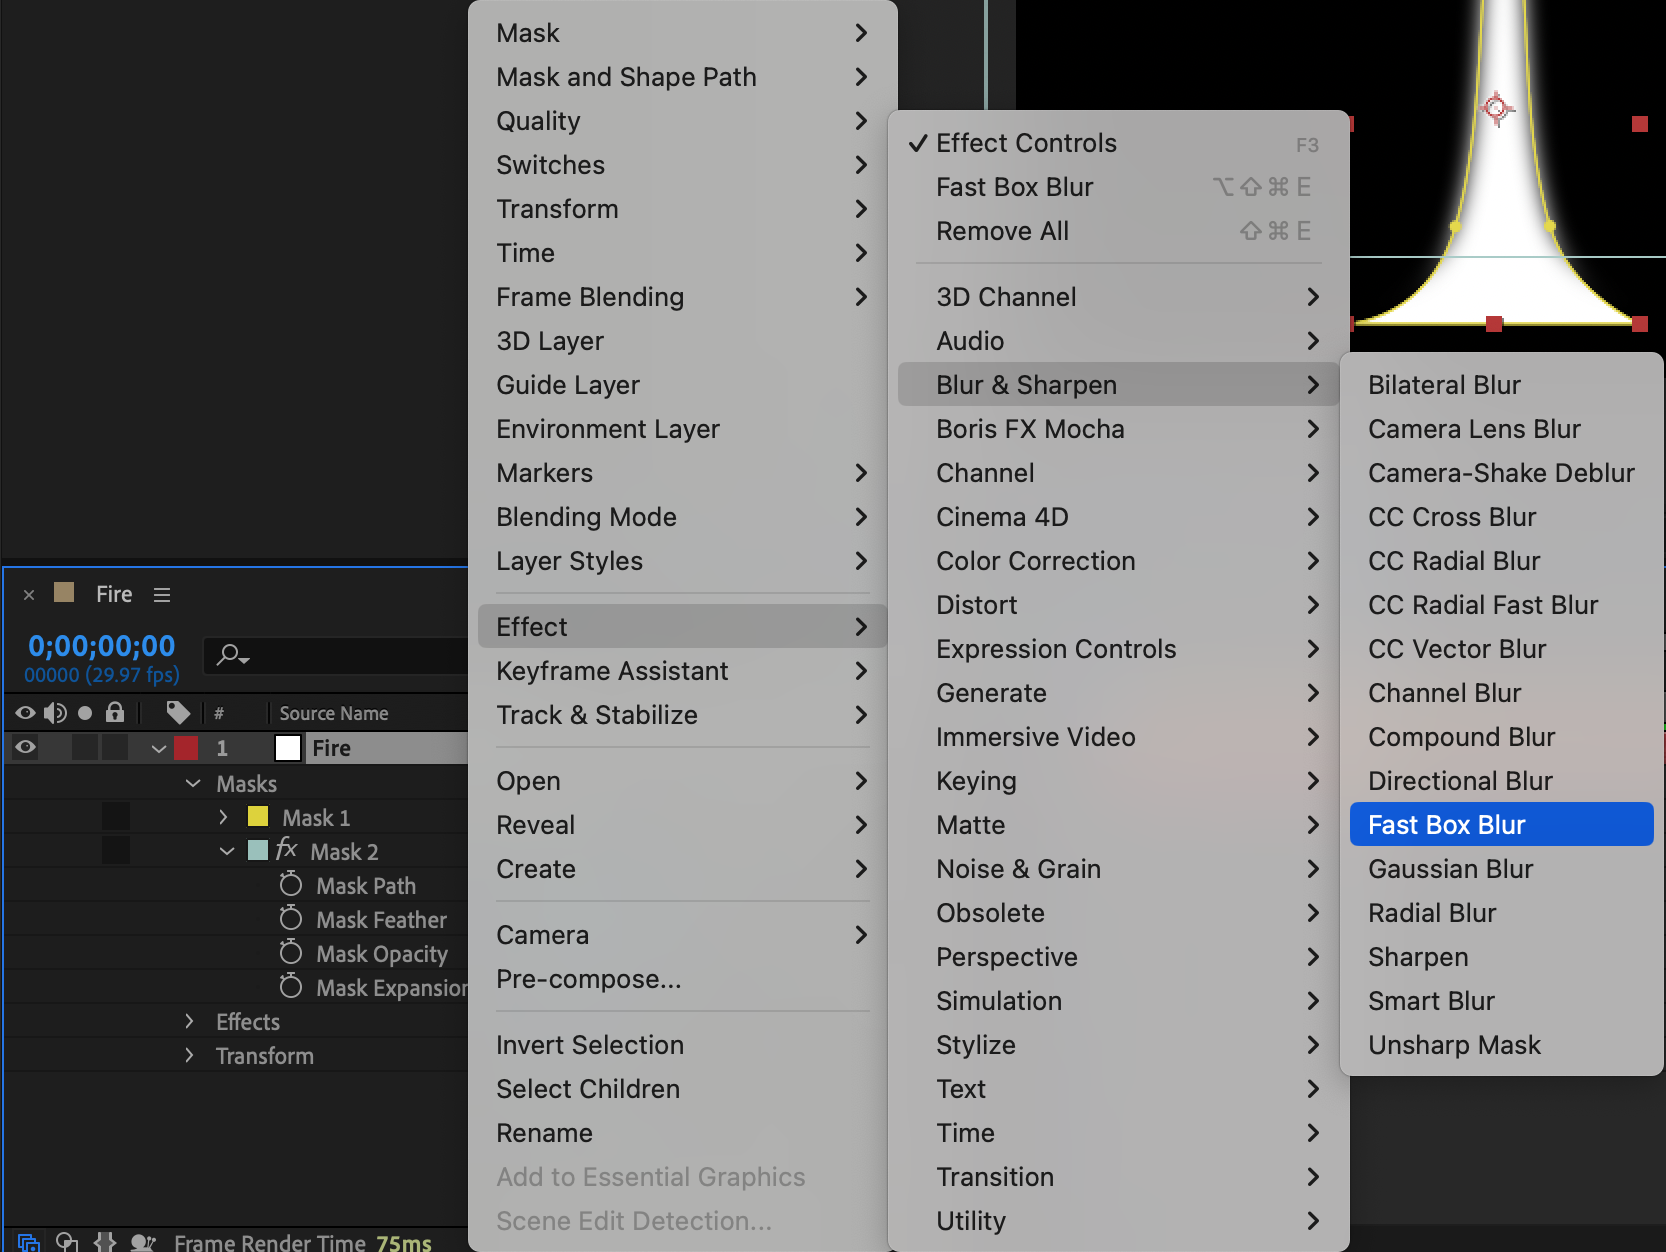
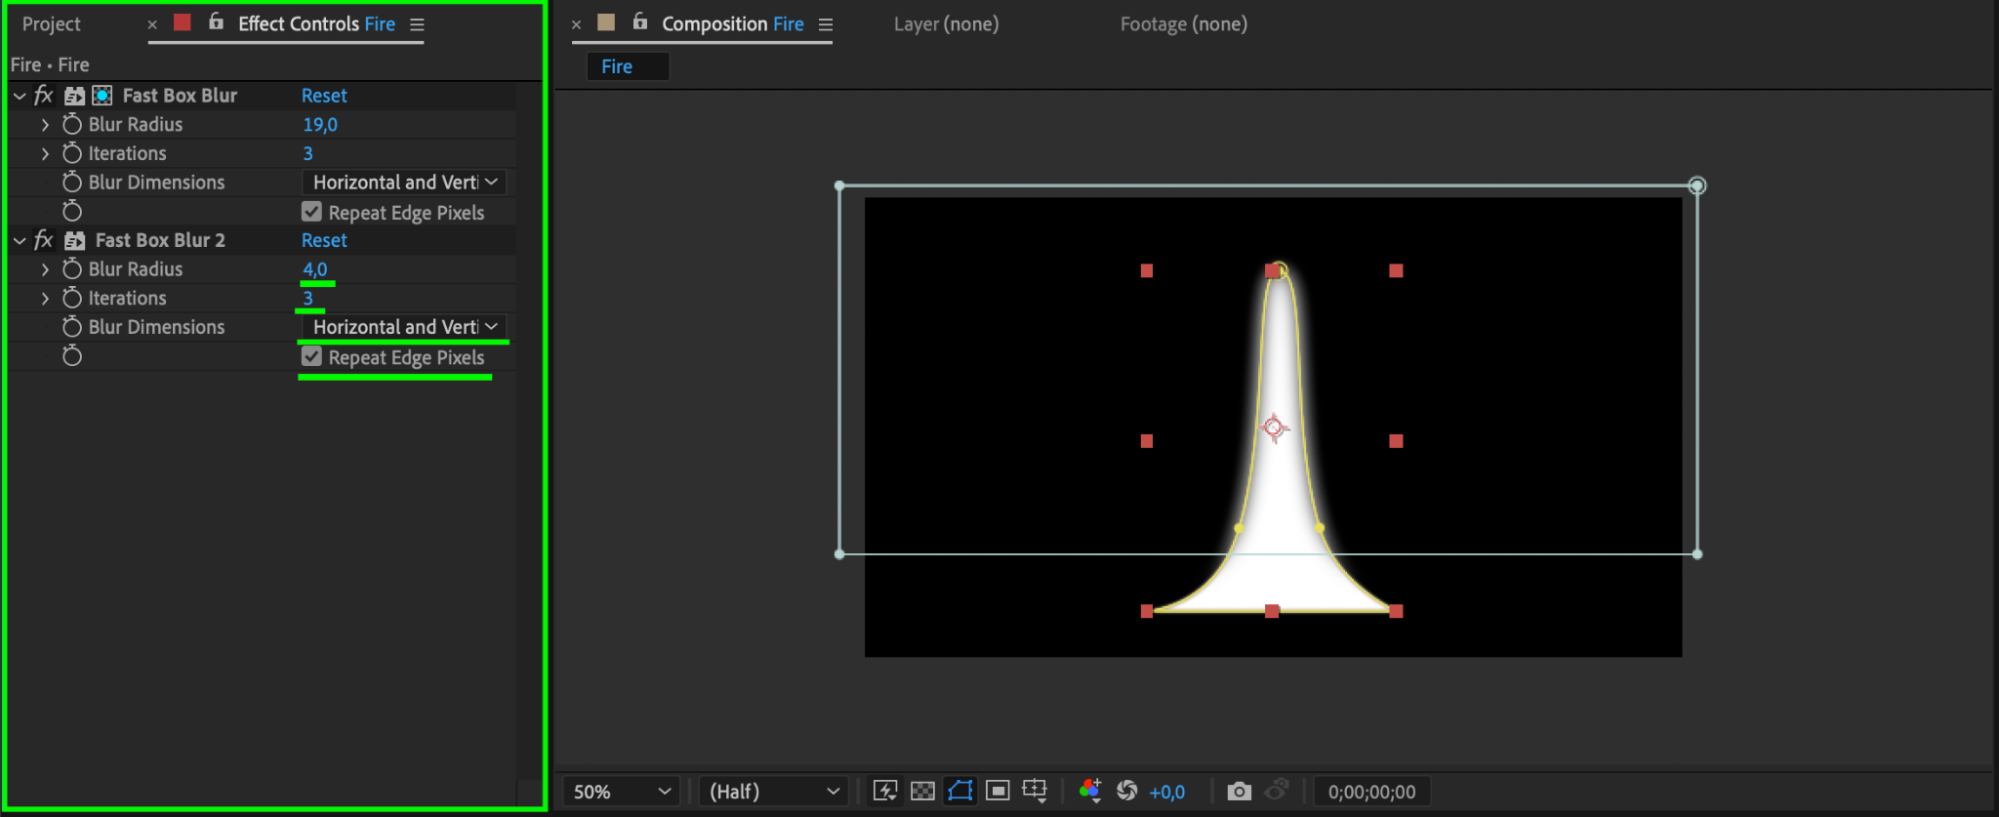 10. Create a New Solid for Fire Map
Get 10% off when you subscribe to our newsletter

From the menu, choose Layer > New > Solid and name it “Fire Map”. This solid will be used to create the texture of the fire.
 11. Apply the Fractal Noise Effect
Get 10% off when you subscribe to our newsletter

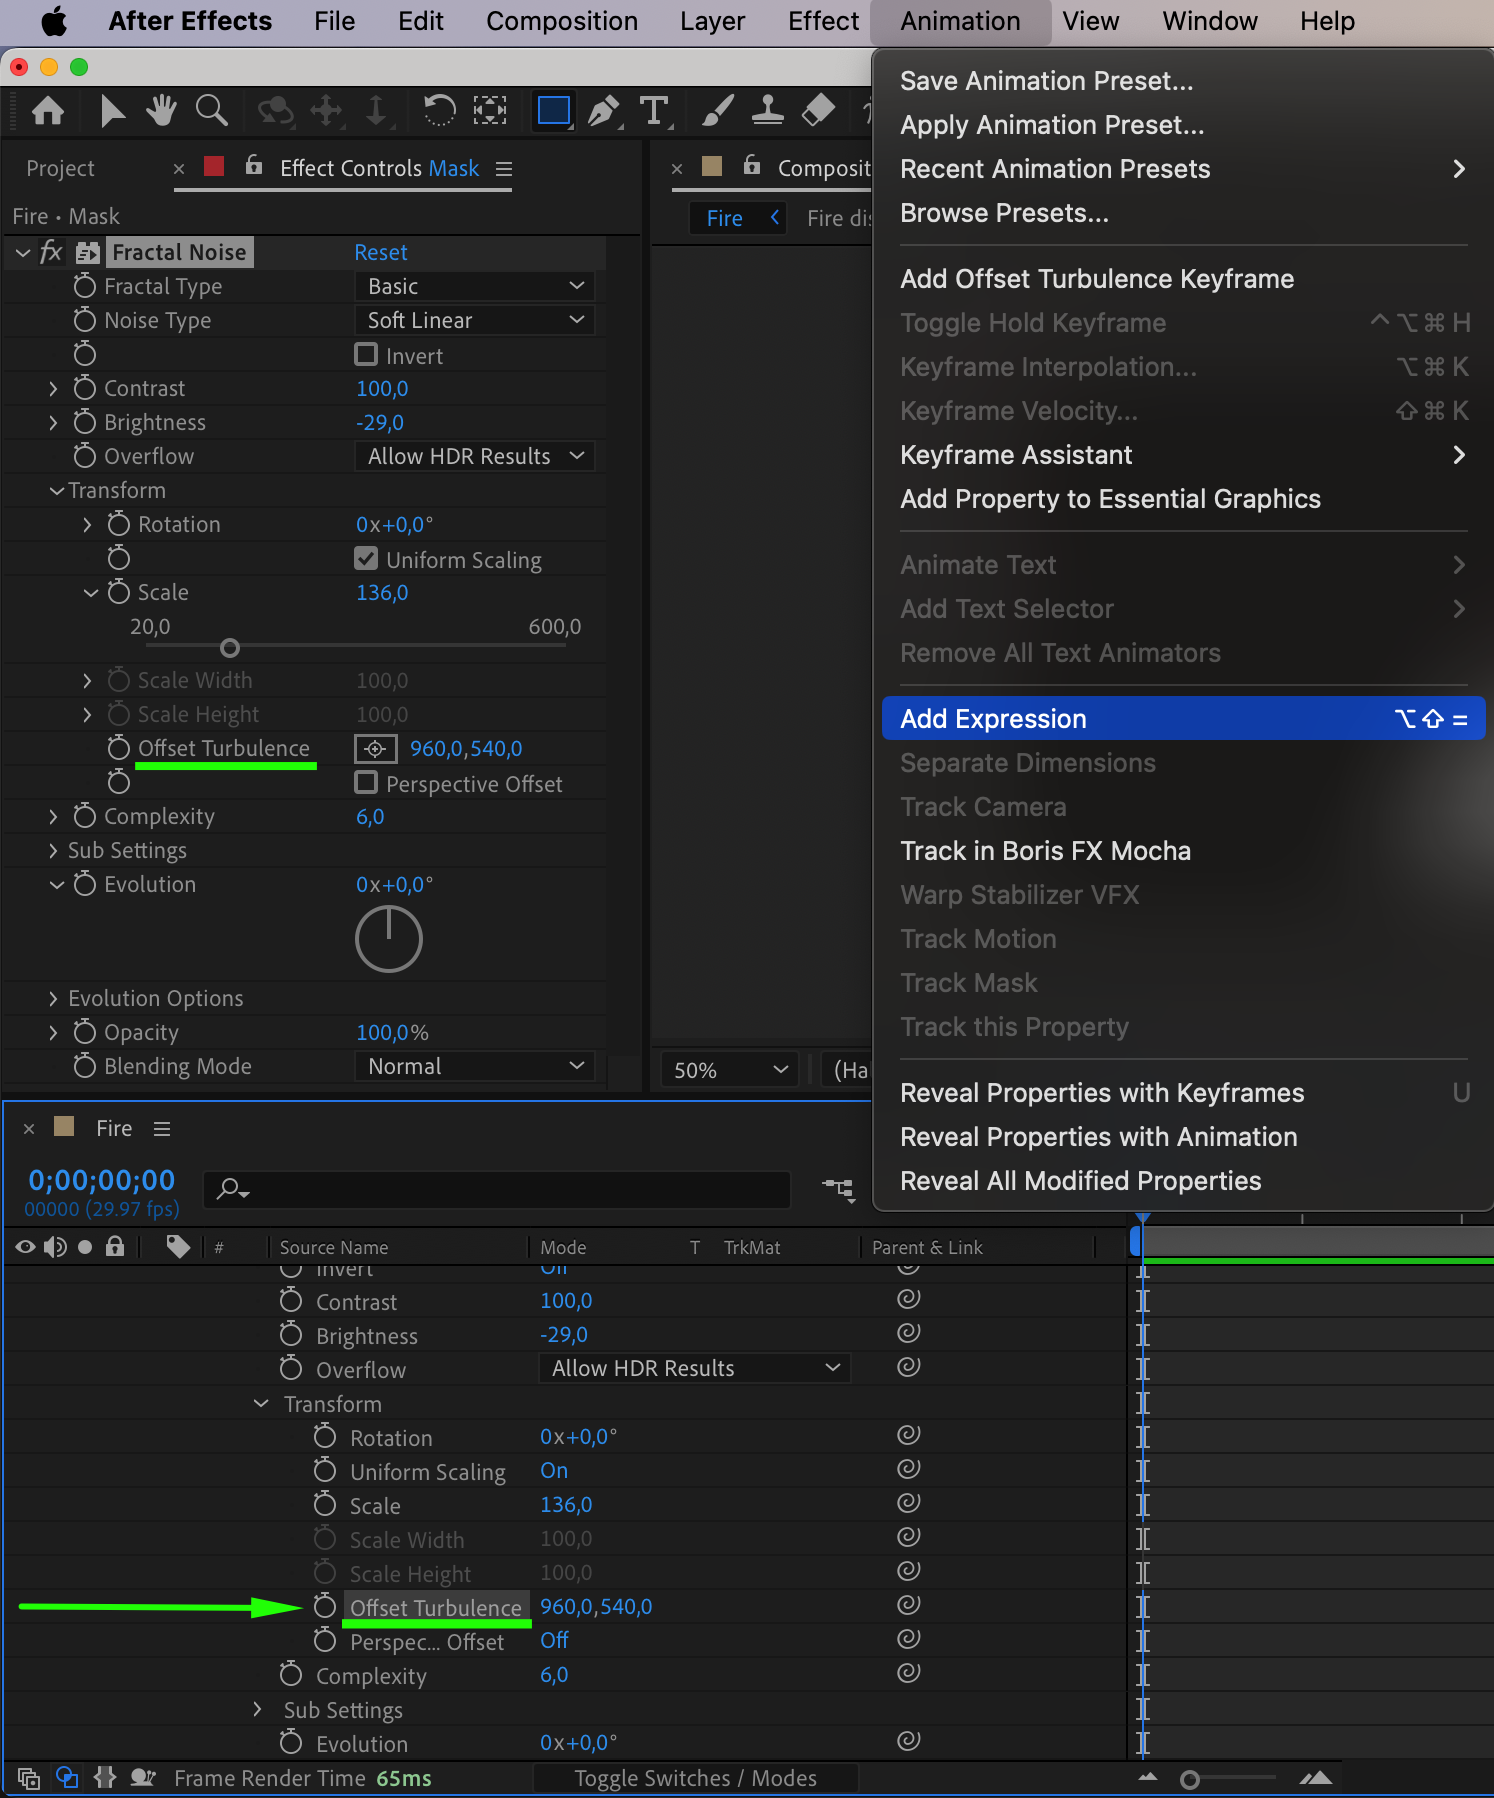
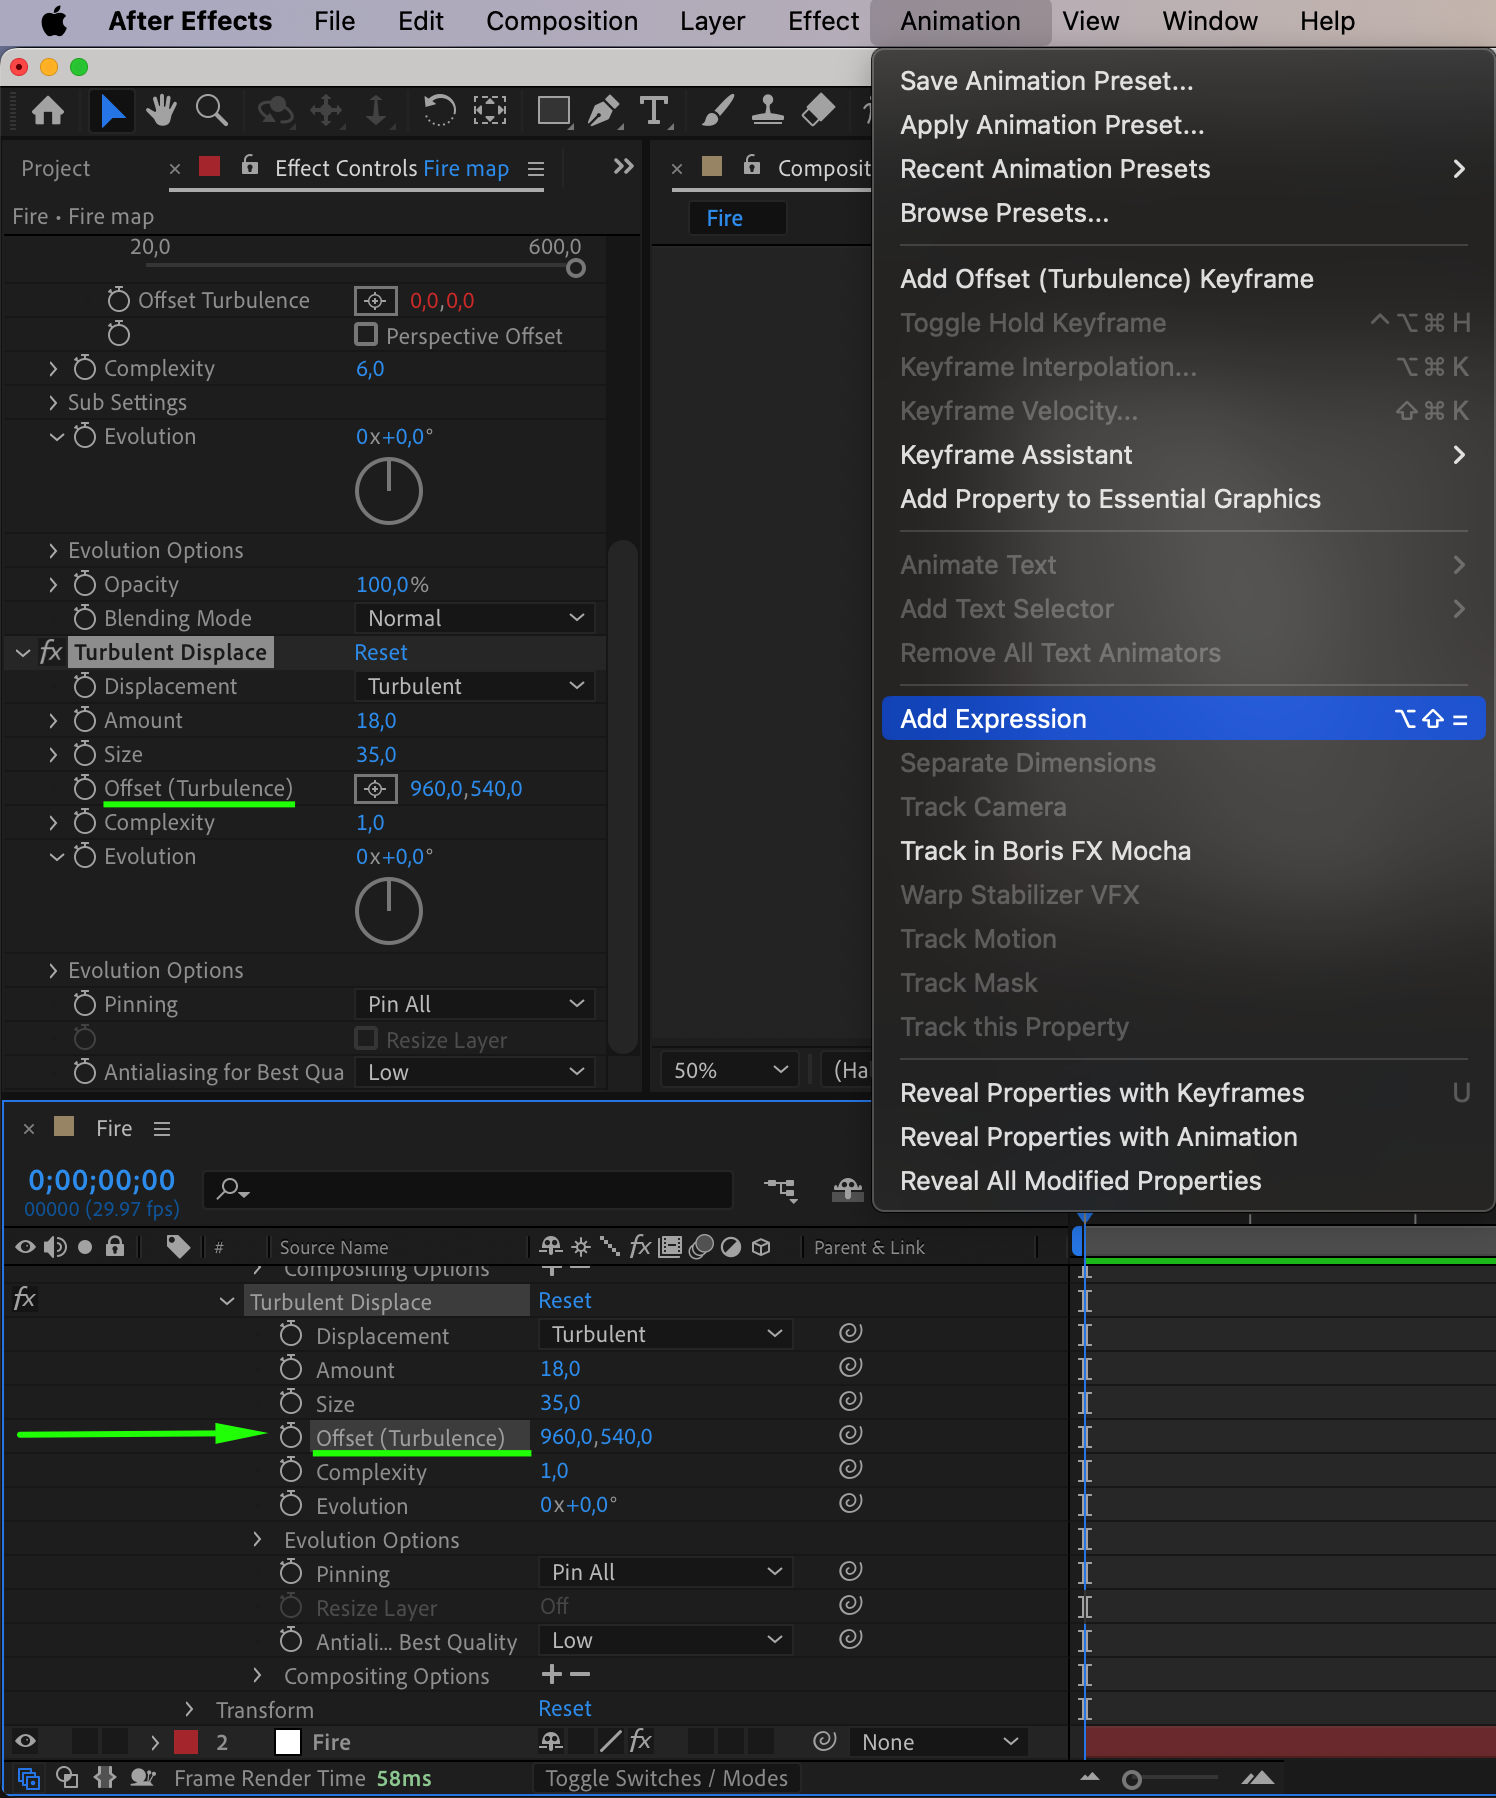
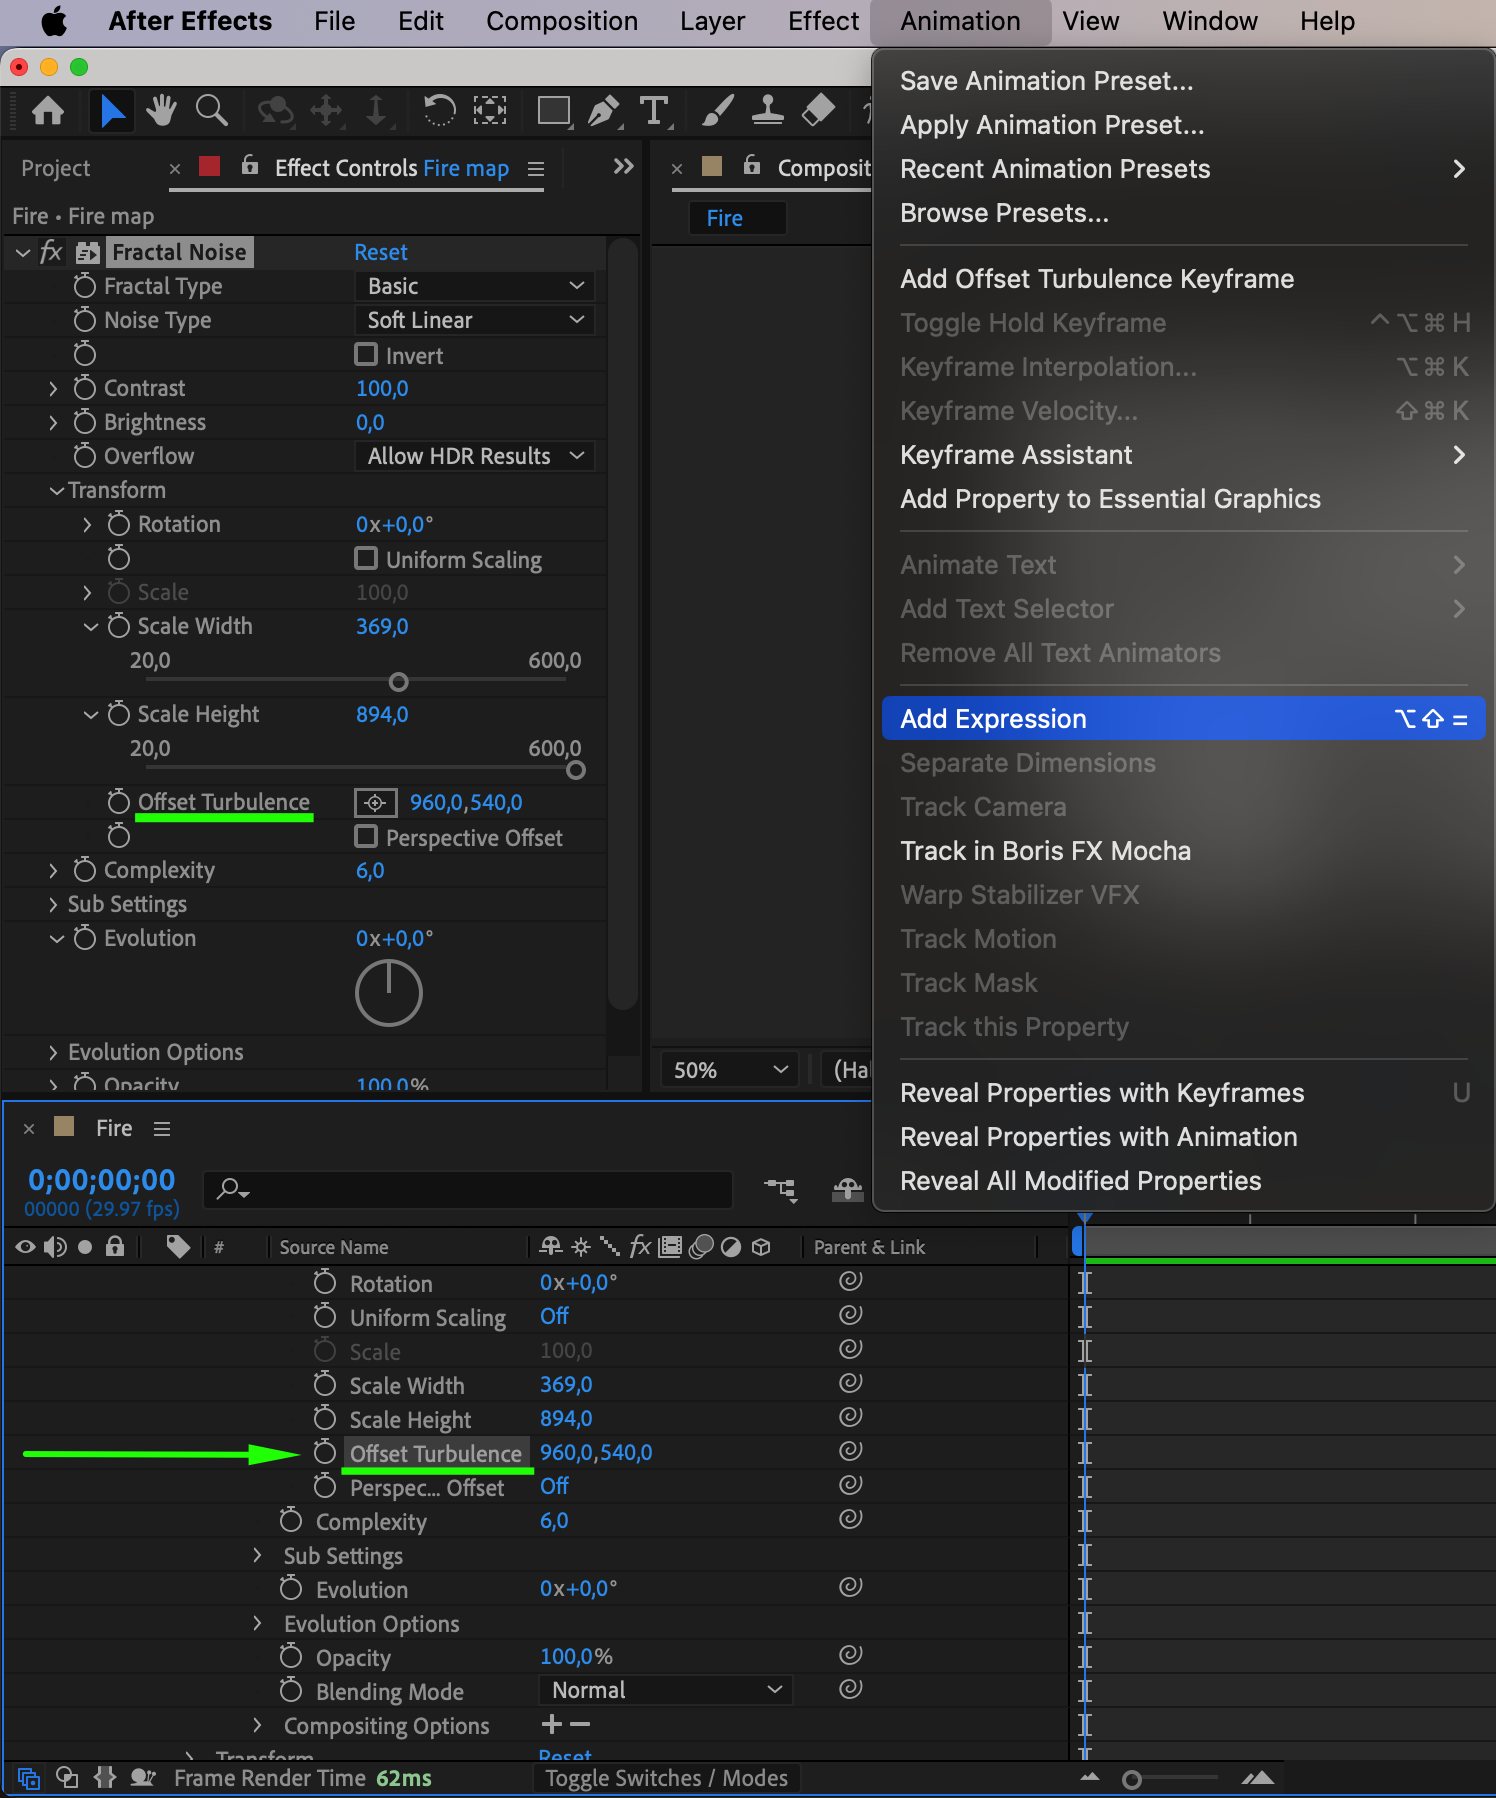
Right-click on the Fire Map solid and choose Effect > Noise & Grain > Fractal Noise. Adjust the settings to create a fire-like texture. For the Offset Turbulence parameter, enter the expression: [0, time * -1500].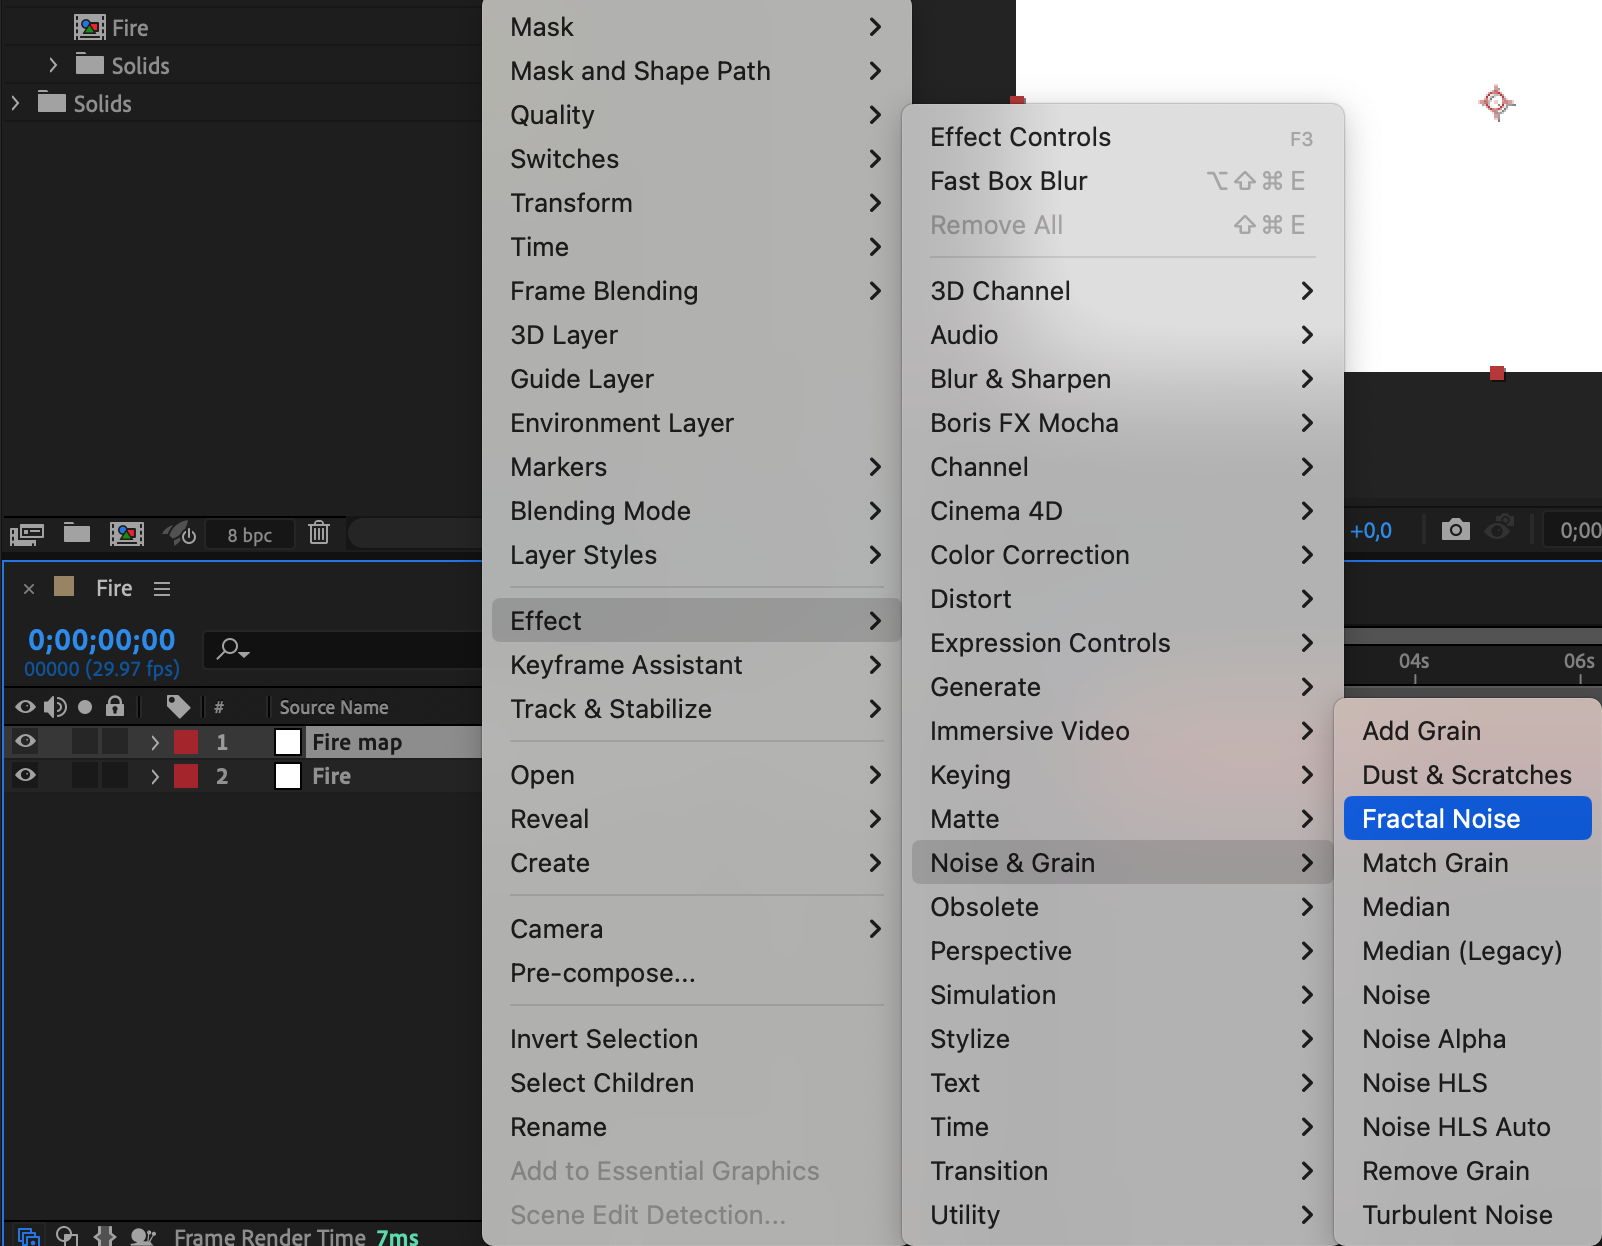
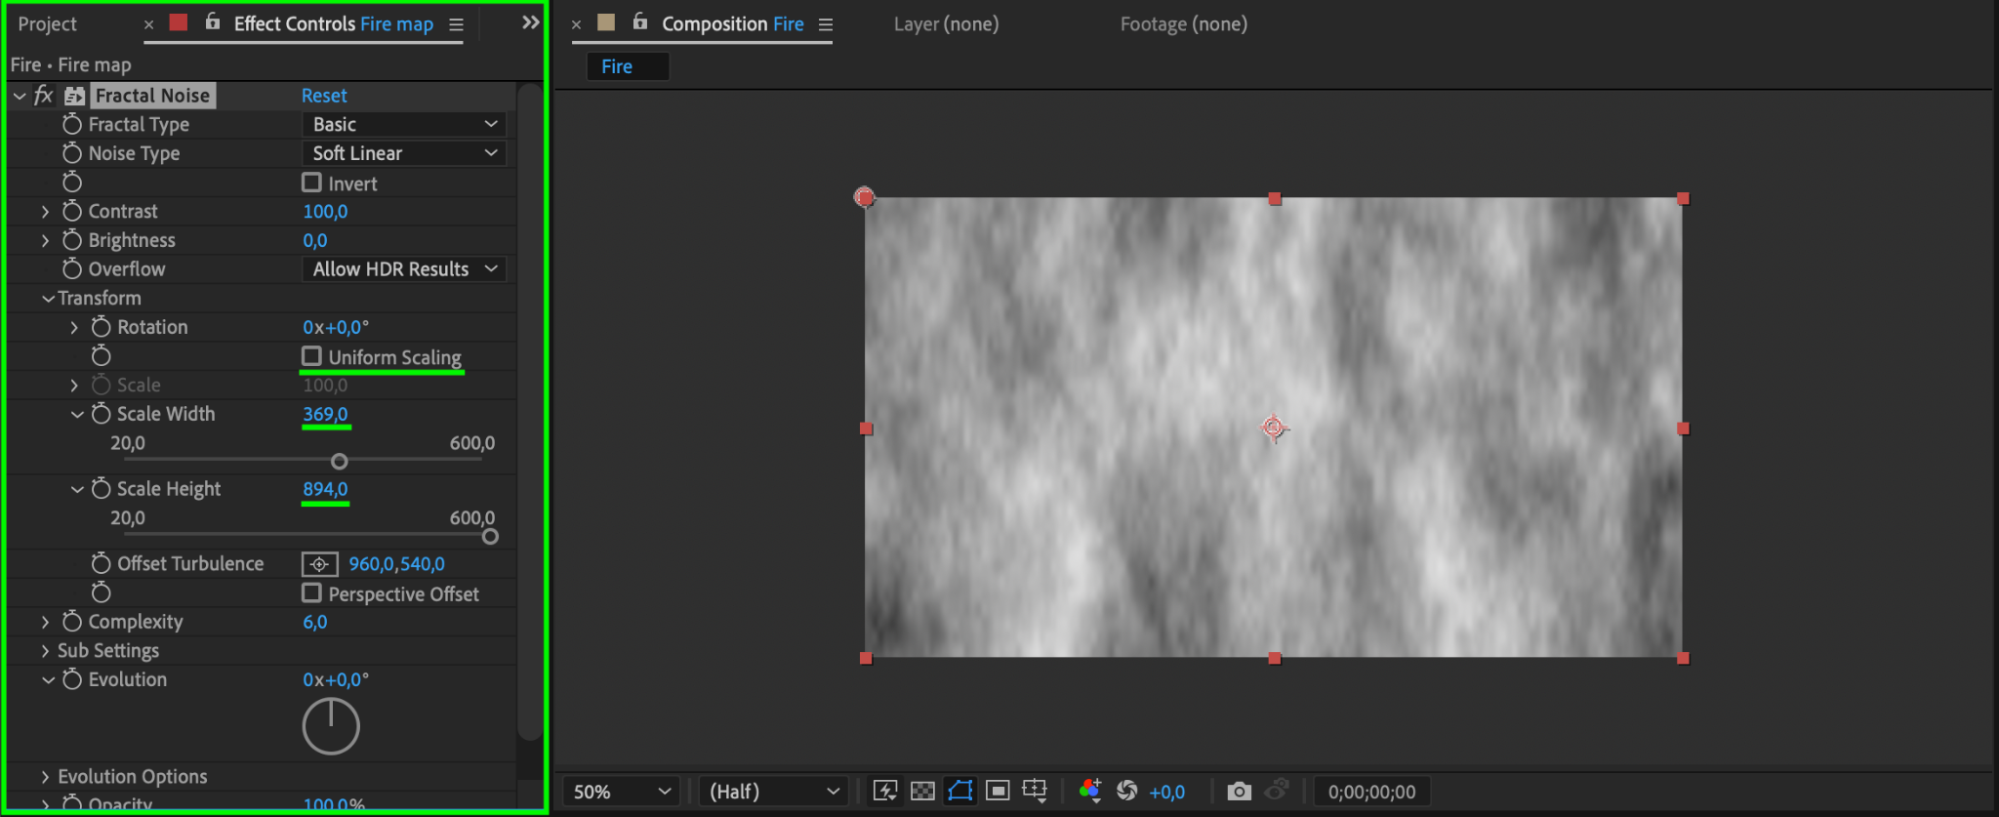

 12. Apply the Turbulent Displace Effect
Get 10% off when you subscribe to our newsletter

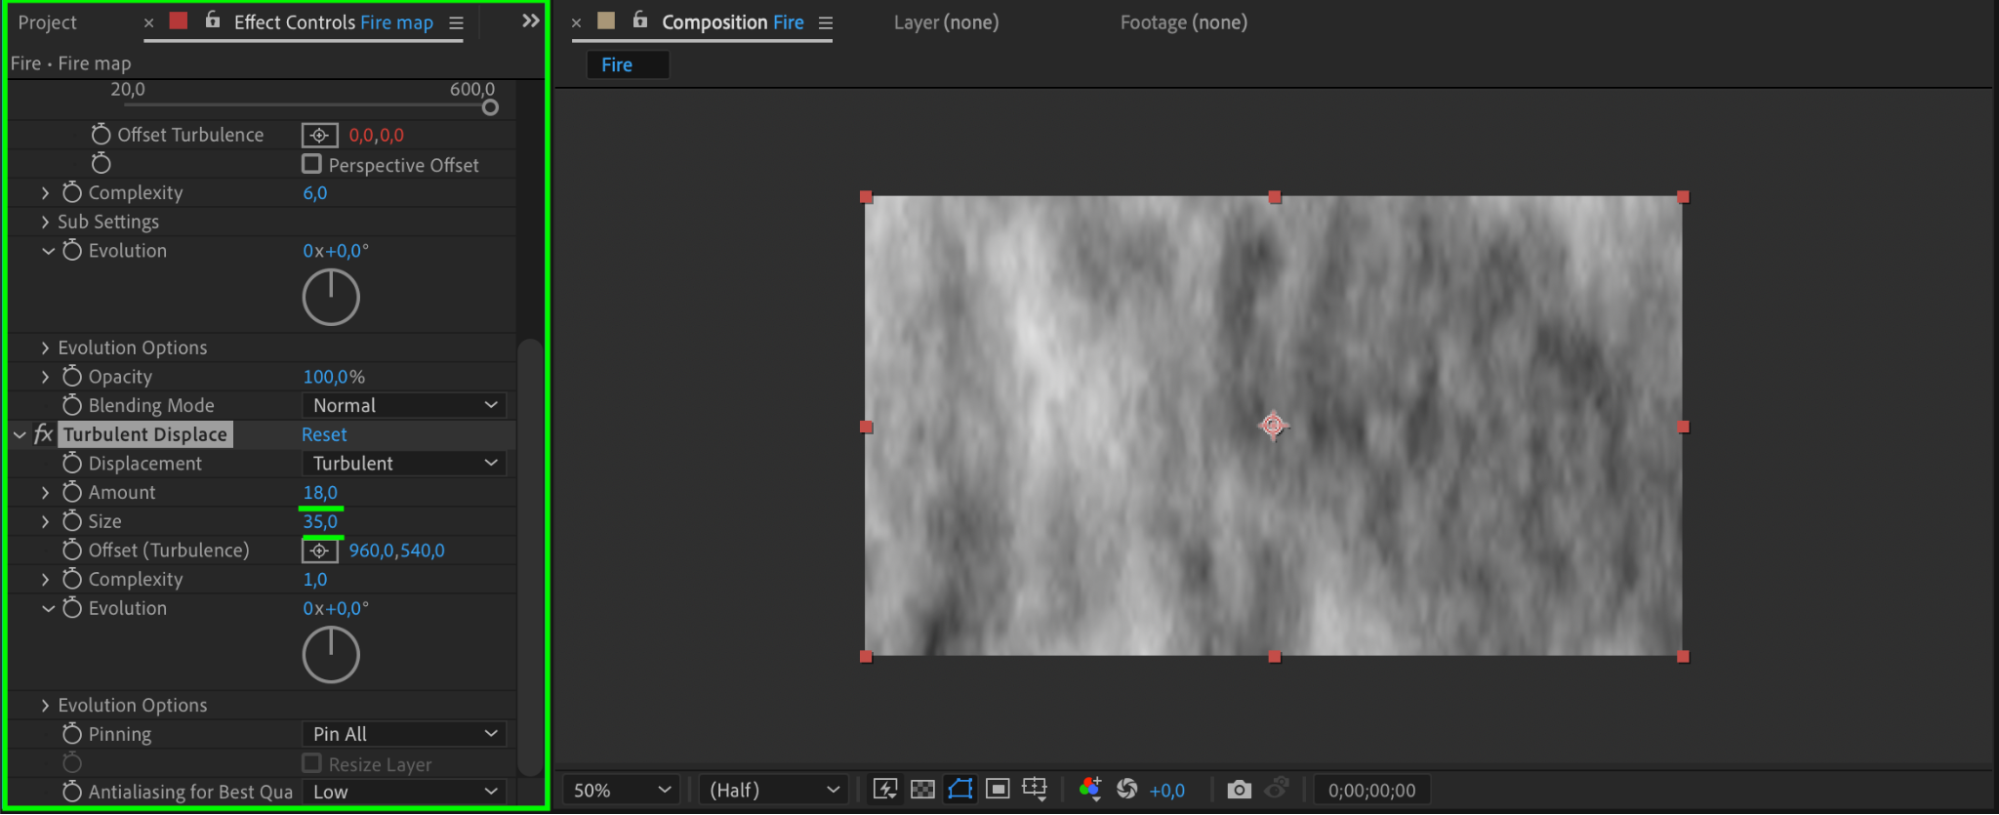
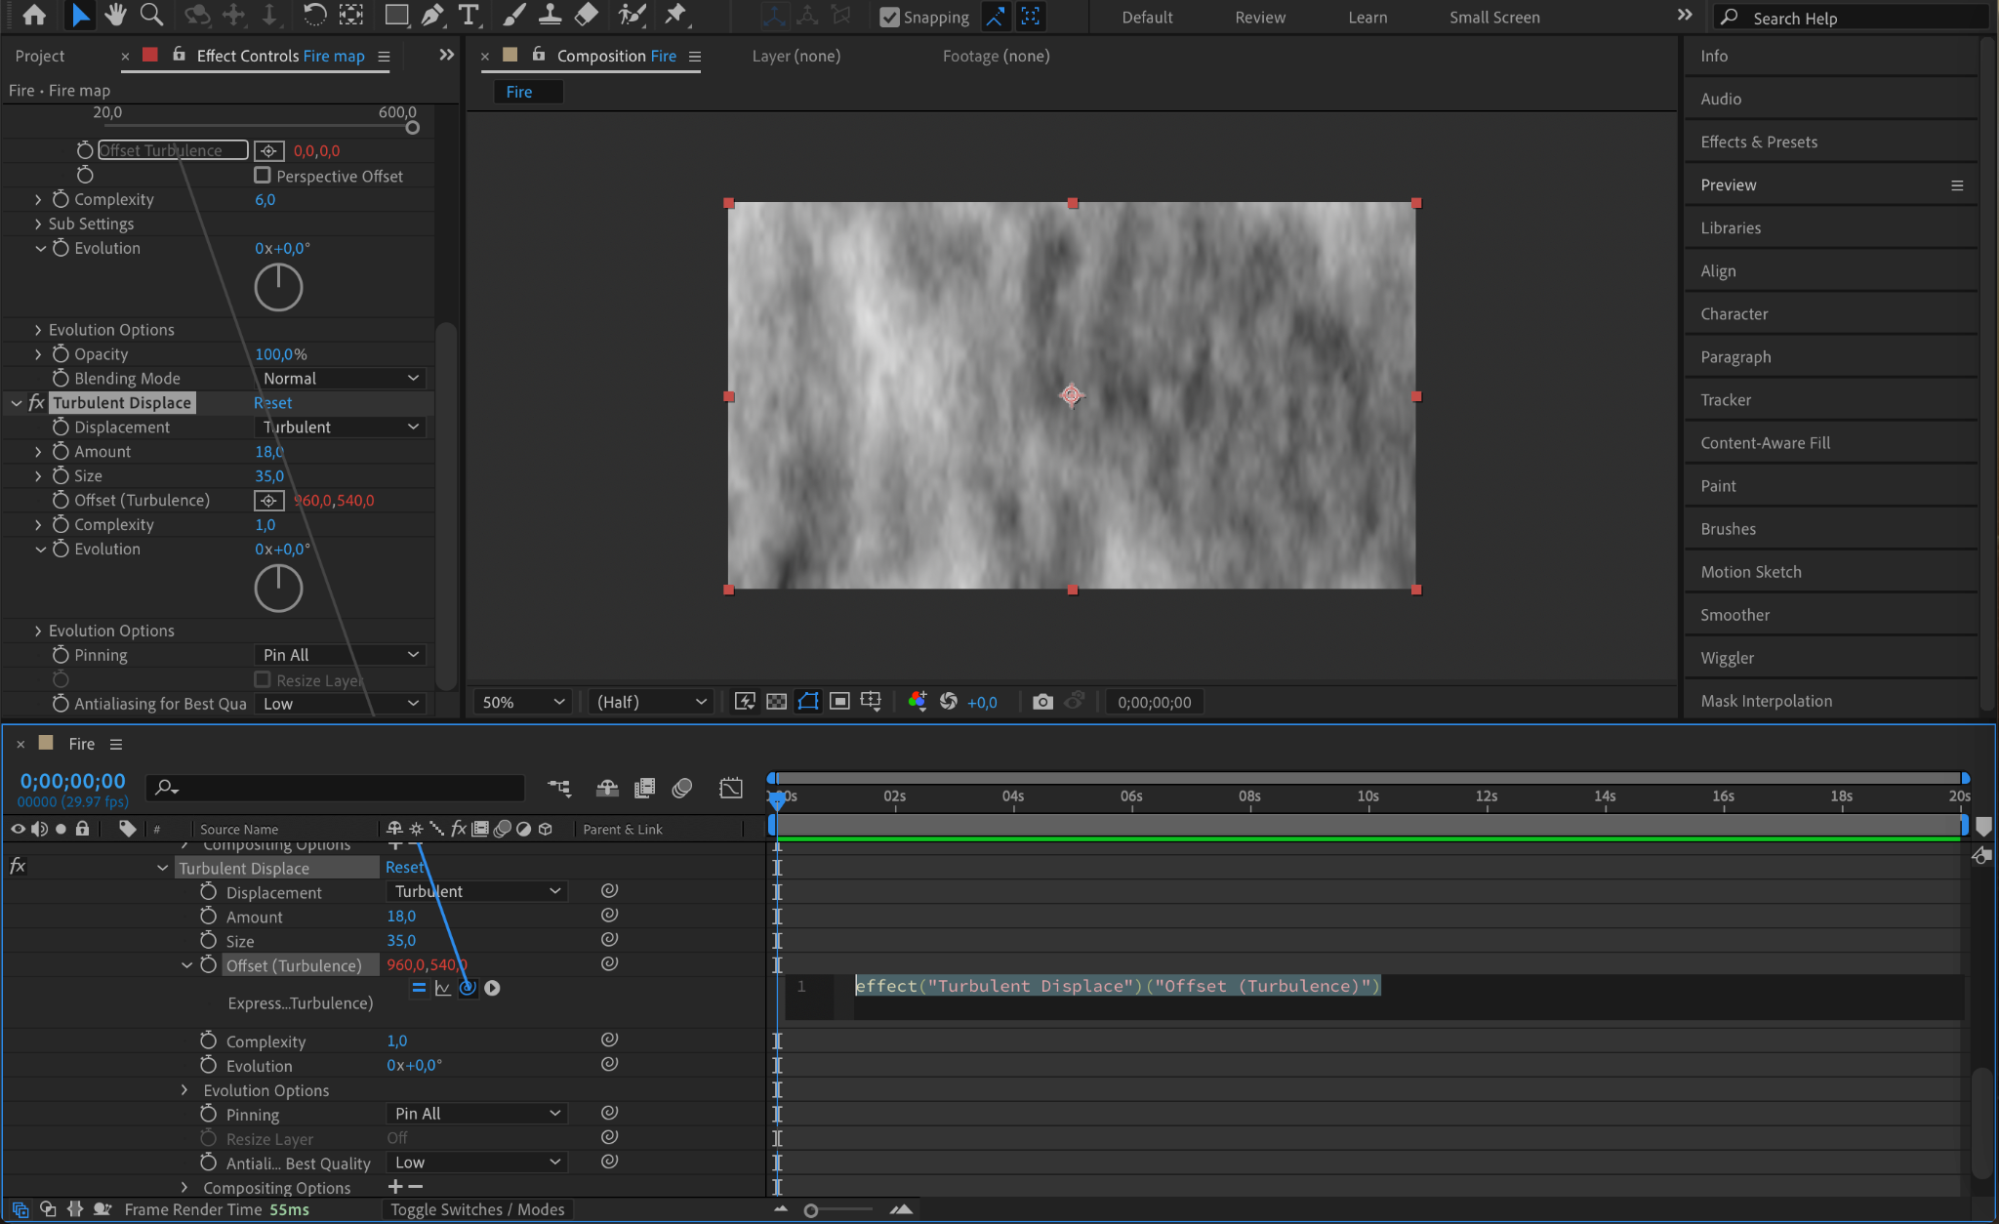
Right-click on the same solid and choose Effect > Distort > Turbulent Displace. Adjust the settings to animate the movement of your fire. Make the Offset parameter of this effect parent to the Offset Turbulence of the Fractal Noise.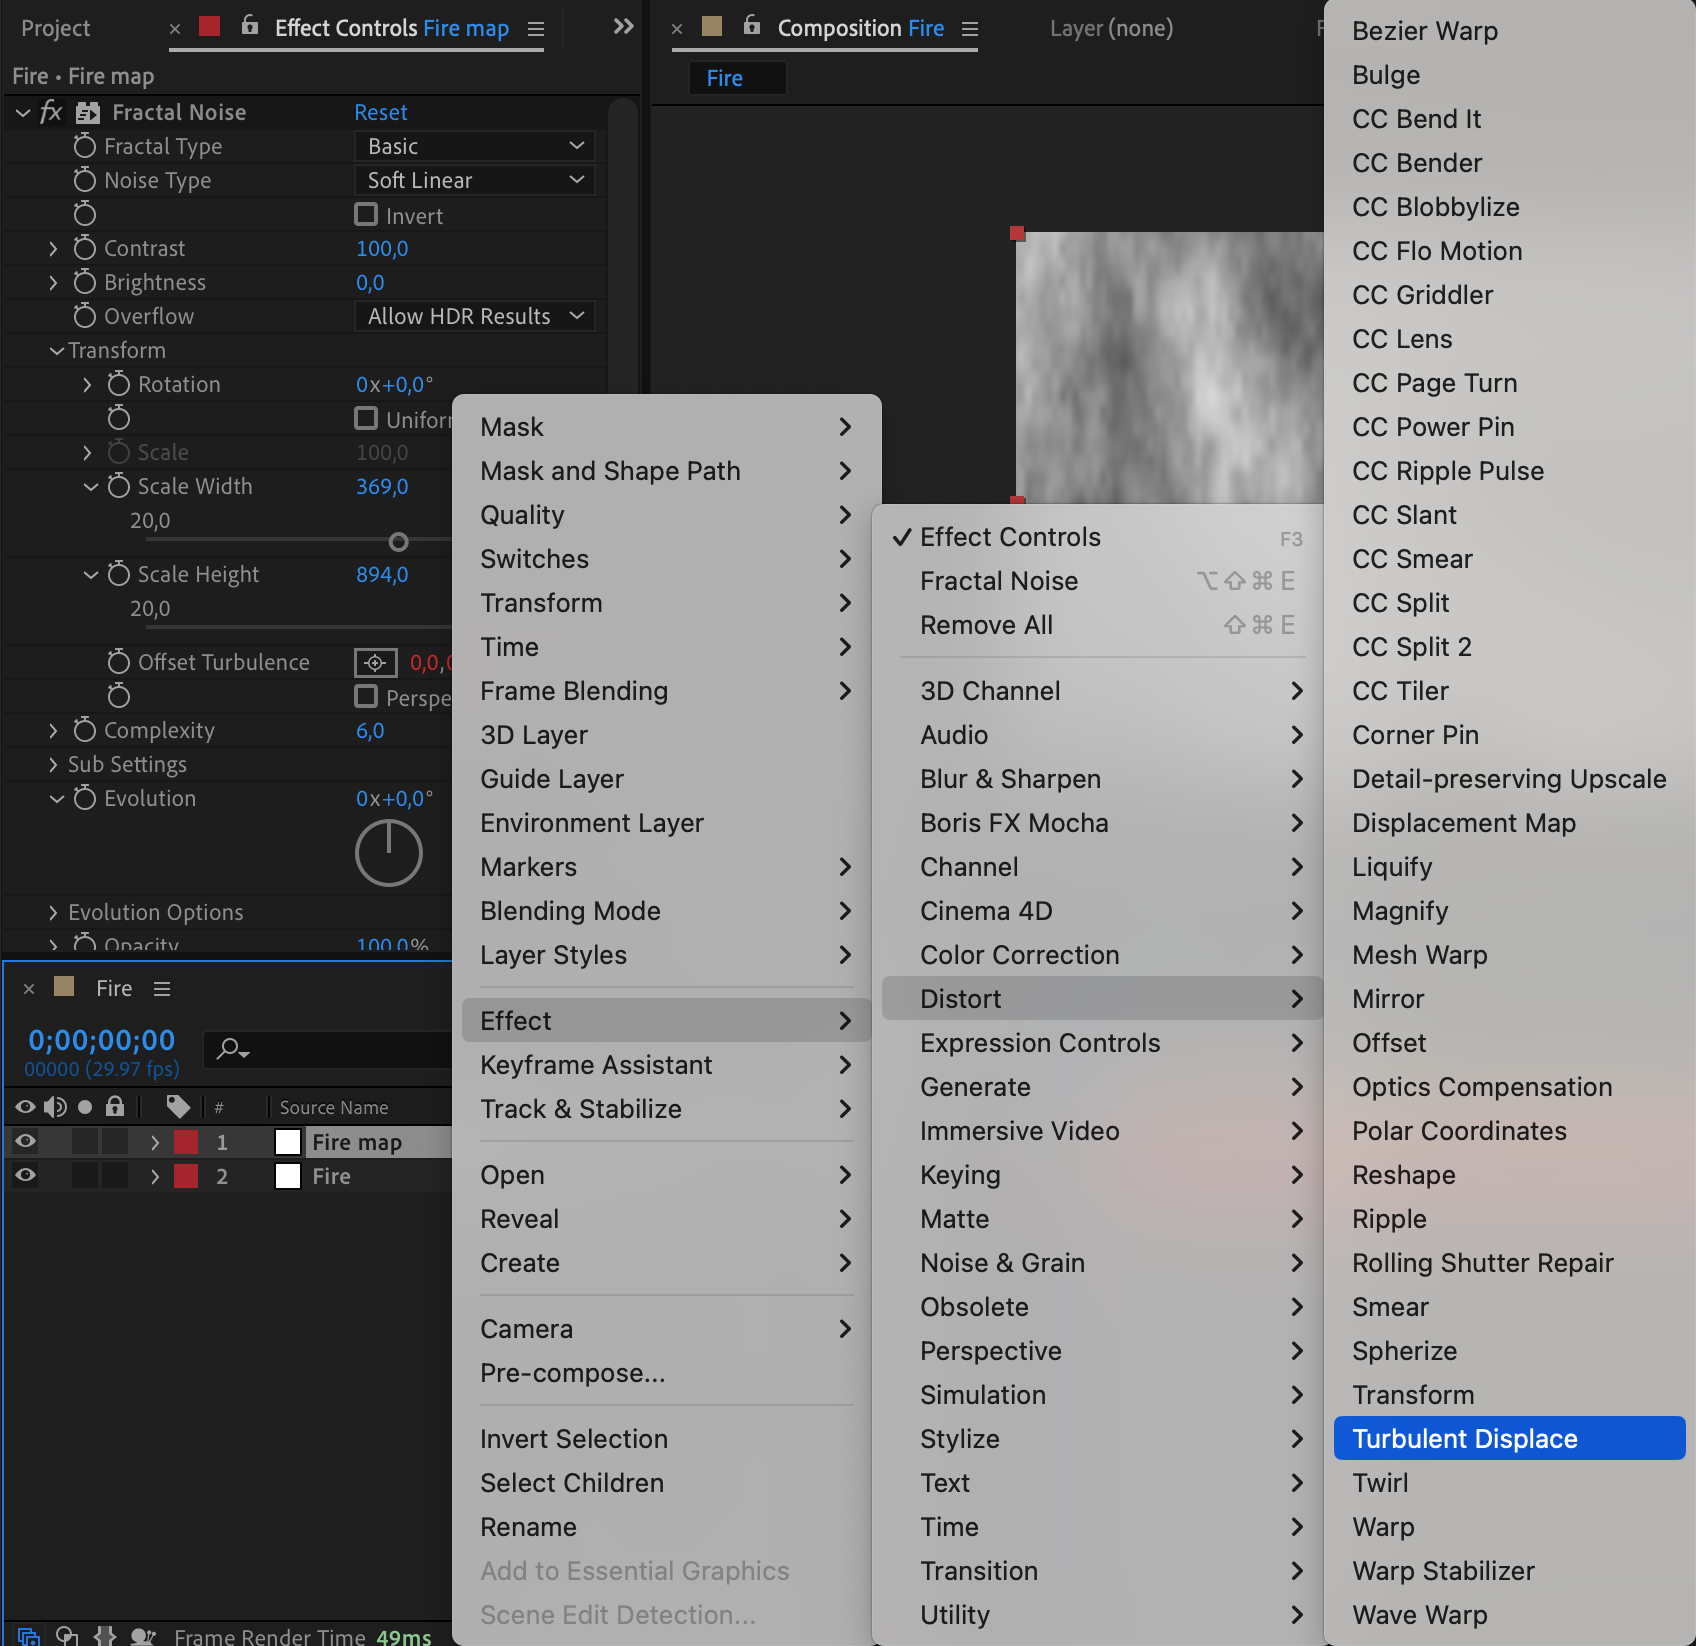
 13. Create a New Solid for Fire Mask
Get 10% off when you subscribe to our newsletter

From the menu, choose Layer > New > Solid and name it “Fire Mask” with the color #808080. This will be used to mask the fire effect.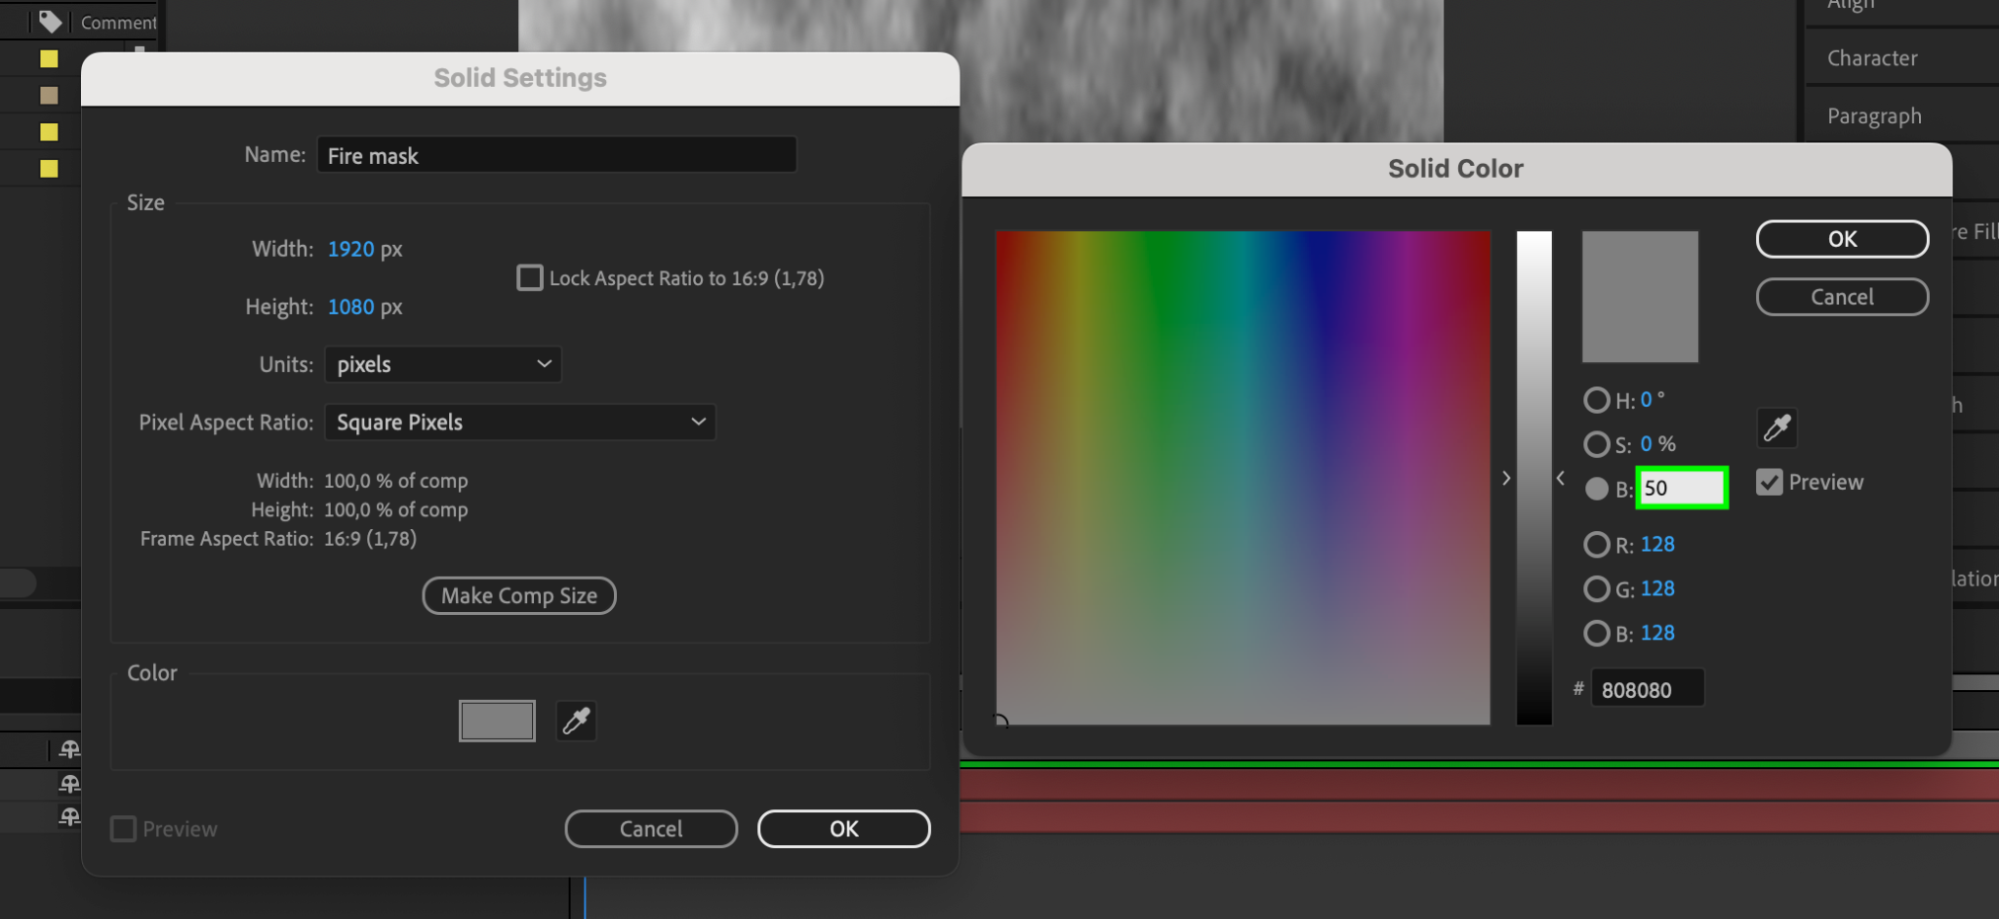 14. Create a Rectangle Mask
Select the Fire Mask solid and use the Rectangle Tool to create a narrow rectangle at the bottom of the composition. Adjust the Mask Feather settings to blend the edges smoothly.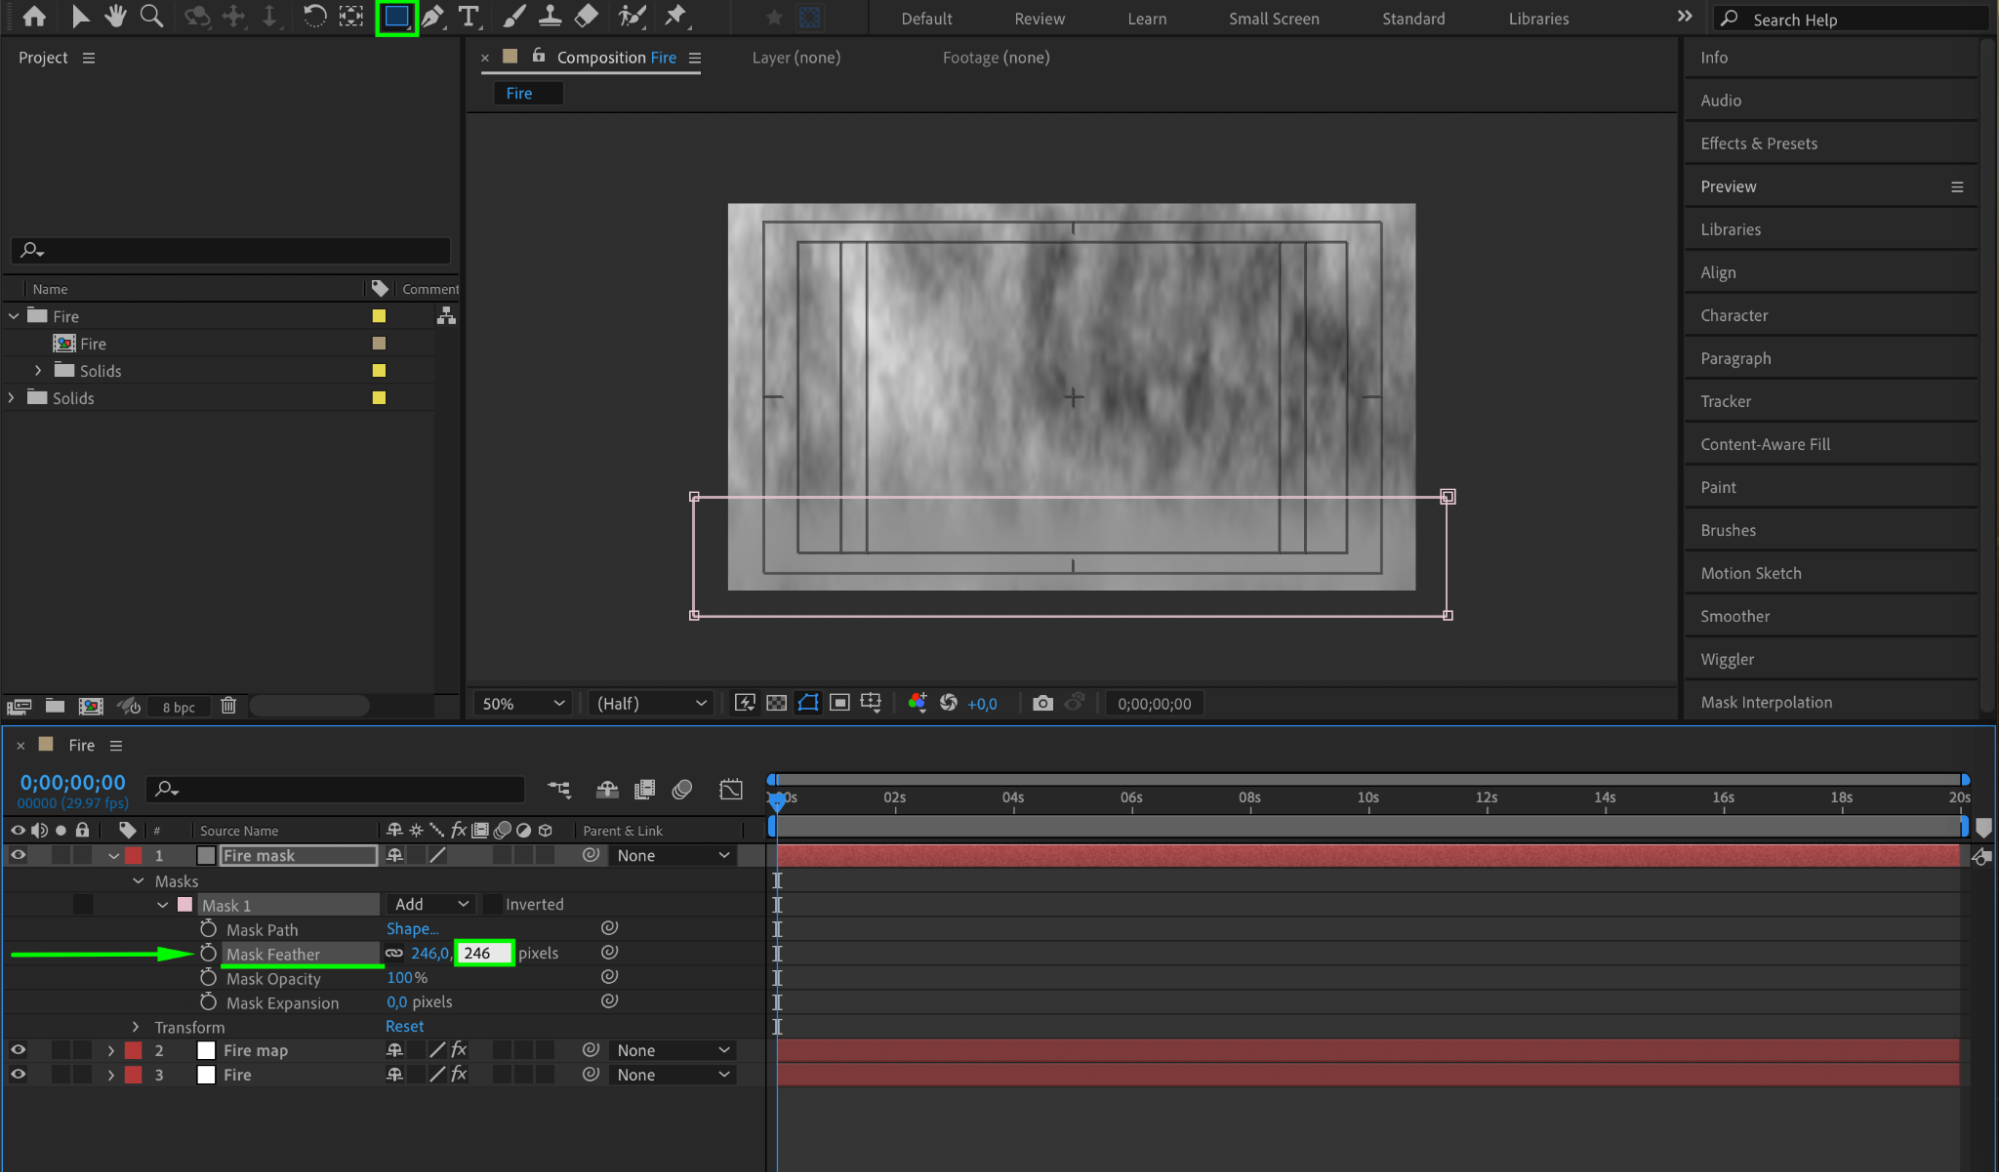
Get 10% off when you subscribe to our newsletter

15. Pre-compose Fire Mask and Fire Map
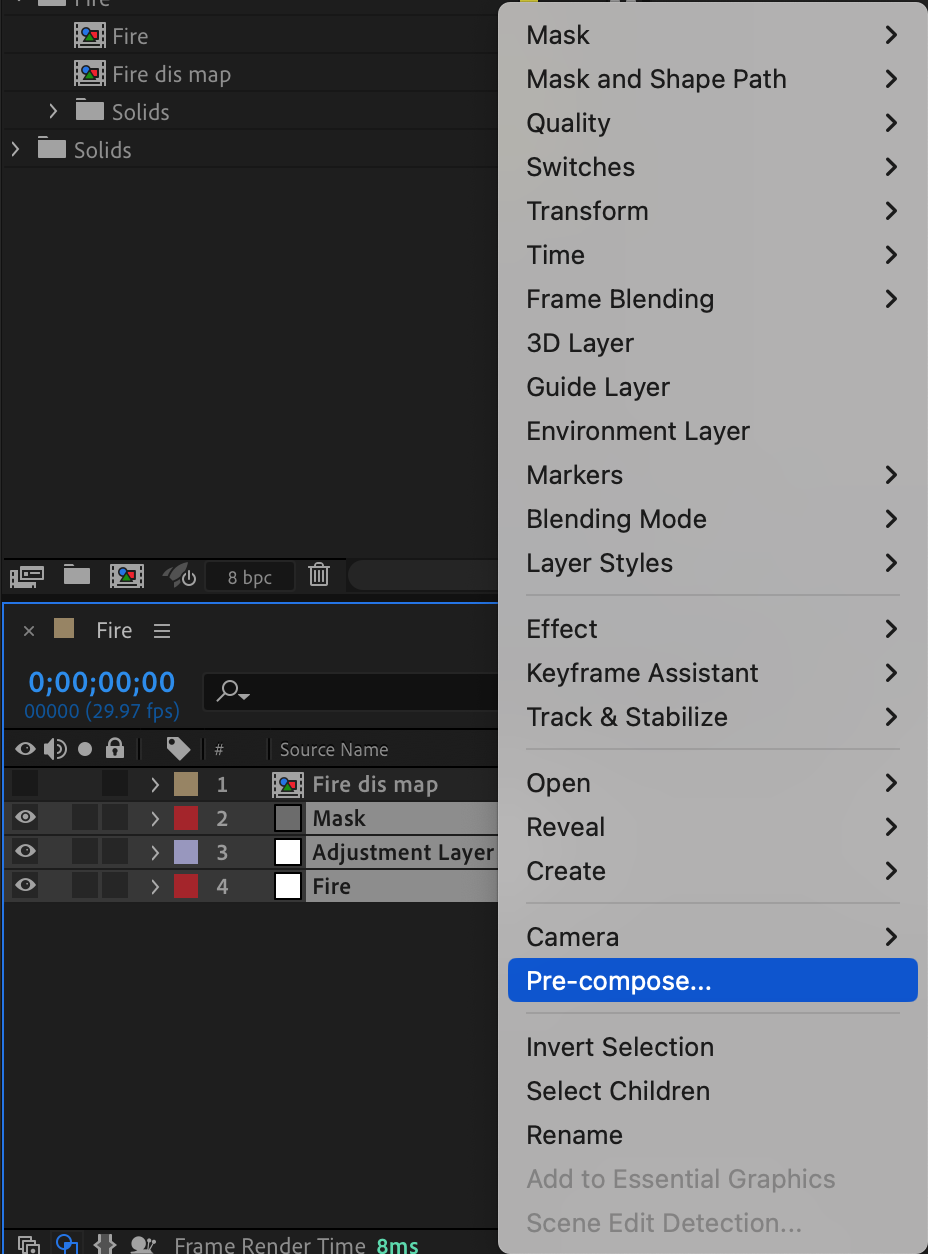
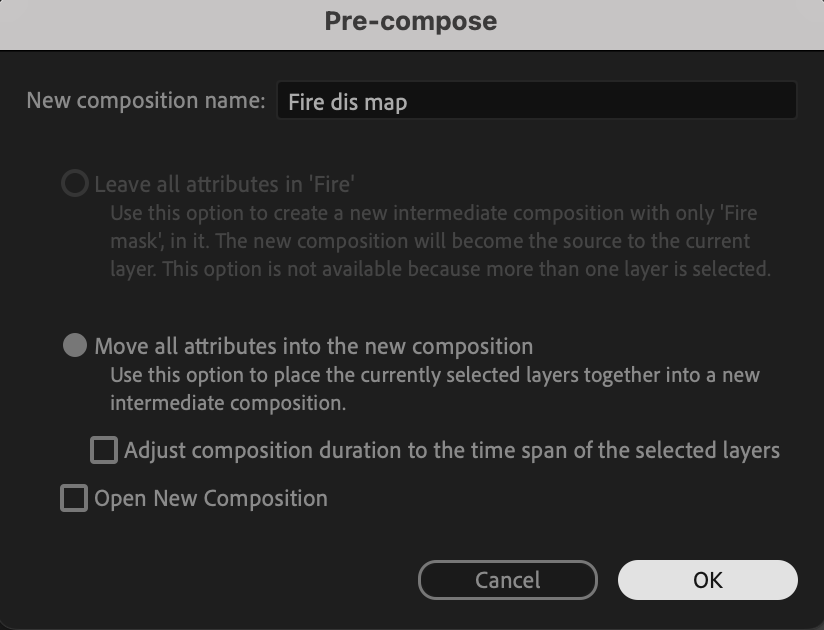
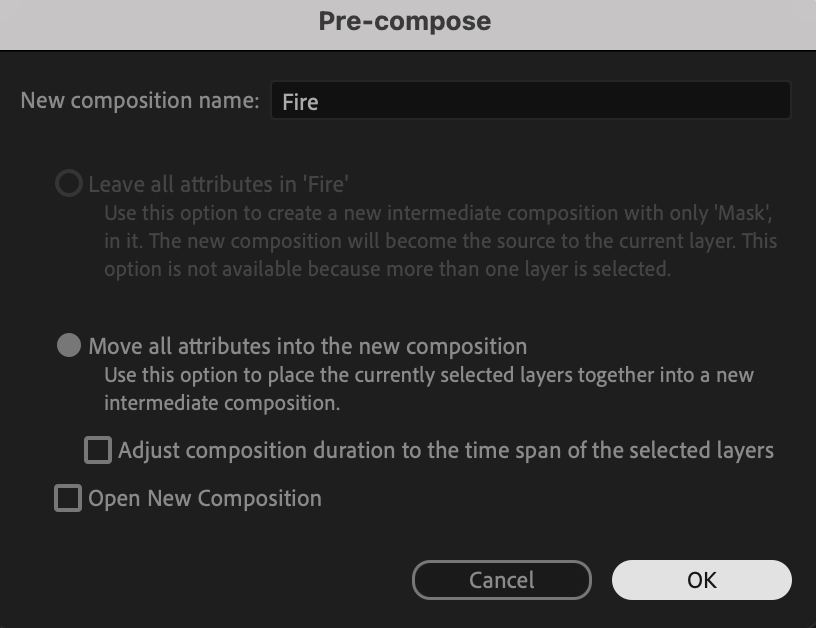
Select both the Fire Mask and Fire Map solids, right-click, and choose Pre-compose. Name the pre-composition “Fire Displacement Map”. Turn off the visibility by clicking the eye icon.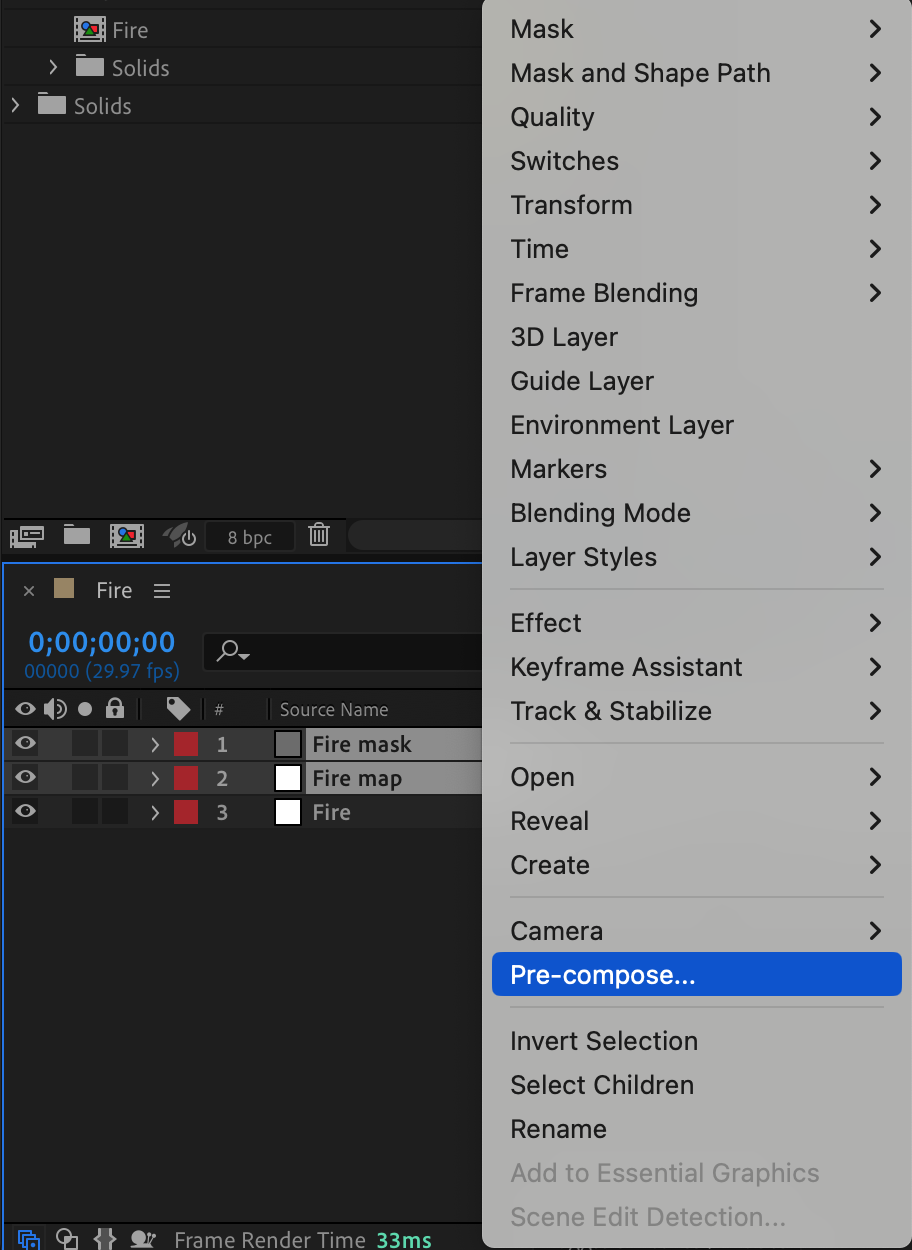
 16. Apply the Displacement Map Effect
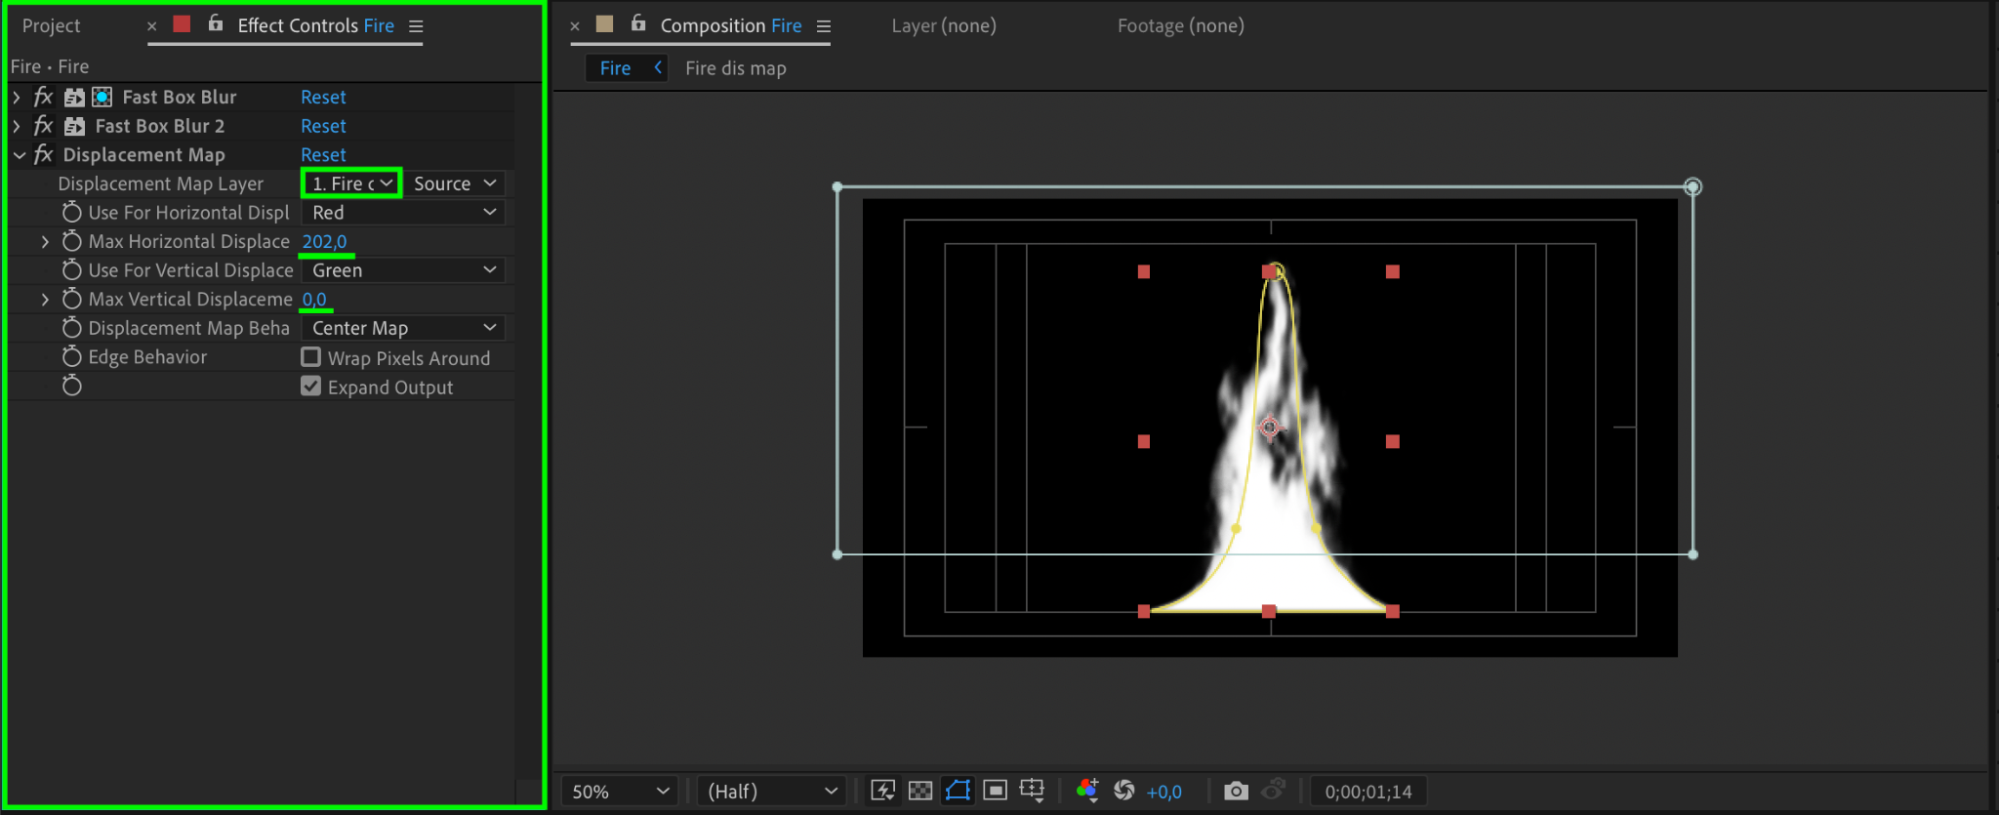
Select the Fire solid, right-click, and choose Effect > Distort > Displacement Map. In the Effect Controls panel, set the Displacement Map Layer to your pre-composed “Fire Displacement Map” and adjust the other parameters accordingly.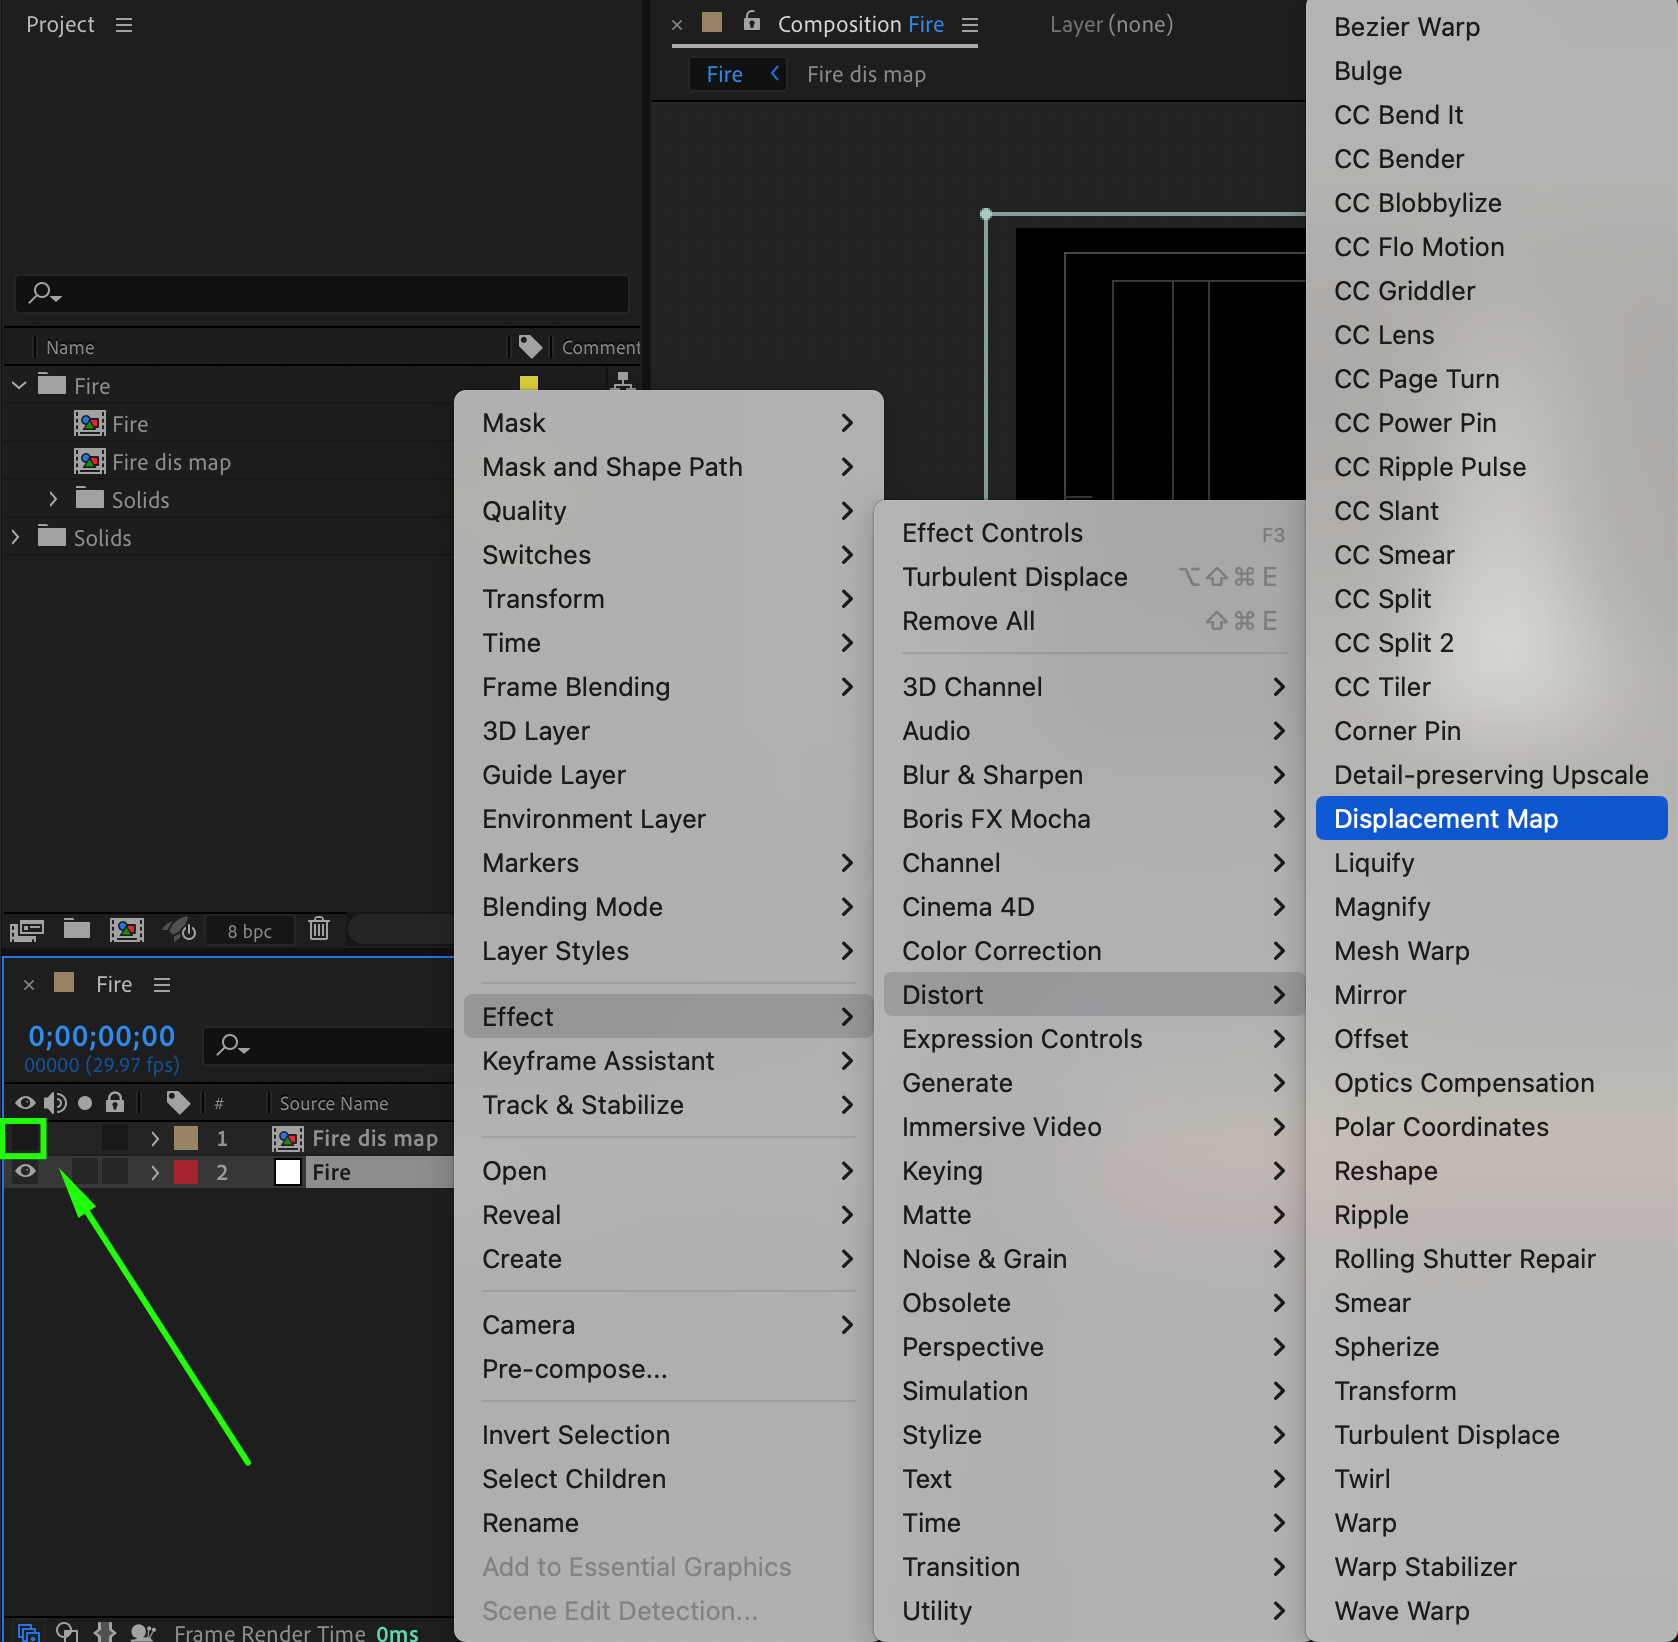
 17. Create a New Solid for Mask
From the menu, choose Layer > New > Solid and name it “Mask”. This will help create the fading effect at the top of the flame.
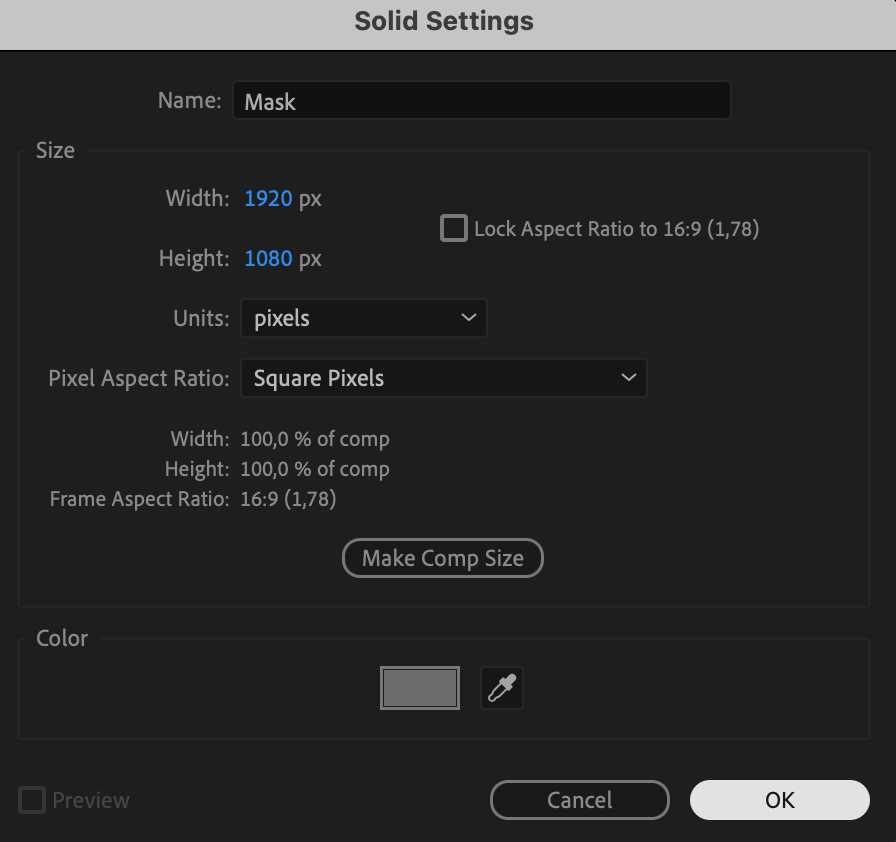 18. Apply the Fractal Noise Effect
Get 10% off when you subscribe to our newsletter

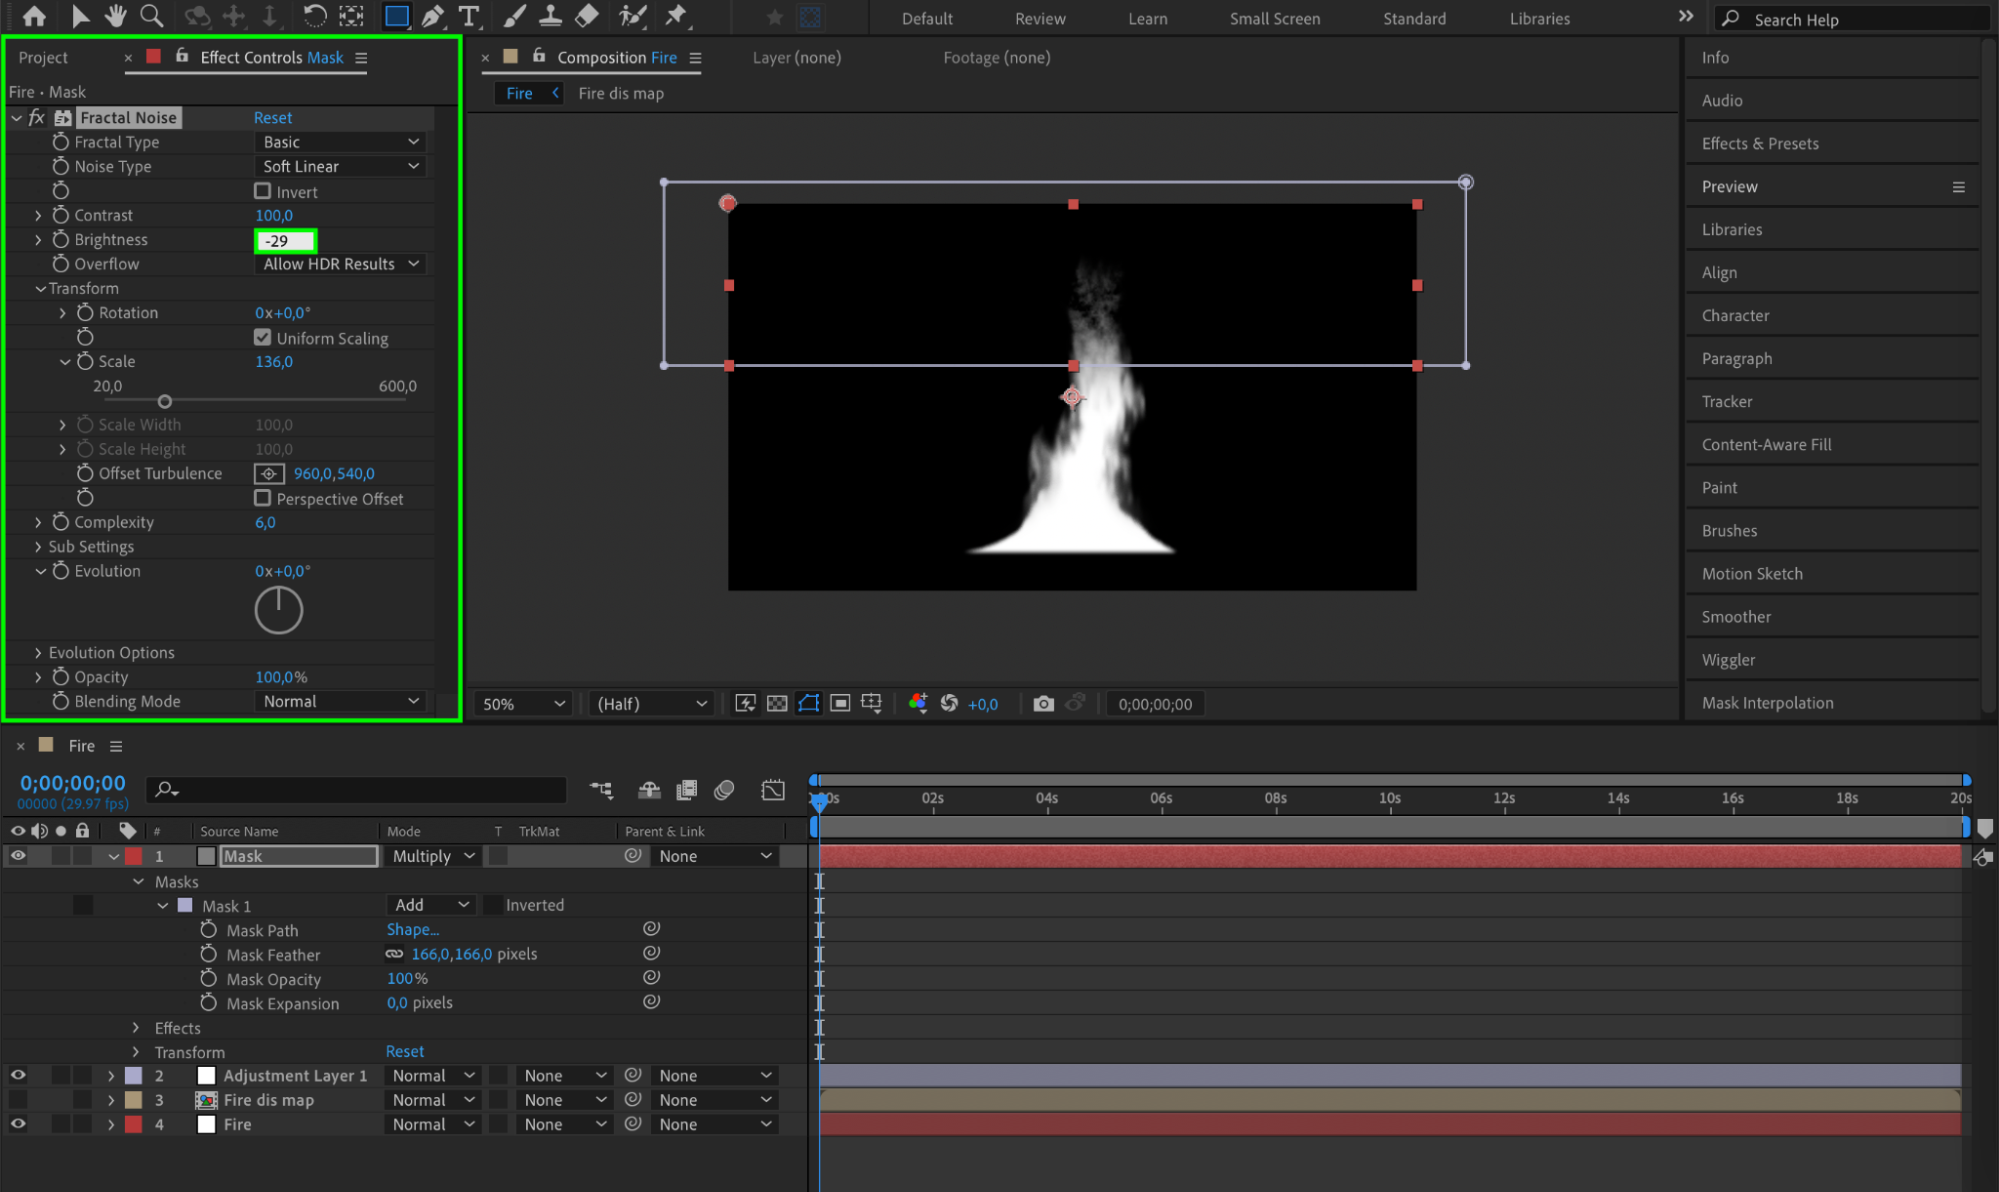
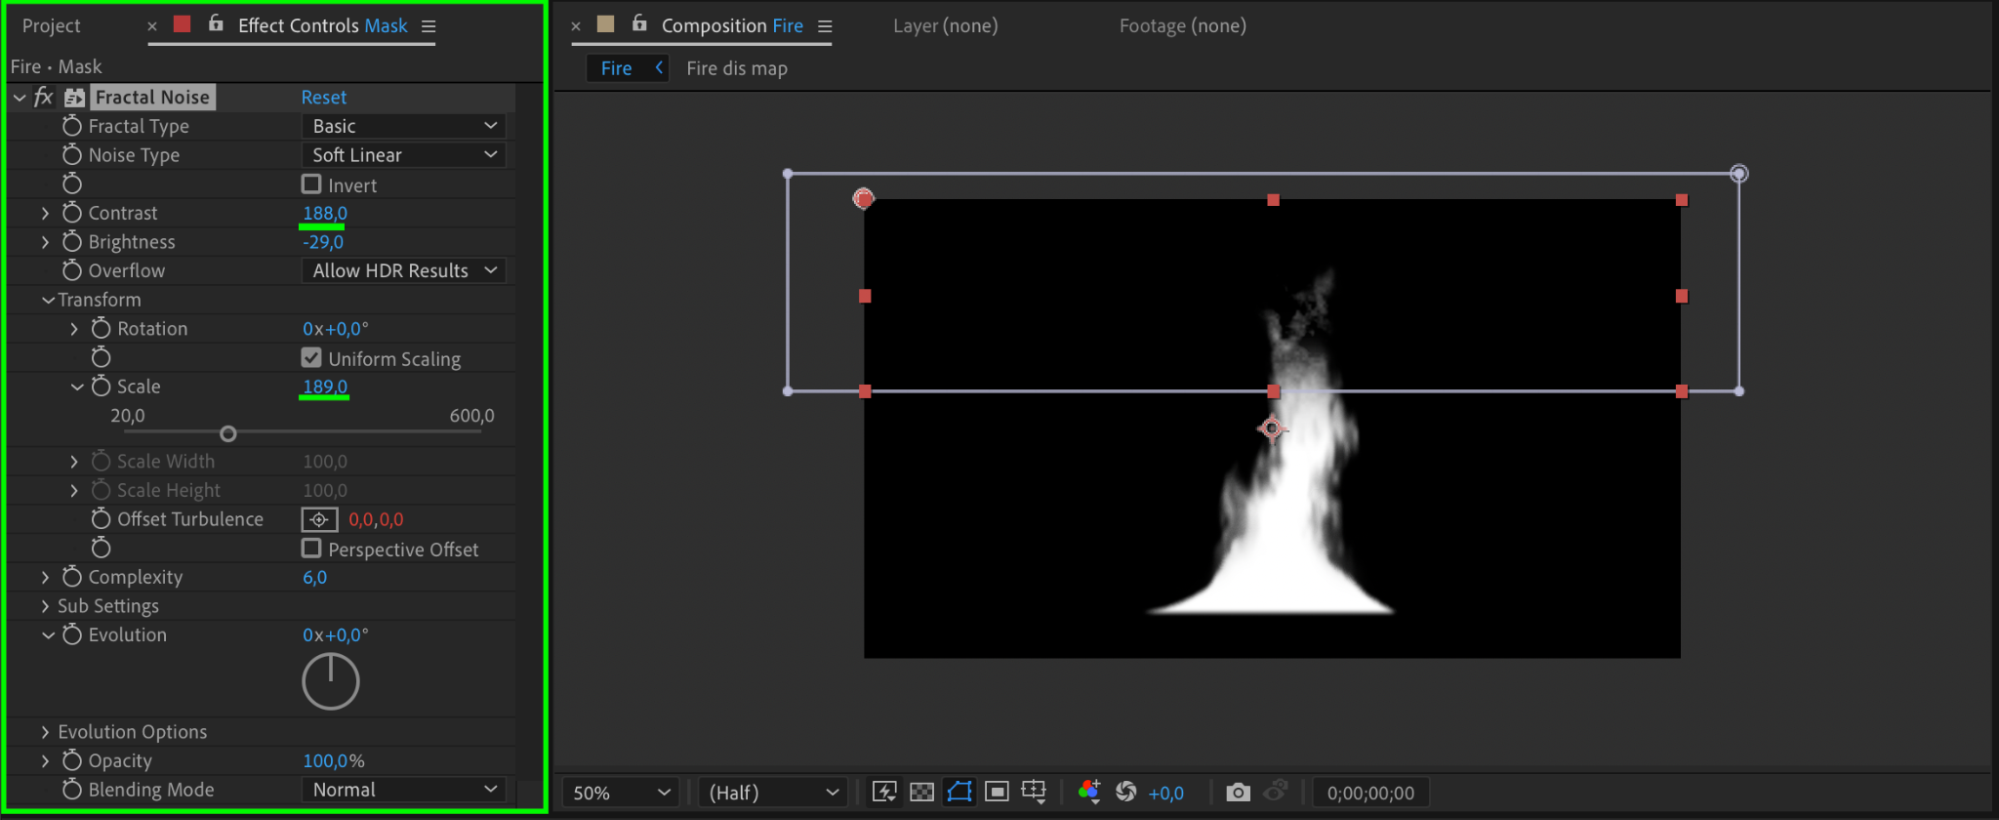
Right-click on the Mask solid and choose Effect > Noise & Grain > Fractal Noise. Adjust the settings to create a texture that will help in masking the fire.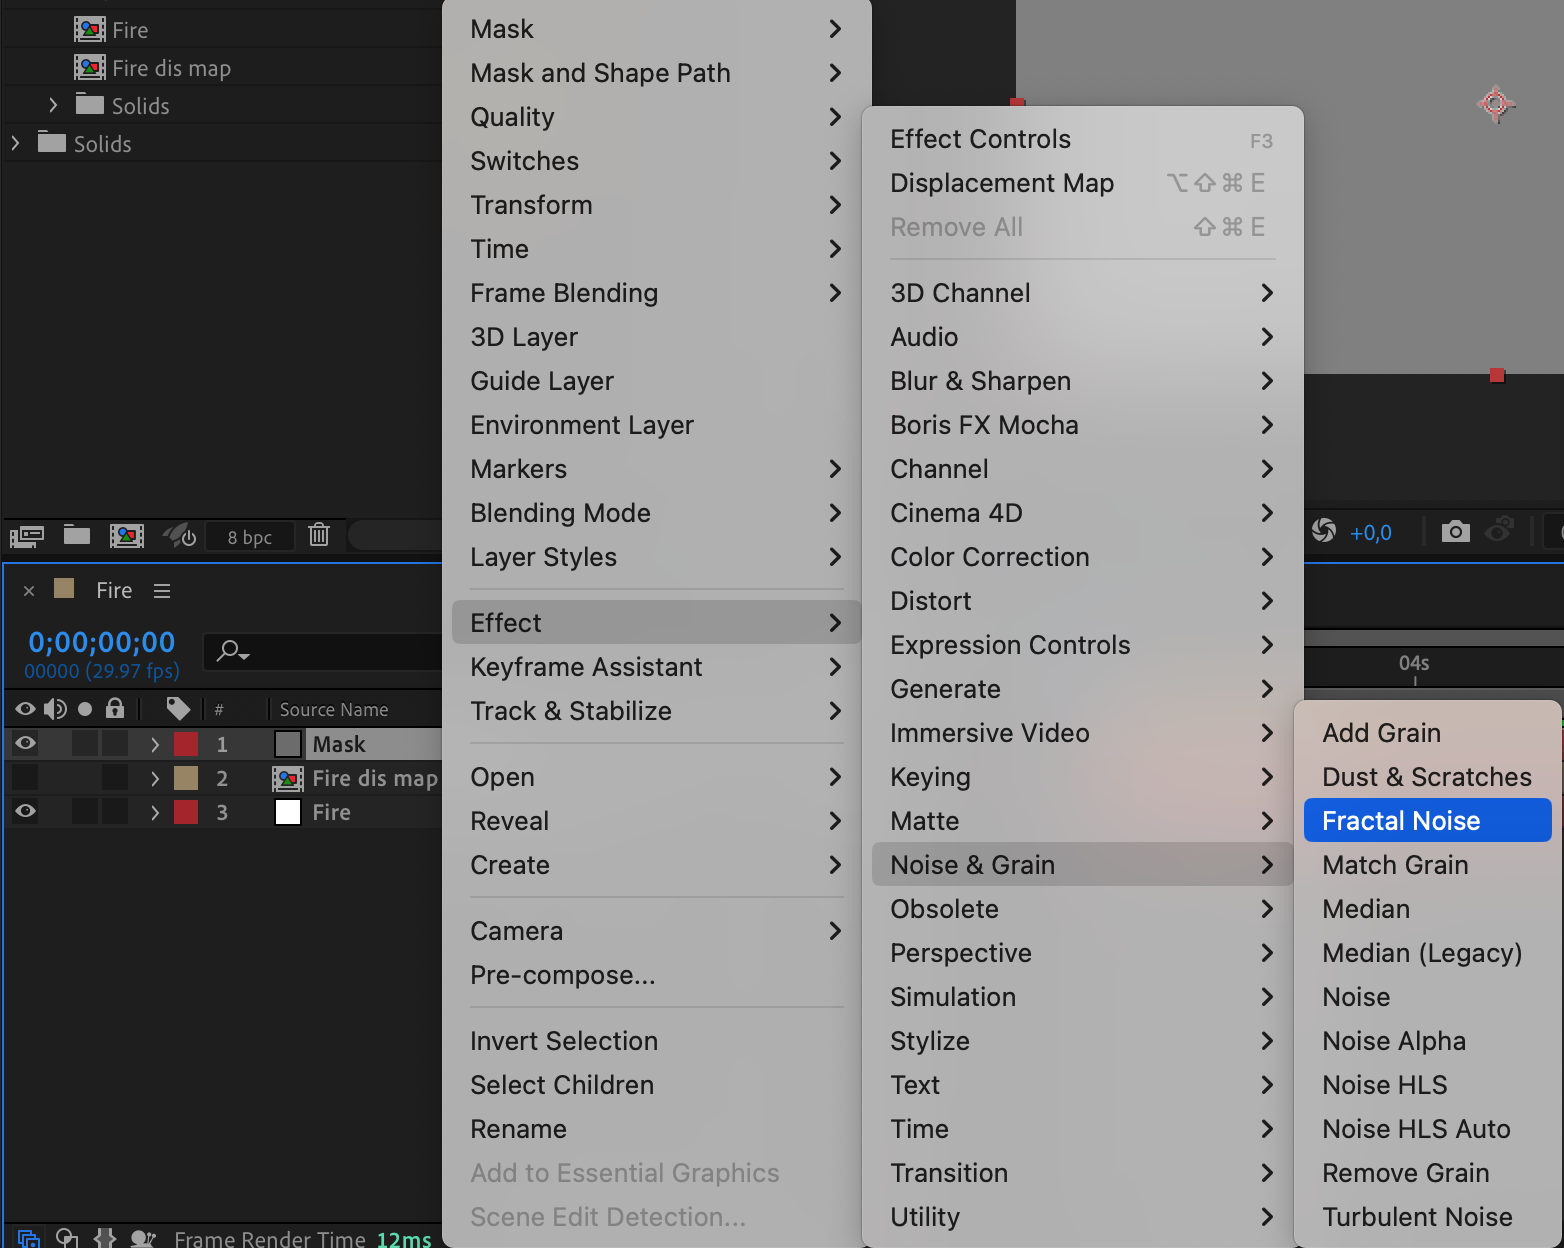
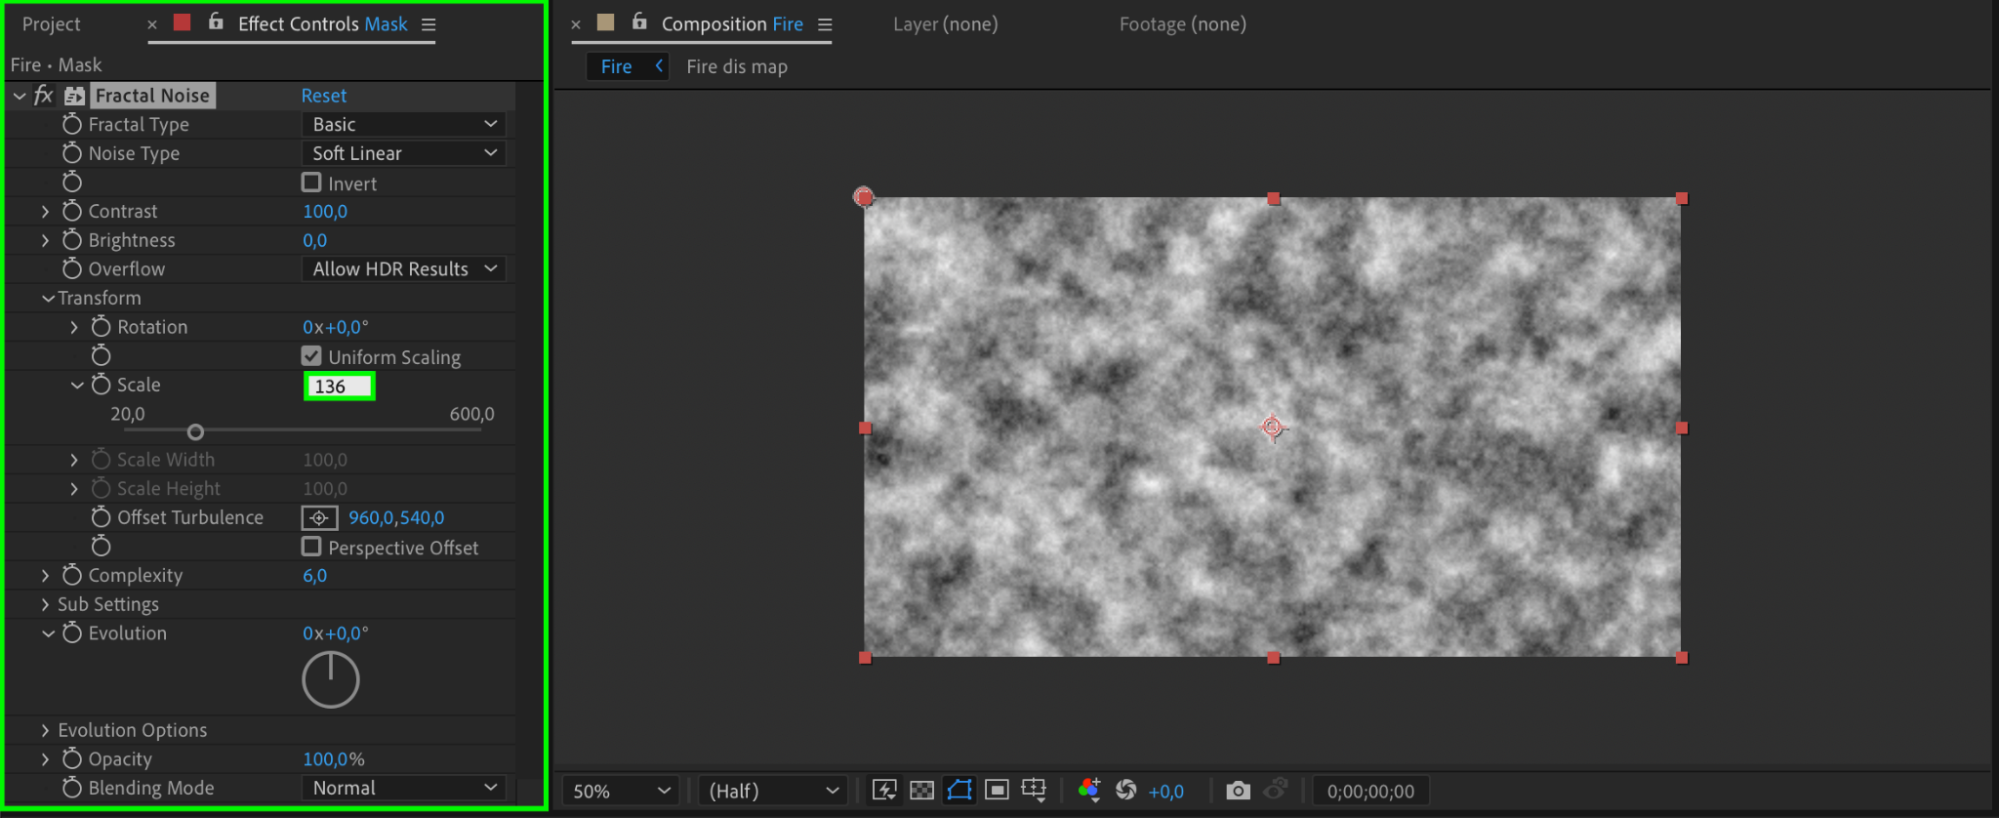 19. Create an Adjustment Layer
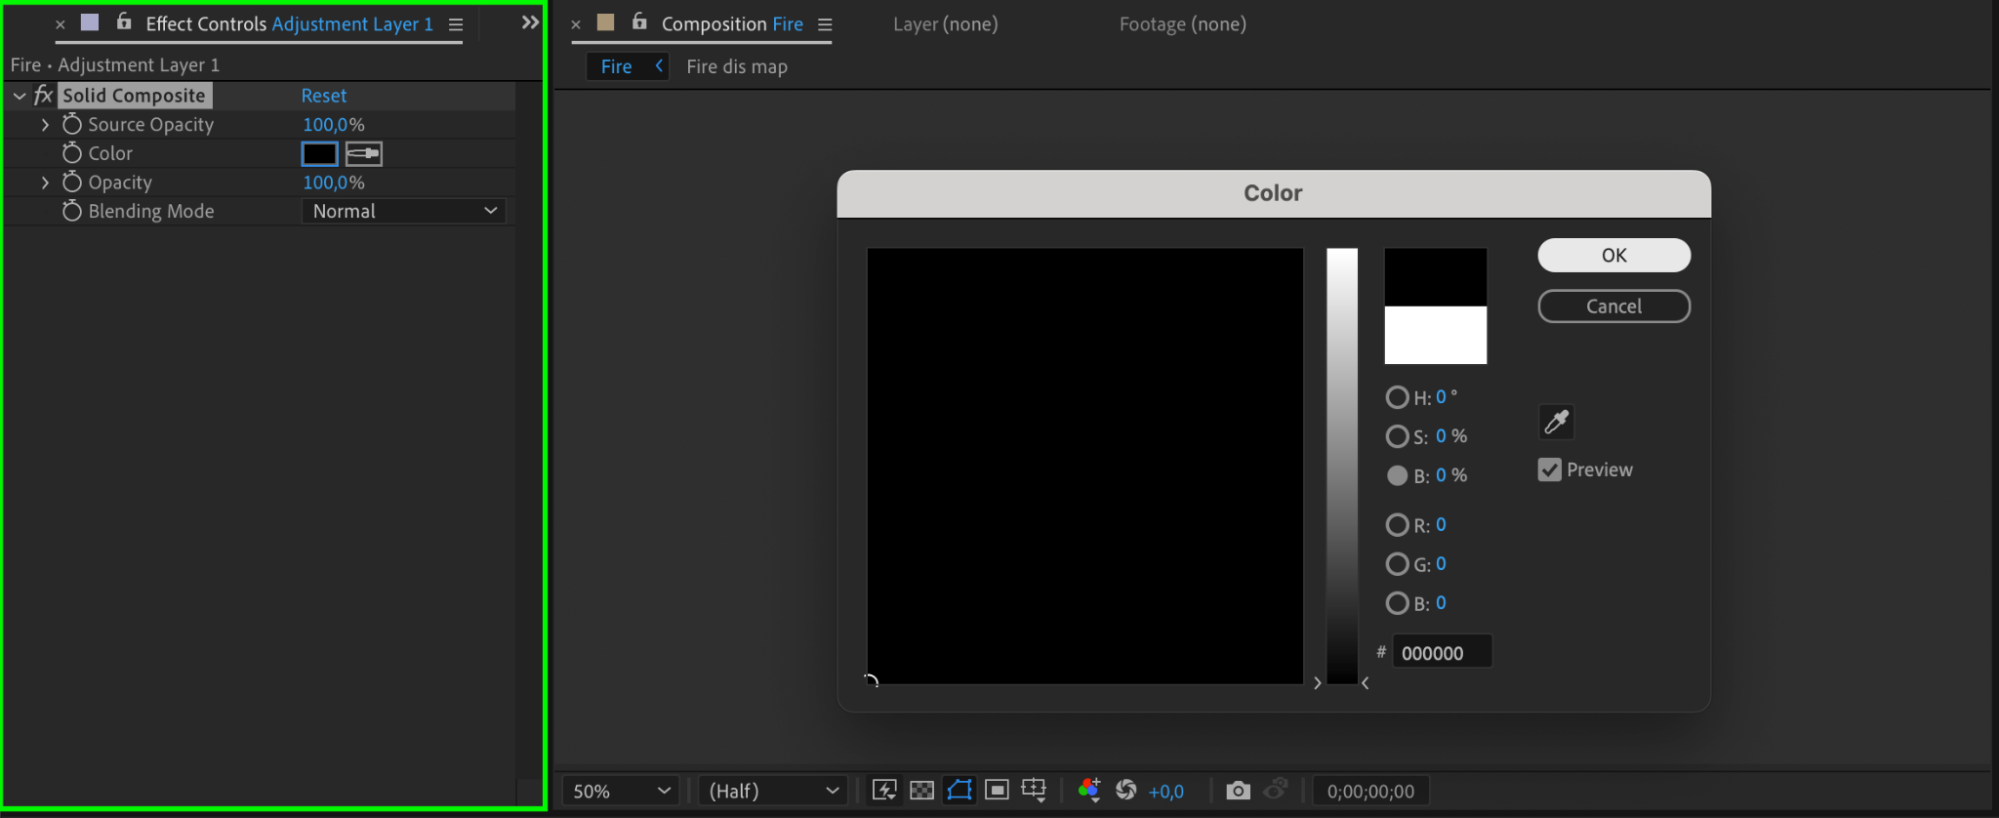
From the menu, choose Layer > New > Adjustment Layer and place it below the Mask solid. Right-click on the adjustment layer and choose Effect > Generate > Solid Composite. Set the color to black in the Effect Controls panel.

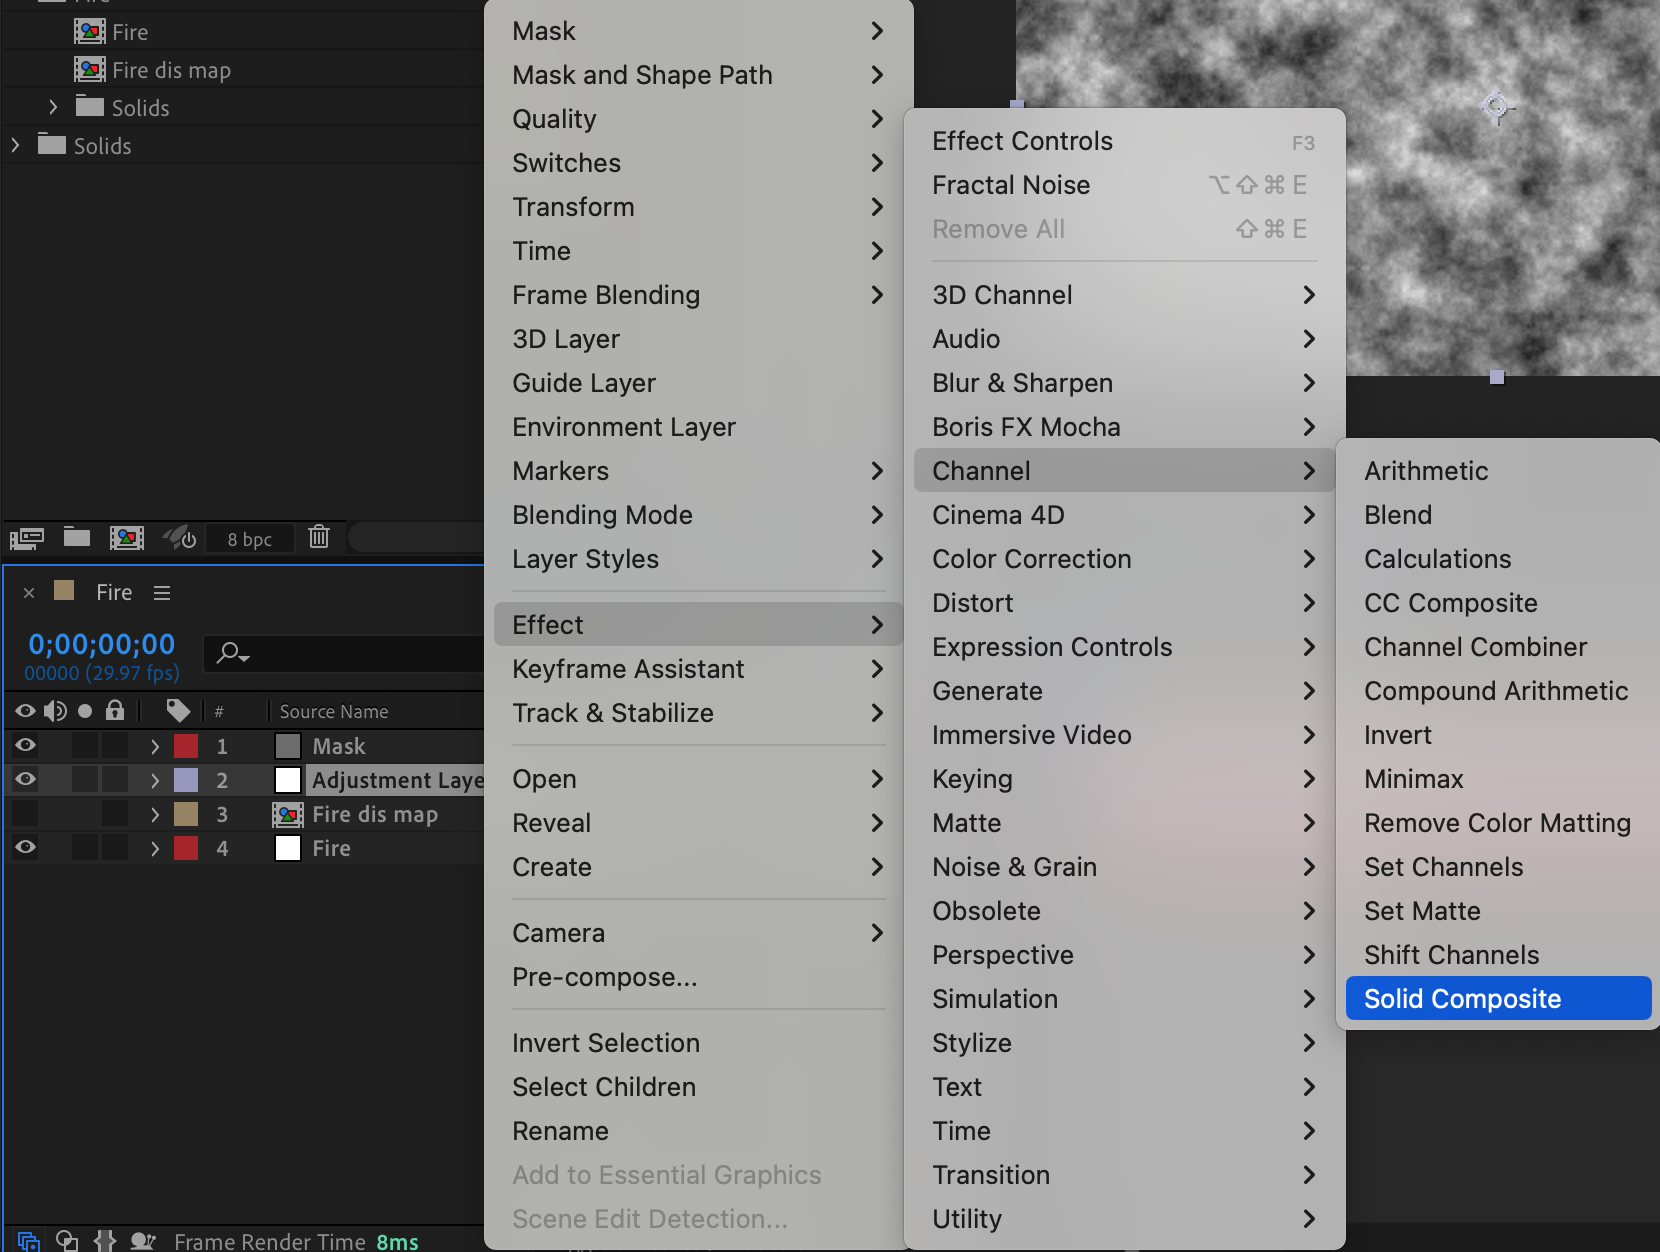
 20. Set the Blending Mode
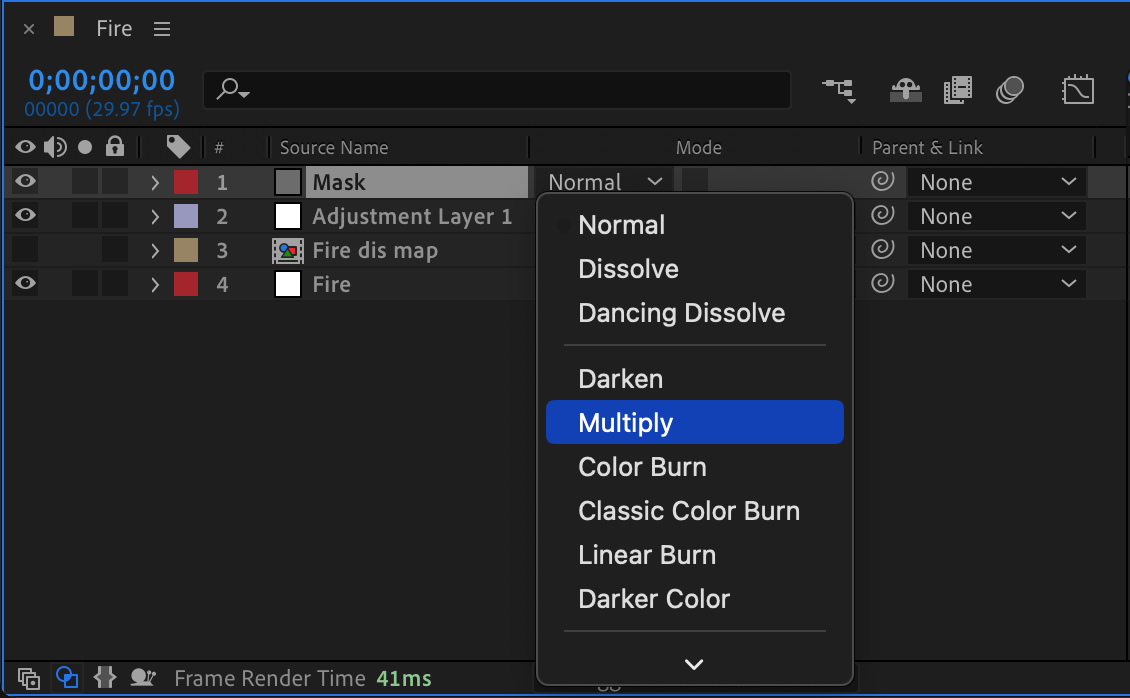
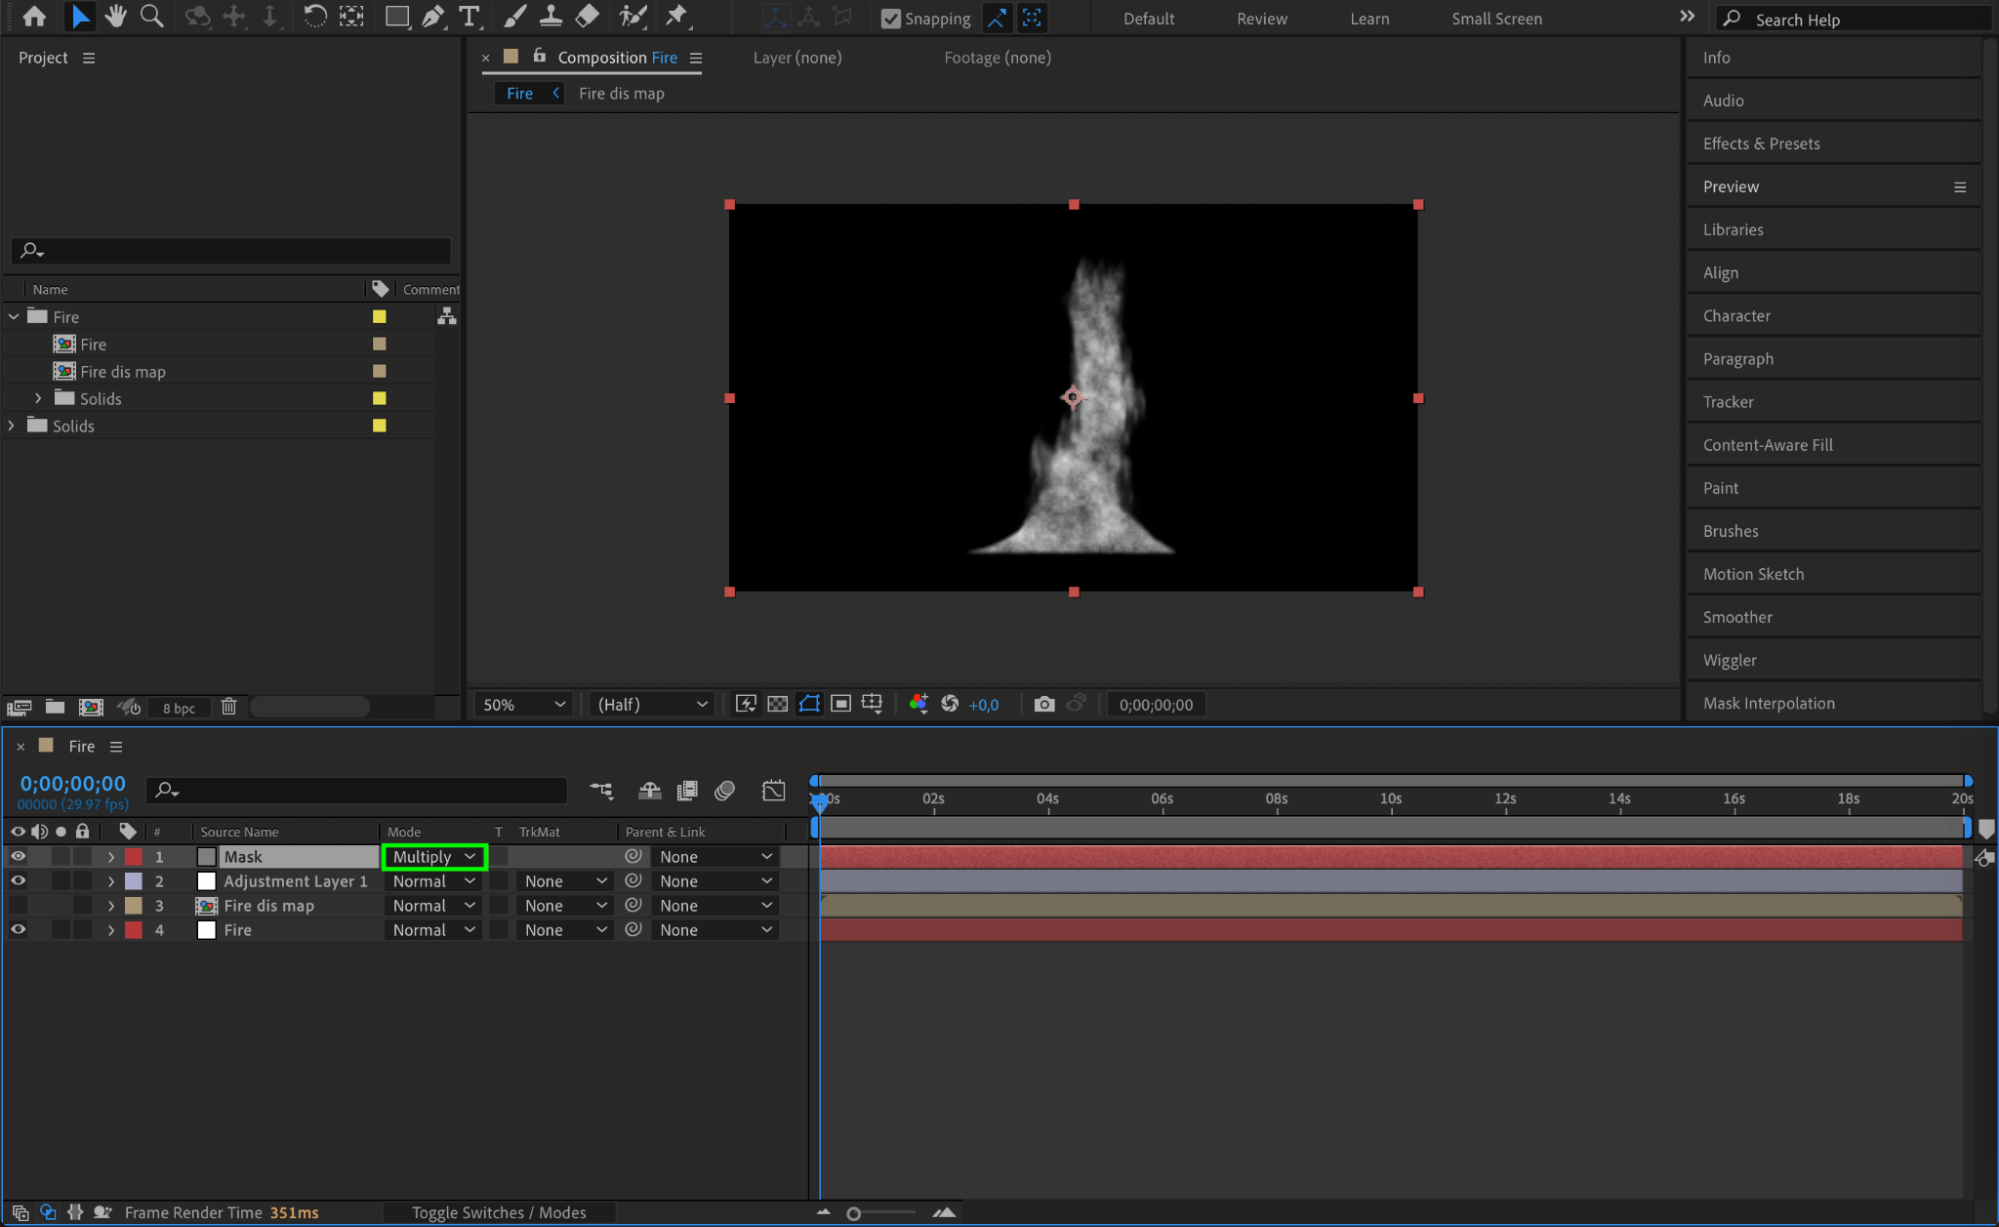
Set the blending mode for the Mask layer to Multiply. This will blend the texture with the fire effect below.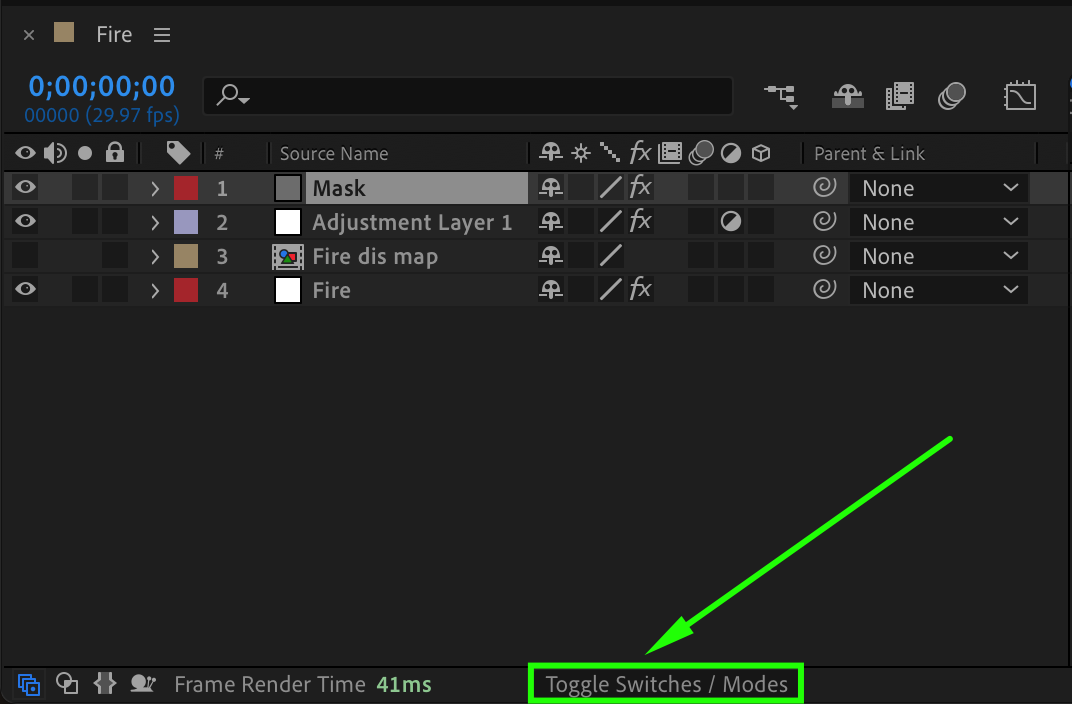
 21. Create a Rectangle Mask for the Fade Effect
Get 10% off when you subscribe to our newsletter

Select the Mask solid and use the Rectangle Tool to create a narrow rectangle at the top. Adjust the Mask Feather settings to create a smooth fade-out effect at the top of the flame. In the Effect Controls panel, enter the expression [0, time * -1500] for the Offset Turbulence parameter and adjust other settings to achieve a realistic look.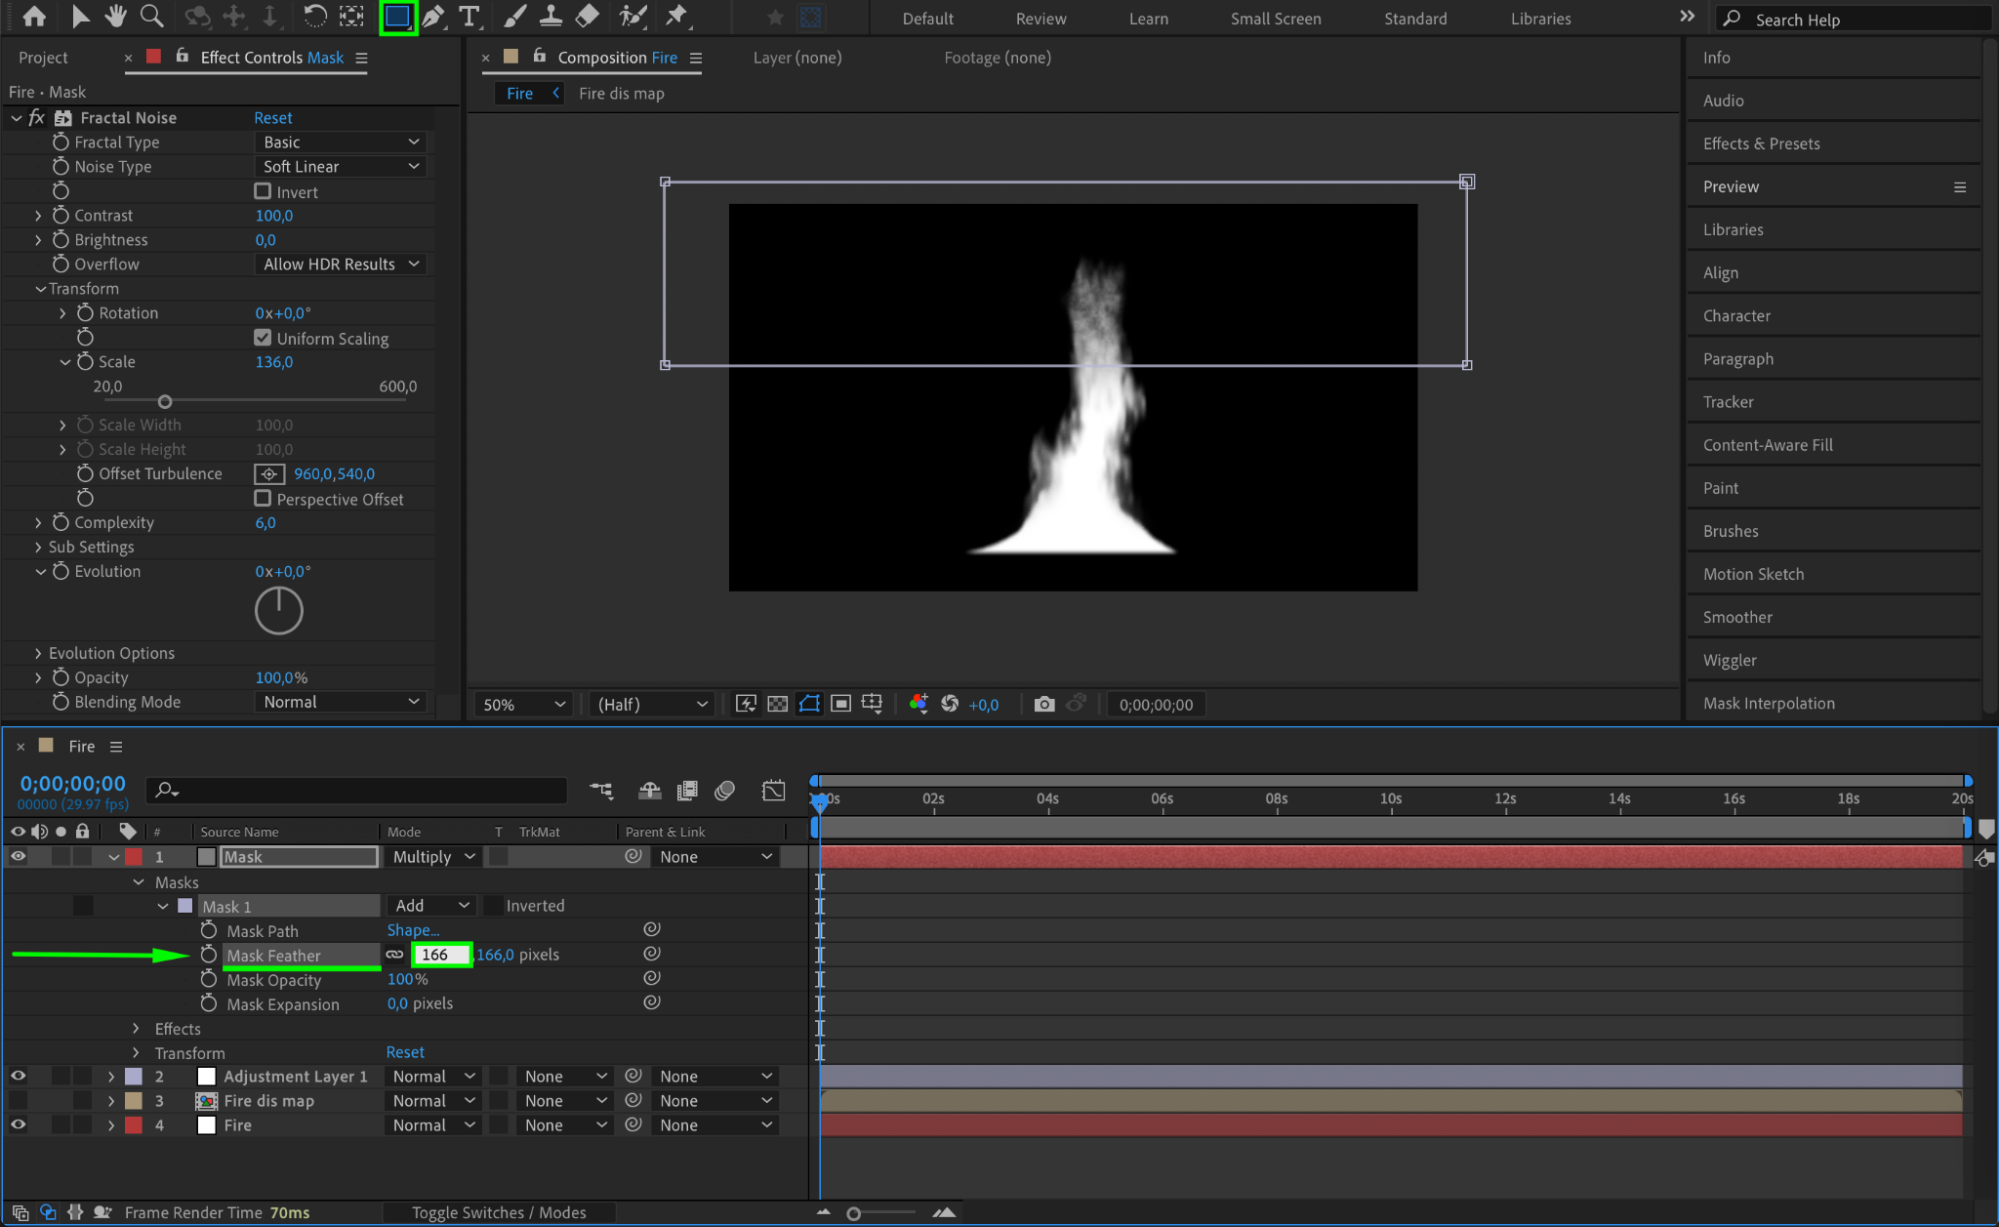

 22. Apply the Turbulent Noise Effect
Get 10% off when you subscribe to our newsletter

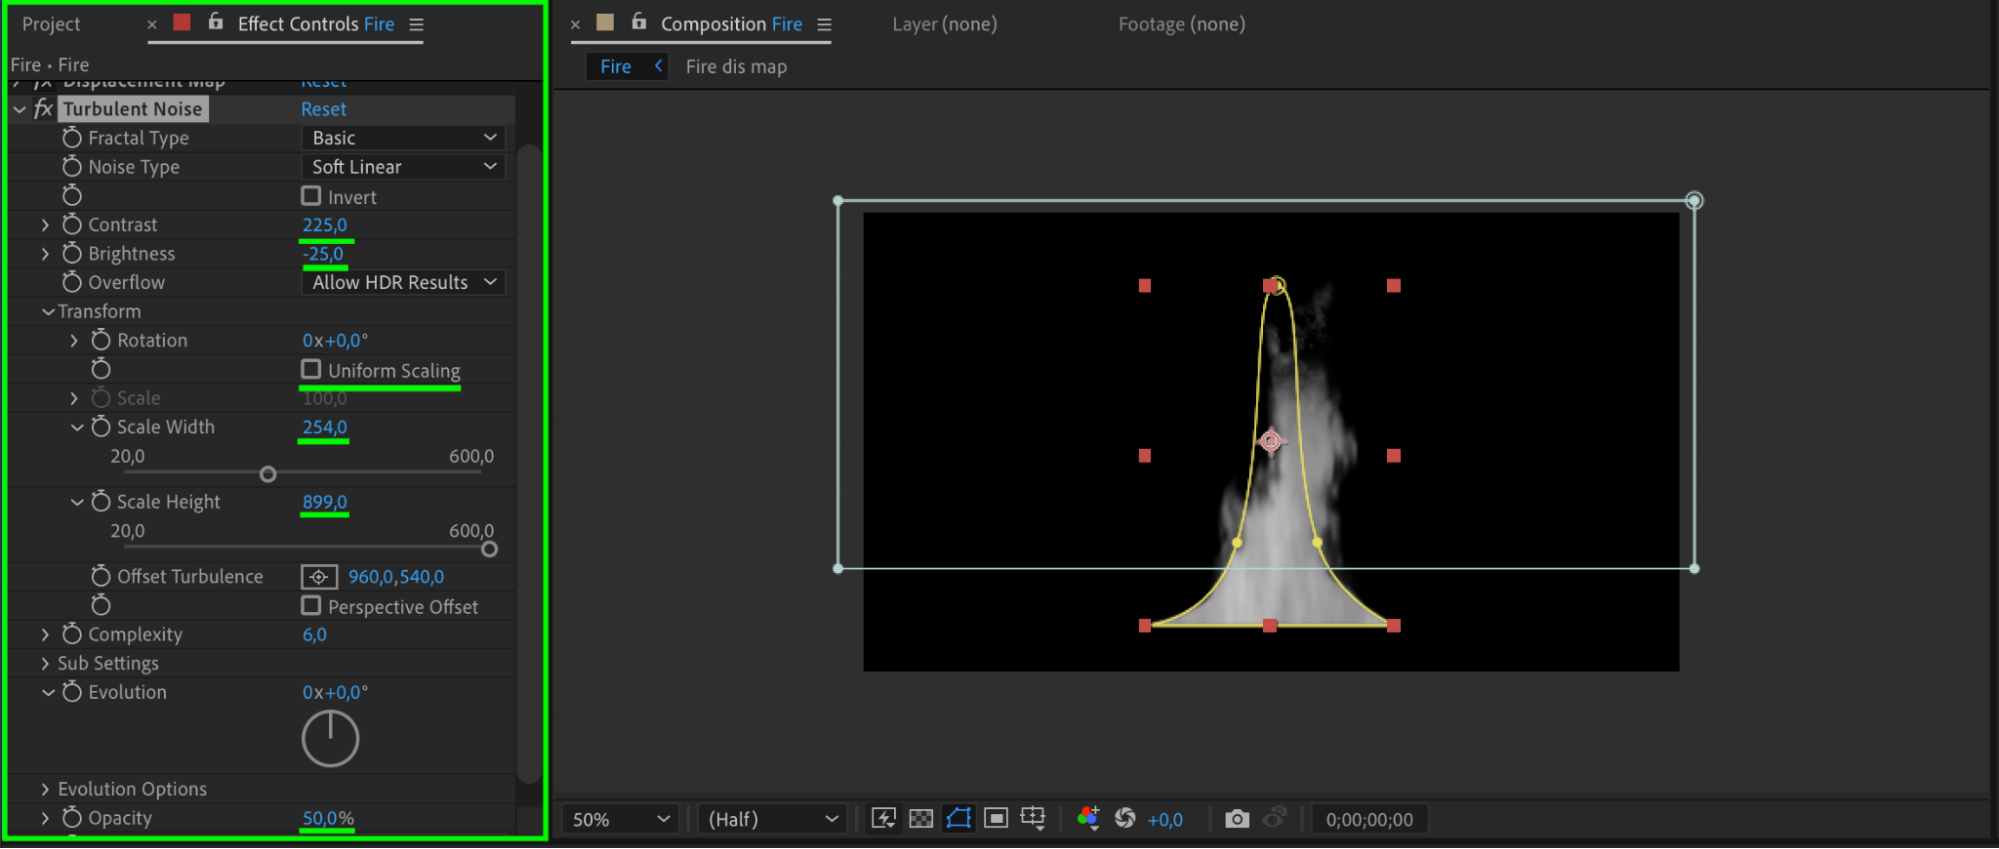
Select the Fire solid, right-click, and choose Effect > Noise & Grain > Turbulent Noise. Adjust the settings to make your shape look more like a flame. For the Offset Turbulence parameter, use the expression [0, time * -1500] to simulate realistic fire movement.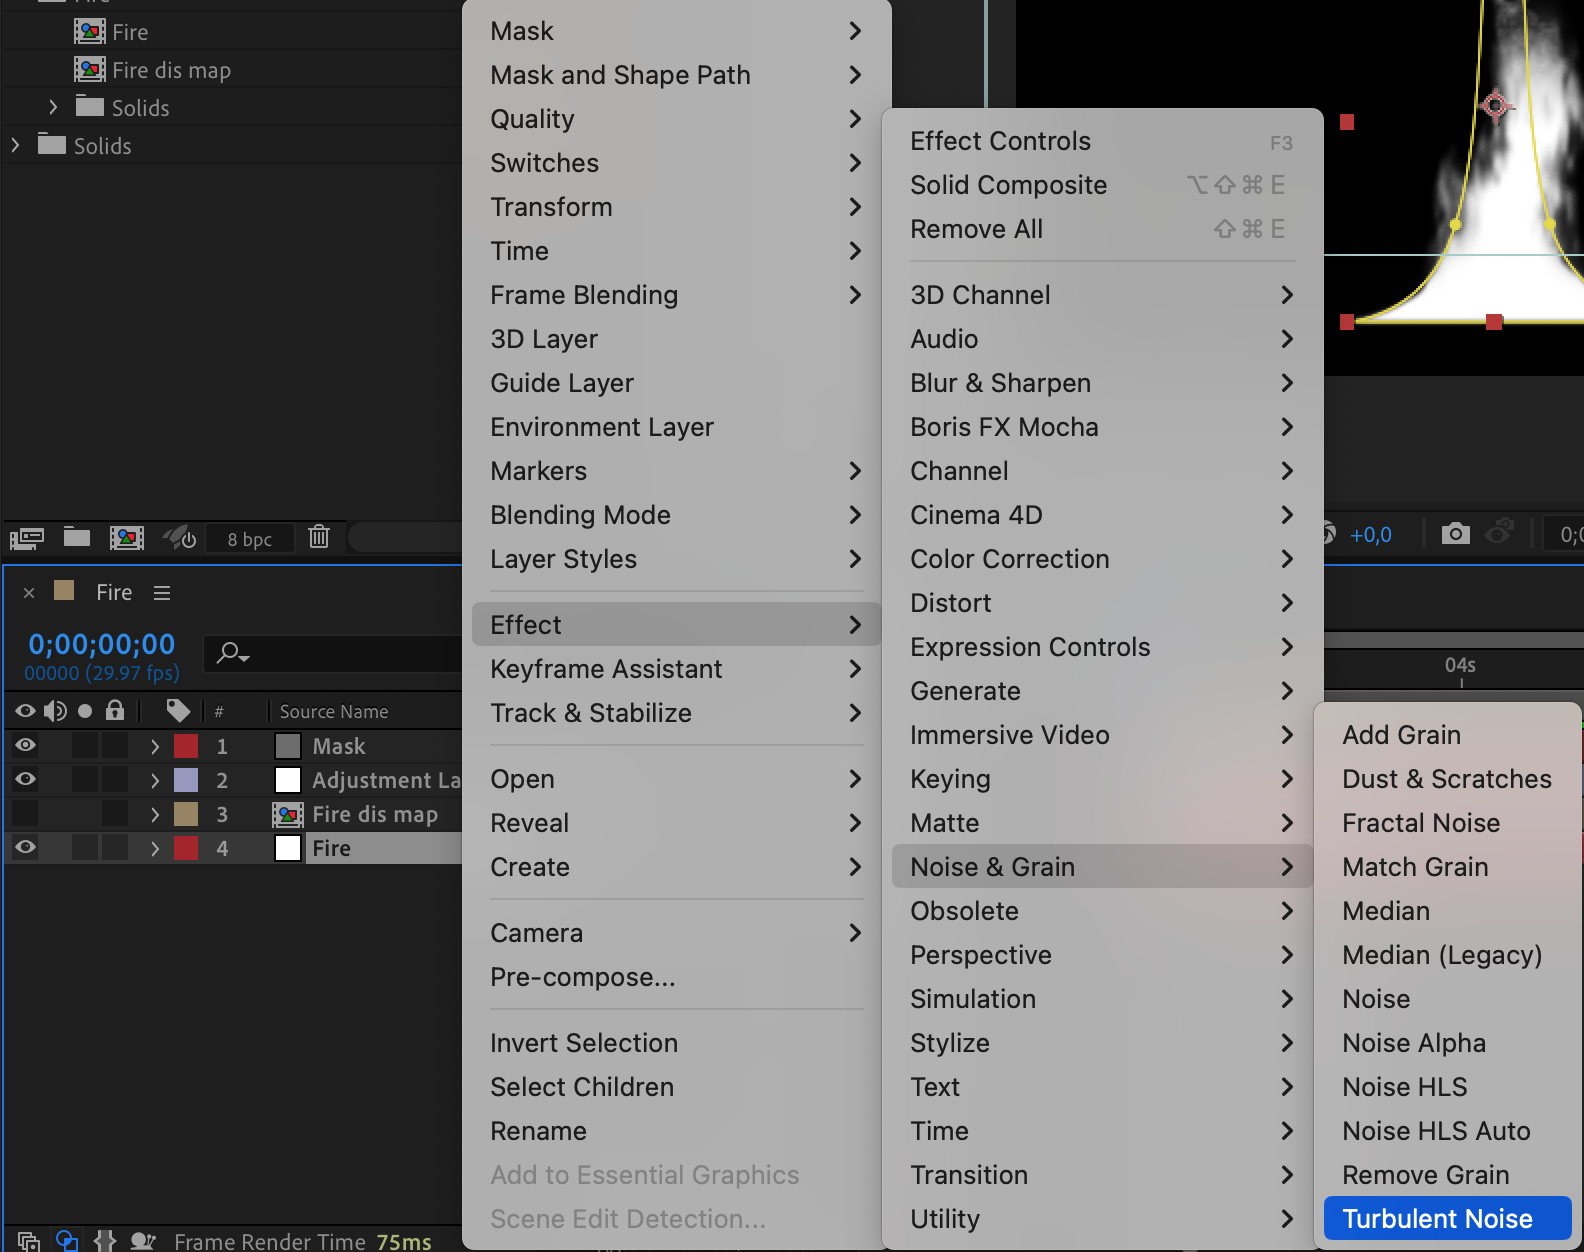
 23. Pre-compose Fire Layers
Get 10% off when you subscribe to our newsletter

Select the Mask, Adjustment Layer, and Fire layers, right-click, and choose Pre-compose. Name it “Fire”.
 24. Apply the Curves Effect
Select the Fire pre-comp, right-click, and choose Effect > Color Correction > Curves. Adjust the curves in the Effect Controls panel to achieve a yellow flame color.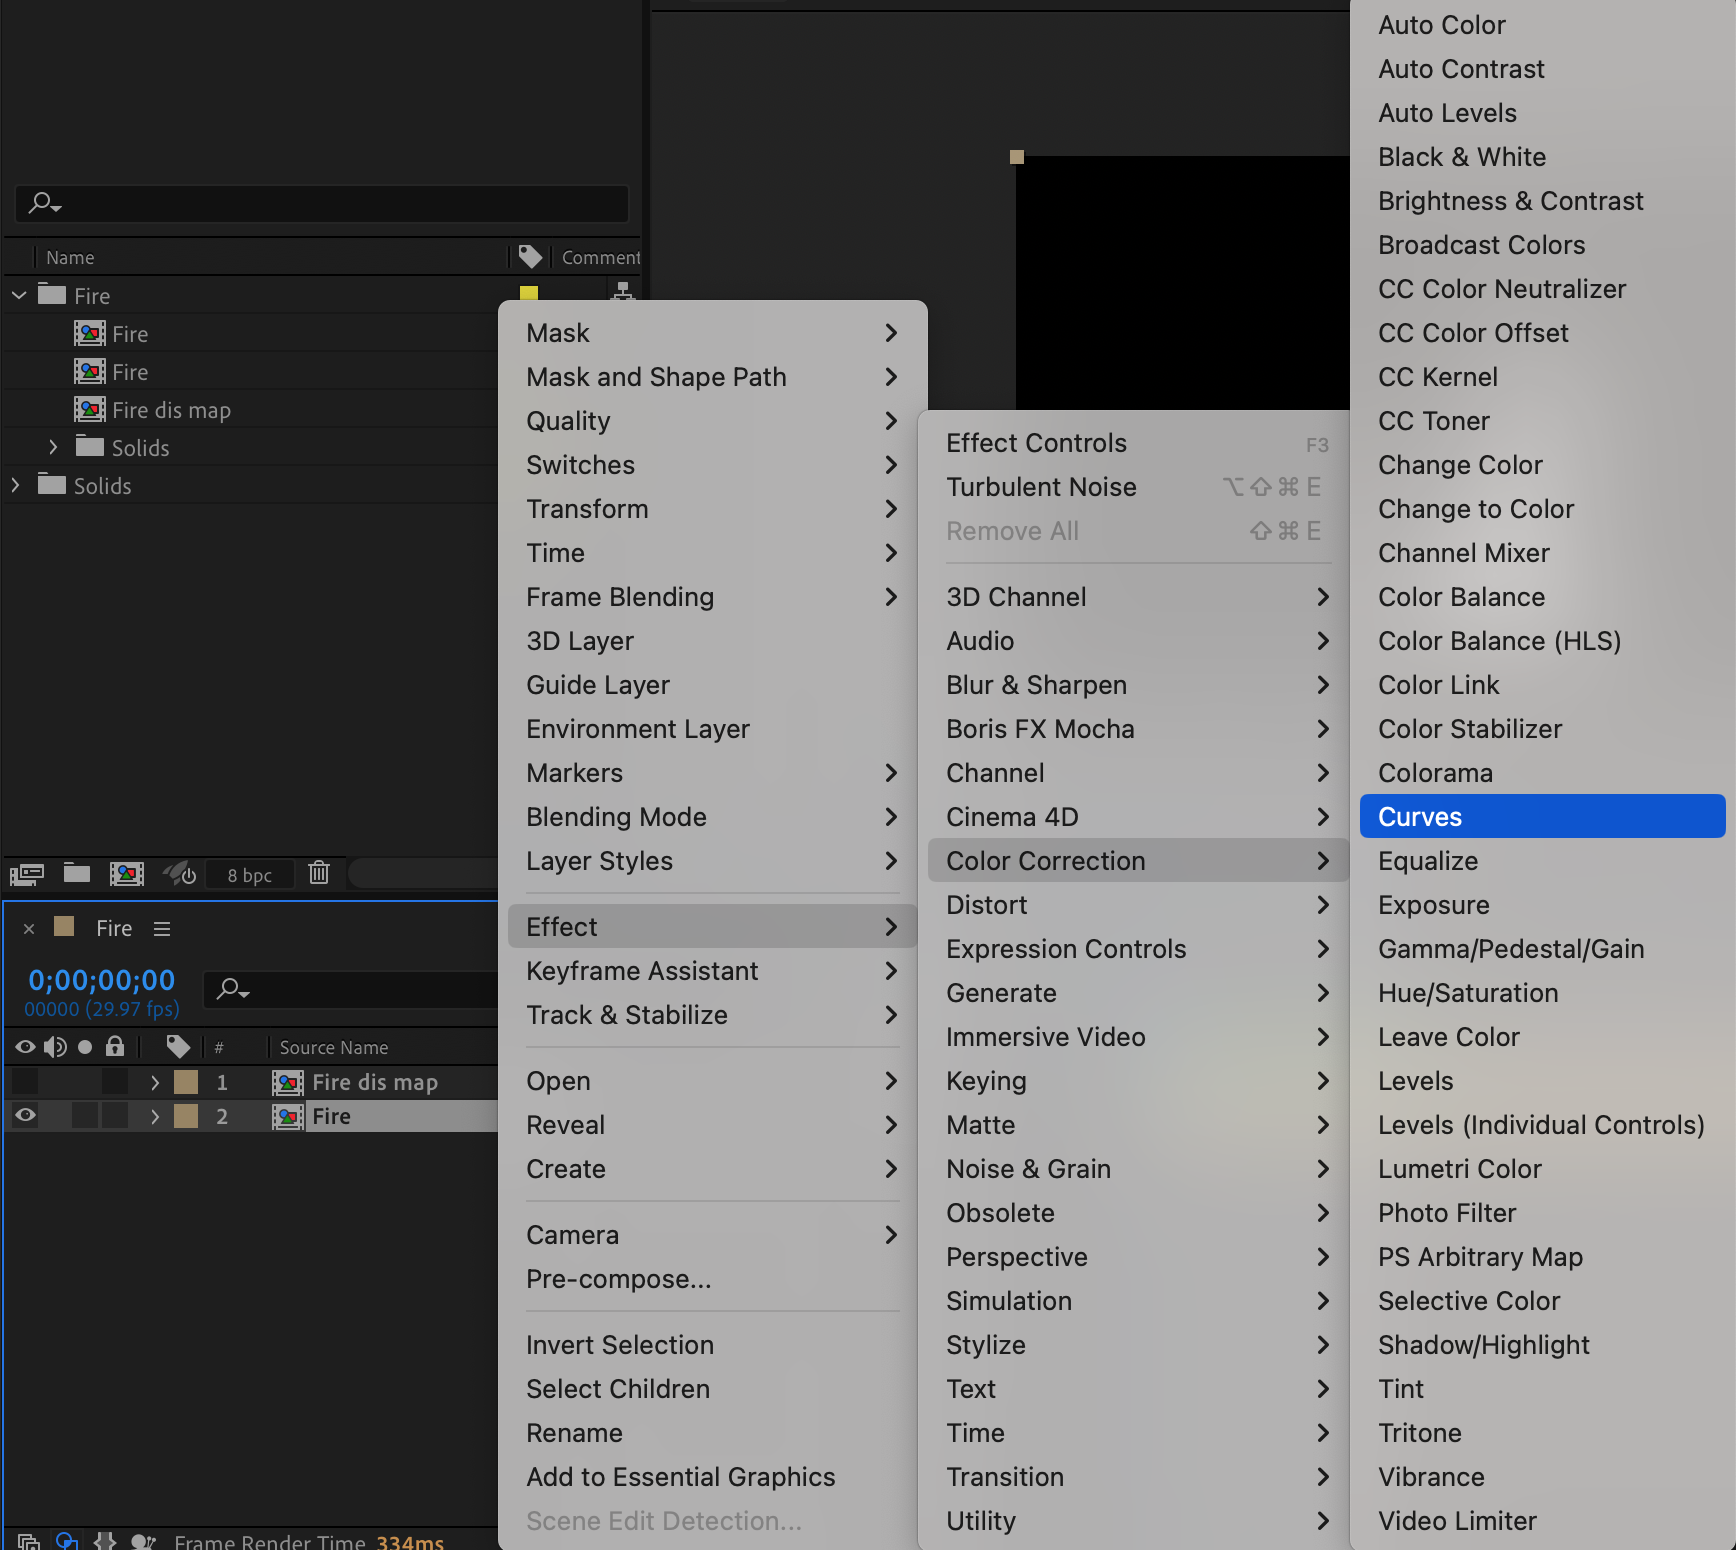
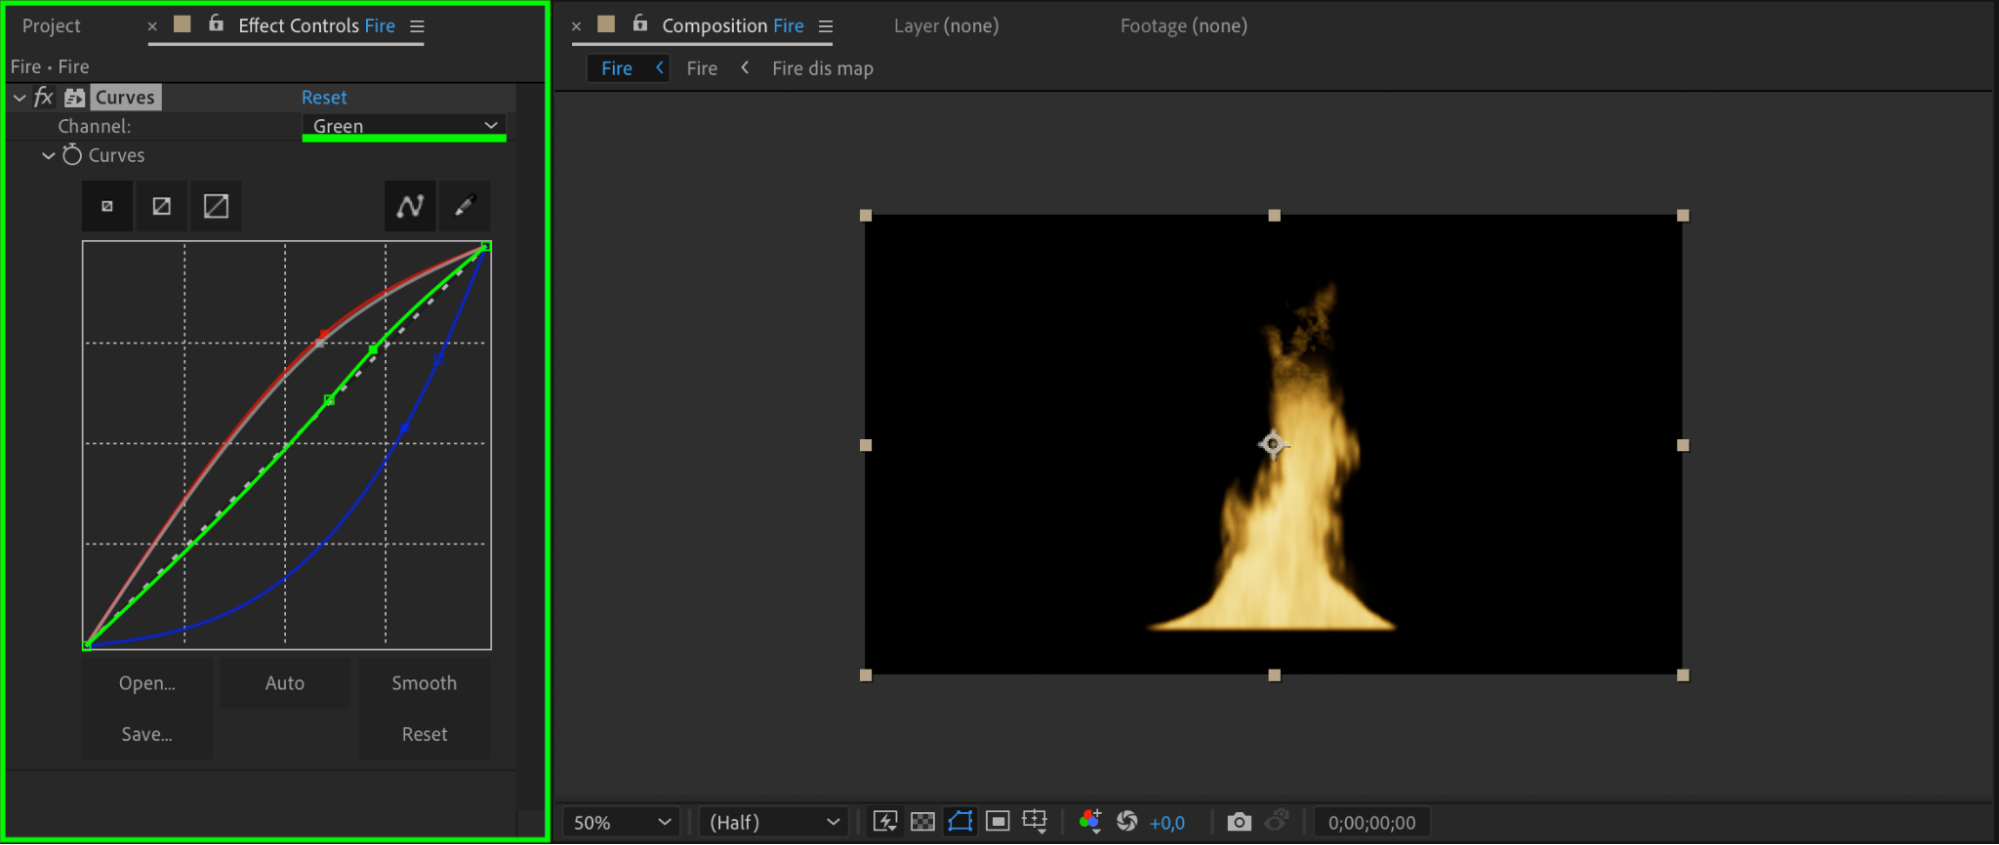 25. Apply the Glow Effect
Right-click on the Fire pre-comp, choose Effect > Stylize > Glow. Set the glow colors to yellow and orange and adjust the other parameters to your liking.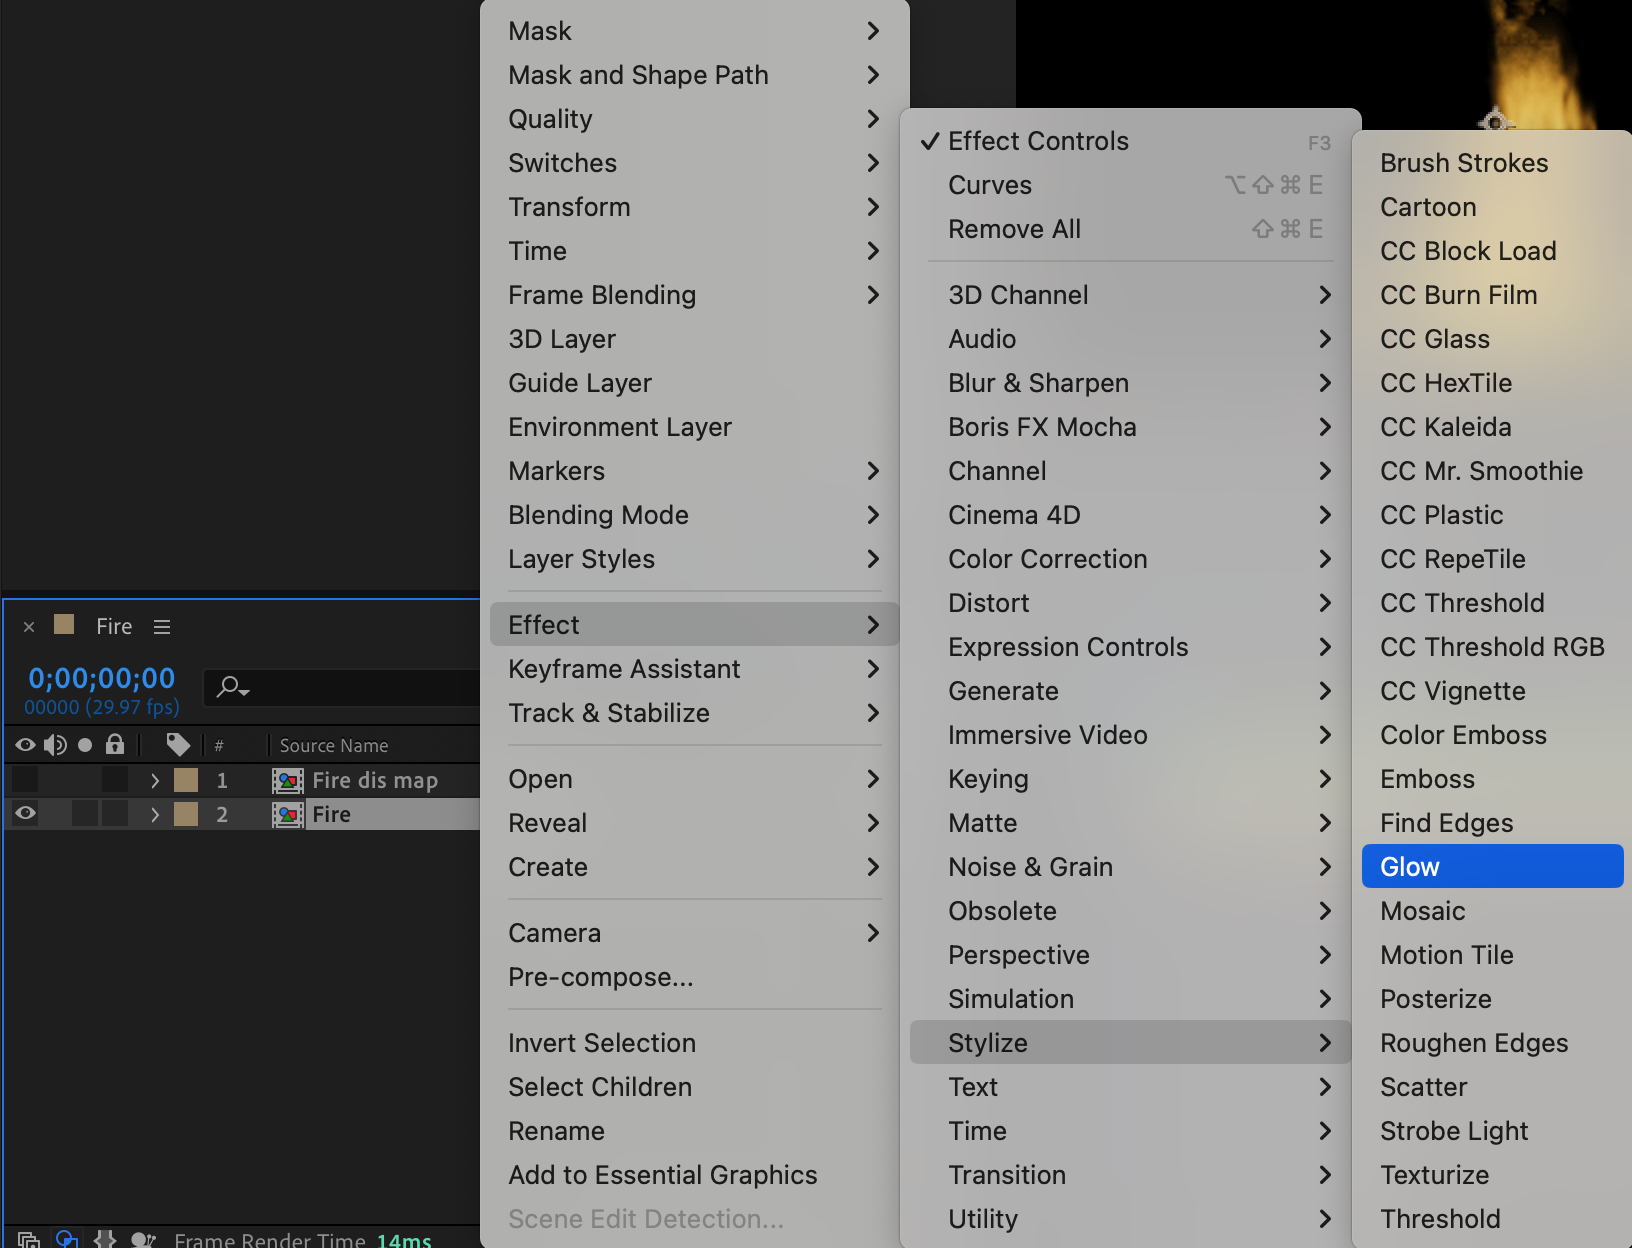
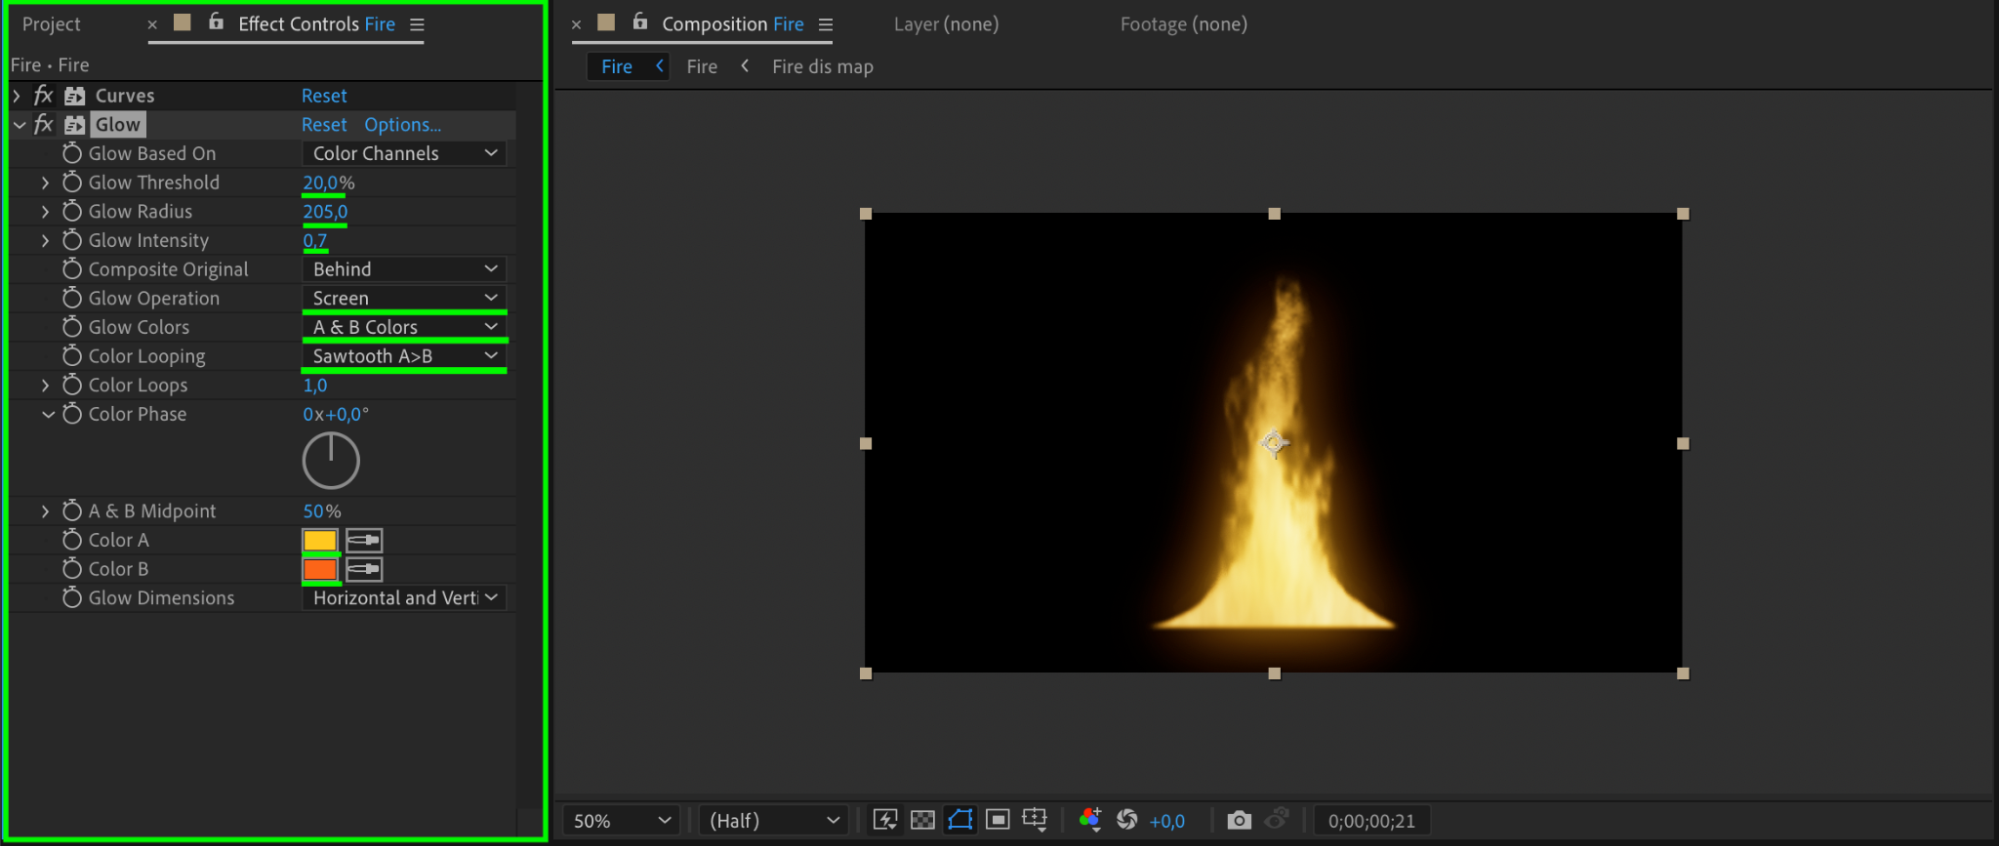 26. Duplicate the Glow Effect
Get 10% off when you subscribe to our newsletter

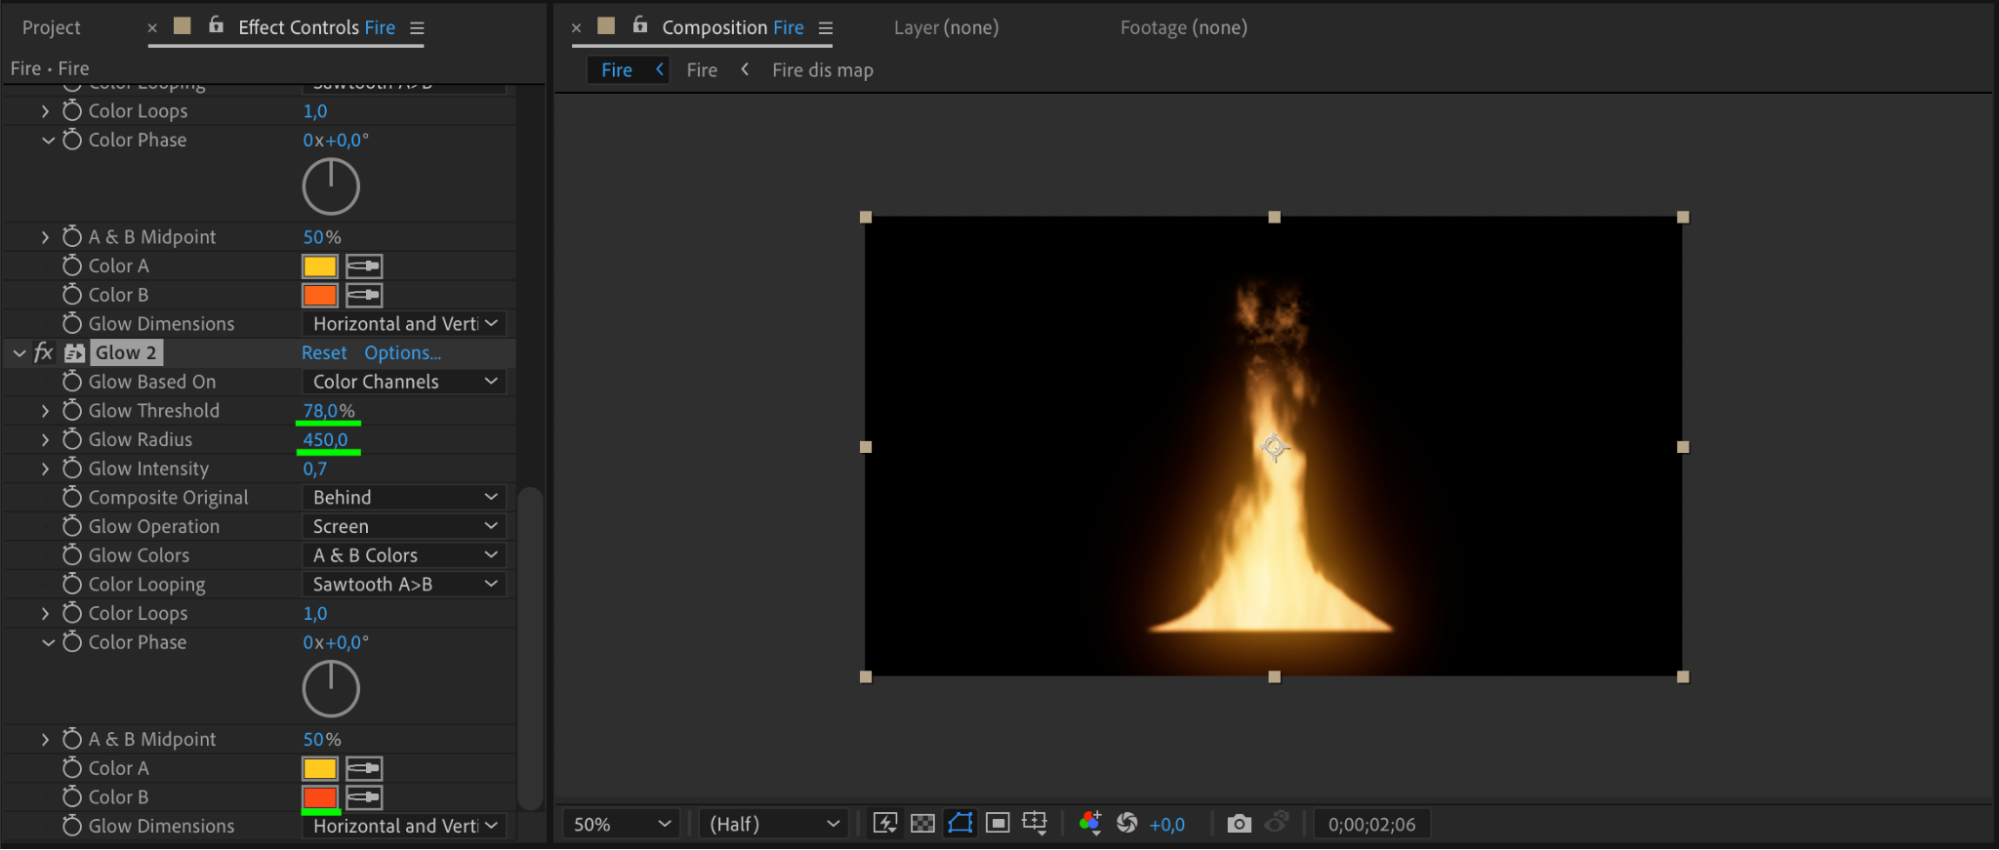
Duplicate the Glow effect by right-clicking on it and selecting Duplicate. Modify the settings, such as making the colors darker, to add more depth and realism to the fire.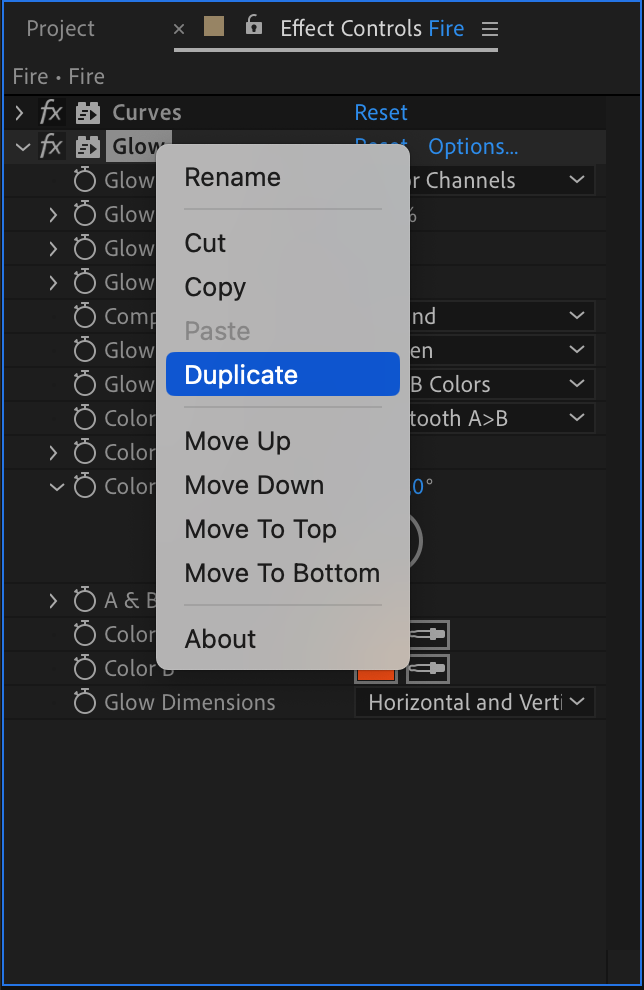
 27. Apply the Exposure Effect
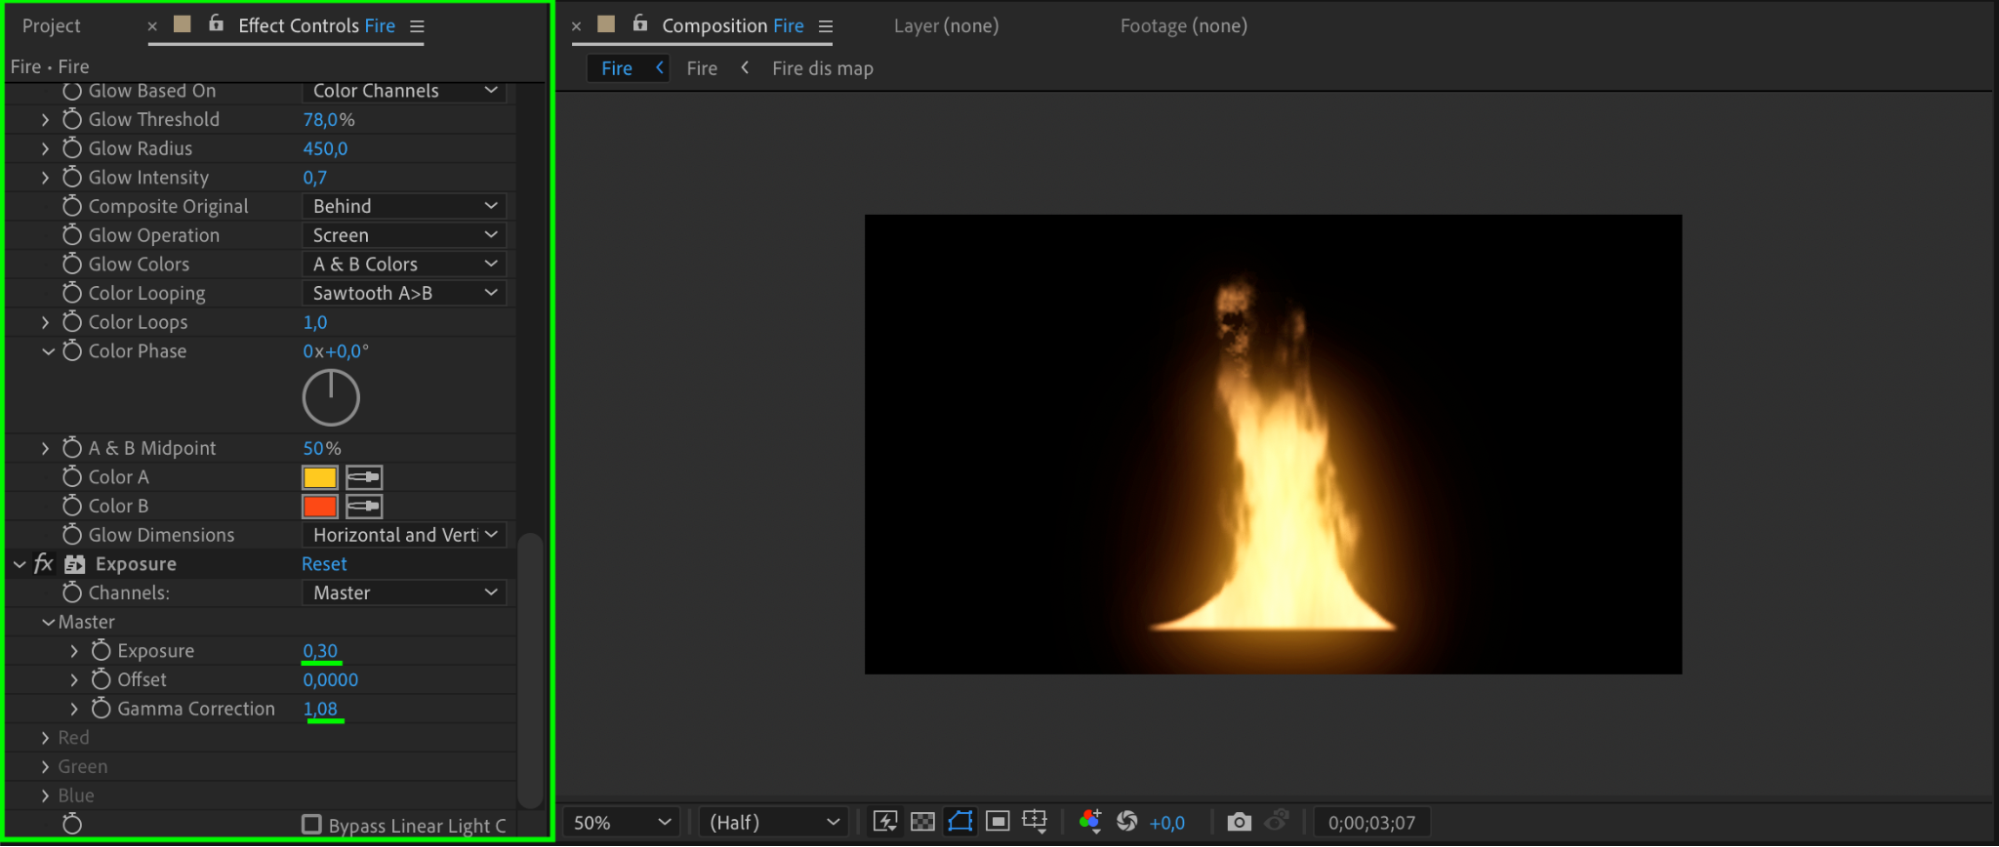
Right-click on the Fire pre-comp, choose Effect > Color Correction > Exposure. Adjust the settings to enhance the exposure and gamma correction, making the fire look more realistic.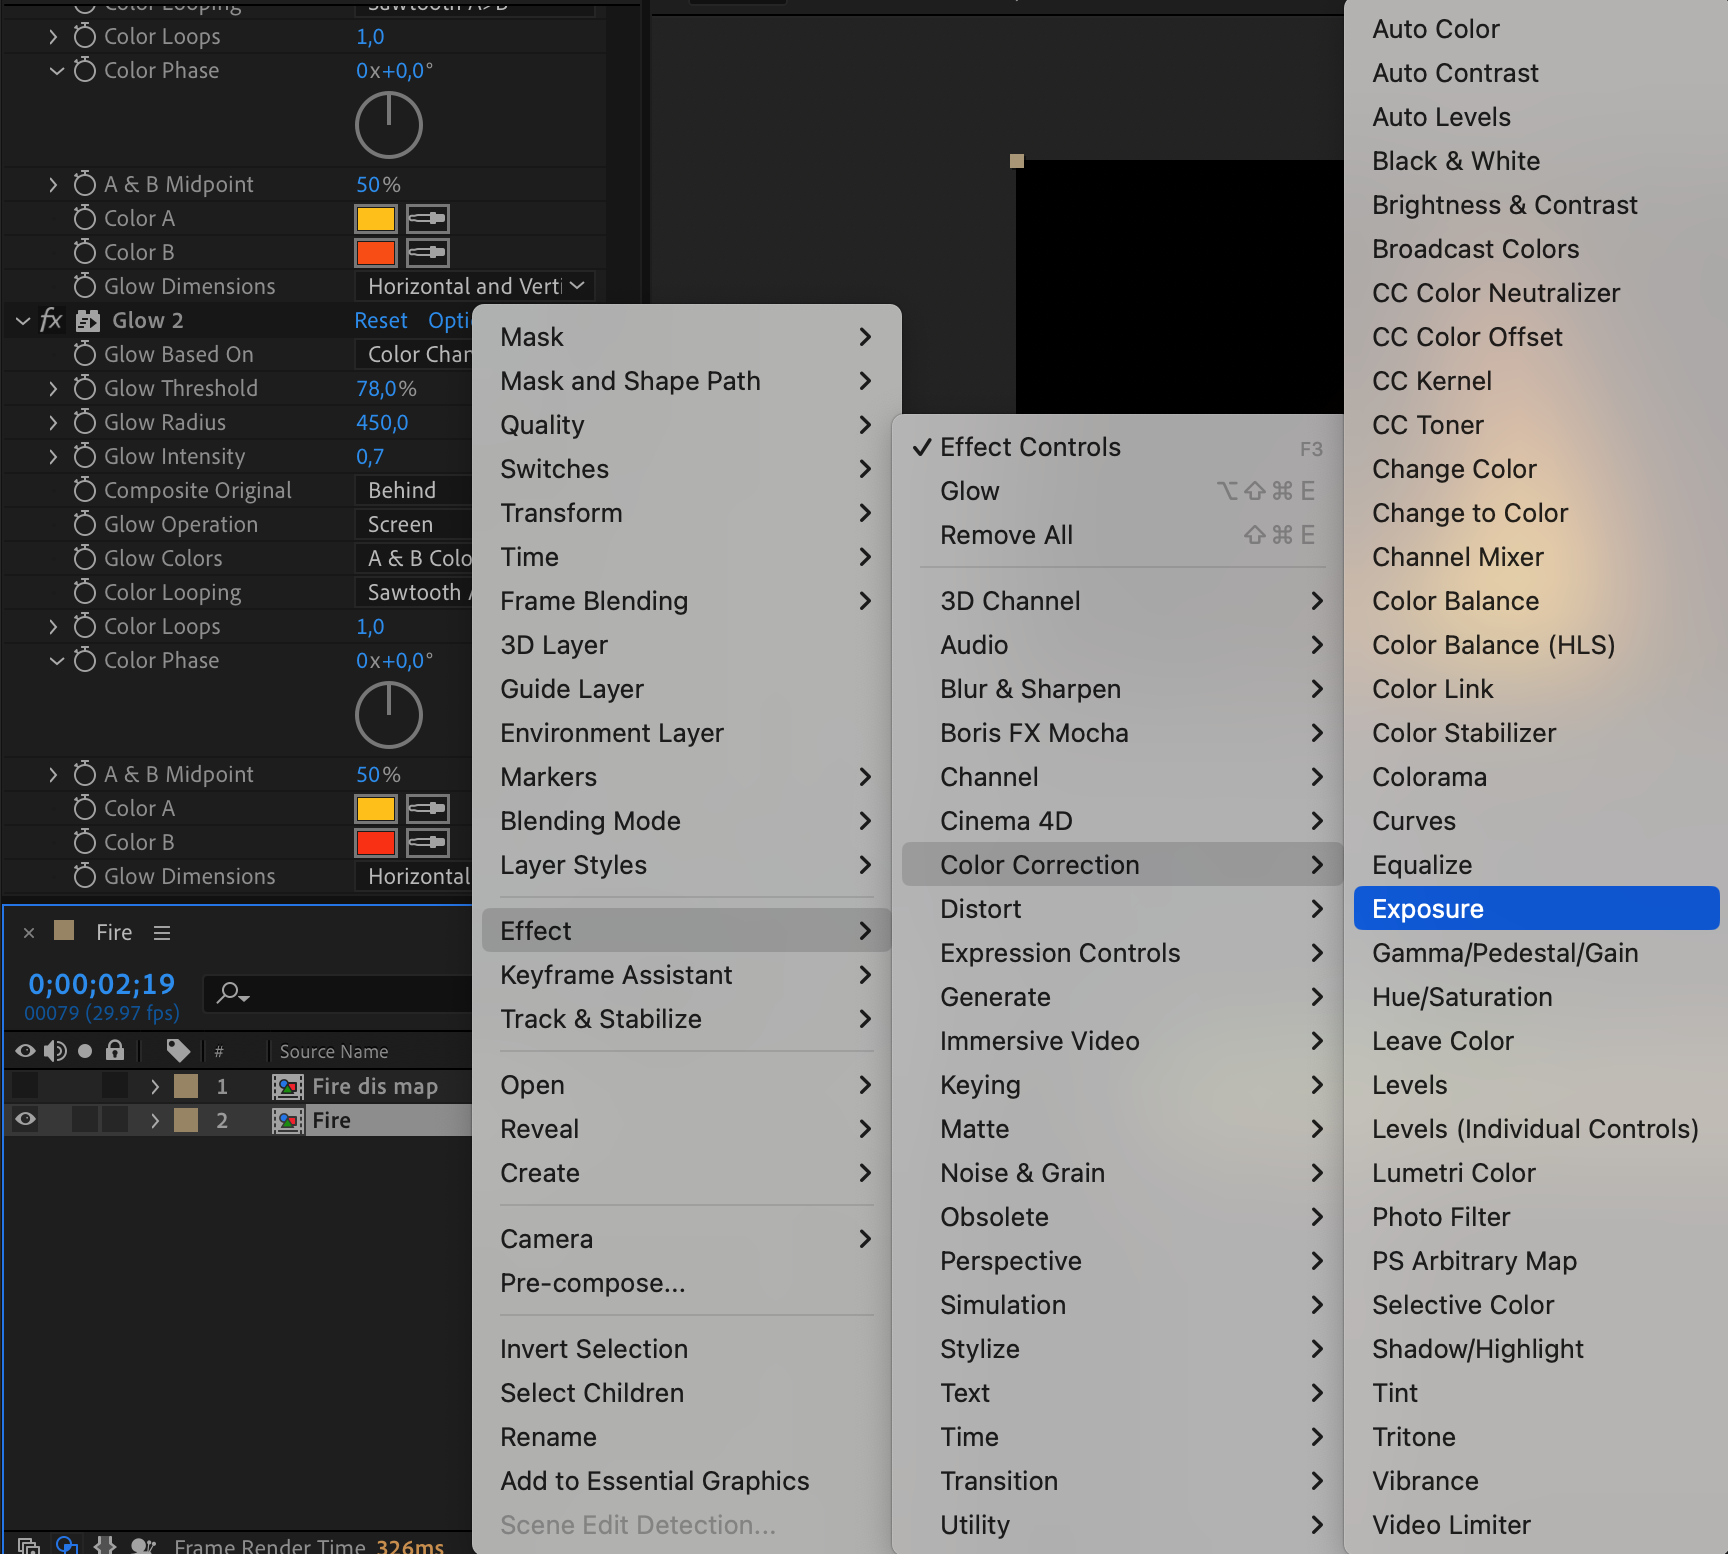
 28. Preview Your Effect
Get 10% off when you subscribe to our newsletter

Finally, preview your composition to see the fire effect in action. Make any necessary adjustments to the effects and settings to perfect the look.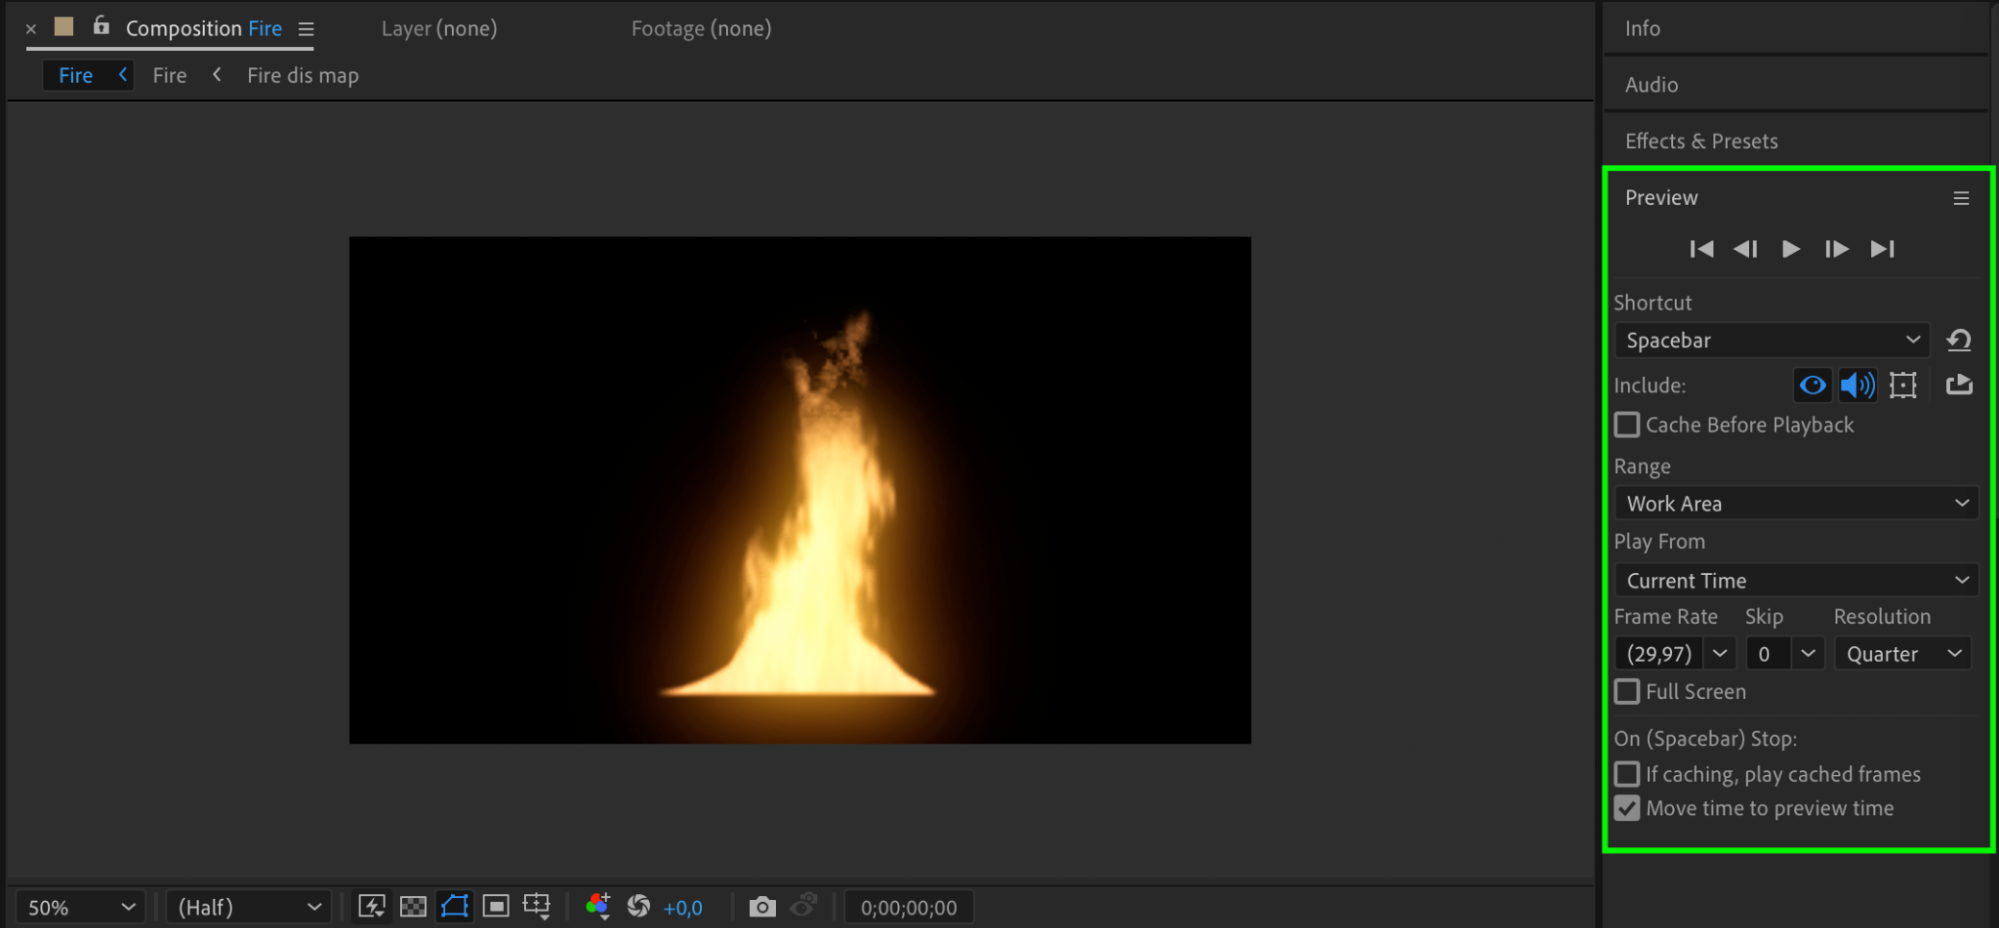
Conclusion
Creating fire effects in After Effects is a blend of technical knowledge and artistic vision. By combining the right tools, footage, and techniques, you can bring the mesmerizing beauty of fire to your video projects. So don’t be afraid to experiment, push boundaries, and let your creativity ignite as you embark on the journey of creating stunning fire effects in After Effects.

