Mastering Flaming Text Effects in After Effects
Introduction – Bringing Your Text to Life with Flames
Are you ready to take your videos and motion graphics to the next level? With Adobe After Effects, you can create captivating flaming text that will add excitement and visual appeal to your designs. In this tutorial, we will walk you through the process of creating eye-catching flaming text that will bring your projects to life.
Before we begin, make sure you have Adobe After Effects installed on your computer. Once you have After Effects up and running, follow these steps to create stunning flaming text:
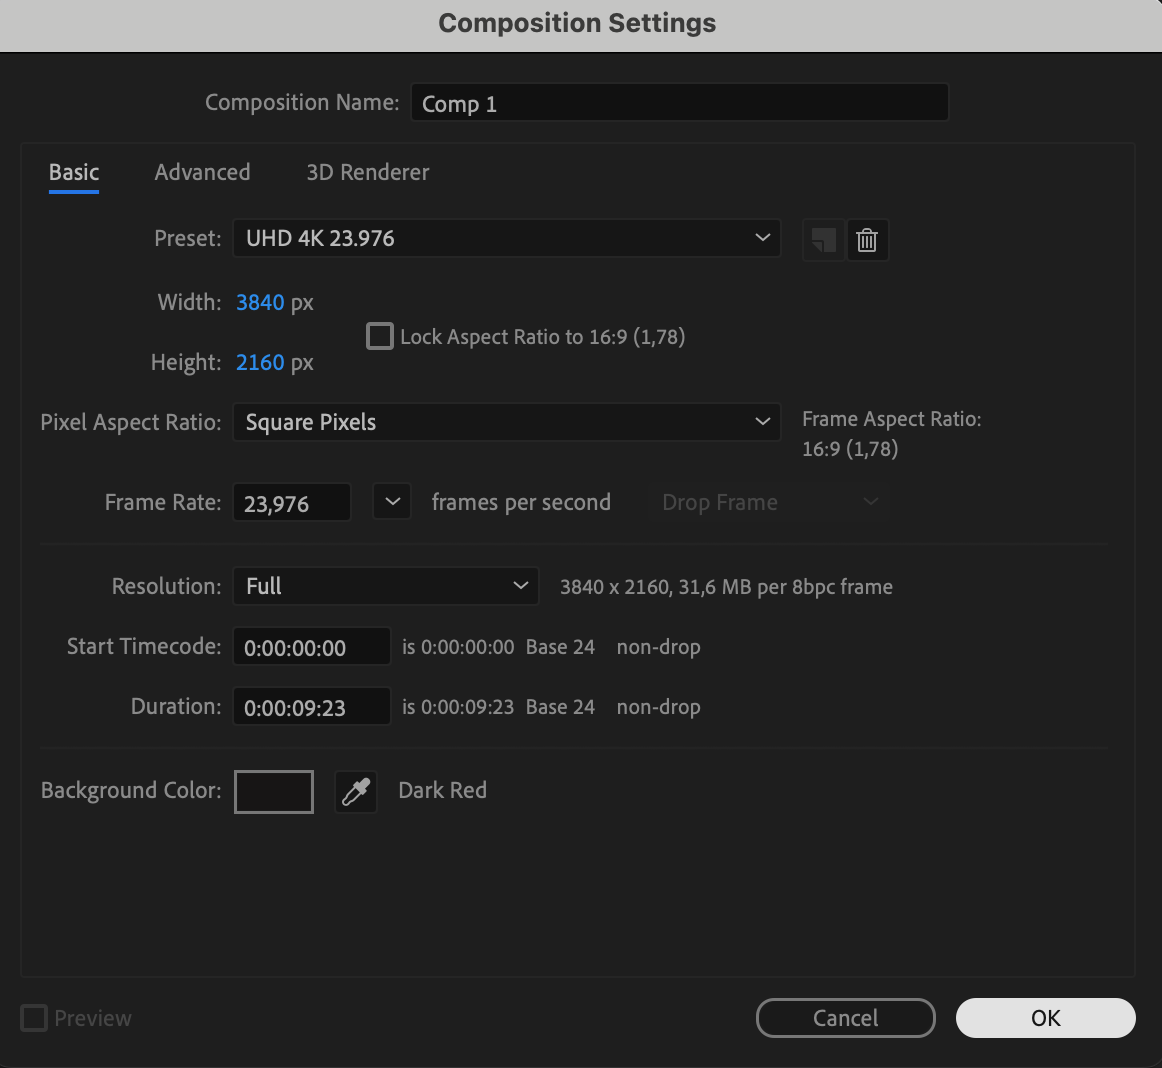
1. Start by creating a new composition in After Effects. Choose the dimensions and duration that best fit your project. Then, create a new text layer and write your desired text.
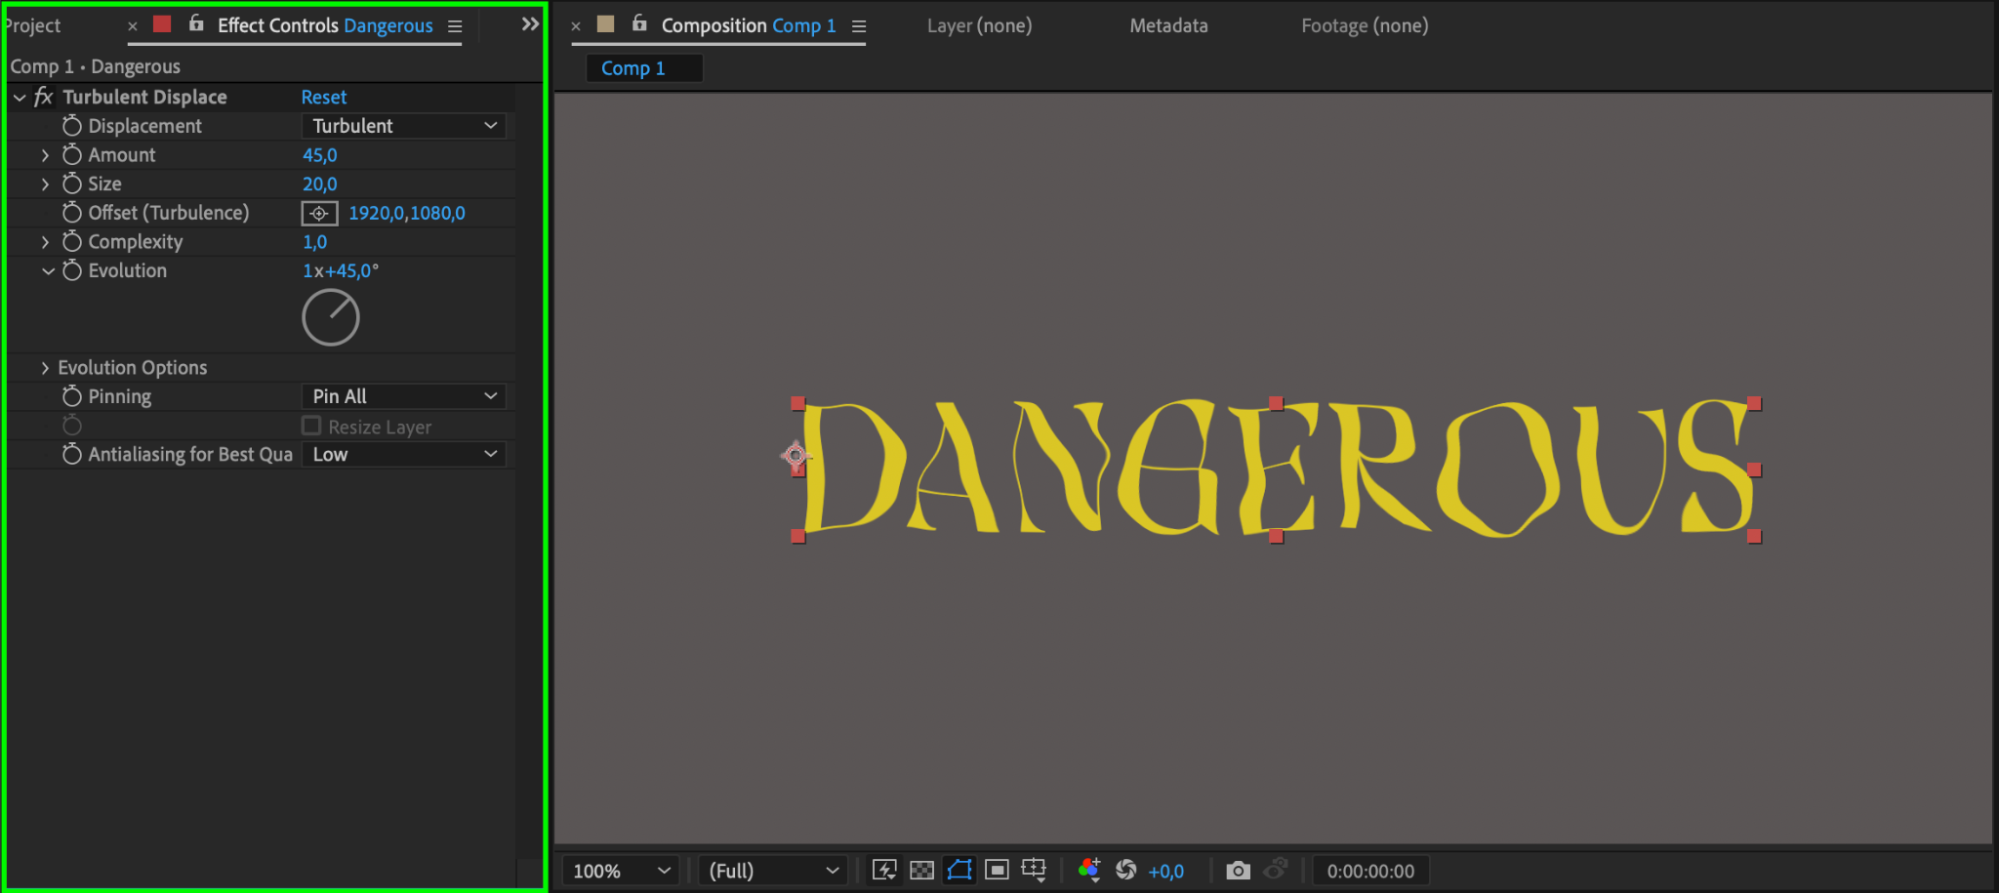
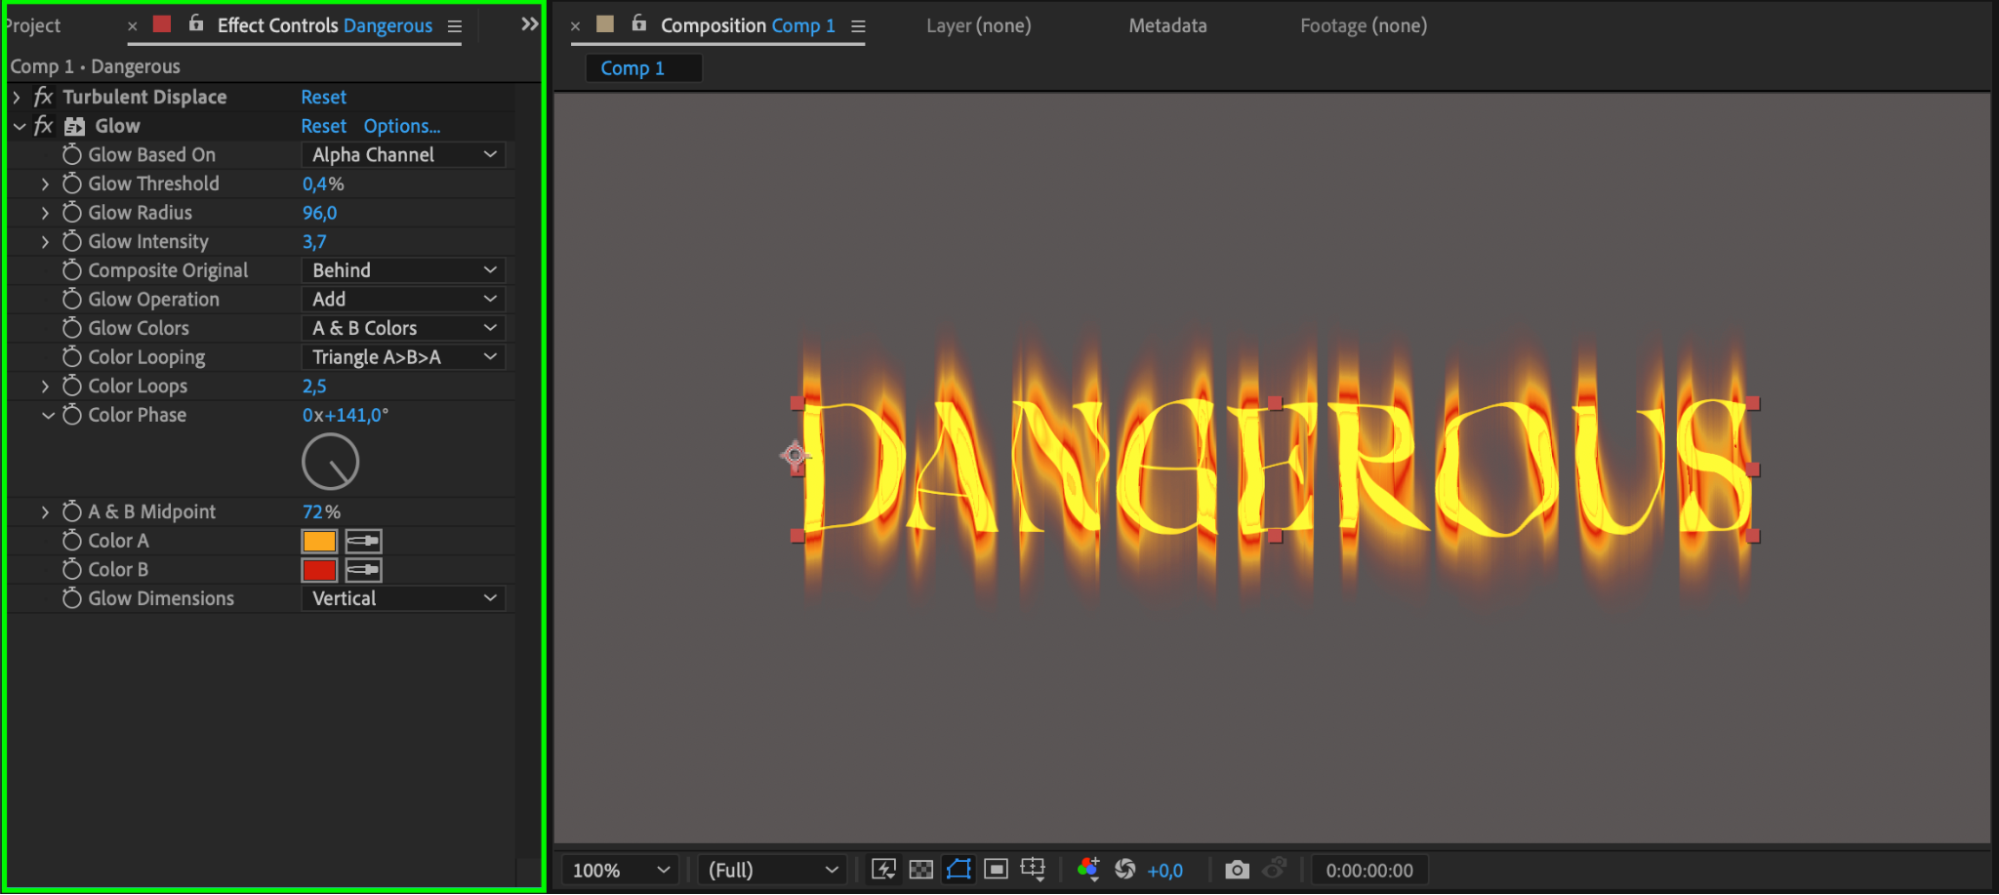
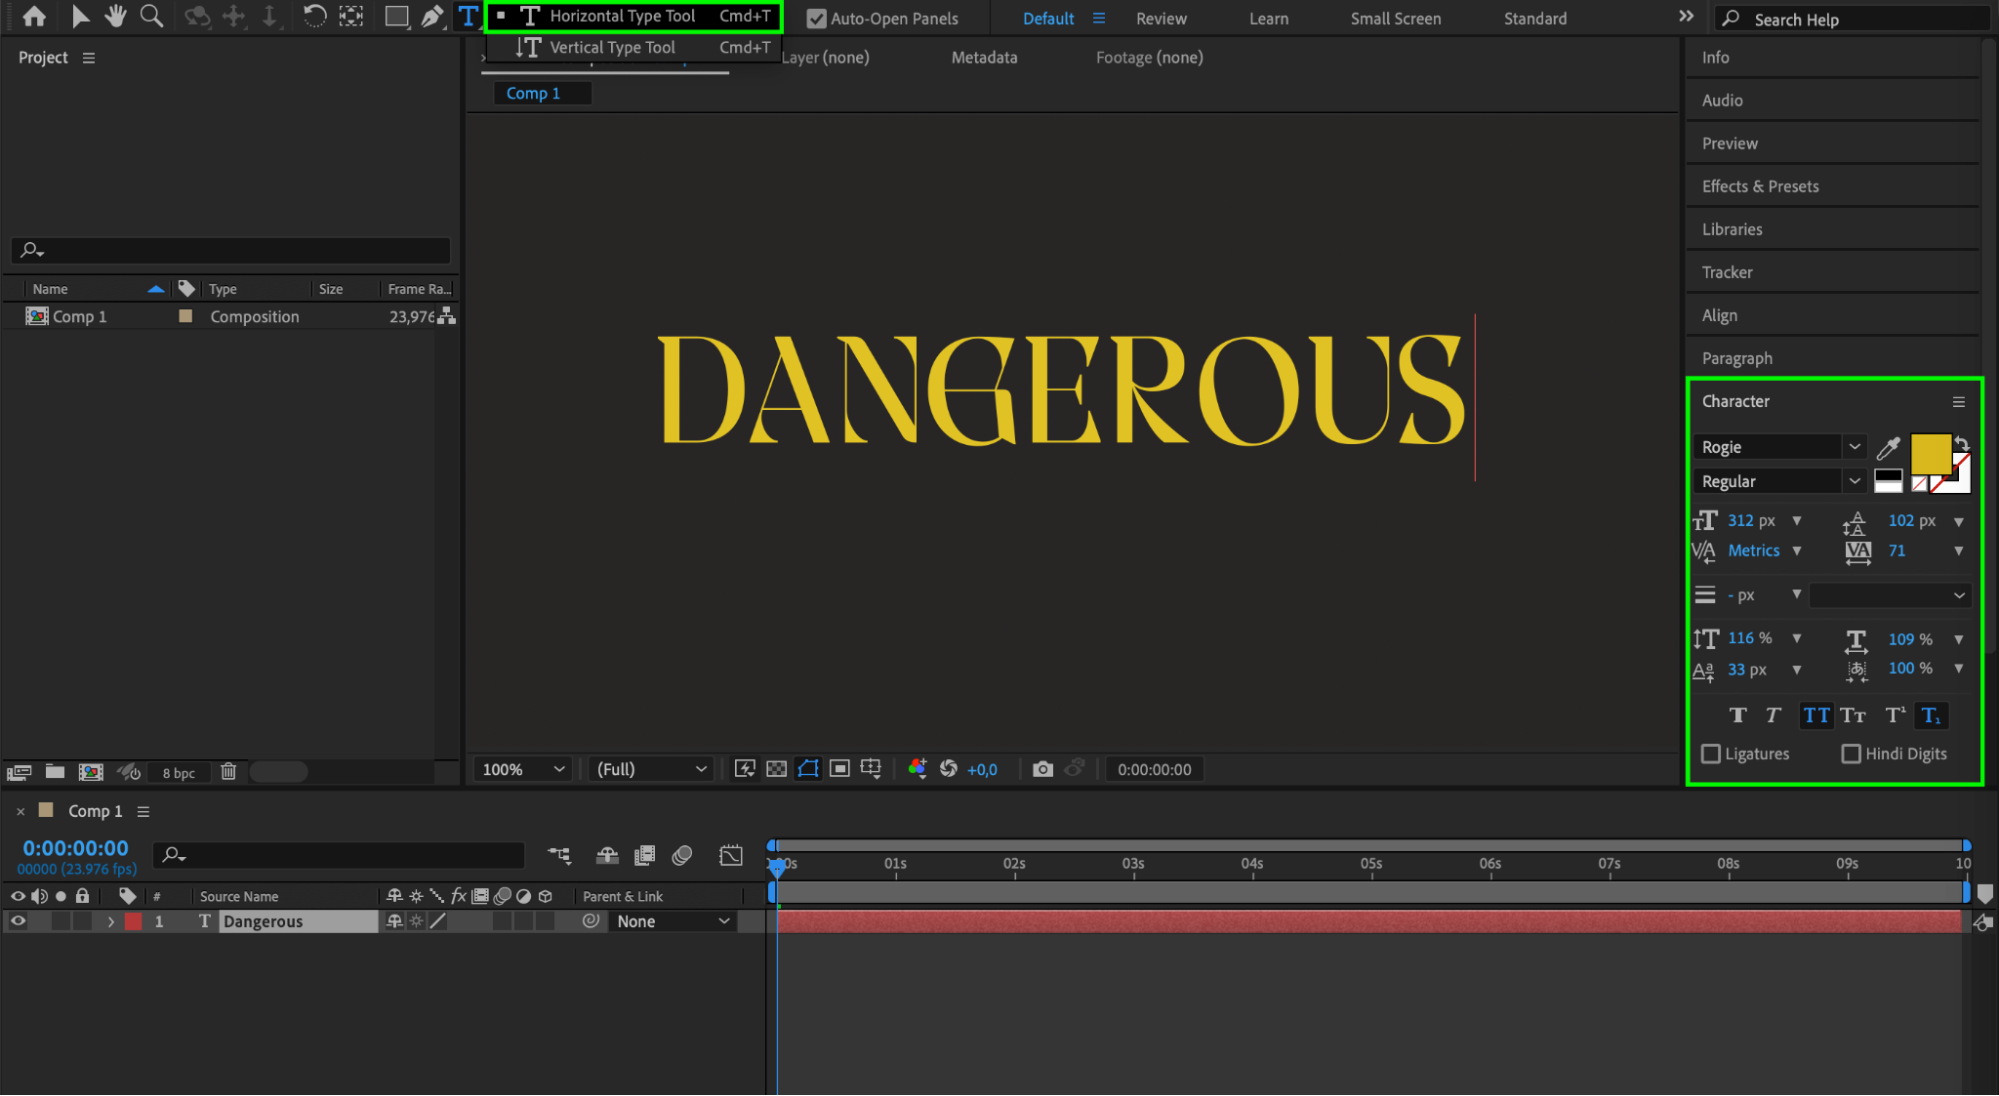 2. Apply the Turbulent Displace effect to your text layer. This effect will make your text appear as if it’s on fire. Adjust the settings, such as the amount and size, to control the look of the flames.
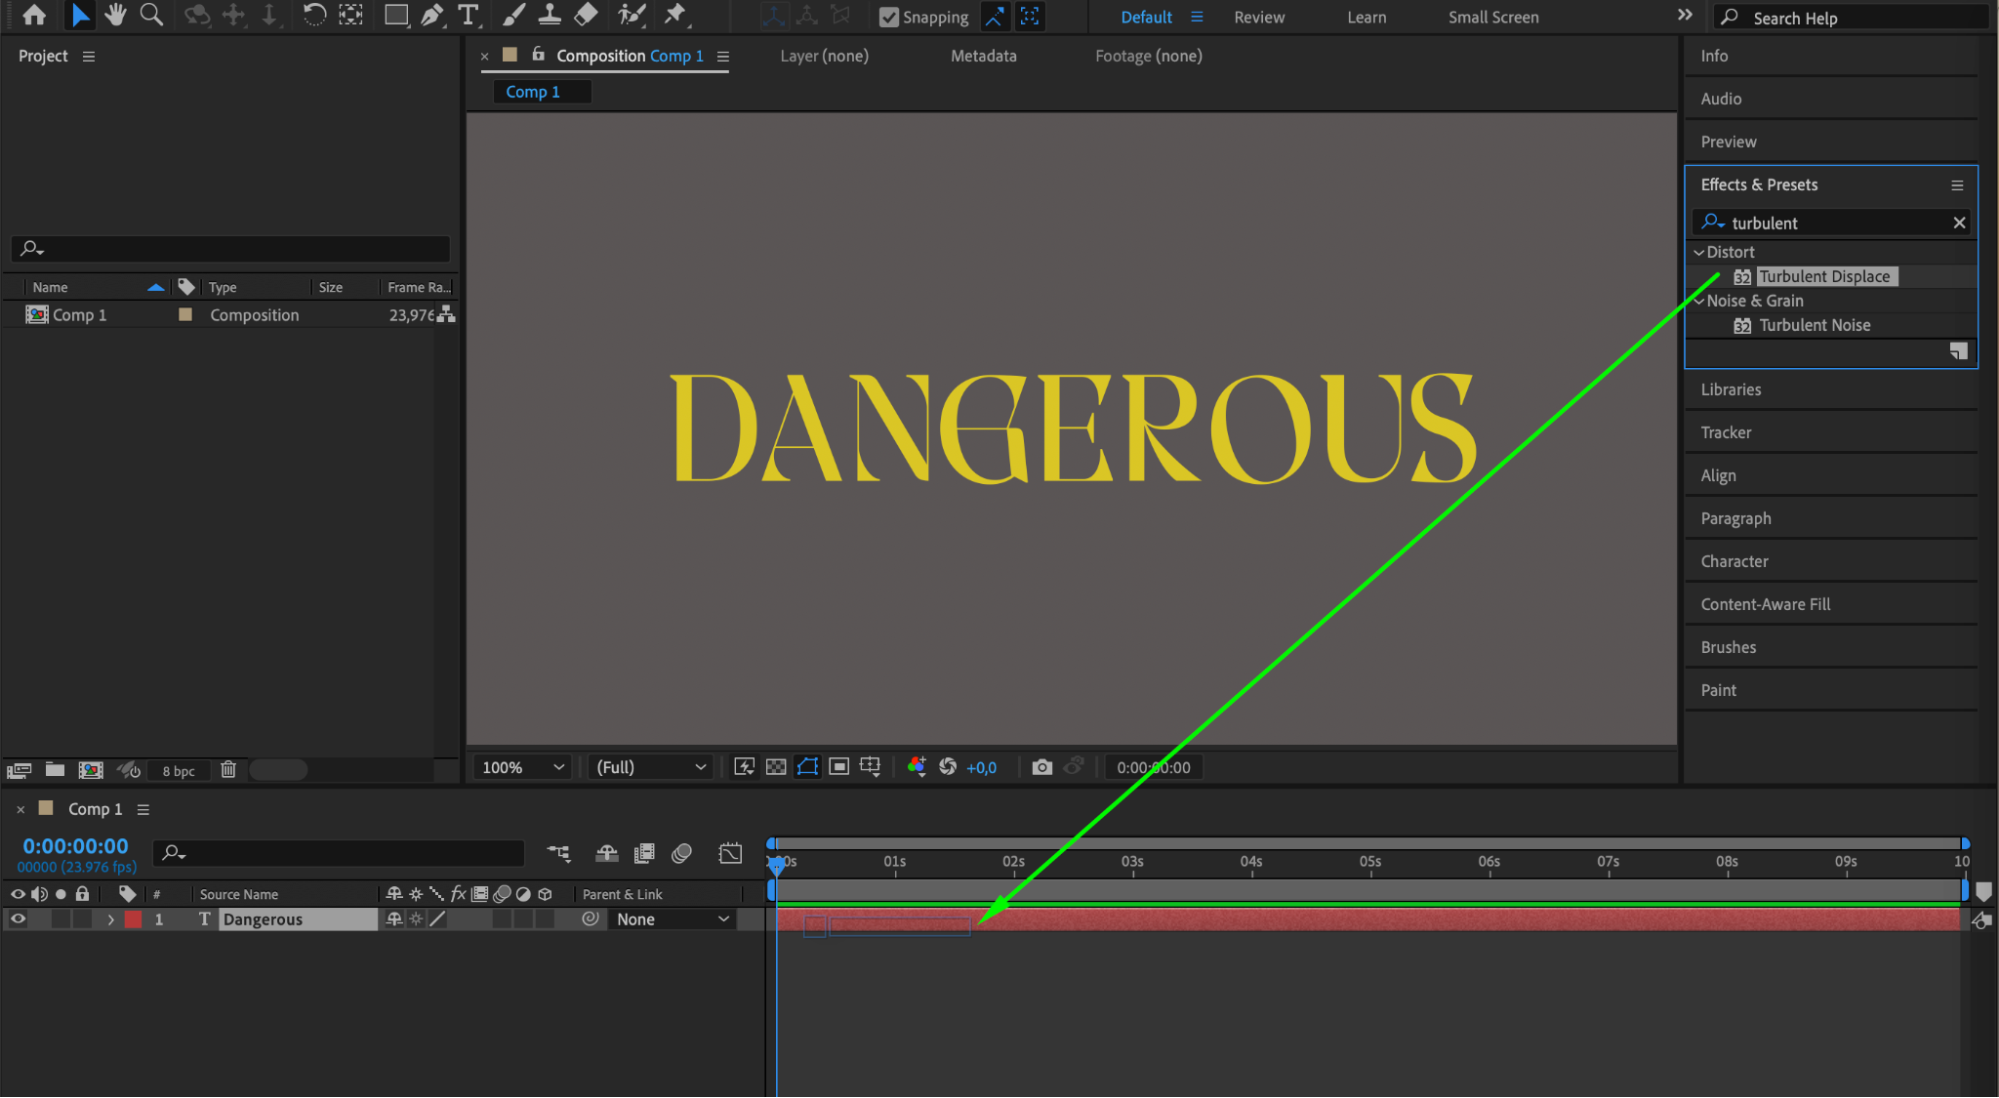
 3. Enhance the flames by adding the Glow effect to the text layer. This will give the flames a vibrant and glowing appearance. Customize the Glow settings to achieve the desired effect.
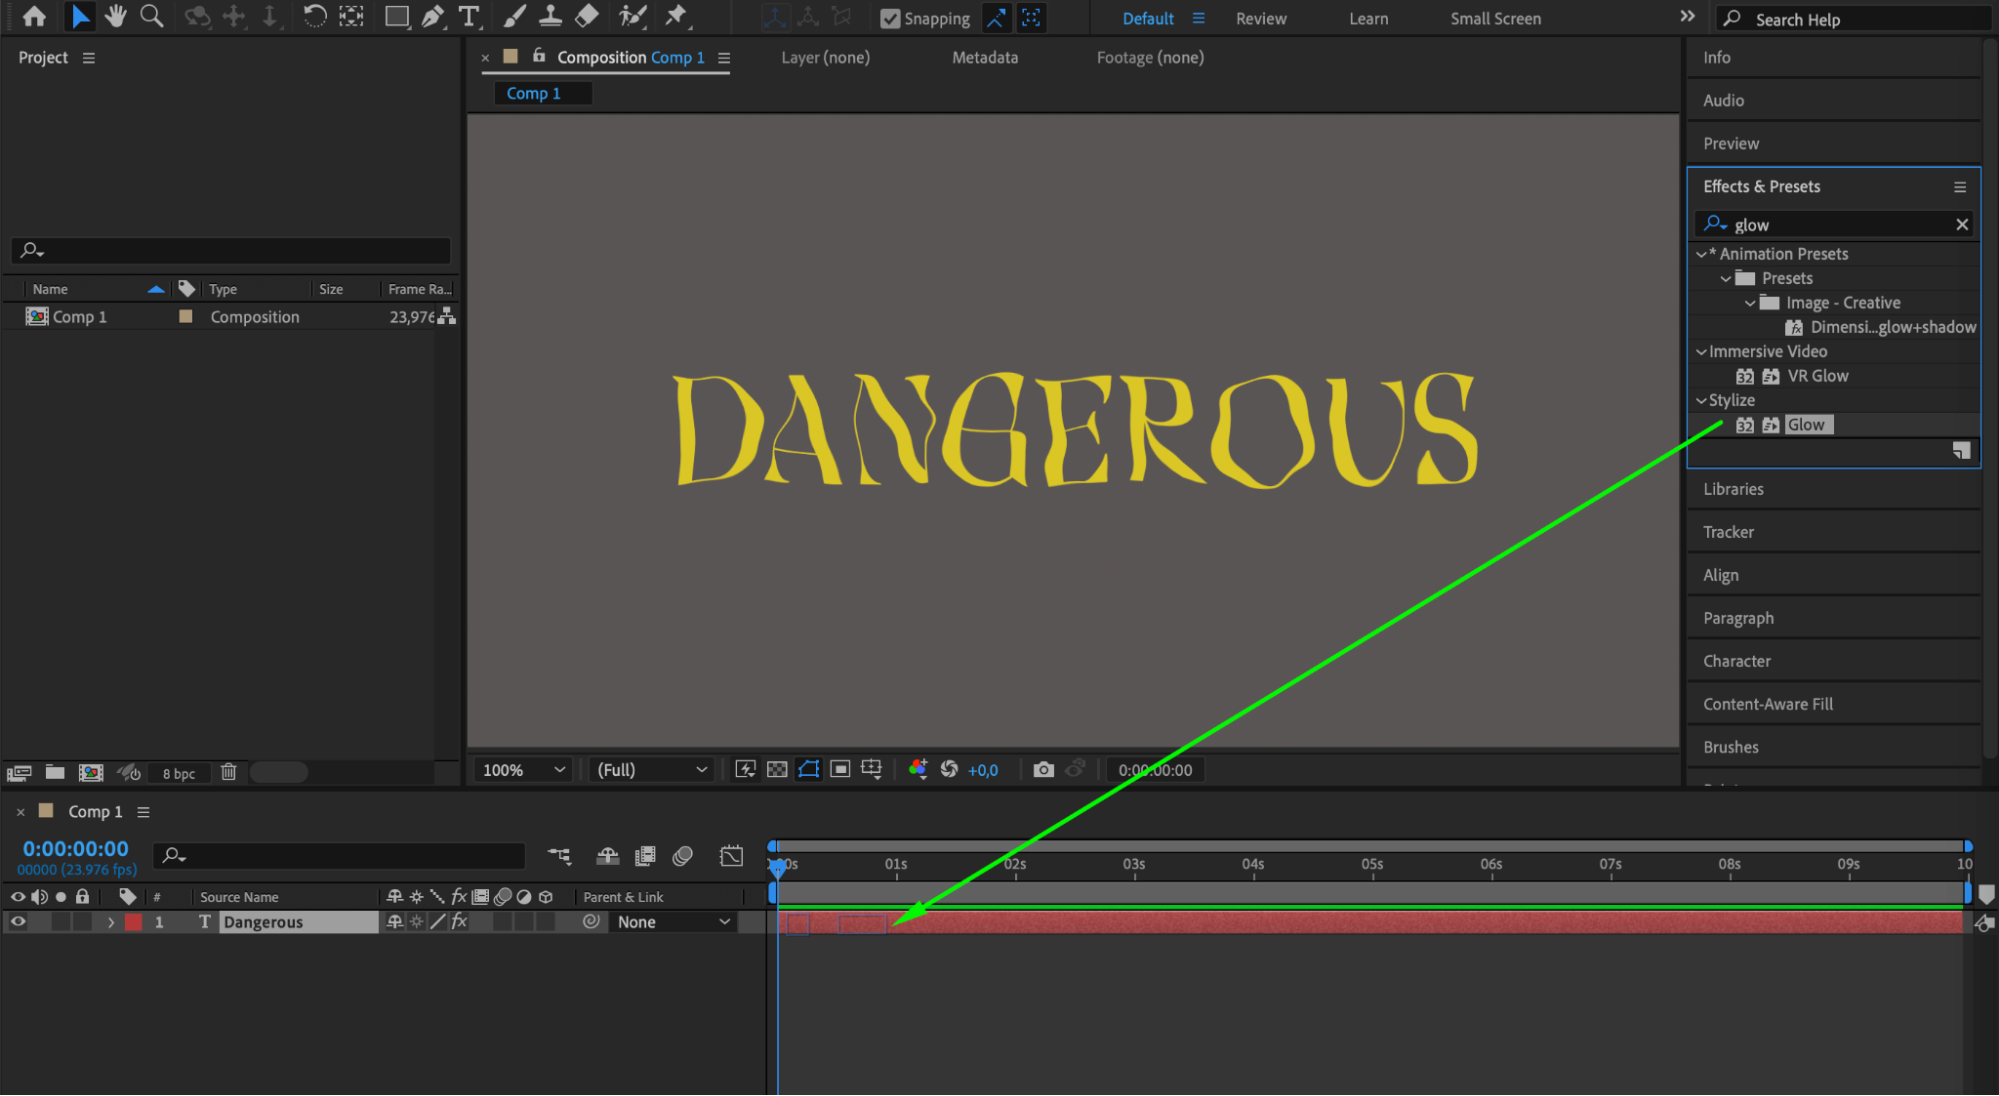
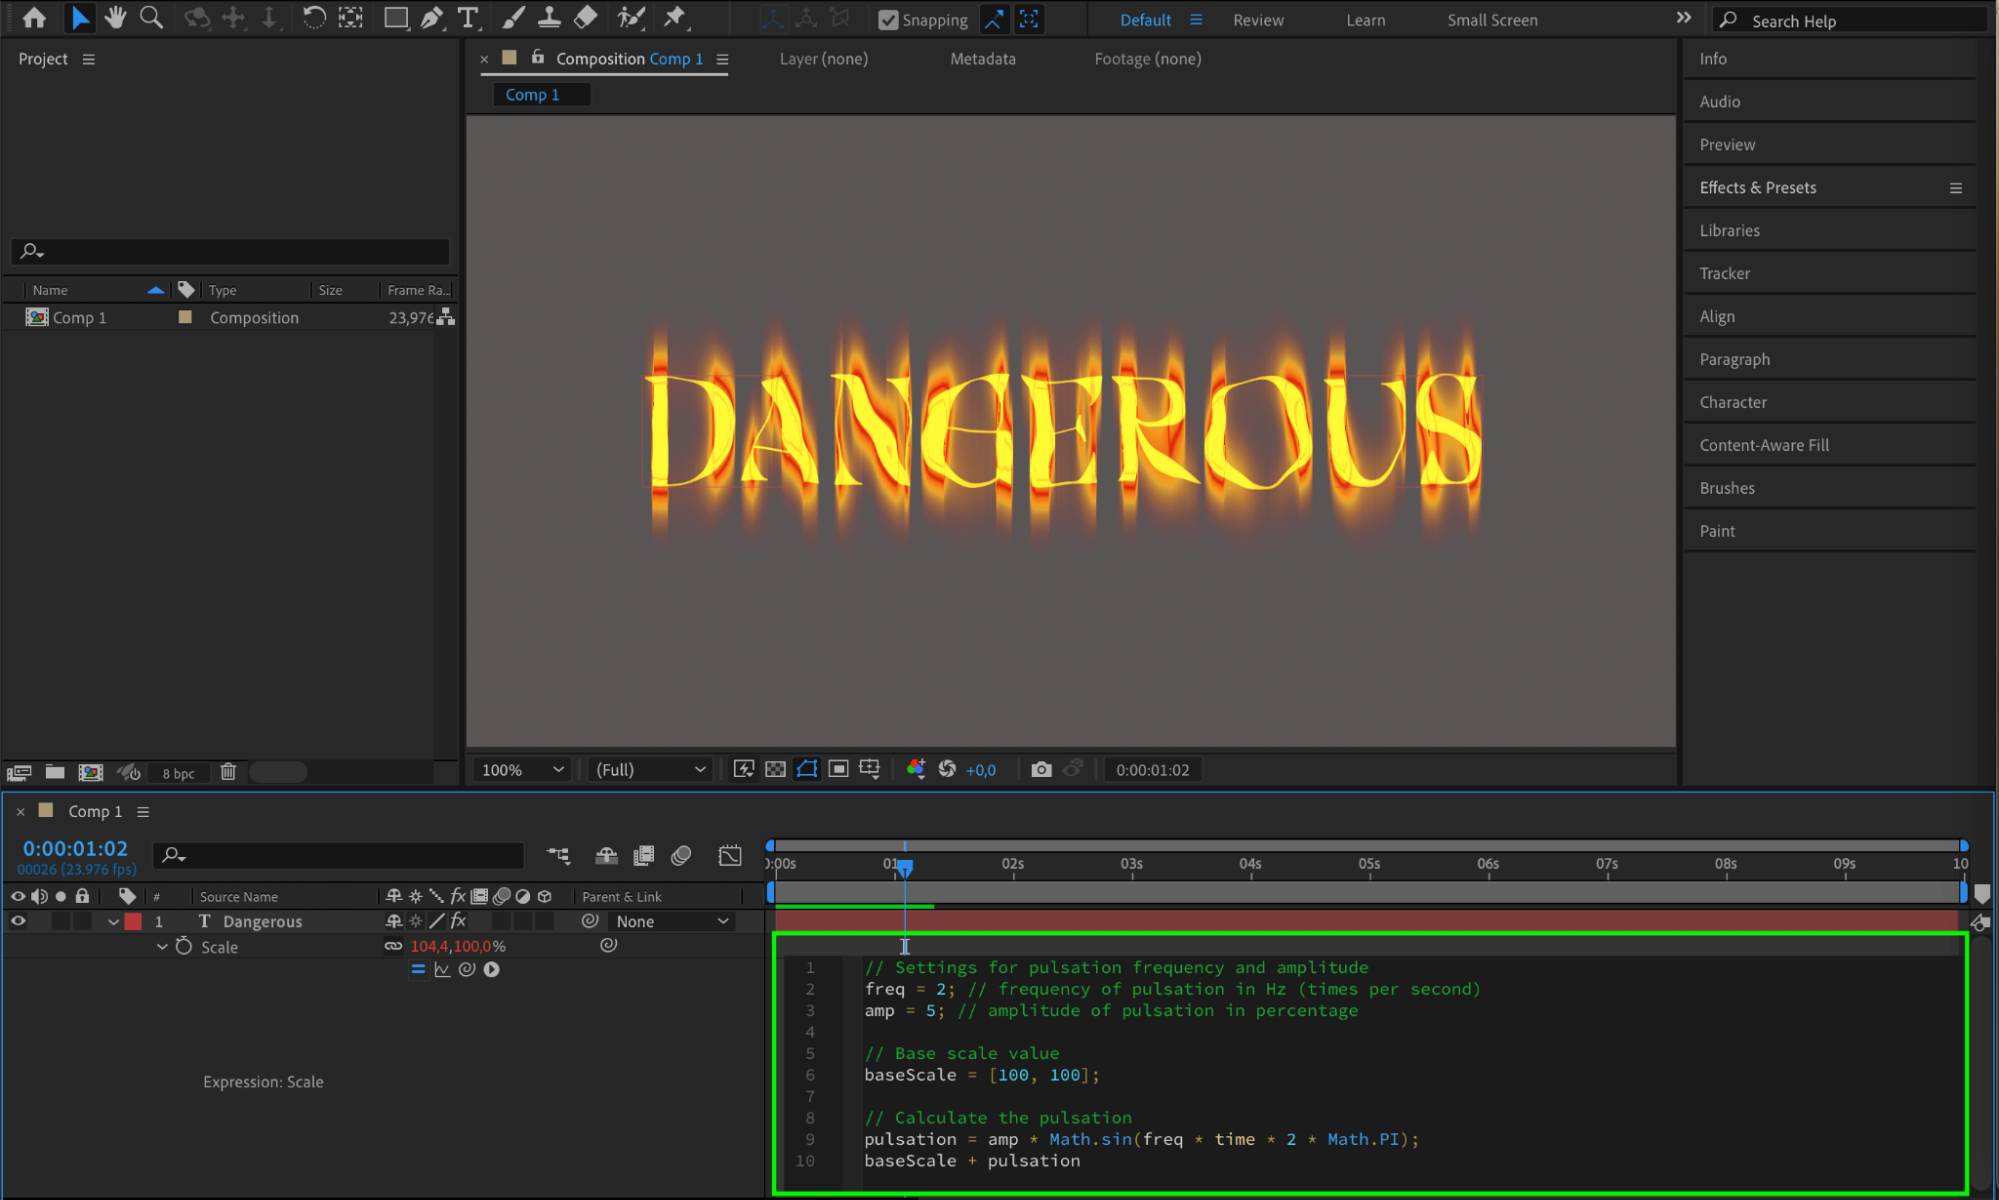
 4. Feel free to experiment with keyframes or expressions to create captivating animations.
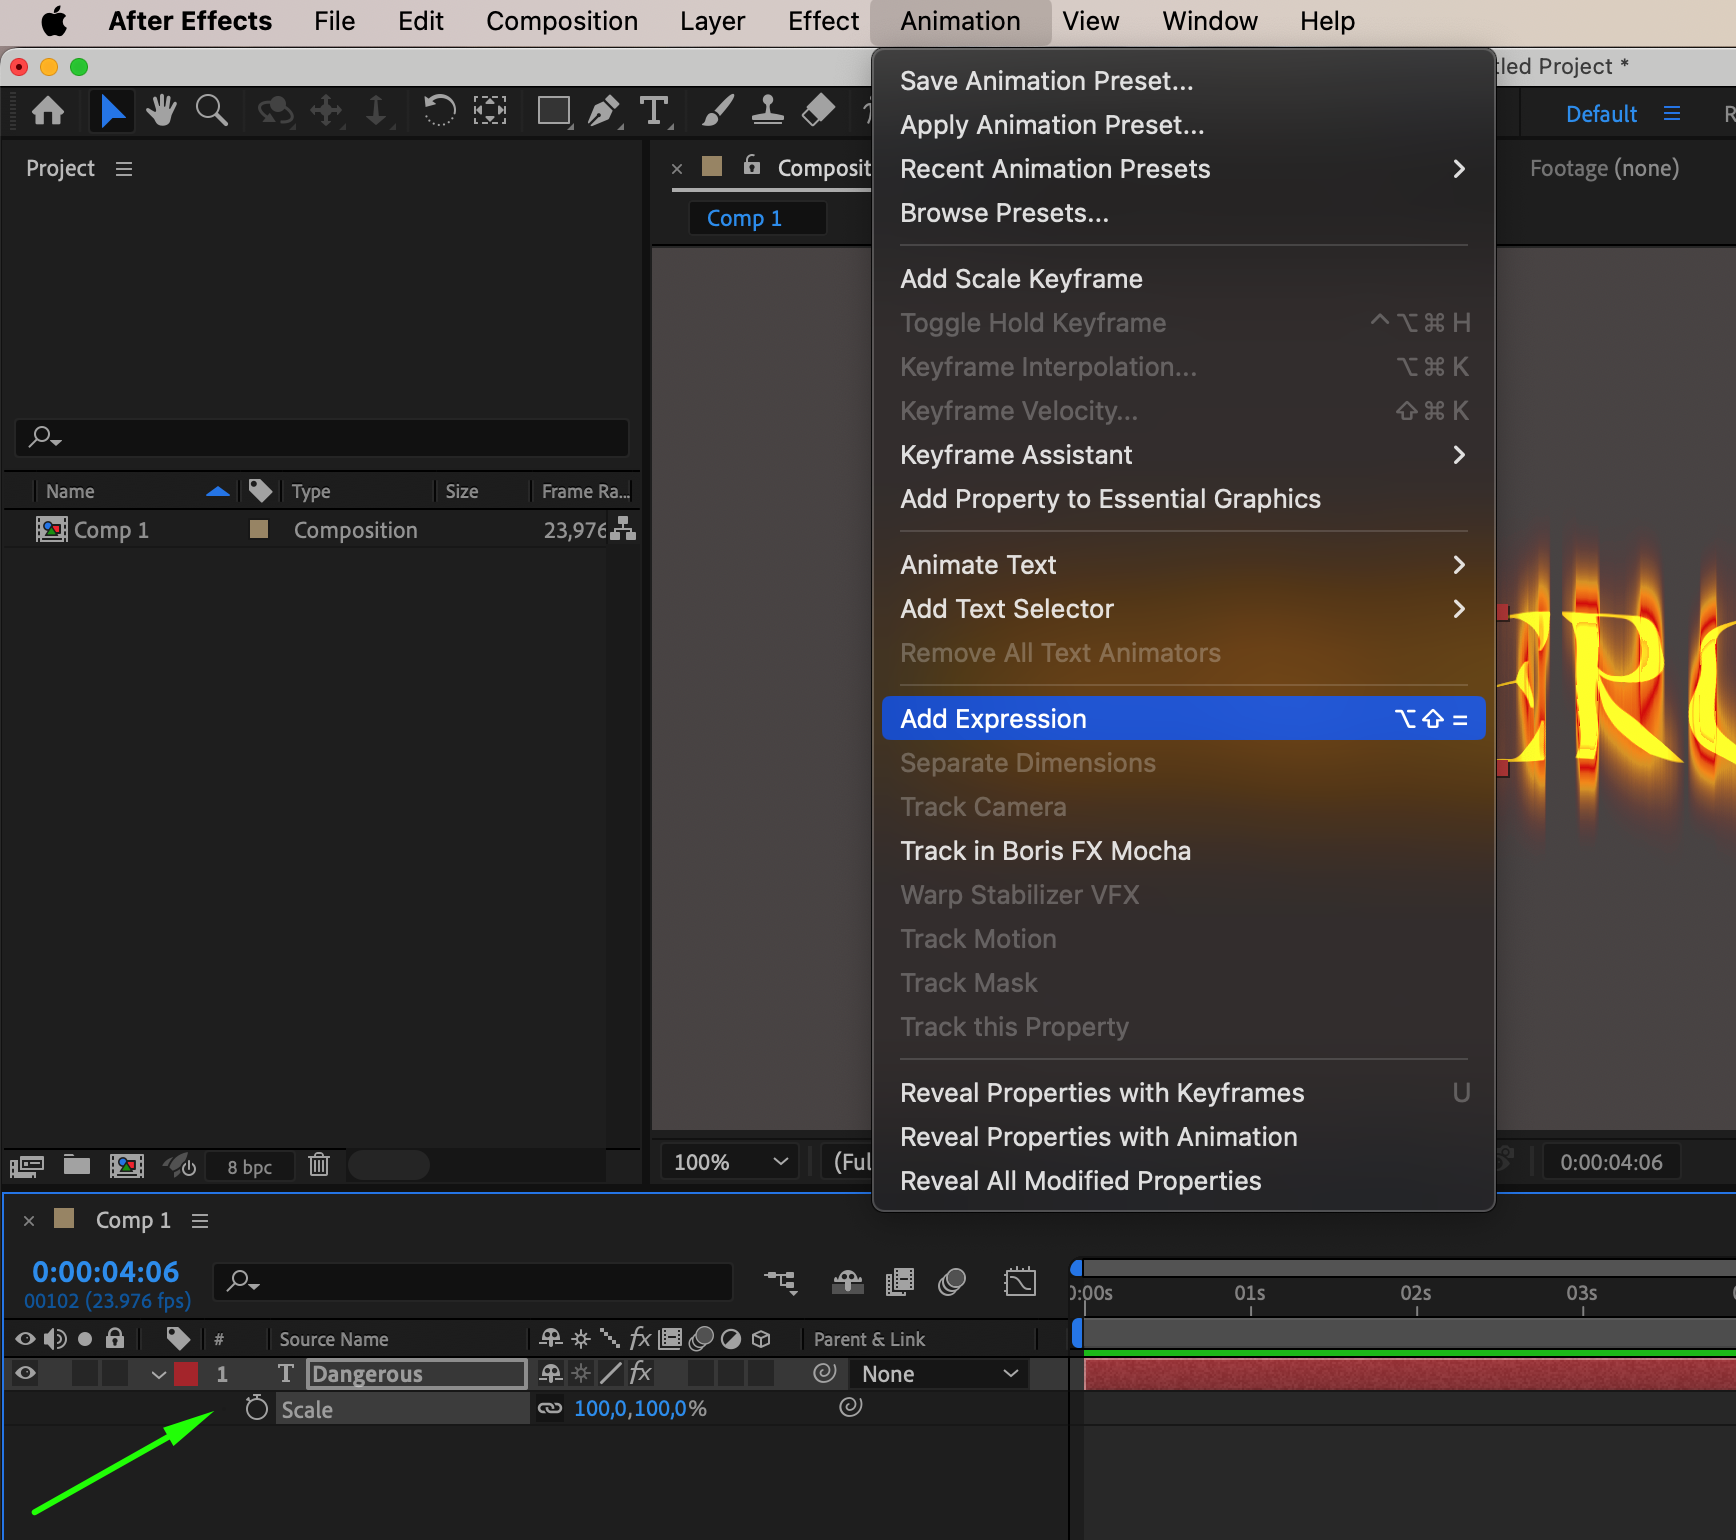
 5. Once you are satisfied with your composition, render and export your project. Adjust the output settings, such as format and resolution, and click “Render” to generate the final video with your flaming text.
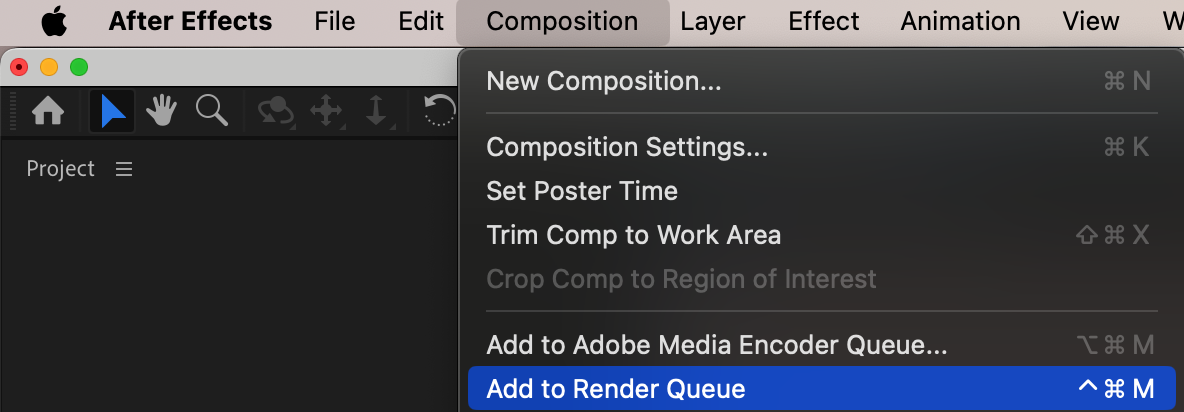
 6. Import the rendered video into your video editing software and position it over your desired footage. Adjust the blending mode and opacity to seamlessly integrate your flaming text into your video.
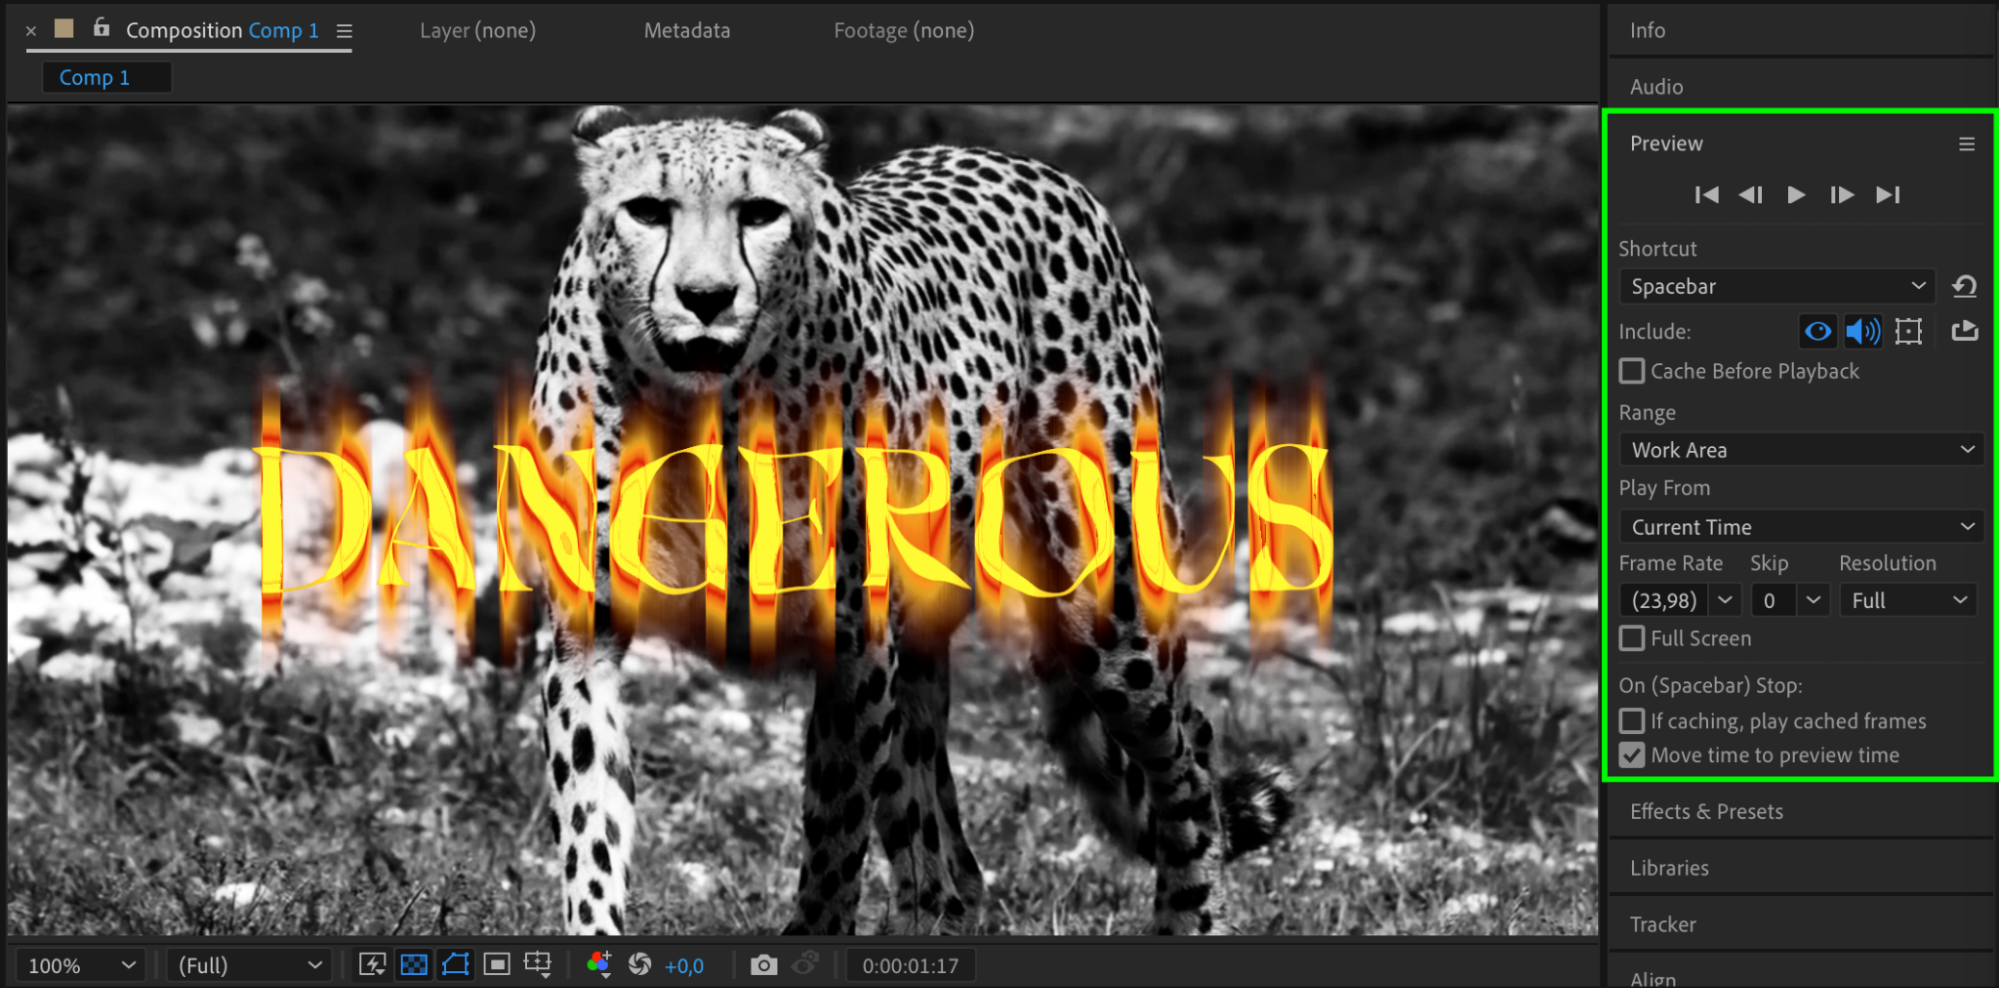 Conclusion
Get 10% off when you subscribe to our newsletter

By following these steps, you can create professional-looking flaming text that will grab the attention of your viewers. So, go ahead and bring your designs to life with fire and excitement in Adobe After Effects!
Our Bestsellers


