Mastering Lens Flares in After Effects: A Comprehensive Guide
Why Lens Flares Enhance Your Visuals
If you want your videos to have that extra visual impact, adding lens flares in After Effects can be the perfect solution. Lens flares are not only trendy in the world of video design, but they also make your visuals captivating and professional-looking.
In this blog article, we will guide you step-by-step through the process of creating stunning flares in After Effects. We will cover everything from basic flare effects to advanced customization options. With these expert techniques and workflow tips, you will have all the knowledge you need to make impressive visuals.
Ready to dive in and discover how to create dazzling flares in After Effects? Let’s get started.
1. Getting Started: Creating Flares in After Effects
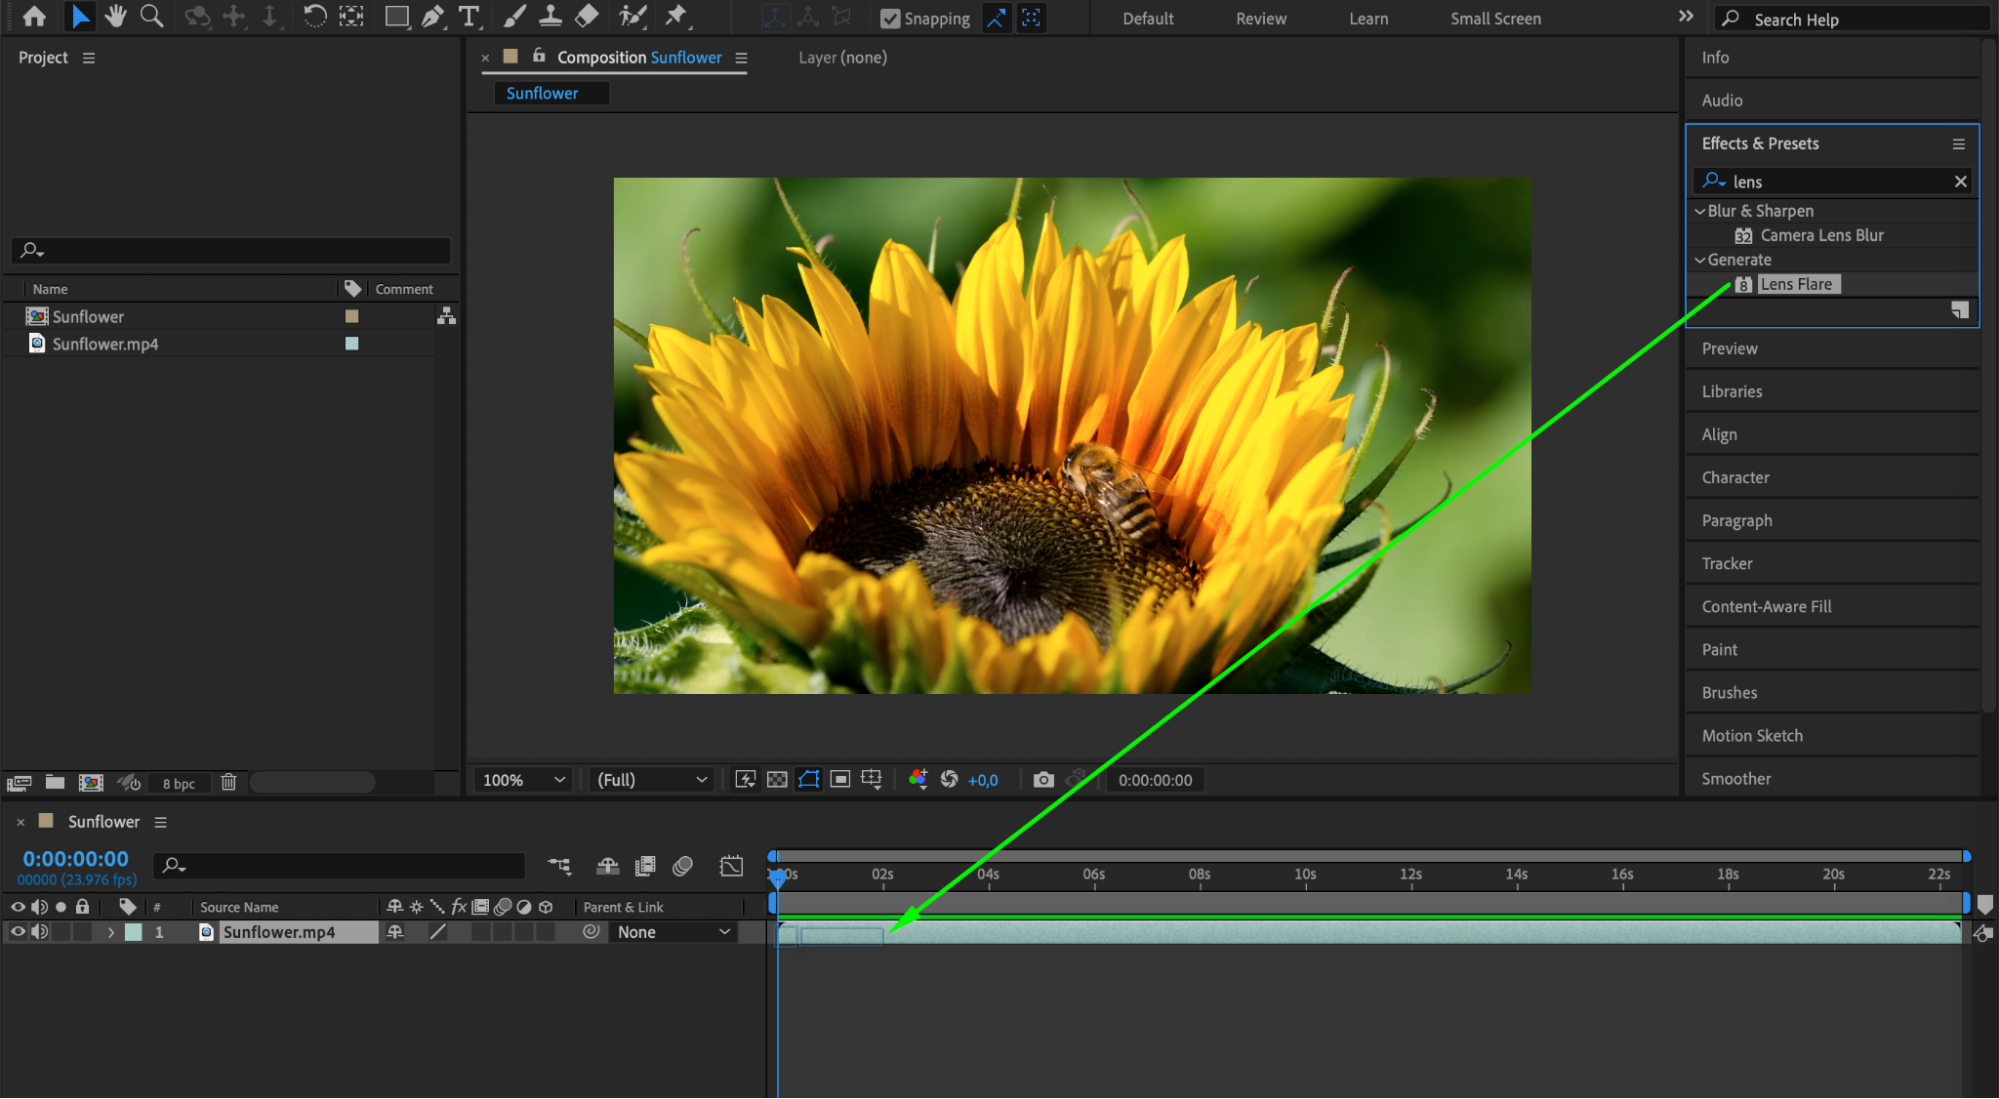
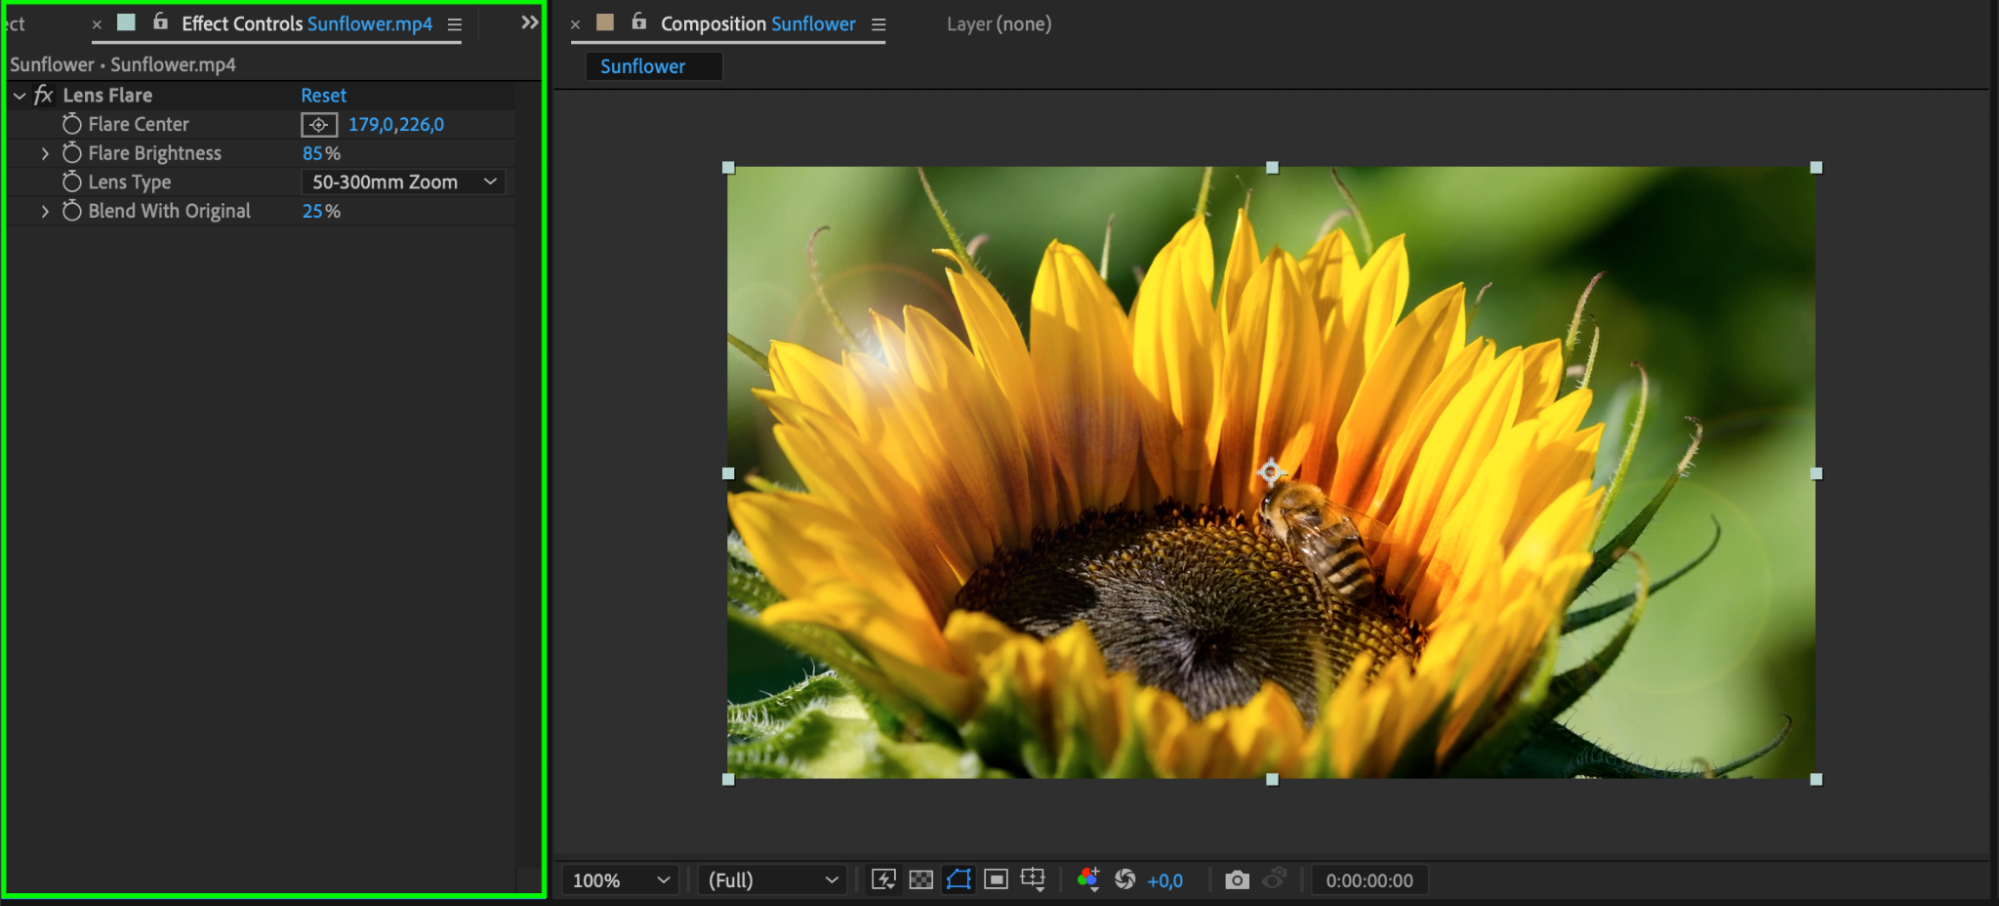
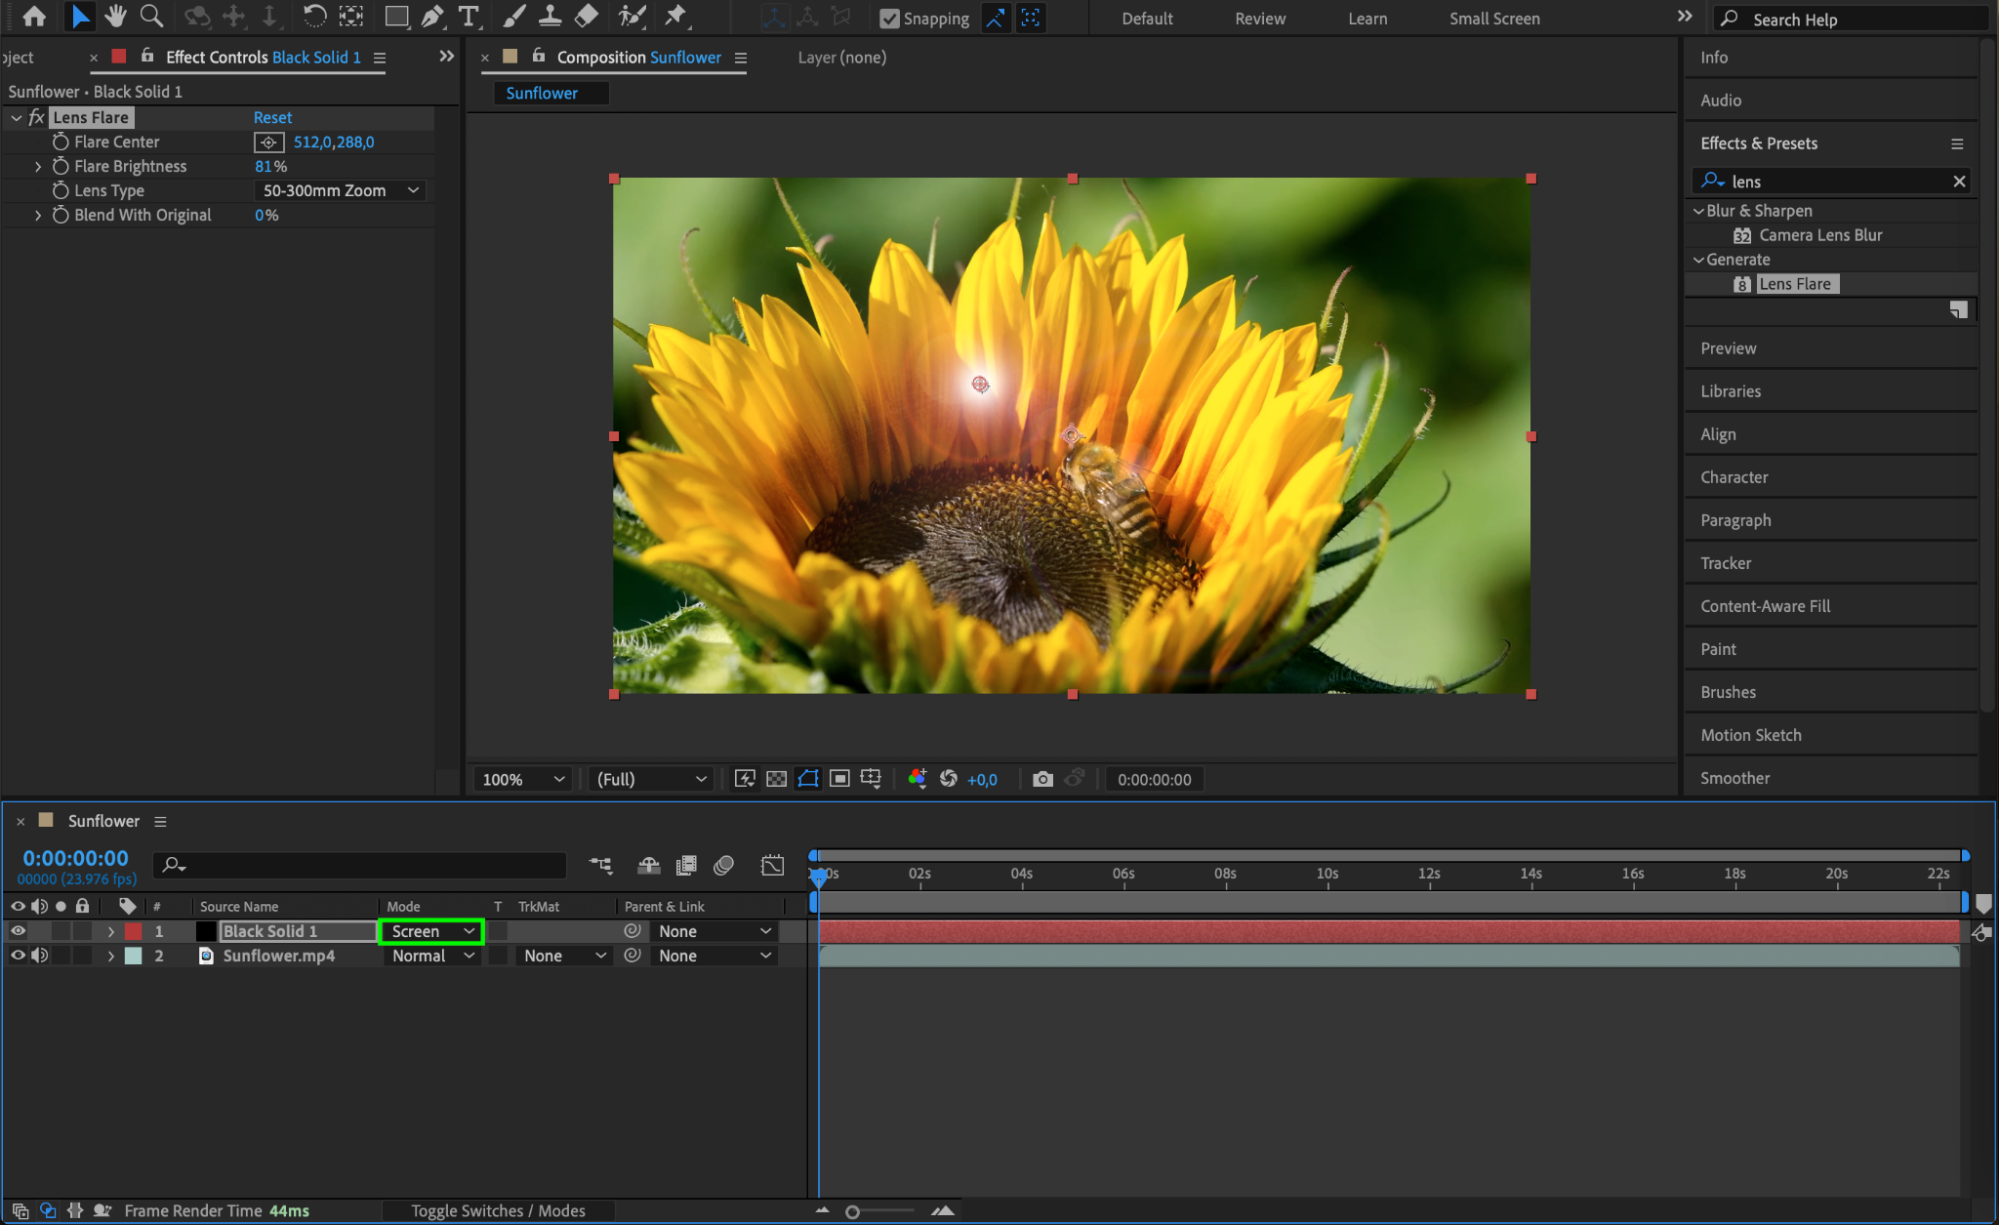
To begin, we will use the built-in lens flare effect in After Effects. With the layer selected, go to the “Effects & Presets” panel, search for “Lens Flare,” and drag it onto the layer. Adjust the parameters, such as the flare center, brightness, and lens type, to customize the look and intensity of the flare to match your scene.
 2. Taking Flares to the Next Level: Third-Party Plugins
If you want even more options and presets, consider using third-party plugins like Video Copilot’s Optical Flares or Red Giant’s Knoll Light Factory. These plugins offer advanced features such as animation controls, light ray effects, and lens texture mapping. They give you complete creative control and allow you to create realistic and dynamic flare effects.
3. Creating Complex Flare Effects: Layering and Blending
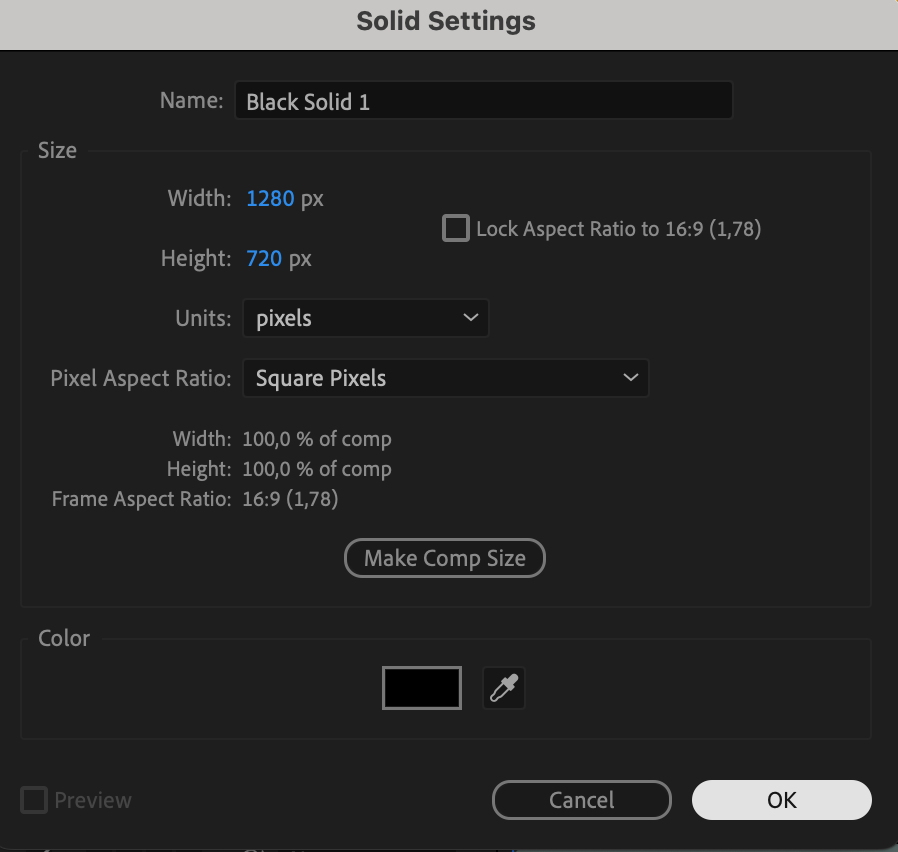
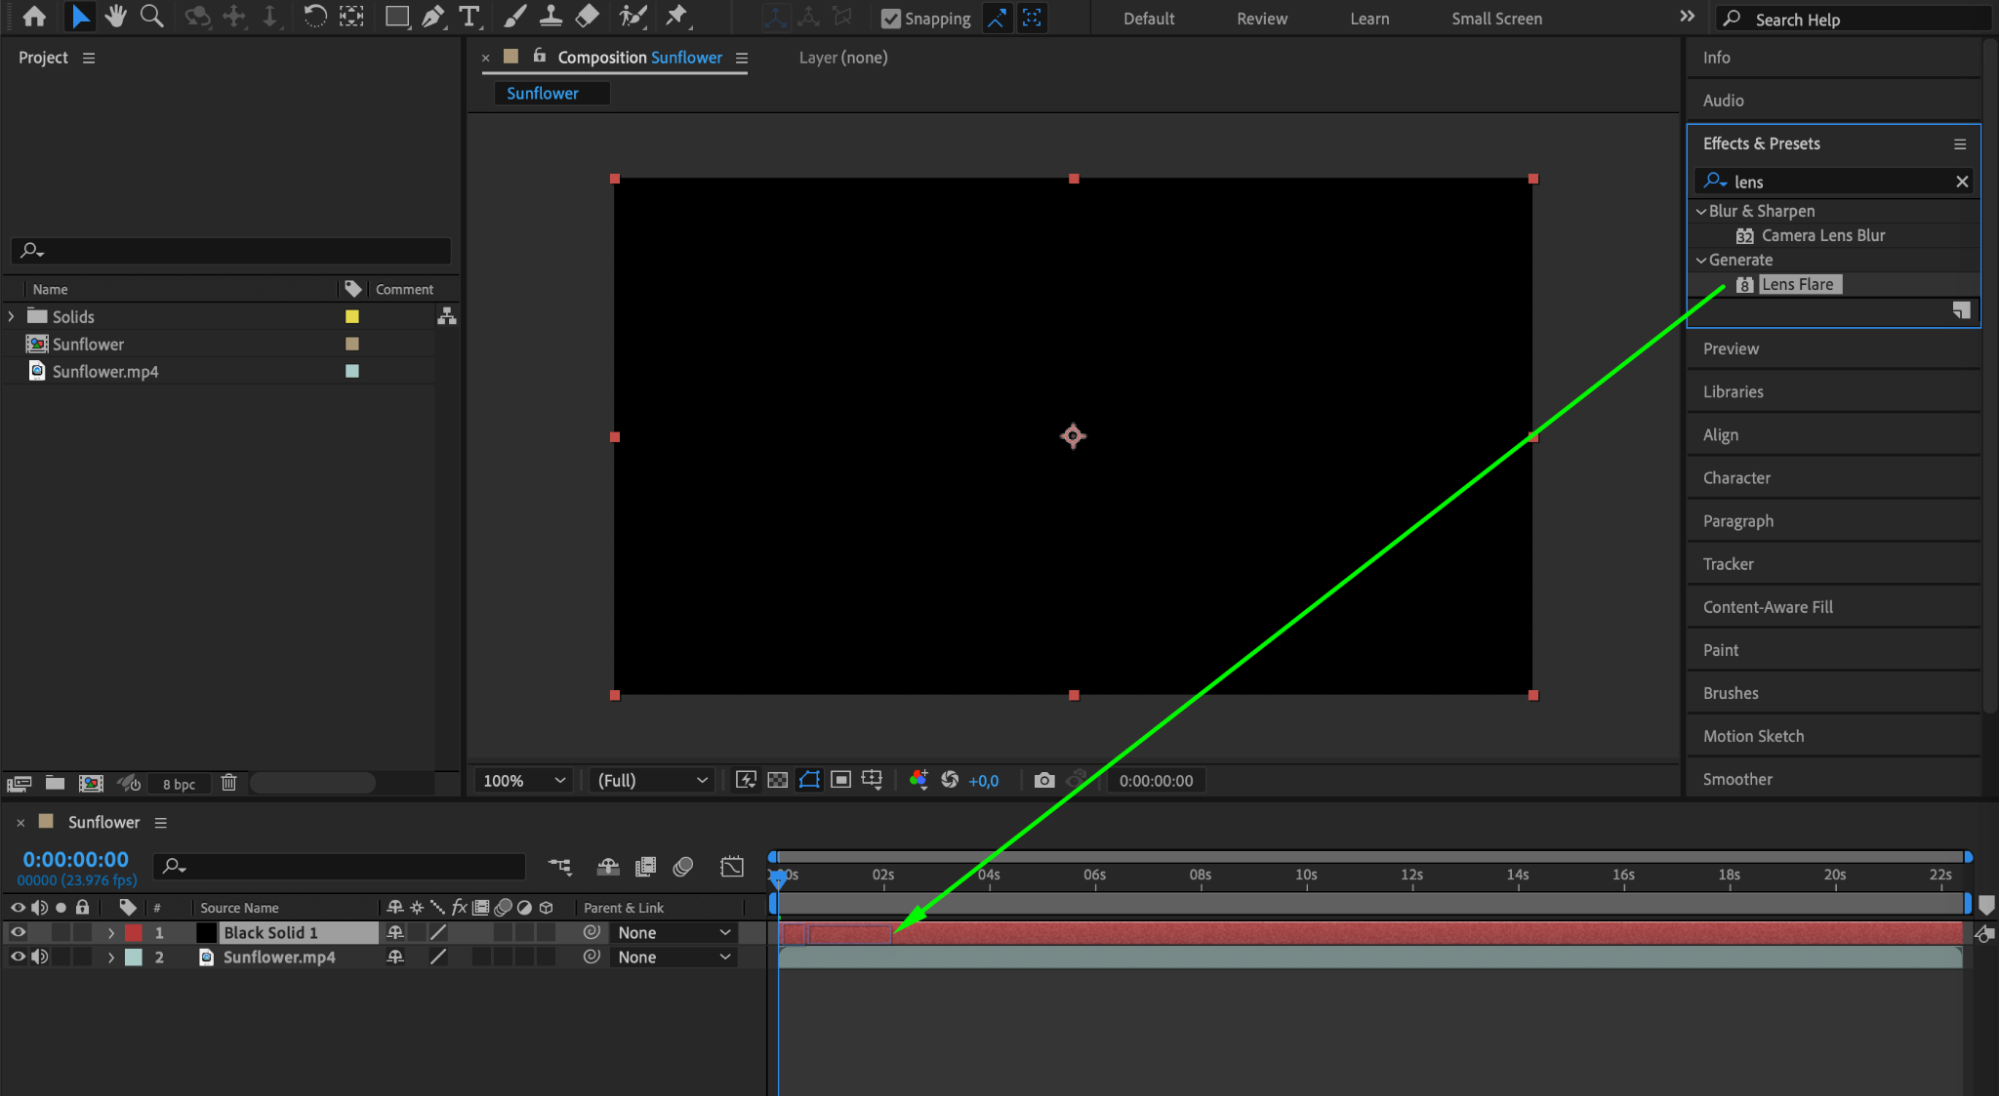
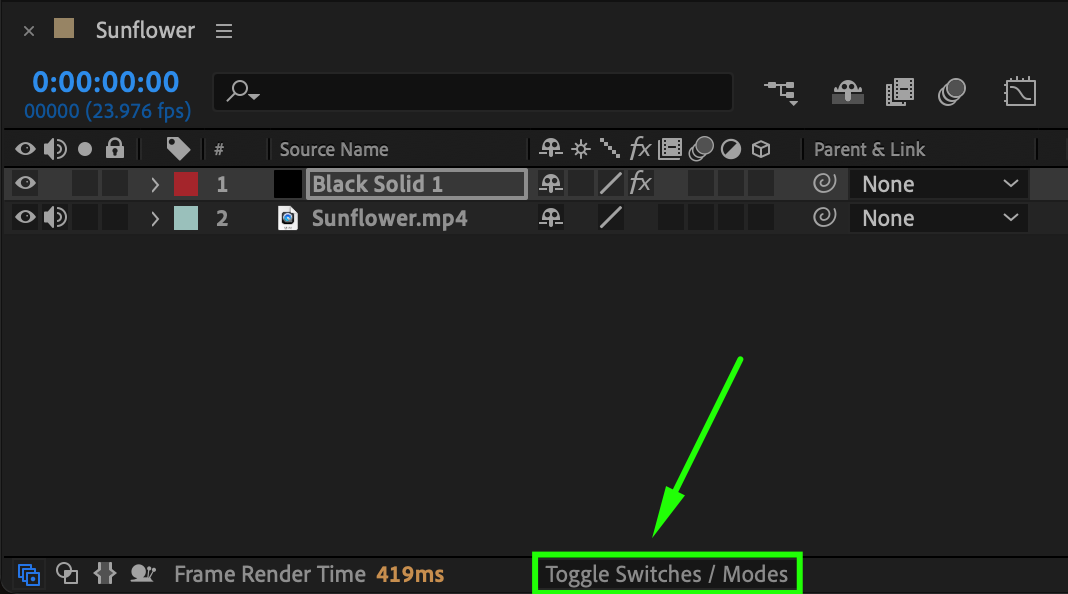
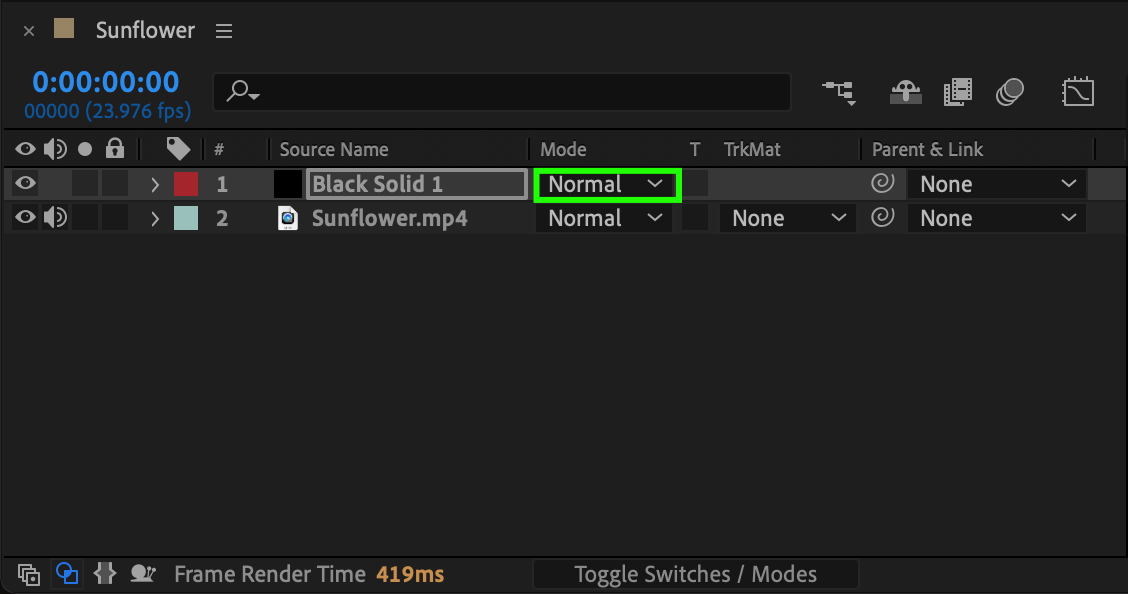
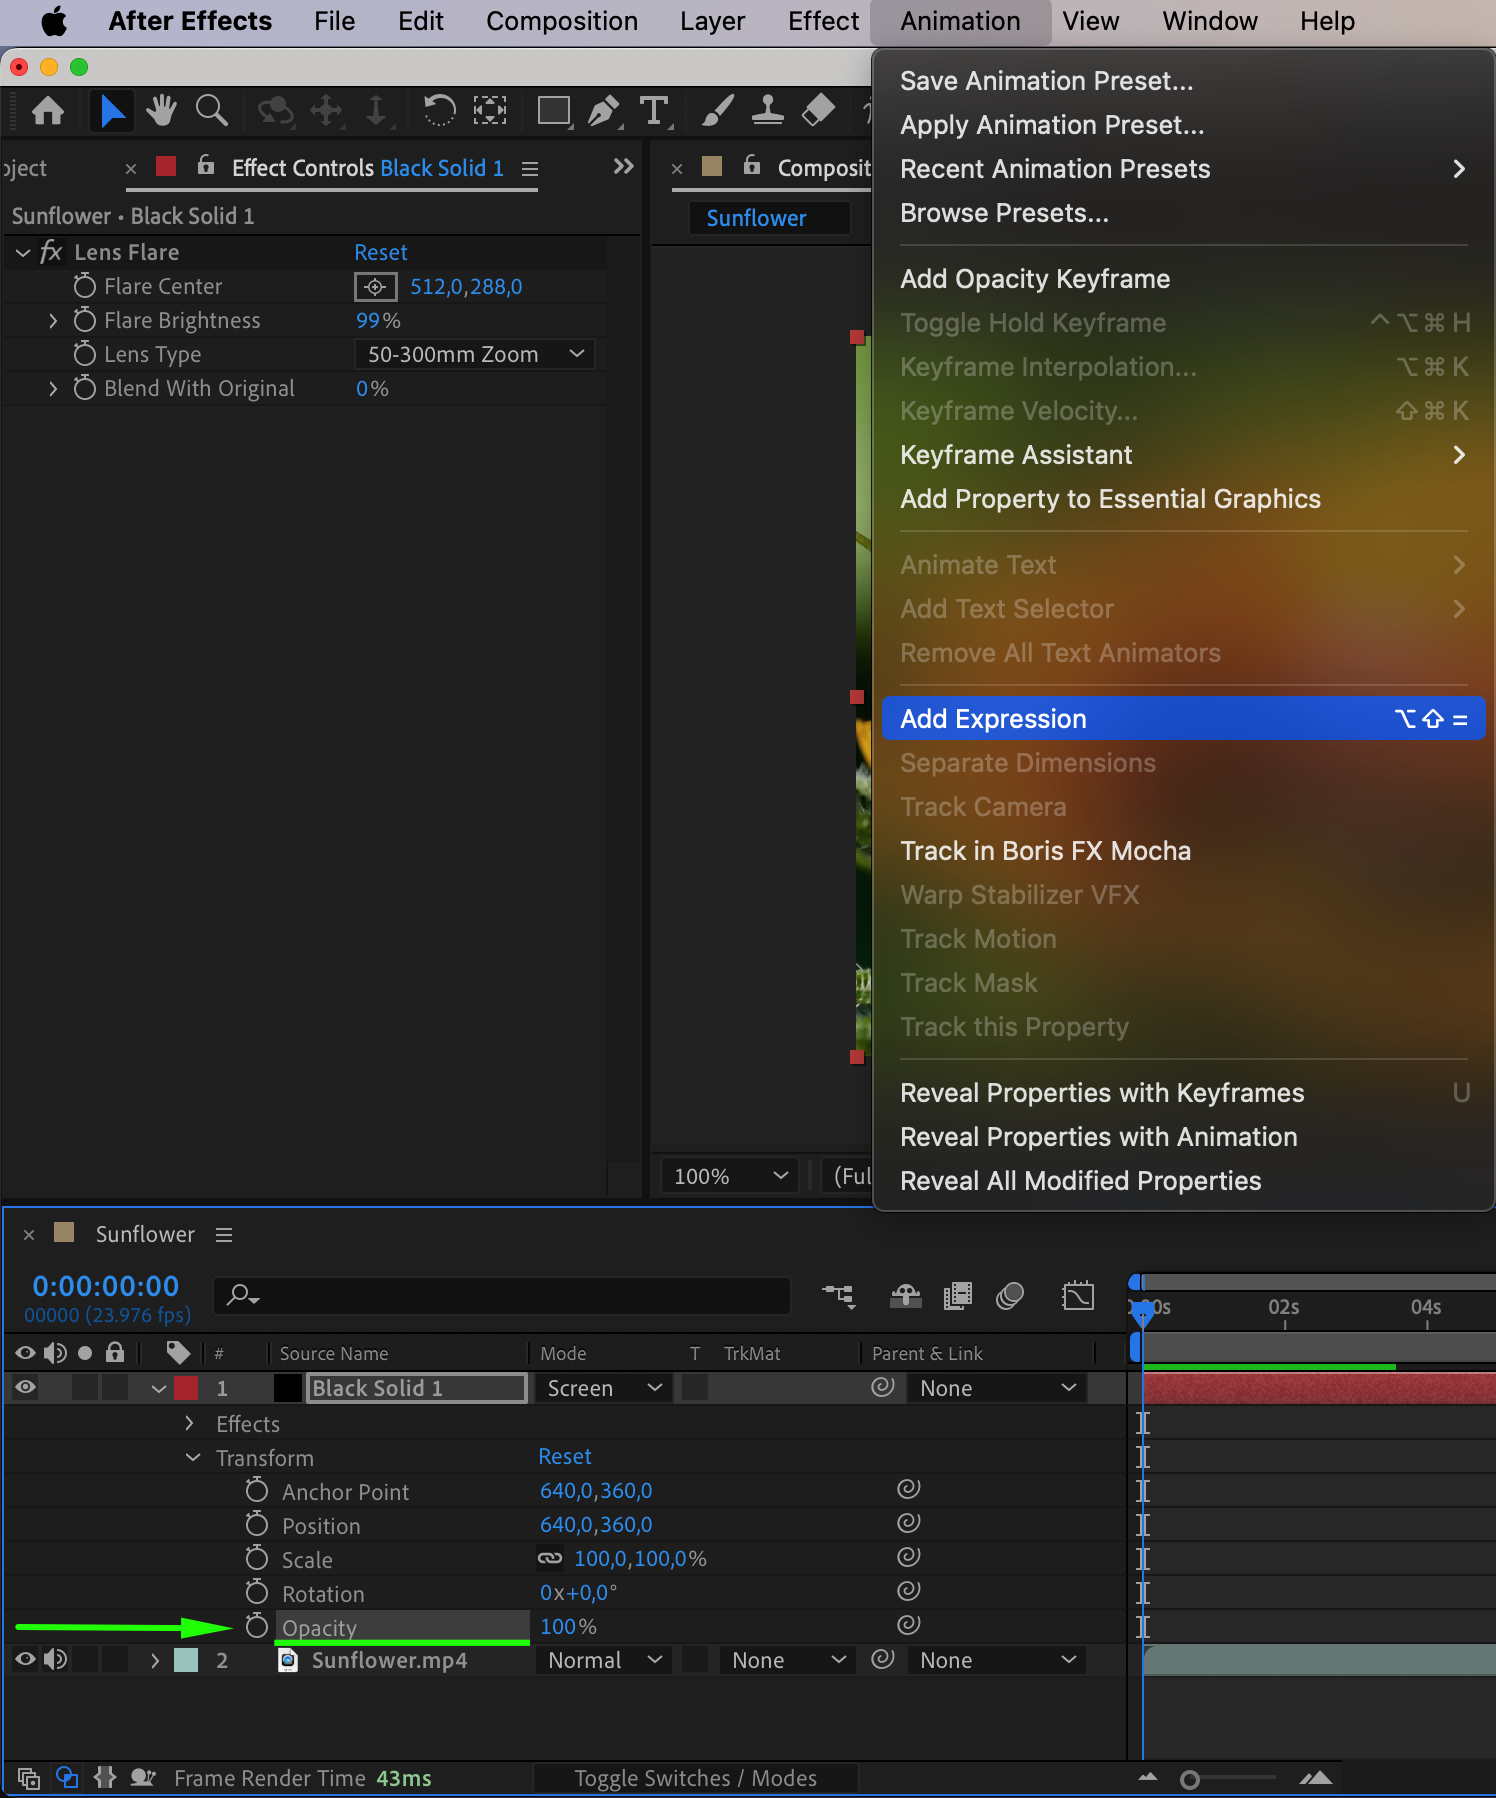
To create unique flare effects, try layering different flare elements and adjusting their blending modes, opacity, and timing. For precise control over the effect, first create a solid layer and then apply the lens flare effect to it. This technique adds depth and vibrancy to your visuals. Experiment with different combinations and settings to find the perfect balance that matches your video’s style and narrative. Adjusting blending modes, such as “Add” or “Screen,” and tweaking the opacity and timing of each layer can lead to captivating and intricate flare effects.
Get 10% off when you subscribe to our newsletter


 4. Understanding Light Interaction: Seamless Integration
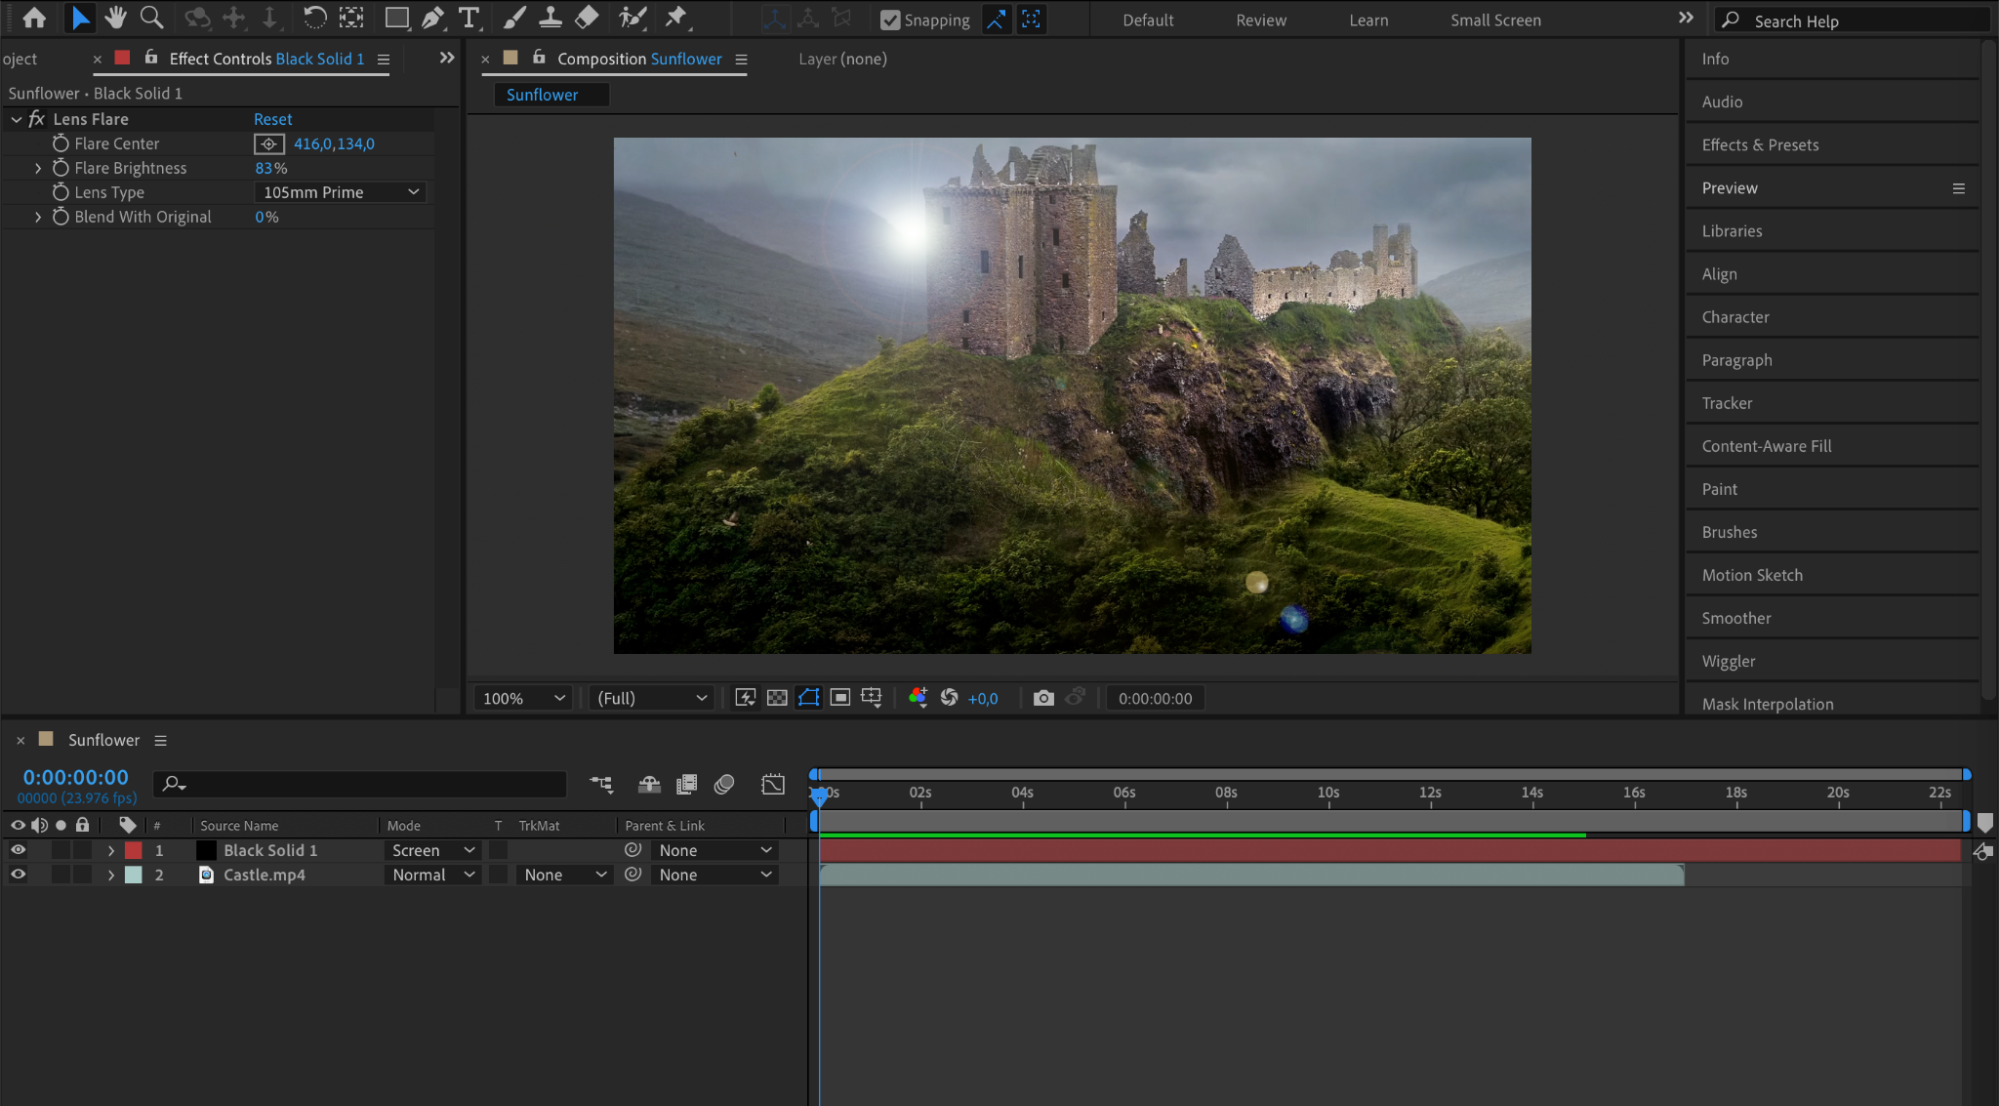
To make your flares convincing, analyze the light sources in your footage and align your flares accordingly. Consider the position, intensity, and color of the light sources. This ensures seamless integration between the flares and the environment, making them look natural and realistic.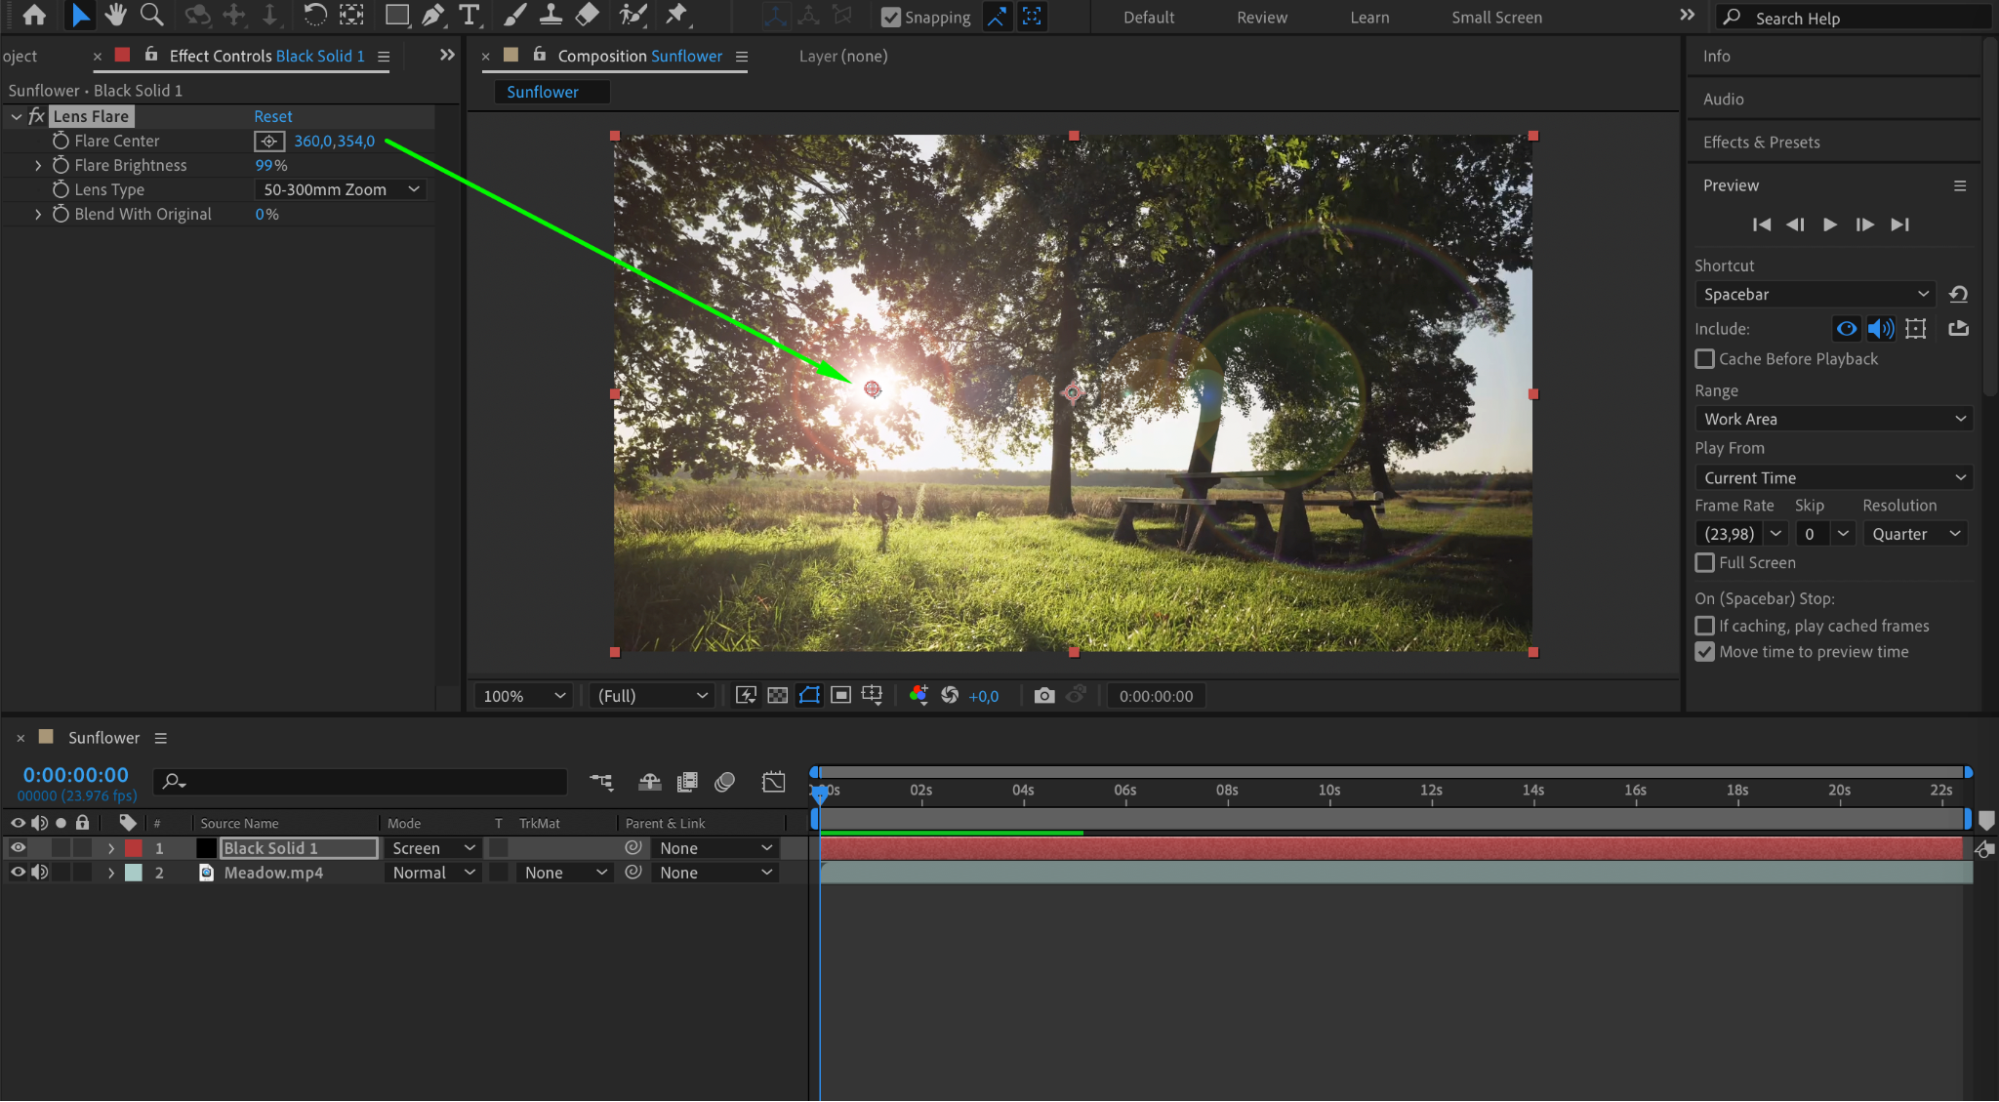 5. Unconventional Flare Effects: Beyond Bright and Sunny Scenes
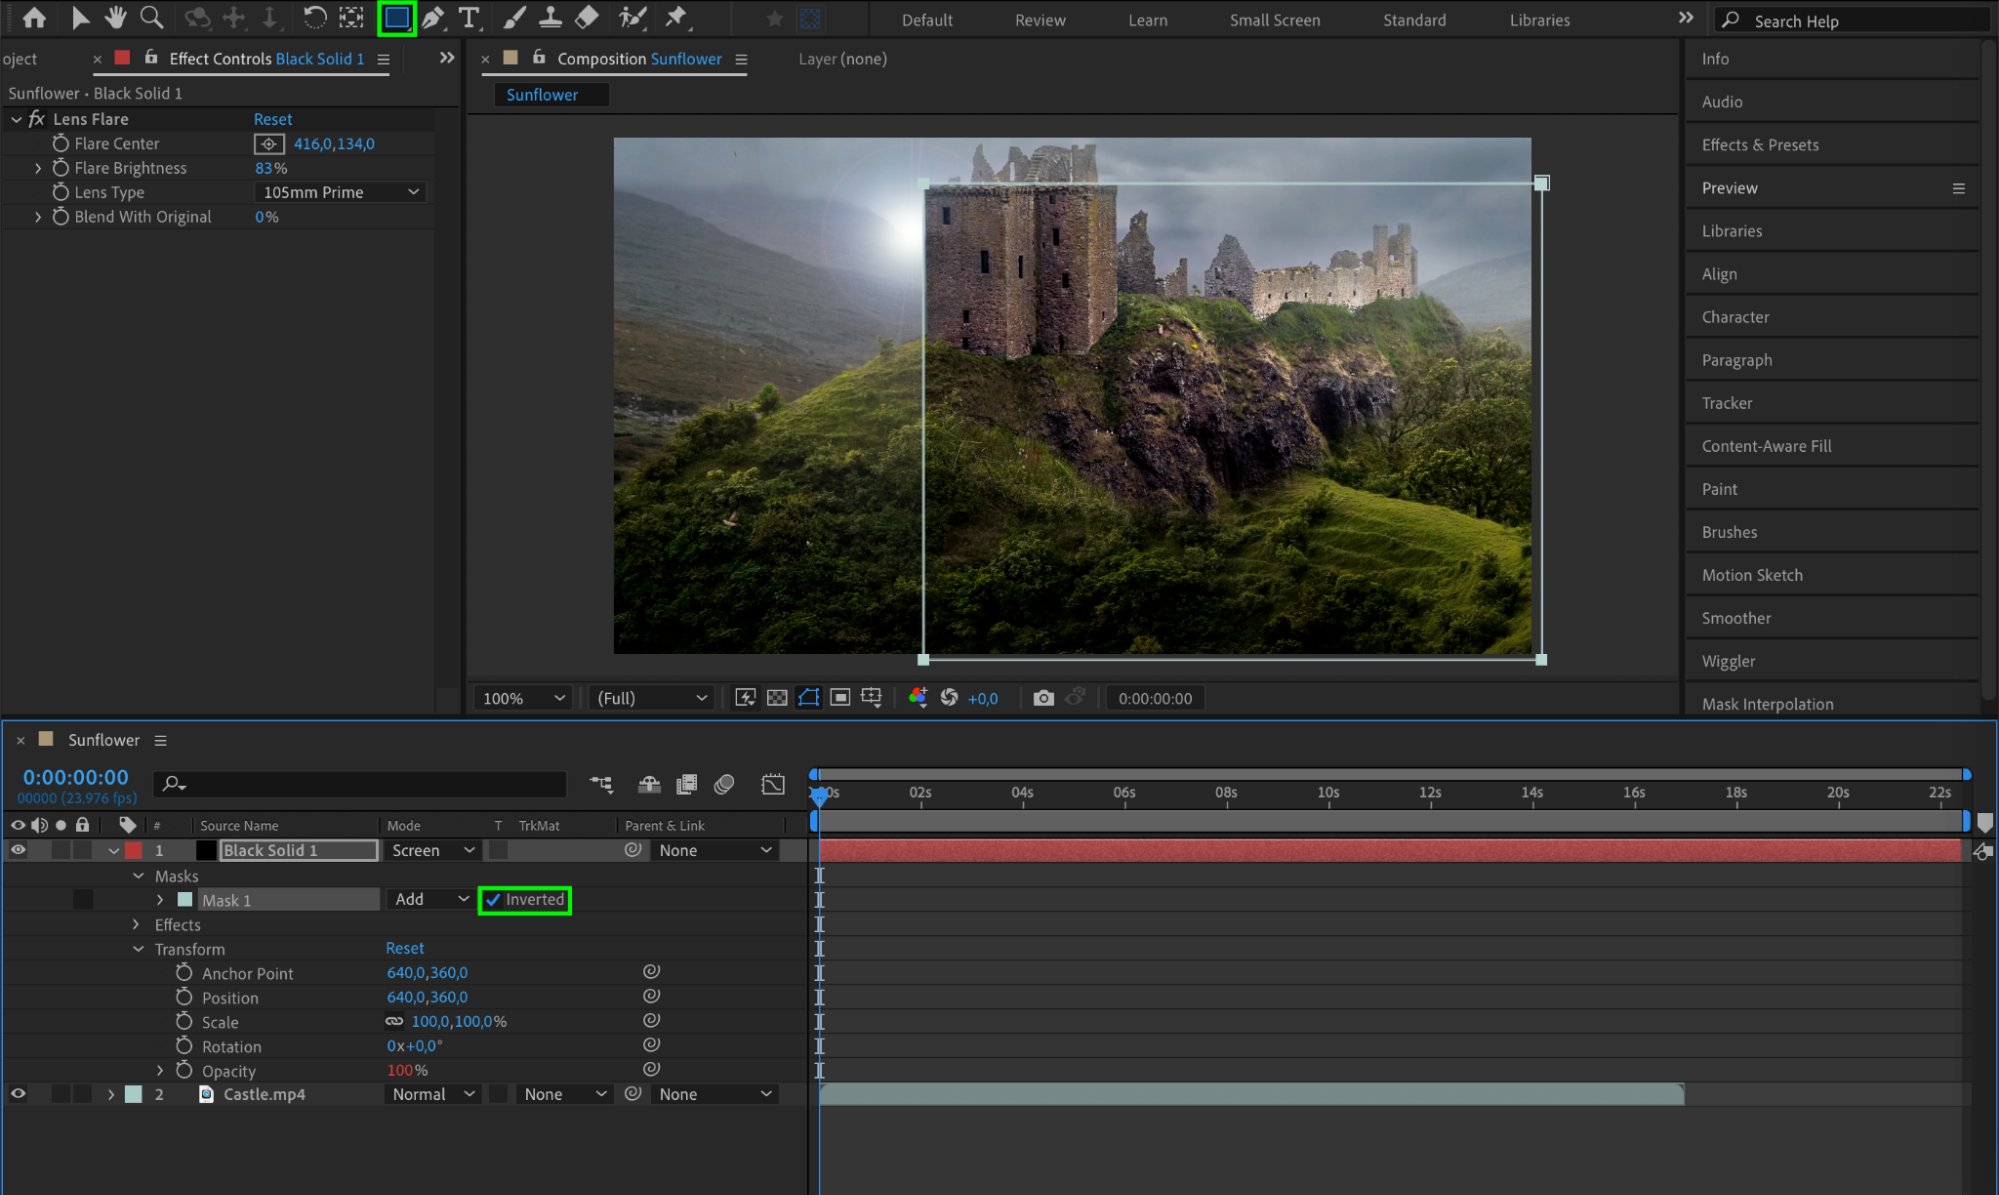
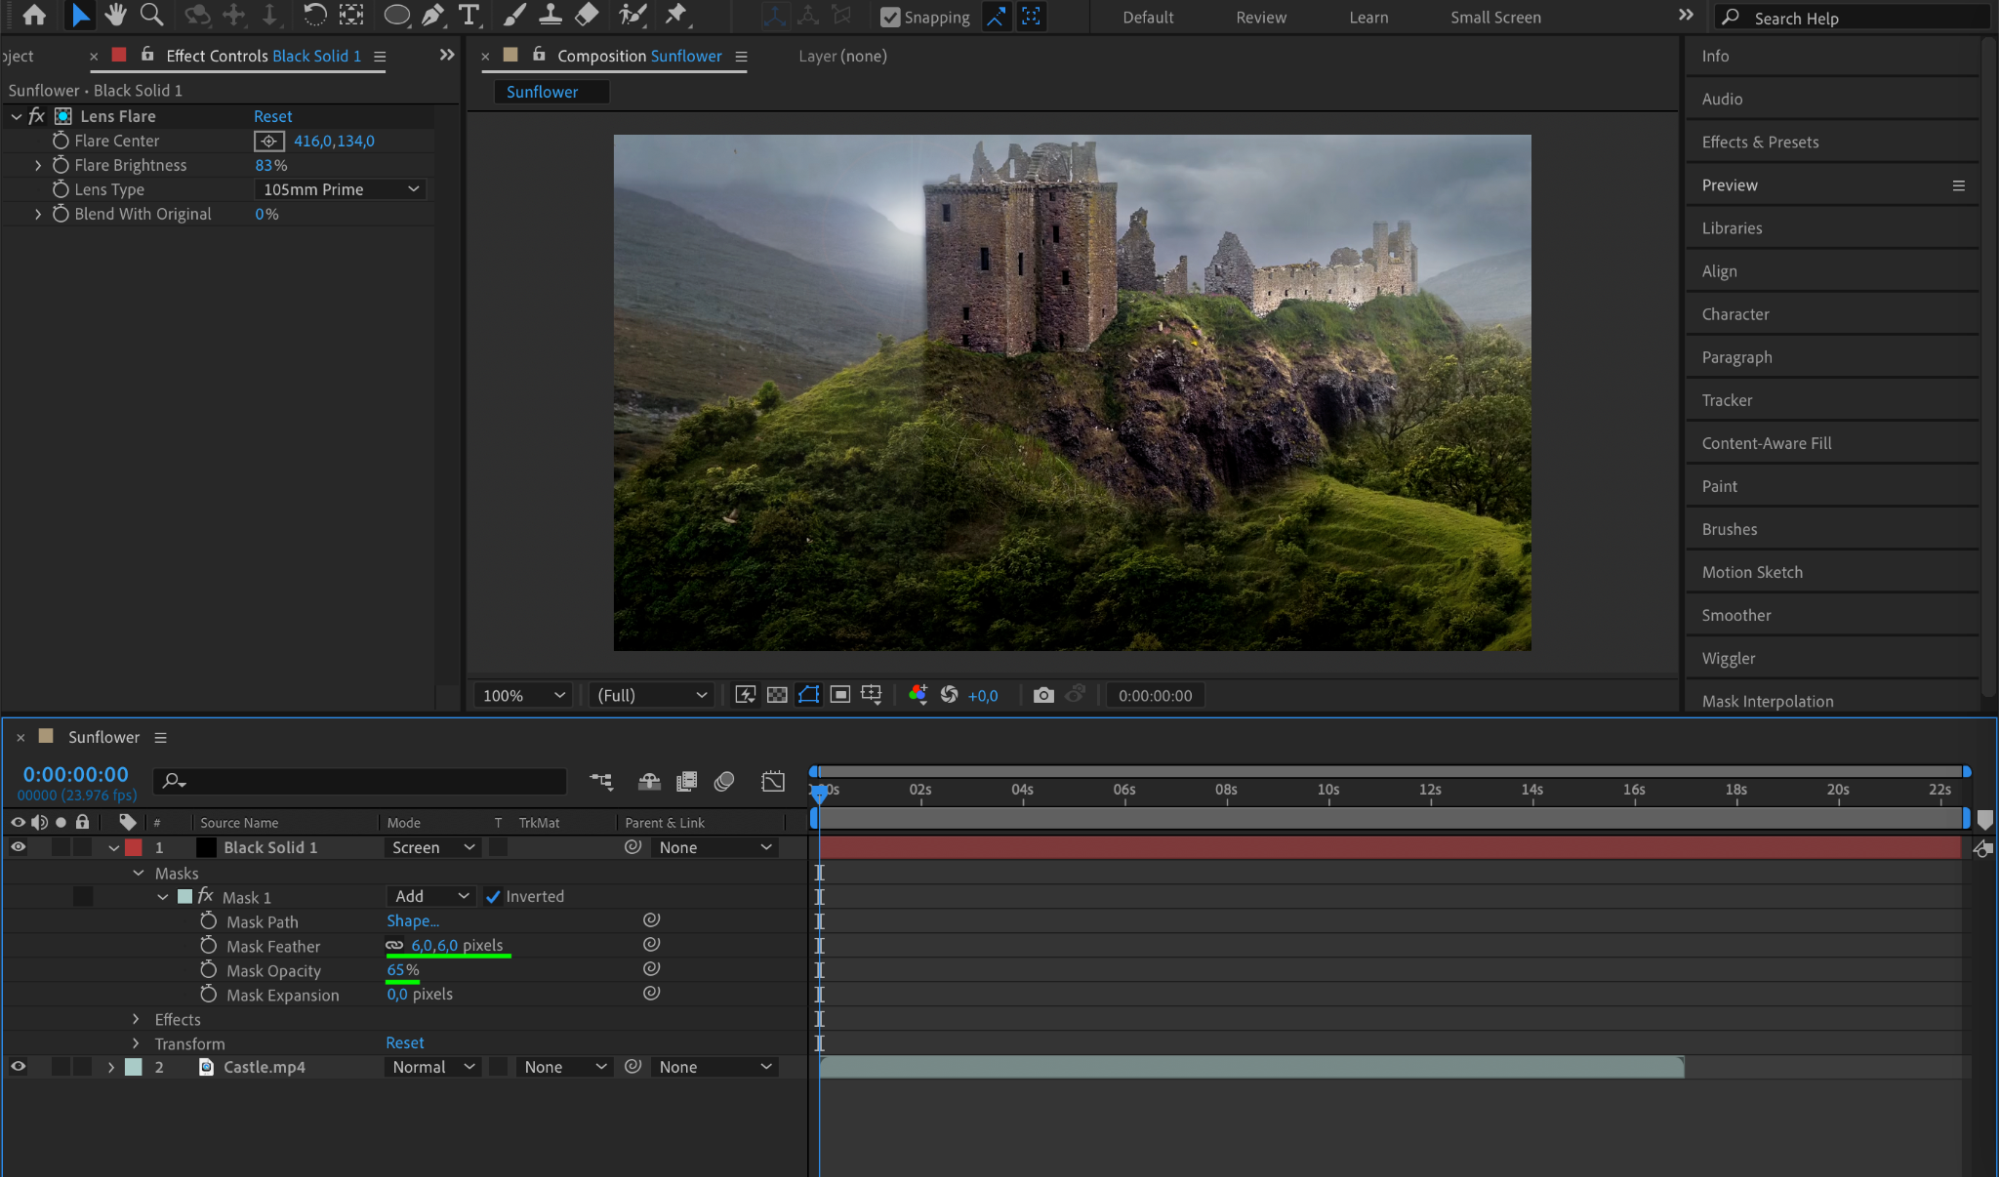
Don’t limit yourself to using flares only in bright and sunny scenes. Flares can be equally impactful in dark and moody environments. They add mystery, drama, or even sci-fi elements to your videos. Use masks to create shadows where necessary, enhancing the realism of your flares in various lighting conditions.
 7. Attention to Detail: Small Adjustments, Big Impact
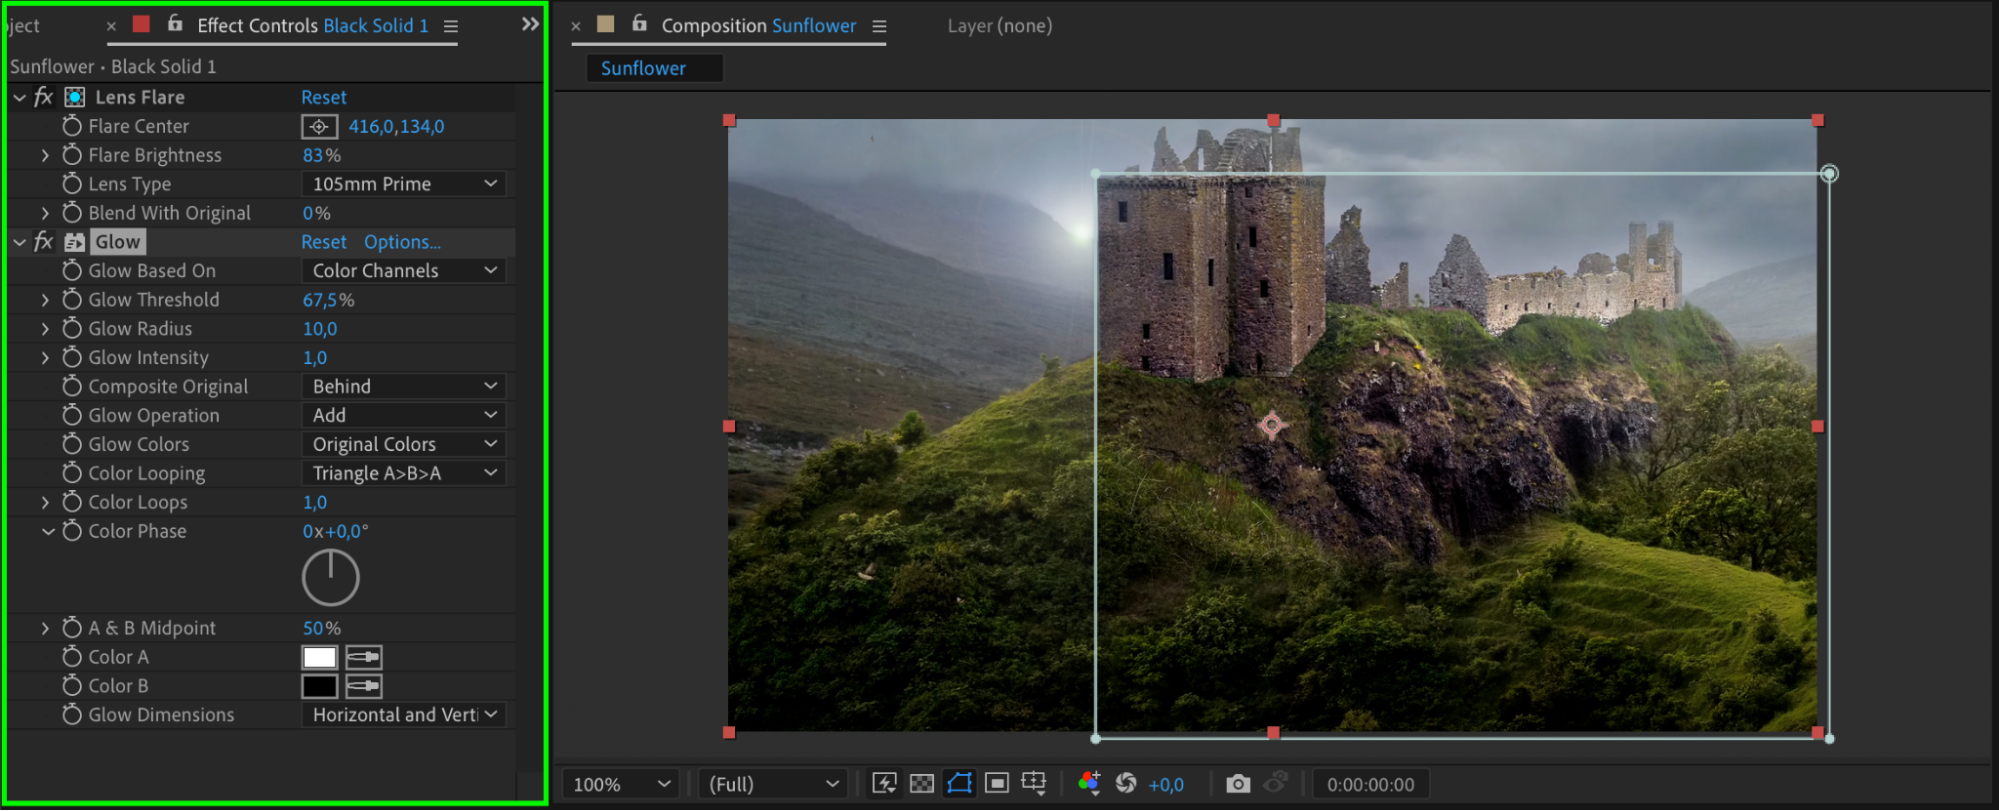
Pay attention to the details. Adding subtle motion blur, adjusting the glow effect, or animating the flares’ movement can make a significant difference in the overall impact of your flares. Don’t be afraid to experiment and iterate until you achieve the desired result.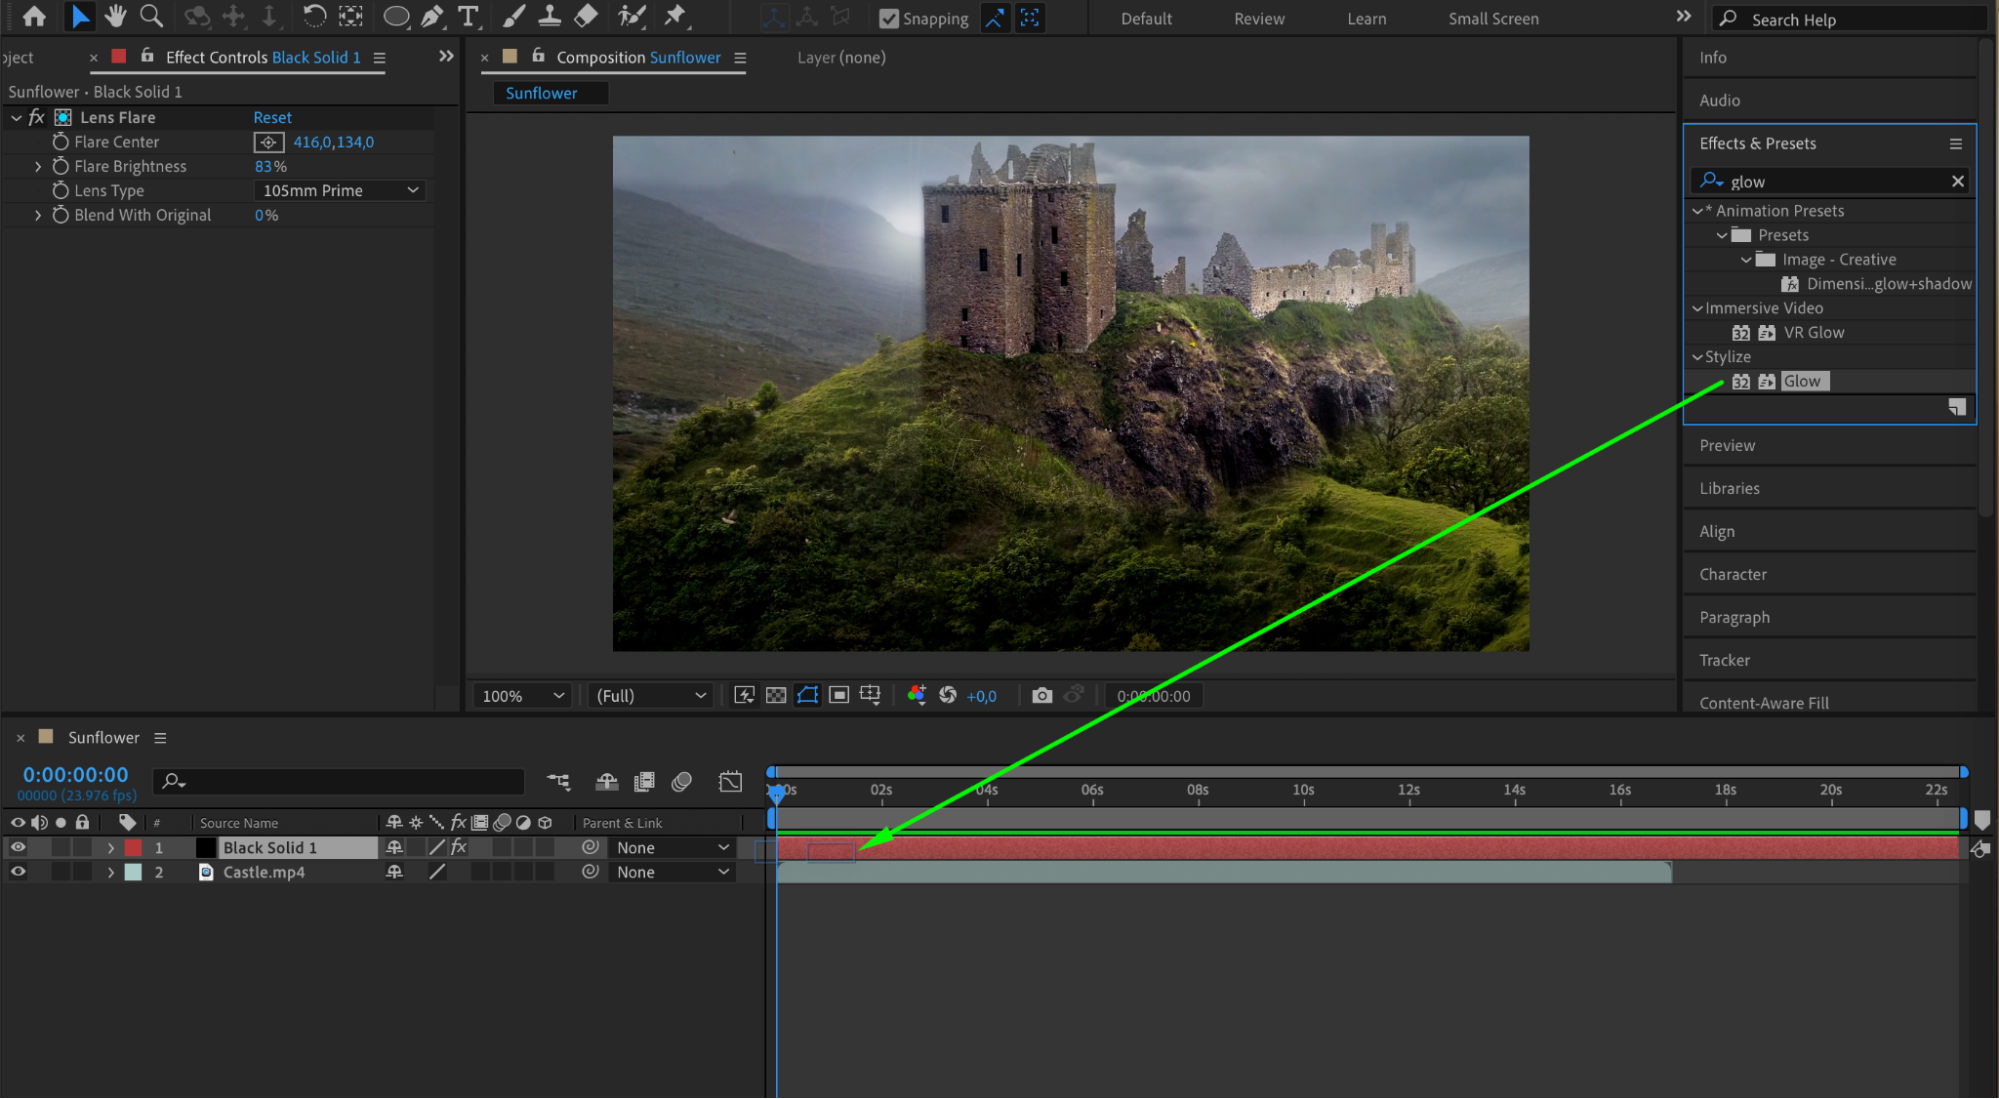
 Conclusion
In conclusion, creating stunning flares in After Effects is a skill that can elevate your videos to the next level. With the right tools, techniques, and attention to detail, you can bring your visuals to life and captivate your audience. So, go ahead and explore the vast possibilities that After Effects offers for creating amazing flares. Make your videos shine brighter than ever before.


