A Step-by-Step Guide to Creating Green Screen Effects in After Effects
Introduction to Mastering Green Screen Techniques in After Effects
Are you ready to elevate your video editing skills? This guide will walk you through creating a professional green screen effect, also known as chroma keying, in Adobe After Effects. Green screen allows filmmakers and video creators to replace a green or blue background with any image or video, enabling endless creative possibilities. Whether you’re a beginner or an experienced video editor, this tutorial will provide you with essential tips and advanced techniques for achieving clean and convincing green screen effects.
Step 1: Set Up Proper Lighting
Proper lighting is the foundation of a successful green screen effect. Use soft, diffused lighting to evenly illuminate the green screen, avoiding shadows, wrinkles, or hotspots. Ensuring consistent lighting across the entire background will make the keying process much smoother and prevent issues like uneven keying or color spill. Place your lights at an angle to the screen and adjust them until the screen is uniformly lit, with no visible shadows.
Step 2: Choose a High-Quality Green Screen Backdrop
Invest in a high-quality green screen backdrop that is free of wrinkles and well-stretched. The smoother and more even your green screen, the easier it will be to achieve a clean key. Avoid using cheap or poorly lit screens, as they can cause complications during the keying process, such as uneven removal of the green background. A good backdrop is essential to creating a professional-looking green screen effect.
Step 3: Apply the Keying Effect in After Effects
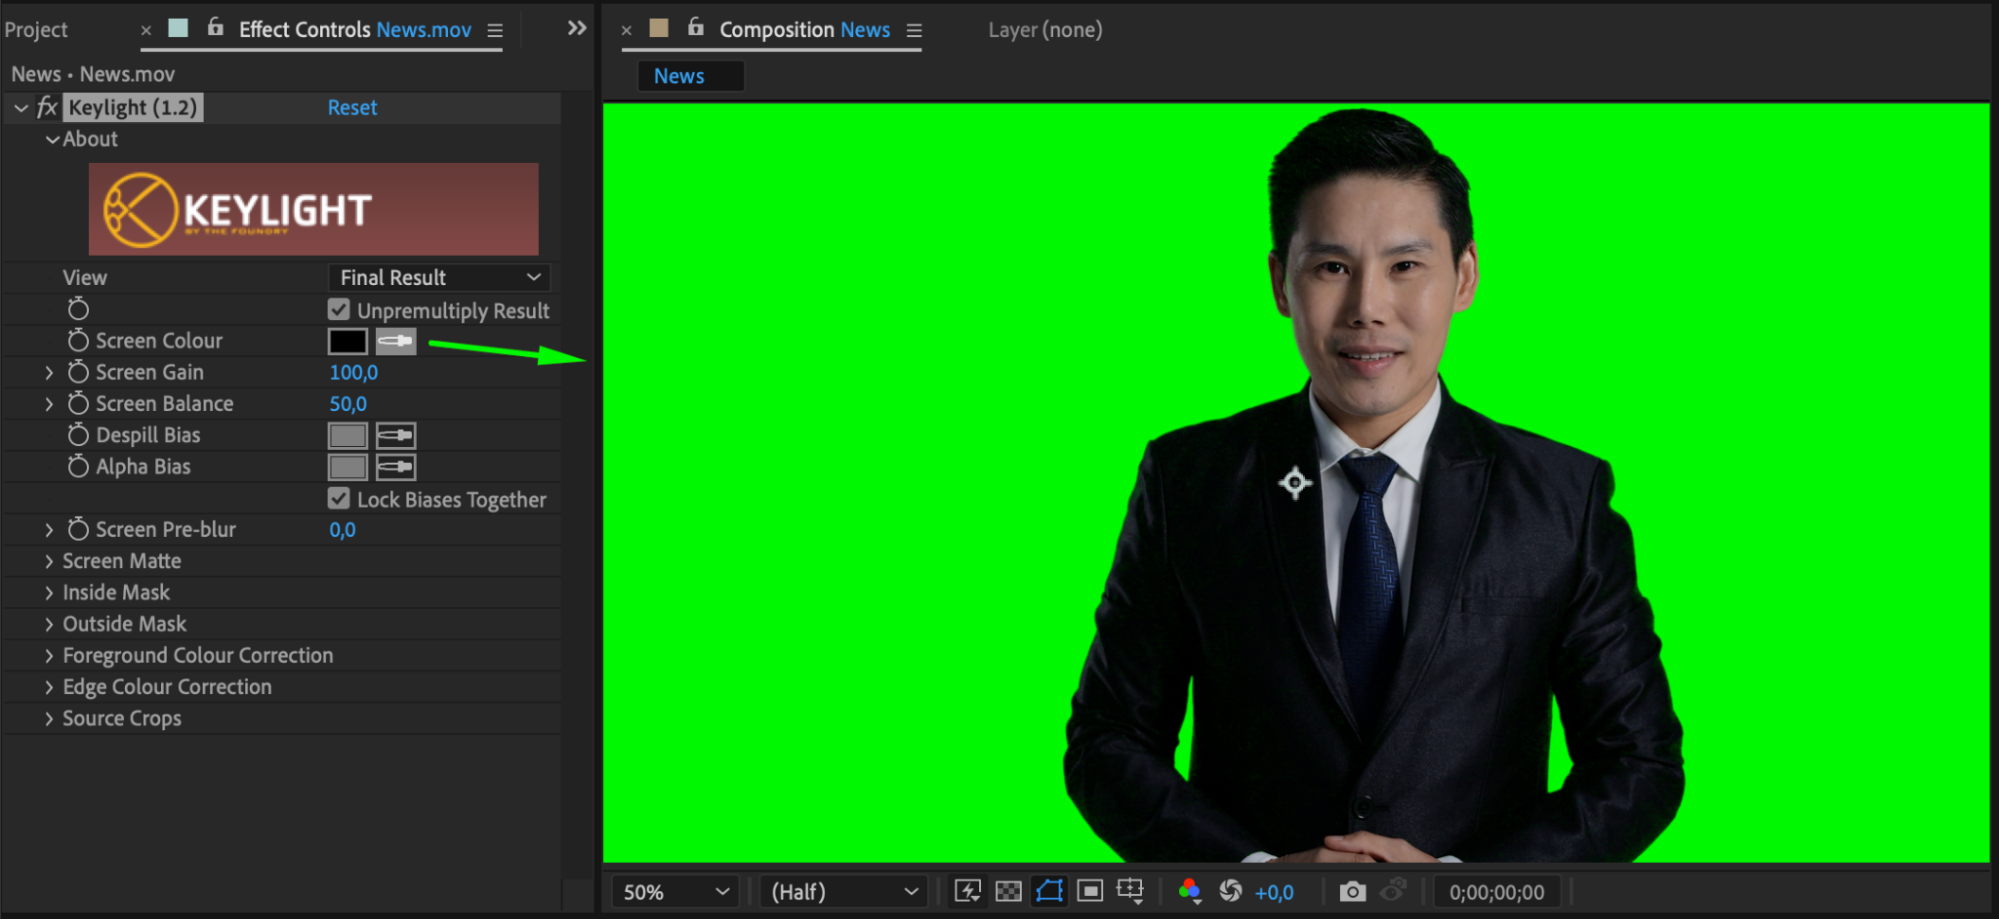
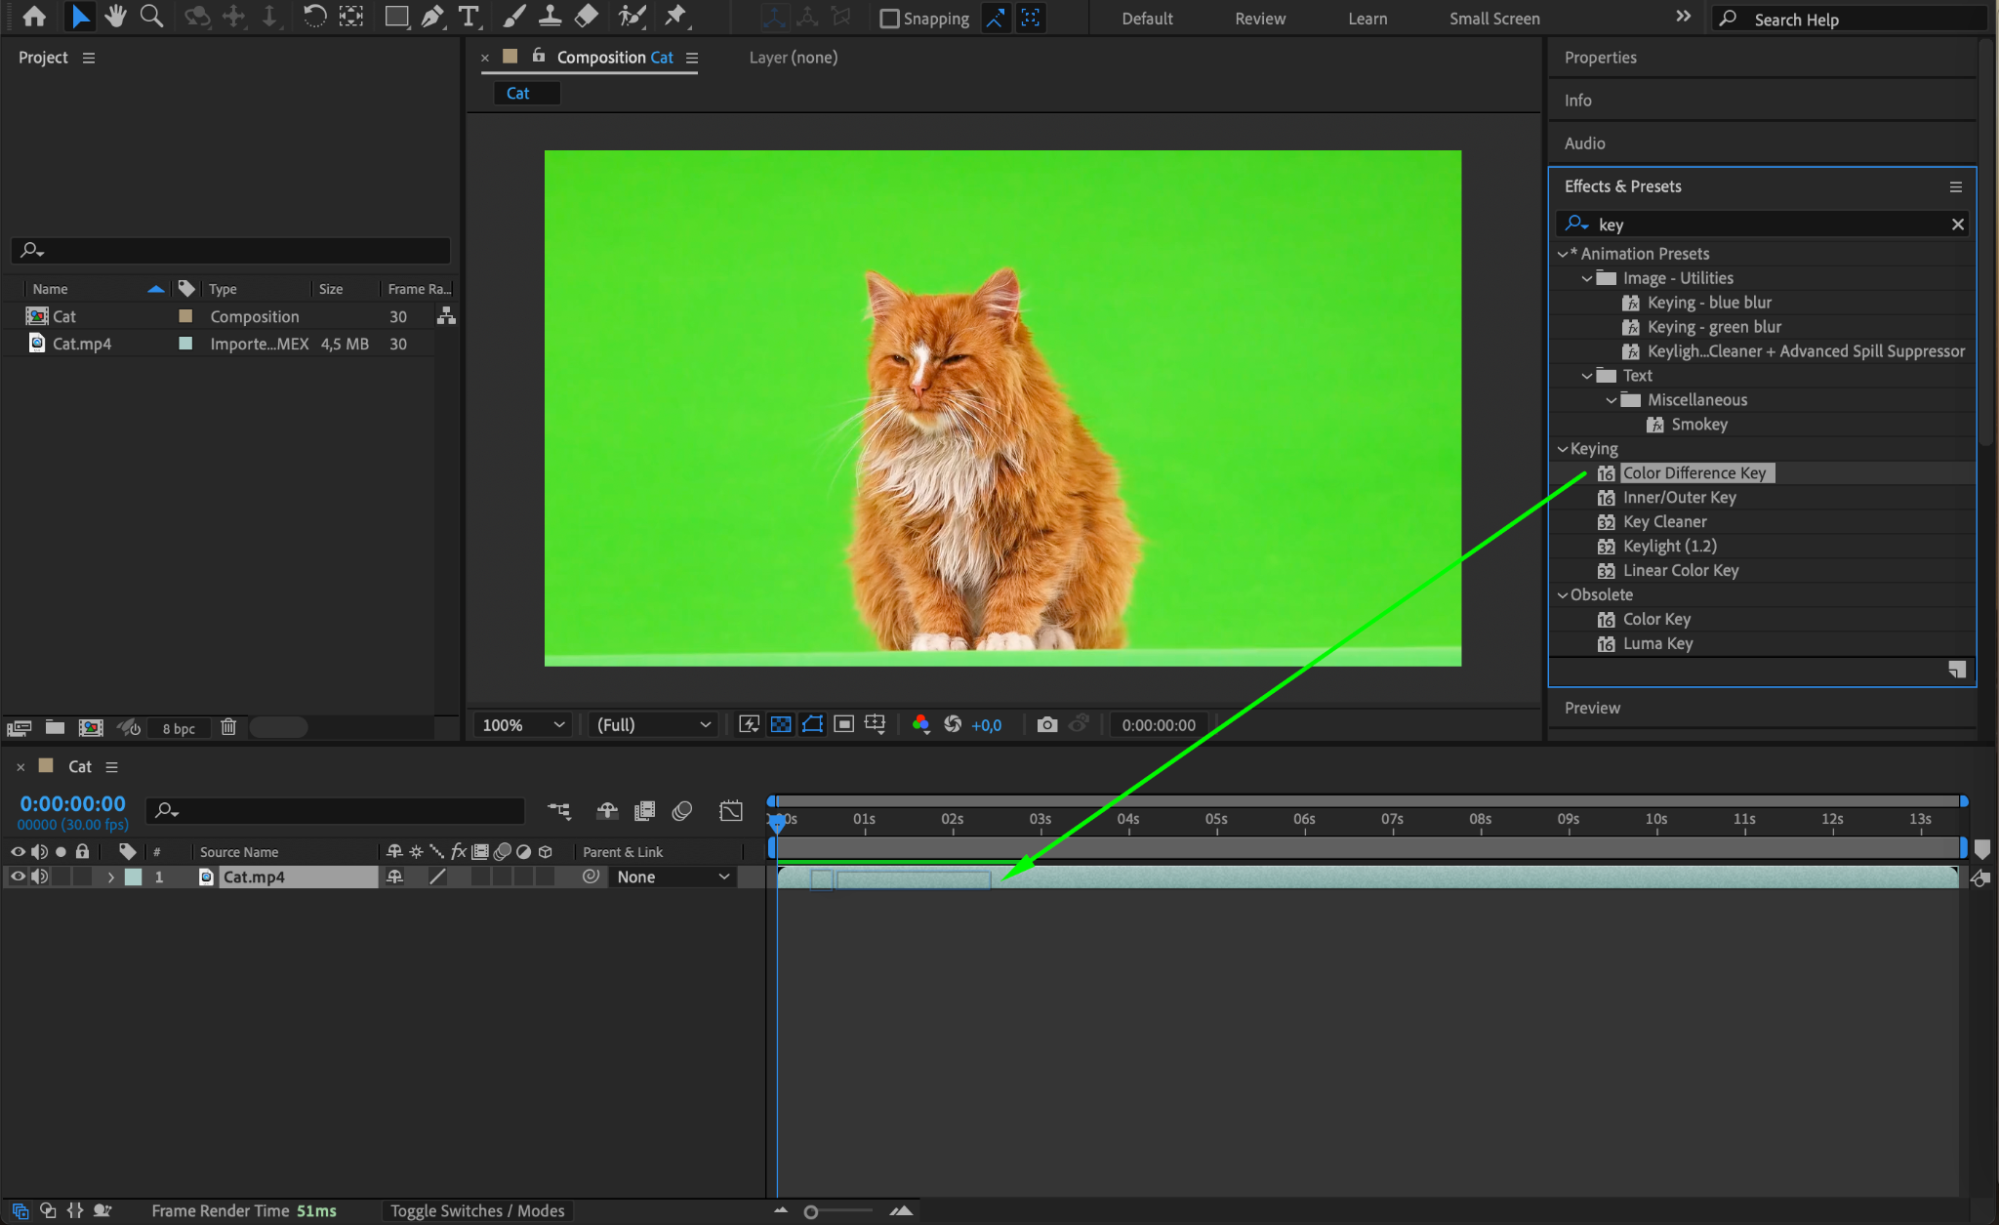
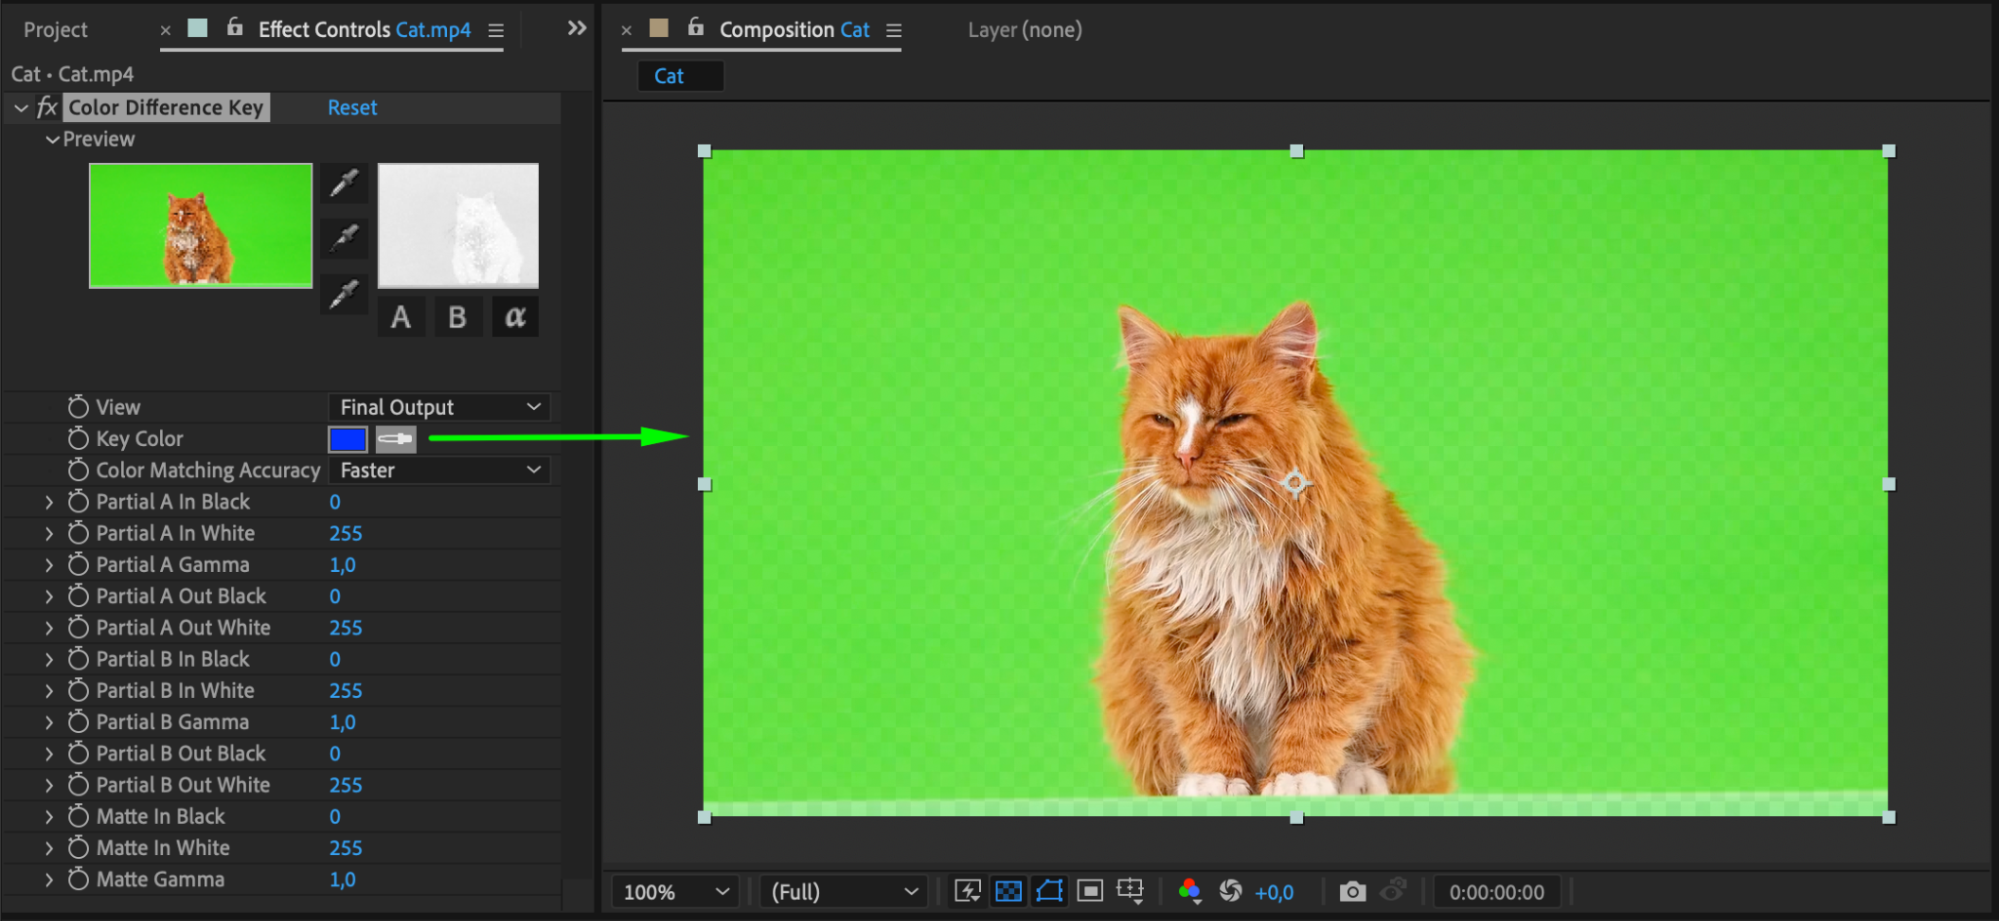
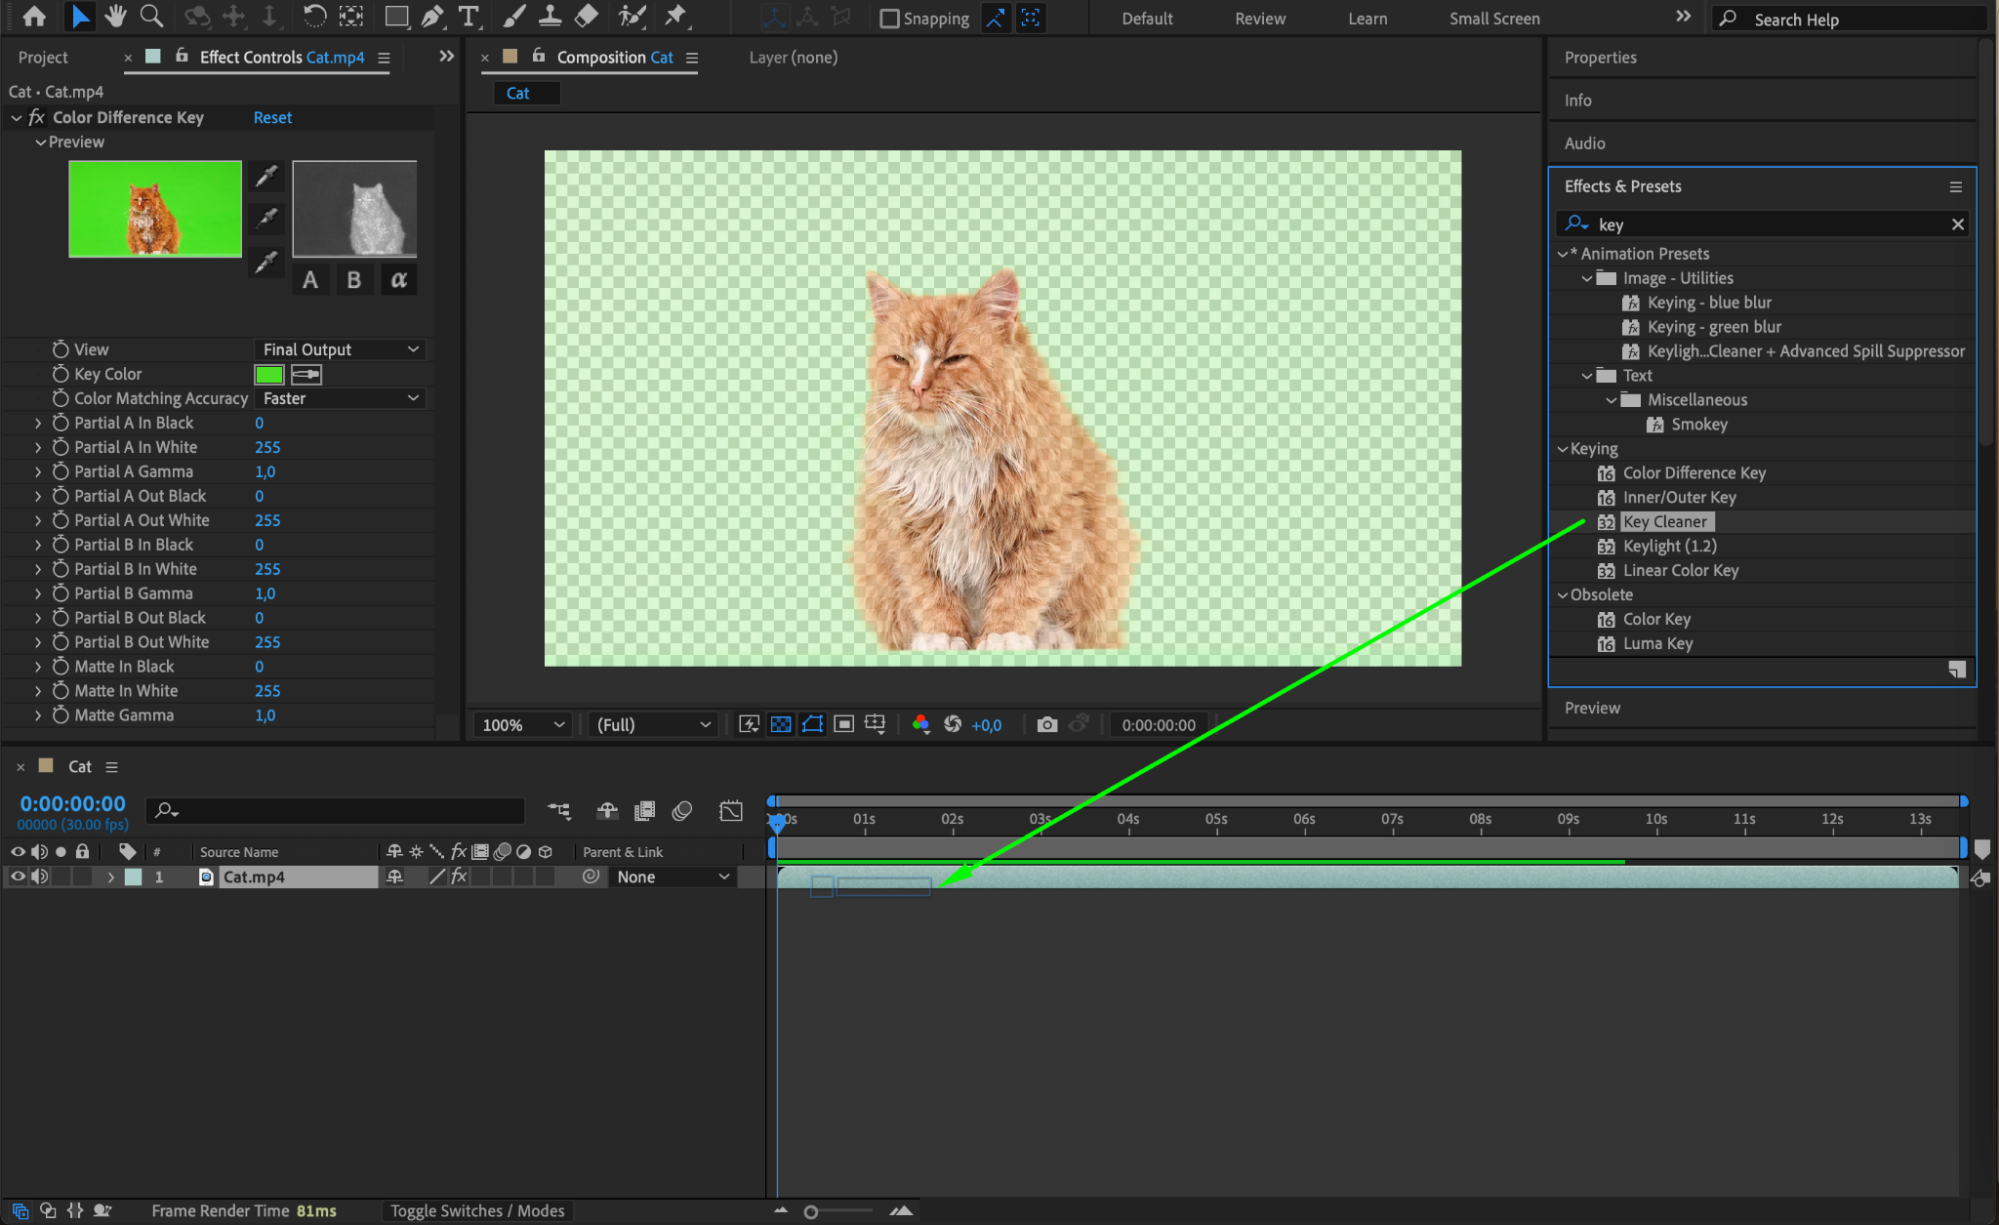
After importing your footage into After Effects, it’s time to apply the keying effect. After Effects offers several keying effects, such as Keylight, Linear Color Key, and Color Difference Key. Drag your chosen keying effect from the Effects & Presets panel onto your footage layer. Use the Effect Controls panel to adjust the keying parameters, such as Screen Gain and Screen Balance, until you achieve a clean and accurate key. This step is crucial to ensuring that the green background is fully removed without affecting the quality of your subject.
Keylight (1.2) effect – A powerful keying tool used to remove green or blue screen backgrounds, offering advanced controls for refining the key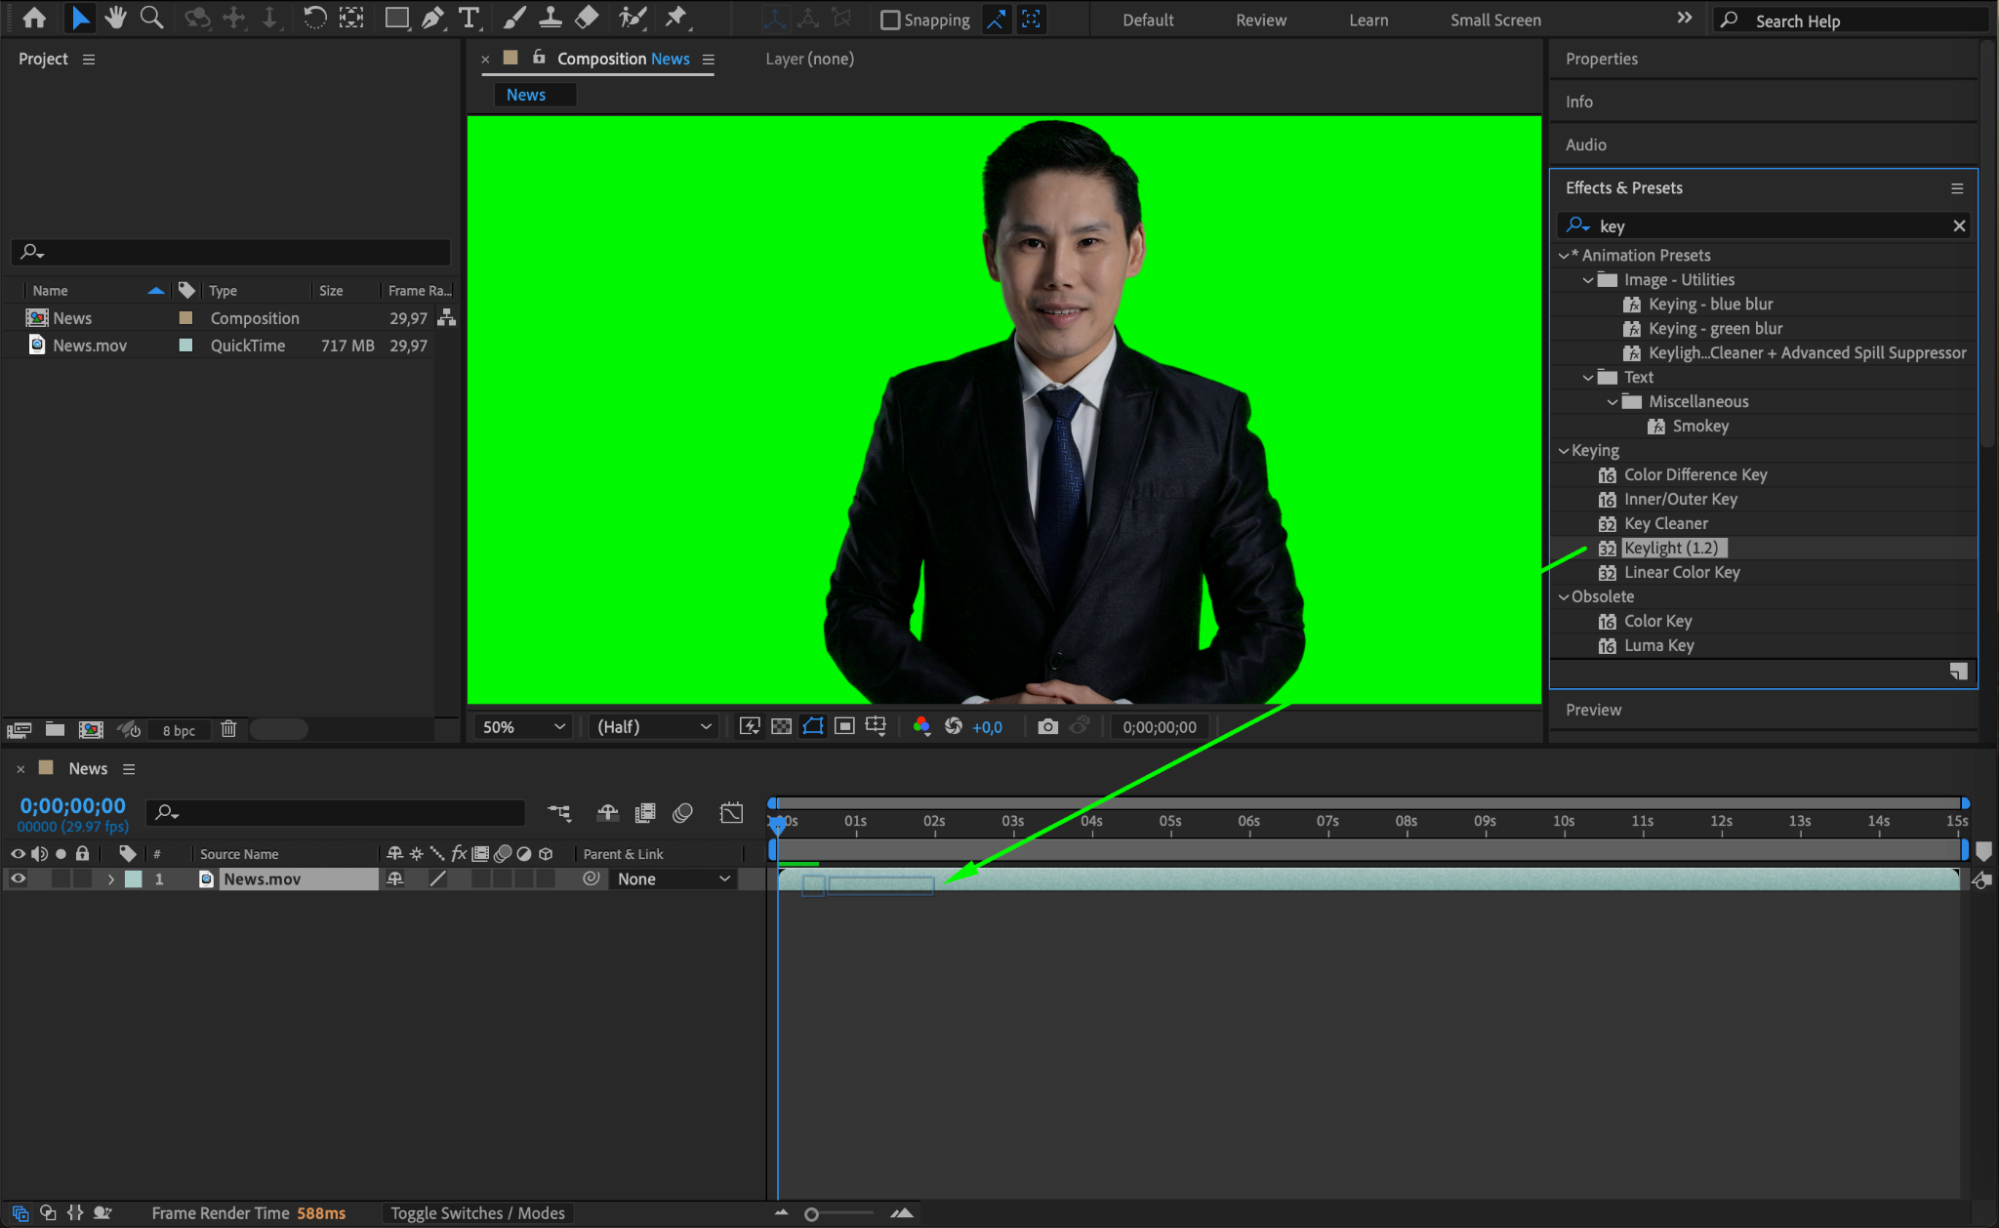
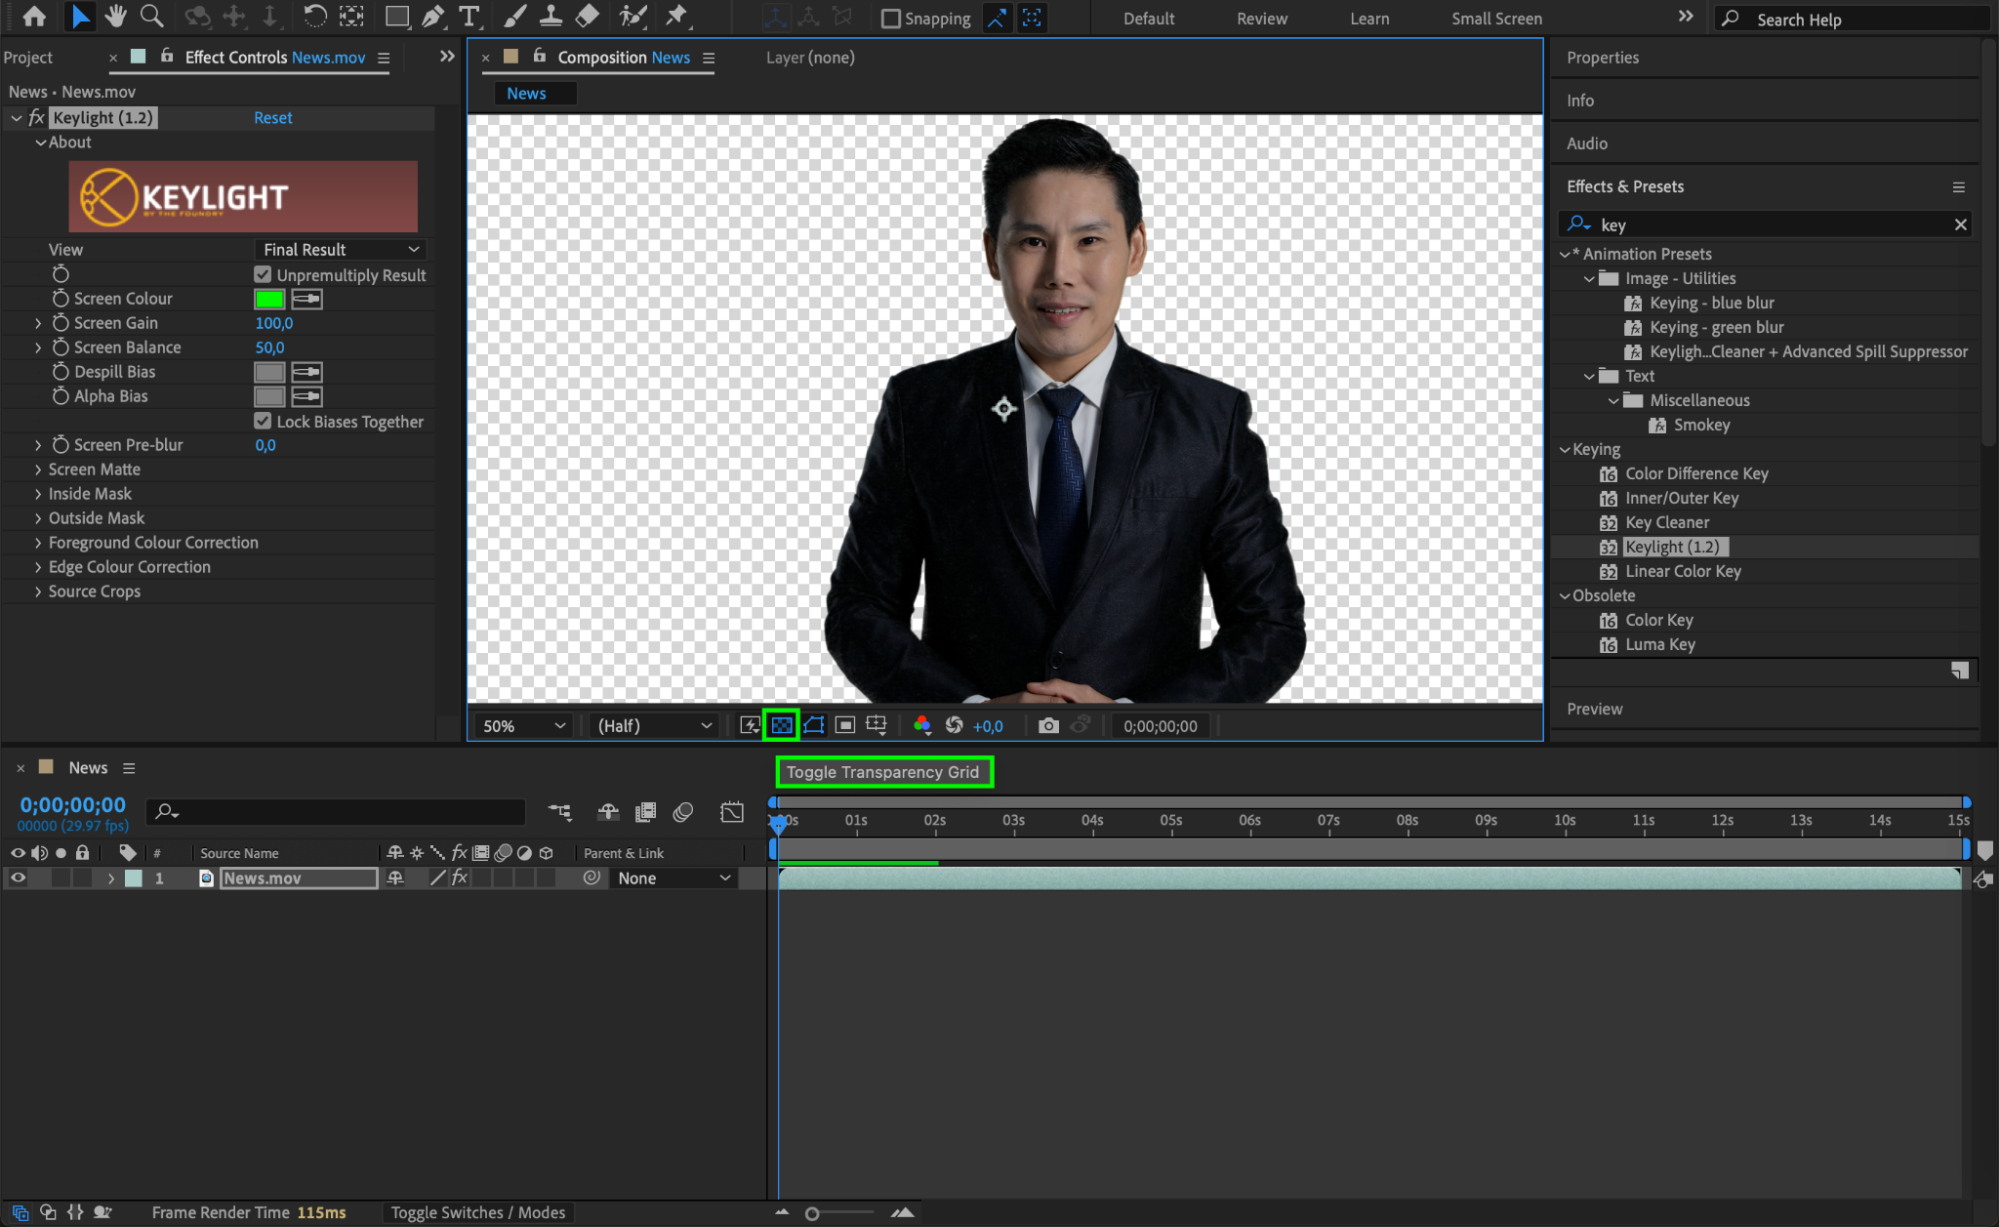
 Pro tip: Use the “Toggle Transparency Grid” button to see how effectively the green screen has been removed.
 Color Difference Key effect – A keying effect that removes backgrounds based on color differences between the subject and the background, commonly used for green or blue screens.
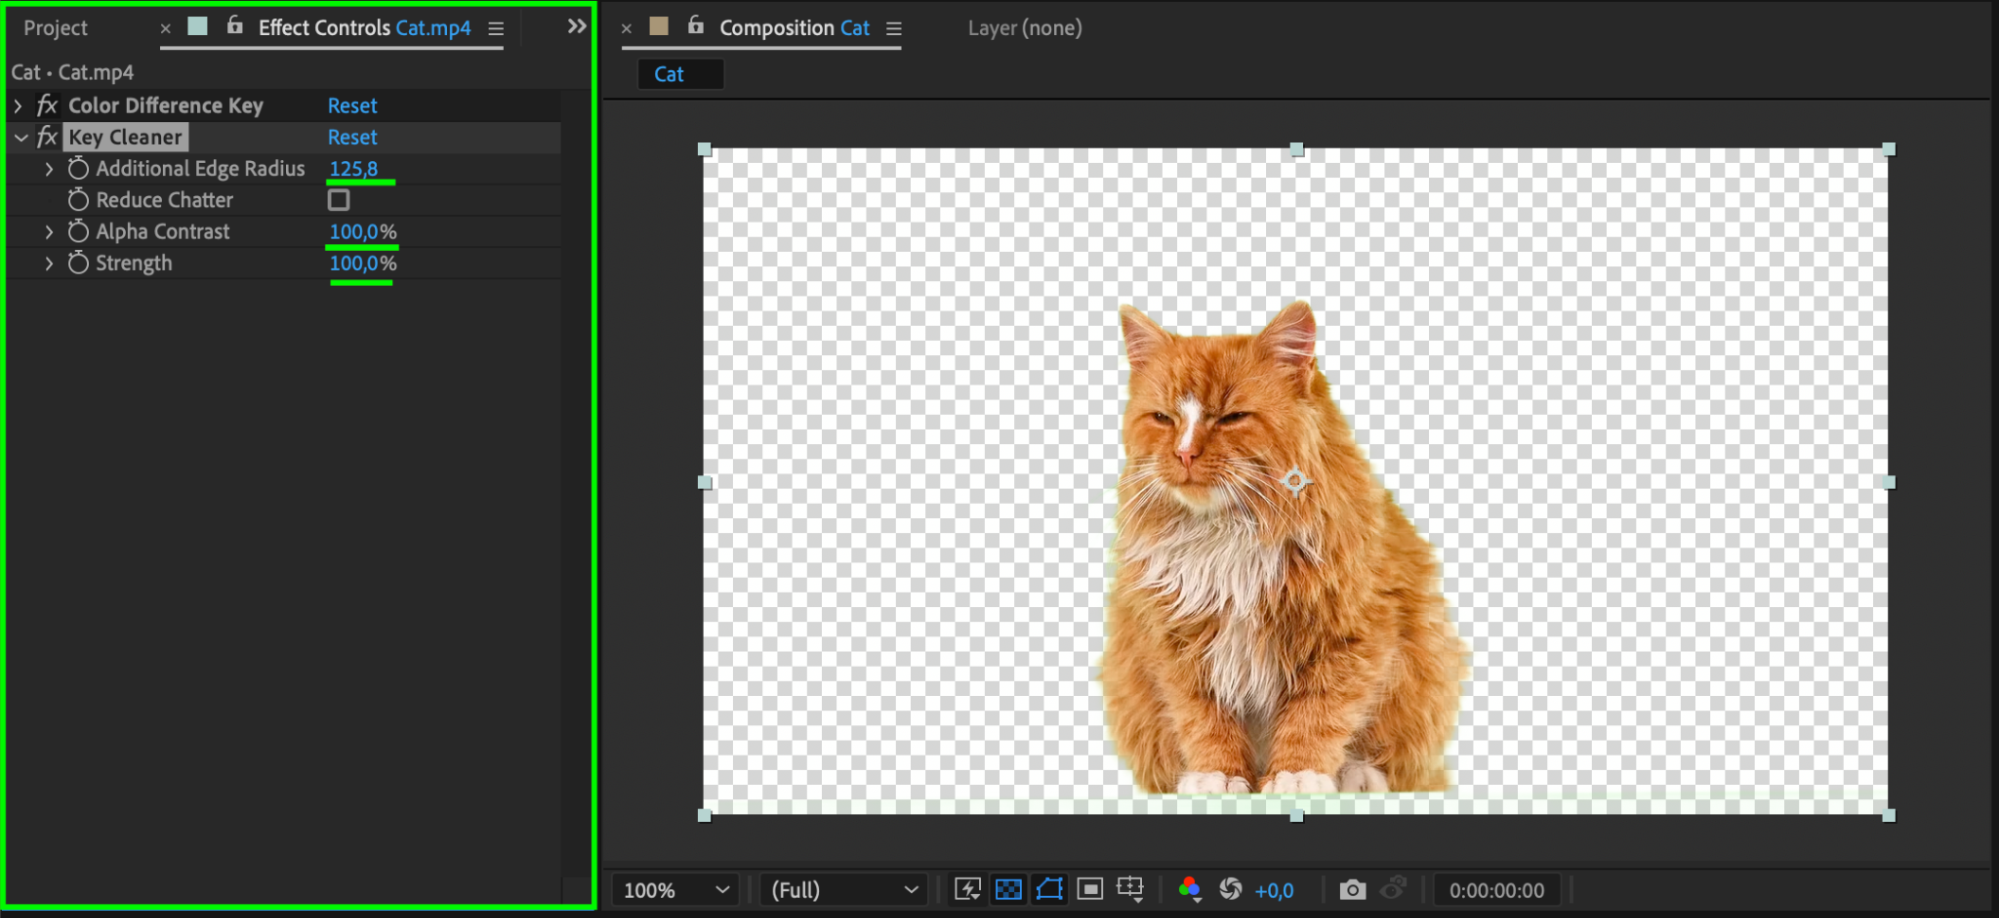
 Key Cleaner effect – An effect that helps refine and smooth the edges of keyed footage, reducing noise and improving overall key quality.
 Step 4: Replace the Green Screen with a New Background
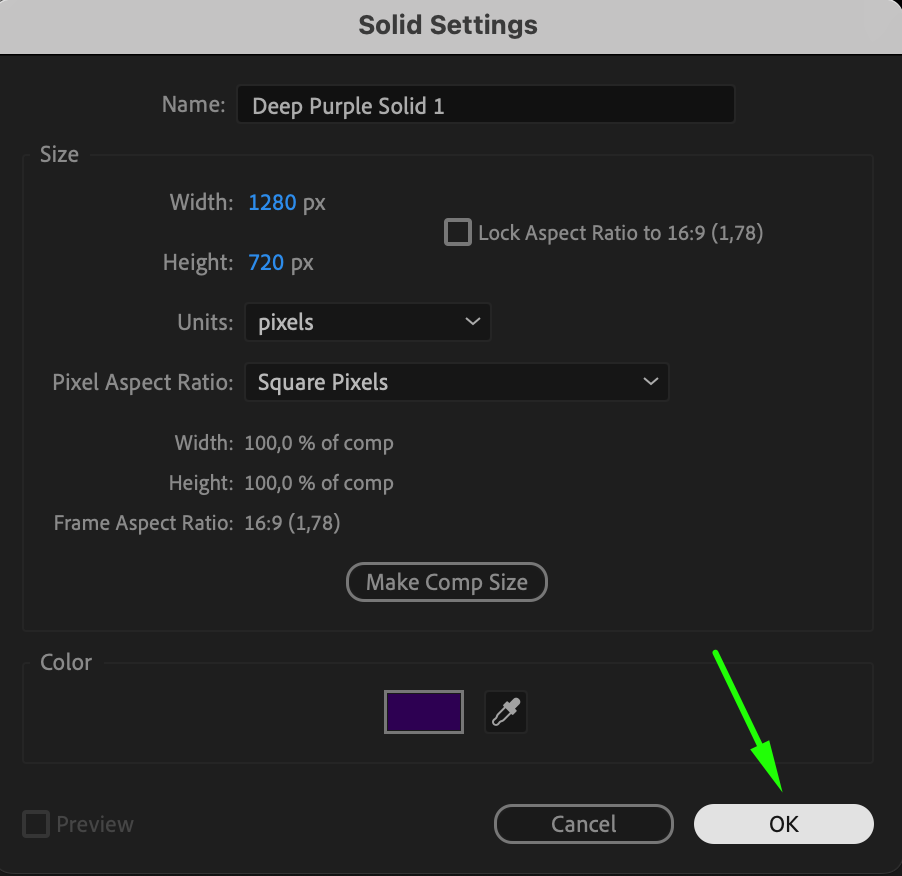
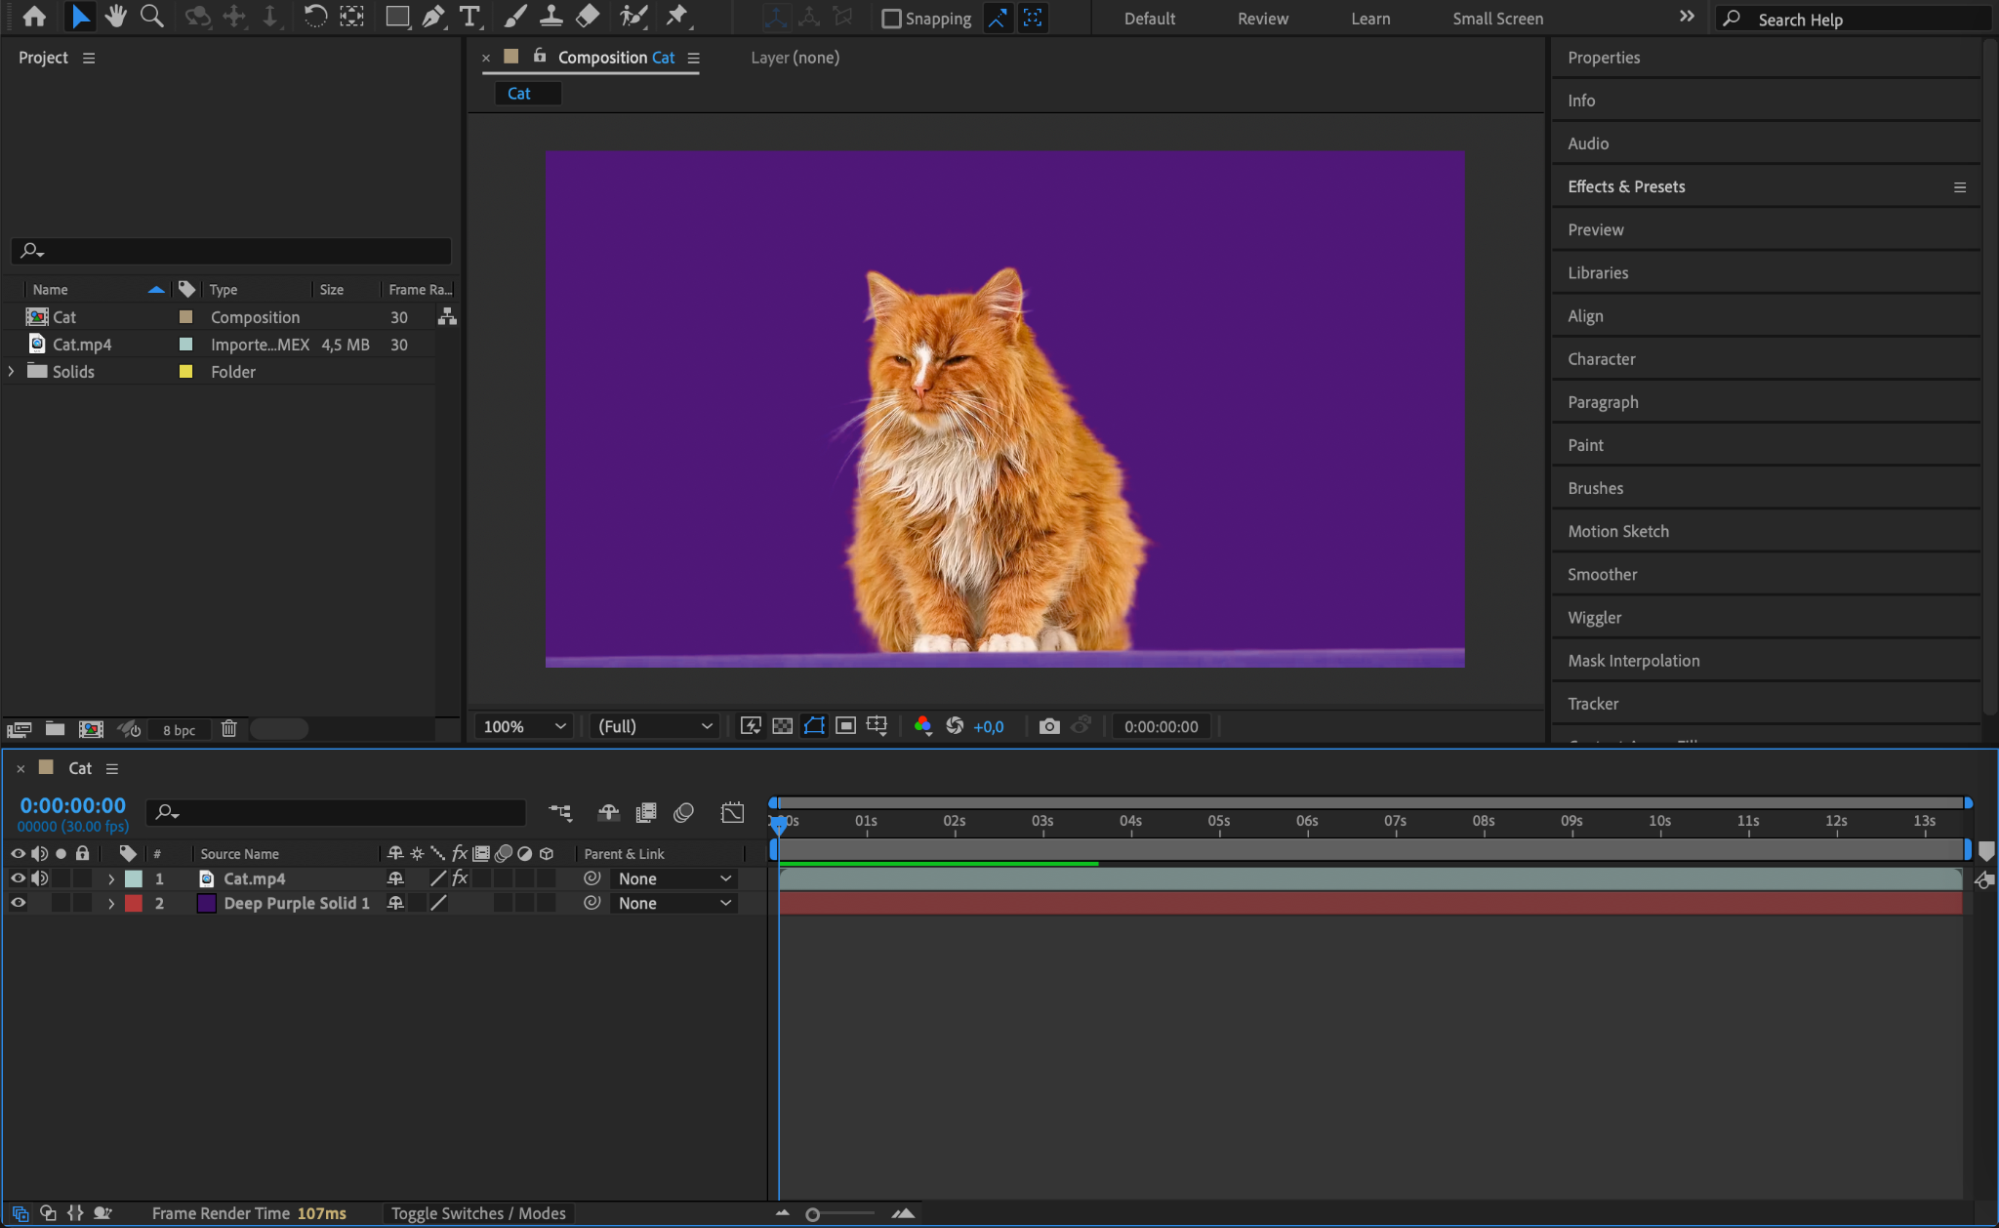
Once the green background is successfully removed, it’s time to add a new background. Go to Layer > New > Solid to create a solid background, or import an image or video to serve as the new backdrop. Drag the new background layer below your keyed footage layer in the Timeline. Customize the background to match the theme and style of your project, ensuring that it complements the subject and enhances the overall composition.
 Step 5: Add Textures and Effects to the Background
Get 10% off when you subscribe to our newsletter

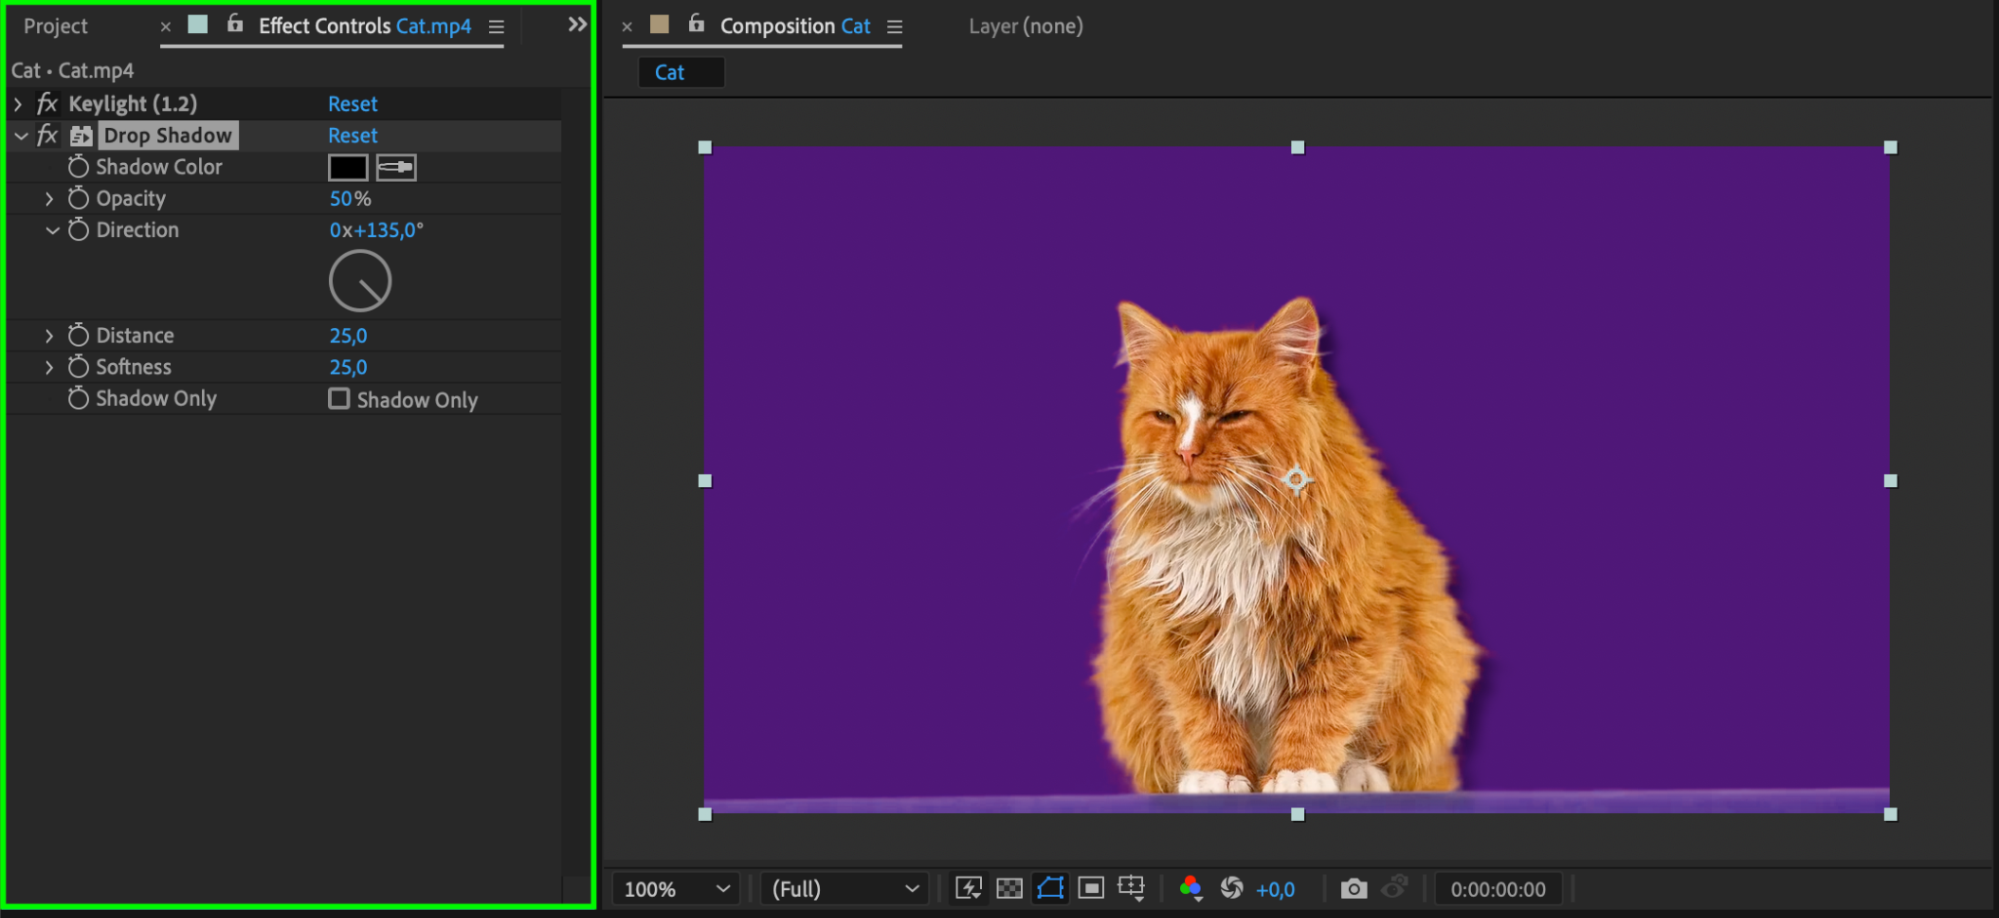
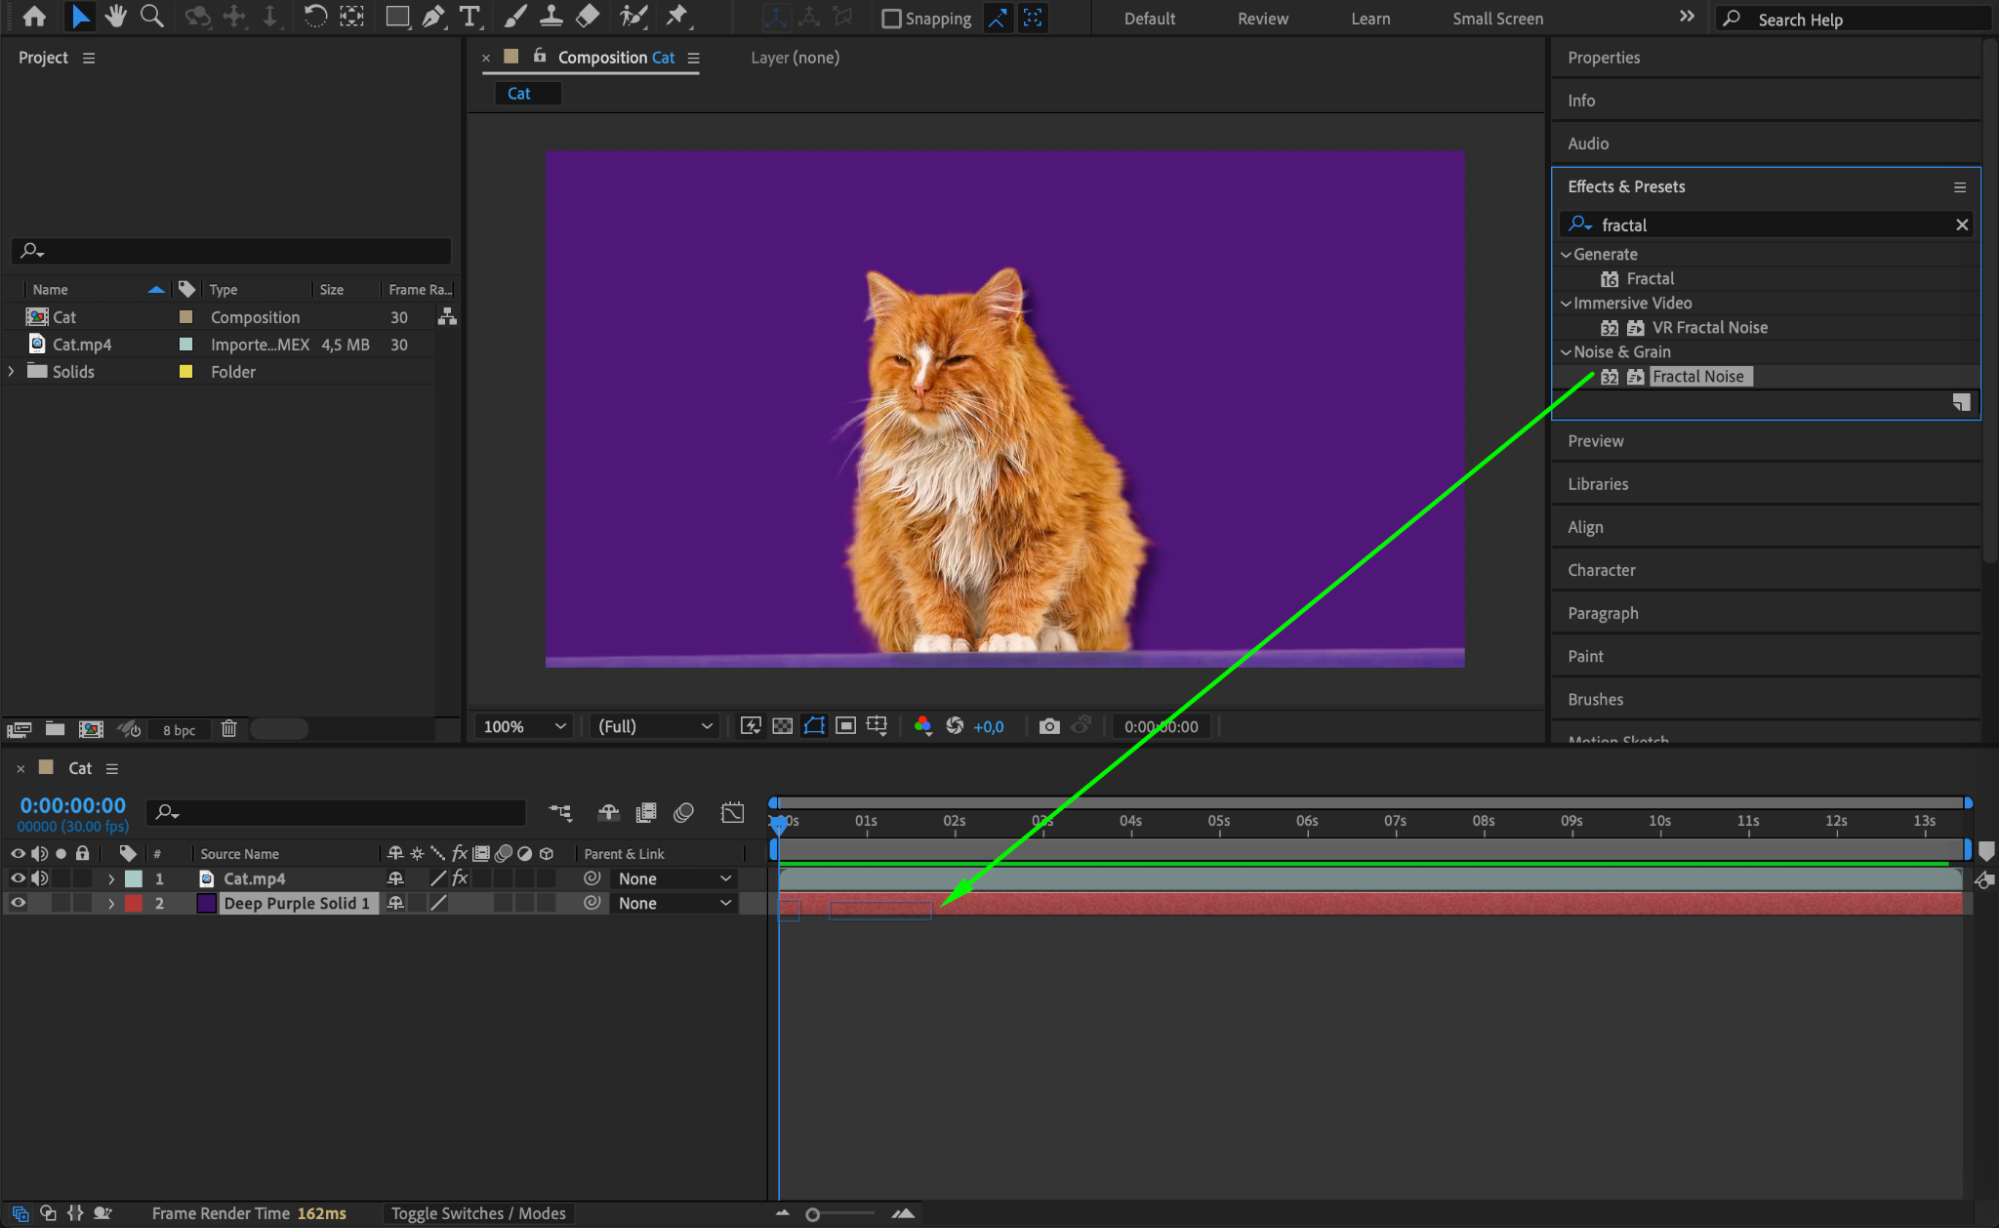
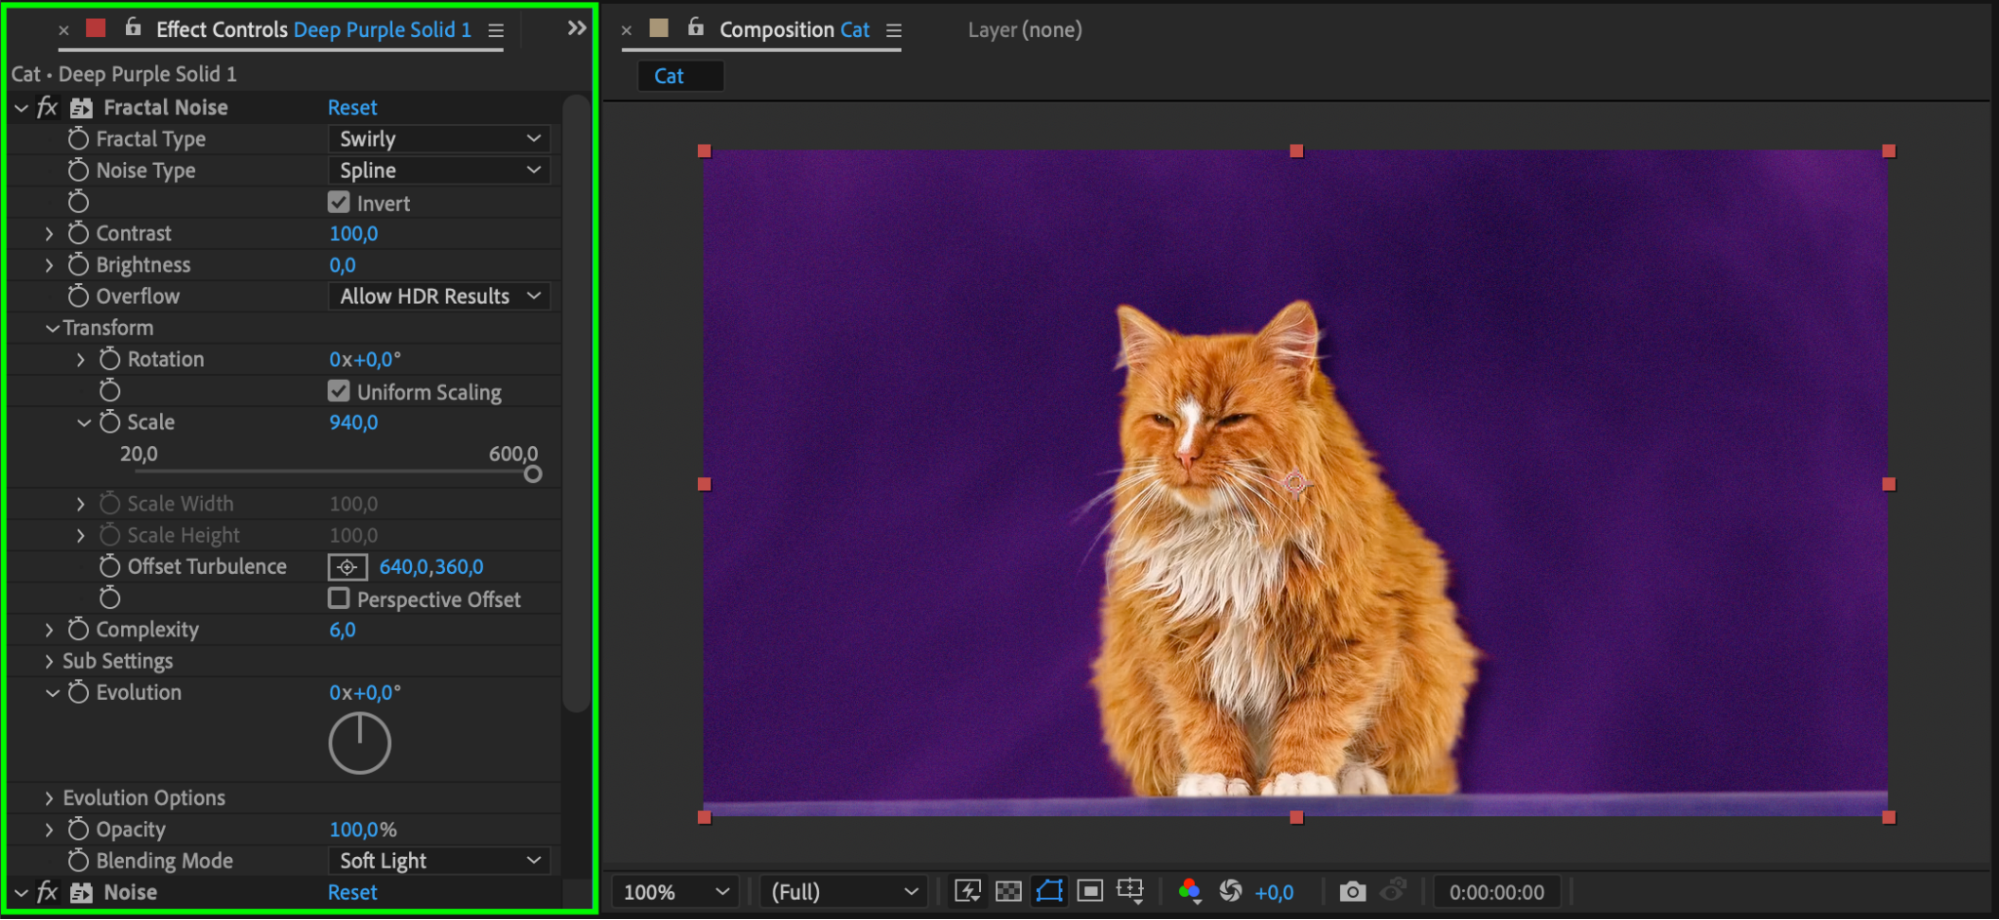
To make your new background more dynamic, use the Effects & Presets panel to add textures, color corrections, or other visual effects. Apply these effects to your solid layer or imported background to create a more immersive and visually appealing environment. Experiment with different effects to find the right look for your project, and don’t be afraid to layer multiple effects for added depth and complexity.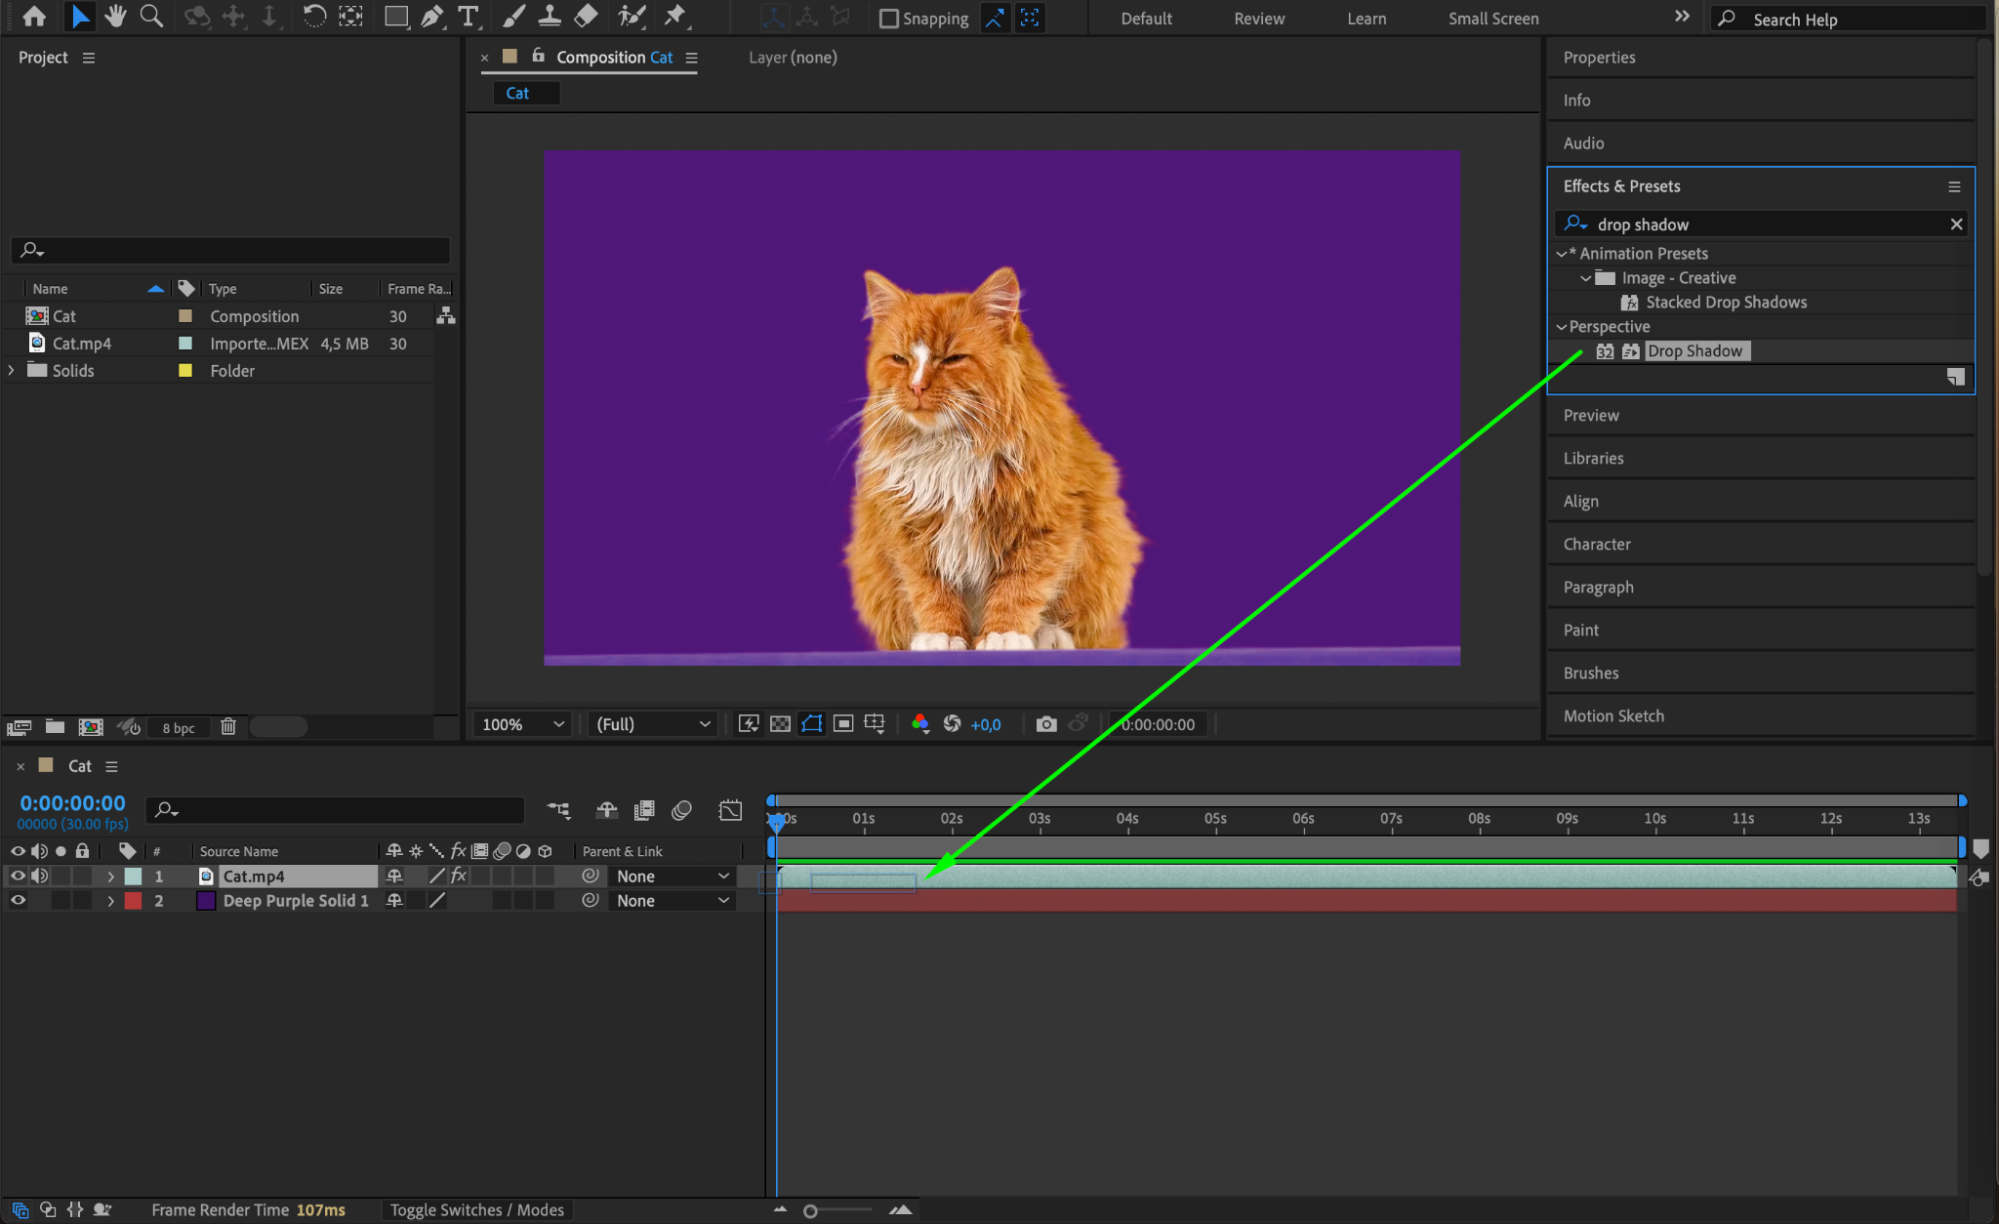
 Step 6: Preview Your Composition
Before finalizing your project, preview the composition to ensure that all elements are working together seamlessly. Pay attention to the interaction between your subject and the new background, making any final adjustments as needed. 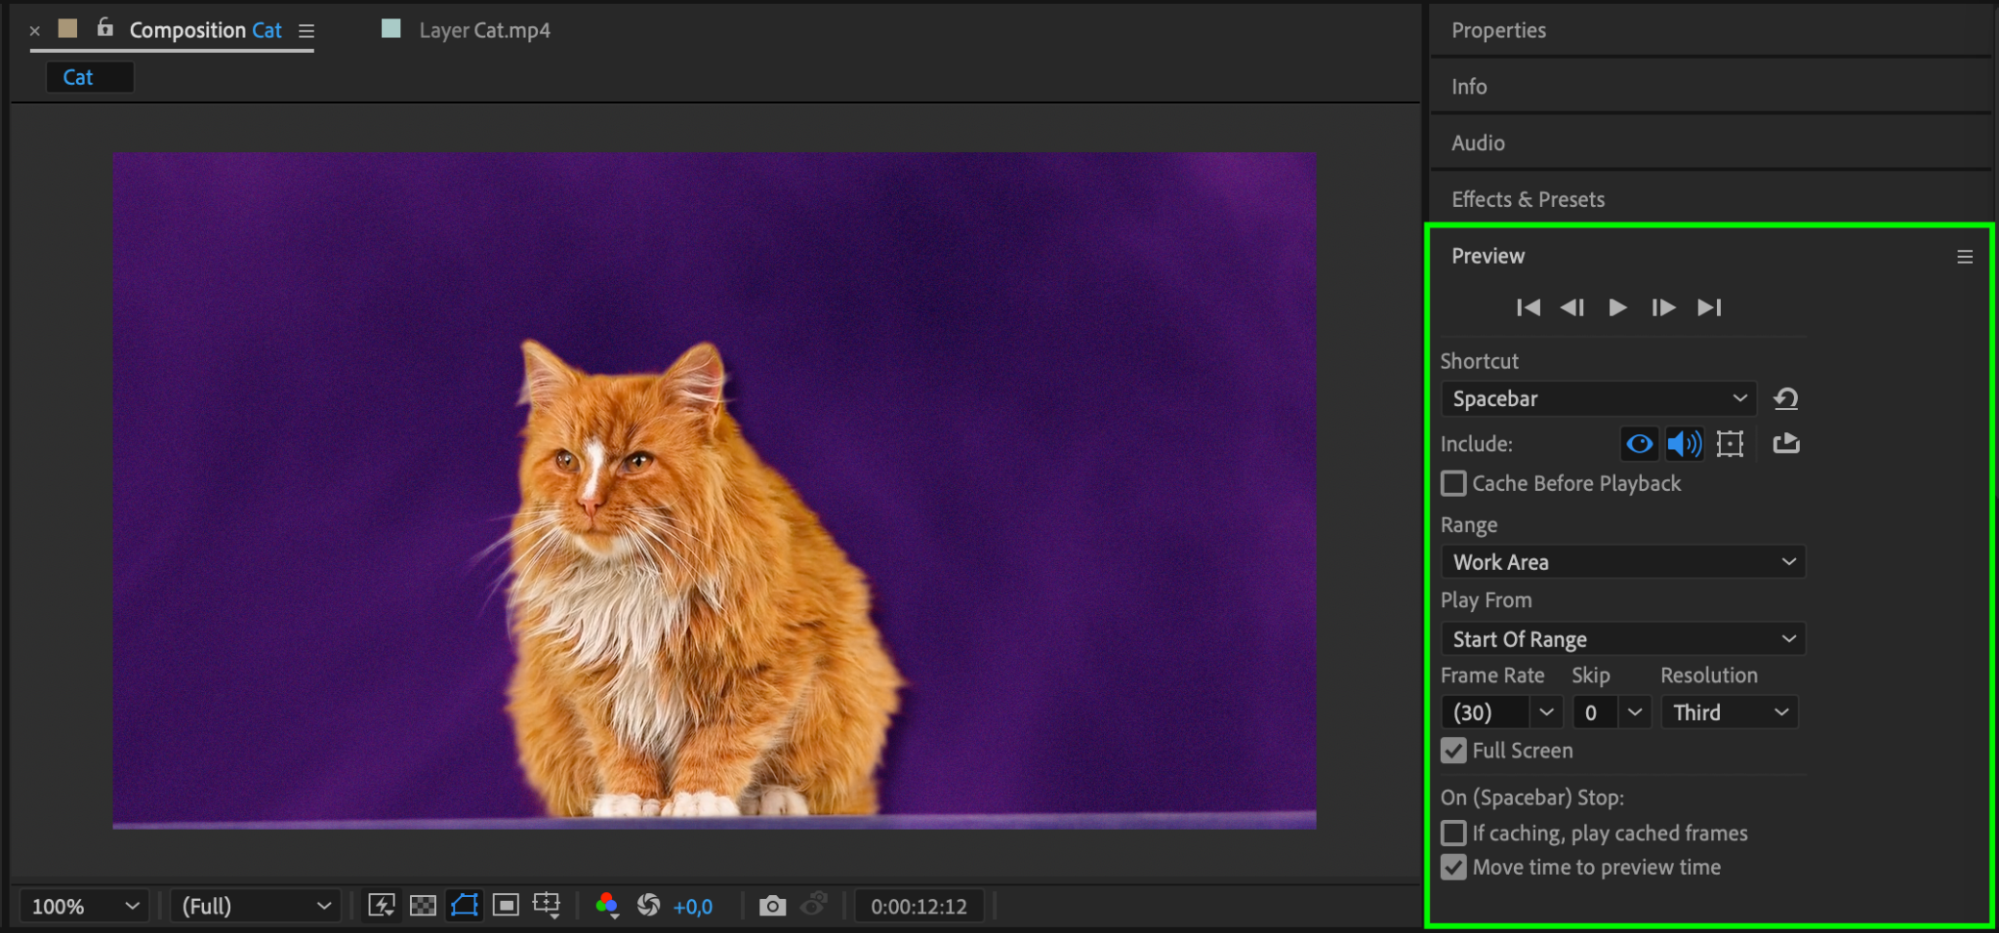
Conclusion
Mastering green screen techniques in After Effects takes practice and patience, but with the right tools and knowledge, you can create stunning visual effects that captivate your audience. Don’t be discouraged if your first attempts aren’t perfect; keep experimenting with different settings and learning from your mistakes. With time and dedication, you’ll be able to produce professional-quality green screen effects that enhance your videos and elevate your storytelling. So, get ready to unlock the full potential of green screen in After Effects and let your creativity shine! Happy keying!


