Mastering Keyframes in After Effects: A Step-by-Step Guide
Introduction
Have you ever wanted to create smooth and dynamic animations in Adobe After Effects? The secret lies in mastering the art of keyframing. Keyframes are the building blocks of animation, allowing you to control the properties of an object or layer over time.
In this blog post, we’re going to demystify the process of making keyframes in After Effects and give you the essential knowledge to create captivating motion graphics and visual effects. Whether you’re just starting out or have some experience, this guide will walk you through the fundamentals of setting and manipulating keyframes.
So, get ready to dive into the world of keyframing in After Effects and unlock the potential to bring your designs to life!
Step-by-Step Guide: Making Keyframes in After Effects
Step 1: Understanding Keyframes
Keyframes are specific points in time where the properties of a layer or object change. By manipulating these keyframes, you can create smooth animations and dynamic effects. Keyframes give you precise control over your motion graphics.
Step 2: Access Layer Properties
Expand the properties of your layer by clicking the arrow next to the layer name. In the “Transform” section, you’ll find parameters such as Anchor Point, Position, Scale, Rotation, and Opacity. These parameters have values that can be changed to alter the appearance of your composition.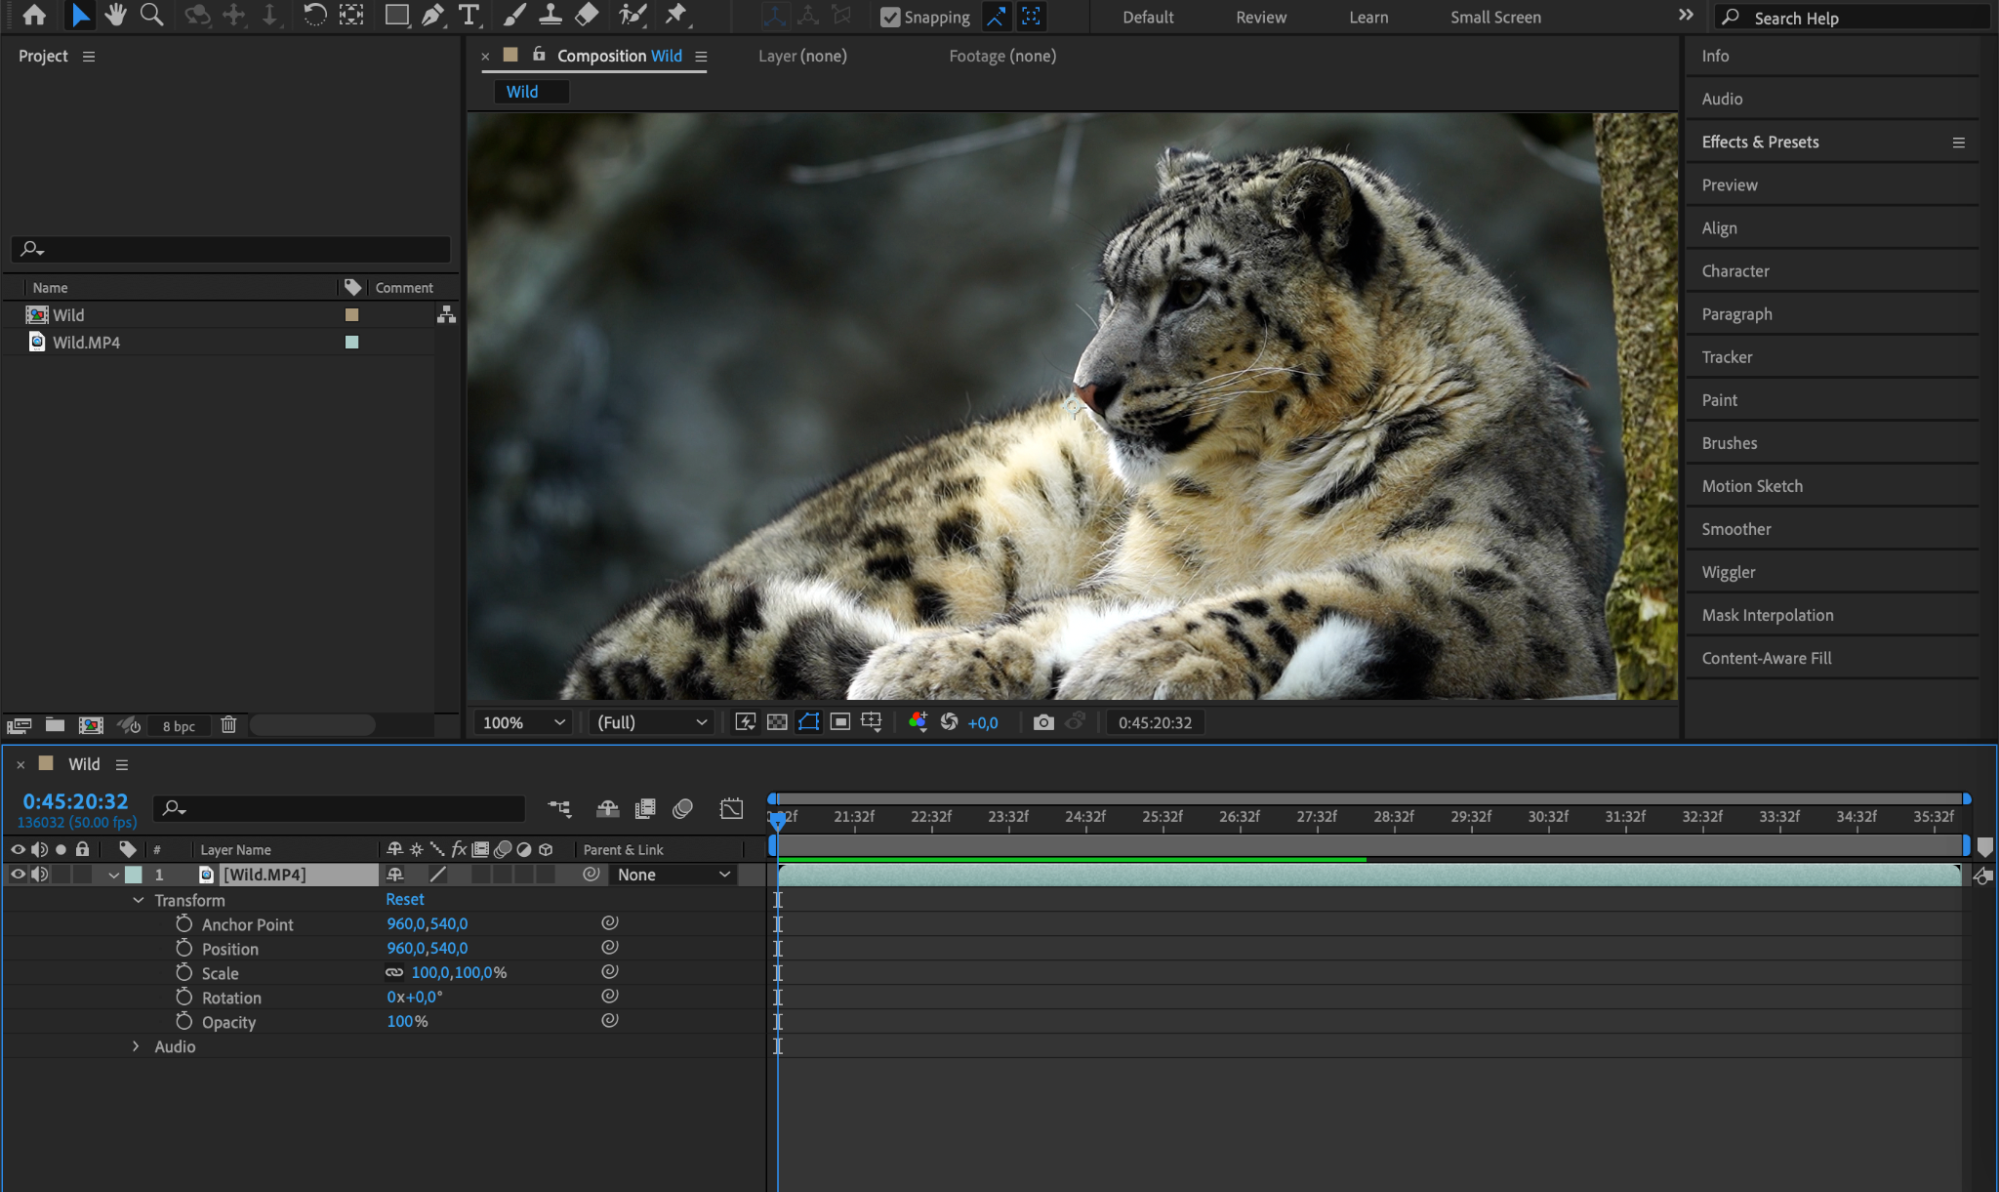 Step 3: Set the Initial Keyframe
Place the Current Time Indicator (CTI) at the point where you want your animation to start. Click the stopwatch icon next to the parameter you want to animate to set the first keyframe. This action marks the starting point of your animation.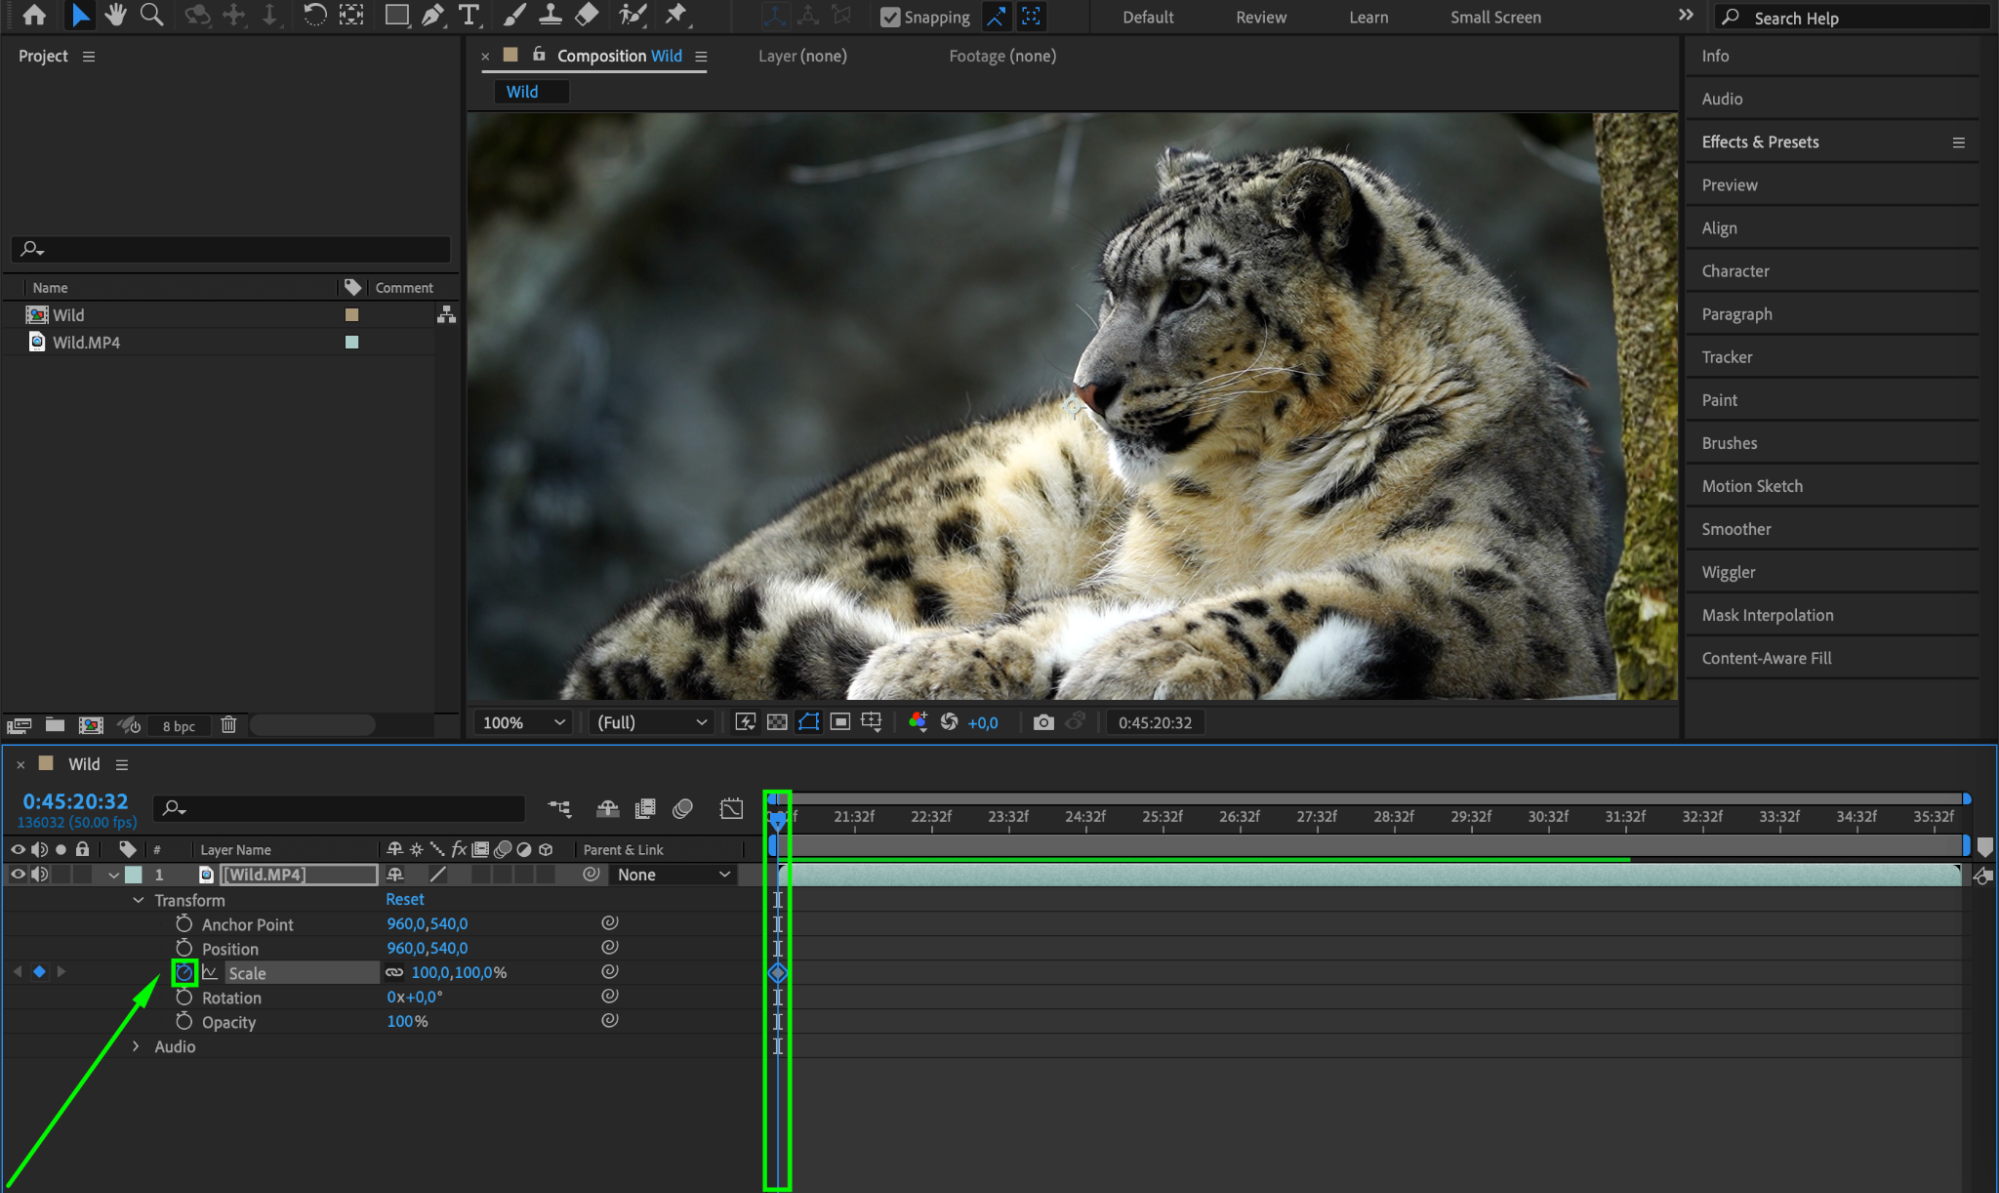 Step 4: Create a Second Keyframe
Move the CTI to a new position in the timeline where you want the animation to end or change. Adjust the value of the parameter, and After Effects will automatically create a second keyframe. This keyframe represents the end point of the animation.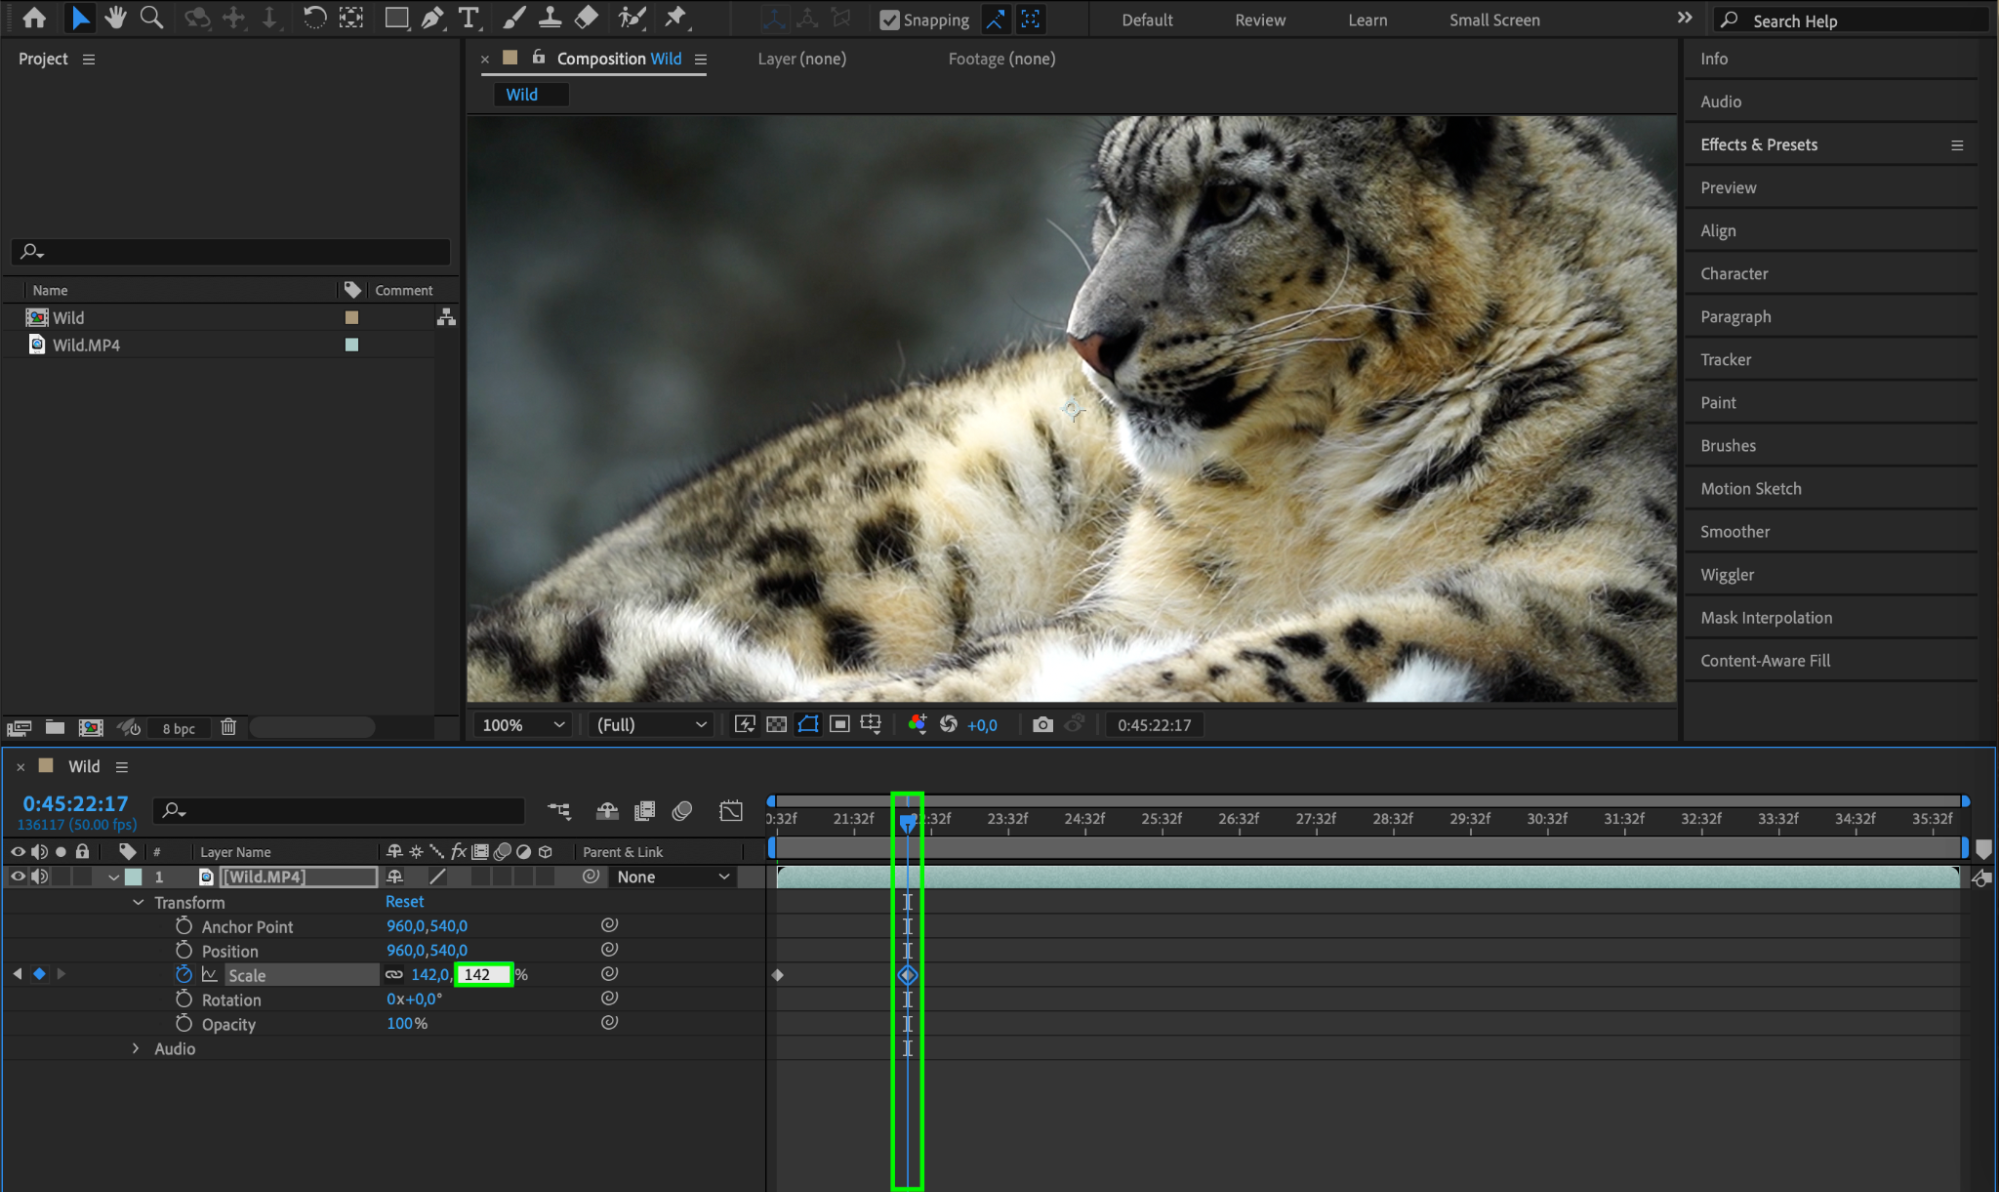 Step 5: Fine-Tune with the Graph Editor
Use the Graph Editor to add smoothness and realism to your animation. By selecting the keyframes and applying Easy Ease, you can create more natural motion. The Graph Editor allows you to edit the speed and interpolation of your keyframes, giving you greater control over the animation curves.


 Step 6: Utilize Expressions
For advanced animations, you can use expressions to control the parameters in the “Transform” section. Expressions allow you to create complex animations and automate repetitive tasks, adding a new level of sophistication to your animations.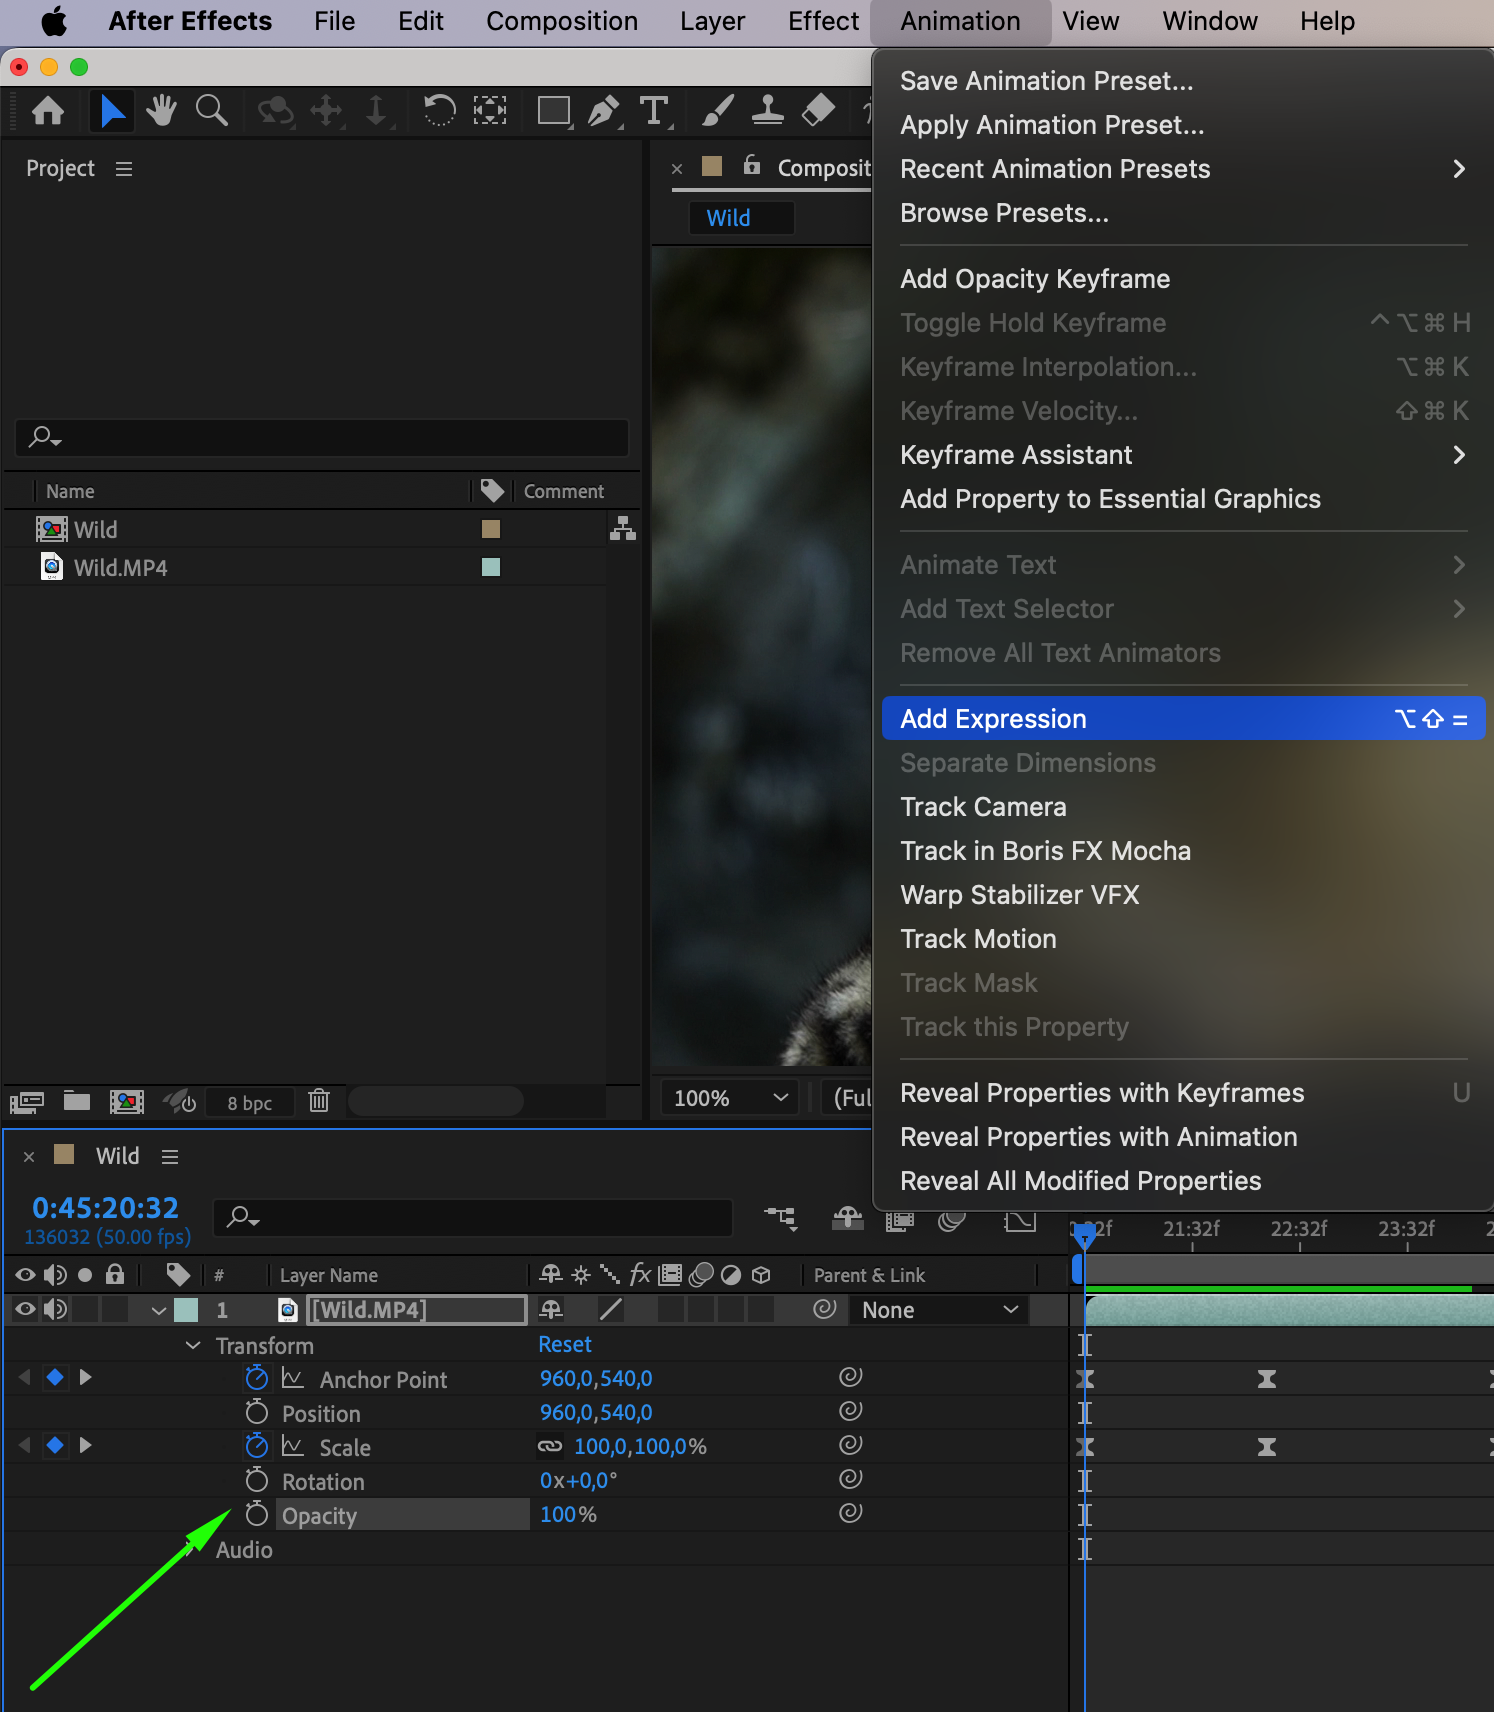
 Step 7: Apply Animation Presets
You can also use animation presets that come with built-in keyframes. Drag and drop presets from the Effects & Presets panel onto your layer. Adjust the keyframes to customize the animation and achieve the desired look.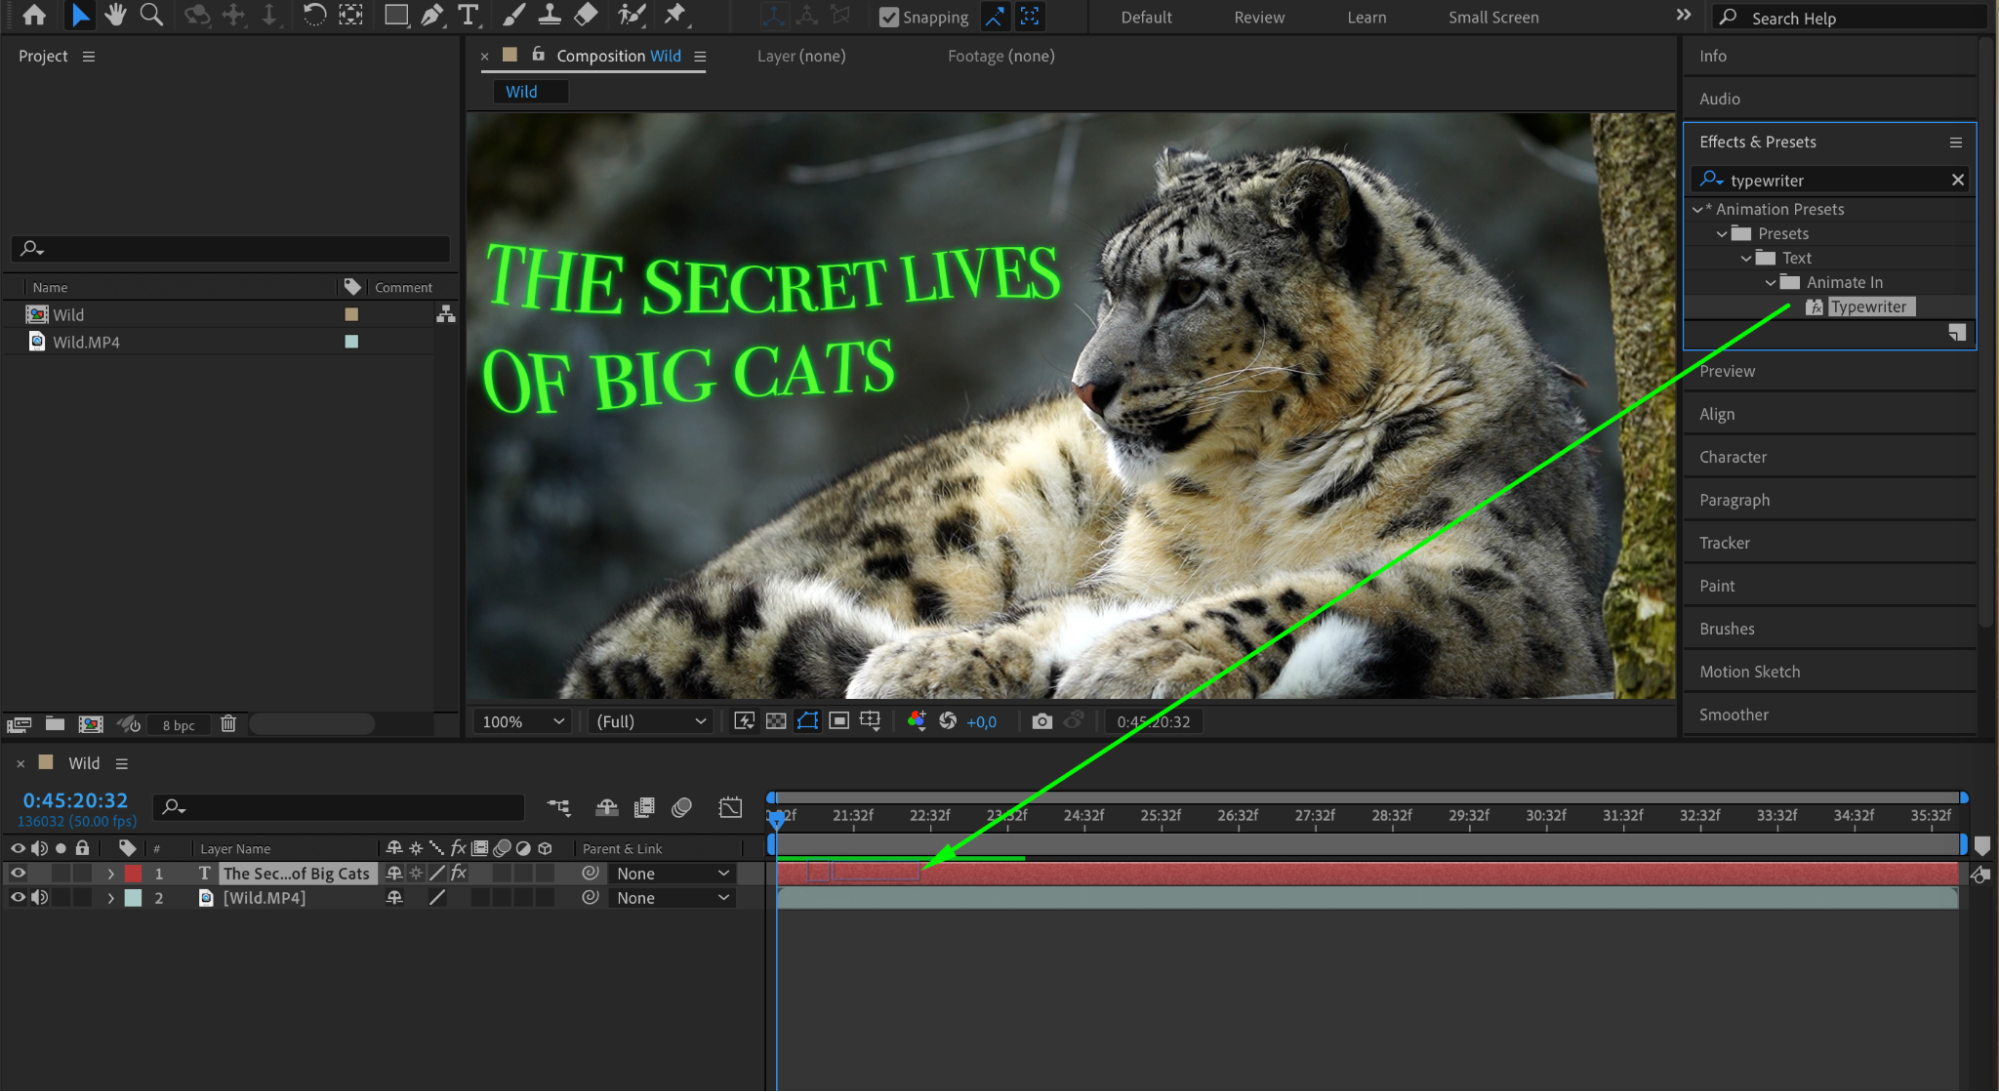
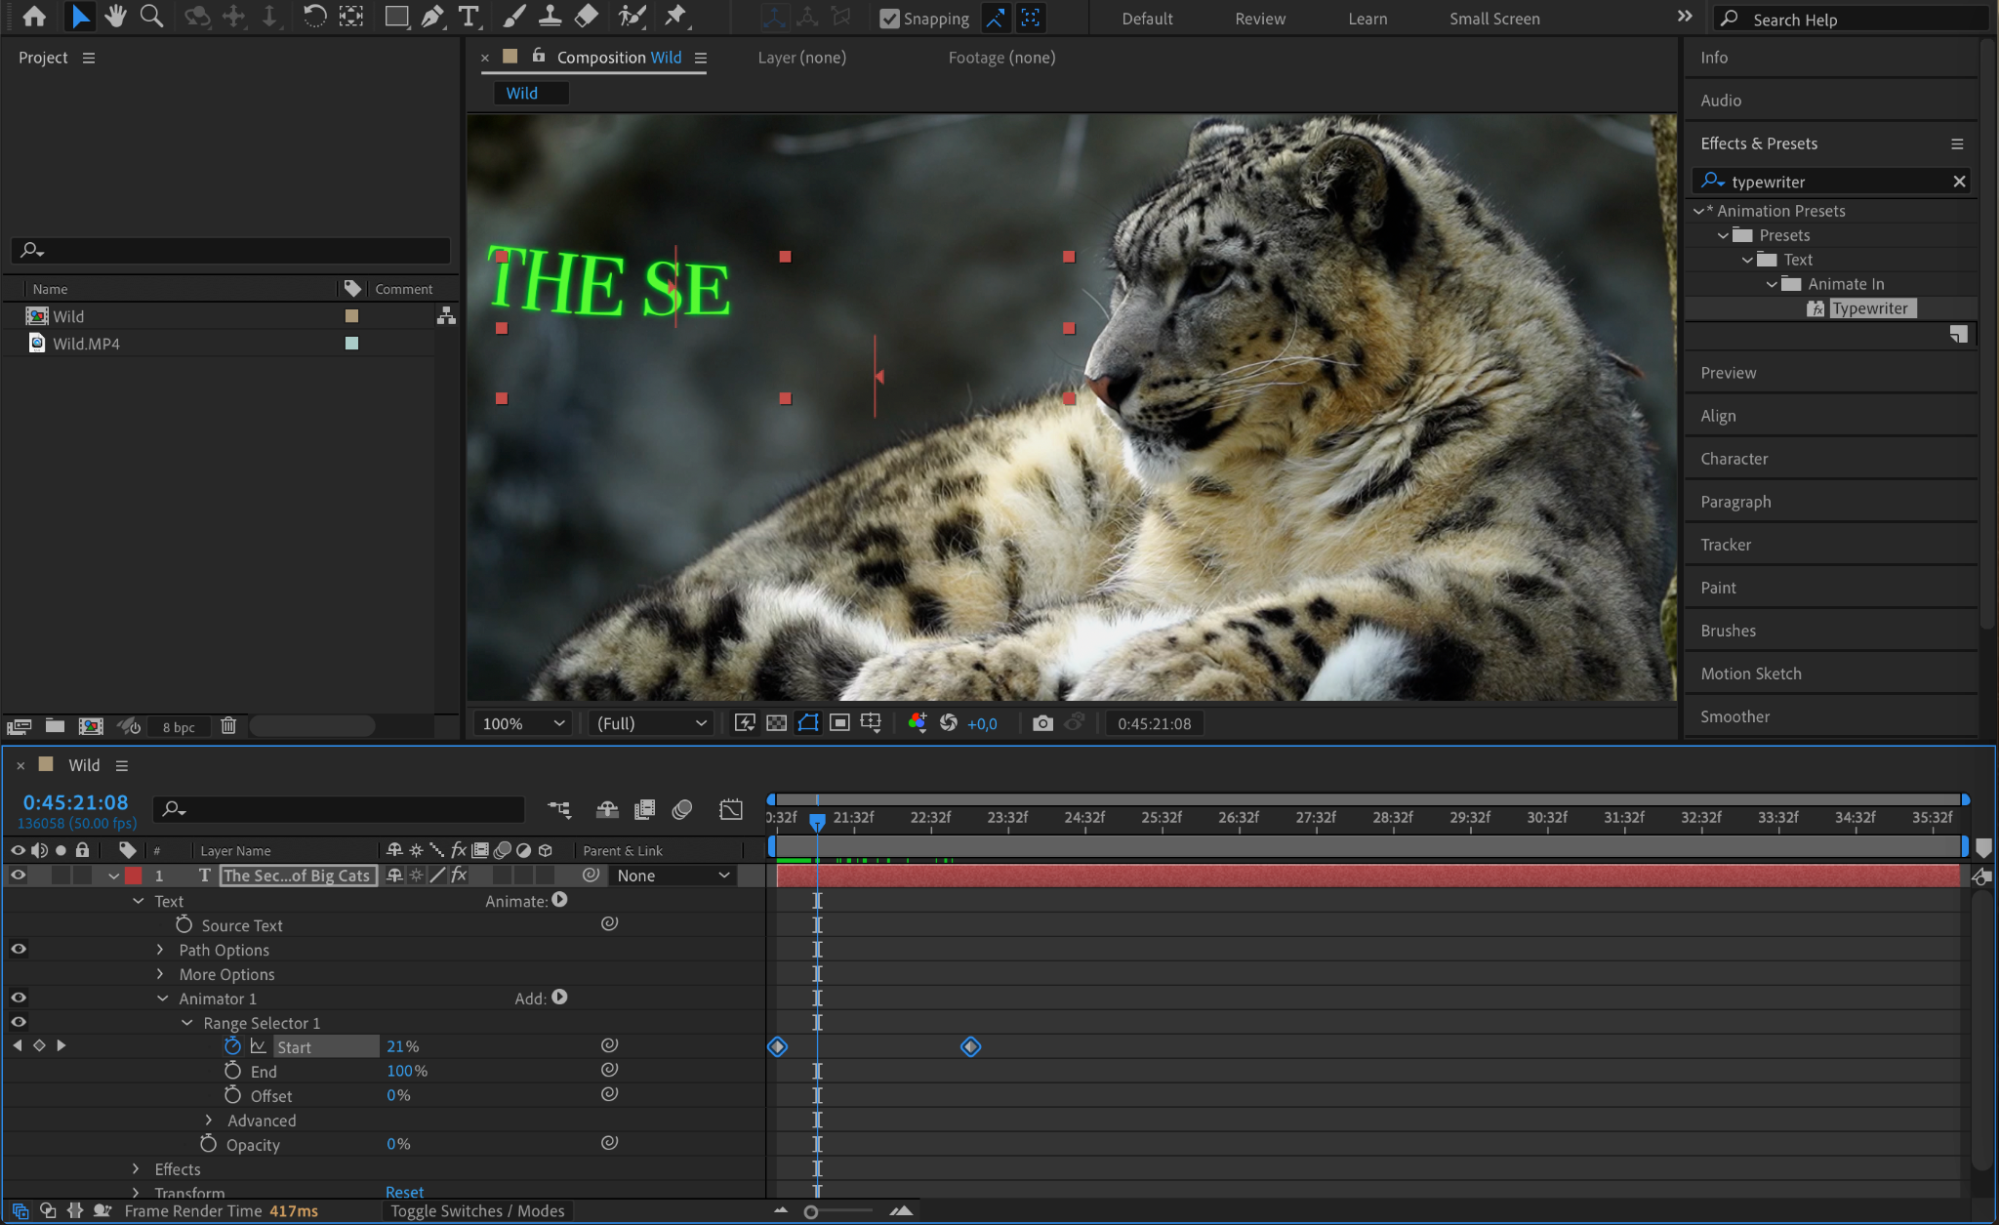 Step 8: Preview Your Animation
Use the Preview panel to see how your animation looks in real-time. Make any necessary adjustments to the keyframes, timing, or easing to ensure a smooth and polished final animation. Step 9: Render Your Composition
Once satisfied with your animation, render the composition by going to Composition > Add to Render Queue. Choose your output settings, select the desired format, and click “Render” to export your animation.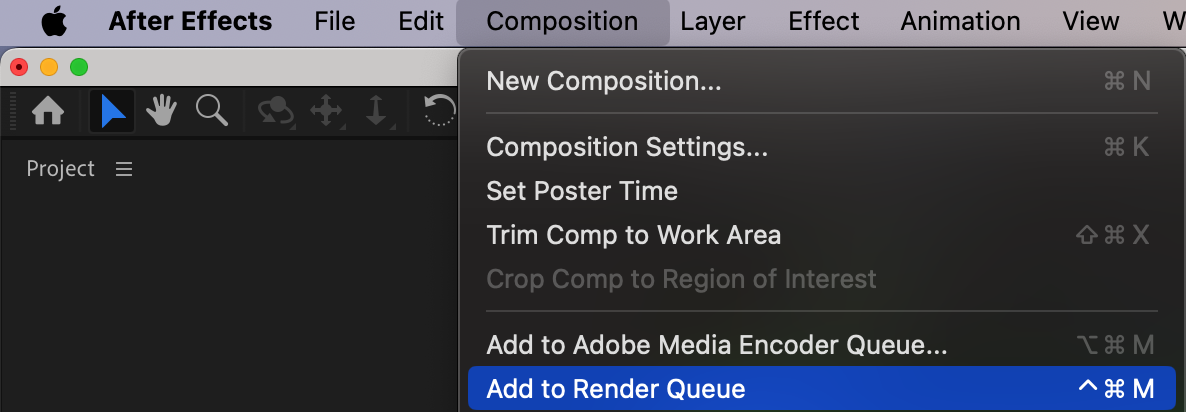
 Conclusion
Whether you’re a beginner just starting to explore animation or an experienced designer looking to enhance your skills, this guide covers you. By following these steps, you can create captivating animations using keyframes in After Effects. So, if you’re ready to unleash your creativity and take your motion design to the next level, dive in and discover the power of keyframes in After Effects!

