Mastering Lightning Animation in After Effects
Step-by-Step Guide
Embark on a captivating journey into the realm of creating realistic lightning effects in After Effects. Unleash your creativity as you discover the power of visual effects to add a touch of electricity to your motion graphics or bring thunderous storms to life on screen. This step-by-step guide will take you through the intricacies of crafting stunning lightning animations, allowing your imagination to spark with the magic of Adobe After Effects. Join us on this electrifying adventure and elevate your video projects to new, visually dynamic heights.
Step 1: Composition Setup
Create a new composition with black as the background color.
Adjust composition settings.


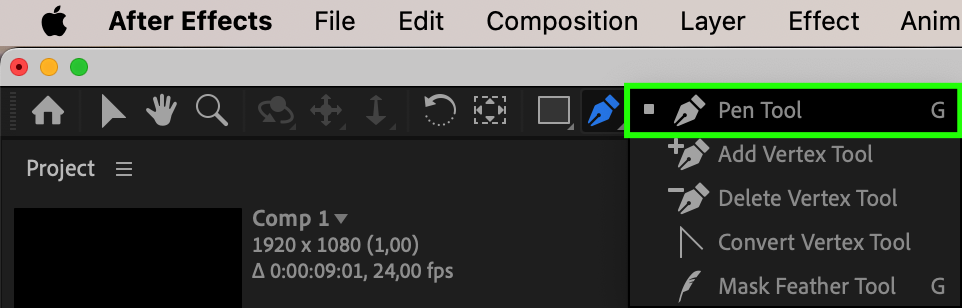
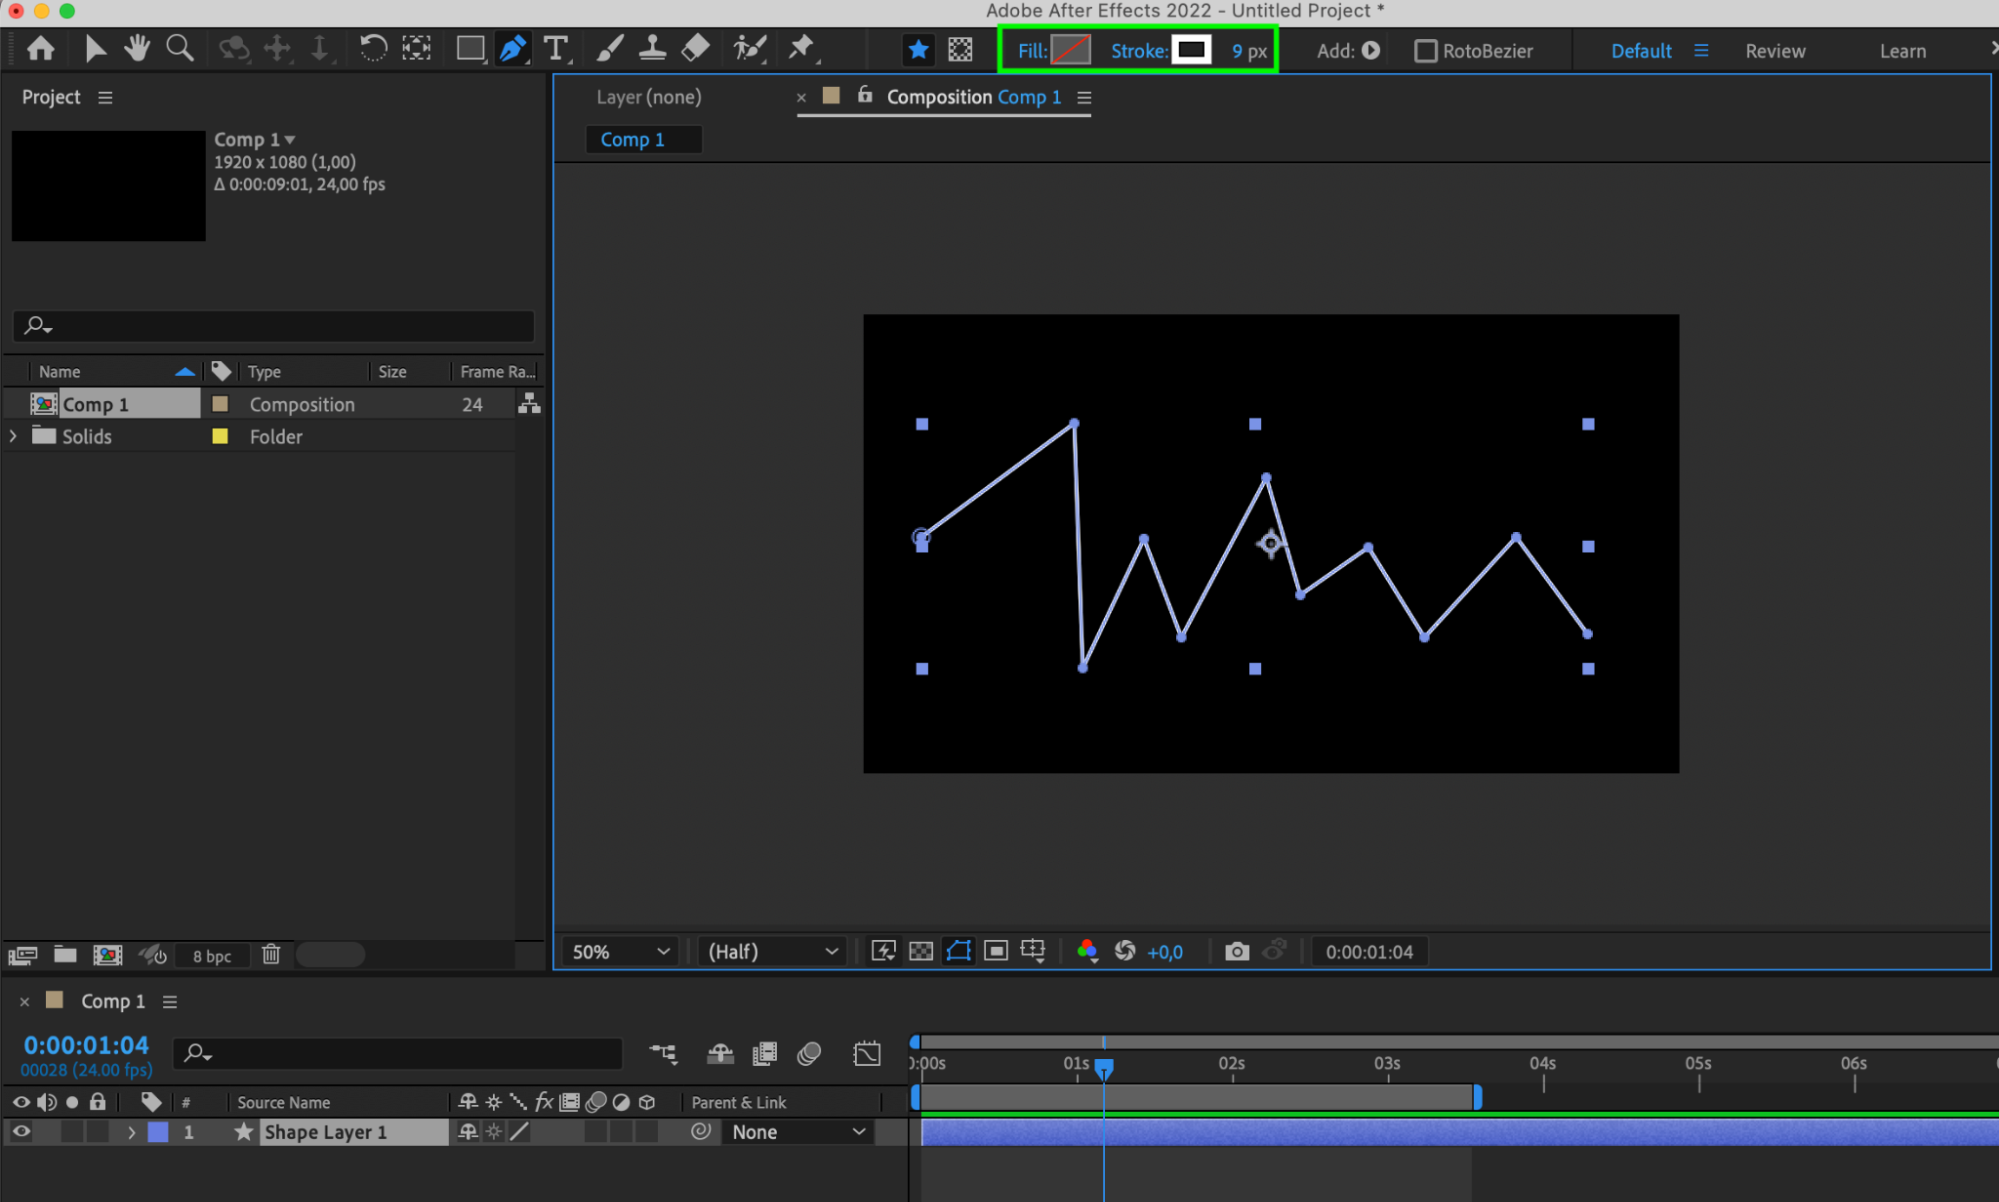
Step 2: Create Lightning Path
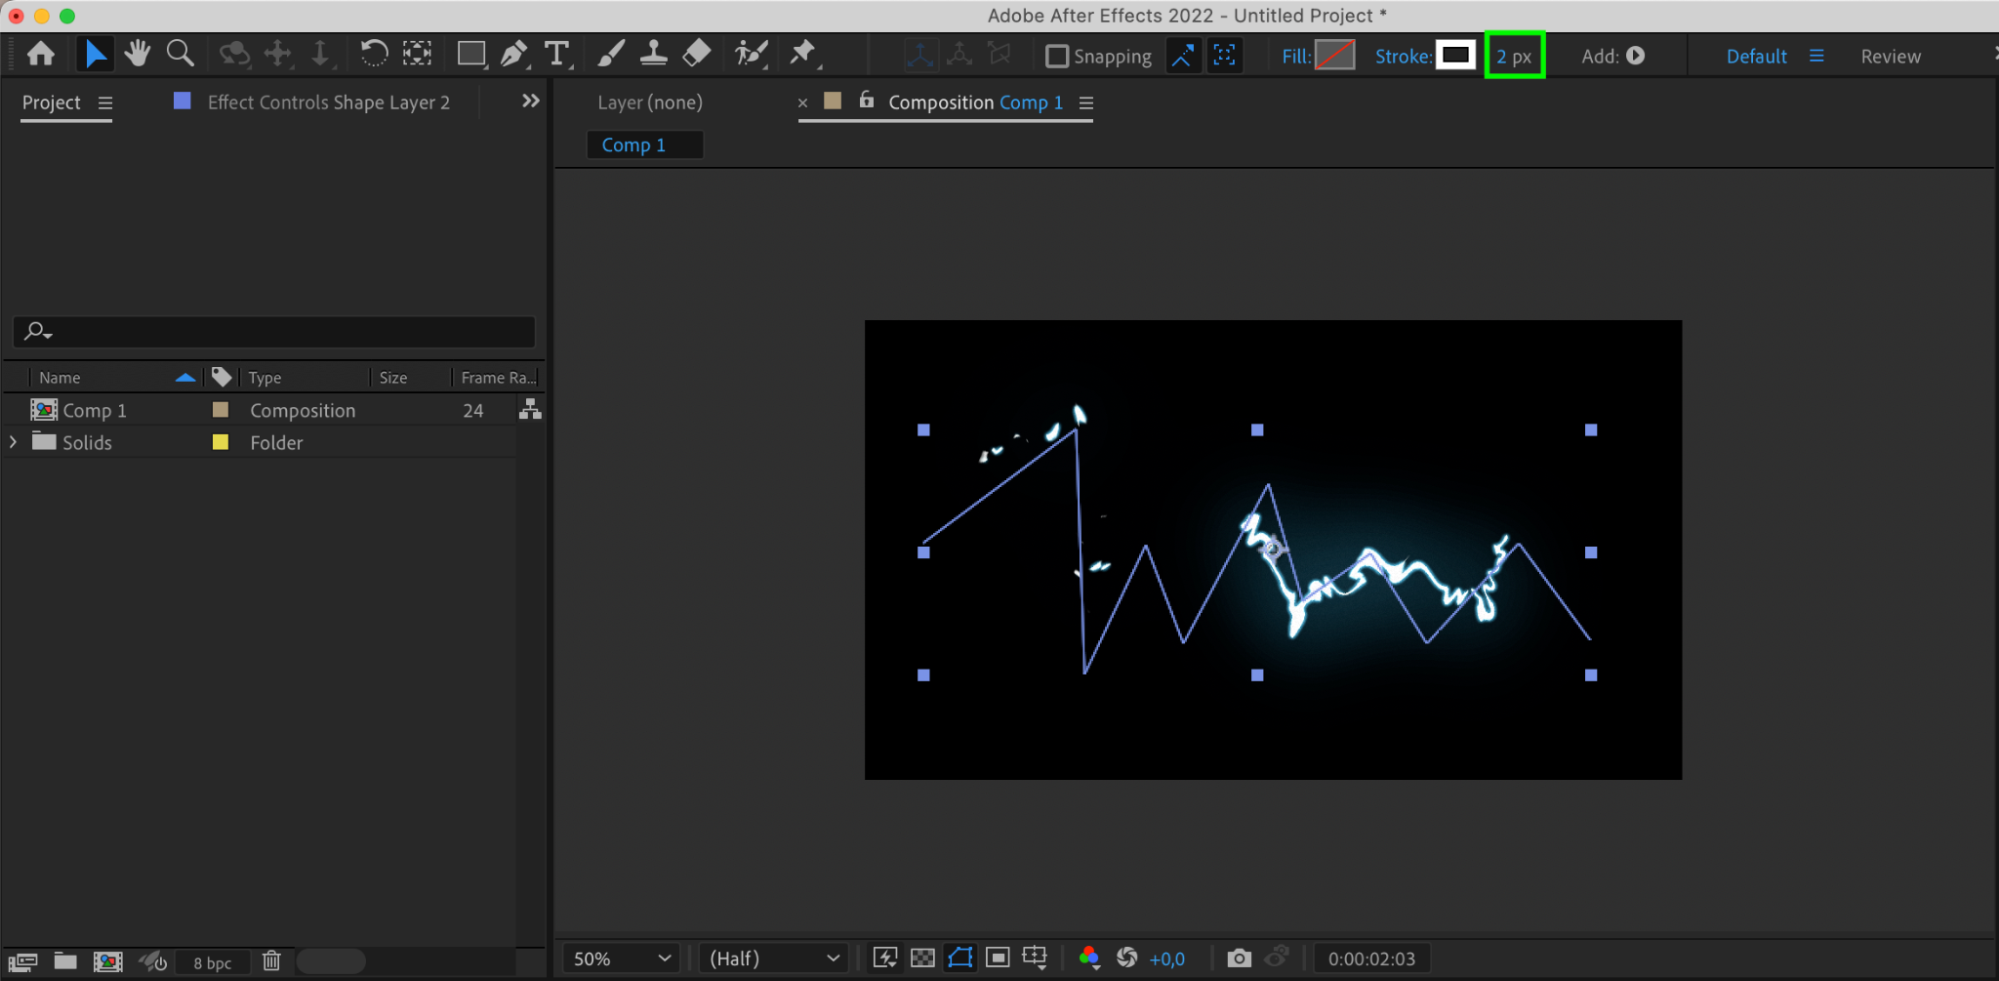
Use the Pen Tool (G) to create a path with white stroke, 9 px.
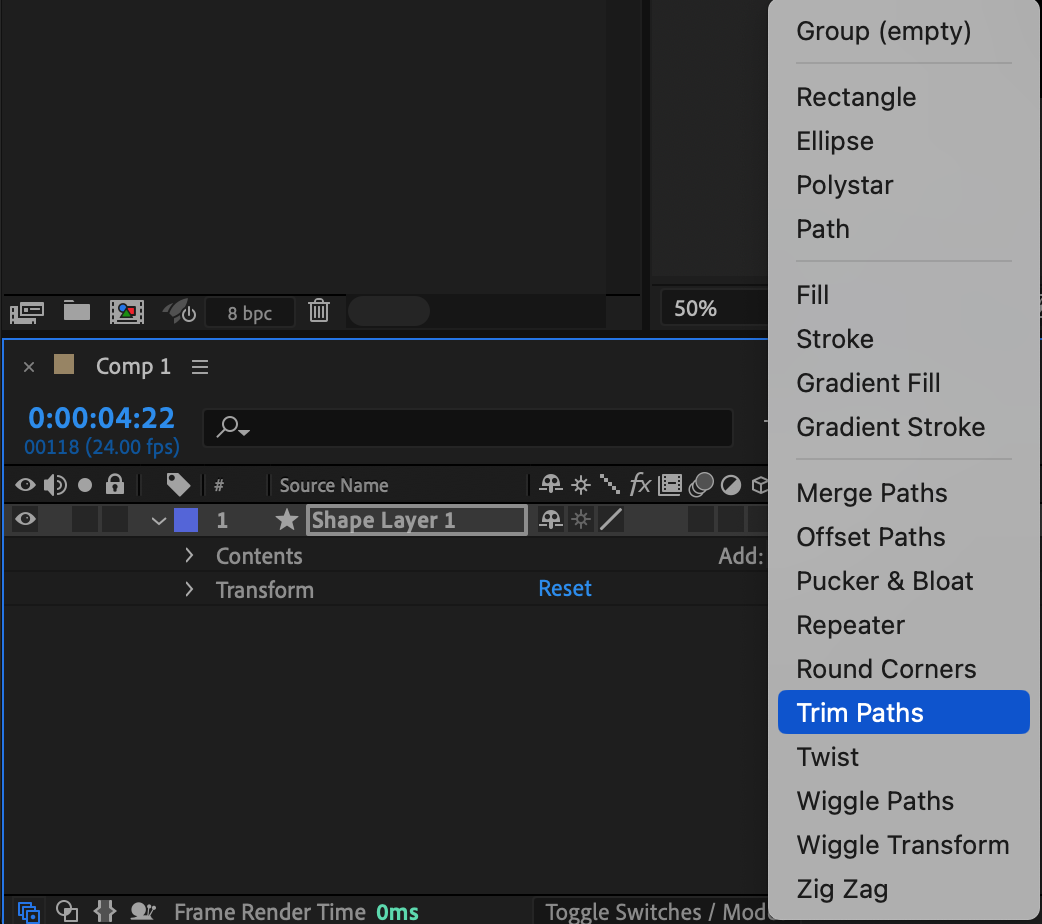
Step 3: Trim Paths Animation
Get 10% off when you subscribe to our newsletter

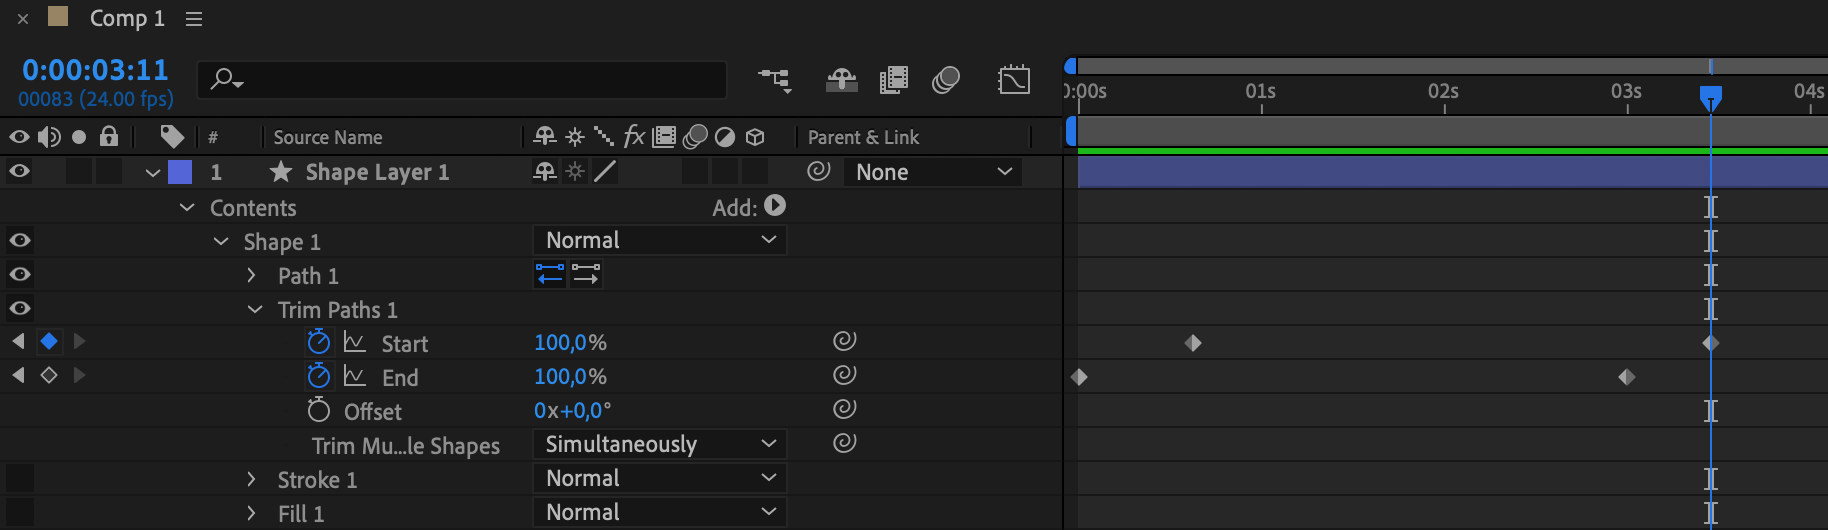
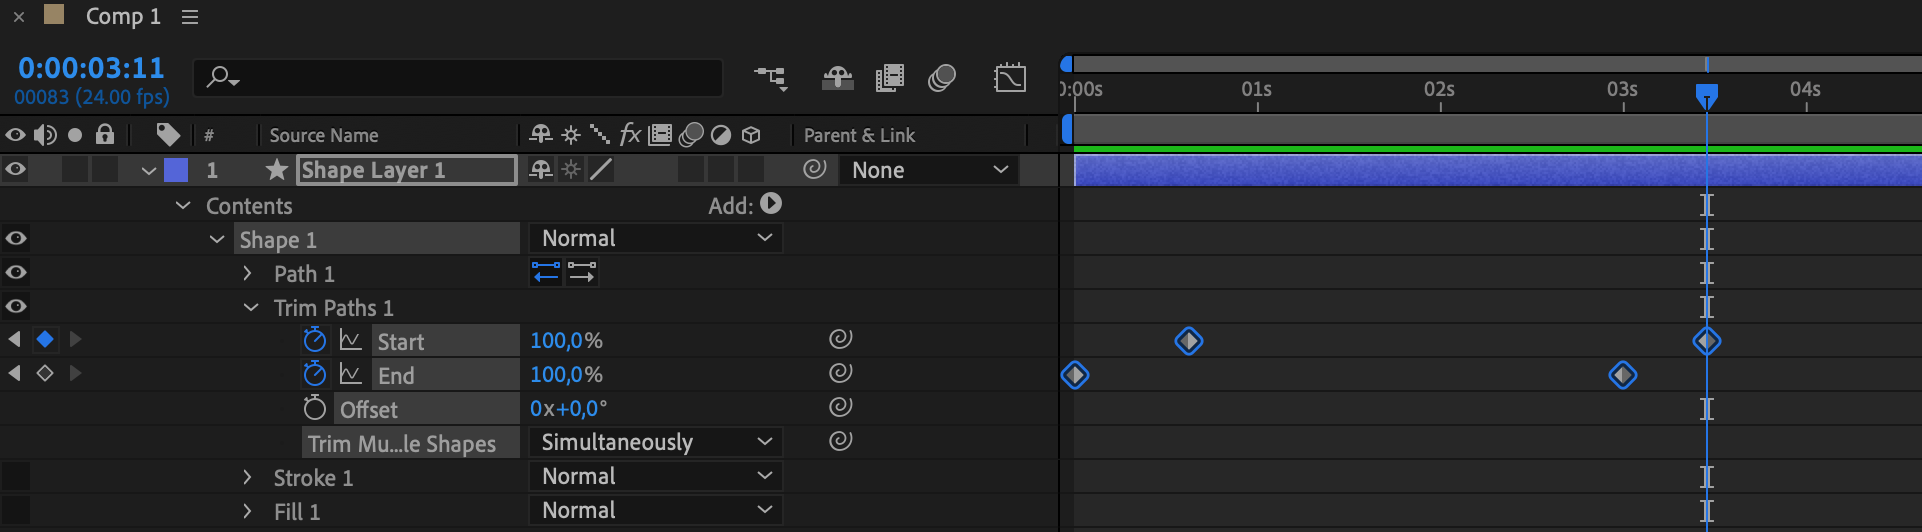
Open layer properties and add Trim Paths from the Add menu.
Set keyframes for end (0 at start, 100 in the middle) and start (0 after the first keyframe, 100 after the second).
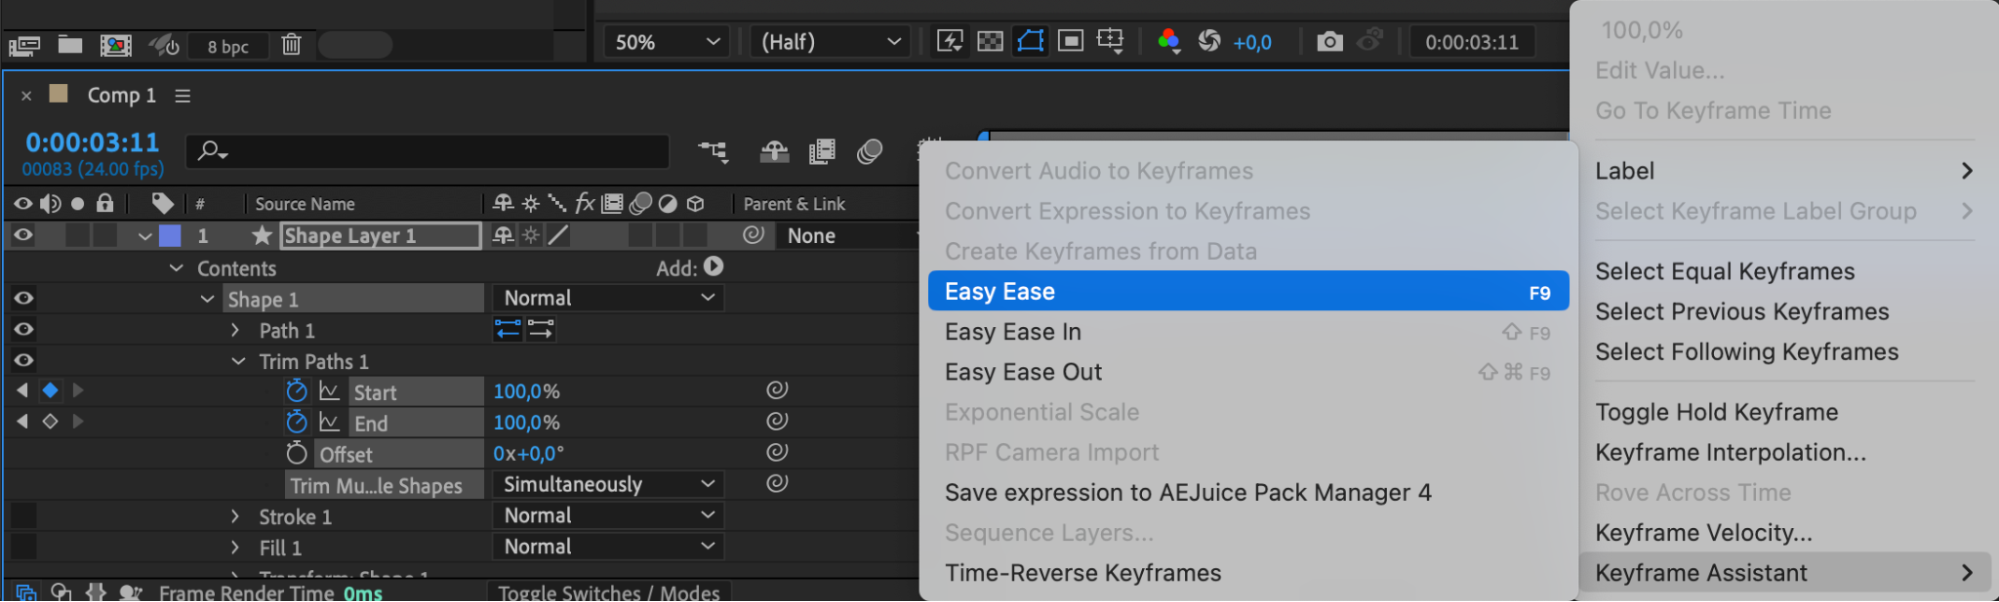
Select all keyframes, right-click, go to Keyframe Assistant > Easy Ease.
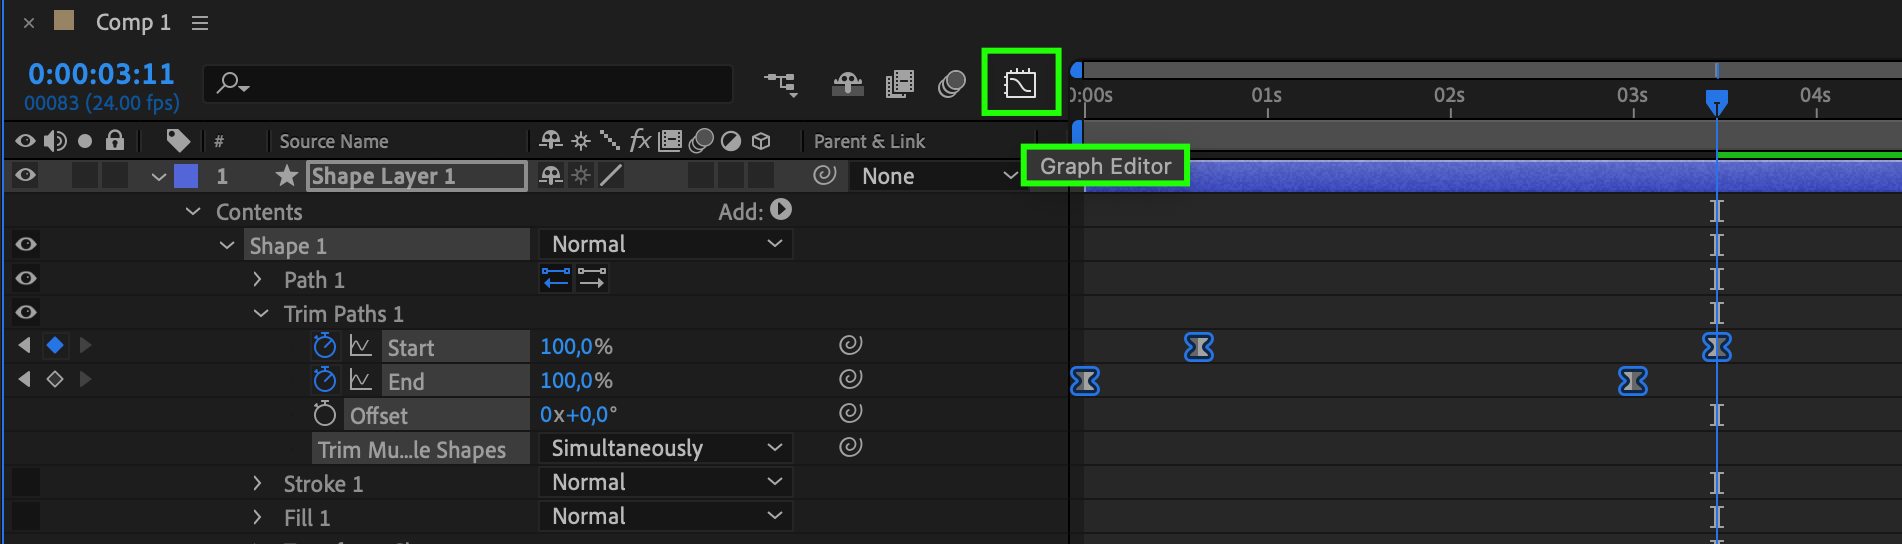
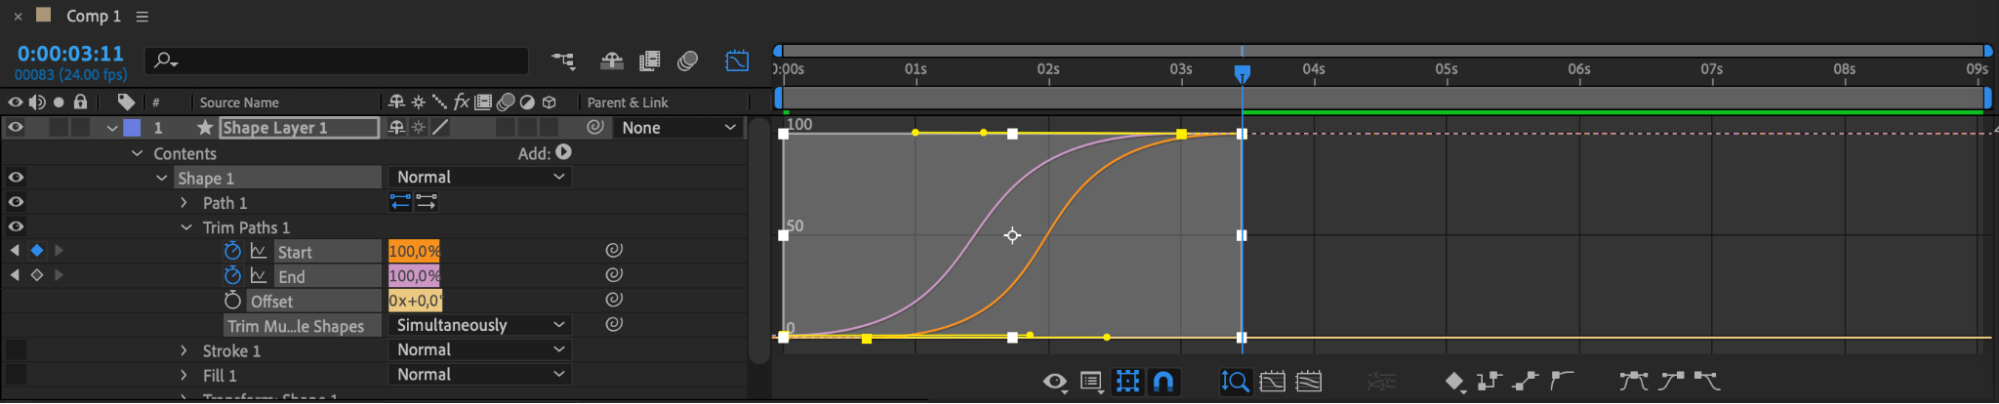
Step 4: Refine Animation in Graph Editor
Open the Graph Editor, select all keyframes, and smooth the animation curves.
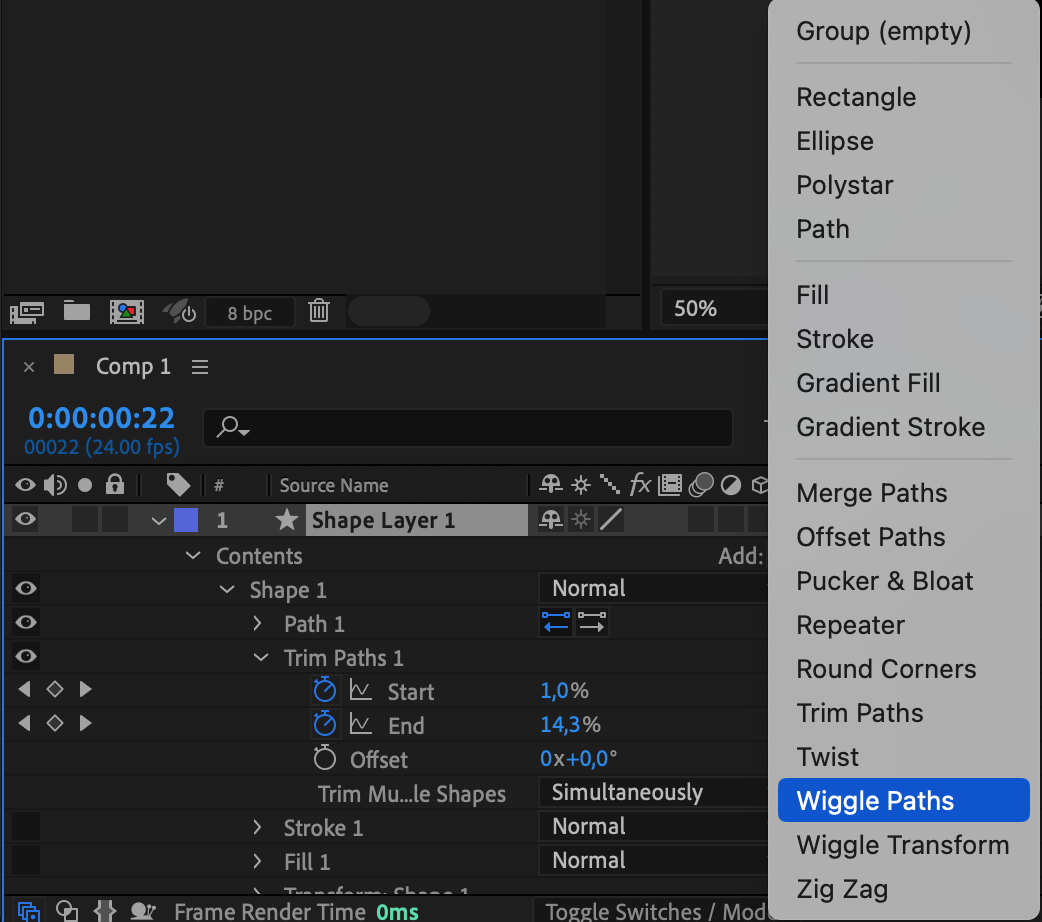
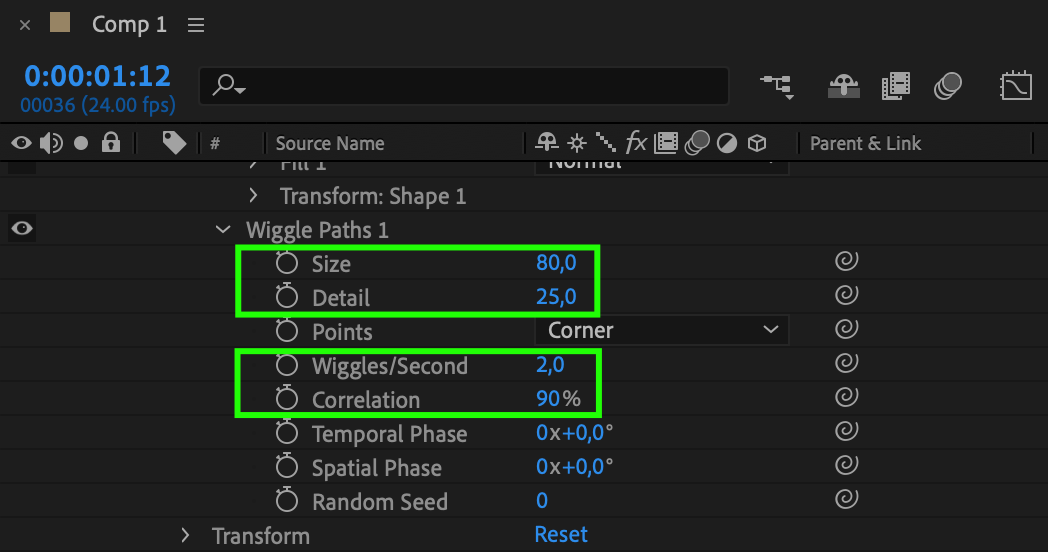
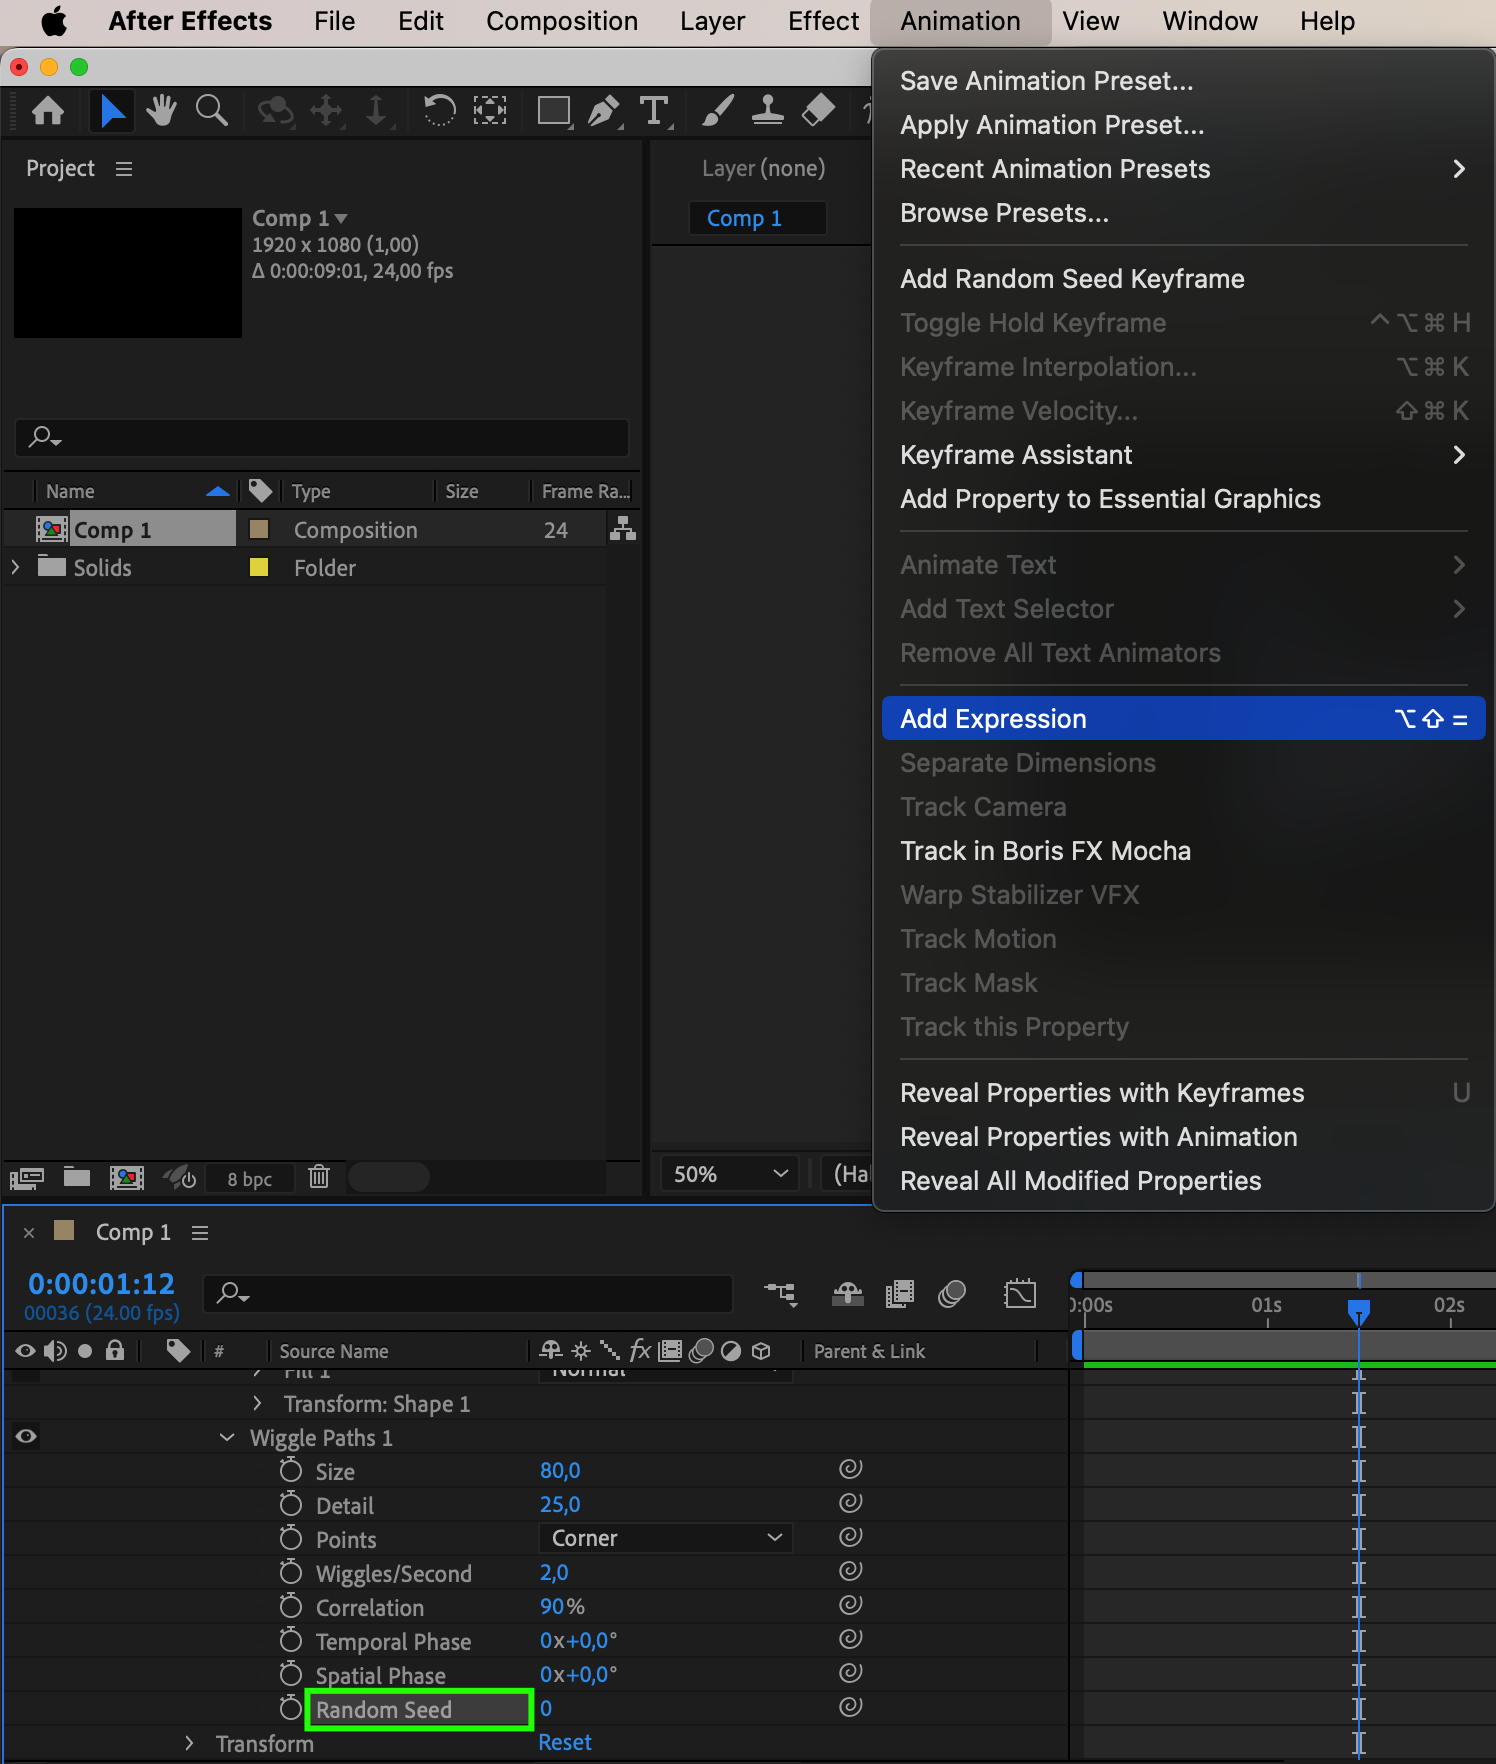
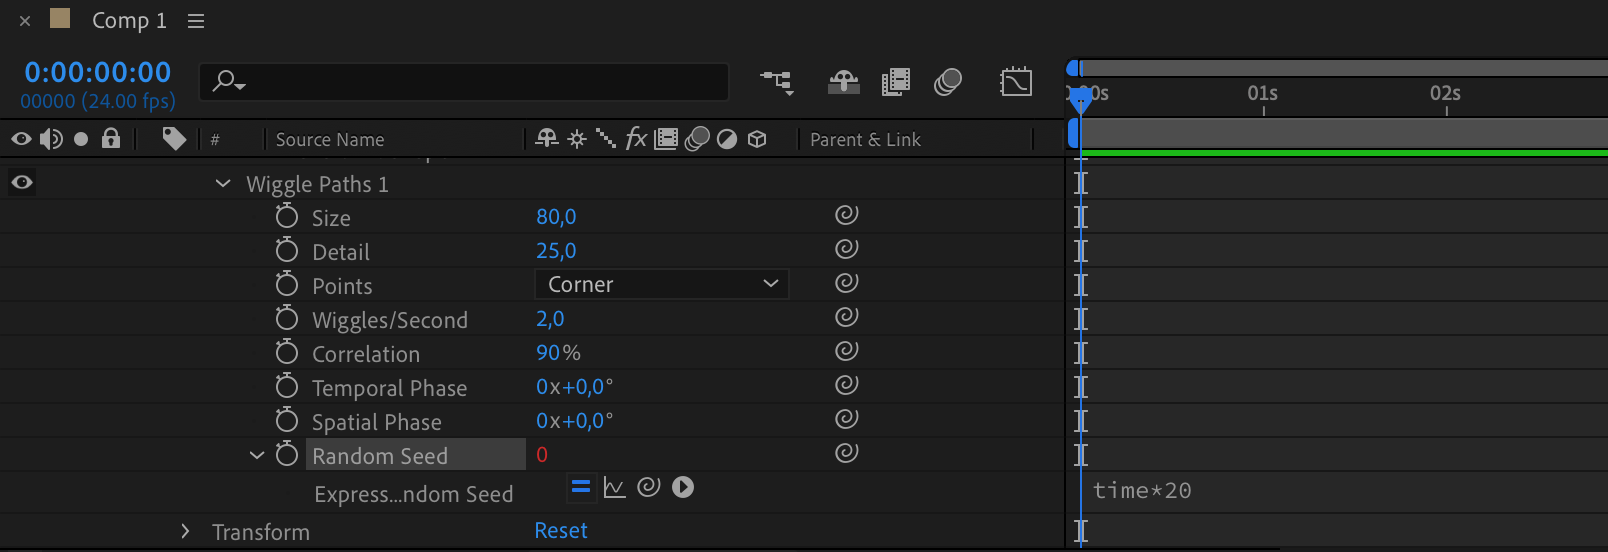
Step 5: Add Wiggle Paths
Use the Add button to create Wiggle Paths.
Adjust parameters like size, detail, wiggle per second, correlation.
Add expression to random seed: time*20.
Get 10% off when you subscribe to our newsletter
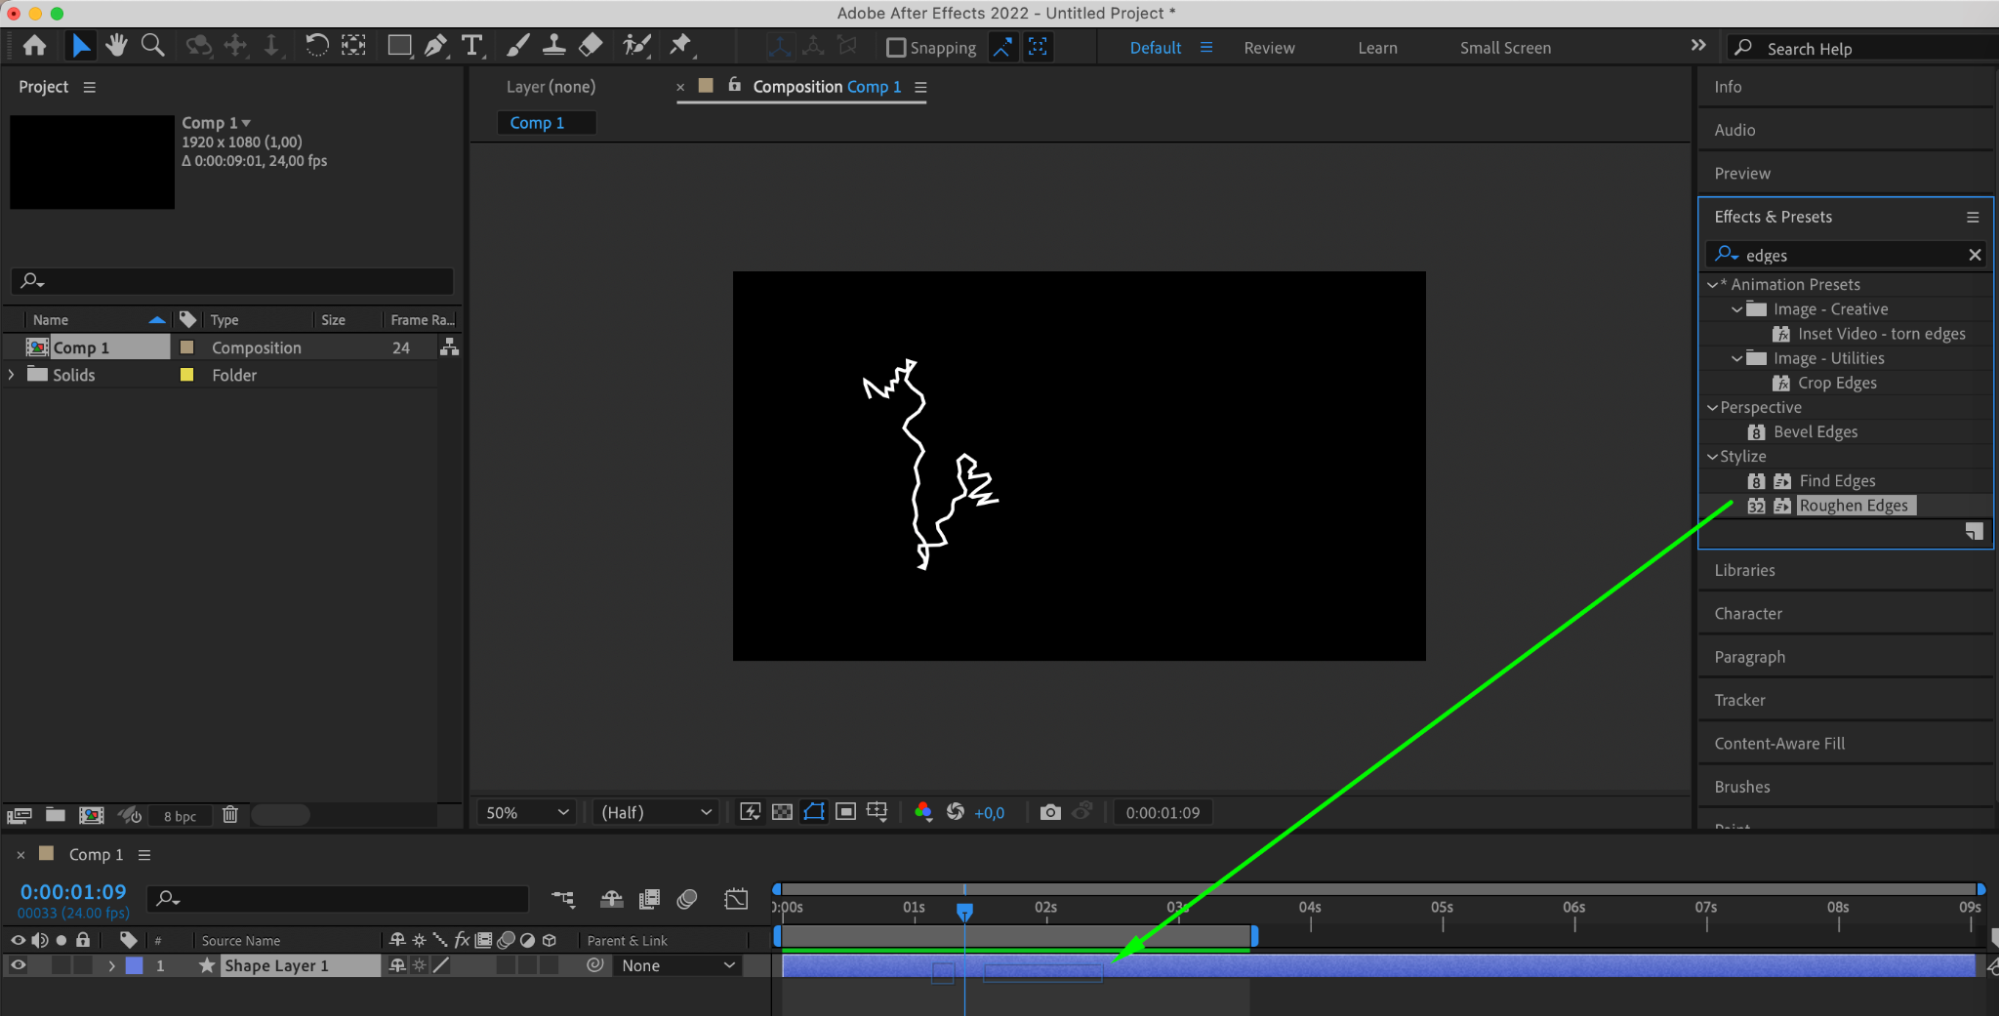
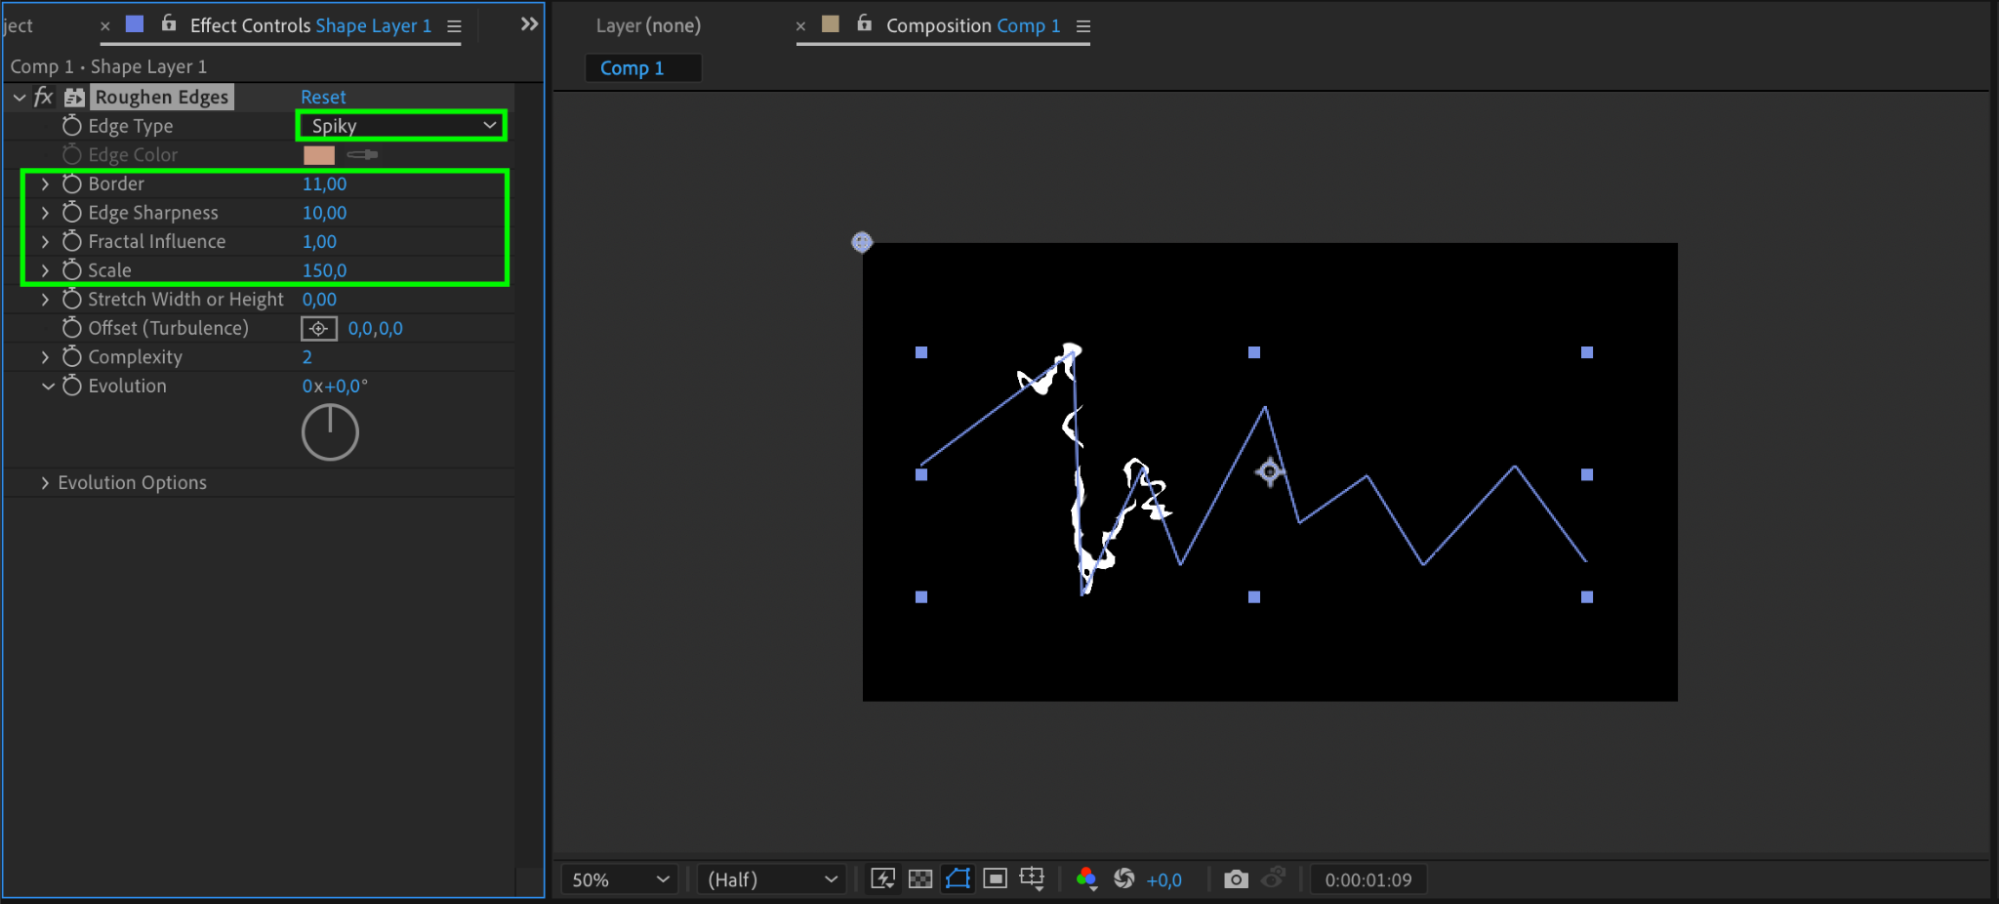
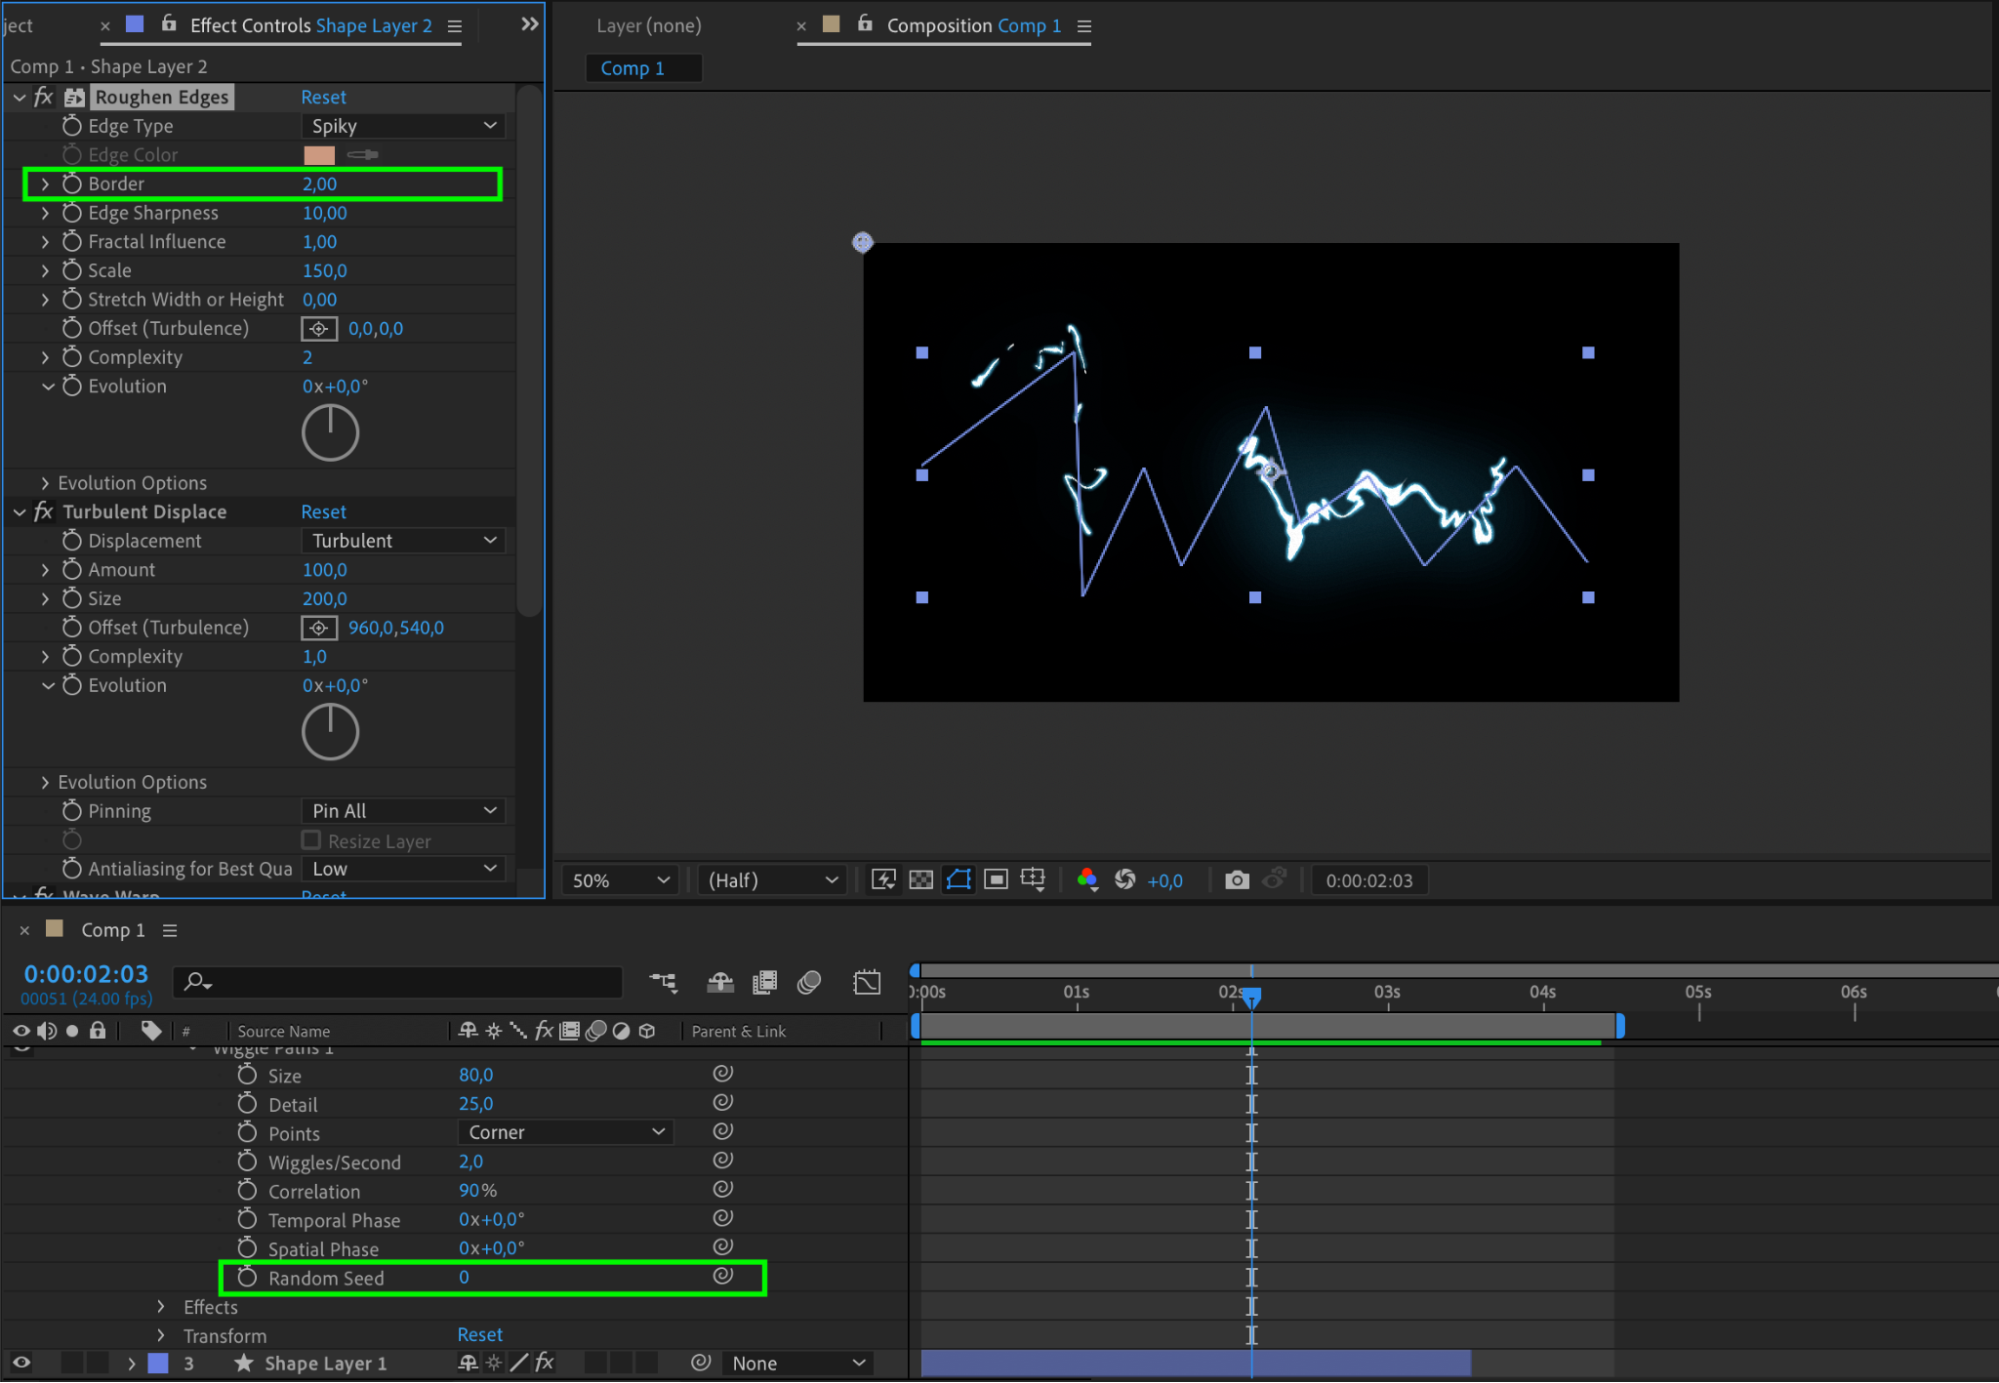
Step 6: Apply Roughen Edges Effect
Apply Roughen Edges effect and adjust parameters: border, edges sharpness, fractal influence, scale.
Get 10% off when you subscribe to our newsletter
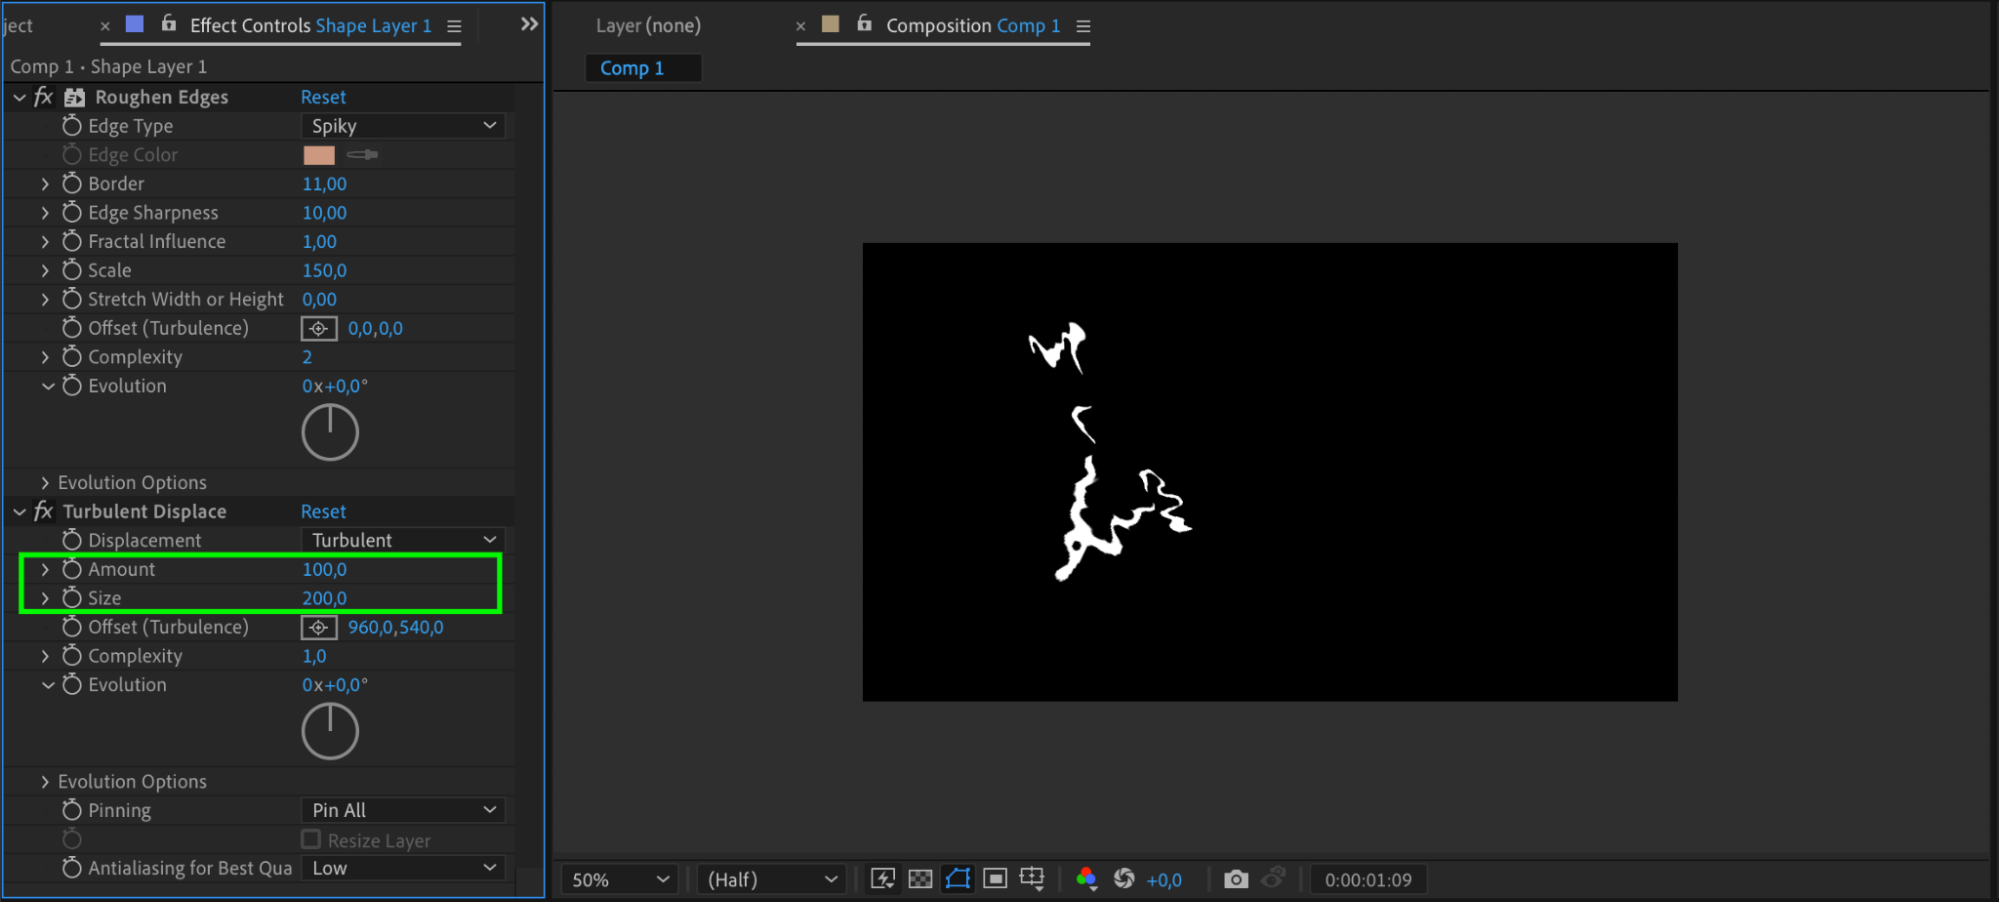
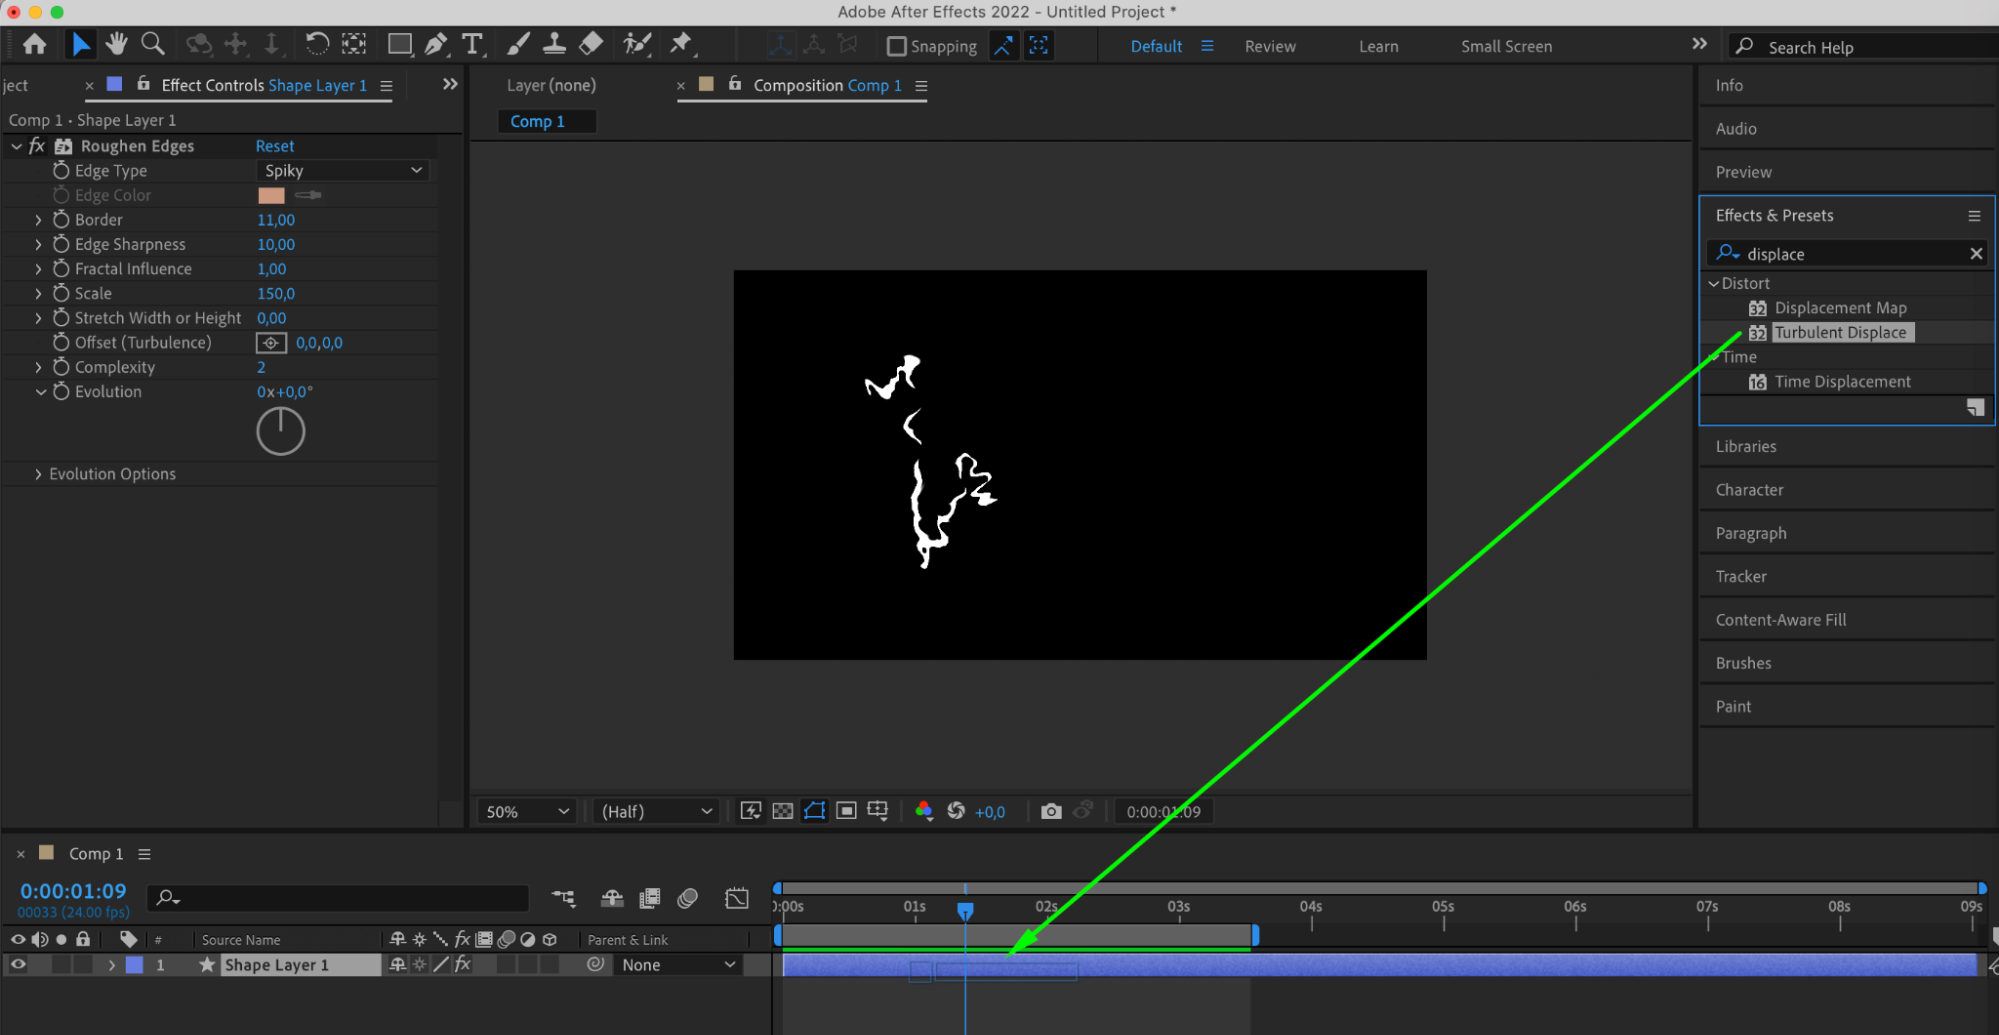
Step 7: Turbulent Displace
Apply Turbulent Displace effect and adjust parameters like amount and size.
Get 10% off when you subscribe to our newsletter
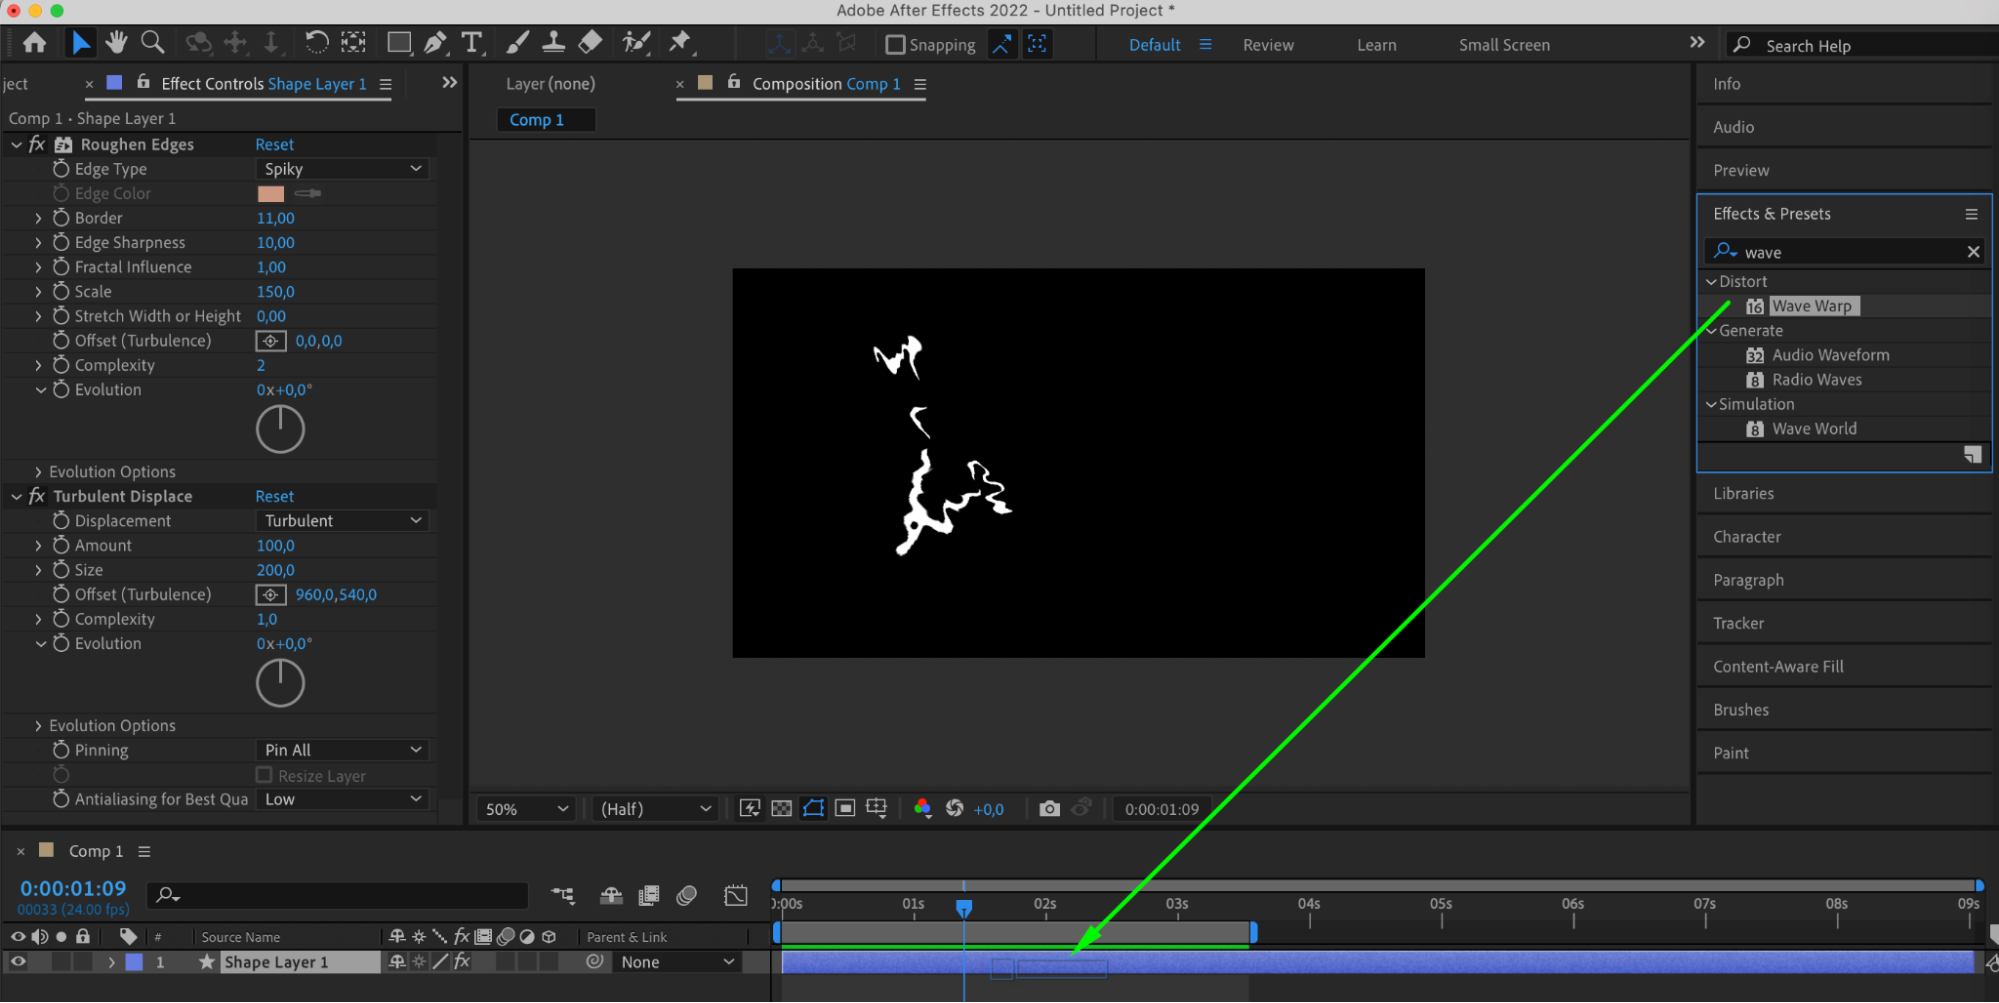
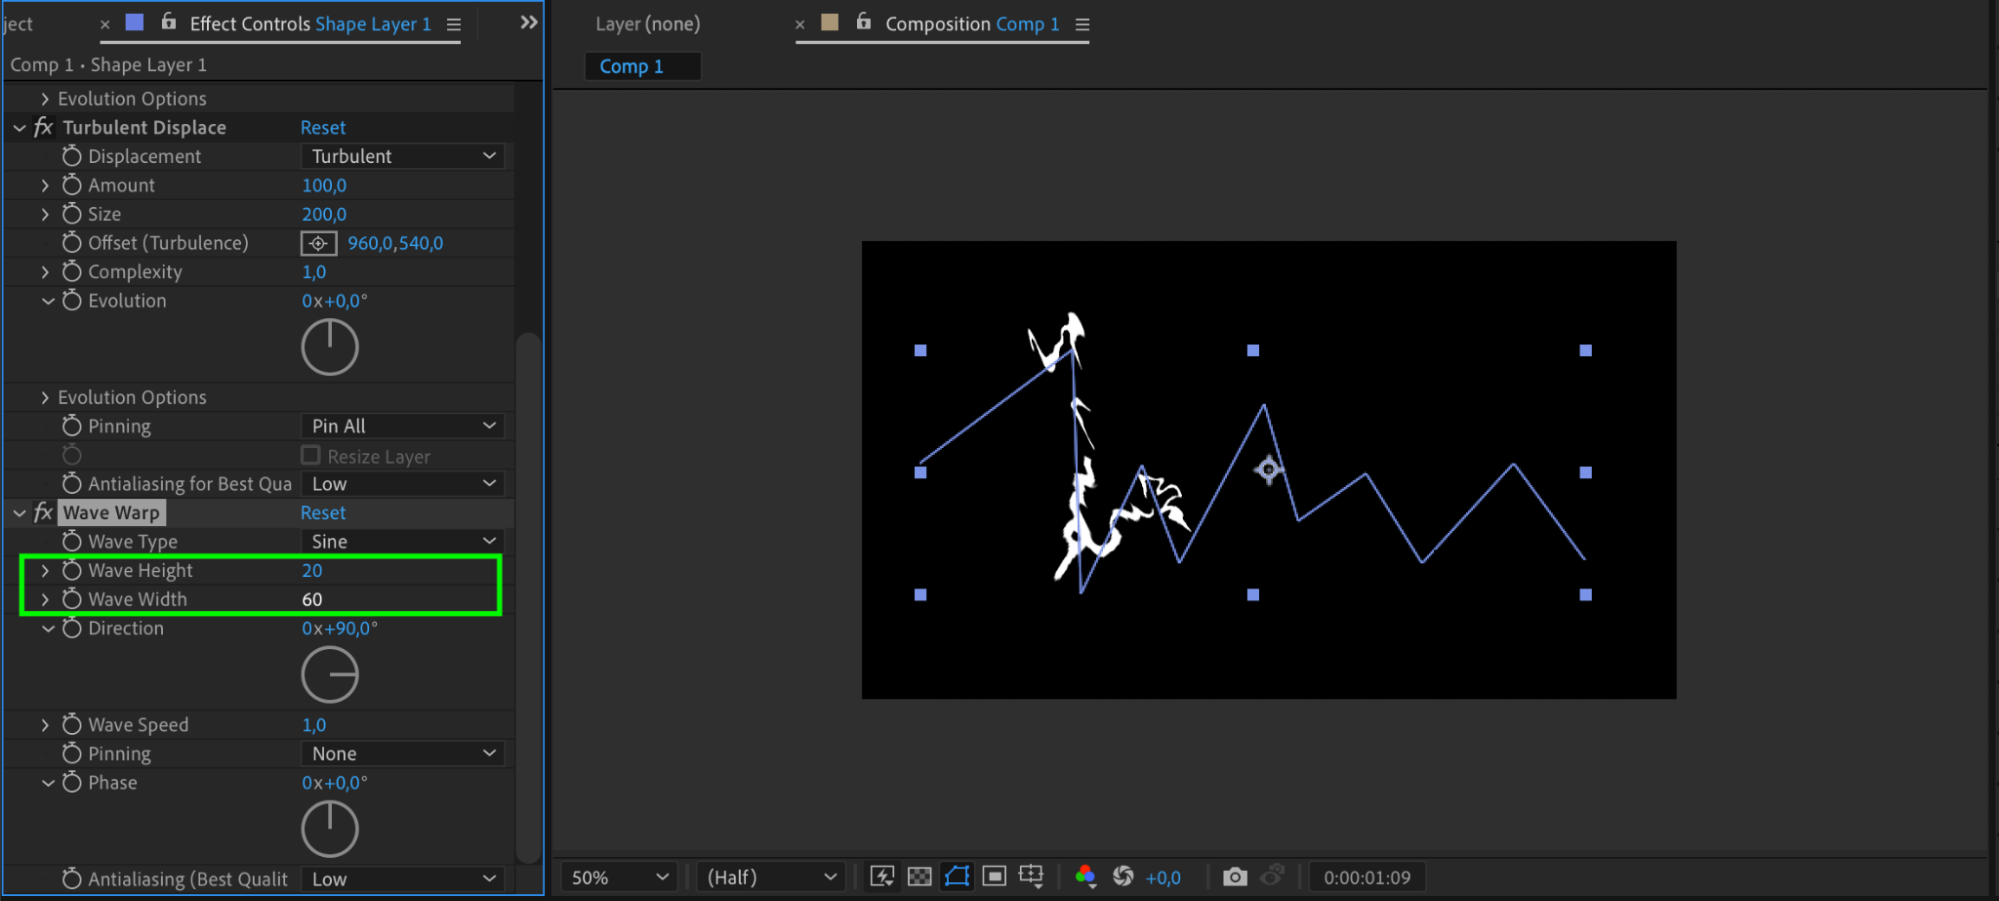
Step 8: Wave Warp Effect
Apply Wave Warp effect and adjust parameters: wave height, wave width.
Step 9: Create Adjustment Layer
Create an adjustment layer.

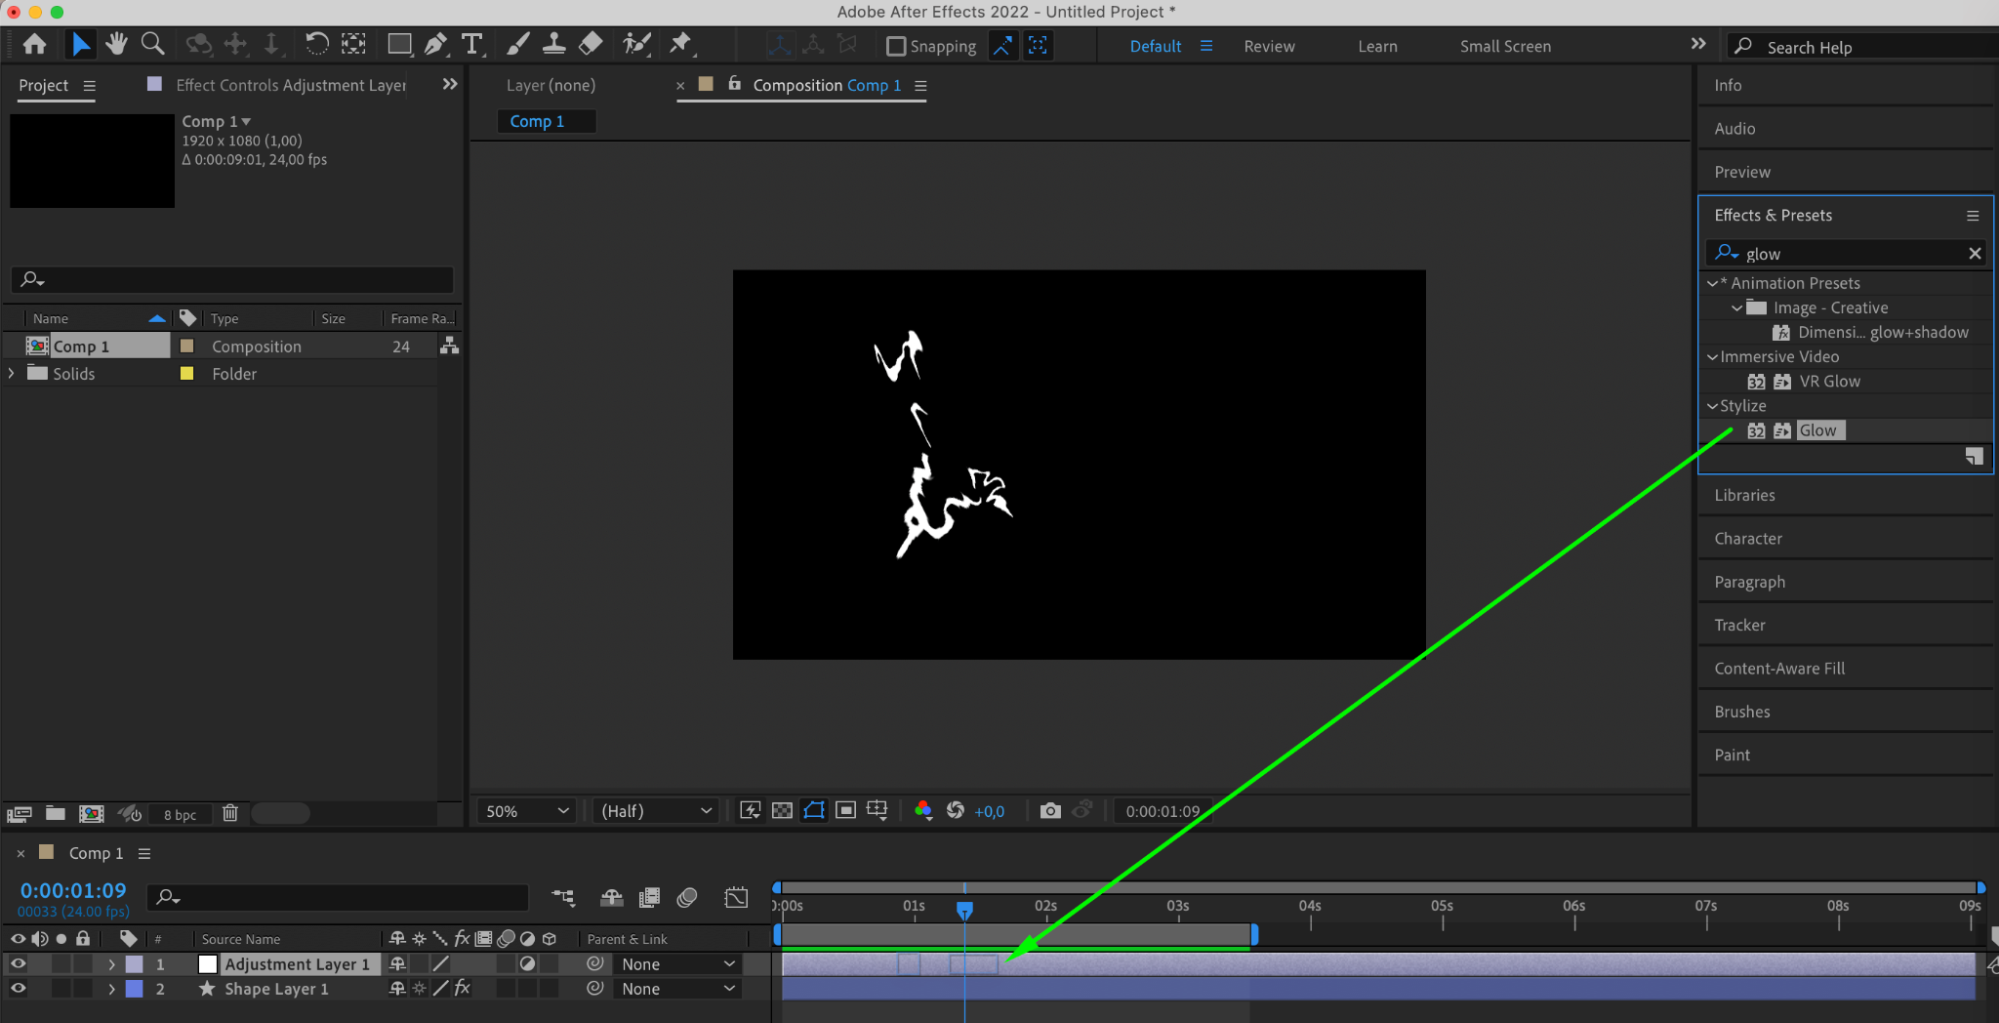
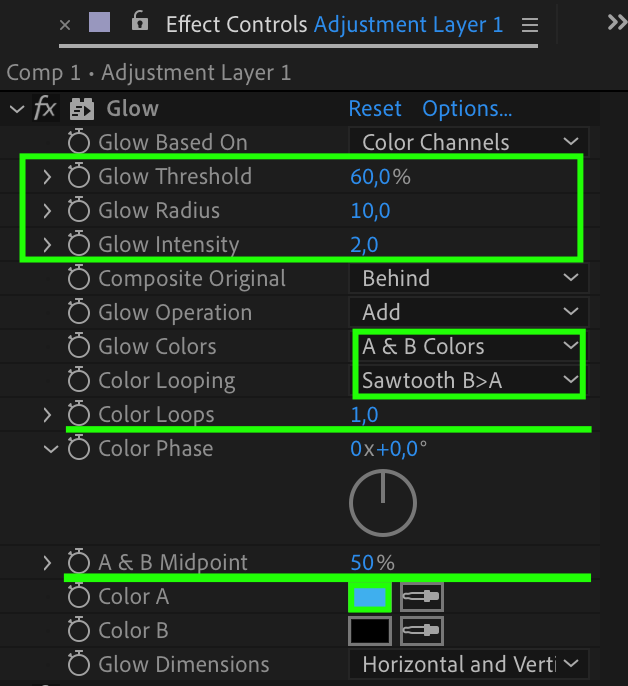
Step 10: Apply Glow Effect
Apply Glow effect to the adjustment layer and adjust parameters: threshold, radius, intensity, color.
Get 10% off when you subscribe to our newsletter
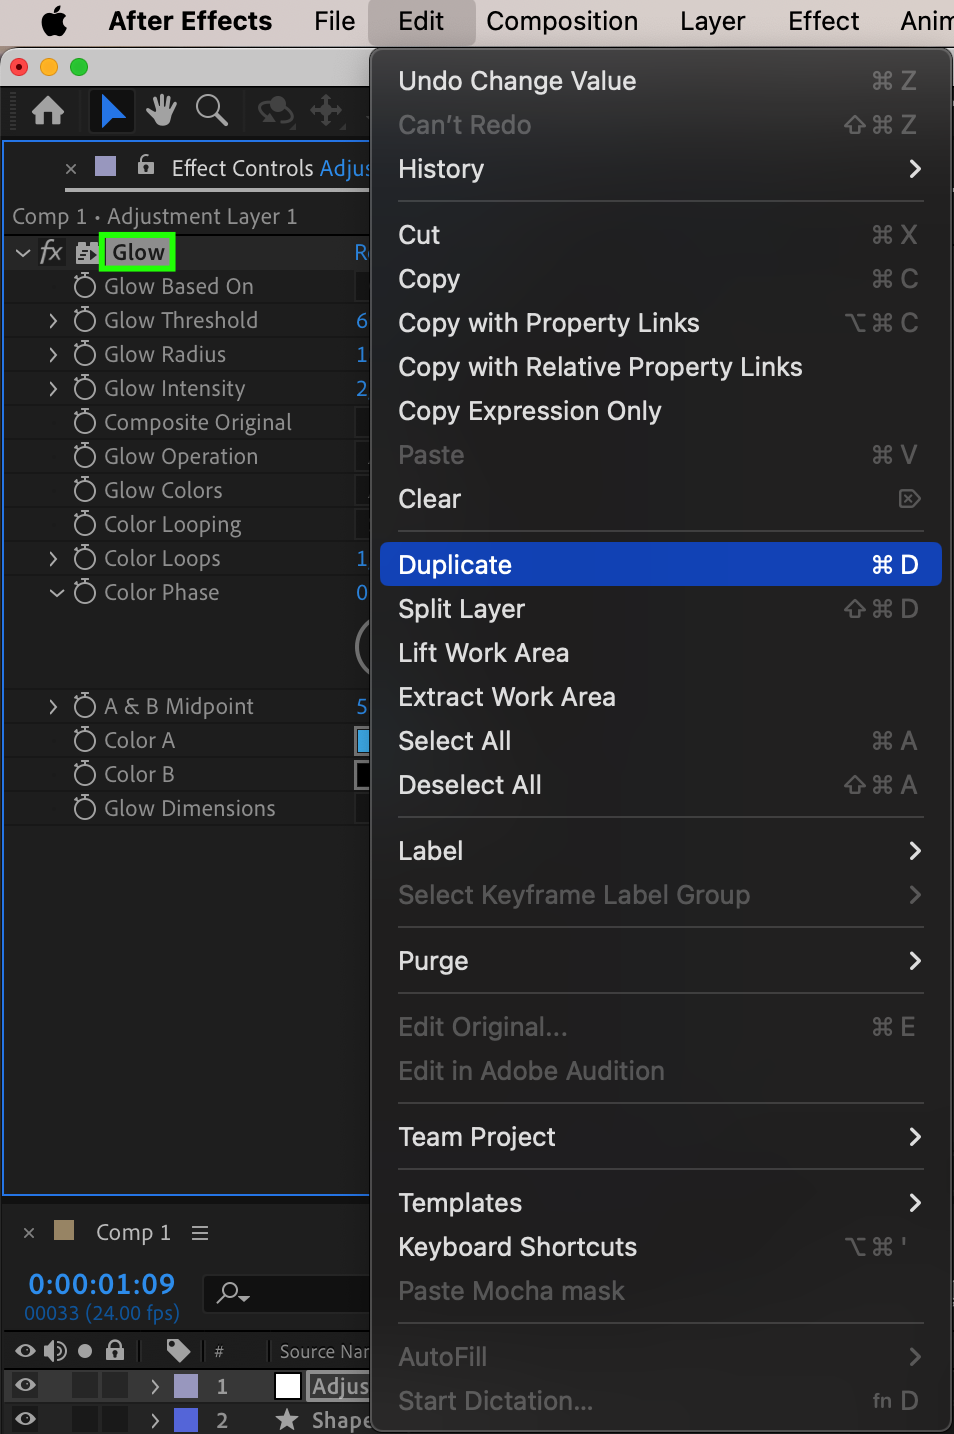
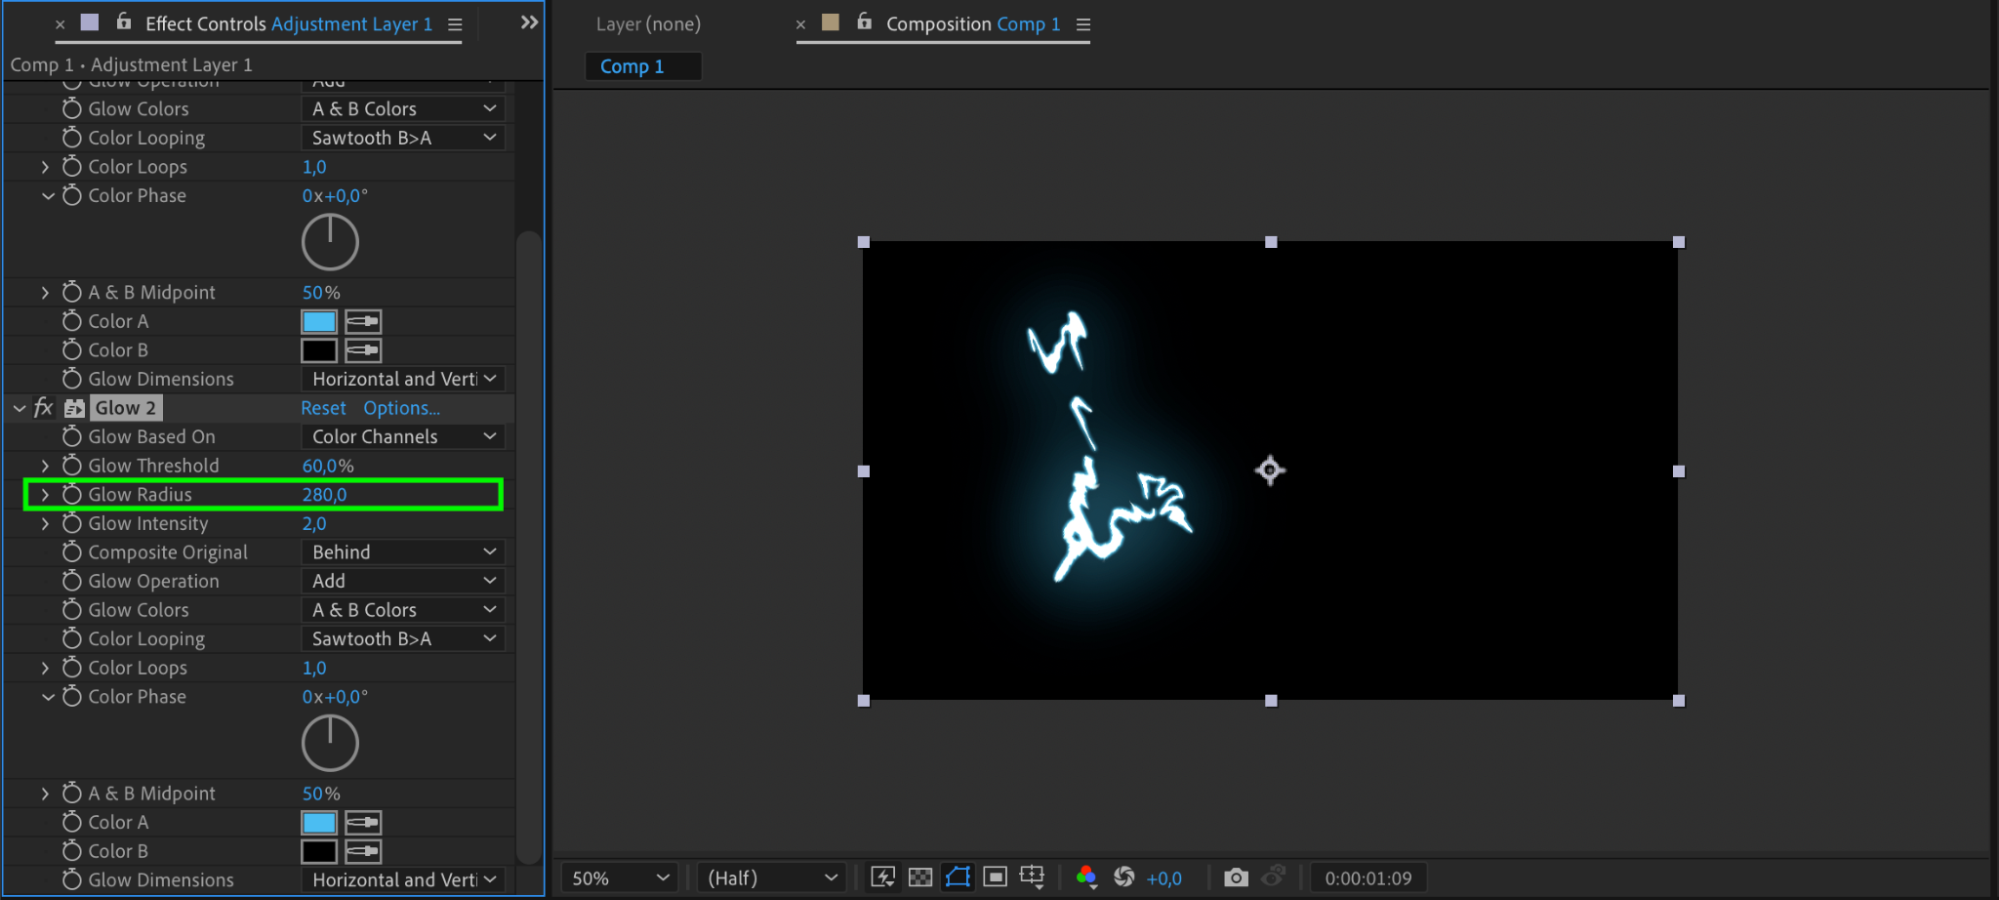
Step 11: Duplicate Glow Effect
Duplicate the Glow effect, adjusting the glow radius.
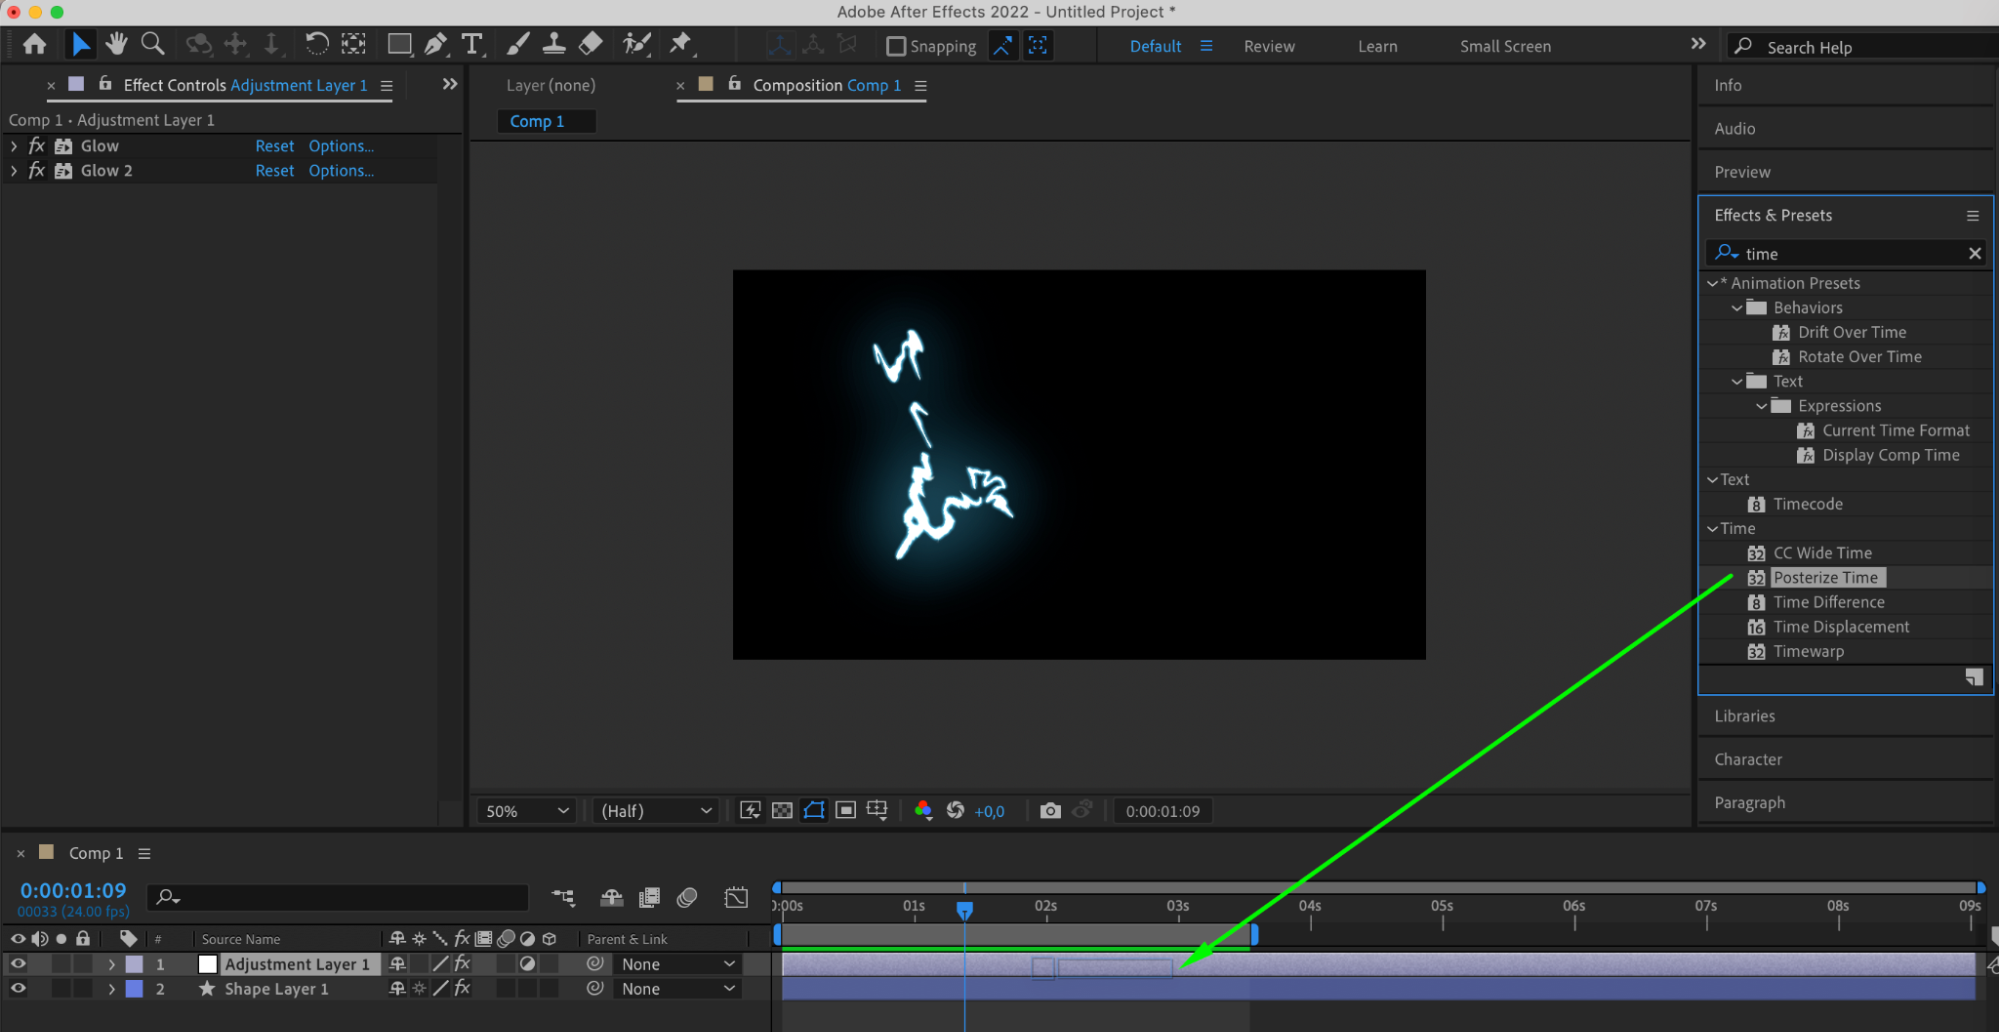
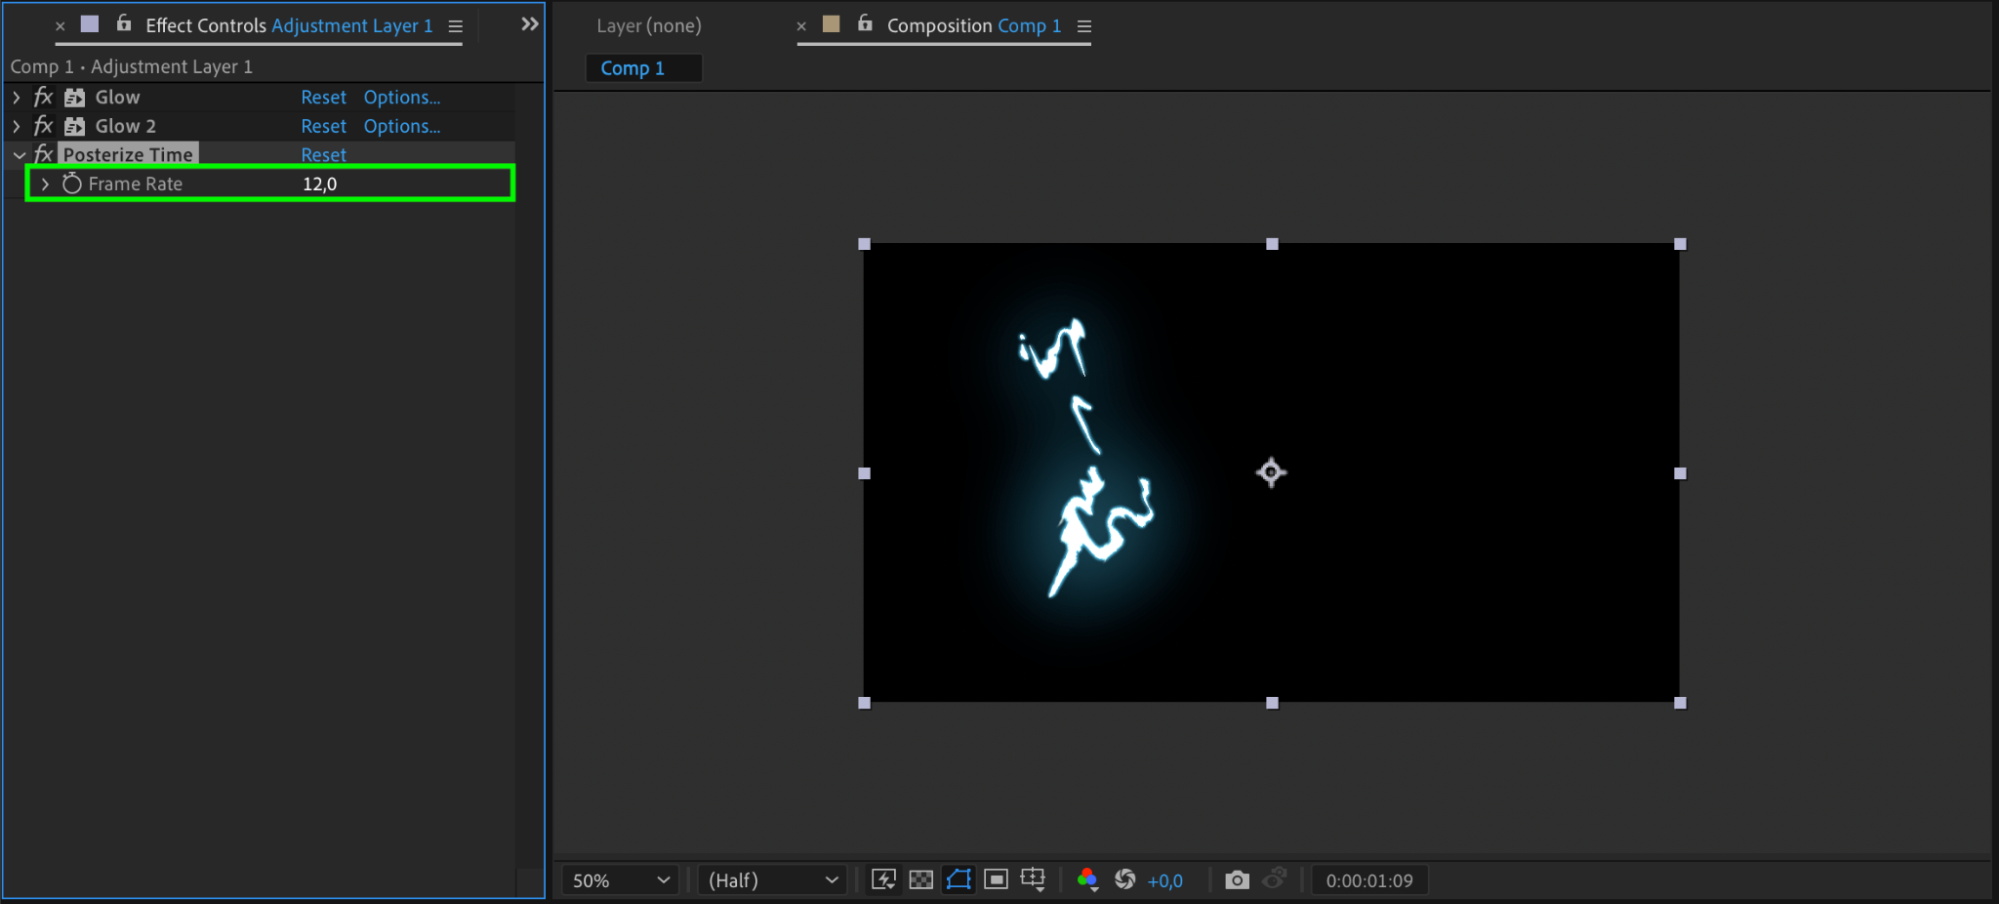
Step 12: Apply Posterize Time Effect
Apply Posterize Time effect to the adjustment layer and set the frame rate.
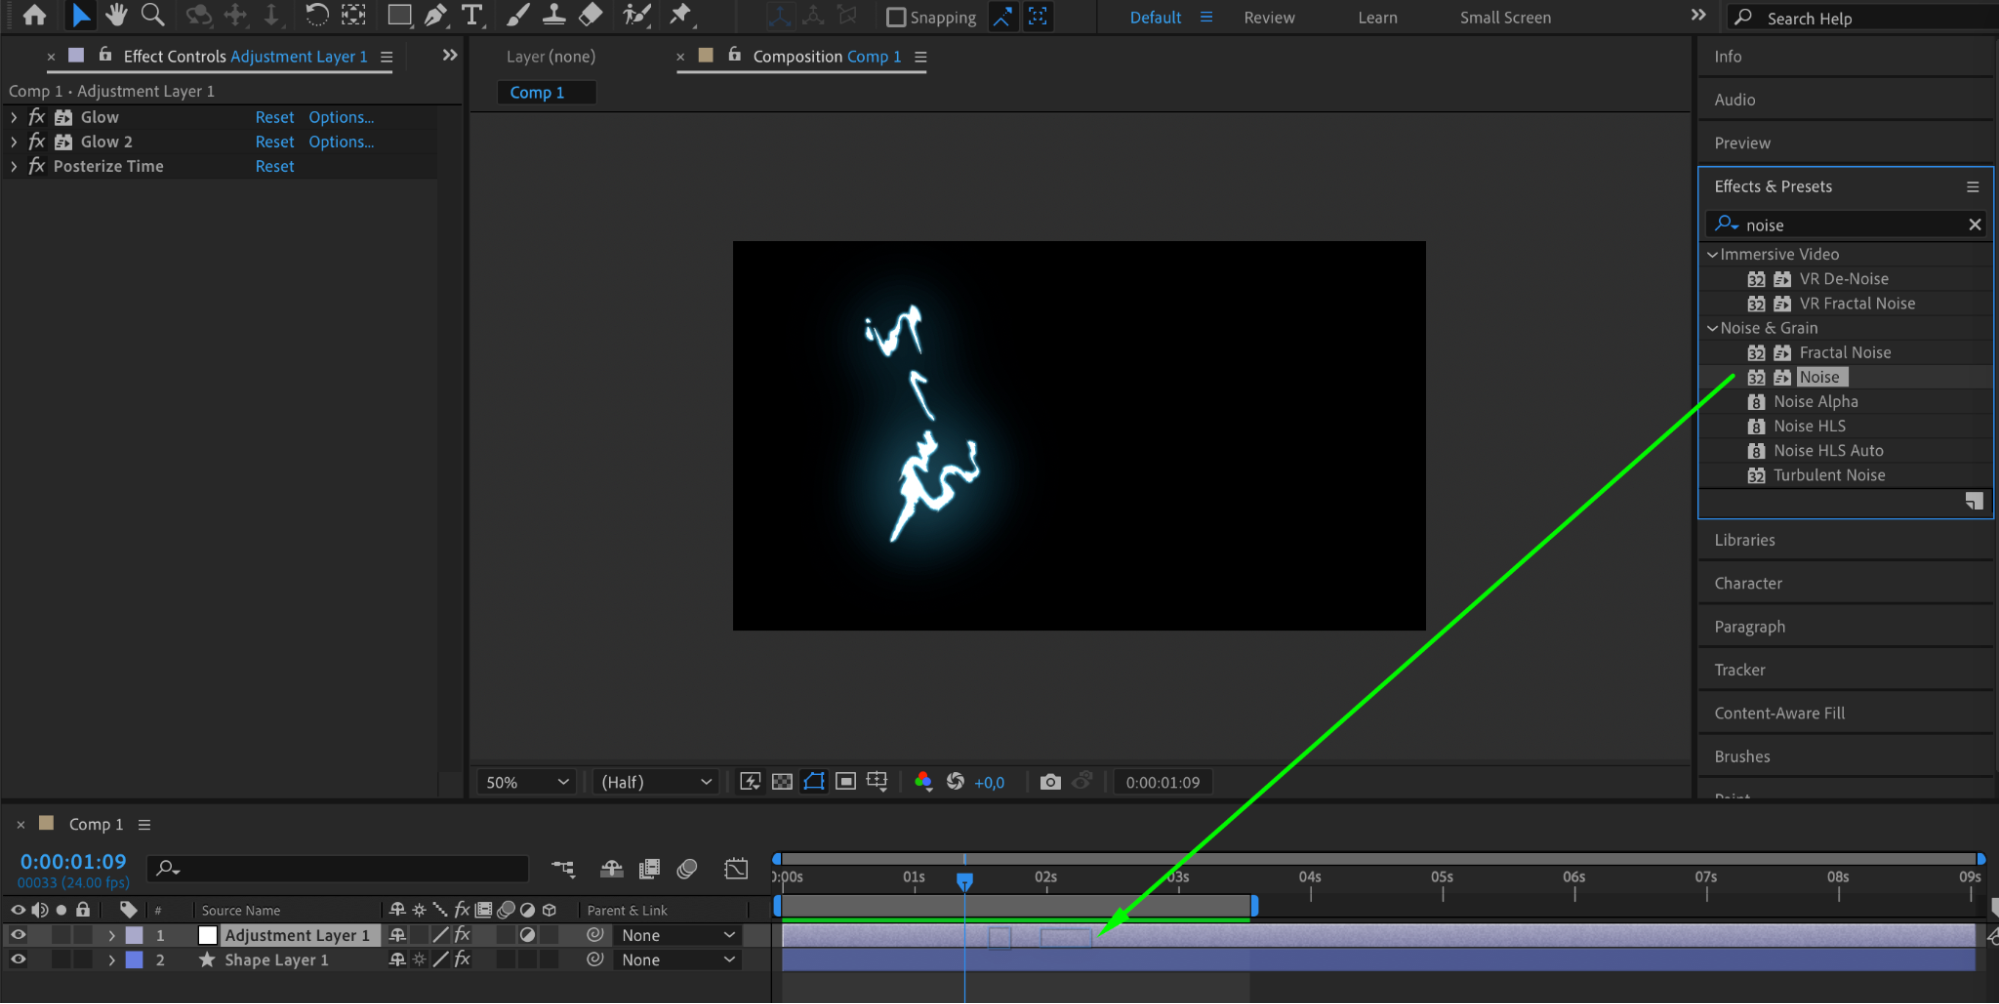
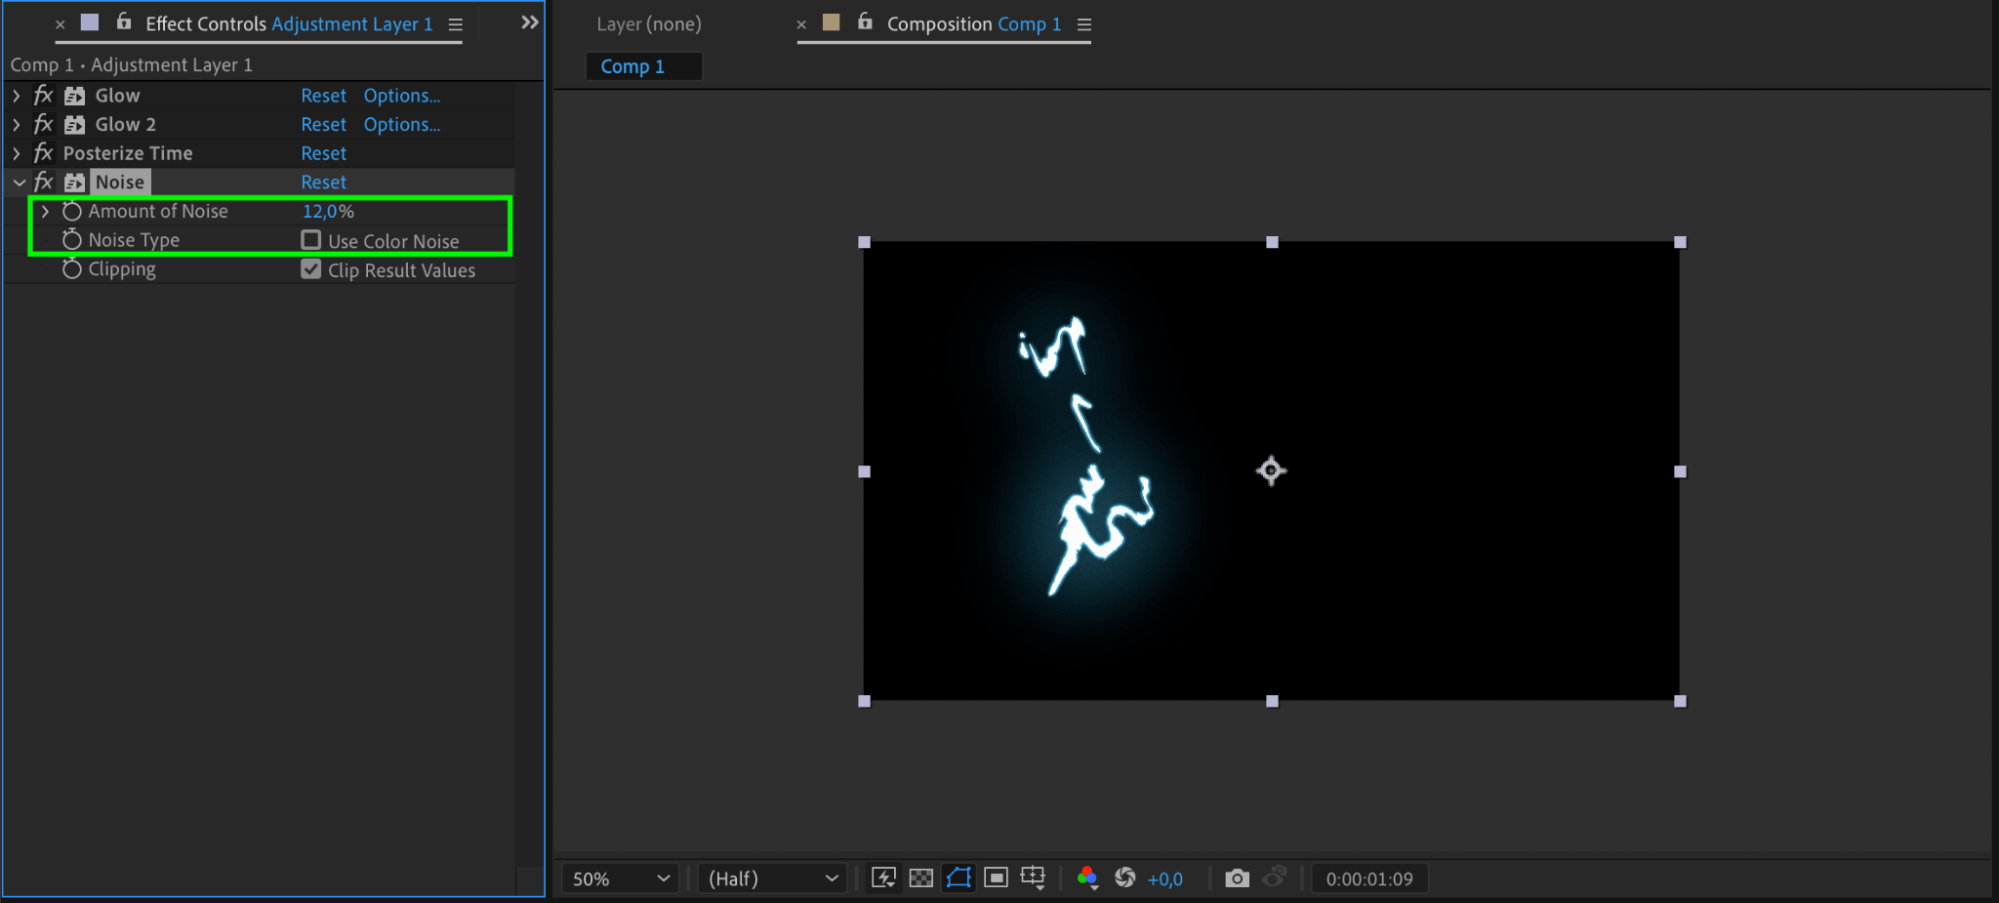
Step 13: Apply Noise Effect
Apply Noise effect and adjust parameters: amount of noise, disable color noise.
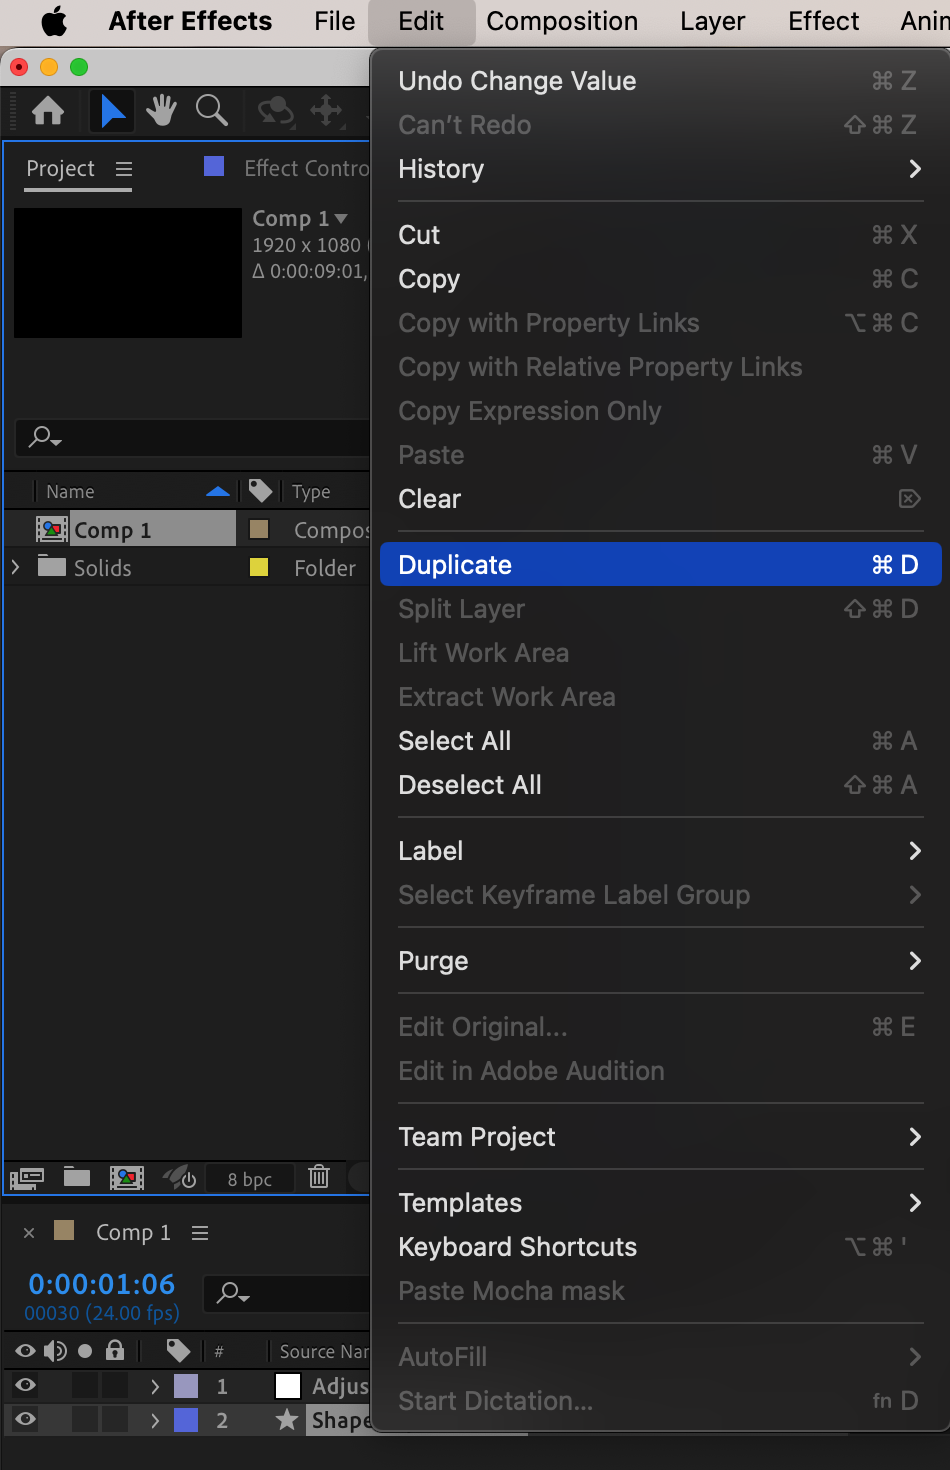
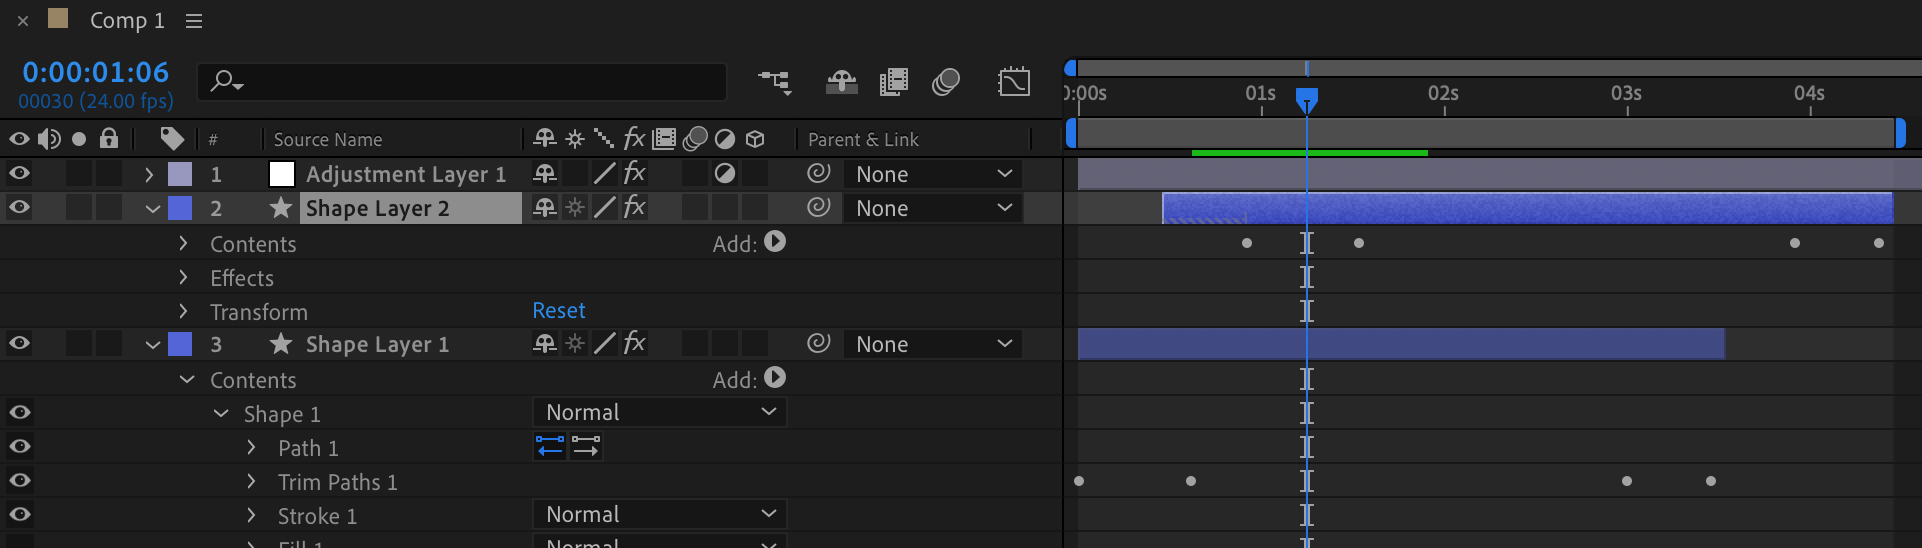
Step 14: Duplicate Lightning Layer
Duplicate the lightning layer, adjusting start and end times.
Modify the Stroke parameter to 2 px.
Remove the expression from the random seed in the wiggle paths.
Adjust the Border parameter in the Roughen Edges effect.
Step 15: Enjoy Your Lightning Animation
Your smooth and realistic lightning animation is now ready to captivate your audience.
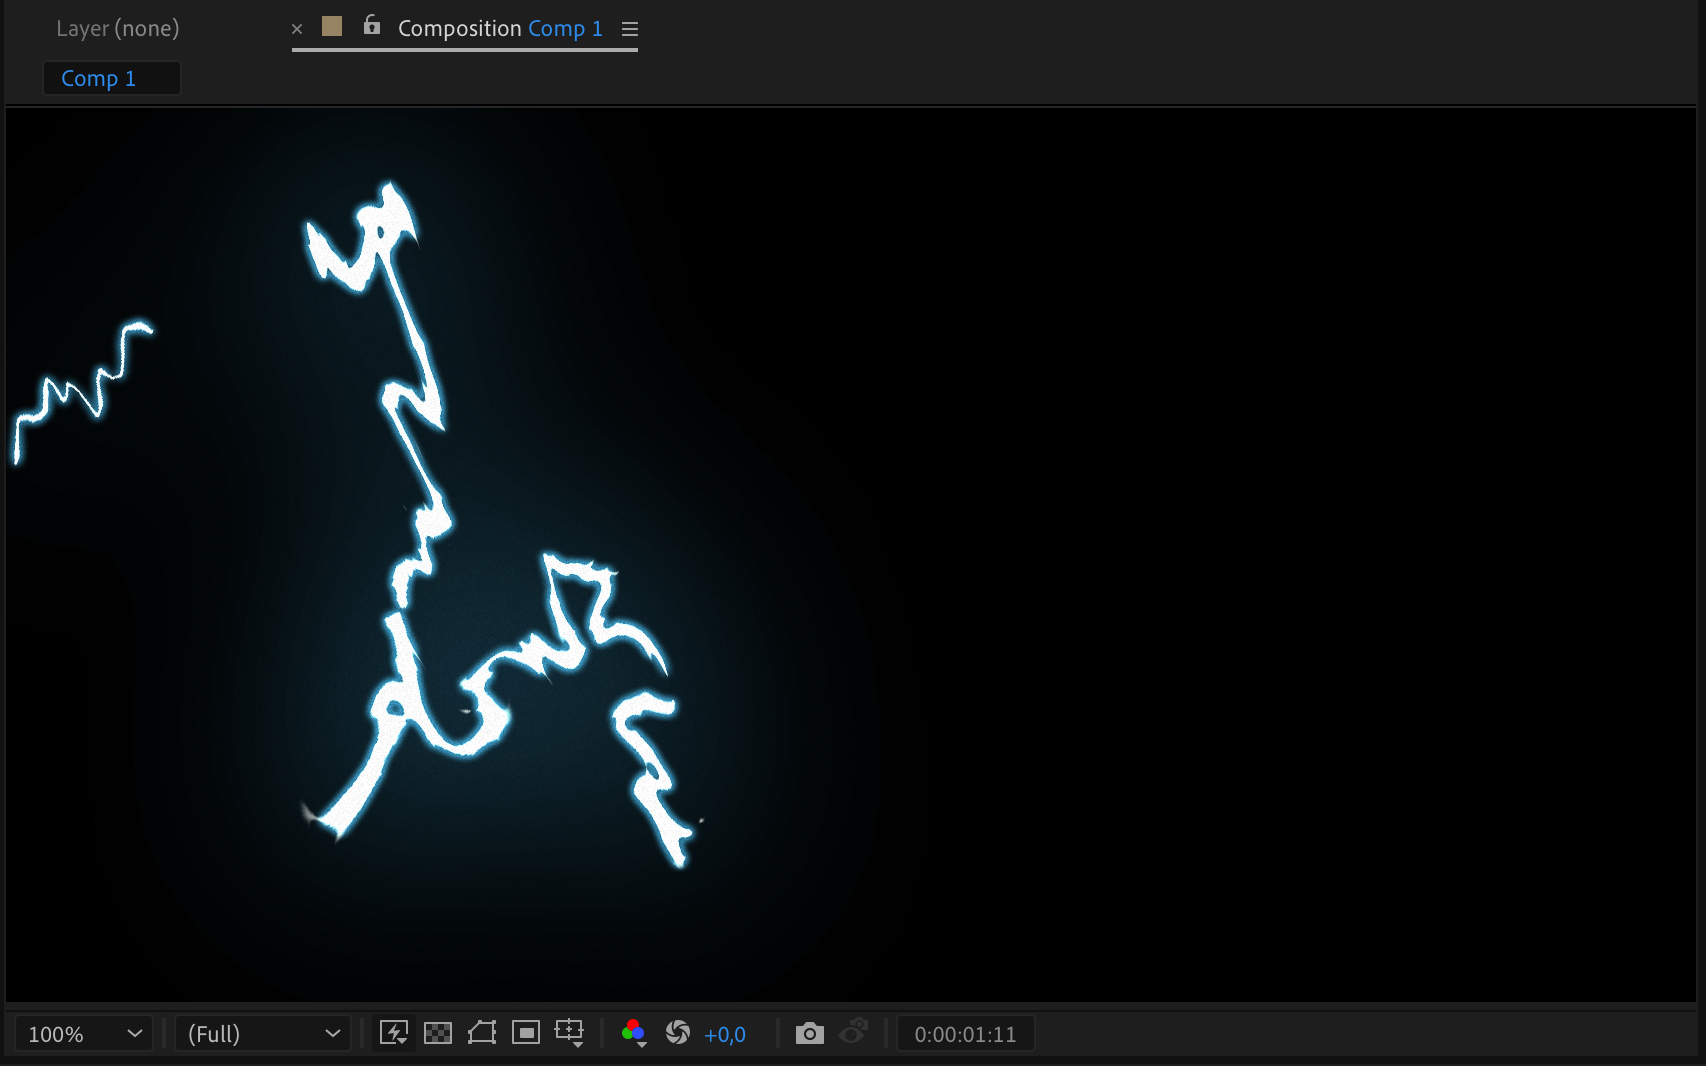
By following these detailed steps, you can achieve a stunning lightning effect in After Effects. Experiment with the settings to customize the animation according to your creative vision.
Conclusion
Dive into the world of creating realistic lightning effects in After Effects and unleash your creativity with the power of visual effects. Whether you’re looking to add a touch of electricity to your motion graphics or craft a thunderous storm on screen, mastering these techniques will take your video projects to electrifying new heights. Join us on this electrifying adventure, and let your imagination spark with the magic of lightning effects in Adobe After Effects.
Our Bestsellers


