Creating Dynamic Line Animations in After Effects
Introduction – Why Make Lines Move?
Are you tired of static motion graphics? Do you want to make your designs more captivating and dynamic? Well, I’ve got just the solution for you! In this step-by-step tutorial, I’ll show you how to make lines move in After Effects, even if you’re a beginner.
Step 1: Create a New Composition
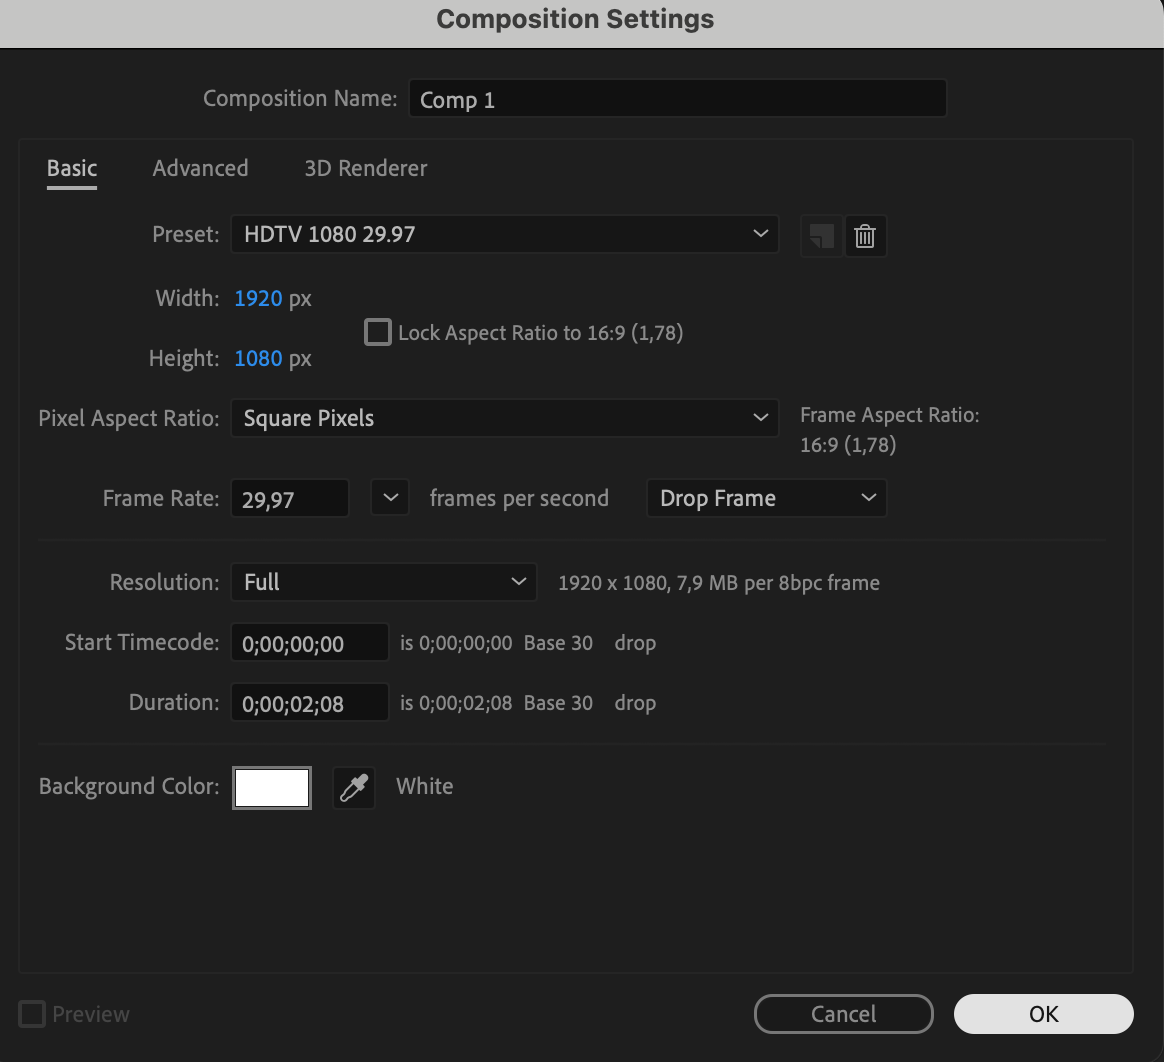
First things first, let’s start by creating a new composition in After Effects. Simply go to the toolbar, select “Composition,” and then “New Composition.” Set the dimensions and duration according to your preferences, keeping in mind the overall look and feel you want to achieve. This will be the canvas for your line animation.
 Step 2: Drawing Your Line
Get 10% off when you subscribe to our newsletter

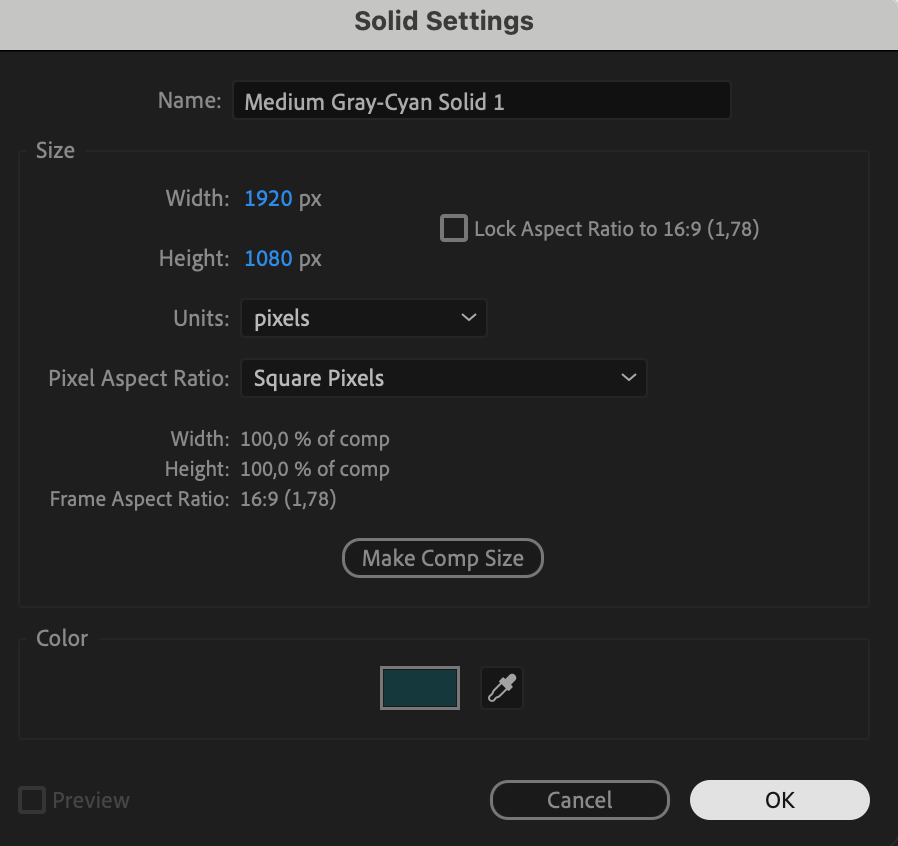
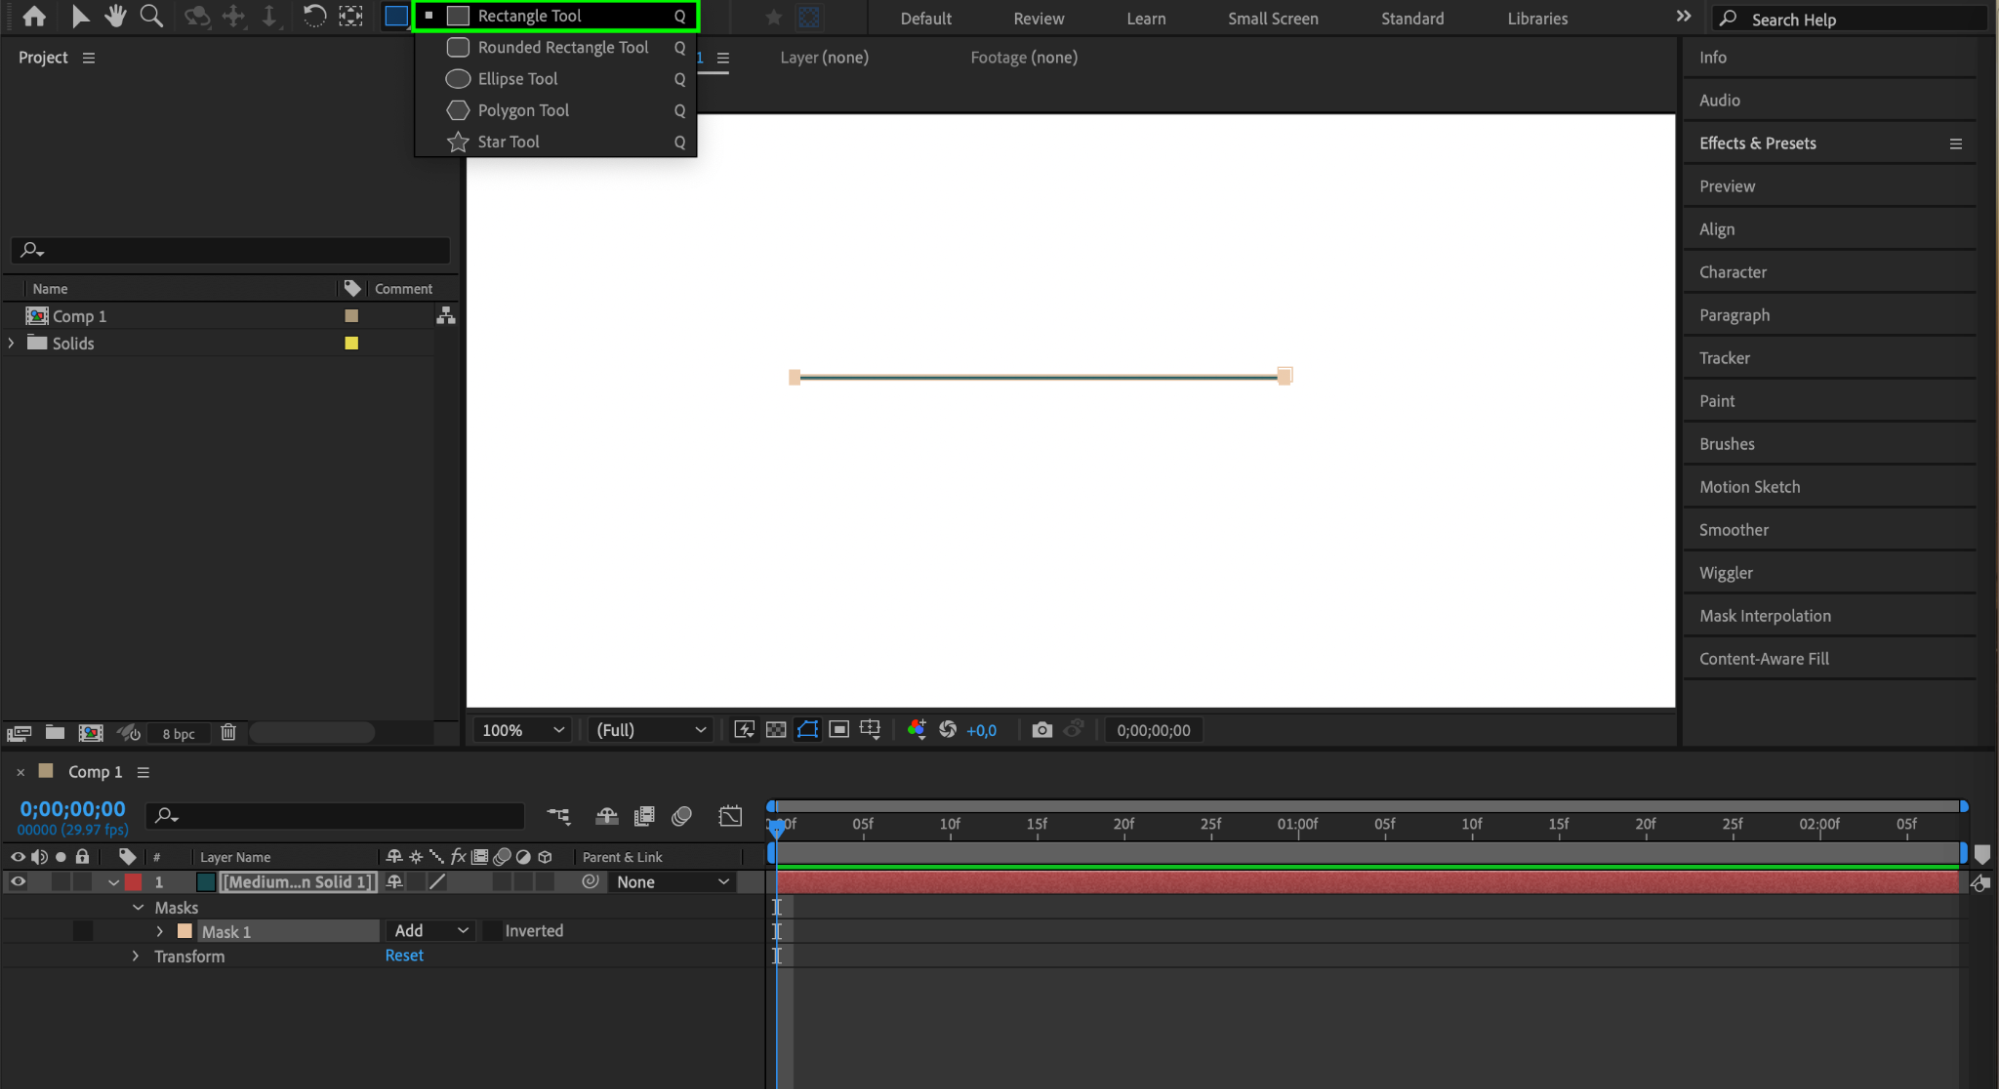
Next, we’ll add a line shape layer. To do this, click on “Layer,” then “New,” and select “Solid” from the drop-down menu. Choose a color for your solid, as this will be the base color for your line. Then, select the “Rectangle Tool” from the toolbar and draw a straight line in the composition. This line will be the main element you animate.
 Step 3: Customize Your Line
Now, it’s time to customize your line. Expand the properties of your solid layer and use the “Mask” and “Transform” sections to experiment with the look of your line. This customization will give your line the desired aesthetic before you start animating.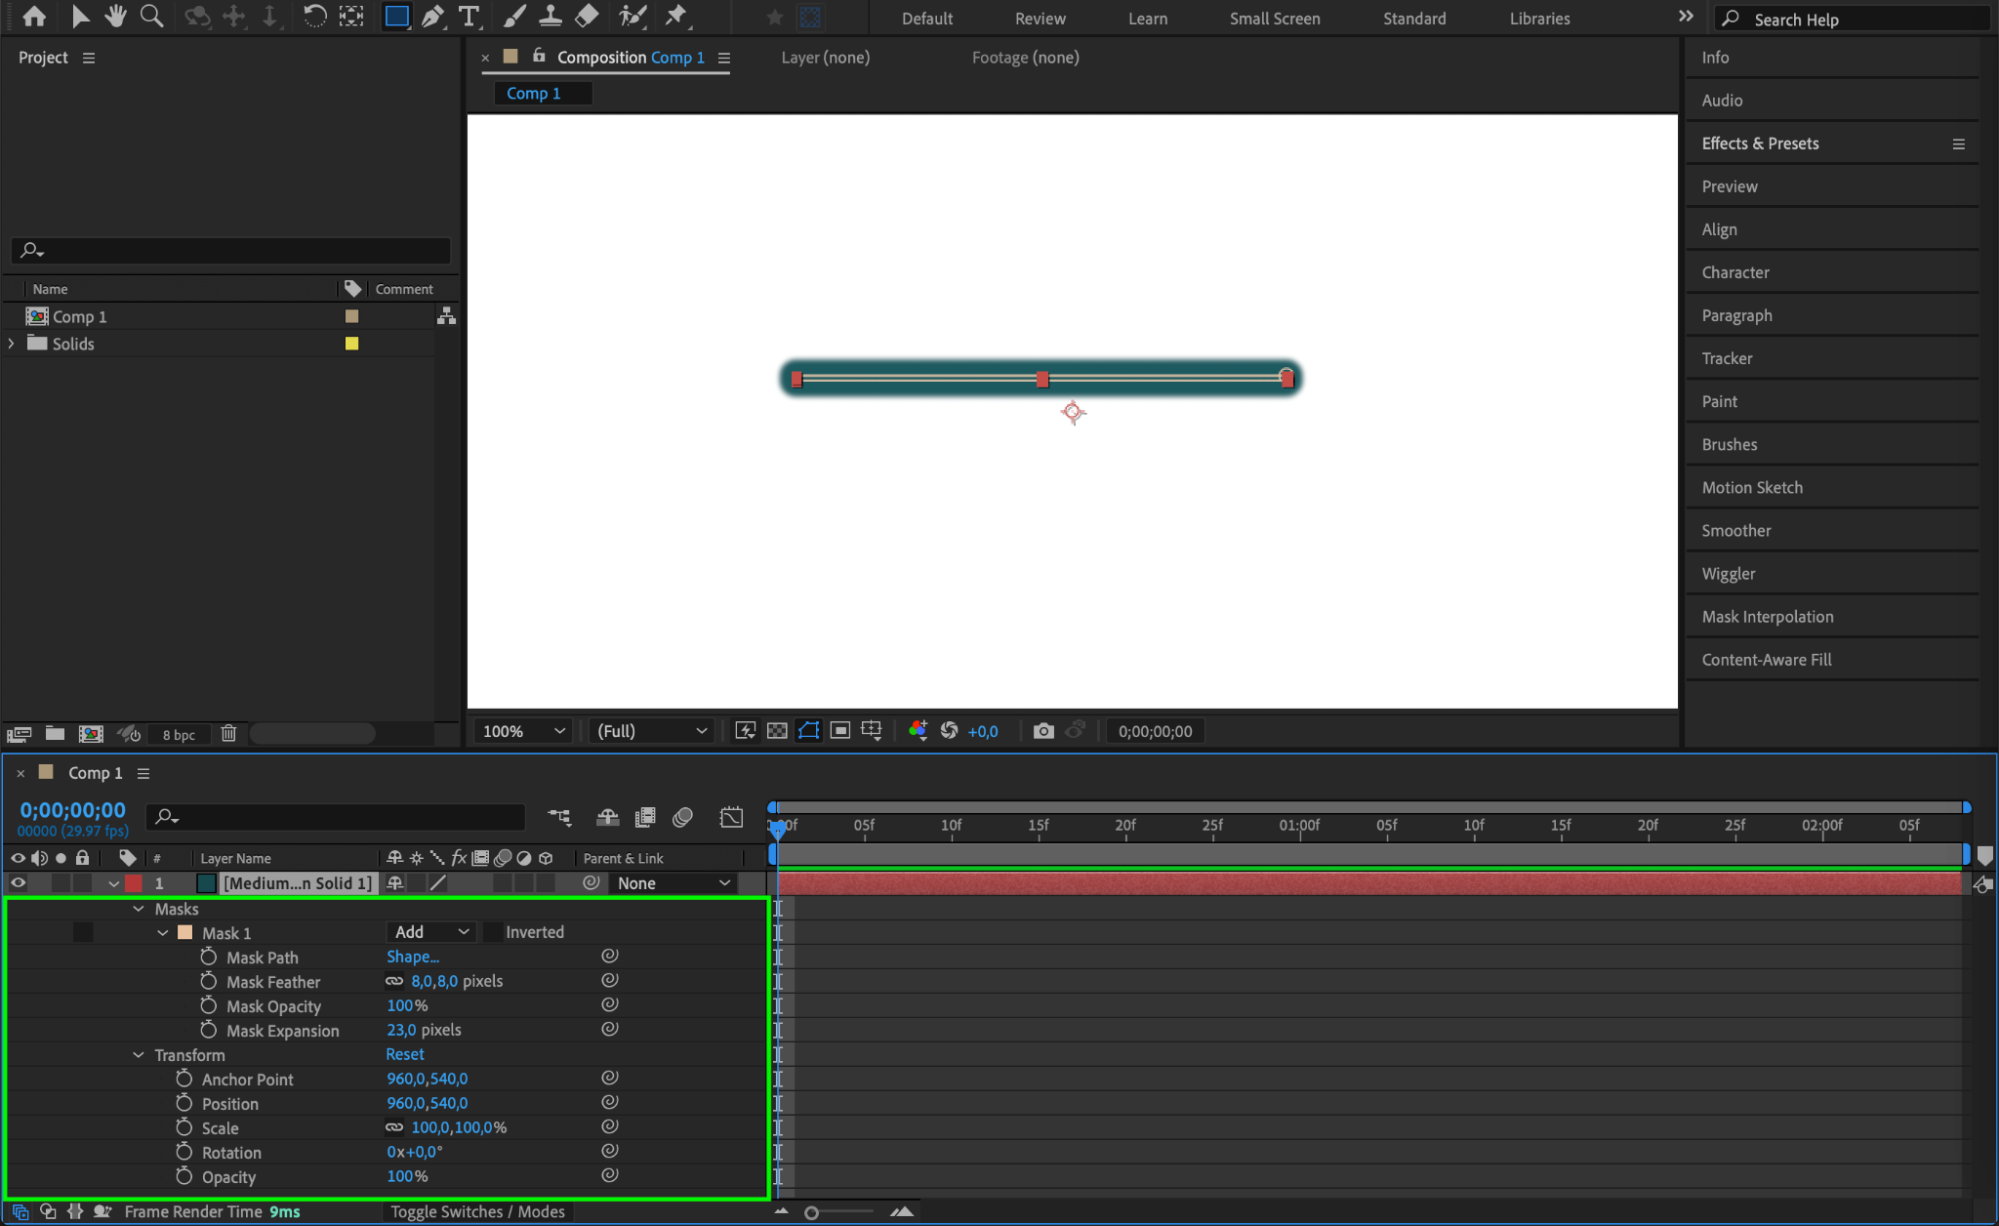 Step 4: Add Keyframes for Movement
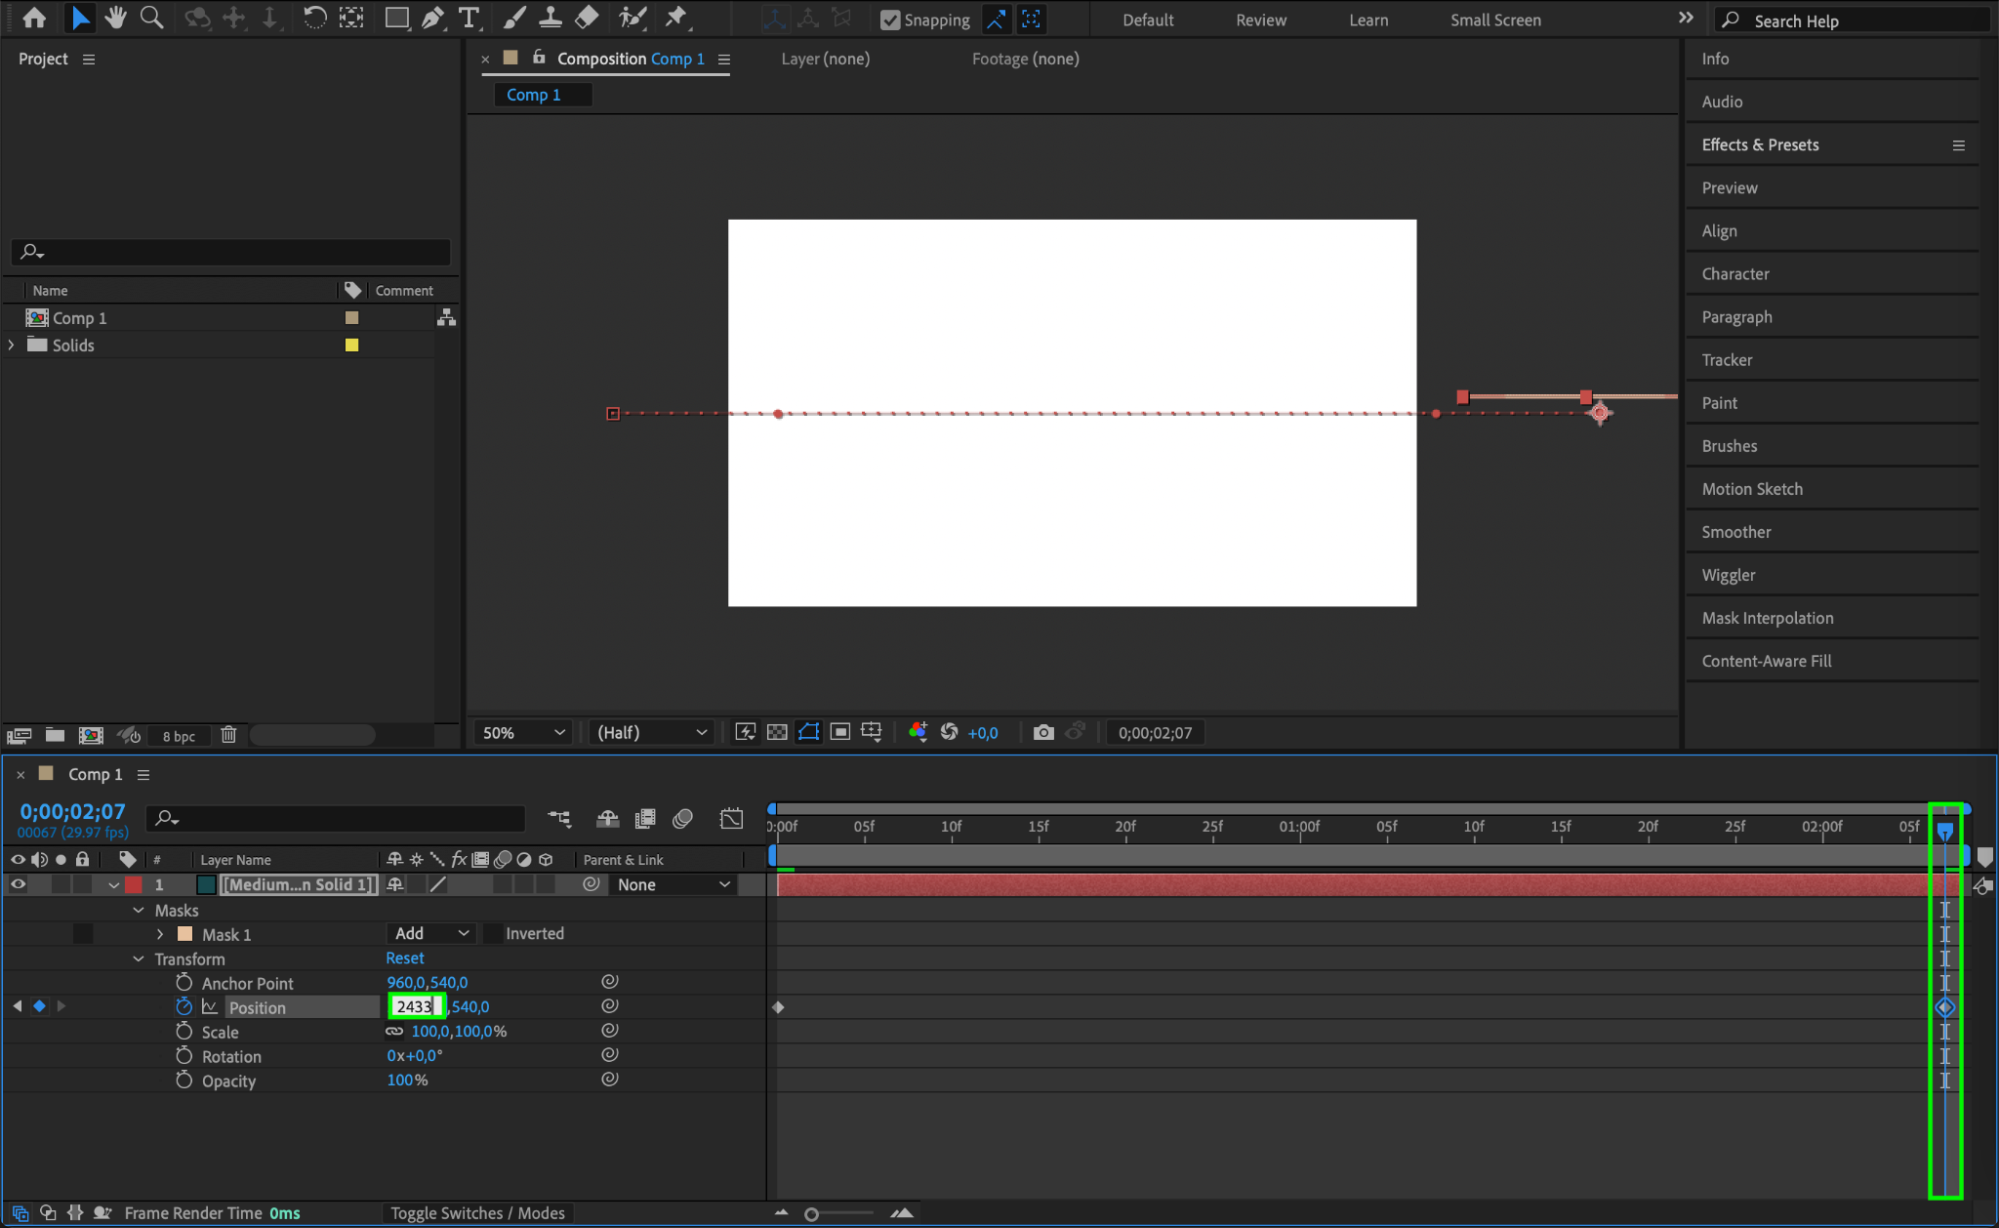
To make the line move, we need to add keyframes. Move the playhead to the desired starting point on the timeline, select the line shape layer, and click on the stopwatch icon next to the “Position” property. This will create the first keyframe. Then, move the playhead to another point in time where you want the line to be in a different position. Simply click and drag the line shape layer to reposition it on the composition, and After Effects will automatically create another keyframe for you.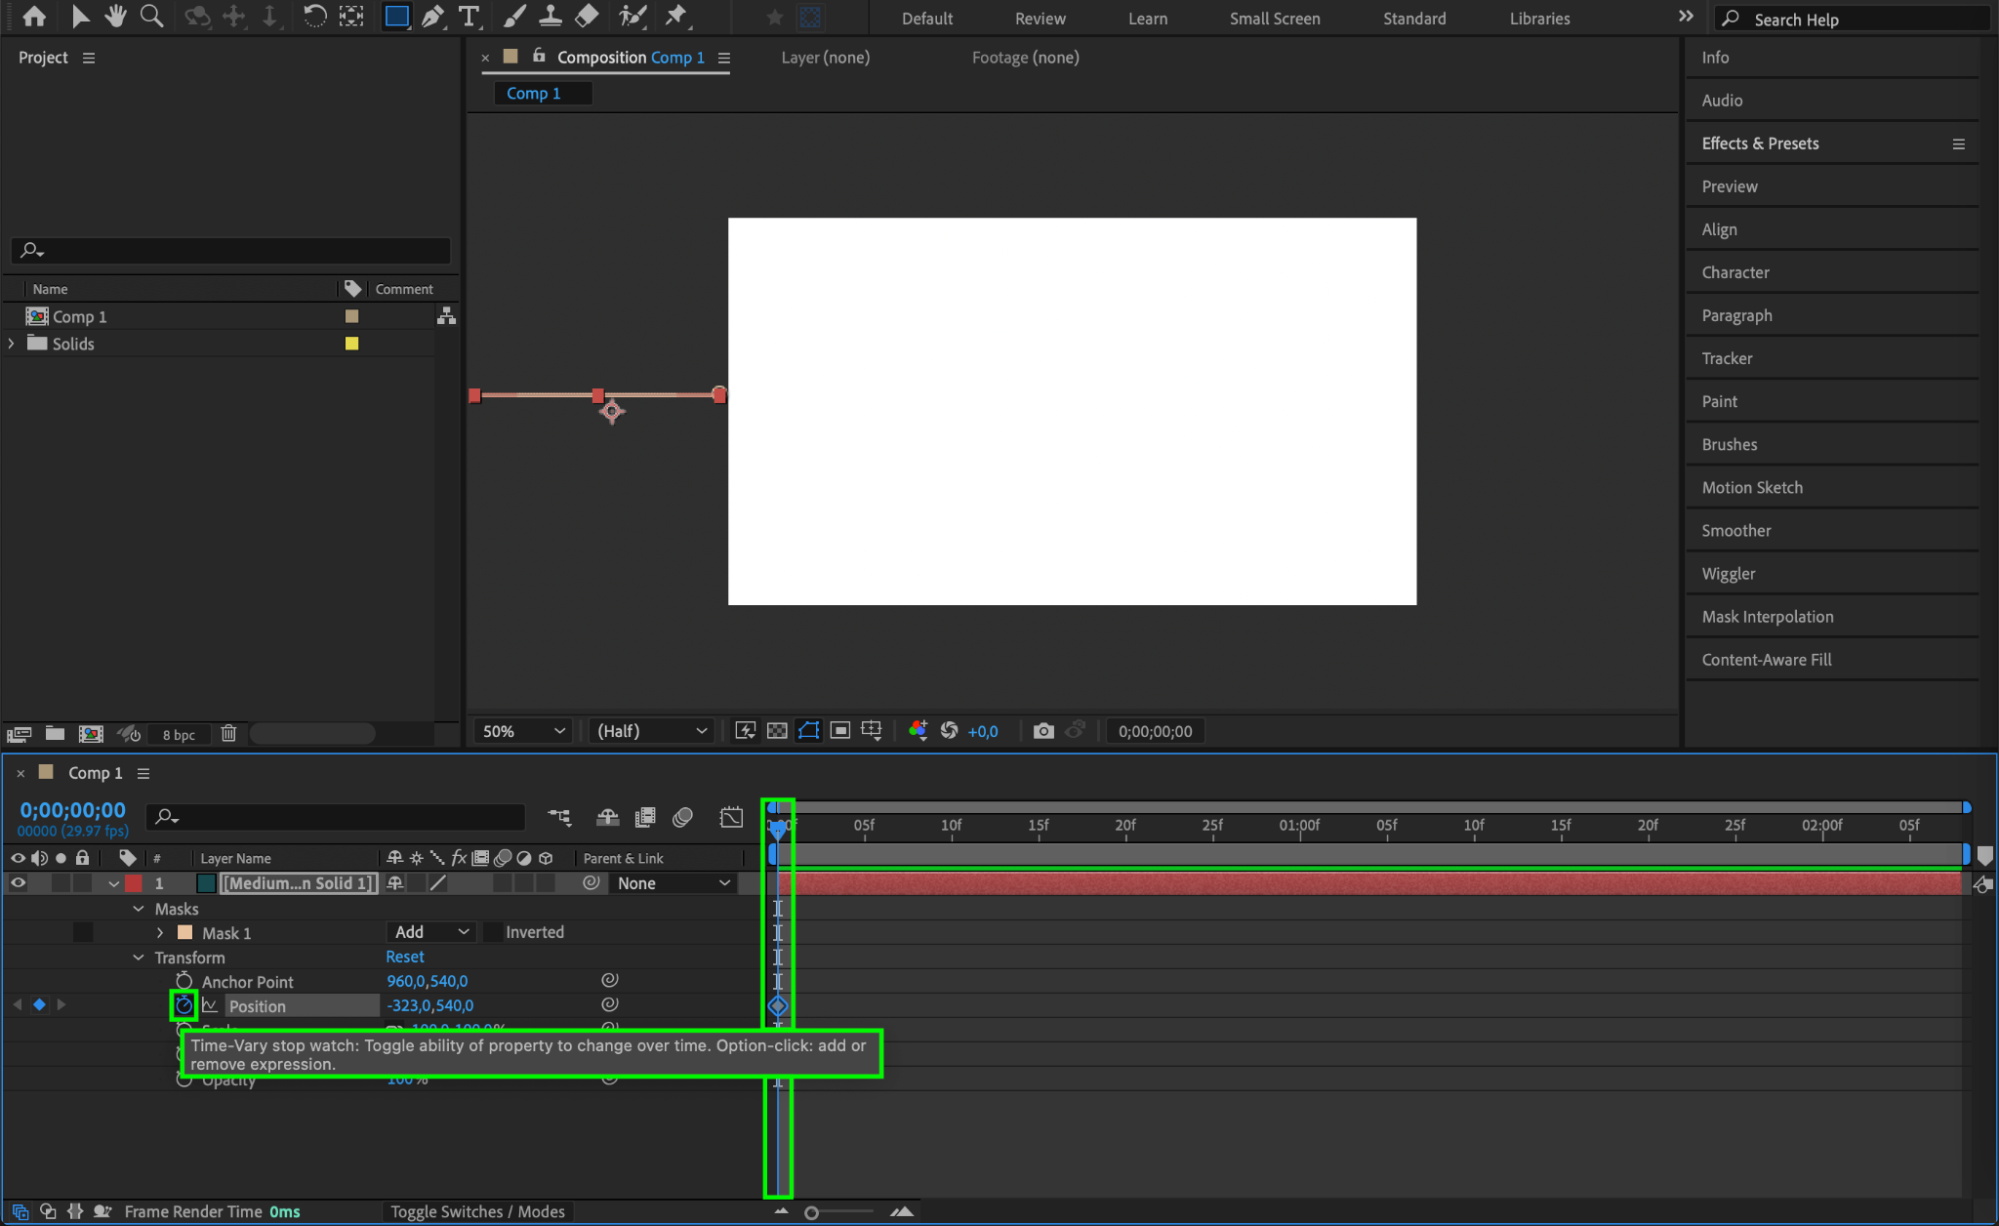
 Step 5: Adjust Easing and Timing
To make the line movement more natural, it’s important to adjust the easing and timing between keyframes. With the line shape layer selected, go to the “Graph Editor” by clicking on the graph icon next to the layer name. Here, you can tweak the curves of the keyframes to control the speed and smoothness of the line movement. 

 Step 6: Enhance with Additional Effects
But why stop there? Let’s take your animation to the next level! Consider adding additional effects and techniques to enhance your design. For example, you can apply the “Wiggle” expression to the position, scale, or rotation parameters to create a subtle, organic movement to your lines. Or try experimenting with effects like “Glow” or “Blur” to add visual interest and depth to your animation.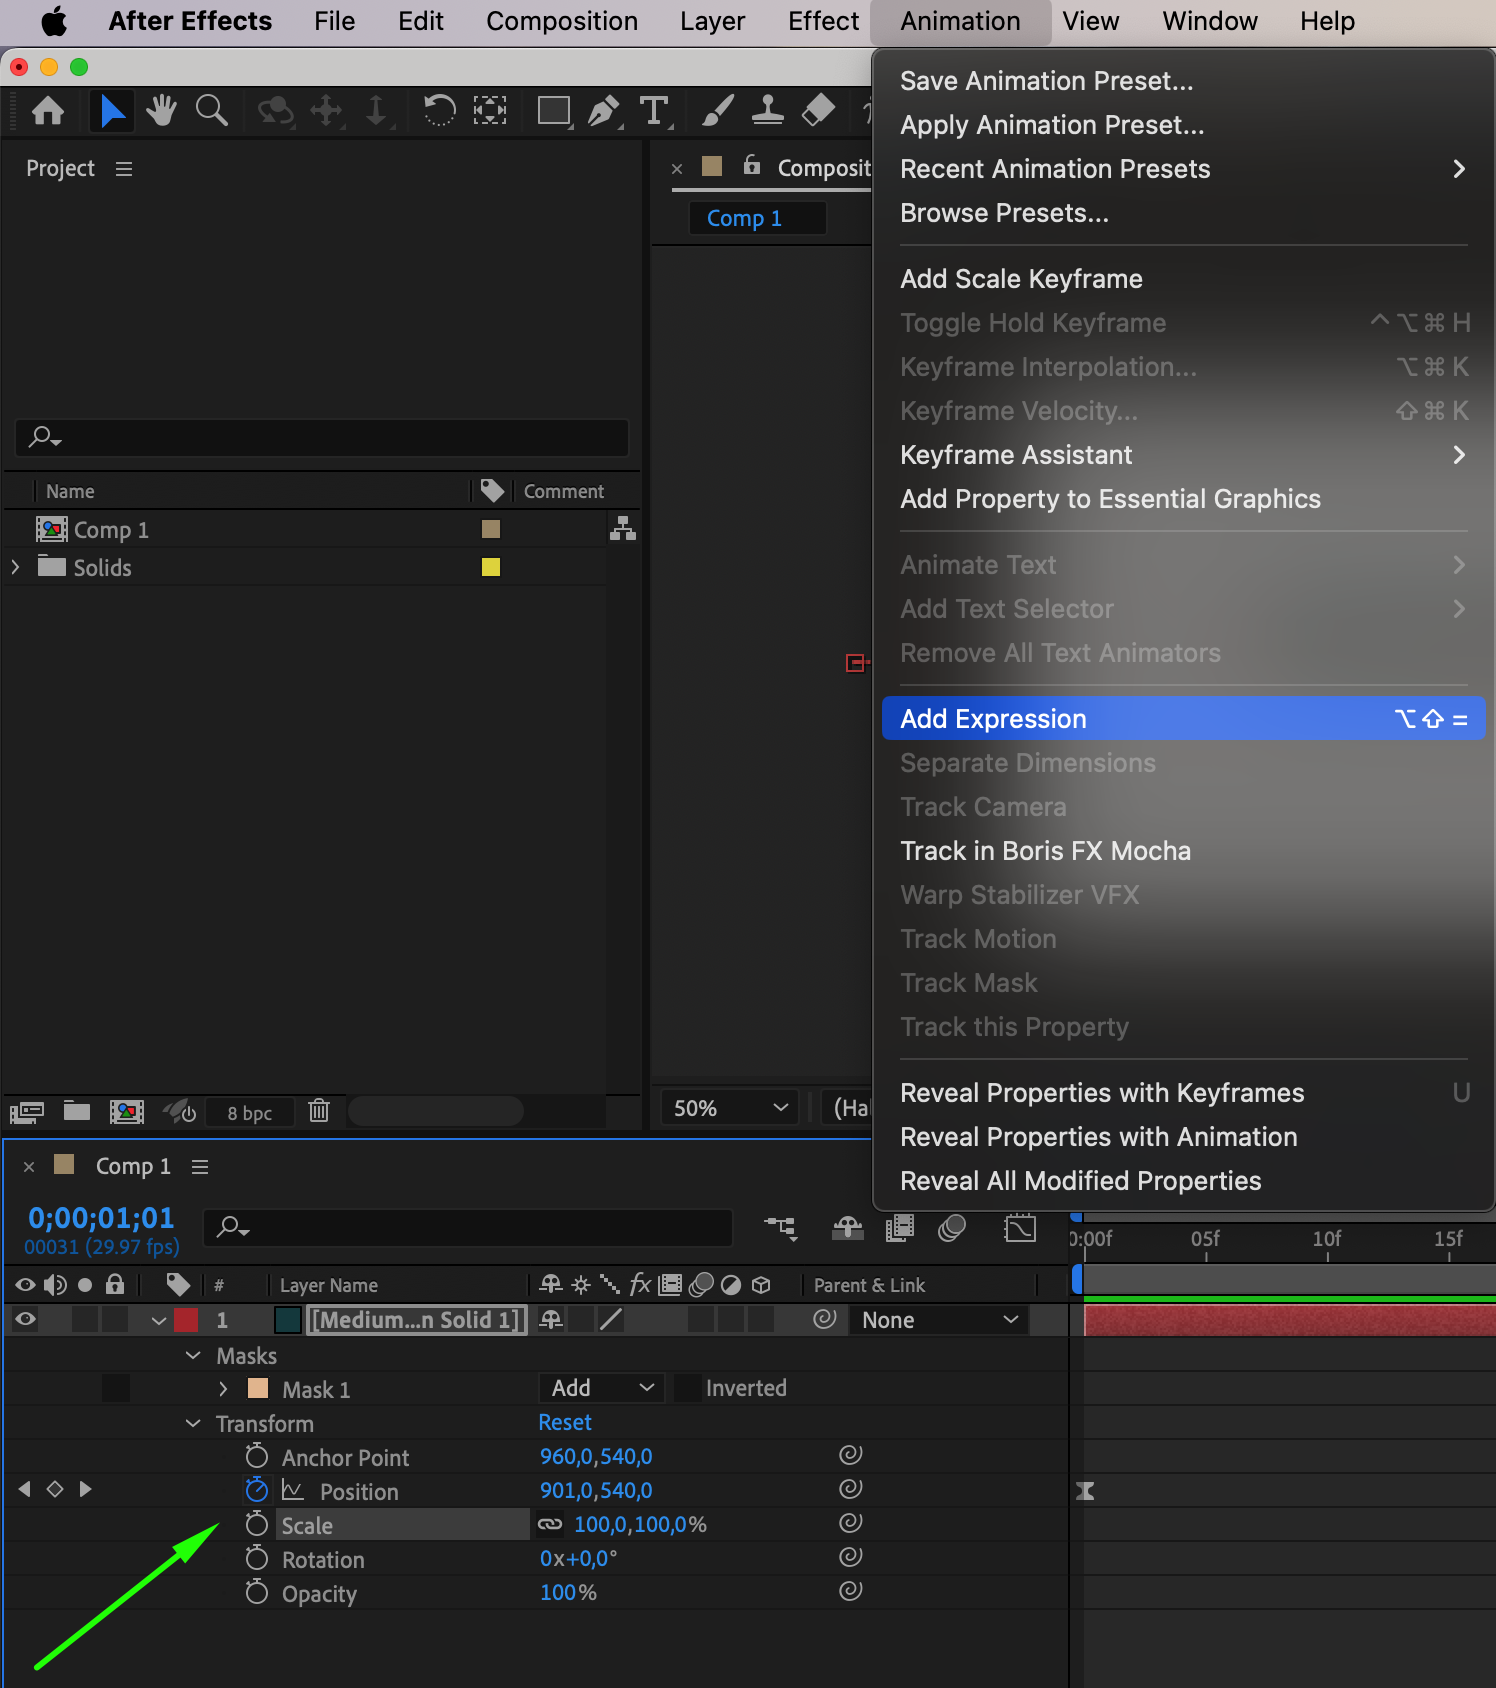
 Step 7: Finalize and Export
Once you’re satisfied with your line animation, it’s time to finalize and export your composition. Double-check your settings, such as resolution and frame rate, to ensure they’re appropriate for your intended output. Then, select “Composition” and “Add to Render Queue” to export your animation. Choose the desired file format and settings, then click “Render” to complete the process.
 Conclusion
And there you have it! By following this step-by-step guide, you’ve learned the essential techniques for creating moving lines in After Effects. Now, it’s time to let your creativity flow and explore endless possibilities in your animations. So go ahead and start adding captivating motion to your designs with moving lines in After Effects. Have fun and happy animating!


