How to Create Stunning Liquid Effects in After Effects
Introduction to Liquid Effects in After Effects
Creating liquid effects in After Effects can add a dynamic and visually appealing element to your animations and motion graphics. With the powerful tools available in After Effects, you can achieve realistic liquid simulations that will enhance the impact of your visuals. In this step-by-step guide, we will explore two methods to create liquid effects and bring your animations to life.
Get 10% off when you subscribe to our newsletter

Method 1: Using Wave World and Caustics Effects
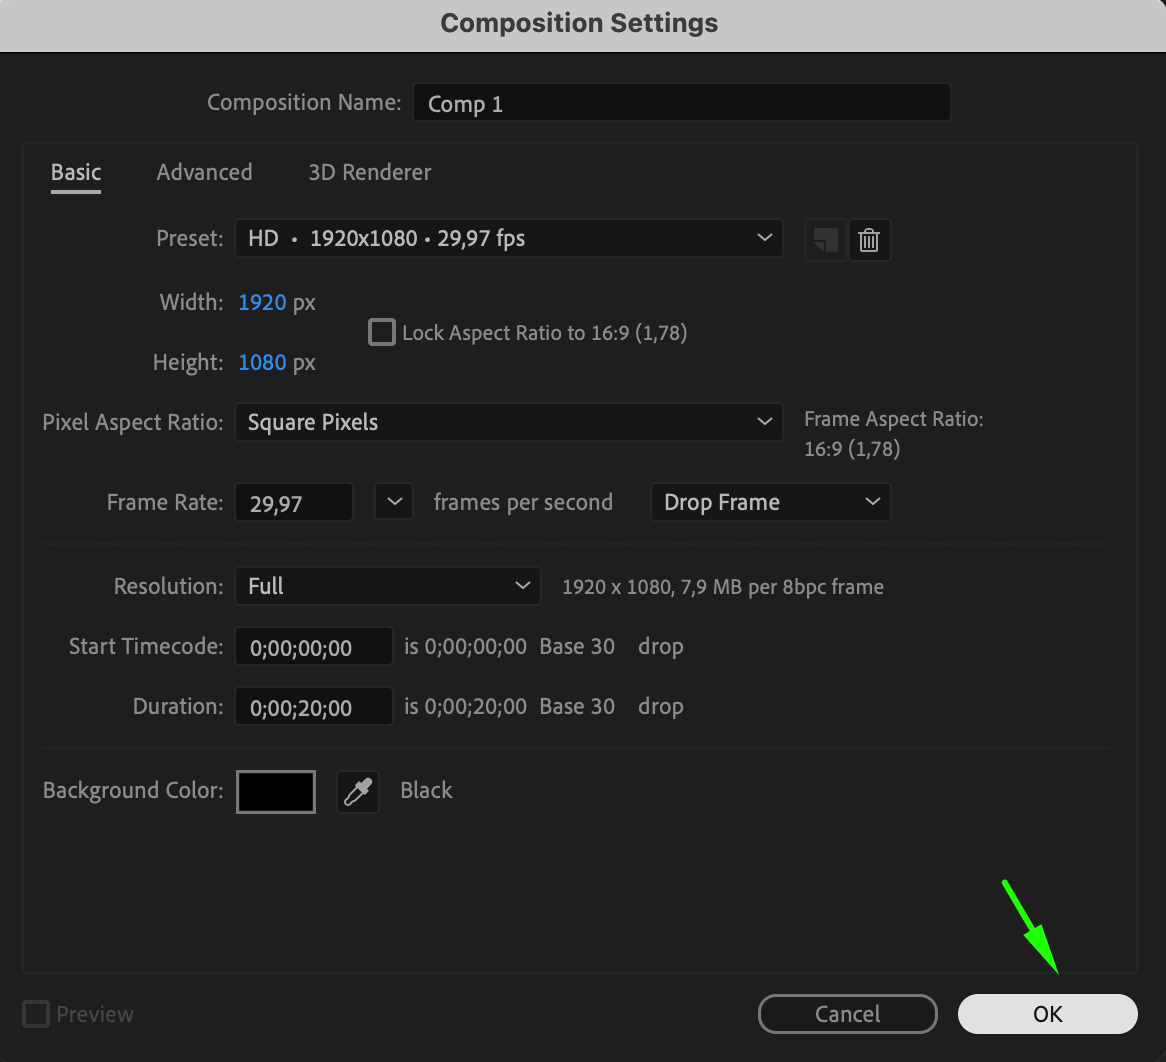
Step 1: Create a New Composition
Create a new composition and set its parameters according to your project needs. This will be the canvas for your liquid effect.

Step 2: Add a Shape Layer
Double-click the Rectangle Tool (Q) to create a shape layer in your composition.
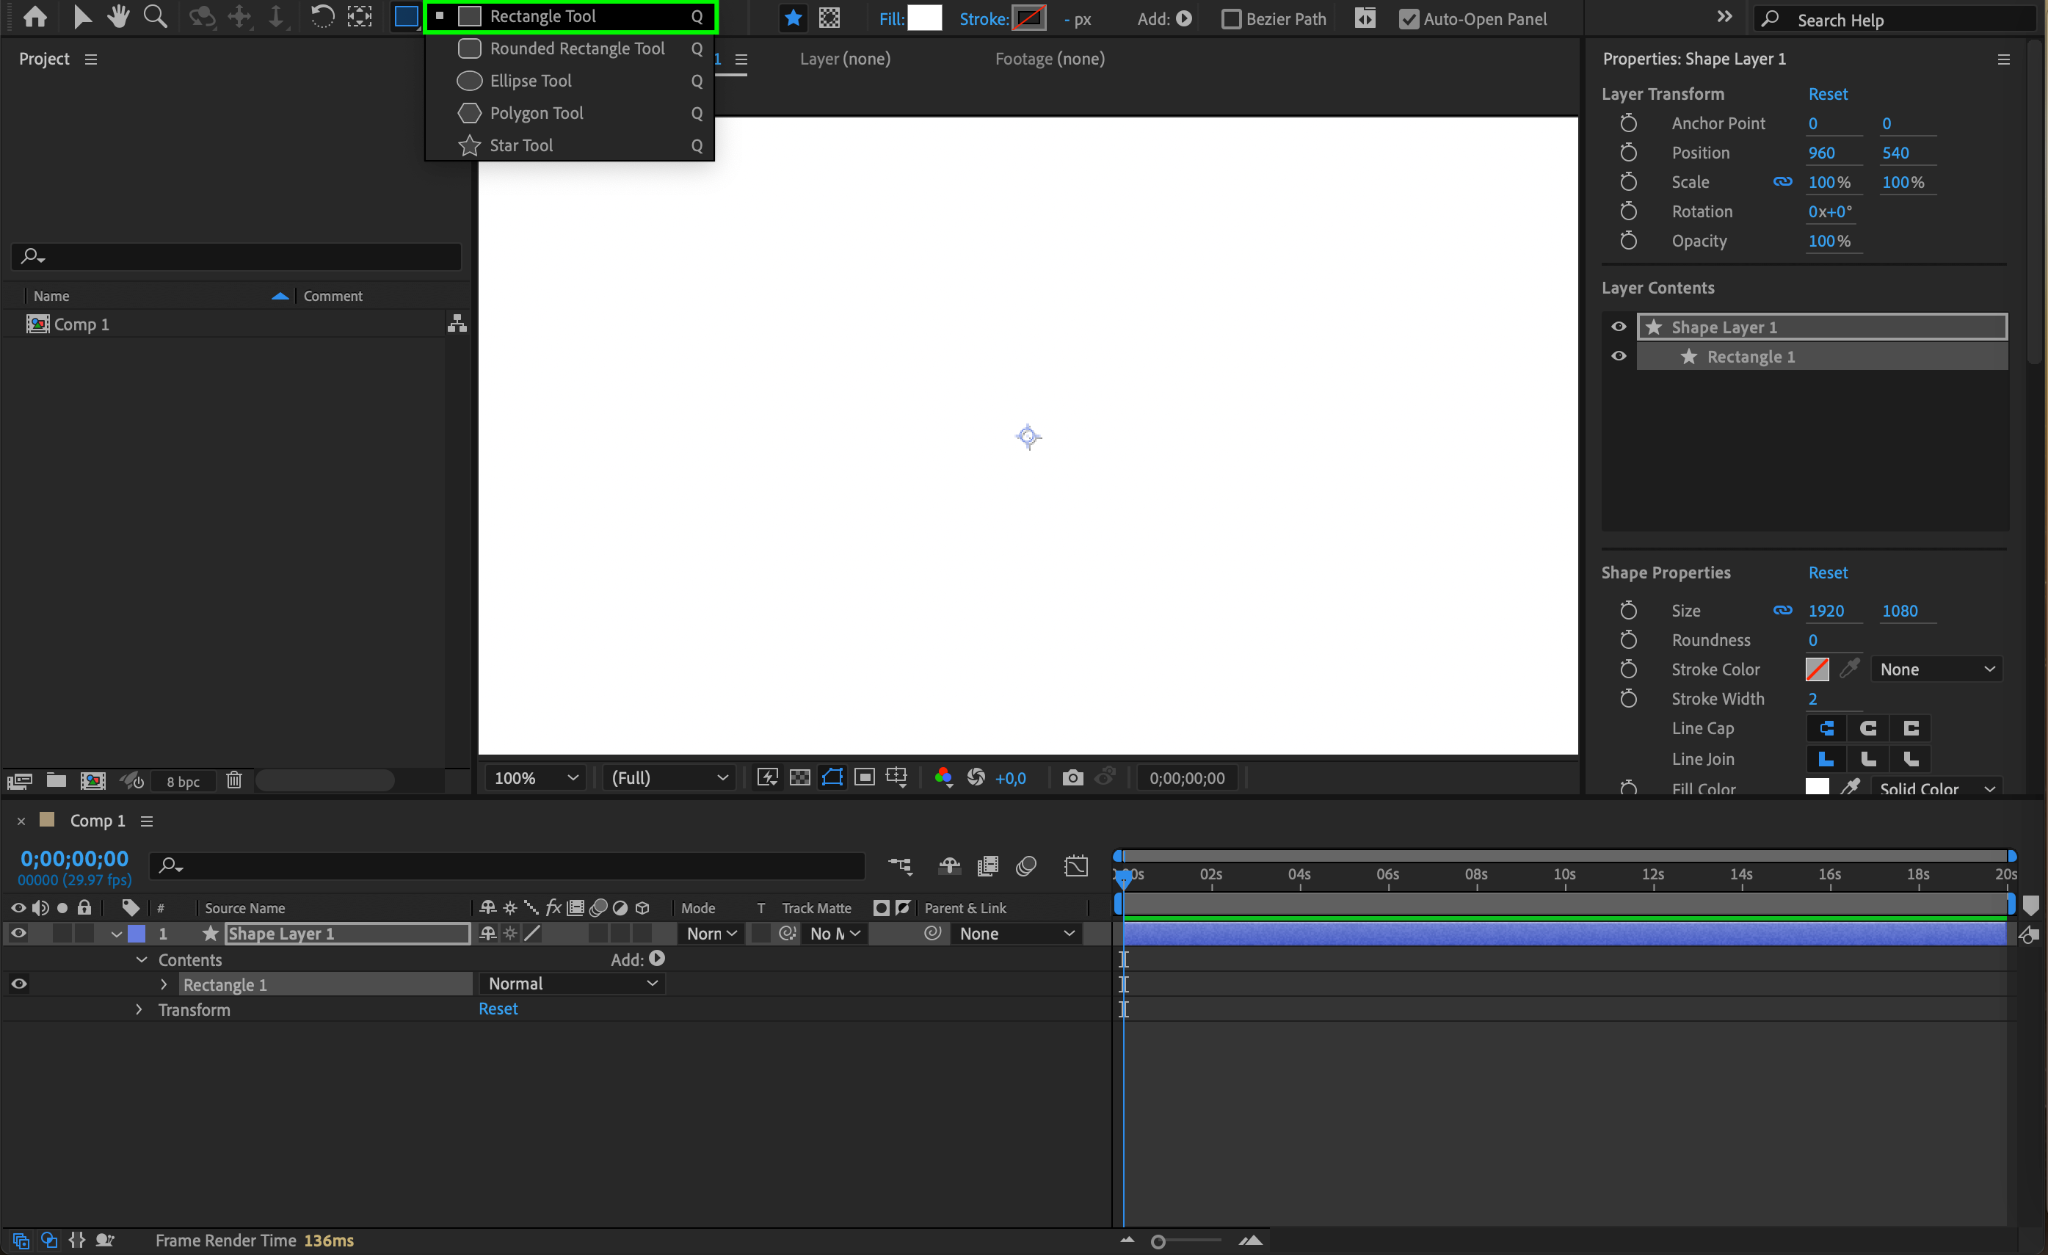
Step 3: Apply the Wave World Effect
Apply the Wave World effect to your shape layer by dragging it from the Effects & Presets panel.
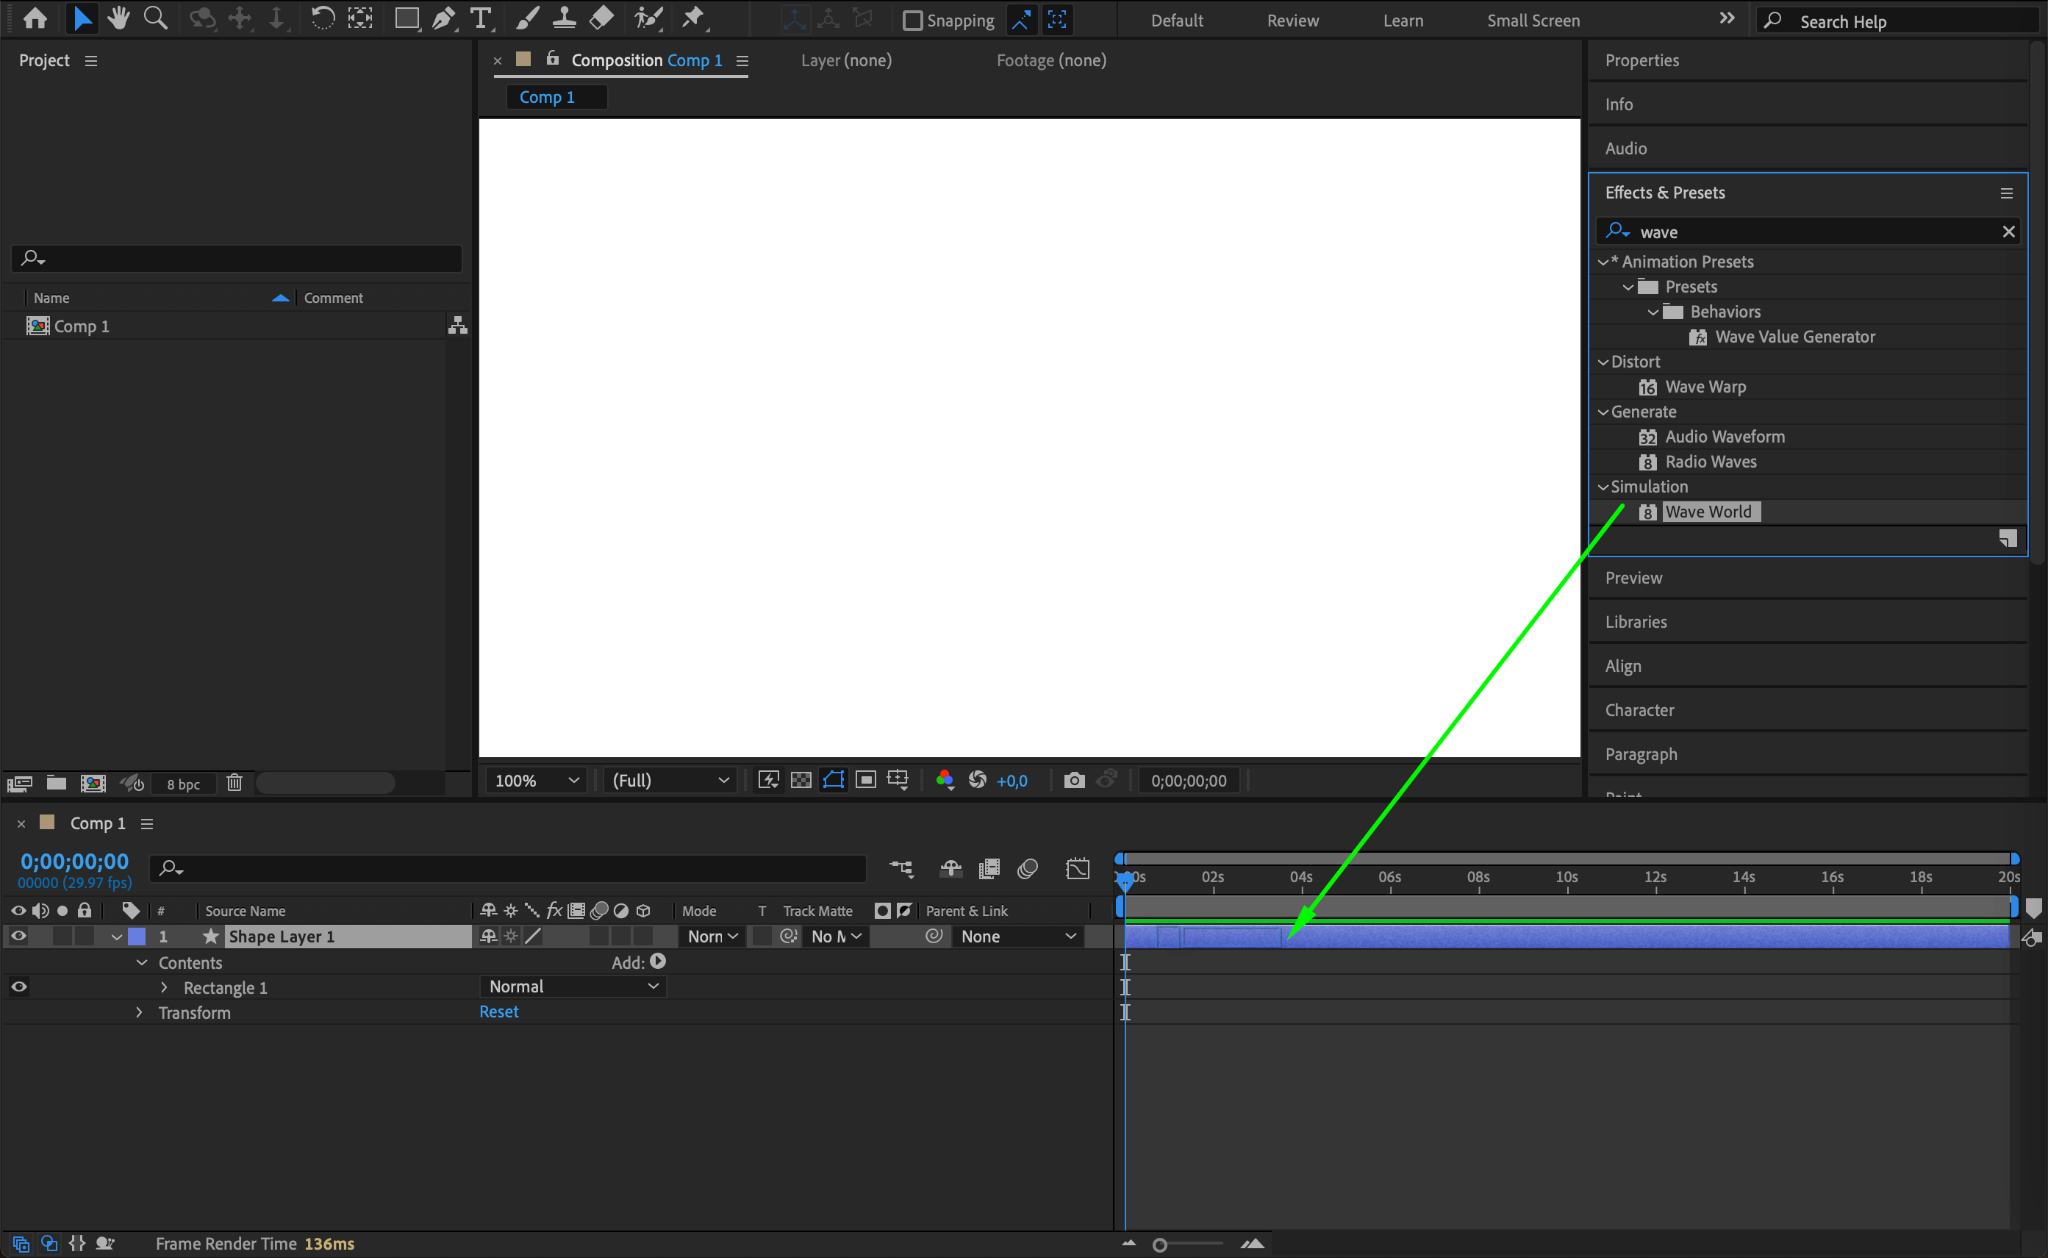
Step 4: Adjust Wave World Settings
In the Effect Controls panel, configure the following settings for the Wave World effect:
Vertical Rotation: 0.4 degrees
Contrast: 0.226
Grid Resolution: 150
Height/Length and Width: 0.05
Amplitude: 0.4
Frequency: 1.5

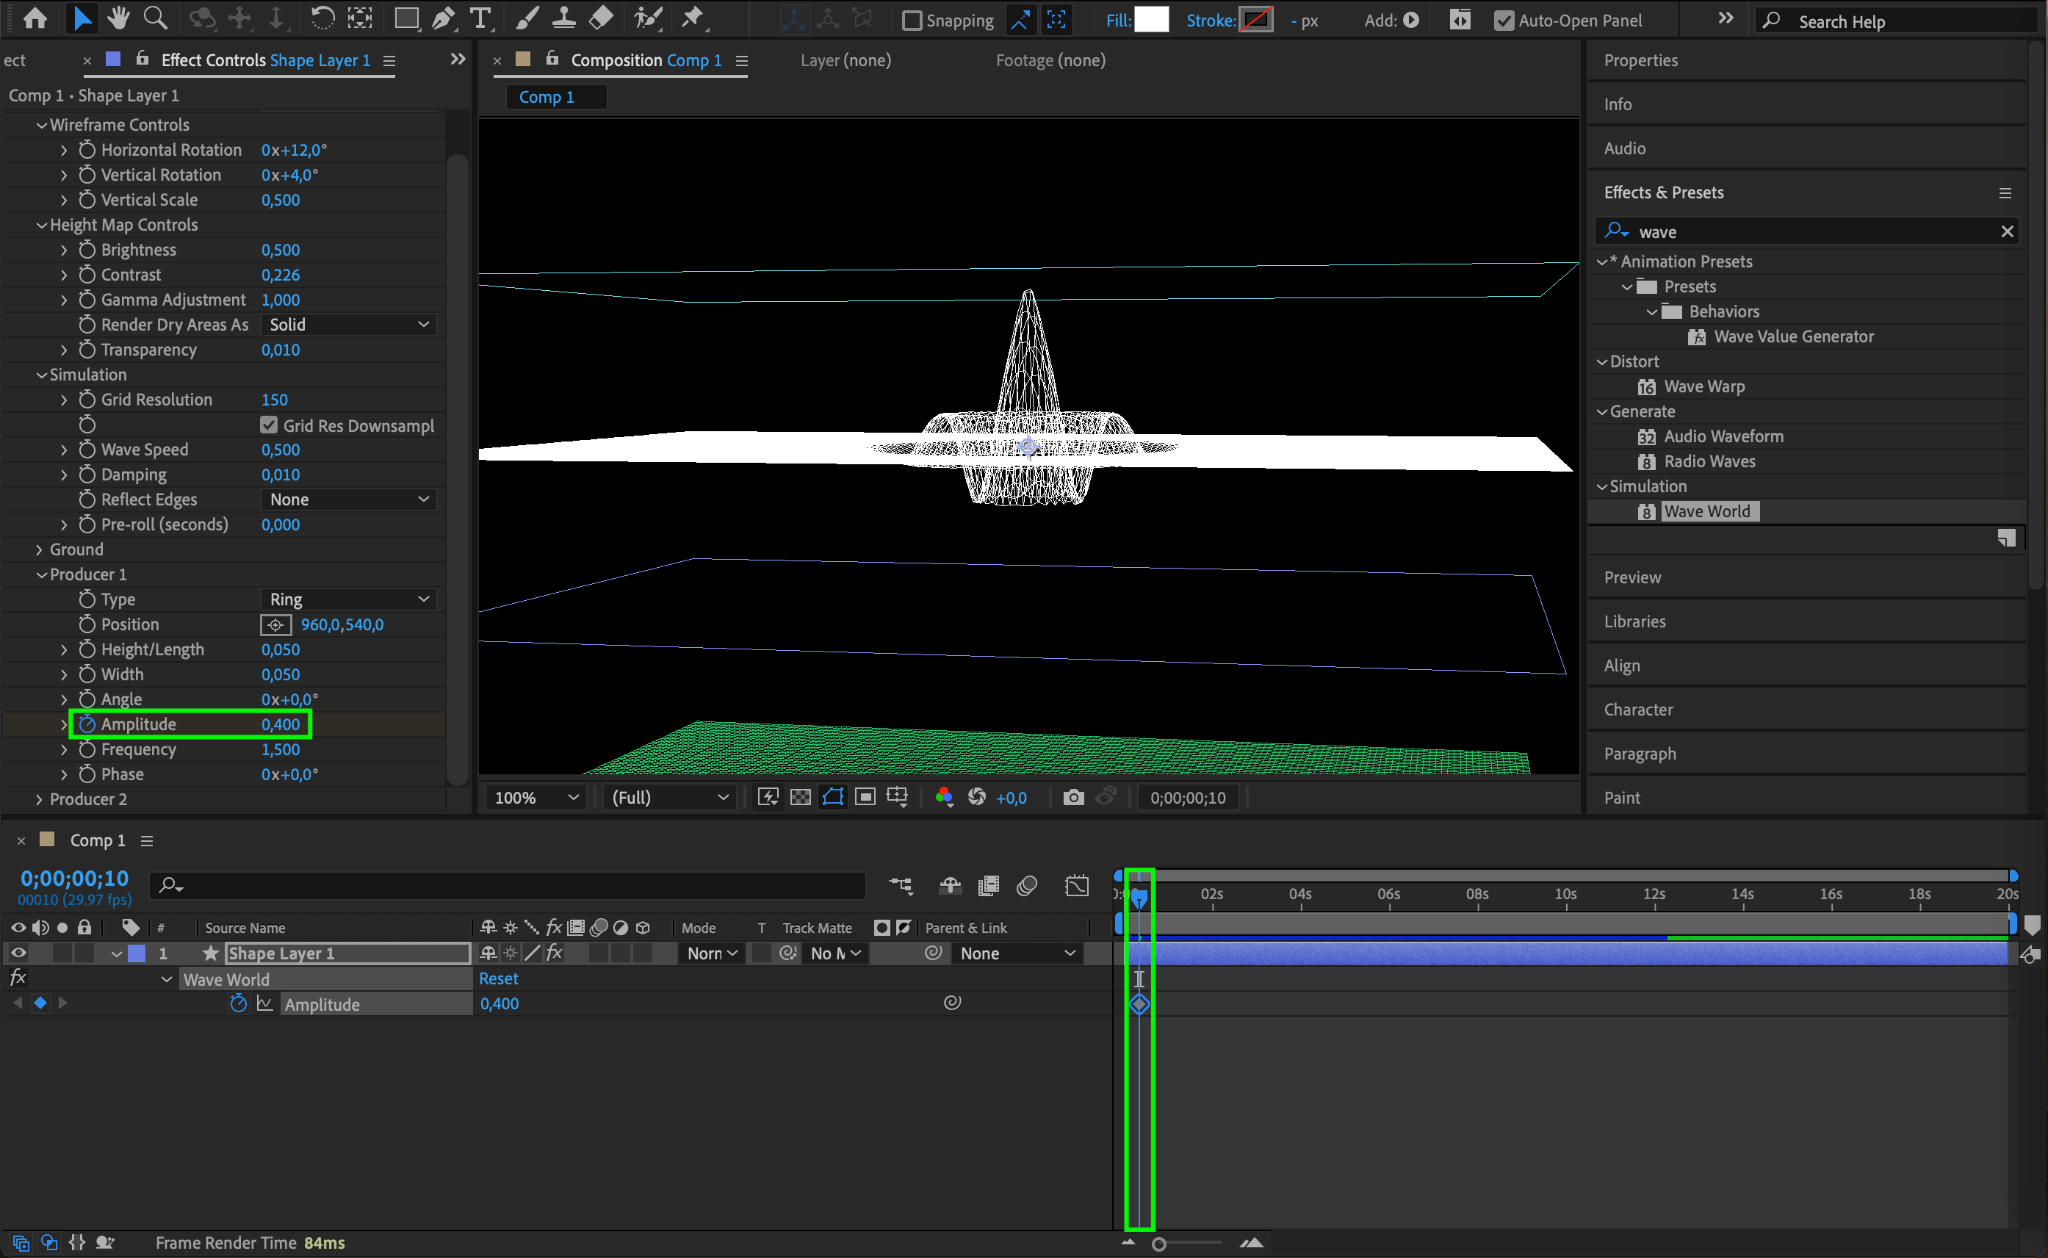
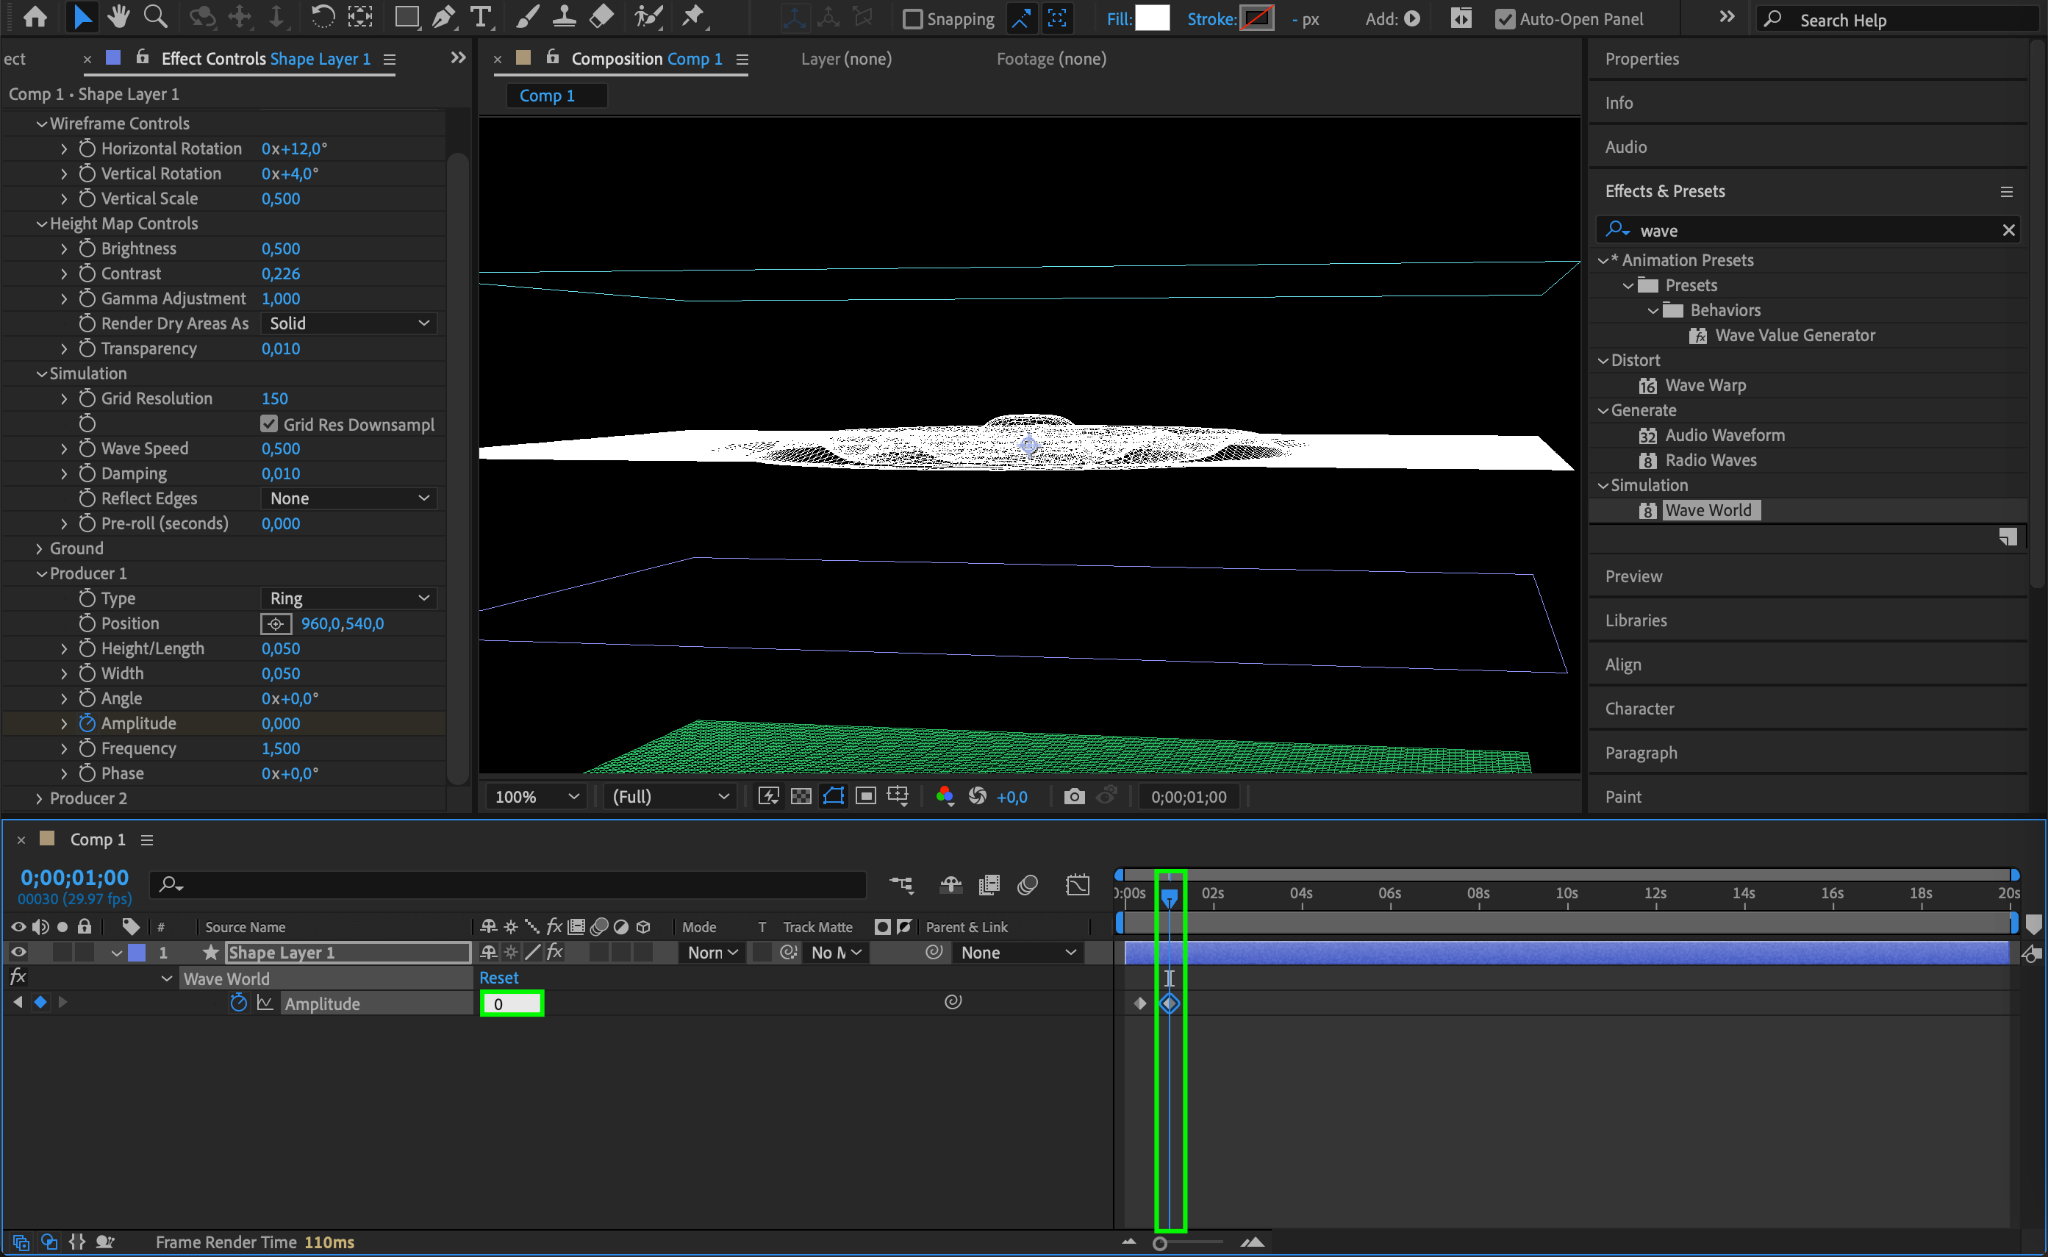
Step 5: Animate Amplitude
Animate the Amplitude parameter by moving the CTI (Current Time Indicator) 10 frames forward from the start of the composition (Ctrl/Cmd + Shift + Right Arrow) and setting the value to 0.4. Move the CTI another 20 frames forward and set the value to 0.
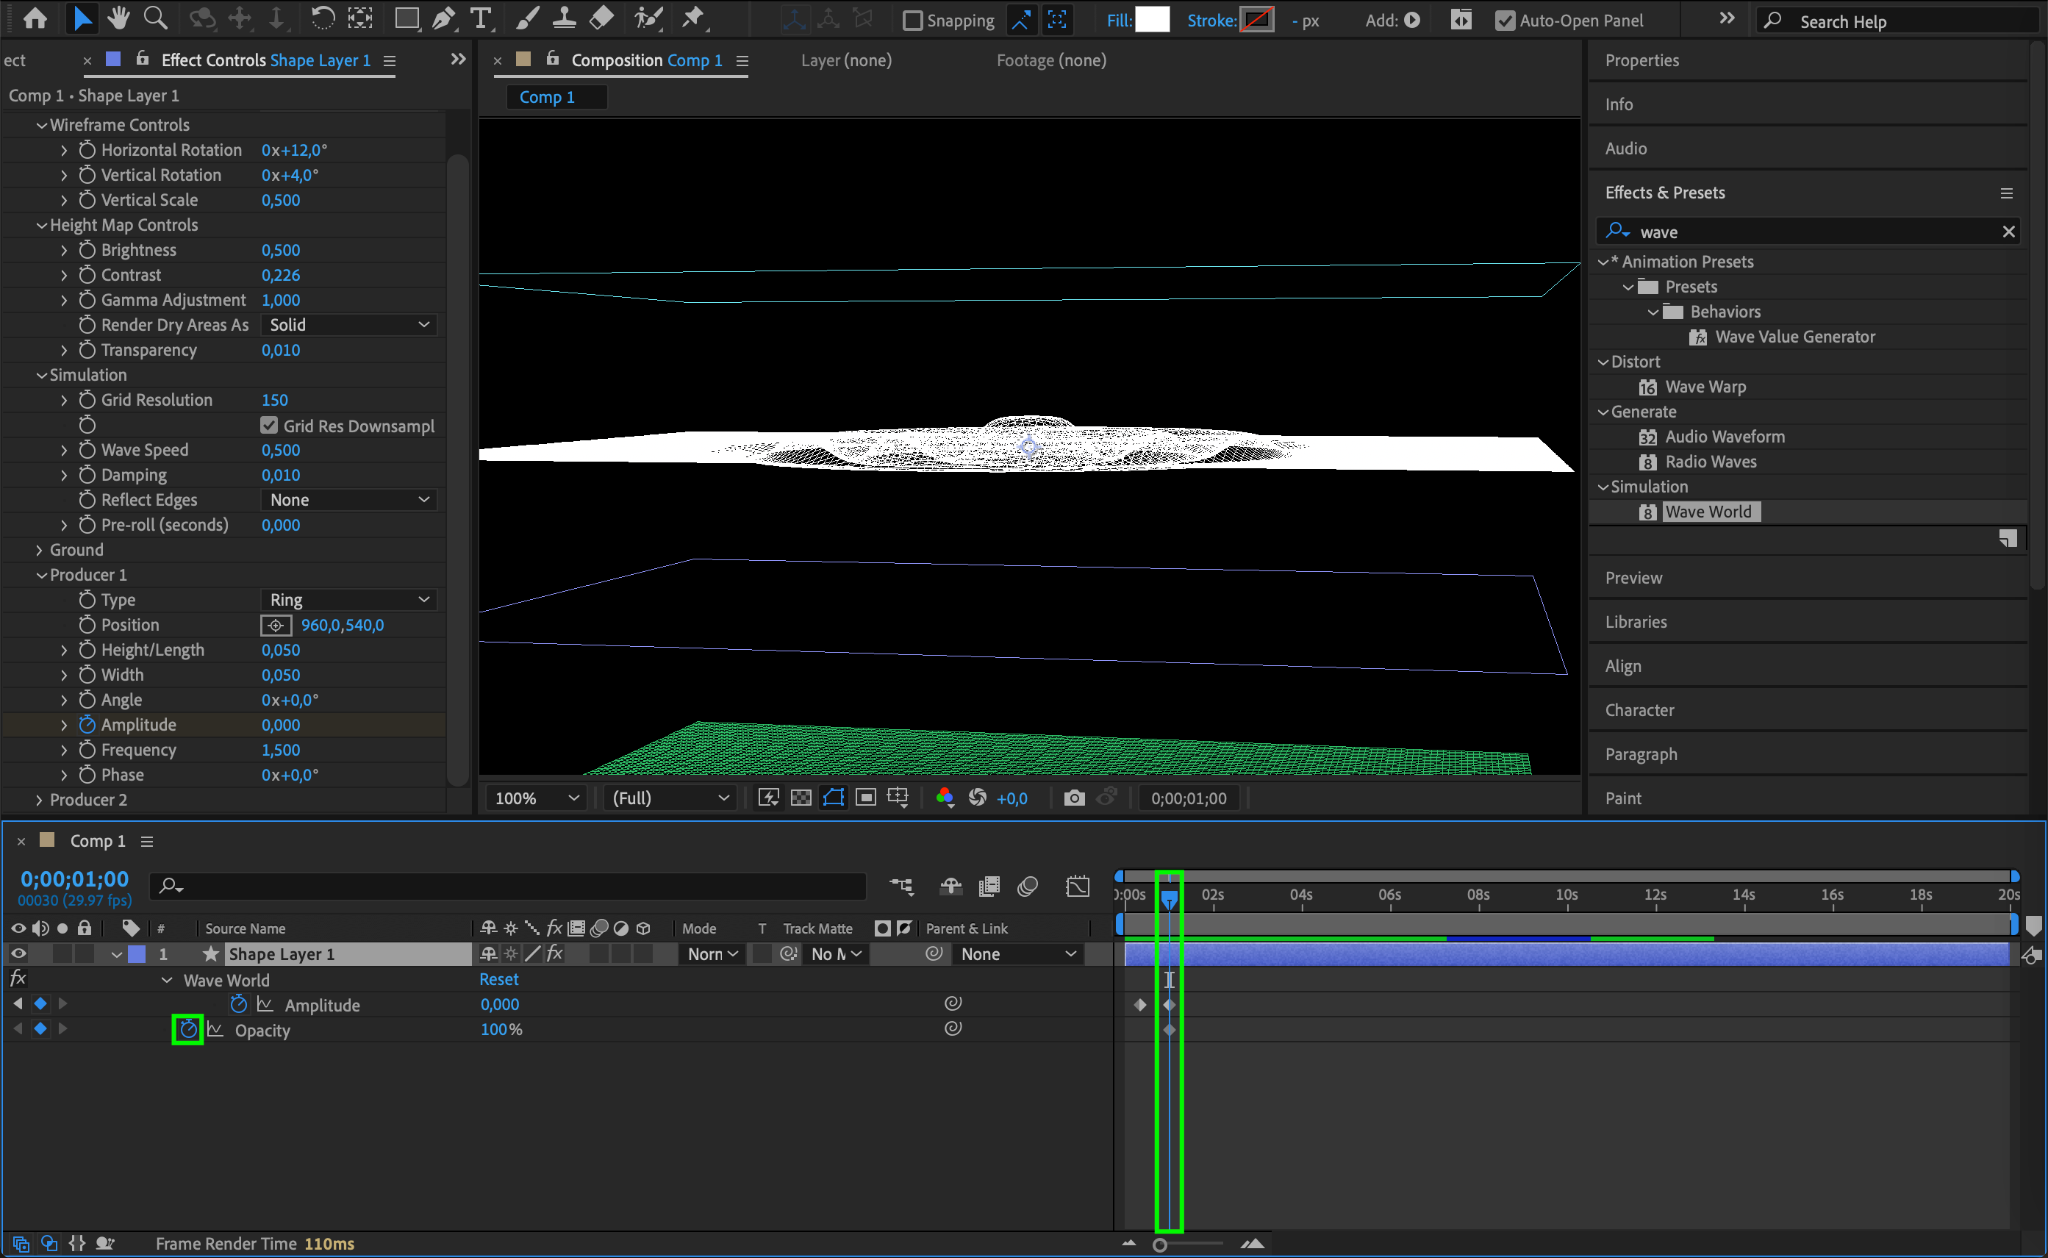
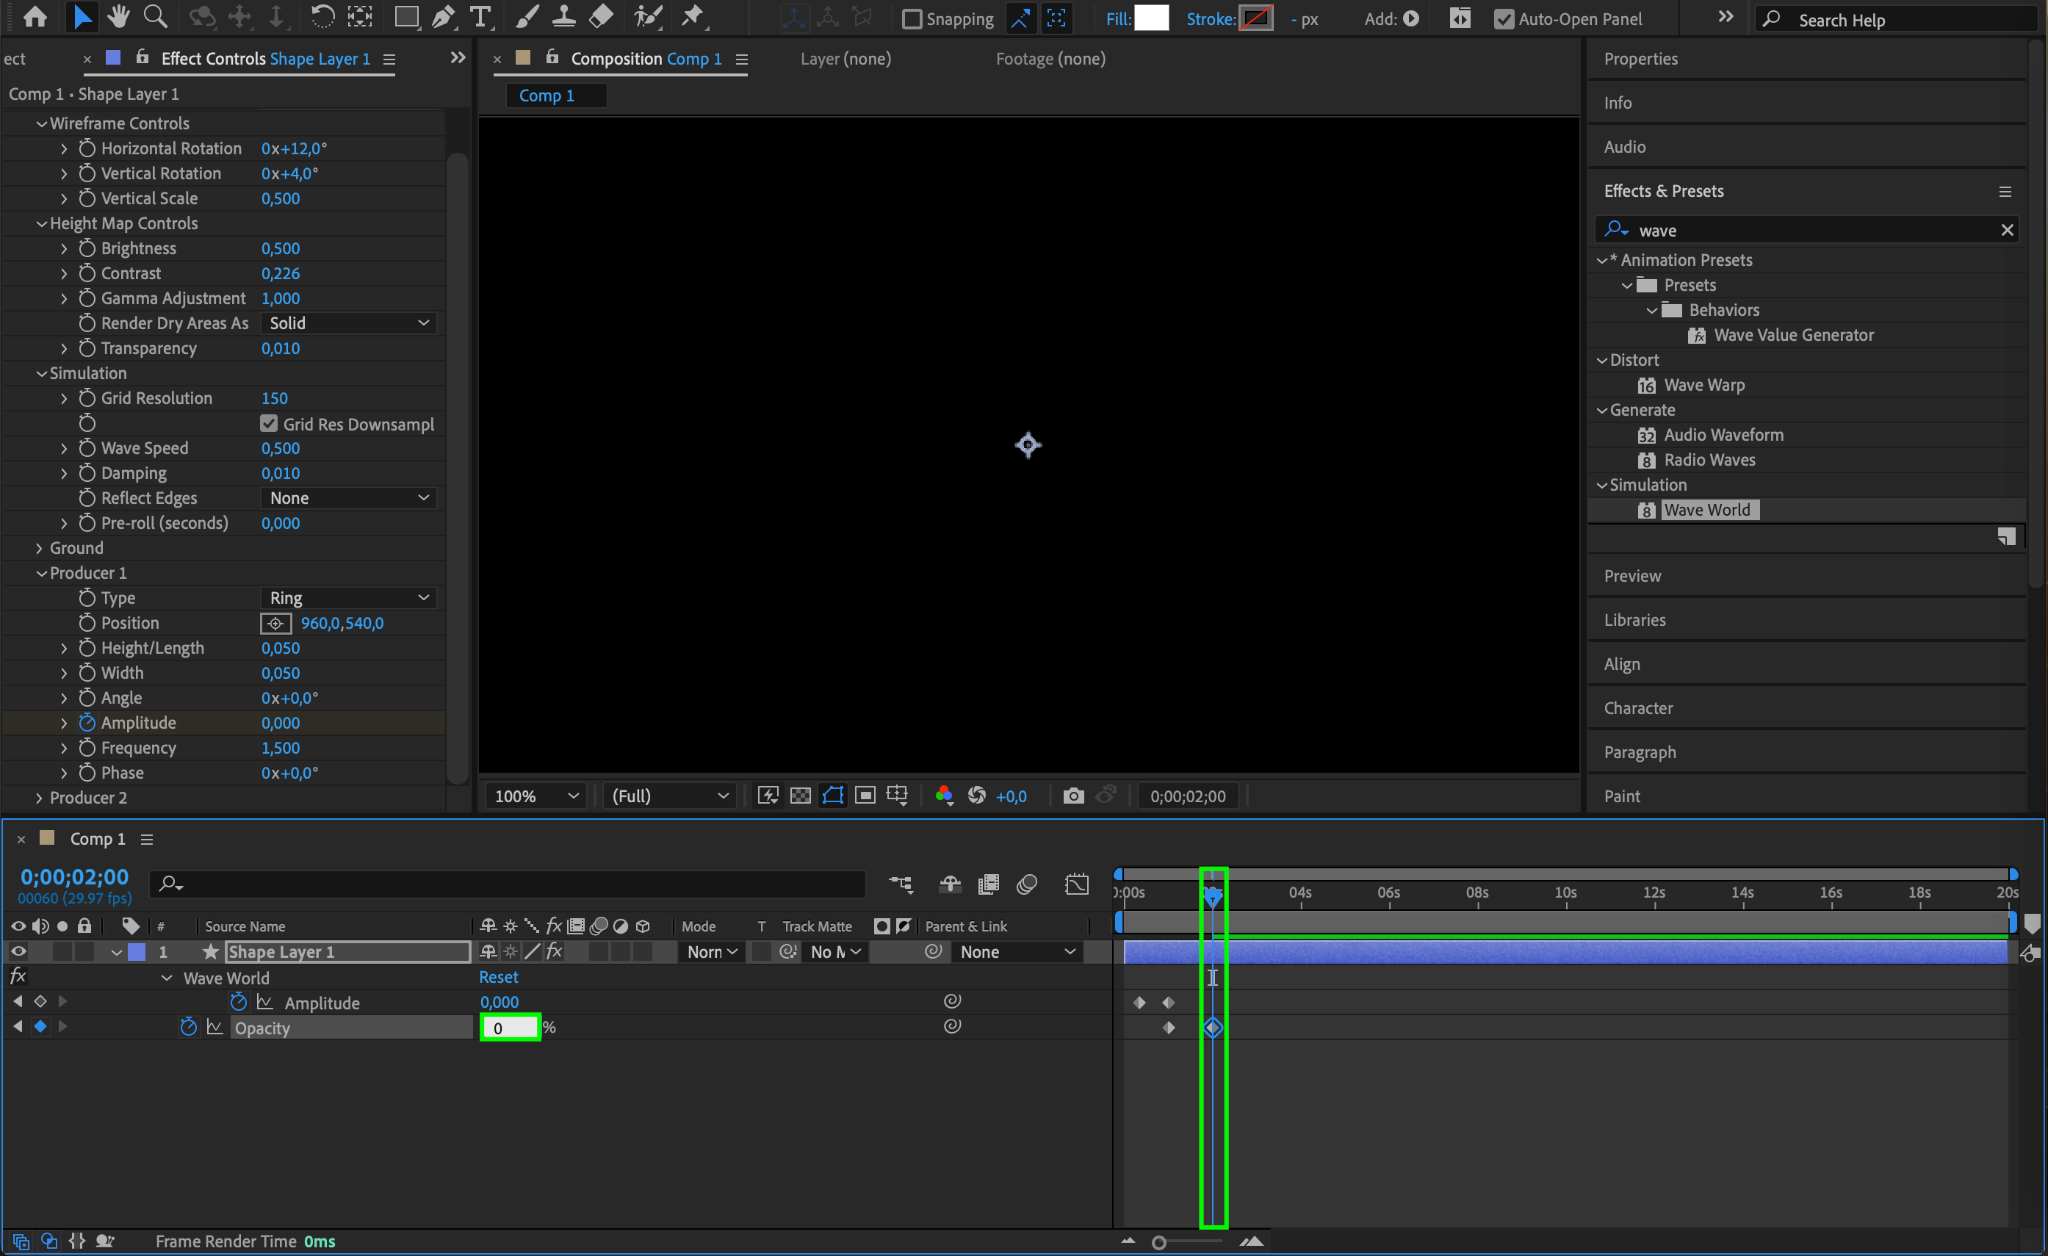
Step 6: Animate Opacity
At the same CTI position, set the Opacity parameter to 100% and create a keyframe by clicking the stopwatch icon next to it. Move the CTI a few frames forward and set the Opacity to 0%.
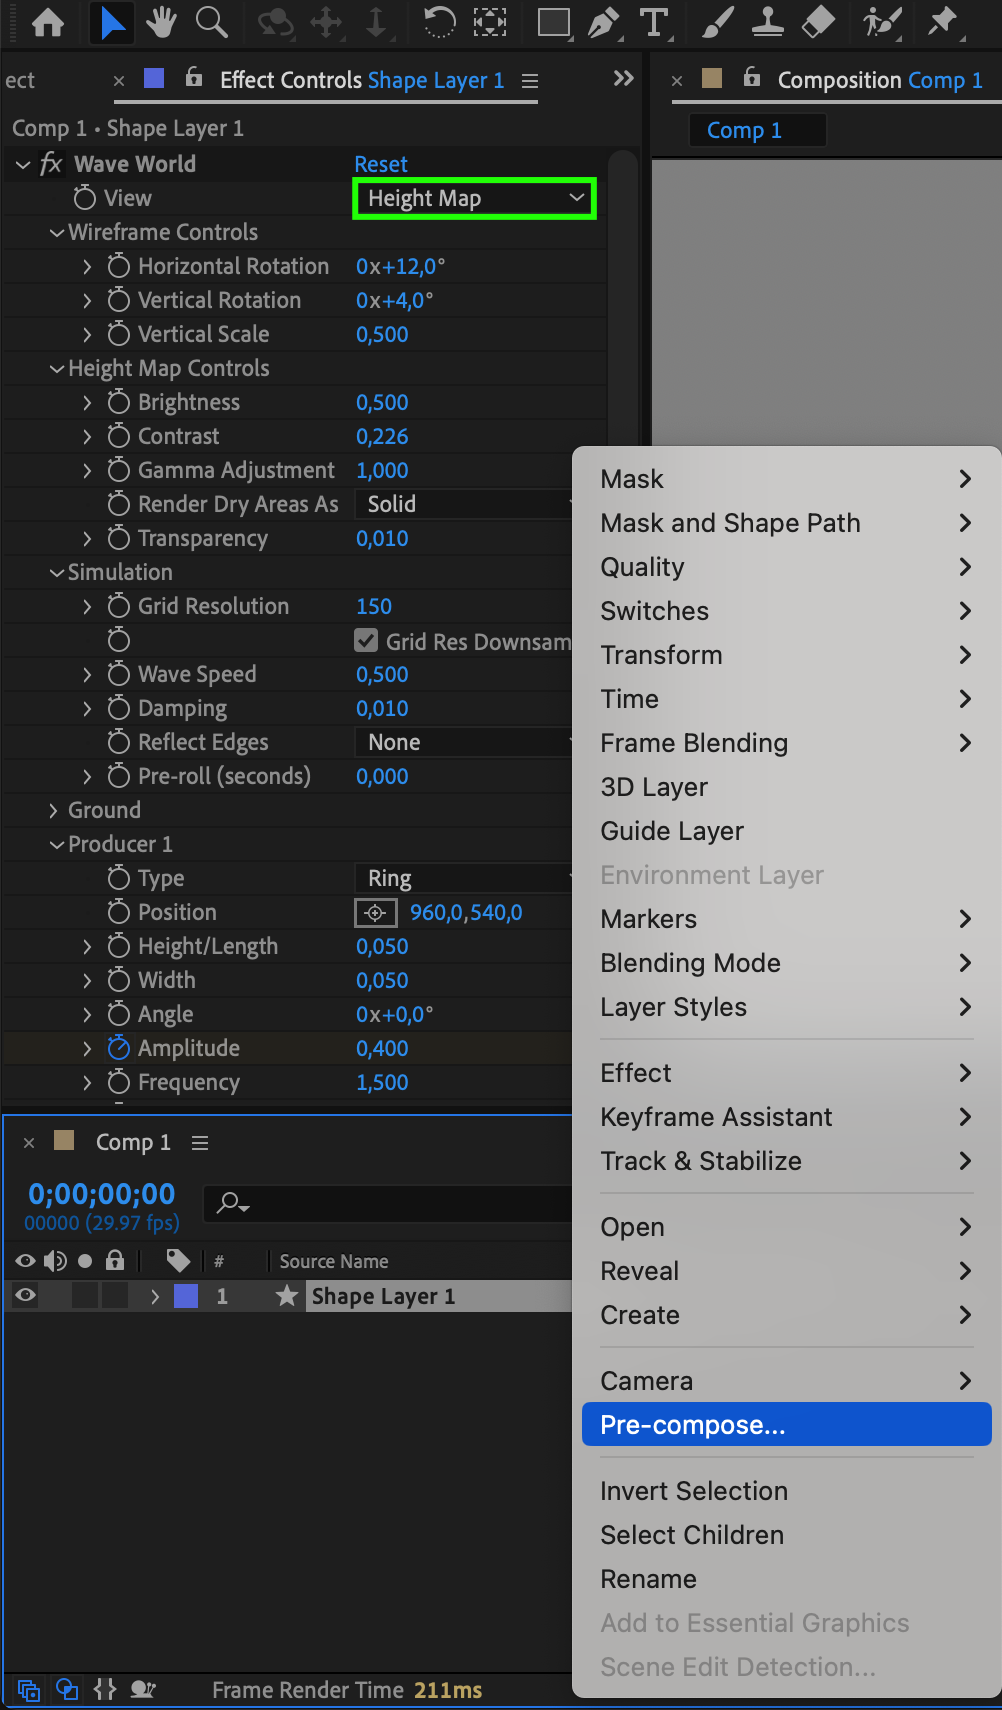
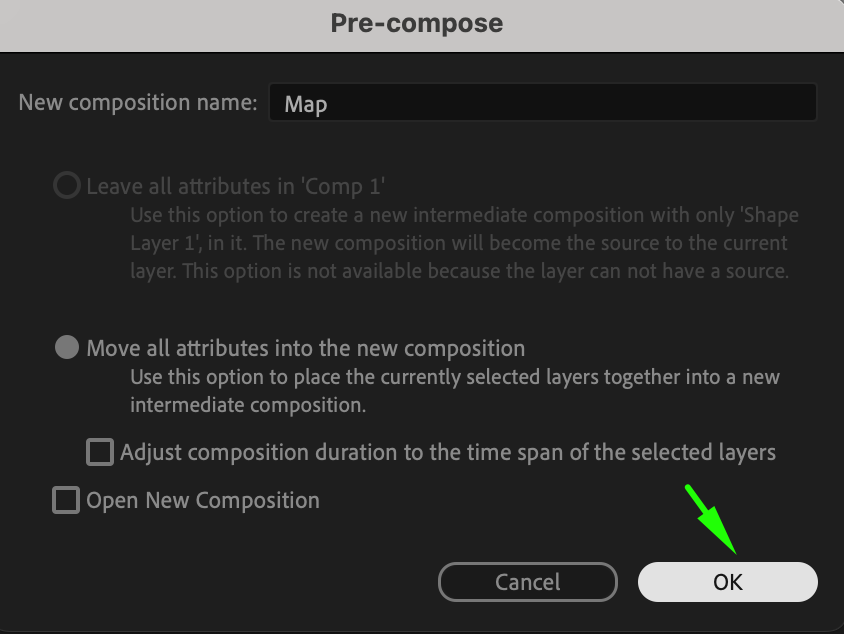
Step 7: Pre-compose the Liquid Map
In the Effect Controls panel, set the View to Height Map. Right-click on your layer and select Pre-compose from the submenu. Name this pre-comp “Map.”
Step 8: Create a New Shape Layer
Double-click the Rectangle Tool (Q) to create another shape layer.

Step 9: Apply the Caustics Effect
Apply the Caustics effect to this new shape layer from the Effects & Presets panel.
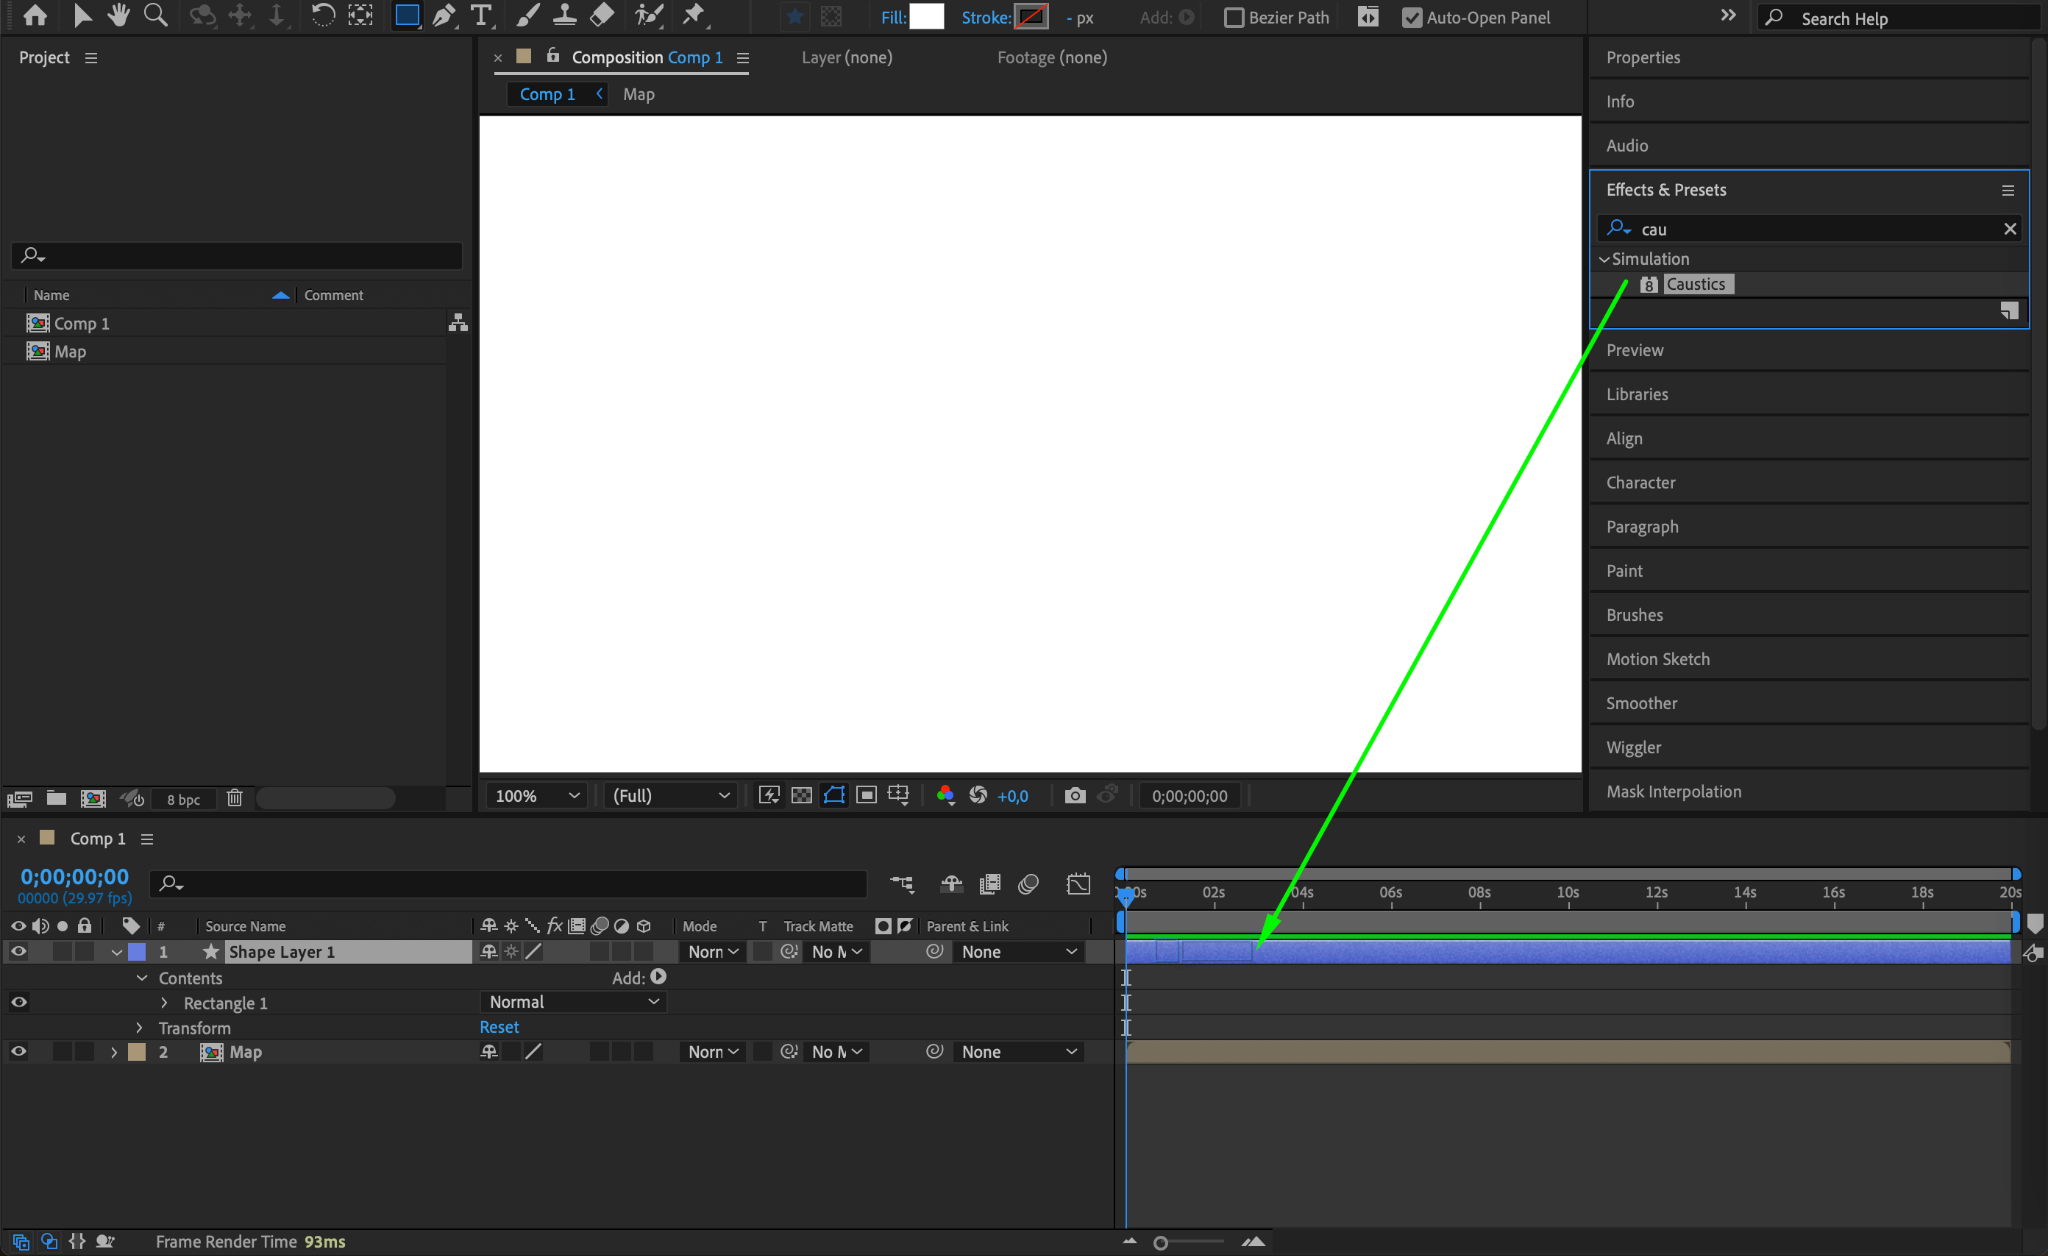
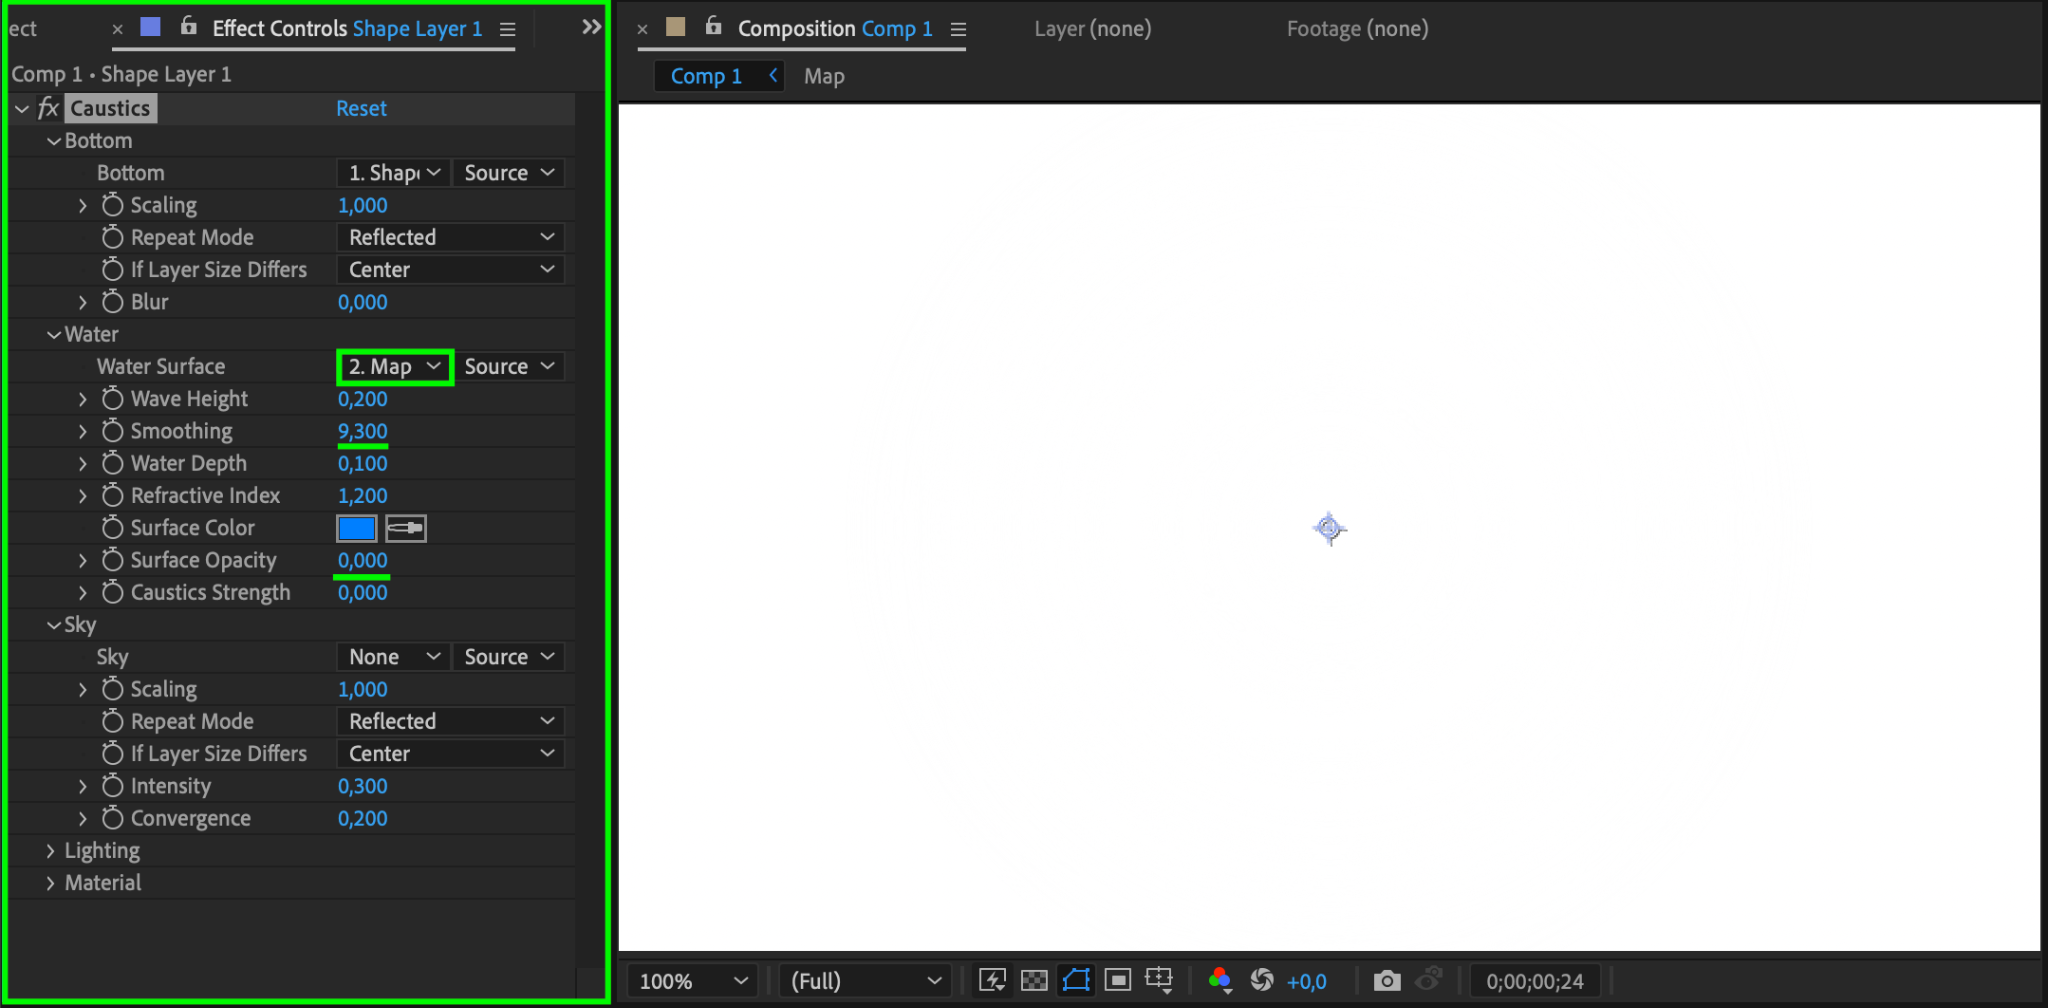
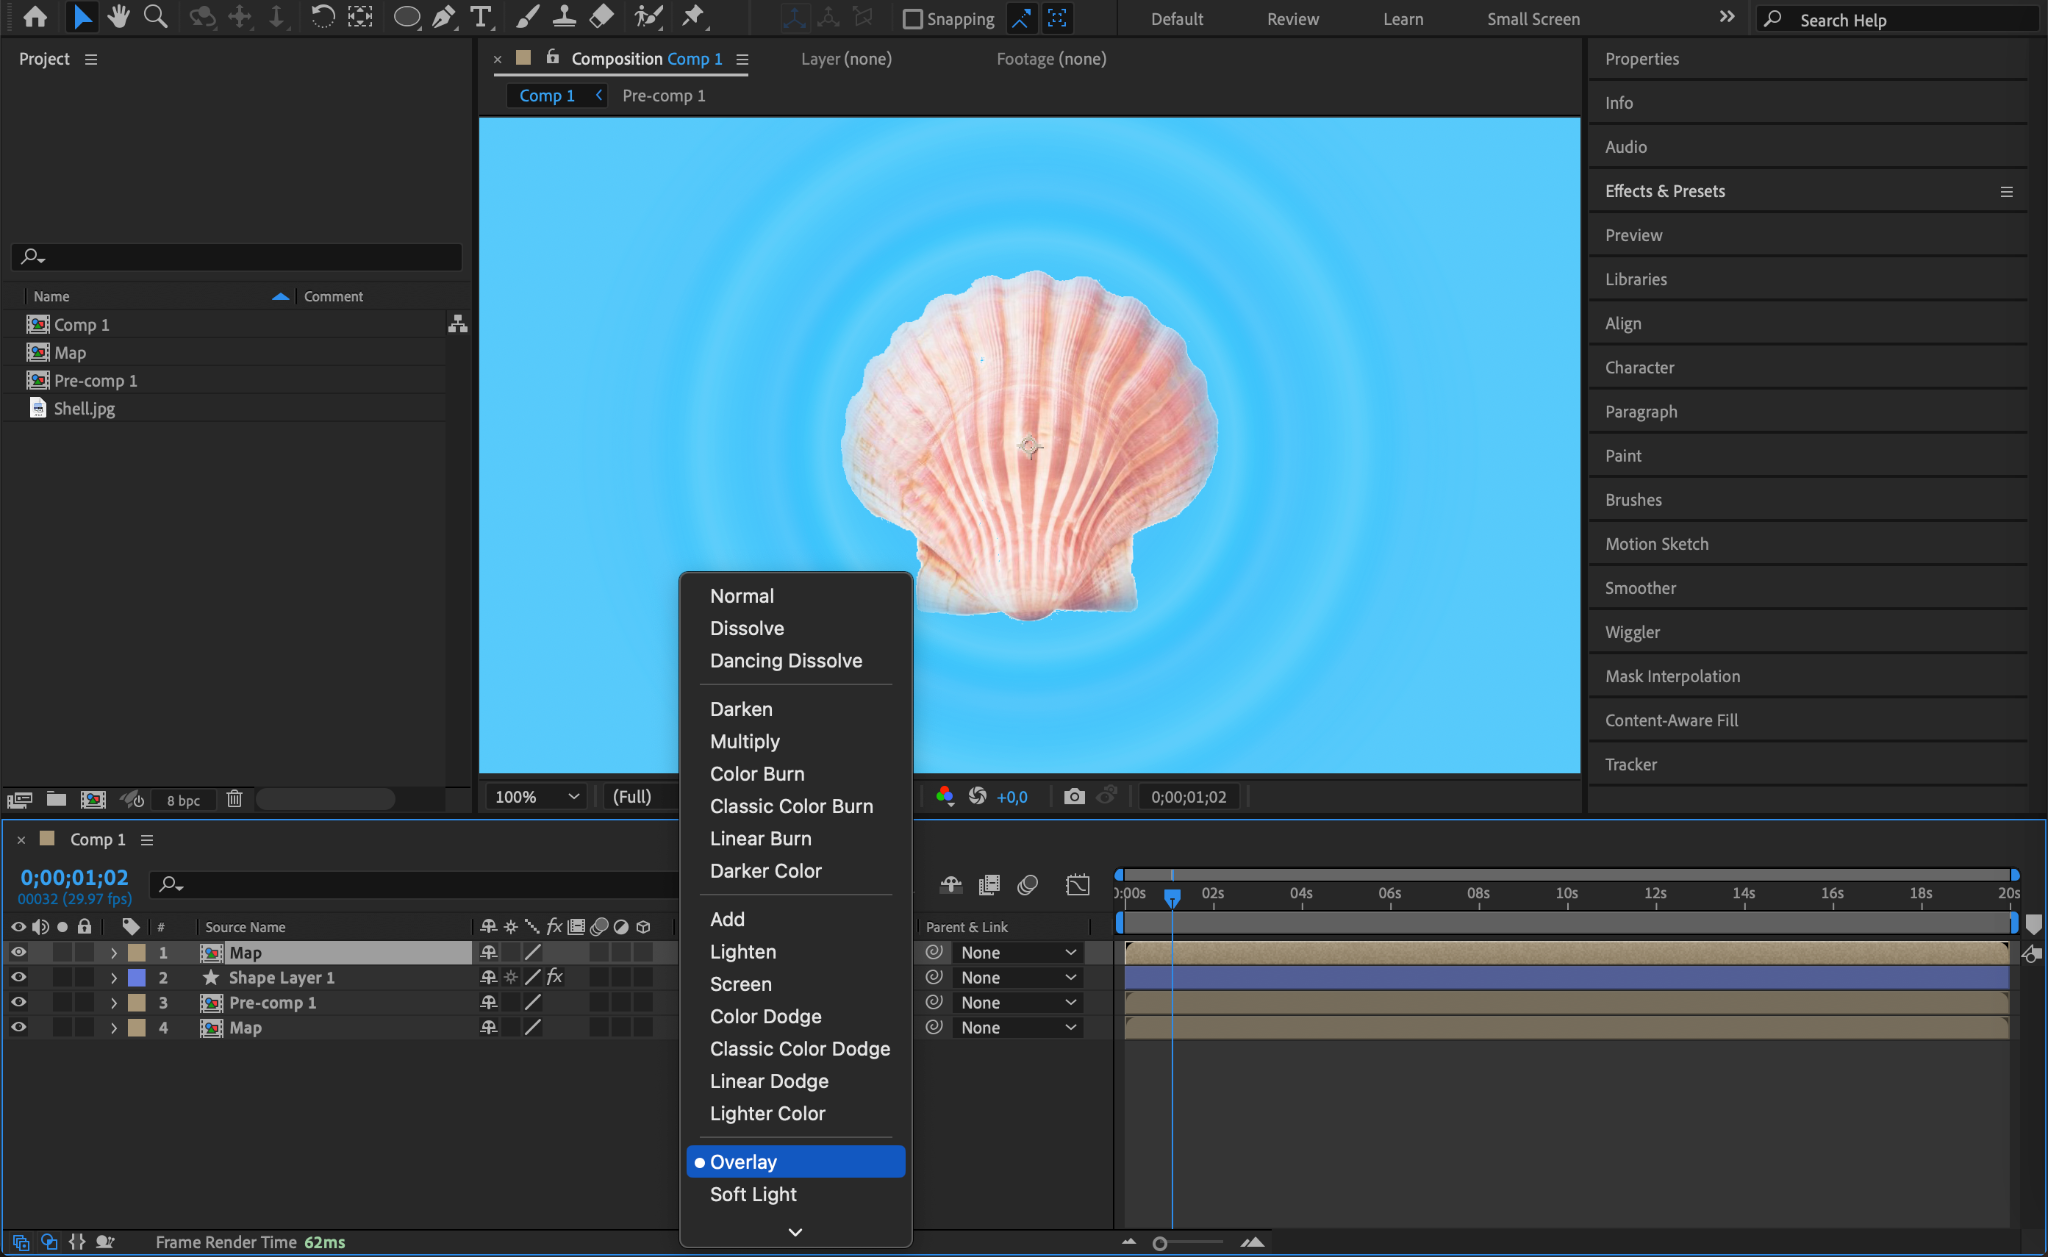
Step 10: Configure Caustics Settings
In the Effect Controls panel, set the following parameters for the Caustics effect:
Water Surface Map: Select “Map”
Smoothing: 9.300
Surface Opacity: 0
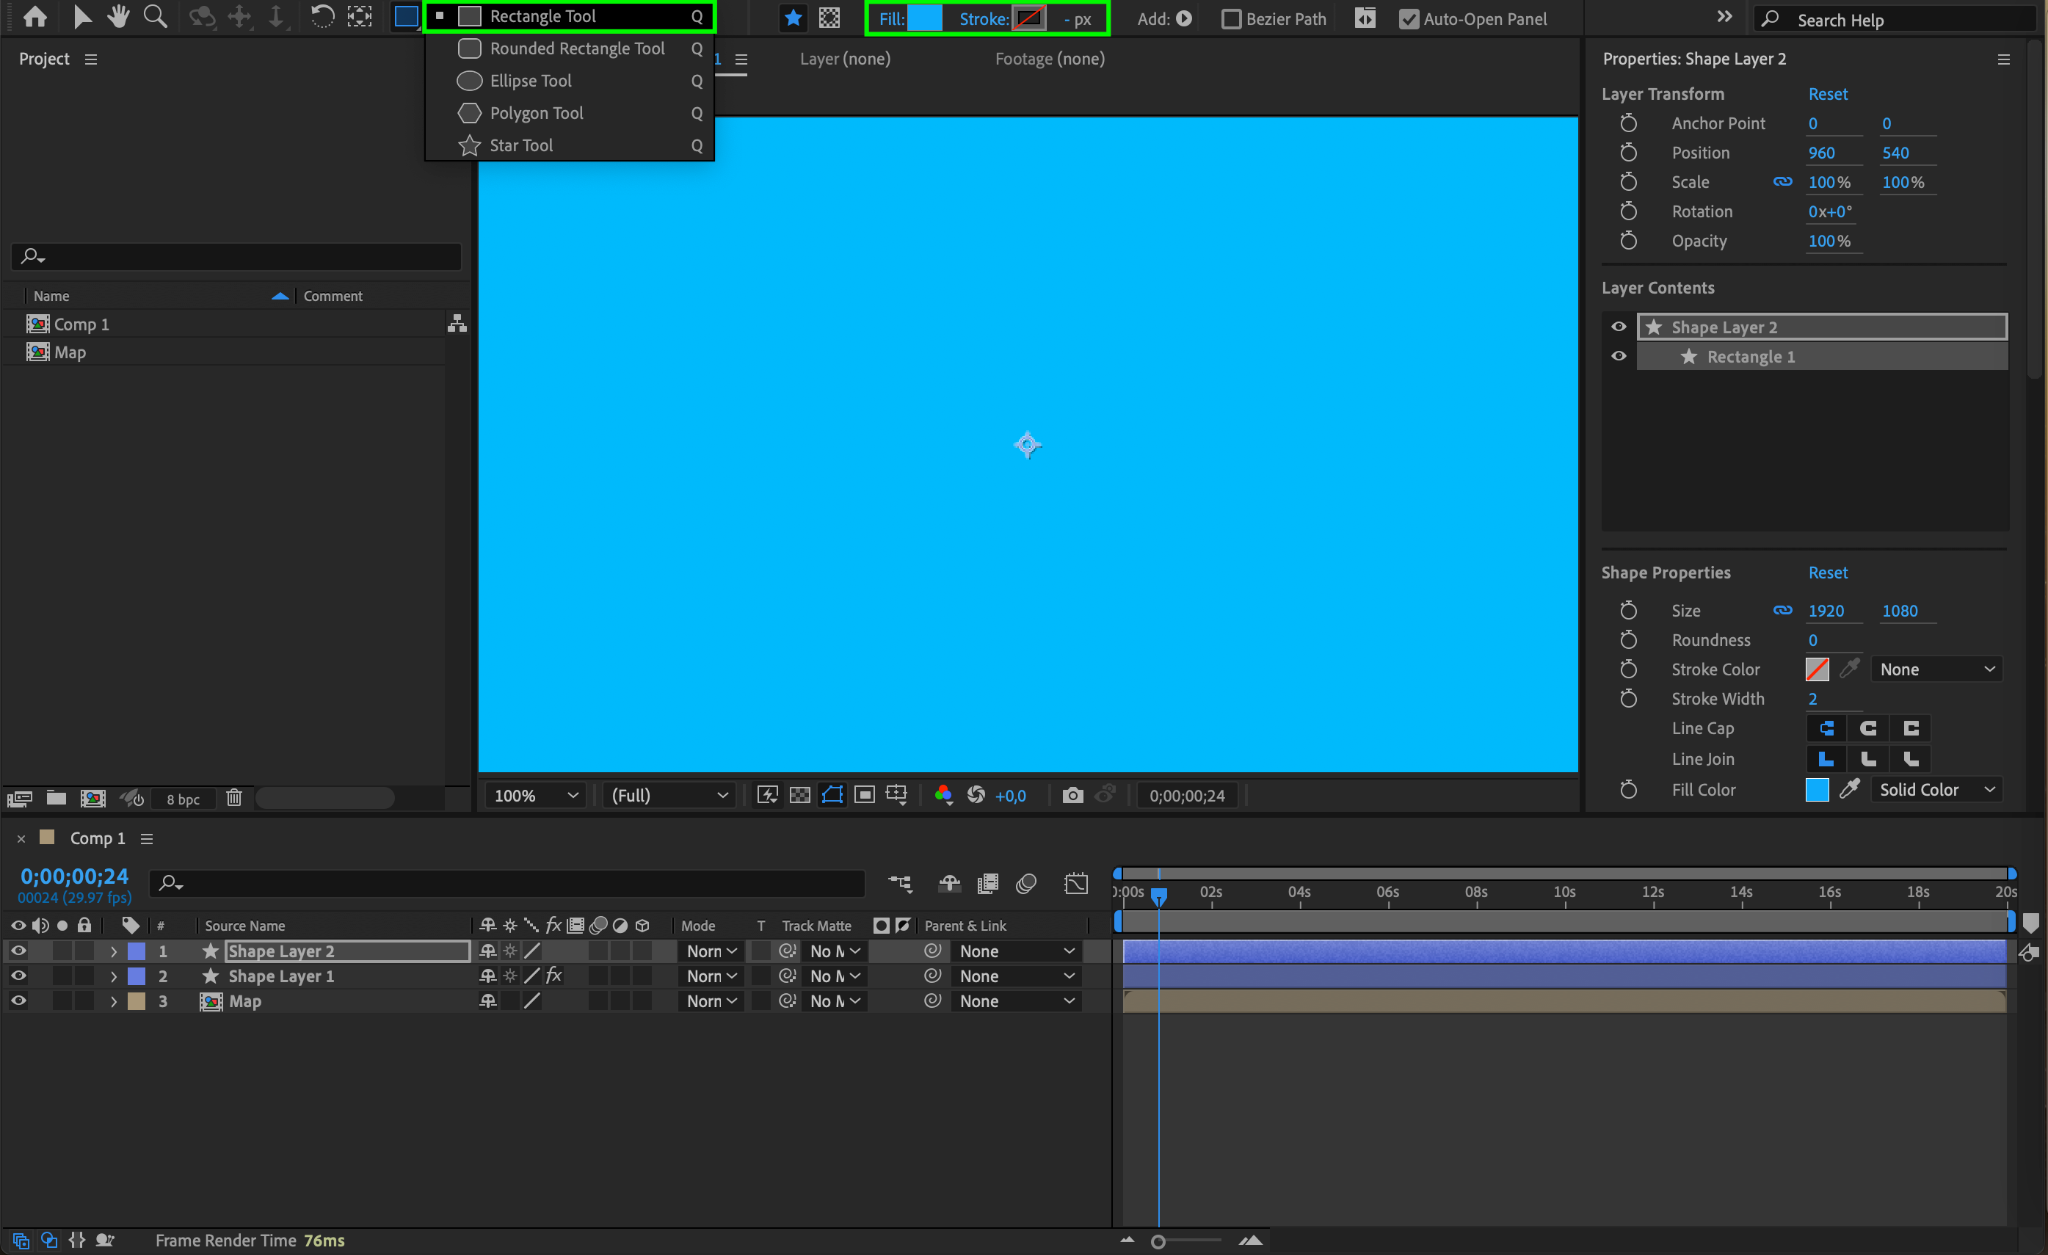
Step 11: Add and Configure Blue Shape Layer
Create another shape layer using the Rectangle Tool (Q) and set the Fill to a blue color.
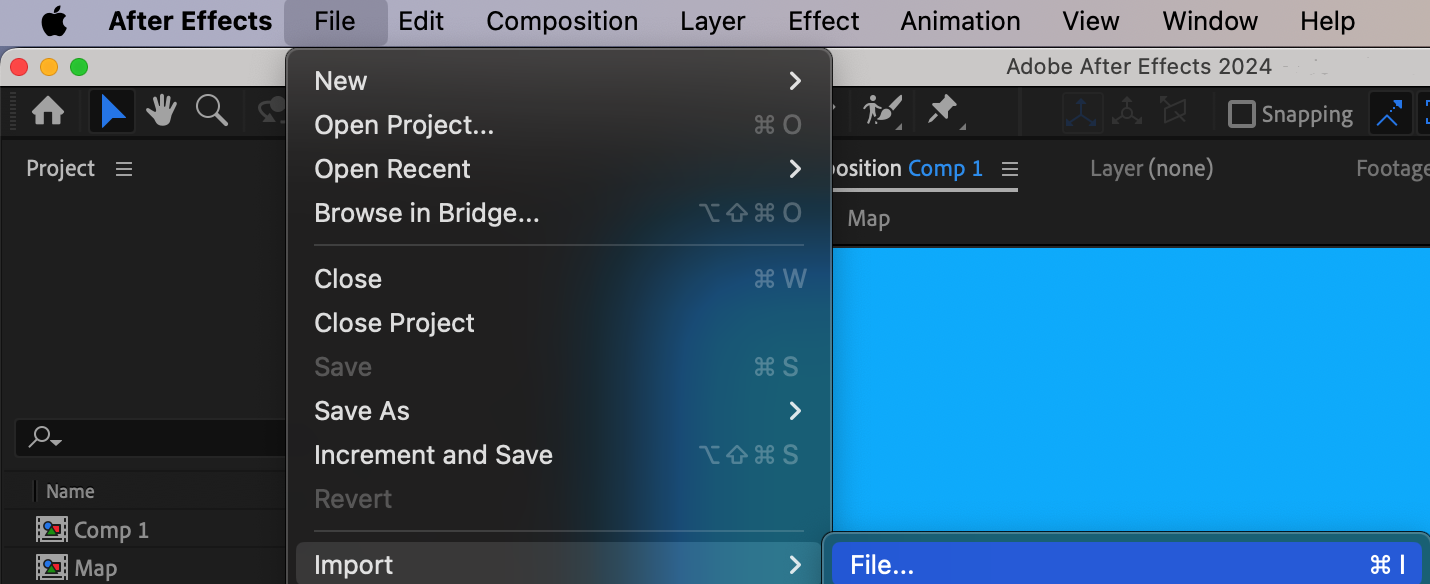
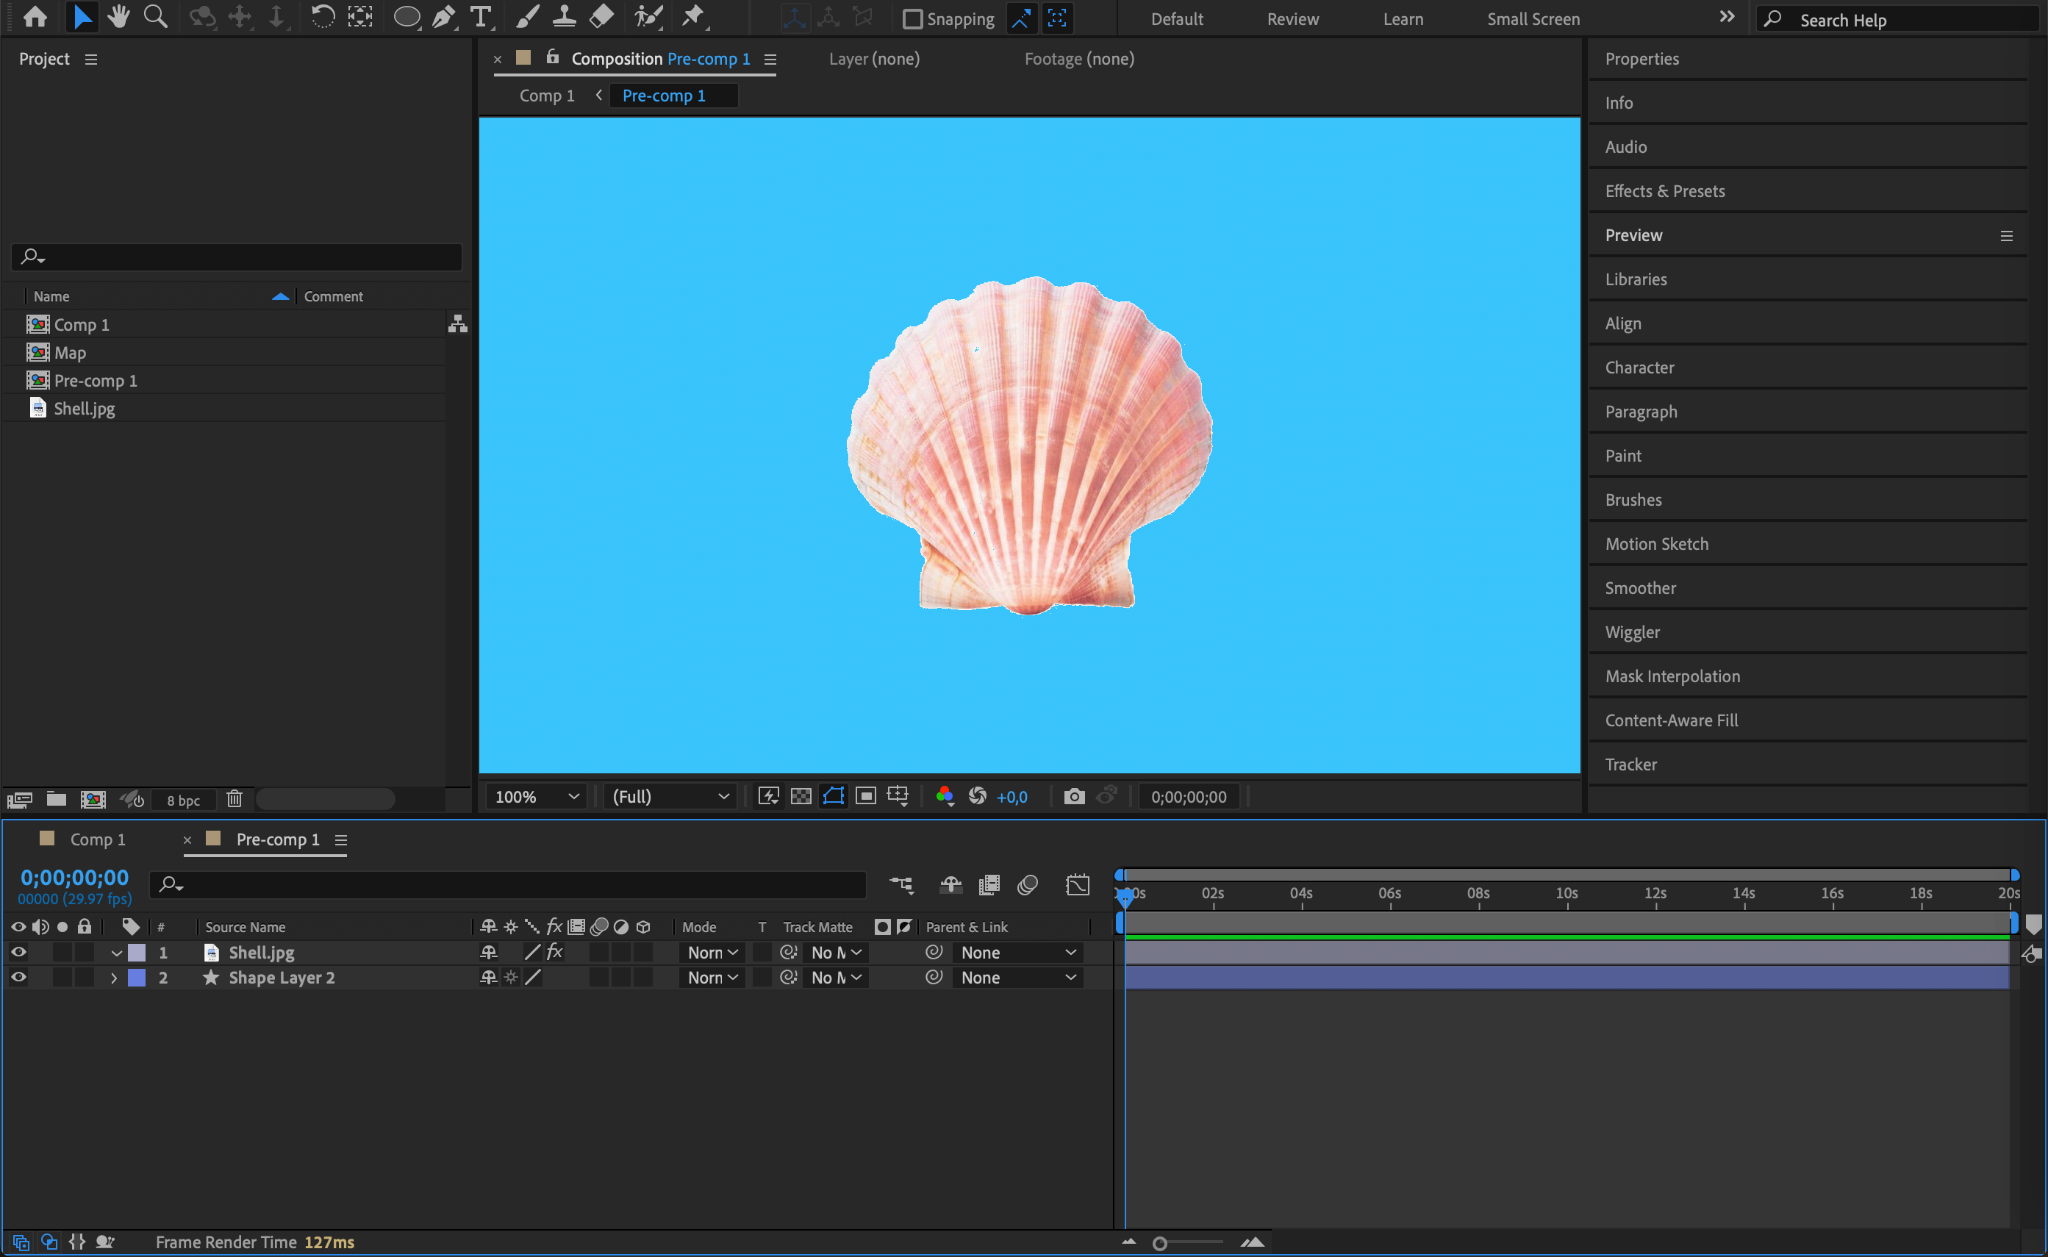
Step 12: Import Image or Logo
Import the image or logo you want to apply the liquid effect to and add it to the timeline.
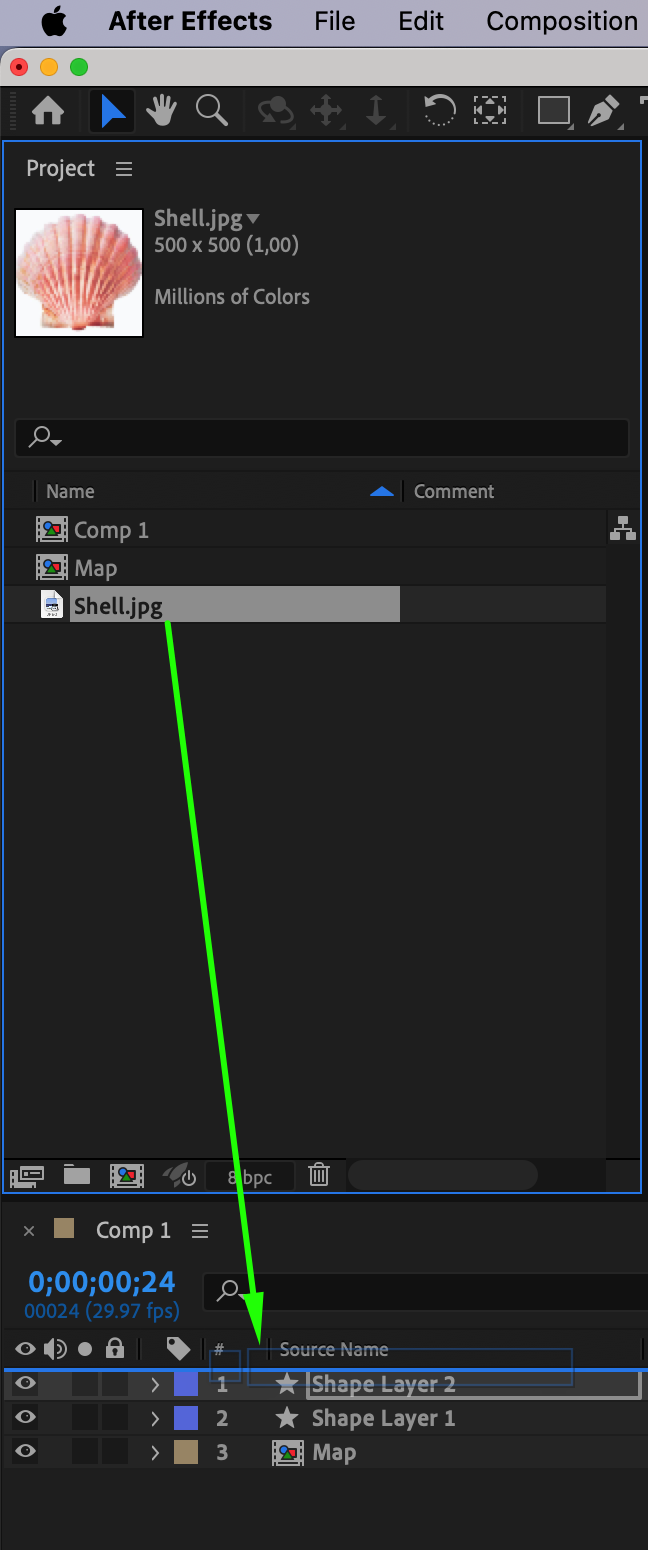

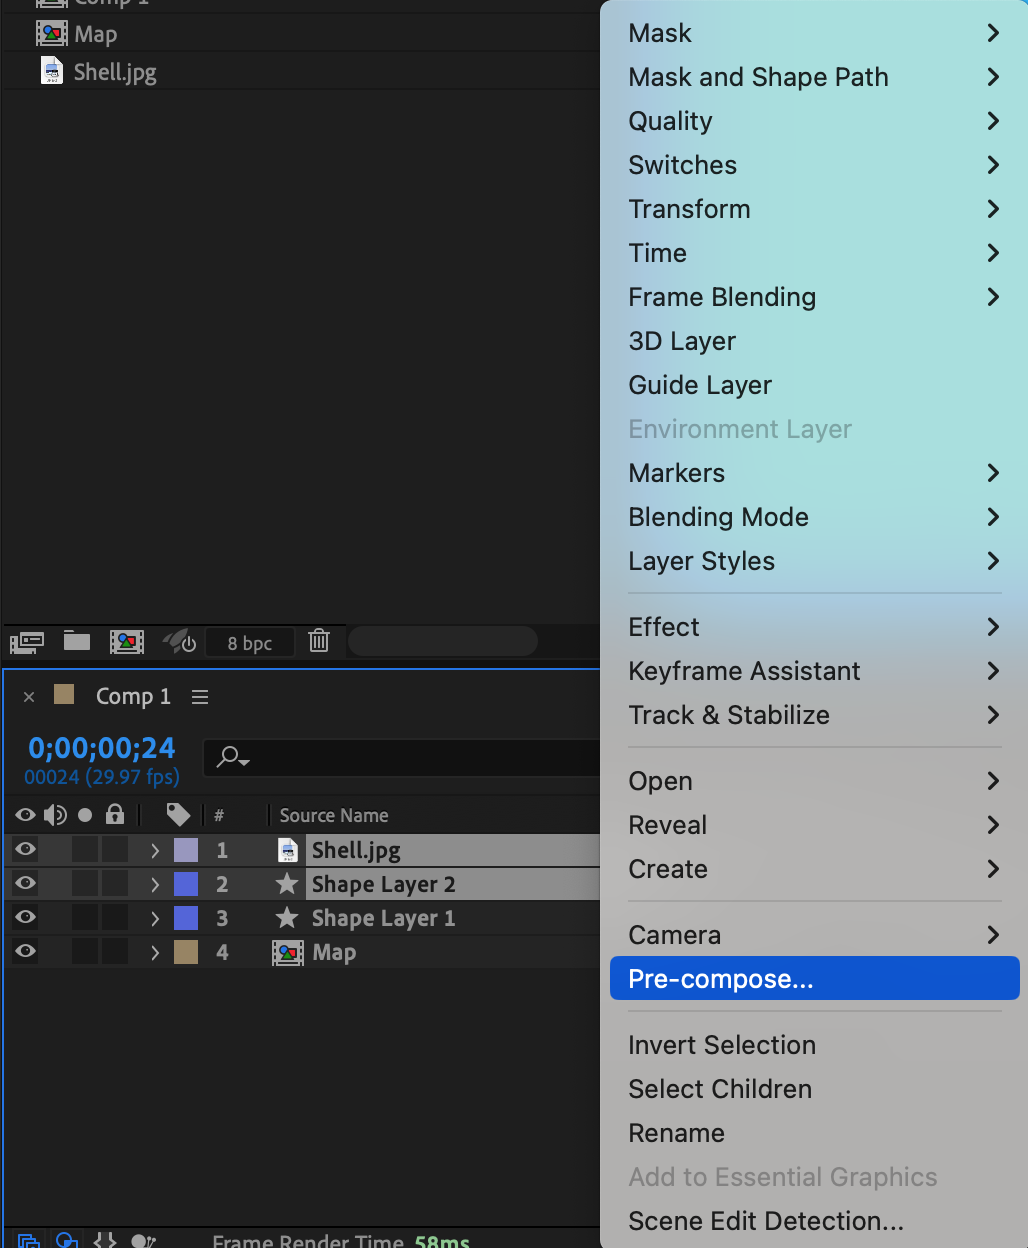
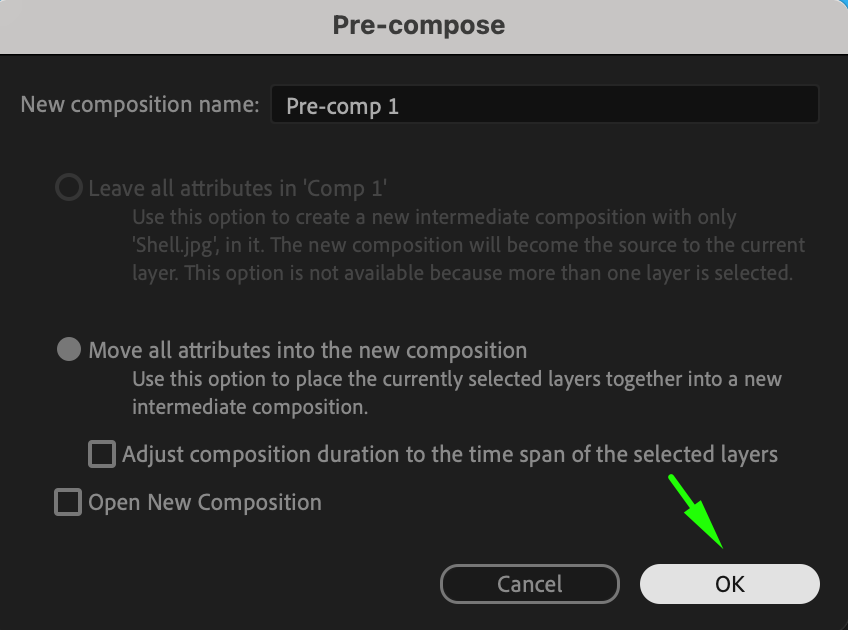
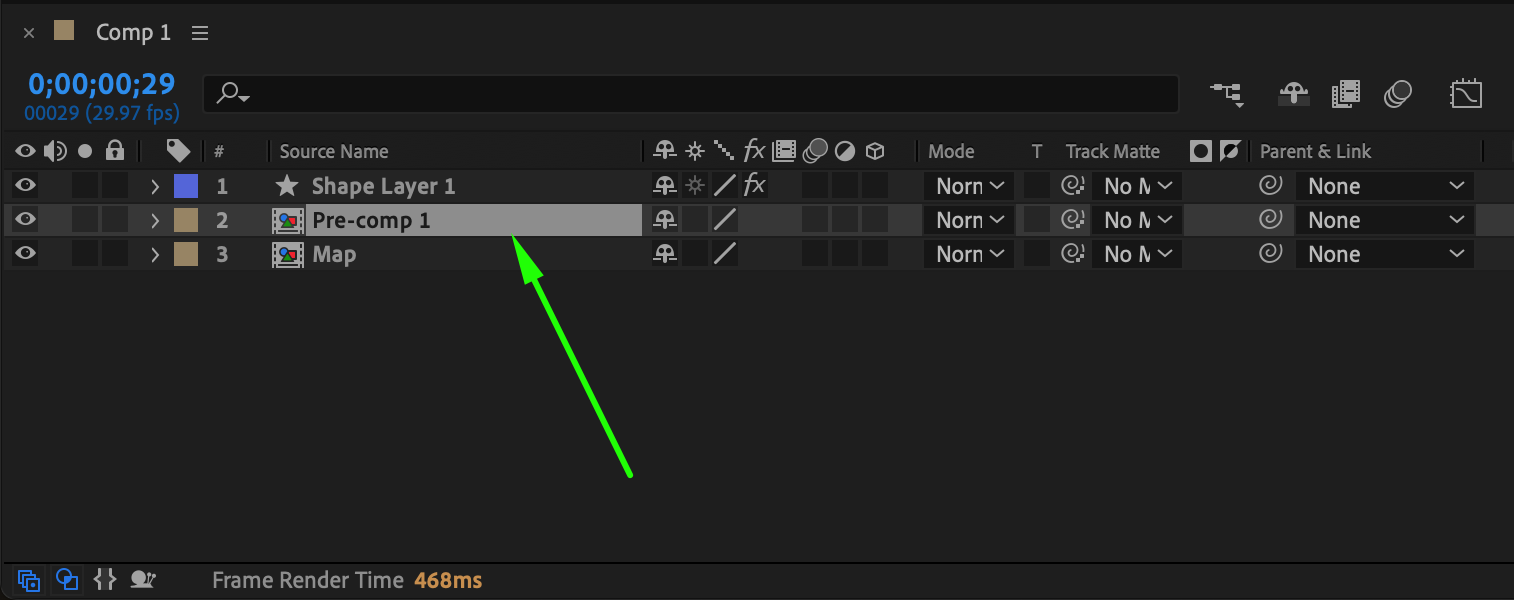
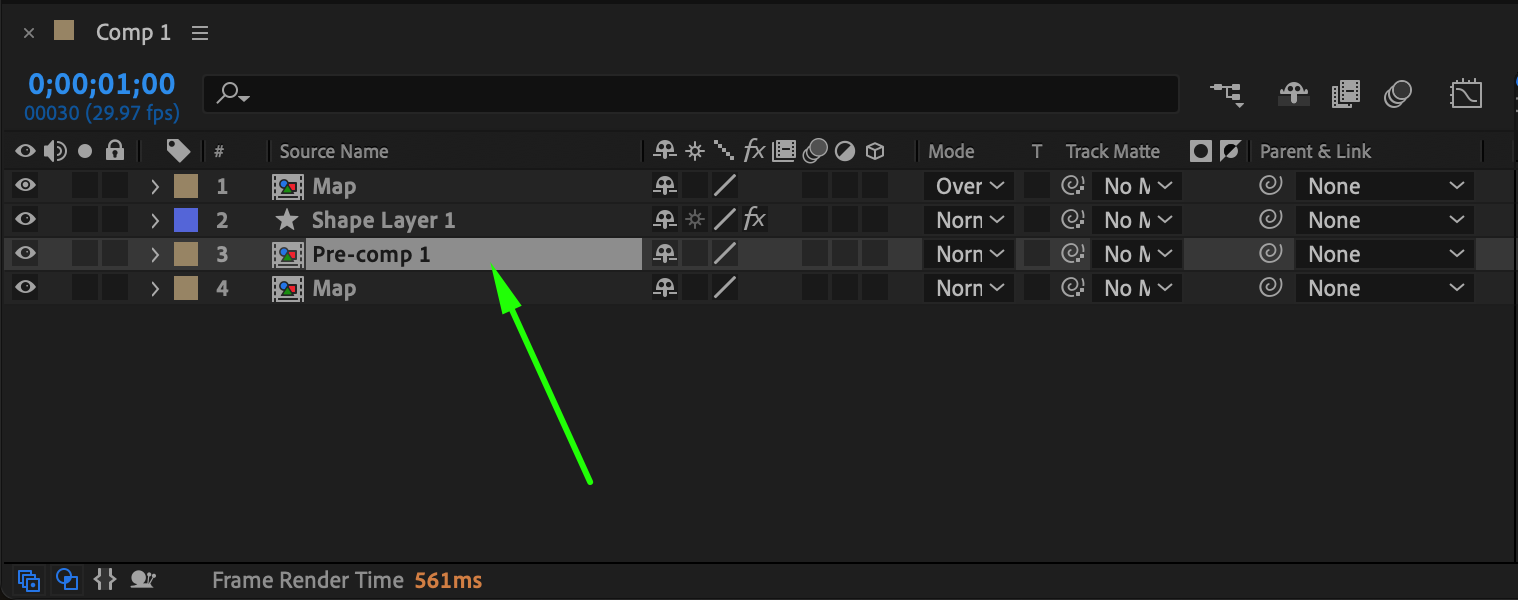
Step 13: Pre-compose Blue Shape Layer and Image
Select both the image and the blue shape layer on the timeline. Right-click and choose Pre-compose from the submenu.
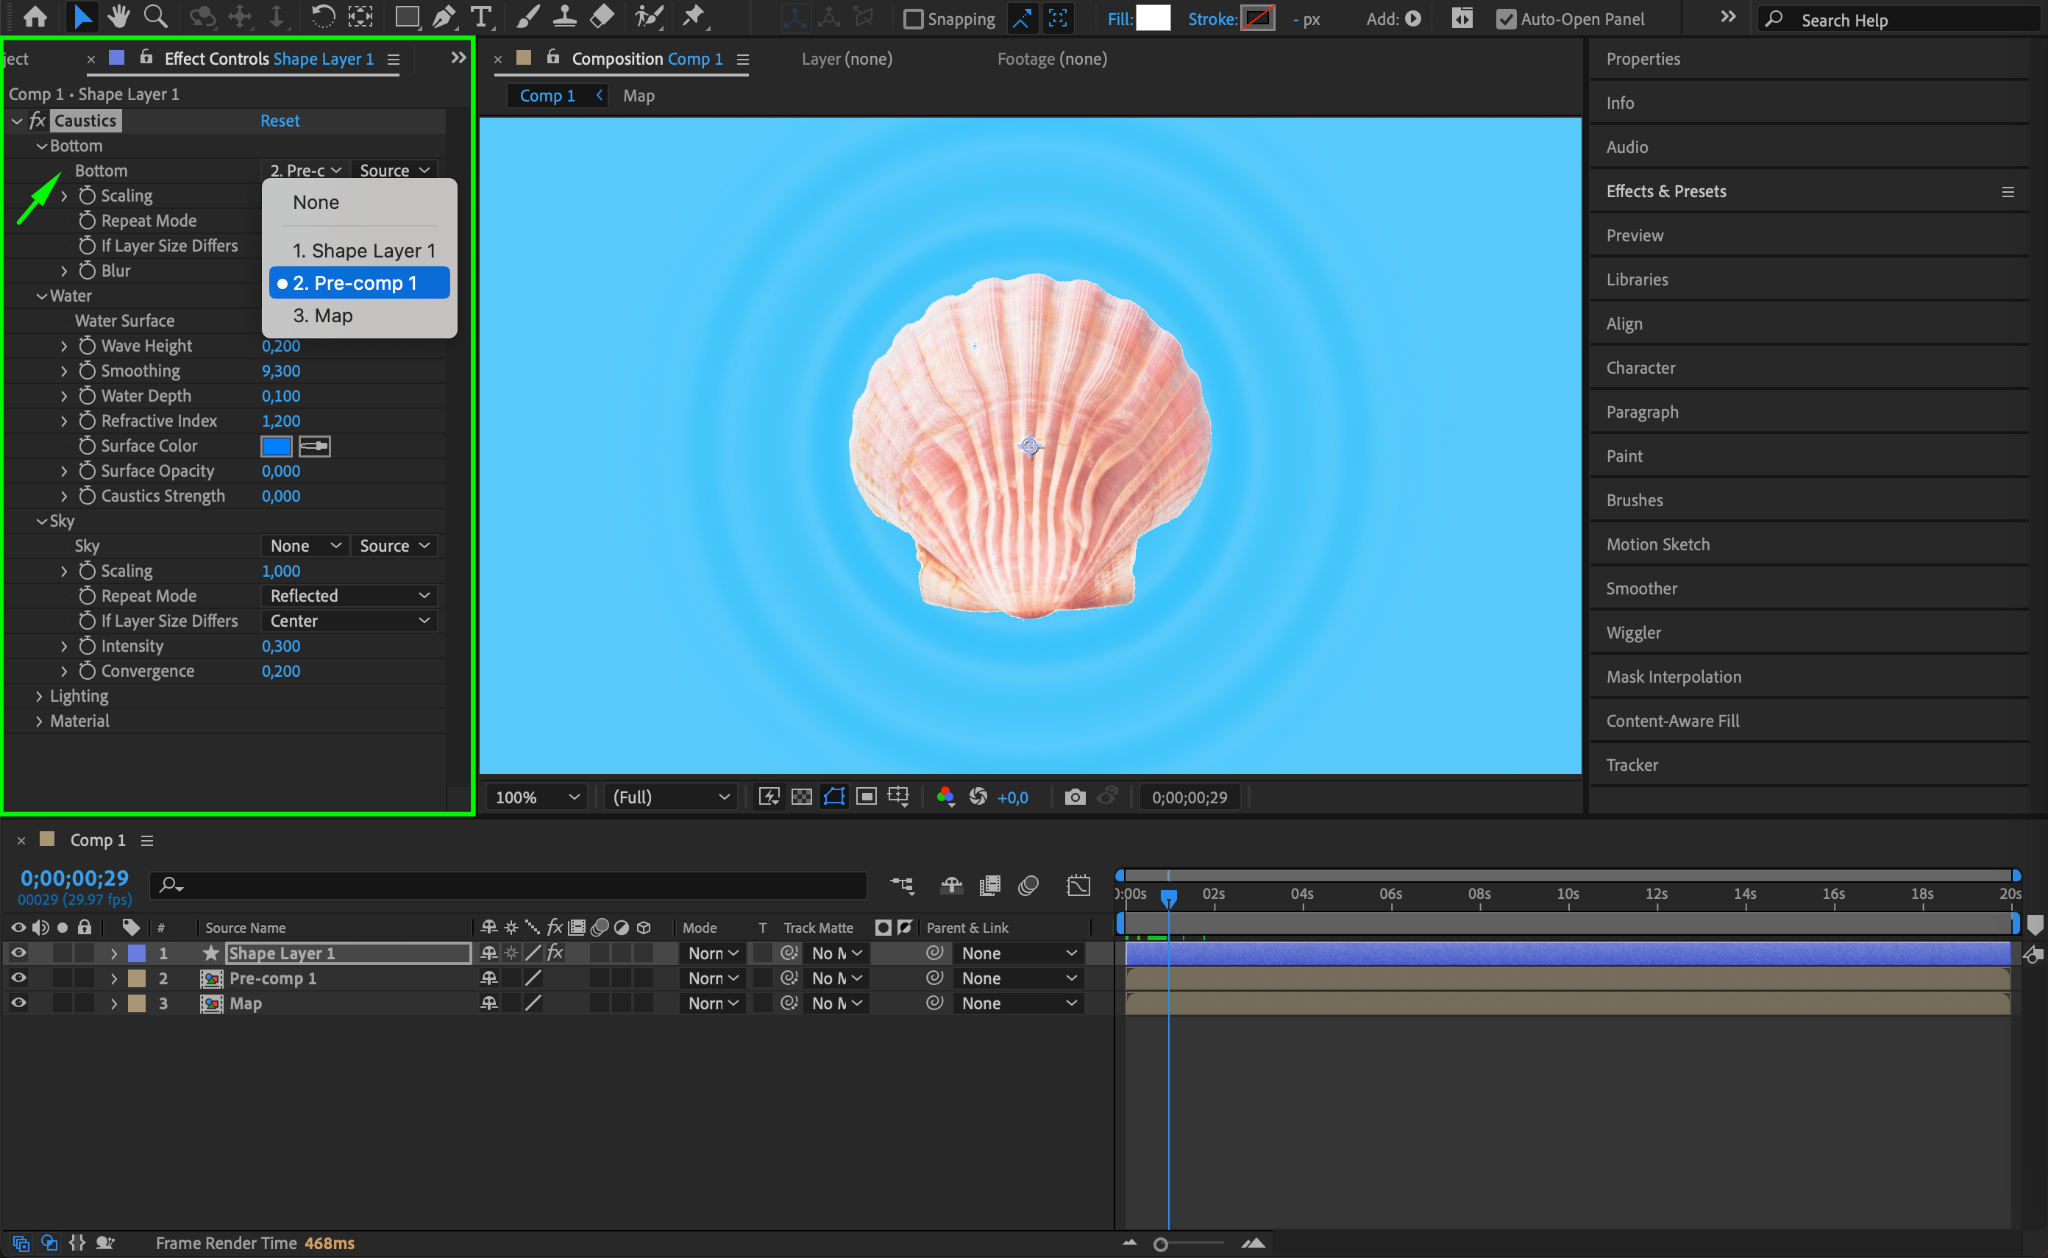
Step 14: Set Bottom Layer
Go to the Effect Controls panel for the remaining shape layer and set the pre-comp as the bottom layer.
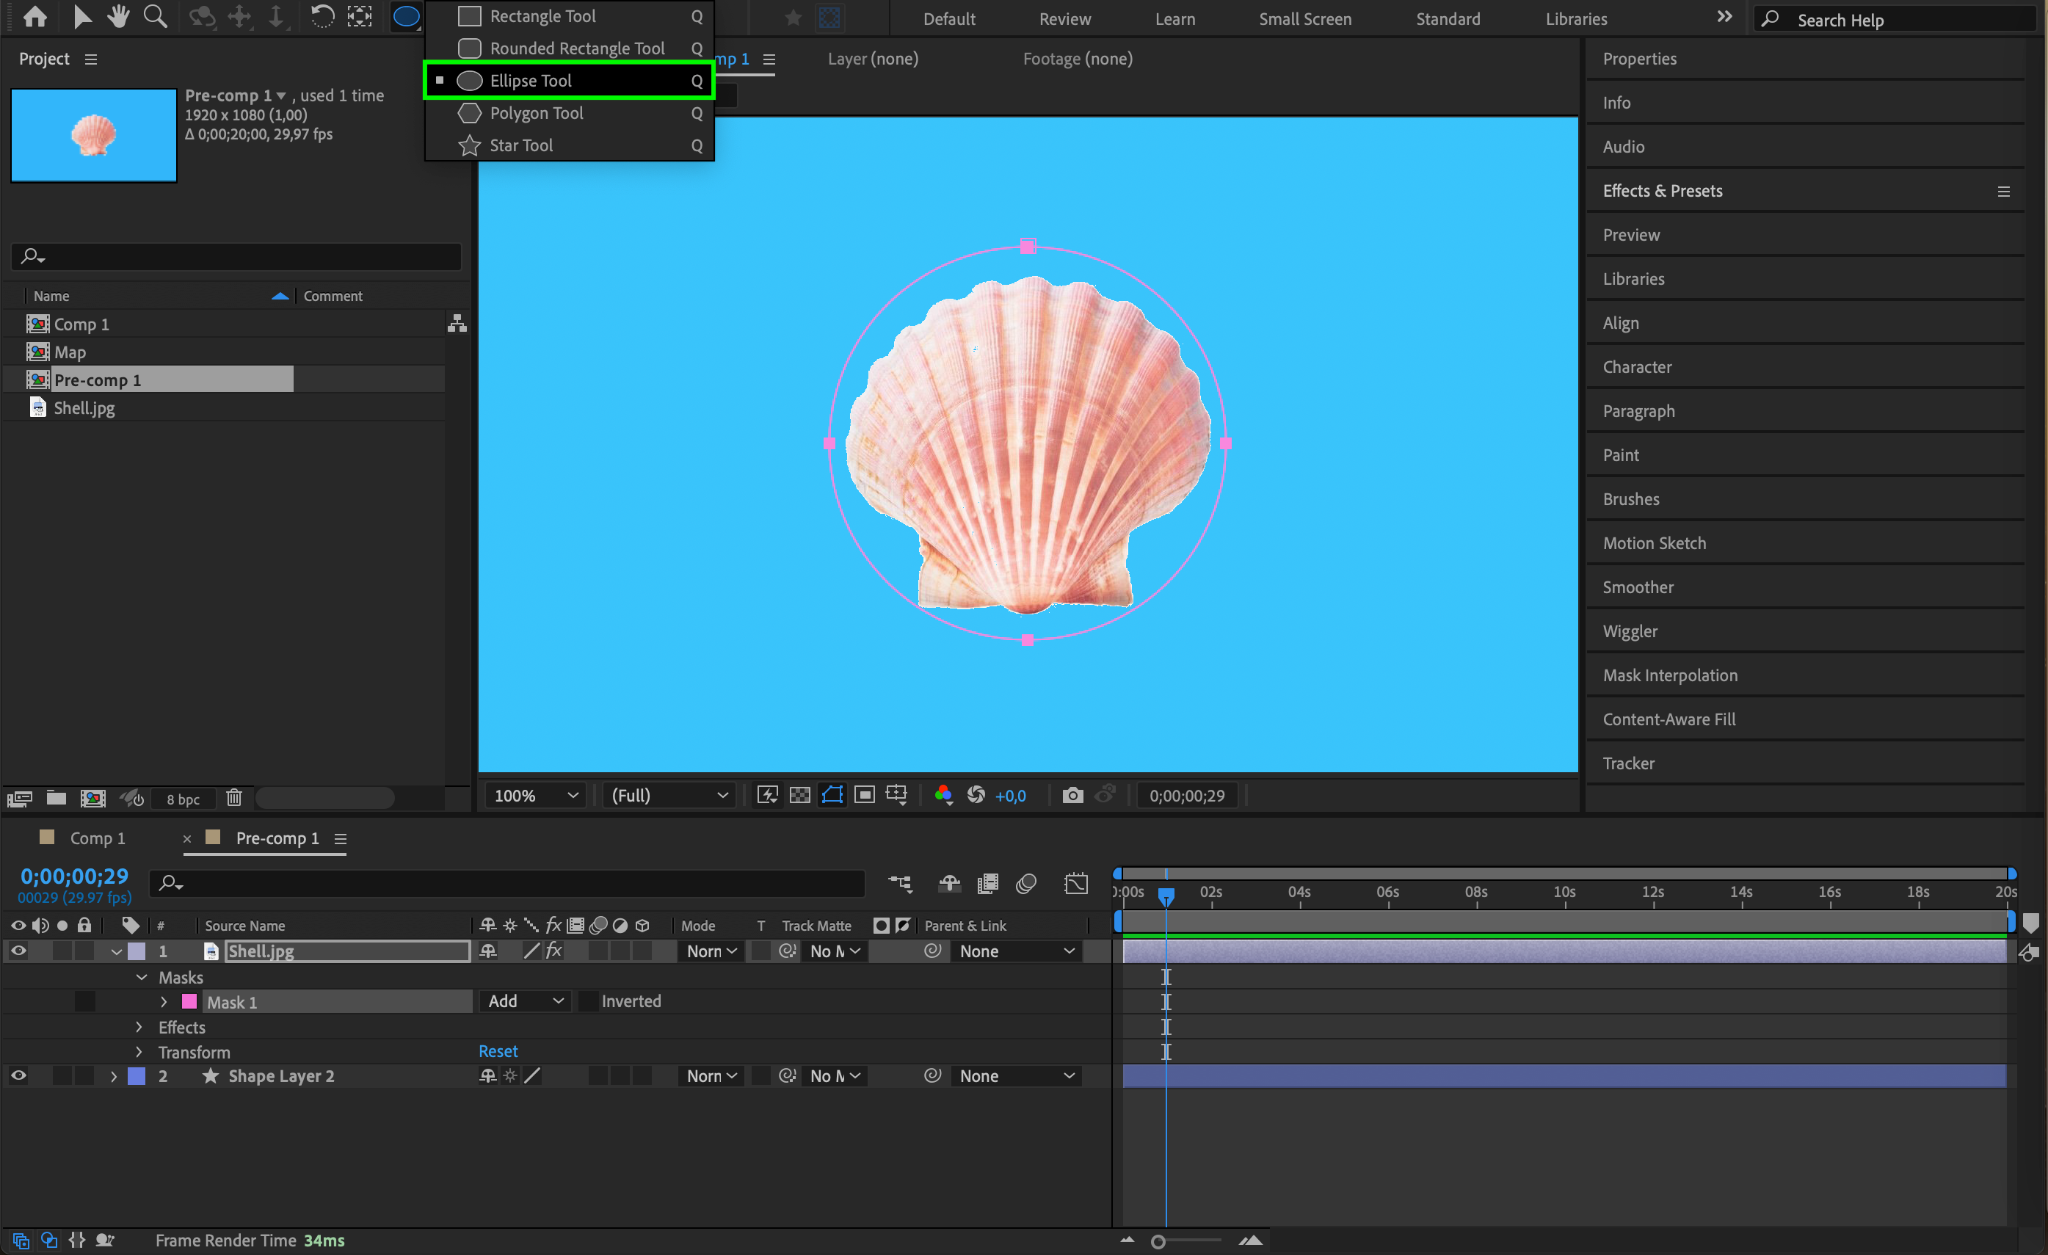
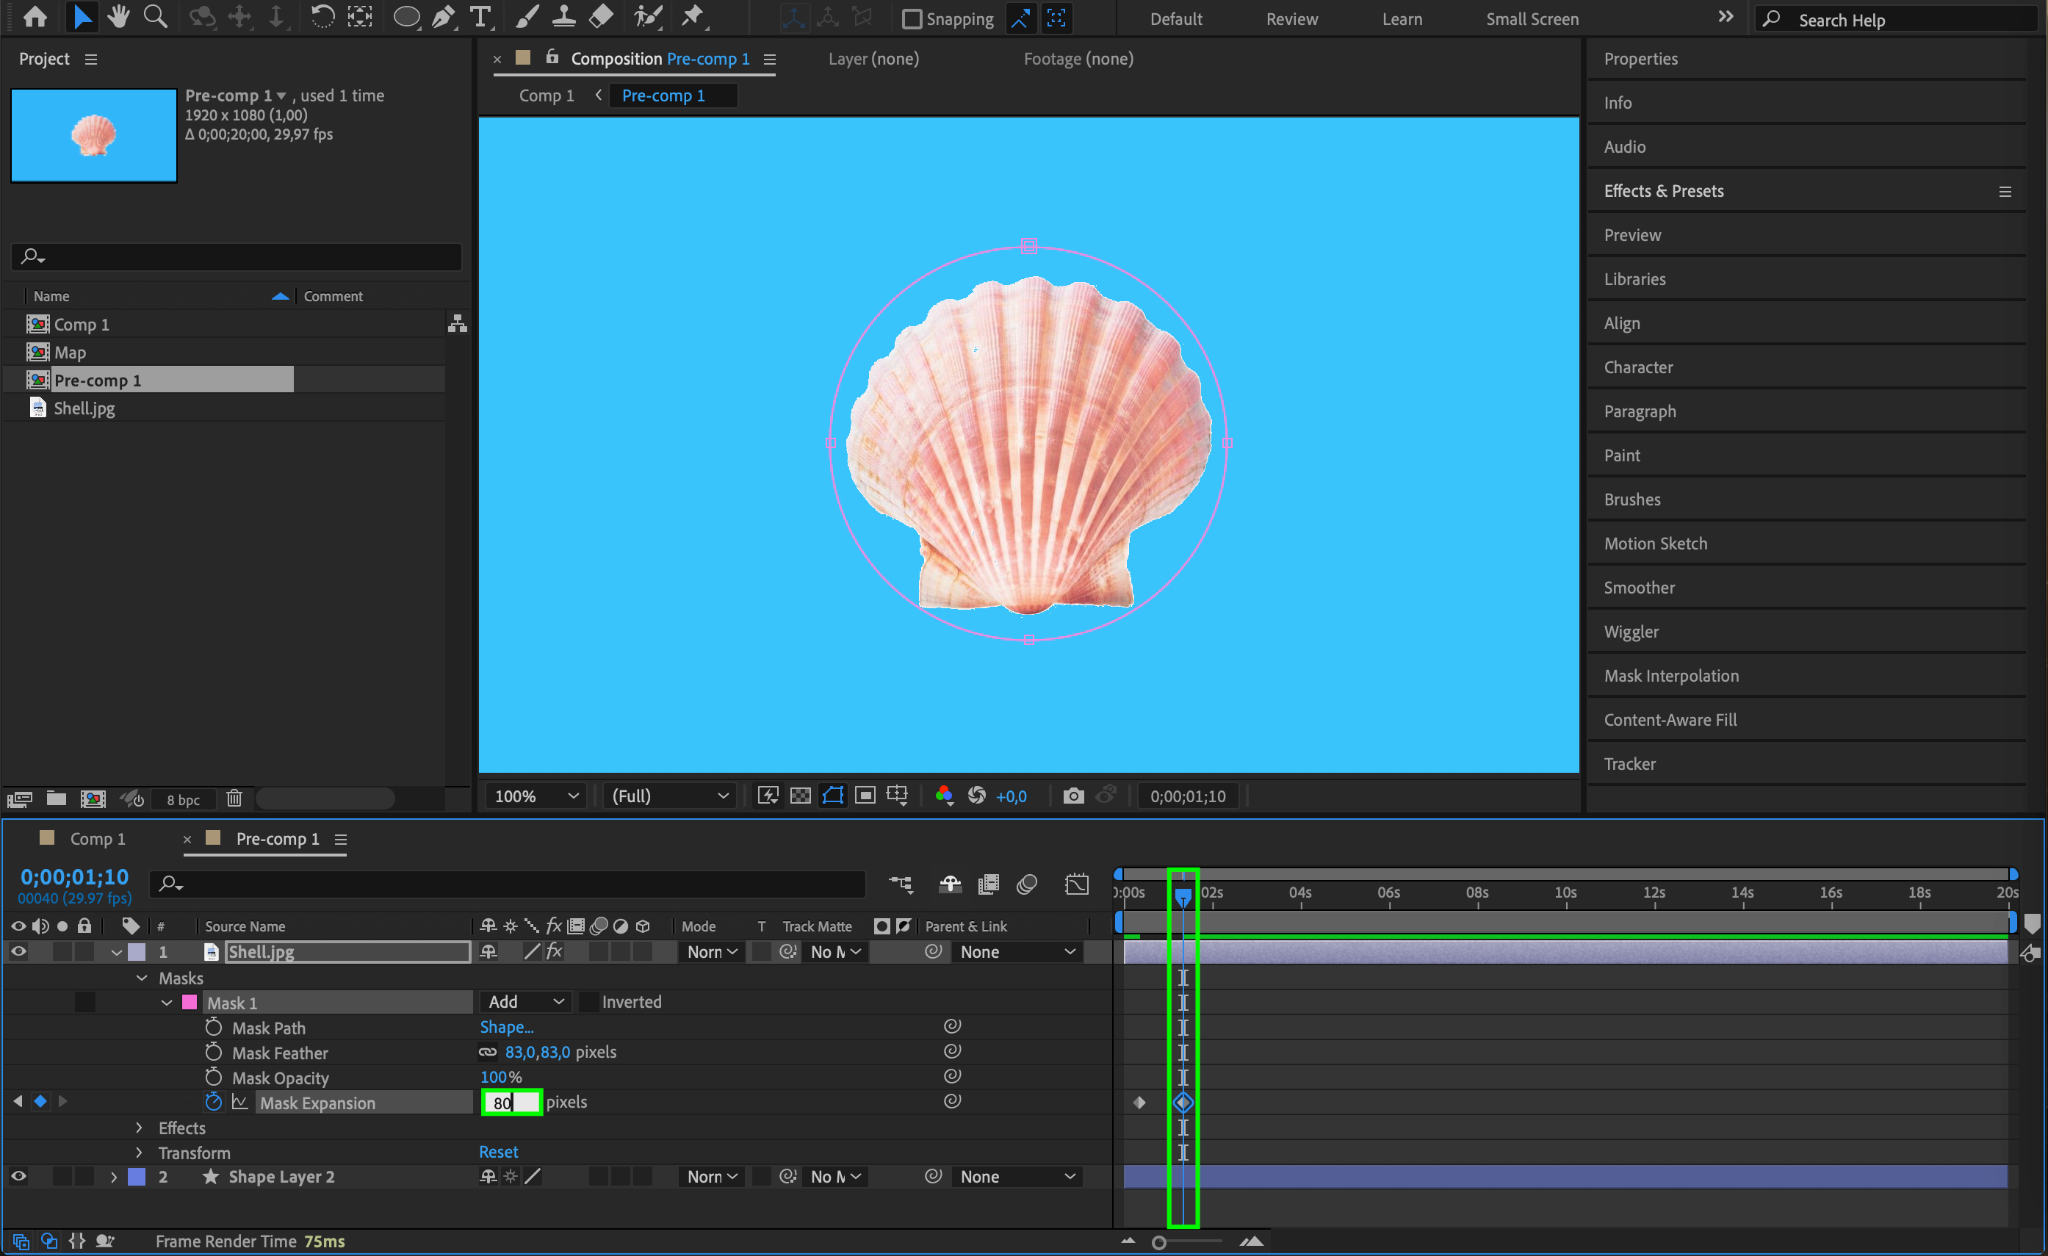
Step 15: Edit Pre-comp for Image
Open the pre-comp by double-clicking it. Create a mask around your imported file using the Ellipse Tool (Q).
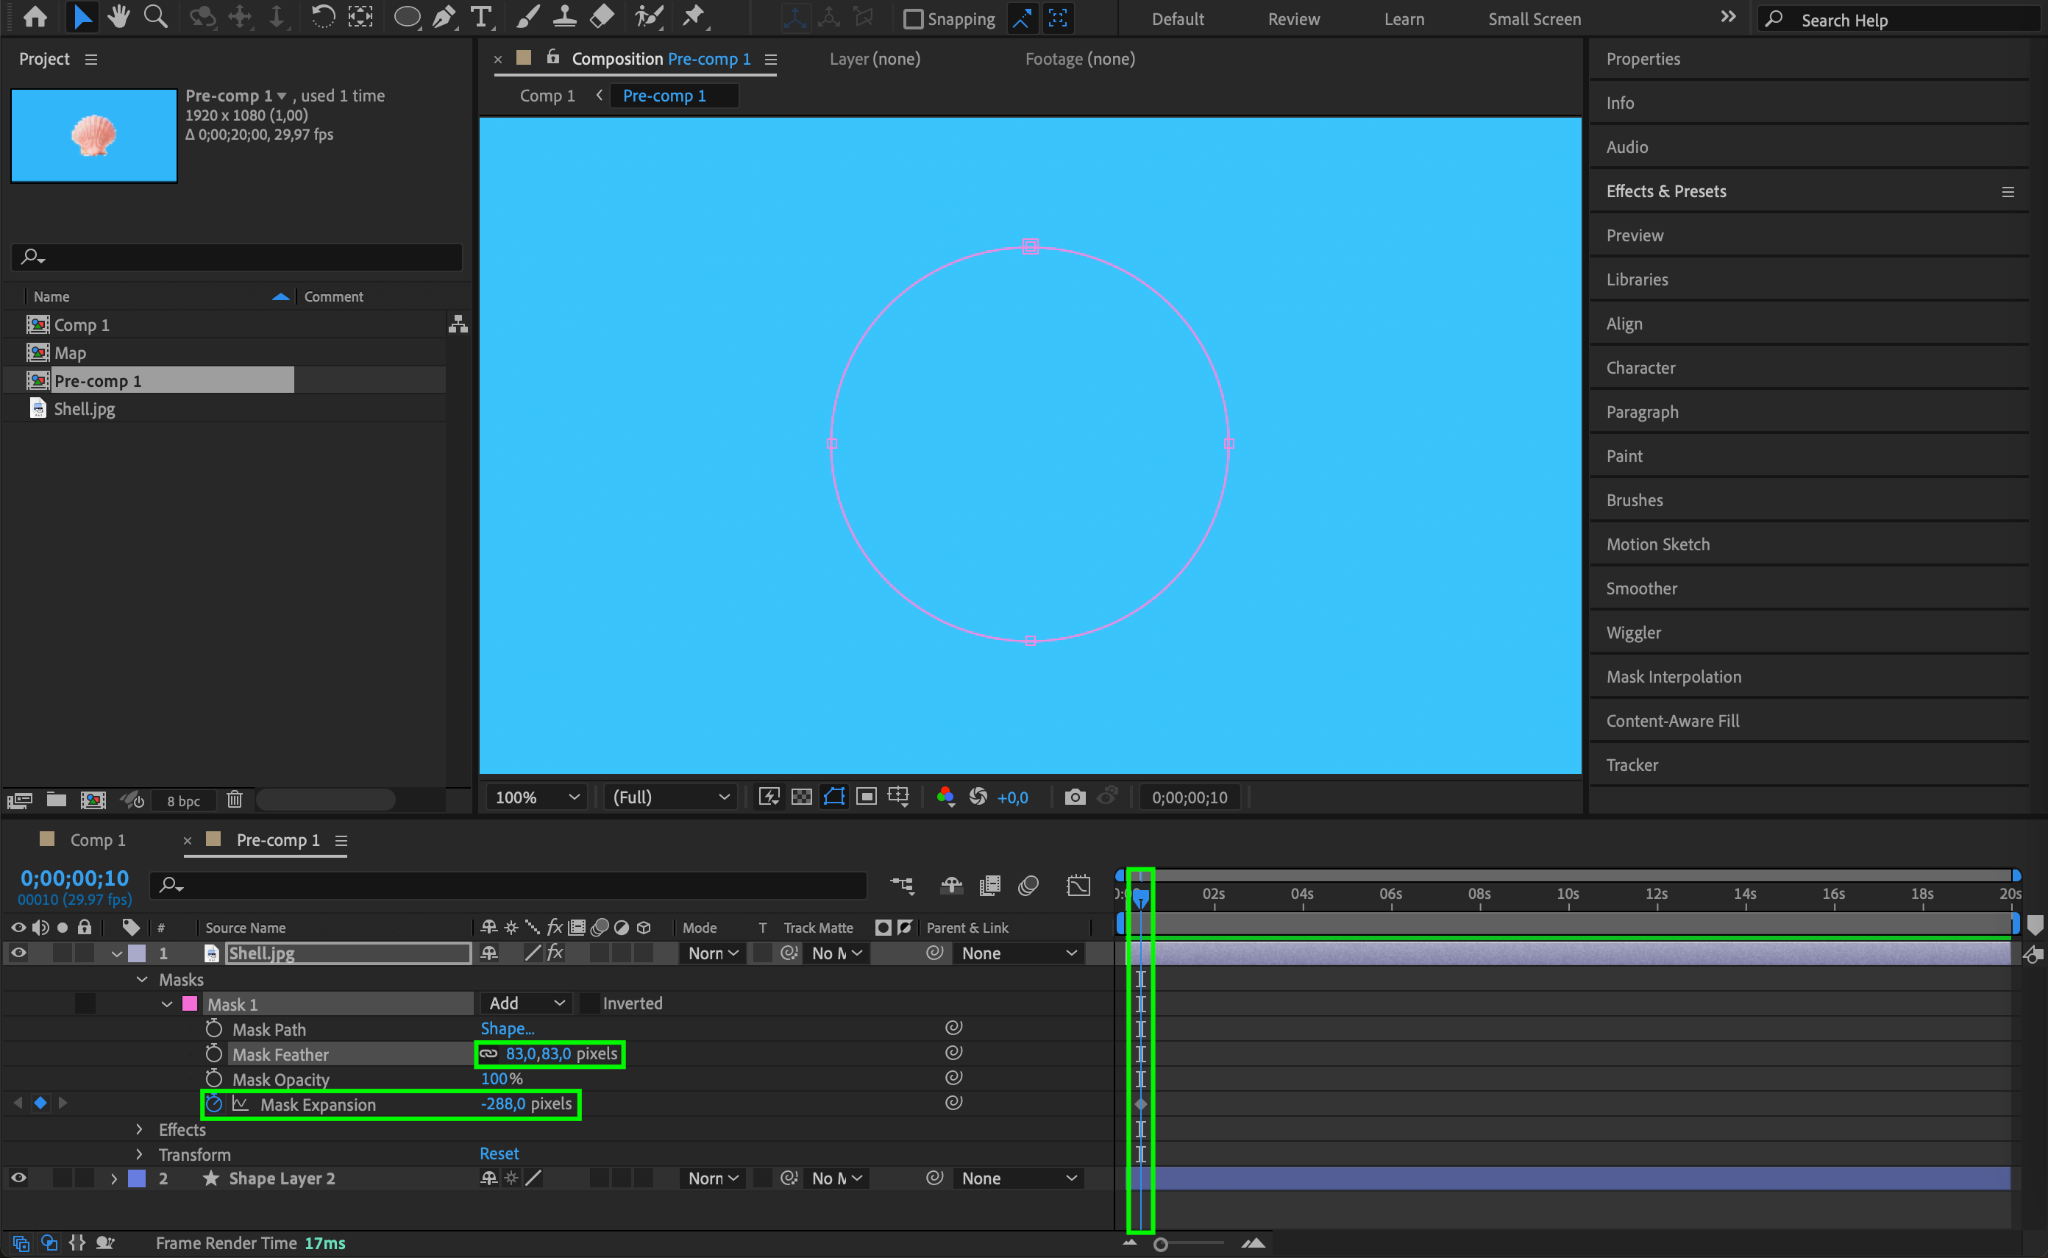
Step 16: Adjust Mask Settings
Set the Mask Feather to 83. Move the CTI 10 frames forward from the start of the composition (Ctrl/Cmd + Shift + Right Arrow) and create a keyframe for Mask Expansion at -288. Move the CTI another 20 frames forward and change the value to 80.
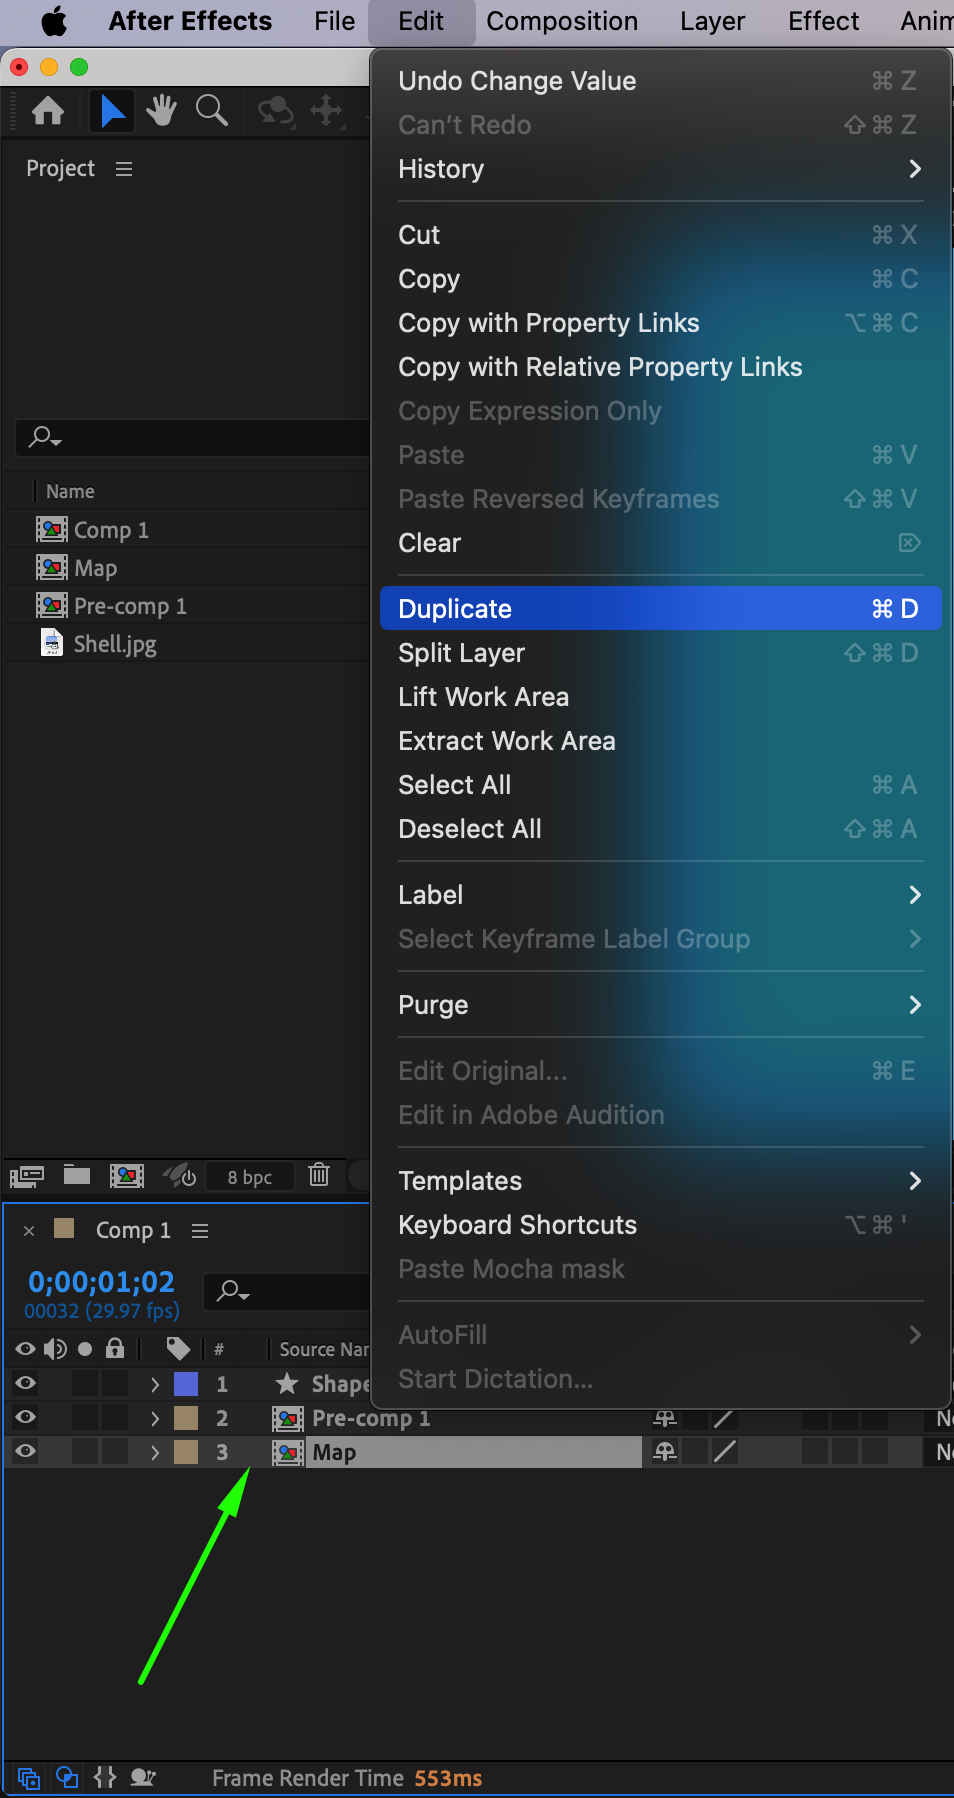
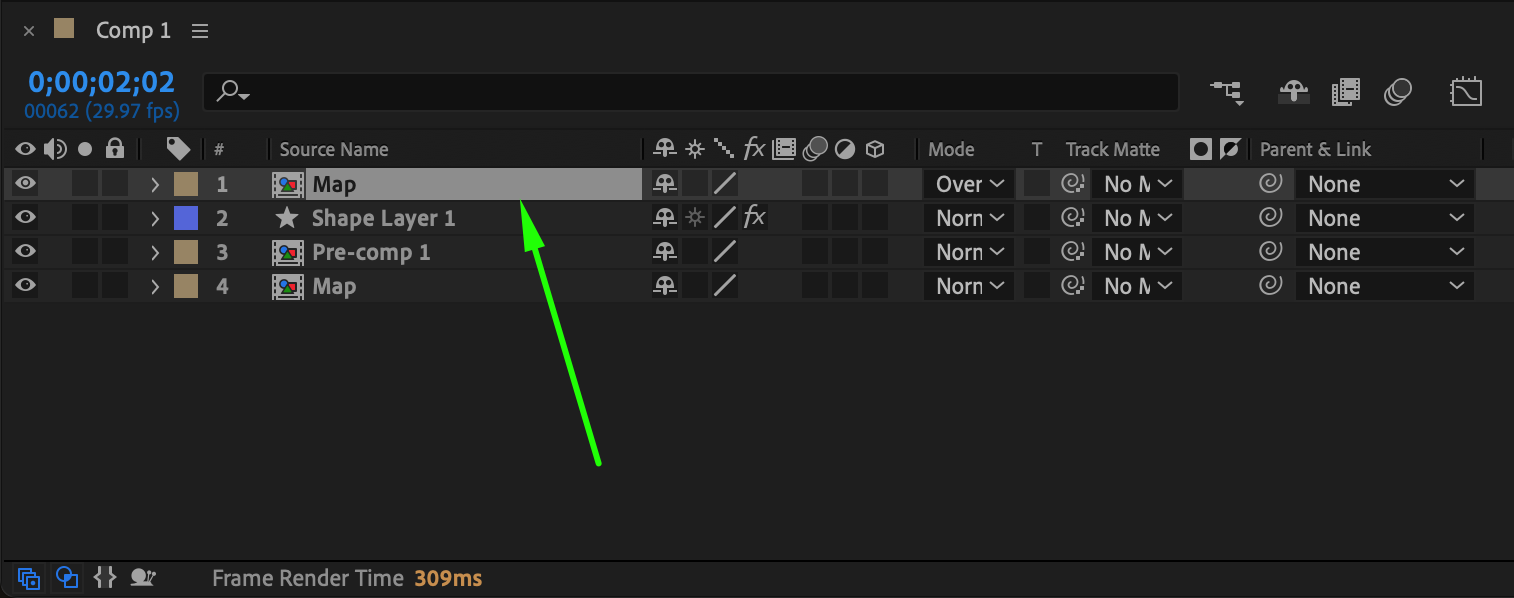
Step 17: Duplicate and Overlay the Map Pre-comp
Return to the main composition, duplicate the Map pre-comp (Ctrl/Cmd + D), and place the duplicate at the top of the timeline. Set the Mode column to Overlay.

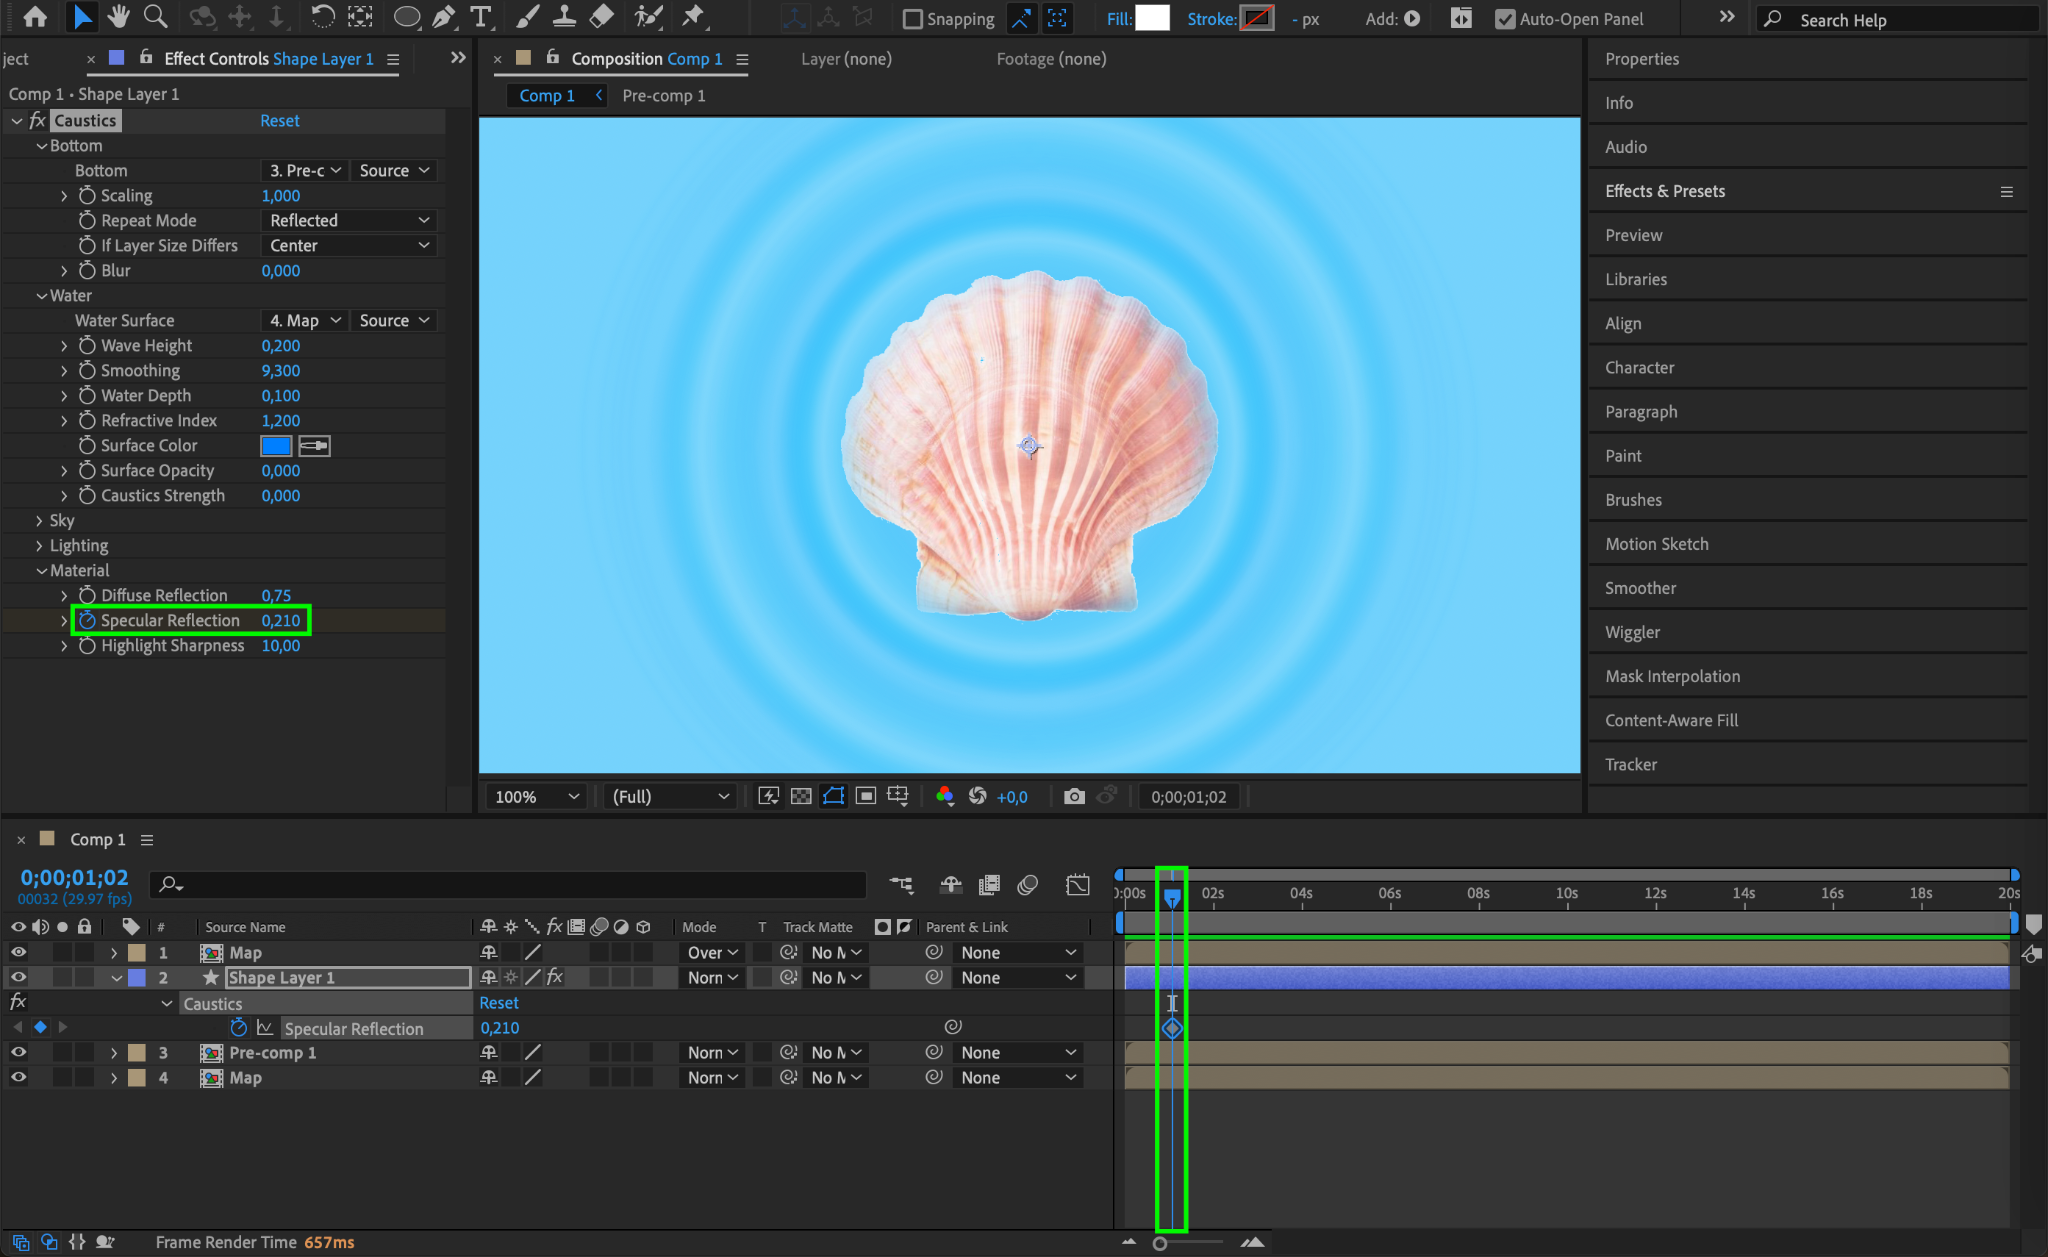
Step 18: Animate Specular Reflection
In the Effect Controls panel for the shape layer, set a keyframe for Specular Reflection at 0.21. Move the CTI forward and set it to 0.

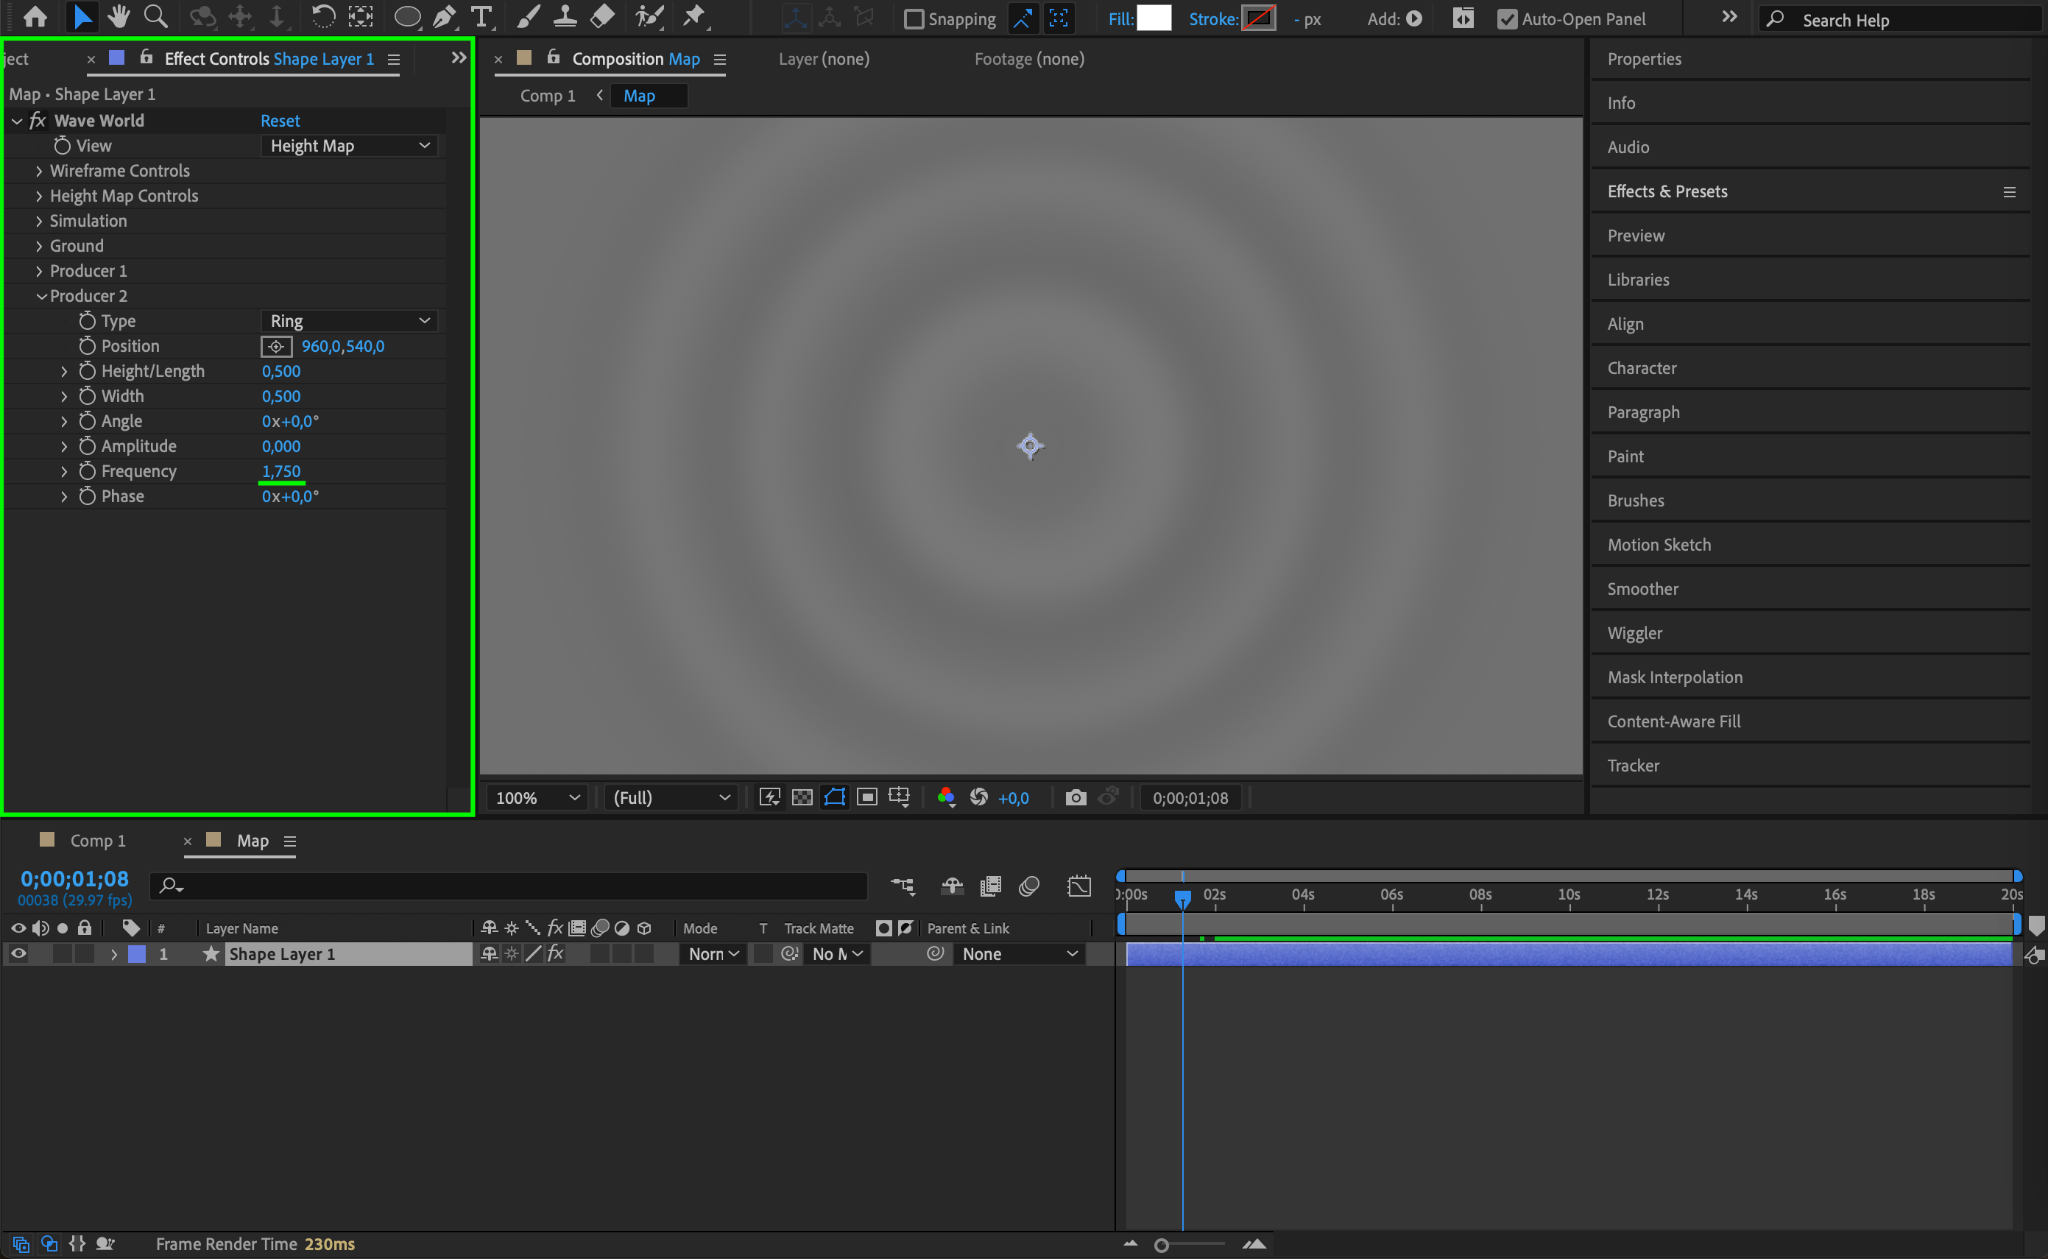
Step 19: Configure the Map Pre-comp
Open the Map pre-comp by double-clicking it. In the Effect Controls panel, set Frequency to 1.75.
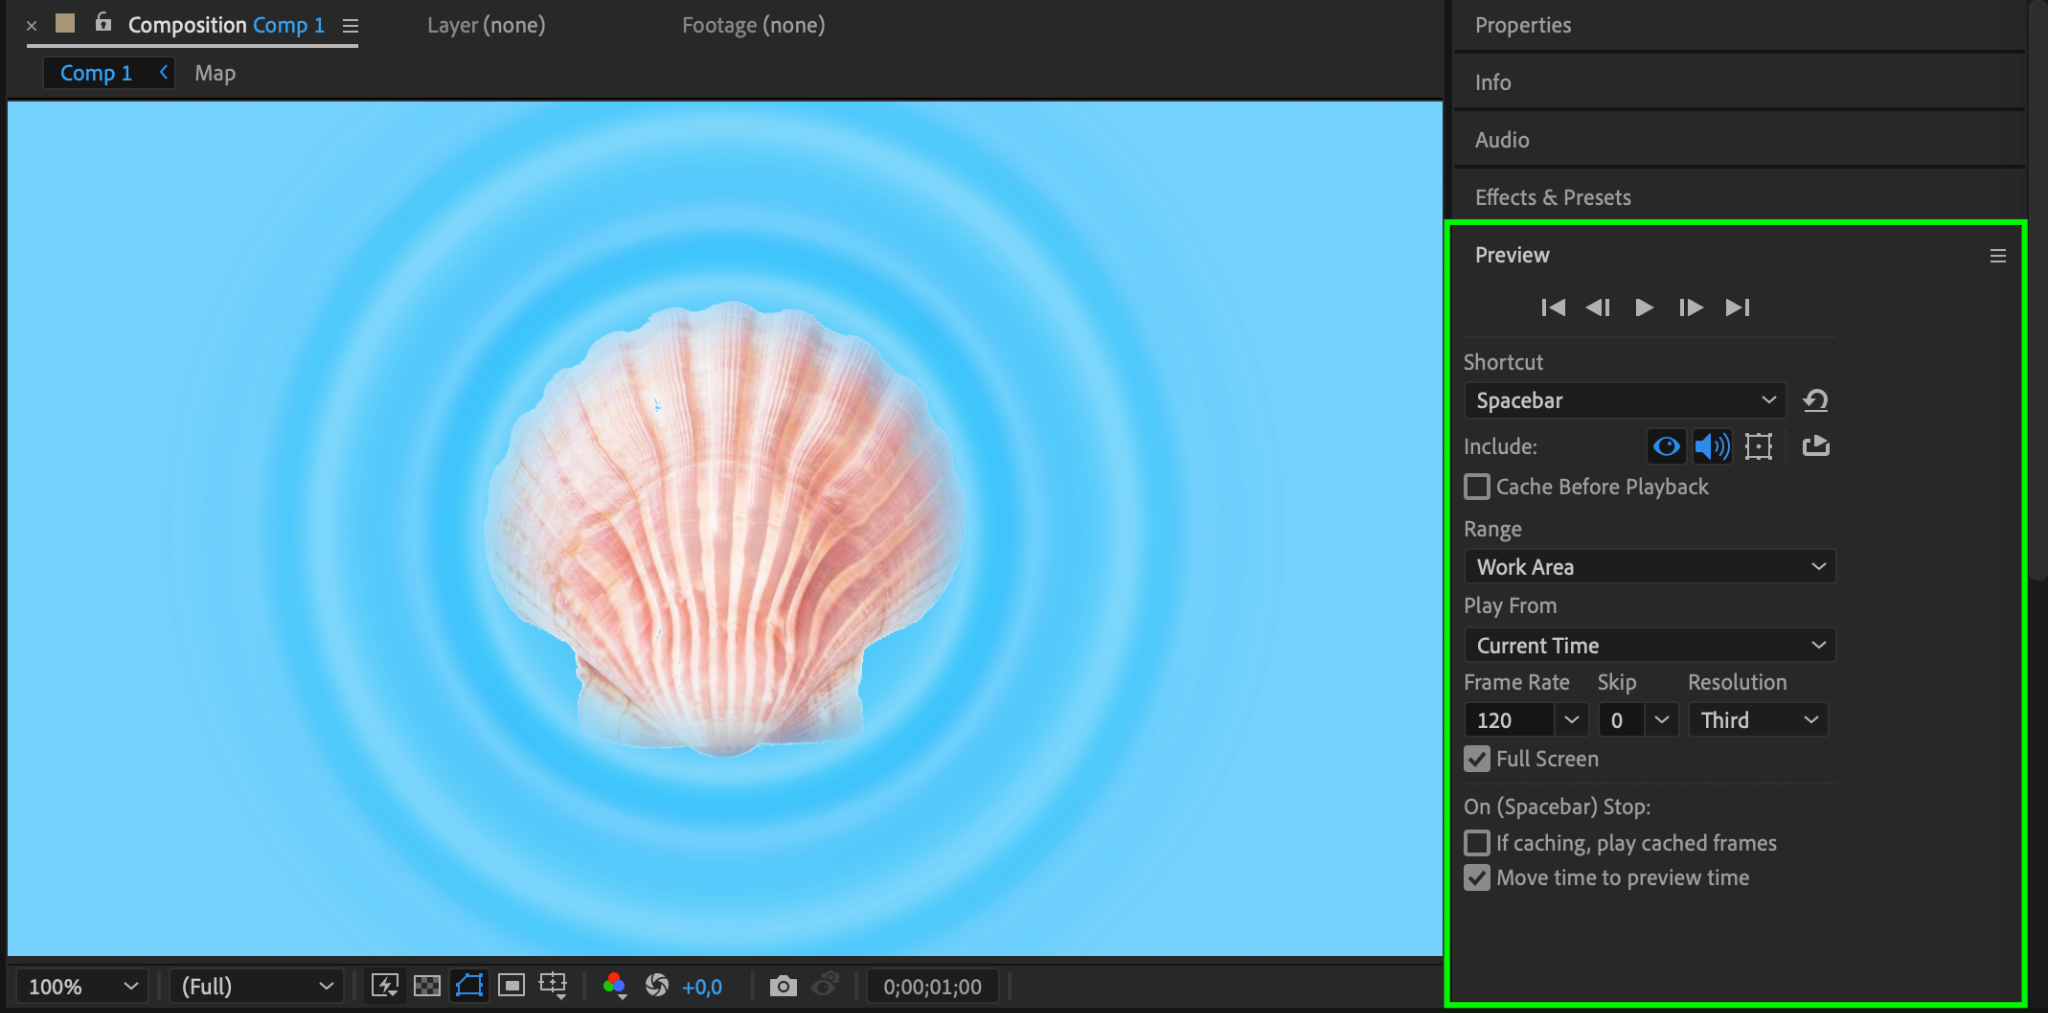
Step 20: Preview Your Effect
Use the Preview function to see how your image appears as liquid, with ripples spreading out as if a drop has fallen into the water.
Method 2: Using Fractal Noise and Caustics Effects
Step 1: Prepare Your Composition
Keep only the pre-comp with your file on the timeline and open it by double-clicking. Remove any created masks and return to the main composition.
Step 2: Create a Shape Layer
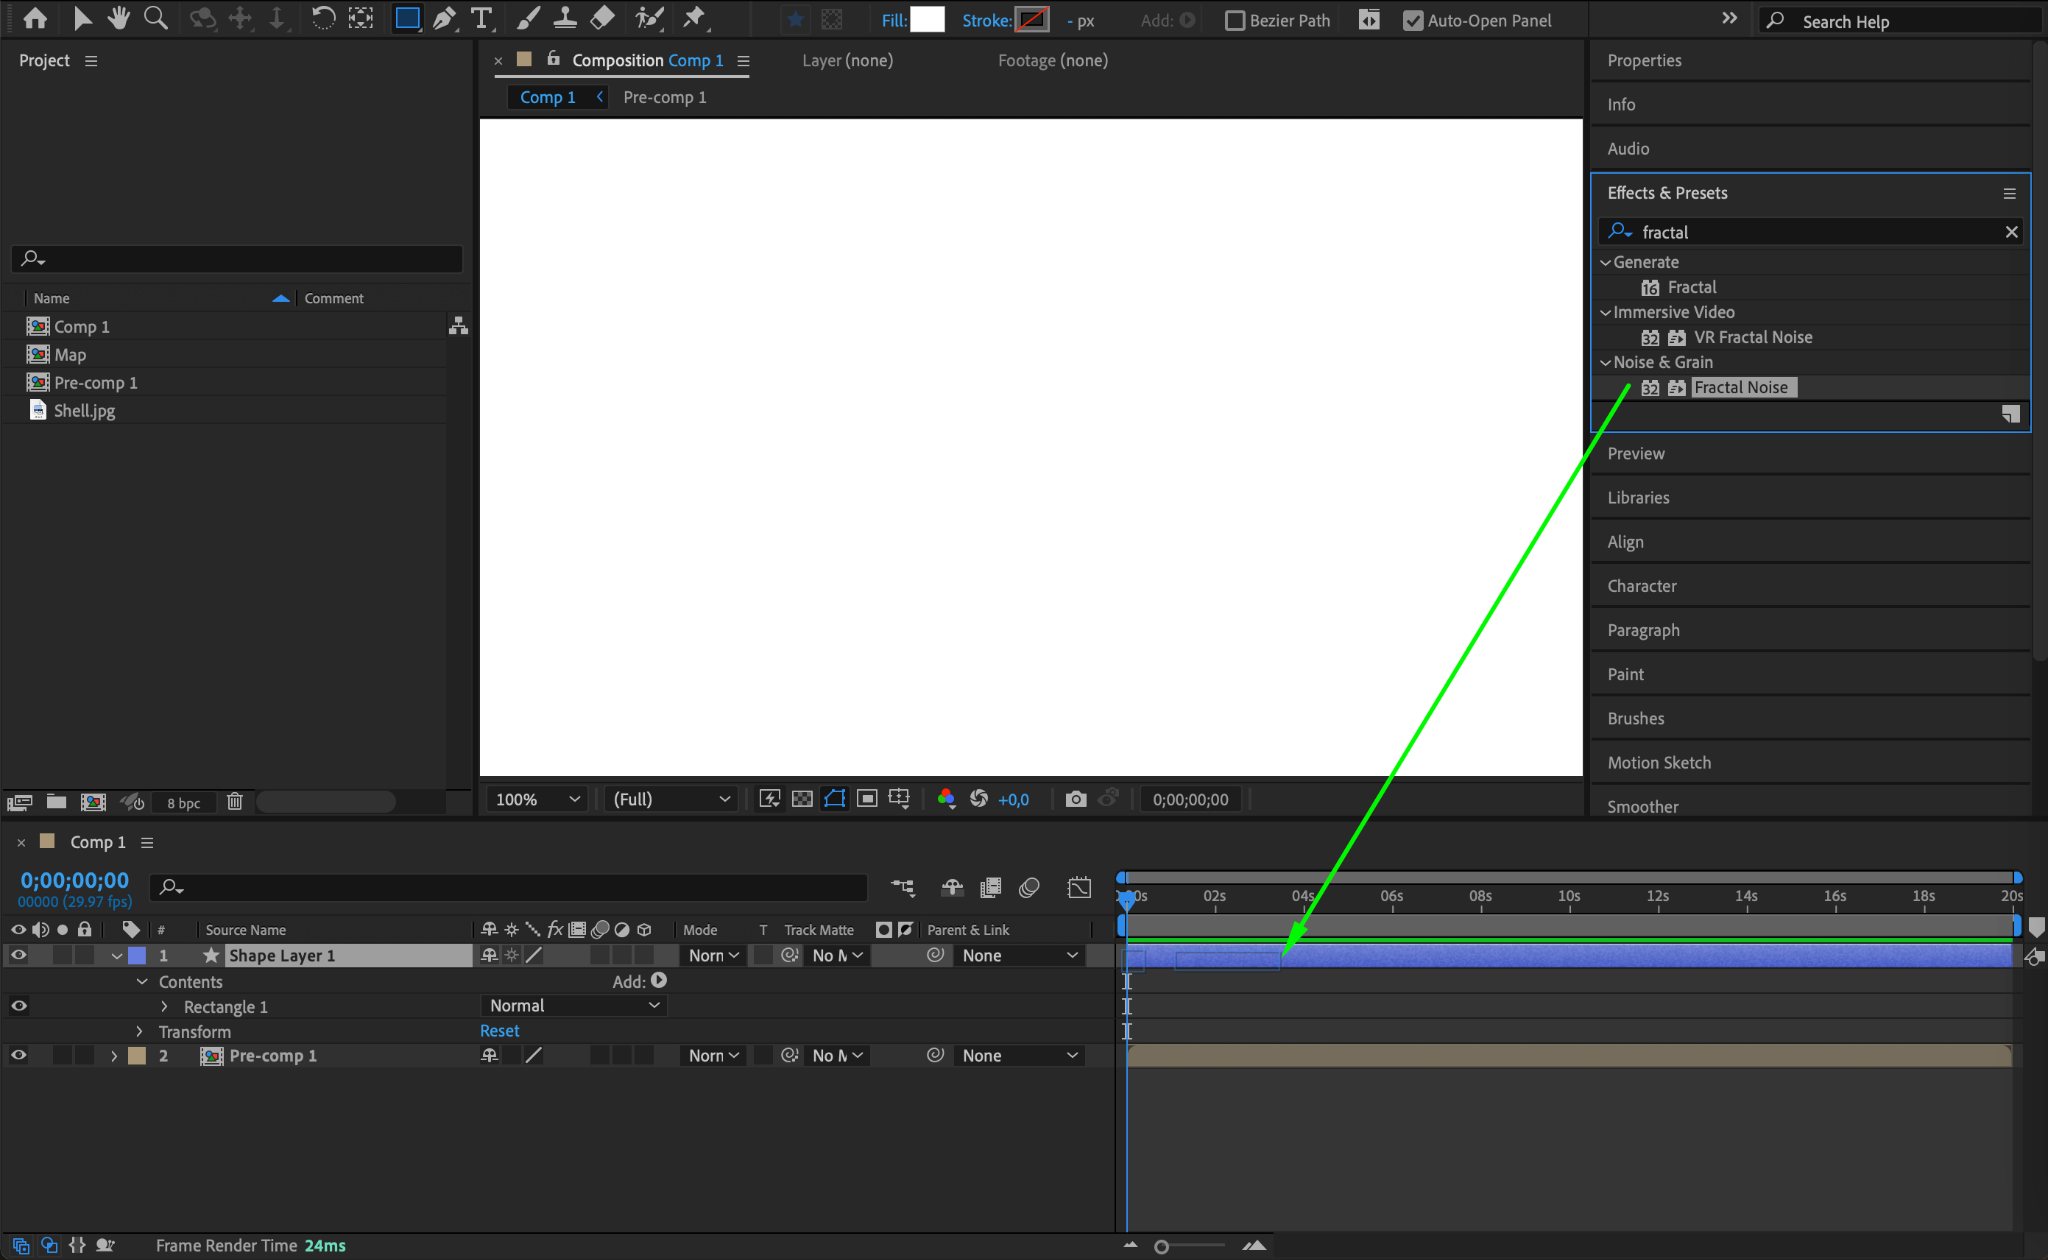
Double-click the Rectangle Tool (Q) to create a new shape layer.

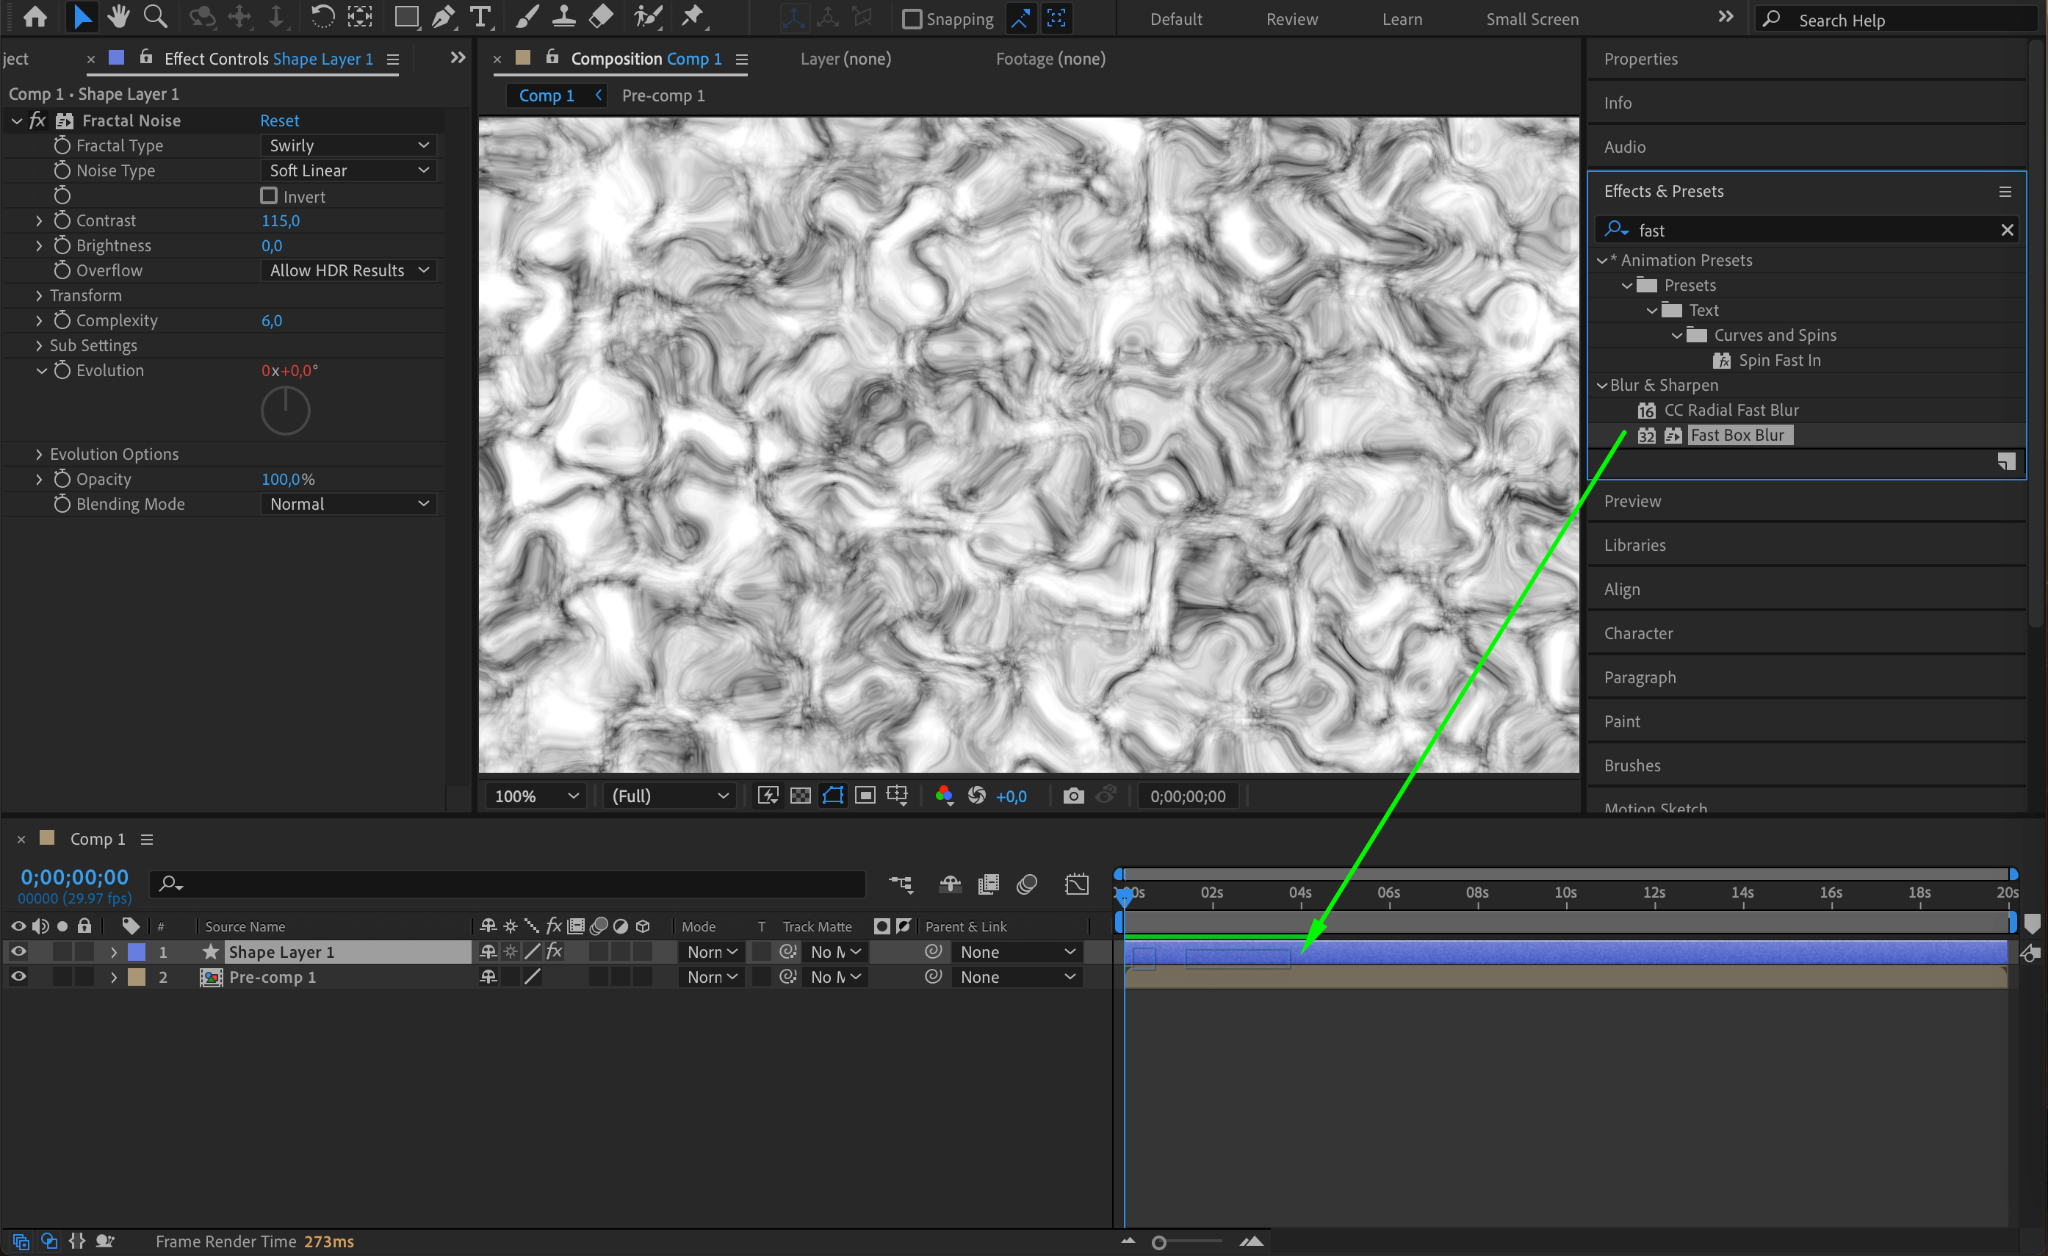
Step 3: Apply Fractal Noise Effect
Apply the Fractal Noise effect from the Effects & Presets panel to the shape layer.
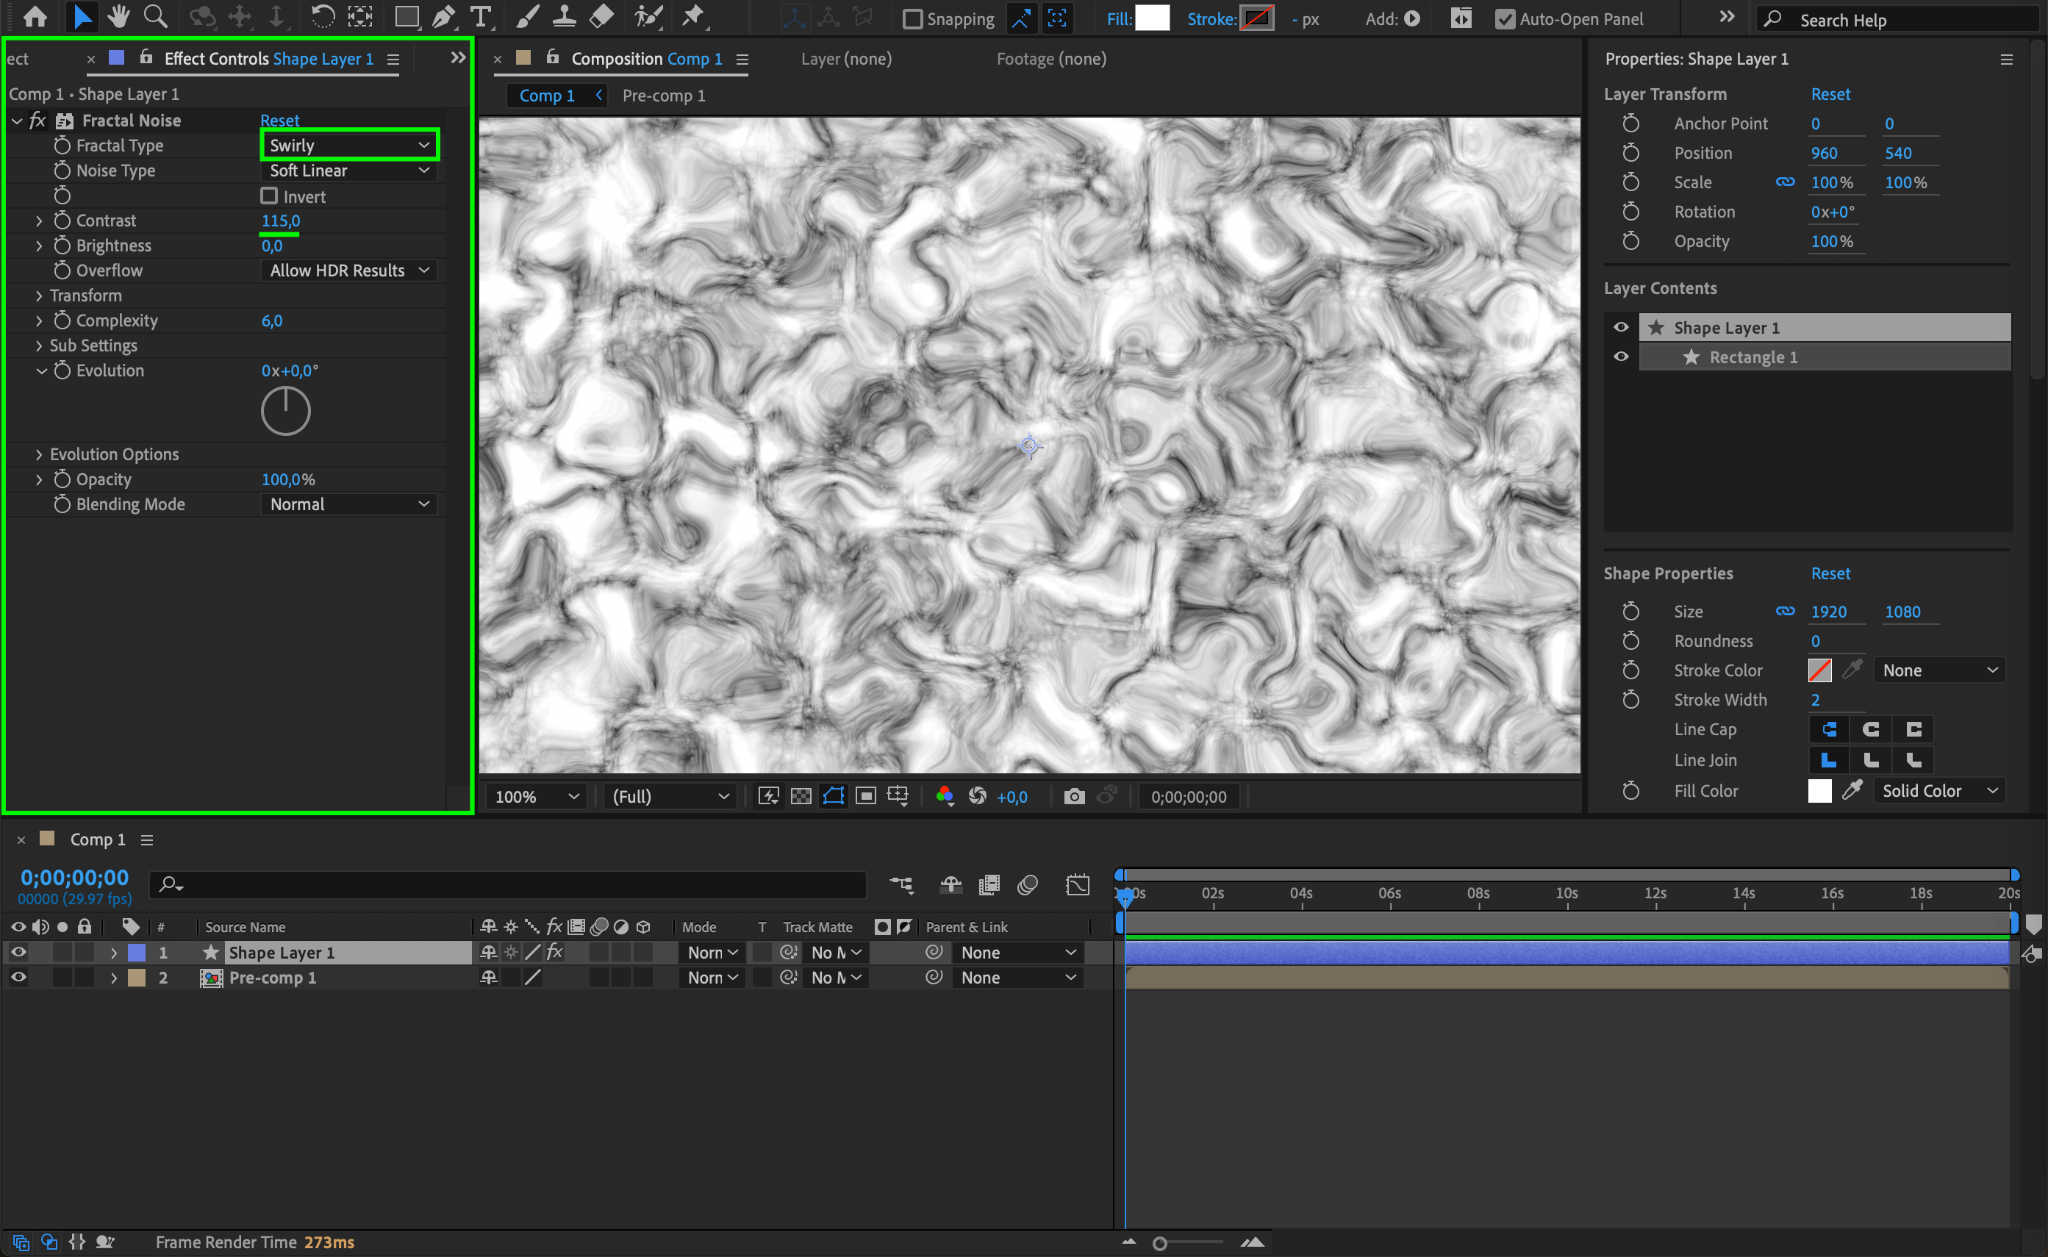
Step 4: Adjust Fractal Noise Settings
In the Effect Controls panel, set the following parameters for Fractal Noise:
Fractal Type: Swirly
Contrast: 115
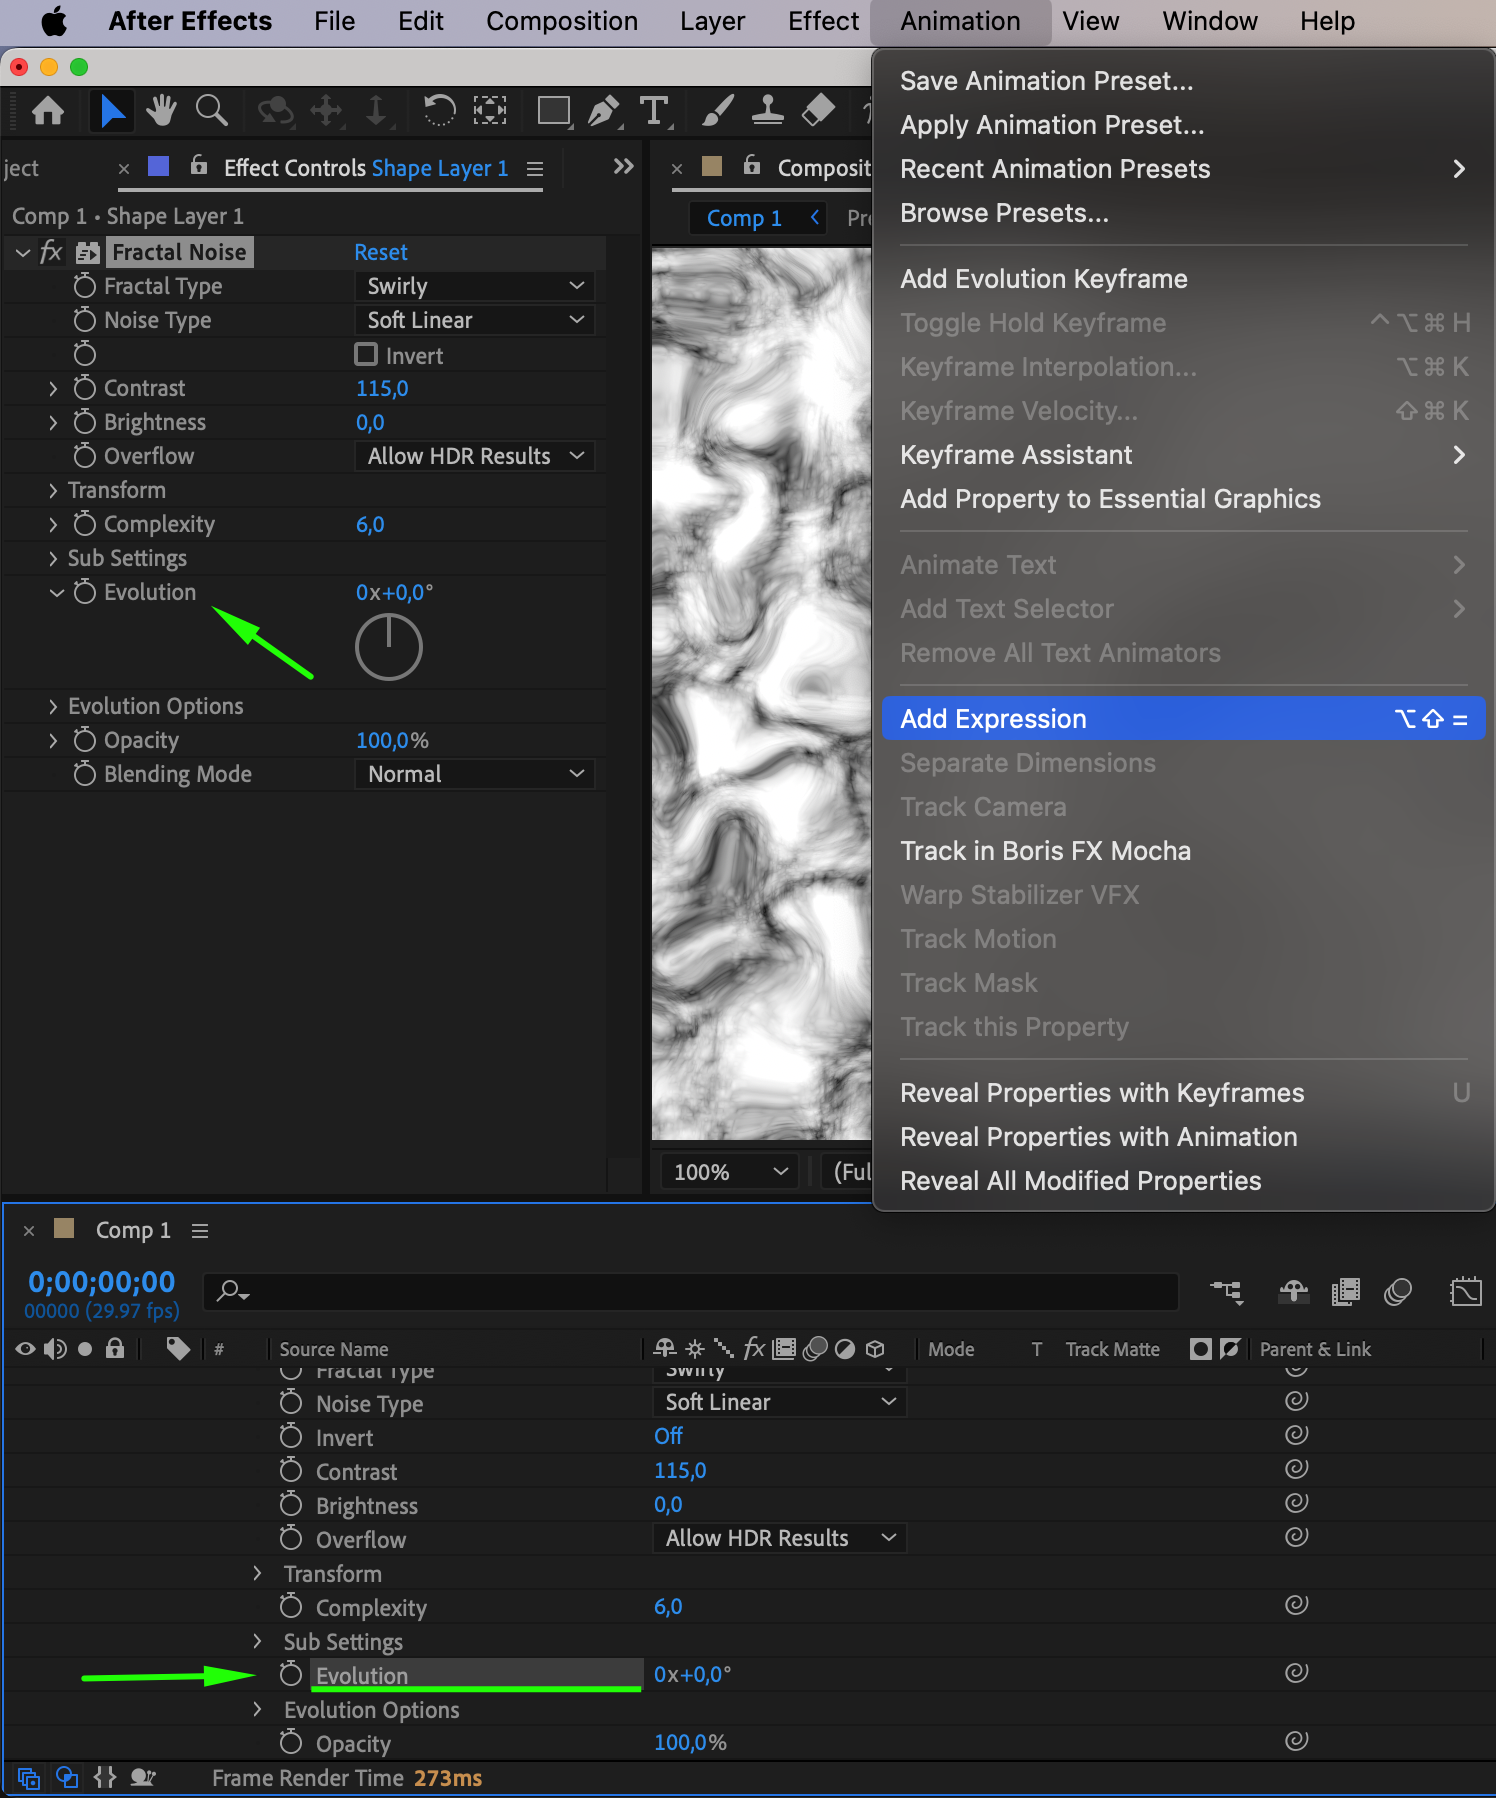
Step 5: Animate Evolution Parameter
Apply the expression time*100 to the Evolution parameter to animate the noise over time.

Step 6: Add Fast Box Blur
Add the Fast Box Blur effect from the Effects & Presets panel.
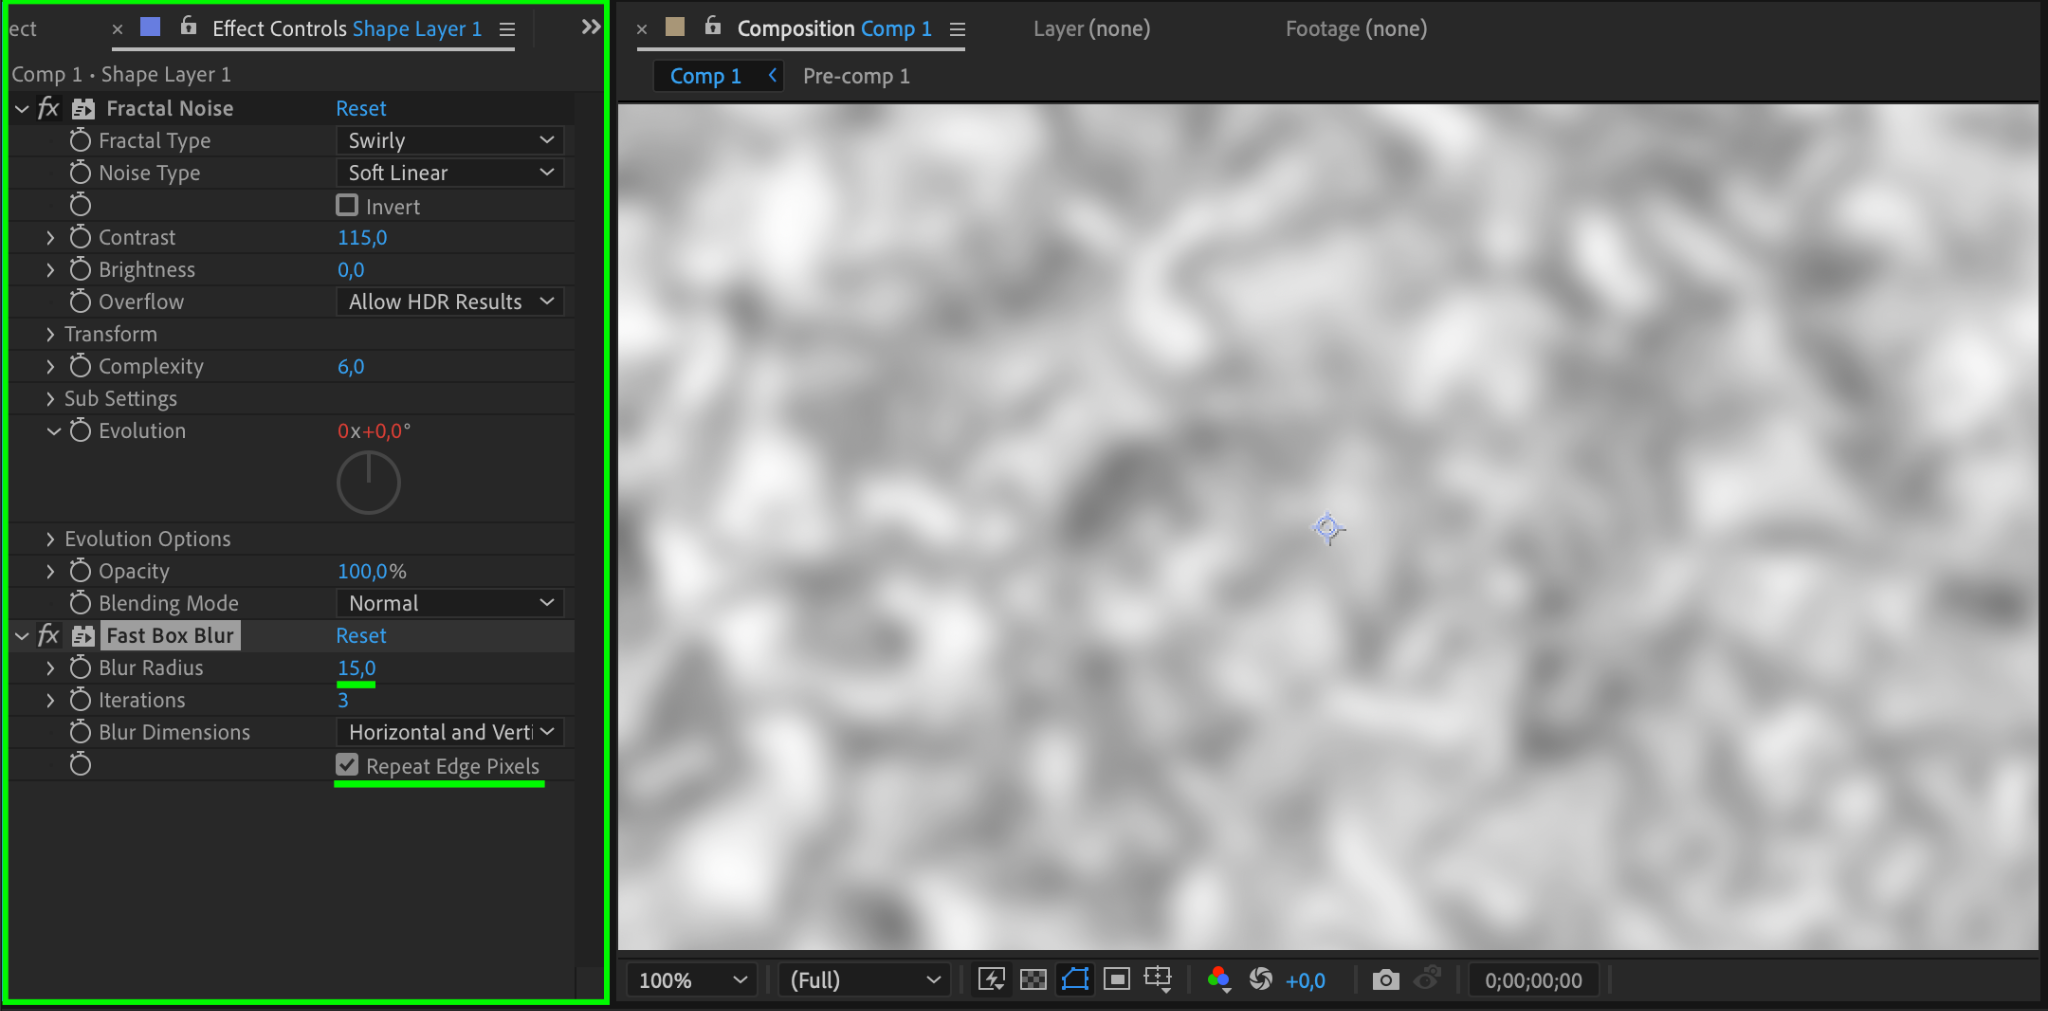
Step 7: Configure Blur Settings
In the Effect Controls panel, set the Blur Radius to 15 and check the option for Repeat Edge Pixels.
Step 8: Pre-compose the Shape Layer
Right-click on the shape layer and choose Pre-compose. Name it “Map.”


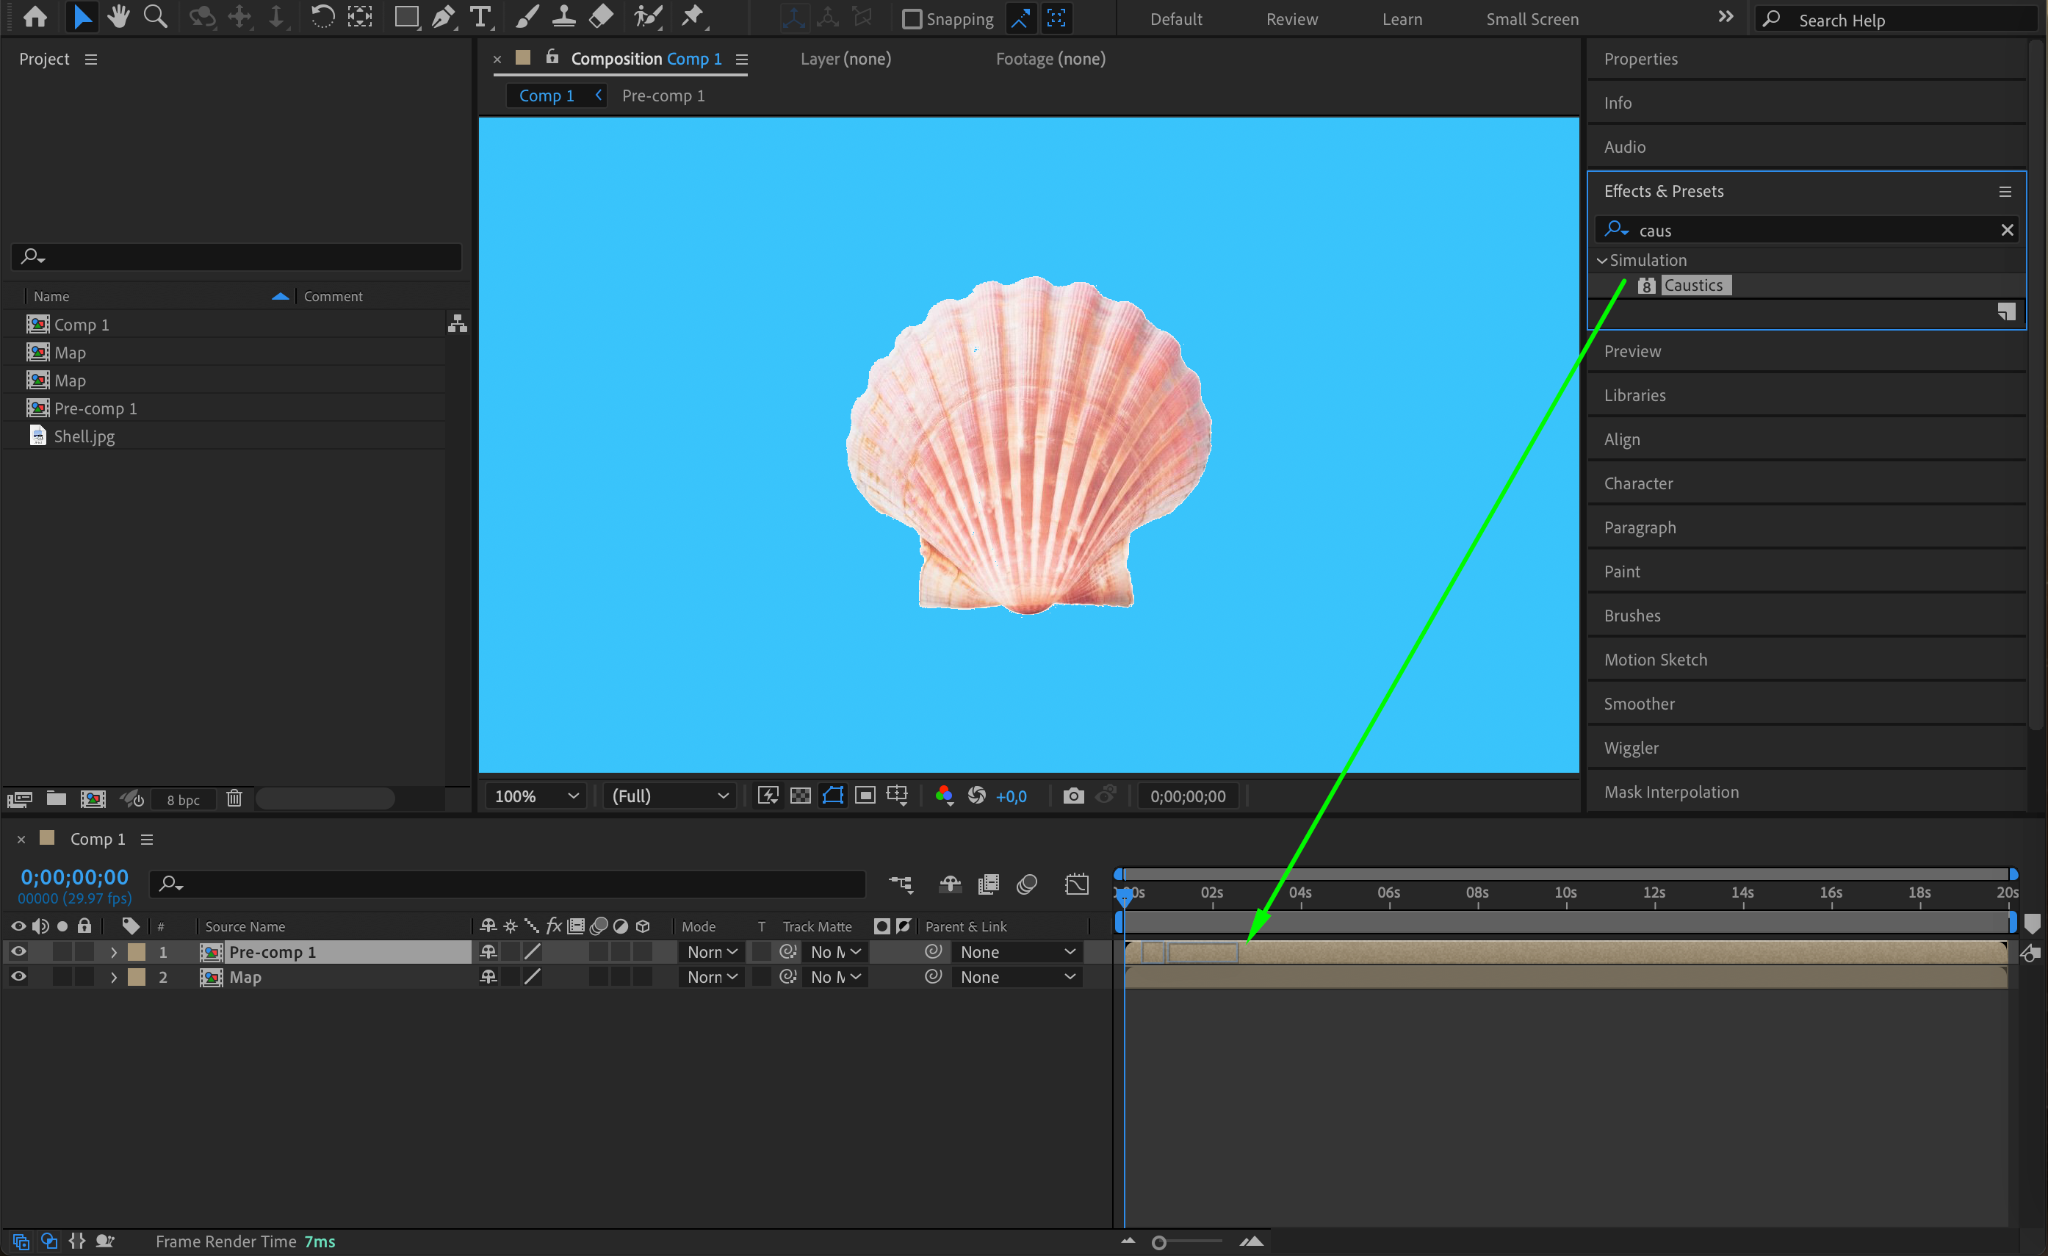
Step 9: Apply Caustics to Pre-comp
Place the pre-comp at the top of the timeline and apply the Caustics effect from the Effects & Presets panel.
Step 10: Configure Caustics Settings
In the Effect Controls panel, set the following parameters for the Caustics effect:
Water Surface: Select “Map”
Light Type: Point Source
Color: Yellow
Light Height: 1.2

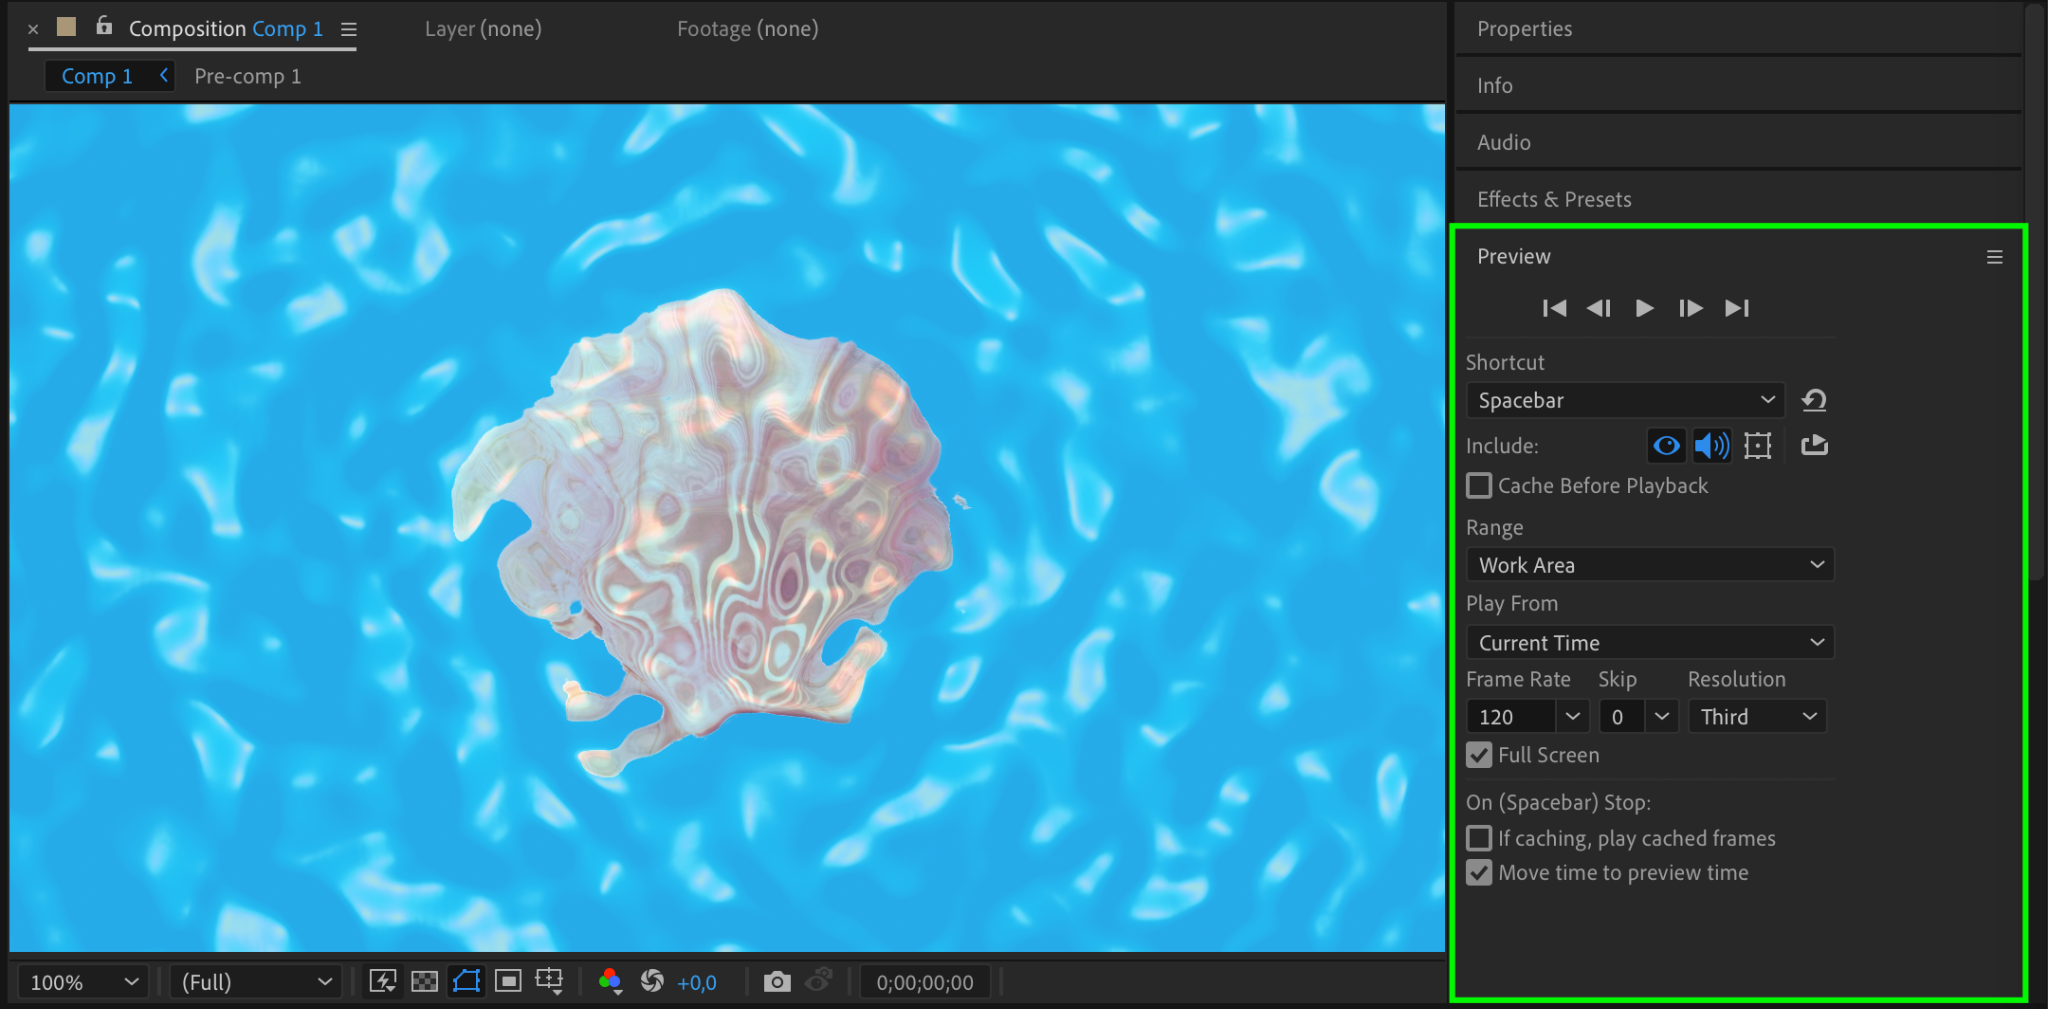
Step 11: Preview Your Effect
Use the Preview function to see how the surface water effect makes your file appear as if it is submerged in realistically moving water.
Conclusion
By following these methods, you can create impressive and dynamic liquid effects in After Effects. Experiment with the settings and techniques to customize the effects for your specific needs. Whether you’re working on animations, motion graphics, or visual effects, these liquid effects will add a captivating element to your projects.
Unleash your creativity and enhance your visual storytelling with stunning liquid effects in After Effects!
If you want to take your liquid effects to the next level, you can simulate fluid dynamics in After Effects. This involves creating a new composition, applying the ‘CC Particle World’ effect to the desired layer, customizing the particle settings, and using additional effects like ‘CC Force Motion Blur’ or ‘CC Vector Blur’ to enhance the realistic motion blur. Experiment with colors, opacity, and blending modes to achieve the desired look. Use keyframes and expressions to animate the fluid simulation over time.
If you’re looking for a quick and easy way to add liquid effects to your animations, you can use pre-built liquid animation presets available in After Effects. Simply search for “liquid” or “water” animation presets in the Effects & Presets panel, apply the desired preset to your layer, and customize the settings to fit your project. Use keyframes to animate the preset and adjust the timing as needed.
To create liquid effects for text in After Effects, you can use techniques similar to the ones mentioned above. Convert your text layer into a shape layer, follow the steps for creating liquid transitions or simulating fluid dynamics, and experiment with different effects and settings to achieve unique liquid text effects.
Remember, the key to creating realistic liquid effects in After Effects is experimentation. Don’t be afraid to play around with settings, effects, and techniques to find your desired look. With practice and patience, you can master the art of liquid effects and add a captivating touch to your motion graphics and animations. So go ahead, dive into the world of liquid effects in After Effects, and let your creativity flow!
Our Bestsellers


