How to Create a Loading Animation in After Effects
Getting Started with Loading Animations in After Effects
Creating a loading animation in After Effects is easier than you might think! AEJuice has put together a comprehensive guide that will walk you through each step of the process. Whether you’re a web designer or a content creator, learning how to design and animate loading screens can greatly enhance the user experience.
Step 1: Create a New Composition
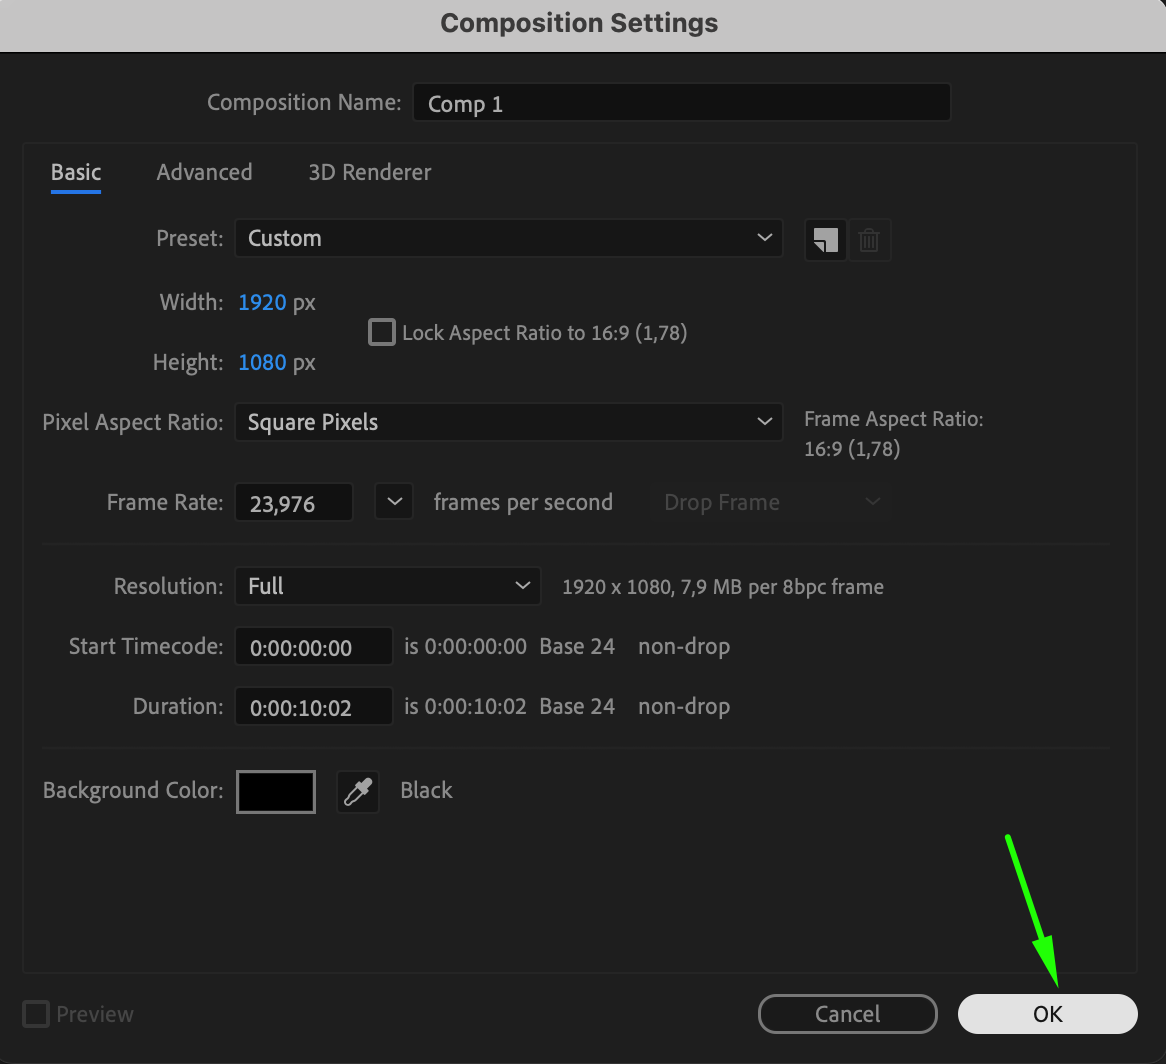
Start by creating a new composition in After Effects. Go to Composition > New Composition or press “Ctrl/Cmd + N”. Set the composition settings according to your needs – common settings include a resolution of 1920×1080 pixels and a duration of around 10 seconds. Set the background color to black for contrast, which will make your loading animation stand out.
 Step 2: Create a Small Circle Using the Ellipse Tool
Get 10% off when you subscribe to our newsletter

To create the loading animation, select the Ellipse Tool (Q) from the toolbar. Draw a small circle in the center at the top of your composition panel. This circle will act as the base of your loading animation. Ensure that the fill color is white, and the stroke is set to none, as this will make the loading circles more visible against the black background.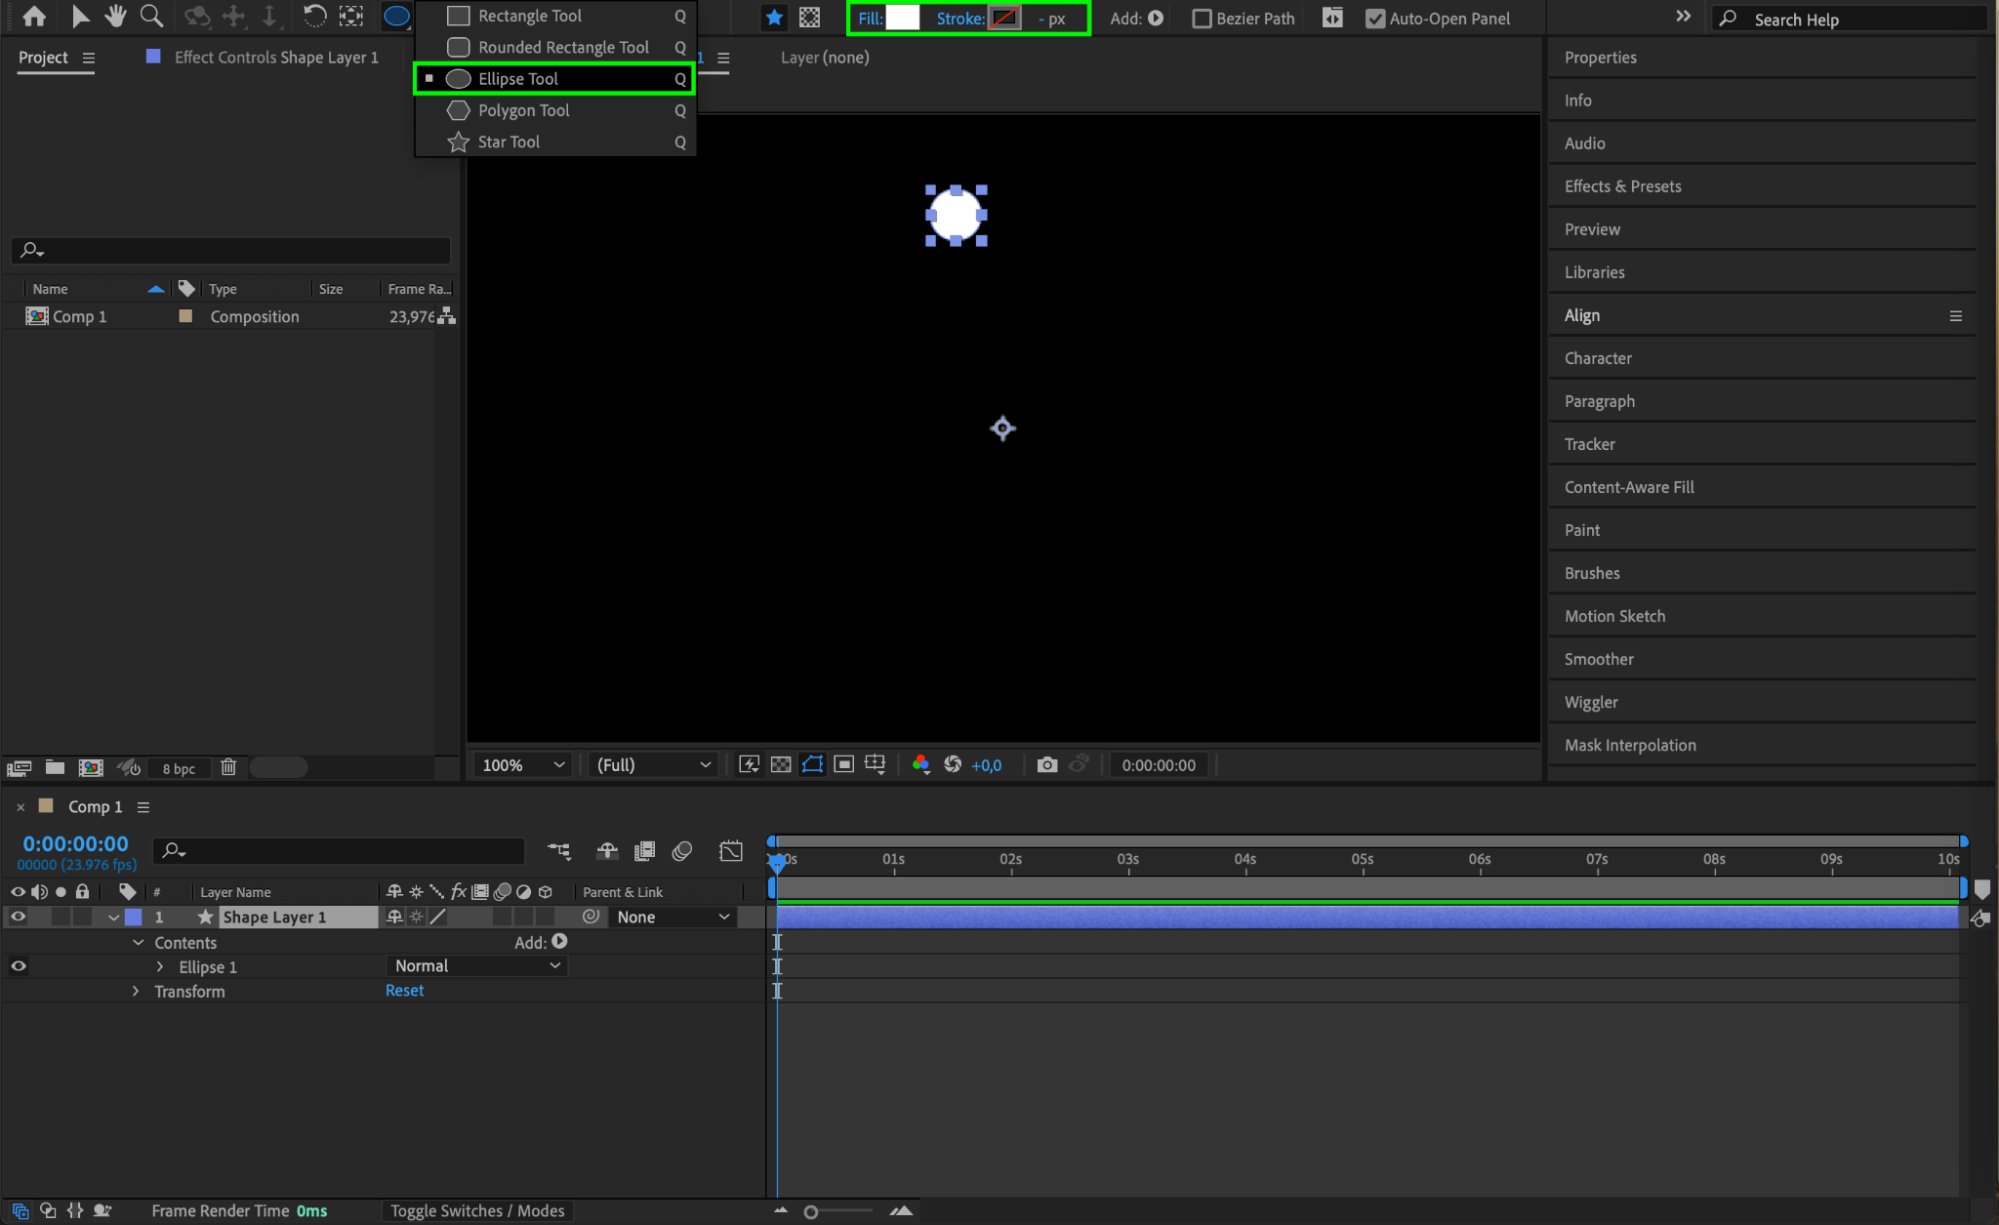 Step 3: Add a Repeater to Your Shape Layer
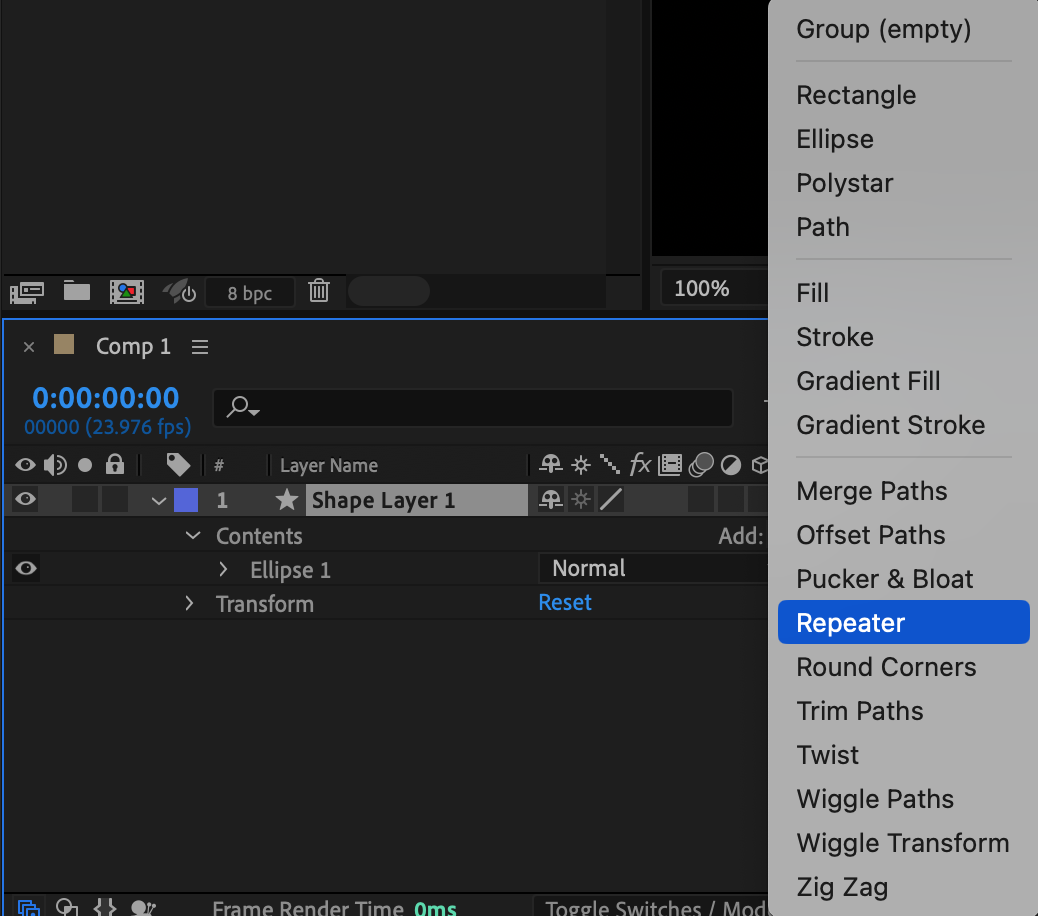
With your circle shape layer selected, expand its properties in the Timeline panel. Next to the Contents section, click on the Add button (represented by a small triangle), and from the drop-down menu, choose Repeater. The repeater will duplicate the circle around a central point, creating the basis for your loading animation.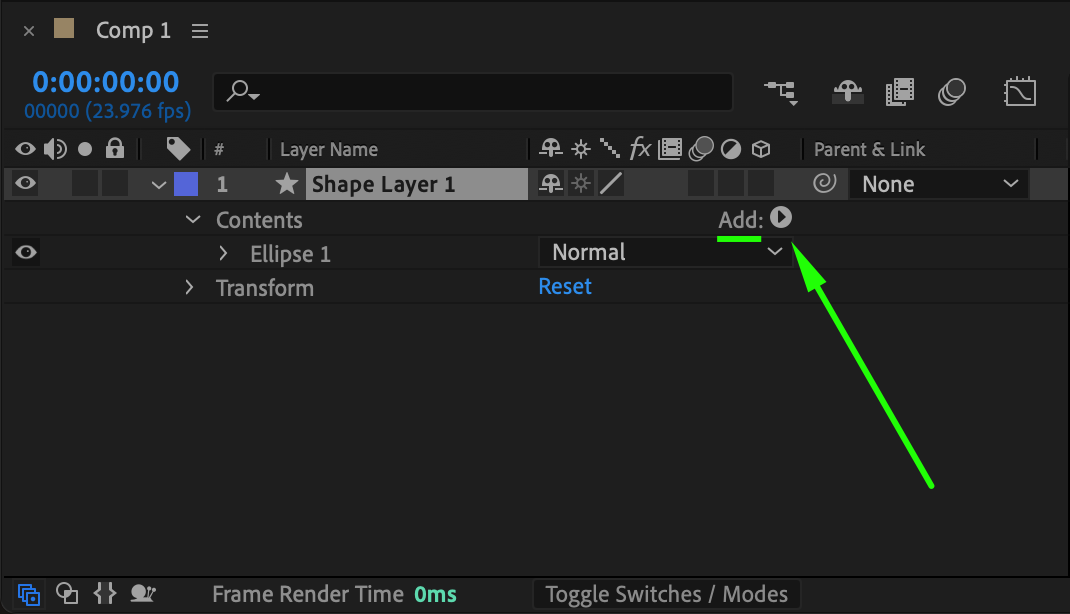
 Step 4: Adjust Repeater Settings
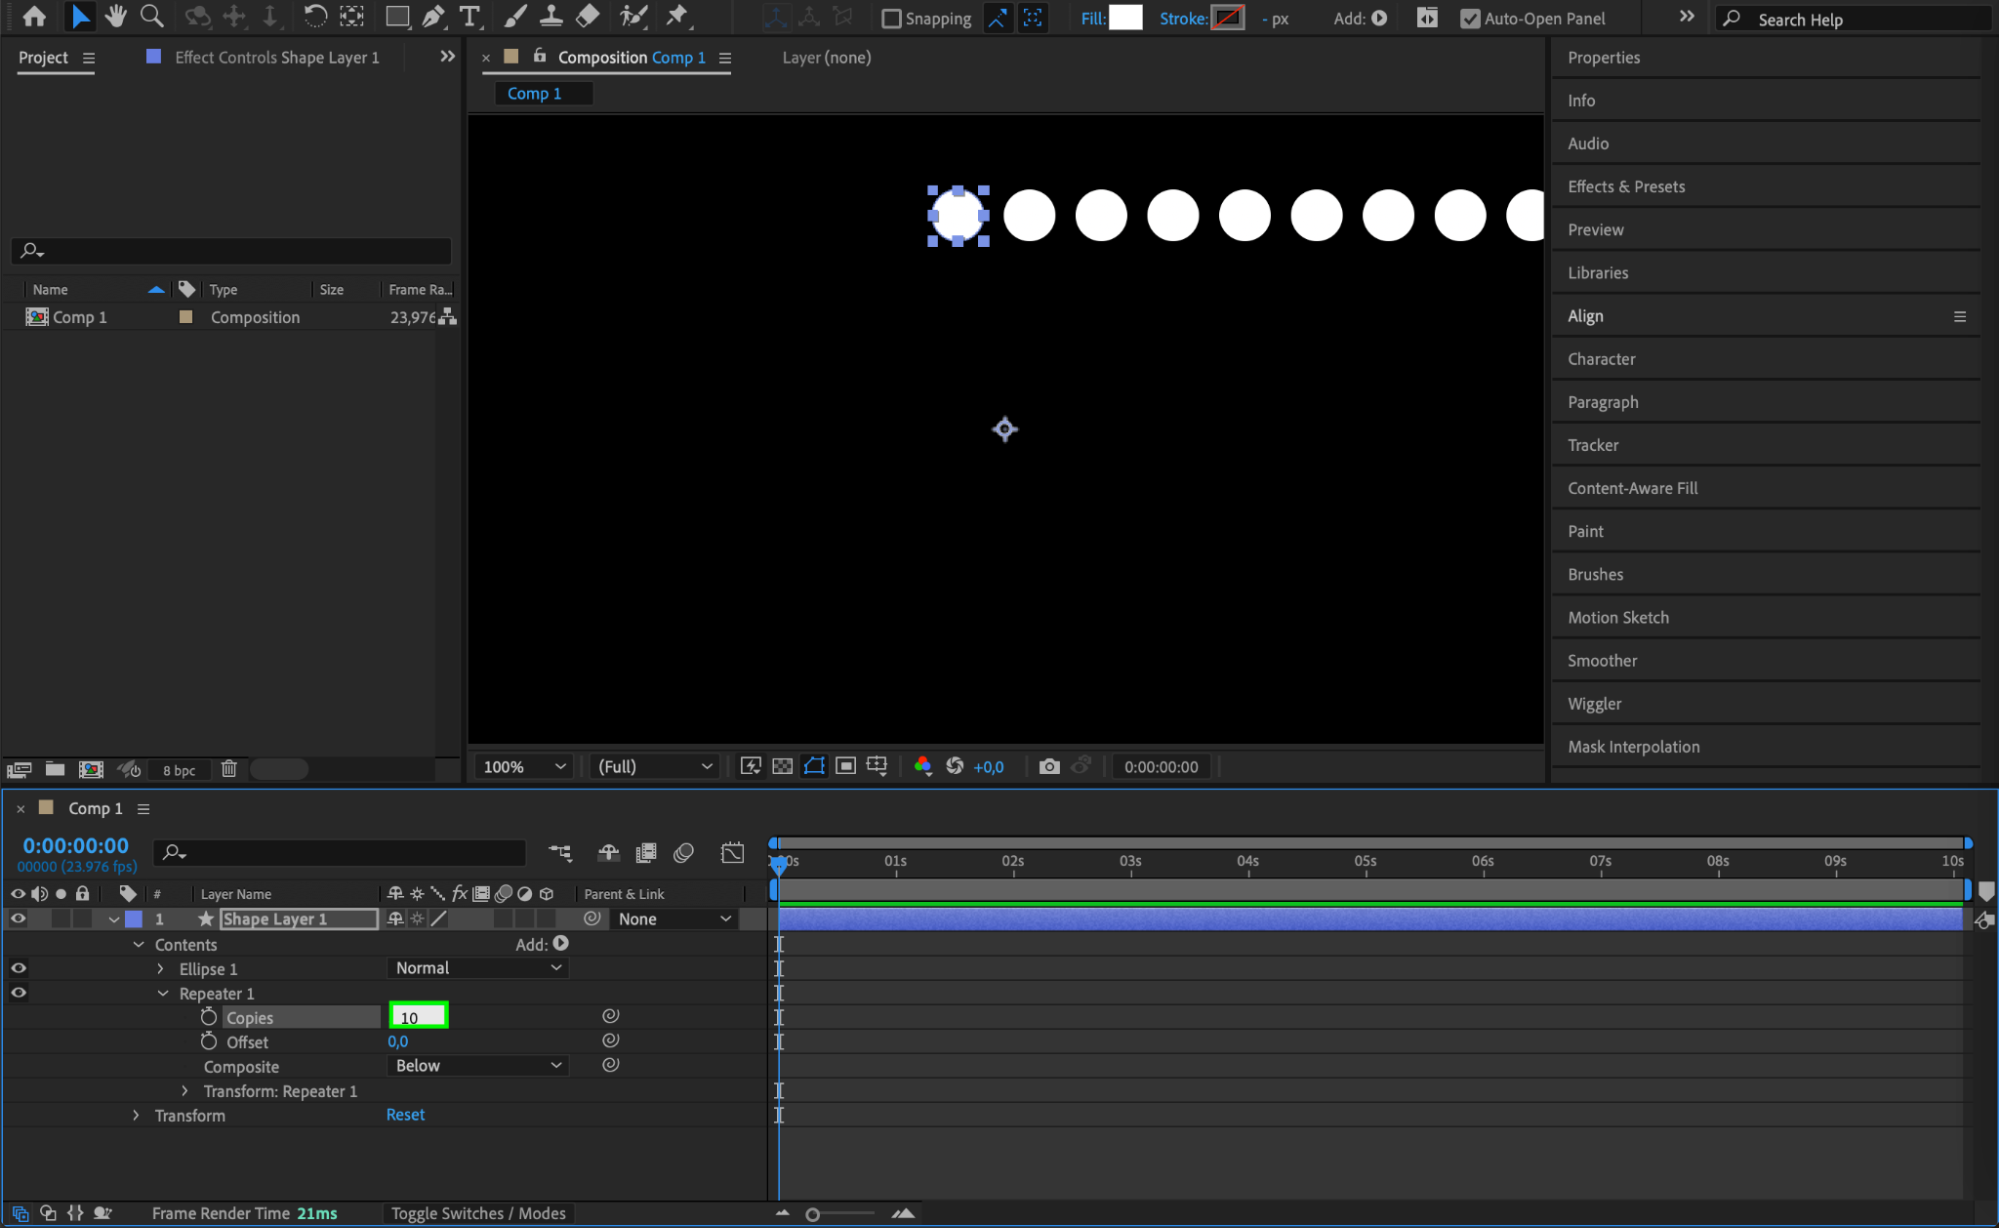
Expand the Repeater 1 properties under the Contents section. Set the Copies parameter to 10 to create 10 equally spaced circles around a center point. This will give your loading animation a complete circular motion as the shapes rotate.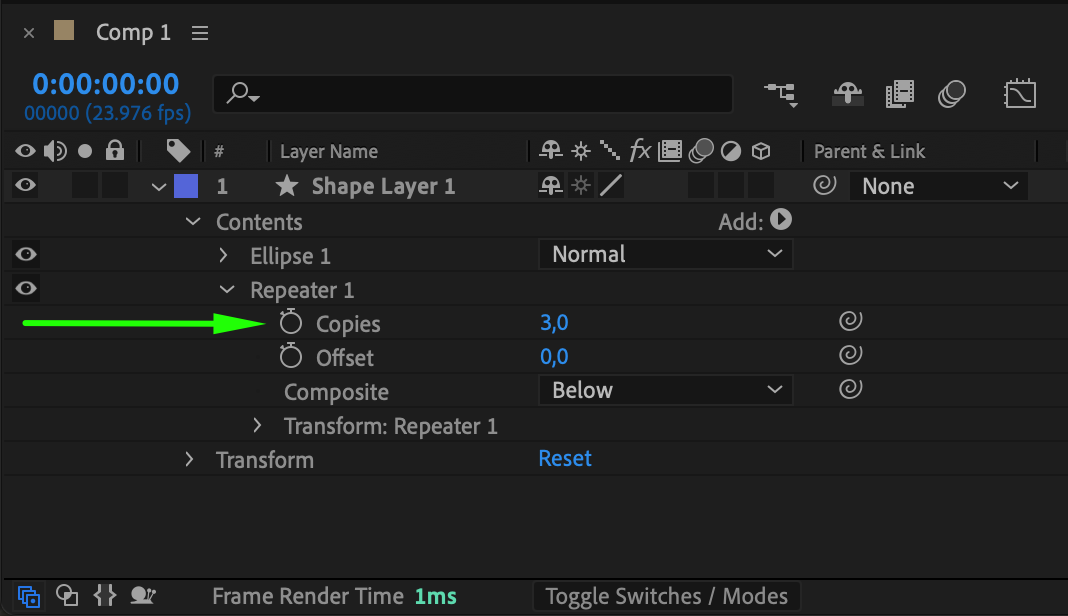
 Step 5: Configure Transform Settings for the Repeater
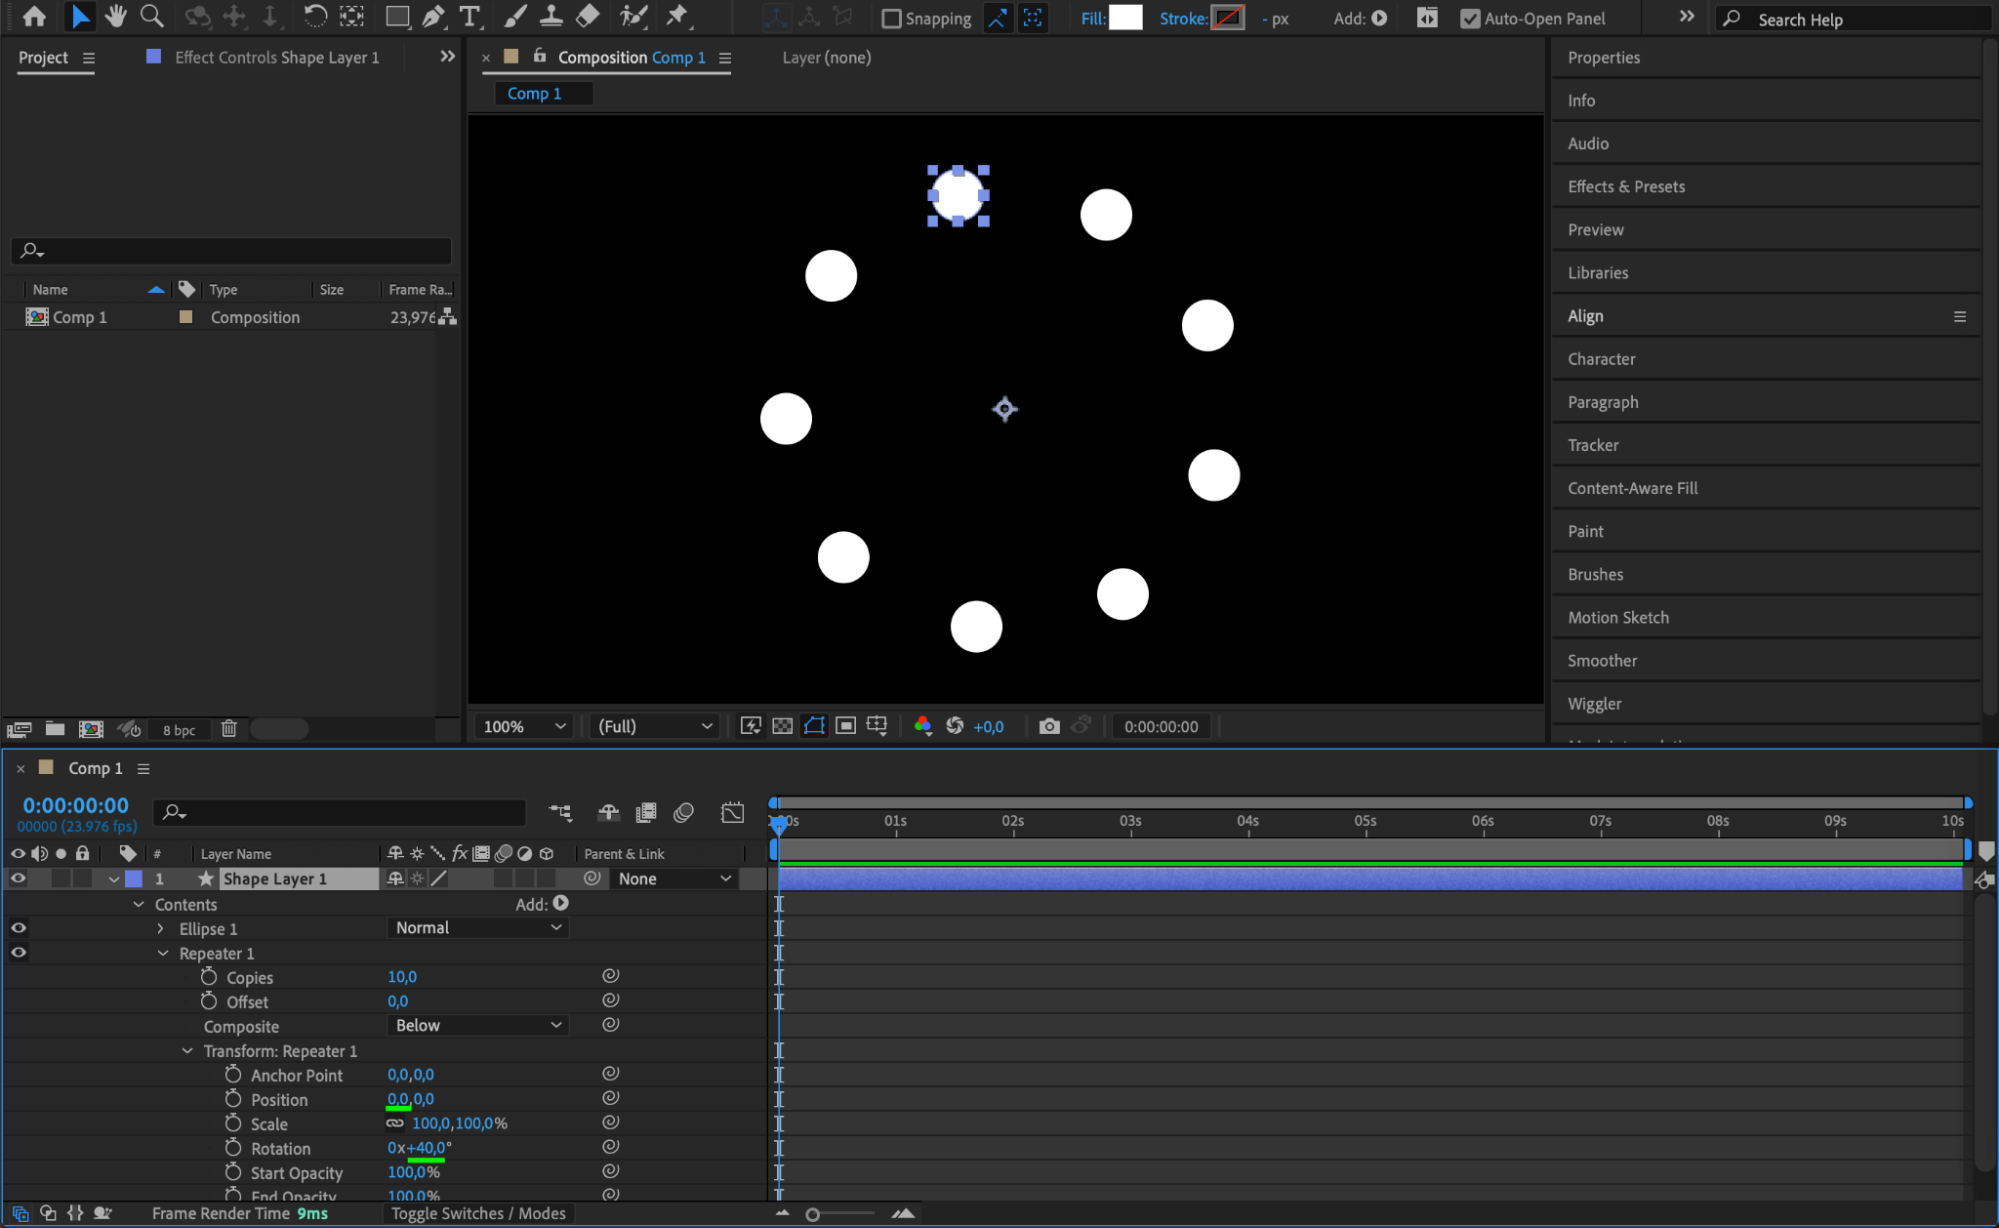
Under Repeater 1, find the Transform: Repeater 1 settings. Set the Position values to 0,0 to ensure all the copies overlap in the center. For the Rotation parameter, set it to 0° and then multiply the number of copies by the rotation angle you want (e.g., 40° for 10 copies). This will evenly distribute the circles around the center, creating a smooth circular pattern.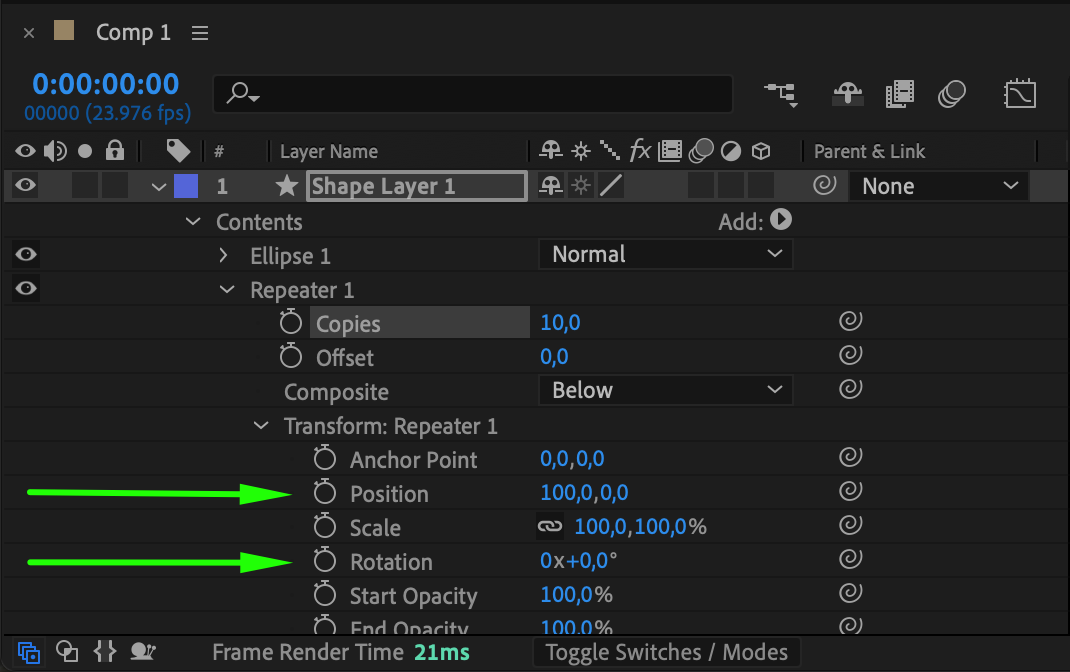
 Step 6: Create a Gradient Background
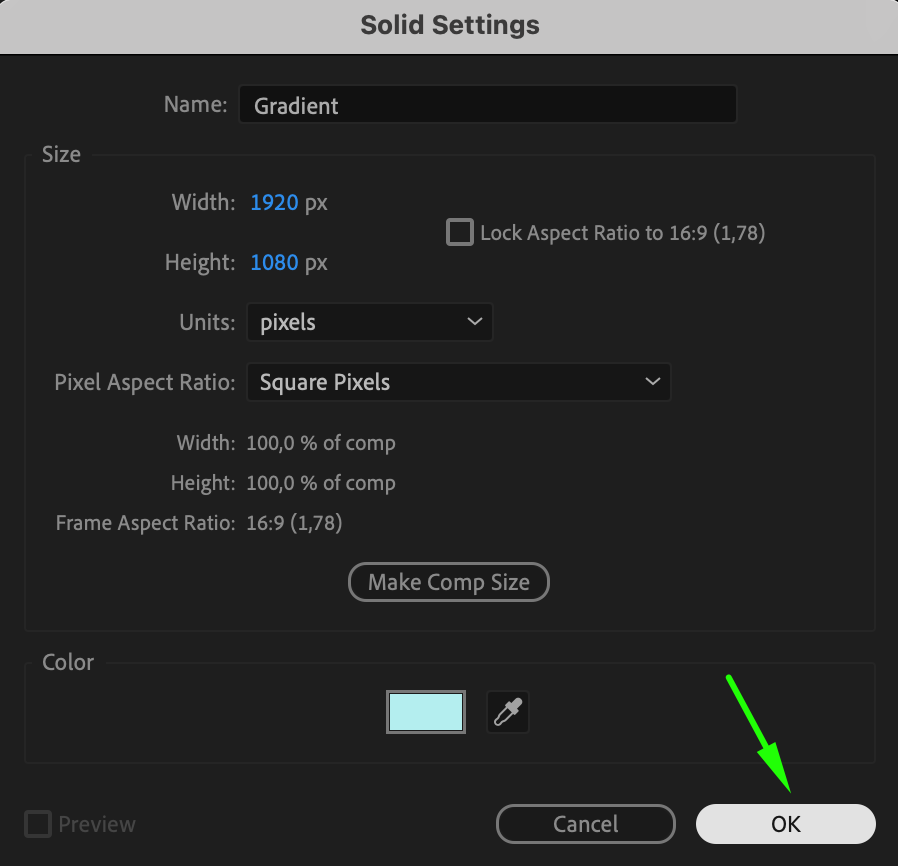
To enhance the look of your loading animation, create a gradient background. Go to Layer > New > Solid and create a new solid layer. Name this layer “Gradient.” The solid will serve as the base for the gradient effect.
 Step 7: Apply the Gradient Ramp Effect
With the gradient layer selected, go to the Effects & Presets panel and search for the Gradient Ramp effect. Drag it onto your gradient layer. This effect will allow you to create a smooth transition between two colors, enhancing the visual appeal of your animation.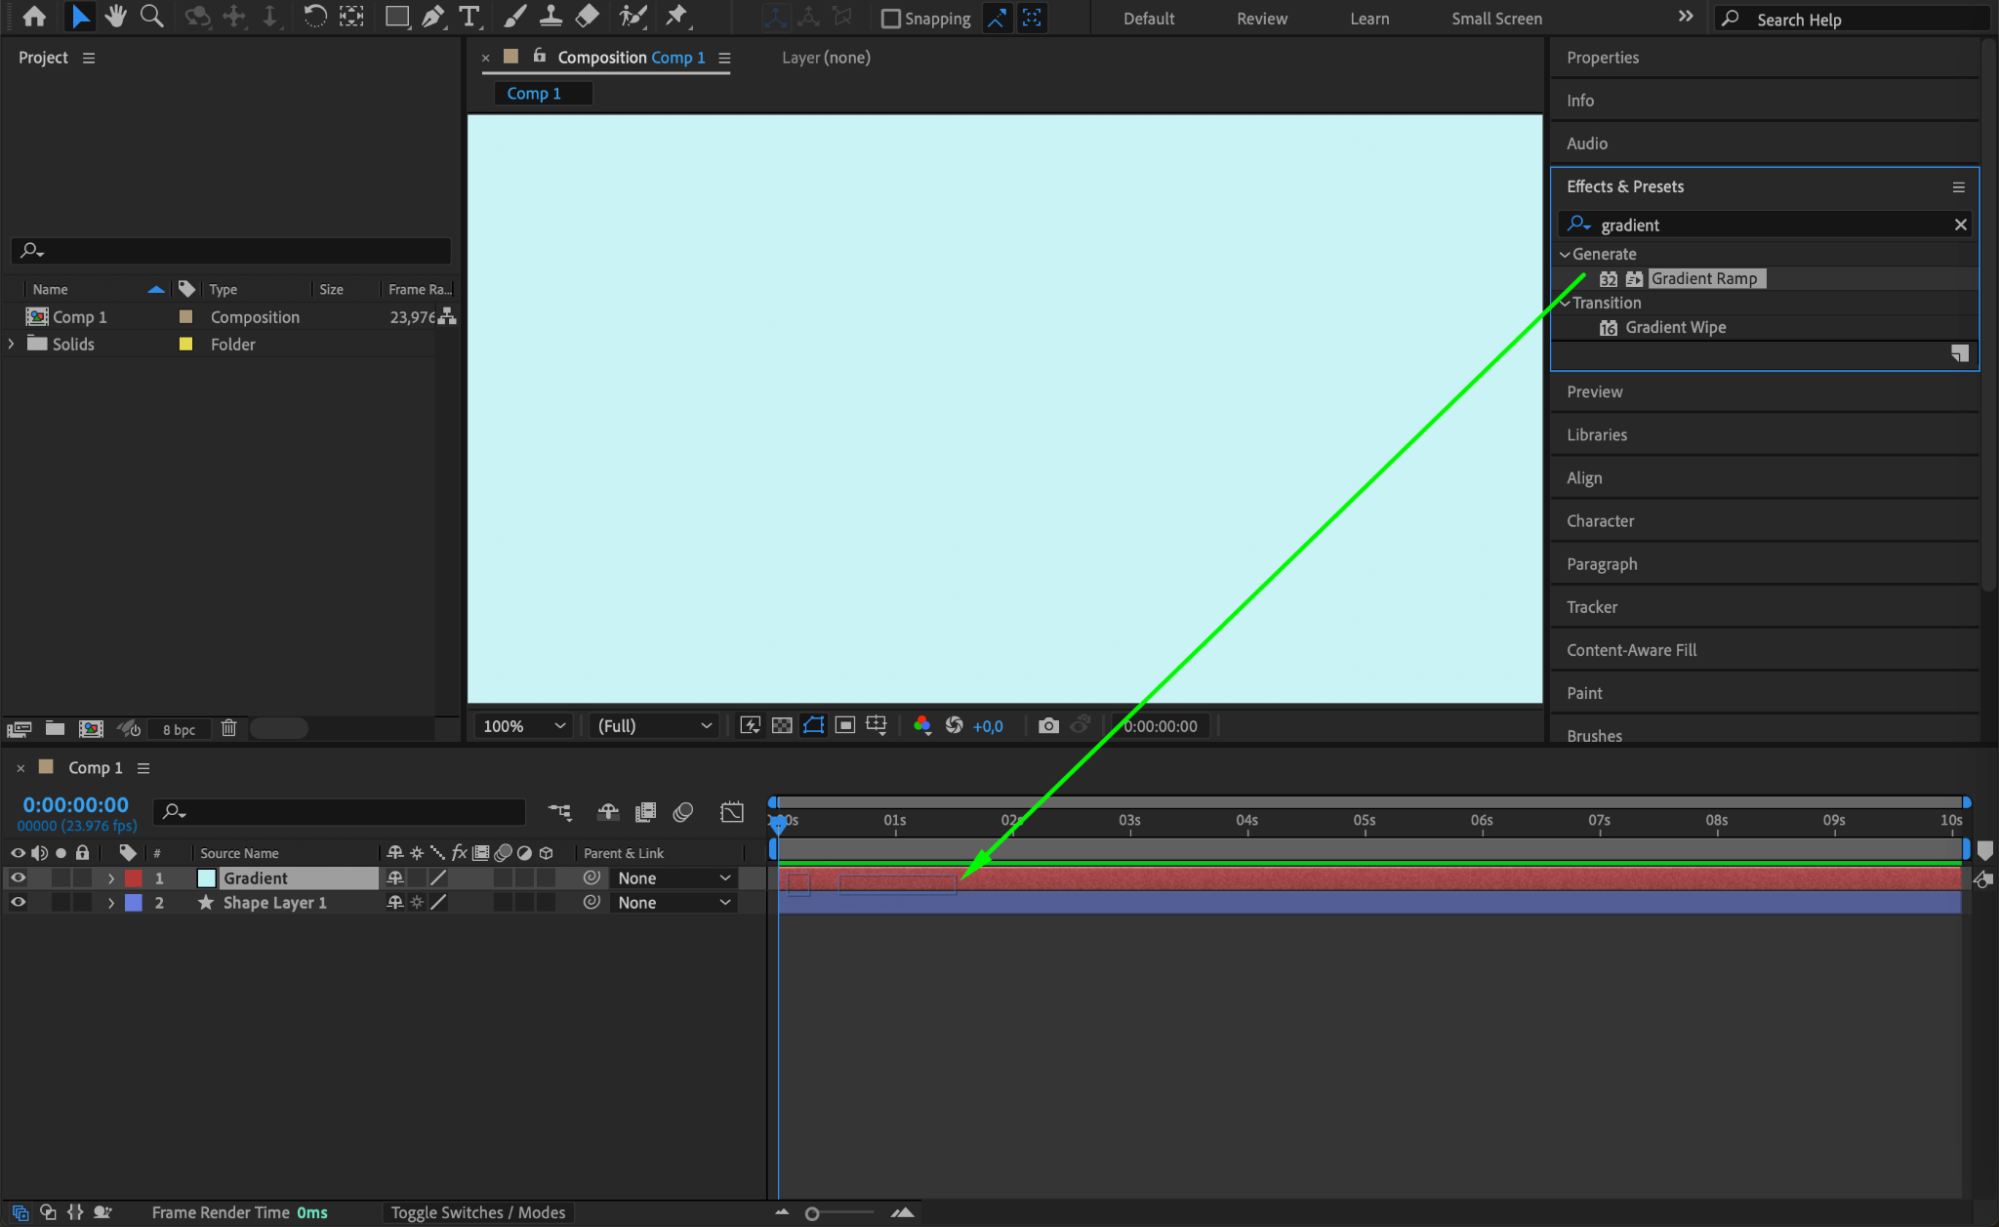 Step 8: Set the Gradient Ramp Parameters
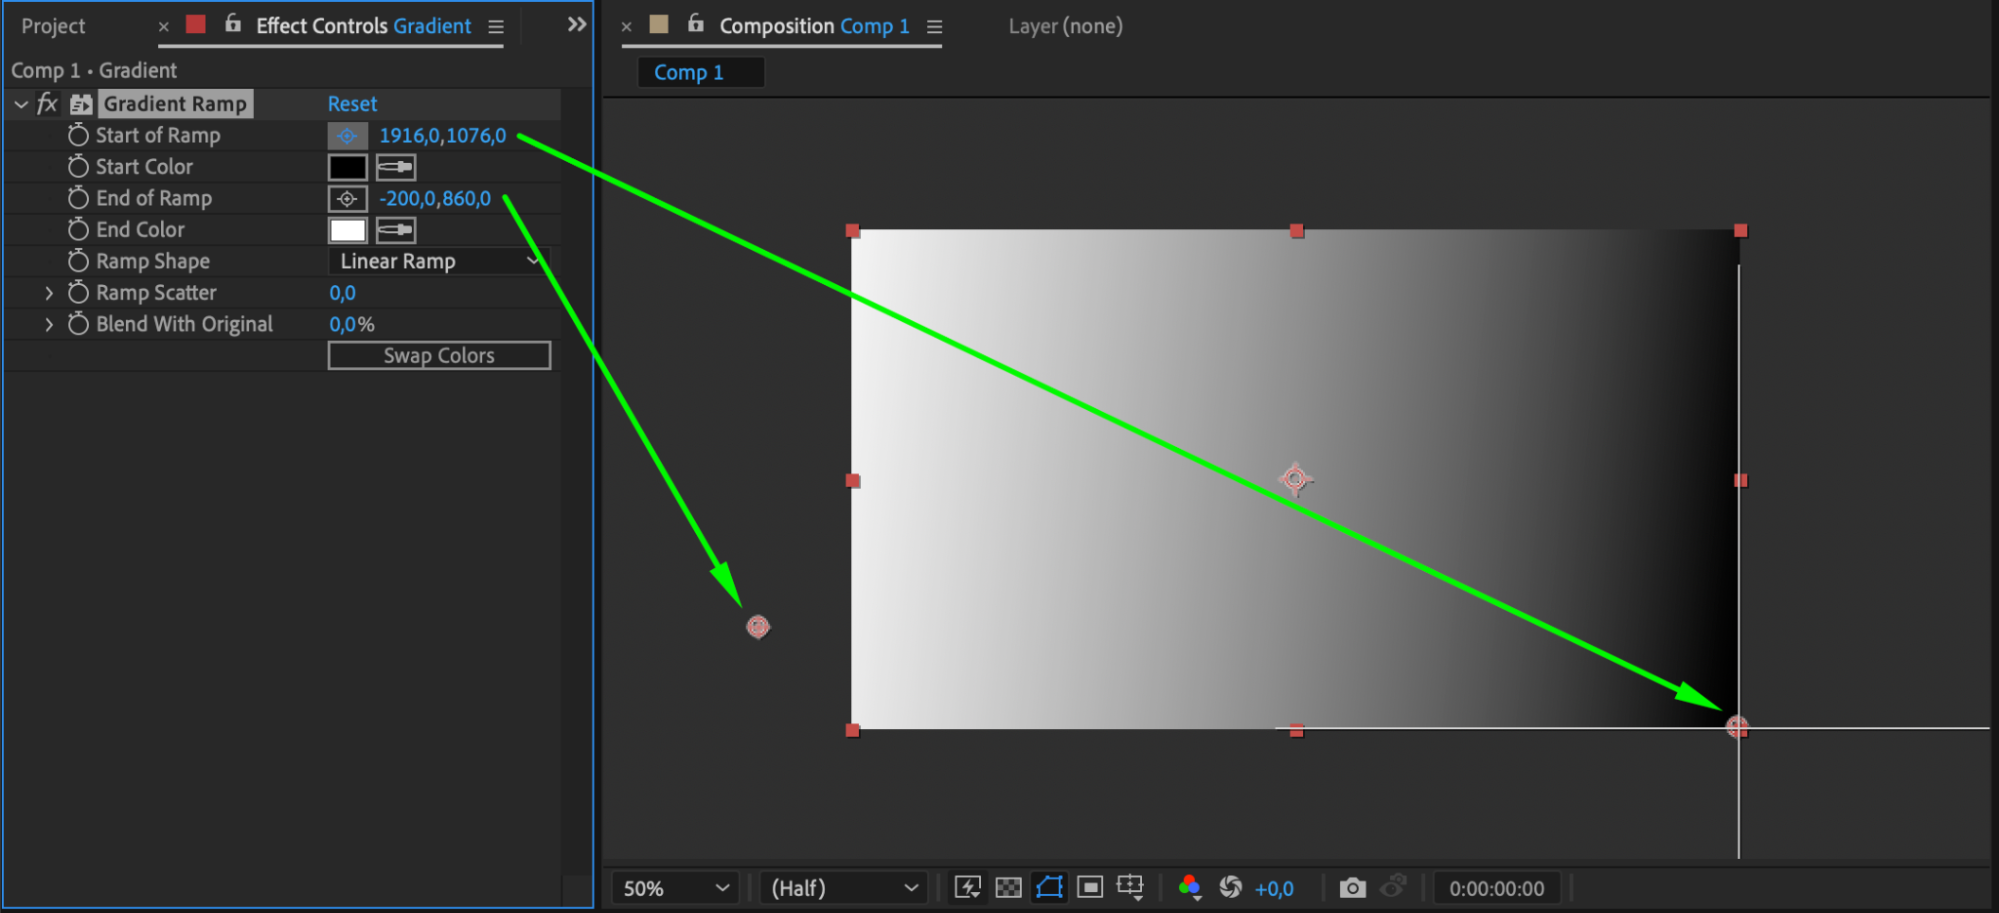
In the Effect Controls panel, adjust the Start of Ramp and End of Ramp parameters to create the desired gradient. Set the Start of Ramp point to the bottom right corner of your composition and the End of Ramp point slightly outside the bottom left corner. This will create a diagonal gradient that adds depth to your animation.Step 9: Apply Polar Coordinates Effect
 Step 9: Apply Polar Coordinates Effect
Next, go to the Effects & Presets panel and search for the Polar Coordinates effect. Apply this effect to your gradient layer.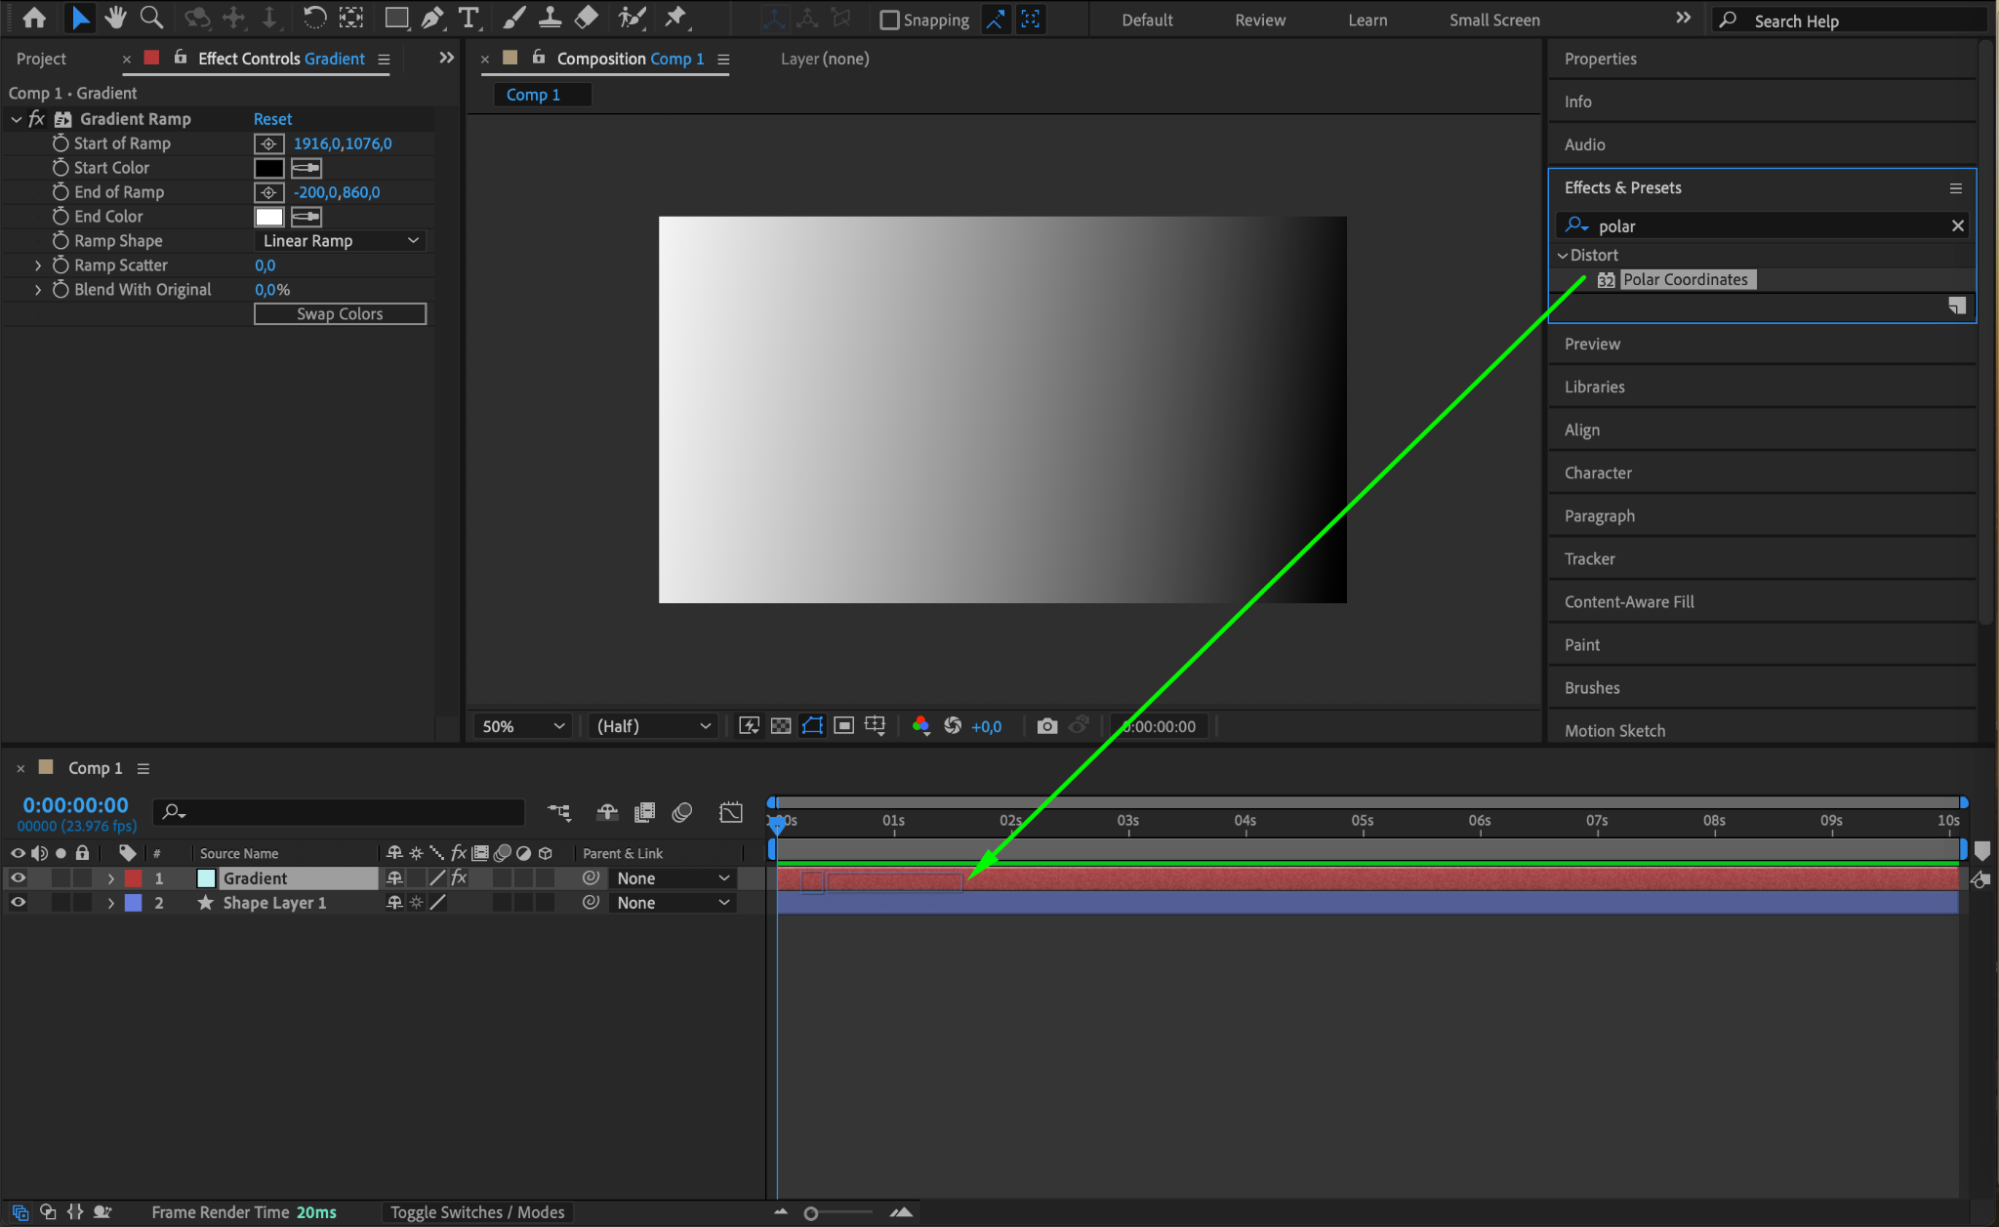 Step 10: Adjust Polar Coordinates Settings
In the Effect Controls panel, set the Interpolation value to 100% and the Type of Conversion to Rect to Polar. This will convert the gradient into a circular pattern that matches the shape of your loading animation.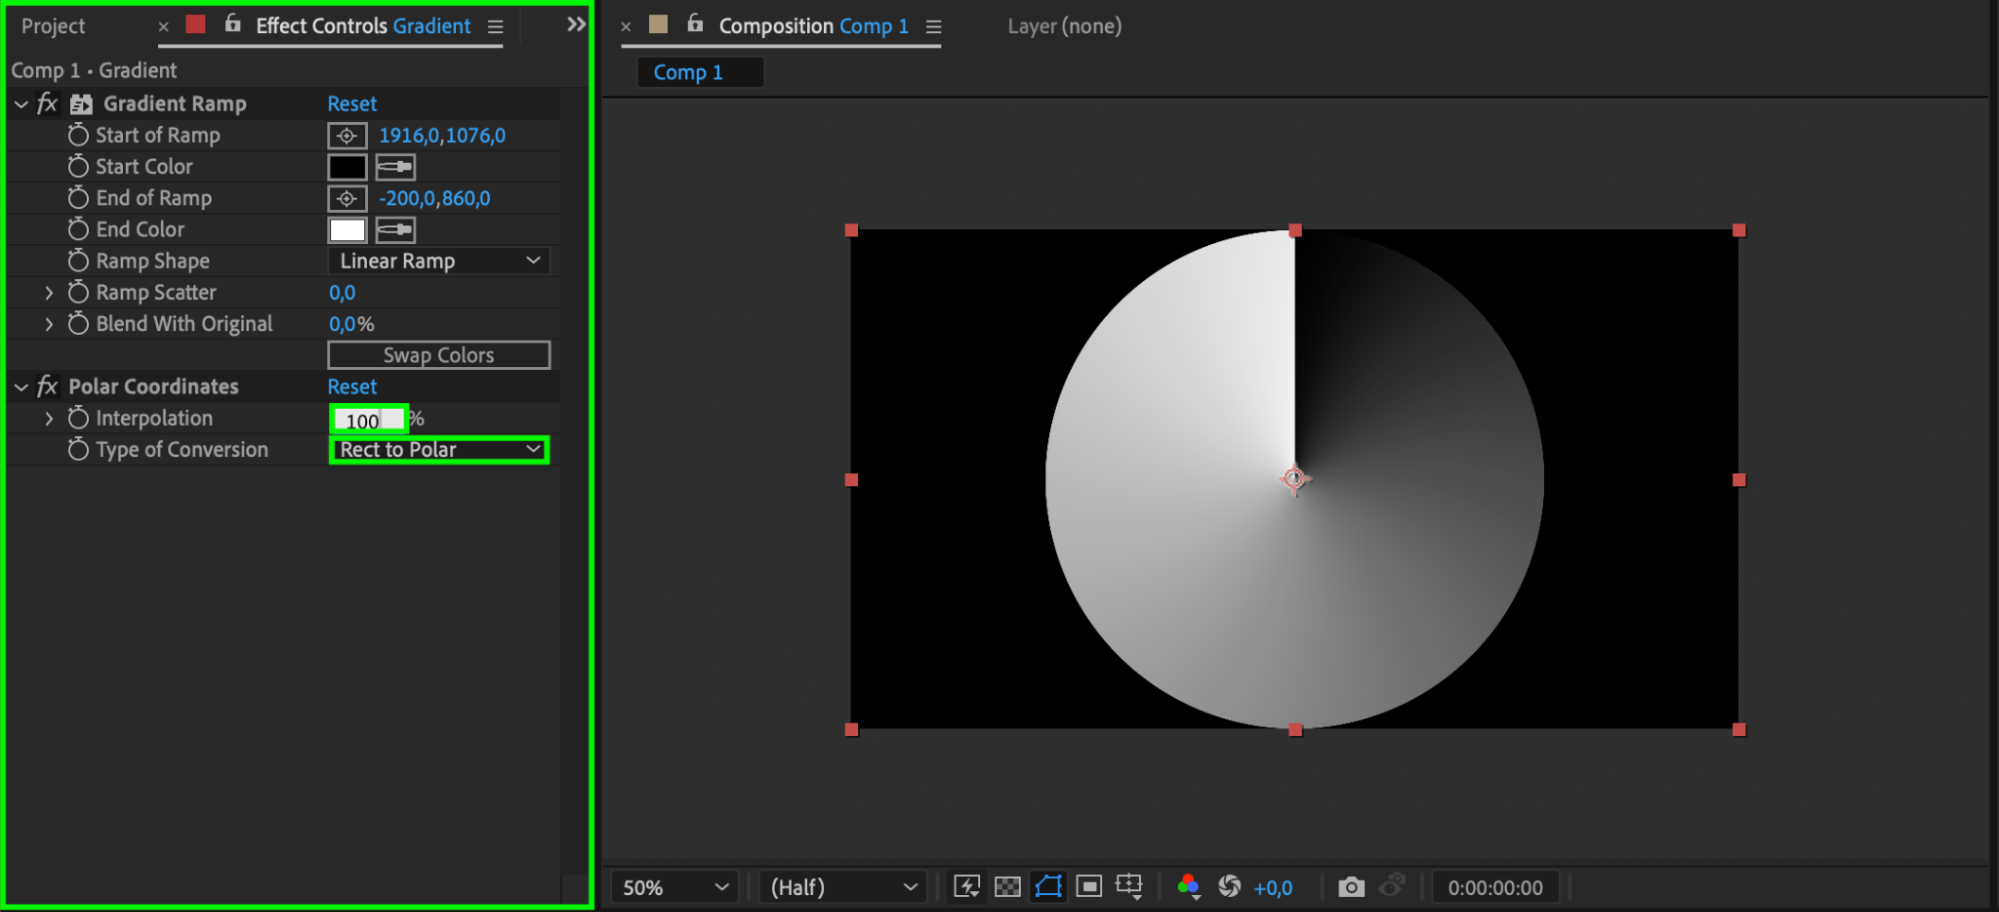 Step 11: Create an Alpha Inverted Matte
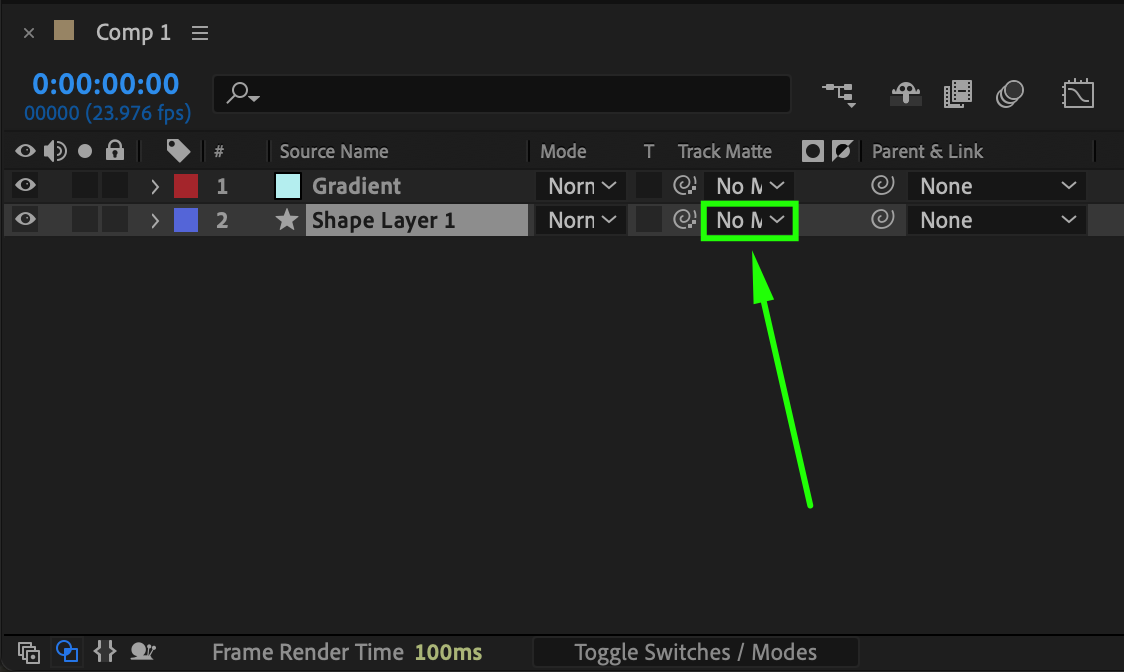
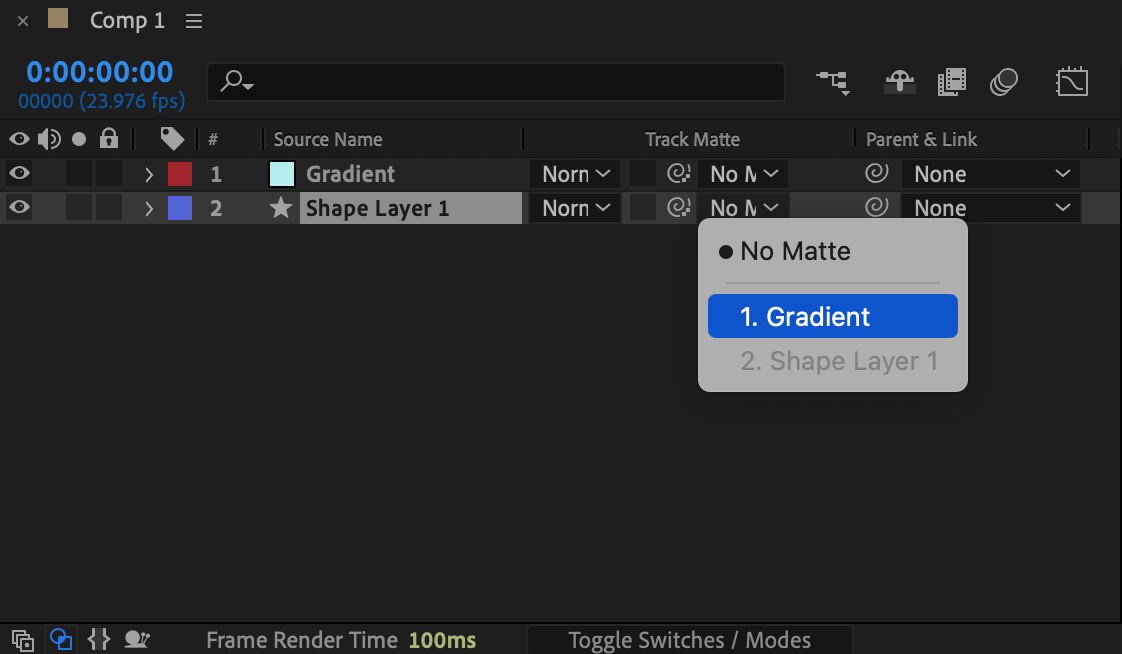
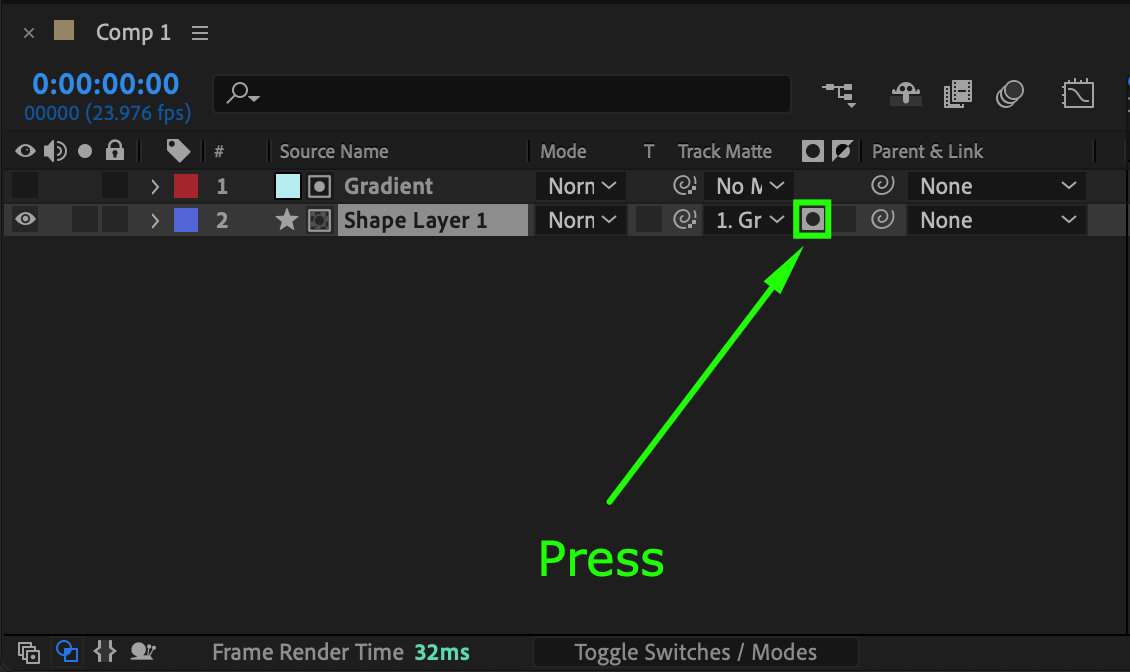
To make your loading circles interact with the gradient background, go to the Timeline panel. Click the Toggle Switches/Modes button at the bottom to reveal the Track Matte options. For the Shape Layer, select Alpha Inverted Matte from the Track Matte drop-down menu next to the Gradient Layer. This will create a mask that only shows the gradient within the loading circles.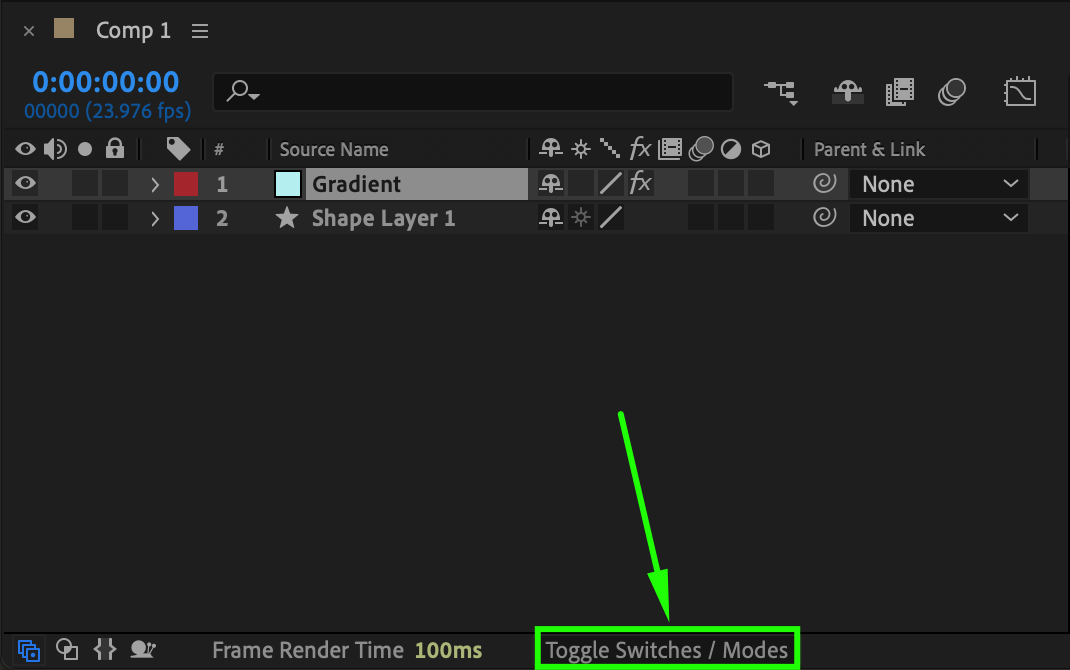
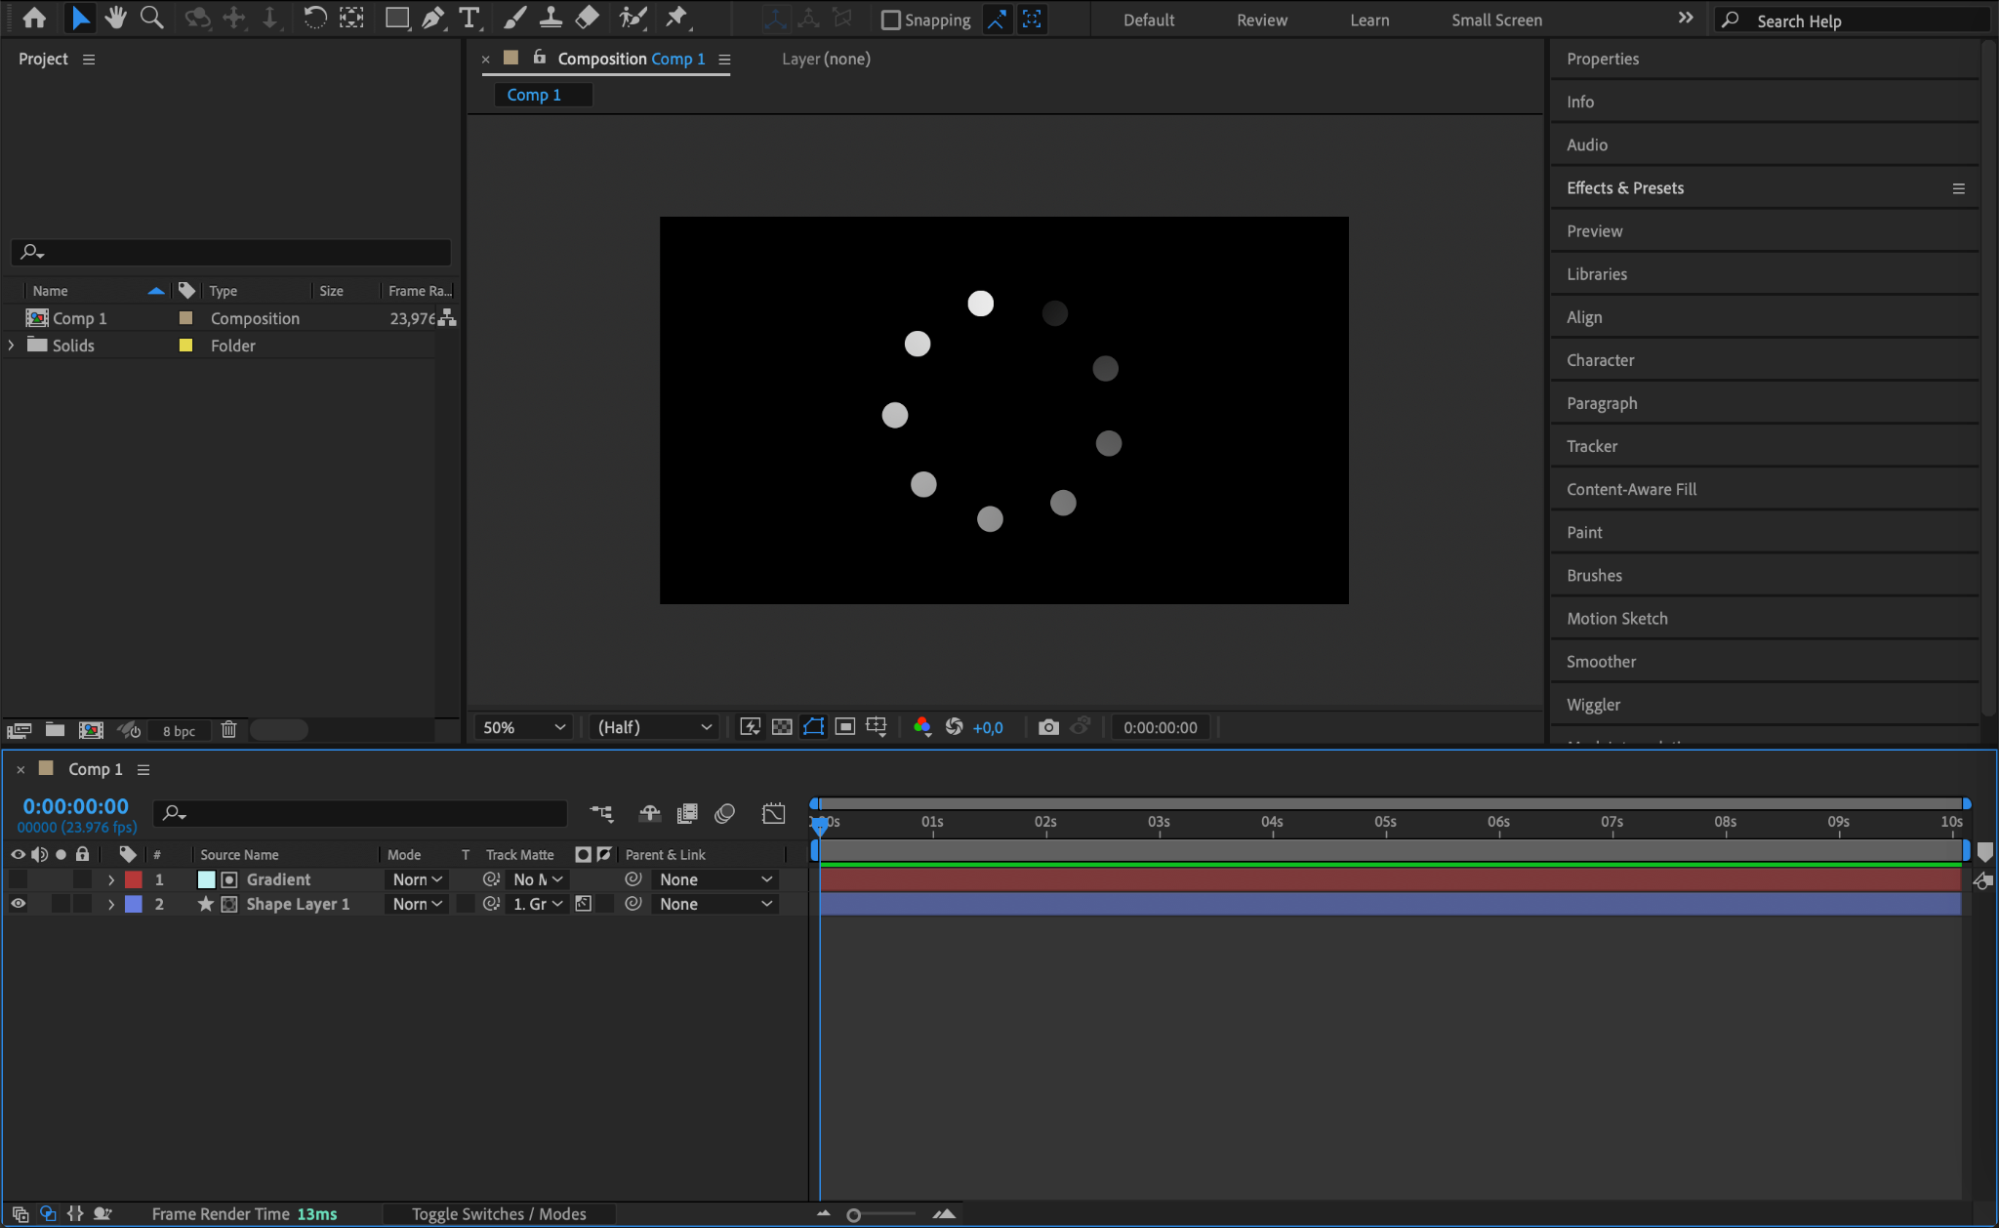 Step 12: Animate the Rotation of the Gradient Layer
Select the Gradient layer and press R to reveal the Rotation property. Move the Current Time Indicator to the beginning of the timeline and click the stopwatch icon next to Rotation to create a keyframe with a value of 0 * 0°. Then, move the CTI to the end of the timeline and change the Rotation value to 15 * 0°. This subtle rotation will add a dynamic feel to the gradient as the circles animate.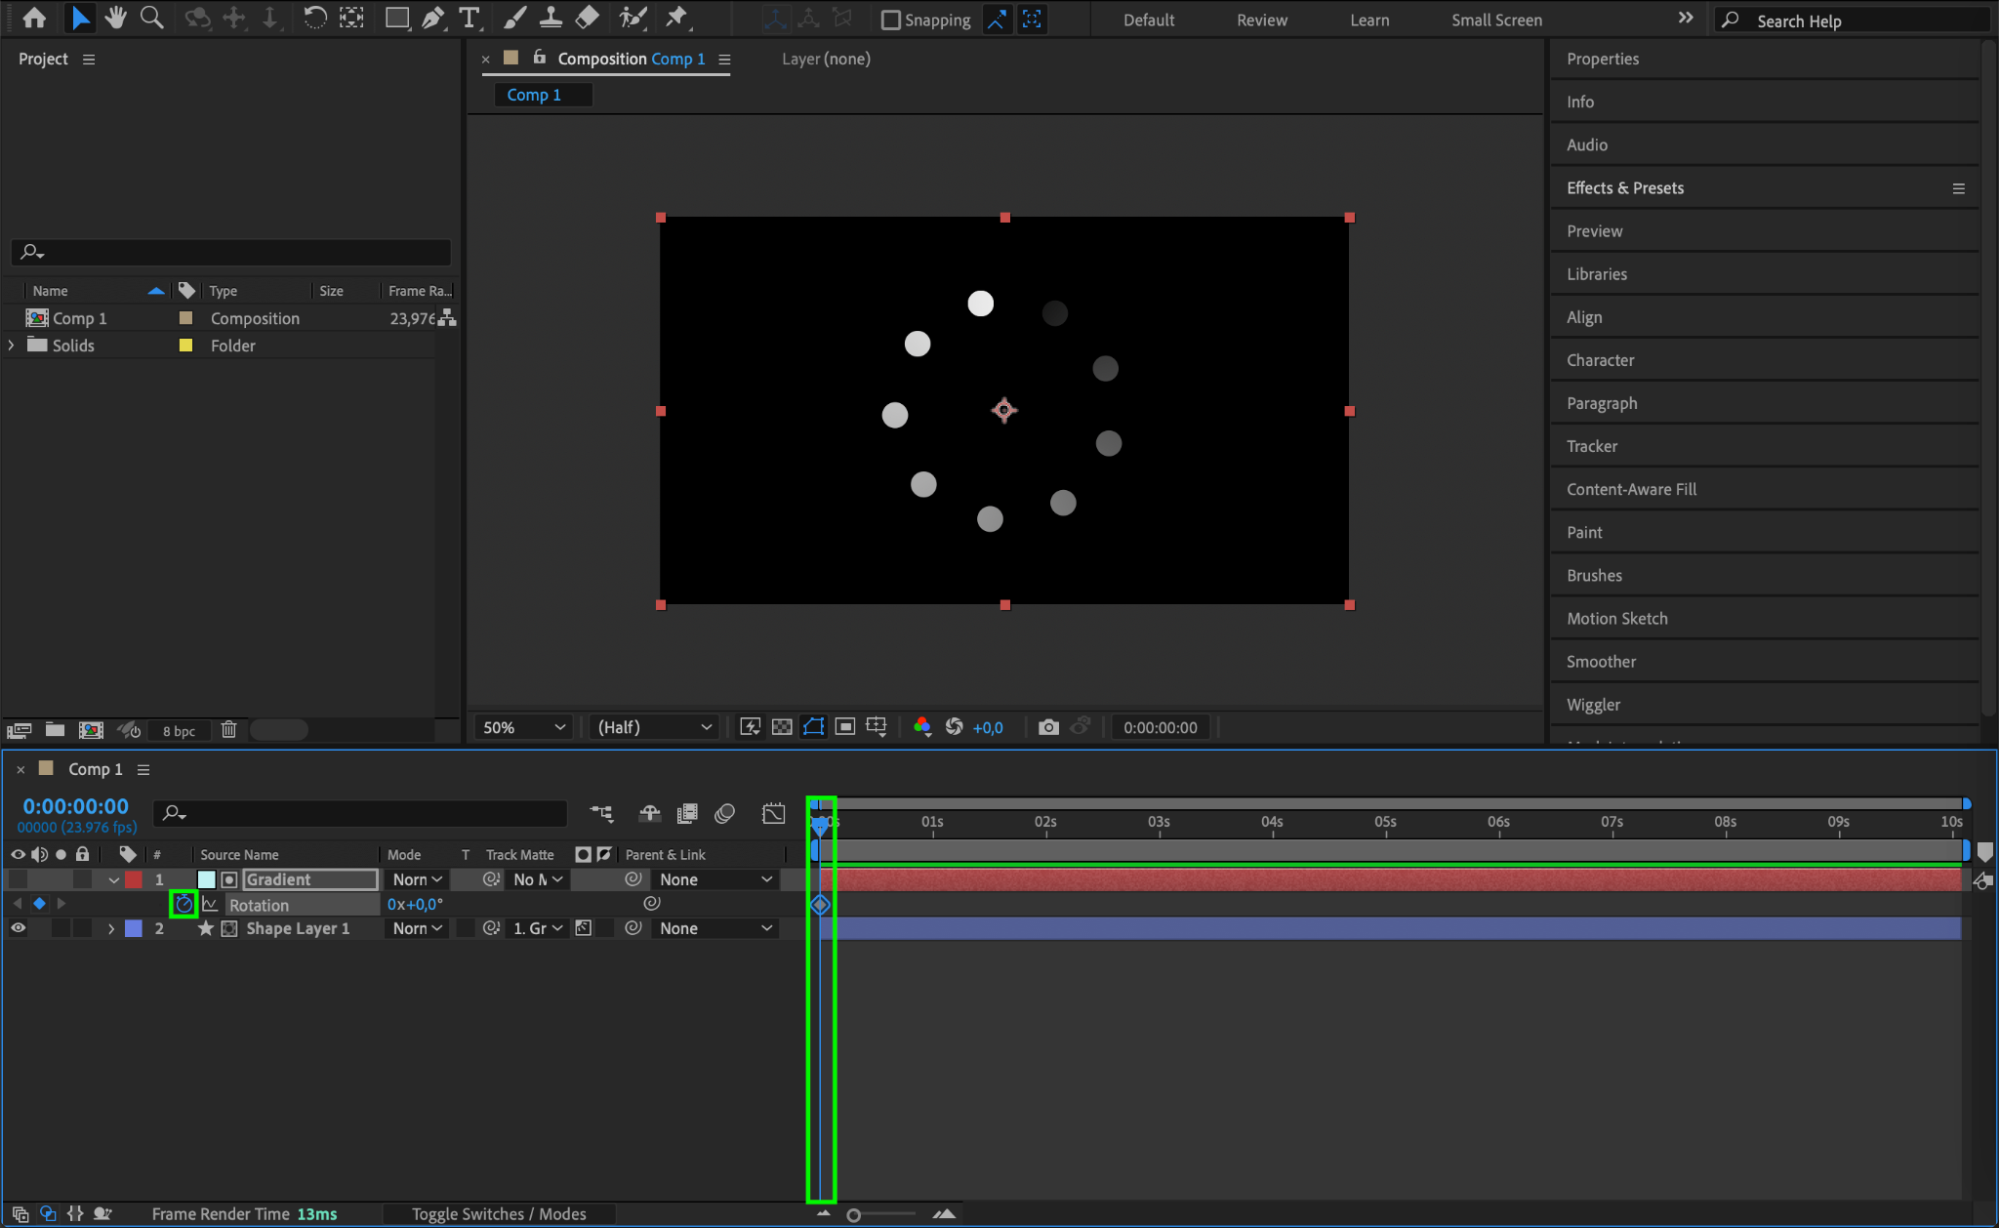
 Step 13: Preview Your Loading Animation
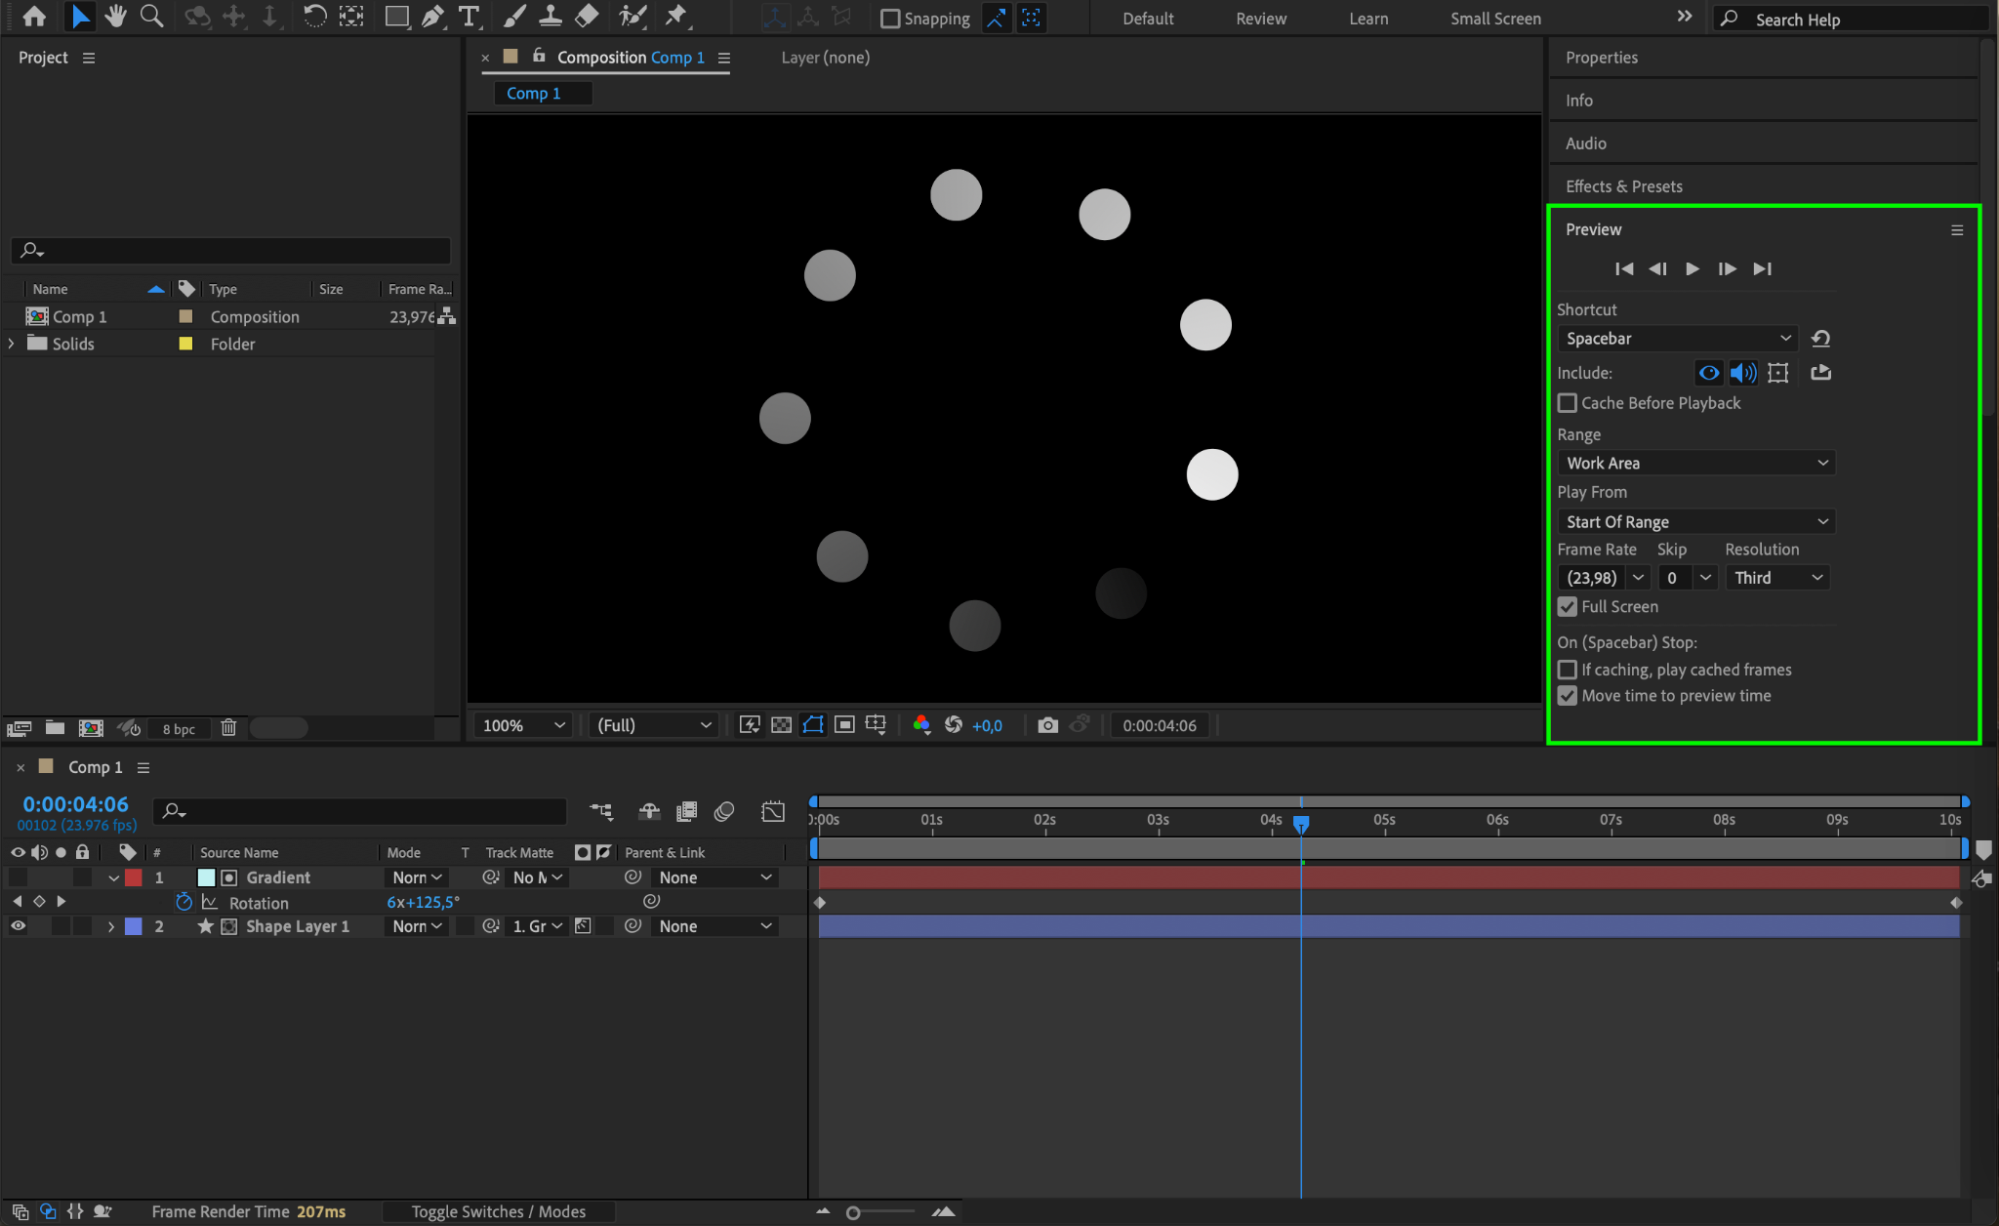
Now that you’ve set up your animation, press Spacebar to preview it. Your loading animation should smoothly rotate with a dynamic gradient background, creating a professional and visually appealing effect. If needed, adjust the timing, rotation, or gradient settings to perfect your animation.
Conclusion
Congratulations! You’ve successfully created a dynamic and visually appealing loading animation in After Effects. This animation can be used in various projects to enhance user experience and add a professional touch. Don’t hesitate to experiment with different shapes, colors, and animation speeds to make your loading screen uniquely yours. Enjoy animating!


