Mastering Mask Creation in After Effects
Introduction
Creating masks in After Effects is a skill that can take your videos to the next level. Masks allow you to control the visibility and behavior of certain parts of your footage or layers, giving you endless creative possibilities. In this step-by-step guide, we will walk you through the process of making masks in After Effects, starting from the basics and progressively moving to more advanced techniques. So, whether you’re new to After Effects or looking to expand your skills, let’s get started by exploring the different types of masks you can create.
Get 10% off when you subscribe to our newsletter

Step 1: Creating Shape Masks
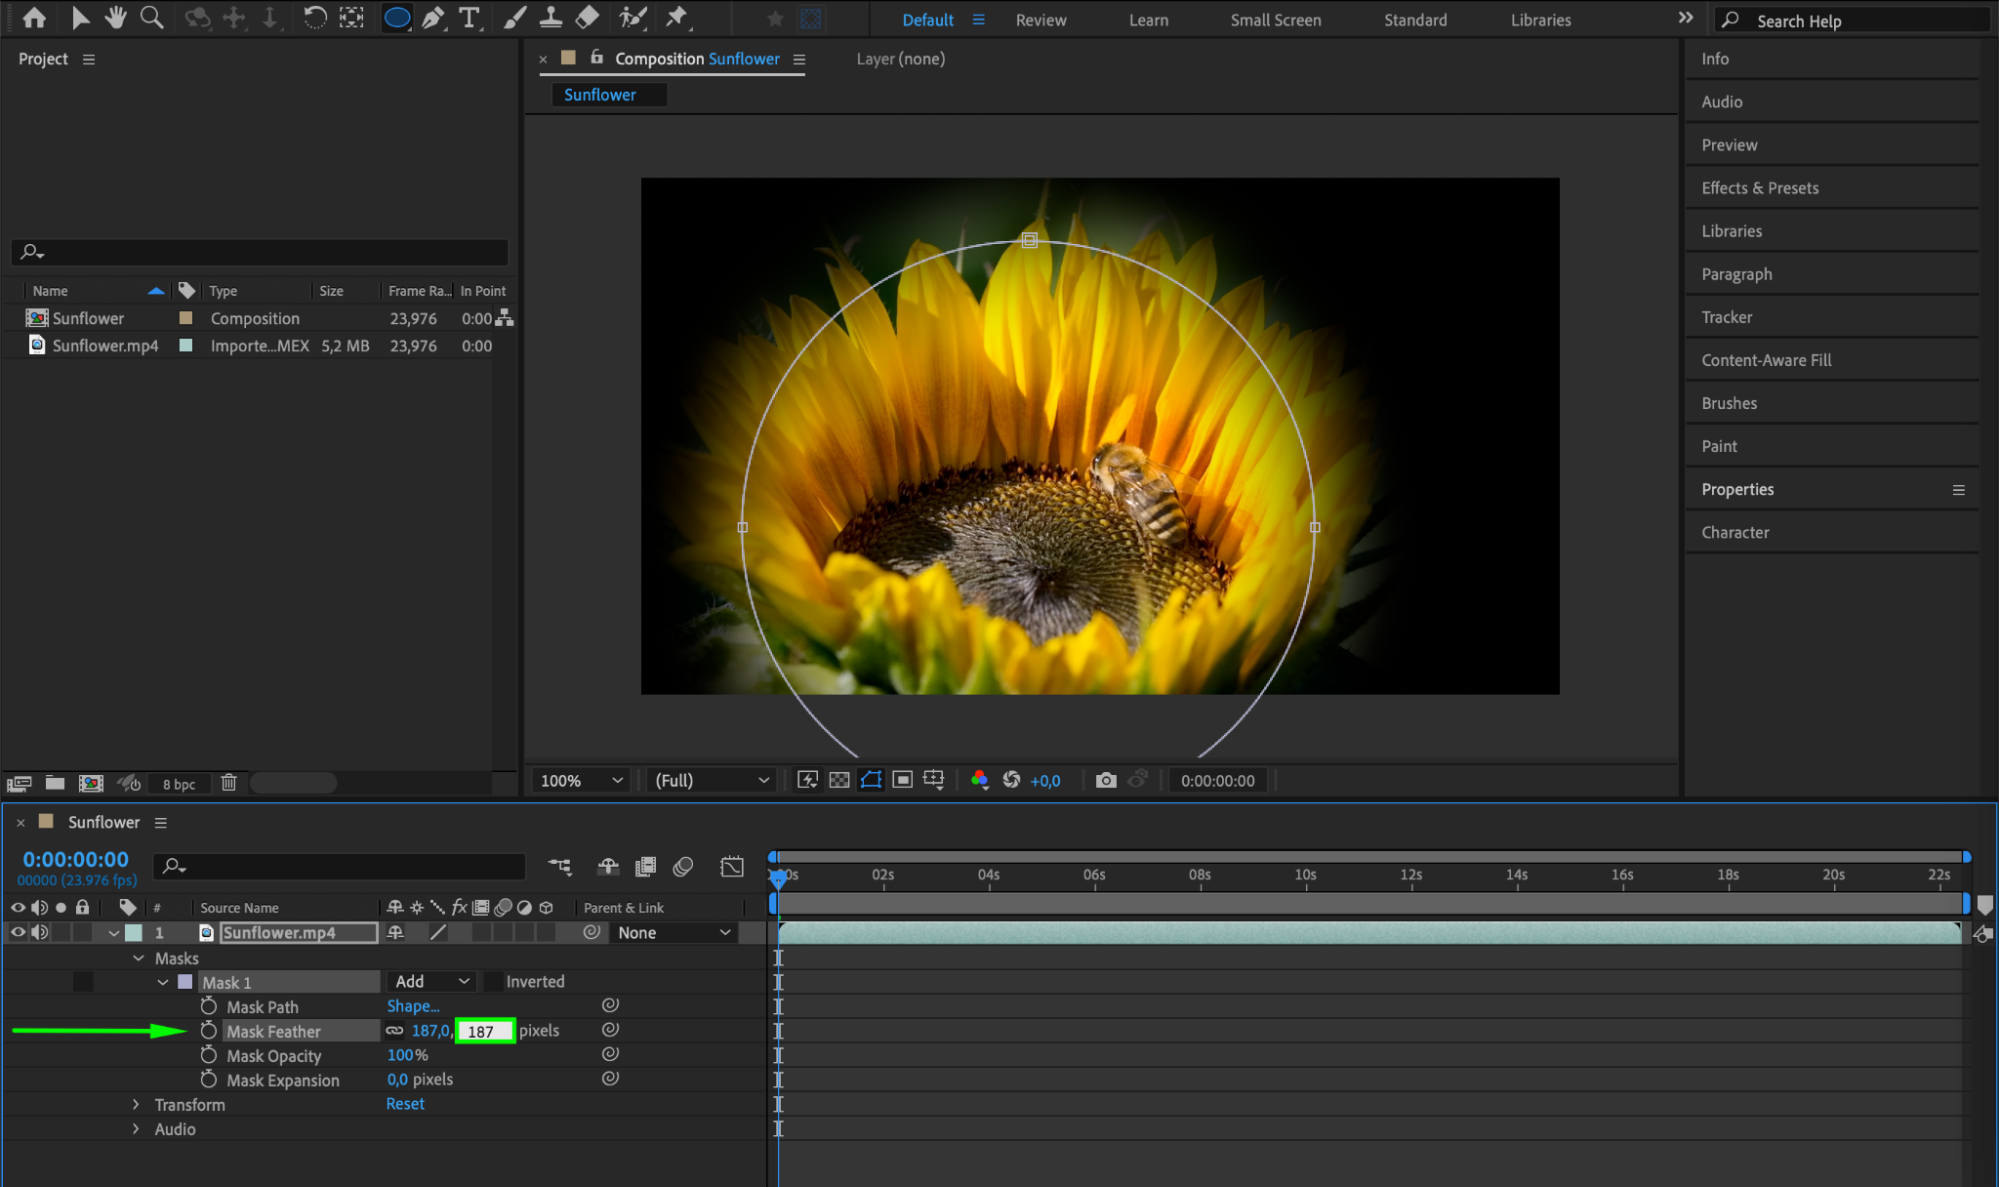
Shape masks are versatile tools that allow you to create masks using basic shapes like rectangles, ellipses, or polygons. To create a shape mask, select the layer you want to mask, choose the shape tool from the toolbar (Q), and draw the desired shape on the layer. This shape will act as a mask, hiding or revealing the content within. You can adjust mask properties like mask feather, opacity, and expansion in the layer properties to fine-tune the appearance of your mask.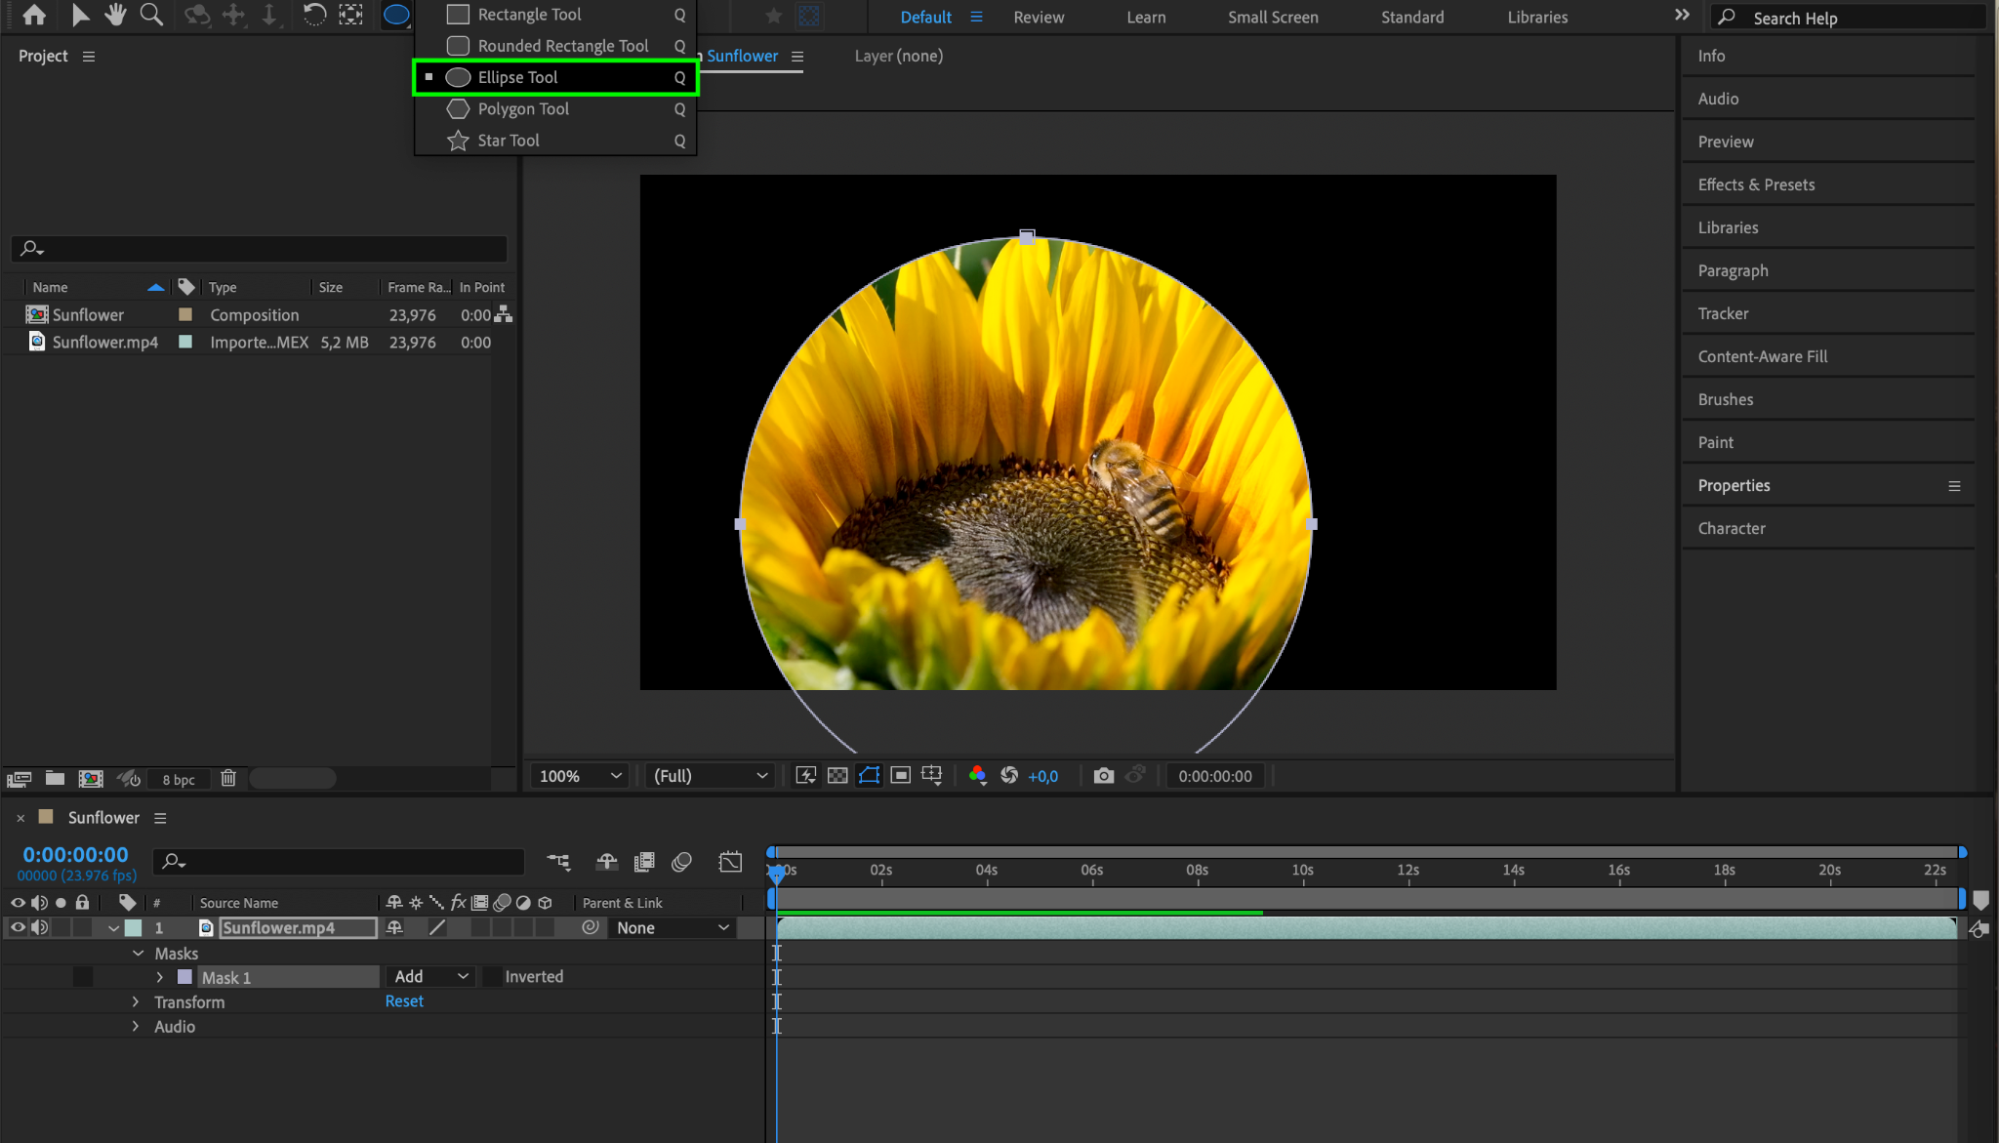
 Step 2: Using the Pen Tool for Custom Masks
Get 10% off when you subscribe to our newsletter

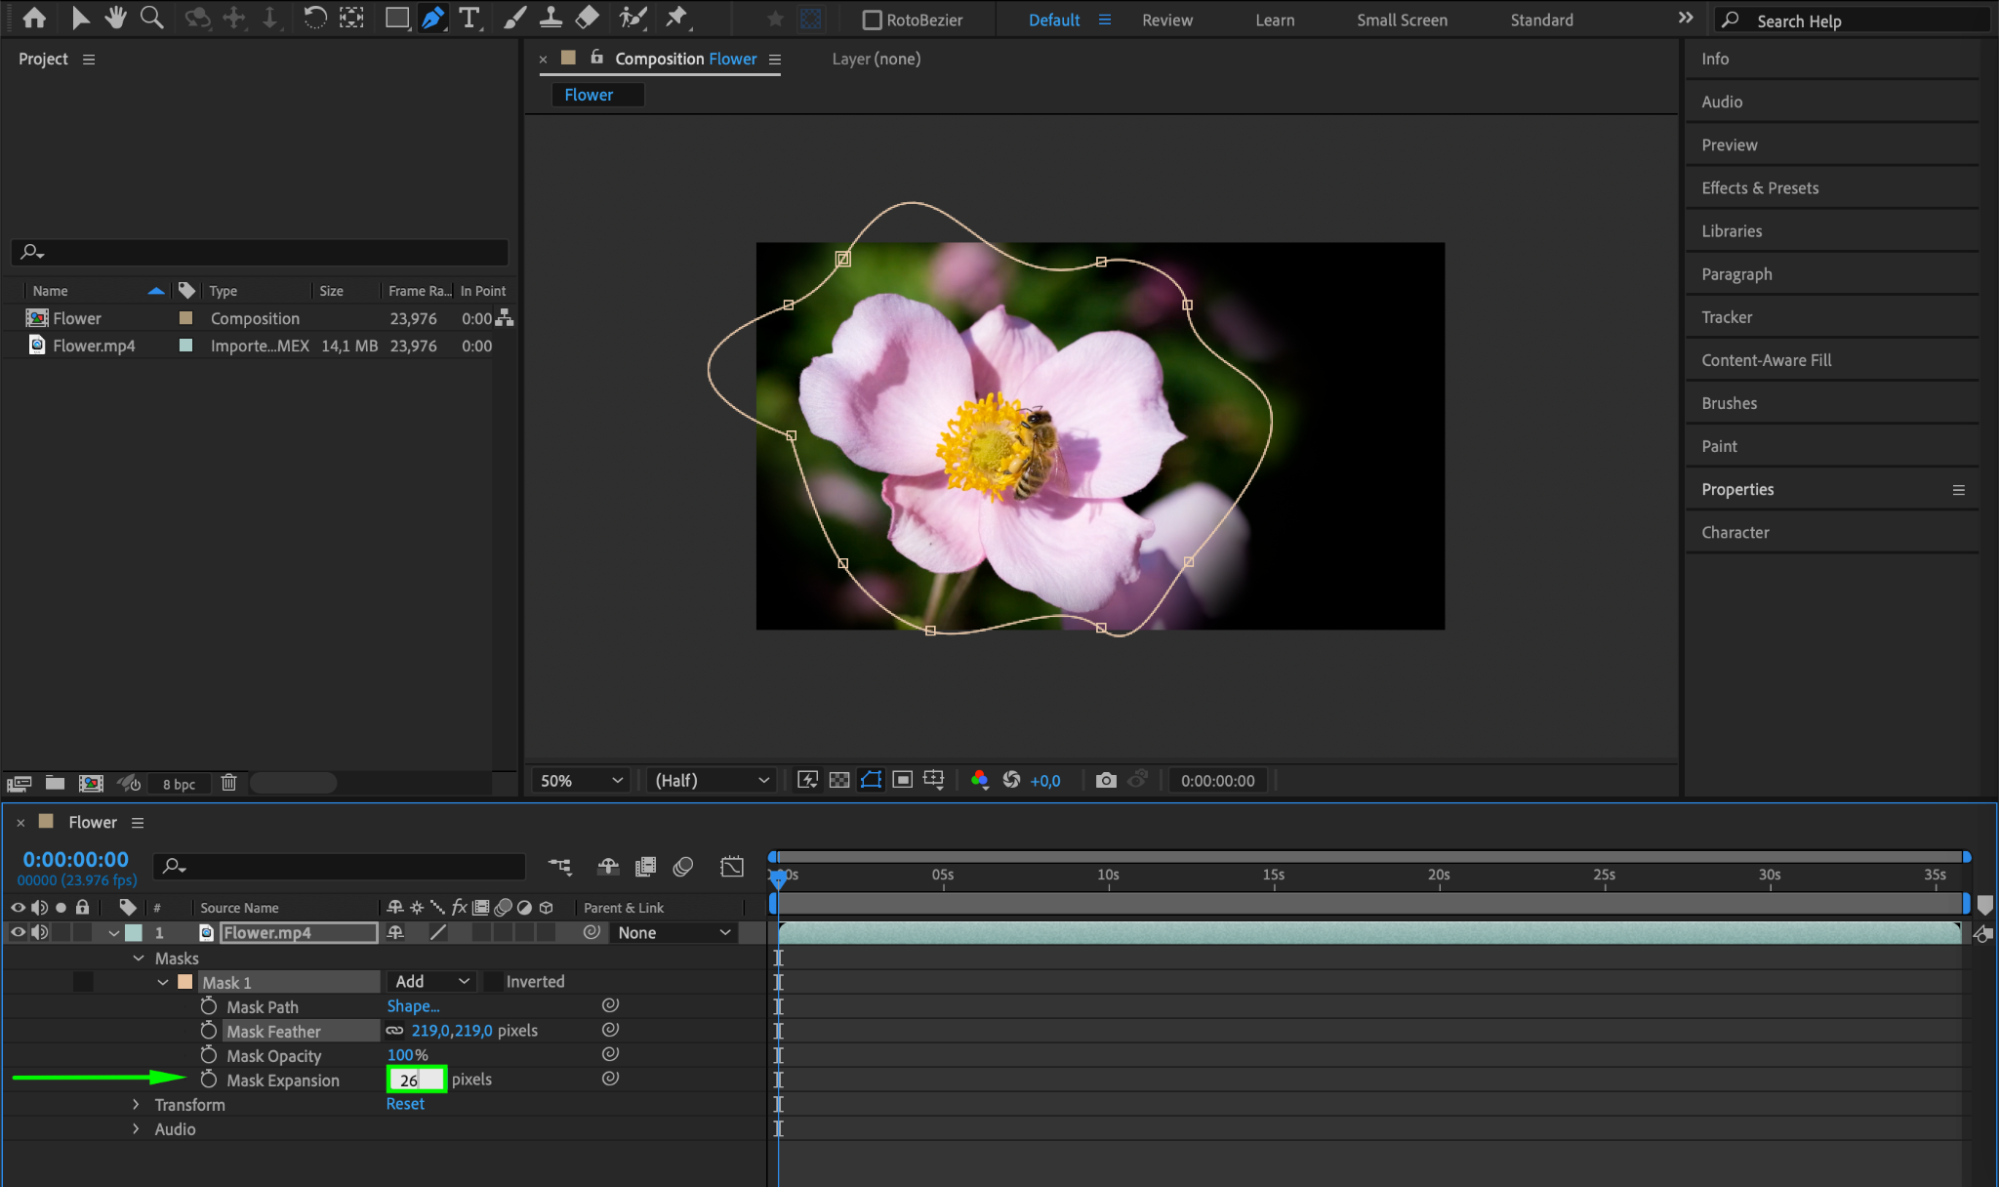
The Pen Tool (G) allows you to create custom-shaped masks with precision. Select the layer you want to mask, choose the Pen Tool from the toolbar, click to create anchor points, and connect them to form the desired shape. You can adjust the curves and angles by manipulating the handles of each anchor point. Pen tool masks are ideal for complex or irregular shapes that cannot be achieved with basic shape masks.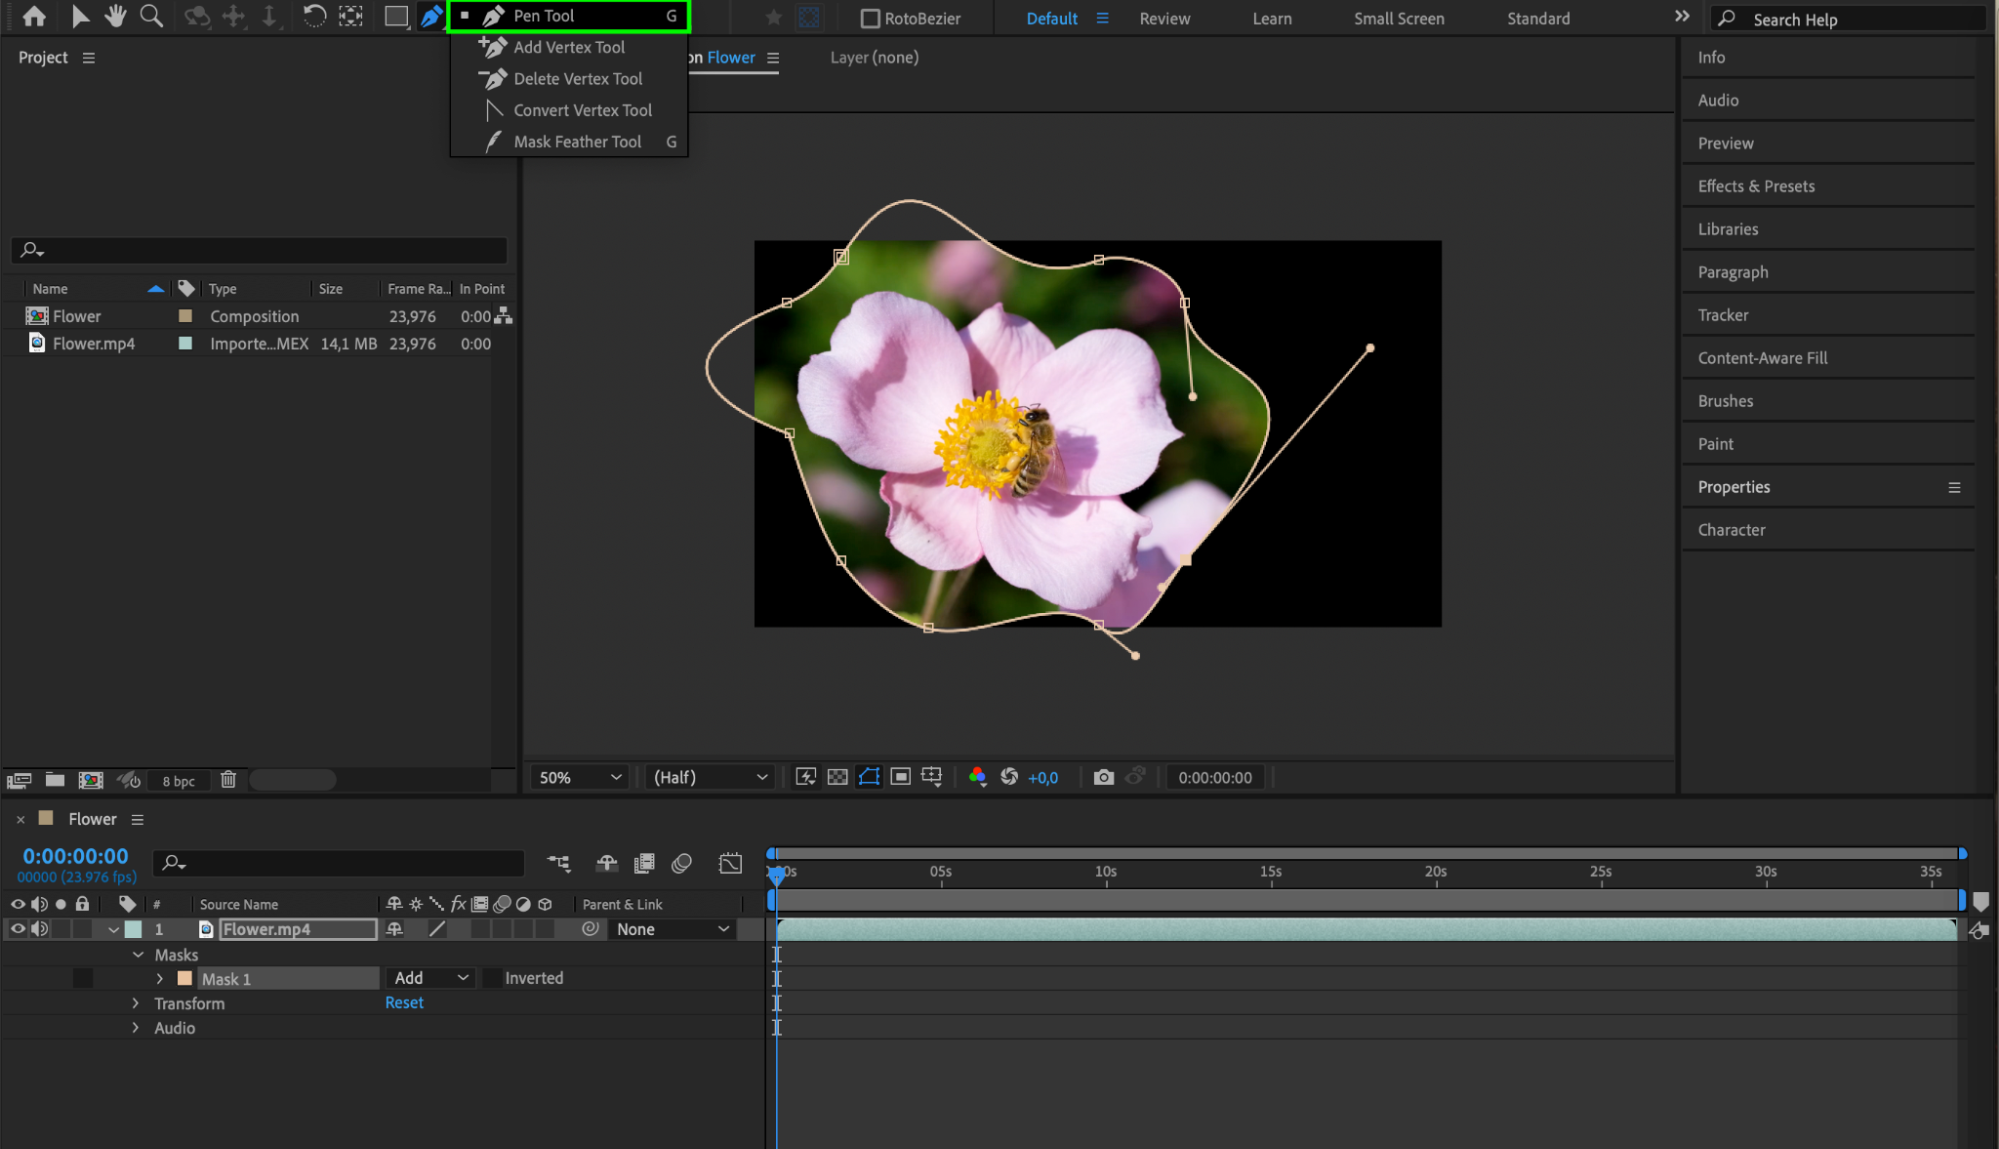
 Step 3: Tracking Masks
Get 10% off when you subscribe to our newsletter

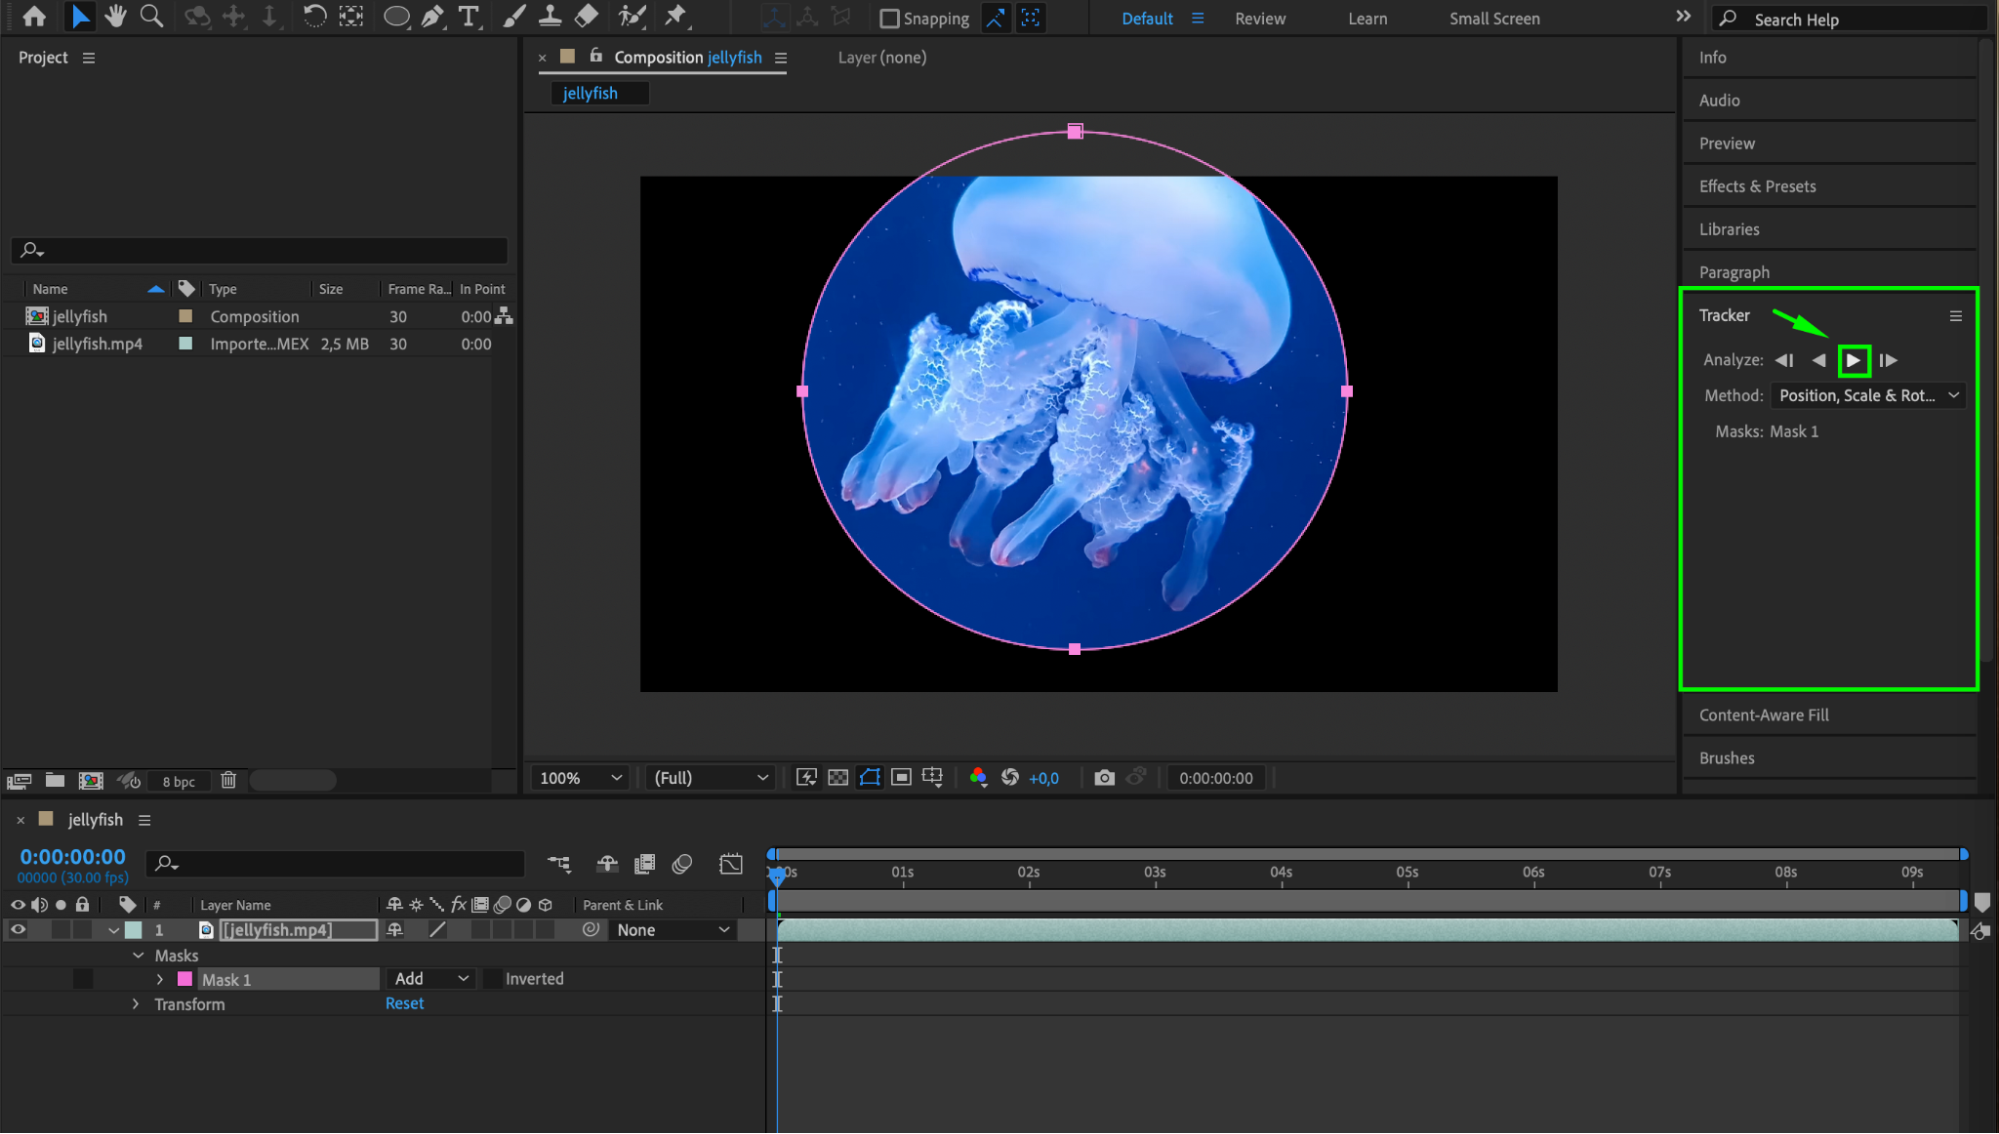
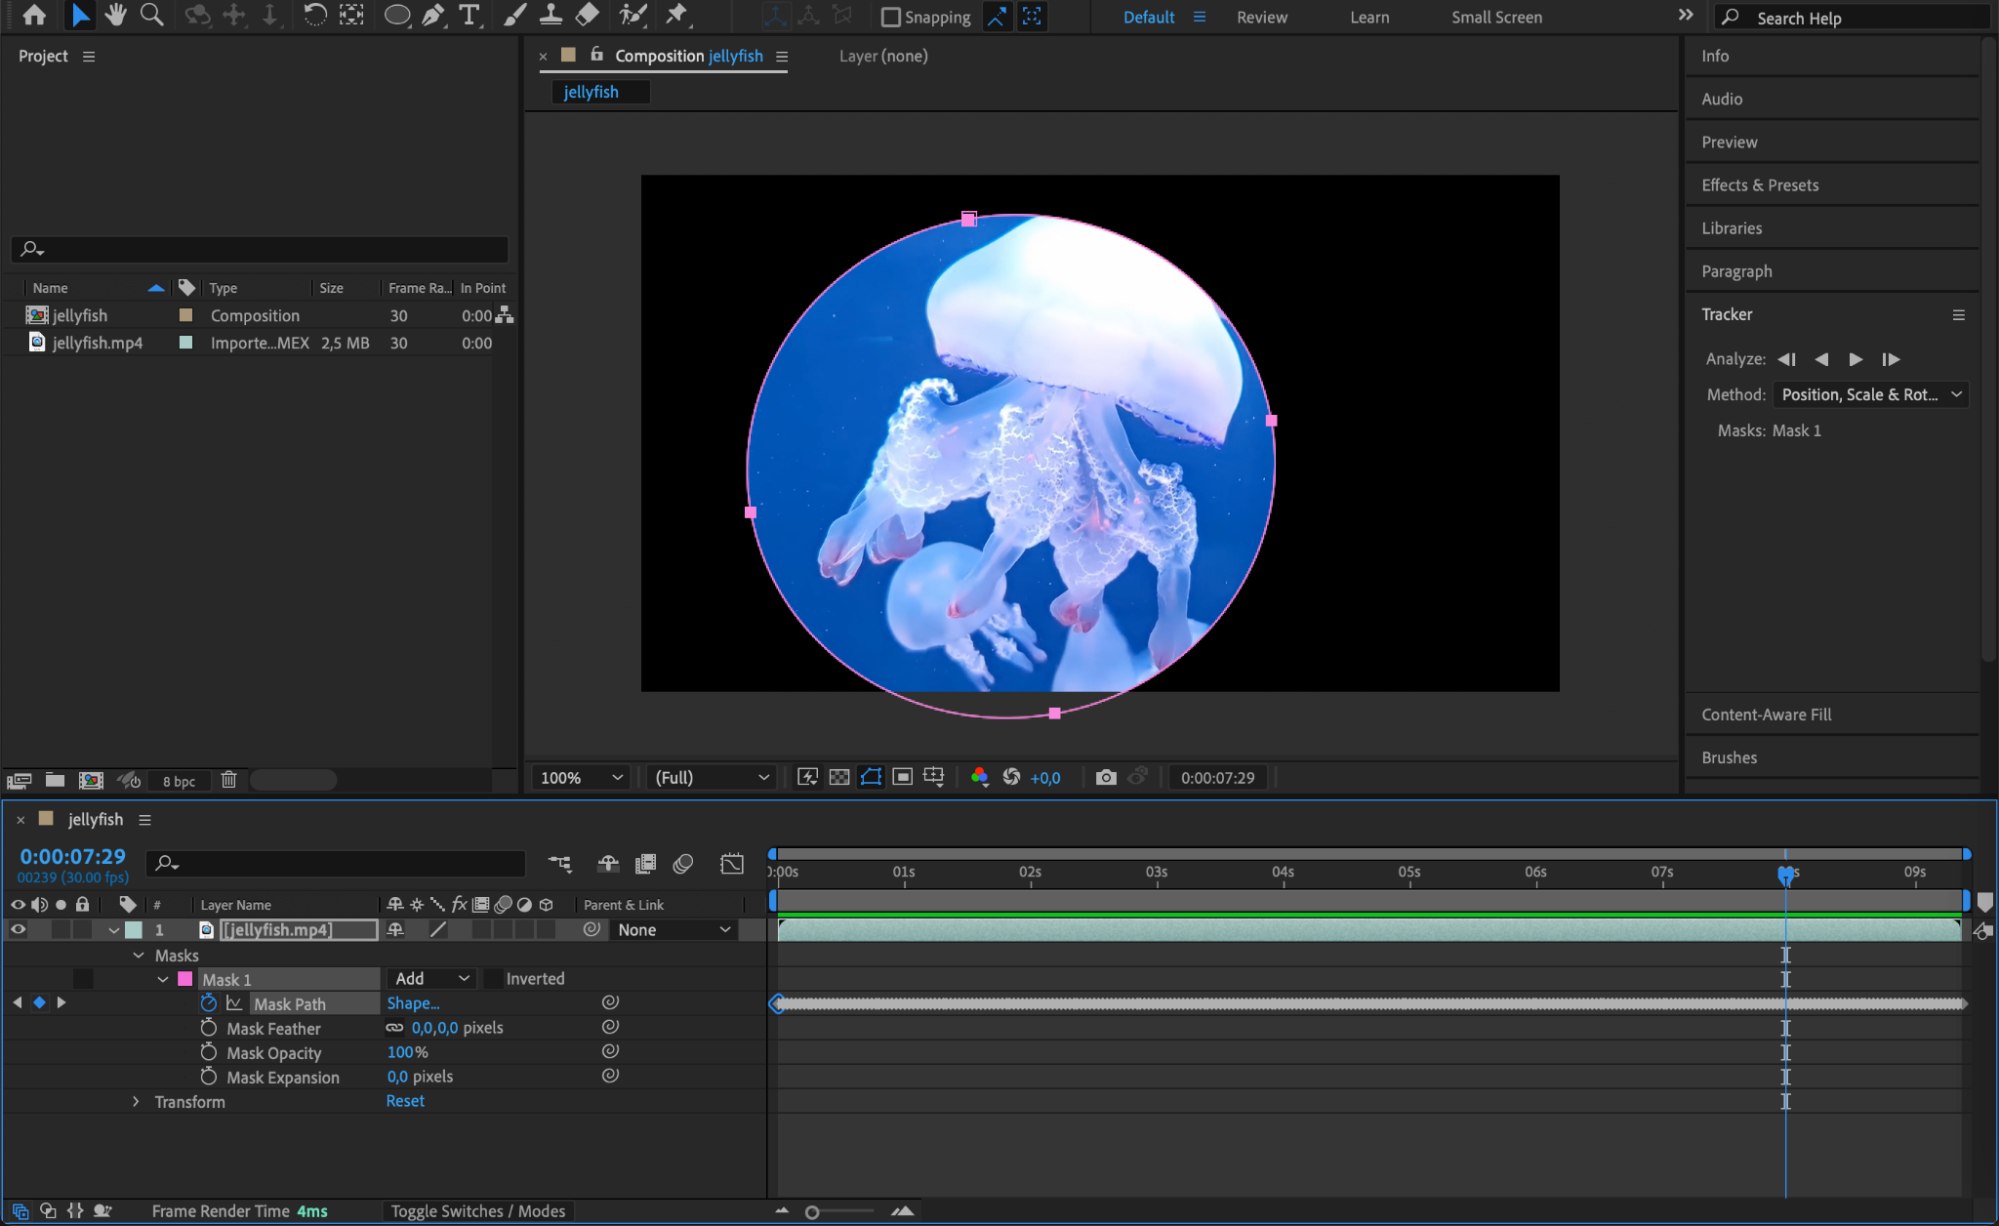
You can track masks to follow the movement of objects in your footage. Right-click on the created mask and choose “Track Mask” from the submenu. In the Tracker panel that opens, click the Play button to automatically track the mask. Keyframes for the Mask Path property will be created, allowing the mask to move with the tracked object. This is especially useful for masks that need to stay aligned with moving elements in your scene.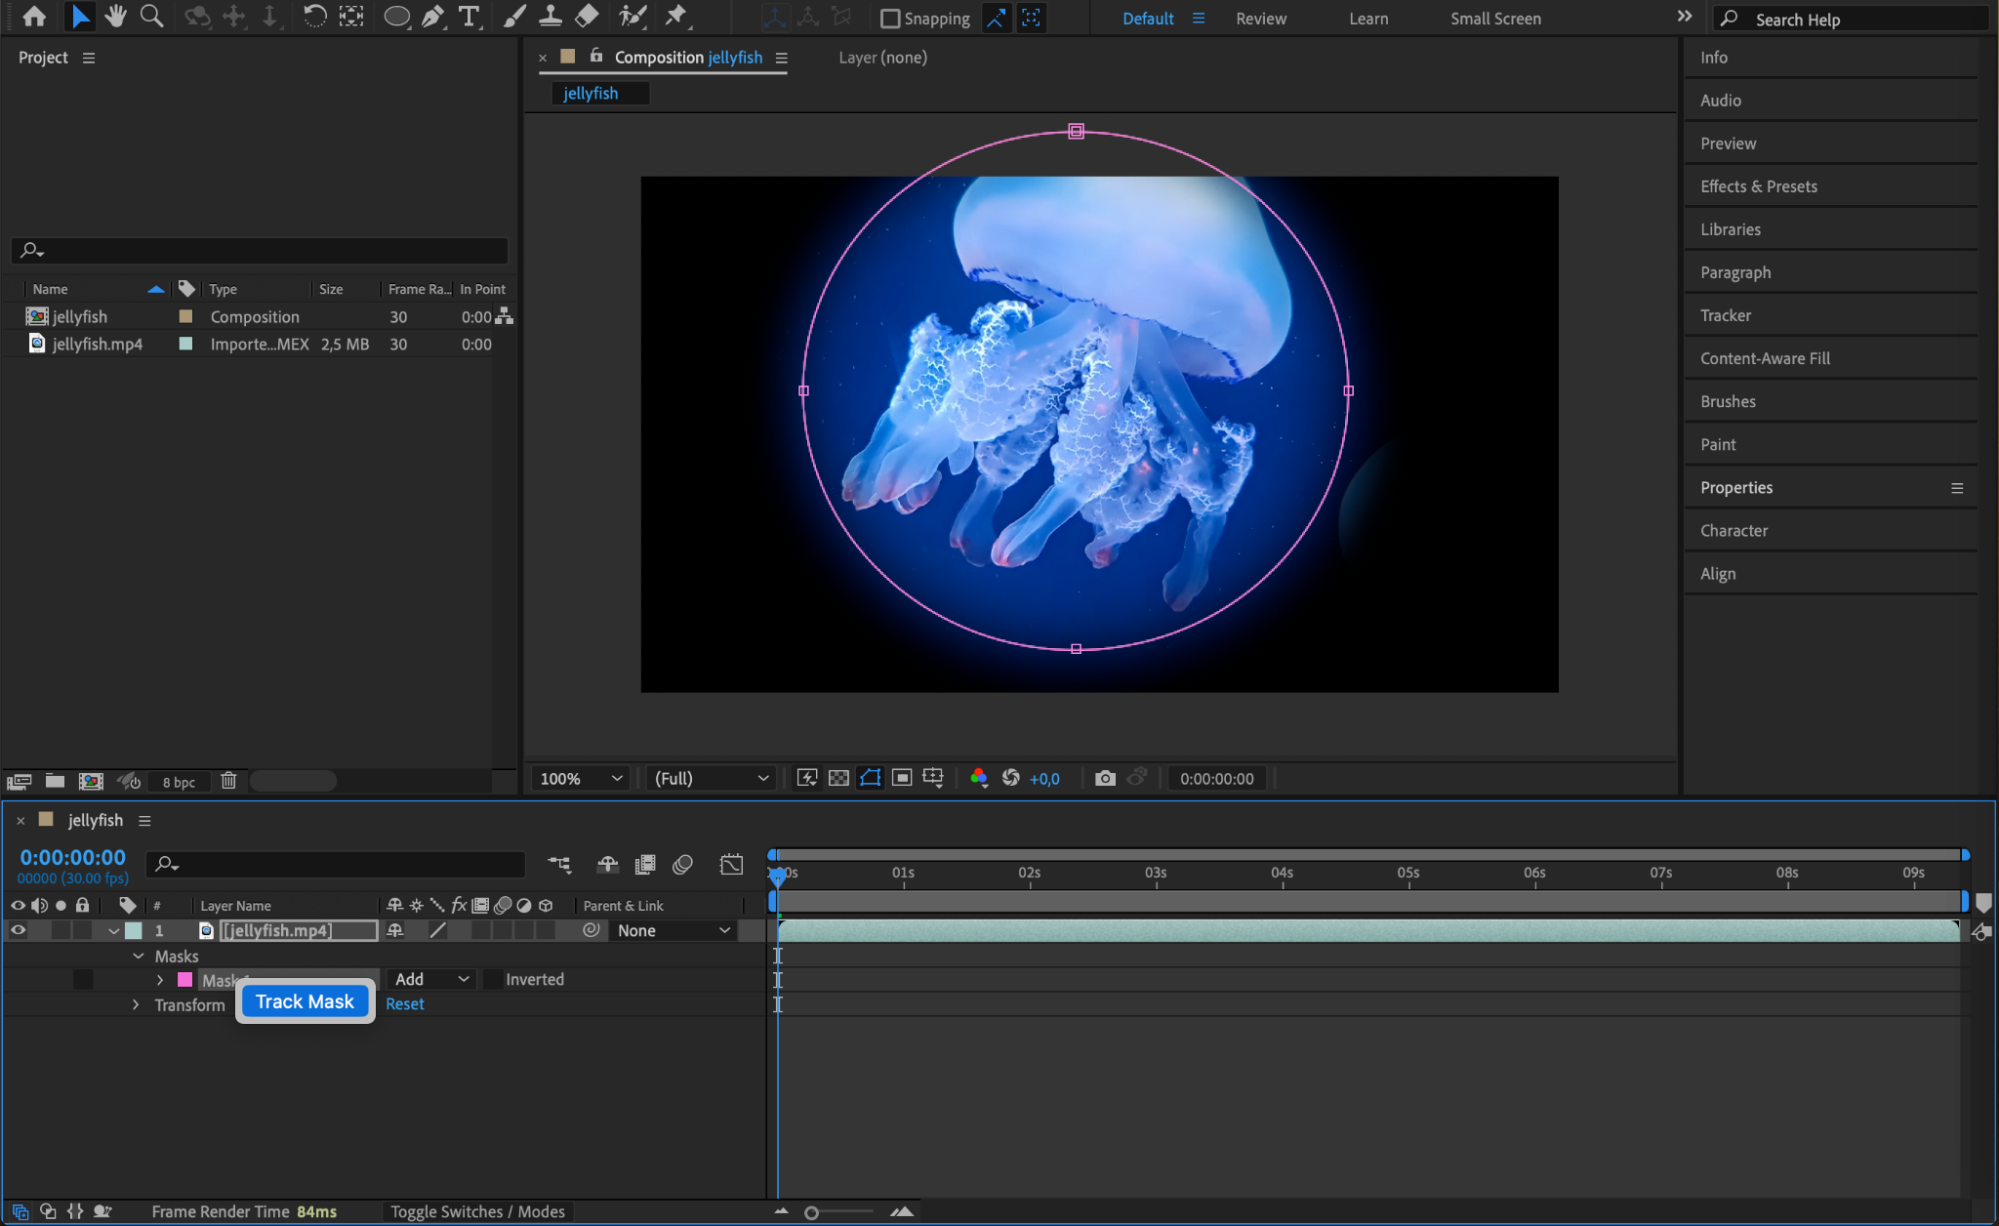
 Step 4: Rotoscoping for Frame-by-Frame Masks
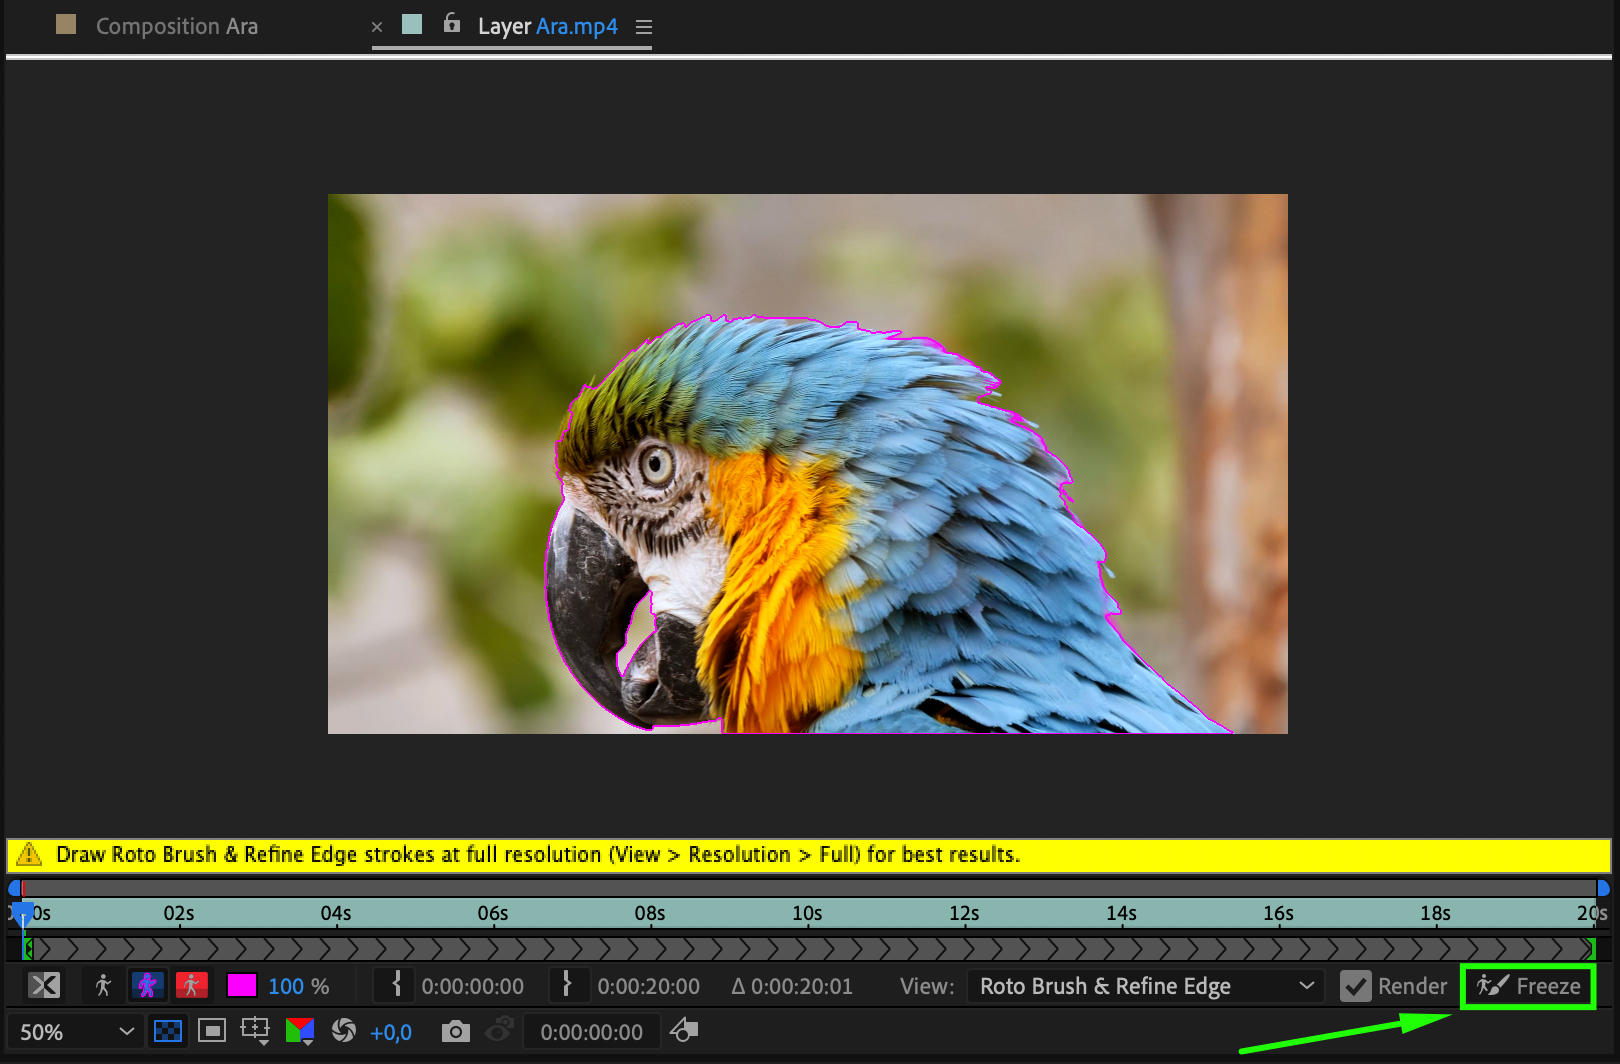
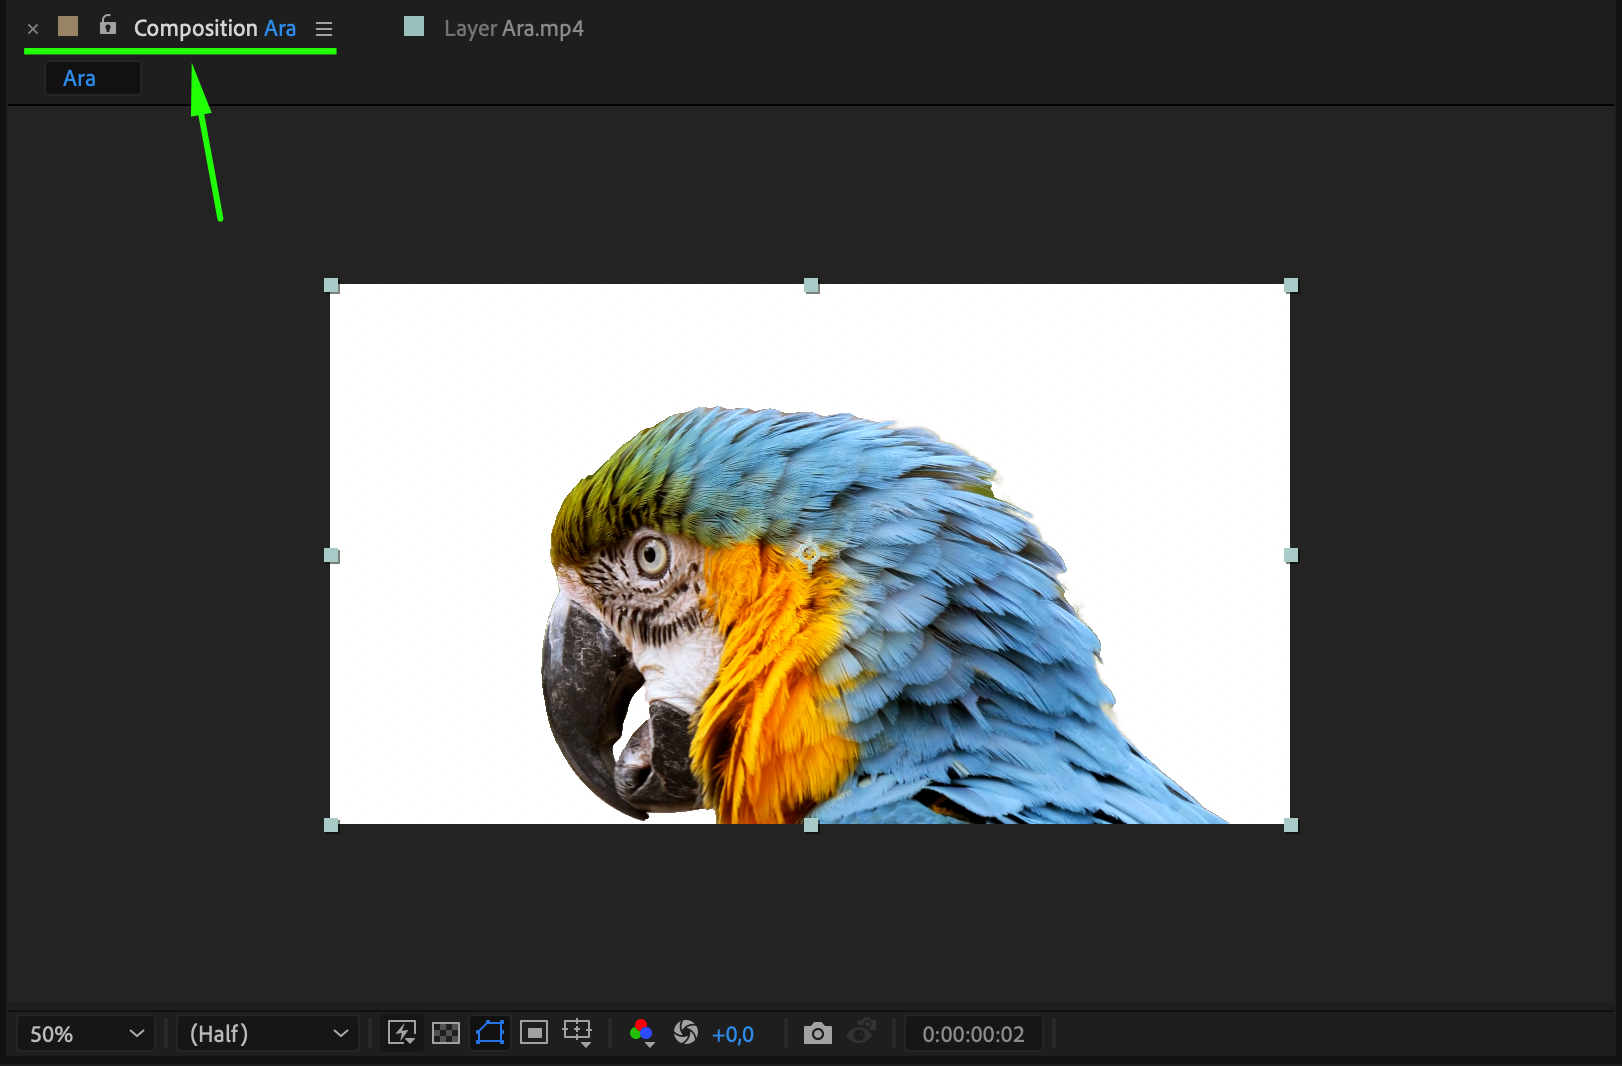
Rotoscoping allows you to create masks frame by frame, isolating specific objects or people in a video. To create a rotoscope mask, select the layer you want to mask and use the Roto Brush Tool (Alt/Option + W) to trace the outline of the subject in each frame. This technique is time-consuming but delivers precise results, especially for complex or detailed masking tasks.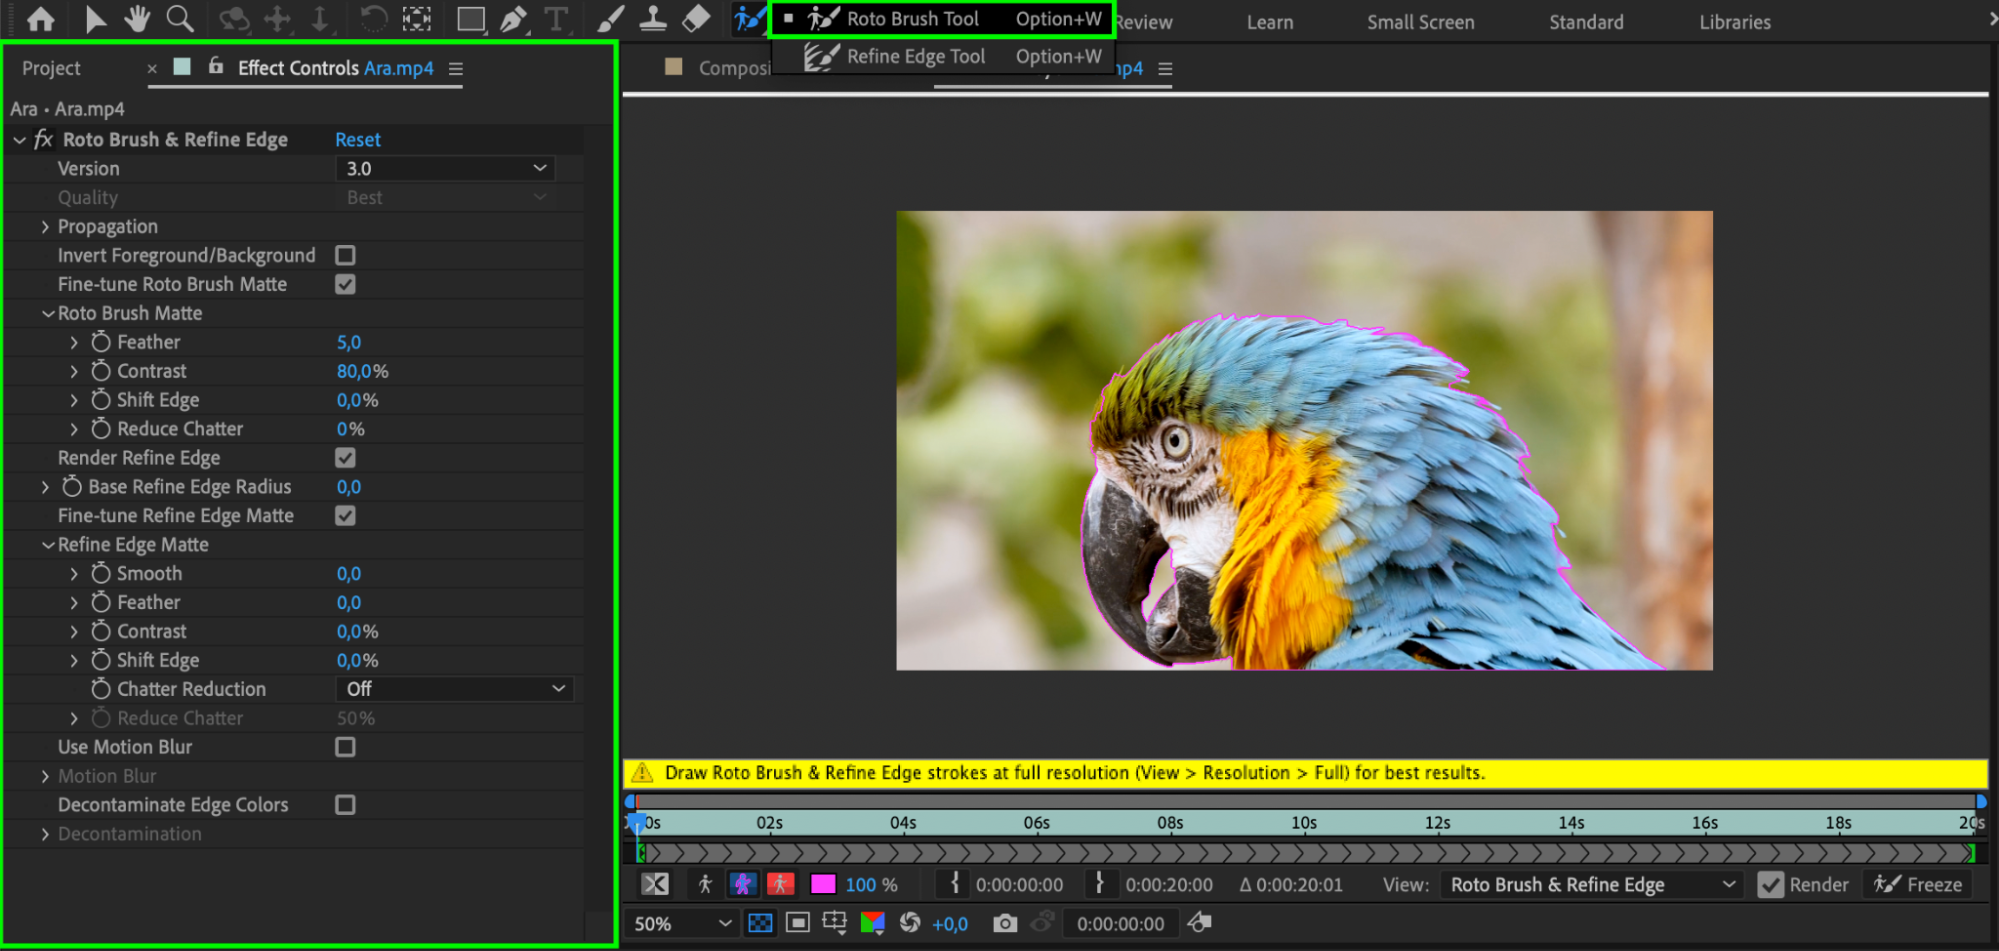
 Step 5: Creating Alpha Channel Masks
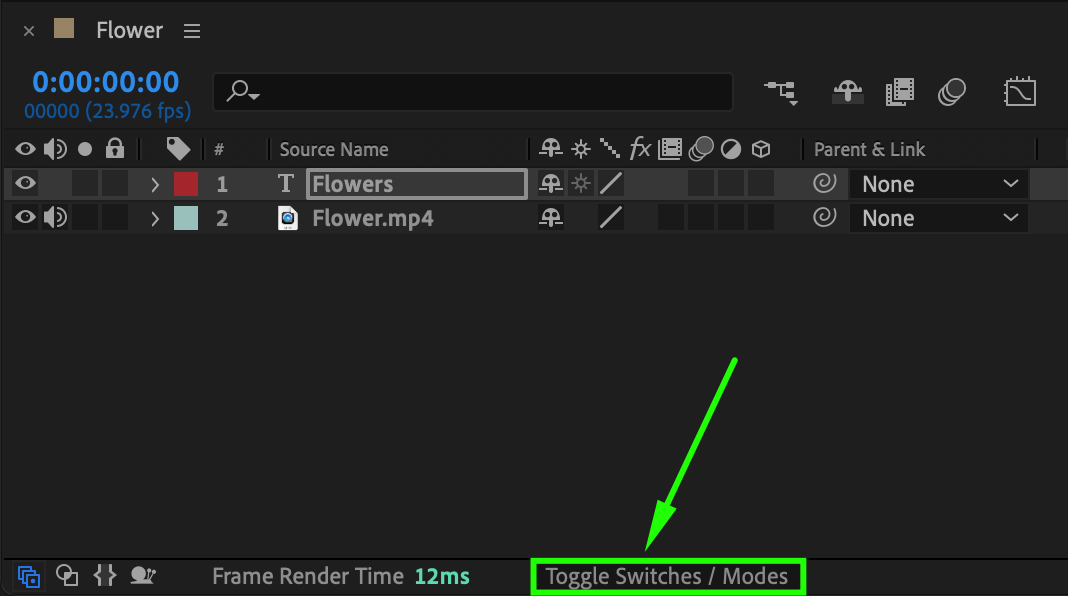
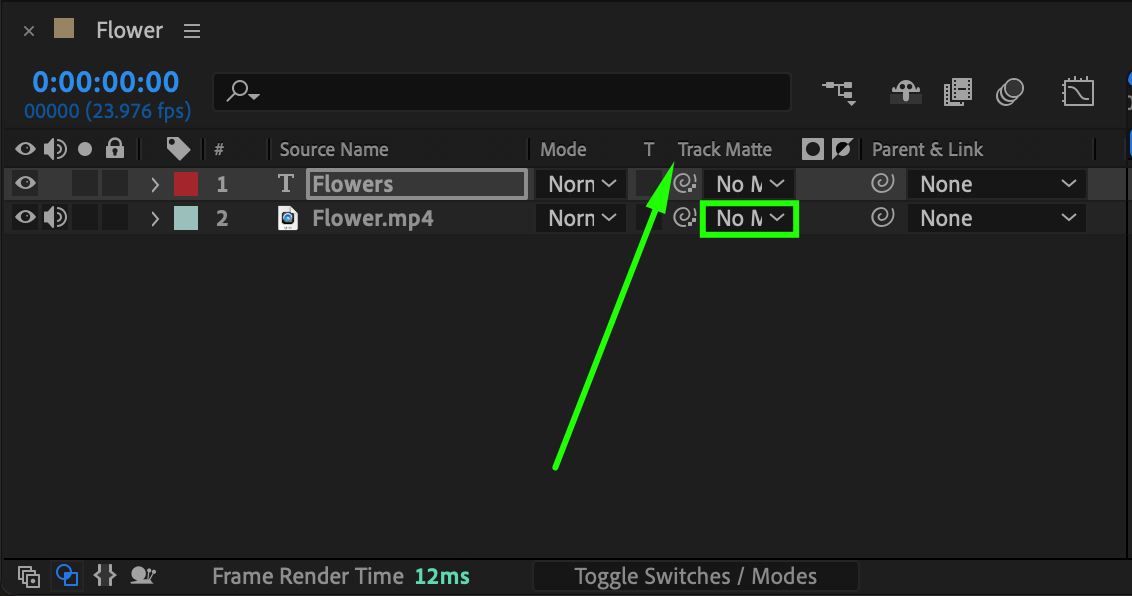
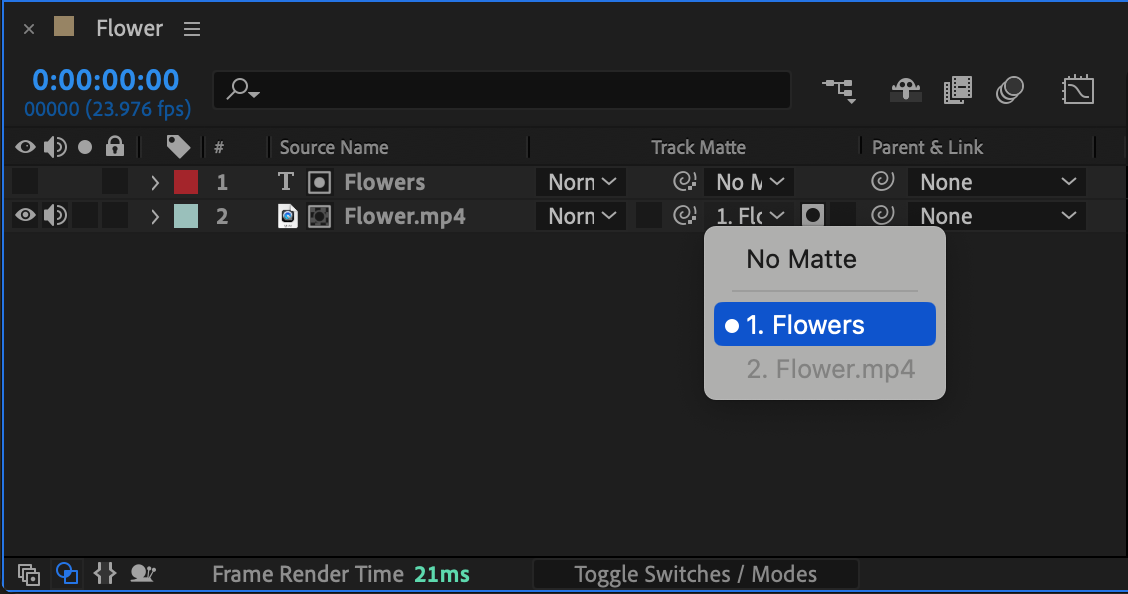
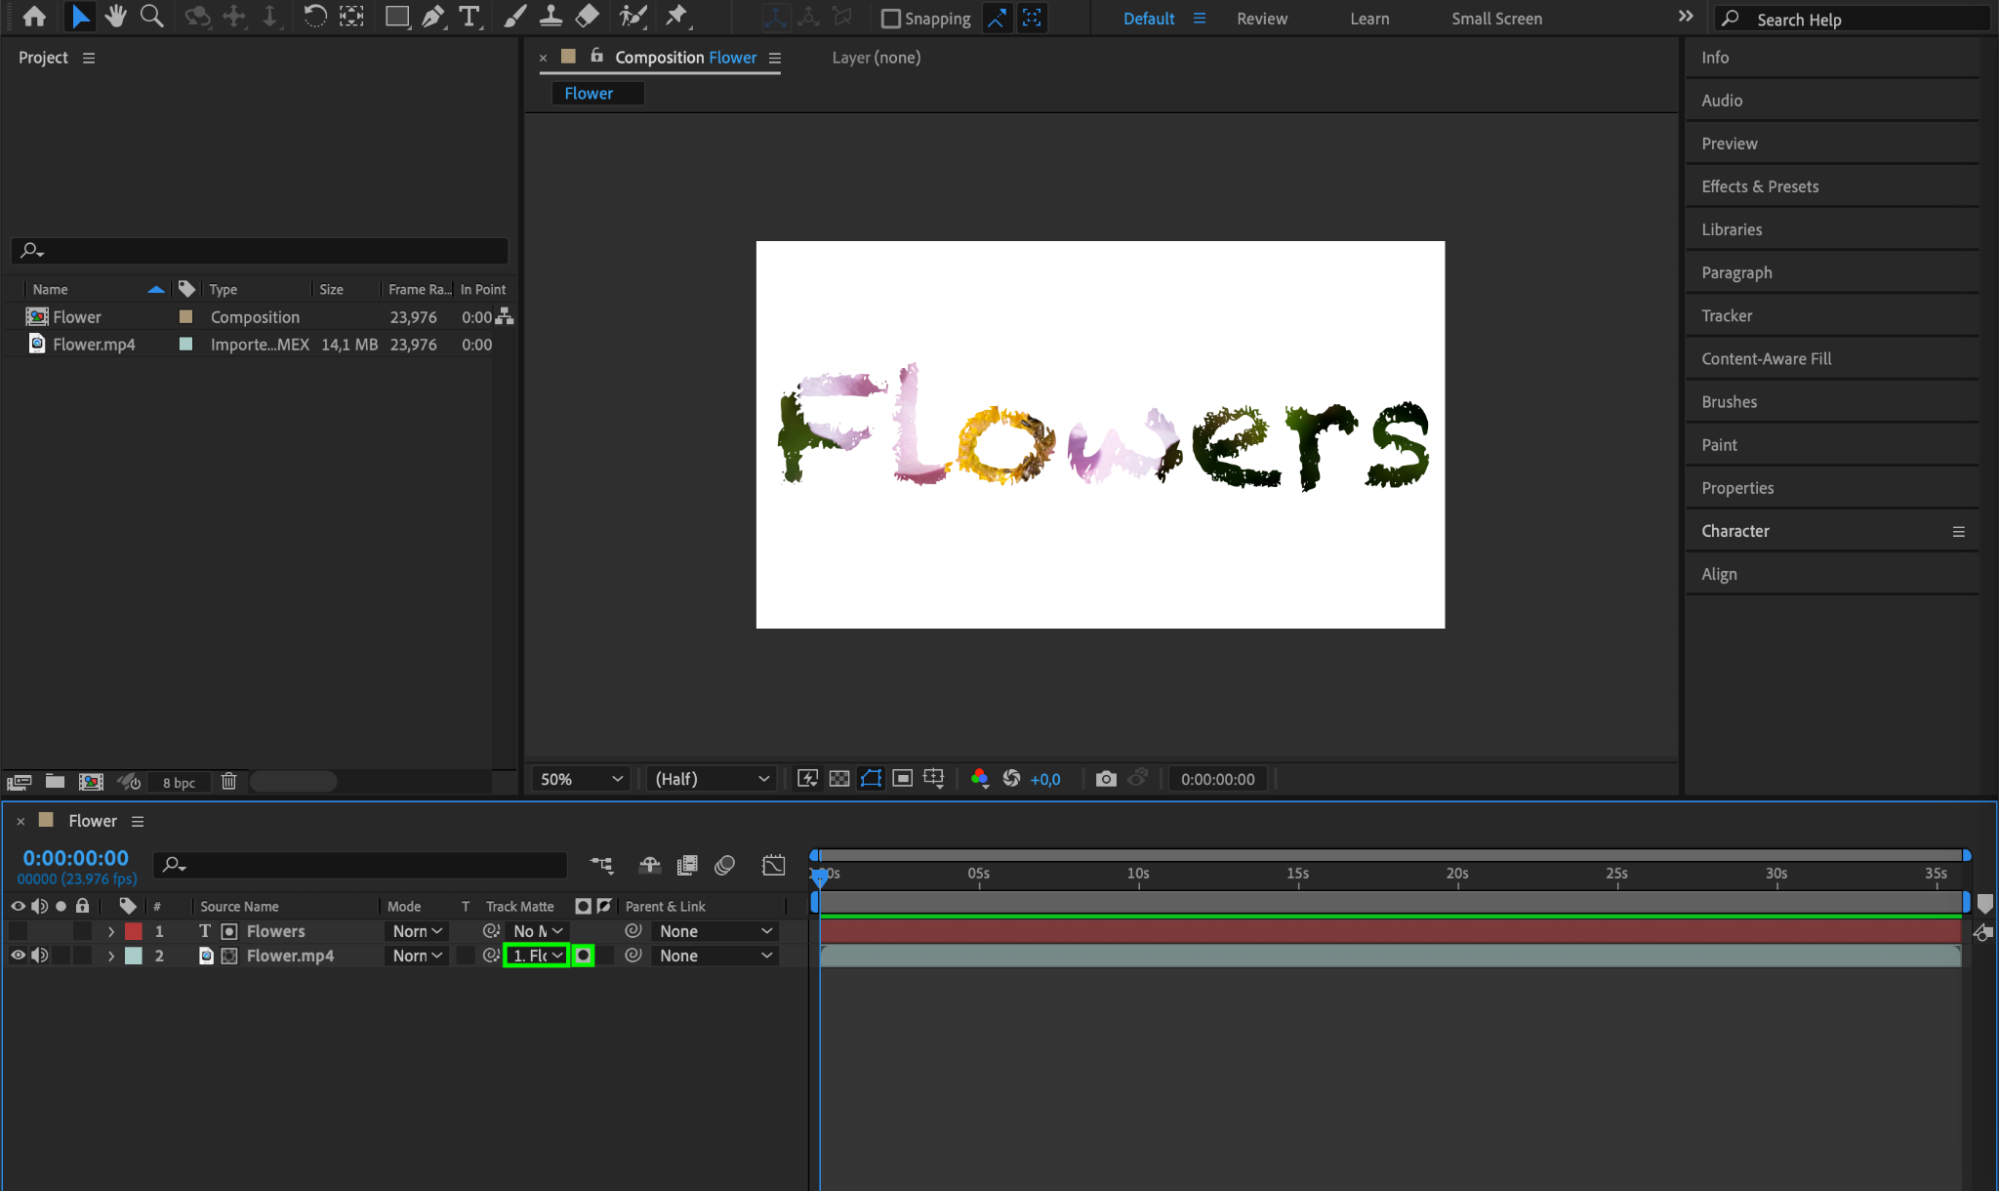
Alpha channel masks are based on the transparency information embedded in a layer’s alpha channel. This allows you to create masks that precisely follow the edges of the content within a layer. To create an alpha channel mask, select the layer, click on the “Toggle Switches/Modes” button at the bottom of the timeline panel, and choose “Alpha Matte” in the “TrkMat” column next to the layer you want to mask.
 Step 6: Animating and Enhancing Masks
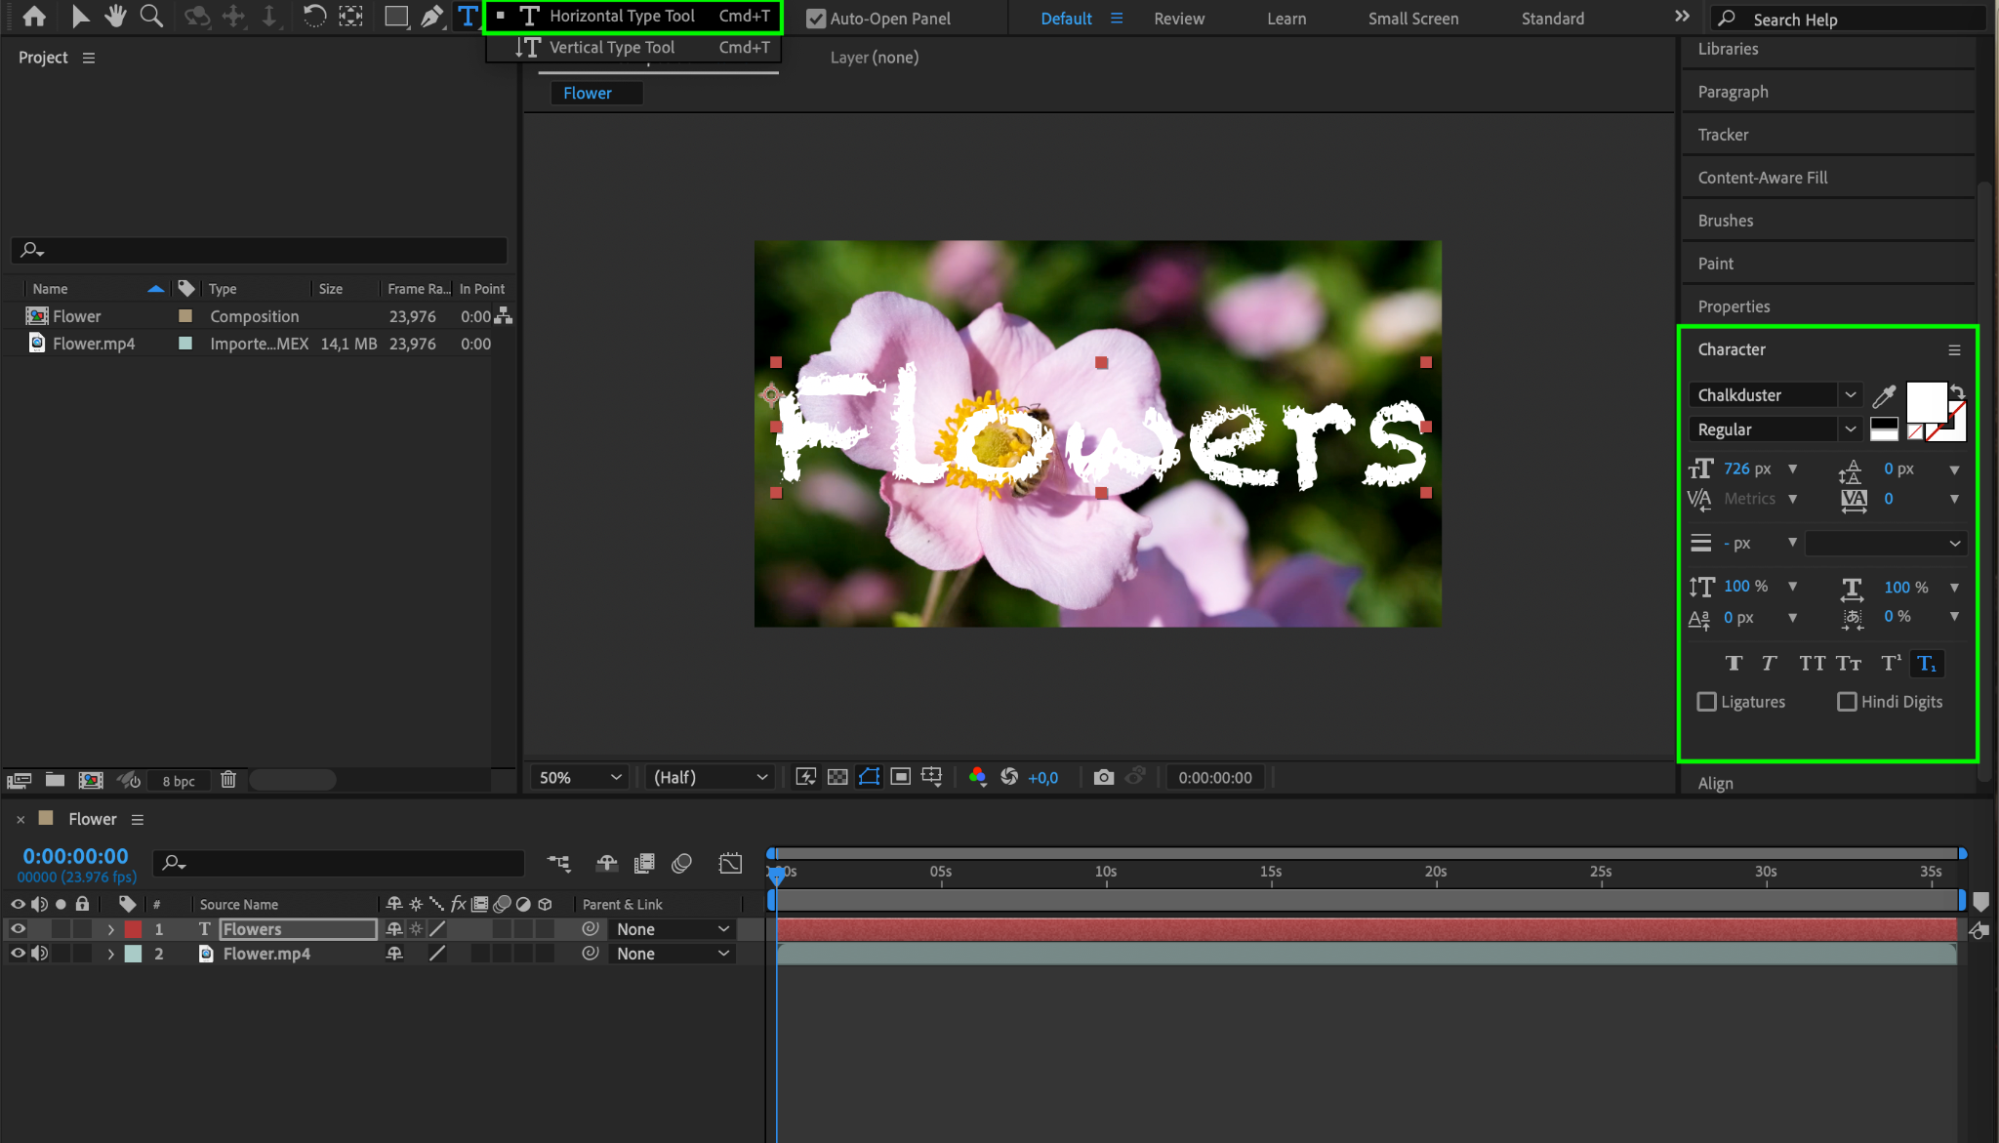
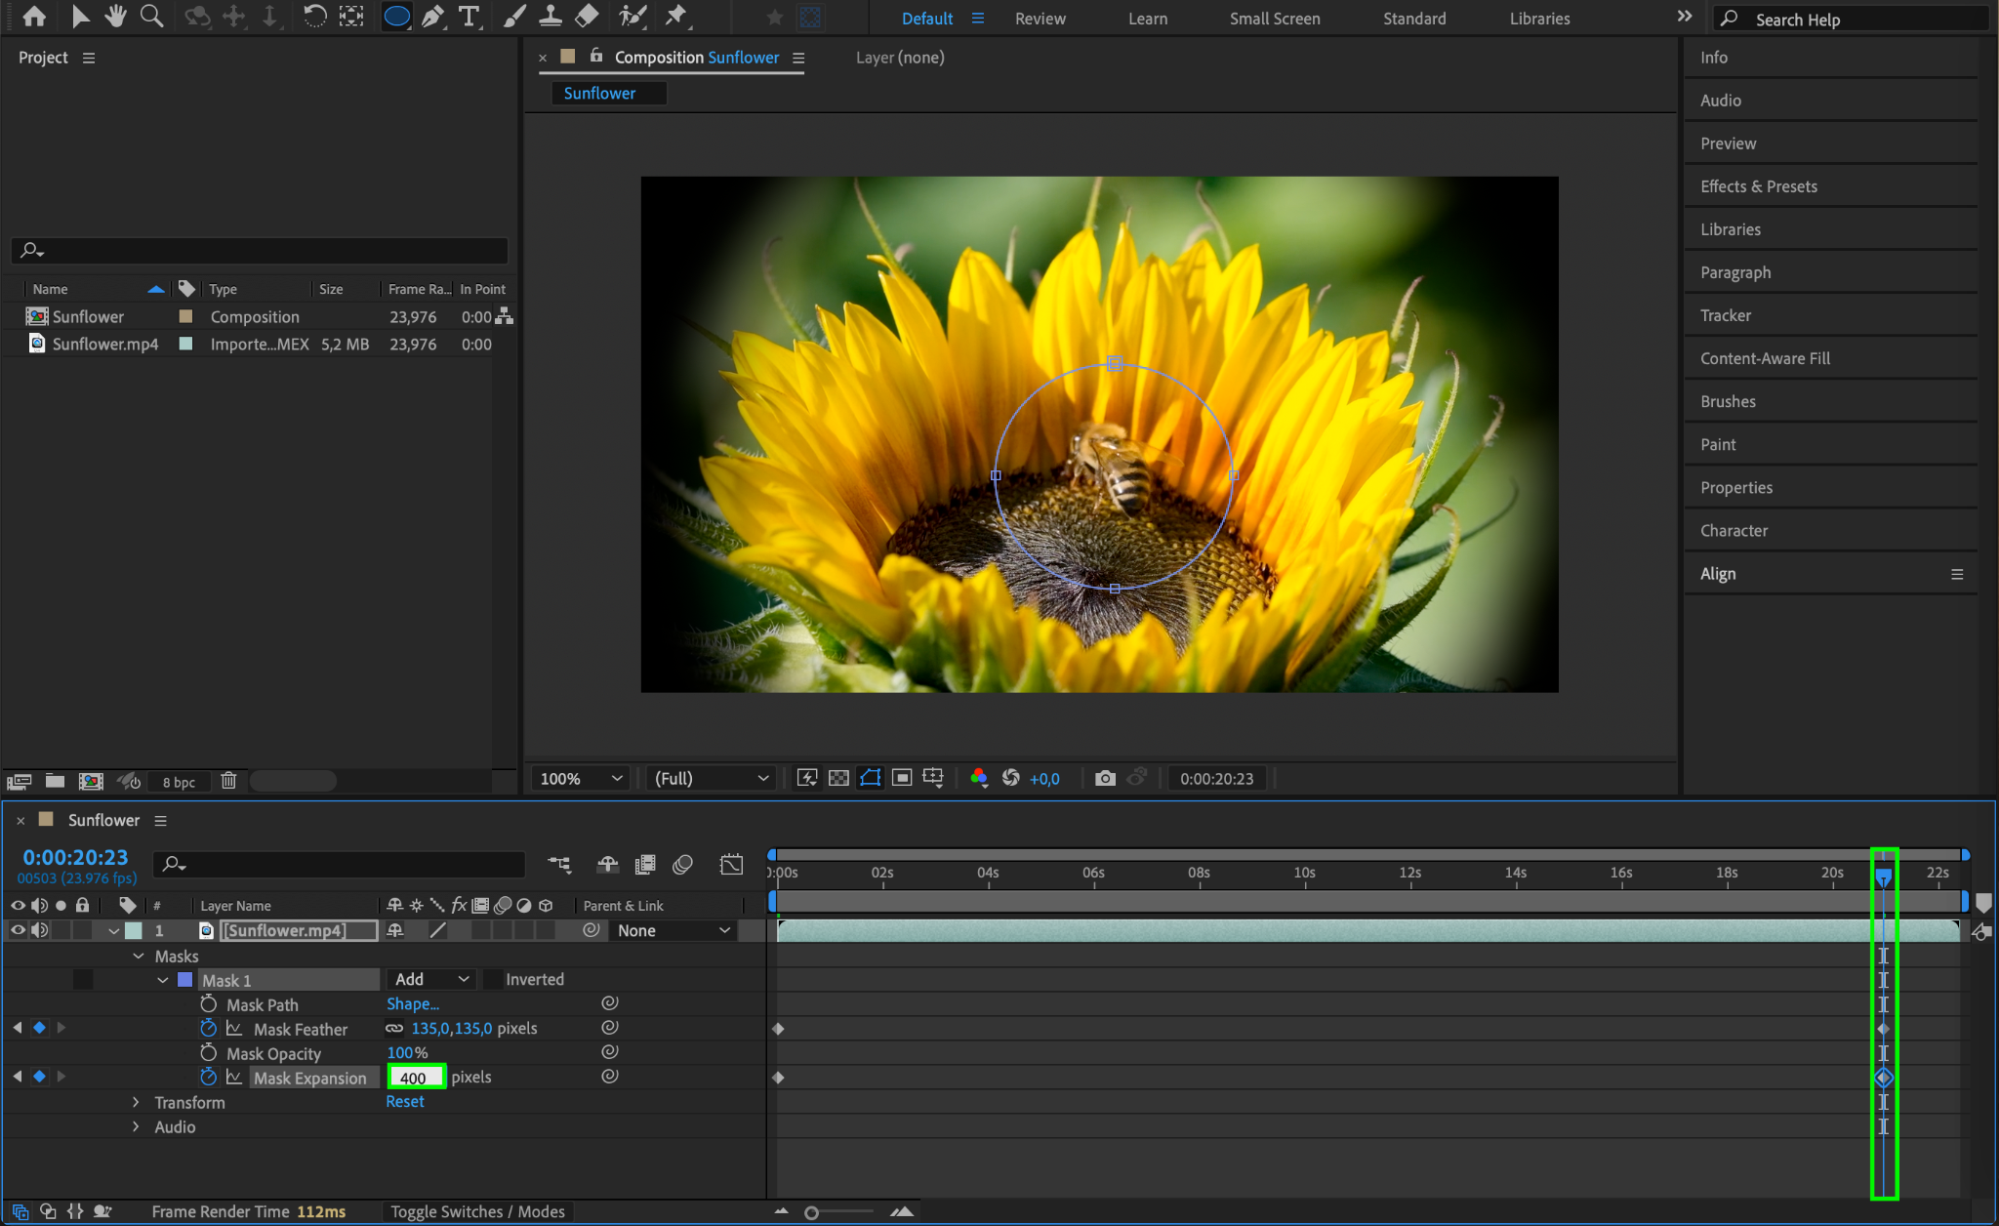
Once you have created your masks, bring them to life by animating them or applying effects. Keyframing mask properties like feather, expansion, or opacity can create dynamic mask movements or reveal animations. You can also apply effects like blurs, glows, or color correction specifically to the areas within your masks, further enhancing the visual impact of your video.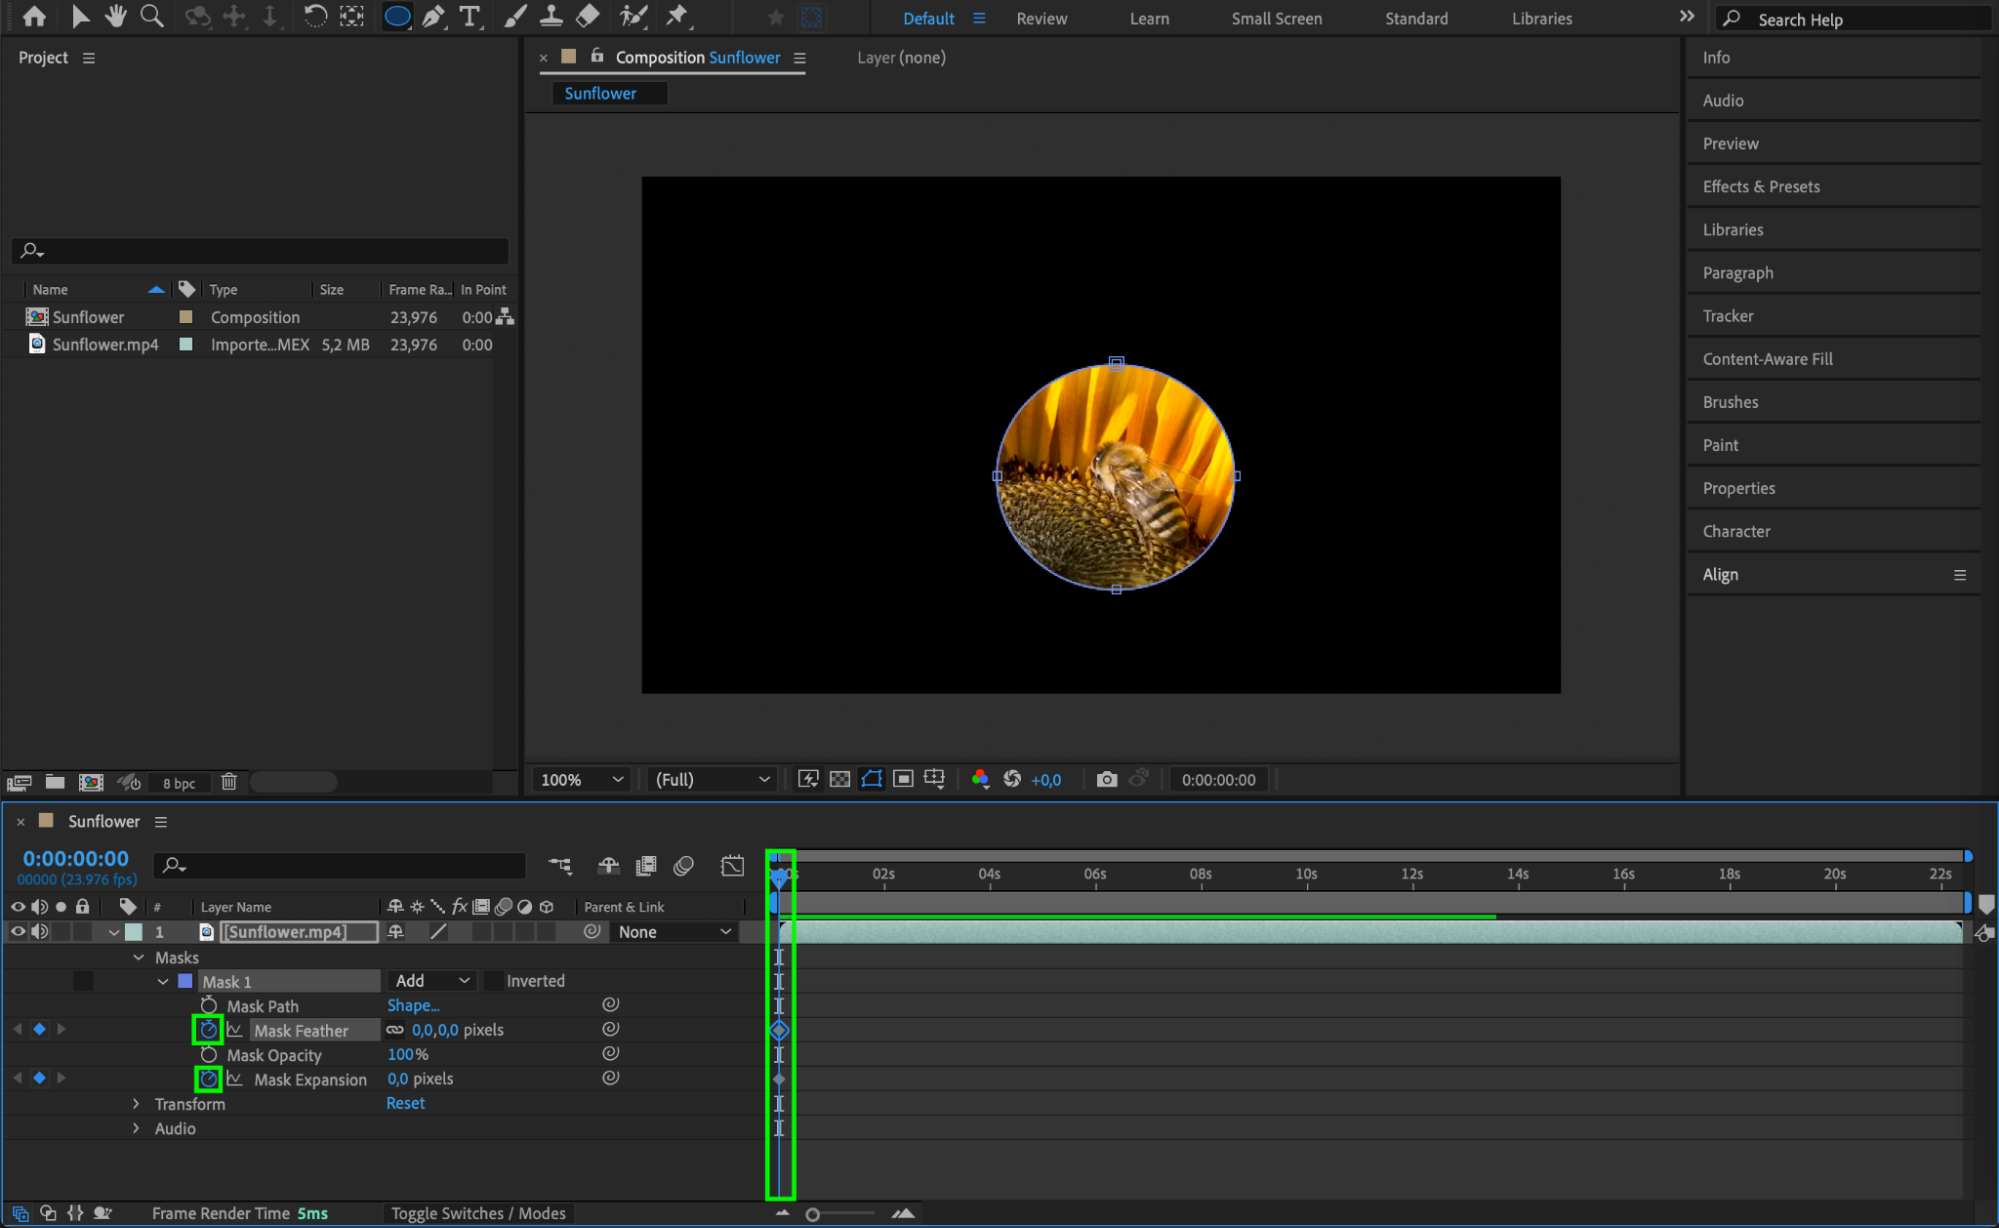
 Conclusion
Now that you have learned the basics of making masks in After Effects, don’t be afraid to experiment and try different approaches. With practice, you will be able to create intricate and stunning masks that add depth, impact, and a professional touch to your video projects. So, embrace the power of masks and unlock a whole new world of possibilities in your video editing journey.


